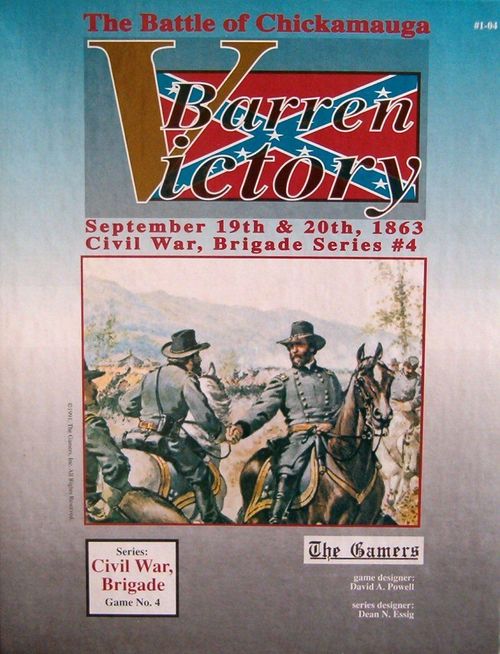
Barren Victory
Barren Victory Rulebook
Table of Contents
Table of Contents
- PART ONE: BARREN VICTORY GAME-SPECIFIC RULES
- 1.0 Terrain and Map Notes
- 2.0 Union Special Rules
- 3.0 Confederate Special Rules
- 4.0 Minor Variants
- 5.0 Victory
- 6.0 Set Up Notes
- Scenario 1: The First Day
- Scenario 2: The Afternoon of the 19th
- Scenario 3: The Second Day
- Scenario 4: The Breakthrough
- Scenario 5: The Rock of Chickamauga
- Scenario 6: The Battle of Chickamauga
- Historical Notes: The Chickamauga Campaign
- Designer Notes
- Player Notes
- Union Personality Sheet
- Rebel Personality Sheet
- Scenario Starting Strengths
- Union Order of Arrival
- Confederate Order of Arrival
- PART TWO: CIVIL WAR BRIGADE SERIES RULES (v3.2)
- Series Rules: Introduction
- 1.0 Game Components
- 2.0 Beginner's Note
- 3.0 Note on Play
- 4.0 Scale
- 5.0 General Game Concepts
- 6.0 Units
- 7.0 General Course of Play
- 8.0 Turn Sequence
- 9.0 Fog of War
- 10.0 Command and Control
- 11.0 Formations
- 12.0 Stacking
- 13.0 Facing
- 14.0 Zones of Control
- 15.0 Retreat and Formation Change Fire Generation
- 16.0 Movement
- 17.0 Extended Line
- 18.0 Forced March
- 19.0 Line of Sight (LOS)
- 20.0 Fire Combat
- 21.0 Stragglers
- 22.0 Wrecked Brigades and Divisions
- 23.0 Close Combat
- 24.0 Morale
- 25.0 Leaders
- 26.0 Artillery
- 27.0 Artillery Supply
- 28.0 Small Arms Supply
- 29.0 Night
- Terms and Abbreviations
- Series Designer's Notes
- Defensive Orders (Optional)
- The Use of Breastworks (Optional)
- Writing Your Orders: What Do They Mean?
- Extended Movement / Hidden Movement (Optional)
- PART THREE: SERIES CHARTS AND TABLES
- Series Charts and Tables (from the v3.2 Series Rules book)
- Series Charts and Tables Sheet v3.0 (earlier sheet; superseded in part by v3.2)
- PART FOUR: BARREN VICTORY LOSS CHARTS
- Loss Charts - Barren Victory: The Battle of Chickamauga
PART ONE: BARREN VICTORY GAME-SPECIFIC RULES
1.0 Terrain and Map Notes
1.1 The Turn Record Track
The Turn Record Track is used to record the passage of time during the game. A marker is used on one track to record the time, while another is placed on a second track to record the particular day. The first and last few turns of daylight have a single number in the time box which indicates the visibility in hexes for that turn. Night turns are indicated by the shading on the turn record track.
1.2 The Entry Hexes
The Entry Hexes, used for the arrival of reinforcements, and for map exit in some cases, are marked with a single red letter. For instance, entry hex A corresponds to hex B1.01. If a reinforcement's entry hex is blocked by enemy units, the reinforcement may enter in any hex free of enemy units at or within 10 hexes of the scheduled hex.
1.3 The Artillery Ammunition Tracks
The Artillery Ammunition Tracks, one provided to each player, uses three markers each to record the expenditure of artillery ammunition for each army. The markers, (x100, x10, x1) record the amount of ammunition remaining in hundreds, tens, and ones respectively. Starting amounts are given in each scenario.
1.4 The Loss Record Tracks
The Loss Record Tracks, one provided to each player, also use three markers each to record the losses (in casualties only, not stragglers) for each army. The markers (x100, x10, x1) record the current number of losses in each army. Each time a side receives one or more casualties, advance the marker by one space for each.
1.5 The Hex Numbering System
The Hex Numbering System is used to identify individual hexes on either map. The two maps are marked A (the North map) and B (the South map). The digit(s) of the hex number before the decimal indicates the number of the hexrows running north-south, counting from west to east. For instance, 1.xx is the Western-most hexrow on each map. The digits after the decimal indicate the precise hex within the given hexrow, counting upwards from the south end of each map. The first hex in each row is numbered xx.01. Furthermore, not every hex number is printed on the map. Each fifth hex in each row is numbered, (xx.05, xx.10, xx.15, etc.) creating gridlines to follow. For instance, to find hex A29.17, follow the gridline of xx.15 on map A until you find hex A29.15, then count north two hexes.
1.6 Forest and Woods Hexes
In a change from earlier games, the much dreaded (and hard to see) forest dot has been eliminated. Any hex that is 1/2 or more forest symbol is forest, otherwise it is woods. When in doubt, roll a die to settle the issue. No quibbles about map edge hexes - count only the printed hex area when determining 50% or more.
2.0 Union Special Rules
2.1 Acting Army Commanders
Before Rosecrans' arrival on the field, No Union Corps commander assumes temporary Army command. If Rosecrans becomes a casualty, the highest ranking surviving corps commander takes command of the army. This order is:
- Thomas
- Crittenden
- McCook
- Granger
2.2 Union Anti-Initiative Ratings
There are no army or corps level anti-initiative ratings for any Union leader.
2.3 Plus Weapons Units
All Union cavalry units and the Wilder Brigade are considered to have "+" weapons and are so marked. There are no other plus weapons units in this game.
2.4 Attachments and Detachments
The Union player may freely attach and detach divisions between his three army corps (14th, 20th, & 21st) with the following restrictions. No corps may have more than two divisions attached or detached at any time during the game. The Res and Cav Corps may detach units to other commands, but may never attach divisions. Cavalry brigades may be attached or detached as above, but count as a division in such cases. All such reassignment details are conducted during the command phase.
2.5 Wilder's Mounted Infantry Brigade
The unit designated Wldr/4/14 is Wilder's brigade of mounted infantry, actually 1/4/14; detached, armed with Spencer repeating rifles, and mounted to strengthen the army's weak cavalry arm. The status of this unit is independent, as historically it acted with a lot of operational freedom. No other unit, Union or Confederate, is considered independent in the game. (Exception: see Scenario 5.)
2.6 The Separate Brigade
The 2/2/Res unit is the only brigade of its division on the field (in the historical game). This unit is treated as a division of one brigade, and may never be attached to another division. This unit traces command radii directly to the Corps HQ, just as if it were a divisional leader. In certain optional situations, the rest of the division may be present, in which case the unit functions normally.
2.7 The Reserve Corps Supply Wagon
The Reserve Corps supply train carried an extensive amount of small-arms ammunition, and was used to resupply much of the 14th Corps after the rout of the rest of the army. In the game, the Res Corps supply wagon carries an unlimited amount of ammunition, and may resupply any Federal unit. In effect, it serves the same function as the army supply train, including being used for tracing the line of supply of Union artillery. Note that if both the army train and the Res train have exited or are eliminated, Federal batteries fire at half strength per the series supply rules.
3.0 Confederate Special Rules
3.1 Acting Army Commanders
If Bragg becomes a casualty, the highest ranking surviving Corps commander takes command of the army.
The order of rank of the various commanders is:
- Polk
- Longstreet
- D.H. Hill
- Buckner
- Walker
- Hood
Note: Longstreet does not take command until he arrives. In the interim, the next man in line takes command.
3.2 Anti-Initiative Ratings
Unlike Rosecrans' force, Bragg's Army of Tennessee was riddled with dissention and ill feeling. Indeed, all of the corps and divisional commanders in the Confederate army were convinced to some extent that Bragg was unfit to command. Only Longstreet, fresh from the relatively congenial atmosphere of the Virginia army, still believed Bragg was capable. This opinion was soon to be altered. In light of this amazing distrust, the following anti-initiative ratings are in effect for the Confederates.
Between Bragg and the following corps commanders:
| Commander | Modifier |
|---|---|
| Polk, Walker | -1 |
| Longstreet | 0 |
| All other corps or acting corps commanders | -2 |
Only one corps commander, Polk, has an anti-initiative of his own to be applied to his division commanders, and it is -1.
3.3 The Confederate Command Structure
At the start of the game, the Army of Tennessee is organized into 5 infantry and 2 cavalry corps, encompassing fifteen divisions. In the middle of the battle, Bragg took the highly unusual step of reorganizing his command structure to accommodate the arrival of Longstreet, creating two wings under Longstreet and Polk, the next highest ranking corps commander. Normally regarded by military historians as a dangerous move, Longstreet's ability to assimilate the situation, create an effective plan, and establish communications with his scattered troops in the middle of the night paid off, as the rout of half of the Federal Army proved. In order to reflect this mid-point reorganization, the following rules are in effect.
At any point after Longstreet enters the game, the Confederate may reorganize his army into two wings; the Left, commanded by Longstreet, and the Right, led by Polk. If Polk is a casualty, the next ranking corps commander takes charge of the Right Wing. Neither wing may be assigned more than one half of the total number of divisions available, (rounding up) nor may more than one existing corps be broken up to create this wing structure. The cavalry corps are excluded from this reassignment, and always remain directly under army control. For example, Longstreet may be assigned no more than six of the eleven historically available infantry divisions, assuming no optional divisions are in play.
The Confederate player may elect not to use this wing structure if he so chooses, in which case Longstreet (when he arrives) assumes command of the 1 Corps and Hood replaces Law in charge of Hood/1. Law is removed from play, but may be used to replace Hood, if Hood becomes a casualty.
3.3a Longstreet and Wing Command
Once he assumes wing command, Longstreet functions like a corps commander. Any corps commanders under his authority are now exempt from the need to accept orders. As long as Bragg sends orders directly to Longstreet, only Longstreet must roll for acceptance. Once he accepts, all the troops under his command may proceed to carry out those directions. Additionally, when rolling for initiative, all troops and leaders under Longstreet's control are exempted from any anti-initiative ratings from Bragg, and therefore roll with a 0 modifier.
3.3b Polk and Wing Command
Unlike Longstreet, Polk performed poorly within this wing structure. Polk does not act merely as a "super corps commander," but instead as more of an intermediary army commander. If Bragg issues an order to Polk's Wing, Polk must roll for acceptance normally. Once Polk accepts, he then turns around and issues orders to his subordinate corps commanders, using the normal order procedure. That is, he determines his command points (as if he were an army commander) and order costs, issues his orders, and then rolls again for order acceptance for the particular subordinate involved. The subordinate corps orders would reflect orders which support and carry out the "general wing orders" - they do not have to be the same orders merely passed down. For any troops in Polk's own corps, this procedure is ignored, and these troops have accepted the order when Polk does.
When conducting initiative rolls, leaders under Polk's control do not use their own or their corps commander's anti-initiative rating, but rather Polk's rating, i.e., rolling with a -2 modifier.
3.3c Wing Command and Casualties
If a wing commander becomes a casualty, that wing is considered dissolved and the troops in it revert to their starting corps assignment. The only exception to this case is if Polk is a casualty before Longstreet arrives and the army is reorganized. In that case, the wings may be created using the next highest surviving corps commander in Polk's place, who operates under the restrictions of "Polk and Wing Command."
3.3d The Historical Wing Structure
For players so interested, the actual historical wing organization was:
- Right Wing - Polk
- Cheatham's Div (C/P)
- Hill's Corps
- Cleburne's Div (C/H)
- Breckinridge's Div (B/H)
- Res Corps - Walker
- Walker's Div (W/Res)
- Liddell's Div (L/Res)
- Left Wing - Longstreet
- Hindman's Div (H/P)
- Buckner's Corps
- Stewart's Div (S/B)
- Preston's Div (P/B)
- 1 Corps - Hood
- Hood's Div (H/1)
- McLaw's Div (M/1)
- Johnson's Prov Div (JPD/1)
The Lw Arty (3xb) may move with any unit of the Left Wing. Note that when the wing organization is not in effect, these guns are always considered to be attached to the 1st Corps.
3.3e Corps Attack Stoppage under the Wing Structure
When rolling for Corps Attack Stoppage, Longstreet's Wing checks as if it were a single corps of many divisions. Corps in Polk's Wing checks separately.
3.3f Command Radii under Wing Structure
In the RW (Polk's), normal Corps HQ to division and corps asset command radii is in effect, and troops always trace to their proper Corps HQ. Note that Polk's HQ serves as both RW and P Corps HQ when the wing structure is in effect.
In the LW (Longstreet's), all "Corps-level" command radii are traced directly to the LW HQ - the LW is essentially a "super corps" (as the Confederate wings have been in past series games). The individual Corps HQ's assigned to the LW basically have no command radii functions.
There is never any command radii from Wing HQ's to Corps HQ's, nor any command radii to be observed from the Army HQ to the Wing HQ's.
3.3g Bragg and Wing Command
After Bragg initiates the Wing Structure, he may not initially bypass his Wing commanders and issue orders directly to the corps commands. Instead, all orders must be issued to the Wings. Divisional orders/goals may still be issued to individual divisions. Bragg may bypass the Wings after he successfully rolls a 12 on 2 dice, as if he were attempting to roll for initiative. Attempt this dice roll on each Command Phase after the Wing structure is put into effect. Once Bragg has rolled this "initiative," he may bypass the Wing Commanders as he chooses for the rest of the game. Beginning at 7 am, 20 Sept, add two to Bragg's dice roll, as his frustration builds up.
Alternatively, Bragg may dissolve the Wing Structure at any time and revert to a more traditional organization, (but he may not later re-create the Wing structure.) In all cases where both Bragg and Polk have issued orders to the same troops, each order supersedes the previous one as it becomes accepted.
Variants allow Bragg to be replaced by either Johnston or Lee. In these cases, Wing structure may still be created under the same guidelines and restrictions. The army commander in question would again roll as if he were attempting to gain "initiative" to obtain "bypass release" - Johnston would need a 10+, Lee an 8+.
3.4 Attachments and Detachments
No corps may ever attach divisions. Detachments may be only made in conjunction with the above wing rules. It may be necessary for a Wing to attach one division, if dividing the one corps allowed above. If optional troops are in play, they may be attached to a corps, an exception to this rule.
3.5 The W/Res Division
The W/Res divisional commander, Gist, is not yet in play at the start of the game. Until he and his brigade rejoin the corps as called for in the arrival schedule, the W/Res division is commanded by a Repl leader.
4.0 Minor Variants
4.1 Union Options
4.1a Allow 1/1/20 to enter with the rest of its division on the 19th. This option gives the Confederate player 1 VP.
4.1b Allow 2/1/21 to set up with the rest of 1/21. This option gives the Confederate player 1 VP.
Both of the above brigades were detached to guard rear areas, 1/1/20 to the south and 2/1/21 to hold Chattanooga. The above options assume that Rosecrans elected to concentrate all possible forces for the fight.
4.1c Allow the following units: Morgan, 3/1/Res, 1/2/Res, 3/2/Res, and 3/3/Res, and the 2 optional Res artillery units, Rb(5) & Rb(2); to set up in all scenarios with the rest of the Res Corps. This option gives the Confederate player 6 VP. The status of 2/Res is now considered a regular division, and 3/3/Res has the status defined for 2/2/Res in the Union special rules.
This option assumes that Rosecrans did not need to leave so many troops behind to guard his supply line, the railroad from Nashville. More troops from rear area departments were made available to take over these tasks, allowing Rosecrans to concentrate more men at the front. The actual locations of these four brigades were: 3/1/Res - Murfreesboro, 1/2 Res and 3/2/Res - Stevenson, Alabama, 3/3/Res - Chattanooga.
4.2 Confederate Options
4.2a Allow the rest of Longstreet's 1st Corps to arrive when Longstreet himself does, at 10:00 pm on the 19th, at E. These units are: W/M/1, B/M/1, J/H/1 & A/H/1. This option gives the Union player 4 VP.
The assumption here is that the troops sent from Virginia ran into fewer delays, and Longstreet was able to concentrate his entire command on the Chickamauga battlefield.
4.2b Allow M/L/Res to set up with the rest of L/Res in all scenarios. This option gives the Union player 1 VP.
When Walker's Reserve Corps was transferred from Joseph E. Johnston's Mississippi department, this unit (Maxey's Bde, originally of French's Division) was left behind.
4.2c Allow the Lo/- division to enter at E, at 10:30 am, 19th. This division enters with orders to report to the Army HQ. Any division marked "/-" has no permanent corps attachment. It may be attached to any corps, or receive direction from the army HQ directly in the form of divisional goals. This option gives the Union player 5 VP.
More troops from Johnston. Loring's division was left behind also, with numbers too few to defend the entire department. In a true strategic sense, it seems to be a better use of these troops to concentrate overwhelming power against the Union, with Bragg.
4.2d Allow the St/- division to enter at E, at 9:00 pm on the 19th. The division enters with orders identical to Lo/-, above. This option gives the Union 3 VP.
Again, following the principle of strategic concentration, this unit under Carter Stevenson is made available to the Southern player. Actually, their appearance here is a bit more far-fetched, because this division was captured and paroled at Vicksburg. By the middle of October, these troops were "exchanged" with paroled Federals, and being integrated with Bragg's army. During September, they were refitting in Alabama. Here it is assumed they could be resupplied and made combat ready by the time of the battle.
4.2e Replace Bragg with Johnston. Ignore all of Bragg's anti-initiative (Polk's Corps anti-initiative is still in effect). All other rules are in effect. This option gives the Union player 4 VP.
The anti-Bragg feeling within the Army of Tennessee by the fall of 1863 was definitely impairing the smooth functioning of command. Lost opportunities and barren victories were the army's legacy under Bragg. Had Bragg not been such a strong friend of Davis, it is likely that he would have been replaced before this time, if only to restore the confidence of the army. Joseph E. Johnston, nominally in command of the entire Western Theater, was the best candidate. Indeed, after the Chattanooga disaster, Johnston finally did take over.
4.2f Replace Bragg with Robert E. Lee. All of the rules in 5, above, are in effect here. This option gives the Union player 6 VP.
Before the battle, there was an influential undercurrent of opinion (including Longstreet himself) that wanted Lee to head west with the troops from his army and take command. Lee refused, not wishing to leave the familiar Virginia Theater for one unknown to him. However, this question remains one of the most tantalizing historical alternatives, akin to the question of Jackson's presence at Gettysburg. Here it is assumed that Lee arrives ahead of his troops, replacing Bragg a couple of weeks before the battle.
5.0 Victory
Measuring success or failure is at best a relative thing. Bragg's actual objective was to destroy the Union army. After a quickly abandoned attempt at attack, Rosecrans was content to survive intact. Bragg obviously failed in his larger goal, while Rosecrans cannot be considered entirely successful either. In the end, Bragg won a "minor" victory, robbed of greater success by the massive losses his troops suffered. The Federals lived to fight another day, and hence the title of this game, Barren Victory. Each scenario will list the specific levels of victory, and any special conditions that apply.
Victory points are garnered by inflicting losses on your opponent, and by possession of specific terrain objectives. Additionally, VP's will be awarded to your opponent when using any of the minor variants/options. The following schedule applies.
5.1 VP's awarded for casualties
Each side is awarded VP for inflicting losses on his opponent. Only casualties are counted for this, ignore all straggler losses.
For the Union Player:
| CSA Losses | VP |
|---|---|
| 0 to 50 | 0 |
| 51 to 90 | 3 |
| 91 to 115 | 6 |
| 116 to 140 | 10 |
| 141 to 165 | 15 |
| 166 to 190 | 20 |
| 191 to 210 | 25 |
| 211 to 270 | 30 |
| 271 or more | 35 |
For the Confederate Player:
| USA Losses | VP |
|---|---|
| 0 to 45 | 0 |
| 46 to 85 | 3 |
| 86 to 110 | 6 |
| 111 to 135 | 10 |
| 136 to 160 | 15 |
| 161 to 180 | 20 |
| 181 to 200 | 25 |
| 201 to 225 | 30 |
| 226 or more | 35 |
5.2 Additional VP awards for wrecked corps
If 50% or more of the brigades are wrecked (again, ignore straggler losses for this calculation - consider casualties only), additional VP's are awarded according to the corresponding table.
To the Union Player:
| For wrecked CSA Corps | VP |
|---|---|
| Polk's Corps | 6 |
| Hill's Corps | 4 |
| Res Corps | 3 |
| Buckner's Corps | 4 |
| 1st Corps | 6 |
| Wheeler's Cav | 3 |
| Forrest's Cav | 3 |
To the Confederate Player:
| For wrecked USA Corps | VP |
|---|---|
| 14 Corps | 10 |
| 20 Corps | 6 |
| 21 Corps | 6 |
| Res Corps | 2 |
| Cav Corps | 4 |
Note: disregard any attachments or detachments to/from corps for these calculations.
5.3 VP's awarded for terrain objectives
VP's are awarded to each player for capturing specific objectives, and for gaining control of his opponent's line of retreat. Both armies were very vulnerable to isolation, operating in supply-poor mountains.
The Union player is awarded 5 VP for controlling each one of entry hexes D, E, or F at the end of the game. Additionally, he is awarded 1 VP for each CSA combat unit (infantry, cavalry, or artillery) which is unable to trace a line of communications to any one of entry hexes D, E, or F, at the end of the game.
The Confederate player is awarded VP for each of the following objectives:
| Objective | VP |
|---|---|
| Entry hex G | 7 VP |
| H & I | 5 VP |
| J & K | 5 VP |
When two hexes are listed for one award, both hexes must be controlled before any VP are given. There is no award for control of only hex J, for instance.
The Confederate is awarded 1 VP for every Union combat unit (infantry, cavalry, or artillery) which is unable to trace a line of communication to any one of the following entry hexes: G, H, I, J, or K, at the end of the game.
For either side, NO VP's are awarded for Leaders, HQ's or Supply units which cannot trace a line of communications. When considering artillery units, count only those "actual" artillery units, not detached batteries.
A line of communications is defined as a path of hexes of any length, free of enemy units and zones of control, from the unit in question to the entry hex. Only TEN of these hexes in the path may be NON-ROAD hexes. In other words, a given unit must use a combination of road or trail and up to TEN non-road hexes to trace an unblocked path to an exit hex. This path may not cross otherwise impassible terrain.
5.4 Levels of Victory
To determine the level of victory, add up all points for both sides, then subtract the Union total from the Confederate total. Compare the resulting number to this chart, the corresponding line gives the level of victory:
| Level | Difference |
|---|---|
| CSA Massive | 25 or more |
| CSA Major | 11 to 24 |
| CSA Minor | 5 to 10 |
| Draw | 4 to -5 |
| USA Minor | -6 to -10 |
| USA Major | -11 to -24 |
| USA Massive | -25 or less |
6.0 Set Up Notes
When setting up the scenarios, the following standard rules and definitions apply:
6.0a All units set up in line, dismounted, or unlimbered, unless specifically directed otherwise in the scenario.
6.0b A number followed by a b indicates an artillery unit. For example, 14b stands for an artillery unit of the 14th Corps.
6.0c A parenthesized number next to an artillery unit, i.e. (4), indicates the starting strength of that artillery unit.
6.0d The symbol "w/i # X" means set up the specified units within that number of hexes of a specific hex (exclusive.)
6.0e Army, Corps, and Wing commanders set up with their HQ's. Division leaders set up with any unit in their division, unless specifically assigned to a given hex.
6.0f All scenarios start with the Confederate as the first player, except in scenarios 1 and 6, which begin with the Union player phase. (Note that the CSA player is still considered the first player, but that these two scenarios start in the second half of the game turn.)
6.0g In all scenarios, historical losses from previous scenarios do count for victory. In effect, all previous historical casualties are additive. For instance, at the start of scenario 3, the Union player has already lost 54 strength points from the first day's fighting. Therefore, the CSA player starts scenario three with 3 VP for Union losses.
Scenario 1: The First Day
The first day's fighting was conducted piecemeal, as Bragg sent his divisions into action one at a time, instead of waiting to concentrate overwhelming power in a simultaneous assault. Despite this, the fighting on day one was bloody. More than once, Confederate troops ruptured the Union line, only to be pushed back by fresh forces. Interestingly enough, the Union Army launched the first attack, as Thomas sent forces forward to capture what he thought was an isolated Confederate brigade near Reed's bridge. The Confederates counterattacked furiously, and the battle was on.
- First Turn: 7:30 am, 19 September (Union Player Turn)
- Last Turn: 6:00 pm, 19 September
- Scenario Length: 22 turns
- Artillery Ammunition: USA: 250 points; CSA: 200 points
Set Up
Union: 1/2/Cav B8.15; Wldr, Wb B14.17; 14 HQ & supply B17.31 (Kelly House); 1/14 (col), 14b (limb) w/i 2 A17.02; 3/14 (col), 14b (limb) w/i 2 A22.05; 21 HQ & supply B12.09; 1/21, 21b w/i 1 B11.05; 2/21, 21b w/i 1 B14.10; 3/21, 21b w/i 1 B13.08; 2/2/Res A36.06; All other units of Res Corps w/i 10 of A24.30.
Union Orders
1/14 and 3/14 have each been given a divisional goal to attack and destroy the Confederate troops around Jay's Mill.
21 Corps is ordered to defend in place to protect the roads behind it, in order to allow the rest of the Union Army to arrive.
2/2/Res has a divisional goal to return to Res Corps HQ.
1/2/Cav has a divisional goal to defend in place.
No other Union troops have any orders.
Confederate
Army HQ & Supply B32.13; 1 Corps HQ & Supply w/i 2 B25.18; 3 x LWb w/i 2 B25.18; JPD/1 w/i 1 B22.17; H/1 w/i 1 B24.19; B Corps HQ & Supply B33.09; S/B, Bb w/i 1 B31.12; P/B, Bb w/i 1 B27.06; FCav HQ & Supply w/i 2 34.32; P/F Cav, FCavb w/i 2 B34.32; A/FCav w/i 1 B33.20; P Corps HQ & Supply B22.04; H/P, Pb w/i 1 B14.05; C/P, Pb w/i 2 B19.05; Res HQ B36.25; L/Res, Resb w/i 1 B32.22; E/W/Res, W/W/Res w/i 1 B41.28; Res Supply B42.28.
W/Res is commanded by a Repl leader
Confederate Orders
The Res Corps is ordered to support the defense of Jay's Mill and the FCav if they are attacked there.
FCav is ordered to defend Jay's Mill and Reed's Bridge.
No other Confederate troops have any orders at start.
Reinforcements
Both sides receive reinforcements as called for by the arrival schedules for the duration of the scenario.
Victory
The standard victory conditions as given in the Game Rules booklet apply.
Scenario 2: The Afternoon of the 19th
The fighting on the first day reached its peak in the afternoon, when the Union center was twice breached by Confederate divisional attacks. Rosecrans' HQ was itself almost caught up in the action. Fresh Union arrivals managed to salvage the situation, repulsing the Confederates under A. P. Stewart and Hood. Finally, starting at 6 pm, Cleburne's Confederate division was ordered to launch a dusk assault, and the fighting lingered on until 8 pm. Players should note that many divisions start this scenario at the extreme limits of the command radius from the corps commanders.
- First Turn: 2:00 pm, 19 September
- Last Turn: 8:00 pm, 19 September
- Scenario Length: 11 turns
- Artillery Ammunition: USA: 225 points; CSA: 210 points
Set Up
Union: Army HQ & Supply B9.19; 1/2/Cav B8.17; Wldr, Wb B14.16; 14 Corps HQ & Supply B17.31; 2/4/14, 14b B16.20; 3/4/14 B19.26; 3/14 w/i 1 A19.03; 1/14 w/i 1 A19.07; 14b (limb) A20.05; 14b (limb) A17.02; 20 Corps HQ & Supply B10.04; 3/20, 20b w/i 2 B10.04; 2/1/20 B17.18; 3/1/20, 20b B17.17; 2/20, 20b w/i 1 B21.30; 21 HQ & supply B12.07; 1/1/21, 21b B14.10; 3/1/21 B13.09; 1/3/21, 21b B16.22; 2/3/21 B16.23; 3/3/21 B16.24; 1/2/21, 21b B21.26; 2/2/21 B21.27; 3/2/21 B19.25 ex B20.25; Res Corps w/i 7 A24.30.
Union Orders
2/21 and 2/20 are attached to 14 Corps.
14, 20 & 21 Corps are all currently ordered to defend in place.
1/2/Cav has a divisional goal to defend in place.
Res Corps has no current orders.
3/21 has a divisional goal to defend the Lafayette Road between the Brotherton and Brock houses.
Confederate
Army HQ & Supply B32.13; P Corps HQ & Supply B33.19; H/P (col), Pb (limb) B25.05, B24.05, B23.05, B22.04; S/C/P B24.27; St/C/P B24.26; W/C/P B24.24; M/C/P B23.24; J/C/P B21.23; Pb B26.28; B Corps HQ B25.18; B Corps Supply B23.13; Br/S/B B21.22; B/S/B B22.21; C/S/B B23.21; G/P/B, Bb B22.13; T/P/B, Bb B23.14; 3/P/B B24.13; 1 Corps HQ & Supply w/i 1 B23.17; 3 x LWb w/i 1 B23.17; G/JPD/1 B20.17; J/JPD/1 B20.18; M/JDP/1 B20.19; L/H/1 B22.18; Tex/H/1 B22.19; B/H/1 B23.19; H Corps HQ & Supply B40.10; C/H (col), Hb (limb) on road from B40.09 to B40.06, inclusive; FCav Corps w/i 4 B34.32; Res Corps (minus Gist, G/W/Res) w/i 2 B30.30.
Confederate Orders
B Corps is ordered to send S/B (only) to attack the Union center between the Brotherton and Brock houses.
H/P has a divisional goal/order to cross at Dalton Ford and return to Polk's Corps HQ.
No other Confederate troops have any orders at start.
Reinforcements
Both sides receive reinforcements as called for by the arrival schedules for the duration of the scenario.
Victory
The standard victory conditions given in the Game Rules booklet apply.
- USA losses at start: 39
- CSA losses at start: 40
Scenario 3: The Second Day
With one day's inconclusive action behind them, both armies prepared to renew the struggle on the morning of the 20th. Rosecrans abandoned all thought of offensive action, content to defend his existing positions. Bragg obliged, electing to continue the role as aggressor. However, the arrival of Longstreet and the availability of fresh Confederate troops would greatly effect the second day's outcome.
- First Turn: 5:00 am, 20 September
- Last Turn: 7:00 pm, 20 September
- Scenario Length: 28 turns
- Artillery Ammunition: USA: 160 points; CSA: 135 points
Set Up
Union: Army HQ & Supply B9.19; Wldr, Wb B6.14; Cav HQ & Supply B3.04; 1/Cav w/i 2 B6.03; 14 Corps HQ & Supply B17.31; 1/1/14 B19.33; 2/1/14 B19.32; 3/1/14, 14b B19.34; 2/14, 14b w/i 1 B14.31; 1/3/14 B15.28; 2/3/14, 14b B15.27; 3/3/14 B17.32; 2/4/14 B14.28; 3/4/14, 14b B17.29; 1/2/20 B18.34; 2/2/20 B18.33; 3/2/20, 20b B19.31; 1/2/21 B18.29; 2/2/21, 21b B19.30; 3/2/21 B18.31; 20 Corps HQ & Supply B9.22; 2/1/20 B12.21; 3/1/20, 20b B11.21; 1/3/20 B8.17; 2/3/20, 20b B9.18; 3/3/20 B10.18; 21 HQ & supply B12.24; 1/1/21, 21b B13.23; 3/1/21 B13.24; 1/3/21, 21b B14.25; 2/3/21 B14.26; 3/3/21 B12.26; Res Corps, 1/2/Cav w/i 7 A24.30.
Union Orders
2/21 and 2/20 are attached to 14 Corps.
1/2/Cav is attached to the Res Corps.
No Union troops have any orders
Confederate
Army HQ & Supply B30.12; LW HQ B20.23; B Corps HQ & Supply B21.15; G/P/B B20.16, ex B20.17; T/P/B, Bb B20.15; 3/P/B, Bb B20.14; S/B w/i 1 B23.26; 1 Corps HQ & Supply B22.24; 3 x LWb with any unit of the LW; H/1 w/i 1 B22.23; M/1 w/i 1 B24.24; G/JPD/1 B19.25; J/JPD/1 B19.24; M/JDP/1 B20.25; M/H/P B19.19, ex 19.20; A/H/P B19.21, ex 19.22; D/H/P, Pb B20.20; RW HQ & P Corps Supply B28.30; C/P, Pb(4) w/i 2 B27.28; H Corps HQ & Supply B26.32; P/C/H B23.28; W/C/H B24.28; D/C/H, Hb B24.29; H/Br/H A26.02; S/Br/H A26.03; A/Br/H A26.04; Hb A27.04; FCav Corps w/i 3 A22.08; Res Corps (minus Gist, G/W/Res) w/i 2 A30.01; Gist, G/W/Res (col) B44.15.
Confederate Orders
The rules for Wing structures are in effect. Longstreet and Polk command their historic Wing structures.
Polk (RW) has orders to attack the Union 14 Corps, but has not yet started issuing them to his subordinates.
Longstreet (LW) has no orders.
P/B has a divisional goal to defend the Confederate left flank between Hall's Ford and the Brock house.
Gist and G/W/Res are ordered to move to join their Corps. Initiative may not be used to change this order. Once these units have rejoined the Res Corps, this restriction no longer applies.
Reinforcements
Both sides receive reinforcements as called for by the arrival schedules for the duration of the scenario.
Victory
The standard victory conditions given in the Game Rules booklet apply.
- USA losses at start: 54
- CSA losses at start: 72
Scenario 4: The Breakthrough
The turning point of the battle occurred at midday on the 20th, when Longstreet's command launched its attack on the Union right. Shortly after 11:00 am, Longstreet's leading troops moved forward, punching through a fortuitous hole in the Federal battleline. Wood's division, responding to a misunderstood order, was pulled out of line and moved north. Given this gap, the Confederates flanked the adjoining Yankees, and in a few minutes thousands of Federals were flung back. The results of this attack were spectacular, as Rosecrans, two of his corps commanders, and four Federal divisions routed and were driven off the field. Many Union soldiers did not stop retreating until they reached the safety of Chattanooga.
- First Turn: 11:00 am, 20 September
- Last Turn: 6:00 pm, 20 September
- Scenario Length: 15 turns
- Artillery Ammunition: USA: 155 points; CSA: 110 points
Set Up
Union: Army HQ & Supply B9.19; Wldr, Wb B6.14; Cav HQ & Supply B3.04; 1/Cav w/i 2 B6.03; Crook, 2/2/Cav, Cavb B3.05; 14 Corps HQ & Supply B17.31; 1/1/14 B19.33; 2/1/14 B19.32; 3/1/14, 14b B19.34; 2/14, 14b(4) w/i 1 B14.31; 1/3/14,14b B15.28; 2/3/14 B15.27; 3/3/14 B14.28; 2/4/14 B16.28; 3/4/14, 14b B17.29; 1/2/20 B18.33; 2/2/20 B18.34; 3/2/20, 20b B19.31; 1/2/21 B18.29; 2/2/21, 21b B19.30; 3/2/21 B18.32; 20 Corps HQ & Supply B9.22; 2/1/20 B14.21 (must face southeast); 3/1/20 B15.22 (must face southeast); 20b B13.21 (must face southeast); 3/20 (col), 20b (limb) w/i 1 B10.20; 21 Corps HQ & supply B12.24; 1/1/21 (col) B13.25; 3/1/21 (col) B13.24; 21b (limb) B13.23; 3/21, 21b w/i 1 B12.27; Res Corps, 1/2/Cav w/i 7 A24.30.
Union Orders
2/21 and 2/20 are attached to 14 Corps.
1/21 is ordered to move to B16.28 & B16.29, go into line, and defend.
1/2/Cav is attached to the Res Corps.
No other units have any orders.
Union Special Rule
The Union player automatically checks for panic at the end of the first turn. His current status is 1, and add three to the die roll. This check is made in addition to the one normal demand that the CSA player may make during the course of the scenario.
Confederate
Army HQ & Supply B30.12; LW HQ B20.24; 3x LWb w/i 1 B20.24; 1 Corps HQ & Supply B20.25; H/1 w/i 1 B19.24; M/1 w/i 1 B22.24; G/JPD/1 B17.24; J/JPD/1 B17.25; M/JDP/1 B18.25; B Corps HQ & Supply B21.15; G/P/B B20.14; T/P/B B16.17; 3/P/B, Bb B19.16; Br/S/B B20.27; C/S/B, Bb B19.27; B/S/B B18.26; M/H/P B17.23; A/H/P B17.22; D/H/P B17.21; Pb (limb) B18.22; RW HQ & P Corps Supply B28.30; C/P, Pb(4) w/i 2 B27.28; H Corps HQ & Supply B26.32; P/C/H, Hb B22.30; W/C/H B22.31; D/C/H B22.29; Br/H, Hb w/i 1 A24.01; FCav Corps w/i 2 A22.08; Res Corps w/i 2 A22.02.
Confederate Orders
The rules for Wing structures are in effect. Longstreet and Polk command their historic Wing structures.
Longstreet (LW) has orders to attack the Union troops between the Brock house (B15.19) and the Poe house (B16.26), in order to capture the road junctions at B8.25 and B13.25 or Hexes J and K.
P/B has a divisional goal to defend the Confederate left flank between Hall's ford and the Brock house.
Polk (RW) is to attack Thomas' position in order to clear the Lafayette Road (B16.29 to B17.35, inclusive), and also to capture the Snodgrass house (in order to link up with LW.) Polk has accepted these orders, but has not yet started issuing them to his subordinates.
Bragg may bypass his Wing commanders and issue orders directly to corps.
Reinforcements
Both sides receive reinforcements as called for by the arrival schedules for the duration of the scenario.
Victory
The standard victory conditions given in the Game Rules booklet apply.
- USA losses at start: 71
- CSA losses at start: 82
Scenario 5: The Rock of Chickamauga
After the collapse of 20th and 21st Corps, only Thomas and his 14th Corps were left on the field to prevent a total Southern victory. Granger's Reserve Corps arrived in the nick of time from the north, blunting Longstreet's attack on Thomas' exposed flank. The waning hours of the battle were given over to Confederate efforts to dislodge the remaining Union troops. Finally, about 5:30 pm, Thomas decided to follow the rest of the Federal army off the field, having shielded their rout long enough. He emerged as the hero of the Army, soon to replace Rosecrans as commander.
- First Turn: 1:00 pm, 20 September
- Last Turn: 7:00 pm, 20 September
- Scenario Length: 13 turns
- Artillery Ammunition: USA: 55 points; CSA: 75 points
Set Up
Union: 14 Corps HQ & Supply B17.31; 1/1/14, 3/1/14, 14b B19.34; 2/1/14 B18.34; 1/3/14, 3/3/14 B11.29; 2/3/14 B10.28; 2/4/14, 14b B16.29; 3/4/14, 14b(3) B17.29; 1/2/20 B19.32; 2/2/20 B19.33; 3/2/20, 20b B19.31; 1/2/21 B18.29; 2/2/21, 21b(4) B19.30; 3/2/21 B17.33; 1/1/21, 21b(3) B12.29; 3/1/21 B13.30; Res HQ and Supply B10.30; 1/1/Res B7.29; 2/1/Res, Resb B8.28; 2/2/Res B9.28; 1/2/Cav A35.32.
Special Reinforcement
4:00 pm: 2/14, 3/20, 14b(4), 20b(3) - arrive at G, with orders to defend w/in 6 hexes of A6.30, in order to block the Rossville Gap.
No other Union reinforcements are used in this scenario.
Panic has already occurred.
Union Orders
2/21 and 2/20 are attached to 14 Corps.
14 Corps has orders to defend in place as long as possible, to protect the retreat of the army.
1/21 has an initiative-based divisional goal with the same mission of 14 Corps.
Res Corps has an initiative-based order to defend 14 Corps' flank.
1/2/Cav is independent for this scenario only.
Confederate
Army HQ & Supply A25.05; LW HQ B13.25; 3 x LWb w/i 2 B13.25; 1 Corps HQ & Supply B11.25; G/JPD/1 B10.26; J/JPD/1 B9.26; M/JDP/1 B11.27; L/H/1 B11.26; Tex/H/1, B/H/1 B12.26; H/M/1 B13.27; K/M/1 B14.27; B Corps HQ & Supply B17.24; P/B (col), Bb (limb) w/i 1 B16.24; S/B, Bb w/i 1 B19.27; H/P, Pb w/i 1 B7.26; RW HQ & P Corps Supply A22.05; J/C/P B21.35; W/C/P B22.35; St/C/P, Pb(4) A22.02; S/C/P A22.03; M/C/P A22.04; H Corps HQ & Supply B22.31; C/H, Hb in line from B21.30 to B21.34; Br/H, Hb w/i 1 A20.03; FCav HQ and Supply A21.09; D/P/FCav, Pegram A21.10; A/A/FCav A19.08; F/A/FCav, FCavb A19.09; S/P/FCav A38.30; Res HQ A18.03; Res Supply A17.05; L/L/Res A16.03; W/L/Res, Resb A17.03; E/W/Res A21.03; W/W/Res A20.03; G/W/Res A19.03.
Confederate Orders
The rules for Wing structures are in effect. Longstreet and Polk command their historic Wing structures.
Polk (RW) is to attack Thomas' position in order to clear the Lafayette Road (B16.29 to B17.35, inclusive), and also to capture the Snodgrass house (in order to link up with LW.) Polk has accepted these orders, but has not yet started issuing them to his subordinates.
Longstreet (LW) has no orders.
FCav is ordered to block the Lafayette Rd between Cloud Church and the McDonald house.
S/P/FCav is considered independent for this scenario only.
Bragg may bypass his Wing commanders and issue orders directly to corps.
Reinforcements
The CSA receives reinforcements called for by the arrival schedules for the duration of the scenario, the USA only gets the special reinforcement indicated above.
Victory
The standard victory conditions as given in the Game Rules booklet apply. In addition, use the following to adjust the level of victory accordingly:
Shift one level of victory in the Union favor for each hour turn - starting with the 5 pm turn - that 14 Corps has less than 9 of its brigades wrecked, counting both dead and stragglers. For this purpose, consider the 14 Corps to consist of 1/14, 3/14, 4/14, 2/20, and 2/21. Ignore all other Union troops for this calculation. The results of this shift are cumulative.
Special: No matter how many shifts accumulate, the best the Union player can achieve is a minor victory.
- USA losses at start: 113
- CSA losses at start: 125
Scenario 6: The Battle of Chickamauga
This scenario recreates the entire battle, addressing the action on both days.
- First Turn: 7:30 am, 19 September (Start with Union player-turn)
- Last Turn: 6:00 pm, 20 September
- Scenario Length: 59 turns
- Artillery Ammunition: USA: 250 points; CSA: 200 points
Set Up
Both sides set up according to Scenario 1. Orders are those given in Scenario 1.
Reinforcements
Both sides receive reinforcements according to the respective reinforcement or arrival schedules.
Victory
The standard victory conditions as given in the Game Rules booklet apply.
Historical Notes: The Chickamauga Campaign
When troops of the Federal Army of the Tennessee occupied Chattanooga, Tennessee on 9 September, 1863, William S. Rosecrans silenced his critics with a brilliant coup. For nine months, since the battle of Murfreesboro at the new year, Rosecrans had remained inactive with the Federal army, despite prodding from all directions. Under ever greater pressure to show success in its prosecution of the war, the Lincoln government needed victories on the offensive. Gettysburg and Vicksburg were welcome successes in the East and along the Mississippi, but Lincoln also wanted action against the deep South, with an eye on Atlanta, second only to Richmond as a military industrial center for the Confederacy. The gateway to Atlanta, of course, was Chattanooga.
Rosecrans refused to move in haste, preferring to arrange everything carefully before launching an undoubtedly difficult offensive. In many ways, his task was the most difficult of any Federal army's in 1863. His supply line rested on a very tenuous rail line through Nashville and points north, exposed to endless cavalry raids. Protecting this line consumed large numbers of his infantrymen, posted in blockhouses and small garrisons across middle Tennessee. His cavalry was inadequate in both men and mounts, greatly outnumbered by the Confederates under Forrest and Wheeler. He worked diligently throughout the summer at solving these problems, even mounting a brigade of infantry (Wilder's) to strengthen his cavalry.
Finally, by late June, Rosecrans felt he was ready. What followed was all too rare in the Civil War: a masterful campaign of maneuver which allowed Rosecrans to capture his primary objective, Chattanooga, without a fight. Caught off balance, Bragg retreated to the mountains of north Georgia. The fall of Chattanooga on 9 September provoked much protest in Southern military and political circles. Bragg's Army of Tennessee, already dissent ridden with quarrels over past campaigns (notably Perryville) lost what was left of their confidence in their commander. Most of the corps and division commanders already held grudges against their difficult superior, and this evidence of further military defeat convinced them of Bragg's unfitness for command. President Davis, however, never lost confidence in his long-time friend, and Bragg remained in charge.
Simultaneously, events in Virginia would have a momentous impact in north Georgia. Before Lee's invasion of Pennsylvania, (which culminated in the defeat at Gettysburg) a plan had been put forth by Longstreet to remain on the defensive in Virginia and reinforce the center, under Bragg. Longstreet hoped that with large reinforcements, the Army of Tennessee could undertake a successful offensive, perhaps even recapturing Tennessee and parts of Kentucky. The plan was shelved in May, but by late August it was revived in the face of Rosecrans successes.
The Army of Northern Virginia was to detach its 1st Corps, Longstreet's command (less the remnants of Pickett's division, still refitting south of Richmond), and move it by rail to Bragg. Originally the transfer was to take two days, but the fall of both Knoxville and Chattanooga eliminated the direct rail link, and the 1st Corps embarked on a 9 day tour of the deep south. Not since 1861 had troop movements been greeted with such exuberance. Most of Longstreet's men passed near their homes for the first time in 2 years, and many went temporarily AWOL to visit loved ones. Longstreet brought with him nine brigades of infantry, of which five would arrive in time to play an important role in the coming battle.
Just before his departure, Longstreet urged Lee to join him, preferring to serve under Lee's steady hand in the coming fight. Lee declined. President Davis might never have agreed to let him go anyway - fearing for the safety of the Southern Capitol - but the possibility makes for interesting supposition. Lee seemed to excel in such counter-stroke situations.
For his part, Bragg was still resolved to offer battle. Having been outmaneuvered at Chattanooga, the Confederate general prepared a trap for Rosecrans. Misinformation, via spies and deserters, was fed to the Federal army to the effect that Bragg's men were demoralized and almost defeated, fleeing towards Atlanta, one hundred miles south. Rosecrans was convinced that the intelligence was accurate and hastily prepared to follow up his initial successes. Plunging into the rugged terrain of northern Georgia, he set off in pursuit.
However, the Army of Tennessee was far from routed. Reinforcements had been pulled from other departments, building Bragg's army up from 35,000 to near 55,000 men even before Longstreet's arrival. Now the Confederates lay in wait behind the long screening mountain ridges south of Chattanooga, ready to strike. In his haste, Rosecrans spread his forces widely in order to move his columns south as rapidly as possible. By the second week of September, the Union troops were dispersed over sixty miles of countryside, negotiating three passes through Missionary Ridge.
These passes led into a valley known as McLemore's Cove, sheltered on the opposite side by Pigeon Mountain. Behind the mountain, Bragg deployed his forces, ready to attack. As Rosecrans' center column, under MG George Thomas, entered the valley, Bragg planned to attack it from three sides and crush the Federals.
The plan fell apart. Delays and confusion riddled the Southern command, and the opportunity slipped away as Thomas realized his danger and notified Rosecrans. Bragg was furious at the errors, blaming division commander Thomas Hindman and corps commander D. H. Hill. Bragg preferred charges against Hindman, which were subsequently dropped. The real fault seems to lie with the lack of proper coordination Bragg imposed, though the mutual feelings of distrust felt between Bragg and his subordinates could hardly have helped.
A second plan, aimed at Rosecrans' northernmost column under MG Crittenden, commander of the 21st Corps, also failed. Crittenden protected Rosecrans' communication with his base at Chattanooga by holding positions near Lee and Gordon's Mill. Bragg ordered another corps commander, Lt Gen Leonidas Polk to attack Crittenden. Polk requested more troops and did nothing further, allowing more time to slip away.
By 12 September, Rosecrans had realized his error and hurried to correct it. Far from fleeing is disorder, Bragg was threatening Rosecrans' army with disaster and the Federal Commander ordered his troops to concentrate on Crittenden's position. Alert to such a move, Bragg ordered his forces to the same vicinity, setting the stage for the coming battle.
Rosecrans was by now well aware of his danger, though not to its full extent. Curiously enough, the Federal high command in Washington failed to notify him of Longstreet's transfer. Indeed, the Union reaction to all of the Confederate concentrations was sluggish at best, and no Federal forces were sent to Rosecrans from either the East or the Mississippi Valley to offset the Confederate build-up. Only later, after disaster had come, would the Union forces make their own epic rail journey, just before the Chattanooga battle in November.
Both armies were now concentrating along the Chickamauga Creek near Lee and Gordon's Mill, 10 to 15 miles south of Chattanooga. Bragg's next battleplan called for his troops to assail Rosecrans' left flank, interposing the Confederates between the Union army and Chattanooga itself. The 18th of September, found both armies skirmishing for control of the creek crossings north of Lee and Gordon's Mill. The Confederates secured the crossings, though not without some bloodshed, as Union cavalry and Wilder's mounted infantry disputed the issue.
On the morning of the 19th, it was the Union army which took the offensive. An erroneous report from BG Daniel McCook's brigade of the Federal Reserve Corps placed a lone Confederate brigade near Jay's Mill, and Thomas decided to send his two lead divisions, 1/14 and 3/14, to destroy the enemy if possible.
Unfortunately for these Union divisions, the lone Confederate brigade, one of Bushrod Johnson's, had moved on south and was replaced by Pegram's division of Forrest's Cavalry Corps. Additionally, the five brigades comprising Walker's Confederate Reserve Corps were near at hand to support the Confederate Cavalry. When Thomas' lead troops (Brannon, 3/14) opened the fighting at 7:30 am, they were fiercely opposed by both Forrest and Walker's lead Confederate division. Brannon was repulsed and pushed back on 1/14 (Baird's division).
Baird's newly deployed strength in turn pushed back the Confederates, until Walker's other division hurriedly arrived to launch a devastating counterattack. Baird was sent back in disorder, with one unit, composed of US regulars (mostly recruits) badly damaged.
This "to and fro" pattern was destined to be repeated throughout the rest of the 19th, as fresh troops on both sides arrived and took their turn in the fray. Johnson's Federal Division (2/20) was sent to the aid of the 14 Corps and halted Walker's advance. In response, Cheatham's Confederate division, a powerful force of five brigades, attacked near the Brock house and caught Johnson in the flank. By noon, Thomas again needed fresh troops to stabilize his center and repulse Cheatham.
Each fresh unit extended the fighting further south, and Thomas' next two arrivals followed true to form. Palmer's (2/21) and Reynolds' (4/14) troops were committed by early afternoon to stopping Cheatham. They succeeded, but at a cost.
Rosecrans so far had influenced the battle very little, content to feed Thomas extra troops when needed. By midday, five of the eight Union divisions on the field had been assigned to the 14th Corps. The other two corps, with only three divisions between them, held their fronts thinly at best. A dangerous gap developed at the midpoint of the Union line. At 2:30 pm a fresh Confederate unit, Stewart's division of Buckner's Corps, dealt the Federal center a powerful blow.
Bragg was still intent on his original plan to flank the Federal army to the north, and had remained unaware of the opportunity in the Union center. Stewart's men were ordered to follow Cheatham's now used up force, but instead, (following the path of least resistance) smashed into Van Cleeve's (3/21) men south of the Brotherton House. The Confederate attack was a success, sending Van Cleeve's men fleeing and overrunning 12 Union cannon. Rosecrans' HQ was itself threatened with capture. Only Reynold's (4/14) quick response, holding stubbornly to the shoulder of the hole and massing fresh artillery, prevented further enemy success. Wilder's mounted men attacked from the opposite flank, coming up from the south to cause Stewart concern for his exposed units. Wilder's success, coupled with Reynold's firm actions, held the Union center long enough for yet more fresh troops to arrive. Negley's division (2/14) filled the gap.
Next it was Hood's turn. With three brigades from Lee's Army, MG John Bell Hood launched an attack at 3:30 pm. His assault followed earlier patterns, engaging Federals still further south from Thomas' original positions. He met with no greater success. Blunted by Wood (1/21) and Sheridan (3/20), a lull followed this last attack.
One more blow was struck on the evening of the 19th. About 6:00 pm, Cleburne's division of Hill's Corps arrived on the north flank, scene of the original fighting of that morning. Cleburne's 3 brigades launched a sunset attack which fared no better than any other Confederate assaults that day. The fighting ended after nightfall, with no gains made.
Bragg was responsible for the Confederate frustration of the 19th by failing to coordinate any of his numerous divisional assaults. In addition, he remained too far from the scene of the fighting to observe the opportunity Stewart's attack generated in the center. This assault actually breached the Federal line, but lack of supporting troops prevented any exploitation.
Although his troops had nearly broken the weak Union center and had made little headway against the strong Union left, Bragg was determined to follow his flanking plan again on the 20th. Longstreet had arrived with two more brigades from Virginia that night, and Bragg took the highly unusual measure of completely revising his command structure overnight. He chose to create two wings, with Longstreet leading one and Polk commanding the other. Theoretically, this would streamline the command problem, as each wing commander coordinated the actions of the divisions under his command to produce simultaneous results. Polk's wing, northernmost, was ordered to launch a dawn attack against Thomas in order to isolate the Federals from Chattanooga. Longstreet's instructions were to attack the Federals once Polk's forces had become engaged.
Longstreet managed to find Bragg, receive his orders and begin his preparations for the next day's fighting. Polk received his instructions from Bragg as well, but was less successful in informing his subordinates. Chief among them was Daniel Harvey Hill, who Polk could not find that night. (D H Hill was also a Lt General and equal in rank with the two wing commanders, but Bragg was displeased with Hill and merely left him as a corps commander under Polk.) Since Hill was to lead the dawn attack with his corps, this was a most unfortunate oversight.
Much historical recrimination has ensued in trying to find blame for Polk's failure to attack on time, and there were mistakes made by all parties involved. However, Polk's failings must take precedence here, for he seems to have made only a lackadaisical effort to find Hill. The result delayed the attack until mid-morning.
By 9:00 am, Bragg was furious. No sounds of battle had greeted daylight, and the Confederate Commanding General at last went forward to find the cause. He found Polk awaiting breakfast, and Polk in turn informed Bragg that Hill was not yet ready to advance because his corps was drawing its own rations. To be fair to Hill, he had also expressed serious doubts about the positions of the attacking formations, finding them in some cases facing the wrong way. Polk passed on none of these concerns to Bragg.
Finally, in frustration, Bragg ordered the various division and brigade commanders to advance, even going so far at one point as to instruct an aide to ride along the battleline and order every company commander to attack. While that instruction was no doubt more figurative than literal, still this action resulted in a disjointed attack beginning around 10:00 am.
Not surprisingly, this complete lack of coordination produced a series of fruitless, brigade-sized piecemeal attacks along Thomas' Federal line, which was behind log breastworks and well supported with cannon. For more than an hour, these assaults produced nothing but Confederate losses. Ironically, the best chance for success was at the extreme north of the Union line where there hadn't been time to fully construct defensive positions. But rather than finally executing his original flanking plan, Bragg missed the opportunity and Thomas held easily.
Mishaps were to play their part for Federal fortunes as well. While Thomas was bearing the brunt of the Confederate effort, one of Rosecrans' aides reported to the Federal commander that a gap existed in his center. Recalling the problems of the previous day, Rosecrans quickly issued an order for Wood's division (1/21) to move north to plug the hole. Wood knew that this was an erroneous instruction because Brannan's men (3/14), concealed in the forest, blocked the supposed gap. However, Wood had received a dressing down earlier from Rosecrans for not responding promptly to an order and so hastened to comply. He put his men into column and marched behind Brannan. This left a good-sized gap where there had not been one.
It was at this moment, 11:00 am, that Longstreet's supporting attack opened. Longstreet had assembled a powerful force of 14 brigades, most of his wing, and was waiting for Polk's forces to open the action. Finally, he sent his troops forward, with the spearhead under Bushrod Johnson, aimed directly for Wood's newly created gap.
The question of how successful Longstreet's attack would have been had there been no hole to exploit is left open, though no one can dispute the power and depth of the attacking force. With the gap, the results were spectacular. Union troops were thrown into confusion and routed. Sheridan's division (3/20) made a series of desperate stands in an effort to delay the Confederate tide. Longstreet's reserves proved too powerful, however, and soon Federals were fleeing the field, catching up Rosecrans, Crittenden and McCook in the retreat. A total of four Union divisions were driven from the field, leaving only Thomas' force to oppose Bragg's suddenly victorious army.
Longstreet now faced a choice, either to pursue the fleeing half of the Federal army or to flank Thomas' Corps and crush the rest of the Army of the Cumberland. Without direction from Bragg, Longstreet elected to turn on Thomas, realizing he was deep in the Union 14 Corps' rear. Wheeling to the right, Longstreet prepared to attack again.
Now, around 12:30 pm, Wilder's brigade made a significant contribution to the battle. Wilder was almost caught up in the rout around him and soon found himself alone on the southern half of the field. Longstreet's entire wing separated his brigade from Thomas' command. Despite these daunting odds, Wilder chose to try and cut his way through the Confederate force, relying on the superior firepower of his Spencer repeating rifles to clear a path. His advance failed to reach all the way to Thomas, but Wilder did reach a point where he could cover the retreat of the rest of the army, and no doubt his force helped deter Longstreet from pursuit. At the same time, the Union Reserve Corps marched south to support Thomas as per earlier instructions.
By 1:00 pm, Longstreet's first troops began to attack the exposed Union flank. Desperately, the Federals stabilized a temporary line along Snodgrass Hill, comprised of Wood's and Brannan's men. As the Confederate assault grew stronger and threatened to overwhelm this thin line, Granger's Reserve Corps arrived to save the day.
The final hours of the battle saw desperate, bloody fighting as Thomas held firm long enough to cover the troops retreating to Chattanooga. Negley's division (2/14), one of those which had fled, fell back to Rossville and defended the gap there, 4 or 5 miles north of the battlefield. One other division, Sheridan's (3/20) reached Rossville and attempted to return to the field via the Lafayette road, but growing uncertainty as to Thomas' exact positions and the approach of darkness halted this movement. Sheridan contented himself with supporting Negley.
Sometime during the afternoon, Rosecrans made the fatal decision that would ultimately cost him his command. Upon hearing that Thomas was not routed, but still holding fast, Rosecrans almost turned back to rejoin him. He then changed his mind and, displaying his great faith in Thomas' abilities, chose instead to go on to Chattanooga to reorganize the demoralized portion of his army. While this choice was perhaps correct militarily, it was fraught with political suicide. Misinterpreted as the actions of a man who had become completely confused and overwrought, Rosecrans' decision ultimately cost him his command.
By 5:30 pm, it had become impossible for Thomas to hold any longer and the Federals began to retreat towards Chattanooga. Still, their holding action had given Rosecrans time to start reorganizing his scattered men, and now Bragg gave him more time.
Despite all evidence to the contrary, Bragg considered himself the loser of the battle that evening. Considering his heavy losses in infantry, Bragg even contemplated his own withdrawal, until the unified and angry protests of his subordinates changed his mind. Most of the Confederate officers urged some sort of pursuit to capitalize on the victory. Not wanting to make another direct assault, Longstreet urged Bragg to outflank Chattanooga by crossing the Tennessee River and maneuvering Rosecrans out of position. Forrest felt that a direct pursuit that night would yield thousands of prisoners and perhaps complete Rosecrans' destruction.
Bragg chose to do nothing. Instead he elected to await developments and see if the Federals would withdraw further north. When it became apparent that the Yankees were going nowhere, the Confederate army advanced and took up besieging positions on the high ground surrounding the town.
Rosecrans was relieved of command a few weeks later, when Grant was sent by Lincoln to take command. Union troops from both the Eastern and Mississippi fronts were sent to reinforce the Army of the Cumberland, and in November Grant conducted a series of battles which raised the siege and culminated in the Battle of Chattanooga, (also known as Missionary Ridge) which drove the Confederates off in defeat.
Despite the unified opposition of virtually every general officer in the Army of Tennessee, Bragg retained command after Chickamauga, managing to lay a great deal of the blame for errors made on that field on Generals Polk and Hill. Davis supported Bragg until the disastrous defeat at Chattanooga in November, when it finally became apparent even to the Southern President that Bragg had to go. As 1864 dawned, Joseph E. Johnston took command. Still, Bragg was not wholly discredited, for Davis made him his military advisor in Richmond.
Nevertheless, one of the real lost opportunities of the war was the failure for the Confederates to pursue after Chickamauga. Despite fearsome losses and the confusion of a major battle, by that late in the war the South could ill afford to waste any chance, however thin, for a decisive victory. A major victory, which returned the seat of war to Middle Tennessee, would have done much to promote Northern war-weariness and offset the disasters of the summer.
Designer Notes
In many ways, designing games is mostly a process of addressing "might-have-been" type questions. After all, much of the appeal of our hobby lies in assuming the commander's role and playing out your own decisions. Personally, I have found games to be great historical aids (living maps, as it were) as well as fun to play.
Given the above, when I started to work on Chickamauga I was determined to follow my own precedents and explore as many of the possibilities as I could. Hence the numerous optional troops and even alternative Confederate commanders included in the game.
Chickamauga was perhaps the last real Southern hope for victory in the field. 1864 still held open the possibility of a political victory through Northern war-weariness, but never again could the South conduct a strategic concentration like the one in the fall of 1863. Unfortunately for the Confederates, it proved a barren victory, marred by incompetence at army, corps, and divisional levels. Hence, not unlike "The Bulge" in WWII, I have always found this campaign especially fascinating, portraying kind of a last gasp for victory.
Each of the scenarios was created to examine a critical point of the fighting, with special emphasis on the second day. The early scenarios are more balanced. I find scenarios 4 and 5 most interesting, focusing as they do on the collapse of Rosecrans' Army. The latter situations definitely favor the CSA, and in competitive play I recommend that the better or more experienced player handle the Federals.
This particular game has more special rules than most in the series, but it was a most unusual battle. I think that the Confederate command rules, while lengthy, aren't excessively complex and yet still capture the somewhat bizarre command arrangements Bragg created. The anti-initiative rules are, if anything, an oversimplification of the Byzantine undercurrents and subplots which ruined much of the Army of Tennessee's effectiveness. There was a strong lobby in the South to replace Bragg, and no doubt such a move would have impacted the battle. The times I have played with Lee in Bragg's place certainly make for a much more responsive army. There is more that could be done here, should players so choose. For instance, D H Hill would not necessarily have welcomed Lee unreservedly. Experiments might be conducted using a different set of anti-initiative ratings to mirror new resentments.
The restrictions imposed on Bragg when using the Wing command are imposed to reflect the historical political problems Bragg faced. Polk was unfit for higher command, but at Chickamauga still retained a large measure of army confidence. Bragg was also a stickler for the proper chain of command, and it took the major failure of his attack plan on the morning of the 20th to enrage him enough to finally bypass Polk. In effect, Bragg's required initiative dice-roll in this case reflects his growing annoyance at the delay, which finally boiled over when he started to order the divisional commanders of the RW forward independently. This rule can be easily ignored for players who feel too straight-jacketed by history. Nevertheless, I do hope players at least try it, and if at some point the Confederate player throws his hand in the air and begins to curse incoherently, "Welcome to the Confederate Army of Tennessee."
By now, followers of the series may also note that I tend not to rely on any fixed Attachment and Detachment rules. I have found that the various armies tended to cross-attach units based on the attitude of the commander and skills of the subordinates. Hence, these rules tend to model the command abilities of the corps commanders involved, as well as the actual handling of the troops involved. For instance, Thomas was a man Rosecrans trusted completely. The 14th Corps commander at one point or another was placed in charge of almost every division in the Federal army and rarely commanded less than 2 attached divisions at any one time. I have restricted his command span to a maximum of 6 divisions since this seems to be the largest number he retained control of at any given moment, and to do more would completely circumvent the command and control rules. Nevertheless, I think the existing rules will allow the Union player to give Thomas a starring role, a fair representation of historical reality.
Confederate Cavalry in the West was more familiar with the stand-up fighting of the battlefield than their eastern counterparts, and so was better equipped to stand in the battleline. Forrest especially saw to it that his men were armed with rifled muskets where possible, and trained them extensively for dismounted combat. Hence, the Confederate horsemen here have their fire levels conforming to those of infantry instead of the more diluted levels occurring in previous games. As the war dragged on, both sides' mounted arms improved in this regard. Unfortunately, there were never enough carbines around to outfit the Confederates with weaponry equivalent to their blue-coated counterparts.
For matters of purely historical interest, I have included the final strengths of the units involved so that players can compare their game results to the actual outcome. I intend to continue to include this in all future releases, and I hope it is of interest to some gamers. Of course, the end strengths include only battle casualties, not straggler losses.
The victory conditions in this game, like the others I have designed, try to reflect only historical success. The levels of victory reflect how successful a player has been in light of historically valid objectives. Since both forces made some effort to destroy the other, terrain takes a back seat to comparative losses. In the end, the victory conditions will measure the difference in combat ability left in the two armies. Little consideration was made on my part to using the VP's as some sort of great leveling factor, to produce a "balanced" game. It is my belief that such a game is almost unattainable, given the vast diversity in player ability that exists in the hobby. Victory conditions that were successfully balanced between the Gamer's staff, or even a group of outside playtesters, are meaningless when two new people sit down to play. Hence, rather that pursue that Grail, I have elected to measure success in historical results. A player who achieves victory in Barren Victory has accomplished something that would have produced a decided historical advantage in 1863.
Player Notes
Barren Victory has a different flavor from previous CWB series games. Overall troop quality (morale) is a little lower. Thus, the forces have less short term staying power (more stragglers causing wrecked status to be reached quicker). Brigades retreat more frequently, Corps "stop attack" earlier, etc. This causes the battle situation to change rapidly, creating an exciting and uncertain, back and forth environment.
Certainly the troop balance and the relative command quality of the armies are different from previous games. Further, the command structures of the two armies are somewhat unique - both rewarding and frustrating.
Finally, the heavily wooded terrain, with abundant streams, creates an entirely new battle situation. Control of the roads, important in previous games, is critical here. Command and control will be difficult to maintain, the word "tangled" will be a frequent description. Tactically, casualties will run heavy as close-range combat is often the only type possible. The offensive player will find the going rough as many of the retreats he is forced into will preclude any return fire, and he will be even more hard-pressed to bring supporting artillery to bear. The defending line will be plagued by a lack of mobility (especially of his artillery), slow reaction to trouble, and difficulty maintaining organization.
Each army has their distinct strengths and weaknesses which change as the battle progresses. Whichever side you command, you'll find the game to be competitive, challenging, closely-fought, tense and bloody - Just like the battle!
Union
The Union army is generally on the defensive in this battle, although by no means exclusively so. It is not an easy defense, since the 3 "victory point" entry areas are so widely spread apart. If you can bottle up the Confederate forces on the southwest area of the field, the defense of your entry areas is much easier. Thus you may want to follow that old adage "the best defense is a good offense."
Assuming you can hold your VP areas, victory will be based on casualties. This Union army simply doesn't have the manpower to absorb excessive or disproportionate casualties. Keep an eye on losses with every decision. Holding a particular area at the cost of wrecking a corps is rarely effective.
It is extremely hard to disengage, withdraw and reorganize a defensive line in this terrain. As heartless as it sounds, sometimes that Dg brigade or stranded artillery unit has to be "hung out to dry" in order to get the rest of the line back into an organized and better defensive position. Be alert and anticipate: it is better to get out too soon, than too late.
The Union's main advantage in the game is its command edge. Although Rosecrans-Crittenden-McCook are not very good, Thomas is tremendous. He can command nearly half of the Union army, using his excellent initiative to allow Rosecrans to concentrate his attentions on the rest of the army. You should try to keep the battle in a fluid and changing situation (particularly early), since your command structure will be able to react more quickly. Ideally, you would like to get Crittenden and McCook in a relatively stable situation - not necessarily static - while Thomas rapidly reacts, counterattacks and "runs circles around" the Confederates, producing locally overwhelming force and destroying them in detail (so to speak, no one "runs" through this terrain). Use your strengths to full advantage, while minimizing your weaknesses and you can win.
Confederate
As the Confederate player, you have several major pluses at Chickamauga. You have better quality troops than the Union, more troops, an initial advantage in deployment, position advantages, well-armed cavalry to use in battle, Longstreet, Hood, Forrest, D.H. Hill, Cleburne, etc.
But don't get too cocky - you've also got Bragg and Polk. So the battle shapes up as a close one, as these guys will have difficulty controlling anything, much less an offensive effort. (Your longtime Union opponent might say its about time you got to enjoy the pleasure of such commanders.) Bragg must take a very active role in command and issue his orders In-Person. These results will be dismal enough. If you want even more frustration, try parking Bragg in his HQ (which he located too far from the action) and direct the battle from there, as he did historically. Even with your best command efforts, your army will delay for painfully long times - be prepared for it, plan with this in mind, and issue orders such that these delays are taken into account.
Bragg failed to win anything more than a minor victory because he failed to coordinate his army's attacks, failed to take advantage of opportunities as they presented themselves, and failed to execute his plan which could have worked. These errors and other mistakes (frontal assaults, poor choices of attacks, etc.), contributed greatly to the excessive casualties which seriously damaged his army's effectiveness. Learn from his mistakes - don't repeat them.
Even though the Confederate army seemingly has the manpower to "bull" its way through the Union troops in bloody frontal assaults, this will get you results not much different from Bragg's. This temptation will be especially hard to resist since you finally have more men than he does and relative to previous situations it will seem as if you have overwhelming power. But you really don't, and you can't waste them here either. And you won't be able to count on the Union commander pulling a division out of line, leaving a "juicy" gap for you to hammer and drive nearly half the Union army off the field.
Once in the Wing structure, Longstreet will do most of the fighting and Polk a lot of sitting - and drive you crazy. As with the Union army's 20 & 21 Corps, you'd like to get Polk in a situation where he can be productive without having to change his orders, while Longstreet is your fast acting arm. When Bragg gets frustrated enough to bypass Polk, the command systems of the two armies are remarkably similar. The key is having enough effective forces left at this point and having enough time to do something with them.
While the Confederate player has an army good enough to win this battle, there are more than enough problems here to prevent victory. A well planned, properly conducted battle is required to win, something less will lose.
Union Personality Sheet
William S. Rosecrans, Major General, Commander, Army of the Cumberland
- Rating: 1
- Starting Army Status: 3
- Anti-Initiative: None
Background: Rosecrans took command of the Union Army of the Ohio, subsequently renamed the Army of the Cumberland, after Major General Buell's poor performance during the Perryville campaign. Afterwards, the army became the most inactive of the Federal forces, fighting only the Battle of Murfreesboro (Stones' river) in December of 1862. However, the initial maneuvering which drove Bragg out of Chattanooga was masterful, forcing Bragg to surrender that important city without a battle. On the 19th of September, Bragg counterattacked just south of the city. The first day's fighting was inconclusive, but on the second day, Longstreet arrived and launched a decisive attack which drove half of Rosecrans' army from the field. Thomas, who held on until dark, retreated with the rest of the Union troops at the end of the day. Bragg followed, and the Federals soon found themselves besieged in Chattanooga. A month or so later, Grant was brought in to remedy the situation, and Rosecrans was relieved of command.
Panic Rolls
| # of wrecked divisions | 0-3 | 4-6 | 7-8 | 9-10 | 11-12 |
|---|---|---|---|---|---|
| Status of 2 | 12 | 11 | 9 | 8 | 7 |
| Status of 1 | 10 | 8 | 7 | 6 | 5 |
Modifiers: +2 to the dice roll if Thomas is killed or wounded
On Panic
If Rosecrans panics, he has determined that only immediate retreat to Chattanooga can preserve the army. Rosecrans orders all Federal units (of all types) within 30 hexes of the Army HQ, except those units currently commanded by Thomas (including units attached to the 14th Corps) to exit the map via hexes G, H, I, J, or K. These orders are automatically issued by Rosecrans on the first command phase after panic has occurred, ignoring order costs. The retreat orders are never lost and automatically accepted.
Each division commander may make one and only one attempt to change these orders by rolling for initiative. A successful roll allows that division, plus one artillery unit from that corps, to remain on the field and join any Union troops still fighting. Failure means that the division complies with Rosecrans orders and leaves the game with its corps. The Union 20th and 21st Corps commanders may also roll once to see if they stay, but success only means that the Corps HQ, Leader and supply stay. Each division still rolls individually. Wilder's independent brigade is automatically exempt from these orders and may elect to join Thomas or leave the map as desired.
Any troops that remain on the field may, at any later time, elect to withdraw. This order does not need to be rolled for, but once invoked may not later be changed.
If Thomas is a casualty at the time of the panic result, then his effect is ignored entirely and all Union troops within 30 hexes of the Army HQ are subject to panic. Each leader may still roll to remain on the field, as described above.
In all cases, units more than 30 hexes away may stand or retreat entirely at their own option.
When Rosecrans panics and leaves the field, the Union player is left without an army commander. None of the remaining corps commanders may assume temporary army command. Thus, after Panic has occurred, any Federal troops which remain on the field must use initiative to issue orders of any kind.
Panic Demands
Rosecrans may make two (2) panic demand on Bragg (or his replacement) in scenario 6 [the whole battle]. One (1) panic demand may be made in scenarios 1 - 5.
Rebel Personality Sheet
Braxton Bragg, General, Commander, Army of Tennessee
- Rating: 0
- Starting Army Status: 3
- Anti-Initiative: Polk, Walker: -1; Longstreet: 0; All others: -2
Background: By the time of Chickamauga, Bragg had proven his unfitness to command to virtually everyone except Confederate President Davis, a close friend. The Perryville campaign in the fall of 1862 was a horribly managed affair, begun brilliantly but ending on a sour note of defeat and withdrawal. Murfreesboro was at best a hollow victory, with the success of the first day thrown away by the tragic slaughter of Breckinridge's troops on January 2nd, 1863. Finally, by allowing Rosecrans to outmaneuver him in front of Chattanooga, Bragg lost the last of the confidence of his subordinates had for him. Desperate for a victory, Bragg led his army to Chickamauga Creek, strongly reinforced from other theaters. The South did indeed win the battle, but again mismanagement marred success. Casualties were horrendous, and Bragg himself was convinced that he had been defeated on the evening of the 20th. Finally, after the disaster in November at Chattanooga itself, Bragg was relieved of field command. Still, Davis retained enough respect for the man to bring him to Richmond and make him an advisor.
Panic Rolls
| # of wrecked divisions | 0-2 | 3-5 | 6-8 | 9-10 | 11-12 | 13+ |
|---|---|---|---|---|---|---|
| Status of 2 | 12 | 11 | 10 | 9 | 8 | 7 |
| Status of 1 | 11 | 10 | 9 | 8 | 7 | 6 |
Modifiers: +1 to the dice roll if Longstreet is killed/wounded
On Panic
If Bragg panics, he has decided the battle is lost and only retreat behind the mountain ridges of north Georgia can save the army from destruction. All Confederate troops must immediately retreat off-map via any road hex leading off the east edge of either map. These orders are automatically issued by Bragg on the first command phase after panic is triggered, ignoring order costs. These orders are never lost and automatically accepted by the receivers. However, before acting on these orders, each Wing commander (or Corps commander, if the Wing structure is not in effect) may roll once on the initiative table to ignore the retreat orders, if he so chooses. If the roll fails, the orders are acted on normally. For this roll, and this roll only, ignore the anti-initiative ratings.
Panic Demands
Bragg may make two (2) panic demands on Rosecrans in scenario 6. He may make one (1) demand on Rosecrans in scenarios 1, 2, 3 & 4. In scenario 5 Union panic has already occurred.
Alternative Panic Rolls
Since it is possible to replace Bragg with either Johnston or Lee by using a variant, use the following modifiers when checking for panic. Only the panic rolls are changed, the other rules pertaining to Southern panic remain the same.
- For Johnston: Use the Panic Table above with NO modifiers.
- For Lee: Use the Panic Table above with a -1 Die Roll Modifier.
The Longstreet modifier remains the same in either case.
Scenario Starting Strengths
The following chart provides the starting strengths for the various units at the beginning of each scenario. Units with no strength listed are considered to be at full strength. Additionally, a unit may have a parenthesized number following its current starting strength, which is the number of stragglers the unit now has. Stragglers may be recovered, but no strength may be regained above the starting strength. The ending strength column is presented purely for historical interest and has no bearing on any scenario. It merely represents the strength remaining in the ranks at the end of the game on the 20th.
Example: 1/1/14 starts Scenario 2 with a strength of 15(2). Its original strength was 19, so X off four spaces for losses. The two (2) stragglers are then marked off with an /. Thus 1/1/14 starts Scenario 2 with 13 strength steps, and may recover two from stragglers.
Note: All units start Scenarios 1 and 6 at full strength.
Union
| Unit | Scenario 2 | Scenario 3 | Scenario 4 | Scenario 5 | Ending Strength |
|---|---|---|---|---|---|
| 1/1/14 | 15(2) | 15 | 13(1) | 13 | 12 |
| 2/1/14 | 13(1) | 13 | 11 | 11 | 10 |
| 3/1/14 | 8(5) | 8 | 7(2) | 7 | 6 |
| 1/2/14 | 10(1) | 10 | 9 | ||
| 2/2/14 |
Confederate
| Unit | Scenario 2 | Scenario 3 | Scenario 4 | Scenario 5 | Ending Strength |
|---|---|---|---|---|---|
| J/C/P | 11 | 10 | 10 | 10 | 9 |
| S/C/P | 8(2) | 8 | 8 | 8 | 8 |
| M/C/P | 9(2) | 8 | 8 | 8 | 8 |
| W/C/P | 10(3) | 9 | 9 | 9 | 9 |
| St/C/P |
Union Order of Arrival
| Time | Area | Units | (Orders) |
|---|---|---|---|
| 19 Sept 7:30 am | A | 4/14, 14b | (1) |
| 10:30 am | A | 2/20, 20b | (2) |
| 11:00 am | A | 1/20, 20b | (2) |
| 11:30 am | A | Rosecrans, Army HQ & Supply | |
| 12:30 am | A | 3/20, 20b | (3) |
| (no time printed) | A | McCook, 20 Corps HQ & Supply | (4) |
| 2:00 pm |
(The time is printed as "12:30 am" in the original chart, as shown; the McCook line has no time of its own and follows the 3/20 line.)
Union Orders Explanations
- Move to Corps HQ and await further orders.
- Move to 14 Corps HQ and take further orders from same
- 3/20 has been given a divisional goal to move to Lee & Gordon's Mill and defend the crossing.
- McCook is to move to the current location of either 1/20 and 2/20 or 3/20. The Corps orders then become the same as the division(s) to which McCook moved, and 1/20 & 2/20 are returned to 20 Corps authority.
- Move to Jackson House (B7.10) and await further orders.
Confederate Order of Arrival
| Time | Area | Units | (Orders) |
|---|---|---|---|
| 19 Sept 1:30 pm | D | Hill, H Corps HQ & Supply, C/H, Hb | (1) |
| 4:00 pm | C | Br/H, Hb | (2) |
| 10:00 pm | E | Longstreet, LW HQ | (3) |
| 10:00 pm | E | M/1 | (6) |
| 20 Sept 4:00 am | E | Gist, G/W/Res | (4) |
| 2:30 pm | C | WCav Corps (all) | (5) |
Optional Arrivals
| Time | Area | Units | (Orders) |
|---|---|---|---|
| 19 Sept 9:00 am | E | St/-, St/-b | (1) |
| 10:30 am | E | Lo/-, Lo/-b | (1) |
| 10:00 pm | E | W/M/1, B/M/1, J/H/1, A/H/1 | (6) |
Confederate Orders Explanations
- Move to Army HQ and await further orders
- Br/H has a Divisional goal to move to Lee and Gordon's Mill and defend the crossing.
- LW HQ and Longstreet are to move to Army HQ and await further orders. M/1 is to move to join 1 Corps
- Move to join the Res Corps.
- Move to Lee and Gordon's Mill and defend the crossing.
- Move to join 1 Corps.
If the specified entry hex is blocked, the arrivals are delayed 1 turn and may appear, in line or column, on the map edge within 5 hexes of the listed hex.
PART TWO: CIVIL WAR BRIGADE SERIES RULES (v3.2)
Series Rules: Introduction
The Civil War, Brigade Series games are accurate, readily playable portrayals of specific American Civil War battles at the tactical brigade level.
The intent of this series is to focus on the command aspects of Civil War combat by having players use a game command system that mimics actual events. The game forces interact with each other in ways that simulate the functions of those they represent.
These rules rely at times on the players' common sense and honesty. Game actions that players conduct outside the observation of their opponents require a certain degree of trust between players and a knowledge that each will apply the spirit as well as the letter of the rules.
We make no claims of infallibility. These rules, even in the second edition, contain areas requiring the use of common sense and historical knowledge to interpret rule statements to cover situations not explicitly mentioned. Players who find an area that they cannot decide to their mutual satisfaction should feel free to call or write for a clarification. We support our products fully and will be delighted to respond to your questions as quickly and clearly as possible. We do not require yes/no questions and will give any available background rationale for a rule's conception. Even in this second edition, your questions will continue the process of locating weak points and potentially help another gamer in the future who is confused by the same problem.
v3.2 Notes
This edition exists for the simple reason that we (finally) needed to print more CWB rulebooks. Given that opportunity, I've taken the time to correct the known errata and make a handful of changes players have requested. Players could easily play with the older rules and never notice the changes, so here is a listing of what has been done:
1.0 Game Components
1.1 The Game Map
The maps of this game depict the actual area in which the battle or campaign was fought. They provide their own terrain keys and informational tracks. To eliminate fault lines and ridges, carefully back-fold the maps and secure them by drafting tape or other non-destructive means to the playing table.
1.1a The Hex Numbering System. This system identifies individual hexes on the game maps. The maps, if a game uses more than one, are lettered A, B, C, etc.. A hex number pertaining to a given map begins with the map letter, as in A10.10. The digits before the decimal point indicate the number of the hex row, running along the horizontal dimension of the map from left to right. The digits after the decimal indicate the exact hex along the row found with the first digits, looking from bottom to top. On each map, the grid system extends from the lower left corner. Not every hex is numbered. Each fifth hex (xx.05, xx.10, xx.15) is numbered to create gridlines to follow. To find a specific hex, say A29.17, follow the gridline for xx.15 on map A until you find the 29th hexrow. Then count up two hexes.
1.1b Map Edge Hexes. Edge hexes with at least half of the hex showing are playable. Tiny hex slivers are not. Units forced off the map are destroyed.
1.1c Off Map Movement. Units may not exit the game map and re-enter later, or conduct any type of off-map movement unless the game rules explicitly allow such movement.
1.1d Turn Record Track. This track indicates the passage of time during the game. One marker shows the time of day while another on a second track records the particular day. The first and last turns of daylight have a single number in the time box to indicate the visibility (in hexes) for that turn. The shading on the Turn Record Track indicates night turns. Advance the Turn Record Marker one box during the Turn End Phase; advance the Day Marker at the end of the 12:00 midnight game turn.
1.1e Entry Hexes. Hexes marked with a red circle containing a white letter show where reinforcements arrive. If enemy units block a reinforcement's entry hex, the reinforcement is free to enter at any hex free of enemy units at or within 10 hexes of the scheduled entry hex along any map edge.
1.1f Artillery Ammunition Tracks. These use three markers each to record the expenditure of artillery ammunition for each army. The markers (x100, x10, x1) record the amount of ammunition remaining in hundreds, tens and ones, respectively. Starting amounts are given in each scenario. Some games give players unlimited ammunition and omit these tracks.
1.1g Loss Record Tracks. These also use three markers to record losses (in casualties only, not stragglers or artillery gun losses) for each army. The markers (again x100, x10, x1) record the current number of losses in each army. Each time a side receives one or more casualties, advance the marker by one space for each strength point lost.
1.2 The Rules
There are two rule books in every Gamers' Brand game: Series and Game. The Series Book, which this is, contains the rules generally applicable to all series games. The Game book gives the details needed for a specific game, including special rules, scenarios and set up information. Game-specific rules supersede series rules if they happen to conflict.
1.2a Organization. Rules are numbered by section and case. Each major grouping of rules is a section; a paragraph within a section is a case. For example, section 4, case 2 would be 4.2. A specified case may contain a number of related statements. Parts within a given case are lettered as in 4.2a, 4.2b, etc.
1.2b Repetition. Only where specifically necessary is a rule repeated in every section in which it might have bearing. Therefore, if "A" has a specific combat effect, it might have this effect listed in the rules about A, but not in B, C, and D, which deal with combat in more general terms.
1.2c Charts and Tables. The center of this rule book contains certain game tables and sheets. Remove these carefully by bending the staples back, removing the charts, and returning the staples. Players should either photocopy loss charts or prepare them for use according to the "Note on Play" below. Use plain lined paper for Order Logs
1.3 The Counters
The game's playing pieces, called "counters," represent both the units that actually fought in the battle and "markers" which display bits of information about the game's functions or unit conditions. Carefully punch out all counters, hereafter units or markers, and sort them by type or designation into plastic bags.
1.4 Set Up Notes
Aside from any special notes in the game rules concerning set up, the following are always true:
- "w/i X" means to set up a given unit within X hexes of the hex listed.
- Unless explicitly stated otherwise, leaders may set up with any subordinate unit.
- Units set up in any desired formation and facing.
- Units may never start the game over-stacked.
- Units generally start at full strength.
- Except when explicitly stated otherwise, the Confederate Player Turn is always first.
- A unit ID notation followed by a "b" - as in RWb - means an artillery battery of that ID. Furthermore, RWb means a 5 gun point artillery unit of RW. Should a battery be something other than a 5 gun point unit, its actual strength will be noted as in RWb (3).
- A hex notation to the effect of (hex 1) ex (hex 2) means the unit listed is in hex 1 and has an extended line in hex 2. Likewise, (hex 1) ex (hex 2), (hex 3) means that the unit in hex 1 has extended lines in both hexes 2 and 3.
2.0 Beginner's Note
If you are new to wargames, WELCOME! This is an exciting and intellectually satisfying hobby. Each wargame, while being an enjoyable competitive activity, will also allow you a glimpse of history in action in a way not possible through any other format.
To learn to play, browse through the rules and components. Try to develop a good idea of what exists in the game and where it is located. Then read the rules lightly. Do not try to memorize them! Set up a few units at random and run through the procedures and examples of different play actions. As questions arise, look up the answers in the rules. Try to imagine why a rule is the way it is by applying common sense and your knowledge of history. All rules have at least something in back of them - even if it is only to avoid conflict with other rules. Allow the game to teach itself to you as you look up puzzling items. If something seems unreasonable, please call or write for clarification.
After these tentative steps, play shorter game scenarios with a friend, again looking up uncertainties. Before long you will have the game system mastered. Avoid the Command Rules as you learn this system, only using "command radius" to keep things in order. Once you understand the basic structure, include the rest of the command system in your next session. All games in this series can be played without the command rules, so, if you do not find them to your taste, feel free to play without them. However, by imposing significant constraints on a player's freedom of action with his forces, they do add a large degree of realism to the game.
By the time you have mastered this game, you will be able to play any game in this series with little or no rules learning. Good Luck and Good Fighting!
3.0 Note on Play
For ease of play, I recommend the encasing of Loss Charts in clear plastic report covers, which are widely available. Write on them with overhead projection markers or other markers designed for use on plastic. These provide for easy erasure and re-use. I prefer to stay away from old fashioned grease pencils as they are entirely too hard to erase neatly for my tastes.
4.0 Scale
Each hex on the game map equals 200 yards of real terrain. Each day-time turn represents 30 minutes, each night turn one hour. The vertical scale between contours is 30 feet.
Infantry and cavalry units are brigades, artillery units usually 16 gun battalions. A strength point of infantry or cavalry is 100 men. A gun point of artillery is roughly 3 cannons.
This game system makes a simplification in terms of artillery. Cannons are a generic "standard" type. We felt a more detailed artillery structure would only serve to needlessly complicate the game. Also the "battalion" represents the maximum number of cannon which can deploy and fire from one hex - even if during the battle portrayed such artillery organizations did not exist.
5.0 General Game Concepts
5.1 The Word "Unit"
For simplicity, the word "unit" in these rules refers to any infantry, cavalry, or artillery combat unit, including extended lines and detached batteries.
5.2 Retreat Rule
Any time a combat result calls for a retreat, the owning player must execute the retreat in a relatively straight line in a direction which is locally "to the rear." Doubling back and other "game tricks" are not allowed.
6.0 Units
6.1 Troop Units
These units are combat formations of infantry, cavalry, and artillery. They have a facing and one or more formations available. They are subject to the stacking and morale rules.
6.2 Leaders
These units represent individual leaders (named on the counter) and a small escort of staff. Leaders fulfill important command and morale functions. They do not suffer from normal combat or morale results, but instead are subject to a special Leader Loss Table when fired upon. They have no facing or formation and do not count for stacking in any way.
6.3 Markers
Note that no marker has a facing, formation, or stacking restriction. Markers only indicate specific conditions imposed on units and do not suffer fire combat or morale results themselves.
6.4 Extended Line and Detached Artillery Markers
These represent the expansion of troop units to take up more ground space. They suffer fire combat and morale results in the same way as their parent units.
6.5 Fire Levels
Infantry and cavalry units (only) measure their strength in lettered fire levels. Use fire level markers to mark fire levels under the unit counter. Use fire level markers only in situations where B or C fire level units exist - all other units are assumed to have an A or better fire level. Artillery units use the different "gun point" system described later.
6.5a Fire levels range in order (from smallest to largest) C, B, A, AB, AA, AAB, and AAA. The starting full strength of a unit appears on the unit counter. In some games, specific scenarios may call for units to set up with reduced strengths, with some losses already marked off. In these cases, find the unit's starting strength in fire levels on the loss charts after marking off the initial casualties.
6.5b When dividing into extended lines, remember that one A=2Bs, one B=2Cs and one A=4Cs. Therefore, an AB that extends line into two different hexes would have a B in each of the three occupied hexes.
6.6 Loss Charts and Fire Level Change
Each player has one or more Loss Charts to use in order to keep track of losses. To the left of each set of ovals or squares is the current fire level of a unit. Whenever the marks reach a new fire level, change the level marked under the unit. Make any required adjustments to extended lines at that instant.
6.7 Fire Level Markers
These represent the current fire level of infantry and cavalry units. Only mark units with a B or C fire level, all other units are assumed to be an A or better. Keep this current as the Loss Charts require changes. To indicate the Fire Levels applied to extended lines, remove markers from underneath the parent and place them directly under the extended line marker.
6.8 Morale Markers
These represent the current morale state (not to be confused with the unit's permanent morale level which is printed on the counter) of a stack of units. Place the Morale Marker, if any, atop all the units in a hex. All units in a hex subject to morale have the morale state of the marker in the hex. No hex may have more than one morale marker in it.
6.9 Gun and Supply Point Markers
These two functions use the same numeric marker to represent either the number of gun points in an artillery unit or the number of supply points in the wagon. Place these markers under the appropriate unit and adjust them to reflect guns lost or supply points expended.
6.10 Low Ammo and Straggler Recovery Markers
Both of these marker types indicate specific conditions and affect only the unit directly under the marker.
7.0 General Course of Play
A "game turn" is a sequence of steps the order of which is termed "the sequence of play." Each of these steps may involve one or the other of the players according to the terminology "phasing" and "non-phasing." The "phasing" player is the one whose player turn it is currently, the "non-phasing" player is the other. Each player has his own distinct portion of a game turn, and the roles of phasing and non-phasing player switch according to the present player turn. At the end of the sequence of play, advance the turn marker and begin the process again. All game actions must take place strictly according to the sequence of play.
In the roughest sense, play proceeds as follows: The first player, as given in the game rules, conducts his Command Phase. In this phase he issues the orders he desires, checks for new order acceptance, if any are being delivered, and checks for any initiative he might desire. This finished, he now moves all, some, or none of his units based on their formation, movement allowances, orders, and his desire. He may now engage in "close combat" (charges). After his Movement Phase ends, the Fire Combat Phase occurs. This is divided into a Non-Phasing Player Fire Segment and a Phasing Player Fire Segment. First the non-phasing player conducts all the fire combats he wishes, as restricted by these rules; then, the phasing player does the same. Upon the completion of all the fire combats for both players, the phasing player checks his units for rally. The second player then becomes the phasing player and repeats the above sequence. When this process is complete the game turn ends and a new turn begins.
8.0 Turn Sequence
8.1 Outline Sequence of Play
First Player Turn
- Command Phase
- Order Issue
- Corps Attack Stoppage Checks
- Initiative Order Determination
- Delay Reduction
- New Order Acceptance
- Movement and Close Combat Phase
- Straggler Recovery Marker Placement
- Movement and Close Combat
- Ammo Resupply
- Fire Combat Phase
- Non-Phasing Player Fire Combat
- Phasing Player Fire Combat
- Rally Phase
- Straggler Recovery
- Rally
Second Player Turn
The Second Player Repeats the above.
Game Turn End Phase
- Game Turn Marker Advance
8.2 Narrative Sequence of Play
First Player Turn
Command Phase
- Order Issue: The phasing player may generate any orders he chooses, paying for each with command points, up to the limit of the command points available. He then logs these orders on the Order Log Sheet and notes their arrival times. See 10.1.
- Corps Attack Stoppage Checks: Any of the phasing player's corps which received small arms fire (not just artillery bombardment) in the previous turn, and are carrying out an attack order, must check to see if the attack continues. If a stoppage occurs, the corps may either halt in place or conduct a turn of movement to the rear and then halt. The phasing player conducts this movement in the Movement and Close Combat Phase of this player turn. Units of corps which fail their corps attack stoppage check must be outside small arms range at the end of the following Movement and Close Combat Phase. See 10.3.
- Initiative Order Determination: The phasing player may roll for any of his leaders whom he wishes to obtain initiative. Leaders who successfully obtain initiative accept (corps leaders must "touch base" to implement initiative orders in order to put them into effect) orders as desired. See 10.2.
- Delay Reduction: Any phasing leaders who have orders in any type of delay status now check to end that status. If a delay ends, the leader accepts the order and may act on it. See 10.1f.
- New Order Acceptance: Roll to see if phasing player orders delivered this turn are accepted, delayed or distorted.
Movement and Close Combat Phase
- Straggler Recovery Marker Placement: On an hour turn the phasing player may mark units meeting the conditions of straggler recovery to attempt to recover stragglers. See 21.2.
- Movement and Close Combat: The phasing player checks his units for correct command radius. Phasing units may now move and conduct close combats based on their movement abilities, formations, and order restrictions. See 16.0, 23.0.
- Ammo Resupply: Phasing units which are at low ammo and close enough to a supply wagon to conduct resupply may do so. Wagons close enough to the Army Supply Train may refill. See 28.0.
Fire Combat Phase See 20.0.
- Non-Phasing Player Fire Combat (Defensive Fire Phase): The non-phasing player may fire all of his units that can based upon their formation, LOS, location and other restrictions.
- Phasing Player Fire Combat (Offensive Fire Phase): The phasing player repeats the above for his units.
Rally Phase
- Straggler Recovery: Phasing units which are still marked with Straggler Recovery Markers, may attempt to recover stragglers. After each attempt, remove the Straggler Recovery Marker. Erase any recovered stragglers from the player's Loss Chart and make any required changes in fire level markers. See 21.2.
- Rally: The phasing player converts all shaken units to normal, disorganized units to shaken, and checks to see if routed units recover to disorganized or if blood lusted units revert to normal. See 24.5.
Second Player Turn
The Second Player repeats the above for his units.
Game Turn End Phase
- Game Turn Marker Advance
8.3 Close Combat Subsequence
- A) Attacker enters hex at +1 MP cost
- B) Defender's Fire Combat, apply losses and stragglers
- C) Attacker's Fire Combat, apply losses and stragglers
- D) Attacker Checks Morale at -6, if required to retreat combat ends
- E) Defender checks morale at -4, if required to retreat combat ends and the defender makes the "additional" morale check
- F) Odds Table used if neither of the above ends the combat. Loser retreats 1 hex if attacker, 2 if defender. The defender, if loser, must make the "additional" morale check.
9.0 Fog of War
In order to increase the reality of the game's simulation in the minds of the players, keep the following secret from your opponent:
a. Casualty, straggler and wrecked status of brigades and divisions. b. Orders, status of order delivery, or plans. c. The morale of your units. d. The current fire levels of your units.
Players may never examine the stacks of the enemy. They are (of course) aware of the top unit in the stack - usually a leader or infantry unit. While unable to examine for himself the enemy stacks, a player may ask if a stack contains troops, artillery, or both. When asked, the owning player must give the correct answer (from this list of three).
Optional: Players may decide to allow this question only when the asking player has units with an LOS into the questioned hex. Since this restriction can bring up a number of sticky problems, we do not recommend its use.
10.0 Command and Control
These command rules strive to be realistic but not overpowering. They embody quite simple concepts and make the game system play in a way that simulates reality well. Note that players may, as an option, play any of these games without these rules (other than Command Radius, which in all cases should be used).
10.0a HQ Units and Leader Positioning. Corps HQ units are the administrative hubs of their corps. The more specific HQ rules follow below, but a few points must be given first. Divisional leaders must stack with a unit of their division at the end of every Movement and Close Combat Phase (unless no such unit exists, in which case they are removed from play). Corps leaders have no such requirement. In order to implement a newly accepted order from either the army commander or initiative, the corps leader must enter the hex of his corps HQ (at least momentarily). The instant the leader "touches base," the order is implemented - in other words a leader with a new order could "touch base" as the first thing in movement and that action would allow the corps to function on its new orders in that turn. Note: Upon accepting an order, the leader must make his way to his HQ to implement it - a player who stalls the implementation of an unwanted order by dallying with the leader is cheating. Otherwise, corps leaders are free to move about as desired. Army commanders send orders to the Corps HQ unit, not to the corps leader.
Example: Council of War. To illustrate the above rule, let's say that the player moves all of his corps commanders to the hex containing the army commander. This action does not require any type of orders. Once his subordinates are there (i.e. in the player's next Command Phase), the army commander begins belting out orders (he's like that) as fast as his command points allow. These orders are all "in-person, verbal" in nature and subject to the best possible chance at acceptance (given order type). The orders are delivered at the instant they are written. In the subsequent New Order Acceptance Phase of the same player turn, the corps commanders lucky enough to be first in line attempt to accept their orders. For the sake of argument, assume all of them but one do. The commanders who have accepted their orders then ride back to their commands. Even though the orders have been accepted, each corps will not begin to function until the corps commander enters the hex of his HQ. Note that he need not stay longer than move through the HQ's hex - he must make an appearance.
What of the guy who got a delay? As he rides back to his corps HQ, assuming it takes a turn or more to make the trip, he may attempt to reduce the delay. Even if he reduces it while en route, the orders still do not take effect until he enters the hex of his HQ.
10.0b Command Methods. In general, the command system works as follows: The army commander, the player, uses his command points to generate the orders he wants. He writes these on scratch paper and records them on the Order Log. The orders take a given amount of time to arrive at the corps HQ (based on the distance when they were written). Upon arrival, the player checks them for acceptance. At this point, the orders may be delayed, distorted, or accepted. Once accepted they must be acted on in good faith, even if game conditions have changed. At the corps and divisional levels, leaders may cancel or self-issue orders by using initiative. Initiative works best for its historically useful role of taking advantage of fleeting opportunities or acting to forestall disaster. Overuse of initiative invites the application of the "loose cannon" rule which may cause a disaster, so use initiative sparingly and never as a substitute for the order system of army command.
10.0c HQ Units. HQ units share characteristics of both markers and combat units. They serve an important control function in the command rules. These units move as leaders, do not count for stacking, have no ZOCs or combat ability, and remain unaffected by morale results of units with which they stack (note: HQs in a stack which is forced to retreat because of a morale or close combat result may retreat with the stack at the owning player's discretion). They never check morale on their own. Corps HQs which are overrun (have enemy units enter their hex) are not destroyed, but displace to the nearest friendly stack of the same command. In the following turn, the entire command of the displaced corps HQ must execute an emergency corps retreat and do a straggler check. When the Army HQ is overrun, it is flipped to its 'Move' side and placed with any friendly unit. Displacing the Army HQ does NOT cause the entire army to retreat. Generally, corps HQ movement is strictly dependent on the current orders of their corps. HQs may not move without orders to move. If a corps has orders, the HQ may move freely within them - separate orders covering the HQ are not necessary. HQs may never be fired upon or destroyed.
10.1 Orders
Orders are the heart of the main command system of this game series. Players prepare orders in writing as instructions to the corps (generally) as to what they are to do. An order is not a hex by hex record of movement. It is the actual wording in the same form as the historical orders.
The general sequence of events in the life of an order is as follows: The player's commanding general has a number of command points available based upon that leader's rating. The player uses these points as desired to pay for orders he wishes to produce. Orders cost a number of points depending on their exact structure and the method of delivery. Write the order on scratch paper (the order sheet) and record it on the order log (a sheet of lined notebook paper with the column headings listed on page 1 of the Charts and Tables). The player calculates the turn of arrival according to the distance from the army commander to the receiving corps HQ and records that turn on the order log. On that turn, he checks the order for acceptance. Once accepted, the order is implemented the instant the corps commander re-enters his HQ's hex. Leaders which have no HQs (such as divisional leaders) implement orders instantly upon acceptance.
10.1a Order Structure - Type and Method. Each order must be classified as either Complex or Simple. A complex order is one requiring movement to, into, or around areas of enemy control or tacit control (e.g. a gap) whether or not this movement will require combat. A complex order allows offensive combat. A simple order is one that does not fit the conditions of a complex order and it does not allow for offensive combat. Note that simple orders do not preclude defenses. Be sure to remember 10.1h Actions not requiring orders.
Method refers to the physical structure of the order, i.e. either written out or oral in presentation and to be delivered either by an aide or in person. All game orders are written on paper, but the player may choose to issue "oral" orders to his units so as to expend fewer points. Players can assemble their orders as desired, as long as they assign each of the above elements. In person orders are always oral in method. Aides may deliver oral or written orders. Note that in addition to affecting the cost of the order, these factors influence the speed of acceptance.
10.1b Order Costs. As mentioned earlier, players write orders using command points. Each army commander possess a certain number of command points based on his leader rating. Order costs appear on the Order Costs Chart. Determine the cost of a given order by the point total of its selections from each of the three categories (Method and Type). Each category must have one and only one selection. Order costs must be payable in full with the player's available command points. Command points may not be saved from turn to turn and are wasted if unused. The full allocation of command points is available each turn, and all, some, or none may be used. A player may write any number of orders in a turn as long as he has sufficient command points available.
10.1c Order Format and Writing. Orders are written at the player's convenience and in a manner in which the player is comfortable and understands. The written content of the order may be as detailed or brief as desired as long as the player can interpret his own orders so as not to make them "pliable" and subject to changing meaning based on circumstances. On the order log, all orders must have an order number (the line on the order log in which they are recorded) and information giving the sender, receiver, order type and time sent. Complex orders also require a start time or signal, a general direction or path of movement, and a reasonable limit ending the operation. The player may skip writing the start time or signal for such orders - if no such specific detail exists in the order, the order must begin to be fulfilled immediately upon acceptance and implementation. "Open-ended orders" (attack west!) are not allowed: they are much too vague.
10.1d Order Records. Orders must be recorded on the Order Log (lined notebook paper). The Order Log's primary functions are to remind the player of when to check an order for acceptance and to give a concise location of the variables pertaining to that order for purposes of acceptance. The idea is for the order log to be a well organized and efficient record of orders so that the player may check to see at a glance what orders are accepted, delayed, cancelled, or on the way. Also, the log allows players to sift out the info needed for an acceptance check without hunting down the order itself.
Example: Order Writing. The following are all acceptable orders. Each was written with a minimum of detail to show the rough structure of orders and to convince players that no large amount of writing required:
- "Take your corps and move down the Battery Road to the Thomas House. When you get there, set up a defensive line facing north." (Simple)
- "Move via the Thomas House on the Green Road to attack the enemy in the vicinity of the Big Hill. Attack to capture the Big Hill." (Complex)
- "Move across the ford to the area south of the Big Hill, report to 2nd Corps HQ and await further orders." (Simple)
- "Attack along the Red Road toward the Big Hill. Assist 3rd Corps in capturing the Big Hill." (Complex)
- "Move into position along side 3rd Corps, advance with them to cover their flank." (Complex)
- "When 2nd Corps attacks, attack to capture the Blue House and cut the Big Road from enemy use. When you get there, set up a defense straddling the Big Road facing north." (Complex)
10.1e Order Delivery. Orders may be delivered by aide or in person. In person delivery may only occur if the sender and receiver are in the same hex. In person orders are received the turn they are sent. For orders to be delivered by an aide, the following occurs. Calculate the number of movement points a leader would need to expend to travel between the sender and the receiver's corps HQ. Divide this number by 10 and round up any fractions. The result is the number of turns the order will take in transit. Add this number of turns to the current turn to determine the time the order will arrive and record this information on the order log.
10.1f Order Acceptance. Acceptance is a measure of how quickly the receiving leader reacts to the new orders. Upon receipt, orders may be accepted, delayed for a number of turns, or distorted.
The Acceptance process is as follows: Using the Acceptance Table, calculate the acceptance number according to the line above the table. Use the acceptance number to determine the table column to use. Shift the Acceptance Table column one to the left if the command rolling for acceptance currently has any type of order. Roll two dice. The result is the acceptance of the given order and should be recorded on the order log. Note that even if the order is instantly accepted, it does not become implemented and usable until the receiving corps commander touches base in his HQ's hex.
Procrastination (optional). A player may automatically check for acceptance only those orders received which are to be acted on in the next hour or less. Orders which are to be acted on more than one hour from the current time may not roll on the Acceptance Table unless the receiving leader rolls for, and gets, initiative. If the leader cannot get initiative, the order cannot be checked for on the Acceptance Table until it becomes one hour or less away from action. The player may have the leader check for initiative each turn (until the one hour mark makes acceptance rolls automatic) to see if he can try to accept the order.
Delay. A delayed order is one that is the subject of some foot-dragging or preparation time before action. Once delayed, an order becomes accepted by rolling one die per turn. The phasing player makes this "Delay Reduction Roll" during subsequent Command Phases starting on the turn after the Acceptance Table produces the delay result. Alternatively, initiative or the receipt of another, different order may cancel a delayed order. The receipt of any new order (accepted or delayed) automatically cancels any pending order (D1, D2), but leaves a previously accepted order in place until the new one is accepted. Two types of delay are possible, type 1 and type 2. Each requires a successful roll on one die to remove. Remove D1 on a roll of 1 to 2 and D2 on a a roll of 1. Once the delay is lifted, the order is accepted.
Distortion. Distorted orders are completely misunderstood and eliminated. Note that distortion may occur even in in-person verbal orders.
10.1g Following Orders. It cannot be overstated that orders must be followed as originally intended, even though game circumstances may have changed. These represent wartime combat orders in a society heavily influenced by notions of glory and honor which may seem quaint today. Players should never rethink their own orders to find loopholes which allow them to "get away with" something. Orders can be followed with a modified degree of enthusiasm (so as to avoid disaster), but their intention, scope, or original purpose should not be altered. Players unable to cope with the responsibility and honesty this rule requires will probably want to play without the written order rules.
10.1h Actions which do not require orders. Many game functions do not either require orders or need be mentioned in orders to be conducted. These are (but may not be strictly limited to):
- Officer movement and functions
- Fire, Close Combat, Straggler Recovery and Rally
- Supply trains and wagon functions
- Artillery functions such as fire, movement within radius, etc.
- Movement, facing and formation functions of units not requiring the movement of the corps HQ
Note: Once a corps HQ is in position, it is literally "bolted to the ground" and cannot be moved short of new orders, initiative, or an emergency retreat. HQs may move along freely during the execution of an attack order or other orders which require movement - but are again bolted to the ground when their orders are fulfilled.
10.1i Pre-Set Orders. These orders represent the commander's initial plan of action for the battle. They are not required, but an excellent player may be able to win the battle with these orders alone. The player writes and logs these orders before the game begins and may make any number of them at that time without regard to command points. These orders are accepted before the game begins.
Example: Order Logging and Acceptance Procedure. The player made the following entry into his Order Log:
| Number | Arrival Time | Receiver | Sender | Type | Method | Status |
|---|---|---|---|---|---|---|
| 1 | 10:00 | Forrest | Bragg | Com | AW |
This order, it tells us, will arrive at Forrest's HQ at 10:00, was sent by Bragg, is a complex order, was sent aide-written. Such an order would cost eight command points to write.
It is now the New Orders Acceptance Phase of the 10:00 turn. The player notes that order number one has arrived. He now checks for acceptance. Forrest is rated a four and Bragg a zero. The dice roll on the Acceptance Table will be made on the 3-4 column (it is a three). Two dice are rolled, giving a seven. The result is D1. The player marks "D1" under the status column for order number one.
In the next turn's Delay Reduction Phase the player rolls one die for order one. He rolls a two which means the delay has been reduced and the order is accepted. The "D1" under status is erased and an "A" for accepted is written instead. As the first thing during movement Forrest makes a quick trip to move through his HQ's hex and implements the newly accepted order. Forrest may now execute order one with his command.
10.2 Initiative
Unless specifically prohibited by the game rules, leaders may use initiative to cancel existing orders or acquire orders when they have none. It is the act of a leader giving himself orders. The player handles initiative orders like any other, except that they do not cost Command Points to create, do not need to be delivered, and are automatically accepted. Corps leaders must make a trip to their HQ to implement orders given to themselves via initiative. Note that in the case of loose cannon, the enemy player moves the corps leader into the HQ's hex, so that no foot dragging occurs.
10.2a A leader's successful initiative roll simultaneously cancels old orders and issues new ones. A separate roll for each function is not required.
10.2b Initiative orders, once given, must be followed like any other order, unless cancelled by more recent orders or further initiative use.
10.2c Only Wing, Corps, and Divisional leaders may use initiative. The Army Commander may only issue formal orders. Furthermore, in a single turn, only one leader may attempt to get initiative for a given formation. Therefore, if a divisional leader rolls for initiative, whether he gets it or not, the corps commander may roll for initiative only for his other divisions. If the Corps Commander rolls first, divisional commanders under him may not roll at all. It is usually best to work from the bottom up when rolling for initiative, just so the player does not inadvertently close any doors!
10.2d Getting Initiative. First, determine the number of Initiative Points a leader has available. IPs equal The Leader's Rating + any Anti-Initiative Ratings given in the game rules which affect the given leader that is, all those above him. Use this total to determine which column to use on the Initiative Table. Roll two dice. If the dice roll equals the number on the table or more, the leader has initiative. If, however, a 2 is rolled, the leader becomes a "loose cannon," see 10.2g below.
10.2e Anti-initiative. Corps and army leaders may be given anti-initiative ratings in the game rules to limit initiative use. If none are given, the assumed value for all leaders is 0. A leader's anti-initiatives remain in effect if he becomes a casualty or is off map for whatever reason. See also 10.6d.
10.2f Initiative-Based Orders. Initiative only bypasses the normal acceptance procedure. Players must still record and faithfully follow initiative-based orders, as they would any other order. Note that leaders may assign divisional goals may be assigned in this way. Initiative may not be used to issue a commander orders which are currently in delay status to that leader - only for different orders. An "iron-clad" rule to cover all potential variations on this theme would be impossible to write, and players are advised to look into the "spirit of the rule" as opposed to its literal interpretation. A player must sometimes look into himself to determine the purpose of the order he desires and its reason for being.
Example: Getting Initiative. Let's say Longstreet wants to get initiative to do something. He has a rating of 2 which gives him 2 initiative points. Lee has an anti-initiative of -1 which reduces the initiative points to a 1. To get initiative, Longstreet must roll an 11 or 12 on two dice. If he manages to roll a 2, he becomes a loose cannon.
Assume Longstreet blows his roll (he rolls a 4). Hood, one of his division commanders now wants to take charge and get initiative for his division. However, according to 10.2c, Hood is unable to try for initiative this turn (since Longstreet tried for the entire corps) and will have to await the next turn. If we assume the player tries Hood on the next turn, and that he blows it too, the player would then be unable to use Longstreet to get initiative for Hood's division, since Hood already tried.
10.2g Loose Cannon. To recreate the historical tendency to avoid excessive initiative (and, hence, lack of control), we have introduced the concept of a "loose cannon." Whenever a leader rolls for initiative and rolls a two, he becomes a loose cannon (he himself, and all assigned units, that is). Upon the leader's becoming a loose cannon, the owning player must notify his opponent of the fact and tell whether the leader has accepted orders currently (but not what those orders are). The opposing player now issues an order to the affected force to move for one turn in the direction of his choosing. The owning player conducts the actual movement, but must follow the order issued by the enemy. This order cancels any orders the affected force may have had, leaving it in a no-orders status afterward. The movement may be an attack, retreat, or any other type of activity. The owning player must follow this order with a reasonable amount of gusto - leaders usually do not drag their feet in executing their own orders! This does not mean the command must wreck itself in futile close combats, etc., only that a reasonable amount of force be applied in execution. The opposing player cannot order the unit to attack units on its own side.
10.3 Corps Attack Stoppage
Corps Attack Stoppage represents the failure of an attack in the mind of the attacking commander. This type of failure occurs frequently because the commander is surrounded by the dead and wounded of his attack, the chaos of the rear of the battle line, and many exaggerated reports of the grim events on the front. He is, much more than the game player, reluctant to push the attack down to the last man.
10.3a For any command executing an attack order, beginning with the first Command Phase following the first turn in which any units of the attacking force are fired upon by infantry or cavalry units, the command must make a Corps Attack Stoppage check. A player may never voluntarily fail a Corps Attack Stoppage roll. In games where a corps command structure does not exist and no "wing" replacement is made, use 10.3d at all times.
Procedure: Make this check on the Corps Attack Stoppage Table. Cross index the number of wrecked divisions in the corps against the total number of divisions currently (i.e., count attached ones) in the corps. The original corps commander, if killed, wounded, or reassigned to a higher command during the game, counts as an additional wrecked division. This number indicates the column of the next table. Cross index this number with the current corps leader's rating. The number then found is the minimum roll required on two dice to pass the check.
10.3b Results of Corps Attack Stoppage Checks. If its commander passes the check, the corps continues to attack as before. If he fails, the corps must stop the attack and await new orders. The owning player may retreat the corps for one turn, if desired. After this free retreat, the corps HQ may not move again until it receives new orders or executes an emergency retreat. Note that regardless of whether the corps HQ retreats, all units of the corps must be outside small arms fire range of any enemy units at the end of the Movement and Close Combat Phase of the turn in which the Attack Stoppage occurs. After it meets this restriction, the corps would require new orders to re-engage the attack. Units found to be violating this restriction are retreated by the enemy player the number of hexes required to be out side of small arms range.
10.3c If wing formations exist in the game, check the game rules for any special conditions which apply Corps Attack Stoppage to these command structures.
10.3d Divisions of a corps which are operating on the map before the arrival of their corps HQ make Corps Attack Stoppage checks normally except that corps size is determined using only those divisions actually on the map. If any division commanders in such a situation are killed or wounded, add one to the wrecked division total. Divisional stoppage does not equal corps attack stoppage. Therefore, should the corps HQ (and presumably other divisions of the corps) enter the map later with attack orders, the stopped divisions on map must join in the corps attack orders (after the division commander reenters command radius, that is).
10.3e Divisions acting on divisional goal attack orders must roll as outlined in 10.3d, as a corps consisting of one division which is either wrecked, or not. Any Corps Attack Stoppage by the parent corps has no effect on divisions acting on divisional goals - they continue their attack and roll separately.
10.3f Any attack stoppage roll made at night receives an additional -3 modifier.
Example: Corps Attack Stoppage Procedure. After its first turn in rifle combat an attacking corps must check for stoppage. The corps has 3 divisions and none of them are wrecked. The corps commander is fine and enjoying the fruits of his labors. He is rated as a 3.
Checking the Corps Attack Stoppage Table, the player determines that he must roll on the 1 column of the second table by cross-indexing 3 divisions in corps with 0 wrecked divisions. Since the leader is a 3, the second table tells him that he must roll a 3 or more to pass. He does this handily.
Several turns of bloodbath later, we find the same corps with all three of its divisions wrecked and the corps commander on his way to discover the miracles of Civil War medicine with a sucking chest wound (he won't make it, but that's beside the point). This time the first table generates a column 4 for the corps (3 wrecked divisions plus 1 for the commander cross-indexed with 3 divisions in the corps).
The second table generates a required dice roll of 11 or more (Column 4, the new corps commander is a 1), which the player fails miserably. Had this roll been required at night, he would have had to roll no less than a 14 on two dice - in other words, he doesn't stand a chance.
10.4 Emergency Retreat
Without orders or initiative, any corps or wing formation may execute an "emergency retreat." This formation must be under a threat of being surrounded or destroyed, or a command might have an emergency retreat forced on it by some enemy action - such as having its HQ overrun. The judgement of when this is appropriate is in the hands of the owning player (except in the latter, forced case). Units doing so immediately accept de facto orders to retreat one turn's movement to the rear - that is, the corps HQ may retreat from 6 to 13 MPs, with other units following as they are able. The exact number of MPs retreated by the HQ is in the hands of the owning player; units need only move far enough as to remain within command radius - which might mean little or no actual retreat for some units. He may use (or not use) roads, etc. as he wishes. Remember, this retreat is a controlled command event, not a rout. Upon completion of this one turn's movement, the formation is considered without orders. Further emergency retreats may be conducted if the formation's safety remains in, or again enters, doubt. Any orders the retreating corps may have had are negated and the corps must accept new orders to conduct the same or other operations. The same emergency corps retreat rules and conditions also apply to units which are independent or under divisional goals.
Game rules may assign a victory point penalty for this maneuver. In addition to any victory point damage done by emergency retreats, all sub-units within the retreating formation must conduct a straggler check upon the decision to conduct an emergency retreat. Make this check on the lesser of the two Straggler Table columns, the 1/2 to 1 fire loss column, and apply any appropriate modifiers.
Note that the direction of an emergency corps retreat is not affected by the standard retreat rule (5.1) since it is a voluntary movement.
10.5 Below Corps Command and Control
Two methods exist for controlling units below the corps level. The first and most common is for units to remain within the proper command radius of their division commander and/or corps HQ, in which case they may move and fight as desired as long as they do not violate the spirit of the current corps orders. The second is the use of divisional goals which frees units from command radius by assigning them orders directly.
10.5a Command Radius. Check command radius at the very beginning of the Movement and Close Combat Phase; units in radius at that time are considered to be in radius for the rest of the phase. (But note that attackers in close combat must be within command radius at the moment of a close combat, as per 23.1b). Calculate command radius distances in the movement points a leader would need to travel from one point to another. The points involved depend on the type of unit and level of command radius involved. In counting movement points, only those hexes a friendly leader could move through can be used. Therefore, impassible terrain, enemy units and EZOCs affect command radius. Friendly units negate EZOCs for this purpose. Units expected to be within command radius (not under divisional goals or army orders), but which aren't, must expend all their available movement to reenter radius each turn until they do so.
A. Brigade to Division Radius. Brigades must always be at or within 4 MPs of their division commander. For a brigade with extended lines, only one hex of the brigade line need be within range.
B. Division Leaders, Artillery Units to Corps HQ Radius. At a range of 8 MPs or less from their corps HQ, these units and their subordinates function normally. No unit may move intentionally (with the exceptions below) outside this range. Note that command radius may extend a maximum distance of 8 MPs between a corps HQ to a divisional leader and then a further 4 MPs to the brigade from the division leader. Units need not be within any required range from the army HQ.
C. Command Radius and Order Acceptance. When a corps accepts orders, divisions and other corps units within radius of the HQ must immediately implement the orders which the corps received. Divisions must maintain their previous order until they are within command radius of their Corps HQ, if out on a divisional goal or coming on as reinforcements. Orders do not need to be issued from the corps HQ to units as long as they are within radius.
10.5b Divisional Goals. A divisional goal is an order to conduct a specific task or mission given a division (or cavalry brigade) which allows it to function beyond normal command radius.
A unit following divisional goals is exempt from normal command radius (distance to corps HQ for divisions, distance to division commander for cavalry brigades).
Division, corps, wing, and army commanders may assign divisional goals. Commanders may assign goals to their cavalry brigades or artillery units. You may assign goals when the appropriate leader (i.e. one that is in the unit's chain of command) stacks with the division commander (or actual unit, in the case of a cavalry brigade or artillery unit). Usually, divisional goals are assigned using initiative. The army commander, however, sends them directly to the division commander like any other order using Command Points and acceptance. A division's own commander may "self assign" a divisional goal by a using initiative. Lastly, divisional goals may be assigned as a part of orders accepted by the corps from the army commander - in effect, he tells them to do X and Y, and while they're at it have division A screen Z. When a corps accepts such an order, the division automatically accepts the divisional goal (provided it is within command radius and not out under some other divisional goal).
Divisional goals created by initiative are automatically accepted when given and may be acted on immediately. Those sent as orders from the army commander must undergo normal order acceptance. Goals sent as orders to individual cavalry brigades or artillery units use a receiver rating of 2. Jot down divisional goals so they may be properly followed.
A divisional goal must be followed until A. the division reenters command radius and the player wishes to remove the divisional goal and revert back to normal corps orders, B. the divisional goal is changed by initiative, or C. the division is issued another divisional goal by an appropriate source.
Units attacking under divisional goals must always check for Attack Stoppage as "corps of one division" with the divisional commander counting as a corps commander would if he is a casualty.
Artillery units may be given divisional goals by their commanders and higher leaders. Handle artillery goals in the same way as any other. Division commanders may not assign divisional goals to artillery units - unless the artillery unit happens to be part of the divisional leader's division.
10.5c Independent and Detached Units. Certain units in the game are listed as "independent." Independent units are never bound by radius restrictions, never need orders, and are always considered to be in proper command. Detached units, on the other hand, have their status determined by the player. A player may detach divisions to the control of other corps. The army commander must issue an order to the owning corps commander to detach a division (with instructions about which corps the division will become assigned to). Once detached, these units function normally as part of the corps to which they are assigned. Generally, only divisions may be detached and they must be detached as a whole. Game specific rules may put limits upon the ability of the player to detach units or allow detachment of individual brigades. Artillery units may be attached to a specific division and function as one of the division's brigades. Cavalry brigades may be detached from their parent divisions and reassigned. The owning player juggles detachments and reassignments during any segment of his Command Phase. Change the ownership of troops at that time, if desired, by simply making a note of the change. Each game may provide special rules regarding detachments.
10.5d No Corps Organization? In games where there is no functioning corps HQs or when divisions are off on divisional goals, the divisional commander functions like a corps HQ. He is bolted to the ground when there are no orders requiring movement (just like a corps HQ). When this rule is applied, the divisional commander is freed from the "must stack with one of his brigades" restriction.
10.6 Army Command
These rules restrict what the army commander can do and reduce the flexibility (also give meaning to) the army HQ. All these rules exist to counter player techniques seen in many games over the years.
10.6a Army HQ Movement. The army HQ can only move if it has orders to do so. The orders must require the HQ to move to a specific hex. These orders (AO type for practical purposes) must come from the army commander while he is stacked with the HQ. The HQ accepts these orders as if it was a leader with a 2 rating. The Army HQ cannot use "initiative" to move itself.
The army HQ is considered to be 'moving' from the moment its accepts an order to move until it has accomplished the specified movement and has been in the destination hex for one entire game turn.
While moving, the HQ cannot issue any orders, nor can it 'recharge' the army commander's IPV allowance (see 10.6b).
10.6b Army Commander Orders. There are only two ways the army commander can issue orders: IPVs while away from his HQ or AO/AW ones sent from the army HQ (with the one exception in 10.6c below).
The army commander has an IPV allowance. He can leave the Army HQ freely to make an IPV order. However, only one such order to one recipient will expend this IPV allowance. He can recharge this allowance by spending one complete game turn in the (non-moving) Army HQ's hex. This use and recharge process can happen as many times as the player desires during the course of a game. With the exception of 10.6c, the army commander can never issue an IPV while in the HQ's hex.
While stacked with his (non-moving) HQ, the army commander can issue AO/AW orders as desired (note that he cannot do this while away from the HQ).
10.6c Conferences. The Army commander can conduct one "conference" in any given historical day. To hold a conference, move all the desired corps commanders to the army HQ's hex. The army commander can then issue an IPV order to the entire group (the same order is received by each attendee). The order cost is that of a single order of the type issued.
11.0 Formations
Combat units generally have two formations which they can adopt, one beneficial to movement and the other to combat. Leaders, HQs and Wagons have only one formation. A unit may never be in more than one formation at a time. Units generally change formation only during the friendly Movement and Close Combat Phase; at other times formation may change after combat results. Some morale results may cause a formation change as part of the execution of the result. When voluntarily changed during movement, formation change costs one or more movement points as given on the Movement Chart. Some formation changes may occur in hexes adjacent to enemy units. However, such changes may initiate a free fire combat by all enemy units within range and LOS (provided they are otherwise able to fire) on the changing unit in the old or new formation, as chosen by the enemy player. Artillery must limber to execute any retreat result from the Morale Table. Such limbering in a ZOC or close combat requires a roll on the Gun Loss Table.
11.1 Available Formations
Infantry units may be in line or column. Cavalry units have a line and a mounted formation. Artillery units may be either unlimbered or limbered.
11.2 Effects on Movement
Each formation/unit type is assigned its own movement allowance on the Movement Chart. Line formations may not use bridges to cross rivers and creeks, but may cross at fords. Units in column, mounted or limbered formation may cross rivers and creeks using bridges at no additional cost. Unlimbered batteries cannot move. Note that both the movement point allowance and point costs for terrain vary according to formation.
11.3 Effects on Fire Combat
Certain formations may not conduct fire combat and others are limited in their abilities to do so. These restrictions are given on the Formation Effects Chart. Units in column or mounted have the option of automatically switching formation when fired upon (after the fires are resolved). Such a formation change does not initiate further fires upon the changing unit.
11.4 Effects on Morale
As recorded on the Morale Table, certain formations receive modifiers when making morale checks.
12.0 Stacking
Stacking is the placement of more than one unit to be in a single hex. Stacking and unstacking have no effect on movement. Stacking is enforced at the end of any phase containing movement of any sort. Units may temporarily over-stack during movement without additional movement point costs. Stacking is enforced for each side independently of each other during the conduct of close combat.
12.1 Restrictions on Stacking
No more than three A fire levels and 10 gun points may ever stack in one hex at one time. Stacks may be adjusted by the phasing player at any time during his normal movement, or by either player after the conclusion of a close combat.
12.2 Effects on Movement
Units may move as a stack as long as each unit's movement allowance and points spent remain independent of others in the stack. When moving on a road, each unit must move individually and may not end its movement stacked with another unit which also moved on the road in that phase and is still in column, mounted, or limbered formation.
Optional: Players may get a more accurate road column if they allow no more than a B fire level to be in column along any given hex of road. In other words, an AB unit would require three hexes of road space. Use extended line markers to show this column - place the actual unit at the head and mark each following hex with an extended line with the arrow pointing forward. Furthermore, each wagon or artillery unit must take up one full hex of road space. Thanks to D. Burrell for this easy to use adjustment. Its effects are interesting and should be tried by all serious players.
12.3 Effects on Combat
Only one A fire level and 5 gun points may fire out of a single hex. This total includes all hexsides through which fire takes place. The same limit applies to close combats. Only the top unit in a hex is the target of fire combat (Exception: artillery units may engage enemy artillery selectively regardless of its position in a stack.) Note that the total available to fire from a hex is counted from the top unit down - therefore, in a hex with an AB, an A, and 5 gun points, the first unit can fire an A and the gun points may fire; no greater combination is allowed. If the top unit is less than an A fire level, the next unit in the stack may add its strength to the fire, and so forth, so the stack can fire up to the A fire level limit. The top target unit provides any applicable modifiers to the fire combat for the target stack.
12.4 Effects on Morale
The top unit in a stack provides the morale level for the stack, and this morale level applies whenever a morale check for any of the stack's units is required. The top unit is also the basis for the assorted morale modifiers affecting the stack during morale and straggler checks. Stacks can have but one morale state, marked by the morale marker atop the stack. When units in different morale states stack at the end of movement, or anytime during a retreat (with the exception of displacement), they adopt the worst morale state of any of the parts of the new stack - this rule does not apply when units momentarily stack during movement.
12.5 Effects of Over-Stacking
When discovered, an over-stacked hex is treated as follows: The stack automatically becomes disorganized. If already disorganized, it is routed. Overstacked hexes must be broken up in the next available friendly Movement and Close Combat Phase. Routed units may move one hex to accomplish this. Repeat as needed.
13.0 Facing
All troop units must be aligned so as to "face" a hex-side. All units in a given hex must face in the same direction. Facing defines the front and Flank/Rear of each stack of units and can have critical effects on the outcome of fire combat and morale checks.
13.0a A target receives the flank fire modifiers to the Fire Combat and Morale Tables if at least one of the attacking units' fires enters via a flank or rear hex or along the hexside dividing front from the flank/rear hexes. Note that in this latter case, the defending unit could not fire upon the unit hitting it along the hexside. A unit blocks enemy fire directed along the hexsides defining the hex it is within - in other words, fire cannot be directed along a hexside of an enemy held hex into the flank of another enemy unit.
13.1 Changing Facing
Facing change never costs movement points. Any amount of rotation is allowed in a single facing change. EZOCs have no effect on the ability to change facing. Facing may be altered at will by the phasing player during his normal movement, or by either player after close combat or at the end of a retreat caused by a Morale Table result. Note that facing changes allowed the non-phasing player by participation in close combat occur after the full resolution of the close combat.
13.2 Effects of Facing on Movement and Combat
A unit or stack of units may only fire and conduct close combats through its frontal hexsides, exclusive of the boundary hexsides - a unit may not fire directly to the right or left. A unit or stack may receive fire or defend against close combats from any direction.
14.0 Zones of Control
Troop units in line formation or unlimbered artillery units have Zones of Control (ZOCs) in the hexes adjacent to their frontal hexsides. Routed units never have ZOCs. ZOCs of enemy units are referred to as Enemy Zones of Control or EZOCs.
14.1 Effects of EZOCs
A unit that enters an EZOC during movement, and does not wish to enter an enemy unit's hex to conduct a close combat, must cease all movement for that phase. Entering an EZOC does not cost extra movement points, but any remaining points are lost (unless the unit moves forward into close combat, in which case, the remaining MPs are retained). Units may freely exit any EZOC they occupy at the beginning of their movement, as long as the first hex entered is either a close combat or does not contain another EZOC. Exiting an EZOC, subject to the above restrictions, does not cost movement points or incur fire of any sort. Units may freely ignore one hex of EZOCs (regardless of how many units contribute to the ZOCs in the hex) in order to enter a close combat. In this one case, the hex entered immediately after the negated EZOC hex must be the close combat attack hex.
14.1a Units forced to retreat into an EZOC by morale results automatically draw fire from all units who have a EZOC in the hex entered (except for the first hex of retreat out of a close combat). This does not affect the firing unit's ability to fire at other times in the turn. The target unit may not return fire in any way.
14.1b Friendly units negate EZOCs they occupy only for purposes of tracing command radius and supply. Units attacking in close combat may trace through one adjacent hex containing EZOCs for purposes of command radius.
14.2 Terrain Effects on ZOCs
ZOCs enter all frontal hexes regardless of the terrain of the hex or hexside crossed.
15.0 Retreat and Formation Change Fire Generation
If, during combat resolution, a potential target unit is forced to retreat before receiving fire, it may not be fired upon. In effect, it gets off easy.
15.0a A unit that retreats into an EZOC hex draws fire from all units which the owning player desires who have a ZOC in the hex. Units which are retreating from a close combat are exempt from this retreat fire for the first hex of their retreat.
15.0b Whenever a unit changes formation adjacent to an enemy unit during its regular movement, it is fired upon by all available enemy units (which exert an EZOC into the hex in which the unit is changing formation). Artillery limbering has its own rule below 15.0d. Note that this rule is intended to affect only those units which change formation under their own power - not as the result of fire combat or morale. The unit receiving fire is considered to be in the least beneficial of the two formations involved for the fire combat. After the resolution of this fire, finish the formation change. The unit may continue to move (if it wasn't routed in the fire combat).
15.0c Infantry/Cavalry brigades in column/mounted formation may change to line formation freely after the resolution of a fire combat against them, and such a formation change does not cause another attack under the provisions of 15.0b. The
owning player may execute this "free" formation change at his option.
15.0d Artillery Units are subject to several special conditions when changing formation. Artillery units can never unlimber in an EZOC. Any artillery unit which unlimbers (which cannot be in an EZOC) is fired upon by all otherwise qualified enemy units at or within 2 hexes (including all artillery, infantry and cavalry units (given LOS and facing); the target unit's position in a stack does not matter). The target in this case is still considered to be in limbered formation until the fire combat is resolved. Artillery which limbers never draws fire, but rolls on the Gun Loss Table if doing so in an EZOC.
16.0 Movement
During each player's Movement and Close Combat Phase, the phasing player may move as many or few of his units as he desires. During the Movement Phase, each appropriate unit may move as many or as few hexes as desired within the unit's movement allowance and any restrictions placed on the unit. Non-phasing player units cannot move during the phasing player's movement phase (except due to morale results). Fire Combat, other than that in Close Combat or triggered by formation change in an EZOC, does not occur during the Movement and Close Combat Phase.
Procedure: Move each unit individually or as a stack maintaining its running movement allowance as movement points are expended. This movement must follow a contiguous path through the hex grid. Units may move in any direction or set of directions, but must always be in only one hex at a time.
16.1 How to Move Units
16.1a During a Movement Phase, a player may move all, some or none of his units as he desires.
16.1b Movement is calculated using Movement Points. Each unit expends a number of movement points for each hex entered or hexside crossed according to the Movement Chart. Keep a running total of the number of movement points a unit expends as it moves. If a unit's movement allowance changes according to formation (e.g. mounted and unmounted cavalry), calculate movement point expenditures proportionally and round fractions of .5 or more up, round fractions of .49 or less down.
Example: A unit has 12 MPs in one formation and 6 in another. While on its 12 side, it expends 9 MPs (the 9 MPs includes the actual cost of formation change) and then flips to its 6 side. It has expended 9/12 of its available movement allowance which is then applied to its 6 MP allowance giving 4.5 which is rounded to 5. The unit has 1 MP remaining. Conversely, the same unit is moving on its 6 side and uses 4 MPs (again, this includes the cost to change formation). This would be a proportion of 4/6 applied to the 12 MP allowance would leave 4 MPs.
16.1c Each unit has a movement allowance, based on unit type and formation, given on the Movement Chart. This is the number of movement points available to the unit in a given phase.
16.1d Movement allowances are completely independent of each other and expenditures of one unit do not affect others. Movement points and allowances, even if unused, may not be transferred from unit to unit or saved for future use.
16.1e A unit starting the movement phase with movement points but having insufficient MPs to enter any adjacent hex may always move one hex. This one hex must not be into a hex that is prohibited, across a prohibited hexside, or into a close combat.
16.2 Terrain Effects on Movement
As per the Movement Chart, each hex and hexside feature in the game costs a varying number of movement points to enter or cross. A moving unit must pay the total required cost before entry, with the "one hex movement" exception above in 16.1e.
16.2a The moving unit may use roads only when crossing a road hexside to enter a given hex. A unit may pay the road movement cost and ignore other features in the hex or hexside crossed.
16.2b A hexside feature that must be crossed and is not negated by a road adds its cost to that of the hex being entered.
16.2c Units may not enter or cross prohibited hexes and hexsides. Units forced to do so are destroyed.
16.2d Forest hexes affect movement if they contain at least two complete tree symbols. The entire hex (including hexsides) blocks LOS if the above is true.
16.2e A unit crossing a hexside which is both an elevation change and a slope or extreme slope pays the movement point cost of the most expensive of these features. These are not cumulative.
16.3 Restrictions on Movement
16.3a Hexes containing enemy ground combat units may only be entered by a friendly unit executing a close combat.
16.3b Only friendly units move during the friendly movement phase. Enemy units may be forced to retreat as the result of combats; this is not considered movement per se and is resolved immediately after the combat is resolved. Retreat movement is not calculated using movement points.
16.4 Effects of Friendly Units
Generally, friendly units have no effect on the movement of other friendly units until the stacking rule is enforced at the end of movement. Units do, however, assume the worst of any mixed morale states in the hex where they are stacked at the end of their movement.
16.5 Effects of Enemy Units
Except in close combat, no friendly unit may ever stack with an enemy unit. Moving units that enter EZOCs must cease movement for the turn, unless the next hex they enter is occupied by an enemy unit and the moving unit desires to conduct a close combat.
16.6 Reinforcements
Reinforcements arrive at the time and entry area listed in the scenario or arrival schedule for the given game. Reinforcements may not be delayed, ignored, or redirected in anyway. They may arrive in any formation.
Move reinforcements onto the map as if they were in a long column extending off the map from the entry hex out. The first unit in the column counts the entry hex as its first hex of movement, the next in line treats it as the second and so on. If the entry hex is a road, the same sort of road is assumed to extend off the map and the reinforcements are in column along it.
Should an entry hex be blocked by enemy units or their ZOCs, reinforcements may arrive anywhere along the map edge at or within 10 hexes from the blocked hex. If one or more hexes of this zone is also blocked by enemy units, add that number of hexes to the outside edges of the zone (if the basic 21 hex zone - 10 on either side plus the original blocked hex - has another four hexes blocked, the zone would be 29 hexes wide). When reinforcements are forced to use this entry zone method, all reinforcements enter as if they were just off the map edge and are no longer in a queue awaiting entry (they have deployed). Supply trains (which require a road to move on) may entry on any available road hex in the zone or delay arrival until the original road entry hex is cleared for entry on the owning player's choice. A player cannot use this "blocked entry rule" voluntarily - the enemy must block the original entry hex with a unit or a ZOC to allow this rule to be used.
17.0 Extended Line
Extended Line is a unit which allows large units the ability to bring more of their firepower to bear. Extended line markers literally move out from the parent unit (or back again to return). These extended lines then behave exactly as any other combat unit except that at the end of every phase they must be adjacent to their parent with the arrow on their counter unambiguously identifying the parent. The arrow restriction is not meant also to restrict facing; it is only a method of identification.
Note the ramifications of the above: Extended lines have the same facing, movement, morale, combat ability and target characteristics of any other unit of the same type. Extended lines may never be in "Column" or "Mounted" formations. As long as both players understand which extended line belongs to which parent, the "arrow restriction" does not affect the facing of an extended line in any way.
17.1 Restrictions on Extended Line
Infantry and Cavalry units in Line formation with at least a B fire level may extend line. Larger units may extend line into two hexes. No unit may ever have more than two extended lines attached to it, and extended line markers may never extend line or stack with other extended lines. Fire levels must be evenly divided between the parent and any extended lines - with any excess in the parent's hex. No extended line marker may ever exist without at least a C fire level.
17.2 Effects of Extended Lines
17.2a Extended lines behave as any other line unit, with the additional requirement to be adjacent to the parent unit at the end of each phase. Extended lines fire, move, close combat, and have morale as would any unit. Morale results affect only the portion of the unit actually checking for morale, unless the extended line is reabsorbed and then the regular morale effects on stacking are followed. If any part of an extended unit is routed, the entire unit must collapse into the parent's hex and be routed.
17.2b Some morale results (notably retreats of 2 hexes) separate extended lines from their parent units. In such cases, the non-retreating portion of the unit must also retreat far enough (usually one hex) to maintain contact with the retreating part, and the unit displaced in this manner has its morale state worsened by one level. The extended line may never "circle" the parent to avoid causing this displacement. Artillery under the non-retreating portion of the line has no effect on the above. Artillery in such a circumstance need not retreat with the line if the player wishes it to remain in place.
17.2c Extended lines rally as separate units.
17.2d After subtracting losses, apply any required reduction in fire levels to the unit as a whole, and divide remaining fire levels evenly among the parent and all extended lines. If the unit no longer has enough strength to support the extended lines it may have, eliminate one or more extended lines until the unit can support them and place the parent in any of the originally occupied hexes as desired.
17.2e Each part of a brigade in extended line becomes Low Ammo separately. Should the brigade reform in one hex, then the brigade is Low Ammo. Only one supply point is required to resupply a brigade, regardless of extended lines.
18.0 Forced March
Forced march is a method of increasing the speed of marching troops; the cost is additional stragglers.
18.0a Only infantry in column may use forced march. Units must be in column at the beginning of their movement and may not change to line at any time during the current phase. Disorganized or Routed brigades may never force march.
18.0b For one set of two (2) extra movement points, first roll on the 1/2-1 Straggler Table with appropriate modifiers. After taking any straggler losses, the brigade may use the extra MPs.
18.0c To gain a second set of two MPs, roll on the Straggler Table. This time make the roll on the 1 1/2+ column. No more than this total of four MPs may be gained by forced marching.
19.0 Line of Sight (LOS)
Line of Sight (LOS) is the determination of whether two units can see and fire on each other. LOS rules cause most players enough problems that they go either with house rules or by the "seat of their pants." The following is an attempt to give a determination method to be used for borderline cases - when players disagree. In general, LOS tends to be straightforward - it is either blocked or it isn't - but some cases defy easy decision. Use the following in those cases.
Note that In CWB v3.0, the effect of Forest for movement and LOS is hex-based, not symbol based (see 16.2d). For games with the New-style Graphics (In Their Quiet Fields II, April's Harvest, Champion Hill, Gaines Mill, Seven Pines, Malvern Hill, Three Battles of Manassas, and Strike Them A Blow) any hex that contains at least two complete tree symbols is considered to be a forest hex. For older games, a hex is considered to be Forest if 50% or more of the hex has the forest symbol; otherwise it is Clear.
19.1 General Rule
The map's hexes are color coded as to their elevation level. The relationship of these levels is given on the Elevation key on the map. The level of the hex represents the elevation of the center of the hex. Consider elevation changes as gradual changes, not as abrupt right-angles as if formed by "layer cake" blocks of terrain. LOS is determined from the center of one hex to the center of the other. Features intersected by this line may block LOS; those features not on this line will not. The elevation of a hexside is considered to be half the change, if any, between the adjacent hexes, added to the elevation of the lower hex.
19.2 Determining LOS
19.2a Rules of Thumb. Higher terrain than both firer and target always blocks. Same elevations as the higher of the two hexes blocks if it is separated from the higher hex by elevations lower than itself or the unit can be considered to be behind the crest of a ridge or hill. Terrain of elevation between the two hexes' elevations (if different) blocks if the mid-way elevation is closer to the lower one and is separated from the higher by elevations lower than itself. If the rules of thumb do not decide the issue, follow the below.
19.2b Terms and Conditions. elevation - Elevation of terrain including any modifiers, such as trees, buildings, or units. (See 19.3b) Elevation - The unit's elevation, e.g., the elevation of terrain ignoring any modifiers.
19.2c Algorithm. Decide if each line is true or false and proceed as indicated. Given unit A and unit B (A and B) regardless of which is the firer or target, and a straight line connecting the centers of the hexes of each unit (the LOS) which continues past both points. Terrain is only a concern here if it lies on the LOS line itself, either between the units or past them.
- No terrain of higher elevation than A's and B's Elevations exists between them. T: Next line. F: LOS is blocked.
- A and B have the same Elevation. T: LOS is not blocked. F: Next line.
- Allow A to have the higher Elevation of the two. Terrain exists between A and B of elevation the same as A's Elevation. T: Next line. F: Go to line 6.
- This terrain of the same elevation as A's Elevation is separated from A by lower Elevations. T: LOS is blocked. F: Next line.
- Either a lower Elevation is closer or the same distance from A to B, than past A or higher Elevations exist past A before reaching lower Elevations. T: Next line. F: LOS is blocked.
- Terrain exists between A and B that has an Elevation higher than B's but less than A's, is closer to B than A, and is separated from A by Elevations lower than itself. T: LOS is blocked. F: LOS is not blocked.
19.3 Effects and Restrictions
19.3a LOS is determined in all cases to be either blocked or not blocked. Blocked LOSs do not allow fire combat to occur between the hexes in question. LOSs which are not blocked allow fire combat in both directions. LOS has no other effects.
19.3b Certain terrain features add one to the elevation of a hex in determining blockage. These are forest, orchard, and urban hexes. These hexes add if any part of the hex (including all that hex's hexsides) is crossed. Note that urban hexes do not affect LOSs that skirt their hexsides, unless both hexes are urban. These features add one to the level of the hex for LOS purposes. They do not add to the elevation of units in a hex. Buildings and other minor features are included purely for historical interest, and - unless marked as urban terrain - never affect LOS.
19.3c Units may always fire into or out of, but not through, forest, orchard, and urban hexes. If the elevations work out correctly, it is possible to fire over these features.
19.3d Units add one to the elevation of the hex they are in when determining the LOS of units firing through their hex. Friendly units may never fire "over the heads" of friendly units if those units are adjacent to the target.
19.3e Units or features within a hex which is an end-point of an LOS never block an LOS. Units always have an unblocked LOS into all their adjacent hexes.
19.3f Hexsides allow LOS if the unit could see through at least one of the hexes adjacent to the hexside, except in the case where one of the hexes contains an enemy unit. Hexsides around enemy units are always blocked if the LOS must traverse them (as opposed to crossing them into the enemy unit, when it is the target).
19.4 Visibility
Visibility is given as a number on the Turn Record Track. It is in effect for that turn only and is the maximum range in hexes any LOS may extend. If no number is given, visibility is unlimited. The visibility number for a turn is inclusive, that is, a five hex visibility means ranges up to and including five hexes are allowed.
20.0 Fire Combat
Fire combat is the game's method of recreating battle between opposing units. Fire occurs during the listed combat phases and may be initiated during movement by close combats or formation changes. In the fire combat phases, one player may fire any of his units he desires, individually or in conjunction, then the opposing player may do likewise. Close combats are resolved as they occur, following the Close Combat Procedure.
Play Tip: A way of making the combat resolution system much faster and easier is to roll all the needed dice at once and to read the results as needed. To do this, place the following combination of dice into a dice roller: two large red dice, one smaller red die, one yellow die, one black die (white dots) and one white die (black dots). (The actual dice and colors used is up to you, but the above is a working example. Using the above dice, they will be read as follows. The two large red dice are for the main combat table. The smaller red one rounds any 1/2 results. The yellow die is for the Straggler Table. The remaining two dice are for the Morale Table with the black die the tens digit and the white die the ones. Use only the results from the dice which are needed according to the Fire Table result - in other words, if the Fire Table result is no effect, ignore all the other dice. This system speeds up play drastically - although it might sound cumbersome at first.)
Procedure: For each target hex, the firing player identifies all firing units. On the Fire Point Tables (above the Fire Combat Table), cross reference each firing unit's current fire level or gun points with the range to the target to find the fire points that unit creates. Total these fire points for all units firing onto the same target. Locate this fire point total along the top row of the Fire Combat Table and adjust the column for any of the circumstances listed on the Combat Table Modifiers list above the Fire Combat Table (total all modifiers before applying any). Note that the table is restricted to the columns shown - fires shifted beyond the table are resolved on the last available table column. Resolve the fire combat on the resulting column. Roll two dice. The cross-index between this column and the dice roll is the combat result. Execute this result and make any Straggler or Morale checks.
Detailed Procedure Steps:
- Total the Fire Points applied to the target using the Small Arms or Artillery range tables to determine the total points firing. Plus ("+") weapons units use the fire points listed in parenthesis.
- Expend one artillery ammo point for each five gun points, or portion thereof, firing.
- Find the column of the Fire Combat Table containing the resulting fire point total. Modify this column according to any special circumstances that may exist.
- Roll two dice.
- Determine the result by cross-indexing the dice roll with the final column.
- Round all 1/2 results by an extra one die roll according to the 1/2 Loss Table below the Fire Combat Table. Mark the unit's Loss Chart for losses inflicted.
- If the roll on the Fire Combat Table was an 11 or 12, mark all small arms firing units with a Low Ammo Marker.
- Roll on the Leader Loss Table for every leader in the target hex.
- Make any required straggler check on the Straggler Table. Mark any straggler losses on the unit's Loss Chart.
- Make any required morale check on the Morale Table. Execute the result.
- Change the target's fire level based on casualties and stragglers incurred.
20.1 Fire Points
Fire points represent the volume of fire generated by different sizes and types of units. Determine a given unit's fire points with the Small Arms and Artillery Tables above the Fire Combat Table. For each firing fire level or gun point unit, find the fire points listed on the appropriate table. Total the points for all units firing at a given target and use it to determine the initial column on the Fire Combat Table.
Disorganized units fire at half strength. Halve the total fire points of all disorganized firers, add them to the total of non-disorganized fires, and then round down (regardless of fractional value). Do not round "less than 1" fires...they are always "less than 1".
20.2 Plus "+" Weapons Types
Certain units are listed as having Plus ("+") weapons, with a + on the counter. These units use the "+" weapon fire point values listed in parenthesis on the Small Arms Table.
20.3 Restrictions on Fire Combat
20.3a Splitting fire is not allowed. A single unit (or extended line) can only fire at a single target hex. A brigade with two extended lines could fire at a maximum of three targets (one for the parent and one each for the extended lines).
20.3b Count the maximum fires from a hex starting with the top unit and working down the stack, as mentioned in Stacking Effects on Combat (see 12.3).
20.3c Artillery units in a stack may be selectively targeted by artillery units regardless of their position in the target stack.
20.3d Units may fire only once per combat phase. Any number of a player's eligible units may fire in a given phase. There is no limit on the number of units or fire levels that can engage a single target.
20.3e A given hex may be targeted a maximum of twice in a given fire phase - once against its artillery (if any) and once against the top non-artillery unit (if any). Note that a given attacking unit may not fire in both attacks. This rule is exclusive of 26.6; in effect, artillery can be targeted separately in a stack (by artillery) and the stack may be fired upon normally in the same fire phase.
Note: Units can be targeted more than once if they happen to retreat to another hex which is later fired upon in the same phase. The retreating units are liable as any other unit in that new hex.
20.3f Units may conduct fire combat freely out to the range of the weapon involved, given LOS and visibility. The max range is 2 hexes for small arms and 10 for artillery.
20.4 Terrain Effects
20.4a Those terrain types that affect combat are listed as column shifts in the Combat Table Modifiers Chart above the Fire Combat Table. Other terrain types only affect combat by restricting LOS.
20.4b A given Modifier line on the Combat Table Modifiers list may apply only once per fire combat.
20.4c A slope affects a fire combat if all fires in the combat cross slope hexsides. If any fire comes into the target hex via a non-slope hexside, the target does not get the benefit of the slope at all. This same rule applies identically to extreme slopes, sunken road hexsides, and trenches.
20.5 Combat Results
After determining the fire points and applying column shifts and modifiers, roll two dice to determine the combat result.
20.5a Morale Checks. Certain results are listed as M, M-1, or M-2. These results call for a morale check only (no casualties or stragglers). Roll on the Morale Table for the top unit. The number following the M (1, -2) is an additional number of upward shifts on the Morale Table.
20.5b Straggler Checks. Any result giving 1/2 or more casualties also calls for a straggler check. See Stragglers for details on making the check. Make the straggler check even if the 1/2 loss rounds to zero. The top non-artillery unit makes the straggler check for the stack if an artillery unit in the stack was the target of fire combat.
20.5c Step Losses. Any numeric result on the table indicates a casualty loss, straggler check, and morale check. Round any 1/2 losses up or down; see 20.5d. Record the casualties on the Loss Chart for the unit. Make the appropriate straggler and morale checks; execute and record those results as needed. Make any adjustments to the fire level markers under the unit and move on.
20.5d 1/2 Loss Rounding. Many results include a 1/2 result. Round this result using an additional one die roll (1-3 down, 4-6 up). Even when a result rounds to zero, a straggler and morale check are still required.
20.5e Low Ammo. Whenever a Fire Combat Table roll is an 11 or 12, mark all the small arms firing units as being Low Ammo. These units remain at Low Ammo until resupplied by a supply wagon or train. See Supply for more details.
20.6 Step Losses
Record step losses of infantry and cavalry units on the player's Loss Charts as mentioned above. Mark off these losses as they occur and adjust fire levels accordingly. Artillery units have no loss charts, but instead have their current strength recorded using numeric gun point markers under the unit counter. For artillery, a given numeric loss from the Fire Table is the number of gun points in that unit destroyed.
20.7 Marking Losses and Stragglers
Each brigade has a row of ovals or squares in a line on the Loss Chart. Mark each casualty with an "X," each straggler with a "/". Keep the casualties to the left of the stragglers by pushing the stragglers to the right and completing the "X" for each new casualty. By doing so, you make straggler recovery much easier to control.
20.7a When all the brigade's spots to the left of the "wrecked mark" are marked with casualties and stragglers, the brigade is wrecked. Mark a line through the brigade's identification on the Loss Chart (for easy reference) and an "X" in one of the Division's spots. Apply any appropriate modifiers from that point on as long as the wrecked status lasts.
20.7b When all the spots to the left of the wrecked line for the division are marked, the division is wrecked. Circle the division's identification on the chart and apply the additional modifiers from that point.
Example: Use of Fire Points and the Fire Combat Table. This example is designed to introduce players to the use of the Fire Table, calculation of fire points and fire combat resolution. Where straggler and morale checks would be required, they are listed but the actual check required is not made.
In this first example, 2 Infantry brigades are firing at a single target at range 2. Both infantry brigades have a strength of greater than the A fire level, so the fire can be calculated as two As firing at range 2. Neither brigade has "plus" weapons.
A reading from the Small Arms Chart tells us that an A at range 2 provides 2 firepoints, or a total of 4 for the two firers. Identify the 3-4 fire point column on the Fire Table. Read down the list of Fire Table Modifiers and determine if any apply. Let's say our target is at a higher elevation than the firer's, but there is no slope symbol between the firers and the target. In this case, the target would not receive the benefit of the column shift awarded for being behind a slope (-1). In fact, none of the modifiers apply. On the 3-4 column, the firing player rolls two dice and gets a 6 which gives a "1/2" result. He would then roll another die to round this result off (as per the bottom of the Fire Table), check for stragglers, and do a morale check. That would end this fire combat.
In the second example, a player is firing a B and an A at range 1, a B at range 2, a battery of 5 gun points at range 6, and a battery of 5 gun points at range 8. The player gets the following fire points for each of these: 2, 4, 1, 1, and 1/2 respectively for a total of 8 1/2 or 8 (after rounding). This places the initial Fire Table column at the 7-8 column.
In this case, however, one of the firers is at Low Ammo, but one of the firers has a flank shot. The following column shifts are awarded: -1, and +2 respectively for a total shift of +1. This means the fire is resolved on the 9-11 column.
The player rolls 2 dice getting an 11. Since the dice roll is an 11 or 12, all the small arms units which fired are now marked Low Ammo (the one that already was so marked is unaffected). The result is a 2 1/2, which is then rounded to either a 2 or a 3 by the additional rounding die roll. Straggler and morale checks are required and made.
21.0 Stragglers
Stragglers are troops separated from the ranks through the effect of combat and exertion. While not casualties or permanent losses, they are not available for combat use. Unlike battle casualties, stragglers may be recovered during play to rebuild a unit's strength.
21.1 Straggler Checks
Stragglers can be lost during combat, forced march, and morale results. Make straggler checks whenever a 1/2 casualty or greater Fire Combat Table result occurs, units make an Emergency Retreat, or when a player chooses to force march.
Procedure: Choose the correct half of the Straggler Table to use based on the "1/2 to 1" or "1 1/2 or more" loss column headings. Consult the column which corresponds to the morale rating of the unit in question. Roll one die and modify according to the modifiers listed under the table. These modifiers are cumulative. Cross index the modified roll result with the correct morale column, the result is the steps lost to stragglers. Mark these accordingly.
21.1a If the checking unit is destroyed by its straggler loss, the next lower unit takes any remaining straggler loss and makes the morale check, if any. Note that this next unit does not roll separately for stragglers.
21.1b If a unit is destroyed in fire combat before making its straggler check, the next lower unit makes the check.
21.1c Artillery units never suffer loss due to stragglers or from the Morale Table. If an artillery unit takes a loss on the Fire Combat Table, the top infantry or cavalry unit in the stack makes the straggler and morale check for the stack. Artillery alone in a hex would check morale for itself (as if it had a C morale rating), but ignore any straggler losses and never make straggler checks.
21.2 Straggler Recovery
Stragglers may be recovered under the conditions below. Units may be marked and attempt to recover stragglers on any day or night hour turn (8:00, 9:00, etc.). Straggler Recovery Markers may be placed on units that fulfill the following conditions:
a. The unit is at least 4 hexes away from an enemy unit. b. The unit may not be in any morale state other than normal, including BL. c. The unit must be within normal command radius (or that part of it available at the time the unit is marked - in the case when the corps HQ is not yet on the map). Divisional goals do not negate this condition.
Once placed, Straggler Recovery Markers are removed if any of the placement conditions is violated or if any of the following occur:
a. The unit moves. b. Another unit that was not there when the marker was placed enters the marked unit's hex and stack with it. c. The unit is fired upon, regardless of combat result.
Eliminated units may re-enter play through straggler recovery. They may do so only if they have at least 2 strength points which can be recovered. Place Straggler Recovery Markers according to the same conditions above in any empty hex within appropriate command radius.
Procedure: For each marked unit, roll on the Straggler Recovery Table for the correct morale value. Erase recovered stragglers from the brigade's loss chart. Make any corrections to fire level markers based on this change. A destroyed unit which reappears through straggler recovery is placed on the map in an appropriately marked hex. Straggler recovery markers can be placed in empty hexes in anticipation of the appearance of rebuilt units. Destroyed brigades roll for recovery using their printed morales. After rolling for each unit attempting recovery, remove the straggler recovery marker.
Brigades may only recover stragglers they themselves have lost. Stragglers may not be combined between brigades, and combat casualties may never be recovered.
22.0 Wrecked Brigades and Divisions
As a unit's losses (both combat and straggler) increase, the unit will reach or surpass its wrecked limit on the Loss Chart. Once all spaces to the left of the limit are filled, the unit is considered wrecked and all resultant penalties apply. A unit may become un-wrecked by the recovery of enough stragglers such that the unit's losses no longer reach its wrecked limit. Divisions, once enough of their brigades are wrecked, also become wrecked. Recovery of component brigades can lead to the unwrecking of divisions.
A wrecked brigade, or wrecked brigade of a wrecked division, differs from regular units in that it has additional morale and straggler modifiers. Wrecked brigades may never attack in close combat. Wrecked divisions also affect Corps Attack Stoppage.
23.0 Close Combat
Close combat is a combination of fire and movement which occurs in the Movement and Close Combat Phase. Moving units which desire to conduct close combat move adjacent to their target, expend one MP plus the cost of the target's hex, enter the hex, and then resolve the combat as listed below.
Procedure:
a. The attacker enters the defender's hex at the hex's cost +1 in MPs. b. First the defender then the attacker calculate and conduct fire combat. Do this sequentially. Execute the results and make straggler checks as each is done. They make no Morale Checks now and ignore modifiers to be applied to the Morale Table from the Fire Table. c. Attacker checks morale at -6 (plus any other applicable modifiers). If the morale result forces the attacker to retreat, the attacking player executes the result and the close combat ends. Note that the attacker is exempt from this check if the defender was unable to fire in the close combat. d. If close combat does not end in c., the defender checks morale at -4 (plus any other modifiers). If the morale result forces a retreat, the close combat ends. The defender then executes the morale result and conducts an additional morale check (that is, after having retreated) without the close combat modifiers. e. If combat has not ended yet, use the Odds Table to determine the winner. The loser from the Odds Table retreats - attacker one hex, defender two hexes. If the defender is the loser, he must conduct an additional morale check at the end of his two hex retreat.
In all cases, one side or the other will end up alone in the hex. The attacker may continue movement with any remaining movement points afterwards. Note that the retreats caused by close combat do not expend movement points or cause a unit to stop moving.
After the combat has been resolved, participating units (only) on either side may freely change facing and stacking position.
Note that when determining unit strength for the Close Combat Odds Table, Low Ammo, DG Morale, and Formation have no effect on unit strength. Do not roll on the Odds Table when the defending units are Routed; instead, the defending Routed units automatically Rout (Back 2 and Straggle 3) and then make an additional morale check.
23.1 Restrictions
A unit may conduct as many close combats in a phase as desired within the constraints of its movement allowance and the conditions of close combat below.
23.1a Attacking units may not be in any morale state other than BL or normal.
23.1b Attackers may not violate command radius. Command radius must reach into the target hex at the moment of the attack. EZOCs in the hex from which the attacker entered CC do not block this trace.
23.1c Close combat attackers may not be wrecked brigades.
23.1d A unit may be the target of an unlimited number of close combats in a given phase. The order of attacks is completely in the hands of the attacking player. The defender must accept close combat attacks.
23.1e Always resolve close combat before conducting other movement. Note that units wishing to conduct a close combat together must start movement together (except for leaders, who may come from anywhere - but still must join from the same hexside the other units crossed to get into the close combat). Units with extended lines may retract those lines on the way to the close combat and attack as a single unit.
23.1f No unit may add its fire to a close combat unless actually engaged in that hex.
23.1g Calculate stacking and fire limits for each side separately; all normal rules regarding stacking and fire are in effect.
23.1h Fire combat in close combat uses the close combat range columns of the Fire Point Determination Chart. Terrain affects close combat fires as any other combat. Hexside features that the attacker crosses to enter the target hex also affect the combat, as if the attacker were in the adjacent hex from which he entered. In close combat, morale checks are made only as called for by the close combat sequence and may not occur directly after a fire combat. Ignore morale checks called for by the Fire Combat Table.
23.1i Artillery units may never conduct close combat as attackers. Infantry in column may not fire in its portion of the fire combat, but may change formation after the fire combat is finished. Such an infantry formation change is exempt from the usual "formation change fire trigger" (15.0b) above.
23.1j Units may cross one EZOC hex to enter close combat. This hex may contain overlapping ZOCs from a number of enemy units. Units wishing to enter a close combat may not move from one EZOC hex to another before entering the target hex.
23.1k When the attacker enters close combat through a unit's rear or flank hexsides, the defender fires with an additional 3 column shift modifier on the Fire Combat Table.
23.1l Unit size greater than "AA" has no additional effect on the Close Combat Odds Table.
23.1m If the attacker must retreat out of a close combat (he lost), the first hex entered must be the one from which he entered the combat. The defender's retreat hex must be opposite the attacker's entry hex, or as close as possible given the presence of enemy units. At the end of his retreat, the attacker still has all the MPs it had remaining before the retreat and may continue to move and conduct more close combats, if it has sufficient movement points remaining.
23.1n Both sides in a close combat are exempt from retreat fires in the first hex they enter. After that one hex, these units automatically draw fire from any enemy units whose EZOC they enter in retreat.
23.1o If fire combat in the close combat procedure eliminates the defending units, the attacker must still conduct his morale check at -6. His attack might falter before he knows he has won.
23.1p Additional morale checks made by the defender (as per the close combat procedure) do not include the -4 modifier.
23.1q BL units are not required to make close combats.
23.1r Units in Column or Mounted formation may conduct close combat as attackers (especially if they have a death wish). Because of morale and formation effects, it is possible that units from one or both sides may be unable to fire.
Example: Close Combat Sequence. This example narrates a close combat in order to show the procedure. The details of the fire combats and the straggler and morale checks have been omitted except where useful to show the effects of a close combat.
The attacking player announces the close combat, pays the defender's hex movement point cost plus one, and enters the defender's hex. The sides exchange fire (defender then attacker) at CC (Close Combat) range for fire points. While the attacker is unable to bring any artillery along, the defender can use his to great effect (assuming it is unlimbered, that is). The losses and stragglers are marked on both side's Loss Charts after each side's fire and including straggler and leader casualty checks. The attacker then checks his morale with an additional drop of 6 rows on top of anything else he is eligible for. If he is forced to retreat because of this roll, the combat ends and there are no other effects - the defender manages to avoid the Morale Table.
Assuming the attacker survives his morale check, the defender must check morale dropping 4 rows in addition to anything else for which he is eligible. If he is forced to retreat, the combat ends and the attacking units may continue to move, provided they still have movement points remaining. They may even close combat the same target again if they wish and their ability to do so is not otherwise restricted (by morale or movement points, etc.). The defender (if he retreats) must make the additional morale check. He makes this morale check without the close combat modifier of -4.
Now let's assume the defender also survives. This is where the Odds Table is used. Convert the unit strength for each side using the Point Value Chart on the Odds Table, keeping in mind that strength over the AA fire level is irrelevant, and determine the odds. Roll one die on the table making any die roll modifiers noted on the Odds Table. The Odds Table result will generate a winner and a loser for the combat. Execute the results. Note that if the attacker loses, he must retreat one hex. If the defender loses, he must retreat two hexes and make an additional morale check. This morale check, as stated earlier, does not use the close combat modifiers.
24.0 Morale
Morale is the quality of a unit which determines how well the unit withstands the shock of combat. It is an evaluation of a unit's leadership, training, and (for the lack of a better term) character. Each unit is assigned a morale level or rating (which is printed on the counter). This level/rating is a permanent feature of the unit and does not change during the relatively short period represented by the game. Units are rated on a scale of A through E, from best to worst.
24.1 Morale States
Unlike morale levels, morale states represent temporary conditions of confusion, fear, or anger. A hex and all units in it can have only one morale state at any given moment. A morale state inflicted on one unit affects all others in that hex. Mark morale states by using the appropriate marker atop the stack (normal has no marker). They are, in order of increasingly poor performance:
- Blood Lust - A temporary state of high excitement, resulting in a short-term suspension of normal fear reactions.
- Normal - The usual state of the unit.
- Shaken - A mild increase in confusion and increased caution.
- Disorganized - A partial command breakdown and increased resistance to commands which would place the unit into danger.
- Rout - A collapse of organization and flight to the rear.
24.1a Each morale state has its own effects, as given on the Morale Effects Table, on fire, movement, and close combat. In addition, the following is true:
24.1b Routed units may not move voluntarily during the friendly Movement and Close Combat Phase. They must retreat, however, if they fail to rally during the friendly Rally Phase are less than 6 hexes of an enemy unit. This retreat occurs instantly in that Rally Phase and continues until the routed unit is 6 hexes away from all enemy units. If a routed unit is unable to execute this retreat due to impassible terrain or enemy units, all remaining strength is marked off as casualties (not stragglers) and the unit is eliminated. Such units may re-enter play by the recovery of stragglers, like any other destroyed unit. Note that this "movement" is not inhibited in any way by normal command radius restrictions.
24.2 Morale Checks
Make morale checks when called for by the Fire Combat Table and during the Close Combat sequence. Follow this procedure for making the check:
A. Find the unit's morale level to the left of the Morale Table. B. Total all applicable modifiers. C. Modify the row, as found on the left of the table, by this total modifier, with "+" being up and "-" being down. D. Roll two dice. The red die is the first digit, the white one the second (a red six and a white four would be 64). Find the column along the modified row which contains the dice roll and read up to the result. E. Apply the column heading result.
24.2a In all cases, the top unit in the stack at the time of the morale check gives the morale rating for the stack.
24.2b Artillery units, if top unit, always have a morale level of C. Artillery alone in a hex never receives the artillery morale benefit on the Morale Table, even if more than one artillery unit is in the hex. Only infantry and cavalry in line formation receive this benefit. Also note that if artillery units are selectively fired upon, the top unit still makes the morale and straggler checks for the stack.
24.2c Units that are in Blood Lust do not make morale checks as do other units. Instead, roll two dice on the Blood Lust Morale Check Table. The only results possible are no effect and removal of blood lust. No modifiers ever apply to this roll.
24.2d Units which are destroyed due to the Morale Table result are removed from play before executing any retreat and, therefore, do not generate rout throughs.
24.2e All losses from the Morale Table come in the form of stragglers.
24.3 Retreats and Rout Through
Retreats off the Morale Table are given in hexes, not movement points. When required to retreat, the affected units must retreat the number of hexes given. If a unit cannot retreat the number of hexes required, due to enemy units or impassible terrain, that unit is automatically routed. Units forced off the map are eliminated. The standard retreat rule (5.2) controls the direction of a retreat. When units form a stack, by retreat or regular movement, the entire stack adopts the worst morale state of any unit in it. Units may move (but not retreat) through hexes containing forces in other morale states and still be considered not to have stacked with the non-moving force. Ending one's movement in an occupied hex is considered stacking. If such a stack then splits up, each portion of the stack carries the new morale state with it. Any unit that even momentarily stacks with a routed unit (for any reason) is automatically routed, regardless of how short-lived the stack. This exception to the normal rule is intentional. It simulates the "contagiousness" of fear and the effect of a disordered unit running to the rear on nearby units - unlike a controlled movement in which other friendly units can "side step" to allow them to pass.
24.3a A rout through occurs whenever a retreating unit enters a hex containing other friendly units during a retreat caused by the Morale Table or a close combat result. Note the retreating unit need not be literally "routed" to create a rout through.
24.3b Units that have a unit rout through their hex may either displace one hex, or stack with the retreating units - at the owning player's option.
24.3c If the units displace, they worsen their morale state by one level (shaken to disorganized, for instance). This displacement may cause additional rout through and, hence, additional displacement situations. Handle each one as an individual event, with the same rules and options applying. Treat displacements like retreats in that they must be "locally to the rear." Note that unlimbered artillery may not displace or follow in a retreat. These artillery units merely absorb the passing unit's morale state and remain in place.
24.3d If units choose to stack together, the worst morale state of the stack is adopted by all units in the stack, and the retreat continues, if required, by the entire stack.
24.3e Blood Lust units which stack with non-blood lusted units, or displace in any way, lose their blood lust status.
24.4 Additive Effects
Whenever a stack with a morale state receives another morale result, the effects are cumulative as follows:
A. If Dg and gets another Dg, the stack is R. B. If Dg and gets BL, the stack is normal. C. If R and gets BL, the stack is shaken. D. If Sh and gets BL, the stack is BL. E. All other results, the unit is the worse of the two.
Additive effects never cause additional retreat or straggler loss.
24.5 Rally
During the Rally Phase of a player's turn, his units in any morale state must check for rally. To avoid confusion, follow this sequence:
A. Remove BL from all units not adjacent to an enemy unit. B. Roll for remaining BLs on the Blood Lust Morale Check Table and remove as required any BLs which fail the check. C. Remove all Shs. D. Convert all Dgs to Shs. E. Roll for Rs. Roll one die for each stack; subtract the rating of any one leader in the hex from this roll. On a two or less, the stack becomes Dg, on a three or higher it remains R. If any remaining R stacks are within 6 hexes of an enemy unit, retreat as noted above.
Rally is a simple mechanical process in which units gradually (and in most cases, automatically) evolve towards normal. See the Rally Diagram for a graphic representation as to how it works.
25.0 Leaders
Leaders are included in the game representing the divisional commanders and above. Leaders provide the focal points for the command system and provide a morale benefit for units stacked in their hex. Leaders may move as any other unit, using their row of the Movement Chart. Leaders have no fire combat ability of their own. Leaders, while usually not the exact target of enemy fire combat themselves, may become casualties when their hex receives fire. Note that a player could fire upon a hex containing only leaders in an attempt to generate a Leader Loss roll and leader casualties.
Leader units have one rating, their leader rating. Use this rating for command, initiative, and morale. In addition, subtract this leader rating from the die when attempting to rally routed units. For all morale functions (morale check and rally rolls), the leader desiring to affect the units must be stacked with them.
25.1 Effect on Stacking
Leaders do not count for stacking restrictions and any number of them may occupy a single hex.
25.2 Effect on Movement
Leaders move as any other unit. They affect the movement of other units in that the division commander's hex is the center of the division's command radius.
25.3 Effect on Fire Combat and Morale
Leaders have no effect on friendly fire combat and do not have a fire combat ability of their own. When a hex containing one or more leaders receives enemy fire and casualties are sustained, roll two dice for each leader and consult the Leader Loss Table. Leaders do not suffer from morale effects or make morale checks of their own. Leaders assist friendly units making morale checks as their rating is a row modifier on the Morale Table.
25.3a Morale Table Use. Use the leader rating in the checking hex as follows. Note that only the senior leader in the hex affects morale checks (owning player's choice when tied). No more than one leader ever affects a single hex. Modify the morale check by adding (going up) rows on the Morale Table equal to the leader's rating minus one. A zero leader, therefore, would give a one row down modifier.
25.4 Leader Losses and Replacement
Whenever a leader is in a hex that receives enemy fire and casualties are sustained (ignore 1/2 results that "round down"), check each leader in the hex for loss. Roll two dice on the Leader Loss Table and read the result. Roll once separately for each leader in the hex. If the leader is killed or wounded, remove the leader from play.
25.4a Leaders who become casualties must be replaced. Corps commanders are replaced by the senior division commander (based on the rank on the counter, owning player's choice in ties). Army commanders are replaced by the available corps commanders as noted in the game rules. Division commanders are replaced by generic brigade leaders. Replace all leader losses immediately.
25.4b Note that in later versions of this series, the backs of division commanders are printed with the replacement leader marked for that command. Corps and army leaders have generic backs. If a division commander is promoted to fill a vacancy, use the generic repl back of the corps leader to fill the divisional position until the division leader is eliminated and the "correct" back is now available. Some repl leaders have unit designations printed on them to clarify command lines at times when officer losses have been heavy.
25.4c When a division commander becomes a casualty, the divisional repl must appear stacked with another unit of the same division (i.e. not in the same hex). If no such unit is available, the repl appears where the leader was lost. Corps and army leaders are not normally replaced by generic repls, and their replacements (other on-map leader units) must move from where they are to their new duty position during regular movement.
25.4d If a leader is in a stack which is destroyed, but escapes harm himself, place the leader in the nearest stack of his command. If no such stack exists, remove the leader from play. Leaders removed solely due to this reason are never worth victory points to the enemy player.
25.4e If enemy units enter a hex containing a leader alone, that leader automatically displaces to the nearest stack of his command. Enemy units can never eliminate leaders simply by entering their hexes.
25.5 Division Commander Placement and Radius
Division commanders must stack with at least one unit of the commander's division. Corps and higher leaders have no such requirement and may travel freely.
The division commander may move as desired and the stacking restriction above is enforced only at the end of the Movement and Close Combat Phase.
The location of the division commander marks the center of his division's command radius. The location of a corps commander is unimportant since the corps HQ marker defines the center of the command radius of a corps.
26.0 Artillery
This system handles artillery somewhat abstractly through generic gun points. Exact weapon and ammo concerns have been factored into the conversion from gun to fire points. More artillery detail is not needed in this game system and would only serve to clutter it up.
Note: Unlimbered artillery units retain their limbered movement allowances. While they have movement points available, they may not use them except to change formation. In other words, the MPs available to an unlimbered artillery unit may never be used to move from hex to hex - it must change formation first.
26.1 Gun Points
Each artillery unit is assigned a number of "gun points" as printed on the counter. (A gun point represents roughly three cannons). Gun points are interchangeable, and may be attached and detached without cost in movement points (the detached points merely move away using their movement allowance).
26.1a The owning player may form detached batteries of up to 3 gun points by using detached markers and numeric gun point markers. These detachments function as any artillery and can link up with any artillery unit, provided the resulting battery has no more than 5 gun points.
26.1b Artillery detachments cannot be created with less than 2 gun points. That restriction only applies at the instant of creation, if the detachment falls below 2 due to losses later, that is ok.
26.2 Losses
When the Fire Combat Table calls for losses, artillery units lose gun points directly as recorded on the Fire Combat Table. Therefore, if the final combat result is a 3, the target battery loses 3 gun points. Place under the artillery unit a gun point marker equal to the number remaining in the unit. When an artillery unit has no remaining gun points, remove it from play. Ignore incurred losses greater than the total artillery strength in the target hex.
26.2a Note that an artillery unit may be targeted by any artillery units within range, regardless of its location in the stack.
26.2b Note the special rules (below in 26.6) regarding artillery formation change both in EZOCs and within 2 hexes of enemy units.
26.3 Fire Combat and Artillery
Artillery may engage targets at up to 10 hexes, with restrictions due to LOS and visibility. Use the Artillery Table adjacent to the Fire Combat Table to convert gun points into fire points. Calculate gun points firing at a hex by the total number of gun points involved at each given range bracket (2-3, 4-6, etc.), not battery by battery, when figuring fire points.
Example: If 3 batteries of 3 gun points each fire at a target 3 hexes away, the resulting fire points is 5, not 6. Similarly, but with an opposite effect, 2 batteries of 4 firing at range 3 would be 5, not 4. 3 gun points firing at range 4 and 3 at range 3 would total 3 (1/2 for the first set, 2 for the second, total 2 1/2, rounded to 2).
Add artillery fire points to any other fire points attacking the hex, whether artillery or small arms, for one combined total.
26.3a Artillery fire points are further modified by target type at ranges of 4 hexes or more. Artillery fire points directed at artillery or wagon units at such ranges is normal (x1). Against any other target type at ranges of 4 or more, artillery fire points are halved.
26.4 Morale and Artillery
When an artillery unit receives fire, no matter what its position in the stack is, the top unit in the stack always checks for morale and stragglers. Artillery, if the top unit, always has a morale of C and, in this case, the top infantry or cavalry unit makes the straggler check. Artillery alone in a hex, or stacked only with other artillery units, never receives the Morale Table benefit for units stacked with artillery. Artillery units never become wrecked.
Artillery must limber to execute any retreat result from the Morale Table, unless stacked with a non-artillery unit and the result allows the "no retreat if stacked with artillery" exception. Limbering in a ZOC or close combat requires a roll on the Gun Loss Table.
26.5 Stragglers and Artillery
Artillery units never check for stragglers and never lose gun points to either the Straggler Table or the Morale Table.
26.6 Formation Change, Enemy Units, and Fires
26.6a Artillery units may never unlimber in an EZOC hex. Any artillery unit which unlimbers is fired upon by all otherwise qualified enemy units at or within 2 hexes (including all artillery, infantry and cavalry units; the target unit's position in a stack does not matter). The target in this case is still considered to be in limbered formation until the fire combat is resolved.
26.6b Artillery which limbers never draws fire, but if doing so in an EZOC or close combat it rolls on the Gun Loss Table. It then loses the number of gun points called for by the table result.
26.6c The Gun Loss Table is never used against and never affects any unit type other than artillery.
27.0 Artillery Supply
Artillery supply is handled in a rather abstract manner in these games - at the army level. Each side has a number of artillery ammo points with which to fight its battle (an infinite number in some cases). The side may then use these points to fire its batteries during the game. Any of a player's batteries may use the army ammo to fire - which means one unit may, in extreme cases, fire all the army's ammo. Once the ammunition supply is expended, artillery units may continue to fire, but at 1/2 effectiveness (divide the value from the Fire Point Determination Chart by 2 and round down any fractions if necessary).
The batteries themselves never record the ammo they expend. The only record of artillery ammo in play is the Artillery Ammunition Track for each player (if any).
27.1 Tracing and Expenditure of Ammo Points
To fire at full effectiveness, artillery units must be able to trace a path free of EZOCs or enemy units to the army supply train (or the hex from which it will enter). This path may be of any length, but only the first (starting with the artillery unit) 5 hexes may be non-road hexes - the rest of the trace must be made on primary or secondary road hexes. Units unable to make this trace have their fire points divided by 2.
Artillery supply is handled as a point total at the army level. Expend one artillery ammo point per fire of 5 gun points or portion thereof, on a per combat basis (or for each fire combat).
Example: If 12 gun points fire in a combat, 3 ammo points are used. Also, if 2 points are fired in a combat and 3 in another, a total of 2 ammo points are expended, one in each combat.
28.0 Small Arms Supply
Small arms supply is handled mechanically on the game map. The player uses his corps supply wagons to move supply points from the army supply train to the units which need it. Small arms units need supply only when they are to remove a Low Ammo Marker - the supply expenditure removes the marker.
28.1 Low Ammo
Whenever the Fire Table dice roll is 11 or 12, mark all firing brigades with Low Ammo Markers. Mark each unit separately. Low ammo never affects artillery units, the supply of which is handled using the Artillery Supply rules above.
Units marked as low ammo:
- ...may not fire at range 2.
- ...have a down one modifier for the Morale Table.
- ...have a back one column shift for any fire combats to which they contribute. Note that if several such brigades are firing in a combat, only a total column shift of one applies.
Units never actually run out of ammo and additional low ammo results are of no effect.
28.2 Supply Wagons
Most corps are assigned one supply wagon. This wagon carries supply points from the army supply train to the units which need it.
28.2a Each wagon may carry 5 supply points, which are marked under the wagon using supply point markers. In all scenarios (unless specifically stated otherwise) wagons always set up or enter with a full 5 supply points. Supply wagons and supply points do not count in stacking. Wagons are unaffected by morale results, but may tag along in a retreat with units retreating out of or through their hex.
28.2b Wagons may be reloaded by moving at or within two hexes of the army supply train. Such loading only occurs at the very end of the Movement and Close Combat Phase in the Ammo Resupply Segment. Up to 5 supply points may be loaded at one time.
28.2c Loading and unloading wagons does not cost movement points in and of itself.
28.2d Supply points may never be unloaded onto the ground and left in a dump - they must always be on a supply wagon or train to be used.
28.2e Supply wagons and their contents are automatically destroyed if enemy units enter their hex. Wagons may also be targets during a Fire Combat Phase - they have one step and are destroyed if it is lost. They may not, however, be targeted separately in the stack as artillery can.
28.3 Supply Train
The army supply train is the source of all small arms supply points. It has an inexhaustible supply. Wagons and units may reload supply points if at or within two hexes of the train.
28.3a The Supply train may never leave primary or secondary road hexes. Except for this restriction, they move as do wagons. Corps supply wagons are not restricted by 28.3a.
28.3b Handle the supply train with respect to fire combat and overrun in the same manner as supply wagons.
28.4 Resupply of Small Arms Ammo
During the Ammo Resupply Segment of the Movement and Close Combat Phase, any Low Ammo marked brigade at or within two hexes of a supply wagon or the supply train may remove the Low Ammo Marker at the cost of one supply point (reduce the wagon's load by one, ignore if drawing from the supply train).
28.4a One ammo point resupplies a single brigade of any size, including all extended lines.
28.4b Wagons can normally issue ammo only to units in their own organization. They may issue supply to low-ammo units from other organizations if there is currently no one in their own command which is low ammo. Note that attached units may draw on the wagons of either their permanent or temporary organization freely.
29.0 Night
Night actions, while rare in the Civil War, did occur. This series allows night actions but restricts them in both active and passive ways. Passively, turns at night are one hour, instead of thirty minutes, making all actions take longer than during the day. Active measures are listed below.
29.0a Visibility at night is always one hex. Always modify night fire combat by an additional -2 column shift. Night morale checks have an automatic -3 row modifier and night straggler checks always use the +2 DRM. Make these modifications in addition to any others which are applicable.
29.0b Any Corps attack stoppage roll made at night receives an additional -3 dice roll modifier.
Terms and Abbreviations
- Acceptance: The action of an arriving order changing to an active status where it can be used. Acceptance is accomplished using the Acceptance Table.
- Additive Effects: The combined effects which occur when a unit in a given morale state receives another morale result.
- Aide-Oral (AO): A method of transmitting an order which requires the aide to memorize the order and verbally transmit that order to the receiver. While quicker than other methods, the chance of error is greater.
- Aide-Written (AW): A method of transmitting an order which involves a written version of the order being hand carried to the receiver by an aide. While more exact than aide-oral, this method is handicapped by the inability of the receiver to ask questions of the sender so as to clarify the order.
- Ammo Points: The points available for use in firing a side's artillery units.
- Anti-Initiatives: The environment generated by the overall command in an army which sends a signal to lower ranking officers regarding the acceptability of independent action. The Anti-Initiatives (if any) apply to the initiative points available to a leader which may inhibit the ability to obtain initiative.
- Blood Lust (BL): A positive morale state of temporary excitement (indicated by an amount of frothing about the mouth) which reduces normal fear reactions making the unit less susceptible to morale checks than normal. They are having fun and they want more of it...
- Close Combat (CC): Combat occurring at much closer ranges than the "normal fire for effect" standards (clear terrain, 200 yards). Such combat is occurring closer than 100 yards (with some variability due to terrain). Some hand to hand or melee combat may ensue, but for the most part, close combat is a fire fight at very tight ranges.
Series Designer's Notes
Most of you have been playing using the first edition rules for a number of years now. I hope you will find the 2nd Edition a degree of improvement. I do want to thank all of you for your patience and help as we have learned. We couldn't have done it without your help.
A number of concepts in these games continue to be misinterpreted by players or game reviewers (usually the latter). Foremost among them is the lack of a woods combat modifier. No, we don't believe that trees fail to stop some bullets, as those with simplistic analyses would have you believe. The simple fact is that the historical evidence points out that commanders in the Civil War felt the problems associated with forest fighting to out-weighed any minor amount of increased protection. Also, when troops did fight in the forest, because of the limited LOSs available, they did so at much shorter ranges than normal. The effect of the shortened range effectively counteracts the protective effects of the woods. The other case people point to when talking about woods modifiers is when a force attacks across an open field to attack a defender in the woods. The problem with this example is that, invariably, the defender would array himself in front of the woods (so as to preserve command and control and avoid the problems incurred on maneuvering elements in the forest). With the defender just in front of the edge of the forest, neither side gets any "benefit" from the woods and the fighting is the same as that in an open field. Given that no one has come forth in five years of debate with an example of a force intentionally forming up inside a forest (so as to get some mythical "defensive benefit") there is no historical basis for such a modifier and its existence would only make players perform actions which are at best ahistorical.
A concept of which my reasons have been misunderstood by a game reviewer involves fire levels vs. strength points. The original conception still holds true: having fire decrease incrementally by each strength point lost is not only a pain to record (making change of strength markers, etc.) but is also much too accurate a measurement. A unit which drops from 10 to 9 strength points cannot be assumed to have 9/10s the firepower. Consider the fire levels to be an indication of the "significant digits" of the amount of fire being supplied by the unit. I don't think I need to explain what a significant digit is to the audience which plays these games.
Stragglers have also been attacked in game reviews. They have been characterized as too much work to be worth it and that one need not bother to recover them (because, it is said, recovery is too hard). OK, let's say you agree and that the simulation benefits of the ebb and flow of battle mean nothing to you, etc. A player who thinks about his units and rebuilds them as they are lost in stragglers will clean your clock. Players who think ahead to the later stages of the battle, who conserve their troops, and who rebuild them after loss, will generally kick the living "daylights" out of players who don't want to be bothered with it. It's your choice.
Some will probably say that these rules are "long overdue" or late in some way. All I can say to that is that they came out as soon as we could put the thing together. Given my injuries in 1990 and the time it took to consolidate the assorted comments and playtest the thing, these rules made as early an appearance as possible.
Some word should be said to the changes in this set of rules. On the whole, we attempted to maintain the actual series rules as they were presented in the first edition with the majority of the work being spent on things like rewriting and filling in the blanks so as to make the rules much tighter. The changes that were made were based on the comments we had gotten which pointed out undesirable effects and unintended results. Also, some things were changed to streamline certain concepts which should have been very simple, but ended up with some little (and silly) strings attached. For instance, the command radius "double zone" rule that confused many players was ditched and replaced with a single corps HQ to division commander range (thanks, Wig). The facing to hex corner thing was dumped because there were no benefits and a number of sacrifices involved in facing to a hex corner, so why have it? The rest of the 2nd Edition is mainly more clarification of what we meant the first time around but were too new at this to correctly verbalize.
These rules can be applied to earlier games in the series without modification. However, one should watch for the initiative restrictions placed on leaders in the earlier games. Since we made initiative much harder to get (so as to preclude misuse), some of the restrictions on initiative applied in earlier games may be too much when used with these rules. Those should be approached on a case by case basis with the goal being a roughly similar reduction in the probability to get initiative.
A number of rules were floating about in the 1st Edition or in the addenda after it which do not appear here. Most of these were based on very early comments or reviews and we put them in to see what others thought. Most of these "changes" were either dumb or stupid and the complaints that generated them were limited to one or two individuals. Having several more years of experience, hundreds of letters, and thousands of accumulated play hours by gamers world-wide to draw on, I can lay these ideas out to rest as they should have been long ago. Those who feel these dinosaur rules "add" something should feel free to go on using them. I don't, and I don't recommend them.
Some have commented that the Fire Tables are too bloody, etc. After seeing all manner of styles of play, I stand by the tables as they are written. When troops are used in a historical fashion, historical levels of loss are generated. The players who manage to drive the butcher's bills through the roof are, without a doubt, causing their own grief by mishandling or overusing their troops. I said it in the first edition and I'll say it again here. This game system does not cushion the blow. If you do something dumb, the game system will happily hand you a bloody nose. Likewise, good play will be rewarded. Handling troops in a tactically inept or thoughtless manner will destroy your units - correct play requires every engagement to be handled as a miniature tactical problem: how do I use the terrain? My infantry? My guns? Pushing two lines together and watching them grind each other down is the wrong way to fight. Don't blame the game if you make a mistake which hands you your own head. And it will if you don't think about what you are doing. Thankfully, most players have learned a thing or two about troop conservation and tactics and don't have this problem.
2nd Edition, Revised - Designer's Notes
Aside from a significant amount of editorial work by Dave Demko, little has changed in this version of the rules. The mistakes (such as extra words) have been corrected, but little actual redesign was done.
Changes include the dropping of the standard rounding rule (which, in this series, caused more problems than it was worth), the new artillery long range effects rule (26.3a), the addition of the Procrastination rule and Hidden Movement (as optionals), and the Rod Miller multiple dice roll system (which speeds fire combat resolution enormously).
In the place of our usual rounding rule, round all fire point fractions down (upon final application) and other roundings are handled on a case by case basis. The regular rounding caused artillery "pot shots" to be resolved as 1 fire point combats (1/2 rounded to 1) and that was excessive - so much so, we added the new artillery at range rule to further deaden the effect of artillery on troop units a long ranges.
Defensive Orders (Optional)
Reprinted from Operations Magazine #3, by David Powell.
When playing a CWB game, have you ever wondered why the defensive player gets off so easily concerning the command system? After all, the guy on the attack has to do all the work. He writes the orders, rolls for corps attack stoppage, and when it all falls apart, starts over. In the meantime, the defensive player just sits there, smug in the knowledge that his orders won't fail. After all, usually, he doesn't have any.
But what if he did? Why not issue defensive orders as well? I think that forcing both sides to participate fully in the command system might result in some very interesting games. Therefore, I propose that the following rules be used, and be considered a variant of the CWB command system. All of the below rules should be considered additions to the existing rules, except the No-Orders status, which must be changed to reflect these additions.
No-Orders status is no longer defined as being an assumed defensive status. Instead, a unit that is attacked while having no orders is allowed to engage in combat for no more than two turns. By the end of this two turn limit, the force must have accepted some form of orders (via initiative or from a superior) or must immediately implement an Emergency Corps Retreat, paying the straggler die-roll penalty for same. Additionally, a force with no orders, and with no units currently engaged in any combat (except artillery fire from 4 or more hexes distance), has 2 added to the acceptance number for order acceptance, or 1 added to any initiative dice rolls made by leaders in that force. Any unit that has not accepted an order is considered to have no orders, including units that have orders currently delayed.
Defensive orders must be written for all forces that the player wishes to defend positions. Defensive orders are accepted like any other order. A defensive order needs to specify the geographic limits of the ground to be defended. Sometimes the orders may be fairly simple, as in "defend Cemetery and Culp's Hills from attack from the North." Usually, defensive orders should specify right and left flanks and some degree of the depth of defense needed. When doubt arises, create a defensive "box" by specifying limits in all four directions. All of the same conditions that apply when writing normal orders apply to writing defensive ones, except that anti-initiatives and any other restrictions on initiative are ignored. Once a force has accepted a defensive order, that force may defend the position to the best of its ability subject only to new orders or an unsuccessful Corps Defense Failure die roll.
Corps Defense Failure: Once a corps with a defensive order has been attacked by enemy infantry or dismounted cavalry units, it must start rolling for Corps Defense Failure. On every Command Phase after the triggering attack, the defensive player must roll two dice on the Corps Attack Stoppage Table, which now does double-duty as the Corps Defense Failure Table as well. Whenever rolling for a defensive order, automatically add one to the roll since defensive orders were usually easier to carry out than attacks. All normal modifiers to the table also apply to units in defensive situations, except: ignore the night modifier from the Corps Attack Stoppage Table for defensive checks. The dice are rolled and the table is consulted just as if attack stoppage were being checked. If the force passes the dice roll, nothing happens and the defensive units may continue to fight normally. If the force fails its roll, however, the force must implement an Emergency Corps Retreat in the next friendly Movement and Close Combat Phase. In addition to the normal ECR rules, the HQ must retreat at least 12 MPs (units without HQs must individually retreat until each unit has retreated 12 MPs). Furthermore, the retreat rule is fully enforced and no "doubling back" is allowed. Subsequently, the force is then considered to have no orders.
If the attacking player ceases his attack for any reason, the defensive player no longer needs to make defense failure checks. In other words, the defensive player only rolls for checks during command phases which immediately follow turns where enemy infantry or dismounted cavalry made attacks on units of the defending force. In all cases, enemy artillery bombardment alone does not trigger a defense check dice roll.
Divisions operating under defensive divisional goals are also subject to defensive checks, just as if they were corps. A division rolls on the table as if it were an independent corps of one division strength, and all normal modifiers apply. If the divisional leader is killed or wounded, apply the modifier for a killed or wounded corps commander to the dice roll.
The Use of Breastworks (Optional)
Reprinted from Operations Magazine #2, by Dave Powell.
What follows is a compromise. We don't intend to start adding countersheets to our games just to include the necessary 60-70 breastwork markers required of a mandatory rule. Hence, this optional set of breastwork rules is offered with the caveat that gamers will need to create their own markers or borrow them from other games. The counters will need to be marked on one side with an "under construction" symbol, and the completed works on the other. A completed breastworks should afford three contiguous protected hexsides which correspond to the frontal hexsides of an infantry unit in line. For want of a more complex "learning process" rule, the following should not be used in games that are occurring before January 1, 1863.
1. Who Can Build Breastworks
Only infantry units in line formation who are at least four hexes away from any enemy unit may build breastworks. Artillery and cavalry may occupy a finished breastwork hex, but may not build them alone. Cavalry lacked both the tools and inclination to do such work, while artillery had the tools but not the manpower to do so.
2. Construction of Breastworks
On any turn, at the start of the Movement and Close Combat Phase, the player places any "under construction" markers he desires, and flips over any previously placed markers (from earlier) to their breastwork side as long as the infantry unit remains qualified as described above in 1. Under construction markers on units which are not at least four hexes from the enemy may not be flipped over, but may remain in place indefinitely until the proper conditions are fulfilled. Any unit marked with an under construction marker may move, but if this leaves the hex without a qualified unit (as per 1, above) the under construction marker is removed.
3. Facing and Removal of Completed Breastworks
At the time the marker is flipped to its completed side, it may be faced as desired - once this is done the marker may never change its facing. Only one breastwork marker is allowed per hex - you may not create miniature forts using multiple markers. At the end of any Movement and Close Combat Phase in which a breastwork marker is alone in a hex, it is removed. If one side captures an enemy breastwork hex via close combat, the marker is removed. A defender who successfully repulses an attacker keeps the marker, but if both sides vacate the hex, the marker is removed.
4. Effects of Breastworks
A unit fired upon via breastwork protective hexsides alone (determined by the orientation of the marker) receives two benefits: a -1 to the die (not a column shift) on the Fire Table, and a +1 shift on the Morale Table. Furthermore, it is not required to retreat given a morale result marked with a single asterisk (*).
5. Leaders and Breastworks
Considering that these rules are optional, consider the following very optional! In any game before 1 January 1864, a leader must successfully obtain initiative before any unit in his command may construct breastworks. No anti-initiatives are ever applied to this roll. Contrary to the Second Edition rules - for this purpose only - more than one leader may roll for a given formation, i.e. if a corps commander fails, his division commanders may check also. Independent units always have permission to build and do not need initiative.
Conversion of Breastworks to Trenches
Units may convert breastworks to trenches in a game occurring after 1 May 1864.
1. The Process of Conversion. Breastworks may be converted into trenches by regularly qualified units which remain qualified for 12 hours of game time. While converting, these units may not move. If an enemy unit approaches within 4 hexes, the conversion is interrupted (see 2, below). Obviously some sort of written record will need to be kept of units attempting to convert and the elapsed time spent on conversion.
2. Interruption of Conversion. A unit that is interrupted does not lose accumulated time (unless, of course, said unit was forced from the hex in which case the breastworks themselves are forfeit) but instead may wait and resume accumulating time when it again fulfills the requirements.
3. Completion and Effects of Trenches. At the end of 12 hours - specifically at the end of the friendly Movement and Close Combat Phase - replace the breastworks marker with a trench marker. I suggest using markers similar to the breastwork ones with double lines or a different color. Trenches provide protection only from fires through the same set of hexsides the breastwork marker did. The benefits are those given in the series rules and on the standard charts and tables. Once completed, trenches are never removed from play (unless new trenches are built in the hex with a different facing, etc.) and either side may use them (given the facing of the trench marker).
Writing Your Orders: What Do They Mean?
By David Powell.
The CWB series is not, by and large, a complex beast to learn or play. It does contain an element that may give many potential players pause - written orders. While not a hex-by-hex plotting system (with all of the slow play that entails), it is necessary to issue to your corps concise instructions for movement and attacks. In effect, this is a free-form orders system governed by that ominous phrase: "use common sense..."
The above rules are a complete rewrite of the original (1986) version rules. Certain abuses have been corrected (e.g. the excessive use of initiative - using initiative to get orders which failed acceptance in the same turn, etc.).
Still, common sense is required. We do not subscribe to the old saw that common sense is anything but common. We, instead, maintain that gamers are intelligent and once they understand the thrust of a concept they can apply it to individual cases with ease. A greater understanding of the command processes in the Civil War will lead to more successful interpretation in specific instances.
Command in the Civil War had yet to become the science that's taught today in war colleges world-wide. Compared to the operations orders of the modern military, Civil War instructions between a commander and his subordinate were much more informal. Approaching Gettysburg on July 1st, 1863, Ewell and A.P. Hill (CSA Corps Commanders) were simply ordered to concentrate their troops in the vicinity of Gettysburg and "not to bring on a general engagement before the rest of the army [was] up."
Consider a much more complex order, Lee's instructions to Longstreet for July 2nd attack around the Round Tops. Lee ordered Longstreet's corps to attack en echelon with the axis of advance of the Emmitsburg Road, in order to catch the Union army in the flank. "En echelon" requires a wave-type action - units attack from the left or the right (which is designated before the attack) with a brief pause between units. This delay causes a rippling effect and is intended to confuse the enemy as to where the main thrust will occur. When Longstreet was in position, he discovered that Lee's orders no longer fit the actual situation. In game terms, Longstreet then received initiative orders to change the existing attack plan.
Finally, a third example, Lee's infamous Special Orders 191. This is the order which was lost and fell into the hands of McClellan during the Antietam Campaign alerting him to Lee's dispositions. This order, which covered the various movements of all the major elements of Lee's army down to the division level, was only a couple of pages long - 9 short paragraphs in all. Yet this order controlled the movements of more than 40,000 men, accomplishing no less than three different operations, and included logistical instructions.
In short, Civil War orders were usually informal, quickly jotted notes, which ideally covered the commander's full intent. (An ideal that was frequently not attained with the resulting confusion that implies.) Players should try to match this same goal. At the end of the game, when rereading your order log, your opponent or a third party should be able to grasp your intent without a lot of explanation. With practice, I feel that this goal is easily achievable. A well written order might specify that a given corps move along a road, attack the enemy at a given location, and specify that the objective of the attack is to capture that same given point. This order would require only a sentence to convey the whole meaning of the instruction. Only in very complex situations would anything like hex boundaries be required - a situation I have yet to see in my own games.
The most frequent abuse of the command system is not poor order writing, but rather stems from the fact that units are allowed to move and fight freely within command radius. Units within command radius can find themselves doing all sorts of things simply because there is no reason to move the HQ. After all, everyone is in command range - so why not attack? Command radius abuse is easily solved. In short, two criteria should be applied - command radius and requirement for orders. Not only must the player check for command range, but must also ask if the involved units need orders to be able to undertake the desired actions. If the answer to the second question is yes, then the next step is to ask if, indeed, these units have orders (either from higher command or via initiative) allowing units to undertake the action in question. If both of these needs are not met, the activity should not occur.
For instance, if two lines are facing each other across 3 or 4 hexes of no-man's land. One player leaves a gap in his line - opening up several flank shots. The other player figures out that even though he doesn't have orders to attack, his HQ is close enough to be able to send two divisions forward to exploit the breach. No need for orders, he'll just launch a quick raid, wreck some troops and return. Alas, unless this player can roll and get initiative (or the army commander is there to give a quick order), this attack shouldn't happen. They are in command radius, but the units do not have the right instructions. Both conditions are not met.
For clarification, I will attempt also to provide more in-depth definitions of various order types:
Complex Orders should be very broadly interpreted. Not only do complex orders cover easily defined attacks such as frontal assaults - Pickett's charge is a very clear-cut case of an attack order - but also movement that could bring about an encounter with the enemy. Any movement towards an objective not currently or last held by friendly units should be construed as a complex order and handled appropriately.
For example, assume that neither player has occupied Little Round Top. If either player wishes to send troops to that location and defend it, such orders would still be complex orders since the hill was not previously held by friendly forces and such movement might initiate combat with enemy units which may also attempt to occupy the place. If there is any real doubt about the combativeness of a particular movement, make it complex. Imagine that the same doubt is mirrored in the real-life commanders those orders are issued to and that they are preparing to meet the enemy.
Simple Orders will be less frequently used. Simple orders are designed to allow troops to be shifted from one position to another within friendly lines, etc. Arriving reinforcements, for example, often are ordered simply to report to the army HQ. Assigning these units a position in a defensive line, so as to shift other troops elsewhere, is a simple order. The key questions to ask here are: 1. Is the end-point of the route still in friendly hands, and 2. Does the route specified involve conflict? An order directing a command to move between friendly controlled points, but specifying a route that is blocked by enemy forces, requires a complex order, not a simple order. As a rule of thumb, a simple order that has its instructions negated by enemy activity is considered unfulfillable and new orders must be issued. For example, suppose the Federal player controls Little Round Top - hereafter LRT - Cemetery Hill, and the Taneytown Road between those two points. The Union player orders some troops off LRT and moves another force south along the road to occupy LRT instead. Suddenly, the CSA player captures LRT - which was just left vacant - and the Union force moving south along the Taneytown Road cannot finish its original simple order without attacking to recapture LRT. The current order cannot be completed. New orders or initiative must be used in order to allow an attack on LRT. Note that simple orders do not completely prohibit combat - if the above force had been able to occupy LRT without contest, but then was attacked, there would be no problem in fulfilling the order as written. As a quick rule of thumb, simple orders prohibit offensive not defensive combat.
No Orders is a condition rather than a positive order. Troops without any orders should be considered to be defending in place. Forces without orders are still allowed considerable latitude in order to fight off attacks. Implied in this condition is the ability to counterattack on a limited scale, which is why the rules state that units do not need orders to move and fight. It is fully within the scope of the rules to allow units, once attacked, to counterattack to recapture lost ground. Of course, units under orders (complex or simple) in this situation are still obligated to try to fulfill (or alter) previous instructions. The mere act of being assaulted while under orders does not automatically void existing commands. Once attacked, however, units without orders should be free to move and fight without restriction up to the limits of command radius. Of course, any action which calls for the movement of the Corps HQ must be triggered through orders or emergency corps retreat. In trying to decide if a given combat is legal in the current framework of a unit's orders, remember that a no-orders force cannot initiate attacks in the larger sense of that word. They can fire during "offensive" fire and conduct close combats. They can conduct counterattacks and other such limited offensive actions needed to defend their position.
Divisional Goals represent a different kind of order and are most useful for detached missions. Often, players won't want to send an entire corps off on some flank protection or other such mission, but will still want a force to guard against emergencies. Divisional goals should contain more detail than a corps order. A corps is always limited because its HQ is unable to move without positive orders and, therefore, operations are ultimately limited by command radius.
A divisional goal has no such self-governing mechanism. Therefore, a division with a goal to attack or defend a certain locale should have specific geographic limits placed upon its operations. For instance, a division assigned to defend a road between points X and Y would be unable to advance or retreat past X or Y without new orders, initiative or an emergency corps retreat.
Issuing orders is only part of the job. Once orders are implemented, the player is expected to carry them out - even if events have changed enough to make a player regret his earlier choices. Usually, the most frustrating of orders are attacks which looked brilliant when issued, but now seem more dubious of success. The varying amounts of pressure a player brings to bear while carrying out such orders can cause controversy at the game table. However, we do not want to impose any mandatory restrictions on exact percentages engaged or loss levels - rejecting these solutions as "gamey." No Civil War general sat down with some master chart that told him how much pressure to bring to bear on an objective. He would tend to press the issue as much as he could without endangering his command. [Thereby leaving himself open to bitter debate and finger pointing after the war...] In game terms, the player is obligated to make some effort to put troops into combat as long as the order holds. Piecemeal brigade attacks or several brigades engaging only at two hex range seem to me to be a fine re-creation of foot-dragging. In my own reading, I can find several instances where such "attacks" were "pressed," usually to the dismay of the higher command. However, this caution may not suit some players. Certainly it is annoying to the defender, who is watching a disaster in the making for the enemy, to realize the guy has found a way to wriggle free. For those players, I suggest the following.
When any order is written, indicate with a number from 1 to 3 how aggressively it is to be followed. For instance, a player who assigned a 1 to an attack is allowed to press very lightly - perhaps one brigade at a time or the two-hex range option. A player who commits himself to a 3 is doomed to a full scale assault, no matter what the odds. A 2 would commit a player to the middle ground, perhaps using 50% of his force at a time. This number doesn't affect acceptance in any way. Changing intensity value would require a new order or initiative. [Note: For the rules lawyers out there who are now planning to issue 1s to everyone in order to have maximum flexibility, not that the above is also the hardest a force can attack at a given level. Giving a force a 1 does not allow it to attack from the one brigade level all the way up - it confines the attack to the light pressure and the light pressure alone.]
Alternatively, a player could jot down a descriptive word or two indicating the intended ferocity of his assault. These would range from "probing attack" to "all out attack." Using a word as opposed to a number would still limit the player to some prearranged guideline, but allows somewhat greater latitude in interpretation. Hopefully, this would result in a middle ground where the player has some guidepost, but is also allowed some degree of discretion concerning his effort. Of course, the players involved will need to discuss this situation, decide if they have a problem, and then choose a method for dealing with it. Note that both of these solutions are offered as suggestions only, and should not be construed as "official." Personally, I suspect that few players actually have a problem with this question.
In closing, a few words need to be said about trust as it applies to the game. A certain minimal amount of trust is expected from all players - to obey orders, etc. Many die rolls are to be made in secret and players should feel comfortable concerning the honesty implied in these rolls. Personally, I care very little for playing a game where tension or suspicion exists, and make it a point not to repeat games against such opponents. There is no mechanism in our games to prohibit cheating and it is easy to circumvent the system if one tries. However, I feel that creating such an airtight structure would also produce games I would have very little interest in playing - and I see little point in trying. All of the games we put out will continue to demand a certain amount of honesty and trust between players. It has been our experience that this presents little problem for the vast majority of our customers.
I hope these extended notes on the command system as a whole provide gamers with better insight into why the system evolved as it did, as well as a better idea of how to apply the thing if they run into problems. Much of the fascination inherent in the Civil War is due to the degree in which it was a clash of personalities in addition to being a vast armed struggle. Our hobby purports to "put you in the driver's seat" (so to speak) and give you some sense of the commander's job. While board games can succeed at this goal only in a limited fashion, much can be done, and I think the CWB accomplishes much in this direction.
Extended Movement / Hidden Movement (Optional)
Reprinted from Operations Magazine #2, by David Powell.
One of the most common complaints about board games is that achieving true surprise over your opponent is impossible. After all, he's watching every move you make. Jackson's dramatic flank march at Chancellorsville is a waste of time, and what fool would go to the lengths Longstreet did at Gettysburg, just to avoid being seen?
The problem stems from the fact that even though you may have completely duped your opponent; once you start movement - with only six movement points - you're hardly going to turn up in his rear before he issues corrective orders. He may have some trouble getting new instructions adopted, but in the end, its a good bet that at least somebody will show up to hold off your flanking column until the rest of his reserves arrive.
Of course, if you had 20 or 30 MPs to spend in one turn, you could put troops into column, slip around on an unguarded road, go back into line, and hit him a devastating rear attack - all in one turn. Imagine the bellows of anguish that this would elicit from the other side of the map!
The basic thrust of this variant calls for a player to be able to issue orders to a force which allow the command in question to remain quietly in one place on the map - seemingly inoffensive and meek. All the while, the force would actually be accumulating movement points, a full allowance for each turn that goes by. Then, at the time of his choosing, the acting player could suddenly set this command in motion, expending all of its 'saved' MPs in one devastating turn. Of course, a number of rules will be set forth concerning visibility, etc., and to provide for discovery.
In order to reap the benefits of this rule, the player would need to observe the following restrictions:
- The player must issue an order to a command that specifies the directed force as making a 'surprise move.' All elements affected by this order must be listed (say, all of 1 Corps plus J/2 attached) and a detailed route. Roads work best here, since they are easier to specify.
- Once the order is accepted, the force cannot physically move or conduct activities like straggler recovery or ammo resupply. They must remain in place in line formation. They may not conduct fire combat of any type.
- Each Movement and Close Combat Phase commencing with the phase immediately following order acceptance, the phasing player must roll a die each surprise moving force, and consult the MP Accumulation Table. The result will either be a pass - indicating that all of the turn's MPs may be saved and used later - or a fail - which means the that the march has been discovered. At the beginning of any Movement and Close Combat Phase, the player may forego this die roll and elect to execute the march voluntarily, at which time the force resumes normal functioning - the surprise order is then carried out in a normal turn by turn manner. This initial movement may continue until all accumulated MPs have been expended or until the lead element reaches a "blocked hex." (See below.)
Upon discovery, the force immediately moves along the indicated route until all accumulated MPs are expended or its lead element reaches a blocked hex - exactly as if the player had voluntarily elected to execute the movement.
Conditions and Definitions
Concealed Movement. When the phasing player actually begins the movement of the surprise force - either by choice or discovery - he must follow his assigned route until either all the accumulated MPs have been expended or he reaches a blocked hex. A "blocked hex" is defined as any hex at or within two hexes of an enemy infantry, cavalry, or artillery unit. Furthermore, a "blocked hex" is considered reached if the phasing player, while following his route, enters a hex that can be seen by an enemy unit or leader in keeping with standard LOS and current visibility. Once the blocked hex is reached, the moving player may move the surprise units 6 more MPs or the remainder of their accumulated MPs - whichever is less. He may conduct close combat and normal fire combat.
Enemy Interference. If the enemy attacks any unit of a surprise force with artillery fire at five hexes or greater, the combat is resolved normally, except that the defending player secretly ignores the result and does not record any straggler or casualty losses. Morale results are also ignored, but the defending player can mark his units with appropriate results (Sh, Dg, etc.) and execute any retreats to preserve the illusion. Units may recover morale and return to their previous locations - the only kind of movement allowed in exception to #1 above. When the owning player initiates his surprise move, simply remove any of these 'sham' markers and return units to their proper locations.
If the enemy attacks any surprise unit with units at four hexes or less, the surprise move is triggered. Additionally, any enemy combat unit (infantry, cavalry, or artillery) that ends its movement at or within two hexes of a surprise unit also triggers the order. This trigger is handled in the following manner:
- The surprise player informs his opponent that a surprise move has been triggered. Any attacks against surprise units are ignored, but enemy units may not pass through or move into hexes occupied by surprise units. They may fire through such hexes.
- At the beginning of his Movement and Close Combat Phase, the surprise player immediately executes the surprise order subject to the following conditions:
- A. He must follow the designated route.
- B. He may only expend 1/2 of his accumulated MPs. He may not expend the additional 6 MPs he would normally get for that turn. He may not stop short of expending 1/2 of his MPs unless he reaches a blocked hex - in which case all movement ceases. All additional MPs over the 1/2 allowed are lost.
Voluntary Cancellation. A player may change a surprise force's order during a normal Command Phase by sending it new orders or by initiative. When sending new orders, arrival time is calculated by adding the expected amount of accumulated MPs to the actual distance to the force's HQ. For example, if the 1st Corps HQ is 20 MPs away from the Army commander - normal time delay would be two turns. However, 1st Corps has accumulated 12 MPs so another two turns must be expended to deliver the order - for a total of 4 turns. Initiative requires no such time delay calculation.
Once the time delay has passed, the surprise force begins to check for acceptance normally. Until the new order is accepted, the surprise order must be followed. At any time during this stage, the player could still choose to implement the surprise order, but would continue to roll for the newly received one.
Once he has succeeded in changing his orders, the player has two options: He may execute the old surprise order as it has progressed so far, and then begin to execute the new order's instructions. Alternatively, he may reverse the order - rolling on the MP Accumulation Table to subtract MPs from the accumulated total - in order to preserve secrecy. Once the total is zero, he could then start executing the new orders. If discovered, however, he would still have to immediately expend the accumulated MPs as described in Enemy Interference above.
Surprise Move Collision. It is possible, though unlikely, that both sides will attempt to use portions of the same route for a surprise move at the same time. In these cases, the players can either allow the player who started his move first to complete all of it and consider the other player's move cancelled with accumulated MPs lost. Or, both players can conduct a semi-simultaneous move in the following manner:
- Player A begins his move and indicates his route.
- Player B checks for any overlap with his own move, and if finding any, informs A.
- A now moves his force 6 MPs.
- B does the same.
- Both players continue alternating this pattern until either all MPs are expended (if one side has more accumulated, he may simply finish his move at the end of the alternation) or they come within 6 MPs of each other. At that point, both forces are done moving and the normal sequence of events resumes. Note that in this instance, the non-phasing player actually moves his force during his opponent's phase. These units may not move again in their own following Movement and Close Combat Phase - consider them already moved. The phasing player, however, may move freely in his next phase - giving him a slight advantage, getting the jump on things so to speak.
Either method may be used as long as both players agree beforehand.
Initiative Use. In addition to the use of initiative to cancel or supersede an order, players may use their leaders to alter a specified route in order to avoid a blocked hex. If, as he expends his accumulated MPs a player discovers he is about to enter a blocked hex, he can have the ranking leader of the force (not a subordinate) roll for initiative to alter his route. If successful, the player may deviate from the specified route in order to avoid the blocked hex. He must announce his intended detour route, and his detour must seek to regain the specified route as rapidly as possible. Note that each avoidance of a blocked hex requires a separate initiative roll. Failure to receive initiative means that the force enters the blocked hex and follows the procedure above. Note that changing the objective or the orders as a whole via initiative would still need to be done in the normal Command Phase - not during this detour procedure. Only the route may be modified in this manner. As an added bonus, allow any force that is accompanied by at least one cavalry brigade to modify this detour initiative roll by +1 to the dice.
Forced Marches. Players may also add forced march MPs onto the accumulated MP total, up to the four max each turn, as per the normal rules. Of course stragglers should be checked for normally, but rolls should be made secretly to preserve the surprise. Note that even if a surprise move is cancelled and a unit is subtracting MPs, it still must make straggler checks if using forced marching.
Visibility Limits. A maximum visibility limit of 20 hexes is imposed. In the series, no visibility limits are set during clear weather as no unit can ever fire more than 10 hexes. Here, a special limit needs to be imposed as a limit to long range observation which would be hindered by woods, buildings, and brush too small to be printed on the map as well as the ever present haze. In situations where weather intrudes, games will specify other (shorter) maximum visibility limits.
General Comments
The above rule simulates wide flanking marches such as Longstreet's and Jackson's in an admittedly abstract manner. Yet, it adds a real measure of suspense. Suddenly, control of high ground like Little Round Top or Cemetery Hill becomes critical - providing vantage points to keep an eye on the bad guys. Cavalry, with fast movement and more latitude in using divisional goals, will be used in their historical roles by alert commanders - to screen flanks and to cover hidden roads.
In order to prevent too much tedious plotting, I suggest specifying road routes where ever possible. In some instances, it may be necessary to list specific hexes to avoid disputes. Another clue would be to conduct approach movements at night, when visibility is nil and only the actual presence of enemy troops need be worried about.
The two hex radius of enemy forces represents the posted pickets of those units. These pickets would rarely be placed further than four hundred yards from their parent units. Again, this makes cavalry especially useful in screening flanks - these brigades serve as tripwires against enemy forces.
The table is provided to make surprise marches more difficult to achieve the greater the distance that is attempted. Hence, the longer the march, the more the risk of premature discovery, and subsequently the more separated and exposed to piecemeal destruction one's forces will be. While somewhat abstract, this increasing risk simulates some of the actual burden borne by commanders who attempted such actions, most notably Robert E. Lee.
I think that this rule will generate some real surprises in play, while still avoiding much of the onerous burden of SiMove systems. Nothing is more dramatic than watching your force - in a burst of energy - zip past an enemy line and plunge into its exposed flank and rear.
Some players may feel that as long as they can see the enemy, how can he get up and leave? To a certain extent this is an abstraction, but also remember that a number of ruses were used to good effect during the war. Events such as the old 'build a bunch of campfires and then slip away in the dark' and 'drag some branches around to kick up some dust' tricks were effectively employed. Who can forget John Magruder's fine acting at Yorktown and again in front of Richmond, facing McClellan? Nathan Bedford Forrest once convinced a Union commander he was badly outgunned by having one artillery battery circle the same stand of trees repeatedly. That same Federal commander - who was very inexperienced - then asked Forrest's advice on whether he should surrender or not! All in all, if your enemy slips one over on you, simply chalk it up to the fortunes of war and drive on. Stranger things have happened.
MP Accumulation Table
| Roll | Turn 1 | Turn 2 | Turn 3 | Turn 4+ |
|---|---|---|---|---|
| 1-3 | P | P | P | P |
| 4 | P | P | P | F |
| 5 | P | P | F | F |
| 6 | P | F | F | F |
-1 from die roll if during a full or partial night turn. P = Pass, F = Fail
PART THREE: SERIES CHARTS AND TABLES
Series Charts and Tables (from the v3.2 Series Rules book)
Command Points
| Leader Rating | 4, 3 | 2, 1 | 0 |
|---|---|---|---|
| Points Available | 16 | 12 | 8 |
Command Radius
- Corps HQ to Division Leader - 8 MP
- Division Leader to Brigade - 4 MP
Order Delivery
Every 10 MP or portion of 10 MP between sender and receiver = 1 turn. (# of Leader Movement Points / 10 = # of Turns, round up, always.) Check for acceptance on the turn the above number of turns from now.
Initiative Table
| Leader Rating | 4 | 3 | 2, 1 | 0 |
|---|---|---|---|---|
| Success | 9 | 10 | 11 | 12 |
| Loose cannon | 2 | 2 | 2 | 2 |
Order Costs
- Method: Oral - 3; Written - 5
- Type: Complex - 3; Simple - 1
Acceptance Table
Acceptance Value: Leader Rating (Sender) + Leader Rating (Receiver*) + Method + Type. *Army HQ Rating = 2
- Method: Oral -1; Written +0; In Person +2
- Type: Complex -2; Simple +0
Shift LEFT one column if Receiver has an Accepted order or an order in Delay.
| Dice | -3 | -2 to -1 | 0 to 1 | 2 to 3 | 4 to 5 | 6 to 7 | 8+ |
|---|---|---|---|---|---|---|---|
| 2 | Dt | Dt | Dt | Dt | Dt | Dt | Dt |
| 3 | Dt | Dt | Dt | Dt | D2 | D2 | D2 |
| 4 | D2 | D2 | D2 | D2 | D1 | A | A |
Result:
- A - Immediate Acceptance
- D1 - Die roll each subsequent turn for Acceptance - 1 or 2 on one die to Accept
- D2 - Die roll each subsequent turn for Acceptance - 1 on one die to Accept
- Dt - Order distorted, thrown away.
Optional: No orders can be sent to this command until a 6 is rolled (on one die). Roll once each turn in the Delay Reduction Segment.
Stoppage Table (Corps Attack Stoppage)
First table: cross-index the Number of Wrecked Divisions (rows; +1 if original Corps Leader has been lost) with the Number of Divisions in Corps (columns) to get the Stoppage Value column (1 to 4) used on the second table. A dash means no entry.
| Wrecked Divisions | 7 | 6 | 5 | 4 | 3 | 2 | 1 |
|---|---|---|---|---|---|---|---|
| 0 | 1 | 1 | 1 | 1 | 1 | 1 | 1 |
| 1 | 1 | 1 | 1 | 2 | 2 | 2 | 3 |
| 2 | 1 | 1 | 2 | 2 | 2 | 3 | 4 |
Second table (Stoppage Value):
| Leader Rating | 1 | 2 | 3 | 4 |
|---|---|---|---|---|
| 4, 3 | 3 | 5 | 8 | 10 |
| 2, 1 | 3 | 6 | 9 | 11 |
| 0 | 4 | 7 | 10 | 12 |
Roll number or greater on two dice to pass.
Die Roll Modifiers: -3 at Night.
Optional Defensive Orders: +1 Defense Order (ignore -3 for Night).
Close Combat Resolution & Odds Table
Sequence of Events:
- A) Attacker moves into defender's hex at +1 MP cost.
- B) Defender's Fire Combat. Apply any losses and stragglers to Attacker.
- C) Attacker's Fire Combat. Apply any losses and stragglers to Defender.
- D) Attacker checks morale with -6 modifier. If required to retreat, combat ends.
- E) Defender checks morale with -4 modifier. If required to retreat, the combat ends and the defender makes an additional morale check (w/o the close combat modifier.)
- F) If none of the above ends the combat, resolve the Close Combat using the Odds Table below. Loser must retreat (2 hexes if defender, 1 hex if attacker.) Again, if the defender must retreat, he must make an additional morale check.
Additional morale checks are only required of losing defenders and do not use the close combat morale modifiers. The close combat modifiers are used in addition to any others that might be applicable.
Odds (Die Roll vs. odds):
| Die Roll | 1-2 or less | 1-1 | 2-1 | 3-1 | 4-1 or more |
|---|---|---|---|---|---|
| 1 | D | D | D | D | D |
| 2 | D | D | D | D | 1/2 A |
| 3 | D | D | D | 1/2 A | A |
| 4 | D | D | 1/2 A | A | A |
| 5 |
Die Roll Modifiers: +1 Defender is wrecked Brigade; +2 Defender is wrecked Brigade of wrecked Division; -2 Attacker is wrecked Brigade.
Result:
- D = Defender wins. Attacker retreats 1 hex.
- 1/2 A = Roll again, 1-3 = D, 4-6 = A
- A = Attacker wins. Defender retreats 2 hexes and makes additional Morale Check.
Unit Strength Point Values for Odds:
| Unit Strength | AA or more | AB | A | B | C or Artillery |
|---|---|---|---|---|---|
| Point Value for Odds | 6 | 5 | 4 | 2 | 1 |
Defender is x2 in Sunken Road or Trench (if applicable). Low Ammo, DG Morale, and Formation have no effect on strength. Strength over AA has no additional effect. ** Routed defending units automatically Rout (Back 2, Straggle 3).
Formation Effects
| Type Unit | Formation | Fire Combat | Movement |
|---|---|---|---|
| Infantry | Line | Yes | Yes |
| Infantry | Column | No | Yes, may use roads |
| Cavalry | Dismounted | Yes | Yes, as infantry |
| Cavalry | Mounted | No | Yes, may use roads |
| Artillery | Unlimbered | Yes | No |
| Artillery | Limbered | No | Yes |
Order Log
On any blank sheet of paper, preferably lined, make the following column headings: Order Number, Arrival Time, Receiver, Sender, Type and Method, Acceptance Status. Allow one line per order and enough room per column to record the required information (about one inch will do.)
Stacking
In one hex: Max Fire: 1x A Fire Level and/or 5 Gun Points. Max Stacking: 3x A Fire Level and/or 10 Gun Points.
Morale State Effects
| Type | Fire | Movement | Close Combat |
|---|---|---|---|
| Blood Lust | NE | NE | Yes |
| Normal | NE | NE | Yes |
| Shaken | NE | NE | No |
| Disorganized | 1/2 | 1/2 | No |
| Routed | No | Special* | No |
- See 24.1b
Fire Determination Chart
Small Arms (# = Normal Fire Points; (#) = Plus Weapon Fire Points):
| Fire Level | Close Combat | Range 1 | Range 2 |
|---|---|---|---|
| A | 8 (12) | 4 (6) | 2 (2) |
| B | 4 (6) | 2 (3) | 1 (1) |
| C | 2 (3) | 1 (2) | 1/2 (1/2) |
Artillery:
| Gun Points | Close Combat | Range 1 | Range 2-3 | Range 4-6 | Range 7-8 | Range 9-10 |
|---|---|---|---|---|---|---|
| 5 | 10 | 5 | 3 | 1 | 1/2 | 1/2 |
| 4 | 8 | 4 | 2 | 1 | 1/2 | 1/2 |
| 3 | 6 | 3 | 2 | 1/2 | 1/2 | 0 |
| 2 | 4 | 2 |
Artillery fire points used on wagon and artillery targets is x1 at all ranges. Artillery fire points used on all other target types are x1 up to (and incl) 3 hexes, fires at 4 hexes or more at these targets are x1/2.
Fire Combat Table
Combat Table Modifiers (Column Shifts). Each line is used only once, even if multiple conditions on the line are true.
- -1 Up Slope or Extreme Slope, in either case Firer must be at lower elevation than target
- -1 Target in Sunken Road or Trench
- -2 Night
- -1 One or more Firers is Low Ammo
- +2 Target is Column, Limbered, Flank, Disorganized, or Routed
- +3 Mounted Target
- -3 Defender's fire in Close Combat, if attacked from a Flank
Fire Combat Table Notes:
- "-" = No Effect
- m-2 = Morale Check, up 2
- m-1 = Morale Check, up 1
- m = Morale Check
-
= # Casualties, Straggler Check, and Morale Check
On 1/2 Loss... Die 1-3: Round Down (1 1/2 becomes 1); 4-6: Up (1 1/2 becomes 2).
Total Fire Points (columns) by Dice (rows):
| Dice | <1 | 1 | 2 | 3-4 | 5-6 | 7-8 | 9-11 | 12-14 | 15-17 | 18-20 | >20 |
|---|---|---|---|---|---|---|---|---|---|---|---|
| 2 | - | - | - | m-1 | 1/2 | 1/2 | 1 | 1 | 1 | 1 | 1 1/2 |
| 3 | - | - | m-2 | m-1 | 1/2 | 1 | 1 |
(On the printed chart, rolls of 11 and 12 are marked with the Low Ammo marker; see 20.5e.)
Leader Loss Check: If stack takes a casualty, roll two dice for each leader in the stack. 2 = Leader is Killed; 3-10 = No Effect; 11-12 = Leader is Wounded.
Straggler Table
Fire Loss (1/2 - 1), by Morale rating of unit:
| Die | A | B | C | D | E |
|---|---|---|---|---|---|
| 1 | - | - | - | 1 | 1 |
| 2 | - | - | - | 1 | 1 |
| 3 | - | - | 1 | 1 | 1 |
| 4 | - | 1 | 1 | 1 | 2 |
| 5 | - |
Fire Loss (1 1/2 or more), by Morale rating of unit:
| Die | A | B | C | D | E |
|---|---|---|---|---|---|
| 1 | - | 1 | 1 | 1 | 2 |
| 2 | - | 1 | 1 | 2 | 2 |
| 3 | - | 1 | 1 | 2 | 2 |
| 4 | 1 | 1 | 2 | 3 | 3 |
| 5 | 1 |
Die Roll Modifiers: +1 to die if unit is DG, Mounted, or hit in the flank. +2 to die if unit is Routed, from a wrecked brigade or fire is at Night. Fire Result (which determines table used) is BEFORE rounding. Fire results less than 1/2 do not require straggler checks. Notes: # = Strength Points Lost to Stragglers.
Gun Loss Table
Roll for any artillery unit that must limber in a ZOC or in close combat. Note that whenever unlimbered guns must retreat, they must limber to do so.
| Die | Gun Points Lost |
|---|---|
| 1-2 | 0 |
| 3-4 | 1 |
| 5 | 2 |
| 6 | 3 |
Straggler Recovery Table
Strength Points Recovered (Die Roll; # = die roll). See Restrictions (20.2) [sic; as printed - see 21.2]. Roll one die for each marked brigade. +2 to die at night.
| Morale | 0 | 1 | 2 |
|---|---|---|---|
| A | 1 | 2-5 | 6 |
| B | 1-2 | 3-5 | 6 |
| C | 1-3 | 4-6 | |
| D/E | 1-4 | 5-6 |
Morale Table
Results columns: Blood Lust | No Effect | Shaken | Shaken, Back One* | Disorganized, Back One* | Disorganized, Back Two, Straggle One** | Routed, Back Two, Straggle Three**. Roll two dice (red die first digit, white die second digit) and find the column along the modified row. A morale level letter (A-E) is shown at the row on which that morale level starts; rows above A are reached by upward row shifts and rows below E by downward shifts.
| Row | Blood Lust | No Effect | Shaken | Shaken Back One* | Disorganized Back One* | Disorganized Back Two, Straggle One** | Routed Back Two, Straggle Three** |
|---|---|---|---|---|---|---|---|
| (top row) | 11-16 | 21-54 | 55-62 | 63-64 | 65 | 66 | |
| A | 11-15 | 16-53 | 54-62 | 63-64 | 65 | 66 | |
| 11-14 | 15-53 | 54-62 | 63-64 | 65 | 66 |
Notes:
- * Units stacked with unlimbered artillery (not guns alone in a hex) or those in a sunken road or trench may ignore the retreat result.
- ** Units qualifying above must retreat. Unlimbered artillery MUST limber to retreat (even one hex), and must roll on the Gun Loss Table if in an EZOC or in a Close Combat when forced to do so.
- Back # - Retreat given number of hexes.
- Straggle # - Lose given number of Steps to stragglers.
Morale Table Modifiers: Row Shifts. "+" is UP on table, "-" is DOWN. Each line is used only once, even if multiple conditions on the line are true.
- +3 Unit is in Sunken Road or Trench
- +1 Unit is Stacked with unlimbered Artillery (does not apply to artillery units themselves)
- +(Rating-1) Leaders
Top Unit in Stack is...
- -1 Low Ammo
- -1 Shaken
- -3 Disorganized
- -3 at Night
- -4 Wrecked Brigade
- -4 Close Combat, Defender
- -6 Close Combat, Attacker
- -6 Column, Limbered, or Flank Target
- -6 Wrecked Brigade of a Wrecked Division (used in the place of the -4 above)
- -6 Routed
Blood Lust Morale Check: Dice 11..43 = No Effect; 44..66 = Remove Blood Lust.
Series Charts and Tables Sheet v3.0 (earlier sheet; superseded in part by v3.2)
The separately issued "Civil War, Brigade Series v3.0 - Charts & Tables" sheet carries the same Fire Point Determination, Fire Combat, Straggler, Morale, Odds, Gun Loss and Straggler Recovery tables as the v3.2 charts above (with the additional odds-table notes "An AB stacked with artillery would be worth 6 points" and "Defender is x2 in Sunken Road or Trench (if benefit is given)"; and the Odds columns printed as 1:2, 1:1, 2:1, 3:1, 4:1+). Its close combat sequence is printed as: 1. Attacker moves into defender's hex at +1 MP cost. 2. Simultaneous Fire Combat, ignore morale results such as m-1, m-2 or m. Regardless of unit destruction at this point, the following morale checks must still be made by remaining units. 3. Attacker checks morale using the -6 modifier. If required to retreat, combat ends. 4. Defender checks morale using the -4 modifier. If required to retreat, the combat ends and the defender makes an additional morale check (w/o the close combat modifier.) 5. If none of the above end the combat, combat is resolved using the Odds Table below. Loser must retreat (2 hexes if defender, 1 hex if attacker.) Again, if the defender must retreat, he must make an additional morale check.
The v3.0 sheet's command-system tables differ from the v3.2 versions printed above, as follows (the v3.2 SOURCE note states that v3.2 supersedes v3.0 including updated charts):
v3.0 Command Point Table
| Leader Rating | 4, 3 | 1, 2 | 0 |
|---|---|---|---|
| Cmd Points Avail | 20 | 15 | 10 |
v3.0 Initiative Table
| Initiative Points | 0 or less | 1, 2 | 3 | 4 or more |
|---|---|---|---|---|
| Dice Roll | 12 | 11 | 10 | 9 |
Initiative obtained if two dice roll is greater than or equal to the value given. A roll of "2" generates a loose cannon, see 10.2g.
v3.0 Order Costs Chart
Sum is Order Cost in Command Points.
- Method: Oral 2; Written 5
- Force: Force 0 = 0; Force 1 = 2; Force 2 = 3
- Type: Complex 3; Simple 1
v3.0 Order Delivery
Number of Leader Movement Points / 10 = # of Turns (Round up, always). Check for acceptance on the turn the above number of turns from now.
v3.0 Acceptance Table
Acceptance Points calculated as follows: Sender's Leader Rating + Receiver's Leader Rating + Method + Force + Type.
- Method: AO -1; AW 0; IPV +2
- Force: F0 -1; F1 0; F2 +1
- Type: Complex -2; Simple 0
Shift one column LEFT if receiver currently has orders of any type. The Dt / D1 / D2 / A result grid is identical to the v3.2 Acceptance Table above (columns: -3 or less, -2 to -1, 0 to 1, 2 to 3, 4 to 5, 6 to 7, 8 or more). Notes: A - Order is Accepted. D1 - Die roll each turn for acceptance: 1 or 2 on one die to accept. D2 - Die roll each turn for acceptance: 1 on one die to accept. Dt - Order is distorted and thrown away. v3.0 Order Log headings: Order Number, Arrival Time, Receiver, Sender, Type, Method, Force, Acceptance Status.
v3.0 Corps Attack Stoppage Table
Number of Wrecked Divisions (+1 if Corps Commander is lost) by # of Divisions in Corps:
| Wrecked | 10 | 9 | 8 | 7 | 6 | 5 | 4 | 3 | 2 | 1 |
|---|---|---|---|---|---|---|---|---|---|---|
| 0 | 1 | 1 | 1 | 1 | 1 | 1 | 1 | 1 | 1 | 1 |
| 1 | 1 | 1 | 1 | 1 | 1 | 1 | 2 | 2 | 2 | 3 |
Leader Rating by Stoppage Value (1 to 4): 4,3: 3, 5, 8, 10; 2,1: 3, 6, 9, 11; 0: 4, 7, 10, 12. Notes: -3 from dice for rolls made at night. Ignore the above for Defensive Orders at night. Roll # or greater to pass check, otherwise corps attack stoppage occurs. In games where divisions are acting independently or corps structure does not exist use 10.3d.
PART FOUR: BARREN VICTORY LOSS CHARTS
Loss Charts - Barren Victory: The Battle of Chickamauga
Transcription note: The Loss Charts are printed as rows of boxes. They are reproduced here with one row per unit: Unit ID, Brigade (leader name), printed Morale rating, and then the boxes at each Fire Level (AAB, AA, AB, A, B, C), read left to right. "■" is an ordinary box and "□" is the lightly printed box that appears in some positions on the original chart (see the "wrecked mark" in series rules 20.7 and 22.0). A row showing only boxes (no morale or fire levels) is a division's row, used to mark divisional wrecked status (series rules 20.7b). "(opt)" marks optional units/divisions. See series rules 6.6 and 20.7 for use of the charts.
Confederate Loss Chart
| Unit ID | Brigade | Morale | Fire Levels and boxes |
|---|---|---|---|
| J/C/P | Jackson | A | AB ■■■ ; A ■■■■■ ; B ■□■■ ; C ■■■ |
| M/C/P | Maney | C | AB ■■ ; A ■■■■□■ ; B ■■■ ; C ■■■ |
| S/C/P | Smith | B | AB ■ ; A ■■■■■□ ; B ■■■ ; C ■■■ |
| St/C/P | Strahl | C | AB ■ ; A ■■■■■□ ; B ■■■ ; C ■■■ |
| W/C/P | Wright | B | AB ■■■ ; A ■■■■□■ ; B ■■■ ; C ■■■ |
| C/P | Cheatham (division) | ■■■□■■ |
Union Loss Chart
| Unit ID | Brigade | Morale | Fire Levels and boxes |
|---|---|---|---|
| Wldr | Wilder | B | AAB ■■■■ ; AA ■■■■■ ; AB ■□■■■■ ; A ■■■■■ ; B ■■■ ; C ■■■ |
| 1/1/14 | Scribner | C | AA ■■■ ; AB ■■■■■ ; A ■□■■■■ ; B ■■■ ; C ■■■ |
| 2/1/14 | Starkweather | B | AB ■■■■■ ; A ■■■□■■ ; B ■■■ ; C ■■■ |
| 3/1/14 | King | D | AB ■■■ ; A ■■■□■■ ; B ■■■ ; C ■■■ |
| 1/14 | Baird (division) | ■■□■ | |
| 1/2/14 | Beatty | C | AB ■ ; A ■■■■■□ ; B ■■■ ; C ■■■ |