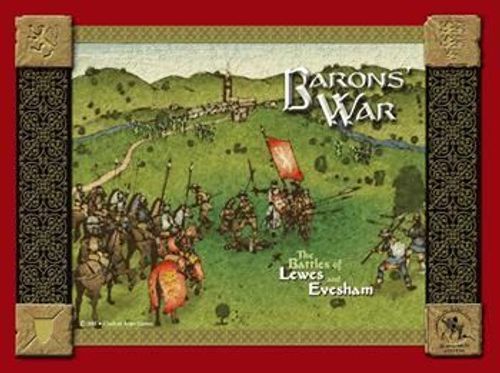
Barons' War: The Battle of Lewes and Evesham
Barons' War: The Battle of Lewes and Evesham Rulebook
Table of Contents
Table of Contents
- 1.0 Introduction
- 2.0 Game Components
- 2.1 Game Counters
- 2.2 Game Map
- 2.3 Game Scale
- 2.4 Game Dice
- 3.0 Sequence of Play
- 4.0 Command Chit Replacement
- 5.0 Command Chits
- 6.0 Leaders
- 7.0 Movement
- 8.0 Fire Combat
- 9.0 Melee Combat
- 10.0 Cavalry Charges
- 11.0 Attack Continuation
- 12.0 Morale
- 13.0 Command Effectiveness
- Exclusive Rules
- 14.0 Scenarios
- 15.0 Game End and Victory Conditions
- 16.0 Designer Notes
- 17.0 The Historical Battles
- 18.0 Arms and Armor in the 13th Century
1.0 Introduction
The Barons' War is a simulation of Simon de Montfort's two great battles, Lewes and Evesham. The system simulates the battlefield of the period and focuses on the command and weapon usage of the day.
2.0 Game Components
Barons' War contains:
- Two 17" x 22" (43cm x 56cm) game maps
- One counter sheet with 280 counters
- One rules book
- Two Combat Results Tables (one on back of book)
- One Terrain Effects Chart
- Two Morale Charts
- Three dice, 1d6, 1d8 and 1d10
Note: If there are any damaged or missing components in this game, please contact the publisher, and they will happily replace them for you. Also, if you would like to order extra components for this game, please contact the publisher.
2.1 Game Counters
Game counters come in two types: combat units and informational counters. Combat units include infantry, cavalry, men-at-arms, and leaders. Informational counters represent cohesion hits and morale status.
The counter diagram in the rulebook labels the following counter types and their printed values:
- Leader: Combat Bonus, Command Span, Leadership, Movement Allowance.
- Cavalry: Morale Rating, Strength Points, Reaction Charge, Movement Allowance.
- Infantry: Morale Rating, Strength Points, Movement Allowance.
- Men-at-Arms: Morale Rating, Strength Points, Movement Allowance.
- Informational Counters: Command Chit.
2.2 Game Map
To regulate play, each game map has a hex grid overlaying the map, depicting the area where the historical battle occurred. To conform to the hex grid, some features have been modified (especially rivers and streams).
2.3 Game Scale
Each map hex is approximately 100 yards from side to side. Each infantry strength point represents 50-75 men. Each cavalry strength point represents 30-45 men.
2.4 Game Dice
The game calls for the use of six sided (D6), eight sided (D8) and ten sided (D10) dice. When reading the result of a ten-sided die, the 0 result is read as 10.
3.0 Sequence of Play
The game is played in a series of Player Turns.
Outline of Game Turn
A. Command Chit Replacement Phase. Beginning on turn 2, both players roll on the Command Chit Table and place any new Command Chits on one of the Command Tracks for the battles being played.
B. Initiative
- Initiative Determination. The player who did not have Initiative on the previous turn chooses one of his Battles and selects a Command Chit (command chits are numbered from 1-4). The other player may then either choose a higher numbered chit (winning the turn's initiative) or pass (the other player wins initiative).
- Expenditure of Command Chit. The player that gains Initiative removes the Command Chit played.
C. Battle Activation. The player with initiative may then activate any units of the Battle, which had its Command Chit expended in B.2. To activate, these units must be within the Command Span of the leader.
- Activated Battle Movement. All activated units may move. Movement may be interrupted by defending cavalry units making a reaction charge.
- Defensive Adjustment. The Player on the non-Initiative side may adjust the facing of units within fire range of the activated units.
- Defensive Fire Combat. Defending units may fire at activated units that are within the defender's fire range. Results are applied immediately.
- Offensive Fire Combat. Activated units may now conduct fire combat. Results are applied immediately.
- Melee Combat. Activated units adjacent to enemy units now conduct melee combat. Both sides check die roll modifiers and apply them to the die roll. Both attacker and defender roll on the appropriate column of the Melee Table. Results are applied simultaneously. Cavalry units that charged and did not eliminate all defending units or force them to retreat have their charge markers flipped to the Shaken side. Their Player then retreats them one hex (see 7.1.3).
- Charge Continuation. If a target hex is vacated during Melee Combat, charging cavalry may conduct a second attack.
- Attack Continuation. A leader of a Battle with a 2 combat rating that activated with a 4 command chit this turn may choose to continue the turn. When so doing, the Battle remains activated and the following sequence is followed: a. Non-Initiative Player Reaction. The non-initiative player may activate a Battle using 0 command. He may then move his activated units, but does not conduct combat. b. Activated Battle Movement. Same as C.1. c. Defensive Adjustment. Same as C.2. d. Defensive Fire Combat. Same as C.3. e. Same as C.4. f. Same as C.5. g. Same as C.6.
D. Morale Recovery Check. Units with Shaken markers are checked for Morale Recovery.
4.0 Command Chit Replacement
Designer Note: During the course of battle occasionally the leaders would change the pre-battle orders. While not the easiest thing to do during this time period, the Command Chit Replacement Phase allows the player the opportunity to change the emphasis of the pre-battle orders. Rather than allocate a specific number of command chits as replacement, I decided to let luck play a more prominent role in chit replacement, since on the real battlefield this was never a sure thing.
Beginning with turn two, both players roll on the Command Chit Replacement Table, using a d10. The result is the number of the Command Chit that may be placed. A - result means that no numbered Command Chit is placed that turn.
5.0 Command Chits
Designer Note: The use of Command Chits is unlike that in most wargames. It might take some getting used to, but once the concept is understood, you will be able to see how this device has allowed me to build leader limitations, troop limitations, the chaos of the battlefield, and the fog of war into the game with a very simple mechanic.
Each player begins the game with a specified number of Command Points. These command points are divided into a number of Command Chits equal to the total of Command Points called for in the scenario. The player then places the Command Chits on the Command Chit track for each leader. This may be kept secret from the other player until all chits on both sides have been placed. Just place a sheet of paper in front of the tracks and then wait until your opponent has finished. Command points may be broken into any combination of denominations prior to the start of the game.
Note: A player may leave some of the boxes for a battle empty. These are treated as 0. Then, at the same time, reveal the Command Chits. [I find this way of doing it adds tension to the Initial Placement and models the decision process that went on before battles of the period.] Command Chits allow players to activate a Battle and also place certain restrictions on the Battle. Check the Command Chit/Command Capabilities Table for a list of the Command Capabilities.
5.1 Playing Command Chits
In order to gain the Initiative, the player must play the highest numbered Initiative Chit during the Initiative Determination Phase. The one exception to this is when a player conducts two Player Turns in a row, in which instance the other player gains the Initiative automatically for the next turn, but must still play a Command Chit (the highest available). The Command Chit that wins the Initiative for a turn is discarded. Once played and used as the Command Chit for the turn, the Command Chit is removed from play.
5.2 Initiative Numbers
Each Command Chit has an Initiative Number. This number is used to determine which player has the Initiative for the turn.
5.3 Command Chit Restrictions
The Command Chit/Command Capabilities Table lists one or more restrictions that must be followed when the Command Chit is used to gain Initiative for the current turn. Below are explanations of most commonly used restrictions. Special Rules will cover those not explained below:
- Attack: All units in the activated Battle may enter enemy Zones of Control (ZOCs) and attack.
- Attack plus Continuation: All units in the activated Battle may enter enemy ZOCs and attack, plus leaders with a leadership rating of 2 or more may perform an Attack Continuation.
- May initiate 2 new attacks: Units of the activated Battle may move into the ZOCs of 2 separate enemy occupied hexes. Activated units already adjacent to enemy units do not count toward this limit.
- May initiate 1 new attack: Units of the activated Battle may move into the ZOCs of 1 enemy occupied hex. Activated units already adjacent to enemy units do not count toward this limit.
- May not move into enemy ZOC: Units of the activated Battle may not move into the ZOCs of enemy units. Activated units already adjacent to enemy units do not count toward this limit.
ZOCs are fully defined in 7.1 and 7.2.
6.0 Leaders
Each Battle has a leader. One of the Battle leaders is also the overall leader. The Special Rules will explain which leader on each side is the overall leader.
6.1 Leader Ratings
Each leader has four ratings: Combat Bonus, Command Span, Movement Allowance, and Leadership. Each is explained below.
Combat Bonus: This bonus is used when the leader is stacked with a unit involved in Melee Combat.
Command Span: This is the number of hexes away from a leader a friendly unit under the leader's command may be and still be in command.
Movement Allowance: This is the number of movement points that a leader has each game turn.
Leadership: Leaders either have Continuation ability or do not. Leaders with a 1 Leadership Rating may never use continuation and may only use one 4 Command Chit during the game. Leaders with a 2 Leadership Rating may use Continuation and may only be assigned two 4 Command Chits at the beginning of the game. They may use more than two 4 Command Chits during the game (i.e. through the Command Point Table). Leaders with a 3 Leadership Rating may be assigned any number of 4 Command Chits at the beginning of the game and may use an unlimited number of 4 Command Chits during the course of the game.
6.2 Effects of Being in Command
In order for a unit to be In Command, it must be in the Command Span of its leader. To check Command Span, count the hex the unit is in but not the hex that the leader occupies. Command span refers to the distance in hexes, not movement points. Command cannot be traced through enemy zones of control, unless the hex is occupied by a friendly unit. Command may never be traced through prohibited terrain, such as ocean or steep slope hexes. It can be traced through marsh.
Units that are In Command may both move and conduct combat. Units that are Out of Command may move normally but may not move adjacent to an enemy unit or fire offensively, unless they began the Movement Phase adjacent to an enemy unit.
Being in Command is checked at the beginning of each Movement Phase and before Attack Continuation.
Exception: Charging cavalry is always considered in command.
6.3 Leader Casualties
Whenever a unit stacked with a leader takes a cohesion hit, the player rolls a D10. On a roll of 9 or 10, the leader is killed or severely wounded and the counter is flipped to the other side. The leader is considered to have no Combat Bonus, a Command Span of 3, a Movement Allowance of 6, and no Continuation. If the overall leader is killed or severely wounded, all units within 5 hexes immediately check for morale.
7.0 Movement
When a player gains Initiative for the turn, he may move his units. Each unit has a Movement Allowance printed on its counter. The Movement Allowance represents the total number of Movement Points (MP) that the unit may use in any one Movement Phase. These MPs may not be saved or transferred in any way. A unit does not have to use all of its Movement Allowance, but may never expend more. Combat units must always move through their front hexes. Leaders may move through any hex.
7.1 Facing & Zones of Control (ZOC)
All combat units except disrupted units have zones of control (ZOC) and facing. Leaders have no facing or ZOC. Facing determines which of the unit's hexsides are Front, Flank, or Rear.
[Diagram: a unit's Front, Flank and Rear hexsides and its Zone of Control, shown on a counter example.]
A combat unit must face (point) in a specific direction at all times. All combat units must be faced toward a vertex (joint) of the hex it is in, not a hexside, as seen in the diagram above and in the next section. All units in the same hex must face in the same direction.
7.11 Changing Facing
A combatant may change facing (in any direction) only during one of the following:
- Movement Segment of the Initiative Player's Turn Phase
- Movement Segment of the Continuation Phase
- Cavalry Charge Continuation Phase
- End of Melee Combat if the combat unit advances after combat
- Defensive adjustment
7.12 Movement Costs for Changing Facing
The first change of facing during a Movement Segment costs no movement points. Each change after the first costs one movement point. A change of facing through any number of hex sides within a single hex counts as a single change. At the end of Melee Combat, facing changes have no cost.
7.13 Effects of Facing
- Combat units may only move through their front hexsides.
- Combat units may only fire through their front or flank hexsides.
- Combat units may only conduct Melee Combat through their front hexsides.
- Combat units being attacked during either Fire or Melee Combat through their flank or rear hexsides suffer adverse modifiers.
- When retreating, units are rotated so that they face toward the hex they are entering. Units may not change facing at the end of the retreat.
7.2 Zones of Control
Combat units exert a ZOC through their front hexsides. Exception: Leaders and shaken units do not have a zone of control.
7.21 ZOC Restrictions
ZOCs do not extend across hex sides or into hexes into which that combat unit could not normally move.
7.22 ZOC and Out of Command Units
- Out of Command units may not enter an enemy ZOC.
- Out of Command units may not leave an enemy ZOC, even if a retreat is allowed.
7.23 Effects of ZOC
- A unit must stop when it enters an enemy ZOC. It may not move further in that Movement Phase, regardless of how many movement points it has remaining.
- A friendly combat unit negates the effect of an enemy ZOC for purposes of tracing a Command Span, but it does not do so for movement or retreat purposes.
- Disrupted units may not attempt Morale Recovery if they are in an enemy ZOC.
- If more than one combat unit exerts a ZOC into the hex, there is no additional effect.
- Retreating units may not enter an enemy zone of control without suffering further loses.
- A unit may never leave one enemy ZOC and move directly into another enemy ZOC.
7.24 Leaving an Enemy ZOC
A combat unit may not leave an enemy ZOC unless forced to retreat as the result of combat. The exception is cavalry which when shaken may retreat from an enemy ZOC.
7.3 Stacking
Stacking refers to having more than one combat unit in a hex at any given time. Up to two units may stack in a hex. Stacking units must be in the same formation. These units must be one of the following combinations:
- Two infantry units in the same formation
- Two cavalry units
- Two men-at-arms units
- A men-at-arms unit and an infantry unit.
Leaders do not count against stacking restrictions.
7.31 Stacking Restrictions
- Stacking combat units must be from the same battle.
- To move as a stack, the units must begin their Movement Segment stacked together.
- A stack moves with the movement allowance of its slower combat unit.
- During Fire Combat, if two infantry are stacked together only the top unit fires.
- Stacked combat units are treated as one unit for Melee Combat and movement purposes, combining their combat values.
- The top unit in a hex suffers combat results. If the upper unit is eliminated, then the lower unit suffers the rest, if any, of the hits.
- Stacked combat units cannot move through other combat units.
- A single combat unit cannot move through a stack.
7.32 Stacking and Morale Checks
When a top unit fails its morale check or is eliminated through losses or rout, the other unit in the stack must check its morale. Otherwise, only the top unit checks morale when required by a combat result.
7.4 Retreats
As a result of Melee Combat (see 8.6.1), a unit may be forced to retreat. When forced to do so, it must retreat two hexes. It may not move through hexes containing enemy ZOCs nor may it move through a hex where it would violate stacking restrictions. It may move through a hex with a friendly unit if it does not violate stacking restrictions and the friendly unit is not in an enemy ZOC. When a unit retreats through another unit, both units must make an immediate Morale Check. Units that may not retreat due to the above restrictions suffer an extra cohesion hit for each hex not retreated but required to, by combat. Retreating units may not end the retreat stacked with another unit unless the two units were stacked together at the beginning of the retreat.
8.0 Fire Combat
Infantry has the ability to perform Fire Combat. Infantry may fire only through their front and flank hexsides. Infantry may only fire at distances of greater than one hex, with one exception (see 8.3). When infantry fires at a range of 2 or more hexes, it must check its Line of Sight (see 8.4). Infantry may fire during either the Offensive Fire Segment, the Defensive Fire Segment, or both. Units fire separately, but may fire at a unit that was previously targeted in the current segment.
8.1 Defensive Fire
During the Defensive Fire Segment of a turn, infantry units of the Non-Initiative Player may conduct fire combat against any units that are currently activated. The defending unit chooses which target to fire at if it has more than one attacking unit in its ZOC.
8.2 Defensive Fire Against Charging Cavalry
When infantry is charged by enemy Cavalry, the Infantry fires on the One Column of the Fire Table.
8.3 Line of Sight and Range
Infantry firing at a range of 2 or more hexes may fire only at targets to which they can trace a line of sight (LOS), i.e., They must be able to see it. LOS is traced from the center of the firing hex to the center of the target hex. If LOS is blocked, fire is not possible. Infantry may fire at a range of one hex if their LOS beyond that distance is blocked or if the target moved adjacent to the firing unit.
8.4 Range
When calculating the distance from firing unit to target, count the target hex, but not the firing unit's hex. No unit may fire at a greater distance than its range. The maximum range is 3 hexes.
8.41 Combat Units Firing at Enemy Units on the Same Elevation
The following block LOS when firing and target units are at the same elevation:
- A wooded or town hex at the same elevation.
- Combat units on the same elevation.
- A hex of higher elevation.
8.42 Combat Units Firing at Enemy Units on a Different Elevation
The following types block LOS when firing and target units are at different (higher or lower) elevations:
- An intervening hex higher than both target and firer.
- Intervening woods or town hex adjacent to the lower unit.
- Intervening combat units adjacent to the lower unit.
8.5 Fire Procedure
Whenever a unit fires, the following procedure is used:
- Firing player checks the Fire Table to determine which range column to use.
- Firing player rolls a D10. He then compares the result to the Fire Table, using the line that corresponds to the correct range.
- The result is the number of cohesion hits the target unit suffers.
- Leaders in hexes where units took cohesion hits check for leader casualties. A D10 die is rolled and on a 9 or 10 the leader is eliminated.
8.6 Applying Results
Whenever a unit suffers a cohesion hit(s), a cohesion marker is placed under the unit receiving the hit. If units are stacked together, the top unit suffers all hits until it is eliminated. If there are already cohesion hits on the unit, then the new hits are added to the existing hits. For example, a unit with 2 cohesion hits suffers another cohesion hit. This means it is flipped to its reduced side. If a unit suffers multiple cohesion hits from one attack, all applicable results are applied.
Example: a unit with one cohesion hit which suffers three more in one attack checks its morale (under the requirement of the third hit) after reducing its number by two, one for the second loss and one for the third. Then the step loss marker is placed and the unit is retreated. When a unit fails its morale check, it suffers the appropriate result under 12 Morale. Units never have to check morale more than once per attack.
8.61 Cohesion Hits
Each cohesion marker has two sides: Step Loss, and Step Loss –1. Players use these markers to record cohesion hits on units, as follows:
- First hit, place a Step Loss Marker under the unit. It suffers no other loss.
- Second hit, flip the Step Loss Marker under the unit to its Step Loss –1 side. The unit's combat strength and morale are reduced by one.
- Third hit, remove the Step Loss –1 marker, and flip the unit to its reduced side. Its strength and morale are reduced by one (the difference between the front and back value). When a unit receives its third Cohesion Step Loss, it must check morale.
- Fourth hit, place a Step Loss Marker under the combat unit and retreat it two hexes.
- Fifth hit, flip the Step Loss Marker to its Step Loss –1 side. The unit has its combat and morale reduced by one. It retreats two hexes and checks morale.
- Sixth hit, the unit is removed from play.
If a unit suffers its fourth and fifth cohesion hit during the same combat, it only retreats two hexes.
8.62 Elimination
Units are eliminated if either of two conditions are met:
- Their current strength after modifying for strength points lost due to cohesion hits equals zero or less.
- Any unit that receives 6 cohesion steps is eliminated.
9.0 Melee Combat
During Melee Combat, the phasing player may attack enemy combat units in the front hexes of any of the activated units. Melee is optional and simultaneous. Units from more than one hex may attack, but all units must be from the same Battle. Each hex of attacking units is rolled separately. All units in the defending stack must be attacked as one unit. The defender chooses which hex of attacking units to roll against. Check which type of unit is attacking to decide which die is used to resolve Melee Combat. If more than one type is being used (this only occurs when Men-at-Arms and Infantry are stacked together), the player uses the die for the type with the most combat strength points and if that is tied, use the following priority list:
- Infantry
- Men-at-Arms
Note: This procedure is also to determine modifiers for unit type on the Type Modifier Table.
A unit that fired during Offensive Fire may only conduct Melee Combat against the hex it fired at during the Offensive Fire Phase.
9.1 Melee Combat Procedure
The following procedure is used to resolve Melee Combat:
- 9.1.1 Attacker announces which hex of combat units it is attacking and which hex of enemy units will be attacked. For each attacking hex, the attacking player resolves combat.
- 9.1.2 Check the die roll modifiers for the attacker and defender.
- 9.1.3 The Type Modifier Table is then consulted. Modifiers are then totaled. The result is used to modify the die roll.
- 9.1.4 The defender now chooses a hex to attack and applies any die roll modifiers, and resolves the die roll on the Melee Table.
- 9.1.5 Both attacking and defending results are applied.
9.2 Melee Die Roll Modifiers
The following modifiers are used to modify the Melee Combat die result:
9.2.1 Leader Combat Bonus. If a leader is stacked with either the attacker or defender, the leader's Combat Bonus Rating is used. The player may only use a leader that is in command of the units attacking or defending.
9.2.2 Flank Attack. To receive this modifier, at least one of the attacking units must be attacking through a Flank hexside of the defending unit.
9.2.3 Rear Attack. To receive this modifier, at least one of the attacking units must be attacking through a Rear hexside of the defending unit.
9.2.4 Attacking Up Slope. To receive this modifier, at least one of the attacking units must be attacking through such a hexside of the defending unit.
9.2.5 Part of Concentric Attack in Flank or Rear. To receive this modifier the attacking units must attack through a flank or rear hexside and must be part of a concentric attack. To be part of a concentric attack, the defending unit must be attacked by units in opposite hexes, or by units in three hexes with one hex between each one and the next, or by units in more than three hexes.
9.3 Melee Results
There are two results for Melee:
- A dash (–) result equals No result.
- 1, 2, or 3 equals the number of cohesion hits.
9.4 Advance and Retreat
If a defending hex becomes vacated as a result of Melee Combat, the attacker may move units from one of the attacking hexes into the vacated hex and change the facing of the advanced unit or units. When retreating as a result of combat, units need not retreat as a stack, but each unit must retreat two hexes.
9.4.1 Retreat Restrictions
In retreating, the following restrictions must be observed:
- 9.4.1.1 The retreating unit may never move through a hex that is in an enemy ZOC.
- 9.4.1.2 The retreating unit may never move through a hex in such a way that it would violate stacking.
- 9.4.1.3 A unit may not retreat across a hex side that it is not allowed to cross in regular movement.
- 9.4.1.4 A unit may never retreat up a steep slope hex side.
- 9.4.1.5 A unit, retreating through a hex occupied by a friendly unit, may not finish its retreat in such a hex. Instead, it must continue its retreat until it reaches a hex without a friendly unit occupying it. This may require it to retreat more hexes than originally specified in the results.
- 9.4.1.6 Whenever a retreating unit moves through a hex occupied by a friendly unit, that friendly unit must immediately make a morale check.
A unit(s) that cannot retreat due to the above restrictions suffers an additional cohesion hit for each hex it did not retreat.
9.42 Cavalry Retreat Option
Before Fire or Melee Combat, cavalry may retreat two hexes only if enemy infantry units are adjacent to it. To do so, the player announces that the cavalry will retreat before either of the phases begin. The cavalry moves back two hexes and then may make a free facing change. All restrictions in 9.41 are in effect.
10.0 Cavalry Charges
Cavalry may charge during Melee Combat as a planned charge and reaction charge during the opponent's movement. To make a planned charge, the target hex must be at least two hexes away at the beginning of the charge (count the target hex but not the hex occupied by the charging cavalry unit). Reaction charges are discussed in section 10.3. Cavalry may not charge up steep slopes. Cavalry units which desire to charge are marked with a charge marker.
10.1 Charge Procedure
The Charge Procedure is the same as that for Melee Combat, except friendly infantry may not be used in the combat. Cavalry can do a free wheel as part of a charge. A free wheel is a facing change. LOS restrictions as to target acquisition apply in that the target of the charge must be within the charging unit's LOS at the beginning of the phase in which it charges.
10.2 Charge Continuation
After Melee Combat, if the cavalry charge has resulted in the cavalry occupying the target hex, the cavalry may make a free facing change and move their full allowance. They then may conduct another Melee Combat.
After cavalry has finished its Melee Combat and Continuation, it is wavered and has a shaken marker placed on it and is retreated two hexes, if possible. The one exception is if the player is using the Attack Continuation option and the cavalry has successfully taken the hex it attacked during the Charge Continuation. In this instance, it is not shaken, but may take part in the Attack Continuation.
10.3 Reaction Charges
One of the problems with cavalry was the impetuous quality that mounted men of the period had. Rather than follow pre-battle plans, cavalry leaders would frequently charge at the sight of an enemy force. This rule simulates this reality on the battlefield of the period.
Whenever a phasing unit moves within three hexes of an enemy cavalry unit through its front hexes, the non-phasing player must check for a charge reaction. To do so, the player rolls a d10 and if the roll is greater than the unit's Reaction Charge rating, the cavalry unit charges. [Printed text reads "Reaction Combat BonusCharge rating", where the words overlap in the typesetting. "Reaction Charge" is the value the counter diagram in section 2.1 labels for cavalry, so that is the term transcribed here.] The cavalry unit must charge the unit that triggered its reaction if at all possible. If not, it must charge the closest enemy unit through its front hexes. The normal charge procedure is followed together with Charge Continuation (10.2). At the conclusion of this, play resumes with the phasing player.
A cavalry unit only makes one check for each phasing unit. It may make numerous checks during a turn, but never more than once for the same unit.
A cavalry unit may try to attack more than once per phase due to reaction charges.
11.0 Attack Continuation
At the conclusion of Melee Combat, the phasing player may conduct a Continuation if the command chit that he played was a 4 and the Leader has a rating of at least 2, which allows for Continuation. If it does, then the player activates that Battle that just finished Melee Combat. Once activated, the battle conducts another round of activation.
12.0 Morale
During Fire Combat and Melee Combat, a combat unit's morale may need to be checked. Units make only one morale check per type of combat phase, even if required to make more than one check. [See 13.0 and 9.41 for exceptions.]
For example, if a unit, as a result of cohesion hits, was required to make two checks, it would in fact make only one check after all units had fired at it. To check a unit's morale, the owning player rolls a d10, subtracts one if a friendly leader is stacked with the unit, and compares the result to the unit's Morale Rating. If the die roll is equal to or less than the morale rating, the combat unit has passed the morale check. If the die roll is higher, the combat unit is shaken.
12.1 Effects of Being Shaken
A combat unit that is shaken suffers the following restrictions:
- Shaken units cannot enter an enemy ZOC.
- Shaken units have no ZOC.
- A shaken unit that fails a morale check (but not a recovery attempt) routs.
- Shaken units may not initiate Melee Combat but defend normally.
- Shaken units have a -1 die roll modifier when conducting Fire Combat.
- Shaken units have their Morale rating reduced by 1.
12.2 Effects of Rout
When a unit routs, it is removed from play and all friendly adjacent units or units in the same hex, make an immediate morale check.
12.3 Morale Recovery
During the Morale Recovery Phase, both players' shaken units within the Command Span of their Battle Leader or their Army Leader and not in enemy Zones of Control may attempt to recover. The Recovery Attempt is exactly like a Morale Check, except that, if the unit passes morale, it is no longer shaken and has its shaken marker removed. If it fails the Recovery Attempt, it remains shaken.
13.0 Command Effectiveness
Checks for Command Effectiveness occur during the Morale Recovery Phase. As units are removed from play either through rout or elimination, they are placed on the Command Effectiveness Displays with their correct Command. When placing on the display, begin in the upper left corner and proceed across the line. If there is more than one line, begin at the left of the next line down when the upper row is filled. As units are placed on the display, one to a box, there will be symbols in some of the boxes. When such a symbol occurs, the player must make a check for Command Effectiveness. Checks are made against the number in the symbol on the Combat Effectiveness Display. To do so, the player checks the type of check being made, and then rolls a D10. Compare this roll to the number in the symbol. If the die roll is equal to or less than the number, there is no effect on the Command. If it is larger, then the Command must check for effects on its Effectiveness. Below are explained the different symbols and the effects on the Command:
- A square symbol is used for a Waver check. When a Battle fails a Waver check, the player must check each unit in the Battle that is still in play to see if it is Shaken.
- A circle symbol is used for a Shaken check. When a Battle fails a Shaken check, the player must check each unit in the Battle to see if it is Shaken. No units in the command may initiate Melee Combat. It is in effect for the rest of the game.
- A triangle symbol is used for a Broken check. When a Battle fails a Broken check, the player must check each unit in the Battle to see if it is Shaken. All currently Shaken units rout and are removed from play. No units in the Battle may conduct Melee Combat, or enter an enemy ZOC and have their morale lowered by 1. This is in effect for the rest of the game.
Exclusive Rules
14.0 Scenarios
Each scenario lists a set up hex for each battle. Players must place all units of that battle within 2 hexes of the hex given. Each scenario also lists the number of command points each side has. Each scenario continues until one side is defeated, or one player concedes victory.
14.1 Edward's Battle Rule (Optional)
Historically, Edward took four hours to reform his cavalry after its charge. To simulate this, the Royalist player at the beginning of the game after the Baron player has set up designates the Battle that Edward will be attacking. Edward's force may only attack this Battle until it is either broken or eliminated. The turn after this occurs; the Royalist player begins rolling for Edward's Battle (using a D10). On a die roll of 10, Edward's forces may attack another Battle.
14.2 Lewes (Historical)
Baron Set Up:
- Henry de Montfort – 3205
- Simon de Montfort – 3510
- Gloucester – 3210
- de Segrave – 3215
Command Points – 45
Royal Set Up:
- Cornwall – 1504
- Henry – 1509
- Edward – 1616
Command Points – 40
Royal player begins with the initiative.
14.3 Lewes (Free Set Up)
First, the Barons set up on the 32xx or higher row, and then the Royalists set up on the 16xx or less.
14.4 Evesham (Historical)
Baron Set Up:
- Simon de Montfort – 1608
Command Points – 20
Royal Set Up:
- Gilbert – 2906
- Edward – 2812
Command Points – 30
14.5 Evesham (Possible)
Baron Set Up:
- Simon de Montfort – 1608
Command Points – 30
Royal Set Up:
- Gilbert – 2906
- Edward – 2812
Command Points – 45
Baron player begins with the initiative.
Baron Reinforcement: Simon de Montfort the Younger. Beginning with the third activation, his Battle enters at any hex from 10xx to xx15 up to 1715 by the expenditure of a command chit for activation.
Royal Reinforcement: Mortimer. Beginning with the third activation, enters at 2918 or 1008 by the expenditure of a command chit for activation.
15.0 Game End and Victory Conditions
Each scenario ends when one side has all of its battles Broken, Eliminated, or Shaken. Victory conditions for all the games are the same. They are as follows:
- Royalist player receives 5 victory points for each Baron Battle that is eliminated, 3 victory points for each Baron Battle that is Broken, and 1 victory point for each Baron Battle that is Shaken.
- The Baron player receives 4 victory points for each Royalist Battle that is eliminated, 2 victory points for each Royalist Battle that is Broken, and 1 victory point for each Royalist Battle that is Shaken.
16.0 Designer Notes
Barons' War came about as the result of a discussion with Charlie Spiegel at Origins 2002 in Columbus, Ohio. When he offered me an opportunity to work with Clash of Arms, I jumped at the chance. CoA has always put out class products and I had never worked with them, although I own most of their games. The battles offered some challenges for me, since I had never designed games in this specific period. Since these battles take place before the longbow takes its prominent place at the center of the English army, cavalry was still the most lethal weapon in the English arsenal at the time. Given the structure and lack of discipline of the feudal levy armies of the time, I wanted a system that would capture some of this. For that, I decided on the Command Chit system that made its way into the game. It took some fine-tuning but the system that resulted was basically part of my original idea. I've been very happy with its results in play testing.
One of the things I try to refrain from doing is giving hints on how best to play the game. First, I find to do so sometimes straightjackets the game for those who play it, and I'd much rather hear about player strategies later. The one bit of advice I'll give you is plan before hand what you are going to do in general terms. The pre-game assignment of command points is almost a game in itself. My advice here is to look at the set up, decide where your opponent's weakness is and exploit it. In playtesting, some followed that line while others decided to put the more emphasis on their strengths and support them, even if it meant facing strength to strength. Whichever way you decide to go, the bottom line is that the initial assigning of commands is one of the most important parts of the game. A plan and some analysis are needed to be effective in this area.
17.0 The Historical Battles
Simon de Montfort's two major battles are the bookends on his brief stay as the power broker of England. The battlefield of Simon de Montfort is much different from what would transpire even 50 years later. Military science had not progressed much since the days of William the Conqueror. Armies were still very much a haphazard mishmash of weapons and skills. Training as a group was virtually non-existent and both armies relied heavily on the enthusiasm for their cause and their leaders. With that in mind, Simon de Montfort fared much better than his adversary, Henry III. Simon was able to create a unifying spirit and reason for his men. With a force of raw recruits from London at Lewes, he was able to inculcate the men with a spirit of high morale. His use of the white cross on their clothing also gave them a sense that this was the equal of any crusade in a foreign land. Henry III on the other hand had to rely more on the loyalty of his troops to his title, than to the charisma of his dour personality.
Lewes
At the outbreak of war, Henry III's strength was in the Midlands, while Simon's strength came from London. The military campaign began with the King reducing Northampton, Leicester, and Nottingham, while Simon moved on Rochester and besieged the town. With the Royalists advancing from Nottingham (rapidly in the case of the young Prince Edward), Simon fell back to London to assemble a larger force to face the Royalists.
Henry, having relieved the siege at Rochester, now started his advance to London. After capturing Tonbridge, he advanced to Lewes. Unknown to him, Simon had rapidly completed raising more troops and set out to challenge the Royalists.
There is some debate on whether Henry sent out scouts to watch for Simon or whether he just assumed that Simon's force was still in London. The reality is that, on the morning of May 14, 1264, it was a foraging party, not scouts that first sighted the advancing army and hurried back to alert Henry of the Baronial army's advance.
As the Royalists scurried to form up, Simon's force took up positions on top of Henry's Hill overlooking the town of Lewes. It was a relatively strong position and afforded Simon an advantage that a better general than Henry would never have allowed him to attain.
The Royalists quickly formed up with Edward's cavalry on the Royalist right flank. Rather than wait for instructions from his father, Edward, sighting the Londoners, whom he believed had insulted his mother, immediately led a charge on the Baronial left flank. Under the weight of the ferocious charge by the Royalists, the left flank dissolved and the Royalist cavalry pursued the fleeing troops.
The rash assault left Henry with little choice but to charge the main position with the rest of the Royalist force. This he did, but Simon's army did not have the same problems against the Royalist infantry as they had had against the cavalry, and the Royalist assault was quickly halted. When Cornwall's force faltered, Simon threw his reserves against Henry and overpowered the Royalists. Pushing the Royalists before them, Simon advanced relentlessly until Henry's forces finally broke. Throughout all this fighting, not a word was heard of Edward's cavalry. Instead, two hours after the battle ended, Edward returned to the battlefield, only to have his force dwindle away when it became evident that the Baronial army had won the fight. In the aftermath, Henry and his son became the "guests" of Simon and the allied Barons.
Evesham
In May, 1265, Prince Edward escaped from captivity and began the process of raising an army. By the end of July, Edward had assembled an army at Worcester and was faced with two approaching armies. Simon had split his army into two parts. His son would take his force to Kenilworth, while he advanced on Hereford. Simon the Younger was to then wait for a supply convoy to reach him there, while Simon would march from Hereford to Kenilworth, with the two linking up somewhere along the Evesham road.
18.0 Arms and Armor in the 13th Century
There are three classes of warrior represented in The Baron's War, mounted men, men-at-arms, and infantry. All three categories had changed subtly over the two centuries since the primacy of the mounted warrior, whether valid or not, had been established at Hastings. The infantry of de Montfort's battles, though not a professional class as a whole, were of substantially better quality than the feudal levies which produced the bulk of most armies as close as a century before. Often armed with well-made edged weapons, pole-arms, some shields, and pieces of armor, their ranks were often leavened with professional crossbowmen. While mounted warriors were contemptuous of the ability of infantry to resist a charge, such was not their intended role in battle. Crossbows were able to pierce the best armor of the time, if properly aimed. The problem faced by the crossbowmen was simple. Their extremely slow rate of fire limited them to two shots at a moving, shielded target, after which they had no chance of standing against the charge. To be effective against cavalry, they had to have the protection of others, or failing that, to fight from cover or as skirmishers.
The result of improvements in infantry meant that experienced troops, well formed could expect to hold against unsupported cavalry charges. This was especially true with men-at-arms as they were a trained class and had experience with repelling untoward attacks by mounted men. Men-at-arms comprised a class of professional fighter that grew out of the need for larger armies, while recognizing the difficulty of mounting such a host. The typical warrior in this group was experienced in combat, armed with a weapon with which he had expertise, and wore decent armor along with a shield. With crossbowmen in their midst, they could hope to withstand the shock of mounted combat without breaking. They had not yet developed the idea of integrating reach weapons to counter those of the mounted man, but were coalescing into professionally led groups. As they were not permanently under arms, their proficiency was not as good as the full time professionals of the mounted class.
When thinking about the mounted warrior, knights most often come to mind. I have purposefully stayed away from calling them knights, as many of the mounted men were not by birth of the noble class, but rather were family retainers (often referred to as sergeants) who were mounted. The up front cost of training a horse to carry a man in combat, armoring them, and arming the warrior, easily equals today's cost of a college education. Add to that the time necessary to learn to ride and use the weapons expected, and it is plain that considerable time and expense were involved in training a mounted fighter.
The knight was armored with steel literally from head to foot. While the helmets of the common infantry and many men-at-arms was either the conical open faced piece worn by knights two centuries before or else the broader open head piece depicted on the box cover and the illustration of mounted vs. foot combat in this rules book, the knight of de Montfort's battles wore a casque that covered the entire head, resting on the shoulder of the man. Slits were left in the front to enable one to see. Visors were extremely rare. For example, while the helm of Richard I as shown in his seal had a visor, that of Henry III did not. Between the mailed coif worn over a padded cap and the helm itself, the knight was protected from most killing blows to the head.
By the mid 13th century armor had evolved to full length. The sleeves were full, ending most often in armored mittens, though some had gloves. The legs too, were full length ending in mailed feet. Some of the richer knights had plate riveted to small areas of their armor, usually the shoulders, knees and elbows, as the illustration from Matthew of Paris illustrates. Under all this was the gambescon, a heavy quilted cotton garment whose thickness offered protection from impact attacks.
The costs of maintaining such warriors meant that their numbers were relatively small. What they were superb at was exploiting holes in enemy foot formations. Where they were deadly was in hitting disorganized foot What usually occurred was that the opposing mounted combatants tried to engage one another.
There were two reasons for this. First, there was no honor in running down infantry. What mattered more, even less profit was attached. Capturing a knight was an extremely profitable occurrence, as the ransom for the captive would usually be worth over a year's living expenses. Added to that would be the money received for the armor and possibly the horse. William, Henry II's Marshall, started as a knight with little besides his horse and armor and wound up a wealthy man through his decades of fighting and winning tournaments. Many a minor knight was catapulted into the ranks of the wealthy after a few knights fell to him in combat.