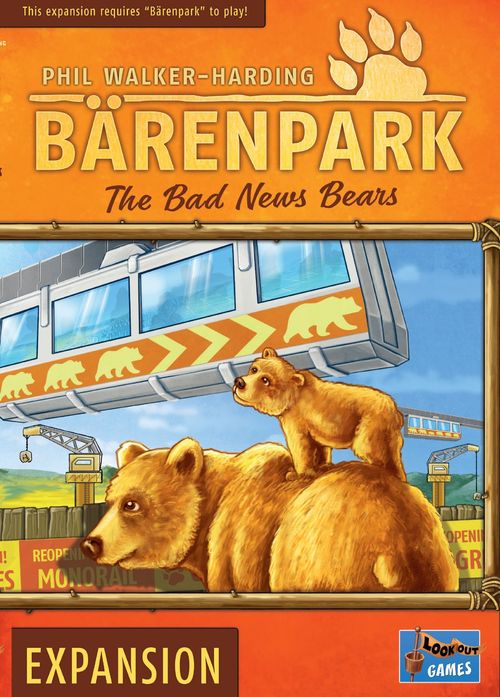
Bärenpark: The Bad News Bears
Bärenpark: The Bad News Bears Rulebook
Table of Contents
Table of Contents
About the Expansion
This expansion contains two modules, Grizzlies and Monorails, that can be added to the base game individually or in combination. Additionally, this expansion comes with extra Toilet tiles and six new Achievements to be added to the base game components. You can use Achievements in any game of Bärenpark, with or without the new modules. We recommend you play the modules individually first before combining them or adding Achievements.
Components
Grizzlies Module
- 12 Grizzly Habitats (different shapes, with values 7-10)
- 4 additional Bear Statues (with values 17-20)
- 4 additional Animal Houses (one of each type, with value 8)
- 4 Park Areas with Exit
Monorails Module
- 24 Monorail Cars (4 each of values 10, 8, 6, 5, 4, 3)
- 28 Monorail Towers (to be assembled before play)
Additionally
- 18 new Achievements (3 each of 6 types)
- 6 additional Toilet tiles (to be added to the base game supply)
Module I – Grizzlies
The Grizzlies module adds humongous tiles seven spaces in size that are quite challenging to place but can give you an edge over your opponents in the race to complete your park. They are gained by discarding tiles from your supply. Not only did the tiles get bigger—your park is going to be bigger too! The game ends after five park areas have been completed by a player.
Setup
Set up the game as described in the base game rules and apply the following changes:
- In a 2- and 4-player game, add the value 8 Animal Houses to the top of their respective stacks. In a 3-player game, add the value 7 Animal Houses instead.
| Player Count | 2 | 3 | 4 |
|---|---|---|---|
| Animal Houses | 2, 4, 6, 8 | 2, 3, 4, 5, 6, 7 | all |
- In a 2-player game, add the value 18 and 20 Bear Statues to the display. In a 3-player game, add values 15, 16, and 17 instead. In a 4-player game, use all 20 Bear Statues.
| Player Count | 2 | 3 | 4 |
|---|---|---|---|
| Bear Statues | 2, 4, 6, 8, 10, 12, 14, 16, 18, 20 | 3, 4, 5, 6, 7, 8, 9, 10, 11, 12, 13, 14, 15, 16, 17 | all |
-
Place the new Park Areas with Exit near the base game Park Areas. (If you have the table space, spread these new tiles out so that all can be seen.)
-
Spread out the 12 Grizzly Habitats next to the supply board.
Course of Play
The game is played as normal, except for the new elements added by this module.
Adding a 5th Park Area
When you cover the Construction Crew symbol on your 4th Park Area, you will now get a Park Area with Exit as your 5th Park Area. You can choose from the available Park Areas with Exit in the general supply. (You may not take a normal Park Area instead.) Add it to your park as per the normal rules except not directly below another Park Area. You must complete all five of your Park Areas to trigger the end of the game.
Note: The Park Areas with Exit do not show any Construction Crew or Excavator symbols.
Gaining a Grizzly Habitat
Once per turn, at the start or end of it (i.e., before or after placing a tile or passing), you may discard both a Green Area and Animal House from your supply (not park) to gain an available Grizzly Habitat from the general supply. Remove the discarded tiles from play. If you do this at the start of your turn, you may place the chosen Grizzly Habitat right away (as your tile placement for that turn). Otherwise, or if you do not place the tile right away, place it in your supply for later use.
Note: You must discard exactly two tiles, one Green Area and one Animal House, to gain one Grizzly Habitat. You may not substitute any of these tiles with a different tile type (e.g., discard two Animal Houses or gain an Enclosure). It does not matter which type of Green Area you discard. Except for the fact that there are only 12 Grizzly Habitats total and space is limited in your park, there is no limit to the number of Grizzly Habitats you can gain during the course of the game. When the supply of Grizzly Enclosures runs out, you cannot gain any more.
Transcriber's note: the printed rulebook says "Grizzly Enclosures" in the last sentence above, while the tiles in this module are Grizzly Habitats. Transcribed as printed; the supply in question is the Grizzly Habitats.
Example: It is Cindy's turn. She has a Green Area and Animal House in her supply from last turn. She decides to exchange them for a Grizzly Habitat that she places on top of a Wheelbarrow and Cement Truck icon, receiving yet another Green Area and Animal House. Because she already exchanged tiles for a Grizzly Habitat at the start of her turn, she may not exchange again. She has to wait until her next turn.
Game End
The game ends when a player completes their fifth Park Area. As normal, all other players get one final turn before scoring. In the rare event that nobody can complete their park, the game ends early. Score your parks as normal, including points from Grizzly Habitats placed in your park. The player with the most points wins. Apply the usual tie-breaker if needed.
Module II – Monorails
The Monorails module promotes your park to the third dimension! Build a monorail above your park by skillfully placing towers across its green areas and attaching car tiles to the towers. This is easier said than done considering your monorail must "zig-zag" through your park. As always, the faster you build your monorail the more points you will get.
Setup
Set up the game as described in the base game rules, adding the following two steps:
- Place the Monorail Towers next to the supply board, using seven Towers per player.
| Player Count | 2 | 3 | 4 |
|---|---|---|---|
| Monorail Towers | 14 | 21 | 28 |
- Place the Monorail Cars nearby, in stacks of equal value, using one Car of each value per player.
| Player Count | 2 | 3 | 4 |
|---|---|---|---|
| Monorail Cars | 2 each of values 10, 8, 6, 5, 4, 3 | 3 each of values 10, 8, 6, 5, 4, 3 | 4 each of values 10, 8, 6, 5, 4, 3 |
Course of Play
The game is played as normal, except for the new elements added by this module.
Building the Monorail
Each time you place a Green Area in your park, including on the first turn of the game, you may immediately place a Monorail Tower from the general supply on the Green Area, if you meet the requirements (see below). You must place the Tower right away or not at all—you cannot retroactively place Towers on Green Areas from previous turns. The Tower must be placed on exactly one space within the Green Area. Toilets have one space, Playgrounds two, Food Streets and Rivers three.
There are no further restrictions for the first Tower you place in the game. All subsequent Towers must be placed such that a Monorail Car can be attached to the new Tower. There must be exactly two spaces, horizontally or vertically, between the new Tower and a previously placed one. It does not matter whether these spaces are empty, covered by a tile, or pits (with or without Bear Statue). You must immediately attach a Monorail Car to the new Tower and the previously placed one, taking the remaining Monorail Car with the highest value from the general supply.
Additional rules for the Monorail line
There are a number of additional rules that you must follow when building your Monorail line:
Only one line: You may not start a new Monorail line, even if you get stuck.
No straight lines: Each Tower can have at most two Cars attached to it occupying adjacent sides. (In other words, the Monorail must take 90° turns at all times and cannot have any intersections.) Consequently, you can only ever extend your Monorail line at its two ends.
No loops: You may place only one Monorail Car per turn. (So, except for the first Tower placed, you will always place exactly one Tower and one Car or none at all.)
This is how a Monorail line might look like during the course of the game. Except for the fact that there are only (up to) 24 Monorail Cars total and space is limited in your park, there is no limit to the number of Monorail Cars you can build during the course of the game. When the supply of Monorail Cars runs out, you cannot get any more. (Monorail Towers cannot run out before Monorail Cars.)
Transcriber's note: the printed rulebook labels the one-car-per-turn rule "No loops". The label is transcribed as printed; the body text describes the one-car-per-turn limit.
Game End
The game ends as normal when a player completes their fourth Park Area. As normal, all other players get one final turn before scoring. In the rare event that nobody can complete their park, the game ends early. Score your parks as normal, including points from Monorail Cars. (Monorail Towers do not provide any points.) The player with the most points wins. Apply the usual tie-breaker if needed.
Combining the Modules
You can play the Grizzlies and Monorails modules together without any changes to the rules. The game ends according to the Grizzlies module rules. Score all the tiles in your parks, including Grizzly Habitats and Monorail Cars. Be aware that playing both modules together makes the game fairly complex, especially if you add Achievements into the mix.
The New Achievements
Add them to the base game Achievements and choose your Achievements for the game from the combined pool. The new Achievements do not require any of the new modules. They can be played with the base game alone or in combination with any or both modules. The usual rules apply.
Construction Freeze (values: 8, 5, 2)
You have placed an Enclosure tile covering no symbols at all (not even a Construction Crew). You cannot claim this Achievement by placing a Green Area, Animal House, or Grizzly Habitat.
Enclosure Planning (values: 8, 5, 2)
You have placed a tile such that you gain two (or three) Enclosure tiles in one turn. You must actually take the Enclosure tiles; merely covering two (or three) Excavator symbols does not suffice.
Toilets Apart (values: 8, 5, 2)
There are (at least) two Toilets in your park with at least 11 spaces in-between them. Count the spaces orthogonally, not diagonally, on the shortest path. It does not matter whether the spaces are empty or covered, or whether there are closer Toilets on the way.
Food Street Connections (values: 9, 6, 3)
There are (at least) three different pairs of adjacent Park Areas in your park that have at least one Food Street going across their common edge. (Consequently, one space of the Food Street must be in one and the other two spaces in the other Park Area.)
Rivers in Corners (values: 9, 6, 3)
There are (at least) three Park Areas in your park that have at least one River in one of their corners. The River must be placed exactly as depicted, covering the corner space and the adjacent two spaces, in any of the four corners of the Park Area.
Playgrounds with Statues (values: 9, 6, 3)
There are (at least) three Bear Statues in your park that are orthogonally adjacent to at least one Playground. (Diagonal adjacency does not count.) The Playgrounds may touch the Bear Statues with any side (not necessarily as depicted).