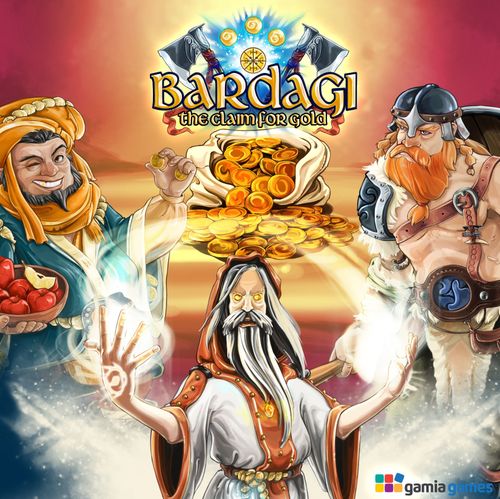
Bardagi: The Claim for Gold
Bardagi: The Claim for Gold Rulebook
Table of Contents
Table of Contents
- Overview
- Game Components
- Game Setup
- Game Play Overview
- Game Rounds
- The Game Board
- The Player Board
- The Buildings
- Building Upgrades
- Resources, Trade, Gold & Glory
- Playing Time
- Your Units - The Characters
- Detailed Round Overview
- 1. Planning - Choose cards, all players simultaneously
- 2. Actions - Lay down the cards and play out the actions, in starting player order
- 2. Actions - Continued: Special Character Actions
- 3. Buy Upgrades - Buy building upgrades if possible, in starting player order
- 4. Claim Glory & Resources - All players simultaneously
- Round Overview
- Unit Overview
- Points
Overview
Bardagi - the claim for gold, is a strategy game for 2 – 5 players, aged 10 and up.
Each player controls a Viking clan and a group of Vikings Berserkur (warrior), Godi (priest) & Kaupmadur (trader). They also have Viking ship at their disposal (Knerrir). Each and every clan has a village (player boards) where players store their resources (timber, wool, meat, skin, stone, iron & gold), which they gain by overtaking areas. These resources are then used to manage the village and upgrading buildings that improves the clan. The Trader can also sell the resources to gain Gold.
During the game, players receive glory points for taking over areas and building upgrades. At the end of the game, the player that has most gold receives a glory bonus, as well as the player owning most areas. When all rounds have been finished (based on number of players) all final glory points are counted and the player with the most glory is the winner!
Game Components
- 1 Game board
- 5 Player boards
- 120 Player cards
- 5 Reference cards
- 10 Point markers 50/100 & 150/200
- 45 Building upgrade tiles
- 5 Berserkur
- 5 Godi
- 5 Kaupmadur
- 5 Knerrir
- 120 Wooden Resources
- 200 Disks
- 48 Runes tokens
- 20 Axe tokens
- 80 x 1 gold coin & 30 x 5 gold coins
- 5 player glory markers
- 1 Round marker
- 1 Starting player token
Game Setup
Place the board where all players can reach it, make room for player boards and game components.
For your very first game, punch out all of the punch boards and sort the cards & plastic disks into their types by colour.
A suggestion for your box setup is shown in the rulebook's setup illustrations.
1. Choose your board. In a 2-3 player game, you can choose which side of the board you want to play. 4-5 player use the Summer side.
- Winter side - more strategy and cunning, more sea travels and more unexpected manoeuvres.
- Summer side - more calm and simplified play, less clash between players.
2. Choose your location & Viking clan. Possible colours based on number of players:
- 2 - 3 players - red, blue & yellow
- 3 - 4 players - all colours, except black
- 5 players - all colours
Based on chosen colour, each player takes: a player board, a set of player cards, disks (x 40), 1 token "at random" and 1 small (1 gold) coin, as shown in the setup illustration. Place the coloured units (the Viking figures) on your coloured location. The remaining of your items go on your player board (see number 8). (The printed setup illustration for this step is not fully legible in the text layer; the item list follows the printed labels "1X at random", "1X small (1 gold)" and "X 40". The Knerrir is set up on the player board harbour in step 8.)
3. Place the resource storage beside the board. Insert the components in each compartment as shown.
4. Pile the Axe tokens beside the board.
5. Pile the Rune tokens beside the board, face down and randomised.
6. Place the building upgrades beside the board. First place the whole stack of each type face down (one of large & one of small). Turn each type face up, according to number of players:
- 2-3 players - show the top 2 of each small type, & 1 type of large.
- 4-5 players - show the top 3 of each small type, & 2 types of large.
7. Place the round token on the spiral. If you want to play the full game (120+ minutes), place it on the green arrow at the end. For a shorter version, place the round token on the 2nd island on the spiral.
8. Set up your player board as shown in the setup illustration:
- The counter goes on the large shield on the glory bar.
- 6 disks are placed on Verslun.
- 6 disks are placed on Virki.
- 6 disks are placed on Hof.
- Knerrir is placed on the harbour.
- 1 gold & 1 rune is placed on your village.
Place the remaining disks and counter tokens beside your player board within reach.
9. Set up complete, you are ready to play! The player that looks most as a Viking goes first, alternatively randomly choose the first player & hand him the Starting player token.
Game Play Overview
Bardagi is played in rounds, depending on number of players as shown on the Round Spiral. Each round is divided into four phases; Planning, Activation, Buy upgrades & Claim. During each round, players have 4 units at their disposal that are activated with the corresponding cards. Each unit has 6 cards, there are 4 units in each clan so players have 24 cards they can choose from during each round. Only 6 cards are used each round, 8 cards after round 5. The cards are used for activating one action of the displayed unit.
In the beginning... Players start the game with their units on their special actions: their home areas. The Knerrir is kept on the harbour on the player board.
All areas on the board (except Sacred Locations) belong to the Barbarians. To gain access to these areas and claim the resources they give, they need to be overtaken.
Game Rounds
Bardagi is played in 6 - 8 rounds (7-10 in the normal game). Each round consists of the following phases:
- Planning
- Activate
- Buy upgrades
- Claim glory & resources
It is good to have the reference card handy during the first few rounds to better understand the flow. There you can also see the units' available actions.
Each character has 3 basic actions, plus "Detailed overview" on pages 10 - 11.
Phase 1 - Planning
All players simultaneously. Choose 6 cards (6 actions) that you want to use this round. All players choose their cards at the same time and keep them hidden until played.
When all players are happy with their chosen cards, proceed to phase 2.
Phase 2 - Activate Cards
In starting player order.
Starting with the starting player, he lays down his 6 cards in any preferred order and carries out the actions of the shown character.
ONE card is ONE action of the shown character.
Each action can be taken multiple times during a player's turn & in any preferred order. When the active player has finished all of his actions, the player on his left goes next and so it continues until all players have laid down their actions.
Phase 3 - Buy Buildings
In starting player order.
If you have the required resources in storage (the boxes on your player board), you can buy 2 building upgrades.
You can buy: 2 small upgrades, 2 large or 1 of each.
Each building (Temple, Barracks or Store) can hold up to 2 large upgrades, 4 small or 1 large & 2 small.
Phase 4 - Claim Resources
All players simultaneously.
Claims are divided into 3 steps:
a) Claim glory from areas that you own (areas with your disk on it), 1 glory for each area.
b) Claim resources from areas that you own (areas with your disk on it), 1 resource from each area.
c) Place recruits & Axes. You can place the recruits & Axe tokens (unused disks or Axe tokens that have been stored in your village during previous turn or turns) on your buildings or any of your overtaken areas.
Re-new any empty building upgrade slots (if any were bought). Advance the Round marker, hand the starting player token to the next player to the left. Next round!
All of the above is shown in more detail in the "Detailed round overview" on pages 10 - 11.
The Game Board
The game board is divided into different areas. Each area is divided with a white line, sea cliffs or beach. The landscape is drawn in 3D so sometimes the line can be partly hidden behind a mountain or hill. In some areas there are harbours and from them, there are dotted lines towards ocean squares. Each ocean square counts as one for the Knerrir movements.
Areas
At the beginning of the game, all areas (except sacred locations) are under control of the Barbarians. It costs 1 disk from a building to overtake an area. Take a disk from the corresponding building (Virki = Berserkur, Hof = Godi & Verslun = Kaupmadur) and place on the aimed area to overtake. Coloured disks indicate the current owner.
Each area on the board has only one token and sometimes also a harbour. The outline of the areas is displayed with a white line or some clear natural boundaries, such as cliffs.
Some areas are adjacent to many areas. For example, a gold mine has a harbour, but it also is connected to other areas. To get to these areas from the coast or beyond the mountains, you need to go through the gold beach. You can only go around the mountains, not over them.
Interconnected areas count as 1 in movement. Unit abilities apply only to the area they stand on, not the whole interconnected area around them.
Home Areas
Areas in the player's colour are their home areas. They are directly connected to the player board. If you need to do any actions on your player board, you need to take your unit to the home area. They are off limits to other players and do not give points or resources.
Harbours
The harbours are the start and end points for all Knerrir movements. It costs one action for a unit to enter the Knerrir, if moving into the area, but nothing to exit it. If a unit is present on a harbour area, it does not cost a move action to enter the Knerrir; you simply sail away (by switching the unit figure with the Knerrir on the player board).
Harbours do not yield resources, only the area it is on, and it cannot be moved. For more info, see the "Knerrir" section on how to sail.
Resources
All areas on the board give you something: resources, runes, recruits or Axe tokens. When you overtake these areas (not sacred locations) you gain its resources during the claim phase. You gain these resources each turn as long as the area is marked with your colour marker.
Resource areas on the board:
- Sheep yield 1 wool OR 1 meat.
- Cattle yield 2 hide OR 1 meat.
- A forest yields 1 timber.
- A quarry yields 1 stone.
- Iron mine yields 1 iron.
- Gold mine yields 2 gold.
Barbarian Camp
- To overtake: 3 disks. Reward: 2 Axe tokens.
- The Barbarian Camp is hard to overtake; only the Berserkur can do it by using 3 disks from his Virki. Kaupmadur & Godi cannot take them over. To successfully overtake them, you need to have at least 3 disks available at Virki. 2 warriors (disks) are used to fight the camp and then discarded. The 3rd disk is used to claim it.
- You receive 2 Axe tokens as reward, & during the claim phase you can place them on your areas as extra defence (each counts as 2). Axe token areas are also defended against enemy runes.
- In the claim phase, you can also buy 1 extra Axe token for 1 gold, for each Camp you own.
Town
- To overtake: 2 disks. Reward: 1 recruit.
- The Town can be overtaken by all units. During claim, players receive 1 recruit for each Town they own.
- The more towns, the more recruits each round.
- Kaupmadur can trade in ALL towns according to the trade table.
- When overtaken, discard 1 disk & place 1 to claim.
The Player Board
The player board shows you your village. There you manage everything related to your clan.
At the top of the board is your storage. When you receive resources from areas you own, they are placed in their corresponding boxes. The maximum each box can hold of a given resource type is 5 resources.
On the left side of the board is an image of your village. You keep your gold, Axe tokens, rune tokens and recruits here until used. Items placed on your village are considered active and can be used when needed throughout the game.
The building upgrades are placed beside the building that is being upgraded, as seen on the building type icon. Building upgrades always improve your status and give your end game points.
Around your village is the glory points bar, where your glory points are marked. When passing 50 points, place the "50" points token on the shield. When passing 100 points, place the "100" points token, etc.
The Buildings
The town buildings have disks on them that are used by the character units the building belongs to. The number beside the shield in your colour shows you the maximum amount of disks that can be on the building at any given time.
-
Verslun - Belongs to the Kaupmadur. The disks represent goods that are used to overtake areas from the Barbarians by trade.
- Disks = goods
- Maximum amount on building = 6
- Resources needed to refill disks = 4 skin
-
Virki - Belongs to the Berserkur. The disks represent your warriors that are used to conquer areas from the Barbarians.
- Disks = warriors
- Maximum amount on building = 6
- Resources needed to refill disks = 4 meat
-
Hof - Belongs to the Godi. The disks represent your divine powers that are used to convert the areas from the Barbarians.
- Disks = divine powers
- Maximum amount on building = 6
- Resources needed to refill disks = 4 wool
Building Upgrades
Between rounds, during the start of the claim phase, building upgrades can be bought. Upgrades are bought in starting player order. You can only buy the top most visible upgrade of any type during your turn (3 small ones & two large in 4 & 5 player games, but 2 small & 1 large in 2 & 3 player games).
When an upgrade has been bought, the one underneath is turned around to be shown. There are two of the same of each small upgrade, but the large ones are all unique.
Building upgrades always improve either the unit it belongs to or your clan in general. Some upgrades give a chance to increase your gold or glory if you overtake certain area types. For example, an upgrade can give you extra glory each round for each Iron mine you own. Each upgrade that you build gives you also more disks to place on each building: +1 disk for each small and +2 for each large building. The maximum number of disks that can be on a building is 10 disks, unless you buy upgrades that enable you to increase that to 12.
Building upgrades give you bonuses in the same round as they are built in. At the end of the game, you receive points for building them. Each small upgrade gives you 3 glory, each large gives you 5 glory. You can only build 1 small upgrade of each type.
Building cost:
- Small = resources & 1 gold.
- Large = resources & 2 gold.
Each round, each player can MAX build: 1 small & 1 large OR 2 small OR 2 large. All required resources must be available! No late trade.
Small Upgrades
| Berserkur (3x) | Godi (3x) | Kaupmadur (3x) |
|---|---|---|
| Virki +1 | Hof +1 | Verslun +1 |
| Move your Knerrir +2 ocean squares for each card you use. 1 Knerrir card = 5 sq. | You gain 2 gold during claim. | You gain 2 gold during claim. |
| You can place +2 disks on Virki, to the max of 12 disks, including all built upgrades. | You gain 1 glory for each Iron mine you own during claim. | Move your Knerrir +2 ocean squares for each card you use. 1 Knerrir card = 5 sq. |
| Berserkur can move +2 areas per Berserkur card. 1 card = 3 areas. | You gain 1 glory for each Cattle area you own during claim. | You gain 1 gold for each Town you own during claim. |
| You gain 1 gold for each attack you make each round. | Move your Knerrir +2 ocean squares for each card you use. 1 Knerrir card = 5 sq. | You gain 1 gold for each Sheep area you own during claim. |
| You gain a recruit for each Iron mine you own during claim. E.g. 2 mines = 2 recruits. | You gain 1 glory for each Quarry you own during claim. | You gain 1 gold for each Forest area you own during claim. |
Large Upgrades
| Berserkur (5x) | Godi (5x) | Kaupmadur (5x) |
|---|---|---|
| Virki +2 | Hof +2 | Verslun +2 |
| You gain 1 glory for each area you overtake. No overtake, gain 1 glory. | You gain 3 glory during claim. | You gain 3 glory during claim. |
| You gain 3 glory during claim. | Each of the Axe tokens you control is from now on 4 in defence (instead of the normal 2). | You gain 3 gold during claim. |
| You can use any card as a Berserkur card. Two cards of other units can be used each turn, giving a chance of 8 Berserkur actions per turn. | Godi can cast 1 free Rune each round. Does not cost a card or divine power. | Kaupmadur can do 1 free home area action per turn (trade & refill). He does not need to be on Home area to do the chosen action. |
| You gain 3 gold during claim. | One free Rune (drawn randomly) each round per Town you own during claim phase. Max 3 runes per turn. | Kaupmadur can sell 1 hide for 1 gold each turn. Max 4 hide each turn. Sell during claim phase. |
| Berserkur gets stronger. From now on, he counts as 6 in defence. You can store 8 disks on Virki (+ additional disks for upgrades, max 12). | If you own a quarry, gain 3 glory during claim. |
Resources, Trade, Gold & Glory
The goal of Bardagi is to own more gold, areas and glory than your opponents. You do so by overtaking areas to get resources from them. These resources are then used to buy building upgrades, refill disks on buildings and trade them in for gold. During this all, you gain glory for all your efforts!
Resources
Areas on the game board are overtaken, either from the Barbarians or from other players, to claim resources from them. You gain resources from all areas you own (with a disk in your colour) during the claim phase. The gained resources are placed in their corresponding box on your player board. Each box can hold 5 resources at maximum.
- Meat - Used to refill disks on Virki. Gained from Sheep & Cattle.
- Hide - Used to refill disks on Verslun. Gained from Cattle.
- Wool - Used to refill disks on Hof. Gained from Sheep.
- Timber - Used for small building upgrades. Gained from Forest.
- Stone - Used for large building upgrades. Gained from Quarry.
- Iron - Used for building upgrades. Gained from mines.
Refill Disks, Trade & Building Upgrades
The resources have 3 different purposes:
Refill the disks on your village buildings (Verslun, Virki & Hof). The disks on your buildings get depleted as you use them to overtake areas or cast runes. You use your resources to refill those disks: Virki - 4 meat, Verslun - 4 hide, Hof - 4 wool. Each refill costs you one action (one card), but the Kaupmadur can refill all buildings with one action. Note that you need to own all required resources to refill the building disks.
Trade, resources for gold. The Kaupmadur can buy & sell resources at will when he is in towns or home village. Trade costs one action (one card) and is done according to the Trade table.
The Trade table is divided into basic resources (meat, wool, hide & timber) & mining resources (stone & iron). Each 1 mining resource costs any 2 basic resources in trade. You can trade resources to gold at will, but you can only trade 1 gold for two basic resources or 1 mining resource.
Buy building upgrades. Resources, as well as 1 or 2 gold coins, are used to buy building upgrades. The building upgrades always improve your status, either the unit it belongs to or your clan in general. They also give you glory points at the end of the game; 3 glory for each small one & 5 for each large.
Gold
Gold mines on the board that you own give you 2 gold coins during each claim phase. The smaller brown disk is 1 gold and the larger gold coloured is 5 gold. Some building upgrades also give you gold each round when they have been bought.
At the end of the game, the one player that owns most gold receives a 15 glory point bonus. All players, including the one receiving the bonus, get 1 glory for each gold they have. Gold is therefore an important part of the game, but you also need to use gold to pay for various things:
- Runes - 2 gold give 3 runes.
- Building upgrades - small upgrade costs resources & 1 gold, large 2 gold.
- Resources - for 1 gold you can buy 2 basic or 1 mine resources during trade.
Glory
This is what it is all about: to gain more glory than your opponents at the end of the game to be claimed the winner!
Each round players receive glory points for the areas they own (marked with disks in players colour), plus any potential glory points received each round from building upgrades.
At the end of the game, players also receive glory points for the following:
- Building upgrades - for each small one you get 3 glory and 5 glory for each large.
- Gold - 1 gold coin gives you 1 glory point.
- End game bonus points:
- Most gold owned by a single player (if equal, most gold mines; still equal, split 14) - 15 glory points.
- Most areas owned by a single player (if equal, most Axes on board; if still equal, split) - 10 glory points.
Playing Time
Bardagi is played in rounds, 7 - 10 rounds depending on number of players (120+ minutes).
During the first few games, we recommend that you start the game with the round marker placed on the 2nd island on the spiral. Then you play 5 - 8 rounds (90 minutes). The round marker is moved to the next island on the left at the end of each round. When the round marker gets to an island that shows the current number of players, the last round begins. End of round, count final score.
The starting island for the first games is the 2nd island on the spiral.
Your Units - The Characters
Berserkur
- Movement: 2 areas per card.
- Home building: Virki.
- Cost to refill disks: 4x meat.
- Your only attack unit; can overtake any area on the board (except sacred locations and other home areas).
- Counts as 4 disks in attack & defence. The only unit that can attack other players and Barbarian Camps. Can strengthen defences anywhere during your turn.
- Moves two areas in each action.
- Can move into any area, except other players' home areas. If an Axe token is present, he must fight it if he wants to stay on the area, which requires him to remove 2 disks from Virki for each Axe token removed.
- Berserkur overtakes Barbarian areas through attacks. Take ONE disk from Virki & place on the area to claim it.
- All attacks against players: you need to have +1 disk on Virki than are currently present on the attacked area to be successful.
Special actions:
- Can attack all areas on the board (except sacred locations and home areas).
- Can attack and force remove other Berserkur.
- Berserkur can strengthen any area he owns during his turn by taking disks from Virki (or any other of his areas) and placing them on his area of choice to strengthen defences. FREE ACTION.
Note: Empty areas do not give resources.
Attack sequence. Attacking players - the whole battle costs one action. The attacker can always retreat.
- Attack the Berserkur (if present). The attacker removes 4 disks from his Virki; the defender removes 4 disks (if owned) from his Virki & places Berserkur on his home area.
- Attack Axes (if present). The attacker discards 2 disks from his Virki for each Axe token present. REMOVE AXE TOKEN.
- Attack units (disks). The attacker removes as many disks as are in the area from his Virki. The defender removes his. All disks are returned to players' disk piles.
- Claim the area by placing one (or more for defence) disks on the area, taken from Virki.
When the Berserkur aims to overtake or fight an area, he must have enough disks on his Virki. If he does not have enough disks, he cannot make the chosen attack (any of sequences 1, 2, 3 or 4 above).
If a Berserkur is placed on his home area as a result of an attack (sequence 1), he must re-activate his Berserkur by re-filling his disks on Virki. The resurrected Berserkur moves from his home area on the board.
Special ability: Counts as 4 in attack and defence against other players. Can increase defence anywhere.
Godi
- Movement: 2 areas per card.
- Home building: Hof.
- Cost to refill disks: 4x wool.
- Your only priest; can cast a rune anywhere on the board. You cannot cast a rune on an area that is occupied by another player's Godi; it is defended against all rune castings.
- Godi can remove a rune from an area by going there and paying 2 gold to remove it.
- Godi gives you 1 recruit from the area he is standing on during the claim phase.
- Godi can buy runes at sacred locations: 2 gold draws 3 random runes.
- Godi overtakes Barbarian areas by converting them. Take ONE disk from Virki & place on the area to claim it. (Printed as "Virki" in this list; the Basic actions section of the same rulebook says the Godi removes the disk from Hof, which is the Godi's building.)
- Godi cannot stand in the same area as another Godi. A player cannot enter an area where another Godi is present.
Runes - Godi free action. You can cast up to TWO runes ONCE during your Activation phase. You can cast a rune anywhere on the board. If there is another player's Godi on the area, it is defended against runes. Runes can stack on areas, but only one of a given type.
Special actions:
- Can move into any area (except home areas), as long as there is no other player's Godi there.
- Can cast runes. Godi can cast two runes during the Activation phase. Free action. Only available runes stored in your village can be cast.
- Can buy runes at sacred locations; pay 2 gold, draw 3 random runes from the face-down pile.
- Not possible to cast runes on areas where an enemy Godi is standing.
Special ability: Gives 1 recruit from the area he is currently standing on. Can cast a rune anywhere on the board.
Divine Powers (Runes)
The rune table in the rulebook lists these runes:
- Divine Powers. Place on own area; gives you +1 resource (area resource) during claim phase.
- Wind in the sails. You can move the Knerrir 10 ocean squares. Discard after use.
- Defence. Counts as +1 in defence. Blocks an area from getting new runes on the area. Runes placed prior to this one are still active.
- No resources. The area will not gain any resources. Needs to be removed to deactivate.
- Theirs are yours. You get the resource from the area. Place your disk on the area to identify it. Needs to be removed to deactivate.
- Double resources. Resources are doubled from the area, e.g. gold mine - 4 gold.
Kaupmadur
- Movement: 2 areas per card.
- Home building: Verslun.
- Cost to refill disks: 4x hide.
- Your only trader. Can buy and sell resources on his home area or towns.
- Can move two areas with one card.
- Can buy 3 runes at Sacred locations for 2 gold.
- Can move into any area on the board, except other players' home areas.
- Kaupmadur overtakes Barbarian areas through trade. Take ONE disk from Virki & place on the area to claim it.
- Kaupmadur cannot overtake other players' areas; only the Berserkur can do that.
- Gives 1 extra resource according to the area he is standing on (e.g. standing in quarry - 1 extra stone). If standing in Home area, take 1 extra resource of your own choice, including ONE gold.
Special actions:
- Can trade in villages according to Trade table. Costs one action.
- Can refill ALL disks AND trade at will if present on his home area. FREE ACTION. All required resources must be available in storage.
- Can refill all disks on buildings and trade resources on Home area.
Special ability: Gives 1 extra resource from the area he is standing on during claim.
Trade - buy and sell resources. The Kaupmadur can buy and sell resources at will, according to the trade table. Only resources placed in storage, or gold in your village, are valid. You can do as much trade as you will with one action when present in towns. You do not need to own the town to trade there. TRADE IN HOME AREA IS A FREE ACTION! Must be done during your activation turn.
Keep in mind that you buy building upgrades in the claim phase, so plan ahead.
Knerrir
- Movement: 3 areas per card (3 ocean squares).
- Home area: Harbour.
- Your ship. Used to transport your units. Not possible to attack.
- Moves 3 ocean squares with each action.
- Can move 1, 2 or 3 units at the same time.
- Can overtake Barbarian harbour areas. PLAYERS NEED TO HAVE A DISK IN THEIR VILLAGE TO OVERTAKE HARBOURS WITH KNERRIR.
- Needs a harbour area to be activated (players must first overtake an area with a harbour icon prior to activation).
Special actions:
- The only sea transport unit.
- Can carry all 3 at the same time.
- Can transport all units at the same time. Can unload and upload units in the same movement.
Special ability: Can overtake Barbarian harbours anywhere.
To Sail
The Knerrir uses only ocean squares. The Knerrir sails from one harbour to another, using the sea routes. One route is one move. While he is not sailing, he is kept on the harbour on the player board. When players want to sail:
- Move the unit you aim to sail with (by using a unit card - action) into an area you own that has a harbour icon. If already at the harbour tile, it does NOT cost an action to enter the ship.
- Swap places with the unit and Knerrir; the Knerrir is moved from the harbour on the player board to the harbour on the main board. The unit is placed on the player board harbour to show that it is now on board the Knerrir.
- While sailing, the unit cannot be used (but Godi can cast runes). Keep the unit on the player board until destination is reached.
- Use Knerrir cards while sailing to move it: 3 squares per card used. At destination, swap the Knerrir & unit again; Knerrir goes on the player board, unit on the location harbour. Moving into location harbour does not cost a movement action for the unit.
If the Knerrir is not on the player board harbour, it cannot be activated to move another unit somewhere else on the board. However, while active it can pick up another unit standing ON a harbour area while moving. That does not cost an action for the unit (but moving into the area does cost an action). The new unit is placed along with the previously placed unit on the player board. This way, all units can be on the Knerrir at the same time - standing on the harbour area on the player board. Units can stay on the Knerrir between rounds.
Units on the Knerrir cannot be attacked. The Knerrir can overtake Barbarian areas even with units on board, but it is not required to have units on board for the Knerrir to overtake.
Detailed Round Overview
Bardagi - The claim for gold is played over the course of 5 - 8 rounds (7 - 10 in the full version). Each player has 4 units at their disposal and during each turn, players choose which 6 actions (8 actions from round 5) they will activate by selecting 6 cards showing the characters they aim to activate. Each card counts as one action for the shown character unit.
Each round is divided into 4 phases:
- Select cards
- Activate units
- Build upgrades
- Claim glory & resources
1. Planning - Choose cards, all players simultaneously
- At the beginning of each round, all players choose the 6 cards they want to use (8 cards from round 5 & onward) during the upcoming turn.
- Each card counts as 1 action you aim to do with the shown character. You can choose any combination from the available 24 cards; e.g. 6 Berserkur cards, or 3 Berserkur & 3 Godi cards.
- The cards should be kept secret and all chosen at the same time. When the action phase starts, it is not possible to change cards afterwards. When everybody is pleased with their selection, continue with round Phase 2.
2. Actions - Lay down the cards and play out the actions, in starting player order
- The starting player (holding the starting player token) starts to lay down all of his chosen cards.
- The cards should be placed up for all to see, in any preferred order.
- Each unit has 3 basic actions they can do:
A) Move. Move your unit from 1 area to another area, by going over a white line that defines an area (see The Game Board). All land units can move 2 areas and the Knerrir can move 3 areas (ocean squares). Areas that all belong to the active player and are interconnected count as 1 area in movement.
B) Overtake areas. All areas that do not have a token on them (except Sacred locations) are considered owned by Barbarians. To claim the area, remove a disk from the building owned by the given unit and place it on the area aimed to overtake:
- Kaupmadur - remove one disk from Verslun and place on area.
- Berserkur - remove one disk from Virki and place on area.
- Godi - remove one disk from Hof and place on area.
- Knerrir - remove one disk from Village (recruits gained from Godi or overtaken Towns) and place on area (only harbours).
If there are no disks on the buildings or Village, the area cannot be overtaken.
Interconnected coloured areas are considered as one. (Example from the rulebook: 4 areas overtaken & interconnected by blue; moving from the right Town to the left mountain would be 2 movements.)
C) Refill disks on buildings. As you overtake areas (or fight with Berserkur) the disks on the buildings eventually get depleted. Players can, with one action (a free action for the Kaupmadur), refill up to 6 disks by paying the required resources:
- Refill disks on Verslun (Kaupmadur) - pay 4 skin (hide).
- Refill disks on Virki (Berserkur) - pay 4 meat.
- Refill disks on Hof (Godi) - pay 4 wool.
Note! Building improvements add to the total number of disks a building can have:
- For each small upgrade, add 1 more disk.
- For each large upgrade, add 2 more disks.
2. Actions - Continued: Special Character Actions
Berserkur special actions
A) Strengthen defences - Free action, once per round. Strengthen defences by placing disks on areas anywhere on the board. The disks can be taken from the Virki or other areas. Note that areas that do not have disks on them do not give resources during the claim phase.
Disks on the board should only be considered as ownership markers and defence. Each disk counts as 1 defence for the area it is standing on. E.g. 3 disks = 3 defence.
B) Attack other players. The complete attack costs ONE action. If an area has a disk on it, the area belongs to a player in the shown colour. The only way to overtake these areas is by attacking them. Follow the sequences below when attacking, as required:
- Attack the Berserkur (if present). Attacker removes 4 disks from his Virki; defender removes 4 disks (if owned) from his Virki & places Berserkur on his home area.
- Attack Axes (if present). Attacker discards 2 disks from his Virki for each Axe token present. REMOVE AXE TOKENS accordingly and place in the Axe token pile. They have been defeated.
- Attack units (disks). Attacker removes as many disks as are in the area from his Virki. Defender removes his. All disks are returned to players' disk piles.
- Claim the area by placing one (or more for defence) disks on the area, taken from Virki.
If there are not enough disks for each required sequence, the area cannot be conquered. The new area will give resources in the same round.
Example from the rulebook: Blue attacks by using his 2nd card. Blue discards 3 disks from his Virki and Yellow must remove her 3 disks from her area. Blue places one disk, taken from Virki, on the new area. In addition, he places two more disks as extra defence. His Virki now has no disks; it must be refilled with 6 new disks by paying 4 meat, either by the Berserkur himself or the Kaupmadur.
Kaupmadur special actions
A) Trade & refill disks in Home areas - Free action, once per round. If the Kaupmadur is in his home area he can trade his goods, that are in the boxes on his player board, according to the Trade table. He can trade as many resources as he wants. During the same free action, he can also refill the disks on all buildings; the required resources must be available in his storage & paid accordingly.
B) Trade in Towns (own or other players' Towns). Costs ONE action. The Kaupmadur can trade according to the Trade table.
C) Buy Runes at Sacred locations - pay 2 gold, draw 3 runes. Costs ONE action. He must be on Sacred location areas to buy Runes.
Godi special actions
A) Cast Runes - Free action, once per round. If the Godi has Runes available in his village, he can cast them anywhere on the board. He can cast as many Runes as he wants.
B) Buy Runes at Sacred locations - pay 2 gold, draw 3 runes. Costs ONE action. He must be on Sacred location areas to buy Runes.
Example from the rulebook: Blue uses one Kaupmadur card to refill his disks on Virki by discarding 4 meat, then his 2nd Kaupmadur card to move the Kaupmadur to the gold mine to the left of his village. Blue now uses his Godi card to cast a Rune on his gold mine. The 6th card is a Knerrir card and that is used to claim a harbour.
3. Buy Upgrades - Buy building upgrades if possible, in starting player order
- The starting player (holding the starting player token) can buy first.
- All required resources must be available in the player's storage (the boxes on the player boards), plus the gold in the village. Late trade is not possible.
- In a 4 - 5 player game, there should be 2 large upgrades & 2 small upgrades visible of each type (Virki upgrades, Hof upgrades & Verslun upgrades).
- Each player can buy: 2 small upgrades of any type; 2 large upgrades of any type; or 1 large & 1 small of any type.
- If an upgrade is bought, a new one is not shown. Therefore, it might be possible the last player has very few building options. Replenishment of the upgrades is done at the end of phase 4.
4. Claim Glory & Resources - All players simultaneously
Done in 3 steps:
A) Claim glory from your owned areas, with your token on them. Each area that you own counts as one glory. Count all areas and move your glory marker accordingly on your player board. If you pass the shield, place the "50" or "150" points marker accordingly on the shield as a reminder.
Advice: In order to remember which area has been counted, push the disks on top of the resource image of each area.
Example from the rulebook: Blue owns 7 areas (the 7th area was claimed by his Knerrir and is not shown). For these 7 areas Blue gets 7 glory points that he moves up on his glory bar accordingly (on his player board).
B) Claim resources from your owned areas, with your token on them. Each area that you own gives you one type of the shown resource. Areas that show two types (Hide & Meat or Wool & Meat): you choose one of either type, not both (example: only Meat, not Meat & Hide). Resources gained are placed in their corresponding boxes on the player board. Gold, Axes & recruits are placed on the village.
- Each Sheep area gives 1 Wool OR 1 meat.
- Each Gold Mine gives 2 gold.
- Each Quarry gives 1 stone.
- Each Forest gives 1 timber.
- Each Iron Mine gives 1 iron.
- Each Cattle area gives 1 hide OR 1 meat.
In addition, for special areas and character placement, you gain:
- Each Town gives 1 recruit (disk).
- Godi gives 1 extra recruit (nothing from Home area or Sacred location).
- You can buy max 2 Axe tokens, 1 gold each.
- Kaupmadur gives 1 extra resource according to area he is standing on (nothing if on Home area, Barbarian camp or Sacred location).
Advice: In order to remember from which area resources have been claimed, push the disks away from the resource image of each area.
Example from the rulebook: Blue owns 7 areas (the 7th area claimed by his Knerrir is not shown). From area he gains 1 stone. From the area with the gold mine he first gains 2 gold as normal, then he gets 1 extra resource for his Kaupmadur standing there, plus more for the Divine Rune the Godi placed there (+1 resource). From another area he gets 1 wood, and from another he gets 1 iron. From the area where he can choose either hide or meat, he takes meat. The Godi on an area gives 1 extra recruit (disk) that is placed on the village, and finally he can choose either meat or wool from the new area. The 7th area not shown was 1 wood.
C) Place recruits & Axe tokens - renew buildings & advance the Round marker. Place the Axe tokens on any of your areas of choice. Place recruits on any of your buildings, remembering the max limit.
Blue places 1 Axe token on the new area he just claimed, as extra defence. He keeps his 1 recruit on his village in case his Knerrir sets out to overtake new harbours.
When all players have finished with their Axe & recruit placement, advance the Round marker to the next island on the spiral, fill empty building upgrade slots beside the board (if any were built), give the next player to the left the Starting player token and the next turn begins.
If it is on the last island (according to number of players), the game ends and you go directly to the end game scoring.
Round Overview
- Planning - Choose your cards, all at the same time.
- Rounds 1-4: 6 cards. Any card combination you prefer.
- Rounds 5+: 8 cards. Any card combination you prefer.
- Actions - Lay down the cards, carry out all actions. Starting player order.
- Upgrades - Buy building upgrades, if you have the resources. Starting player order.
- Claim - all players at the same time.
- A) Claim glory: you gain 1 glory for each area you own, marked with a disk in your colour.
- B) Claim resources: you gain resources for each area you own, marked with a disk in your colour. Towns give you recruits, buy Axe tokens in Barbarian Camps.
- C) Place recruits and Axe tokens: recruits placed on any of the 3 buildings, Axe tokens on areas as defence.
New round, starting player token to the left. Advance round marker. If last round, count end game points. Claim a winner!
Unit Overview
- Berserkur - Virki. Movement: 2 areas per card. Basic actions: move, overtake & refill. Special actions: attack players, place extra defence.
- Godi - Hof. Movement: 2 areas per card. Basic actions: move, overtake & refill. Special actions: cast runes.
- Kaupmadur - Verslun. Movement: 2 areas per card. Basic actions: move, overtake & refill. Special actions: trade at will & refill at home areas.
- Knerrir. Movement: 3 ocean squares per card. Basic actions: move & overtake.
Points
Glory Points - Each Round
- Each area with a disk in your colour: 1 glory point.
- Building upgrades give glory/gold/recruits each round, after purchase.
- Glory cards: 3 glory points.
- Glory for areas: ? glory points.
- Gold/recruits for areas: ? gold/recruits.
Glory Points - End of Game
- Each small upgrade: 3 glory points.
- Each large upgrade: 5 glory points.
- 1 gold coin: 1 glory point. Count all gold.
- Most gold: 15 glory points.
- Most areas: 10 glory points.
If tie: most gold mines. Still tie: most Axe tokens. Still tie: most Towns. Still tie, play again - no winner.