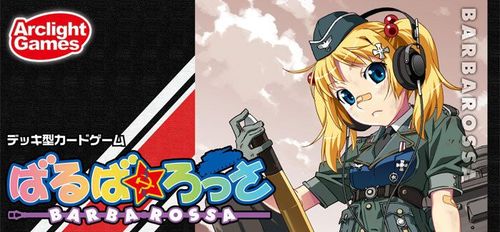
Barbarossa (2010)
Barbarossa Rulebook
Table of Contents
Table of Contents
1. Game Components
Barbarossa contains the following:
- 305 Game Cards
- 10 Reference cards
- 1 Rule book
2. Symbols
1) Tactic Points (Small icon: Tactic Points icon. Grayscale: Tactic Points icon.)
Tactic Points are used to play cards from your hand. Sometimes they are also used to pay for card abilities.
2) Supply Points (Small icon: Supply Points icon. Grayscale: Supply Points icon.)
Supply Points are used to Recruit new cards. Sometimes they are also used to pay for card abilities.
3) Draw Points (Small icon: Draw Points icon. Grayscale: Draw Points icon.)
Whenever gained, Draw Points are used immediately to draw the indicated number of cards.
4) Reinforcement Points (Small icon: Reinforcement Points icon. Grayscale: Reinforcement Points icon.)
Each Reinforcement Point allows you to Recruit one card. You must also pay the requisite number of Supply Points for the card.
5) Attack Points (Small icon: Attack Points icon. Grayscale: Attack Points icon.)
Attack Points are used during combat to conquer Site cards.
6) Victory Points (Small icon: Victory Points icon. Grayscale: Victory Points icon.)
The player with the most Victory Points at the end of the game is the winner.
3. Cards
There are six types of cards in Barbarossa, and they all have different features and instructions. In this section you will learn how to read each card type.
3-1 Supply Cards
Supply cards represent resources being provided for your campaign. When you play this type of card, you gain Supply Points. You collect the Supply Points to recruit more armies during your Reinforcement Phase. Occasionally you may also use the Supply Points to pay for your army units. You can play Supply Cards any time during your turn without spending Tactics Points.
Example card: Horse-drawn Transport — Play Cost 0, Reinforcement Cost 1, Card Type: Supply. Play Bonus: Supply Points +1. Flavor text: "Horses are the best way to transport. I mean, they're cute... hey! Fritz, stop that!"
- Play Cost
This indicates how many Tactic Points you need to play the card. All Supply Cards have zero Play Cost meaning you can play these cards free.
- Card Name
Name of the card.
- Reinforcement Cost
This indicates how many Supply Points you need to pay to Recruit this card.
- Card Type
This indicates what type of card it is. Some cards may also have a subtype.
- Card Text (Play Rule)
This is the card text in the white box.
This text describes the play effect (Black text) that happens when you play this card, and/or the recruit effect (Red text) that happens when you recruit this card. The Play Bonus is part of play effect. Supply Cards only have Play Bonus in their Card Text.
3-2 Army Cards
Army cards are the centerpiece of your army, and they are also the core of your military potential. Most army cards produce Attack Points. You may use these Attack Points during combat to conquer Site Cards. Some of the Army Cards also have abilities that help your army.
Example card: SS Panzer Regiment — Play Cost 2, Reinforcement Cost 8, Card Type: Army (Tank). Play Rule: "Play this card. Never-tiring battlefield extinguisher... The armored SS are here!" Deploy Rule: "Exhaust this card and pay 1 Supply Point -> gain 6 Attack Points. Forfeit this card -> gain 2 Attack Points." Victory Points: 1.
- Play Cost
- Card Name
- Reinforcement Cost
- Card Type
- Card Text (Play Rule)
This is the card text in the white box.
This text describes the play effect (Black text) that happens when you play this card, and/or recruit effect (Red text) that happens when you recruit this card. The Play Bonus is part of the play effect. Some of the Army Cards have an "Activation Ability" in the Play Rule. See section 9 "Card Effects and Abilities" for more detail.
- Card Text (Deploy Rule)
Occasionally a card will have a Deploy Rule. Deploy Rules are below Play Rules. If a card has the Deploy Rule, you may Deploy the card.
If a card has effects in the Deploy Rule text, the effect works only when the card is Deployed. Also, you can only use the abilities in the Deploy Rule while the card is Deployed. See section 9 "Card Effects and Abilities" for more detail.
- Victory Points
Some cards grant Victory Points. When the game is over, sum all Victory Points on the cards you have in your deck, discard pile, hand, and Deployed cards in Combat Zone. The sum will be your total Victory Points.
3-3 Strategy Cards
Strategy cards help your army, but generally return to the War Zone once you use them. If you want to use the card again, you will have to Recruit the card once again.
Example card: The Fuhrer's Suggestion — Play Cost 1, Card Type: Strategy. Play Bonus: Supply Points +1. Play Rule: "You may search your deck for a card and put it in your hand then shuffle your deck. During your Clean-up Phase, return this card to the War Zone instead of putting it in your discard pile." Flavor text: "Anything! Just say what you want! La-la-la-laaaa!"
- Play Cost
- Card Name
- Reinforcement Cost
- Card Type
- Card Text (Play Rule)
3-4 Support Cards
Support cards are facilities and commanders that you can gain, but they are not Army Cards. Every Support card is automatically Deployed after you play the card.
Example card: Li'l Gyderian — Play Cost 1, Reinforcement Cost 6, Card Type: Support (Commander). Play Rule: "Play this card." Flavor text: "Operations? Leave it to me!" Deploy Rule: "During your Clean-up Phase, you may exhaust cards you wish to reactivate. During your Starting Phase, you may Scrap two Supply cards from the War Zone." Victory Points: 4.
- Play Cost
- Card Name
- Reinforcement Cost
- Card Type
- Card Text (Play Rule)
- Card Text (Deploy Rule)
- Victory Point
3-5 Event Cards
Event cards are special events that happen when a player attacks a city. When a player declares combat on a City Card, reveal the top card of the Event Deck. Add the Defense value on the Event Card to that of the City's. If the attacking player successfully conquers the City, they will gain the revealed Event Card. Do as the Event Card instructs when you gain it.
Example card: General Winter — Card Type: Event (Obstacle). Additional Defense Value 4. Play Rule: "When you conquer the City, Deploy this card to any Front Line." Deploy Rule: "While this card is in your Front Line, your cards do not exhaust as normal during your Starting Phase. You must exhaust cards you wish to reactivate."
Example card: Russian Guards Tank Army — Play Cost 1, Card Type: Event (Enemy). Additional Defense Value 6. Play Rule: "When you conquer the City, Recruit a card." Deploy Rule: "When you play this card, you may Scrap it. If you do, Recruit a Grenadier Regiment (not SS) from the War Zone." Flavor text: "I'm just a worker at the factory..." Victory Points: 7.
- Play Cost
- Card Name
- Card Type
- Card Text (Play Rule)
Each Event Card has different types of text. Text in red happens when the card is revealed or gained. Text in black is only followed when the card is played from your hand.
- Card Text (Deploy Rule)
Some Event Cards instruct you to place it in another player's Combat Zone. The black text is the card effect while it is in the Combat Zone.
- Victory Point
- Additional Defense Value
When the card is revealed, add this Defense Value into the city that is being attacked.
3-6 Site Cards
Site Cards are the only cards which are able to be attacked. They are also the main source of Victory Points in the game. Players gain Site Cards by attacking them during Combat. If the total attack force matches or exceeds the Defense Value of the Site Card, the Site is conquered and the player will Deploy that card.
Example card: Strategic Position — Card Type: Site (Foothold). Defense Value 7. Play Rule: "When you conquer this card, Deploy it." Flavor text (partly visible at page edge): "...positioned at the edge of the city." Deploy Rule (partly visible at page edge): "Return this card to the War Zone -> the City you are in combat with gets -1 Defense Value this turn, to a minimum of 0."
- Card Name
- Card Type
- Card Text (Play Rule)
- Card Text (Deploy Rule)
- Victory Point
- Defense Value
The Attack Value must be equal to or greater than the Defense Value to Conquer.
4. Preparations
-
Separate all of the Supply Cards, Strategy Cards and Army Cards and place them in their own piles.
-
Shuffle all Support Cards into one pile and place it face-up. And then the same with the Event Cards but place it face-down.
-
Place all of the Fortified Hill and Strategic Position cards each face-up in their own pile. With the remaining City cards, place Moscow face-up on the table, shuffle the remaining cards and place them face-up on top of Moscow.
-
We suggest placing all Supply, Strategy, and Army cards in rows according their Supply cost (the number in the upper-right). This area of piles is called the War Zone.
War Zone - Setup Example (illustrative pile layout, Cost 1 to Cost 6 rows):
- Cost 6: Supply Pile — (none); Army Piles — SS Panzer Regiment (018), Heavy Tank Battalion (016), Panzer Regiment (017); Support Pile (face-up); Event Pile (face-down)
- Cost 5: Army Piles — Locomotive Transport (003), Assault Gun Battalion (015), Division HQ Company (014)
- Cost 4: Army Piles — Engineer Battalion (013), Armored Scout Battalion (012), Artillery Battalion (011); Strategy Piles — Strategic Planning (021); Site Piles — City
- Cost 3: Army Piles — Motorized Transport (002), Security Company (010), Panzer Grenadier Regiment (008); Strategy Piles — The Fuhrer's Suggestion (020); Site Piles — Strategic Position (033)
- Cost 2: Army Piles — Anti-tank Gun Battalion (007), Motorcycle Messenger (009); Strategy Piles — Commando Troops (006); Site Piles — Airdrop (019); Site Piles — Fortified Hill (032)
- Cost 1: Supply Pile — Horse-drawn Transport (001); Army Piles — Feldersatz Battalion (005), Grenadier Regiment (004)
Pile setup instruction: white piles are Face-up Piles, dark piles are Face-down Piles.
-
Each player takes 6 Horse-drawn Transport cards and 2 Grenadier Regiment cards and shuffles them together. This is your starting deck.
-
Randomly select one card pile from the Supply, Tactics, Army, or Support areas and remove it from the game. For your first game, it's recommended to remove the Support pile.
-
Determine a start player in any suitable fashion. Each player draws the top 4 cards of their deck and you're ready to begin the game.
5. Areas, Playing Cards, and Keywords
5-1. Warzone and Combat Zone
The War Zone
The communal piles of cards from which all players will Recruit cards.
All face-up piles, including the City pile, Support pile and players' discard piles, are public information.
Combat Zone
Each player has their own Combat Zone. Each Combat Zone contains 4 separate areas — 1) deck 2) discard pile 3) playing area 4) Front Line — where Deployed cards are kept. How you arrange the Combat Zone is up to you, but it's important to keep the areas separate so that played cards don't end up in the Front Line, or that cards in the Front Line don't accidentally end up in your discard pile during your Clean-up Phase.
Combat Zone Example: Discard Pile, Player's Deck, Front Line (containing Deployed Cards), Playing Area (containing Played Cards), and Hand.
5-2. Playing Cards
Playing Cards and Using Points
Playing cards from your hand is generally done during your Tactics Phase; a played card is always put into your playing area. Cards cost Tactic Points to play; you must have and pay the requisite amount of Tactic Points to play a card from your hand to your playing area. The Tactic Point cost to play a card is at the top left of each card. You start each Tactics Phase with 1 Tactic Point and may thus play one card with a Tactic Point cost of 1 (and as many 0-cost cards as you wish). In order to play more than one 1-cost card, or to play a 2-cost card, you must play, or have in play, a card that generates more Tactic Points for you.
In special instances, Supply Cards may be played during your Starting Phase.
Played cards may generate Draw Points, Tactic Points, Supply Points, Reinforcement Points, Attack Points, and/or other effects. Each type of point is used differently.
Draw Points are used immediately. When a card gives you one or more Draw Points, draw that many cards immediately.
Tactic Points are used during your Tactics Phase to play cards. You begin your Tactics Phase with 1 Tactic Point. The Tactic Point cost of each card is in the upper-left corner. Most cards cost 1 Tactic Point, some cost 2, or even 0. Some cards will grant you more Tactic Points when played. Cards which have no Tactic Point cost printed in the upper-left corner cannot be played and should never be in your hand. Unused Tactic Points are lost during your Clean-up Phase.
Supply Points are used primarily during your Reinforcement Phase to Recruit new cards, but are also sometimes used during your Starting Phase to reactivate cards or during Combat to activate tanks. You are not granted Supply Points as you are Tactic and Reinforcement Points; all Supply Points are generated by cards. The Supply Point cost for each card is in the upper-right corner. Unused Supply Points are lost during your Clean-up Phase.
Reinforcement Points are used during your Reinforcement Phase to recruit cards. You begin your Reinforcement Phase with 1 Reinforcement Point. Each Reinforcement Point allows you to Recruit one card. If you use multiple Reinforcement Points to Recruit multiple cards you must have enough Supply Points to pay for all Recruited cards. Unused Reinforcement Points are lost during your Clean-up Phase.
Attack Points are used during combat to conquer Site Cards. Unused Attack Points are lost during your Clean-up Phase.
When you play a card, you gain the points and the effects stated in the white text box. Effects stated in the yellow text box are only active when the card is Deployed (see below); these effects do not happen when you play the card from your hand.
Played cards will generally stay in your Playing Area (unless they were Deployed as part of their effect), and are discarded during your Clean-up Phase. Strategy cards are returned to War Zone after they are played.
Some Event Cards are played onto other players' Front Lines. Please refer to each card's effect for details.
5-3. Discarding Cards
To "discard" a card means to put it in your discard pile from your hand. The discard piles are open information. When you discard a card, put it on the top of your discard pile, face up. You may look at any player's discard pile at any time, but the order cannot be changed.
Players also can check any face-up card piles as well. For example, you can check the Supply pile in the War Zone at any time, but you cannot change the order of the cards.
5-4. Forfeiting Cards
To "Forfeit" a card means to put it into your discard pile from Playing Area or Front Line.
5-5. Scrapping Cards
To "Scrap" a card means to remove it from the game entirely. Put the Scrapped card back in the game box.
5-6. Exhausting Cards
Many cards instruct you to exhaust them, either when they are played or to activate their abilities. To exhaust a card means to tilt it to the side. An exhausted card cannot be exhausted again, thus any ability that requires you to exhaust the card cannot be used more than once per turn. If the card has additional abilities that can be activated without exhausting as a cost, you may activate those abilities even after the card is exhausted.
Unless stated otherwise, all exhausted cards on your Front Line will be reactivated at the beginning of your Starting Phase. Other effects may also reactivate exhausted cards. An active card cannot be reactivated.
Card's Position: Active <-> Exhausted (Exhaust moves a card from Active to Exhausted; Reactivate moves a card from Exhausted back to Active.)
6. The Flow of the Game
After setting up the game, select a starting player. Whenever a player's turn is finished, play passes to the left.
Each turn has 4 phases.
Each phase is performed in the order below, and is only performed once per turn.
1) Starting Phase
Reactivate any cards that were exhausted during your previous turn.
2) Tactics Phase
(a) Gain 1 Tactic Point
(b) Play cards from your hand until you choose to play no more, or cannot due to lack of Tactic Points.
(c) Declare combat. (Only once per turn.)
Note that step (c) can be performed at any time — beginning, middle, or end — during step (b).
3) Reinforcement Phase
(a) Gain 1 Reinforcement Point
(b) You may Recruit one card for each Reinforcement Point you have. You must also pay the requisite amount of Supply Points.
4) Clean-Up Phase
(a) All cards played this turn that did not go to your Front Line are put into your discard pile.
(b) If you have any cards in your hand you may choose to keep one. All other cards are discarded. If you do not keep a card, discard your entire hand.
(c) Draw 4 cards.
(d) All unused Points expire.
7. Phases of a Turn
Each turn consists of 4 phases.
7-1. Starting Phase
Ignore this phase on the first turn. During your Starting Phase, you will reactivate any units that were exhausted in your previous turn. You can play Supply cards in this phase, but you cannot play any cards or abilities unless one of your cards indicates it.
7-2. Tactics Phase
During your Tactics Phase, you will play cards from your hand for various effects. You begin your Tactics Phase with 1 Tactic Point. Most cards cost 1 Tactic Point to play; the Tactic Point cost of each card is in the upper-left corner. Supply cards (gray frame) cost 0 Tactic Points: you may play as many Supply cards as you like during your Tactics Phase.
7-2.1 Combat Step
At any time during your Tactics Phase, you may declare an attack on a Site card. To conquer the Site card, you must commit enough Attack Points to meet or exceed the defense of the Site card. See below for a more detailed explanation of Combat.
7-3. Reinforcement Phase
During your Reinforcement Phase, you will use Supply Points gained during your Tactics Phase to Recruit from the War Zone. You receive 1 Reinforcement Point each turn. Each Reinforcement Point allows you to Recruit one card. If you played a card during your Tactics Phase that gave you more Reinforcement Points, you may gain more than one card, but you must have enough Supply Points to pay for all of them. Newly Recruited cards are sent to your discard pile.
7-4. Clean-up Phase
During your Clean-up Phase, place all cards you played this turn that were NOT Deployed (described on page 9) into your discard pile. If you have any cards still in your hand, you may choose to keep one, and then discard the rest. Next, draw 4 cards from your deck. If, at any time, there are no cards in your deck and you must draw a card, shuffle your discard pile to form your new deck. Any unused Supply Points, Tactic Points, Reinforcement Points, and Attack Points are lost.
Pass the turn to the player on your left. Play continues until a player conquers the Site card Moscow.
8. Game End and Victory
8-1. Game end
Once a player conquers Moscow, the game ends after that turn's Tactic Phase.
8-2. VP and Winner
Each player adds up all Victory Points in their Front Line, playing area, deck, hand, and discard pile. The player with the most Victory Points is the winner. In case of a tie, the player with the most valuable City card wins. If it's still a tie, the player with most City cards wins. If it's still a tie, the game is a draw.
9. Card Effects and Abilities
A card effect is something that happens automatically every turn or when you play a card. A card's activation ability is identified with an arrow symbol (=>) and may be activated if you wish.
Cards with activation abilities in your Combat Zone may only be played on your turn.
If a Deployed card has an activation ability, you can use the ability anytime you want.
If a card in your hand has an activation ability, you cannot use the ability until you play the card. Once you play a card from your hand, the card effect (text that does not have an arrow symbol in it) happens immediately but the ability does not. Once you play a card from your hand, it will stay in your Combat Zone until your next Clean-up phase.
You can use an activation ability immediately after playing the card, but you do not have to. If you want, you can use the activation ability later. But be aware, the card will be sent to your discard pile during your Clean-up phase unless you Deploy it.
Example of card Ability: The 2nd ability of the card requires you to put it into your discard pile to get the effect. You can activate the ability anytime during your Tactic phase regardless of whether the card is exhausted or not, because the cost does not require you to exhaust the card. Card text (SS Panzer Regiment's Deploy Rule): "Exhaust this card and pay 1 Supply Point -> gain 6 Attack Points. Forfeit this card -> gain 2 Attack Points."
By paying the cost to the left of the arrow, you gain the effect stated to the right of the arrow. An activation ability may be played as many times as you wish as long as you are able to pay the cost(s). If the cost requires you to Exhaust the card, you can only use it once unless you reactivate it somehow. During a card is exhausted, you cannot exhaust it again. Likewise, you cannot reactivate an active card.
You may use any number of activation abilities and play any number of cards from your hand in any order, but each card effect or ability must be resolved separately and fully before playing another card or activating another ability.
You must pay the entire cost to gain the benefit of an ability. You cannot pay a partial cost. If you are unable to pay all requisite costs, you cannot activate the ability.
10. Deploying Cards
Certain cards have an effect that states "Deploy this card". These cards also have a yellow text box below the white one. To Deploy a card means to place it in your Front Line. Deployed cards are not put into your discard pile during your Clean-up Phase. They remain on your Front Line until a card effect removes them.
When you play a card from your hand, follow the instructions printed in white. While a card is Deployed, only the text in yellow is relevant.
Note that no Tactic Points are required to activate the abilities of Deployed cards; Tactic Points are only used to play cards from your hand.
Your Front Line can hold an unlimited number of cards.
Example of Deploy: Card with Play Bonus: Reinforcement Points +1. Play Rule: "You may Deploy this card. If you do, exhaust it." Flavor text: "Aah, the Kar98k. Wonderful. Never leave it..." Deploy Rule: "Exhaust this card -> gain 1 Attack Point. Return this card to the War Zone -> gain 1 Attack Point."
Thomas plays "Grenadier Regiment" and immediately gains +1 Reinforcement Point as a play bonus. Thomas may now Deploy the card to his Front Line if he likes. If he chooses not to Deploy the card, it will be put into the discard pile during his Clean-up phase.
If he decides to Deploy the card, it will be put into his Front Line. Now he can use the Deploy Rule abilities of the card.
However, once he has Deployed the card, it is Deployed as exhausted as the Play Rule instructs. He cannot use the first ability because it requires him to exhaust the card. He cannot exhaust it again if it is already exhausted.
The second ability does not require him to exhaust the card to get 1 Attack Point. He may use the ability this turn if he likes.
11. Reinforcement
11-1. Reinforcement Points
In your Reinforcement phase, you may recruit more armies by using your Supply Points and Reinforcement Points. Think of your Supply Points as the currency of the game.
You may recruit one card per 1 Reinforcement Point. If you want to recruit more cards, you need to get more Reinforcement Points. You begin your Reinforcement Phase with 1 Reinforcement Point.
You may recruit any number of cards as long as you have enough Reinforcement Points and Supply Points.
11-2. Paying Reinforcement Costs
To Recruit a card from the War Zone, you must use 1 Reinforcement Point and expend the requisite amount of Supply Points, as indicated in the upper-right of the card.
11-3. Cards you can gain
The following card types may be Recruited from the War Zone during your Reinforcement Phase — Supply, Strategy, Army, Support. When you recruit a card, take the top card of the pile.
Remember, any time you Recruit or acquire a card, it is put into your discard pile.
Caution:
You can only gain Site cards and Event cards through combat. You cannot recruit the cards.
Most Site and Event cards do not have a Tactic Point cost in the upper-left. When you gain these cards through Combat, Deploy them immediately. If a card DOES have a Tactic Point cost, it goes to your Discard Pile as normal.
12. Combat
Once per turn, during your Tactics Phase, you may declare Combat. You may declare Combat at any time during your Tactics Phase, beginning, middle or end, but you may not play cards from your hand during Combat. Also, you may not declare Combat if you have no Deployed Army cards.
Combat is declared against Site cards (Fortified Hill, Strategic Position, or City). When you declare Combat against a Fortified Hill or Strategic Position (Foothold cards), simply calculate the Attack Points you have and/or wish to use. You may also return to the War Zone any previously conquered Fortified Hill and Strategic Position cards to lower the targeted Site card's defense value. If your Attack Points are equal to or greater than the defense value of the Site card, you have conquered it. Take the top card of the pile and follow the instructions printed in red.
Attacking a City is slightly different. When you declare Combat on a City Site card, flip over the top card of the Event pile and add the number in the upper right to the defense value of the City. After that, decide how many, if any, Fortified Hill and/or Strategic Position cards you wish to return to the War Zone, and which activation abilities on your Front Line cards you wish to activate. However, you cannot play any cards from your hand during Combat. After adding the Event card bonus, using your Foothold cards and activating the cards on your Combat Zone, if your Attack Point total is equal to or greater than the defense value of the City card, you have conquered the city. Take both the City card and the Event card and do as instructed in the red text on both.
If your Attack Point total is lower than the defense of the City, you will win neither card, but must still do as instructed in red on the City card (but not the Event card). The City card stays on top of the City pile and the Event card is put on the bottom of the Event card pile.
Unless a card effect states otherwise, you may only declare Combat once per turn. And you may conquer only one Site card in one Combat.
13. Other Rulings
13-1. Reshuffling your deck
Any time you must draw a card or otherwise interact with your deck and have no cards in it, shuffle your discard pile to create your new deck. Note that you do not create your new deck until you must. Also, if you create your new deck mid-turn, only the cards currently in your discard pile will form your new deck. Cards you have played that turn stay in play until your Clean-up Phase.
If you must draw but both of your deck and discard pile are empty, you cannot draw more cards.
13-2. Card Effects vs Rules
Occasionally you will encounter text on a card that contradicts or runs counter to a rule in this book. When this happens, always follow the text on the card.
14. Example of Play
14-1. Starting Phase
Now it's Raoul's turn.
Raoul has 1 "Grenadier Regiment" and 1 "Strategic Position" each in the active position. He also has 1 "Heavy Tank Battalion" and 1 "Panzer Grenadier Regiment" each in the exhausted position from use during his previous turn. At beginning of his Starting Phase, he will reactivate his "Panzer Grenadier Regiment". "Heavy Tank Battalion" does not reactivate as normal because of the card's ability; however Raoul plays the Supply card "Locomotive Transport" to get 3 Supply Points, and uses them to reactivate his "Heavy Tank Battalion".
14-2. Tactic Phase
Raoul receives 1 Tactic Point at beginning of his Tactics Phase. He uses that Tactic Point to play "Armored Scout Battalion" from his hand. This unit's play bonus is +2 Tactic Points and +2 Attack Points.
Raoul spends 1 Tactic Point to play "Assault Gun Battalion" from his hand. Then he exhausts and moves the card to his Front Line as instructed in its text box.
Next, he spends his last Tactic Point to play "Division HQ Company" from his hand. He receives 1 Tactic Point, 1 Draw Point, and 1 Reinforcement Point play bonus from the card. The Draw Point must be used immediately, so Raoul spends it to draw one card.
"Division HQ Company" also has a special ability that allows him to put Infantry or Tank cards from his hand directly into play on his Front Line without paying the costs. He puts a "Panzer Grenadier Regiment" that he just drew onto his Front Line from his hand.
The "Panzer Grenadier Regiment" also has a play bonus; however Raoul did not play the card this time, so he does not get the play bonus. Also, usually "Panzer Grenadier Regiment" is deployed exhausted; however, in this case, the card is deployed as active because this card was put onto Front Line via the ability of "Division HQ Company" and is not played as normal.
Now Raoul moves to Combat. The top card of the Site pile is "Kharkov" (Defense Value: 12). Raoul wishes to conquer the city, so he announces his Combat Step to attack the city.
He flips up the top card of Event Pile, revealing "Russian Guards Tank Army" which gives +6 Defense Value to the Site card. Now the Defense Value of the "Kharkov" is 18.
Raoul currently has 2 Attack Points from the "Armored Scout Battalion" he played earlier. He still needs at least 16 more Attack Points to win the Battle.
First, he activates "Heavy Tank Battalion" and exhausts it to receive 7 Attack Points. He also activates and exhausts 2 "Panzer Grenadier Regiment" and 1 "Grenadier Regiment" to receive 5 more Attack Points. Now he has 14 Attack Points total. He still needs 4 more Attack Points to conquer "Kharkov".
He decides to activate the 3rd ability of "Assault Gun Battalion". He Forfeits 1 "Grenadier Regiment" to receive 2 Attack Points. After that, he activates and Forfeits 1 "Strategic Position" to reduce "Kharkov's" Defense Value by 2 to 16.
He ends up with 16 Attack Points which ties the Defense Value of "Kharkov". He uses all of his Attack Points to conquer the "Kharkov"!
Having attacked "Kharkov" forces him to Forfeit 1 Tank from his Front Line. He chooses to Forfeit "Heavy Tank Battalion" and puts the card in his discard pile. Also, he deploys "Kharkov" onto his Front Line and gains the Event card "Russian Guards Tank Army" which goes into his discard pile.
After the Combat step, he plays "Motorized Transport" from his hand. He receives 2 Supply Points from the card. At this point, he has 1 Tactic Point, 1 Reinforcement Point, and 2 Supply Points.
He decides to finish his Tactics Phase.
14-3. Reinforcement Phase
At beginning of his Reinforcement Phase, Raoul receives 1 Reinforcement Point. Now he has 2 Reinforcement Points.
He can spend the 2 Supply Points he has to recruit up to 2 cards. He chooses to recruit 1 "Horse-drawn Transport" and 1 "Grenadier Regiment", using 1 Supply Point and 1 Reinforcement Point on each, and puts them into his discard pile.
He is now out of Supply Points. His Reinforcement Phase is over.
14-4. Clean-up Phase
During Clean-up Phase, all cards remaining in his Combat Zone, that are not on the Front Line, are put into his discard pile. He puts "Armored Scout Battalion", "Division HQ Company", "Locomotive Transport", and "Motorized Transport" into his discard pile.
Next, he refreshes his hand. Raoul entered his Clean-Up Phase with no cards in his hand, but had he had cards in his hand he would discard them before drawing for the turn. Remember, he would have the option of keeping one of those cards before discarding. After choosing whether or not to keep a card and discarding the rest, Raoul draws 4 cards.
Raoul's turn ends. The turn passes to the player on his left.
15. Special Thanks
Andrea Calogero - SoSR 393, Andy Ing, Aya Kyunik, Brennan See, Bruce W. Oberst, Charles Vincent Ng, Chio-Yee Hwang, Chris Copeland, Christopher Leong, Daniel Wood, Danny, David, David, David "Sockrates-tan" Chang, Devin Smithson, Felipe Augusto Batista, Ferdinand, Geoffrey Kelly, Harvey Lodder, Henry Khuu, James D. Hecker, Jan-Peter Seifert, Jarred Nation, Jason, Jason B. Savoy, Jeffrey Alley, Jeffry Welfare, Jenny Nguyen, Johnny Huynh, Joseph Fong, Joseph Ng, Junda Chen, Justin Yap, Kawarazu, Kevin P. Hutton Jr., KissaTaikuri, Kudryavka, Imm, Matt Halverson, Michael Miller, Michael Morairty, Michael Thomas Landreth, Paul G. Williams, Peter Schober, Ryan Erichsen, Spuddy59, StaplerX, Stealth5, Steve Landreth, Timothy Link.