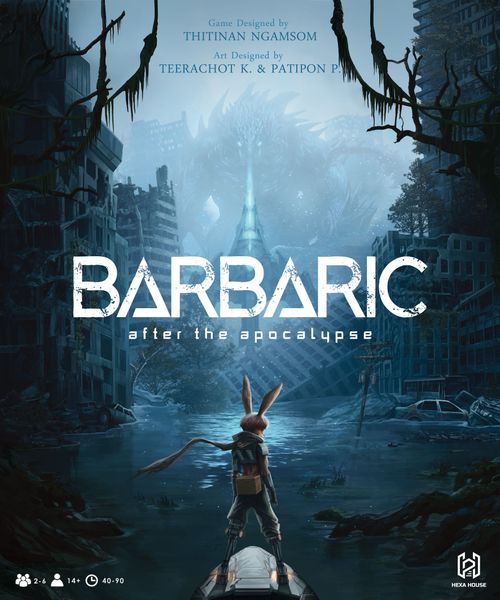
Barbaric: After the Apocalypse
Barbaric: After the Apocalypse Rulebook
Table of Contents
Table of Contents
Components
- Rulebook (1)
- Map Board (1)
- Atomic Core Token (1)
- Stamina Tokens [Cooldown] (4)
- Sub Stamina Tokens [Cooldown] (12)
- Energy Tokens [Cooldown] (4)
- Sub Energy Tokens [Cooldown] (12)
- Victory Tokens [Death] (8)
- Special Status Tokens (30)
- Fuel Resources (12)
- Food Resources (12)
- Scrap Resources (12)
- Survivors Cards (12)
- Survivors Tokens (6)
- Event Cards (14)
- Blue Die [Resource] (1)
- Red Die [Monster & Skill] (1)
- Monster Board (1)
- Monster Cards (10)
- Monster Miniature (1)
- Minions Miniatures (6)
- Rage Tokens (8)
- Rider Boards (4)
- Rider Miniatures (4)
- Gear Boards (4)
- Gear Miniatures (4)
- Skill Cards (80)
- Player Aid Cards (8)
- Initiative Tokens (4)
Game Setup
- Place the Map Board in the center of the table. Then place an Atomic Core Token on "Atomic Core Space", which is in the middle of the map board. Separate Damage Cubes, Stamina Tokens, Sub Stamina Tokens, Energy Tokens, Sub Energy Tokens, Mastery Markers, Victory [Death] Tokens and 3 different types of Resources and place them nearby as a general supply.
- Shuffle the Event Cards, Survivors Cards and Monster Cards separately and place them near the Map Board.
- Place the Monster Miniature on the "Atomic Core Space", and then place the Monster Board beside the Map Board. Then, place a Rage Token on every Frenzy Level and a Damage Cube in the 0 position of the Minion Tracker.
- Place 1 Minion in each "Minion Nest Space". Then, place 1 Survivors Token in each "Survivors Space".
- Choose the first player by rolling the Monster Die. The person who gets the most number will become the first player (In case of more than 2 players are tied, reroll the Die with the remaining players) or choose the first player randomly. The person to the left of the first player will become the second player and the play continues clockwise around the table.
- Starting from the first player, each player chooses a Rider Board, starting with the first player and continuing clockwise. After every player has chosen a Rider, each player chooses a Gear Board in reverse order, starting with the last player to choose a Rider and continuing counter-clockwise.
- In turn order, starting with the first player, each player places their Initiative Marker on the Day track on the Map Board.
- Each player assembles their chosen Rider Board and Gear Board and puts them in front of themselves. Also, give each player their own Player Aid Cards and Special Status Tokens to their chosen Rider and Gear.
- Each player places a Damage Cube on both the 0 positions of their Character Board, then adjusts both the Rider and Gear Dials to the leftmost position, until they are showing 1 Stamina / 2 Health on the Rider Dial, and 1 Energy / 2 Shields on the Gear Dial (with HEALTH directly above STAMINA, and SHIELD directly above ENERGY).
- Each player chooses 4 of their cards (2 Rider Skill and 2 Gear Skill Cards) to form their hand (do not choose the same name skill). Then each player shuffles their remaining Rider and Gear Skill cards together to form their Character deck.
Victory and Defeat Conditions
The game ends immediately and the winner is the first player to do one of the following:
A. Move off the edge of the Map with the Atomic Core Token. B. Gain 2 Victory Tokens (by Defeat another player) or 3 Victory Tokens in a 5-6 player game. C. Eliminate every other player on the Map.
- If a player draws a card when their deck is empty, that player shuffles their discard pile to form their deck and gains 1 Death Token.
Game Phases
A game of Barbaric is played over several rounds, and each round consists of several phases divided into either Day or Night time. The phases are played in the following order: 1. Initiative Phase (Day) > 2. Event Phase (Day) > 3. Player Phase (Day) > 4. Initiative Phase (Night) > 5. Event Phase (Night) > 6. Player Phase (Night) > 7. Monster Phase (Night) > Then start 1. Initiative Phase again.
1. Initiative Phase
This is where players determine the order in which each player will take their turn during the upcoming Player Phase. The player whose Initiative Marker is in the leftmost position of the current Time Track is the first player and will be the first to take their turn. Turns continue in order, from left to right on the Time Track, until all players on that Track have taken a turn. Once a player has ended their turn, if the player did not use the First Aid or Repair action, move their Initiative Marker to the leftmost empty position on the opposite Track.
Example of Initiative Phase
- In a 4-player game, the game starts with players A, B, C, and D on the Day Track.
- Players A and B both take their turn without using the First Aid or Repair action. There is no need to adjust the Time Track.
- Player C uses the First Aid action on their turn, then places their Initiative Marker in the first position of the Night Track.
- Player D uses the Repair action on their turn, then places their Initiative Marker in the first position of the Night Track, moving each other marker to the right.
- After that, take the Initiative Markers of players A and B continue respectively of the Night Track. Then, the next round starts with players D, C, A, and B on the Night Track.
2. Event Phase
The Event Phase shapes and twists the game, helping or hindering the players and their plans. Event Cards affect all players while they are face-up near the Initiative Track. If the Event deck is empty at the beginning of the Event Phase, shuffle the Event discard pile to form the Event deck. When the Event Phase begins, the first player follows these steps in order:
2.1 The first player draws the top card of the Event deck and reads it aloud, applying its effects to all Characters on the Map. 2.2 Then, put the Day-Night Marker on the drawn Event Card, revealing the Dayside, to inform everyone that the game is currently in the Day. 2.3 When the game enters Event Phase (Night) and draws a new Event card and its text or condition affects every player as usual. The Day-Night Marker is then shifted to Night to indicate that the game time is at Night. 2.4 After the Monster Phase, enters Initiative Phase (Day) as mentioned earlier. Then the game proceeds to Day, starting with the Event Phase as normal.
3. Player Phase
The Player Phase is divided into 3 sub-phases which are taken in order, they are the Preparation Phase, Action Phase, and Upkeep Phase. During a player's turn, that player becomes the active player. After the active player's turn ends, the next player in turn order becomes the active player.
3.1 Preparation Phase
During the Preparation Phase, the active player may use one of the available actions. If the active player chooses to use an action, each other player in turn order may use the same action. The active player may forego using any action. The available actions are as follows:
3.1.1 Learn a Skill
Place a Learning Skill face-up into your play area by spending the Resource type and cost indicated on the card. If there is no other card with the same name in your play area, spend the Level I cost. Otherwise, spend the Level II cost and place it on the other card. Skills in your play area are considered Learned Skills, and their Level is the number of copies.
3.1.2 Consume a Resource
Discard 1 Resource to gain the corresponding benefits associated with that type of Resource. These benefits do not apply when they are discarded for other effects.
- Fuel: Either Move 1 space or draw 2 cards.
- Food: Either heal 2 Health or draw 2 cards.
- Scrap: Either regain 2 Shields or draw 2 cards.
Reminder: At any time, players may discard 2 Resources of the same type to gain 1 Resource.
Learn a Skill Example
- Player A uses the Learn a Skill action during their Preparation Phase, spending 1 Scrap to place CARROT MISSILE in their play area. Player B follows and discards 2 Fuel to gain 1 Food. Then, player B chooses to use the same action, spend 1 Food to place RADAR SYSTEM in their play area. Players C and D pass on the action.
Consume a Resource Example
- Player C uses the Consume a Resource action during their Preparation Phase, discarding 1 Fuel to Move 1 space. Player D follows and discards 2 Scrap to gain 1 Food, then uses it with the Consume a Resource action to heal 2 Health. Players A and B pass on the action.
3.2 Action Phase
The active player may spend Stamina and Energy Tokens to use the available actions. Players spend Stamina and Energy Tokens by flipping the chosen Token to its Cooldown side. The player must spend 1 Stamina to use a Rider action (Search, Activate a Rider Skill, or First Aid) or 1 Energy to use a Gear action (Move, Activate a Gear Skill, or Repair). Only one Rider and one Gear action may be used, but they may be used in any order, and you may forego any actions.
3.2.1 Rider Action
- Search
- Gain the Resources indicated in your space. If the space contains a "?", roll the Resource Die to determine the type of Resource you gain randomly. If the space contains a "??", roll the Resource Die twice to determine the 2 Resources you gain randomly. If you roll "?", you gain any 1 Resource. If you roll the blank on the Resource Die, you do not gain a Resource for that roll.
- First Aid
- Choose and discard any number of cards from your hand to heal the same amount of Health. Then, move your Initiative Marker to the first (leftmost) position of the opposite (Day or Night) Time Track, moving any other markers already on that track 1 space to the right.
- Activate a Rider Skill
- Use a Learned Rider Skill in your play area. Place the spent Stamina (now a Cooldown) Token on the Rider Skill and resolve its effect. If the Skill is Level I, apply the Level I effect only. If the Skill is Level II, apply the Level I effect with the bonuses of the Level II effect. After resolving the action, gain 1 Rider experience by rotating the Rider Experience Dial by 1 step.
- For the first time that a player turns their Rider Experience Dial to a space indicating Sub Stamina, they will gain a Sub Stamina, which is then placed on the Rider Board immediately. (Similarly, this also happens with the second and third Sub Stamina). A player may spend Sub Stamina to do Free Actions, but they are not allowed to do additional Rider Action, as during the Action Phase.
- If a player turns their Rider Experience Dial to a space showing the Mastery icon, they take a Mastery Marker and place it on one of the Mastery Skills on their Rider Board. After that, a player may spend Sub Stamina to use that Mastery Skill when the conditions on Mastery Skill are met. However, the effects are not active in the same turn as the Mastery Skill is gained.
3.2.2 Gear Action
- Move
- Move your Character 1 space into an adjacent hex. You cannot move your Character into a space occupied by a Character, Monster, Minion, or a space containing a Minion Nest Space. You can only move through an Exit (and off the Map) if you control an Atomic Core Token.
- Repair
- Choose and discard any number of cards from your hand to regain the same amount of Shields. Then, move your Initiative Marker to the first (leftmost) position of the opposite (Day or Night) Time Track, moving any other markers already on that Track 1 space to the right.
- Activate a Gear Skill
- Use a Learned Gear Skill in your play area. Place the spent Energy (now a Cooldown) Token on the Gear Skill and resolve its effect. If the Skill is Level I, apply the Level I effect only. If the Skill is Level II, apply the Level I effect with the bonuses of the Level II effect. After resolving the action, gain 1 Gear experience by rotating the Gear Experience Dial by 1 step.
- For the first time that a player turns their Gear Experience Dial to a space indicating Sub Energy, they will gain a Sub Energy, which is then placed on the Gear Board immediately. (Similarly, this also happens with the second and third Sub Energy). A player may spend Sub Energy to do Free Actions, but they are not allowed to do additional Gear Action, as during the Action Phase.
- If a player turns their Gear Experience Dial to a space showing the Mastery icon, they take a Mastery Marker and place it on one of the Mastery Skills on their Gear Board. After that, a player may spend Sub Energy to use that Mastery Skill when the conditions on Mastery Skill are met. However, the effects are not active in the same turn as the Mastery Skill is gained.
Reminder: After resolving the effect of a Rider Skill Card, gain 1 Rider experience. / After resolving the effect of a Gear Skill Card, gain 1 Gear experience.
3.2.3 Free Action
Any player may use these actions at any time. If a Skill has any conditions in its effect, those conditions must be met before that Skill can be used. Players must spend 1 Sub Stamina to use a Rider Skill or 1 Sub Energy to use a Gear Skill.
- Use a Counter Skill
- If the conditions on a Counter Skill Card in your hand are met, you may interrupt play immediately.
- After the Skill effect is done, a player will gain 1 experience for their Rider or Gear. After resolving its effect, place the card in your discard pile.
- Some skill Counter Skill Cards (When X Takes Damage,) can be used to counter Ultimate Skill Cards.
- In the case of multiple Counter Skill Cards used in the same turn, the last Skill Card will take its effect first, followed by the next card played before the last card in the sequence. The first player to use the Skill Card will take its effect last. (Example: Player A, Player B, Player C play Counter Skills in that order; start with the last Counter Skill Card, Player C's.)
- Use an Ultimate Skill
- Use the effect of an Ultimate Skill Card in your hand.
- After the Skill effect is done, a player will gain 1 experience for their Rider or Gear. After resolving its effect, place the card in your discard pile.
- In the case of multiple Ultimate Skill Cards being used in the same turn, the first Skill card played will take its effect first followed by the next card played in the sequence. (Example: Player A, Player B, Player C play Ultimate Skills in that order; start with the first Ultimate Skill Card, Player A's.)
Reminder: After resolving the effect of a Skill Card, gain 1 Rider Experience if you spent a Sub Stamina or 1 Gear Experience if you spent a Sub Energy.
- Use a Mastery Skill
- Use the effect of an available Mastery Skill on your Character Board. After resolving the effect, place the spent Sub Stamina or Sub Energy (now a Cooldown) Token on that Skill. A Mastery Skill cannot be used if it has a Cooldown Token on it.
3.3 Upkeep Phase
During the Upkeep Phase, the active player gathers all Cooldown Tokens on their Skills, places them on their Character Board, and then flips them over to their Stamina or Energy side. The active player then draws 1 card and ends their turn.
- Once the last player's Initiative Marker moves to the opposite Track, time shifts to match that Track (either Day or Night). When the time shifts to Night, proceed through phases 1, 2, and 3 again. But if time shifts to Day, proceed to Phase 4, the Monster Phase, before time shifts.
4. Monster Phase
The Monster Phase is divided into 3 sub-phases and occurs once the last player on the Night Track has finished their turn before time shifts to Day. The Monster Phase occurs during Twilight and is considered both Day and Night. Effects that check for Day or Night during Twilight are considered as one or the other.
4.1 Monster Actions
- The first player draws 1 card from the Monster deck and reads it aloud, then applies the effect on the card using the Movement, Range, and Attack values found on the Monster Board and adding all bonuses revealed on the Frenzy Level. (Example: Monster Stats Move 1, Attack 2, Range 1, plus Monster +1 Move: Move 1+1 = 2 / Attack Damage 2 / Range 1.)
- If more than one Character can be targeted, each of their players rolls the Monster Die. The player who rolls the lowest number becomes the target of the Monster. If more than one player rolls the lowest number, those players roll the Monster Die again until a target is determined.
- The player whose Character is targeted by the Monster chooses the route the Monster's Movement will take. The Monster cannot move into a space occupied by a Character, or Minion, but if possible, the Monster must be moved into a position where it can carry out its attack. If it cannot move into a position within Range to Attack its target, it will attempt to move as close to the target as possible.
- In case any player is defeated by Monster Card, no one will gain a Victory Token from this defeat, but the defeated player still gains a Death Token as normal.
- There is a certain case that might occur during the Monster Phase. If the Monster is Counterattacked or receives Damage from Special Status Tokens, the player who commits the Counterattack or owns those Special Status Tokens is granted a Monster Die roll. If the roll result allows the player to control the Monster's movement and attack, the player committing the Counterattack or Special Status Tokens owner is allowed to control the Monster according to the rule of Monster Reaction (p. 21) as normal.
4.2 Minion Actions
- Each Minion targets their nearest Character for their Attack. If more than one Character can be targeted, the player who was targeted by the Monster chooses which of those Characters will be the target.
- Each Minion moves toward and then Attacks their target using the Movement, Range, and Attack values found on the Monster Board and adding all bonuses revealed on the Frenzy Level. (Minion stats example: Move 0 + 1 bonus, Attack Damage 1, Range 1, Health 1; with Minions +1 Move: Move 1 / Attack Damage 1 / Range 1 / Health 1.)
- The player who was targeted by the Monster chooses the route the Minions Movement will take. Minions cannot move into a space occupied by a Character, Monster, or Minion, but if possible, the Minion must be moved into a position where it can carry out its attack. If it cannot move into a position within Range to Attack its target, it will attempt to move as close to the target as possible.
- If the Minion defeats a Character, the Character gains a Death Token, but no player is awarded a Victory Token. However, if a player's effect allows them to Attack with the Monster or Minion, and that Attack results in a Character being defeated, then the player who Attacked with the Monster or Minion is awarded a Victory Token.
4.3 Respawning Minions & Frenzy Level
- The player who was targeted by the Monster chooses a number of Minion Nest Spaces on the Map equal to the number of players (including defeated players) and places 1 Minion in each of the chosen spaces. If 6 Minions are on the Map at any space, ignore any remaining placements.
- Finally, remove a Rage Token from the Frenzy Level, starting in the top leftmost position and following the arrowhead. (Frenzy Level: When "Respawning Minions & Frenzy Level" or the Minion Tracker moves into the final space (5), remove 1 Rage token.)
- Once the Monster Phase has been completed, the round ends. The game continues into another round, starting with the Initiative Phase, until a player achieves one of the victory conditions.
Example of a Monster Phase
After the last player's Upkeep Phase during the Night, the game proceeds to the Twilight (Monster) Track, and a Monster Phase occurs.
- One Player draws 1 card from the top of the Monster deck and reads the text aloud. The card is RUTHLESS TAIL, and its effect says, "Move toward the Character with the least damage, then Attack all adjacent targets."
- This forces the Monster to target the Character with the least amount of damage on both of their Character Boards, move toward that Character, then attack all Characters adjacent to the Monster.
- Player D has 1 damage on their Gear Board, while Players A, B, and C each have no damage and are all possible targets. Players A, B, and C roll the Monster Die to determine which will be the target. Player A rolls the lowest result and becomes the target of the Monster.
- The number of spaces the Monster can move is determined by its Claw icon combined with all matching icon bonuses revealed on the Frenzy Level. The Monster has a Base Stats of 1 and a bonus of 2 from the Frenzy Level, for a total of 3 available movements.
- The Monster's Range determines how close it needs to be in order to Attack its target. The Monster has a Base Stats of 1 and no bonuses from the Frenzy Level, for a total of 1. This means the Monster can only Attack targets in adjacent spaces (unless instructed otherwise).
- Since player A is the Monster's target, that player decides which route the Monster will take for its movement, ending its movement in an adjacent space. Afterward, the Monster Attacks all (Character) targets in adjacent spaces, resulting in Players A and C being Attacked.
- The Monster has a Base Stats of 2 and a bonus of 1 from the Frenzy Level, for a total of 3 damage dealt on an Attack. Players A and C are dealt 3 damage each. The game then proceeds to the "Minion Actions".
- Minions operate under the same principles as the Monster, except Minions Attack their nearest target. Players A and D can be targeted by one Minions Attack, while Players B and D can be targeted by another. Since Player A was the target of the Monster's Attack, Player A decides which of those targets each Minion will Attack.
- Player A decides each Minion will Attack Player D, which results in Player D being defeated. Since Player D was defeated by a Minion and not an effect of a Skill that controlled the Minion, no Player is awarded a Victory Token. The game then proceeds to the "Respawning Minions & Frenzy Level".
- Player A chooses 4 empty Minion Nest Spaces and places 1 Minion in each until 6 Minions are on the Map.
Rising Threat Phase
Each time a Minion is defeated, move the Damage Cube on the Minion Tracker one space to the right. If the Damage Cube ever moves into the final (5) space of the Minion Tracker, a Rising Threat Phase will occur after the active player's turn ends and before the next player's turn begins.
- During a Rising Threat Phase, the last player to defeat a Minion chooses a number of Minion Nest Spaces on the Map equal to the number of players (including defeated players) and places 1 Minion in each of the chosen spaces. If 6 Minions are on the Map at any space, ignore any remaining placements.
- Then, remove a Rage Token from the Frenzy Level, starting in the top leftmost position and following the arrowhead.
- Finally, place the Damage Cube in the leftmost position (0) of the Minion Tracker.
- Play then continues as normal, with the next player in the initiative order or the Monster Phase.
Sub Stamina / Sub Energy
The player will gain Sub Stamina / Sub Energy by Gaining Experience.
- When an Experience Dial reveals a symbol (Sub Stamina or Sub Energy) on the outer edge, that player gains 1 Sub Stamina or 1 Sub Energy, which they can use at any time (p.17).
- The player may choose to spend a Sub Stamina to use a Rider Free Action or spend a Sub Energy to use a Gear Free Action (p.9).
Reminder: Sub Stamina and Sub Energy cannot be used for the Rider or Gear actions in the Action Phase.
Movement
Movement is vital to the optimal use of abilities in Barbaric. All hexes on the Map are referred to as spaces, and each space has its own benefits and rules governing it. When instructed to move a Character, Monster, or Minion on the Map, move that piece 1 space into an adjacent unoccupied hex (Characters cannot move, or be placed, in a Minion Nest Space). If an effect instructs you to move a number of spaces, repeat the process the required number of times.
- If a player's Character is on a Tunnel Space, they may use the Move action to place their Character on another unoccupied Tunnel space.
- If a Character moves into a space containing an Atomic Core Space, that Character's player may take the Atomic Core Token and place it on their Character Board.
- A Character with an Atomic Core Token on their Character Board may use the Move action while adjacent to an Exit icon to move off the Map and win the game.
- If a Character with an Atomic Core Token is defeated, that player places the Atomic Core Token in the space their Character was defeated before they enter Recovery Status.
Damage
Damaging a Character
- When a Character takes damage, that Character's player decides where that damage will be allocated. The player can decide to damage their Health, Shields, or both unless the damage was dealt directly to their Health or Shields. In that case, the damage must be allocated to where it was designated. When a Rider or Gear is allocated damage, move their appropriate Damage Cube towards the 6 by the same amount. When a Rider heals any Health, or when a Gear regains any Shields, move their appropriate Damage Cube toward 0 by the same amount.
- If a Rider is ever allocated an amount of damage equal to or greater than their maximum Health, that Rider is considered "Defeated" and is removed from the Map to enter "Recovery Status" until the start of that player's turn. (Defeated: gain a Death token, then enter Recovery Status.)
- If a Gear is ever allocated an amount of damage equal to or greater than their maximum Shields that Gear is considered "Broken" and cannot use the "Move" action or be moved by any effect until it has regained at least 1 Shield.
Damaging the Monster After resolving an effect, if that effect dealt any damage to the Monster, the player who resolved the effect rolls the Monster Die to randomly determine the outcome. The player who rolls the Monster Die chooses the route the Monster or Minions movement will take, if any, and if a Character is defeated as a result of the outcome. The player who rolls the Monster Die gains a Victory Token.
Damaging a Minion When a Minion is damaged, if the amount is equal to or greater than the Minion's Health (as indicated on the Monster Board), the Minion is defeated and removed from the Map. Move the Damage Cube on the Minion Tracker one space. Then, the player who defeated the Minion gains a Resource and rolls the Resource Die to randomly determine the type.
Recovery Status
If a player's Rider is Defeated, remove that player's Character from the Map, and place it in front of its player. It is considered to be in Recovery Status. When a player's Character enters Recovery Status, that player follows these steps in order:
- Place both Damage Cubes on their Character Board in the "0" position.
- Flips all Cooldown Tokens on their Skills and Character Board. Gathers their Stamina and Energy Tokens on their Character Board.
- Remove all Buff and Debuff Tokens from their Character Board.
- Shuffles their discard pile into their deck and gains 1 Death Token.
- While a Character is in Recovery Status, that Character cannot use any Skills, or be targeted or affected by any Skill. When a player starts their turn with their Character in Recovery status, that player chooses an unoccupied Spawning Space on the Map and places their Character in the chosen space.
- Then, that Character's player ends their turn immediately, and their Character loses Recovery Status. If a Character has a Death Token when they enter Recovery Status. They are eliminated from the game instead.
Resources
Resources are essential in Barbaric. They provide crucial bonuses and allow access to specific actions during every game phase. Players can acquire resources by:
- Using the Search action during the Action Phase.
- Using specific Skills, acquire Resources through different means.
- Defeating a Minion and rolling the Resource Die.
Discovering Survivors
If a Character uses the Search action while in the same space as a Survivors Token, they may decide to "Discover Survivors" after resolving the Search action and draw 1 card from the Survivors deck. The player then decides whether to Rescue, Plunder or Ignore the Survivors. Depending on the choice, the player does the following:
- a. Rescue: The player spends Sub Stamina or Sub Energy as indicated on the card by flipping them to the Cooldown side and putting that Survivors Card beside the Character Board. Then, remove the Survivors Token in the same space. From now on, a player may use the effect of the Survivors Card as indicated at the bottom of the card once per turn.
- b. Plunder: The player takes damage as indicated on the card and gains the Resources shown on the card. Then, discard that Survivors Card from the game and remove the Survivors Token in the same space.
- c. Ignore: Discard that Survivors Card from the game and ignore the Survivors Token.
Player Board
A player's Character Board comprises 2 Rider and Gear Boards. Some abilities may only affect one side of the Board (Rider or Gear) or a specific feature, while others affect the Character Board in general. The features and their function on the Character Board are listed below.
- Rider's Name: Referenced in effect, target the Rider itself.
- List of Rider Actions: A reminder of the Rider actions.
- Damage Tracker (Health): On the left side of the Character Board, tracks the damage the Rider has taken, starting from 0. If the Rider is assigned any damage, move the Damage Cube toward 6 by the same amount. If the Rider heals any amount of Health, move the Damage Cube toward 0 by the same amount. Health can never go below 0 or above 6. The amount of damage that can be assigned to the Rider's Health equals the Rider's maximum Health.
- Rider Mastery Skill: The type of Skill that is not available for use at the start of the game, and they only become available when the inner wheel of the Experience Dial moves to the Mastery icon on the outer edge of the Dial. Each time the Dial moves to a Mastery icon on the Rider Experience Dial, place a Mastery Marker from one of the Mastery Skills. From now on, any time you can activate the effect of that Mastery Skill, you may spend 1 Sub Stamina to use that effect, then place the spent Sub Stamina (Cooldown side) on the Mastery to indicate that it has been used.
- Rider Experience Dial: Tracks the amount of experience earned by your Rider. Each time you use the ability on one of your Rider's Learned Skills or the ability on one of your Rider's Counter Skills or Ultimate Skills card in your hand, rotate the inner wheel of your Rider Experience Dial clockwise until you uncover a number. The uncovered number is your Rider's maximum Health, and the symbol of Sub Stamina on the outer edge, if any, is the maximum amount of Sub Stamina available.
- Gear's Name: Referenced in effect, targets the Gear itself.
- List of Gear Actions: A reminder of the Gear actions.
- Damage Tracker (Shield): On the right side of the Character Board, tracks the damage the Gear has taken, starting from 0. If the Gear is assigned any damage, move the Damage Cube toward 6 by the same amount. If the Gear regains any amount of Shields, move the Damage Cube toward 0 by the same amount. Shields can never go below 0 or above 6. The amount of damage that can be assigned to the Gear's Shields equals the Gear's maximum Shields.
Gaining Experience
When a player uses a Learning Skill, Ultimate Skill, or Counter Skill card, after resolving the effect on the card, that player gains 1 Rider Experience if they spent a Stamina, or 1 Gear Experience if they spent an Energy.
- When players gain experience, they rotate their appropriate (Rider or Gear) Experience Dial clockwise until they reveal a number. That number is the maximum Health or Shields of the Rider or Gear. If the number exceeds the previously shown number, the maximum Health or Shield is increased to match the number. (Example: Now Keltz has 3 maximum Health.)
- When an Experience dial reveals a symbol (Sub Stamina or Sub Energy) on the outer edge, that player immediately gains 1 Sub Stamina or 1 Sub Energy, which they can use at any time.
Paragon Experience
When an Experience dial reveals the Paragon icon, the player heals 1 Health with the Rider's Dial or regains 1 Shield if revealed with the Gear's Dial. Then, the player rotates the same dial counter-clockwise until they reveal a number.
Unlocking Mastery Skill
When a player gains Experience in the space with the Mastery icon, they will receive a Mastery Marker to upgrade the Mastery Skill, which boosts a specific ability of your Character. A player can use Mastery Skill a turn after it is learned by spending Sub Stamina or Sub Energy (depending on Rider or Gear side) to receive the indicated effects. If a player gains further Experience enough to reach the next Mastery icon, they will receive an additional Mastery Marker to upgrade another Mastery Skill. All Mastery Skills can only be learned once.
Skill Cards
Skill Cards are the primary way to interact with the game. Each Rider and Gear has its own unique set of Skill Cards that will help them during the course of the game.
Learning Skills
This Skill type must be learned first by spending the indicated Resource during the Preparation Phase. Afterward, it can be used during the Action Phase by spending Stamina or Energy to use the "Activate a Skill" Action. If there is only 1 copy of that card in your play area, the Skill is considered Level I, and you resolve the Level I effect only. If there are 2 copies of the card in your play area, the Skill is considered Level II, and you resolve the Level I and Level II effect simultaneously, applying any benefits or alterations of the Level II effect to the Level I effect.
Counter Skills
Counter Skill Cards can only be used according to the condition indicated on the card by spending Sub Stamina for Rider Skill or Sub Energy for Gear Skill. After the Skill has completed its effect, a player gains 1 Experience of either Rider or Gear (depending on the card's deck). After the Counter Skill Card is used, discard it. If multiple Counter Skill Cards are used in the same turn, the last Counter Skill Card will take effect first, followed by the next card in the sequence. The first player to use the Counter Skill Card will take its effect last.
Ultimate Skills
A player can use Ultimate Skill anytime by spending Sub Stamina for Rider Skill or Sub Energy for Gear Skill. After the Skill has completed its effect, a player gains 1 Experience of either Rider or Gear (depending on the card's deck). After using the Ultimate Skill Card, discard it. In case of multiple Ultimate Skill Cards being used in the same turn, the first Ultimate Skill Card used is the first to activate its effect. This is followed by the next played Ultimate Skill Cards in the sequence until the last card. Additionally, the player can use the Ultimate Skill's effect before or after any other Action.
Skill Card Components
- Cost to Learn
- When a player uses the Learn a Skill action, if there is a card of that name in their play area already, spend the (Level) II cost to learn the card. If not, spend the (Level) I cost instead. If a card does not have a Resource cost in the top left corner, it cannot become a Learned Skill.
- Skill card type
- This indicates the type of Skill and restrictions relating to the use of that Skill. Certain Skills may only be used at specific times, or by using specific actions.
- Target and Range
- The Skill's effect is applied using the range and targeting conditions found in this box as the base, before adding any bonuses, penalties, or alterations caused by the Skill itself or by other abilities.
- Skill name and effect
- Each Skill has a name and an effect. Some abilities may reference a Skill by name. In that case, they affect the named Skill and not any other.
- When a player uses a Level II Learning Skill, resolve both the Level I and Level II effect of the card simultaneously, applying any bonuses or alterations of the Level II effect combined with the Level I effect.
- Flavor text does not impact the game. It is merely cosmetic.
- Character icon
- This icon indicates which Character the card belongs to, the Rider or the Gear, and can also be found in the center of the Experience Dial on the corresponding Board.
Skill Usage Types and Skill Range
Most Skill cards have restrictions on how they target something and the maximum range in which they can target something. A card will have a symbol indicating the area being targeted and a number indicating the maximum amount of spaces between your Character and the target (not including your Character's space) that can or will be affected.
- Single target: Single target Skills affect any single occupied space within range of the Character, regardless of direction. (Only 1 target within Range.)
- Surrounding: Surrounding target Skills affect all spaces adjacent to the Character. If the Skill has a Range of 2 or more, the Skill also affects any space adjacent to the other affected spaces for every point of Range past the first. (Maximum of Targets indicates on a Skill.)
- Linear: The Skill selects its target from the current space the Character in is from the straight line drawn to the maximum space indicated on the Skill card. Most Linear Skills affect the first target with a shorter range first or everyone in the straight line of length to the maximum range. There are some Skills that have Special targeting conditions, which allow them to target at different ranges linearly from the Character. (Maximum of Targets indicates on a Skill.)
- Fan: Fan target Skills affect three spaces adjacent to the Character and each other, and a number of spaces directly away from the Character for every point of Range past the first. The maximum number of targets is indicated in the Skill's explanation. If the Skill's Range is more than 1, a number of spaces directly away from the Character for every point of range past the first (as if using a Linear target Skill in 3 consecutive spaces). (Maximum of Targets indicates on a Skill.)
- Empty Space: Empty Space Skills target any single unoccupied space within range of the Character, regardless of direction and allows the placement of a Special Status Token in the Empty Space selected. If there is a player moves into the Empty Space with the Special Status Token, a certain effect on the Skill Card of Player Aid Card will happen. (Maximum of Spaces indicates on a Skill.)
- Boost: Boost Skills target either the Character using the Skill or any Allied Character within range, regardless of direction. This type of Skill mostly heals Health or regain Shields or grants Buffs to the target. (Maximum of Targets indicates on a Skill.)
*All abilities treat the space of the Character using them as a reference point (Range 0). If a card does not have a symbol, then there is no specific space you can target, and if a card does not have a number, then there is no specific limit to the range.
Special Status Tokens and Conditions
Some Skills or Characters have specific tokens or abilities that affect the game as long as they are on the Map or a Character Board.
- Buff: These types of Tokens generally give the target some kind of benefit, which will be described on the Character's Player Aid Card.
- Debuff: These types of Tokens generally give the target some kind of detriment, which will be described on the Character's Player Aid Card.
- Usage Conditions: Skills with this symbol (warning triangle) have restrictions or specific conditions, which will be described in the card's effect, that need to be met before you can activate the Skill.
- Passive: Certain Skills continually affect the target or some aspect of the game with an effect, which will be described on the Character's Player Aid Card. These types of effects last until the Passive Skill is changed or the target enters Recovery Status.
- Gadget: Some Skills place Gadget Tokens on the Map, the effect of which will be described on the Character's Player Aid Card. Two Tokens of the same name cannot be placed or moved into the same space. If an ability would allow a player to place another Gadget of the same name on the Map, but there are no more Gadget Tokens remaining, that player may move a Gadget of that name to a space within Range instead. The Gadget's owners and Allied Characters will not take damage or Debuff from their own Gadget.
(Examples shown: Dive, Buff / Maximum Stack 1: a Character with a Dive token gains the following ability: Avoid Damage Completely for the next damage. Then, discard the Dive token. Time Dimension, Debuff / Maximum Stack 1: a Character with a Time Dimension token gains the following ability: when this Character's player is the active player, during Action Phase, they may only use a Rider action or a Gear action, but not both. During this Character's Upkeep Phase, discard the Time Dimension token. OIL HUNT: Move adjacent to the target. Usage condition: the target must have half or less of their total Shields remaining. Defensive Stance / Offensive Stance, Buff / Passive: when Theodore takes damage while in Defensive Stance, you may spend any amount of Sub Stamina to reduce the damage by the same amount; when Theodore deals damage while in Offensive Stance, you may spend any amount of Sub Stamina to increase the damage by the same amount. Tidal Trap, Gadget / Gadget Limit 5: when a Character moves into a space containing a Tidal Trap token, they take the amount of damage indicated on the card that placed the token and inflict them with Vortex token. Then, the Tidal Trap token is discarded.)
Resolution Chain
A Resolution Chain is formed when players use Counter Skills or Mastery Skills. When any Skill is used, each player may use an appropriate Skill in response, starting with the active player and continuing in turn order.
- Skills are resolved in the reverse order that they were used, starting with the last Skill used and continuing until the first Skill. If multiple Skills are used in response to the same instance, the active player decides which order they are added to the Resolution Chain.
- The Resolution Chain is easy to understand if you consider each activated ability as a card. The first card is placed on the bottom of a stack, and then the next card is placed on top of it, and so on, until the final card. Then, they are resolved in order from the final card on top of the stack to the bottom.
Monster Board (Side A - Challenge Mode)
This is where you will find the Movement, Range, and Attack values for the Monster and Minions, along with the attacks, bonuses, and all other necessary information in order to operate the Monster and Minions. The features and functions of the Monster Board are listed below.
-
Minion Tracker: The Minion Tracker counts the number of Minions that have been defeated. When the Damage Cube moves on to the "5" position on the Minion Tracker, There will be a Rising Threat Phase after the active player's turn.
-
Base Stats: These are the statistics used for the Monster and Minions. Each icon represents a specific statistic that, when calculated along with any bonus revealed on the Frenzy Level, determines the total Movement, Attack, and Range values of the Monster and Minions.
- 2a. Monster Stats: Each of these icons represents a Monster's Stats.
- Claw: The amount of Movement the Monster may use.
- Fangs: The amount of damage dealt by the Monster's attack.
- Target: The Range at which the Monster can attack its target.
- 2b. Minion Stats: Each of these icons represents a Minions's stats.
- Foot: The amount of Movement each Minion may use.
- Teeth: The amount of damage dealt by each Minion attack.
- Target: The Range at which each Minion can attack its target.
- Heart: Damage threshold to defeat a Minion.
- 2a. Monster Stats: Each of these icons represents a Monster's Stats.
-
Monster Reactions: If a Character deals damage to the Monster, that Character's player rolls the Monster Die and applies the corresponding effect determined by the roll. If the effect results in any other Characters being defeated, the player that rolled the Monster Die gains a Victory Token for each defeated Character unless they were also defeated.
Map Icons
- Spawning Space: Characters start the game in a Spawning Space, and when a Character is defeated, they are placed in a Spawning Space at the beginning of their turn.
- Random Resource: When a Character uses a Search action, that Character's player gains a Resource of the type indicated in their space from the general supply. If the space contains a "?", roll the Resource Die the indicated number of times to randomly determine the type of Resource they gain.
- Tunnel: A Character in a space containing a Tunnel icon can use the Move action to move to any other unoccupied Tunnel Space.
- Minion Nest: Minions start the game in Minion Nest Spaces, and they are placed there during a Rising Threat Phase. Only the Monster and Minions are allowed to move into, through, or out of Minion Nest spaces, and effects cannot place or move Characters in those spaces, although the spaces may still be used for targeting and range for abilities.
- Whirlpool: If a Character ends their turn in a space containing a Whirlpool, and if they haven't been moved by the effect of a Whirlpool Space this turn, they must move their Character 1 space clockwise into an unoccupied space containing a Whirlpool. If they cannot move into an unoccupied space, they take 1 damage instead.
- Atomic Core: The Atomic Core Token is placed here at the start of the game, and the space has no other effect until the Atomic Core Token is moved off the space.
- Exits: If a Character with an Atomic Core Token is in a space with an Exit icon on its edge, that Character can use the Move action to Exit the Map and win the game. Only a Character with an Atomic Core Token can Exit the Map this way.
- Survivors: When the player uses a Search action on the Survivors Space with Survivors Token, They may choose to use a Discover action as a free action. If they do, draw 1 card from the Survivor deck and decide the outcome (p.15).
Solo Mode
In Solo Mode, the player takes on the role of a Champion Rider, piloting their Gear into the horde of the Monster to attain the Atomic Core and escape without being defeated. During Solo Mode, an AI determines the actions of the Monster and Minions, and some Special Tokens and effects can affect the Monster as if it is a Character.
Victory Conditions
The player must move off the Map with the Atomic Core Token to win the game.
Loss Conditions
The game is over, and the player is eliminated, if either of the following occurs: a. The player's Character is defeated. b. The Event deck is shuffled.
Solo Mode Setup
Setting up the game for Solo Mode is similar to the normal Competitive Mode but with a few slight changes, which are explained as follows:
- The "B" side of the Monster Board is used.
- There is no Initiative Phase.
- A variant of the Monster Phase (Monster Actions) occurs during the Day.
- Special Status Tokens and Special Conditions treat the Monster as a Character.
- Some Special Status Tokens and Special Conditions are altered for Solo Mode.
Changes to Solo Mode
During Solo Mode, there are a few slight changes, which are as follows:
- The Initiative Phase is unnecessary and is removed.
- After the player ends their turn during the Day, a variant Monster Phase occurs, but only step 3.1 (Monster Action) is resolved. The game then continues as usual.
Phase Summary
Day:
- Event Phase (Day)
- Player Phase (Day): a. Preparation Phase, b. Action Phase, c. Upkeep Phase
- Monster Phase (Day): a. Monster Actions
- Time Shifts To Night -
Night:
- Event Phase (Night)
- Player Phase (Night): a. Preparation Phase, b. Action Phase, c. Upkeep Phase
- Monster Phase (Night): a. Monster Actions, b. Minion Actions, c. Respawning & Frenzy Level
- Time Shifts To Day -
Monster Board (Solo) - Solo Mode Monster Board (B side)
There are 3 main differences on the Solo Mode (B side) Monster Board.
-
Monster Armor Stats: When the Monster is dealt any amount of damage, instead of rolling the Monster Die, place an amount of Damage (Damage Cubes) on the Monster Board equal to that damage. If the Monster Board ever has an amount of Damage Cubes equal to or greater than its Armor value, remove all Damage Cubes from the Monster Board and resolve the Monster Disruptions step as described below.
-
Monster Reactions are changed to Monster Disruptions: When a Monster Disruption occurs, roll the Monster Die and apply the corresponding effect indicated on the Monster Board. After applying the effect of the result, continue the game as usual.
- 1 Stuned: Skips the next Monster Actions in the Monster Phase.
- 2 Confused: Skips the next Monster Actions in the Monster Phase. Then, remove 1 Rage Token.
- 3 Run Away: Control the Monster to Move.
- 4 Irritate: Control the Monster to Move and remove 1 Rage Token.
- 5 Spawn: Respawn a Minion.
- 6 Counter: Perform a Move toward the Attacker. Then, Counterattack.
-
Monster Phase: After the player ends their turn during the Day, a variant Monster Phase occurs, but only step 3.1 (Monster Action) is resolved. The game then continues as usual.
(The Solo Monster Board shows Monster Stats of Move 1, Attack 2, Range 1, and Armor "Per Player" 3; Minion stats Move 0, Attack 1, Range 1, Health 1.)
Adjusting Special Status Tokens and Special Conditions
During Solo Mode, Special Status Tokens and Special Conditions treat the Monster (not Minions) as a Character, and some effects are altered as follows:
- Keltz, the Vagabond — Time Dimension: A Monster with 2 or more Time Dimension Tokens gains the following ability: During the Monster Phase, do not draw a Monster Card, and move the Monster 1 space toward the player instead.
- Megalodon, the Tidehunter — Dive: A Character with a Dive Token gains the following ability: When Megalodon takes damage from the Monster, reduce the damage by half (rounded up), then discard the Dive Token.
- Genbu, the Immortal Shield — Vortex: A Monster with 2 or more Vortex Tokens gains the following ability: During the Monster Phase, the Monster cannot move but may still Attack if able. Discard all Vortex Tokens at the end of the Monster Phase.
- Mobydick, the Gigantic — Haze: A Monster with 1 or more Haze Tokens gains the following ability: During the Monster Phase, the Monster has a maximum range of 1. Discard all Haze Tokens at the end of the Monster Phase.
- Pia Amber, the Mercenary — Randomly Discard: The Monster is considered to have 0 cards in hand.
Appendix
- After X Takes Damage: This often appears in Counter Skills. It happens after the damage is dealt.
- All targets within Range: This often appears in fan target Skills. It describes there is no limit on the number of targets the Skill can affect within range.
- Attacker: This indicates the target that dealt the damage to the Character.
- Avoid Damage Completely: This often appears in Skill and Special Status Tokens, which make the player evade the damage and not be inflicted by the Debuff.
- Cancel the Effect: This indicates that the effect should be ignored completely.
- Control the Target: This type of control is temporary and is relinquished at the end of the effect. While being controlled, use the piece as if it was your Character.
- Counterattack: This often appears in Counter Skills. It allows an attack on the target outside of normal opportunities.
- Deal Damage: This often appears on Skills. It indicates the amount of damage that the target's player allocates to their Health or Shields.
- Day/Night: This indicates that the effect refers to either the Day or Night Track.
- Draw Deck and Discard Pile: All players start the game with a deck, combined and shuffled from the card set of their chosen Rider and Gear at the beginning. When certain cards are used or discarded during the game, they are placed into the discard pile. If the player cannot draw cards from the draw deck (Empty draw deck), take the discard pile and shuffle it into a new draw deck. Then, the player will receive a Death Token.