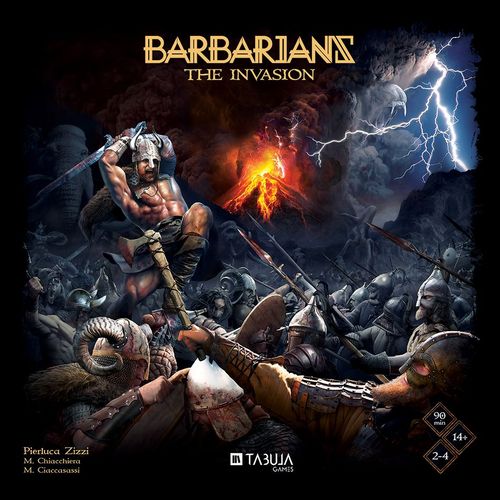
Barbarians: The Invasion
Barbarians: The Invasion Rulebook
Table of Contents
Table of Contents
Goal of the Game
Use your Champions to gather resources, construct buildings, praise Gods, and lead your warriors in battle to conquer civilized regions. In the end, the player with the most Domination Points wins.
Components
1 Game board — The centerpiece of the game. It contains the Volcano, two Knowledge tracks, the Honor track, and the Domination track to keep track of the progress of every Clan.
1 Volcano (4 plastic pieces and 4 cardboard pieces, double-sided) — Where players place their Champions to perform actions and play out their strategy. Each cardboard ring is divided into sectors: position each ring randomly so that each sector is linked to two sectors of the successive ring.
Note: The Volcano's outmost piece is an exception, as it is only linked to two sectors of the previous ring.
The Volcano's "blue side" is part of the Hunt expansion (see p.17).
1 War Map of Thunmar (double-sided) — Civilized territories, the target of the Clans' invasion. The horizontal War Map is compatible with the Hunt expansion.
4 Player boards (1 per player) — The 5 tracks on the left serve to keep track of your available resources. The 3 tracks on the right serve to keep track of your troops.
16 Warchief cards — Players may rely on them to recruit troops during Wars, or sacrifice them for an instant bonus.
16 God cards — Players may pray to the Gods to obtain great powers and rewards.
25 Building cards — Buildings generate a constant income of resources for the players who erect them, and provide Domination Points at the end of the game.
72 Region cards (18 for each kind of Region: Glacier, Forest, Mountain, and Swamp) — Each card is a battle a clan must face to win a War. They vary depending on the nature of the terrain.
4 Demon cards — A costly bargain to achieve greatness, by the end of each even Era.
4 Feast cards — By the end of each odd Era, spend your riches to feast and celebrate.
20 Faction tokens (5 for each faction) — The civilizations scattered on the War Map.
5 First Conquest tokens — Gained by the first player who conquers a Region on an untouched island.
8 Colored cubes (2 per player). Divided as:
- Domination Points markers, used to keep track of Domination Points.
- Milestone markers, used to keep track of the Honor track's Milestones.
36 Player discs (9 per player). Divided as:
- 8 Knowledge discs for the Game board's Knowledge tracks.
- 1 Honor disc for the Game board's Honor track.
16 Champions (4 per player) — Placed on the Volcano to perform actions. (Miniatures version or Meeples version.)
20 Resource markers (1 Food, 1 Wood, 1 Iron, 1 Stone, and 1 Gold per player) — Used to keep track of resources.
12 Troop markers (1 Archer, 1 Berserker, and 1 Raider per player) — Used to keep track of troops.
32 Banners (8 Banners per player) — Used to keep track of conquered Regions.
48 Colored base rings (12 per player) — Attach them to bases of Champions and Banners.
Getting Ready
-
Place the Game board in the center of the table. Assemble the Volcano and place it on the indicated space on the Game board. Each cardboard ring is divided into sectors: position each ring randomly so that each sector is linked to two sectors of the successive ring.
Note: The Volcano's outmost piece is an exception, as it is only linked to two sectors of the previous ring.
-
Set up the War Map. Place one First Conquer token near each island's name. Randomly place one Faction token in each Region on the map, aside from the starting one.
- 3-player: Return to the gamebox the faction tokens in the Regions marked with "4".
- 2-player: Return to the gamebox the faction tokens in the Regions marked with "3+" and "4".
-
Sort by color the 72 Region cards into 4 decks. Shuffle each deck and place them face-down.
-
Sort by type the God, Warchief, and Building cards. Shuffle each deck and place them face-down. Reveal the first two God cards, the first two Warchief cards, and the first four Building cards to form the display area.
-
Shuffle the Demon cards and place one randomly, face-up, in each corresponding slot of the Timeline. The same applies for Feast cards. Return the remaining Demon and Feast cards to the gamebox.
-
Each player chooses a clan and takes the corresponding Player board, Knowledge discs, colored cubes, colored base rings, Champion miniatures, and Banner miniatures. Attach the colored rings to the miniatures' bases, accordingly. Put the Domination Point marker (colored cube) at the start of the track on the edge of the Game board.
Note: During the game you may go lower than 0 Domination Points, as well as above 100.
Each player then takes one of each type of both Resource markers (Food, Wood, Iron, Stone, and Gold) and Troop miniatures (Archer, Berserker, and Raider). Then place them on their Player board: all players start with 3 of each resource and 2 of each troop.
Gameplay
A game of Barbarians: The Invasion is divided into Eras. Each Era is divided into three phases:
- Phase 1 - Maintenance
- Phase 2 - Action
- Phase 3 - End of an Era
A game may last a maximum of 6 Eras, then ends. For other ways to end the game, see End of the Game.
Phase 1 - Maintenance
Note: Skip this phase for the first Era of the game.
- Each player restores their activated God and Warchief cards, flipping them upright if sideways.
- Each player gains the resources indicated on their Buildings. You can activate each Building only once per Maintenance phase. The number of Buildings you can activate corresponds to your progress on the Production track (see Barbarian Knowledge).
Example: Red Player has two Buildings, but only one Production knowledge. They may only choose one of their Buildings to gain the resources indicated.
Phase 2 - Action
- Players take turns following their order on the Honor track.
- A series of turns is called round. Check the Honor track at the start of every round to determine the turn order.
Note: An Era consists of rounds and a round consists of a series of turns.
- During your turn, place one of your Champions on an unoccupied action space of the Volcano. You may perform the depicted action.
- Players alternate to place Champions, and resolve Actions, until they have no more Champions to place.
Action spaces are marked with a distinct outline.
During your turn, before or after placing a Champion, you may decide to either praise one of your Gods or sacrifice one of your Warchiefs. You cannot do both, nor do one more than once.
PRAISE A GOD: Activate a God, by flipping their card on the side, to immediately resolve the effect depicted on the bottom of that card.
SACRIFICE A WARCHIEF: Discard one Warchief card to immediately resolve the effect depicted on the bottom-right of that card. Then, discard the Warchief card to the bottom of the Warchief deck.
Note: You cannot sacrifice an activated Warchief. Warchiefs may be activated during a War action to gain specific bonuses (see Summoning a Warchief, under War).
Allowed Placements
- If it is your first Champion, place it on any action space of the central ring.
- If it is your second Champion, place it on an action space of the intermediate ring, but only in one of the two sectors directly linked to the sector hosting your first Champion.
- If it is your third Champion, place it on an action space of the external ring, but only in one of the two sectors directly linked to the sector hosting your second Champion.
- Some effects may allow you to place a fourth Champion. Place your fourth Champion on an action space of one of the outmost sectors directly linked to the sector hosting your third Champion.
Note: In the remote case you cannot place your Champion due to a lack of free action spaces, skip your turn and gain 2 Domination Points.
The Action Spaces
Resources (and others)
Keep track of your resources by moving the Resource marker left or right on its track. You can never exceed the limit of 6 of any kind of resource. You can never spend a resource you do not have.
Below you can find some examples:
- Gain: 1 Food, 1 Wood, and 1 Iron.
- Gain: 2 Domination Points, 1 Stone, and 1 Gold.
- Gain the amount of resources indicated.
- Gain: 1 Food, 1 Wood, 1 Iron, 1 Stone, and 1 Gold.
- Advance 2 steps on the Honor track and gain 2 Iron.
MILESTONES: Whenever your Honor disc advances past a Milestone on the Honor track for the first time, you immediately gain the indicated bonus. The bonus can still be gained by the other players, it is not consumed. Remember that each Milestone can only be claimed once by each player.
When you reach a Milestone for the first time, place on it your Milestone marker. Even if you were to lose Honor, the marker will be helpful to remember which bonuses you already claimed.
Erect a Building
Choose one of the Building cards from the display and spend the resources indicated on the top-left corner. Place the Building card you acquired in front of you, face-up. You may have up to 4 Building cards at the same time. If you are about to get another, you must immediately discard one to the bottom of the Building deck.
Note: On the display area, acquired cards' empty spaces are not refilled until the End of an Era. Building cards can still be obtained by other means.
Invoke a God or Invoke a Warchief
INVOKE A GOD: Choose one of the God cards from the display and spend 1 resource of your choice as indicated on the top-left corner. Immediately score the Domination Points indicated on the top-right corner of the card. Place the God card face-up in front of you. You may have up to 3 God cards at the same time. If you are about to get a fourth, you must immediately discard one to the bottom of the God deck.
INVOKE A WARCHIEF: Choose one of the Warchief cards from the display and pay 2 Gold as indicated on the top-left corner. Immediately gain the Honor indicated on the top-right corner of the card. Put the Warchief card face-up in front of you. You may have up to 3 Warchief cards at the same time. If you are about to get a fourth, you must immediately discard one to the bottom of the Warchief deck.
Note: On the display area, acquired cards' empty spaces are not refilled until the End of an Era. Both God and Warchief cards can still be obtained by other means.
War
Before engaging in a war (which consists of a series of battles), you may recruit troops. Troops can only be recruited during the first step of the War action. To recruit 1 unit of a type of troop, spend the amount of resources indicated below the troop icon on your Player board.
Keep track of your troops by moving the corresponding Troop marker up and down on its track. You can never exceed the limit of 6 units of any kind of troop.
Note: The back of the Region cards shows the types of troop required for the upcoming battles. All cards of the same Region-type require the same kinds of troops. For example, to fight in a Forest region you need both Archers and Berserkers, but Archers are more necessary than Berserkers (as indicated by the bigger icon).
Example: The Red Player performs a War action and plans to attack a Glacier region. The back of all Glacier cards suggests that Archers and Raiders will be required, so the Red Player recruits troops accordingly. A: They spend 1 Food and 1 Wood to recruit one Archer. B: They spend 2 Food and 2 Iron to recruit two Raiders.
After recruitment, you may declare war on the Region you wish to conquer. To attack a Region, all the following conditions must be met:
-
The Region must be adjacent to the starting Region or to a Region that was already conquered by any player — not necessarily by you.
Note: The starting Region is the Region of the War Map with a volcano depicted on it. It is located in the Thunmar area.
-
The Region has still a Faction token on it.
-
Your Discovery knowledge is sufficient to travel to the island where that Region is located (see Barbarian Knowledge).
Example: The Red player's Discovery knowledge is level 2 (the letter B). They can only attack a Region of Thunmar, Aaruwn, or Boenhoor island. Still, the Region must also be adjacent to already conquered Regions (or to the starting Region), and containing a Faction token. In this scenario, the Red Player has three valid options to choose between.
Once you have determined the Region you want to attack, you will have to draw Region cards from the corresponding deck. Each card represents a battle, and the total number of battles you face is determined by the progress of your Tactical Knowledge associated with the Faction present in that Region. If you have no Tactical Knowledge of the attacked Faction, you must face 6 battles.
Example: The Red Player is attacking the Nefriar faction. Since they advanced twice on the Tactical Knowledge track of the Nefriar faction, they have to face a total of 4 battles (see Tactical Knowledge).
Each kind of Region card depicts which types of troops, and how many, you need to employ in order to win a battle. By spending the required amount of troops, you win the battle.
SUMMONING A WARCHIEF: Instead of spending troops from your Player board, you may activate a Warchief card (flip it sideways) to employ the troop indicated in the bottom-left corner of the Warchief card.
Note: You can summon more than one Warchief during the same battle, but each Warchief can be summoned only once per Era.
If you do not want to, or cannot spend the troops required to win a battle, you immediately lose the battle and suffer a penalty. The applied penalty depends on the Faction you are facing:
- Nefriar — Pay 1 troop of any kind and lose 1 Domination Point. If you cannot pay a troop, you lose 1 additional Domination Point.
- Shan — Pay 1 Stone and 1 Gold. For each resource you cannot pay, you lose 1 Domination Point.
- Aspidian — You lose two Honor. If your Honor disc is at "0", lose 1 Domination Point for each step-back you cannot take.
- Varg — Flip sideways two cards, either God and/or Warchief cards. For each card you cannot flip, you lose 1 Domination Point.
Note: If you have advanced on the Defence knowledge track, you may avoid taking one penalty. (See Defence knowledge track.)
Once you have faced all the battles, two outcomes are possible.
A) If you won at least half of the battles, rounded up, then you conquer the Region. Claim the Faction token of that Region and put it in front of you, then place one of your Banners in that Region. You immediately score Domination Points equal to the number indicated on the Faction token, plus Domination Points related to the island where you fought (check on the War Map, next to the island's name). If you are the first player to conquer a Region in that island, also take the First Conquest token of that island to score 3 additional Domination Points. The same applies for the first conquest in the Thunmar area.
B) If you did not win at least half of the battles (rounded up), you do not conquer that Region. However, you still gain the rewards for the battles you won.
Note: You can conquer a maximum of 8 Regions per game.
Example: The Red Player won two battles out of four. Since they have won half of the battles, they win the war. They claim the Nefriar Faction token from the Region and place their Banner. They score 3 Domination Points (as indicated on the Faction token) plus 2 Domination Points (as indicated next to the island name). Since they are not the first player to conquer a Region in this island, they cannot claim the First Conquest token and score its 3 Domination Points.
REWARDS: Some Region cards have a reward indicated on the bottom-left corner. At the end of a war, collect the rewards of the battles you won.
OVERKILL: Some cards indicate that you may spend additional troops (highlighted in red) to gain Domination Points. You do not need to spend these troops to win the battle, but if you do, you immediately gain the Domination Points indicated on the bottom-right corner.
Example: To win this battle, the Red Player must spend 2 Raiders. Additionally, they may spend 1 Archer to perform an overkill and immediately gain 3 Domination Points. Either way the battle is won, so they will gain 1 Gold by the end of this War.
Knowledge Tracks
For each such action, advance one of your discs on one of the corresponding Knowledge tracks by 1 step or place one of your Knowledge discs on the leftmost space of a track where you are not already present.
There are two different types of Knowledge tracks, Barbarian and Tactical. The Barbarian Knowledge brings useful improvements to different aspects of your Clan. The Tactical Knowledge allows you to conquer Faction tokens with less effort.
Barbarian Knowledge
DISCOVERY TRACK — This track extends the range of Regions where you can attack. If you have never advanced on the Discovery knowledge track, you can attack only Regions of the starting area.
Note: On the War Map, the islands' names start with the first four letters of the alphabet (A, B, C, and D).
When your disc is on the first space of this track, "A", you may also attack the Regions of the island whose name begins with the letter A. The second space lets you reach the island whose name begins with the letter B, and so on.
Bonus: The first player who reaches the last space of this track immediately scores 2 Domination Points for each Faction token they have collected so far.
ECONOMY TRACK — For every advancement on this track, you gain more resources when you perform resource related actions on the Volcano. If you are on the track's first space, gain 1 additional Food every time you gain at least 1 Food from an action. If you are on the second space, also gain 1 additional Wood every time you gain at least 1 Wood from an action. If you are on the third step, also gain 1 additional Iron every time you gain at least 1 Iron from an action. If you are on the last step, also gain 1 additional Stone every time you gain at least 1 Stone from an action.
Bonus: The first player who reaches the last space of this track immediately scores 2 Domination Points for each triplet of Food, Wood, and Iron they have.
DEFENCE TRACK — This track allows you to avoid penalties from losing a battle. You can only avoid one penalty during a single war. You can decide when to avoid that penalty based on where your disc is. For example, if you are in the first space of the Defence track, you can avoid a penalty only for the first battle; if you are in the second space, you can avoid a penalty only for either one of the first two battles.
Bonus: The first player who reaches the last space of this track immediately scores 2 Domination Points for each Milestone they have passed.
Note: Do not consider the current progress on the track, but the furthest milestone ever reached during the game (check the Milestone marker position).
PRODUCTION TRACK — For every advancement on this track, you can activate a different Building during the Maintenance phase. If you are on the first space, you can activate only 1 Building card during the Maintenance phase; if you are on the second space, you can activate 2 different Building cards during the Maintenance phase, and so on.
Bonus: The first player who reaches the last space of this track immediately scores 2 Domination Points for each Building card in front of them.
The second player who reaches a track's last space gets its bonus as well, but they only get to multiply 1 Domination Point instead of 2. This applies to all Barbarian Knowledge tracks.
Tactical Knowledge
Each Tactical Knowledge track is related to one of the four factions and works in the same way, except for the bonus for reaching the last space. For every advancement on these tracks, you reduce the number of battles you have to fight in a war against a specific faction.
Example: If your disc is on the first space of the Aspidian faction's track, every time you attack Aspidian you will face a total of 5 battles. If your token is on the second space of the Aspidian faction's track, you will face a total of 4 battles.
If you declare war on a particular faction where you don't have a disc on the corresponding Tactical Knowledge track, you will fight a total of 6 battles.
NEFRIAR FACTION TRACK — Bonus: The first player who reaches the last space of the Nefriar faction track immediately scores 3 Domination Points and recruits 3 troops of their choice.
ASPIDIAN FACTION TRACK — Bonus: The first player who reaches the last space of the Aspidian faction track immediately scores 3 Domination Points and advances 2 spaces on the Honor track.
SHAN FACTION TRACK — Bonus: The first player who reaches the last space of the Shan faction track immediately scores 3 Domination Points and gains 4 resources of their choice.
VARG FACTION TRACK — Bonus: The first player who reaches the last space of the Varg faction track immediately scores 3 Domination Points and draws the top-card from either the God deck or the Warchief deck without paying its cost.
The second player who reaches a track's last space chooses either one of the two bonuses. This applies to all Tactical Knowledge tracks.
Trade Actions
- Spend 2 Food to advance 1 space on both the Barbarian Knowledge track and the Tactical Knowledge track. Also, advance of 1 Honor.
- Spend 2 Wood to immediately draw and play the top-card of the Building deck, without paying its cost.
- Spend 2 Iron to immediately draw and play the top-card of either the Warchief or the God deck, without paying its cost.
- Spend 2 Stone to gain 3 troops of your choice.
- Spend 2 Gold to perform a War action. If you win the war, double the Domination Points on the Faction token you gain.
Note: First Conquest tokens and additional Domination Points of the island are not doubled.
Other Actions
- On your next turn, you may perform twice the effect of the action space where you place your next Champion.
- During this Era, you may place a fourth Champion on the outmost ring of the Volcano.
Note: The fourth Champion is not immediately placed when unlocked. After all players have placed their third Champion, those who unlocked the fourth proceed on an extra round of play to place theirs.
Phase 3 - End of an Era
- Recover all Champions from the Volcano.
- Following turn order, each player resolves the effect of the leftmost face-up card of the Timeline (Feast or Demon). The resolved card is then flipped face-down.
- Discard all the Building, God, and Warchief cards from the display area to the bottom of their respective decks. Reveal 4 Building cards, 2 God cards, and 2 Warchief cards to become available for the next Era.
- Resolve the Final Event depicted right below the resolved Feast or Demon card.
- Begin the next Era.
Feast Cards
Following turn order, every player may offer some of their resources to feast and celebrate. Choose one of the two possible offerings and pay the amount of resources required, gaining Domination Points. If you decline to feast, you only gain the 2 resources indicated in the last row.
Example: You may pay 1 Wood and 1 Gold to score 3 Domination Points, or 3 Wood and 1 Gold to score 7 Domination Points. Alternatively, you can pay nothing and gain 2 Wood.
Demon Cards
Demons are powerful entities that will ask you to pay a price to please them. First, players must choose to either pay 1 Gold or lose 5 Domination Points. Then, following turn order, players may offer a higher tribute to gain a powerful advantage. Every Demon offers a different bargain.
Example: Spend 5 resources of your choice to perform two Barbarian Knowledge actions or two Tactical Knowledge actions.
Final Event
Rotate the highlighted Volcano ring by 1 or 2 steps, in the direction indicated on the board.
Example: The leftmost icon tells the players to rotate the intermediate ring by 2 steps counter-clockwise.
The sixth Final Event of the Timeline is the chance, for each player, to perform a last War action before ending the game. Players may decide not to perform this last War action.
Note: You do not need to place a Champion to perform this War action; follow all the standard rules for War.
End of the Game
A game of Barbarians: The Invasion can end in two different ways.
A) At the end of the sixth Era, after the round of War actions triggered by the sixth Final Event.
B) When all Faction tokens from the War Map are collected. Keep playing until the End of that Era, but do not resolve the corresponding Final Event.
Final Scoring
Buildings Scoring
Each Building shows one of five different criteria to score points:
- Score 2 Domination Points for each Faction token you collected.
- Score 2 Domination Points for each different type of Building you erected. (Note: The type of Building is determined by its artwork.)
- Score 2 Domination Points for each Barbarian and Tactical Knowledge track where your disc reached the last space.
- Score 2 Domination Points for each God card in front of you.
- Score 2 Domination Points for each leftover resource you have, according to the type.
Banners Scoring
Each player scores Domination Points for each group of Regions they conquered. A group is formed by adjacent Regions conquered by the same player. Regions linked overseas count as adjacent.
| Regions in a group | 1 | 2 | 3 | 4 | 5 | 6 | 7 | 8 |
|---|---|---|---|---|---|---|---|---|
| Domination Points | 0 | 1 | 4 | 9 | 16 | 25 | 36 | 49 |
Example: The Yellow Player scores 4 Domination Points for their group of Regions on Thunmar and Aaruwn (3 adjacent Regions) and zero points for the single Region conquered on Cae. Both the Blue and Green players score 4 Domination Points each as well, while the Red Player only scores 1 Domination Point.
The player who has the most Domination Points at the end of the Final Scoring is the winner of the game. In case of a tie, the player who is first on the Honor track wins.
Clans' Powers (Asymmetric Variant)
If you are interested in experiencing an asymmetric game, take the five Clan Power tiles and randomly deal one to each player during step 6 of the setup. Clan Power tiles can be slotted into the Player boards.
Note: It is also possible to let the players decide which Clan Power to take.
Clans' Powers last for the entire game. Their effects are described below:
-
Whenever you reveal a Region card during a War action, you may choose to discard the revealed Region card and draw another to face instead.
Note: You may use this power multiple times during the same War, but for each battle you can only replace its Region card once.
-
Each time you sacrifice a Warchief, you may pay 1 Stone and 1 Gold to resolve its effect twice. Then, discard the Warchief card to the bottom of the Warchief deck as usual.
-
At the very beginning of each Maintenance phase, you may gain 2 resources of your choice.
-
During Phase 3 of each Era, you may resolve the corresponding Feast or Demon card twice. Feast card: When you resolve it for the second time, you may choose any of the three options. Demon card: When you resolve it for the second time, you do not have to resolve its penalty (either pay 1 Gold or lose 5 Domination Points).
-
At the very beginning of the first, third, and fifth Eras, before the Maintenance phase, you may gain 1 Archer, 1 Berserker, and 1 Raider.
Note: On the Game board, Feast cards correspond to the first, third, and fifth Eras.
Hunt Expansion
The Hunt Expansion brings new components and mechanics into the game. The Hunt Expansion must be played on the horizontal War Map of Thunmar.
Additional components:
- 4 Alternative Volcano cardboard pieces (printed on the back of the default rings)
- 1 Alternative War Map of Thunmar (printed on the back of the default War Map)
- 12 Hunt cards, divided as: 6 Monster cards and 6 Beast cards.
- 8 Magma tokens — Reach them to apply penalties to your opponents.
- 4 Skullcrusher miniatures — Your trustworthy beast hunters. (Miniatures version or Meeples version.)
- 4 Hunt markers — They represent the current position of a prey.
- 4 Colored base rings (1 per player) — Attach them to the Skullcrushers' bases.
Set Up
Set up following the steps of the base game, but consider the list below:
1a. Use the Volcano rings' side dedicated to the Hunt Expansion. Randomly choose 4 Magma tokens and place them face-up on four different sectors, each on a different Volcano ring.
Note: Do not cover the actions spaces with the Magma tokens, if possible.
2a. Place all 4 Hunt markers on the first island, each in a different kind of Region.
Note: The first island's name always starts with the letter A.
3a. Sort the Hunt cards (both Beasts and Monsters) by color into four decks. Shuffle each deck, then place them face-up next to the Region decks.
6a. Each player claims a Skullcrusher, then place it on the starting Region of the War Map (the Region with a volcano in the Thunmar area).
New Action Spaces
New action spaces are introduced by the Volcano side dedicated to the Hunt Expansion.
War Action Spaces
War action spaces work like a standard War action, except that you get a bonus on some Regions. The bonus is indicated by the small card icon, as follows:
- If you declare War to a Glacier region, you face one less battle.
- If you declare War to a Forest region, you face one less battle.
- If you declare War to a Mountain region, you face one less battle.
Skullcrusher Action Spaces
Move your Skullcrusher from their Region to an adjacent one. You may move them up to as many times as indicated on the action space. You may decide not to move as well.
If your Skullcrusher is in a Region holding a Hunt marker, you may immediately choose to start a Hunt (see Hunt). You cannot move your Skullcrusher after a Hunt.
Hunt
If your Skullcrusher is in a Region holding a Hunt marker, you may try to hunt down some bizarre creatures.
-
Look at the Hunt deck corresponding to your Skullcrusher's current Region type. The amount of battles you are going to fight are displayed on the top-left corner of the face-up card.
Example: Your Skullcrusher ends their movement on a Forest region containing a Hunt marker. The Snake is the top-card of the Forest's Hunt deck. In order to hunt down the Snake, you need to fight two battles by drawing two cards from the Forest's Region deck — as indicated on the top-left corner of the Snake's card.
-
Recruit troops as in a standard War action.
-
Draw the amount of Region cards required by the Hunt card, then reveal them altogether.
-
You may now decide either to pay the total cost of gray troops indicated on the Region cards to capture the creature, or pay nothing and return all the revealed Region cards to their deck.
Note: These are not standard battles. No rewards or Overkill are obtainable while performing the Hunt action. Furthermore, you have not access to any kind of bonus (such as Defence track knowledge, Warchief cards, or Beasts powers).
At the end of a Hunt, two outcomes are possible:
-
You cannot or do not want to pay the total cost of troops: the creature escapes, and the Hunt fails. If the Hunt fails, leave the creature's card at the top of its deck.
-
You pay the total cost of troops: the Hunt is successful. If the Hunt is successful, you may either:
- Claim the Hunt card of the creature you defeated, and put it in front of you (Tamed Beast, Monster Trophy).
OR
- Immediately score the Domination Points indicated on the top-right of the Hunt card, multiplied by the number indicated next to the island where you hunted the creature.
Example: You hunted down the Snake in the Forest region of the second island, but decided not to claim its card. Instead, you score 5 Domination Points for the Hunt card, multiplied by the island's 2 Domination Points, for a total of 10 Domination Points.
Whether your Hunt is successful or not, move the Hunt marker to the next island (remember that the islands' names follow the alphabet from letter A to D). A Hunt marker must always be placed on the same type of Region. If the Hunt action was performed on the fourth and last island, remove the Hunt marker from the War Map, as it will not be used anymore during the game.
Beasts and Monsters
As explained in the previous paragraph, both Beast and Monster cards can be claimed by players as a reward for a successful Hunt. Even though they are acquired in the same way, they have different uses.
Tamed Beasts
You may use your Beast cards during any War action to immediately win a battle without paying any troops. You can use each Tamed Beast only once for each War, and only if you are facing battles on the same regions indicated on your Beast card:
- Glacier
- Forest
- Mountain
- Swamp or Glacier
- Swamp or Forest
- Swamp or Mountain
If you use a Tamed Beast to win a battle, collect the rewards at the end of the War as usual, including any Domination Points for an Overkill bonus.
Example: You are facing a War on a Swamp region, and you have the Mammoth Tamed Beast at your disposal. You may use it to automatically win a battle, gaining any depicted reward and/or Overkill bonus, without having to pay any troops. The tamed Mammoth could also be used in a War on a Glacier region.
Monster Trophies
During your turn, before or after placing your Champion, you may discard a Monster Trophy to resolve the effect depicted on the card. Discarded Monster cards are removed from the game.
Example: During any one of your turns, you may discard the Yeti to immediately perform a War action. If you win, triple the Domination Points you would normally get from the Faction token.
Note: Beasts and Monsters are finite. Choose carefully when to attempt a Hunt!
Magma Tokens
Whenever you place a Champion on an action space of a sector where a Magma token is present, you immediately deal damage to the other Clans. The kind of damage depends on the specific Magma token (either showing a resource or a troop).
Each enemy player must immediately lose one of the indicated type of resource or troop. If they cannot fulfill the penalty, they lose 1 Domination Point instead.
At the end of Phase 3 of each Era, move each Magma token to the next sector, clockwise.
One-Player Rules
Before venturing in the One-player mode, we highly recommend you to first play a couple of games using the standard rules in order to gain confidence with both the game's mechanics and terminology.
Additional components: 6 Fate cards.
Set Up
Follow setup standard instructions, and all the variations listed below.
2a. Set up the War Map. Return to the gamebox the Faction tokens from the regions marked as "3+" and "4".
4a. Randomly draw 10 God, 10 Warchief, and 14 Building cards. Shuffle them all together to form the Asset deck. Place this deck close to the Game board. Before returning all the remaining God, Warchief, and Building cards to the gamebox, draw a random God card and keep it aside until step 8a. Lastly, draw and reveal 7 cards from the Asset deck and place them in a row. This forms the display area.
6a. Choose one non-player-color to be your opponent (NPC from now on). Take the corresponding Champions and place them on four random action spaces on the Volcano, each Champion on a different ring.
7a. Randomly stack both the NPC's Honor disc, and yours, on the starting space of the Honor track.
8a. Reveal the God card you put aside during step 4a. Then, advance your Domination Point counter by the amount indicated on the top-right corner of that God card. Keep the God card face-up near your Player board.
10a. Shuffle the Fate cards and form a deck beside your Player board, face-down.
11a. Choose the difficulty of your game:
| Difficulty | Domination Points |
|---|---|
| Easy | 80 |
| Normal | 100 |
| Hard | 130 |
| Insane | 150 |
Gameplay
When playing a game in One-player mode, follow the standard game rules with all the variations listed in this section.
A game may last a maximum of 6 Eras, each divided into four phases:
- Pre-phase
- Phase 1 - Maintenance
- Phase 2 - Action
- Phase 3 - End of an Era
Pre-Phase
Draw a card from the Fate deck. Then immediately resolve all the effects indicated, from the top row to bottom one.
-
Move the NPC's Champions by either 0, 1, or 2 action spaces in clockwise or counter-clockwise direction.
-
Place (or advance) the NPC's Knowledge discs on the indicated tracks, by the number of steps indicated. If one of the NPC's Knowledge discs reaches the last space of a track before you do, it will prevent you from claiming the first player bonus.
-
From the display area, discard to the bottom of the Asset deck the cards marked by a red slash.
-
Advance the NPC's Honor disc on the Honor track, by the number of steps indicated.
-
Check the War Map to identify Regions targetable by the NPC. A targetable Region must respect both the following conditions:
- The Region is adjacent to an already conquered Region — it does not matter if it was conquered by you or by the NPC — or to the starting Region.
- The Region still has a Faction token on it.
On the Fate card's last row, each Faction has a different priority: from left to right, from highest to lowest. Among the targetable Regions, try to select the one with the leftmost Faction between those indicated. In case there are multiple Faction tokens, all of them valid, pick the one with the highest Domination Point value.
Lastly, place an NPC's Banner on that Region, and return the defeated Faction token to the gamebox.
Note: When the player performs a War action, the Regions with the NPC's Banners are considered as if they were conquered by another player for determining Regions' adjacency.
-
Shuffle the resolved Fate card back into the Fate deck.
Phase 3 - End of an Era
At the very beginning of Phase 3, slide the remaining cards of the display to the left of the row to fill in the empty card spaces. Draw new cards and place them in the right-most space of the row until there are 7 cards in the display.
End of the Game
Final Scoring
If the NPC's Honor disc is ahead of you on the Honor track, lose Domination Points equal to the difference between the two Honor discs.
At the end of the final scoring, if you have more Domination Points than the chosen difficulty level, you win. Otherwise, your Clan succumbs to a grim Fate.
Special Rules
DRAWING A CARD: Every time you would have to draw the top card of a specific deck, look through the Asset deck instead — without revealing its cards — until you find a card of the type you were looking for, and take it.
Note: Do not change the order of the cards in the deck.
DISCARDING A CARD: Whenever you have to discard a card, place it on the bottom of the Asset deck.
Additional Modules
Each module can be added both to the base game and to the game with the Hunt Expansion. Modules can be combined one with another, and all of them are playable on any War Map.
Personal Objectives
5 Personal Objective cards.
Before step 1 of the Setup, shuffle the 5 Personal Objective cards and randomly deal one to each player, face-down. Players can look at their Personal Objective, but cannot reveal it to the others. Return the unused Personal Objective cards to the gamebox.
There are two ways to use Personal Objectives. They may be either:
- Conserved to score additional Domination Points at the end of the game, by meeting the criteria indicated on the card.
OR
- Discarded to gain an immediate bonus. A player may discard their Personal Objective at any time during their own turn, before or after placing a Champion. The player then gains the bonus indicated on the bottom of the card. Return any discarded Personal Objectives to the gamebox; they will not be used again in this game.
Extra Cards
Buildings
During step 4 of the Setup, add these Building cards to the Building deck.
-
END GAME SCORING: Score 1/3/7/12/18/23 Domination Points if, at the end of the game, your Milestone marker has advanced to 1/2/3/4/5/6 Milestones, respectively.
Example: If your disc on the Honor track has advanced further than 3 Milestones by the end of the game, you score 7 Domination Points.
IMMEDIATE BONUS: Discard this card to immediately advance your Honor track disc by 4 spaces on the Honor track.
-
END GAME SCORING: Score 2/7/14/20 Domination Points if you have 1/2/3/4 pairs of "Building card + God (or Warchief) card" respectively.
Example: If you have 3 Buildings, 3 Gods, and 2 Warchiefs at the end of the game, you score 14 Domination Points.
IMMEDIATE BONUS: Discard this card to immediately take the top card of the Building, God, or Warchief deck without paying any cost.
-
END GAME SCORING: Score 2/7/14/20 Domination Points if you collected 1/2/3/4 different Faction tokens, respectively.
Example: If you have 2 Nefriar Faction tokens and 3 Aspidian Faction tokens at the end of the game, you score 7 Domination Points.
IMMEDIATE BONUS: Discard this card to immediately perform a War action. If you win the war, double the Domination Points indicated on the conquered Faction token.
-
END GAME SCORING: Score 2/7/14/20 Domination Points if you have your Tactical Knowledge discs on the right-most space of 1/2/3/4 Tactical Knowledge tracks respectively.
Example: If you have 4 Nefriar Knowledge points, 3 Aspidian Knowledge points, and 2 Varg Knowledge points at the end of the game, you score 2 Domination Points.
IMMEDIATE BONUS: Discard this card to immediately gain 2 Tactical Knowledge advancements.
-
END GAME SCORING: Score 2/7/14/20 Domination Points if you have your Barbarian Knowledge discs on the right-most space of 1/2/3/4 Barbarian Knowledge tracks respectively.
Example: If you have 4 Discovery Knowledge points, 4 Production Knowledge points, and 2 Defence Knowledge points at the end of the game, you score 7 Domination Points.
Demons and Feasts
During step 5 of the Setup, add these Demon and Feast cards to the corresponding decks.
-
ARACNUS: You may discard one of your Warchief cards, without performing its effect, to immediately double the current number of all your troops on your Player board.
-
DUNGORN: You may lose 2 Domination Points to immediately activate all your Building cards, regardless of your progress on the Production Knowledge track.
-
CROM: You may pay 1 troop of each kind to immediately gain 8 Domination Points.
-
FHAFNIR: You may pay 3 Gold to immediately place one of your Banners in a Region of the War Map, following standard rules for choosing a Region (see War). Claim the Faction token and gain the Domination Points as if you conquered that Region by a War action.
Note: This is not a War action: do not recruit troops or fight any battles.
-
SKELARIA: You may discard one of your God cards to immediately advance 3 steps on the Honor track and gain a fourth Champion. Use this fourth Champion in the next Era.
-
WARGU: You may pay 5 resources of your choice to perform either two Barbarian Knowledge actions or two Tactical Knowledge actions.
Variable Milestone Tokens
6 Milestone tokens.
The Milestone tokens are used to vary the unlockable rewards from the Honor track. Before step 7 of the Setup, randomly use the tokens to cover up the Milestones printed on the Game board. These new bonuses replace the Milestone bonuses of the base game. All the rules involving Milestones are kept the same.
Kickstarter Exclusive War Maps
1 Cardboard War Map (double sided).
These exclusive War Maps feature some unique maritime routes that connect very distant islands. The horizontal map is compatible with the Hunt expansion.
New Warchief: Amarice
During the Kickstarter campaign we kept track of the comments section looking for the most enthusiastic supporter. Our backer Amarice has been illustrated as a barbarian and his artwork became a new Warchief Card.
Reference
A quick summary of icon meanings used throughout the game:
- Choose to resolve only one of the two options.
- Pay the cost on the left of the arrow to perform the effect on the right.
- Gain any three resources of your choice.
- Gain any three troops of your choice.
- Gain 1 Archer, 1 Berserker, and 1 Raider.
- Advance 1 step on the Honor track.
- Gain the indicated amount of Domination Points.
- You may move your Skullcrusher to an adjacent Region. If a Hunt marker is present in the Skullcrusher Region, also resolve a Hunt action.
- Take one of the Building cards from the display (paying its cost).
- Take one of the God cards from the display (paying its cost).
- Take one of the Warchief cards from the display (paying its cost).
- Perform a War action.
- Advance one of your discs on a Barbarian Knowledge track by 1 space, or place one of your Knowledge discs on the leftmost space of a Barbarian Knowledge track where you are not already present.
- Advance one of your discs on a Tactical Knowledge track by 1 space, or place one of your Knowledge discs on the leftmost space of a Tactical Knowledge track where you are not already present.
- Perform a War action. If the target Region is the same type indicated by the action space, face one less battle.
- Only for the current Era, you may place your fourth Champion on the outmost Volcano ring.
- Resolve your next action space twice (x2).
- Take the top-card of the Building deck — without paying its cost. Apply all the other rules for Building cards as usual.
- Take the top-card from either the Warchief deck or the God deck — without paying any cost. Apply all the other rules for Warchief and God cards as usual.
Demons
-
CROM: You may pay 1 troop of each kind to immediately gain 8 Domination Points.
-
FHAFNIR: You may pay 3 Gold to immediately place one of your Banners in a Region of the War Map, following standard rules for choosing a Region (see War). Claim the Faction token and gain the Domination Points as if you conquered that Region by a War action.
Note: This is not a War action: do not recruit troops or fight any battles.
-
SKELARIA: You may discard one of your God cards to immediately advance 3 steps on the Honor track and gain a fourth Champion. Use this fourth Champion in the next Era.
-
WARGU: You may pay 5 resources of your choice to perform either two Barbarian Knowledge actions or two Tactical Knowledge actions.
Banners Scoring
By the end of the game, each player scores Domination Points for each group of Regions they conquered:
| Regions in a group | 1 | 2 | 3 | 4 | 5 | 6 | 7 | 8 |
|---|---|---|---|---|---|---|---|---|
| Domination Points | 0 | 1 | 4 | 9 | 16 | 25 | 36 | 49 |