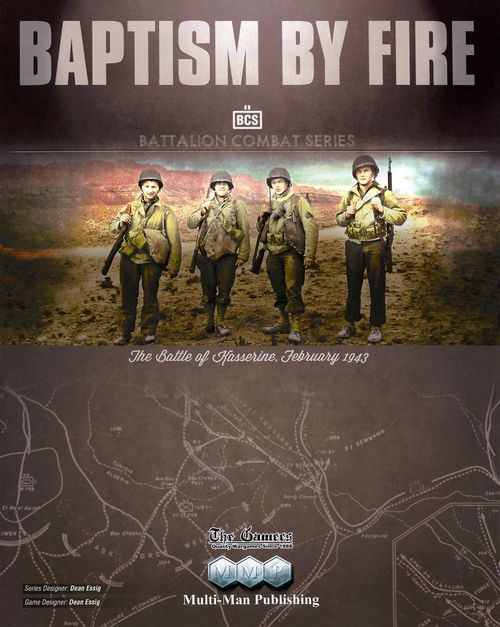
Baptism By Fire: The Battle of Kasserine
Baptism By Fire: The Battle of Kasserine Rulebook
Table of Contents
Table of Contents
- Battalion Combat Series Rules (v1.2)
- v1.2 Preface
- 1.0 Game Components & General Rules
- 2.0 Game Turn Sequence of Play
- 3.0 The Activation Phase
- 4.0 Command
- 5.0 Movement
- 6.0 Zones of Control (ZOCs)
- 7.0 Combat
- 8.0 Barrage
- 9.0 Specialized Rules
- 10.0 SNAFU, Supply, Fatigue & Isolation
- Series Designer's Notes
- v1.1 Designer's Notes
- v1.2 Designer's Notes
- Optional Rules
- A BCS Primer
- Red, White, and Black
- Charts & Tables
- Activation Phase — Sequence of Play (3.2)
- Attack Sequence (7.2)
- Combat Table Modifiers
- Combat Table (Modified Two Dice)
- Retreats (7.5)
- Advance after Combat (7.4)
- Engagement Table (7.1)
- Barrage Table (8.1 & 8.3)
- Snafu Table (10.1)
- Snafu Result Effects
- Fatigue Increase Table (10.4b)
- Unit Capabilities Chart
- Baptism by Fire Game Specific Rules
- Designer's Notes
- Historical Notes
- Learning to Fight: Allied Order of Battle Notes
- Muddled Hierarchy: Axis Order of Battle Notes
- The Gear
- Allied Order of Arrival
- Axis Order of Arrival
- Bibliography
- Game Charts
- Terrain Effects Chart
- Official Errata
Battalion Combat Series Rules (v1.2)
v1.2 Preface
This version of the series rules mainly corrects the known errata and clarifications to the v1.1 rules. Changes/corrections/additions in this rulebook from v1.1 are in Red. True changes from v1.1 are tagged with a margin symbol, as such (note that if the item appears more than once, generally only the most important mention is marked): ✔
1.0 Game Components & General Rules
1.1 The Game Map
1.1a Scale. Ground Scale is from 500m to 2 km per hex, depending on the terrain being shown. Combat Units are generally Battalions, with some Companies. Game Rules will state the exact scale for that game.
1.1b The Hex Numbering System. All hexes are identified by a unique four-digit number in the form "column.row". If the game has more than one map, a letter identifies each, and the hex numbers for hexes on a given map are prefixed with the map's letter. For example, B10.10 identifies hex 10.10 on map B. The digits before the decimal point identify the hexrow, reading along the horizontal dimension from left to right. The digits after the decimal identify the exact hex along that particular hexrow, reading along the vertical dimension from bottom to top. Not every hex within each is numbered. Each fifth hex (xx.05, xx.10, xx.15) is numbered to create grid lines. For example, to find hex 29.17, follow the grid line for xx.15 until you find the 29.xx hexrow, then count up two hexes to 29.17.
1.1c Map Edge Hexes. Only hexes with at least half of the hex showing are playable.
1.1d Off Map Movement. Unless specifically allowed in a given game, units can neither exit the map to re-enter later nor conduct any off-map movement.
Exception: See 7.5h for units that Retreat off the map.
1.2 The Counters
Important: See the Unit Capabilities Chart for a general list of the combat functions of the various unit types. The Chart does not supersede specific mentions and additional restrictions in the rules themselves.
1.2a Unit Counter Ratings.
- Assault Arrow: This symbol is used to identify units with Attack capability. Only a unit with an Assault Arrow can be the Attack unit for a regular Attack.
- Movement: The maximum available number of Movement Points is the unit's Movement Allowance or MA. The color of the number shows the Movement Class of the unit on the side showing. A Red MA is Tactical, a Black MA is Truck, and a White MA is Leg.
- Armor Value & Range: Rated by vehicle and gun. Vehicles have only one number (yes, this means a loss of some tactical detail when defense is significantly different from offense). Range is one hex if no value is printed.
- Steps: A measure of the resilience of a unit, as the number of step losses a unit can take in combat and still function. Units are rated for their size and organization.
- Action Rating: A rating from 0 to 5 (best) representing the leadership, training, morale, and other soft qualities of the unit.
1.2b Unit Counter Sides. Most unit counters have two printed sides. Usually the distinguishing feature between them is the Movement Allowance. The side with the lower MA is called 'Deployed' or 'Deployed-side.' The one with the higher MA is called 'Move' or 'Move-side'. Units with only one printed side to their counter are considered to be Move-side. The side printed on the front of the physical counter will be the side that unit uses most.
Important: Whichever side is currently facing up defines the unit's capabilities. See the Unit Capabilities Chart.
Unit Key
The printed Unit Key (page 2) is a symbol diagram. Its artwork is not reproduced here; each entry lists the label printed beside the symbol.
HQs
- Unused Side; Used Side
- Command Radius; Activation Roll; Arty Points; Formation ID
- Formation Color Code Bar (added to BCS games after Baptism by Fire)
- MA (Truck type)
AV Units
- Hard (Yellow Symbol)
- Formation ID; Armor Value (Red AV); Range; MA (Tactical type); Action Rating
- Steps Available; Unit Size
- Range assumed to be 1 hex if not printed
Dual Units
- Assault Arrow; Armor Value; Not Hard (White Symbol)
Infantry Units
- Deployed Side; Move Side (see Unprepared); Assault Arrow; MA (Leg type); Action Rating
Combat Trains
- Regular; Ghost
Types and Special Symbols
- AV Types: Red AV; Limited AV; Stand Off AV; Light AV
- Movement Classes: Tactical (TAC) MA; Leg MA; Truck MA (background colors on the key are representative only)
- Support Only
- Breakthrough AV
- No Rebuild Unit
- Static Unit
- Unit Sizes: I Company; II Battalion; KG Kampfgruppe; TF Task Force; Tm Team; Grp Group; III Regiment; X Brigade; XX Division; XXX Corps; (-) Portion of the larger command; (+) Reinforced Unit
Unit Symbols
- Infantry; Motorized Infantry; Arm Inf or PG; Abn Infantry or FJ; Mtn Infantry; Marine; Glider Inf; Amphibious; Commando; Ski Troops; Voraus; Bicycle; Machine-Gun; Police; Ost; Ersatz; Ad Hoc Unit; Special Desert Troops; Assault Engineers
- Armor or Pz; Tiger; Josef Stalin Hvy Tank; Josef Stalin AG; Light Tank; Tank Destroyer; Soviet SP Gun; Jagdpanzer; Jagdtiger; Marder; StuG; Sturmtiger; Brummbär; FKL Tiger; Flame Throwing Tank; Matilda; Valentine
- Pzjg I; Tankette; AT; 102mm Guns; 90mm Guns; 88mm Guns; AA Weapons in Ground Mode; Arm AA; Cavalry; Arm Recon; Motorcycle Infantry; Motorcycle Recon; Arm Car; Engineer; Abn Engineer; Arm Engineer; Pioneer
Markers
- Prepared Defense; Objective (OBJ); Double OBJ; Red Support; Limited Support; Stand Off Support; Dropped Support; Temporary Dropped Support; Fresh Fatigue; Fatigue Level 2; MSR Blocked Level 1
- Step Loss (5 remaining); Game Turn; Activation Marker; Formation Activation Marker; Weather (one of normal possible types)
- Coordination; Traffic Stopped; 2 Arty Asset Points; 2 Air Points; Recon Screen; Leader; Locked Formation
- Blown Bridge; Bridge tried and did not blow; Bridge Not Open
- "Higher Formation" (for historical information); March OBJ; Naval Bombardment; Fort; Mines; Minefield Breach; Wire Breach
1.2c Unit Types and Classes.
General:
- Infantry. Any unit that has no printed AV number is Infantry for purposes of the terrain DRM on the Combat Table.
- Recon. Any unit with a "Cavalry Slash" in its unit symbol and any additional unit types designated as Recon in the Game Rules.
- Artillery. Artillery is abstractly given as "Arty Points" on the various HQs and "Arty Asset Points" the player assigns to his HQs. Artillery is not represented by explicit unit counters.
- AT Guns. Only some heavier AT Guns are shown as separate units. Lighter guns are dispersed inside units.
- Headquarters (HQs). Headquarters represent the command and control hub of a Formation.
- Combat Trains. Combat Trains are the Formation's forward logistical establishment.
- Hard Unit. Any unit which has a Yellow background to its unit symbol is a Hard unit. This is a judgment value based on the vehicles involved, open-top armor or WW2 mech infantry would not be Hard.
- Non-Rebuildable Units. Any unit with a Yellow dot in back of its Action Rating cannot receive Replacement Points. If destroyed, such units cannot return to play.
AV Specific:
- Armor Value Units (AVs). An AV unit is any unit with an Armor Value.
- Dual Unit. A unit showing both an Assault Arrow and an Armor Value.
- Support. These unit's AV weapons are dispersed among the Formation's non-AV units. Support can help these units in combat.
- Red AV Units. Any AV unit with a Red AV showing. These units are more capable of offensive action than the other varieties of AV units.
- Limited AV Units. Any AV unit showing an "outlined" AV. These units are more defensive in nature than Red AV units. Limited AV units suffer a penalty on the Engagement Table when they are the Firer.
- Light AV Units. Any AV unit with a Light AV (White) showing. These units are more defensive in nature than Red AV units, but are equipped with low caliber weapons (MGs, usually) on vehicle mounts. They are unable to initiate Engagements as the Firer. Light AV units are the same as Limited AV when in Support.
- Stand Off AV Units. Any AV unit with a Black AV showing. These units are more defensive (like Limited AV), but have a unique ability to fire 'offensively' and provide Engagement Zones when in Support.
- Breakthrough AV Units. Any AV unit with a 'Breakthrough Armor designation' on its unit symbol. These units have heavy armored vehicles designed to penetrate strong defensive positions. They have a special DRM in Shock Attack.
1.2d Unprepared Units. These are units with neither an Assault Arrow nor AV showing. Unprepared units lose a number of functions:
- Unprepared units:
- have no ZOC
- cannot Attack or Assist an Attack
- cannot use Prepared Defense
- have no Support present
- cannot 'jump' HQs or Combat Trains
- However, they can still:
- spot for Barrages
- count as a unit in a Defender's hex
1.2e Step Losses and their Effects.
- a) Place a Step Loss marker under a unit counter that has lost any steps. Use the number facing "up" on the marker to show the number of steps remaining to the unit. When the marker goes to zero (or below zero), the unit is removed from the map.
- b) Any unit without a marker is assumed to be at its full printed strength.
- c) There are no other effects of step loss beyond the eventual removal of the unit.
1.3 The Rules
Every BCS game contains both Series and Game rulebooks. The Series Rules contains the rules generally applicable to all series games. The Game Rules give the details needed for a specific game, including special rules, scenarios, and set-up information.
Where the Game Rules and the Series Rules disagree, the Game Rules take precedence.
1.3a Organization. Rules are numbered by section and case. Each major rules grouping is a section; a paragraph within a section is a case. The number 4.2 would, for example, refer to section 4, case 2. A specific case may contain a number of statements. Statements within a case are lettered, as in 4.2a, 4.2b, etc.
1.3b Repetition. Once stated, a rule is repeated in another section only if needed for clarification in that section.
1.3c Rounding. Players will on occasion be required to round numbers to whole numbers. Unless specified otherwise, if the fractional part is less than .5, round down. If the fractional part is .5 or more, round up.
1.3d Cumulative Effects. In all cases where a unit is subject to multiple DRMs, those effects are cumulative.
1.3e BCS Crib Notes. The Crib Notes provide a brief summary designed to answer common questions during play. They do not include all the caveats and special cases that might apply; consult the Series Rules for full detail. If ever there is a conflict between the Crib Notes and the Series Rules for any reason, the Series Rules take precedence.
1.4 Setup Notes
The Game rulebook contains set-up information for the various scenarios presented. Except as amended by special notes in the Game rulebook, the following are always true:
- A) "w/i X" means to set-up a given unit at or within X hexes of the location given.
- B) Units never start in violation of the Stacking Limit or in terrain they could not enter during movement.
- C) Units generally start at full strength. If a number is shown in brackets, such as "[3]", it is the unit's current available Steps. If no value is given, the unit is at full strength.
- D) Units can set-up anywhere within a zone specified to include the boundary lines.
- E) Units can set-up on either counter side, unless stated otherwise in the set-up. Units start in Support (or not) strictly as called for by the set-up. A unit cannot set-up on a counter side that its hex's terrain would prohibit.
- F) If a unit is listed as 'in Support' you can place it near the HQ or off map as desired and apply the appropriate Support marker to the HQ.
- G) Note that the Pre-Turn Phase of the first turn of a scenario is frequently modified: Weather and the First Player Determination may be pre-determined and there is no roll for Repl Points. Conduct the Assignment Phase as per rule 2.1 Assignment Phase's Important Note.
1.5 Fog of War
1.5a Players are free to look at the top enemy Combat Unit of any stack and its values, but this freedom does not extend to any other unit in the hex or the number of steps the unit has remaining.
1.5b At a minimum each HQ should display that Support is available. Available Arty Asset Points, Prepared Defense, and Air Points can be hidden from the opposing player's view. However, the player can display the contents of HQs adjacent to each HQ's hex to make play go faster.
1.5c All die rolls are normally made in the open, after announcing their purpose. If players agree, they can make certain rolls in secret to add to the fog of war.
1.6 Terms
-
Activation. The function of a single Formation following the Activation Sequence of Play which must be completed before the next enemy Formation can function.
-
Assigned/Unassigned. The status of independent units and Arty Asset Points as being attached (or not attached) to a specific Formation. (9.1k)
-
Attack by Fire. The effect of AV unit fires on non-AV units. (8.3)
-
AV ZOC. A type of ZOC generated by AV units. They come in two flavors: Real and Support AV ZOCs, depending on the type of AV unit creating it. AV ZOCs affect enemy Tac MA units more than regular ZOCs. (6.0h)
-
Blob. The area on the map containing the units of a given Formation ignoring its Combat Trains and any Out of Command Radius units.
-
Blocking Terrain. Terrain that blocks the minimal 'line of sight' needed to make Engagements or spot Artillery Fires at ranges greater than 1 hex.
-
Buddies. Different Formations which are completely used to working together and are able to avoid many typical problems. (4.1c)
-
Combat OBJs. An OBJ marker placed to generate an OBJ Zone allowing Attacks and Barrages. (4.3)
-
Command Radius. The maximum distance from an HQ at which units operate normally. (4.2)
2.0 Game Turn Sequence of Play
Each Game Turn is made up of the following phases, in order:
2.1 Game Turn Sequence of Play Outline
1) Pre-Turn Phase
-
1. Reinforcements & Weather. Both players place Reinforcements as listed on the Order of Arrival Charts. Roll for Weather effects, new Air Points, and Replacement Points. Apply all available Replacement Points.
-
2. Assignment. Both players can change units to (or from) Support and/or assign (or reassign) Arty Asset Points (8.0d) and independent units (9.5).
Important: With the exception of newly arriving Reinforcements, there is no Assignment Phase at all on the first turn of any scenario. Yes, that means no assignment/unassignment functions can be conducted on any first turn.
-
3. First Player Determination. If not assigned by the scenario, each player rolls two dice to determine who plays the first Activation of the new turn. The player with the greater roll wins and can choose to take or not take the first Activation. Re-roll on any ties.
2) Activation Phase
Players alternate Activating Formations (3.1) until the turn ends.
3) Admin Phase
Flip and/or orient HQs to their Unused sides.
4) Game Turn End
3.0 The Activation Phase
3.1 Formation Activations
3.1a In the Activation Phase, Players alternate Activating Formations and conducting those Formations' movement and combat. Only one Formation Activates at a time. The Activation Checklist ensures players consider all steps in an Activation.
3.1b The Active player conducts the current Activation; the other player is the Inactive player.
3.1c The Active Player makes all dice rolls.
3.1d In group games, players can run multiple Activations at the same time, provided the different Active Formations are not actually interacting with each other.
3.2 Activation Phase Sequence of Play
3.2a In general, the player is free to use his stacks and artillery in any order he likes, but he must finish moving one stack before starting another and cannot use any stack or Artillery/Air Point more than once in a single Activation. Conduct the Activation Phase by following the sequence of phases below, in order.
A given Formation can Activate twice in a given Game Turn, but the Second Activation, if any, must be attempted immediately after the Initial Activation.
- a) Initial Activation. Identify the Formation to activate, flip the HQ to its Used side (the one with the white stripe). If the Formation HQ started the turn on its Used Side, skip to step (h) below.
- b) Preparation. Declare and execute a Fatigue Recovery Activation (10.4c), if desired. OR Deal with MSR Blocked issues (10.2b), Prepared Defense (4.5), and Mixed Formations (10.1e), as needed.
- c) SNAFU. Make a die roll on the SNAFU Table to determine the Formation's SNAFU Result. Remove the Formation's Coordination marker after rolling.
- d) Initial Actions. Place OBJ markers, based on their SNAFU Result availability.
- e) Activities. Conduct the Formation's Stack Activities. Non-Finished Stacks conduct their choice of Movements, Engagements, Regular Attacks, Shock Attacks, Barrages, and Attacks by Fire. Move Combat Trains, flipping from Ghost side as needed.
- f) Clean Up. Remove all OBJ, Traffic Stopped, and Temporary Support Dropped markers. If Combat Trains are NOT in a Legal Hex, remove them. If the Combat Trains are Legal, but not at Optimal Distance (10.3c), then ensure they are on their Ghost side.
- g) Fatigue & Isolation Effects. If Fatigue Increase is possible (10.4) roll to see if it occurs. Apply any Isolation Effects (10.5).
- h) Second Activation. Orient the HQ as "Done" and if the player desires to attempt a Second Activation (3.5), roll to see if one occurs. If it does, start the sequence with step (b). If the roll fails or the player chooses to forego a Second Activation, play passes on to the next player.
- i) Play continues with the other player. When finished, play goes to the opposing player. Follow the above sequence for his Formation.
3.2b Basically, each player activates a Formation and uses its units to move and conduct combat. He can use available Artillery or Air Points before, during or after each unit's move. He continues to do these things until he runs out of units and Arty/Air Points to use from the current Formation, then play passes to the other player for his next Formation's Activation. Continue alternating Formation Activations until both sides are "done," then execute the Admin Phase and start the next turn.
Just to be clear, the player cannot Pass when it is his turn to Activate (3.6a).
3.2c Frequently one side will have more Formations to Activate than the other. In this case, when one side runs out of Formations to use, the other will continue to Activate repeatedly until he Activates all his Formations at least once (3.4b). Only then is the turn completed. To be clear, the turn does not end because one side runs out of Formations.
3.3 Stack Activation
3.3a All references to 'stacked units' in this section refer to stacks of units from the same Formation. If units of two Formations stack, only those belonging to the currently Active Formation can function in any way.
3.3b Stacked units can split up into separate stacks before—or after—beginning to move together.
If done before movement, each unit moves and functions freely out of the common starting hex.
If the stack splits after beginning its move together, follow the STOP instructions below for a stack created during a move.
New stacks can be created during the Activation and operate together as a stack after they "join up." To join up, one of the units starts to move while the other stands fast. When the moving unit enters the other's hex, the two can continue the move together as a stack. Such a stack can also split during its move, but to do so, one unit must STOP its move while the other continues. You cannot go back to the unit that was 'dropped off' and move it some more.
3.3c One stack must complete its movement and Fire Events before another stack begins. Once another begins, the player cannot go back to a previous stack, even if MPs or Fire Events remain. The only things a stack can do after its chance to move and use Fire Events is to Attack, Assist an Attack, or spot for Barrages.
3.3d A unit or stack which has not Finished could, given other rules and requirements:
- Move normally provided it has MA remaining and has not Stopped
- Execute Fire Events, including Shock Attacks (7.0d)
- Conduct or Assist a Regular Attack
- Attack by Fire
- Recon
…Finished units and stacks cannot do any of these activities.
3.3e A stack becomes Finished when it:
- Conducts or Assists a Regular Attack.
- Fails (or declines) in its attempts to free itself from a STOP where Stopping Engagements (6.0i) are required.
- Executes a Voluntary Retreat.
Note that a STOP does not preclude executing remaining Fire Events and/or Finishing by some other means, but anything that Finishes a unit means the unit cannot do anything later, even if Movement Points or Fire Events remain unspent. Exception: Finished units can still spot for Barrages.
Play Note—Stack Sequencing: You can, for example, move stack A, move stack B, fire a Barrage, move stack C, attack a hex using A with B as Assist (A enters the hex after winning), fire another Barrage (using A as a spotter from its new hex), move stack D through the hex cleared by the attack, use D to initiate Engagements against some deeper enemy hex, move stack E through the same hole, attack with stack C with an assist from E… and so on.
What you can't do, for example, is move stack A some MPs, fire a Barrage, move stack B… and then go back to finish stack A's remaining MA, etc.
You also cannot move stack A, then move stack B, and then go back to stack A to conduct Engagements, Shock Attacks, or Attacks by Fire. Those must be done before starting a new stack.
You can, however, move stack A some, do an Engagement, Shock Attack, or Attack by Fire, move stack A some more and do another Engagement, Shock Attack, or Attack by Fire and then call a Barrage. As well as move stack B so that A and B can make a regular Attack (as Attack and Assist).
Important: Once a unit ends its movement (provided it is not Finished) and another unit starts its movement, the first unit can no longer conduct an Engagement, Shock Attack, or Attack by Fire, although it can still Attack, Assist an Attack, or spot for a Barrage.
3.4 Activating a Formation
3.4a Only one Formation can be activated at a time.
3.4b Each Formation must Activate at least once in a game turn—but it could activate twice in a game turn. A Formation which is listed as 'Done' in the set-up is exempt from this requirement on that first turn. A Formation listed as 'Used' in the set-up must attempt a Second Activation (3.5).
3.4c The Initial Activation of a Formation in a turn requires no die roll. A Second Activation (if any) requires an Activation die roll. See 3.5.
3.4d Players can only select Formations with HQ's marked Unused or Used for Activation. The player cannot select a Formation with its HQ marked as Done.
Play Note—HQ's Done Status: Normally, an HQ's status as being Done is shown by orienting the HQ's counter opposite the way its units are arrayed (with its banded 'Used' side showing). However, since all Second Activations must occur immediately after the Formation's Initial Activation, the designation can be ignored on most game turns (if you aren't already working with a Formation that has its Used side up, it cannot be Activated). The exception is the first turn of some scenarios or Reinforcement Placement, where Formations might begin already Used but still need to attempt to Activate. In that case, it is important to know who is 'just' Used and who is actually Done. At other times, just being flipped to Used can be enough of a marking to know who is also Done.
3.5 Second Activations
3.5a You can activate a Formation up to twice in a game turn. Exception: Formations with a Fatigue Level of 4 cannot conduct a Second Activation (10.4a).
Except for Formations which set-up or arrive with their HQ Used, all Second Activations must be done immediately upon finishing their initial Activation (and before the enemy can get a new Activation or any other friendly Formation can Activate). Formations with their HQ setting up or arriving Used can obtain only one Activation and it is handled as a Second Activation as described below.
3.5b To conduct a Second Activation, roll one die. Add one (1) to the roll if the Formation is Fresh (10.4d). If the modified roll is greater than or equal to the Activation Roll number (printed on the HQ's counter), the Formation successfully activates. Otherwise it does not and play passes back to the other player (or the turn ends).
3.5c Whether the player is successful or not in a Second Activation attempt, the Formation HQ is Done, meaning it cannot be activated again that turn. Orient the counter in a way which indicates to the player that the Formation is done.
3.5d If the player does not want to attempt a Second Activation he can rotate the Formation's HQ to its Done orientation without attempting one. The player is never required to attempt a Second Activation.
Exception: Formations which start play with their HQ 'Used' must make an attempt. Regardless, Second Activations cannot be held onto for later.
3.6 Passing, and Turn End
3.6a A player must Activate (or attempt to Activate) a Formation every time play passes to him. He cannot decline to do so. He cannot "pass."
3.6b A player is only done for the current game turn once all his HQs are oriented as Done. Once a side is done, it cannot Activate again. Play continues with the other side until all HQs are Done. At that point, the turn ends.
4.0 Command
4.1 Formations
4.1a Formations are flexible in size from game to game based on the needs of the situation being simulated. Each Formation has an HQ unit that represents the center of its command system.
4.1b Formations can never exchange or reassign units with a printed Formation affiliation to another Formation. See also Independent Units (9.5).
4.1c Buddies. Formations listed as "Buddies" do not apply Coordination (4.4), Mixed Formations (10.1e), or Crossing the Streams (10.2d) to each other. Note: the game specific versions of this rule in LB and BbF also allow an exemption from 5.1h (Unit Traffic) as well. This is incorrect; 5.1h (if used) should apply even to Buddies.
4.2 Command Radius
4.2a Each HQ has a Command Radius printed on its HQ. It is the maximum distance from the HQ at which a unit functions normally. Units which are beyond Command Radius apply the penalties and restrictions in 4.2d.
4.2b Given other rules, Command Radius does not affect the ability of units to move, Attack, Shock Attack, Engage, Attack by Fire, or spot for Barrages (but see 4.2e and 4.2f). Units outside their HQ's Command Radius still have access to their Formation's Support provided that unit has not had it Dropped.
4.2c Command Radius is measured in hexes (not MPs) from the HQ to the unit's hex. Ignore everything: terrain, EZOCs, Engagement Zones and even Enemy units.
4.2d Out of Command Radius Effects. Use the Formation HQ's current position to determine if a unit is Out of Command Radius at the moment any of these effects would apply. Units which are Out of Command Radius function normally in every way except where explicitly mentioned below. Out of Command Radius units are subject to Isolation Effects (10.5). ✔
Units which are Out of Command Radius or do not have a Safe Path of the correct type cannot:
- … accept Replacement Points.
- … remove a Dropped Support marker.
Note: A unit that is Out of Command Radius which is not marked Dropped Support retains the Support its Formation might have. The difference is that such units cannot recover from a Support Dropped result until they return to Command Radius.
4.2e Independent Units. Unassigned Independent units do not have any Command Radius to be within and are never affected by the penalties in 4.2d and 10.1e.
4.2f Staying in Command Radius. Units (except Combat Trains) must end the Activation in Command Radius. If doing so is not possible, a unit must either move or Attack in a way that will help the unit get into Command Radius without foot dragging OR stay in the hex in which it began the Activation. A unit currently in Command Radius cannot make an Attack that, if successful, risks the unit advancing Out of Command Radius for the end of the Activation. In either case, it is allowed to simply leave a unit in the hex in which it began the Activation. Isolation Effects (10.5) apply normally to any unit that cannot or does not make it back within Command Radius (with the exemption for Reinforcements). This requirement does not apply to the Combat Trains or the HQ itself.
4.3 Objectives (OBJs)
OBJ markers represent the Formation's planning capabilities. There are two types of OBJ marker (Combat OBJs and optional March OBJs). Combat OBJ markers create OBJ Zones allowing combat operations. March OBJ markers only designate a HQ's planned location after its move.
4.3a OBJ Marker Availability. The SNAFU Result Effects Chart (10.1d) gives the number of OBJ markers the Formation can create.
OBJ markers cannot be saved for future Activations or given to other Formations—they only exist for the current Activation and are removed in that Activation's Clean Up Phase. Nor do they extend into the Formation's Second Activation, if any.
4.3b Placement. Combat OBJ markers can be placed in any hex containing an enemy unit or Victory Hex.
If a Formation has Prepared Defense, Combat OBJ markers can be placed no further than 6 hexes from the Formation HQ. If a Formation has no Prepared Defense, there is no distance restriction from the HQ. Otherwise, the player can place all, some, or none of his available OBJ markers anywhere he likes.
The player can place TWO OBJ markers in the same hex to obtain DRMs on the
Complete Activation Example
In this example, we will follow the Activation of the 12 VG Division at the start of Last Blitzkrieg. It will not be a canned example (events will play out as they actually do) nor is it 'perfect' play. It is here as a straight version of what can happen in an Activation, not a look at everything that could happen in one.
[Map diagram omitted.]
This is the at-start situation. The 99 ID HQ has been moved into an easier to see position. To keep everything correct with the real start, the unit at 43.19 is not in the 6 hex range that allows Prep Def, so it has none. At the far right of the image is the 12 VG Combat Trains which are currently stacked with the 3 FJ Combat Trains and ensuring, as if it wasn't obvious enough, that they each have a case of Crossing the Streams. The 'Mixed Formations' DRM does not apply.
First, the German player identifies that he is Activating the 12 VG and flips the HQ. This is the Formation's initial Activation so no die roll is required to do so. Since the Germans are on the offensive, the German player is not interested in establishing a Prep Def or doing a Fatigue Recovery Activation, and has no MSR Blockage or odd Combat Train distance concerns to deal with, so the player moves onto SNAFU.
As discussed earlier, 12 VG suffers from Crossed Streams (-1), has a Fat-0 (so no DRM one way or the other), is at Optimal Distance (in this case, 10 hexes, +1), the Germans get a +1 Game Specific SNAFU DRM for this turn, but has no other effects in play. SNAFU roll DRM is a net +1. The player rolls a 6, modified to 7 which is just barely a Pass.
A Pass SNAFU allows the division to place two OBJ markers. Here I used KT-X markers. The VOR unit in the 12 VG (KG Holz) is capable of laying a Recon OBJ, but will be unlikely to be able to use that function in this Activation due to other demands on it. Looking ahead to the future (poorly, as events will show), I placed both OBJs in 44.20 which catches all three 99 ID front line units and allows the Double OBJ Zone DRMs to be used.
Holz moves first expending 8 MPs to enter 44.19. Note that the Overpass Bridge in 47.18 is not operational, so the Open Terrain cost (2) was paid to move from 48.18 to 47.18. Holz will burn both Fire Events to Drop Support and be STOPPED in that hex to be an Assist for the later attack.
Holz engages the Support in first C44.20 and then C43.19. They are both effective 6's, Holz is a 6 but gets a +1 DRM for the Double OBJ (some call this a Double Tap) in each shot. The Support Involved row on the Engagement Table is used with a +1. A two dice roll of 8 becomes a 9 and 7 becoming an 8 and gives the needed Support Dropped results.
In order to save closer units for potential deeper operations, I/89 moves to 45.20. This unit makes a regular attack on 44.20 using Holz as an Assist (which Finishes both units for the Activation). The German player uses 1 Arty Point as Suppression (it is important to evict the US unit from the hex, so the +2 for Suppression on the attack is much more valuable here than inflicting extra losses).
The attack is worth 8 (AR of 4, +2 for Suppression, +1 for Assist, +1 for Double OBJ). The defense is worth 5 (AR of 3, +1 for Terrain, +1 for Prep Def). So, it is a net +3. The German player rolls a 5 for a modified 8 result giving A1, Situational, Traffic. The Attacking unit takes a loss and the defender must take his Situational as a Step Loss staying in the hex because the unit has Prep Def. This wastes the Traffic result as that will not apply unless the defender is destroyed or Retreats.
I/27 and the Pioneer move to 44.18 and attack 43.19. With the main route sealed by the failure in the center, the German player uses three of his Arty Points (he started with 6) to conduct a Destruction Barrage. These rolls need a 4-6 to inflict a step loss. He rolls 6, 2, and 6 for two step losses. I/27 is the Attack unit, the Pioneer is the Assist. The attack is worth 6 (4 AR, +1 for Assist unit, +1 for Double OBJ). The defense is worth 4 (3 AR, +1 for Terrain, out of range for Prep Def). So, +2 overall. A roll of 8 modified to 10 gives no loss result ([A1] converts to no result because of the lack of Prep Def), Situational, and Traffic. The US player must Retreat as the unit, itself, does not have Prep Def. This leaves behind a Traffic Marker. The Situational Retreat requires 3/394 to flip to its Move side. I/27 advances into the hex.
Further north, I/48 and II/48 move into position to attack 2/394. The German player uses his last two Arty Points to go for kills here. Rolling a 3 and a 6 getting one kill. The Attack unit is II/48 and the Assist is I/48. The Attack is worth 6 (AR 4, +1 Assist, +1 Double OBJ) and the Defense is worth 6 (AR 3, +1 Terrain, +1 Support, +1 Prep Def). Net +0. A roll of 6 gives an A1.
The rest of the division pushes forward, including the HQ which moves across the blown Overpass which requires the MSR to the Combat Trains to pass to the Tracks in the 3 FJ area. While the Trains are at 15 hexes, the path is currently illegal because of the EZOC in 47.17. The player may be hoping that other Formations will shoo the 14 Cav unit away, but this will not help the Second Activation of the 12 VG if there is one. As a result, the 12 VG Trains must be removed from the map at the end of the Activation. The 12 VG's Blob never overlaps that of the 3 FJ, so no Mixed occurs and no Coordination markers are applied.
This leaves the situation as follows:
[Map diagram omitted.]
The situation before Clean Up is as follows:
[Map diagram omitted.]
The German player rolls one die for Fatigue. Because of the Attacks, he will increase Fatigue on rolls of 1-3. He rolls a 1 and increases Fatigue. After Clean up, the result looks like:
[Map diagram omitted.]
[Map diagram omitted.]
German Reactivation:
The German player rolls one die to see if he can do his Second Activation. Obviously, he really wants to apply more effort at breaking the frontline before the US player can react. A roll of 6 allows this, the HQ is rotated to done, and the Second Activation continues with step b (Preparation). None of the activities there apply, so play moves on to SNAFU.
SNAFU is more complicated than last time. The Trains are off map (therefore, not Legal) so many of the usual DRMs do not apply, but a new MSR Blocked Level 1 marker is added. Rather, they get a -1 for Fatigue, +1 for the German Game Specific DRM, -1 for the Blocked marker, and a -3 for the illegal Trains (-4 overall). A roll of 8 gives a modified roll of 4 which is a Partial.
Most importantly for this Activation, the number of available Arty Points is halved to 3, all units move at 1/2, and only one OBJ is allowed. The single OBJ is placed on C44.20.
I/27 moves to 42.20 and II/27 moves into 45.21. This cuts the Safe Path to 1/394 in C44.20.
KG Holz is again pressed into service to drop Support on the intended target (1/394). 6 vs 6, or +0. Roll of a 6 is just barely enough to Drop Support. Several options present themselves at this point. Holz could be used for an Assist and make an Attack by Fire. It could do a Shock Attack. Shock Attacks are best designed for weak targets, this target is not weak. Holz could also lead the Attack, which would get an additional DRM because it is a Dual unit.
Holz will do the Assist/Attack by Fire role. Here the Attack by Fire works with a roll of 4, killing a Step. Because of the Partial, the German player only has 3 Arty Points to use and decides to burn them on this attack in an effort to kill the unit outright. Rolls of 3, 4 and 3 kill one Step, leaving the unit with 3 Steps remaining.
I/89 is the Attack unit again, with Holz as the Assist. The Attack is worth 4 (AR of 4, +1 for Assist, -1 for the MSR Blockage) while the defense is worth 5 (AR of 3, Terrain +1, Prep Def +1), so a -1 DRM overall. A roll of a 6 gives an A1 result. The lack of a Retreat result frees 1/394 from the No Safe Path loss.
I/48 and II/48 execute the same attack as in the first Activation, this time with no Artillery support. The attack is 4 vs. 6 (same as the first Activation, less the Double OBJ that existed then and with the -1 for the MSR Blockage). -2 DRM. A roll of 8 gives a modified 6 or another A1 result.
The positions at this point are at left.
(4.3b continued) Engagement and Combat Tables. Two co-located OBJ markers create a "Double OBJ Zone" and any Engagement target or defending hex in such a Zone applies the table DRMs.
Once placed, an OBJ marker cannot be moved or removed until the Clean Up Phase. At that point, remove all OBJ markers from the map.
OBJ markers have an arrow in the corner of their counter. This can be used to off-set the marker from the hex it indicates to relieve congestion.
Design Note: Obviously, having to place Combat OBJ markers literally on top of enemy units is an abstraction. Anyone who has ever looked at a real OBJ knows they are best selected by geography. This was allowed in earlier versions of the system, but players were doing all manner of obscene things with OBJ markers in an attempt to maximize their usefulness in hitting multiple targets or catching units that retreat. OBJs started showing up in back of enemy units and even on top of friendly ones. The time expended here was criminal. The simplification above reduces the crazed planner effect.
4.3c OBJ Zones
Each Combat OBJ marker creates a 2-hex radius OBJ Zone.
Important: Regular & Shock Attacks, Attacks by Fire and Barrages can be executed only in OBJ Zone hexes. Engagements, however, do not require OBJ Zones but can take advantage of the DRM for Double OBJ Zone hexes.
4.3d Recon
A Recon unit (any unit with a 'Cavalry Slash' in its unit symbol and any other unit types listed as Recon in the Game Rules) may place ONE Combat OBJ marker per Fire Event used, if successful.
Only a Recon unit from the currently active Formation may use the process below and then only if the SNAFU Results Chart allows it.
- A unit doing a Recon cannot be overstacked at the moment the OBJ marker is placed. Any required Stopping Engagement must be carried out successfully (6.0i) before the attempt to place the OBJ marker.
- A Recon cannot be executed if a unit is Stopped for any reason.
- Conducting a Recon costs a unit ONE Fire Event.
Procedure: Roll one die. If the roll is less than or equal to the Recon unit's Action Rating, place an OBJ marker on any enemy unit w/i 2 hexes of the Recon unit.
Once created, the new Combat OBJ marker and its OBJ Zone can be used normally by the Recon unit and any other unit(s) of the active Formation.
If the roll fails, place no OBJ marker, and the unit continues its movement normally (if any). If a Fire Event remains, the unit can stay in position and attempt to recon the same hex again or conduct a different recon elsewhere.
Recon OBJs cannot be placed in a hex already containing an OBJ marker (to obtain the benefits of a Double OBJ).
Placement of Recon OBJs by Formations with Prepared Defense is also restricted to 6 hexes or less away from the HQ.
4.3e March OBJs (Optional)
A March OBJ can be used to show the intended location of the end of the Formation HQ's move. This is done when other OBJs are placed in order to lock down the HQ's intended ending hex so the 'plan' doesn't change once the Activation begins. If no March OBJ is placed, the HQ cannot move in its Activation.
A March OBJ does not create a OBJ Zone and does not count against the total OBJ markers available from the SNAFU Result. Recon units cannot create March OBJs. A March OBJ can be placed in any road hex (which need not contain an enemy unit) which connects to the HQ. The HQ must move directly toward this hex as best it can manage. Ignore March OBJs for Fatigue purposes.
4.3f Route Planning (Optional). An additional layer of realism can be applied to March OBJs (making them mark 'Axes of Advance') by applying these rules to the route from the HQ to the March OBJ. This rule cannot be used unless 4.3e is as well.
The March OBJ must be linked to the HQ via a road pathway the player selects on placement. The road path must be continuous as printed on the map, but it is OK to use a connection that does not exist at the moment (such as a bridge that is not built yet or one that has been blown).
The road need not be marked, as it should be simple enough to remember. Enemy units, their EZOCs, and other friendly Formations have no effect on this pathway—it is merely a line on the commander's situation map.
The selected route must be simple and direct. Be reasonable here. If several nearby routes could be used, note the one you are using to yourself and be sure to apply it stringently.
A unit of a Formation with a posted March OBJ can only move if the hex it will enter is w/i 2 hexes of any hex of the designated route from the March OBJ through the HQ and then to the Combat Trains (if on the map and Legal), inclusive. If the Combat Trains are either off map or illegal, then the route ends at the HQ.
Once a unit moves into the March OBJ's hex, it is free from the above restriction (it acts as a Release Point).
Exceptions: This requirement does not affect Advance after Combat or newly arrived reinforcements of a Formation which are attempting to catch up.
Design Note: This is a concept I tried mightily to find a simple solution for in the design process. Easy enough on the face, I could not find an adequate wording that didn't instantly find players violating the intended spirit by weaving the path in order to not be hindered by its restrictions. Others very much appreciated the added depth it gave the simulation. I present its final testing form here for your enjoyment…but if you think you might 'play' the path to 'pick up units', just do me a favor and don't use it. If you have an understanding of what an Axis of Advance would look like in real life and want that added dimension in your play—enjoy the swim!
A nice by-product of this rule is the need to assemble a dispersed formation for such a movement. This takes time. As such, you can't instantly change posture from widely dispersed to a deep movement (or vice versa). Those are good things.
Obviously, the restrictions here give you even more reason to avoid micro-moves with your HQs!
4.4 Coordination
Coordination between friendly Formations occurs whenever one Formation enters (or crosses) another Formation's area of operations.
4.4a Coordination occurs in two ways:
- If at any time in an Activation, Mixing (10.1e) occurs, apply a Coordination marker to each Formation involved.
- Any time an HQ Retreats, mark that Formation with a Coordination marker.
Otherwise, Coordination is never caused by a Retreat. Never place a Coordination marker as the result of any Advance after Combat or non-HQ unit Retreat.
4.4b Additional Coordination markers have no additional effect on a Formation (once marked, it is marked, so only apply one marker), but a single Formation can inflict Coordination on multiple other Formations depending on 4.4a.
4.4c Formations marked with a Coordination marker must "pay" for it by applying the Coordination DRM on the SNAFU Table. Remove the Coordination marker after doing so, regardless of the roll's result. Coordination markers can also be removed 'for free' during a Recovery Activation (10.4c).
4.5 Prepared Defense
Prepared Defense shows the improved defensive status of a Formation which occupies a position for an extended time. Prepared Defense provides additional protection on the Combat and Barrage Tables.
A Formation creates or removes Prepared Defense in the Preparation Phase.
Mark Prepared Defense with a marker at the HQ.
A Formation with a Prepared Defense marker:
- a) Suffers a limitation on its SNAFU result (it can be no better than Partial, even if a better result is rolled).
- b) Cannot move its HQ (if the HQ retreats, the Prepared Defense is removed.).
- c) Suffers a DRM on the Combat Table when attacking.
- d) Cannot Recover Fatigue.
All Deployed-side (never Move-side) units of a Formation marked "Prepared Defense" which are w/i 6 hexes of their HQ:
- a) Use the Defender Combat Table DRM.
- b) Are said to "have" Prepared Defense in cases where such a designation is needed.
4.5a Only Formations with at least one Artillery Point AND not marked with a MSR Blocked Level can have a Prepared Defense marker. At the moment any Formation with a Prepared Defense is given a MSR Blocked Level marker or no longer has one Arty Point after Assignment Activities in the Pre-Turn Phase, remove its Prepared Defense marker.
Prepared Defense is unaffected by SNAFU results.
Design Note: To a large extent, Prepared Defenses represent the preparation of artillery FPFs (Final Protective Fires) and Artillery/Mortar firing points and not—as one might think—digging holes in the ground.
4.5b To create or remove a Prepared Defense marker, do so in that Formation's Activation's Preparation Phase. The marker is automatically removed when the HQ Retreats or if the Formation conducts a Recovery Activation.
The restrictions and advantages of Prepared Defense appear/disappear instantly with the marker.
4.5c SNAFU. Prepared Defense restricts the SNAFU results a Formation can use. If the SNAFU result is Pass or Partial, the Formation must use Partial. If the result is Fail, it remains Fail.
4.5d OBJ Placement. Formations with a Prepared Defense marker cannot establish any Combat OBJ marker (from SNAFU or Recon) further than 6 hexes away from its HQ.
4.6 Formation Activation Markers
Each Formation has a Formation Activation marker. Use these to keep track of which Formations can still Activate. When a Formation is finished for the turn, remove the marker from those available (it will return for the next turn). The scenario will list the markers available at start. Those belonging to reinforcing Formations should be added as they enter play.
Optional: It is acceptable to place the available markers in a cup and randomly draw them to determine the next Activating Formation.
5.0 Movement
5.1 Movement Basics
A player can move as many or as few of a Formation's units as he likes during its Activation. Each unit can move as many or as few hexes as desired, subject to MA, SNAFU results, stacking, Traffic, enemy units, EZOCs, and terrain.
How to move units. Move units individually or in stacks. Movement must follow a contiguous path of hexes through the hex grid. Units can move in any direction or series of directions.
5.1a Movement Points (MPs). Each unit expends MPs for each hex entered and hexside feature crossed according to the Terrain Effects Chart. Keep a running MPs expended total as each unit/stack moves.
5.1b Movement Allowance (MA). A unit's MA is the maximum number of MPs it can use in a single Activation.
5.1c If eligible to move in an Activation, a unit without enough MPs can still move a minimum of one hex. Units can never use this rule to conduct a Shock Attack, move across or into Prohibited terrain, violate the effects of Failed SNAFU, or to move from EZOC to EZOC when not allowed. Only units with a current MA greater than zero can use this rule.
5.1d A unit can only move from hex A to hex B if it could also move from hex B to hex A. For example, a unit prohibited from entering a Slope hex could not move from a Slope hex to an adjacent Open hex through a non-road hexside.
5.1e Units in a stack have independent MAs and the MP expenditures of one unit do not affect the other. A player cannot transfer MPs, even if unused, from unit to unit or save them for later use.
5.1f Halved Movement Allowance. An MA might be halved (x1/2) for a number of reasons (SNAFU results, Weather, etc.). Regardless of the number of reasons a unit might have for a x1/2 multiplier, ONLY halve the MA once. Keep fractions; never round a reduced Movement Allowance.
5.1g Traffic. Traffic shows the effects of areas which are clogged with post-combat confusion.
Traffic Stopped markers are applied in some Combat and Engagement Table results.
- Traffic Stopped markers inflict a STOP on all units in or entering that hex.
- A Combat Table Traffic Stopped marker is only placed as the result of a Combat if the defending unit is destroyed or retreats (otherwise ignore the Traffic result). Place the marker in the defender's hex.
- When the Attack unit enters the hex in an Advance after Combat, it executes the STOP there.
- Engagement Table Traffic results, however, place a Traffic Stopped marker in the Firer's hex.
If a Traffic Stopped marker is in the hex:
- There is no additional MA cost for a unit to enter the hex, but it must STOP when it does so.
- If a Traffic Stopped marker exists in a hex that already has two units in it, another unit cannot enter the hex.
All Traffic Stopped markers are removed from the map in the Clean Up Phase of the Activation in which they were placed.
5.1h Unit Traffic (Optional). Unit Traffic exists in a hex containing:
- …an Active Move-side unit which has completed its movement for the Activation (to include the HQ)
- …any unit of an Inactive Formation (regardless of side showing).
There is no marker for Unit Traffic, it is assumed in the above situations.
Units entering a Unit Traffic hex do not benefit from the roads in that hex OR on the hexside crossed to enter it. In this case, the unit must pay the MP cost of the other terrain in (and the hexside crossed). If the other terrain in the hex and/or hexside is prohibited to the unit's Movement Class, the unit cannot enter the hex.
Apply these Terrain Effects only as a unit enters a Unit Traffic hex, but never as it exits it.
Ignore all Combat Trains and Unassigned Independent units for this rule.
Design Note: Unit Traffic (5.1h) was, for a long time, a part of 5.1g and the standard way to play. It was always a time consuming matter that (in the end) provided only limited returns. Some players loved it, others hated it. I'd suggest playing without 5.1h at first and adding it later if the greater detail appeals. It does work very well, but it is also a lot of work to do since players will have to carefully orchestrate their moves.
5.2 Terrain Effects on Movement
According to the Terrain Effects Chart, each hex and hexside feature costs a specific number of Movement Points. The moving unit must pay the total required cost before entry (Exception: 5.1c). A hex or hexside's Movement Point cost varies depending on the unit's Mobility Class: Tactical, Leg, or Truck (5.3) as listed on the Terrain Effects Chart.
5.2a Roads can only be used if the moving unit follows a continuous road path. The unit pays the road movement cost and ignores other features in the hexes and hexsides crossed (Exception: 5.1h Optional Unit Traffic). There is no requirement for roads to intersect within a hex in order to leave via any of them—roads are considered to be linked in a common hex even if this is not literally shown. ✔
5.2b Add the cost of any hexside feature crossed to that of the hex entered. (Exception: Units moving along roads ignore all hexside features.)
5.2c Units cannot enter or cross Prohibited hexes or hexsides (unless using a bridge or road).
5.2d Multiple Terrain Types. Some hexes have more than one area terrain symbol. Use the type most costly for movement, with the exception of units following roads. The quantity of the symbol in the hex does not matter.
5.2e STOP Terrain. Units must STOP movement for the current Activation upon entering a hex containing STOP Terrain, regardless of the MA remaining. The hex itself costs 4 MPs.
5.3 Movement Classes
A counter's Movement Allowance (MA) Color is used to show its Movement Point (MP) class.
- Tactical (Tac) units have a Red MA.
- Leg units have a White MA.
- Truck units have a Black MA.
Design Note: These are the same as their OCS predecessors, except 'Tactical' replaced 'Tracked' as Armored Cars are included.
5.4 Restrictions on Movement
5.4a Only the currently active player can move units.
5.4b Units in Support do not affect the stacking or movement of the Formation's regular units.
5.4c Off-map Movement is generally prohibited. See 1.1d and 7.5h.
5.4d HQs must end their movement (or Retreat) in a non-RR road hex.
5.4e Units that start outside of Command Radius must move as best they can to return to Command Radius if they move at all. See also 4.2d and 4.2f.
5.4f Units can never enter hexes containing any kind of enemy unit, except to 'jump' HQs or Combat Trains as per 9.1f and 10.3d.
5.5 Stacking
Stacking is when more than one unit is in a hex.
5.5a No more than 2 Combat Units can occupy a single hex at the end of an Activation.
5.5b HQs, Support, Combat Trains, and all game markers do not count for stacking.
5.5c Two units from different Formations can stack together, but the player must take care that when a given Formation Activates, only its units function.
5.5d Stacking is enforced at the end of the owning Formation's Activations. Momentary overstacking during a stack's move is allowed.
Exceptions: Overstacking is not allowed:
- a) At the moment of Fire Event usage (7.0d)
- b) During an Attack or Assist of an Attack (7.2e)
- c) When doing a Recon (4.3d), or
- d) Upon placement as Reinforcements (9.3).
- e) When entering a hex with a Traffic Stopped marker.
- f) At the end of a Retreat.
If a stack is found in violation of stacking at the end of an Activation, the owning player retreats his choice of the excess units to the next hex back which allows legal stacking (repeat this process as needed).
5.5e Stacking Order. A stack's top Combat Unit must be the one with the longest printed Range (use greatest AV rating in ties). Otherwise, the moving player can freely determine stacking order at any point during his Activation.
5.5f Both sides can re-order their stacks freely for an Attack, but they must return to normal order immediately after its resolution.
5.5g The unit providing the Action Rating for each side in an Attack must be the stack's top unit when executing the Attack. It is the unit being used for an assortment of DRMs.
5.5h The player cannot "withhold" a unit from a stack's defense. All units in a defending hex must participate.
5.6 Alternate Counter Sides
Many units have sides showing variations on the unit's values (see also 1.2b). Whatever 'unit' is facing up determines the values and attributes associated with that unit at that moment.
Design Note: Many will note the similarity between the 'sides' concept here and the 'Modes' as shown in the Operational Combat Series. What I've done here is a bit looser than the OCS Mode structure and I wanted what the side shows to be different depending on the unit type involved, some of which aren't really a 'mode' in any event. So, dealing with the 'side showing' gets the job done without any fuss.
5.6a Units can flip only before beginning any Activities (3.2a step e). The unit then functions normally based on the side presented. No unit can flip more than once in an Activation.
Flipping does not cost MPs and can be done regardless of circumstances with the exception of 5.6c.
5.6b A unit only has the attributes of the side showing at that moment; the values on the face-down side have no effect on the unit's capabilities.
Exception: When it comes to Replacement Points, having an AV rating on either side determines the type of Repl required.
5.6c A unit on a Leg MA side cannot switch to a Tac or Truck MA side…
- …in terrain a Tac/Truck MA unit could not enter,
- …when out of Command Radius, or
- …without a Safe Path (1.6).
5.7 Realistic Movement (Optional)
Players frequently ponder, control, redo, and rework moves in games to squeeze ever greater levels of optimization out of their play. Their opponents must do the same.
The result is a level of precision that has nothing to do with reality and comes at a great deal of time expense. This rule is designed to make the cardboard units start to move like the real thing.
Mistakes happen, a lot.
5.7a Unit Movement. Units move as the real elements they are. In other words, if the counter moves along the grid into a hex, it really did do that. No redos, if you go down the wrong track and need to back-pedal, do so literally using your MA.
5.7b Honest Mistakes. Units get lost, can't make it on schedule, and so on all the time. The above rule is designed to make that happen in the game.
However, if you literally screw up (normally a matter of counting MPs wrong, forgetting a rule, or what not), let your opponent know what you did and figure out where the unit should be if the mistake was not made.
Figuring out you could have made another shot with a unit or some such and you just now realized it, doesn't count.
6.0 Zones of Control (ZOCs)
6.0a Combat Units generally have ZOCs in all adjacent hexes and terrain does not limit ZOCs in any way. Some ZOCs may also be AV ZOCs. (see 6.0h) ZOCs generated by enemy units are EZOCs.
6.0b HQs, Combat Trains, and Unprepared units (1.2d) never have ZOCs.
6.0c Friendly units do not negate EZOCs, Exception: Safe Path (1.6).
6.0d Units can only be designated as an Attack or Assist if the defending hex is in their ZOC.
6.0e EZOCs can inflict step losses on Retreating units (7.5).
6.0f HQs can never enter an EZOC hex. They can stay in one, if already there, but they can never move themselves into an EZOC hex.
6.0g Leg MA and Truck MA units must STOP if they enter an EZOC and cannot move from one EZOC hex directly into another EZOC hex. Tac MA units can move freely from non-AV EZOC to non-AV EZOC. (Exception: see 6.0h) Any unit can freely exit an EZOC provided they are not moving directly into another EZOC, given other rules.
6.0h AV ZOCs. AV and Supported Non-AV units also have AV ZOCs in all adjacent hexes. AV ZOCs do not extend out further than this, regardless of the unit's range. Available Support generates Support AV ZOCs for all eligible Formation units. AV units generate Real AV ZOCs.
Tac MA units must STOP upon entering either type of AV EZOC and possibly be required to conduct a Stopping Engagement (6.0i). However, Support AV EZOCs are ignored for Retreat and Safe Path determination.
6.0i Stopping Engagements. Any stack containing one or more AV units must STOP and then conduct at least one Engagement upon entering a Real AV EZOC hex. Light AV, since they cannot initiate an Engagement, must STOP upon entering such an EZOC unless other units clear it for them.
There is no requirement to conduct a Stopping Engagement if the hex contains only Support AV EZOCs. However, the STOP still applies for either Support or Real AV EZOCs.
The STOP requirement for the AV EZOC is waived if all the units providing the AV EZOCs in the hex are eliminated by a) destroying the providing unit, b) causing the providing unit to Retreat, or c) Dropping Support, as applicable. If, however, the moving stack fails to do this in a Real AV EZOC, the STOP converts into a Finished.
The moving player chooses the AV unit in his stack to use for this purpose if there is more than one.
The inactive player selects the unit of his choice providing an AV EZOC as the target for each Engagement (even if spread out to more than one hex), choosing those giving Real AV EZOCs before Support AV EZOCs.
Needed Stopping Engagements must be done and the hex's STOP waived per the above before making any Recon attempt.
Stopping Engagements never occur in Advance After Combat or Retreat.
Note: 6.0i is not in conflict with the example below. A stack can continue to "try" to win the Stopping Engagement for as many Fire Events as it has to use. It must fire at least once, but the STOP does not convert into a FINISHED until the player decides to stop or the stack runs out of Fire Events.
6.1 Engagement Zones
6.1a AV units which are not in Support and any eligible unit of a Formation with a Stand Off unit in Support generate an Engagement Zone. If a unit can have an Engagement Zone, then it creates one in all hexes in the AV unit's Range, given Terrain and Weather.
6.1b Terrain has no effect on an Engagement Zone into adjacent hexes, but greater ranges require a hex path which does not include any hexes of Blocking Terrain along the straight line between the two ending hexes. Ignore terrain in both end-point hexes entirely.
Use the listing on the Terrain Effects Chart to determine if an intervening hex is Blocking or not. This means the whole hex Blocks. The specific location of any symbol in the hex is irrelevant. Hexside features, units of both sides, and all game markers are ignored.
If the shortest pathway between the firer's hex and the target hex runs on a hexside between a hex that Blocks and one that does not, the Engagement Zone is not Blocked.
6.1c Engagement Zone Movement Effects.
-
Truck MA units must STOP when they enter an Engagement Zone hex.
-
HQs cannot enter any Engagement Zone hex in normal movement, but are only restricted in a Retreat by the ending hex.
-
Engagement Zones have no effect on the movement of Tac or Leg MA units.
6.1d MSRs cannot enter enemy Engagement Zone hexes (10.3a).
7.0 Combat
Combat occurs in a number of ways, including Engagements (7.1), Attacks (7.2), and Shock Attacks (7.3).
Important: Most Combats types require the target hex to be in an OBJ Zone (4.3c). Engagements do not require OBJ Zones, but can take advantage of the DRM for Double OBJ Zone hexes.
Engagements are conducted using units with Armor Values (AVs). These are exchanges of fire between various weapons platforms.
Most units can physically Attack (or Assist some other stack's attack against) hexes adjacent to themselves. These are set-piece assaults to push the enemy out of a desired position.
Shock Attacks can be conducted by certain Tac MA units. These represent mechanized units taking advantage of their armor and mobility to storm weaker enemy positions.
In addition to Combat, the player can Barrage (8.0) enemy units using his Artillery, AV, and Air Assets. Obviously, these represent the application of firepower to an area to cause disruption and casualties.
HQs and Combat Trains cannot be Engaged, Attacked, or Barraged. They are only affected by the actions described in 9.1f and 10.3d.
7.0a The Terrain Effects Chart divides terrain features into those that affect Combat and Barrage (simply termed 'Terrain') and those that do not. Apply both the hex and hexside (if any) feature effects on Attacks. There are no hexside feature effects on Engagements, Attacks by Fire, or Barrages.
7.0b Supply. SNAFU results determine if and how Formations can initiate Combat or Barrage.
7.0c Step Losses. Combats and Barrages apply losses to units as Step Losses. A unit's available steps (at full strength) are printed on the counter. Place a Step Loss marker under the unit with the number of steps remaining facing the same way as the unit. Rotate and/or flip the marker as needed to show the current steps.
When a unit's steps available becomes zero, it is destroyed. Remove it from play immediately.
HQs and Combat Trains can never be used to satisfy step loss requirements.
7.0d Fire Events. Each execution of the following uses one Fire Event:
- Engagement
- Attack by Fire
- Shock Attack
- Conduct a Recon
A Fire Event is expended once its use is announced, regardless of the results obtained.
Important: A given Active unit can only initiate TWO Fire Events in an Activation. Once these are executed, the unit STOPs.
Any use of a unit in a regular Attack or as the Assist in one doesn't expend Fire Events, but the unit is Finished for the Activation and wastes any remaining Fire Events it might have still had available.
A unit cannot be overstacked when using a Fire Event.
Once a unit activates, it must either 'use or lose' both of its Fire Events before another unit activates.
7.1 Engagements
Engagements use the Engagement Table to represent AV units firing upon each other. Unlike Attacks, they do not represent an effort to seize terrain.
7.1a Engagements are fires upon enemy units to generate losses, suppress Support, and sometimes to allow the friendly unit to continue to move or attack (6.0i).
The Inactive player never executes Engagements.
An Active stack containing AV units (including Dual and Limited AV) can execute an Engagement by firing on a single Inactive stack. Exception: Light AV units cannot initiate an Engagement as the Firer; they can only be the Target of one.
Support can be the targets of Engagements, but (except for Stand Off AV units in Support) cannot initiate them.
Important: Engagements (alone) do not require the target hex to be in an OBJ Zone.
7.1b The player cannot initiate an Engagement against a hex that has no AV unit or Support in it. See Attack by Fire (8.3) instead.
7.1c Beginning a phase in an EZOC does not affect the ability of a stack to initiate Engagements.
7.1d Each Engagement counts as the expenditure of one Fire Event (7.0d). A given target hex can have any number of Engagements directed at it in a single Activation.
7.1e If a target hex has more than one AV unit (because of multiple units in the hex or multiple available Supports), the targeted player decides which to use while giving priority to Real AV over Support AV.
7.1f If the Active player starts movement with a non-Support AV unit (or Stand Off Support) with an enemy hex in its Engagement Zone, the player freely decides if he wishes to make an Engagement.
7.1g The Active player can initiate an Engagement at any point in his stack's movement, need not move to do so, and is free to move afterwards, but STOPs after the second Fire Event occurs.
7.1h Engagements do not cost any MPs to execute—they affect movement only by the expenditure of Fire Events.
7.1i Conduct an Engagement by rolling two dice on the Engagement Table adding any applicable modifiers.
The result will be:
- Target Loss
- Firer Loss & Traffic
- Both Loss
- Target Loss & Retreat
- Target Drop*
- No result.
* Applies as 'No Effect' if Target is not Support.
Apply the result to the side or sides indicated. Traffic Results (5.1g) apply Traffic Stopped markers to the Firer's hex.
Ignore any Firer Loss AND Traffic results if the Firer is outside the Target's Range.
7.1j Engagements are usually possible at or within the unit's range, but may be restricted by terrain (6.1b) and weather. If, however, the Target is in a hex containing Terrain that affects Combat/Barrage, the maximum range to shoot at it is 1 hex.
7.1k If Support is the firer, target, or both, resolve the shot on the 'Support Involved' row. If a Target Loss result occurs, a Target Drop (7.1L) applies as well.
Note that the 'Multiple Support' DRM only applies in this case and only if the Targeted Formation has more than one unit in Support (regardless of type) and each Support unit has enough range to be involved in the Engagement.
In any Engagement where Support is involved, use the Supported unit's Action Rating to determine its Base Differential modifier.
7.1L If an Engagement results in a Target Drop, all of the target's Support is Dropped. A Target Drop result Drops Support from each unit in the stack, even if their own Support was not involved in the Engagement. (See also 9.2i & 9.2j)
Engagement Example (printed box):
For purposes of this example, Visibility is greater than 2 hexes. TF Harper has moved into the hex shown and has not expended any Fire Events so far.
Visibility allows it to 'see' both German units, but as Unit A is in Terrain, it cannot be Engaged from a range greater than 1 hex.
TF Harper chooses to Engage German unit B. None of the DRMs apply, so this is a -1 shot (Harper is an effective 6 (AV + AR) and the German is an effective 7.
This is resolved on the top row on the Engagement Table as no Support is involved.
Choosing to fire at range 2 is a smart move on the part of the US player as there is no risk of Firer loss as Harper is out of range of the German tanks.
Harper's first shot rolls a 6, modified to be a 5 which would have been a Firer Loss & Traffic, but in this case both are ignored and it is a No Result because of the range.
The next roll of an 8, modified to a 7 converts a Both Result to a step loss for the Germans, but no effect on Harper because of the range. Both Loss has no Retreat result attached.
However, having expended its two Fire Events, TF Harper is STOPPED for the Activation, which in this case is the same as being FINISHED.
7.1m Stand Off Support. These units act as normal Support, but can also fire one Engagement (or Attack by Fire) for each of their steps. Use the "Support Involved" row for such Engagements.
Any Formation unit with access to Support can be the "host" for one (or more) of these shots—the Stand Off Support fires come from that unit's hex.
Stand Off units are the only units that provide Engagement Zones while in Support and do so from all the units of their Formation eligible for Support out to the Stand Off unit's maximum Range, given Terrain and Weather.
Stand Off Support Example (printed box):
Here the 88mm unit is with the HQ in Command Radius of the two FJ units, both of which have their Support.
The 88mm unit can make two Engagements as a Stand Off Support (one per step). These could be made one per FJ unit or both from the same one. Note that the player will need to make them one at a time, regardless of how the player envisions it playing out.
The German player decides to use III/15 as the host unit for the first shot (a good choice as it has a better AR). The German shot is an effective 8 (5 AV plus 3 AR) and TF Rose is an effective 5 for a net +3.
The shot is resolved on the "Support Inv'ld" row on the Engagement Table. The German player rolls a 7 for a modified 10 and a Target Drop. Because TF Rose is a Real AV unit, the result is No Effect.
The second shot, also using the same host for the +3, rolls an 8 for a modified 11. This kills a step on Rose. Because this is a Stand Off Support shot, Rose must also Retreat.
7.2 Attacks
Attacks use the Combat Table to represent assaults into adjacent enemy held hexes. There are two kinds of Attacks: Regular and Shock.
Regular Attacks are fully planned, set piece actions with coordination between assaulting units and various supporting units and fires.
Shock Attacks are the efforts, usually in isolation, of mechanized units to exploit their protection and mobility to run a quick, off-the-cuff, assault on an enemy location. They are generally only useful against weak/poorly defended enemy hexes.
Regular Attacks use the full rules here in 7.2; Shock Attacks use many of them, but also apply a number of exceptions and special requirements in 7.3.
Both types of Attacks are carried out using the following sequence:
Attack Sequence
- Attacker declares the Attack and identifies the defending hex.
- Defender announces if he has Prepared Defense and identifies his AR unit.
- Attacker identifies the Attacking and any Assisting units.
- Attacker executes any Barrage.
- Determine the Net Combat Table DRM.
- Roll on the Combat Table.
- Apply results (Losses, Retreats, Advances). Advance after Combat (7.4) is mandatory if possible.
Regular Attack Requirements:
- Only Combat Units with an Assault Arrow showing on their counter and a printed MA greater than Zero can be identified as the Attack unit.
- A hex can only be Attacked with a Regular Attack if it is in an OBJ Zone (4.3c) and contains an enemy Combat Unit. If Artillery or Air is to be used in the Attack, the hex must also be in the Command Radius of the HQ (8.1a).
7.2a Attacks are made using the Combat Table. Do not confuse them with Engagements.
7.2b Attacks can only be made by unfinished Active stacks adjacent to the enemy.
7.2c The player can execute Attacks at any time during his Activation.
7.2d A given hex can only be Attacked with a Regular Attack once in an Activation. No more than one defending hex is ever involved in a single Attack. If the enemy units retreat to a new hex, they could be Attacked again, by different units.
This limitation on a single Regular Attack in an Activation does not restrict Shock Attacks, which can be done multiple times including before or after a given hex has suffered a Regular Attack.
7.2e Units cannot Attack (or Assist) when overstacked. The terrain must allow the Attack unit to move into the defender's hex should the defender retreat or be destroyed.
7.2f No unit is ever required to Attack.
7.2g Once the Active player declares the Attack—but before he identifies his Attack or Assist units—the defending player announces if he has a Prepared Defense and identifies the Defending AR unit (5.5f & 5.5g). This unit will provide the Defender's Action Rating.
7.2h Once an Attack has been declared and the Defense determined, identify the Attack unit. This unit will provide the Attacker's Action Rating.
7.2i Assists. The Active player can identify one additional unit in (or adjacent to) the Attack unit's hex as the Assist. An Assist gives the player a DRM for the Attack, but is Finished after doing so (7.2p).
- Assists must be adjacent to the defender's hex.
- Shock Attacks can never make use of an Assist.
- See the Unit Capabilities Chart to determine if a given unit can be an Assist.
- Only one unit can Assist a given Attack.
- No unit is ever required to Assist.
- An Assist need not be capable of entering the defender's hex.
7.2j The attacker can select one of two kinds of Barrage using available Arty/Air Points to support his Attack Sequence. A Suppression Mission Barrage (8.0f) generates a +2 DRM, but creates no Barrage step losses. A Destruction Mission Barrage (8.0) can cause step losses from the Barrage Table, but gives NO DRM for the Attack.
If a Destruction Mission Barrage destroys the defending stack, follow the Advance after Combat rule and the attack ends without rolling on the Combat Table (all involved units are Finished as if they actually conducted the attack). For Fatigue purposes, the Attack did occur.
7.2k Each side determines its Net Action Rating by applying the applicable Combat Table DRMs to the chosen unit's AR. Use the AR unit if unit-specific information is needed to determine applicability.
Subtract the defender's Net Action Rating from the attacker's Net Action Rating to find the final DRM.
Roll two dice, add the final DRM, and read the result off the Combat Table.
7.2L For Combat Table DRMs, use the terrain in the defender's hex and any hexside terrain the Attack unit is crossing to make the attack.
7.2m Results include Losses (7.0c), Advances (7.4), and Retreats (7.5). Attacks can also result in the placement of Traffic Stopped markers (5.1g) The owning player applies these as desired, within the restrictions of other rules. Losses from the Combat Table cannot be applied to Support.
7.2n Attacking losses can only be applied to the Attack unit. Losses never apply to the Assist. If the Attack unit cannot absorb all the losses the attacking result requires, ignore the excess.
7.2o The defender must inflict the first loss on his AR unit and can then distribute any additional losses within the defending stack as desired.
7.2p Units which Attack or Assist are Finished for the Activation after doing so.
7.2q Units that are Finished cannot Attack or Assist. Units that have Stopped can still Attack or Assist. No unit can move after participating in a Regular Attack (other than the possibility of Advance after Combat).
7.3 Shock Attack
Shock Attacks are Attacks which allow mechanized units to continue to move afterwards.
They have special restrictions and freedoms not accorded to Regular Attacks. Use the Regular Attack rules with the following changes in effect. These rules are exceptions to a number of rules in various sections.
Shock Attack Requirements:
- Only Combat Units with a Tac MA can make Shock Attacks (7.3). They must have either an Assault Arrow and/or Red or Light AV.
- An enemy hex can only be Shock Attacked if it contains no AV rating (including Support).
- A hex can only be Shock Attacked if it is in an OBJ Zone (4.3c) and contains an enemy Combat Unit.
- If Air is to be used in the Attack, the hex must also be in the Command Radius of the HQ (8.1a).
7.3a Only Tac MA units shown as being Shock Attack capable on the Unit Capabilities Chart can conduct Shock Attacks.
7.3b Shock Attacks can only be made by a single unit (no Assist is allowed). Follow the normal Attack Sequence, except only ONE Air Point for either a Suppression or Destruction mission (8.2) is allowed. Arty Points cannot be used in Shock Attacks.
7.3c Each Shock Attack costs one of the unit's Fire Events, but does not automatically Finish the unit like a Regular Attack. Shock Attacks, themselves, have no MP cost, but the target hex must have a movement cost of 3 MPs or less (road MP rates can be used in this determination) for Tac MA.
A unit that is out of MA cannot make a Shock Attack, even if it has Fire Events remaining.
A given hex can have as many Shock Attacks made against it as the player can manage in an Activation (in addition to a regular Attack and any Attacks by Fire, Barrages, or Engagements that occur). A hex can have Shock Attacks conducted against it after a regular Attack has been completed (or vice versa).
A given unit can attempt to make more than one Shock Attack against the same defender's hex, given other requirements.
Design Note: Yes, this all means that a unit could make a successful Shock Attack against a hex, Advance after Combat into it, and thereby get to 'move into the hex for free.' Remember, they are hustling at the time and the world is not as black and white as a unit's MA might indicate.
7.3d Resolve Shock Attacks on the Combat Table.
7.3e Terrain and Shock Attacks. The following restrictions apply to all Shock Attacks:
- a) The Attack unit must be able to enter the hex for 3 MPs or less using Tac MA movement. If the hex would cost 4 or more (or is a 'P'), Shock Attack against it is not allowed. Roads can be used in this determination.
- b) All STOP movement effects are handled normally (including Traffic and EZOCs). A unit can make a Shock Attack against a STOP hex, and that STOP only affects the unit normally if it advances into it. If a STOP exists in the Attacker's hex, a Shock Attack cannot be performed.
7.3f If the Defender Retreats or is destroyed, Advance after Combat normally. The attacking unit can then continue to move if it has MA remaining, has not used both Fire Events, and is not STOPPED in the Defender's hex. If movement does continue after advancing into the Defender's hex, any EZOCs will affect the unit normally (including the need for Stopping Engagements).
7.3g If the Defender does not retreat or is not destroyed, the attacking unit can continue to move from its current hex if it has MA remaining and has not used both Fire Events.
7.4 Advance after Combat
7.4a If an Attack causes the defender to Retreat or be destroyed, the Attack unit must move into the defender's hex. An Assist unit stacked with the Attack unit may also advance if the player so chooses and the terrain allows it to do so, but Assist units in other hexes (and, of course, any unit not involved in the attack) may never advance.
7.4b The advance into the newly vacated hex does not expend Movement Points.
7.4c Engagements cannot be made, and are not required, during an Advance after Combat.
7.4d EZOCs have no effect on Advance after Combat.
7.4e In a Regular Attack, the units involved are Finished and there is no movement after an Advance after Combat (regardless of remaining MA). Shock Attacks are different, see 7.3f.
7.5 Retreats
7.5a The Combat and Engagement Tables can produce Retreat results.
Situational Retreats are specifically listed as such on the Combat Table and could be taken as either a Retreat or as step losses depending on the situation involved. (7.5g)
Automatic Retreats are those listed at 11-12 or 13+ on the Combat Table and any Retreat from the Engagement Table.
Units can also conduct Voluntary Retreats (7.5j).
Important: Retreats always involve all the units in the hex. If a stack contains a mixture of unit types, use the Target for Engagement Table Retreats OR the defending AR Unit for Combat Table Retreats to determine the effects applied below.
Retreat to the Rear. The owning player Retreats his units in a direction that is 'locally to the rear'. Simply pick up the stack and place it in the new hex. Apply the guidelines below to determine a reasonable direction and destination. If more than one hex is roughly as qualified, the owning player can choose the one he prefers. The list below is in approximate order of priority, but do not drive yourself nuts …it's just a Retreat.
- Away from the local enemy units, especially the Attack and Assist hexes.
- End in a hex that does not contain any EZOC.
- End in a permissible (7.5c) Terrain type better for defense.
- End closer to the unit's HQ.
- Do not end in any hex blocking enemy Safe Paths or MSRs.
- End closer to the Formation's Combat Trains. If these are not currently on the map, use the Supply Source the Formation's Combat Trains last used instead. OR, in the case of HQs only, displace as needed to any hex containing terrain allowed in 9.1a AND at least one unit of the HQ's Formation. The latter could result in the HQ escaping into a pocket. ✔
7.5b A stack must Retreat together to a common hex if a 3-Hex Retreat result occurs. See also 7.5i.
Effects of No Safe Path. In general, if there is No Safe Path, all Retreat Results are automatically handled as "-1 step per unit, no Retreat" for Leg or Truck MA units. If the Situational Retreat result would have been executed as "-1 step per unit, no Retreat" anyway, then there is no change to the result.
Exceptions: No Safe Path has no effect on Retreats by TAC MA units or on any unit conducting Voluntary Retreats.
7.5c A Retreat's ending hex cannot contain an enemy unit of any type or be a hex the unit could not enter in normal movement because of terrain or stacking restrictions (5.5d). If the Retreat cannot be executed because all possible hexes contain enemy units or cannot be entered, the Retreating stack stays in place and takes an additional step loss per unit instead.
7.5d Except in the ending hex (7.5c), terrain has no effect on Retreat. The unit found a way.
7.5e If a Retreat's ending hex is in an EZOC of a type affecting the retreating units, each applicable unit takes one additional Step Loss. Engagement Zones have no effect Retreat.
Reminder: EZOCs that Apply to specific Movement Classes:
- Leg MA: All EZOCs
- Truck MA: All EZOCs
- Tac MA: Real AV EZOCs only, not Support AV EZOCs.
7.5f Important: If a unit which has no printed MA is forced to Retreat, it is destroyed instead. See also the Retreat Answer Key on the back cover.
Retreat Execution. See also the special rules regarding HQs (9.1f) or Combat Trains (10.3d). Use the first listed which applies. (Use "All other Retreats" for Voluntary Retreats, as No Safe Path does not apply to them).
| Retreat result and Circumstances | Execution |
|---|---|
| No Safe Path AND Leg or Truck MA | -1 step per unit, NO Retreat |
| Situational Retreat… | |
| …AND Key Terrain or Prepared Defense | -1 step per unit, NO Retreat |
| …NOT Key Terrain or Prepared Defense | Retreat 3 hexes, FLIP to Move-side ✔ |
| Automatic Retreat AND Leg or Truck MA (for Unassigned Independents, use All Other Retreats instead) | Retreat to/adjacent to HQ & FLIP to Move-side (see box below) |
| All other Retreats* | Retreat 3 hexes & FLIP to Move-side |
* For Voluntary Retreats, each unit also suffers -1 step loss (7.5j).
See also the Retreat Answer Key on the back cover.
If either (or both) of the following are true for Automatic Retreats AND Leg or Truck MA…
- The HQ is less than 3 hexes from the Retreating stack's hex at the moment of combat,
- --OR--
- The Retreating unit cannot be placed w/i 1 of the HQ without overstacking. (Apply to each unit independently in the order chosen by the owning player.)
… take the unit off the map and return it to (or adjacent to) the HQ's hex in the next Reinforcements & Weather Phase.
7.5g Situational Results. Some Combat Table Results are Situational. These become a step loss instead of a Retreat if the affected defending unit is in Key Terrain or Prepared Defense. If the Attack unit is killed as a result of the Attacker's Loss result, ignore the defender's Situational Result.
7.5h The Map Edge. Any units may freely Retreat off the map edge. Such units come back as reinforcements in any Entry Area (owning player's choice) along that same map edge the next turn.
7.5i HQs and Combat Trains. These units Retreat following their own special rules (HQs see 9.1f, Combat Trains see 10.3d). If a Retreating stack contains HQs and/or Combat Trains in addition to other units, follow the displacement rule for HQs (9.1f) or Combat Trains (10.3d) as needed to Retreat those units; they are not affected by the requirement to Retreat a stack to a common location.
7.5j Voluntary Retreats. In lieu of any normal Movement, the Active player can self-inflict Retreats on Active Formation units if he desires. Retreat 3 hexes and FLIP the Retreating units to their Move-sides. Each non-HQ unit that does a Voluntary Retreat (Safe Path or not) takes -1 Step loss. Having No Safe Path has no effect on Voluntary Retreats.
Note: In a change from v1.0, any unit with an MA can do Voluntary Retreat, not just those with an Unprepared side (and HQs).
Only HQs can conduct a Voluntary Retreat under a Fail SNAFU result. Any Formation unit can do so under a Pass or Partial SNAFU result.
A unit that executes a Voluntary Retreat is Finished for the Activation.
7.5k Retreat Returns. Units removed from play because of a Retreat, return in the next Reinforcements & Weather Phase automatically. They are NOT subject to the Legal Combat Trains requirement of actual Reinforcements.
Retreat Example (printed box):
Here fires from Spitze have forced the 32 Cav to Retreat. Because this is from the Engagement Table, the Retreat is automatically 3 hexes and a flip to Move-side. The flip does not occur as the unit is already on its Move-side.
Furthermore, the lack of a Safe Path does not matter as the unit is Tac MA.
The most logical retreat point is to Hex F. It is away from the local enemy, in terrain, toward the HQ, and is on a road leading to the the HQ the enemy could use.
A and B are both bad because they are in EZOCs. C and D are not locally away from the enemy and are not closer to the HQ. E and G are not un-reasonable, but are not as useful to the player as F.
H is a possibility, but risks blocking an enemy MSR on the nearby Secondary Road and would be ruled out if that was the case.
[Map diagram omitted.]
8.0 Barrage
Artillery and Air fires are shown by the use of Arty and Air Points which can inflict either Suppression or Step Losses on the enemy using the Barrage Table.
There are two kinds of Barrage: Destruction and Suppression.
Destruction Missions involve one or more Arty/Air Points and roll on the Barrage Table.
Suppression Missions can only use one Point, have no roll for losses, but apply a DRM in combat (Destruction Missions do not award any DRM).
Arty/Air Point Use. In any Barrage outside of the Attack Sequence, the player can only use ONE Arty or Air Point.
Inside an Attack Sequence, the player can use up to THREE Arty/Air Points.
In any Shock Attack, the player can only use ONE Air Point and cannot use Arty Points.
8.0a Arty Points allow the player to make Barrages and are required to create a Prepared Defense (4.5). Each HQ has its number of Intrinsic Arty Points printed on it. Arty Asset Points can be assigned to an HQ which add to the HQ's Intrinsic Arty Points giving the Formation a greater overall number.
8.0b Arty Points associated with a Formation can be used at any point during that Formation's Activation, but each Arty Point can only be used once per Activation. The total available Arty Points is refreshed in each future Activation, including a Second Activation if there is one.
Unused Arty Points cannot be saved and used later.
8.0c Make any desired Barrages before, during, and/or after any stack's movement.
8.0d Arty Asset Points. The scenario may issue the player Arty Asset Points which represent the assignment of higher level artillery units.
Arty Asset Points can be assigned and unassigned in the Assignment Phase. An HQ can be assigned any number of Arty Asset Points. Once assigned, only that HQ can use them.
The Arty Asset Points add to the Formation's Intrinsic Arty Points to create the total available for use.
8.0e Air Points. The player could also be issued Air Points representing available aircraft sorties.
Air Points follow the same handling rules as Arty Asset Points, except that Air Points are not assigned to specific HQs, can be used in any friendly Formation's Activation, and exist as a pool available to the player. Each Air Point can only be used once in a given turn.
Air Points cannot be saved from turn to turn.
Air Points are unaffected by SNAFU results.
Only Air Points can be used in Shock Attacks.
8.0f Suppression Missions. Arty and Air Barrages made during an Attack Sequence automatically earn the player a +2 DRM for 'Suppression' IF exactly ONE Air or Arty Point was used and NO roll was made for losses.
All Arty and Air Barrages that do roll on the Barrage Table (Destruction Missions) in the Attack Sequence do not obtain any Combat Table DRM.
Barrages made outside the Attack Sequence never generate the Suppression DRM.
8.1 Barrage Execution
8.1a Spotting. Arty and Air Barrages can only be made against hexes that are "Spotted" according to the following:
- They are w/i 4 hexes of an Activated Formation's unit (including the HQ, but not Combat Trains).
- The line from the spotter to the target must be one that would currently allow an Engagement Zone (Terrain and Weather affect this normally, 6.1b).
- A unit that acts as a Spotter for a Barrage not in the Attack Sequence must execute a STOP.
- The target must be in the Activated HQ's Command Radius and in an OBJ Zone (4.3c). These location requirements apply to the target hex, not to the Spotter.
8.1b Resolve Destruction Missions on the Barrage Table. For each Arty/Air Point expended roll one die for each unit (target) in the hex. So, a three point Barrage against a hex with two target units will require six die rolls to resolve.
Use the row designated by the terrain and/or target type. The results for each roll will be either no effect or one Step Loss (losses come from the unit being rolled against at the moment).
8.1c If a unit is not in Terrain, but can use a Prepared Defense, use the table's Prepared Defense row instead of 'All Other.' When firing at a Hard unit (1.2c) or City, apply those rows even if the target also has Prepared Defense (in other words, Prepared Defense never makes a unit easier to hit).
8.2 Barrage Missions
8.2a A hex can be subject to only ONE Barrage Mission (of either type) per Activation. This restriction does not affect Attacks by Fire.
8.2b Declaration. The Active Player must declare the number of Arty/Air Points being used before rolling. Once committed, the Points are expended, even if it turns out some are wasted.
8.3 Attack by Fire
Attack by Fire allows AV units the ability to engage non-AV targets.
Design Note: AV units fire on other AV units using the Engagement Table, but they fire on non-AV units using the Barrage Table. The difference here comes from how the combat is being fought. Obviously, AV vs. AV is a contest of machines while AV vs. non-AV represents something more akin to shelling (aka Barrage) against the target unit's position.
8.3a Any number of Attacks by Fire can be made against a given hex, in any sequence the player chooses, even after attacks of either or both sorts.
8.3b Only units adjacent to the target hex can make Attacks by Fire.
Important: Attacks by Fire require the target to be in an OBJ Zone.
8.3c Each Attack by Fire is made by a single unit. Only unit types listed on the Unit Capabilities Chart as being able to make Attacks by Fire can do so.
The firing unit must pass any required Stopping Engagement before making an Attack by Fire.
Important: A hex cannot suffer an Attack by Fire if it contains either an AV unit or Support.
8.3d Each Attack by Fire costs the unit ONE Fire Event. One Fire Event translates into one Barrage Roll per enemy unit in the Target hex, just like an Artillery Barrage.
8.3e Resolve Attacks by Fire on the Barrage Table like any Arty/Air Point Barrage.
8.3f Attacks by Fire cannot be made in the Attack Sequence and therefore can never be Suppression Missions.
9.0 Specialized Rules
9.1 Headquarters (HQs)
9.1a HQs move like any other unit.
Restrictions:
- HQs must end movement (or Retreat) in a hex containing a non-RR road. (5.4d)
- A Retreating HQ always generates a Coordination marker on itself.
9.1b HQs have normal Movement Allowance Classes (usually, but not always, Truck MA). Regardless of the HQ's Movement Allowance Class, HQs cannot cross or enter terrain prohibited to Truck MA.
9.1c HQs cannot enter enemy Engagement Zone or EZOC hexes.
9.1d HQs do not count for stacking and have no ZOC.
9.1e HQs cannot be destroyed (see 9.1i) or used to satisfy a step loss. They do not count as the Second Unit for the defense of their hex.
9.1f Effect of Enemy Units. Enemy units can cause an HQ to Retreat through Combat or Engagement (as per 7.5) when the HQ is stacked with units which must Retreat. In addition, HQs must Retreat when an Enemy unit enters their hex (assuming there are no other units there—units in Support do not count).
Enemy Unprepared units, HQs, or Combat Trains cannot enter such a hex to force an HQ to retreat.
Ending Location: Retreat the HQ to any desired hex 3-hexes from its starting hex which must be any non-RR road hex that does not contain an EZOC, enemy Engagement Zone OR an existing enemy MSR.* There is no path of retreat for an HQ, simply put it in the ending hex. Flip its Combat Trains to Ghost. Remove the HQ's Prepared Defense marker, if any, and apply a Coordination marker to the HQ.
* The player can extend the Retreat of an HQ as desired provided it ends up in a hex fulfilling the above and is in a position where a complete MSR is possible.
Note that if applying the "escape into a pocket" clause in 7.5a, the HQ can extend the Retreat as needed, but is not required to end with a complete MSR as above.
9.1g The owning player can voluntarily retreat the Active Formation's HQ following the procedure in 9.1f.
9.1h Retreat does not alter an HQ's Activation status.
9.1i HQs without Units. If a Formation loses its last non-Support unit physically on the map in play**, pull the HQ, its units in Support, any units in the Dead Pile (including those which have used Repls) and Combat Trains from play (if 9.1j will apply, do not remove these units completely from play, they instead await the requirements of 9.1j off map). It does not matter if the Support could also be a real unit or not. Assets assigned to the HQ (Arty Points and Independent units) become unassigned, are pulled off the map, and all can be re-assigned in the next Assignment Phase. No unit can be assigned to the now removed Formation to attempt to revive it.
** Units which will be returning to the HQ in the next turn because of a Retreat Result count as 'in play' for purposes of this rule.
9.1j The HQ, Support units, and Combat Trains return to play only if more units arrive later, according to the Order of Arrival. In that case, these units arrive with the first such unit to do so and the HQ arrives with Fatigue Level 2. Then, and only then (with the HQ back on the map), can any of the Formation's units in the Dead Pile begin to re-enter play as they are rebuilt.
Design Note: Effectively a Formation that is destroyed during the game is gone for the duration. The time frame shown is usually too short to show the rebuilding of major Formations. Exceptions, if any, will be noted in the Game Specific Rules. The player should work to retain at least one non-Support unit in play for a Formation so as to be able to rebuild units for it as the game goes along. Don't treat them as 'just cardboard.'
9.1k Higher Level Assets. Higher Level Assets (Arty Asset Points and independent units) must be assigned to specific HQs in order to function. They can be reassigned only in the Assignment Phase. Jot assignments down in any convenient manner.
Distance, terrain, and enemy units have no effect on the reassignment of Higher Level Assets, but the Legality of the Formation's Combat Trains is critical. See 9.5 for the procedure.
Unassigned Independent units cannot Activate at all, they merely sit in place.
If an Independent unit is destroyed, it becomes Unassigned and can be Assigned freely upon being rebuilt.
9.2 Support
9.2a Some units can be dispersed among the Formation's units as Support.
Only non-Dual AV units can be put into Support. Some units have 'Support' written on their counter—if on that counter side, they can only be in Support (if this is the only counter side they have, then they are permanently in Support and can never be anything else). Light AV are the same as Limited AV when in Support.
While in Support, the Support unit provides Support functions, but is never treated as a real unit.
Support units do not…
- …count for stacking
- …move under their own power (or affect the movement of any 'real' unit)
- …take losses from Barrage, Attack by Fire, Regular Attacks or Shock Attacks.
- …count as the Second Unit in a stack for defense.
9.2b A Formation's Support is available to every Assault Arrow unit in the Formation (including assigned independents) regardless of the Support unit's step size.
Support is NOT available if the unit is Support Dropped (marked or Temporary).
9.2c AV units (including Dual) never have access to Support.
9.2d Units can only change into or out of Support in the Assignment Phase.
9.2e To place a unit in Support, place the unit near its HQ or off-map (it is no longer an actual unit and need not have a literal hex location, it just needs to be associated with its HQ). The new Support need only be in a position where it could physically move to the HQ hex on its Move-side—given terrain and enemy units, but distance does not matter. Support-only units are assumed to have Tac MA for this purpose.
Place the counter with its greater printed AV rating showing while in Support.
Mark the HQ with a Support marker of the appropriate type (Red, Limited, or Stand Off).
9.2f When Support "re-concentrates" into a real unit, place the unit, on its Move-side, in the HQ's hex.
9.2g For all eligible Formation units, available Support…
- …creates Support AV ZOCs
- …may provide a Combat Table DRM
- …determines some Engagement Zones
Remember, a Support unit only provides Engagement Zones to its Formation's units if it is a Stand Off unit.
- …provides an AV for enemy Engagements against their host units
- …provides protection from Shock Attacks and Attacks by Fire.
Support Display on the Map (printed box; the map diagram is omitted):
Support should be splayed out from the HQ's hex in any convenient manner to facilitate play.
Stack A has two separate units in Support, but only displays the Red Support marker since the Red Support can do anything the Limited Support can do (and then some).
Stack B is an option available for display using fewer counters for units that have a Support side to their counter. It is only shown here as an option, since effectively it should be in the Stack A as well (no need to expend extra map space on that unit).
Stack C, associated with the 99 ID, has no Red Support, only Limited, so it is marked with a Limited Support marker so the player knows the Support there is not capable of giving a Support DRM for attack purposes.
9.2h If a Formation has more than one unit in Support, the owning player can freely choose which one to use. Multiple units in Support can help with the defense against Engagements against supported units.
9.2i Dropped Support Markers. Dropped Support markers are placed when:
- a) The unit moves or retreats into/across terrain that is P for Tac MA.
- b) When a Formation without Support assigns new Support but that Support "cannot get to the unit." See the Support Dropped marker removal requirements below.
- c) All a Formation's units are assumed to be 'Dropped Support' the moment all of its Support is removed or destroyed. There is no need to mark them as such in this case, it is automatic.
While Dropped, the units involved do not benefit from Support for any reason, including the ability to have a Support AV ZOC.
Remove Support Dropped markers at any moment when all of the following are true:
-
- The unit is in Command Radius.
-
- The Formation has something in Support.
-
- The unit has a Support Establishment Safe Path (1.6).
Play Note: KT-X brand plastic moved/fired markers are highly useful in marking Dropped Support in a way that does not hide the stack's top unit.
9.2j Temporarily Dropped Support. There are cases where no Dropped Support marker is placed, but the unit has Dropped Support for the remainder of the Activation. There are a few Temp Support Dropped markers the player can use if he prefers to actually mark the unit.
This occurs from the Engagement Table (see 7.1k) provided both of the following are true:
-
- The unit is in Command Radius.
-
- The unit has a Support Establishment Safe Path.
If these are not true, actually mark the unit with a Dropped Support marker as per 9.2i instead.
9.3 Reinforcements
Reinforcements enter play according to the Order of Arrival Charts or when rebuilt from the Dead Pile.
They are sometimes placed with their Formations or into specific hexes as listed on the Order of Arrival Charts, but most enter play by moving from designated Entry Area hexes.
All hexes of a specific Entry Area are marked with a common Entry Area letter.
9.3a Reinforcements are placed in the Reinforcement Phase. Place reinforcing Support units with their HQ (9.2e) at that time (record these in the following Assignment Segment applying 9.5). Reinforcements slated to arrive at specific hexes (not marked Entry Areas) or at their HQ, must be placed in the Reinforcement Phase (they cannot wait for Activation as in 9.3b).
Upon placement, a unit can enter play with whichever side of the counter showing the player desires.
9.3b If more than one Entry Hex can be used, the exact hex(es) to be used are chosen in the Formation's first Activation. That decision cannot be changed once made.
Units cannot over-stack in an Entry Hex at the moment of placement. If there is an excess, place it off map next to their Entry Area hex. Units begin counting MPs as if they all started their move in the Entry Area hex.
Design Note: This mechanic exists to keep the hex from ending up overstacked on entry if the Formation botches a Reactivation or SNAFU roll.
There is no Unit Traffic effect (5.1h) for units sitting in the Entry Hex.
Place the arriving HQ and Combat Trains in the Entry Area first and from there the Activation proceeds normally (to include matters of SNAFU and its DRMs, Command Radius and OBJ placement, etc.) In an Entry hex, the Combat Trains are assumed to be at Optimal Distance (10.3c).
9.3c Reinforcements can sit near their Entry Areas (off map) before entering as long as the player wishes—even into later turns.
9.3d Reinforcements cannot be Barraged, Engaged, or Attacked in any way before being placed in the Entry Area hex, but units in those hexes are fair game.
9.3e Reinforcements can only move onto the map from an Entry Area hex during their Formation's Activation.
9.3f EZOCs have no effect on the use of an Entry Area hex by any unit. If an enemy unit occupies a given Entry Area hex a unit could use according to the player's Order of Arrival, the entering units have the following freedoms:
- Enter via other hexes of the same Entry Area
- —OR—
- Attack from 'Off Map' to enter.
Attacks from Off Map. If an enemy unit occupies an Entry Hex where reinforcements are attempting to enter via the normal Reinforcement rules, they can run an attack from off map to do so.
If an Attack from Off Map is called for the following are always true:
- The entering units have a hex Off Map attached to the Entry Area containing the same kind of road, if any, as the Entry Hex. They can Attack (and Assist) from that hex normally, but cannot BE attacked or barraged in any way while in it. The Terrain of the virtual hex is not a factor and there is no hexside terrain between it and the on-map hex.
- A Formation needing to make an Attack from Off Map always has a Pass SNAFU to do so. (Do not roll, and no, you cannot make use of this free SNAFU if the Entry Hex is not occupied by the enemy.)
- Attacks from Off Map are awarded a +2 DRM on the Combat Table in addition to any normal DRMs that apply (this DRM applies to Shock Attacks as well as to Regular Attacks). If the HQ is trying to enter as well, its full complement of Arty Points is also available for the attack.
- Once on the map, all normal rules apply to the entering units.
Design Note: Obviously, the 'problem' with map edge hexes is that players use them as literally the end of the world. The above rule allows the entering units to take advantage of the fact that not only does the world NOT end right there, but there are lots of units as well as space to operate that is outside the normal scope of play. So, if you don't want to deal with the dragons just off map, then back up to allow the normal use of the Entry Hex. Basically, Attacks from Off Map temporarily extends the map one additional hex out from the map edge and gives a couple of benefits (PASS SNAFU and the +2 DRM) to help the reinforcements get on the map. And, no, the enemy player cannot also try to occupy that off-map hex!
9.3g There are no Isolation effects on reinforcements attempting to catch up to their Formation HQ until they start an Activation in Command Radius. Be reasonable about this—this rule only exists to keep reinforcements from tripping up behind the lines.
9.3h Combat Trains, unless specifically stated otherwise, always arrive on their Regular (non-Ghost) side. Other units which have Alternate counter sides, can arrive on either side. Arriving units can be in Support (or not) as desired and allowed.
9.3i If Reinforcements are to arrive at an HQ, the HQ's Combat Trains MUST be Legal at that moment; if they are not, the Reinforcements must wait until the first Reinforcement Phase in which they are Legal so as to enter play. These units are placed in the HQ's hex or in any of the hexes adjacent to it; provided the chosen hexes are not terrain Prohibited for the unit's movement class nor occupied by an enemy unit.
9.4 Replacements
9.4a During each Reinforcement Phase, the players may acquire Replacement Points (Repls).
Exception: Do not roll for or otherwise acquire Repls to use on the First Turn of any scenario. They are already accounted for in the set up.
9.4b Repls come in two flavors: AV and non-AV.
A unit with an AV (on either counter side) can only use AV Repls. One with no AV on either counter side can only use non-AV Repls.
The player is otherwise free to use his available Repls as desired given the following restrictions.
9.4c Repls can only be used to rebuild units…
- …in Command Radius.
- …whose Formation Combat Trains are in a Legal Hex.
- …with a Safe Path traversable by Leg MA for non-AV Repls or Tac MA for AV Repls.
- —OR—
- …which are in the Dead Pile.
If a dead unit gets a Repl, place it in or adjacent to its HQ's hex (which can be in an EZOC). If the HQ's Combat Trains are not in a Legal hex, the rebuilt unit must remain in the Dead Pile until the Combat Trains are legal. If the HQ is eliminated according to 9.1i, then any partially rebuilt units in the Dead Pile belonging to it are removed from play and the Repls used are wasted.
9.4d Each Repl applied rebuilds one step. No unit can accept more than ONE Repl in a single Reinforcement Phase. Units can never accept more steps than the counter's full-strength step number.
9.4e Non-Rebuildable units (1.2c) cannot accept Repls.
9.4f Reinforcing units on the Order of Arrival which have less than their maximum number of steps can be given Repls before arrival.
9.4g Repls must be used the turn available and cannot be saved for later. Unused Repls are wasted.
9.5 Independent Units & Assignment
Independent units must be assigned to a Formation to function. If the Game Rules require units to remain unassigned, they cannot Activate or function in any way (except to defend themselves) until (and if) they are assigned.
Assign Independent units and Arty Asset Points to the desired Formation in the Assignment Phase.
To accept a new Assignment, the receiving Formation's Combat Trains must be Legal at that moment. Simply place them in their newly assigned HQ's hex at that time. ✔
To be eligible for assignment, Independent units and Arty Asset Points must be currently unassigned when the Assignment Phase begins.
To unassign an Independent unit or Arty Asset Points, do so in an Assignment Phase and the losing Formation's Combat Trains must be Legal at that moment. ✔
Pull Unassigned Arty Asset Points and Independent units off the map for storage until they are again assigned.
If a Formation is destroyed, place its Arty Asset Points into the pool for future use, but remove any Independent units assigned to it from play. ✔
10.0 SNAFU, Supply, Fatigue & Isolation
10.1 SNAFU
Supply and other logistical concerns (including transportation, routing, march traffic control, and simple friction) are abstractly handled using the SNAFU Table roll.
10.1a A SNAFU roll is required each time a Formation Activates. A separate roll is made for Second Activations.
10.1b A SNAFU roll uses two dice and an assortment of DRMs on the SNAFU Table. The DRMs are the result of Coordination (4.4), Fatigue (10.4), Main Supply Routes (10.2), Combat Trains (10.3), Mixed Formations (10.1e), and MSR uses Tracks (10.1f). There are also Game Specific SNAFU DRMs for each side listed in the player specific booklets for each game.
SNAFU results can be Pass, Partial, or Failure.
10.1c Reinforcing Formations roll for SNAFU normally.
10.1d The effects of SNAFU results are given on the SNAFU Result Effects Chart.
10.1e Mixed Formations. Formations are 'Mixed' if an Active unit is in, or enters (including being placed as a Reinforcement), a hex within the 'Simple Blob' (see below) of any Inactive friendly Formation. In addition to the SNAFU effect (if this condition exists at the moment of the die roll), apply a Coordination marker to each Formation involved if it does not have one already. Check for possible Mixing throughout a Formation's Activation.
A 'Simple Blob' would be the smooth shape including the outermost units of a Formation. [Illustration omitted.]
Ignore Combat Trains, units out of Command Radius, Unassigned units, and 'Buddies' when determining the 'blob' of a Formation.
Mixed status can vary based on the order Formations Activate. For example, in the illustration above, if the 26 VG Activated first, it would be Mixed with the 2 Pz Division.
Design Note: This Blob concept should be a simple observation by eyeball. The Formations are either using the same area or not. Don't overthink it, just look at what is going on. Yes, if a unit Retreated to a bad location, you might now be Mixed while you Activate to fix the mess. Players can be tempted to 'check hexes' to see if they will create Mixed Formations or not. They should consider that 'skirting' the next Formation essentially means the Formations are mixed. Make it clear and don't fight over a specific hex or such. If the Formation's Blob is cleverly intertwined with another Formation: It is Mixed.
10.1f MSR uses Tracks. This SNAFU DRM applies if any hex of the MSR from the HQ to the Combat Trains (inclusive) is Track instead of a better road type. The number of such hexes used does not affect the value of the DRM.
10.2 Main Supply Routes (MSRs)
10.2a For a Formation to operate normally, there must be an MSR from its HQ to a Supply Source through its Combat Trains which follows the requirements of 10.3a.
10.2b MSR Blocked. In the Preparation Phase…
- …if the Formation's Combat Trains are off map, apply an MSR Blocked Level 1 marker, or increase its existing MSR Blocked marker to Level 2.
- …if a Formation with an MSR Blocked marker has its Combat Trains on the map and those trains are currently in a Legal hex (10.3a), remove any MSR Blocked marker (either Level).
Formations with any MSR Blocked marker...
- …apply the Combat Table DRM to any unit of the Formation on the attack or defense.
- …have a negative DRM on the SNAFU Table equal to their MSR's Blocked Level (in addition to the DRM for having illegal Combat Trains).
- …cannot have a Prepared Defense marker.
10.2c Any number of Formations can share a single MSR, but at the expense of 10.2d.
10.2d Crossing the Streams. Apply a -1 DRM to SNAFU if the path between the Formation's HQ and Combat Trains uses any hex of the path used between another Formation's HQ and its Combat Trains (inclusive of the HQ and Combat Trains hexes themselves).
10.3 Combat Trains
'Combat Trains' represent each Formation's forward supply package and rear area establishment.
Combat Trains are required to link the HQ to the map edge's supply source. An HQ can only define an MSR using its own Combat Trains.
10.3a Legal Hexes. A Legal Hex for a Combat Train requires all of the following to be true:
- a) It is a Primary or Secondary Road hex. Exception: Track hexes are allowed in an Entry Area and/or Supply Source hex.
- b) The hex is connected to a Supply Source using only contiguous Primary and/or Secondary Road hexes, or is a Supply Source itself.
- c) The hex is connected to the HQ by a contiguous path of any sort of non-RR road hexes using the shortest route available (player's choice of measuring in hexes or MPs). Once established, the HQ-to-Trains trace path may not change until the HQ or Trains are moved, the trace is disrupted by the enemy, or the HQ/Trains are jumped and forced to relocate.
- d) The hex and the entire MSR (HQ to Supply Source, exclusive of the HQ's hex) does not contain EZOCs, enemy Engagement Zones, or any enemy units. Friendly units do not negate any enemy effect for this determination.
- e) The hex does not block an existing enemy MSR.
10.3b Movement & Ghost Side. Combat Trains 'move' in the Activities Phase. Combat Trains must move if they are not currently in a Legal Hex. If they cannot move to a Legal Hex, remove them from the map.
Combat Trains 'move' by merely plucking them off the map and placing them in a Legal Hex. Flip the Trains to Ghost if they move. Combat Trains that will end an Activation outside the Optimal Distance (in either direction, 10.3c) must flip to Ghost.
If the Combat Trains are in a legal hex, at Optimal Distance (10.3c, including the map edge exemption) AND didn't move in the current Activation, they can flip out of Ghost to their Regular side in the Activities Phase.
Combat Train removal merely requires them to be plucked off the map from whatever their situation. When they return, place them in any desired Legal Hex (if there is none, they can not enter).
Unless stated otherwise by the Order of Arrival, all arriving Combat Trains are on their Regular, not Ghost, side.
In an Activation, Combat Train Movement, if done at all, can only be one of the following:
- From one Legal Hex to another Legal Hex.
- From off map to a Legal Hex.
- From an Illegal Hex to a Legal Hex.
- From an Illegal Hex to off map.
10.3c Optimal Distance. The MSR between the Combat Trains and their HQ must be between 5 and 15 hexes (inclusive) to gain the effect of the Optimal Distance DRM. Furthermore, the DRM cannot be applied if the Combat Trains are further from the Supply Source than the HQ (or 'forward of the HQ'). A quick way to check is to see if the MSR trace from the Combat Trains to the Supply Source and the trace to the HQ share any hexes (ignoring the hex of the Combat Trains themselves).
This DRM automatically applies if the Combat Trains are in an Entry Hex and the HQ is not more than 15 hexes away. Combat Trains in this situation can ignore the 'must stay Ghost' rule below.
If a Combat Train is Legal but unable to apply the Optimal Distance DRM in the Activation's Clean Up Phase, it must enter Ghost (if not already) and is not able to recover from Ghost.
10.3d Effect of Enemy Units. Enemy units can cause a Combat Train to Retreat (7.5) when the Combat Train is stacked with units which must Retreat. In addition, Combat Trains must Retreat if an Enemy unit enters their hex. Combat Trains can never be captured or destroyed.
Enemy Unprepared units, HQs, or Combat Trains cannot enter a hex to force a Combat Train to Retreat.
When a Combat Train Retreats, displace it 10 hexes back along the MSR toward the Supply Source they could be assumed to have been using last. Flip them to Ghost. If they are w/i 10 hexes of the Supply Source itself (the map edge), they can stop in the Map Edge hex or shift to another Entry Hex Supply Source.
The ending hex of the displacement cannot contain an enemy unit, but may contain an EZOC or Engagement Zone. The displacement must be (unless exempted above) 10 hexes along a Primary or Secondary Road, but enemy units along that route have no effect on the displacement.
10.4 Fatigue
Fatigue in BCS represents the accumulation of stress on a Formation to the point where its dependability becomes questionable and rest is required.
Players will need to manage Fatigue accumulation versus the Formation's operational tempo to ensure his forces are not caught flat-footed. He can do this by controlling how the Formation is used and by conducting Recovery when he can.
10.4a Fatigue (Fat) Levels, Marking, and Effects. Each Formation has an associated Fatigue level (or just Fatigue, for short) which is marked with a Fatigue marker. Fatigue is a progression from Fresh to Fatigue Levels 0, 1, 2, 3 and 4. Fat-0 is normal (Fresh is 'better' than normal) and Fat-4 is exhausted. Fatigue can never increase beyond Fat-4.
Keep the appropriate marker with the Formation HQ to identify the Formation's Fatigue.
Fatigue affects the SNAFU roll as a DRM and Fresh applies a +1 to Second Activation die roll attempts.
Fat-4 Formations cannot have a Second Activation. (3.5)
10.4b Increasing Fatigue. Determine if there is a Fatigue Increase in the Fatigue Increase & Isolation Effects Phase. The maximum Fatigue Increase for any single Formation Activation is 1.
If a Formation executes any of the following activities, it must roll on the Fatigue Increase Table. Roll for the worst applicable situation (i.e., the one most likely to give a Fatigue increase).
- Placing any OBJ markers
- Engagement or Attack by Fire
- Regular or Shock Attack (See also 7.2j)
If none of these situations apply, there is no Fatigue Increase.
10.4c Recovery. Formations can Recover Fatigue given the following:
- a) The Formation must have its Combat Trains in a Legal Hex and a complete MSR.
- b) It has not already Recovered in the current Game Turn.
- c) It is not already Fat-0. (No Formation can recover to Fresh during the course of the game.)
Announce that the Formation is doing Fatigue Recovery in the Preparation Phase. Do not make a SNAFU roll. The Formation must do (and can ONLY do) the following during the Activation:
- a) Remove any Coordination and/or Prepared Defense marker(s) the Formation might have.
- b) Flip the Combat Trains from Ghost side to normal side, if allowed.
- c) In the Fatigue and Isolation Effects Phase reduce Fatigue by one level, then apply Isolation, if any, normally.
- d) Remove any Dropped Support markers, given 9.2i.
Play continues normally starting with step (h) in 3.2a.
Failure Flip. If the player intends to do a regular (non-Recovery) Activation and obtains a Failure SNAFU roll, he may to execute a "Failure Flip" and convert the Activation into a Recovery Activation at that point (meaning only those actions listed above for Recovery can be done; negate anything done in this Activation prior to the SNAFU Roll).
Failure Flip can only be done in Initial Activations and the player then forfeits the Formation's potential Second Activation (when this is done, the Formation is automatically Done for the turn).
Follow the actions above at that point as if the player had chosen a Recovery Activation instead and mark the Formation Done. The player can choose to accept the Failure SNAFU result and play from there normally with no Recovery.
Fatigue Examples (printed box):
At the end of each of the following Activations, the player attends to Fatigue as follows:
- The player did not Attack, Engage, or place an OBJ marker at all. Do not roll, Fatigue cannot increase.
- The player conducted a Fatigue Recovery Activation. Reduce Fatigue by one.
- The player placed an OBJ, but made no Attacks, Attacks by Fire, or Engagements. Roll one die. On a result of 1, increase Fatigue by one.
- The player placed an OBJ, but only made a Barrage. Roll one die. On a result of 1, increase Fatigue by one.
- The player placed an OBJ and made an Engagement. Roll one die. Fatigue increases by one if the roll is 1 or 2.
- The player made numerous Engagements, plus one Shock Attack. Roll one die. Fatigue increases on a roll of 1-3.
- The player makes several Attacks of both sorts, but no Engagements. Roll one die. Fatigue increases on a roll of 1-3.
10.4d Fresh Formations. These units are in better than normal condition. They get a +1 DRM for SNAFU and Second Activations. When their Fatigue increases, remove the Fresh marker and they become Fat-0.
10.5 Isolation Effects
Isolation occurs when units are cut off from their HQs and increases the degradation of a unit's capabilities—dramatically, if the situation is bad enough. This is in contrast to units which have been "isolated" in a pocket with their HQ. The enemy must root out the latter.
Apply the following losses to any Active unit that qualifies in the Fatigue & Isolation Effects Phase.
For each stack of the Formation…
Case 1: …with no Safe Path OR is Out of Command Radius: Destroy one step per unit.
Case 2: …with no Safe Path AND is Out of Command Radius: Destroy two steps per unit.
Additionally, for both cases: If the Formation is marked MSR Blocked Level 2: Destroy one step per unit.
Complete Command Disruption: If ALL a Formation's units (ignoring the HQ and Trains) are subject to Case 2 above: Remove the HQ and all its units from the game. See 9.1i for the procedure.
Series Designer's Notes
How'd the bus get to this stop anyway?
BCS was a long time in gestation. Many a playtester's printer, and much of the forests of South America, went to the great beyond trying to keep up. But what was the origin of this effort?
Well, in the beginning it was envisioned as nothing more than a "Battalion-level OCS" adaptation. A change of scale—only—allowing for smaller units and battles. Nothing to it, I thought. Yeah, right.
It wasn't long into the work that it left the OCS far behind (battalion level is much more than the operational level system could show, even with smaller units). I wanted to do battalion level right and show the player things that other systems just didn't bother doing—primarily because they continued on to where the road I started on would have led: taking fundamentally operational rules sets and shoe-horning them into the smaller scale.
That started a very wild ride.
The Big ideas
If I may be so bold, I think I've come up with a few ideas of note in my 25 or so years of professional design work. Each caused a stir when released of "that just can't work" but each has stood the test of time in one way or another. Love them or hate them, they are what they are.
They are, I think, actual advances in the art of wargame design and my own small contribution to the effort to show warfare in a way that actually teaches the player something beyond just some "neat mechanics which are popular at the moment." I am quite proud of them.
These are: the written orders system in CWB/RSS/NBS/LoB, the graphic orders system in TCS, the surprise roll mechanic in OCS, and I'll dare to add… the Combat Trains & Traffic systems here in BCS. (Noting that the Traffic rule did mainly become optional due to the workload it added.)
In and amongst these big items are a slew of other things I'm proud of that don't rise to this level. Things such as the "Grail Games" (DAK, Last Blitzkrieg, and Last Chance for Victory), the analysis of Gettysburg in Last Chance for Victory, the Boss Points system in Karelia, the victory system in Heights of Courage. But, these are not the same as the top tier concepts above.
So, how do things as "tiny" as Combat Trains or Traffic find its way into the same list as the various orders systems and the OCS surprise mechanic? It is the result of what they do and show.
Supply rules are, pretty much, a barren wasteland of design effort. Only a few care to even try and just slap in the standard "trace and you are good" mechanic on their way to the 'cool kid' mechanics like cards and chit pull. It's the red-headed step child of design work.
When it is looked at directly, designers might give it some attention in details such as the availability of Supply Points, maybe types of SPs, and the transportation of them. In all, this amounts to "if you have enough of the right kinds of stuff, you are good to go." Certainly, OCS made a career out of exactly that kind of decision making.
Even those games that attempted to go well beyond that which was reasonable for players to do (I'm looking at you, Campaign for North Africa) did so with an accountancy-based system of Supply Points of some sort (or a dozen) and a boat-load of mechanics that allowed their use in various mixtures to get a specific end result (or not). But still, when stripped of all the Rube Goldberg sub-systems, if you had SPs, you could do whatever it was you were trying to pay to do. If you had X times the number of points needed, you could do that activity X times and so on.
Originally, BCS had a system that grafted over the OCS one. Players were given SPs (two kinds here—Ammo and Fuel) and literally paid for what they wanted to do. One twist I tried was to ignore the transportation of SPs on the map. There were no trucks. Rather, players issued SPs to the HQs (each of which had a "Lift" capability). You could give an HQ all you wanted, but if the HQ moved, it would bring only its Lift value along with it—the rest was destroyed and wasted. The idea was to show that the primary ingredient in logistics in warfare is waste. As one would expect, testers reacted by placing only those SPs with the HQ which it could move to avoid losing any.
That effort became a drill of screwing over some Formations so that others could live large. On top of that, fuel use payments were made behind the scenes so that only Ammo made it to the map anyway—and players were constantly finding literal limits to what they had available and balked at the restraints it put on them (especially when one of the "stripped" Formations had to defend).
Historically, this became a problem as well. The Americans were flush enough that in most situations, I just assumed they had all they needed and skipped logistics entirely.
The Germans could be given their points in one of two ways: a huge supply at start and a trickle coming in each turn (fairly accurate to what happened) or a smaller dump at start and a larger amount per turn.
Neither worked.
Both were crushed by the same accountancy mentality they promoted. If the Germans were given the huge dump, by putting "unwelcome" Formations on a starvation diet, the "prime" units were never affected by supply shortages (and much of the army would not bother participating in the campaign). The smaller dump version didn't allow the historical initial spasm of activity, and even then still encouraged the starvation of the slow and the weak.
Along the way, the literal SPs gave way to the abstract LOG (what later became SNAFU) die roll which, forced some Formations in some situations to do less than the player wanted. It got the job done, but was relegated so far into the background that logistics, as such, seemingly disappeared from the game.
We played on, refining the other systems in the game (bringing them to an extraordinarily high level of polish and shine).
A certain level of unease started to settle in on me when I looked at the result. Recalling that I wanted BCS to show something more. Something more than down-scale operations, but also something more than the straight-forward level of "ZOC-Bonking" seen in so many titles already. I began to wonder if BCS had lost a bit of its philosophic underpinnings and become something I started calling "SCS with Engagements."
This led to an effort that spawned efforts at re-inserting the "something more" soul: OBJs, Traffic, and Combat Trains.
OBJs simply applied some of the player's effort toward the planning of operations for a Formation. They limit the number of different directions the Formation could manage at one time and limit how well he could react to events as they unfolded. Before, a Formation could split up to the four winds to do any number of microscopic jobs all at once (or worse, execute what my son, John, did and run what I termed a "Bubble Offensive"). None of those things looked anything like what the real Formations could, or did, do—always an excellent tip-off that something isn't right.
After some experimentation, the fairly straightforward OBJ marker placement system addressed these and numerous other issues. On top of that, I was able to dedicate a simple system allowing players to make use of the critical assets of these Formations: the ability of some units to conduct recons of locations that became useful after the Activation began (so as to take advantage of the evolving situation).
The optional March OBJ rule brings out a modest, but important, effect of committing the player even more to a specific course of action.
Traffic came about later but addressed player concerns that while two Formations would interfere with each other via the Coordination rules, inside a given Formation, march congestion was never an issue. Now (when using the optional rule), players must carefully orchestrate their movements so as to avoid causing traffic blockages that will quite realistically jam up the movement of follow-up units. And even then, Murphy raises his ugly head when an attack clumsily 'barely wins' leading to a situation blocking the way.
At this time, logistics began to make a come-back into the system. Trains were added first, but were merely placeholders for the road net needed to operate the Formation (leading to rules about 'MSR Congestion' which later converted into restrictions on coming back into 'in Service' and later 'LOG Congestion' which eventually became 'Optimal Distance' and 'Crossing the Streams'). These worked nicely and the players responded well to the planning and care needed to "do things right."
Moving the Trains results in them flipping to their 'out of service' (Ghost) side and inflicting a DRM on the formation's SNAFU roll. Players reacted with care as to when to shift the Trains around and when to wait. This was good, but something still seemed to be missing. That something is what elevated Combat Trains from a simple mechanic to something more.
It was the addition of Logistical Inertia and Supply without Accountants.
But, ya gotta count them Points!!!
Trained by the games that even bothered about it, players learned to think of logistics like accountants. You have a pool of resources which are both quantified and discrete. You draw them off at some constant level for the actions you'd like to do and can repeat that process until you run out. When you run out you are done until you can get some more. Logistics was literally a matter of resource allocation and nothing deeper.
Cardboard units have no needs (or feelings) when you choose to not use them. So, you can deny Formations all ammunition and fuel so that your favorites can make use of those points. Those stripped units will cheerfully await the end of the war, costing you nothing in the meantime, while they sit on their hands and watch.
Not much of that reflects reality.
Your resources are in a state of flux to an unknown degree. Errors exist in the inventory of what you have, spoilage is occurring, parts were mislabeled or put on trucks going to the wrong units, supplies you counted on get pilfered by units that thought they had more use for them than the ones you chose, all manner of things are making the clear cut become vague and unknowable—some of which are difficult to imagine—and all completely beyond your control.
Every activity has a cost, true, but the amount of the cost is only known in general terms and the planning figures can be thrown out the window by unforeseen conditions, unit behaviors, and waste. What you thought should last for four days ends up being burned down in two while something else set up for four days seems to be lasting forever. And your best guess on hospital beds was simply wrong.
Inactive units still use food, fuel, and even ammunition. Troops have a bad habit of stealing from neighboring units ("They can make that good, right?") and bulldozing dead vehicles off the road instead of sending them back for repair. Nobody knows what happened to the cases of ammo Private Snuffy was supposed to bring from the unit's last position. Supply sergeants the world over maintain private stashes of material for trading purposes and 'rainy' days. "They asked for two of them? Grab three, you never know what might come up." No unit is so inactive that it doesn't continuously tap into your—still unknown—resources. Nor do they (and their commanders) react well to the idea of "you are going to be helpless while we send all the fuel to so-n-so."
Ask Patton about that.
Yet, game supply systems invoke a world where the exact opposite is true on almost all of these points. Accountancy systems cannot help but measure with precision a system that has 'precision' in only the roughest terms. Accountancy rewards "just enough" thinking; real life revolves around pushing as much forward as you can, as fast as you can, and wait for the war to be won. You don't know where "just enough" exists between "failure due to not enough" and "too much"… so you opt to risk too much.
The SNAFU (originally LOG) system bypasses the accountancy game. The typically player-driven main effort business is impossible to create (because you can't). Predictive certainty in results "where it really, really matters" is illusive. The trucks might get stuck or not arrive at all—not based on where it is important, but like Mr. Murphy says, where it'll probably hurt you the most. What's available in the depot doesn't translate into a discrete amount of activity on the map. Or, for that matter, a dip in depot reserves may or may not show up as a specific reduction.
Eventually, as the Germans see in Last Blitzkrieg, their weak logistical system will give them an overall reduction in effectiveness—but the player will still not be able to starve some units in order to keep his panzers gassed up.
Furthermore, without the 'accountants gone wild' method of supply, the player himself cannot say with certainty that formation X will do everything he needs them to do. The overall supply situation will produce a distribution of capabilities across the map that reflects itself, but the player can't count on any given activation turning out for the best.
All of that brings logistics more into line with reality better than the more precise looking SP based system accomplishes.
One last point about prioritization, of course the real commanders can try to force scarce resources away from one sector so as to help out another. That's not at issue. The problem with the game model is that such actions are taken as standard behavior and executed with ruthlessness and precision that is simply impossible in real life. We all see this a lot in games. Players will ask me for a rule covering a certain action that a given unit did in a very special situation. No doubt—they really did it. Problem is, should I allow that action in the rules, players will use it frequently and in situations that are nowhere near as extreme as the reason it was done in real life. So, therefore I cannot allow the exception.
As time went on, the need to insert other items of friction, confusion, and outright failure into the 'LOG' system caused me to change the name to SNAFU. Logistics is (of course) still an important part of why units might not do all you ask of them—but so too are traffic control, command failures, and the myriad of other reasons all of which force 'but it looks so easy on a map!' into not translating into reality.
Inertia of what?
There are a couple levels of inertia built into Combat Trains.
When the Trains are jumped by the enemy, they bounce backwards (which brings its own inefficiencies) or eventually end up off map if a legal hex is unavailable (which brings bigger ones) creating less than optimal behavior on the part of the formation.
A smaller effect is when the Trains move and temporarily go "Out of Service" or into Ghost. Once on their Ghost side the SNAFU problem can compound until you get your lines of communication straightened out. It's reasonably mild, but can degrade sloppy play in favor of the player who takes the time to mitigate and minimize the effect.
The choice of when and where to move on the part of the player is a drag on his freedom of action. In a perfect world, he'd be able to shift the Trains, right now, to where he needs them without the fuss of having them re-establishing themselves. If he chooses to shift too soon, he risks a hiccup in his logistical net. If he moves them too late (or not at all), he could find the speed of his operations degraded as the Trains try to keep up and maybe can't. In any event, we can count on Murphy making the worst possible thing happen at the worst possible time.
As with units tripping each other because of Traffic, rear area establishments (HQs and Trains) must be positioned with care to avoid crippling the movement of other units or Formations.
Mechanical Mechanics
There are quite a few mechanics in this system that go against the grain of traditional wargame fodder. All were carefully chosen to show what they are designed to show, and tempered by exhaustive testing. All contribute to my goal of giving the player an insight into this level of warfare he's been denied until now.
Alternating Formations within the turn (as opposed to either a IGO-UGO framework, or full-on Chit Pull) was designed to allow both sides to both have more lower level interaction than IGO-UGO allows (with less perfect across-the-map coordination of your own side, and no need for special 'inactivity' (read: Reserve) phases and rules) yet also allows the player more input into what he wants to do (theoretically based on relative importance) than you get with completely random Chit Pull.
The order of Formation selection by default assigns some Formations a type of reserve status as they 'wait and see' what happens now in order to exploit the new situation later at the cost of not influencing the situation right now. Likewise, the Reactivation choice at the end of the initial Activation gives them the chance to exploit what they just did before the enemy can interfere. It does so with a strong nod to the agility of the Formation involved as well (through the die roll needed to get it). Simple and gets the job done very well, in my opinion.
Reactivation itself allows the Formation to (maybe) do more in the turn and that "maybe" is luck driven with a probability based on the Formation's ability to think on its feet and react rapidly to events.
The final Engagement/Attack/Barrage system for combat resolution is the result of a very long and convoluted series of trials and (mainly on my part) errors to get the best balance of playability combined with the distinguishing features of armor and infantry combat at this level.
In a brutal over-simplification this can be seen as armor spars with opponents at range (and sometimes rams straight into enemy held hexes), infantry gets in the enemy's face and literally assaults their position, and artillery lays waste to whole areas in the hopes of inflicting losses.
Of these, artillery was the simplest—they provide a chance of inflicting step losses. There were a number of side-trips along the way (usually dealing with interdiction in various forms, all of which were subject to easy abuse and not worth the weight of rules needed to have them around).
Infantry ground assault was also pretty straight forward. We went through a lot of modifier permutations to pick the best ones to retain, adjusted the table to the point where it gave the right level of losses mixed with retreats, and it rapidly evolved toward final form.
Engagements, the interaction of AV units, their supports, and how all that boils into the final EZOC and AV EZOC rules was a long and involved affair. I'll talk about that in the Tanks! section below.
The 'Combat Flow Chart' idea is best left forgotten in the dust bin of the system's history. Suffice it to say, the road to the final form has been long.
There—literally—isn't an idea out there that wasn't tried (sometimes multiple times) to flesh out what works best.
The essentially Odds-Free combat system and the seeming lack of effect of step losses goes completely against the grain of wargame canon. I can understand how those ideas will rub players raised on odds CRTs and surrounding defenders to get some coveted ratio and a linear degradation in unit strength as losses accumulate. It strikes me that all those ideas are deeply rooted in an attrition-based theory of warfare (the reader should underscore that and contemplate how that affects the image of warfare games that emphasis has fed him since the very beginning). BCS attempts to meld maneuver and attritional warfare into their proper respective positions. Real warfare is a mix of both. I have attempted to replicate that here for you.
Let's look at those parts in turn.
First off, surrounding the defender with stacks and, essentially, attacking him from 4 or more directions at the same time is simply impossible in real life. One could argue that all those "extra" directions are merely pinning forces (much like the assist stacks here), but if that's the case, why do they add to the combat strength as much as the 'real' attackers and also why can any of them advance after combat like them? No, the design is giving the (false) impression that units at pretty much any scale form a circle around the defender and charge toward the center. This is not how things are done in real life and a fine way to generate Blue on Blue fighting.
Odds ratios are trickier. They have their place, of course, but the rub is in how they are shown. Typically, this is done on a combat-by-combat basis where the attacker (free of enemy interference) pumps the odds up as best he can against a single perfect-intel selected point while literally ignoring any other enemy units nearby (the hoary old 'soak off' attack and mandatory attack requirements were attempts at mitigating this effect). The problem was that the player was doing exactly what those systems reward: surging force ratios in a very small zone in order to obtain a maximal result from the few combats done.
That, of course, is the problem. Such massive concentrations of power are unlikely in real life simply because the desired (best) target can't be identified properly and the resulting forces would trip all over one another in such a small zone of attack. The example one might try to use is late-war Russian offensives that applied incredible mass to small sections of line in order to achieve a breakthrough. Key there is the business of 'sections of line' as the target is geographical in nature, not some specific weak German unit. Also, 'sections of the line' being quite large in extent—huge stretches of front by the end of the war.
In BCS, force ratios come into play because if you out-number the enemy locally, you can afford to build more 'complete' attacks across the zone; you have more power leftover to exploit the results, and can protect your forces from any counterattack potential that exists. It's not that you do an 'extra good job' on 'A' Battalion in front of you, but you can take out 'A', its supports on either side, and thrust into its rear areas all at once.
Linear degradation of unit strength is another attritional chestnut. Obviously, attritional theory itself is based on the idea that you will destroy the enemy faster than you destroy yourself and, eventually, in a mindless pool of blood, 'win'. Losses and disruption to unit cohesion & leadership, all contribute to a unit eventually becoming combat ineffective. That's true (and true here, too), but where the problem is in the linear nature of the business typically shown. A 5-step unit that loses one step is not 20% weaker. It's 20% closer to becoming ineffective (or, in our imprecise terms, dead), not 20% less of the unit it was before.
The model here follows more the one I showed in the TCS 25 years ago (where the combat strength was determined by the crew-manned weapons and taking out the strength of the unit wouldn't diminish firepower until the bitter end) than the one in the bit later OCS (where losses instantly take the shine off a unit's offensive power and half losses reduce it defensively).
The OCS case is at a very different scale than you see here. One counter is usually an entire BCS Formation, so taking 1 OCS step loss (out of maybe 4) actually represents 25% of the units of the Formation becoming destroyed—as things go here, that rapidly hits on the offensive power and number of operations the Formation can do on the attack. By the time a Formation has lost half its units (the next layer in OCS), I'm pretty sure you'd say they are 'defending at half strength' (if not far worse) and their offensive potential will be very limited.
In BCS, steps are a measure of the 'depth' of a unit—what damage it can take before becoming combat ineffective. They are not a direct increment of fighting strength.
It should be noted that the choice to use 'Arty Points' instead of the usual physical artillery units was to keep the counter density under control, to better reflect the assignment requirements of higher level artillery units (and its natural inertia), plus to avoid the 'games players play' in terms of either hunting these relatively defenseless units down or using them in ahistorical functions (like convenient road blocks).
Command
The simple framework of Command as shown in BCS was a relatively late addition to the design process. I added it only after spending a great deal of time hammering out the movement and combat mechanics. Its need literally grew out of what I was observing in the testing of those underlying systems.
One obvious issue was that Formations were simply able to do too much and were too agile. They'd strike out in multiple directions at a time (zeroing in on weak defenders in order to advance the attritional ball by merely killing off enemy units). Even if this did not happen, players would instantly react to events as they unfolded to the degree that if the planned advance to objective X fell apart because of a botched earlier attack, objective Y was instantly substituted as if X was never contemplated. Large scale units can't act like this—heck, any complicated undertaking cannot do this.
OBJ markers were the solution to that unease. Before seeing how events would unfold, the player had to make decisions on where the Formation would attempt to drive and was limited to attacking those enemy forces near those Objectives—not merely cherry-picking some weak unit that meant nothing in the bigger picture, but was simply available (according to perfect intel) to be killed.
The development of OBJs went through a series of more complex versions (usually involving route control and recon assets) to the current fairly straight-forward level. In the end, movement routing wasn't deemed all that important as the places you could go and do something major was limited and indirectly that affects how you choose to get there (other pathways being of limited use). The more important matter was the development of an honest (and reasonably inflexible) Axis of Advance representing the Formation's current plan.
Coordination came about as an outgrowth of what was a bit more complicated rule on Passage of Lines (the name change needed because Coordination covered a number of topics that weren't technically Passage of Lines). Its development played around the edges with another difference between game thinking and real life. The player approached these rules with a mindset of 'how much can I get away with before I get punished' of trying to figure out where the line was so they could exploit it as far as possible with the least application of resources or effort. To an extent, players still act that way around these (and other rules), but not to the disturbing degree they did in playtesting the old Passage rules.
Meanwhile, in real life, staffs routinely coordinate with adjacent formations an effort that moves from 'courtesy' to a 'major command function' depending on the degree of Passage of Lines involved. What they won't do is look at a map and figure out how close they can run an OP to the nearby unit and get away without bothering to let them know what was going on.
Coordination is a minor item if not allowed to get out of control. A DRM on SNAFU isn't the end of the world unless it gets stacked with other planning failures or affects a large number of units. Ramming a bunch of Formations into a small space is inviting all manner of confusion and not a little bit of Traffic problems.
The maneuver model vs. attritional model comes to a point here in the effort to smash enemy rear area installations (when you can). The benefits of clobbering a guy's lines of communication are many. You might induce logistical paralysis. This can be more efficient than simply 'attacking his units to death' in the usual wargame slugging match. These are not necessarily easy things to accomplish (especially if the player has a taste of what they feel like when done to him!), but can give bigger benefits faster than not doing so.
Players who like their attrition can indulge themselves here, too, but mastery of what maneuver can reap at this level is the best way to win. The best mix is the most effective way to play. Enjoy the swim.
Tanks!
The armor model is of a greater detail than the infantry one here as, literally, armor affects the battlefield, other armor, and infantry in ways the infantry model simply cannot show. Typically, designers do force the armor into the infantry model and get what you'd expect—armor that behaves like really strong and fast infantry.
Armor fights other armor using the Engagement Table (i.e., by trading fires) or they can mix it up directly (using Shock Attack). Tac MA units in general can use Shock Attacks to allow them the increased tempo their mobility creates.
How they do these jobs or if they can do them is based on one primary decision: the use of the armor in concentrated form or split up into support teams. This takes some explaining as players frequently confuse what infantry support means. The confusion comes from thinking that being dispatched as infantry support means something like what the French did with their armor in 1940.
Strictly speaking, the French model is what happens when a player here stacks a concentrated tank unit with infantry and then pesters me wondering why he didn't get a support mod for it.
No, that's not it.
The development of effective tank-infantry teams took much of the war for the US Army. Too often the two arms would operate "near" each other, doing their own actions independently and accidently functioning as Combined Arms to a greater or (usually) lesser degree. Doing this kind of Combined Arms correctly (and obtaining maximum effect) requires the arms to work together frequently so they can both learn what the other can and cannot do and requires a means of communication between the crew in the vehicle and the infantry commander on the ground (usually a telephone in the back of the tank).
Properly mixed, the resulting tank-infantry team is many times more effective than either by itself in both offense and defense, but is still limited in rapidly moving operations (because of the infantry's limited mobility unless they come equipped with their own armored vehicles).
Importantly, training and skill level is critical to obtaining these abilities.
Concentrated armor is—of course—centralized and operating as a 'herd'. As such, it cannot function with the same close working relationship with infantry that happens to be around (if the tank-infantry team effects of support were allowed for Concentrated armor, we'd have the infantry working at armor speeds, which they cannot manage). Rather, Concentrated armor gives up some Combined Arms abilities so as to fully exploit the massive hammer they can wield. That is subject to terrain, of course.
While an AV EZOC may require armor to trade blows (or stop functioning in a hex), there are no Overwatch or Opportunity Fire rules to follow out at range. Well, none in terms of literal fires, the restrictions on HQ and Truck movement in Engagement Zones should not be ignored. A relatively enormous amount of time was expended on various ways to either show fires literally or have the ZOC and/or Engagement Zone rules 'cover' the topic of fires while the active player is moving. What you see here is the final distillation of those rules to the best balance of playability and simulation. More isn't better. We tried everything and many ideas more than once.
Beyond that, there is the matter of typical combat ranges being far less than the theoretical maximums available to the weapon system. In NW Europe, this is a matter of a lot of minor terrain (hills, trees, etc.) blocking what looks like a clear LOS on the map. In the desert matters are different.
Basically, avoiding an unplayable nightmare of excessive detail and (actually) excessive losses meant that inactive player fires is not shown literally (but are what is going on in Stopping Engagements). Normally, they do their shooting in their own activations.
In addition to the major issues of being Concentrated or in Support, armor units are frequently faced with a decision on which of their two modes to use: Move-side and Deployed side. 'Move' gives the unit its best map speed, lowers its AV, and (when using the optional rule) provides the potential to create Traffic downstream on the map. 'Deployed' tanks are busy dodging and weaving, so they do not move rapidly on the map, but do have a better AV.
Of these, the latter is very important, as it shows the current thinking on 'first fires' whereby it isn't necessarily the 'best' vehicle that wins the fight as much as it is whoever gets off the first shot. That small increase to AV may not look like much, but it has a significant effect on the result of an armor Engagement.
Deployed vs. Move-sides also is a rough stand in for 'who's running along vs. who's looking for targets' as a gauge of who gets the first shot. It's not perfect by any stretch, but is better than trying to track movements done over previous activations!
v1.1 Designer's Notes
What you see in v1.1 is the accumulation of clarifications, suggestions, clarity rewrites, added cross references, and even a longer section that kept the same rules, but presented them in a better way (such as 9.5), but beyond those, there are a few items qualifying as actual changes.
Staying in Command Radius, 4.2f. This one merely tries to restrict players for whom losing a step was not a big enough price to pay to decline to take advantage of perfect intel. The testers played the way this rule enforces before it was explicit, now you will, too.
Retreats, 7.5. Oddly, I wouldn't even list this here except some players put a lot of importance on how retreats are conducted (As Rod said: "Really? You've been retreating units in games your whole life... just retreat it!") Rather than forever try to thwart the player scamming the system (but just barely, so it is still technically legal), the new Retreat process allows players to act like adults, get a better simulation in various situations, closes some loopholes, and is brutally easy to do. This is a case of I'm not going to dumb this down, players deserve—and can handle—the real thing.
Attack from Off Map, 9.3f. This was the second (or third?) version of a rule keeping players from using the edge of the world as a force field. The earlier ones had unintended consequences allowing the 'blockee' too much freedom. The final version allows the player to get onto the map, punishes his opponent for trying to 'cork' the edge, yet keeps the player from obtaining a major maneuver benefit from the situation. Beware the map edge, there be dragons.
Coordination, Mixed Formations, and Blobs, 4.4 and 10.1e. These changes were to get rid of the hoary Command Radius crossing rule in v1.0 (which 'worked' as it was too big of a pain for any player to want to get anywhere near needing to use it) and go back to the way I wanted Mixing (then Passage of Lines) to work in the first place. Formations are assigned areas (and if it is marginal in some way, they should pay the price, NEVER to see how close they can get to a problem before getting on the horn to 'those other guys'), that's how it works in real life and what should be presented to the player—not scooting a unit to a specific hex so that something else can 'just barely' skate by. This was another case of 'I'm not going to dumb this down' nor reward the player willing to expend a huge amount of time on busy work. Players have more important things to do.
Beyond these, there are some changes that seem like bigger items, but really are not (such as limiting Prepared Defense to Deployed units, rather than using UnPrepared as a decider). Such changes are designed to simplify other rules or add depth to the model.
As the testers can attest (sorry), some of these ideas are not as much changes as a need on my part to show the intended simulation model. In their defense, the testers were greatly concerned that 'Joe Wargamer' might not be able to implement the ideas or would not be able to be realistic and reasonable about application. They argued long and hard, which caused me to punt on some of the issues in v1.0. Those 'watered down' concepts worked just fine (and you can still use them if you want), but they skimped on some of the simulation effects I wanted in the system and (I feel) long-time players deserve in their games.
Enjoy!
v1.2 Designer's Notes
v1.2 is a modest set of adjustments and corrections. The most obvious change (if you can call it that) is the use of the Infographics for the Charts and Tables.
Known errata have been fixed and I've added the "best of" the current Official Optionals.
Of actual changes, there are very few. About the only one of note is the need to flip units that conduct a Situational Retreat (but are not in Key Terrain or a PD) to their Move-side. This, intentionally, makes them more vulnerable, briefly, after doing such a Retreat.
Adopting the Retreat Key from the Optionals merely streamlined things.
Optional Rules
These rules can salt the game's model to taste. They tend to add 'more', but only you know if the 'more' they add is worth it in your play. My recommendations follow each one in the design note.
1. Ranged Fires
In any Engagement at a range greater than 1 hex, read any Both Loss result as No Effect.
Design Note. This little modifiaction merely reduces the likelihood of 'kills' at ranges greater than one. For obvious reasons, AFV loss rates drop as range increases. It also has a side effect of watering down the advantage that occurs when a unit engages another outside the latter's range. While the original effect is realistic, it also tends to exaggerate the use of a player's perfect intel view of the battlefield which is not a good thing. Reducing kill rates at range make the deal for the player in those situations a bit less impressive.
2. Modified Chit Draw
If Chit Draw for Activations is used, rather than simply drawing one chit and Activating that Formation, do the following.
Draw three chits. The side that owns the majority of the three gets to pick the Formation from those available to Activate. Remaining chits go back into the cup.
Design Note: Makes for a good compromise between full random selection and having the player pick freely.
3. Planned Fatigue
This is a series of interrelated concepts. The changes below are in a cribbed form for brevity. It is suggested that both the whole package be used if any of it is wanted AND that players approach it only after getting a grounding in the RAW system.
Replace the current Fatigue SNAFU DRM ( Fat-1 = -1, etc.) with the below:
- Fresh = +1 SNAFU
- Fat 0-3 = +0 SNAFU
- Fat-4 = -1 SNAFU
Fat-4 cannot 'pay Fatigue'. Fat-4 takes effect instantly when the Formation obtains a Fat-4 marker (in the midst of the current activation). If a Formation is Fat-4 when it initially activates, it must conduct Fatigue Recovery.
Fatigue increase not done on Table with a die roll. Instead, 'pay Fatigue' to purchase the following:
- +1 Place an OBJ further than 15 hexes from the HQ*
- +1 Place one additional non-Recon OBJ*
- (if both above apply at once, Fatigue increase is only +1)
- +1 Remove Traffic marker*
- +2 Conduct Forced March
- +1 Second Activation DRM of +2
* These can be done more than once in an Activation, pay separately each time (e.g. removing two Traffic markers = +2 Fatigue).
Note that even with the ability to pay Fatigue to buy additional OBJ markers, such purchases can only be done at the time when SNAFU OBJs are placed, not any time during the Activation. Recon placement of OBJs do not count for the 'additional OBJ' Fatigue cost, but might apply the 'further than 15' cost.
SNAFU
- Pass SNAFU gives only one OBJ.
- Partial and Fail give no OBJ.
- Additional OBJs can be purchased using either Fatigue or Recon abilities.
- Partial SNAFU allows only one Fire Event per unit, not 2.
5. Middle Ground Coordination
Allow Coordination markers and their DRMs to accumulate up to 3 markers for a single Formation. Markers are applied as they are currently with the exceptions below. Do not add additional markers once a Formation has the three marker maximum, ignore any excess at that point.
- Apply two Coordination markers (not one) to each Formation if units create (even temporarily) a stack containing units from more than one Formation as per 4.4a.
- Apply one Coordination marker to the Activated Formation for each Traffic result created. There is no effect on the Targeted Formation(s), only the Active one.
Design Note: This creates a middle ground between the basic system and the full-Traffic Optionals. A decent compromise between them.
6. Orders.
Orders consist of nothing more than the location the formation is to move to and maybe a waypoint or two to make the route clearer:
For Example: Bardia via Sidi Aziz.
This is enough to describe how a division moves from wherever it is to Bardia with a routing that includes Sidi Aziz. No need to include 'attack' or any other details, those exist merely because the Formation meets the enemy (or not). WHAT a Formation is to be doing or HOW to do it need not be mentioned. Note that the player can, indeed, slow step his movement, or even not move, to his heart's content… he just cannot decide to 'march the other way' on the fly.
Also, a Formation that is defending doesn't need an order unless the HQ is to be moved.
Orders can be changed only in the Assignment Phase each turn. Jot them down in secret on scratch paper. Note that in an exception to the normal rule (BCS 2.1) that there is no Assignment Phase on Turn 1 of any scenario. IF this Option is being used, there is an Assignment Phase on Turn 1, but it can ONLY be used for the creation of orders.
Orders can be freely assigned on Turn 1 of any scenario, except that if a Formation listed as PD cannot leave PD until Turn 2.
Exception: If a Formation (not currently in PD) Activates in any turn in which its MSR has been cut (where it was not cut when the turn began), the player may substitute any orders desired for the ones written before the MSR was cut).
If any Reinforcement Formations are to arrive in a turn (no matter when they might do so based on other requirements), be sure to give them any orders they might need in the Assignment Phase.
As part of the Orders system, the abilities to enter Prepared Defense (PD) and conduct Fatigue Recovery are more strictly controlled (no rushing forward and then popping into PD in the 2nd Activation, for example). All PD and Fatigue Recovery changes on the map should be marked AFTER both sides have completed their Order writing in the Assignment Phase.
PD is marked, retained, and sometimes removed in the Assignment Phase (enemy forced removals, such as when an HQ is jumped, occur normally). Formations with a PD cannot get a 2nd Activation. Orders cannot be assigned to a Formation in PD.
If the enemy forces a PD to be removed before that Formation Activates, then it will get a normal 2nd Activation, but will have no orders to move.
Fatigue Recovery ONLY occurs in the Assignment Phase. Flip those that conduct Fatigue Recovery to their DONE sides. Remove all the language regarding Failure Flip or various other Activation use/restriction rules.
Just so it is very clear, both here and in the Standard BCS rules, no Formation can Recover Fatigue and be in Prepared Defense at the same time. Fatigue Recovery cannot be done while a Formation has a Prepared Defense marker. If it has one, it can be removed so that Recovery can occur.
Design Note: These are very, very simple orders. They essentially do one thing: display the relative inertia of Formations. By committing to a specific action (or not) at the start of the turn, even where that action is as rudimentary as where the HQ might be move to, a whole new world of Formation interactions opens up. Traditionally, players wait until the Formation's activation before deciding what they will do (using all that perfect intel we know and love). It is amazing to watch hitherto good players vibrate in indecisive puzzlement when they have to choose in advance and live with it. We have found this to be very easy to play and add a lot to the game. It isn't for competitive players or those who will squeak out the very edge of matters to try to minimize the effect on their forces, but if you play with a good heart and want to see some lovely effects… sticking to the intent of the rules above and your own understanding of what you intended to do when you set down your orders, you'll enjoy the swim.
Forced March
- Announced on the First Activation of a Formation.
- Purchased using Fatigue.
- No combat actions (Barrage, Fire Event use, any form of attack, no OBJs, testing bridges, or exiting for VC purposes) are allowed.
- Roll and Apply SNAFU normally.
- NO Second Activation allowed in such an Activation
- MA of all units is x3 (Leg/Truck) or x2 (Tac) after applying SNAFU effects.
Traffic
- Add 'Traffic' to all CRT results less than the 13+ die roll.
- Traffic applies to the hex with the marker and the 6 adjacent to it. (No additional effects if there is an overlap between multiple markers.)
- The player can remove a Traffic marker after it is placed by paying Fatigue.
Fatigue Recovery
- Treat Fatigue Recovery exactly like a SNAFU Failure.
- Eliminate Failure Flip. The player must commit to a Fatigue Recovery Activation before he sees the SNAFU result, no ability to turn a Fail into a Recovery.
- Fatigue Recovery is required if the Formation is Fat-4 when an Initial Activation begins.
Minimal Movement
In a SNAFU Failure (incl. Fatigue Recovery), allow all units except the HQ, to move 1 hex or 1 MP whichever is further.
Design Note: There are a number of things going on here. The revision to the SNAFU DRM reflects that Fatigue collapse, like so many things, isn't a linear progression of effects but rather a fairly steady state until a boundary (Fat-4) is hit. This is also why Fat-4 is given more teeth here. Paying Fatigue for more activity puts it under the player's control. He can force his units to do more, at a cost. This puts more planning in the hands of the player and removes some hoping for chance to help out (as in running an engine, where the fuel tank gets used, no amount of 'luck' is going to keep it topped off… Fatigue is like that). Other features above integrate these concepts into the other systems in the game. This is a good package of rules to play with once you are well versed in the regular system.
4. The Rod Miller Package
Attrition. Do not use Safe Path, instead if the unit is 'bracketed' (surrounded by units and/or appropriate EZOCs) apply what would have been the Safe Path Isolation losses.
Tiger Rolls. Roll for each Tiger unit in the Reinforcement & Weather Phase, do not roll in any Activation. Same die roll as before (loss on a 1), so some Formations will get a little gimme if they activate twice.
7. Soft and Hard Jumps
Any time a hex containing a HQ and/or Combat Trains…
- … is entered by an enemy Combat Unit (given the restrictions in BCS 1.2d and 9.1f),
- … is inflicted with a Retreat result, of any kind,
- … has its last Combat Unit step eliminated as a result of a Combat against it,
…roll one die* and execute the following:
- 1-4 Soft Jump
- 5-6 Hard Jump.
Hard Jump: Execute 9.1f and 10.3d as written, displace/retreat normally, all effects intact.
Soft Jump: Wait until the currently moving enemy stack stops moving (it might still have an Attack, etc. to do). Then…
The owning player shifts both jumped HQ and their Combat Trains (regardless of which was actually jumped) as needed (retaining PD, no Coordination, no Ghost effects…it just wasn't found). There is no concern about a path from the original hex to the new one, the idea is that it was in the new one the whole time, it was just thought to be in the old one.
The hex selected (which could be the original ones) must…
- …have Appropriate Terrain (a location where the HQ/Combat Trains could go to given other rules)
- …not contain an enemy unit, Engagement Zone, or EZOC
- …not block an Enemy MSR
The chosen hex need not be Legal at the moment, this will sort itself out the next time the Formation Activates.
* If more than one Formation has an HQ and/or Combat Trains in a hex where a die roll for Jump Type is required above, roll for each Formation separately. Also a given Formation could end up rolling any number of times in the same Activation depending on the enemy's actions.
Design Note: Here I'm addressing the limits of the intel the player has regarding the actual locations of HQs and Combat Trains. In real life, the commander might have some intel about them and can certainly look at a map and guestimate where he'd have these facilities if he was running the enemy. He can risk a mission to go look and maybe interrupt the enemy a little. What he can't know is that he is dead on right with absolute certainty and that some minimal force raid will massively disrupt the enemy. The above makes the results of the effort less certain.
8. Recon Screens
Actual screening missions are not currently a feature of BCS where Formations Attack, Move, or Defend. While there is a form of mobile defense embedded in the v1.1 Retreat rules (for units defending without Prepared Defense or Key Terrain), there was no status that allows trading space for time and limited losses. This rule provides a mechanic to do so.
Capability? Any unit designated as Recon in BCS 4.3d as modified by the game specific rule regarding Recon Unit Types. The ability to Screen (or enter Screen) is unaffected by SNAFU results.
Marking. Units can only be marked as Screening in the Formation's Initial Activation, never in a Second Activation, but a Screen marker can be removed in either Activation if desired.
At the start of an Initial Activation of the unit's Formation, place (or remove) a Screen marker onto the desired Recon unit. The unit must be on its Move Side to acquire the marker.
The Screening Unit's Functioning. The unit marked as Screen…
- …can Move, establish OBJ markers, and spot Barrages normally,
- …cannot Attack, Assist, or Initiate Engagements,
- …also cannot jump HQs or Combat Trains. They have no effect on any part of an MSR (this includes the Screening unit itself, its ZOC, and its Screen Zone).
Additionally, a unit cannot end any movement or Retreat STACKED with any other unit (including one also marked as Screen). Should this happen, remove the Screen marker from all involved units.
Note that since they are unable to Initiate an Engagement, they must STOP if in a situation requiring a Stopping Engagement.
Effects on the Enemy: Combat. While Screening units cannot initiate Engagements, they can be fired upon using the Engagement Table. Convert any Both Loss result into Target must Retreat, no Losses instead.
Units marked as Screening cannot be Attacked on the Combat Table or by Barrage. Instead, Screening units automatically retreat 3 hexes if any enemy unit moving using Deployed Leg MA enters their hex. Ignore the Screen unit's ZOC effects if a Leg MA unit is moving into its hex (that is they do not get stuck in the hex adjacent to the unit and are unable to enter the hex).
Effects on the Enemy: Movement. Screening units retain their normal ZOCs, but also have a Screen Zone that includes the normal ZOC hexes as well as all others up to a number of hexes away from the unit (inclusive). Ignore enemy units and terrain for purposes of the Screen Zone. See list below for the applicable Screen Zone radius by BCS title.
Effects of the Screen Zone: Enemy units moving on their Move Side pay +1 MP per Screen Zone hex entered. There is no effect at all on enemy units moving using their Deployed side or on any friendly unit. Note: Tac or Truck MA Infantry units cannot enter the hex occupied by a Recon Screen unit.
Screen Zone Radius: Normally: 3 hexes, but 2 hexes in Last Blitzkrieg
Restrictions on Screening Units. Screening units cannot jump HQs or Combat Trains. They have no effect on any part of an MSR (this includes the Screening unit itself, its ZOC, and its Screen Zone).
Design Note: In LB, NO US unit (not even the 14 Cav Grp) sets up on 16 Dec with a Screen marker. In all non-16 Dec start scenarios in that game, Recon units are allowed to set up with a Screen marker, if the player chooses. Since LB is the only one of the Series Games to not have its own Screen markers, if used there you will need to borrow some from another game or use a substitute.
9. Activation Smoothing
In some scenarios or even at times in one, one side or the other will have more formations to Activate. Under the standard BCS rules the Activation of all these "extra" formations occur after the side with the smaller number of formations has completed his Activations. Under this Optional Rule these "extra" Activations happen at random times during the turn.
For the explanation of this rule I'll call the two sides Side-A and Side-B. Side-A will be the side with more Formations to Activate.
At the start of each turn, put a number of chits into a cup equal to the number of Formations in Side-B. The chits will be numbered 1 or 2, with the number of chits with a 2 equal to the difference in number of Formations between the two sides. The remainder will have a 1 on them.
For example: Say Side-A has 8 formations and Side-B has 5 formations. 5 chits will be put in the cup. Three of them will have a 2 on them. Two of them will have a 1 on them.
Each time during the turn after Side-A has completed a Formation's Activation, he draws one chit. If the chit is a 1, Side-B does the next activation. If the chit drawn is a 2, Side-A does the Activation of a second Formation right away. He does not draw a chit after this second Formation's Activation, instead play goes directly to Side-B.
Do not count any Formations that begin the Scenario "Done" in the available number of Formations used to determine the chits above.
A BCS Primer
Tips For Playing The Battalion Combat Series Well
By Doug Fitch
The Battalion Combat Series (BCS) is a fantastic design from the creative genius of Dean Essig. However, the radical design of the system means that nothing you have previously encountered in your gaming career can fully prepare you for it. While the game mechanics are quite elegant, previous gaming experience can hinder rather than help your attempt to learn the system. You must throw out everything you know about playing operational level wargames when you come to BCS. To quote a certain Jedi Master, "You must unlearn what you have learned." Combined with some new terminology, this leads to a bit of a steep learning curve for the game.
The most challenging aspect of BCS, though, is not learning how to play the game, but learning how to play the game well. The purpose of this article is not to help you learn the rules of the game. There are many excellent resources for that already available. This article aims to go a step beyond the mechanics and focus on how to apply those mechanics in the strange, new world of BCS. We will discuss some of the key principles I have learned (sometimes the hard way) through my experience with the system.
Forest For The Trees
Focusing on your individual battalions as discrete units causes players more grief than just about anything else in BCS. The vast majority of wargames published to date allow players to move their pieces across the board without penalty, freely intermixing them with other units from different higher level organizations. Real world considerations like unit boundaries and lines of communication are not a factor in those games. Frequently, battalions and regiments from various divisions end up stacked with one another without penalty. Or divisions jump from corps to corps on a weekly or daily basis. By so doing, those games have trained players to maximize the movement and attack abilities of each individual piece. One is not only allowed, but encouraged, to shuffle his units back and forth to bring maximum firepower in every attack. Do this in BCS and you will lose.
Trained by years of playing other games, most players' initial reaction to BCS is to focus on what they can do with each of their individual battalions. They lose sight of the forest for the trees. One of the critical skills to master for success in the BCS is to "think big". By that, I mean that you cannot think in terms of the individual pieces on the map. You must think in terms of formations. When you look at the map, you should not see 10 or 12 units, but one formation (usually a division, occasionally smaller). The individual pieces are merely parts of the whole.
If you are looking at a BCS map and thinking, "I can move my tank battalion from this hex to attack that hex," you are going to set yourself up for failure. Instead, your mindset needs to be, "I can send 3rd Armored Division to capture that crossroads/village/bridge." But since the entire division cannot fit in that village, you need to think about not only the battalion or two you are going to send to capture the village, but where you are going to put the rest of the division; as well as how that division's location (described in the rules by the scientific term "blob") is going to interact with the other divisions in your force. In BCS, you move formations around the map, you do not simply push pieces. The command and logistical system BCS uses will punish you severely for not thinking in terms of formations.
The Objective marker mechanic reinforces this. Other games you have played basically allowed you to attack everywhere, with all of your units, every turn. And if you did not, you felt as though you were not optimizing your forces. In BCS, all of your attacks and artillery barrages must occur within the "Objective Zone" that exists out to two hexes from an Objective marker. Newbies view this as a restriction on their ability to attack. Experienced players find that this mechanic focuses their formation's activities.
When you place those Objective markers on the map, you are making a conscious decision about your formation's priority for this activation. Instead of your battalions careening about the map attacking everywhere and nowhere, you now have a strong visual reminder of the task you have assigned this formation. This should not only impact the movement of the individual battalions you have selected for the actual attack and capture of the objective, but also every other battalion in the formation as you consider how best to secure and consolidate your recently won objective. BCS formations do not have the strength to successfully attack along more than one, maybe two, avenues in any given activation.
In addition to dissipation of force, spreading your formation to the winds has more (and often worse) problems, which will be addressed below.
If there is one thing you can master that will improve your BCS play the most, it is to "THINK BIG". Do not let the fleeting opportunity that an individual battalion's position might offer distract you from the situation of the formation as a whole. Stepping back and seeing the big picture in terms of formations will help you get more out of each of your individual battalions over the course of a game.
"A Tidy Battlefield"
Field Marshal Montgomery's predilection for a tidy battlefield is something for which every BCS player should strive. The SNAFU Table punishes players whose sloppy play results in battalions from multiple formations getting intermingled. This can have an ongoing and detrimental effect on the ability of your army to do…anything. Just moving a unit temporarily through another formation's "simple blob" results in BOTH formations being marked Coordinated and suffering a -1 DRM on their next SNAFU roll. If you allow those units to begin their activation with that unit still inside the other formation's blob, then you also accrue an additional -1 DRM for Mixed Formations. For formations like the US early in Last Blitzkrieg, that additional -2 DRM usually eliminates ANY possibility of getting a Pass result on your SNAFU check. And it makes even a Partial result very iffy.
Again, the best way to avoid messy situations on the map is to think in terms of formations. But you need to not just be aware of how the formation will fit into the frontline, but also where its logistical tail will be located. The SNAFU Table will also penalize you for not keeping a tidy battlefield behind the front. Ideally, you will be able to assign a road to a specific formation. Once you've given the road to a formation, avoid the temptation to allow other formations to use that same road unless it's an emergency.
Obviously, there will be times when there simply aren't enough roads to go around. The Germans face this at the start of their offensive in Last Blitzkrieg. However, once they cross the Our River and are able to do some broken field running, there are usually enough roads to allow a couple of panzer divisions to operate side by side. And if you can manage to pull that off, it is a beautiful thing to behold.
Because the Crossing the Streams DRM only applies from the HQ to the Combat Trains, keeping your logistical tail as short as possible will also help you avoid a tangled mess in your rear. It's often better to move your Trains (and take the -1 for Ghost Trains) than to leave them far behind your HQ. Crossing the Streams affects every formation whose Main Supply Routes (MSRs) are crossed, while Ghost Trains only affects the formation in question.
If you strive to maintain a tidy battlefield for your own forces, your goal should be to make your opponent's army as messy as possible. Retreating units into a neighboring formation is a great way to Coordinate both of them (and likely leave them Mixed). Similarly, cutting the number of roads available for his Trains forces them all on to the remaining few, thus saddling him with yet another -1 for Crossing the Streams.
Inflicting negative DRM's on your opponent's formations has a snowball effect. Having a -6 or -8 SNAFU DRM (I've seen it) eliminates any possibility of a Pass result, and makes it very likely he suffers a Failure. This prevents him from reacting at all to the initial dislocation, allowing your units to continue to run amok and worsen his formation's position. When you have your opponent down, don't stop kicking him.
Conversely, if you find the enemy has pushed aside one of your formations and that formation is now mixed up with one or more of your other formations, you may well be better off cutting your losses and giving up ground in order to unscramble your units ASAP. The longer you are under those negative DRM's from being Mixed, the harder it will be for you to do anything about it. In many cases, you are better off withdrawing, reorganizing, and counterattacking to retake the lost positions than trying to hold on to a crumbling front.
A less dramatic situation may be one where you do not move some battalions to their full extent because it would result in either Coordination for the two formations involved, or even being Mixed. Avoid the temptation to inflict a step loss or two on the enemy in exchange for Coordinating and Mixing your formations. It simply is not worth the cost.
Along the same lines is the relief operation. BCS makes it very tricky to relieve a frontline formation with a different formation. To avoid Coordination and Mixing, you need to move the formation to be relieved out of its position before you move in the relieving formation. Rarely will the enemy allow you to do this unmolested. You could easily find yourself fighting to retake ground you just voluntarily gave up. Your other option is to move the relieving force in on top of the original formation. But this will give you Coordination and Mixed DRM's on your SNAFU rolls, making it much harder to un-mix the formations by getting the original force to activate and move out. The best course of action is to try to keep some reserve battalions within your formation, allowing some units to rest and receive replacements while others hold the frontline. This will give your formations a much longer shelf life when in combat. But even this is hard to accomplish most of the time.
Never Send a Tank To Do an Infantyman's Job
A tank has a much bigger gun than an infantryman, and it moves a lot faster, too (okay, Matildas excepted). So I should just use tanks whenever I can for everything, right? Not in BCS. Most games treat armor like it's nothing more than stronger, faster infantry. But BCS is not most games. The problem is, armor is NOT the same as infantry, and it doesn't fight like infantry. The BCS mechanics do an excellent job of highlighting the differences between the two combat arms.
Any unit that has an Armor Value (AV) qualifies as armor (at least for purposes of this discussion). These units are given different capabilities than the Assault Capable units in the game (indicated by the white arrow on the counter). They use a different Combat Table entirely (the Engagement Table & Barrage Table, depending on target type). The fact that different combat tables exist should be a huge red flag that these units will not behave the same as infantry, and should not be thought of in the conventional wargame way.
A common mistake I see with new players is using armor units to hold important real estate. Their previous years' experience of armor automatically being the strongest unit in the game has conditioned them to continue that tactic in BCS. This often leads to unfortunate results for the player, who is expecting their mighty armor battalion to hold off all attackers. The problem lies in the nature of armor vs. armor engagements. When a defending armor unit is attacked by another armor unit, you resolve the attack on the Engagement Table. A modified 9+ causes a defender step loss & retreat. For the US in Last Blitzkrieg, the German armor consistently has a qualitative advantage that results in a +2 or +3 DRM to the Engagement roll. So suddenly that big, strong armor battalion will be chased out of its hex by a 6 or 7 on the roll of the dice, which is very doable. Armor does not hold ground well. That is as true in real life as it is in BCS. Sure, there are times when you will have no other option, but do not expect your armor units to hold their ground for any length of time.
Another common preconception I have seen is players stacking an armor battalion with an infantry type unit (to give it some 'armor support'). While it's true that an attack on the Combat Table will see a +1 DRM for the defense due to 2 units in the stack, your opponent is not likely to humor you by assaulting the hex. Instead, he'll drive up his own armor and conduct an Engagement. And since the rules require ALL units in a hex to retreat if one of them suffers a Retreat result, by placing an armor battalion in the hex you desperately want to hold, you have actually made it far easier to take. If you want to give your infantry units support, then use Support. That's what it's there for. Save your armor units for counterattacks to retake the objective if the enemy pushes you out.
But armor is not just vulnerable on the Engagement Table. It is also more vulnerable on the Combat Table. Infantry can assault that nice, impervious armor unit just as easily as they can another infantry unit or some armored cars. But since AV units are never eligible for Support, unless your armor battalion is a Dual unit you are giving up the +1 DRM for Supported/Dual. And even a +1 could make a difference in an attack.
Speaking of Dual, I'd like to spend a moment discussing them. The late war US armor divisions are chock full of them. Dual units combine the best AND the worst of assault and AV type units. Among the benefits of Dual units is that they carry their own support with them, and it CANNOT be dropped. This effectively gives them an AR one higher than what is printed on their counter whenever they face enemy infantry. They can drop enemy support by themselves, or (if that support has been dropped), use a Fire Event to kill a step before attacking on the Combat Table. This means that over the course of a game, their attacks are going to bleed the enemy more than non-Dual units. But while Dual units bring along all the benefits of being AV, they also bring along the problems. When facing superior enemy armor, do not expect your Dual units to hold ground very long. All this means that you should view your Dual units as offensive units, and use them defensively only when you are absolutely desperate.
Learning the differences between infantry and armor units in BCS is critical to success. Armor should be attacking, whether on the offense or as part of a defensive counterattack. Let the infantry hold the ground. By sending the right units for the task at hand, you stand a better chance of achieving your objectives.
IGO-UGO, Not IW8-UGO
BCS uses an alternating activation mechanic during the turn. I have seen much discussion about players trying to game this mechanic to their advantage. This is especially true when one side has several more formations in play than the other, like the start of the Last Blitzkrieg campaign. The major complaint being that a player can wait to activate certain formations until his opponent is forced to activate all his formations on a certain sector of the front. Thus, the player has a free hand for his activations without interference from any opposing formations.
While this may be true in certain situations, waiting often has as big a downside as not waiting. By not activating your formations in a certain area, you hand the initiative on that sector to your opponent. And in BCS, he who moves first often has an advantage, one that outweighs waiting out your opponent.
There are legitimate reasons for waiting to activate certain formations. For example, you need other friendly formations to move out of the way before you can activate to avoid mixing your formations (see "A TIDY BATTLEFIELD" above). But playing games with the activation sequence for no other reason than to exhaust your opponent's activations on one area of the front can have a lot of unintended (and negative) consequences for you. For example, the formation you are hoping to trap and destroy may well activate and just move away, robbing you of the chance to inflict any serious harm on it. Worse yet, the enemy may launch an unexpected attack which disrupts your formations, and could even saddle you with some negative SNAFU DRM's preventing your formation from even getting out of the starting blocks this turn.
Furthermore, the ability of the side with an advantage in number of formations to wait is a subtle way of portraying the initiative such a side has. For example, the Germans greatly outnumber the US at the beginning of Last Blitzkrieg and the initiative is solidly with them for the first few days (even week) of the campaign. Allowing them to "manage" their activation sequence reflects their ability to dictate the tempo of the battle early on. As the campaign progresses and the numbers switch to favor the US, we see the initiative also move in their direction. It's just one more example of the elegance and subtleties with which BCS is loaded.
"Preppers" (or Why Prepared Defense Isn't a Magic Bullet)
Prepared Defense (PD) is probably the game's most overused mechanic. Many players see the +1 DRM it provides to defenders on the Combat Table, combined with the ability to ignore a Situational Retreat (in exchange for a step loss) and think PD is a must have. What they do not consider are all of PD's down sides, of which there are plenty.
For starters, the best SNAFU result possible while in PD is a Partial. This halves unit MA and gives you only one Objective marker, thus eliminating any chance at the "Double Tap" DRM on your attacks. Your HQ cannot move while in PD. Also, only units within six hexes of your HQ are eligible for the PD benefits. PD halves (rounding down) your artillery points available, which really hurts your plans to attrit the bad guys with your artillery as you sit in your defenses. You cannot recover fatigue while in PD. If you make an attack on the Combat Table you receive a -1 DRM. When you consider that you are also ineligible for the Double Tap +1, this equates to a -2 on the Combat Table before anything else is even considered. I don't know about you, but I hate giving away 2 pips on my dice in any attack.
Also the Orders Optional rule makes formations in PD ineligible for a second activation in a turn.
Everybody loves to have their cake and eat it, too. And I think this may be one reason why folks seem so enamored with PD. Unfortunately for them (but fortunately for historical verisimilitude) PD in BCS is a tradeoff. It is a nice way of showing the posture of your formation. Either your formation is mobile or it is not. PD hurts a mobile (even a moderately mobile) formation far more than it helps one.
All of which is not to say that PD is never useful. If your formation is where you want it to be, and you are willing to trade casualties to hold terrain, then PD is warranted. But the trend among folks I have played is to enter PD as a matter of course. It is their default position. PD doesn't even provide any better protection from Barrages than regular terrain. You should think hard about entering PD as a protection for your units when just locating them in terrain will serve you just as well without any of the PD downsides.
Do not underestimate the consequences of PD on the Combat Table (note that it has absolutely no effect on the Engagement Table). Sure, you ignore those Situational Retreat results, but it costs you 1 step to do so. If you were not in PD, you would have to retreat. But the retreat is only three hexes and you suffer no losses. Meanwhile, there's a chance that the enemy suffers a step loss while you do not. You are trading ground for time, and perhaps even getting ahead in the attritional battle, by not going into PD.
Again, there is definitely a time and place for PD, but it should be integrated into your overall plan and not merely a kneejerk reaction every time you go to activate a formation. And given the lack of benefits of PD on the Engagement Table, putting armored formations into PD requires even more careful consideration.
"Kicking Puppies" (Jumping HQ'S & Trains)
BCS places an emphasis on logistics, and that should guide your strategy as well. It is extremely difficult, costly, and time consuming to destroy a formation by attacking all of its combat units to death. The highest number of casualties you can inflict on a defender in a given attack is two (three, given certain retreat situations). Your typical infantry battalion would need to be attacked at least three times to eliminate it through combat alone. Given the mechanics of the Objective Zone, this means it will take at least a few turns barring the commitment of several armor units to use their Attack by Fire capability on it. Rarely have I seen the situation where a player has two or three spare armor battalions sitting around with nothing better to do than barrage a single infantry battalion.
No, in BCS the key to beating the enemy is disrupting his command and logistics. This is done by jumping his HQ's and Trains. Jumping the HQ gives the formation Coordination, drops its PD, and Ghosts its Trains. That's at least a cumulative -2 SNAFU DRM on its next activation. Jumping his Trains will usually put them beyond Optimal Distance, as well as ghosting them, which robs the formation of a +1 SNAFU DRM and inflicting a -1 DRM. Another possible net -2 DRM (-3 if you do both). There is also a chance that by jumping his Trains you could cut his MSR. If so, his Trains will not be in a Legal Hex thus imposing a -3 SNAFU DRM on the formation. And if he cannot move his Trains to a Legal Hex in the ensuing activation, the Trains will come off the map, to be followed next activation by placement of a MSR Blocked marker.
Those MSR Blocked markers really up the ante. First, all units in the formation receive a negative DRM on the Combat Table. Then, in the Isolation Phase, if any units are out of Command Radius or have no Safe Path, they will take an additional step loss.
Jumping HQ's and Trains hastens the snowball effect mentioned earlier. By piling up negative SNAFU DRM's on the enemy, it makes it much harder for him to react to your attacks and to salvage his position. Once you've reached a point where you have started inflicting negative SNAFU DRM's on the enemy, do everything you can to continue doing so in future turns until the formation is sufficiently isolated as to literally wither away.
An abundance of roads can make cutting a formation's MSR difficult. It may require a substantial commitment of your forces and a few turns to accomplish, but if you can bag a number of enemy formations, your efforts will be handsomely rewarded. Remember, removing the last combat unit of a formation from the map will frequently permanently remove the entire formation from the game (unless the formation has some straggler units showing up on the OOA). In a long game like Last Blitzkrieg, the absence of an entire division or two could be decisive in the late game struggle. And the best way to remove large chunks of a formation in the same turn is to starve them off the map, not attack them.
Separating Units From HQ's
While cutting MSR's will accelerate the demise of a formation, to truly eliminate units through Isolation you need to separate them from their HQ. Isolation effects are only implemented if a unit is either out of Command Radius or has no Safe Path (or both).
Removing a Safe Path can often easily be accomplished by "ZOCing in" the unit in question. However, this has repercussions when it comes to retreats due to combat. Without a Safe Path, a unit will not retreat, but instead take a step loss. If you really need that hex, do NOT "ZOC in" the defender. You will regret the time (and often steps) lost attacking the unit turn after turn as the Isolation effects slowly take effect.
The better way to inflict Isolation effects is to separate the combat units from their HQ. This is accomplished by jumping the HQ (usually repeatedly) to force it to retreat up its MSR and away from its units.
Circling back to the first issue discussed (thinking in terms of formations), you should develop your attack plans with an eye to dismembering the formation, ideally decapitating its head (the HQ).
The Complete Command Disruption rule provides another incentive to pursue the goal of separating HQ's from their formations. If none of a formation's combat units is in Command Radius or has a Safe Path, then the entire formation is immediately and permanently removed from the game. No waiting on Isolation effects to whittle them down, just a sudden, total, and complete elimination of an enemy formation.
It's a general rule that designers build incentives for various behaviors into their designs. I cannot think of a bigger incentive than the immediate removal of an entire formation. And that means you need to make separating HQ's from their units a priority.
The Indirect Approach
(Apologies to Capt. Liddell Hart)
With the introduction of the Hard & Soft Jump rule, the comments about jumping your opponent's HQ's and CT's need a little modification. While the bulk of the above sections remains valid, the manner in which you go about achieving the goals must change.
Being able to blast a hole in the enemy's line and then launching your mobile units like a heat seeking missile directly at his vulnerable HQ and CT is an ability of which historical commanders could only dream. The Hard & Soft Jump rule is designed to address the player's omniscient view of the battlefield given by the limitations of the medium (in case you missed it, this is a recurring theme in Dean Essig game designs over the years). Essentially, now when one of your units enters a hex containing an enemy HQ or CT, there is a 2 in 3 chance your opponent's assets are not there. In other words, your G-2's best guess about the enemy HQ location was wrong.
This has some significant ramifications for how you go about disrupting your opponent's forces. If you make a beeline for the HQ counter and enter the hex only to find that it is empty instead, the opponent gets to reposition the HQ (or CT) to another Legal Hex without penalty. I have seen many situations where this actually helped the defender more than the attacker. It can be quite frustrating to put your opponent's Formation in an untenable position, and about to administer the coup de grace by jumping his HQ, only to see the HQ disappear and appear in another hex which undoes all the work you just accomplished (often at a price). Do not despair, though. You are not condemned by this new rule to play an endless game of Whack-A-Mole. You need merely adjust your thinking.
Instead of thinking about jumping the enemy's HQ/CT, you should be thinking about cutting his MSR's. You can achieve much of the same effects as physically jumping an HQ by instead just cutting the MSR. Recall that a legal MSR runs from a supply source, through a CT to an HQ. By placing a unit, ZOC, or engagement zone, in any hex of the enemy's MSR, the CT is no longer in a "Legal Hex". This will require the MSR to flip to its Ghost side and move. If the CT is not is a Legal Hex, you've saddled your opponent's Formation with a -3 SNAFU DRM. Even just having the CT in Ghost mode gives a -1 DRM and you have likely eliminated the +1 Optimal Distance DRM, too. But it gets even better.
Rather than trying to overrun the HQ's hex, you should instead aim to surround it, or at least cut off all viable routes that could be used for an MSR. With his MSR cut, your opponent now has a choice to make. He can leave his HQ in place and accept the penalties (which are severe) of having an MSR Blocked marker on his Formation, or he can voluntarily displace his HQ. This causes the same effects as if you had overrun the unit (loss of PD and marked Coordinated). Remember that it is impossible to permanently cut an opponent's MSR because of his ability to displace his HQ/CT as far as necessary to reestablish it. However, by forcing his HQ to displace farther to the rear, you are also achieving your prime objective of separating his HQ from his line units.
Instead of a dagger thrust at your opponent's HQ hex, you should be looking to cast a wide net across his potential MSR routes. The deeper and wider the net, the more harm you will do your opponent by forcing his HQ that much farther from his combat units. Instead of the direct approach of overrunning the HQ itself, you will be more assured of the results you want by taking the indirect approach of cutting MSR's and leaving the HQ's hex alone.
A Hard Day's Night
It's easy to forget that those little cardboard counters we push across the map represent flesh and blood soldiers. Soldiers that get tired and need rest. BCS brings this reality to you with its Fatigue mechanic. Fatigue affects two aspects of the game: as a SNAFU DRM and a formation's chance to get a second activation.
Given that the SNAFU Table has the greatest single impact on your army's effectiveness, managing negative DRM's when you roll on it is vital to success. While Fatigue accretion depends on the dice, it is not entirely random. You do have the ability to influence the rate at which your formations acquire Fatigue. The two activities in the game that do not carry any risk of increasing Fatigue are movement and defending. If you want to do anything else, you will have to evaluate the potential Fatigue impact.
Attacking on the Combat Table carries the biggest Fatigue risk, with a 50% chance of picking up a Fatigue level. Any Fatigue that your formation does accrue will require an entire activation (or game-turn, if using the highly recommended Orders optional) to get rid of. In a short game like Baptism By Fire, that's a considerable portion of the game that your formation will be useless. Given that, you should not be blindly attacking everything you can, just because you can. A vulnerable enemy unit may not be worth the hit to your future SNAFU rolls. Instead of attacking it, can you surround it, or force it out of its position through maneuver (remember, movement does not increase your Fatigue)?
The Engagement Table and Attacks by Fire only increase your Fatigue on a 2 or less. So your armor units can wreak more havoc on the enemy without Fatiguing as quickly. But if they are facing enemy infantry, they suddenly become a less attractive option for grinding down the bad guys. Because armor attacks infantry with an Attack by Fire on the Barrage Table, the end result is the same thing as an infantry unit's barrage, but with twice the chance of increasing your Fatigue. If killing enemy steps tops your priority list, barraging is the most cost-effective option in terms of Fatigue. Only a 1 in 6 will increase your Fatigue, regardless of the number of barrage attacks you make in an activation.
That said, don't get too trigger happy. I have seen players make one lone barrage attack in an activation, only to see their Fatigue increase when they roll that 1 on the Fatigue Check. So, to kill a single enemy step (and sometimes none at all) they have saddled their formation with an additional -1 DRM to every future SNAFU roll they will make. Yet another example of the recurring theme in BCS of, "Just because you CAN do something, doesn't mean you SHOULD do something."
Since any amount of qualifying activity still nets only one roll for Fatigue, if you make an attack (thereby giving yourself a 50-50 chance of picking up Fatigue) maximize your offensive efforts in the same activation. This is a situation where you definitely want to shoot it if you have it. The lone barrage attack won't hurt you because the attack you made earlier in the activation has already inflicted a 3 or less Fatigue check on you. Likewise, make sure you can get as many attacks on the Combat Table for a single Fatigue check as you can.
Fatigue management can make or break your efforts in the late game portion of any BCS scenario. By having a solid plan, not getting distracted by small, fleeting opportunities, and staying focused you stand a much better chance of managing your army's Fatigue and giving yourself a decided edge over an opponent who ignores his Fatigue until it's too late.
Summary
The above points hardly comprise an exhaustive list, but they will hopefully give you a framework for approaching BCS in a successful manner.
BCS oozes with subtleties. Understanding (and eventually mastering) them gives you the keys to enjoying this rich system. The beautiful design and hours of great gaming justify the time and effort required to adequately learn the Battalion Combat Series. An exciting line up of future games in the series will allow players to explore operations on all fronts of the Second World War in new and interesting ways, and I hate to see anyone miss out on what is the best game design to hit the industry in the last few decades.
May your dice stay hot!
Red, White, and Black
A Guide to Armor Values in the Battalion Combat Series
By Carl Fung
At its heart, the Battalion Combat Series (BCS) is not a tank vs. tank simulation and doesn't do the "rivet counting" of tank characteristics that low-level tactical games go to. Yet there is enough in an AV unit's counter information and the Unit Capabilities Chart to represent different armored fighting vehicles (AFVs) and anti-tank weaponry well to simulate engagements between different armor and anti-armor platforms at battalion level.
This article expands on the AV specific unit type and classifications in 1.2c. As tank units would often be composed of different tank models or types, AV ratings for units are selected based on majority of type, most powerful, or a combination of both. Hence the armor examples are the representative types found in a unit counter, not accounting for minor types in the unit.
Note that as BCS doesn't have the concept of modes like OCS, to describe the two sides the unit, I will use "Deployed" for the higher AV/lower MA side and "Move" for the lower AV/higher MA side. AV numbers are provided for the deployed side and ranges given for the 1 km/hex map scale.
Red AV: This is a catchall for offensively minded armor. They can do all the Fire Events an AV could do: Engage, Shock Attack, Attack by Fire, and (if properly classed) Recon. Red AV as a concentrated unit can engage other AV units (i.e. tank on tank combat). It can also conduct Shock Attack (basically overrunning infantry) and Attacks by Fire (i.e. firing its weapons at soft targets from a distance). When Red AV disperses into support, it can help the supported unit to attack or defend with a DRM.
There are some subdivisions of Red AV based on additional characteristics of the unit:
Hard Red AV: These are your typical tanks—cannon in a turret and full crew protection. Hard Red AV uses your basic tank tactics. It can be concentrated to defeat other tanks or Shock Attack or Attack by Fire on soft targets. In support, they help the infantry attack and help it defend.
Non-Hard Red AV: These represent thin-skinned armor, usually up-gunned armored cars (mounting 20mm or 37mm guns), but without the armor protection of a tank. Unlike Hard Red AV, these units do not get a DRM in a Shock Attack.
Breakthrough AV (Hard Red): These are typically heavy tanks designed to be at the forefront to bust through enemy lines and field fortifications. They can also represent assault guns with large low-velocity guns used for direct assault on tough enemy positions. They would have a large cannon and thick armor, but would often be slower as a result of their bulk and weight. Breakthrough AV gets a better DRM in a Shock Attack than just being a Hard Red AV as they are better designed for the task.
Light AV (White AV): These are Machine Gun mounted armor (tankettes or early war armored cars) as well as some unique vehicles like Flamethrower Tanks. The difference between Red AV and Light AV when not in support is that it cannot engage enemy AV, but can be the target of an engagement owing to its light anti-tank weaponry. Remember that Light AV in support acts as Limited AV (usable in defense, but not in attack). Light AV can only be engaged as a target in an engagement, but it can Shock Attack and conduct Attack by Fire. In short, Light AV can pretend to be a tank, but it can't do anything against a tank with a cannon or even against another MG-only tankette. They can take out soft targets without a problem.
Limited AV (Outlined AV): This armor has a limiting factor or AT Guns. The limiting factors include lack of a turret or exposed crew with lessened armor and/or doctrinal limitations on use. These include most tank destroyers and assault guns. Limited AV is basically like the Red AV, but its main hiccup is not being able to engage other AV as well as real tanks. So those turretless assault guns, open topped, and thinly armored American Tank Destroyers are at a disadvantage going toe to toe against turreted tanks that can maneuver around them. They can provide support in defense, but not on the attack. Note that depending on doctrine and usage, some limited AV on the move side can flip to a Red AV when deployed or in support. The Germans were notorious for using long barreled 75mm StuG's and Jagdpanzers to assist infantry on the assault. This capability warrants these limited AV to give a +1 DRM to infantry that it supports in the attack.
Standoff AV (Black AV): This is Limited AV armor or AT Guns that have large cannons with good range that were historically used to engage enemy AV from a safe or long distance. As a concentrated unit, Standoff AV behaves like a Red AV. When it goes into support, however, it cannot support an attack, but rather is allowed to engage and attack by fire while in support (up to the number of steps and on the support line on the Engagement Table). Standoff AV just by unit capabilities shows why the 88mm was feared. It had the range and punch that set it apart from other standard Anti-tank guns. Note that only a handful of anti-tank guns would get the Standoff capability and I've been asked why the M36 with its 90mm is not also Standoff. The simple answer is doctrine and usage. While the 90mm had almost the same punch as the 88mm, it was not used tactically the way the Germans used their 88mm.
Dual Unit: Self-contained battalion-sized units that have armor and infantry working closely together. Dual are almost exclusively Red AV plus an assault arrow. Dual units combines the best of Red AV as well as assault units by allowing them the whole gamut to do a Regular Attack on the Combat Table, Engagements, Shock Attacks, and Attacks by Fire. Dual cannot go into support since they are basically supporting themselves. Dual units as I mention were self-contained combined arms units.
Support: A state which represents a unit dispersing its weapons among a Formation's line units. Most AV units need to be marked as being in support using a marker (Red AV Support, Limited AV Support, Standoff AV Support) if the game specific rules allow, while other units have their counter backs as support meaning they do not have a Deployed side. Yet others are Support Only which does not allow them to form as a concentrated unit that can be moved around the board itself. One pet peeve of mine are the American independent Tank and Tank Destroyer battalions that were assigned to Infantry Division as depicted in some games. I will see these be used in an ahistoric manner as a concentrated roving attack tank battalion. Instead, support only keeps the historic dispersion of these assets preventing them from being misused. Compare this to units that can concentrate or disperse to support, such as tank battalions in armor divisions, these are true to their role that could be kept whole as an armored fist or dispersed among the mechanized infantry to help support them in the attack.
Examples of different types of AV with their deployed side AV, range at 1km/hex scale, deployed/move Movement Allowance, game(s) they are featured, and brief note of model, gun, or comment for each.
The game abbreviations used are: LB (Last Blitzkrieg), BbF (Baptism by Fire), BC (Brazen Chariots), PLS (Panzers' Last Stand).
-
Panzer III (short): 2 AV, Range 1, 4/14 MA (BC)—Ausf. G, H, and J with 50mm L/42
-
Panzer III (long): 3 AV, Range 1, 4/14 MA (BbF)—Ausf. J/1, L, and M with 50mm L/60
-
Panzer IV (long): 4 AV, Range 2, 4/14 MA (LB, PLS)—Ausf. F/2 and G (75mm L/43) and Ausf. H and J (75mm L/48)
-
Panzer V Panther: 5 AV, Range 3, 4/16 MA (LB, PLS)—75mm L/70
-
M3 and M5 Stuart: 2 AV, Range 1, 6/16 MA (BC, LB as LT with armor oval)—37mm L/53.5
-
M3 Grant/Lee: 3 AV, Range 1, 4/14 MA (BbF)—75mm L/40 and 37mm L/53.5
-
M4/75 Sherman: 3 AV, Range 2, 5/14 MA (BbF, LB, PLS)—Typical US Medium Tank Battalion with majority 75mm L/40
-
M4/76 Sherman: 4 AV, Range 2, 5/14 MA (LB, PLS)—Majority 76mm L/50 M4 tanks
-
Sherman Firefly: 4 AV, Range 2, 5/14 MA (LB)—1:4 ratio 17 pdr to 75mm Shermans in British Armor Units
-
Cruiser Mk I, II, IV (A9, A10, A13): 2 AV, Range 1, 3/12 MA (BC)—Cruiser type Mix (some fast, some slow, all poor) (2 pdr)
-
Crusader I (A15): 2 AV, Range 1, 4/14 MA (BC)—2 pdr
-
Matilda II (A12): 3 AV, Range 1, 2/10 MA (BC as Mat with armor oval)—Not Breakthrough (poor gun (2 pdr) and doctrine)
-
Valentine II: 3 AV, Range 1, 3/10 MA (BC as Val with armor oval)—Not Breakthrough (poor gun (2 pdr) and doctrine)
Counter-symbol key (the printed key is a graphic; the labels it carries are): Hard Red AV; Non-Hard Red AV; Breakthrough Hard Red AV; Light AV; Breakthrough; Limited AV; Stand Off AV.
Charts & Tables
The charts are reproduced as text. Their colour coding and icon artwork are not reproduced.
Activation Phase — Sequence of Play (3.2)
- a) Initial Activation. Identify the Formation to activate. Flip the HQ to its Used side (the one with the White Stripe). If the Formation HQ started the turn on its Used side, skip to step (h) to attempt to conduct a Second Activation, instead.
- b) Preparation. Declare and execute a Recovery Activation (10.4c), if desired. OR Deal with MSR Blocked issues (10.2b), Prepared Defense (4.5), and Mixed Formations (10.1e), as needed.
- c) SNAFU. Make a die roll on the SNAFU Table to determine the Formation's SNAFU Result (10.1). Remove the Formation's Coordination marker after rolling, unless 10.1e applies. Failure Flip decision. (10.4c)
- d) Initial Actions. Place OBJ markers, based on their SNAFU Result availability (4.3b).
- e) Activities. Conduct the Formation's Stack Activities. Non-Finished Stacks conduct their choice of Movements, Engagements, Regular Attacks, Shock Attacks, Barrages, and Attacks by Fire. Move Combat Trains, flipping to or from Ghost side as needed.
- f) Clean Up. Remove all OBJ, Traffic Stopped, and Temporary Support Dropped markers. Remove the Combat Trains if they are not Legal. If they are Legal, but not at Optimal Distance (10.3c), then ensure they are on their Ghost side.
- g) Fatigue & Isolation Effects. If Fatigue Increase is possible (10.4), roll to see if it occurs. Also, apply any Isolation Effects (10.5).
- h) Second Activation. Orient the HQ as "Done" and if the player desires to attempt a Second Activation (3.5), roll to see if one occurs. If it does, start the sequence with step (b). If the roll fails or the player chooses to forego a Second Activation, play passes to the next player.
Fatigue (10.4) — (chart box)
- Any combat OBJ markers placed: Increase Fatigue on a roll of 1.
- Engagement table or attack by fires used: Increase Fatigue on a roll of 1-2.
- Combat Table (Regular or Shock) used: Increase Fatigue on a roll of 1-3.
Isolation (10.5) — (chart box)
- Case 1: …with no Safe Path OR is Out of Command Radius: Destroy one step per unit.
- Case 2: …with no Safe Path AND is Out of Command Radius: Destroy two steps per unit.
- Additionally, for both cases: If the Formation is marked MSR Blocked Level 2: Destroy one step per unit.
- Complete Command Disruption: If ALL a Formation's units (ignoring the HQ and Combat Trains) are subject to Case 2 (at left): Remove the HQ and all its units from the game (9.1i).
Attack Sequence (7.2)
- Attacker declares an Attack.
- Defender announces if he has a Prepared Defense and his AR unit.
- Attacker identifies the Attacking and Assisting units.
- Attacker's Barrage, if any.
- Determine the Net Combat Table Modifier.
- Roll on the Combat Table.
- Apply results (Losses, Retreats, Advances).
Combat Table Modifiers
Take each side's Action Rating independently plus… (Use AR Unit if unit-specific information is needed).
| Modifier group | Modifier | DRM |
|---|---|---|
| Common Modifiers | Dual or Supported | +1 |
| Common Modifiers | MSR Blocked marked | -1 |
| Attacker Only (Regular & Shock) | Suppression Mission | +2 |
| Attacker Only (Regular & Shock) | Assist (Regular Attacks ONLY) | +1 |
| Attacker Only (Regular & Shock) | Attacking Formation has Prep Def | -1 |
| Attacker Only (Regular & Shock) | Attack from off map (9.3f) | +2 |
| Attacker Only (Regular & Shock) | Double OBJ Zone | +1 |
| Shock Attack Only (Use only one) | Breakthrough AV Unit |
Net Modifier = Net Attacker AR – Net Defender AR
Combat Table (Modified Two Dice)
| Roll | Loss | Retreat | Traffic |
|---|---|---|---|
| 4 or less | A2 | - | - |
| 5-6 | A1 | - | - |
| 7-8 | A1 | D: Situational | Traffic |
| 9-10 | [A1] | D: Situational | Traffic |
| 11-12 | D1 | D: Retreat | - |
| 13 or more | D2 | D: Retreat | - |
- A# — Attacker loses # steps from his AR unit.
- D# — Defender loses # steps, first from his AR unit.
- [A1] — A1 if defender has Prepared Defense, otherwise no loss.
- Situational — If unit Prepared Defense or is in (or behind) Key Terrain, defender must take a step loss per unit and stay, otherwise must Retreat. (7.5g)
- Retreat — Automatic Retreat.
- Traffic — Traffic Stopped marker if the defender is destroyed or retreats. (5.1g)
Retreats (7.5)
Use the first listed (left to right) which applies*.
| No Safe Path and Leg or Truck MA | Situational: …And Key Terrain or Prepared Defense | Situational: …NOT Key Terrain or Prepared Defense | Automatic Retreat and Leg or Truck MA | Voluntary Retreats | All other Retreats |
|---|---|---|---|---|---|
| -1 step per unit, no Retreat | -1 step per unit, No Retreat | Retreat 3 hexes & FLIP to Move-side | Retreat to (or adjacent to) the HQ & FLIP to Move-side (see HQ Issues) | Retreat 3 hexes & FLIP to Move-side; -1 step per unit | Retreat 3 hexes & FLIP to Move-side |
* Ignore Safe Path for Voluntary Retreats. (7.5j)
HQ Issues: If you have to flip and go back to (or adjacent to) the HQ and…
- …too close to the HQ (2 hexes or less) OR …would be forced to over-stack
- …then Go Off Map, instead.
Advance after Combat (7.4)
If the Defender retreats or is eliminated, the Attacker's Action Rating unit (and only that unit) must advance into the defender's hex. If the Assist is stacked with the AR unit, it may advance as well. Other units cannot advance.
Engagement Table (7.1)
Modified Two Dice. Base for each side is its AV + its Action Rating (Use Supported unit AR for action rating of Support).
| Firer Only | Target Only |
|---|---|
| +1 Double OBJ Zone | +1 Multiple Supports (Support ONLY 7.1k) |
| -1 Limited AV |
Net Modifier = Net Firer - Net Target
Support Not Involved (7.1)
| Die Roll | Result |
|---|---|
| 5 or less | Firer Loss & Traffic |
| 6-8 | Both Loss |
| 9 or more | Target Loss & Retreat |
Support Involved (7.1)
| Die Roll | Result |
|---|---|
| 3 or less | Firer Loss & Traffic |
| 4-5 | No Result |
| 6-10 | Target Drop * |
| 11 or more | Target Loss ** |
Ignore a side's result if that side is out of enemy range.
If the Target is in Terrain, max range is 1 hex.
- * No Result if target is not Support
- ** If Firer is Stand Off Support and Target is not Support, result is Target Loss & Retreat instead.
Traffic: Traffic Stopped marker placed in Firer's hex. (5.1g)
Retreat: Automatic Retreat.
The Engagement Example printed on this page is the same example printed on page 17 and is not repeated.
Barrage Table (8.1 & 8.3)
One Die.
| Situation | Loss Range |
|---|---|
| Hard Unit | 6 |
| City | 5-6 |
| Terrain and/or Prepared Defense | 4-6 |
| All other Barrage | 3-6 |
Roll one die per unit in Target Hex. One loss on each roll in range.
Barrage Example (printed box):
Here several situations will be explained, all of which assume the needed OBJ Zones. It is the German Player's Activation.
He wishes to Barrage the three stacks of US units. These are the options that are available: He can fire one Arty Point at the hex as a Destruction Mission, and make no Attack, he can Attack and then use one Arty Point as a Suppression Mission, or he can Attack and use 1, 2, or 3 Arty Points as a Destruction Mission. He can only attack one of the three hexes with the Assist DRM for the second German unit, so the other two can only get a single Point Destruction Barrage each (he could use the two German units separately and attack two hexes, but would then forgo any Assist DRM).
If the Suppression Mission option is chosen, there is no roll for Step Losses, but the DRM for Suppression helping the attack is automatic.
For example purposes here, the player is going to Attack the 1/38 Inf Bn's hex and is firing 3 Arty Points at the hex in a Destruction Mission.
In Terrain, the roll on the Barrage Table to generate a Step Loss is 4-6. Because there are 3 Arty Points being used, this Barrage will take 6 rolls of one die to execute (3 on each unit in the target hex).
The German Player rolls 1, 6, and 2 against the top US unit for one Step Loss. He then rolls 4, 6, and 2 against the bottom US unit for two Step Losses.
These losses are marked on the two US units and the Attack Sequence continues onto the Combat Table itself. Note that in spite of the large amount of Artillery poured onto the target there is no DRM for Suppression in this case.
Either before or after executing the Attack and its Barrages, the German player fires one Arty Point at each of the other two hexes (one of which is a double stack). This obtains one extra loss. The German player has used 5 of his 6 Arty Points, but has no further targets to use. The last point is wasted.
Snafu Table (10.1)
| Fail | Partial | Pass |
|---|---|---|
| 2 or less | 3, 4, 5, 6 | 7 or more |
Prepared Defense: Best SNAFU Result is PARTIAL.
Dice Roll Modifiers (Use all that apply)
| Always… | If Combat Trains are Legal… | If Combat Trains are not Legal and/or Off Map… |
|---|---|---|
| +1 if Fresh | +1 if Optimal Distance* | -3 Combat Trains not in a Legal Hex |
| -1 Coordination Marker | -1 Ghost Trains | -X if Formation has a MSR Blocked marker of Level X |
| - Fatigue Level | -1 Crossing the Streams | |
| -1 Mixed Formations (10.1e) | -1 MSR uses TRACKS | |
| + Game Specific SNAFU DRMs |
* At least 5 hexes, no more than 15 hexes, see 10.3c. Automatically applies if the Combat Trains are in an Entry hex and the HQ is not further than 15 hexes away. If this DRM does not apply, the Combat Trains must enter and stay in Ghost.
Snafu Result Effects
| Action | Fail | Partial | Pass |
|---|---|---|---|
| Objectives: | |||
| HQ Created? | 0 | 1 | 2 |
| Recon Created? | No | Yes | Yes |
| Movement: | |||
| Movement? | No | ½ MA | Yes (Truck is ½ MA on Mud turns) |
| Voluntary Retreat? | HQ Only | Yes | Yes |
* Round down if needed.
Fatigue Increase Table (10.4b)
Use the most likely to increase version that applies. Roll one die if a roll is required. If none of the situations apply, there is no Fatigue Increase.
- Any Combat OBJ markers placed: Increase Fatigue on a roll of 1.
- The Engagement Table or Attacks by Fire used: Increase Fatigue on a roll of 1-2.
- The Combat Table (Regular or Shock Attack) used (See also 7.2j): Increase Fatigue on a roll of 1-3.
- …On any other roll, there is no increase.
Unit Capabilities Chart
Transcriber's note: the chart's green cells are shown as ✔ and its uncoloured cells are left blank; the printed "TARGET" label is kept as printed.
| Unit Type | Regular Attack (7.2) | Engage (7.1) | Shock Attack ONLY if Tac MA (7.3) | Attack by Fire (8.3) | Assist (7.2i) | Support Attack | Support Defense | Recon (4.3d) | Spot Barrage (8.1a) | 2nd Unit in Defense |
|---|---|---|---|---|---|---|---|---|---|---|
| Assault Arrow | ✔ | ✔ | ✔ | ✔ | ✔ | ✔ | ||||
| Red AV (1.2c) | ✔ | ✔ | ✔ | ✔ |
Quick Reference Card
Sequence of Play (2.1)
Pre-Turn Phase
- Reinforcements & Weather
- Assignment
- First player determination
Each Activation
- Initial Activation. Flip HQ to Used. See 3.2a if the HQ set up already Used.
- Preparation. Either declare and execute a Recovery Formation (10.4c) OR Deal with Blocked issues (10.2b), Prepared Defense (4.5), and Mixed Formations (10.1e), as needed.
- SNAFU.
- Initial Actions. OBJ placement.
- Activities. Stack Activities. Movement of Combat Trains and their flipping from Ghost mode.
- Clean Up. Remove all OBJ, Traffic Stopped, and Temp Support Dropped markers. Remove the Combat Trains if they are not Legal. If they are Legal but not at Optimal Distance (10.3c), then ensure they are on their Ghost side.
- Fatigue & Isolation Effects.
- Second Activation, if any. Roll to Activate, Rotate to Done (as needed).
Play continues.
Admin Phase
Orient (or flip) all HQs to Unused.
Activation Checklist (3.1a)
"If desired" and "if allowed" always assumed.
Start…
- ☐ Flip HQ to Used OR Reactivate DR (remember the Fresh DRM, +1)
Recovery Activation…
- ☐ Declare a Recovery Activation (10.4c)
- ☐ Remove any Coordination & PD markers
- ☐ Flip Combat Trains to Normal
- ☐ Reduce Fatigue
- ☐ Apply Isolation
- ☐ Remove Dropped Support markers
- ☐ Decide to Reactivate… …IF this wasn't a Failure Flip
OR
Regular Activation…
- ☐ Declare a Regular Activation
- ☐ Handle MSR Blocked Level (10.2b)
- ☐ Handle Prepared Defense (PD means Partial SNAFU max)
- ☐ Determine Mixed, Apply Coordination
- ☐ Roll for SNAFU (Failure Flip Recover, if 1st Activation decision)
- ☐ Place OBJ markers
- ☐ Conduct Movements, Combats, Barrages
- ☐ Apply Isolation
- ☐ Roll for Fatigue Increase
- ☐ Remove Trains if Illegal, Flip from Ghost to Normal
- ☐ Decide to Reactivate, IF 1st Activation
HQ & Combat Trains 'Jumping' & Retreat
HQs: Retreat to a non-RR road hex 3 hexes away without an enemy ZOC or Engagement Zone in it OR which blocks an existing enemy MSR. Remove any Prepared Defense and flip the Formation's Combat Trains to Ghost. Apply a Coordination marker. (9.1f)
Combat Trains: Displace the Combat Trains 10 hexes back along the MSR toward the Supply Source they could be assumed to have been using last. Flip them to Ghost. If they are at or within 10 hexes of the Supply Source itself (the map edge), they can stop in the Map Edge hex or shift to another Entry Hex Supply Source as the player desires. (10.3d)
Combat Trains (10.3)
Legal Hexes. A Legal Hex must be connected by appropriate road hexes to both the HQ and Supply Source via hexes free of enemy units, EZOCs or their Engagement Zones (10.3a).
Movement. Simply place in a Legal Hex. If not possible, then pull the Combat Trains off map. If the Combat Trains are not in a Legal Hex when the Activation begins, they must move to a Legal one. Flip to Ghost if they move, if they don't move AND are within Optimal Distance they can flip to regular mode.
Fatigue Increase Table (10.4b)
Use the most likely to Increase version that applies. Roll one die if a roll is required. If none of the situations apply or the roll is out of the range given, there is no Fatigue Increase.
- Place any Combat OBJ markers? Increase Fatigue on a roll of 1.
- Any Engagements or Attacks by Fire? Increase Fatigue on a roll of 1-2.
- Was the Combat Table Used? Increase Fatigue on a roll of 1-3.
Safe Path (1.6)
Safe Path can never be longer than Command Radius + 5 hexes. If the HQ hex checks, the Safe path must be 3 hexes long on the roads toward the Trains. In general, the Safe Path must be traversable by the unit in question's MA Type (with the special cases below):
- Flipping to a Tac/Truck MA-type side: Use Tac/Truck MA.
- AV Repl Points or Support Reestablishment: Use Tac MA.
- Non-AV Repl Points: Use Leg MA.
Isolation (10.5)
- Case 1: …with no Safe Path OR is Out of Command Radius: Destroy one step per unit.
- Case 2: …with no Safe Path AND is Out of Command Radius: Destroy two steps per unit.
Additionally, for both cases:
- If the Formation is marked MSR Blocked Level 2: Destroy one step per unit.
- If ALL a Formation's units (ignoring the HQ and Trains) are subject to Case 2 above: Remove the HQ and all its units from the game, see 9.1i.
Retreat Answer Key
Leg or Truck MA?
- —Yes:
- No Safe Path? #3
- Automatic Retreat? #2
- If neither of the above apply, use the No version below anyway.
- —No:
- Situational Retreat Result AND Key Terrain or PD? #3
- Everything else: #1
Results:
- #1 Retreat 3 hexes, Flip to Move-side
- #2 Flip to Move-side, back (or adjacent) to its HQ
- #3 Stay in place, but lose ONE step per unit
Special Cases: If you have to do #2 AND are…
-
…too close to the HQ (2 hexes or less)
or…would be forced to Over-Stack -
…THEN Go Off Map, instead.
-
If you are doing a Voluntary Retreat, regardless of all other considerations, do #1, but also take a step loss per unit.
-
Unassigned Independent units always use #1.
Baptism by Fire Game Specific Rules
1.0 Common Special Rules
1.1 Weather & Air Points
Roll one die each turn to determine the Weather. The result will either be Rain or No Rain. Apply the below based on that roll. Place the Weather marker in the appropriate box on the map to show the current game turn's Weather. The Weather is always No Rain for the first turn of any scenario starting on 14 Feb.
Rain. Make no rolls for Air Points. Use the Rain MP costs on the Terrain Effects Chart. No Formation can get a SNAFU result better than a Partial.
No Rain. Each player rolls one die to determine the number of Air Points he has available for the turn. Use the normal MP costs on the Terrain Effects Chart and Full SNAFU results are possible.
Visibility is always 4 hexes.
Historical Note: During the real battle, it rained the 18, 19, and 20 Feb turns. The result was flash floods and extensive mud during those days. To play historically, skip the Weather Table and just use Rain on those three days.
1.2 Supply
1.2a Axis Supply Sources. Hexes marked with the Axis Supply Source designator.
1.2b Allied Supply Sources. Hexes marked with the Allied Supply Source designator.
1.3 Buddies
Formations in the same row below do not apply Coordination (4.4), Mixed Formations (10.1e), or Crossing the Streams (10.2e) to each other. They do not apply Unit Traffic (5.1h) to each other if the option is used.
- Allied: All Combat Commands of 1 Arm Div are Buddies with all Allied Formations.
- Axis:
- 21 Pz (KGs Schutte and Stenkhoff) and KG DAK
- 21 Pz with itself (KGs Schutte and Stenkhoff)
- 10 Pz with itself (KGs Lang, Gerhardt, and Reimann)
1.4 Recon Unit Types
Only those allowed by BCS rule 4.3d can do Recon in this game.
1.5 Recon Screens
Actual screening missions are not currently a feature of BCS where Formations Attack, Move, or Defend. While there is a form of mobile defense embedded in the v1.1 Retreat rules (for units defending without Prepared Defense or Key Terrain), there was no status that allows trading space for time and limited losses. This rule provides a mechanic to do so.
1.5a Who can Screen? Any unit designated as Recon in BCS 4.3d. The ability to Screen (or enter Screen) is unaffected by SNAFU results.
1.5b How to Mark Screening. At the start of any Activation of the unit's Formation, place (or remove) a Screen marker onto the desired Recon unit. The unit must be on its Move Side to acquire the marker.
1.5c Effects on the Screening Unit. The unit marked as Screen:
- can Move, establish OBJ markers, and spot Barrages normally,
- but cannot Attack, Assist, or Initiate Engagements.
Additionally, a unit cannot end any movement or Retreat STACKED with any other unit (including one also marked as Screen), should this happen, remove the Screen marker from all involved units.
Note that since they are unable to Initiate an Engagement, they must STOP if in a situation requiring a Stopping Engagement.
1.5d Effects on the Enemy: Combat. While Screening units cannot initiate Engagements, they can be fired upon using the Engagement Table. Convert any Both Loss result into Target must Retreat, no Losses instead.
Units marked as Screening cannot be Attacked on the Combat Results Table or by Barrage. Instead, Screening units automatically retreat 3 hexes if any enemy unit moving using Deployed Leg MA enters their hex. Ignore the Screen unit's ZOC effects if a Leg MA unit is moving into its hex (that is they do not get stuck in the hex adjacent to the unit and are unable to enter the hex).
1.5e Effects on the Enemy: Movement. Screening units retain their normal ZOCs, but also have a Screen Zone that includes the normal ZOC hexes as well as all others up to 3 hexes away from the unit (inclusive). Ignore enemy units and terrain for purposes of the Screen Zone.
Effects of the Screen Zone: Enemy units moving on their Move Side pay +1 MP per Screen Zone hex entered. There is no effect at all on enemy units moving using their Deployed side or on any friendly unit.
Design Note: This rule is a Series Optional available for all BCS games (if you use it in LB, use the Screen markers from here or any desired substitute). It is presented here only as a game specific rule. In LB, NO US unit (not even the 14 Cav Grp) sets up on 16 Dec with a Screen marker. In all non-16 Dec start scenarios in that game, Recon units are allowed to set up with a Screen marker if the player chooses.
1.6 Not Trained to Support
No US or Italian AV unit can go into Support.
German and British non-Dual AV units can be put into Support of their Formations.
1.7 Replacement Points
Both sides obtain Replacement Points from the Replacement Points Tables and schedule. Apply these according to the series rules (9.4).
Do not roll for Replacement Points on the first turn of any scenario. They have already been installed in the set up.
1.8 MSRs and Victory Point Hexes
Neither side can trace an MSR through a Victory Point hex (of either side) unless that side currently controls that VP hex as per the rules in 4.1.
1.9 Counter Colors
1.9a Axis. The Axis player controls all German 5th Panzer Army (Dark Tan), German DAK (Tan), Luftwaffe (Sky Blue), and Italian (Blue-Green) units.
1.9b Allied. The Allied player controls all US (Green), British (Brown), British Guards (Red), and French (Blue) units.
Within each side there are no nationality restrictions beyond the limitation on Rommel in 2.1.
2.0 Axis Special Rules
2.1 Rommel
After his arrival on the 19th, Rommel must be assigned to one of the three major German Formations (DAK, 10 Pz, 21 Pz). In each turn's Assignment Phase. Simply place the Rommel marker in the desired box in the 'Rommel Will Affect' display on Map B.
For the entire turn, and each Formation listed in the box chosen, Rommel has the following effects:
- +1 to any SNAFU Roll
- +1 to any Second Activation Roll
Note that 10 Panzer and 21 Panzer Divisions include more than one named Kampfgruppen Formations. To help track which Panzer Division is which for this purpose, the 10 Pz is a tan color while 21 Pz has the yellowish tint of the rest of the Afrika Korps.
Rommel cannot be assigned to the Italian Centauro Division.
2.2 Kampfgruppen (KGs)
Except for the needs of the Rommel rule (2.1) and Buddy Exclusion (1.3), each of the five Panzer Division KGs are their own Formation and function independently of each other.
3.0 Allied Special Rules
3.1 Mines
The US player gets three Minefield counters to place as 'reinforcements' according to the OOA.
3.1a Placement. The Mines are placed in the Reinforcement and Weather Phase of the arrival turn (un-Breached side up) in any hex of the US player's choosing that is at or with the Command Radius of the Stark TF HQ which is at least 4 hexes from any Axis unit. No Allied unit need be in the area to place Mines.
3.1b Breaching. Only Axis units can breach mines and Axis units cannot move through or attack from a minefield until it is breached. Breached and Unbreached Mines have the same effect on Allied units (3.1c).
Only Axis units with an Assault Arrow and a Leg MA currently showing can breach mines.
Axis units breach a Minefield by the following procedure:
- a) One Axis unit which must be moving by Leg MA enters the Minefield hex and is Finished. Only the Breaching unit can do so.
- b) Flip the Minefield over to its Breached side at the end of the current Activation.
Once Breached, Mines remain so for the rest of play. Breaches have no orientation (the breach symbol on the marker is merely for color)—They 'work' in all directions.
3.1c Minefield Effects. See Table on the Terrain Effects Chart.
3.2 9 ID Divarty
3.2a There are no flexible Arty Asset Points in this game, but the US player does have the Divarty of the US 9th Infantry Division available. Its Arty Points are assigned like any other Arty Point, but All Points must be assigned to a single Formation. Otherwise, they are Arty Points the same as any other.
3.2b "Red" Irwin. Any Formation the 9 ID Divarty is assigned to can apply 2 Arty Points per target hex (instead of a maximum of one) in non-Attack situations with all its available Arty Points (including the 9 ID's contribution).
Historical Note: BG Stafford LeRoy "Red" Irwin was commander of the US 9 ID Divarty and aggressively left his mark on the Kasserine battlefield by his effective and inspired use of his guns.
3.3 Command Radius
Task Force Drake. Three units of the 168 Inf Rgt (shown under CCA in the game) are nominally commanded by their regimental commander Col. Thomas Drake.
These units are TF Waters, TF Drake, and 3/168 Inf Bn.
While these units Activate with their parent Formation (CCA), they are exempt from Command Radius and its effects. These units always have a Safe Path. This rule ONLY applies if the unit is still in its scenario starting hex.
All three units are non-rebuildable and have specially slow MAs to reflect their historical usage.
Other Out of Command Radius Units. There are other CCA and TF Stark units which begin the game outside of Command Radius. These are treated normally if they end up out of Command Radius at the end of their Formation's Activation.
4.0 Victory
Victory for the Axis counterattack at Kasserine is something that illustrates the confused nature of the command structure well beyond the battlefield itself. What was first an attempt to secure the Eastern Dorsal passes from Allied control opened the door to a much more extensive counteroffensive based on a limited window of opportunity caused by the approach of Montgomery's 8th Army from Libya.
As such, the Axis player does not know his own goals when play begins. Rather, he draws one Victory Objective marker from a cup at the start of the 19 Feb turn to determine what objective he has been assigned by the Italian Comando Supremo. The Axis player notes the result and places the counter, face down, on the map to retain that information in secret until the end of the game.
This objective will be one of two possibilities:
Tebessa. Rommel's preferred Big Solution. This would strike right at the heart of the command and logistical base for the US and French Forces in southern Tunisia with an eye toward driving even deeper to do the same to the British Army in the north by striking to the coast at Bone.
Exit Locations: Any Entry Area A hex.
Le Kef. Here the idea is to drive a wedge between the forward Allied forces and their base, but to do so via a route west of the Western Dorsal.
Exit Location: Entry Area B and/or C
Regardless of the objective assigned, the Axis wins if they exit all available Tac MA Axis units via the Entry Hexes listed above before the game ends. Each exiting unit must be in Command Radius and have its Combat Trains in a Legal hex at that moment.
4.1 Victory Point Hexes
Each VP hex gives the Axis player 1 VP if it is under Axis control and if it lists the drawn Axis Victory Objective. Some say "Either" which means they count for VPs regardless of the Victory Objective drawn. Lack of control awards no VP.
Control is defined as being the side that occupies, or is last to occupy, the hex with a non-HQ, non-Combat Train friendly unit that is both in Command Radius and has a successful MSR at that moment. The player initially controlling each VP hex will be listed in the scenario.
Important: If a VP hex is controlled by the enemy, no friendly unit can enter the hex in any manner unless that hex contains a friendly OBJ marker. In an exception to BCS rule 4.3b, players can place any OBJ marker on any enemy controlled VP hex even if it does not contain an enemy unit.
Regardless of Victory Points, the Axis Player 'wins' if he fulfills the exit requirements of his Victory Objective in 4.0. Otherwise, the game is 'won' on points.
If the Axis holds the following of the 14 VP possible hexes applicable to the Victory Objective, the result is:
| Axis VP Hexes Held (of 14 possible) | Result |
|---|---|
| 9 or more | Axis Victory |
| 8 | Draw |
| 7 or less | Allied Victory |
5.0 Scenarios
5.1 Kasserine Campaign
This scenario covers the entire campaign.
- First Turn: 14 Feb 43
- Last Turn: 23 Feb 43
- Game Length: 10 Turns
- First Player on Turn 1: Axis
- Dead Pile: Prov Arm Bn
Allied Set Up:
- CCC Arm Bde:
- B42.06: CCC Arm Bde HQ (Fat-0 marker), 2/1 Arm Bn (CCC), 3/6 Arm Inf Bn (CCC Arm)
- B38.13: CCC Arm Combat Trains
- CCA Arm Bde:
- B14.09: CCA Arm Bde HQ (Fat-1 marker), 3/1 Arm Bn (-) (CCA Arm), 701 TD Bn (CCA)
- B4.10: 81 Arm Cav Bn (CCA, Screen marker)
- B19.07: G/1 Arm Co (CCA)
- B10.06: Drake Inf TF (CCA)
- B22.06: Waters Inf TF (CCA)
- B11.02: 3/168 Inf Bn (CCA)
- B23.16: Kern Arm Inf TF (CCA), CCA Arm Combat Trains
- Stark Inf TF:
- A8.26: Stark Inf TF HQ (HQ is Done, Fat-0 marker), 805 TD Bn (Stark), 1/26 Inf Bn (Stark)
- A25.12: A,D/19 Eng Bn (-) (Stark), E,F/19 Eng Bn (-) (Stark)
- A14.26: Stark TF Combat Trains
Formation Activation Markers in Play: CCA Arm, CCC Arm, Stark Inf TF
Axis Set Up: None
Victory Conditions: Use the campaign victory conditions, 4.0.
5.2 Operation Spring Wind
This scenario covers the initial attack by the two German Panzer Divisions codenamed Operation Frühlingswind.
- Playing Area: Map B only
- First Turn: 14 Feb 43
- Last Turn: 17 Feb 43
- Game Length: 4 Turns
- First Player on Turn 1: Axis
Trace Supply Source:
- Allied: Entry Area C, B32.35, and B3.35
- Axis: use the ones listed in 1.2a in the playing area
Allied Set Up: Same as Scenario 5.1 for units on Map B
Allied Reinforcements: The Allies get all units on the Allied Order of Arrival that can arrive in the playing area. No minefields can be placed as Stark Inf TF HQ is not in play.
Formation Activation Markers in Play: CCA Arm, CCC Arm
Axis Set Up: None
Axis Reinforcements: The Axis get all units on the Axis Order of Arrival that can arrive in the playing area.
Victory Conditions: The Axis player wins if he controls Sidi bou Zid (B14.09), Kern's Crossroads (B23.16), Sbeitla (B30.29) and at least one other Victory Hex location at the end of the scenario. The Allied player wins if he controls Sbeitla and Kern's Crossroads at the end of the scenario. Any other result is a draw.
5.3 Mid-Campaign Start
This scenario starts with the Americans entrenched in Kasserine Pass and forming the defenses north at Sbiba. The Italian Comando Supremo is about to issue its directive given "a unique opportunity is now offered to force a decisive success in Tunisia."
- Playing Area: Both maps
- First Turn: 19 Feb 43
- Last Turn: 23 Feb 43
- Game Length: 5 Turns
- First Player on Turn 1: Axis
Reminder: Remember to draw one Victory Objective marker at the start of this scenario
Dead Pile: Prov Arm Bn, CCA Arm Bde (3/1 Arm Bn), CCC Arm Bde (2/1 Arm Bn)
Allied Set Up:
- CCB Arm Bde:
- A56.33: CCB Arm Bde HQ (Fat-2 marker), 2/13 Arm Bn (CCB)
- A56.34: 601 TD Bn [1] (CCB), 2/6 Arm Inf Bn (CCB)
- A55.35: CCB Arm Combat Trains (Ghost mode)
- CCC Arm Bde:
- A35.19: CCC Arm Bde HQ (Fat-1 marker), 3/6 Arm Inf Bn (CCC)
- A42.17: CCC Arm Combat Trains
- Stark Inf TF:
- A33.17: Stark Inf TF HQ (Fat-0 marker, Prepared Defense)
- A31.16: 1/26 Inf Bn (Stark)
- A30.16: 805 TD Bn (Stark), A,D/19 Eng Bn (-) (Stark)
- A30.17: E,F/19 Eng Bn (-) (Stark)
- A29.16: Minefield marker
- A29.17: Minefield marker
- A30.15: Minefield marker
- A39.19: Stark TF Combat Trains
- CCA Arm Bde:
- A24.34: CCA Arm Bde HQ (Fat-3 marker), 81 Arm Cav Bn [1] (CCA)
- A25.35: 1/13 Arm Bn (-) (CCA), 3/13 Arm Bn (-) [2] (CCA)
- A26.35: 701 TD Bn [1] (CCA), Kern Arm Inf TF (CCA), CCA Arm Combat Trains (Ghost mode), Welvert TF Combat Trains
- Welvert French Inf TF:
- A22.32: Welvert French Inf TF HQ (Fat-1 marker, Prepared Defense)
Formation Activation Markers in Play: CCA Arm, CCB Arm, CCC Arm, Stark Inf TF, Welvert Inf TF, 34 Inf, 1 Gds Inf Bde
Allied Reinforcements: Use the Allied Order of Arrival
Axis Set Up:
- DAK Pz KG:
- A19.18: DAK Pz KG HQ (Fresh marker)
- A26.14: 33 Pz Recon Bn (DAK)
- A25.14: I/8 Pz Bn (DAK)
- A27.15: I/Afk Inf Bn (DAK), II/Afk Inf Bn (DAK)
- A10.24: XVI Italian Arm Bn (DAK)
- A10.25: XIV/5 Brs Italian Mot Inf Bn (DAK), DAK KG Combat Trains
- Reim Pz KG:
- B44.06: Reim Pz KG HQ (Fat-1 marker)
- B42.06: 1/501 TGR Arm Co (Reim)
- B43.08: 90 Mdr Arm Bn (Reim)
- B44.07: II/86 Inf Bn (Reim)
- B48.00: Reim KG Combat Trains, Lang KG Combat Trains
- Lang Pz KG:
- B46.05: Lang Pz KG HQ (Fresh marker), I/7 Pz Bn (Lang)
- B45.05: 10 Krad Pz Recon Bn (Lang)
- B46.04: I/69 Inf Bn (Lang)
- B47.04: I/86 Inf Bn (Lang)
- Lang KG Combat Trains (see Reim Pz KG set up)
- Stnkoff Pz KG:
- B30.29: Stnkoff Pz KG HQ (Fat-1 marker), II/5 Pz Bn [4] (Stnkoff), II/25 LW "88" Bn (Stnkoff, Support)
- B31.31: 580 Pz Recon Bn (Stnkoff)
- B29.28: I/104 Inf Bn (Stnkoff)
- B30.28: II/104 Inf Bn (Stnkoff)
Formation Activation Markers in Play: DAK KG, Reim KG, StnkoffKG, Scht KG
Axis Reinforcements: Use the Axis Order of Arrival.
Victory Conditions: Use the campaign victory conditions, 4.0. The following Victory Point Hexes are controlled by the Axis player, the remaining are still under Allied Control:
- VC: Either: Kasserine (A25.12), Sbeitla (B30.29)
- VC: Tebessa: Thelepte (A10.25)
- VC: Le Kef: Hadjeb el Aioun (B42.06)
5.4 Between a Rock and a Hard Place
This scenario is the western portion of the mid-campaign start with TF Stark holding Kasserine Pass and Welvert's mixed TF defending the southern approaches at Djebel Dernaia.
- Playing Area: Map A only
- First Turn: 19 Feb 43
- Last Turn: 23 Feb 43
- Game Length: 5 Turns
- First Player on Turn 1: Axis
Reminder: Remember to draw one Victory Objective marker at the start of this scenario
Trace Supply Source:
- Allied: use the ones listed in 1.2b in the playing area
- Axis: use the ones listed in 1.2a in the playing area and A32.01
Dead Pile: Prov Arm Bn, CCA Arm Bde (3/1 Arm Bn), CCC Arm Bde (2/1 Arm Bn)
Allied Set Up: Same as Scenario 5.3 for units on Map A
Formation Activation Markers in Play: CCA Arm, CCB Arm, CCC Arm, Stark Inf TF, Welvert Inf TF
Allied Reinforcements: The Allies get all units on the Allied Order of Arrival that can arrive in the playing area.
Axis Set Up: Same as Scenario 5.3 for units on Map A
Formation Activation Markers in Play: DAK KG
Axis Reinforcements: Do not use the German Order of Arrival. Use the following Order of Arrival.
- 19 Feb 43: Victory Chit Draw
- H: DAK Pz KG (I/1Jg, II/1Jg LW FJ Bn)
- 20 Feb 43:
- A32.01: Reim Pz KG (Reim Pz KG HQ, Fat-1 marker, 1/501 TGR Arm Co, 90 Mdr Arm Bn, II/86 Inf Bn, Reim KG Combat Trains, Gerhdt Pz KG (Gerhdt Pz KG HQ, Fat-1 marker, II/7 Pz Bn, II/69 PG Bn, 49 Pz Pio Bn, Gerhdt KG Combat Trains)
- H: Centro Italian Arm Div (Centro Arm Div HQ (Fat-0 marker), XIV, XVII Italian Arm Bn, V/7 Brs, XII/7 Brs Italian Mot Inf Bn, Centro Div Combat Trains)
- 21 Feb 43:
- A32.01: Lang Pz KG (Lang Pz KG HQ, Fresh marker, 10 Krad Pz Recon Bn, I/7 Pz Bn, I/69. I/86 Inf Bn, Lang KG Combat Trains)
- H: Centro Italian Arm Div (DII Italian "90" Bn, XVIII Italian Pol Bn, Aosta Italian MG Bn)
Victory Conditions: Use the campaign victory conditions, 4.0 if Le Kef is selected as the Victory Objective, only Entry Area B counts as the Exit Location and the Axis adds 4 to its total Victory Points at the end of the scenario. If the Victory Objective drawn is Tebessa, the Axis adds 1 to its total Victory Points at the end of the scenario. The following Victory Point Hexes are controlled by the Axis player, the remaining are still under Allied Control:
- VC: Either: Kasserine (A25.12)
- VC: Tebessa: Thelepte (A10.25)
5.5 End Campaign Start
This scenario is the last attacks in the campaign as Rommel has broken through Kasserine Pass only to face stiffening resistance and the attacks of Sbiba have stalled as higher command's interests wane.
- Playing Area: Both maps
- First Turn: 21 Feb 43
- Last Turn: 23 Feb 43
- Game Length: 3 Turns
- First Player on Turn 1: Axis
Victory Objective Draw: The Axis player draws one Victory Objective marker per 4.0 at the start of this scenario
Dead Pile: CCA Arm Bde (3/1 Arm Bn), CCC Arm Bde (2/1 Arm Bn), Stark Inf TF (1/26 Inf Bn, E,F/19, A,D/19 Eng Bn(-))
Allied Set Up:
- CCB Arm Bde:
- A44.31: CCB Arm Bde HQ (Fat-1 marker)
- A44.30: 894 TD Bn (Assigned to CCB)
- A43.31: 2/13 Arm Bn (CCB)
- A46.29: 601 TD Bn [1] (CCB), 2/6 Arm Inf Bn (CCB)
- A49.32: Prov Arm Bn [2] (Assigned to CCB)
- A55.35: CCB Arm Combat Trains
- Stark Inf TF:
- A50.26: Stark Inf TF HQ (Fat-2 marker)
- A46.26: 3/39 Inf Bn [4] (Stark)
- A57.21: Stark TF Combat Trains (Ghost mode), Nick TF Combat Trains
- CCC Arm Bde:
- A40.32: CCC Arm Bde HQ (Fat-2 marker), 3/6 Arm Inf Bn [4] (CCC)
- A41.35: CCC Arm Combat Trains (Ghost mode)
- Nick CW Arm TF:
- A44.17: Nick CW Arm TF HQ (Fat-1 marker, Prepared Defense)
- A43.19: 17/21 L CW Arm Bn (Nick)
- A42.17: 10 Rifle CW Arm Inf Bn (Nick)
- A41.16: 2 Loth CW Arm Bn (Nick)
- A39.19: Gore CW Arm Inf TF [1] (Assigned to Nick)
- Nick TF Combat Trains (see Stark Inf TF set up)
- 1 Inf Div (-):
- A31.32: 1 Inf Div (-) HQ (Fat-1 marker), 1 Eng Bn (1 Inf)
Formation Activation Markers in Play: CCA Arm, CCB Arm, CCC Arm, Nick Arm TF, Stark Inf TF, Welvert Inf TF, 1 Inf, 34 Inf, 1 Gds Inf Bde
Allied Reinforcements: Use the Allied Order of Arrival
Axis Set Up:
-
DAK Pz KG:
- A30.16: DAK Pz KG HQ (Fat-1 marker)
- A33.20: 33 Pz Recon Bn [5] (DAK), I/8 Pz Bn (DAK)
- A32.19: I/Afk Inf Bn [4] (DAK), II/Afk Inf Bn [4] (DAK)
- A32.18: XVI Italian Arm Bn (DAK), XIV/5 Brs Mot Inf Bn [5] (DAK)
- A29.16: I/Jg LW FJ Bn (DAK), Minefield marker (Breached)
- A28.15: II/Jg LW FJ Bn (DAK)
- A29.17: Minefield marker (Breached)
- A30.15: Mindfield marker (Breached)
- A25.14: DAK KG Combat Trains (Ghost mode)
-
Gerhdt Pz KG:
- A25.12: Gerhdt Pz KG HQ (Fat-1 marker), II/7 Pz Bn (Gerhdt)
- A25.11: II/69 PG Bn (Gerhdt)
- A26.10: 49 Pz Pio Bn (Gerhdt)
- A29.05: Gerhdt KG Combat Trains (Ghost mode), Reim KG Combat Trains (Ghost mode)
-
Reim Pz KG:
- A28.09: Reim Pz KG HQ (Fat-2 marker), 90 PJ Mdr Arm Bn (Reim, Support), 1/501 TGR Arm Co (Reim)
- A28.08: II/86 Inf Bn (Reim)
- Reim KG Combat Train (see Gerhdt Pz KG set up)
-
Lang Pz KG:
- A30.04: Lang Pz KG HQ (Fresh marker), 10 Krad Pz Recon Bn (Lang)
Formation Activation Markers in Play: DAK KG, Lang KG, Gerhdt KG, Reim KG, Stnkoff KG, Scht KG, Centro Div
Axis Reinforcements: Use the Axis Order of Arrival
Victory Conditions: Use the campaign victory conditions, 4.0 The following Victory Point Hexes are controlled by the Axis player, the remaining are still under Allied Control:
- VC: Either: Bordj Chambi (A30.16), Kasserine (A25.12), Sbeitla (B30.29)
- VC: Tebessa: Thelepte (A10.25)
- VC: Le Kef: Kef el Ahmar (B49.18), Hadjeb el Aioun (B42.06)
5.6 High Water Mark
This scenario covers the western portion of the end campaign start. The Americans get a second wind and deploy their depleted forces to defend the passes west of Kasserine. The British forces set up a screen south of Thala with the weight of the German effort bearing down.
- Playing Area: Map A only
- First Turn: 21 Feb 43
- Last Turn: 23 Feb 43
- Game Length: 3 Turns
- First Player on Turn 1: Axis
Victory Objective Draw: The Axis player draws one Victory Objective marker per 4.0 at the start of this scenario
Trace Supply Source:
- Allied: use the ones listed in 1.2b in the playing area
- Axis: use the ones listed in 1.2a in the playing area and A32.01
Allied Set Up: Same as Scenario 5.5 for units on Map A
Formation Activation Markers in Play: Nick TF, CCA Arm, CCB Arm, CCC Arm, Stark TF, 1 Inf Div (-), Welvert TF
Allied Reinforcements: The Allies get all units on the Allied Order of Arrival that can arrive in the playing area.
Axis Set Up: Same as Scenario 5.5 for units on Map A. Rommel can affect 10 Pz or KG DAK at the start of this scenario.
Formation Activation Markers in Play: DAK KG, Lang KG, Gerhdt KG, Reim KG, Centro Div
Axis Reinforcements: The Axis get all units on the Axis Order of Arrival that can arrive in the playing area.
Victory Conditions: Use the campaign victory conditions, 4.0 If Le Kef is selected as the Victory Objective, only Entry Area B counts as the Exit Location and the Axis adds 3 to its total Victory Points at the end of the scenario. If the Victory Objective drawn is Tebessa, the Axis adds 1 to its total Victory Points at the end of the scenario. The following Victory Point Hexes are controlled by the Axis player, the remaining are still under Allied Control:
- VC: Either: Bordj Chambi (A30.16), Kasserine (A25.12)
- VC: Tebessa: Thelepte (A10.25)
Abbreviations
| Abbreviation | Meaning |
|---|---|
| 88 | 88mm Anti-Aircraft Gun |
| Afk | Afrika |
| Alg | Algerian |
| Arm | Armor/Armored |
| Art/Arty | Artillery |
| AT | Anti-Tank |
| Bde | Brigade |
| Bn | Battalion |
| Brs | Bersaglieri |
| Cav | Cavalry |
| CCA/B/C | Combat Command A/B/C |
| Centro | Centauro |
Designer's Notes
Designing Baptism by Fire was a very straightforward process. With the team in place that tested and helped develop Last Blitzkrieg, this went extremely smoothly.
The design work here centered around three central concerns: a) The Limited Road Net, b) Getting German Force Levels Right, and c) Making sure the Axis Command Confusion was properly shown in the Victory Conditions.
The Limited Road Net
Unlike the Ardennes, where the roads aren't very good and the terrain between them very difficult—but there are tons of roads all over the place. Tunisia offered some very few roads with open desert between them. Admittedly, stories abound about the hideous mud conditions which limited major formation movement to the road net.
This situation created a bit of a 'Raider' problem. 'Raiders' being our inside baseball term for the little units that run out to leap on enemy supply lines to generate major effects. It didn't take a genius to spot the couple of points on the map where one could force a choke hold on the bad guys.
One solution that was tried but seriously backfired (though one would not think it would) was to allow all or part of the Formation's MSR to be off-road. This allowed much more freedom to ignore the road net entirely (not something the real forces could do at all) and led to some rather entertaining trace paths to avoid the Crossing the Streams DRM.
The next solution was to identify key LOG nodes and make them VP hexes. This worked by requiring significant effort (at least an OBJ marker) to take a road junction away from the MPs detailed to guard it below the game scale. But, as you can already guess, this was actually an excessive amount of effort for the tiny forces involved. Also, while taking the more efficient road junction location was preferred, stepping on the roads individually accomplished the same thing.
In the end, the VP hexes which remain in the game are there for more strategic reasons (locations important to the overall campaign in its various forms) not for such minor reasons as road junction control for supply purposes.
The final solution was to re-evaluate the base maps (very, very detailed maps of this area exist) and identify more track features which, while they aren't much as roads, allowed for more ways to redirect LOG traffic (at least from the Combat Trains to the HQ) which eliminated the issues of 'too few' roads that generated the problem in the first place.
German Force Levels
In spite of the initially successful offensive against Sidi bou Zid, the German advance to Sbeitla featured a pause and seeming indecision that no gamer would ever exhibit. Beyond the shifting Axis High Command thoughts on what they were trying to accomplish, the use of 10 Pz was hardly unrestricted. First, one KG was held in reserve, then another was dispatched to a side show at Fondouk.
Originally, we had the division as a whole removed from play and then return a few days later. This, of course, over-stated the degree of the strength sent off to Fondouk, but it also had the usual features of players burning the division out (because it was going to be removed) and how to handle those losses and Fatigue when it returns. Lastly, and more annoying, was that its departure meant (usually) that the spearhead that took Sbeitla (way too soon) would just depart and the Allied player would stroll back into town to retake it against no opposition. A very odd look.
The solution first tried was to leave the division in play, but to withdraw their tanks. This allowed them to hold anything they had taken, but not be quite the offensive force they were before. This didn't defang them very much and player's soon found that they could get a lot of mileage out of a rump Panzer Mech Infantry Division.
Refining the OOB into the German KGs allowed a much finer display of the division's capabilities. Having Lang (the reserve) arrive late for use degraded the division's fire power in the opening turns. Pulling Gerhardt shows them going off on their wild goose chase.
The result of this fine tuning is to make the force ratio at Sbeitla work to give the fight there the time it really took and keeps the Germans from going crazy in both VC directions way too soon for the Allies to try to deal with it historically.
Axis Command Confusion
In addition to the Force Ratio issue above, once the attacks along the east map edge end on the 2nd or 3rd turn, we find the combination of Rommel, Kesselring, v. Arnim, and the Italian Comando Supremo in a deep argument as what to do next. Rommel, of course, wanted a big splashy solution, taking Tebessa in the Allied Rear, in an attempt to turn back the Allied forces in Tunisia (as well as restore his image after being beaten at El Alamein and chased across Libya). Others argued for less 'risky' shorter ranged goals for various purposes. Once a decision (of sorts) was made, Rommel probed his way toward Tebessa attempting to generate a fait accompli, but found his usual energy flagging with the toughened Allied defenses. He had to give up the attempt, making little useful progress.
The upshot of this confusion was to leave the commanders on the ground in doubt as to what they were supposed to be doing until several critical days had passed. The Victory Conditions do that to the player here. No Axis player has the situation and power to fulfill both sets of conditions, and one can little afford to lay the ground work of both 'just to be ready'. This leaves him in the position of resting his forces for a brief time while things sort themselves out.
As a side effect, this indecision affects the Allied player as well. He cannot concentrate his defenses all in one zone or the other. He, too, has to be ready for both. As a result, both avenues are in about the right level of defenses for the Axis attack to have a sporting chance (running everyone one way or the other makes it lopsided...it is important for the Axis player to keep the Allies guessing even after the choice is made.
Historical Notes
by Carl Fung
Myth vs. Reality
I'll admit that my first knowledge of Kasserine Pass came from the movie Patton. Let's see—Americans get trounced, Rommel mocks them, and Patton gets revenge by reading Rommel's book at el Guettar… next scene. This is, of course, before I got involved with Baptism by Fire.
While American performance at Kasserine Pass (used here as the catchall for the entire campaign from Sidi bou Zid to the Thala and Sbiba passes) was not stellar at the tactical and operational level, it wasn't totally incompetent or compensated by sheer bullheaded bravado. Generals Lloyd Fredendall (II Corps) and Orlando Ward (1st Armored Division) do deserve blame for the confused Allied positioning and planning in which the battle was fought. Leaving aside Fredendall's literal man-cave and leading from the rear, many of the formations fought piecemeal and only at the end of the battle did a more coherent defense form and subsequently tested before the Axis withdrew.
Individual unit performances between American formations and their constituents varied. The lower rung performances included Alger's 2/1 Arm Bn who led CCC's counterattack at Sidi bou Zid on 15 Feb. The battalion attacked in near textbook formation and was easily destroyed by the combined arms defense of the Panzer Divisions.
Next, there is nary a mention of active participation from 1st Armored Division's Armored Infantry beyond 3/6 Armored Infantry Battalion's assistance of Stark at Kasserine Pass. They were mostly relegated to back up positions and did not work closely as combined arms teams with the tankers with the exception of Kern's 1/6 Arm Inf Task Force who had only a company of Stuarts. Another limitation was the American half-tracked tank destroyers that were obsolete and had improper tank destroyer doctrine even before they landed in North Africa. Lastly, the engineers under Stark were true REMF's (Rear Echelon… I'll let you figure out what MF stands for). They were volunteered to defend and lay mines but were never fully up to the task demanded from them.
The rest of the American forces, however, performed well enough, if not well indeed. The best performing American unit was Gardiner's 2/13 Arm Bn of CCB. They performed admirably against the Panzers twice (at Sbeitla and then at Dejebel el Hamra), even though equipped with the obsolete M3 Medium Tank. Hightower's 3/1 Arm Bn of CCA fought well at Sidi bou Zid despite going against two panzer divisions. It was virtually destroyed on the first day of battle but considering the odds, this wasn't unexpected. The 1st and 34th Division's defenses at Bou Chebka Pass and Sbiba, respectively, deserve credit. The German forces were stymied in their efforts against both formations. Likewise, Stark's defense at the pass, while not masterful, delayed the Axis effort long enough for recovering and reinforcements to set up. Finally, a special recognition goes to "Red" Irwin's Artillery, a rushed reinforcement consisting of the majority of the 9th Infantry Division's guns. It was sent forward to support the British and contributed greatly to stopping the Axis thrust to Thala.
The majority of the British forces fought well. Their forces were not the veterans of Montgomery's 8th Army, but instead newly arrived forces with the majority of them not having seen combat before. Nickforce performed well on defense and the 1st Guards Brigade did very well buttressing the Americans at Sbiba. The notable exception was the 2/5 Leicestershire that had just debarked from ships before rushing ahead into their first combat. This was its debut combat and it suffered many casualties.
Welvert's enemy-turned-ally Vichy troops was poorly equipped and of questionable quality, but they were acclimated to the terrain and Welvert inserted himself forcefully when others dawdled.
Learning to Fight: Allied Order of Battle Notes
There is strong representation of non-American forces at the Kasserine battle where most of the popular histories usually just regard the battle as American (or rather the humiliation of American forces).
For the Americans, there were three divisions in the battle, the 1st Armored, 1st Infantry, and 34th Infantry, but none of them fought as whole formations.
Keen observers will note that the 1st Armored Division's Combat Commands are A, B, and C, while not having a CCR. In the pre-"light" armor division organization later in 1943, there were no combat command HQ's, usually relying on existing Armor or Armored Infantry Regiment HQ's for the ad hoc combat commands. Ward had gone one step further and actually had a CCD operating right up until the German offensive. This was one of the reasons critics fault him as he had split off 1st Armored into so many operating units as to dilute the fighting power.
CCA was centered around Sidi bou Zid but had elements scattered all the way back to Sbeitla to the west. CCB was located around Maktar way north off map. CCC was in between at Hadjeb el Aioun. The 2/1 Tank Bn in the CCC formation actually starts with CCB but was immediately assigned to CCC for the counterattack on 15 Feb and hence is shown as belonging to CCC. A Provisional Tank Bn was formed from the remnants of the various destroyed tank battalions from the actions at Sbeitla and Sidi bou Zid. They consisted of repaired or newly arrived tanks with surviving or ad hoc crews.
CCA had attached two battalions of the 168th Regiment of the 34th Infantry Division in three groups atop hills around Faid pass. Waters Task Force was based on 2/168 Inf Bn minus Company E with G/1 Tank Company supporting it. Drake's Task Force was E/168 along with miscellaneous rear echelon troops. They were to be stranded in those hills and were defeated when they were surrounded and tried escaping out (in game terms isolation effect).
The rest of the 34th Infantry Division, the 133rd and 135th Infantry Regiments (minus the 2/133 which remaining off map) would form the defenses around Sbiba along with the 18th Infantry Regiment of the 1st Infantry Division that was also located in the Maktar area. The divisional command would fight alongside the British 1st Guards Brigade.
The remaining battalion of the 34th Division, the 1/168, would fight with Major General Welvert's mixed Task Force. The recently enemy-turned-ally quickly rallied his forces to fight against the Germans. He nominally commanded the Constantine Division but only a portion of it fought at Kasserine, mostly the 7th Algerian Infantry Regiment (RTA - 7e Régiment de Tirailleurs Algériens). These units, along with the Constantine division, were scattered through Tunisia, but the Algerians concentrated at the Dernaia pass to block the southern attempts towards Tebessa. Also with Welvert was the 1st Ranger Battalion, which by all accounts fought well but without any great distinction. Just to note, a battalion of the American 1st Inf Div (3/26 Inf Bn as Task Force Bowen) and the 1st Derbyshire Yeomanry Reconnaissance Regiment were covering passes further south off the map. These two units appear on situation maps of the battle and deserve some mention.
The 1st Infantry Division would fight as the most scattered of the American divisions, with the aforementioned 18th Inf Rgt under the 34th Inf Div. Col. Stark, commander of the 26th Infantry Regiment, commanded the ad hoc forces centered around his 1/26 Inf Bn to defend Kasserine Pass. He commanded the 19th Engineer Regiment (4 companies) that were of limited frontline capacity but were able to lay down mines before the Germans arrived. He would eventually also command two Tank Destroyer Battalions, a 1st Armored Division tank company, the 3/6 Armored Infantry Battalion from CCC, and a battalion of the 9th Infantry Division just coming into Tunisia.
The rest of the 1st Infantry Div, really the 16th Inf Rgt, 2/26 Inf Bn, and other forces and artillery not assigned elsewhere, was used to shore up the pass at Bou Chebka protecting Tebessa.
The 9th Divisional Artillery under "Red" Irwin (future 5th Infantry Division commander) was composed of the 34th Field Artillery Battalion (155mm), the 60th and 84th Field Artillery Battalions (105mm), and the 47th and 60th Regimental Cannon Companies (Pack 75mm). It was assigned to Nickforce.
Moving to the British, the 1st Brigade (Guards) landed in North Africa during the Operation Torch landings assigned to the 78th Infantry Division. In the battle it operated as a separate formation. It contained two Guards Infantry units (2nd Coldstream Gds and 3rd Grenadier Gds) and one non-Guards unit (2nd Hampshire). The 2nd Hampshire Regiment only has 4 steps instead of the normal 6 because of the action at Tebourba from 29 Nov to 1 Dec, 1942. It lost 2/3 of its men and was slowly rebuilding its strength by the time it was committed to Sbiba.
Fighting alongside the Brigade was an attached tank regiment from the 26th Armoured Brigade (16th/5th Lancers) as well as a Churchill tank regiment from the 25th Tank Brigade (142nd RAC - Royal Armoured Corps). It also had attached two independent Anti-tank regiments, the 72nd and 93rd armed with the very good 6pdr (57mm equivalent).
To the west, Nickforce was based on the bulk of the 26th Armoured Brigade from the 6th Armoured Division (minus the tank regiment with 1st Guards Bde). It was named after Brigadier Cameron Nicholson of the 6th Armoured Division. The task force also contained a green Territorial (similar to American National Guard) unit, the 2/5th Bn, Leicestershire Regiment. This battalion had just arrived on the continent and hurried forward from its parent 46th Division.
A portion of Nickforce was split off and moved forward to join Stark's task force at Kasserine Pass. Named Goreforce after a commander in the 10th Bn, Rifle Brigade, it consisted of a tank squadron (company in British terms) from the 2nd Lothians & Border Horse and a company from the 10th Rifle Bde. There were seven Valentine III's and four Crusader III's both armed with 6pdr guns.
Muddled Hierarchy: Axis Order of Battle Notes
The Axis forces were all veteran forces but hampered by higher command peculiarities, confused objectives, the weather, and stubborn resistance.
Kampfgruppe DAK was a mixture of forces from the remnants of the famous corps. The 33rd Recon Bn and I/8 Panzer Bn were from the 15th Panzer Division. The reduced Afrika Regiment (former Sonderverband 288) was from the 90th Light Division. The Luftwaffe 1st Jäger Brigade were renamed from the remnants of the famous Ramcke Fallschirmjäger Brigade. Two Italian battalions were attached to Kampfgruppe DAK during the battle, the XVI Armor battalion from the 32nd Armor Regiment (the regiment is left off the counter for space considerations) and the XIV motorized infantry battalion from the 5th Bersaglieri Regiment. It was tasked to take Gafsa, Feriana, and Thelepte before its big action at Kasserine Pass.
The 21st Panzer Division was the famous veteran division that had fought with Rommel since spring 1941. It was formed into two Kampfgruppen, Stenkhoff and Schütte, with some references to a Kampfgruppe Pfeiffer, but as far as I can discern, it fought as two kampfgruppen where Schütte may or may not have been renamed to Pfeiffer after Sidi bou Zid. It had been battered at El Alamein and rebuilt to zip ahead to take care of the situation in Tunisia. The II/5 Panzer Bn was renamed from the independent 190 Panzer Bn, with the original II/5 transferred to the 15th Panzer Division as II/8 (not present in the battle).
The 104th Panzergrenadier Regiment is unique in that it consists of four battalions (sometimes referenced as regiments 104A and 104B in reports of two battalions each). The I/104 PG Bn was originally the 8th Motorized MG Bn as the original I/104 was captured at Halfaya Pass at the conclusion of Operation Crusader. Likewise, the 15th Kradschützen Bn was renamed the III/104 PG battalion. None of the panzergrenadier battalions had enough halftracks to be equipped as such.
The 10th Panzer Division was refitting in France after campaigning on the Eastern Front when it was sent to Tunisia after the Torch landings. It fought well and did not have to acclimate to hot desert conditions because the winter in Tunisia was generally wet and cold. It served under von Arnim's 5th Panzer Army, causing Rommel to do the dance between various commands to commandeer it to fulfill his objectives. It operated as three kampfgruppen: Reimann, Gerhardt, and Lang, with the last as a reserve force. Note that the removal of KG Gerhardt was the sideshow commitment to Fondouk only to have it reverse course two days later.
The 131st Centauro Division was a late arrival to Rommel's forces, having missing the El Alamein battles. The harried nature of the retreat across the desert caused the division to already be somewhat depleted by the time it was committed alongside KG DAK for the southern thrust. Researching the components of the reorganized division during the Kasserine was a bit difficult as different sources conflicted slightly, but I am confident in what is in the game. The division contained one armor battalion each from the 31st and 32nd Regiments (XIV and XVII respectively).
Centauro's infantry was centered on two battalions of the 7th Bersaglieri Regiment (V and XII). The Bersaglieri were the black-feathered better trained troops in the Italian army whose motorized regiments were found in the Armor and Motorized divisions. Rounding out the infantry was the "XVIII Btg CC.RR." (18th Royal Carabinieri Battalion) which was a national gendarmerie unit. There was also the VI Aosta Machine Gun Battalion.
The division was supported by the DII Gr.C.A (Gruppo Autocannone) anti-aircraft unit that used a truck mounted 90mm L/53 gun used in the anti-tank role much like the famous 88mm. The Italian gun had very similar penetration numbers as the German gun but rarely got the headlines.
The Gear
The primary tank used by the Americans was the ubiquitous 75mm Sherman. At this point, there was only one battalion remaining in all of 1st Armored Division that still had the M3 Medium Tank (2/13 Tank Bn). These obsolete tanks were being phased out after losses since the Torch landings and were replaced by Shermans. The tank destroyers, really just WWI era 75mm guns (the famous French 75's) mounted on halftracks, were wholly ineffective with inadequate Armor Piercing shells and awkward deployment not being fully tracked and with severely limited traverse.
The main British Armoured Battalions had a combination of Crusader Mark III's and Valentine Mark III's within each squadron (company-sized equivalent). It's an interesting mix for the British that drew distinctions between their Cruisers and their Infantry Tanks. The Crusader Mark III was armed with the adequate 6pdr while the thick armored and slow Valentine was still armed with the 2pdr. These units' movement allowance is rated on the slow side to follow the adage that you are only as fast as your slowest member. The sole Churchill tank unit (142 RAC) had the tank with as much armor as the German Tiger tank. The unit used the Mark III version mounting the very good 6pdr gun, but this was not strong enough to penetrate the Tiger but was strong enough to take on the other German tanks.
The Germans' primary tank was the Panzer III armed with the long barreled 50mm L/60. I would suspect they were mostly the J/1 or re-designated L variant but could also have included M variants. To be clear, there were Panzer IV armed with the 75mm L/43 (Ausf. G) but these were not the dominant model in proportion to the Pz III lang (long). For example, 10th Panzer Division's had between 19-21x Pz II (used more in recon and auxiliary capacity), 89-105x Pz III long, 8-16 Pz IV long, and perhaps 4 Pz IV short (the snub-nose 75mm L/24). Note the range of vehicles depends on the source where the smaller number may reflect the vehicles in service at the time of battle and the larger number the nominal number given the standard organization. The ratio of about 8:1 Pz III to Pz IV isn't enough to have the superior 75mm L/43 up the Armor Value. The two Panzerjager battalions were armed at least in part with the Marder III, a Czech Pz 38 mounting Soviet 76.2mm Anti-Tank guns.
The Tiger I makes its appearance in the form of a company from the 501st Heavy Panzer Battalion. This early Tiger organization consisted of 20x Tiger I's and 25x Pz III armed with the 75mm L/24 as support before late war configuration designated 45x Tiger's in the battalion. There is very little mention of the Tiger's impact on the battle with some wild claims that it destroyed 20 Shermans.
The Italians were armed with the M14/41, which was only a slight improvement over the obsolete M13/40. This was to be the last tank type used in combat before Italy signed the armistice. Also present were a handful of Semovente 75/18 and 47/32 but not enough to be represented as units.
Allied Order of Arrival
| Turn | Entry Area | Units |
|---|---|---|
| 16 Feb 43 | B, C or D | CCB Arm Bde (CCB Arm Bde HQ (Fat-0 marker), 601 TD Bn, 2/13 Arm Bn, 2/6 Arm Inf Bn, CCB/1 Arm Combat Trains) |
| A or H | Welvert Inf TF (Welvert Inf TF HQ (Fat-1 marker), 1 Ranger Bn, 1/168 Inf Bn, 2/7 Alg, 3/7 Alg French Inf Bn, Welvert Combat Trains) | |
| 17 Feb 43 | CCA/1 HQ or A | CCA Arm Bde (1/13 Arm Bn, 3/13 Arm Bn (-)) |
| Per 3.1a | 3x Minefield Markers | |
| C | 34 Inf Div (34 Inf Div HQ (Fat-1 marker), 1/18, 2/18, 3/18, 1/133, 3/133 Inf Bn, 34 Inf Combat Trains) | |
| 1Gds CW Inf Bde (1 Gds CW Inf Bde HQ (Fat-1 marker), 72 RA AT Bn (Support), 93 RA AT Bn (Support), 16/5 L Arm Bn, 3 Gren, 2 Cold Gds Inf Bn, 2 Hamp Inf Bn, 1 Gds Combat Trains) |
Axis Order of Arrival
| Turn | Entry Area | Units |
|---|---|---|
| 14 Feb 43 | F | Reim Pz KG (Reim Pz KG HQ (Fresh marker), 1/501 TGR Pz Co, 90 PJ Mdr Arm Bn, II/86 Inf Bn, Reim KG Combat Trains) |
| Gerhdt Pz KG (Gerhdt Pz HQ (Fresh marker), II/7 Pz Bn, II/69 PG Bn, 49 Pz Pio Bn, Gerhdt KG Combat Trains) | ||
| G | Scht Pz KG (Scht Pz KG HQ (Fresh marker), I/5 Pz Bn, 39/609 Mdr Arm Bn, IV/104 Inf Bn, Scht KG Combat Trains) | |
| Stnkoff Pz KG (Stnkf Pz KG HQ (Fresh marker), 580 Pz Recon Bn, II/5 Pz Bn, II/104 Inf Bn, II/25 LW 88 Bn, Stnkf KG Combat Trains) | ||
| 15 Feb 43 | F | Scht Pz KG (III/104 Inf Bn, 220 Pz Pio Bn) |
Bibliography
Blumenson, Martin. Kasserine Pass: Rommel's Bloody, Climactic Battle for Kasserine. Blumenson writes a very readable account of the battle. This is easily the go-to book for the battle.
U.S. Army Center of Military History. Kasserine Pass Battles: Staff Ride Background Materials. http://www.history.army.mil/books/Staff-Rides/kasserine/kasserine.htm Part of the Staff Ride Series, this collection has American and German unit reports to derive lessons learned. This is a one-stop shop for original material on the battle.
Atkinson, Rick. An Army at Dawn. Rick Atkinson is the new Stephen Ambrose, telling very personal stories about the American experience in war with this first volume on the involvement in North Africa. For my money, I'd stick with Blumenson, but go for it if you're getting the three-volume set.
Pallud, Jean-Paul. Kasserine. After the Battle Number 134. A very comprehensive account of the battle considering this was an article in a magazine. As the sections are broken down by each date, its easy to look up what happened on a particular day.
Gillono, Claude. Panzers of Kasserine: The Afrika Korps in Tunisia: Campaign Series. A very nicely presented book that showcases previously unpublished photos of German forces in Tunisia in the early months of 1943. The introduction presents some very good information and numbers of the German and Italian armor involved. The most surprising in the book are the many images of captured American vehicles used by the Germans.
Game Charts
Weather (One Die)
Weather is automatically No Rain on 14 Feb.
| Die | Result |
|---|---|
| 1-2 | Rain |
| 3-6 | No Rain |
Air Points Available (One Die each)
Do NOT Roll for Air Points on Rain Turns.
| Air Points for the Turn | |
|---|---|
| Allies | One Die -2 (if less than 0, use 0) |
| Axis | One Die |
Axis Replacement Points (One Die)
Do NOT Roll for Repl Points on the first turn of any scenario.
| Die | Result |
|---|---|
| 1-2 | 0/0 |
| 3-5 | 1/1 |
| 6 | 2/2 |
AV Repl Points / Non-AV Repl Points
Allied Replacement Points (One Die)
Do NOT Roll for Repl Points on the first turn of any scenario.
| Die | Result |
|---|---|
| 1-2 | 0/0 |
| 3-4 | 1/1 |
| 5-6 | 2/2 |
AV Repl Points / Non-AV Repl Points
Game Specific SNAFU DRMs
| Feb 14 | Feb 15-17 | Feb 18+ | |
|---|---|---|---|
| Axis | +1 | -2 | +0 |
All Turns, Allies: +0
Terrain Effects Chart
| Terrain | Leg | Tac | Truck | Terrain for Combat/Barrage? | Blocking Terrain? | Key Terrain? |
|---|---|---|---|---|---|---|
| Open | 1 | 1 | 2 | - | - | - |
| Secondary Road | 1/2 | 1/2 | 1/4 | - | - | - |
| Track | 1/2 | 1 | 1 | - | - | - |
| RR | 1/2 | 1 |
ot = use other terrain in the hex for this purpose.
[X] = Rain MP Cost
P = Prohibited
Notes:
(1) Apply the Hexside Terrain DRM on the Combat Table for these Terrain Features if the Attack unit is attacking across it. These never apply to Engagements, Attack by Fire, or Barrages.
(2) Roads of any sort do not negate Minefield hexes, but once Breached, a road can be used to traverse that hex normally.
(3) If a unit is in a Minefield hex (Breached or not), apply a 1 DRM against it on the Combat, Engagement, and Barrage Tables. If a unit ends a Retreat in a Minefield hex (Breached or not), apply one additional Step Loss.
(4) Applies if the Allied unit is adjacent to the Minefield hex (Breached or not) and the Attacking unit is in it.
Official Errata
The official errata are reproduced below as published by Multi-Man Publishing, with the Baptism by Fire errata first and the Battalion Combat Series errata second. The errata are not applied to the printed text above; where an entry names a section, the section is shown as printed and the entry governs. The BCS v2.0 entries (and the Baptism by Fire note dated 21 May 20, which applies only with BCS 2.0) are omitted, because this rulebook uses BCS v1.2.
Baptism by Fire Errata (16 March 2017)
-
Add to 1.5e: Screening units cannot jump HQs or Combat Trains and have no effect on any part of an MSR (this includes the Screening unit itself, its ZOC, and its Screen Zone).
-
Revise 1.5b: Units can only be marked as Screening in the Formation's Initial Activation, never in a Second Activation, but a Screen marker can be removed in either Activation if desired.
-
In Scenario 5.5, set up the Scht Pz KG HQ in B49.18 (the Pioneer stays in B51.22) and the Scht Pz KG Combat Trains in B40.11 (still in Ghost Mode).
-
In Scenario 5.5, 2/26 Inf Bn (1 Inf) should set up with 3/16 Inf (1 Inf) in A33.31.
-
The two AT battalions in 1 Gds Bde (72 RA and 93 RA) are incorrectly sporting range 2 on their counters, they should be range 1 like all the other pop gun AT units.
-
In Scenario 5.3, the KG Lang Formation marker should be listed as In Play.
-
Lake Hexsides (such as between A14.21 and A14.20) are impassible to all MA types.
Battalion Combat Series Errata
Entries are listed by the series version they amend, as printed in the errata document. The v1.0, v1.1 and v1.2 entries apply to this v1.2 text; the v2.0 entries are omitted.
Battalion Combat Series v1.0 (1 Aug 16)
-
In 8.2a, A hex can be subject to only ONE Barrage mission (of either type) per Activation. This limitation does not affect Attacks by Fire.
-
For any scenario stating that a number of 'units' must exit for specific Victory Conditions, HQs and Combat Trains DO NOT count as 'units.'
-
Entry Area Blocking (REVISED). If an enemy unit occupies an Entry Hex needed by the entry of units according to the player's Order of Arrival, the entering units have the following freedoms:
- Units can enter via any map edge hex at or within 5 hexes of the occupied Entry Area hex.
- If a Formation is entering and the above does not encompass any hex where the HQ can enter, expand the 5 hexes just enough so the zone contains such a hex. Only the HQ and Combat Trains can make use of this expanded entry zone.
This renders 9.3f unecessary (except the part about EZOCs) and so 'shifting' no longer occurs.
-
Clarification of the 2nd Bullet Point, 9.1a: Moving HQs only generate Coordination if they enter a hex within 2 of a unit of another Formation (which obviously includes stacking with one). Retreating HQs always generate Coordination on themselves, but do not generate Coordination on any other Formation (the 'non-HQ Retreats' phrase in 4.4a attempts to isolate the fact that when an HQ Retreats it does place a Coordination marker on itself from the fact that no Retreating unit ever places a Coordination marker on some other Formation).
-
The Activation Checklist on page 40 of the BCS Series rules mentions Recover Fatigue twice. Ignore the one just after 'Choose Formation to Activate'.
-
Expansion of item #3 covering exiting units. If units must exit the map for Victory Conditions, the player can exit via either map edge hex adjacent to the specific listed hex.
-
For 10.4c's list of things you can do in a Recovery Activation, add 'Remove Dropped Support markers', given 9.2i.
-
In the Activation Checklist, Check MSR is very late in the process. To better follow the sequencing of the Activation, that entry should be just before rolling for SNAFU.
-
Reinforcements slated to arrive at specific hexes (not a marked Entry Area letter) or at their HQ, must be placed in the Reinforcement Phase (they cannot wait for Activation). Also, if they are to arrive at the HQ, they can arrive at the HQ or in any of the hexes adjacent to it.
-
Units must end an Activation either in Command Radius or must stay in the hex in which they began it. If it is not possible to end the Activation in Command Radius, it is permitted to move in a way that will get the unit into Command Radius without footdragging. Isolation effects apply normally in this case and Reinforcements are exempt. This requirement does not apply to Combat Trains or the HQ itself.
Battalion Combat Series v1.1 (1 Dec 17)
-
In 7.5a, the references in the sentence "Units can also conduct Voluntary Retreats (7.5i)" should be to 7.5j.
-
For an unassigned independent unit that must 'retreat to its HQ', apply the result as "All other Retreats" instead.
-
In the general restriction on Regular Attacks in 7.2 regarding Combat units which can be identified as Attack Units, an Attack unit must have a printed MA greater than Zero as well as an Assault Arrow. Rarely comes up, but it is possible.
-
10.3c makes obtaining Optimal Distance impossible if the Combat Trains are forward of the HQ; the Crib Notes version makes it sound as if the Combat Trains are Illegal in that case. The Crib Notes are incorrect, the 'forward' Trains merely cannot use Optimal Distance; they are NOT Illegal.
-
In the example of Shock Attacks (pg 21), the sentence in the second paragraph explaining that the German Panzer unit wishes to do a Shock attack on 99 ID unit B is not completely clear. It should read "In the first example, the German Panzer unit, 1,2/I moves into hex 36.22, and wishes to do a Shock Attack on 99 ID unit B."
-
Just to make the implicit explicit and to clean up the sequencing mechanics involved, change 10.4c, second list, a) to: "Remove any Coordination and/or Prepared Defense marker the Formation might have." FROM "Remove any Coordination marker the Formation might have." Likewise add "Remove any Prepared Defense marker the Formation might have." to the Recovery Activation Checklist.
-
Add to 7.5c after "cannot be entered" the following: "…because of terrain or stacking restrictions (5.5d). Then add to 5.5d item f to the list of times when overstacking is not allowed… "f) At the end of a Retreat."
-
The example of Stopping Engagements and rule 6.0i are not in conflict. 6.0i merely needs to note that a stack can continue to try to "win" the Stopping Engagement for as many Fire Events as it has to use. It must fire at least once, but the STOP conversion into FAILURE does not occur until the player decides to stop trying or the stack runs out of Fire Events.
Battalion Combat Series v1.2 (24 Feb 20)
-
9.1i wasn't updated to match the v1.2 rules and is in conflict with 9.5. 9.5 is correct, Independent units are removed from play (as in not availble for rebuilding), but Arty Points go back into the available pool. Moral of the story: Strip Formations of their independent assets if it looks like they might get cut off and destroyed.
-
For the application of Optional Rule #7 Soft and Hard Jumps:
- Resolve a Soft/Hard Jump resulting from a Shock Attack which is still moving before the attacking stack finishes moving.
- In any case, after determining the type of Retreat, resolve the Soft/Hard Jump before finishing the resolution of that Retreat. What occurs will not change the type of Retreat done, but if it is a Soft Jump, the conditions requiring pulling a unit off the map might change and the unit could stay on map.
-
When applying the Screening Rule: Screen Zones never affect any type of Safe Path and if the Optional Traffic Rule is in play, Screen Zones do not affect Traffic nor does Traffic affect Screening units.
-
For better clarity, Replace the existing last sentence, last bullet point, in Retreat to the Rear (7.5a) to read: OR, in the case of HQs only, displace as needed, to any hex satisfying the Ending Location requirements in 9.1f AND containing at least one unit of the HQ's Formation. The latter could result in the HQ escaping into a pocket.
-
The next step in the sequence of play a Fatigue Recovery Activation should move to in 10.4c and the sequence of play graphic should be step "i" not step h. There is no Second Activation in a Fatigue Recovery Activation.
-
Add Breakthrough Armor units are capable of Shock Attack. So a unit is capable of Shock Attack of it has one or more of the following:
- Assault Arrow
- Red or Light AV
- Breakthrough Armor