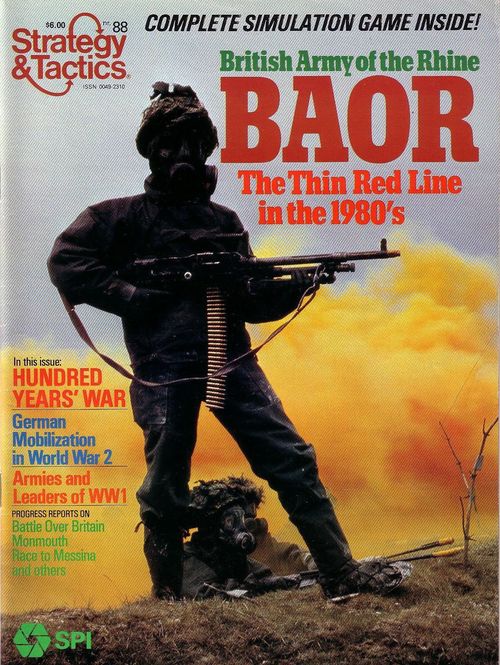
BAOR
BAOR Rulebook
Table of Contents
Table of Contents
-
- 1.0 Introduction
- 2.0 How to Play the Game
- 3.0 Game Equipment
- 4.0 Sequence of Play
- 5.0 Movement
- 6.0 Zones of Control
- 7.0 Stacking
- 8.0 Combat
- 9.0 Friction Points (FP's)
- 10.0 Supply
- 11.0 Artillery
- 12.0 Attack Helicopters
- 13.0 Airmobile Operations
- 14.0 Air Power
- 15.0 Airborne Units
- 16.0 Engineers, Rivers and Bridges
- 17.0 Reinforcements
- 18.0 Electronic Warfare
- Charts and Tables
- BAOR Exclusive Rules
1.0 Introduction
Central Front is a series of games using the same game-system, in which each game may be played individually or may be joined together with others in various configurations to create larger games. The games cover potential warfare in West Germany during the 1980's. The scale is 4 km to a hex and 12 hours per turn. The game system is unique in that "losses" are measured in terms of Friction Points (FP's). FP's represent personnel and equipment losses, the expenditure of ammunition (particularly for artillery units) and fatigue. The removal of FP's from a unit represents the receipt of supply and replacements, and the accumulation of combat experience. The ability of units to have combat as a function of movement, plus the use of an "endless turn" (ending by mutual consent or the complete exhaustion of units) allows for very fluid play.
2.0 How to Play the Game
Central Front is a two-player game. One Player controls the NATO forces, while the other Player controls the Warsaw Pact forces. The Players agree on a scenario they wish to play, and playing pieces are placed on the game-map in accordance with the scenario instructions. Other playing pieces will be brought onto the map as play of the game proceeds.
The game is played in Game-Turns, each consisting of a theoretically endless number of Player Phases. Each Player Phase consists of one Player moving any number of his playing pieces (called units) and conducting attacks with each unit as he does so. The other Player then moves and attacks with his units in the next Player Phase. This alternates until neither Player wishes to move or attack with his units, thus ending the Game-Turn.
Combat results are expressed in terms of Friction Points gained by the defending and/or attacking units. When a unit surpasses its maximum FP level, it is considered destroyed. Unlike most games, a unit may be moved more than once per Game-Turn in Central Front. This, however, adds to a unit's fatigue (by adding Friction Points to the unit or stack of units).
Play continues for a set number of Game-Turns (depending on the scenario being played), after which the Victory Conditions are consulted to determine the winner.
Game Terms
Access Hexside: A hexside traversed by a minor road (not shown) that negates the cost of terrain in the hex being moved into.
Adjacent: A unit is considered adjacent to another unit when in a hex sharing a hexside with the hex occupied by the other unit.
Attack Strength: The relative strength of a unit when attacking.
Defense Strength: The relative strength of a unit when defending.
Direct Fire: Artillery support conducted by an artillery unit in combat when stacked with a non-artillery unit also participating in the combat.
Friction Point (FP): Every unit possesses a variable FP level, ranging from zero (fresh, full strength) to a maximum FP level (depleted and fatigued). When a unit's FP level exceeds its maximum FP level, it is destroyed.
Indirect Fire: Artillery support conducted by an artillery unit in a combat when not stacked with a non-artillery unit participating in that combat.
Mobile Combat: A special form of combat using the Mobile Combat Strengths of all the involved units (see 3.41).
Operation Point Allowance: The maximum number of Operation Points that may be expended when moving and conducting attacks with a particular unit during a Player Phase.
Range: The maximum number of hexes that may lie between the hex occupied by an artillery or attack helicopter unit conducting indirect fire (exclusive) and the hex it is firing into (inclusive).
Unit Designation: The historical identity numbers of the units. Each unit has either two or three identity numbers (separated by slashes). The leftmost number is the identity number of the unit itself. The rightmost number is the unit's parent Division (if in boldface), or other parent formation. If three numbers are used, the central number is usually the unit's parent Brigade identity.
Unit Size: The unit size is a standard military symbol: I = Company, II = Battalion, III = Regiment, X = Brigade. Note: A brigade is considered smaller than a regiment.
3.0 Game Equipment
3.1 The Game Map
The game-map portrays an area of West Germany where the hypothetical confrontation occurs, and is based on current military maps at a 1:250,000 scale. It includes all the terrain significant to the battles. The Terrain Key explains the symbology used. A hexagonal grid is superimposed over the terrain features printed on the mapsheet in order to regularize movement and the positioning of the playing pieces. Each hexagon (or "hex") on the map has its own four digit identity number. To make the map lie flat, back-fold it against the creases. Small pieces of masking tape may be used at the corners of the map to hold it taut.
3.2 Game Charts and Tables
Various visual aids are provided in order to simplify and illustrate certain game functions. These are the Operation Point Cost Chart, the Friction Point Average Chart, the Combat Results Table, the Airpower Table, and the Warsaw Pact March Order Diagrams.
3.3 The Playing Pieces
The cardboard pieces (called "units") represent the military units that could take part in the actual battles. The numbers and symbols on the pieces represent the Attack Strength, Defense Strength, Mobile Combat Strength, and the type of unit represented by that piece. The game also includes informational markers, that are used to keep track of the state of certain units.
3.4 How to Read the Units
A typical combat unit (front) shows the unit size, unit designation, unit type symbol, Attack Strength and Defense Strength. A typical artillery unit (front) additionally shows its Range.
3.41 Mobile Combat Strength. If a unit's Attack Strength or Defense Strength appears under a mobile combat symbol, that strength also represents the unit's Mobile Combat Strength, used when attacking or defending in a mobile combat. A unit with no underlined strength possesses a Mobile Combat Strength of "1."
3.42 Soft Targets. A unit with a soft-target symbol is considered a "soft" target (non-armored), which affects the losses it must take when involved in combat (see 8.87). All other units are "hard" targets.
3.43 Operation Point Allowance. Each unit has an Operation Point Allowance of 12. This value is not printed on the unit.
3.44 Backside of Units. The back-side of each unit is referred to as its "FP side." When this side of a unit is face-up, the unit does not operate as effectively as when it is face-down.
3.45 Summary of Unit Types
Mechanized Infantry; Armor; Armored Cavalry; Infantry (non-motorized); Motorized Infantry; Engineer; Airborne Mech Infantry; Artillery; Rocket Artillery; Self-Propelled Artillery; Airborne Artillery; Attack Helicopter (each shown by its own unit-type symbol on the counters).
Note: The Friction Point side of each combat unit is identical to the front except that it is printed in white.
3.46 Summary of Marker Types
Friction Point marker (front and back) and Game-Turn marker.
4.0 Sequence of Play
Each game is played in a variable number of Game-Turns, depending on the specific game being played. Each Game-Turn is composed of a number of alternating Player Phases, preceded by a Game-Turn Preparation Phase. The Player whose Player Phase is currently in progress is referred to as the Phasing Player; the other Player as the non-Phasing Player. Each Game-Turn proceeds strictly as outlined below:
1. Game-Turn Preparation Phase
A. Friction Point Removal Segment: The Players remove a Friction Point from each and every unit on the game-map by flipping each unit over from its FP side to its non-FP side. If a unit begins this Segment on its non-FP side, the FP is removed from it by adjusting its FP marker (see 9.2 and 9.3). Note: This Segment is not conducted on the first Game-Turn of the scenario.
B. Airpower Segment: The NATO Player rolls the die and consults the Airpower Table to determine which Player has air superiority and whether there is ground fog this Game-Turn.
C. Nuclear Attack Segment: Both Players may resolve nuclear attacks they plotted in the previous Game-Turn, and then may plot nuclear attacks to be resolved in the next Game-Turn (see the Exclusive Rules).
D. Initiative Segment: The Players determine who will be the first player and who will be the second player this Game-Turn. Each Player rolls one die. The player who rolls the highest result is the first Player, the other is the second Player. In the event of equal die results, the NATO Player is declared the first Player. Note: On Game-Turn One this procedure is not undertaken; the Exclusive Rules for the game being played assign the first and second Player.
2. First Player Phase
The first Player may move any number of his units or stacks of units. Each unit may be moved up to the limit of its Operation Point Allowance. As a unit is moved, it may be used to conduct attacks against adjacent enemy units, which also requires the expenditure of Operation Points. When the movement of each unit is completed and any attacks conducted by that unit have been resolved, it gains a Friction Point (see 9.3). If the first Player does not wish to move or attack with any of his units this Phase, he may pass.
3. Second Player Phase
The second Player may move any number of his units or stacks of units following the same restrictions and procedures as the first Player, or may pass.
4. First Player Phase
The first Player may move any number of his units again. However, he may only move those units that are currently on their FP side (that is, were moved in the Player's Initial Player Phase of the Game-Turn), or he may pass.
5. Second Player Phase
The second Player may move any number of his units again, following the same restrictions imposed on the first Player in Step 4, or he may pass.
The Players repeat Phases 4 and 5 until both Players pass in successive Player Phases, in which case the Game-Turn is over. The Game-Turn marker is moved one space along the Game-Turn Record Track, signalling the beginning of a new Game-Turn.
A unit may be moved any number of times during a single Game-Turn (unless it is at its maximum FP level). However, a unit may not be moved at all unless it is moved in the owning Player's Initial Player Phase of the Game-Turn.
The act of passing does not exclude a Player from moving his units in upcoming Friendly Player Phases of the Game-Turn (unless he passes in his Initial Player Phase).
5.0 Movement
General Rule
Each Player may move his units during his Player Phase only. In a Player's Initial Player Phase, he may move any of his units that he wishes and may bring any reinforcement units due him into play. In all subsequent Friendly Player Phases of the Game-Turn, he may only move those units that are on their FP-side. The movement of each unit requires the expenditure of Operation Points from the unit's Operation Point Allowance. As a unit is being moved, it may be used to conduct attacks, which also requires the expenditure of the Operation Points.
Procedure
Each unit has an Operation Point Allowance of twelve, representing the maximum number of Operation Points that may be expended for that unit in a single Player Phase. Each unit or stack of units is moved individually hex-by-hex in any direction or combination of directions. Movement of a unit into a hex "costs" a certain number of Operation Points. As a Player moves a unit, he keeps track of the number of Operation Points expended for each hex entered and for each attack conducted by the unit. When the unit has expended twelve Operation Points, its movement must cease for the Player Phase.
5.1 How to Move Units
A Player may expend as few or as many Operation Points as desired in moving a unit, up to the limit of the unit's Operation Point Allowance. Operation Points may not be saved from one Player Phase to the next, nor may unused Operation Points be transferred from unit to unit.
When the Operation Point Expenditure of a unit is completed in a given Player Phase, it gains a Friction Point. This is noted by flipping the unit over so that its FP side is face-up, or, if the unit is already on its FP side, by adjusting its FP marker.
5.11 Each unit or stack of units is moved one at a time. All movement and combat conducted by a particular unit in a single Player Phase must be completed before beginning the movement of another unit. (Exception: See 5.14.)
5.12 A unit on its FP side must expend one additional Operation Point for every hex it is moved into, for every attack it conducts, and for any other action listed on the Operation Point Cost Chart that it undertakes. Exception: A unit on its FP side must expend an additional 1/2 Operation Point to enter a hex through a hexside traversed by an Autobahn.
5.13 If a unit is not moved per se, but is used to conduct an attack, it has expended Operation Points and thus must gain an FP when all its attacks are completed. Exception: An artillery unit or an attack helicopter unit does not expend Operation Points to support an attack or defense. It gains an FP each time it does so, but does not gain an FP for being moved (unless it actually moves).
5.14 If the Phasing Player declares a multi-hex attack (see 8.33), he may have all his involved units expend Operation Points to participate in the attack, regardless of how many hexes they occupy. After the attack has been resolved, and any advances after combat have been completed, the Phasing Player may continue moving one participating unit (or stack) only. The movement of all other participating units is considered completed for the Phase.
5.15 Retreats and advances after combat (see 8.8 and 8.9) are not considered movement and do not require the expenditure of Operation Points.
5.2 Movement Restrictions
A unit may be moved once per Player Phase only. A unit that has its non-FP side face-up in any Friendly Player Phase except the first of the Game-Turn may not be moved or expend Operation Points in any manner. However, see 7.33.
5.21 Friendly units do not impede the movement of other Friendly units (however, see 5.32, and 5.33 and 7.0). A unit may not be moved into an Enemy-occupied hex.
5.22 A unit that is moved into an Enemy-controlled hex (see 6.0) must stop. Such a unit may not be moved for the remainder of the Player Phase, unless the hex ceases to be Enemy-controlled as a result of attacks conducted by that unit. A unit in an Enemy-controlled hex may expend Operation Points to attack.
5.23 A unit that begins a Player Phase in an Enemy-controlled hex may be moved out of that hex (see 6.2). A unit may never be moved from one Enemy-controlled hex directly to another.
5.24 A unit that is at its maximum FP level may not be moved or expend Operation Points in any manner.
5.25 An artillery unit or an attack helicopter unit that is on its non-FP side may always be used to aid an attack or defense, regardless of the Player Phase in progress. This does not require the expenditure of Operation Points (but does require the gain of a Friction Point). See 10.0.
5.26 No NATO unit may ever be moved or retreat into any hex of East Germany or Czechoslovakia. No NATO unit may ever be moved or retreat into any hex on the east edge of the map area, nor into any hex adjacent to such a hex.
5.27 The Exclusive Rules of the game being played may place additional restrictions on the movement of units.
5.3 Effects of Terrain on Movement
For each flat terrain hex (not containing woods) into which a Player moves a unit, one Operation Point is expended. Other terrain costs more (or in the case of Autobahns and roads, less) to enter. These costs are detailed on the Operation Point Cost Chart (5.5).
5.31 Autobahns. A unit or stack of units that is moved from a hex to an adjacent hex through a hexside crossed by an Autobahn expends 1/2 of an Operation Point regardless of the terrain in the hex entered or the presence of other Friendly units. Also see 5.12.
5.32 Roads. A unit that is moved from a hex to an adjacent hex through a hexside crossed by a road expends 1/2 of an Operation Point regardless of the terrain in the hex entered. If the hex being moved into is Friendly-occupied, one Operation Point is expended instead. If a stack of units, or a regiment-sized unit is moved into a road hex (along a road) adjacent to a hex occupied by a Friendly unit(s) on the same road, expend one Operation Point. These effects are not cumulative.
5.33 Access Hexsides. A unit moved from a hex to an adjacent hex through a hexside crossed by an access symbol expends one Operation Point, regardless of the hex terrain. If the hex entered is Friendly-occupied, the hex terrain cost must be expended instead. Non-motorized units treat roads and Autobahns as access hexsides.
5.34 Rivers. A NATO unit may be moved across an unbridged river hexside at a cost of five Operation Points. A Warsaw Pact unit may be moved across an unbridged river hexside at a cost of three Operation Points. This cost is in addition to the cost of the terrain in the hex being entered. If the river hexside is crossed by a bridge, no Operation Point expenditure to cross the hexside is required. An artillery unit or attack helicopter unit may never cross an unbridged river hexside. (Note that this restriction does not apply to attack helicopters using their range in combat.)
5.35 Multiple-terrain hex. A unit moved into a hex containing flat, broken and/or rough terrain expends the Operation Point Cost of the predominant terrain type in that hex. The Operation Point costs of all other terrain types are cumulative.
5.4 Entering and Exiting the Game-Map
During the course of play, units may enter the map as reinforcements (see 17.0) while other units may exit the map to fulfill Victory Objectives, as noted in the Exclusive Rules.
5.41 A unit may exit the map only if the Exclusive Rules of the game being played specifically allow it.
5.42 A unit may only enter or exit the map from a hex containing a road or Autobahn that leads off the map from that hex. A unit exits the map from such a hex by expending the road or Autobahn Operation Point cost to enter an imaginary hex just off the map. A unit enters the map from such a hex in accordance with 17.1.
5.43 A unit that exits the map is removed from play and may never be returned to the game. Such a unit is not considered eliminated; it may count towards the owning Player's victory conditions.
5.44 A unit may not exit the map while retreating or advancing after combat.
5.45 Enemy units may not enter the game-map in a hex from which a Friendly unit that exerts a Zone of Control has been exited, nor may such a hex be used as an Enemy supply source (see 10.1).
5.5 Operation Point Cost Chart
(see Charts and Tables)
6.0 Zones of Control
General Rule
Each unit exerts a Zone of Control (ZOC) into all six hexes adjacent to the hex it occupies. (Exception: Artillery units, attack helicopter units and engineer units never exert a Zone of Control). A hex into which a unit exerts a ZOC is called a controlled hex. Hexes controlled by Friendly units inhibit the movement of Enemy units. Terrain has no effect on Zones of Control (except for city hexes, see 6.15).
6.1 Effects of Zones of Control
6.11 A unit may be moved into an Enemy-controlled hex at no additional Operation Point cost, but its movement must cease upon being so moved (see 5.22).
6.12 Friendly ZOC's never affect Friendly units (however, see 5.32).
6.13 There is no additional effect of more than one unit controlling a given hex. If Enemy and Friendly Zones of Control are exerted into the same hex, that hex is mutually controlled by both of the Players.
6.14 The presence of a Friendly unit negates Enemy Zones of Control for purposes of tracing Friendly Supply Lines (see 10.1) and conducting retreats of Friendly units (see 8.8) in the hex occupied by that unit. Friendly units do not negate Enemy Zones of Control for purposes of movement.
6.15 Zones of Control never extend into city hexes. Zones of Control may extend out of city hexes (but not into other city hexes). A Friendly unit that occupies a city hex adjacent to an Enemy-occupied hex is not affected by the Enemy units' Zone of Control until the Friendly unit is moved out of the city hex.
6.2 Exiting Enemy-Controlled Hexes
The Phasing Player may attempt to move a unit or stack of units out of an Enemy-controlled hex if those units have expended no Operation Points (have not yet attacked or moved) in the current Player Phase.
6.21 If the Phasing Player wishes to move all the units in a particular Enemy-controlled hex out of that hex, the stack (or single unit) must expend six Operation Points, and the Player must roll a die. (Exception: See 6.24.) If the die result is three or less, the unit(s) may conduct the move (paying the six Operation Points and the cost of the terrain in the hex being entered). If the die result is four or higher, the move may not be conducted (or attempted again this Phase).
6.22 If an attempt to exit an Enemy-controlled hex fails, the involved units must still gain an FP for attempting to do so. The movement of such units is considered completed for the Player Phase; they may not conduct an attack.
6.23 If a stack of Friendly units is in an Enemy-controlled hex, the Phasing Player may move one or more of the units out of that hex, as long as at least one unit that exerts a Zone of Control remains in the hex. Such a move requires that the units being moved expend six Operation Points, but does not require the Phasing Player to roll a die; the attempt automatically succeeds.
6.24 A unit or stack of units in a hex controlled by one Enemy company-sized unit only may exit that hex at a cost of six Operation Points. No die roll is required.
6.25 A unit that is moved out of an Enemy-controlled hex may not be moved into an Enemy-controlled hex in the current Player Phase.
7.0 Stacking
General Rule
When more than one Friendly unit occupies a single hex, the units are collectively referred to as a stack. Both Players are limited in the number of units they may have in a hex at any one time. Stacking restrictions apply at the end of every Player Phase and at every instance when combat occurs. If there are more units in a hex than allowed, excess unit(s) of the owning Player's choice must be eliminated. Friction Point markers do not count against stacking limits.
7.1 Stacking Restrictions
7.11 The Warsaw Pact Player may never have more than three units in a hex. In addition, a regiment-sized unit may never stack with another regiment-sized unit (such a unit could be in the same hex as one or two non-regiment units).
7.12 The NATO Player may never have more than two units in a hex. NATO units of different nationalities may not be stacked together. A NATO unit of one nationality may be moved through a hex containing a NATO unit of another nationality, but may not end its movement or conduct an attack from such a hex.
7.2 Stacking and Movement
A stack of units is considered to be one unit for purposes of Operation Point expenditure.
7.21 When the Operation Point expenditure of a stack is completed, all the units in the stack gain a Friction Point, shown by flipping the entire stack over, or by adjusting the stack's FP marker, if the stack is already flipped over. (Exception: 7.32).
7.22 Units may pass freely through other stacks of Friendly units during movement. (Exceptions: 5.32 and 5.33.) Stacking restrictions apply only at the end of the Player Phase and during combat.
7.3 Stacking and Friction Points
When a unit completes its movement in a hex occupied by another unit, the newly formed stack is assigned one FP level. (Exception: See 7.32.) If the units in the stack now possess the same FP level, one FP marker (only) is used to show the FP level of the entire stack. If the units in the stack possess different FP levels, the two FP levels are averaged together to determine one FP level for the newly formed stack. One FP marker is then used to show this FP level. The Friction Point Average Table (7.4) provides the Players with all the possible averages that may occur.
7.31 When averaging Friction Point levels, always round up (as is done on the table).
7.32 Every artillery unit and attack helicopter unit always retains its own Friction Point level (and thus, its own FP marker), regardless of what type of units such a unit may be stacked with. If such a unit expends Operation Points as part of a stack, the owning Player must make sure to increase the unit's FP level separately upon completion of its expenditure.
7.33 If a unit completes its movement in a hex occupied by a unit on its non-FP side, the unit in the hex is flipped to its FP side and its FP marker (if any) is reduced by one. The Friction Point Average Table is then consulted to determine the stack's new FP level. (Exception: See 7.32.)
7.34 If Players wish, they may ignore the restrictions of 7.3 and keep track of the FP levels of stacked units on an individual basis. In this case, it is entirely possible that a given combat result will destroy some units in a hex and leave others (which began with a lower FP level) still in play.
7.35 Players should always keep track of FP levels of stacked units on an individual basis (see 7.34) if, by averaging, any unit(s) in the stack would exceed its maximum FP level.
7.4 Friction Point Average Table
(see Charts and Tables)
8.0 Combat
General Rule
Combat may occur (but is not required) between a unit or stack of units and all the enemy units in an adjacent hex. Combat is a function of movement requiring the expenditure of Operation Points. In a combat, the Phasing Player is termed the attacker and the non-Phasing Player is the defender, regardless of the overall strategic situation. The attacking units and/or the defending units may be required to gain Friction Points as a result of combat.
Procedure
When the Phasing Player initiates a combat, the following steps are undertaken, in order:
-
The attacker states which Enemy-occupied hex is under attack, and which of his units adjacent to that hex are participating in the attack. He then declares what type of attack he is conducting; a march attack, a hasty attack, or a prepared attack and whether it is a normal or mobile attack. Finally, each of his involved non-artillery units must expend the appropriate number of the Operation Points.
-
The attacker may commit non-adjacent artillery units, attack helicopter units and/or Air Points to the attack. He may also declare the use of smoke and chemicals. He may use his EW Points to conduct electronic warfare.
-
This step is not undertaken if the attacker conducted successful electronic warfare in step 2. The defender may commit artillery units and/or attack helicopter units that are not under attack, and Air Points to aid his defense. He may also declare the use of chemicals. The use of items described in this step and step 2 of the Procedure are subject to their availability to the Player (see the scenario instructions).
-
The Attack Strength of all the attacking units is totaled and compared to the total Defense Strength of all the Enemy units in the hex under attack. If a mobile attack has been declared, the Mobile Combat Strength of both Players' involved units is used. The comparison is stated as a ratio of the attacker's strength to the defender's strength. Round off the ratio in favor of the defender (e.g., 14 to 5 = 2 to 1) to conform to the simple ratios found on the Combat Results Table.
-
The combat ratio is used to determine which column on the Combat Results Table (8.6) will be used to resolve the combat. The ratio should be located in the row of the Table corresponding to the terrain in the defending units' hex. The column referred to may be altered by the application of column shifts for various modifiers.
-
The attacker rolls one die, cross-referencing the die result under the declared attack type with the determined column to yield a combat result. The effects of the combat result are applied at once.
8.1 Declaring Combat
The Phasing Player (only) may declare a combat. He may do so whenever a unit or stack of units that he is expending Operation Points with is in a hex adjacent to an Enemy-occupied hex that he wishes to attack, at the beginning of the Player Phase or during a unit's movement.
8.11 When the Phasing Player declares a combat, he states whether it is a prepared, hasty or march attack. Each attack type costs a certain number of Operation Points to conduct (see the Operation Point Cost Chart), and is resolved on a different die result column of the Combat Results Table (8.6).
8.12 The Phasing Player may declare that an attack is a mobile attack, regardless of which of the three attack types he chose, as long as the requirements of 8.7 are met.
8.13 A Player may involve a unit or stack of units that he is moving in more than one attack in a given Player Phase (although each attack is resolved one at a time). As long as a unit's Operation Point Allowance is not exceeded, the unit may be involved in any number of attacks and may expend Operation Points to move before, between or after attacks. Remember that all movement and combat conducted by one unit (or stack) must be completed before beginning to move another.
8.14 The Phasing Player may declare an attack against a given Enemy unit any number of times in his Player Phase, as long as he has units with the requisite Operation Points to conduct such attacks.
8.2 Which Units May Attack
8.21 An attack may not be conducted solely by artillery units, attack helicopter units, Air Points or Electronic Warfare Points.
8.22 An attack may not be declared if the combat ratio of that attack would be less than the lowest combat ratio listed on the Combat Results Table. For example, a unit in a broken hex may not be attacked at less than a 1-3 ratio. This restriction applies before column shifts for modifiers are taken into account.
8.23 A unit that has reached its maximum FP level may not participate in an attack. Such a unit may defend.
8.3 Multiple Unit and Multi-Hex Combat
8.31 No more than one Enemy-occupied hex may be attacked in a single combat. Furthermore, all the Enemy units in that hex must be attacked, if the hex is attacked at all. The defender may not withhold a unit in a hex under attack.
8.32 If the attacker wishes to involve a unit that is part of a stack in an attack, he must include the entire stack in the attack. Exception: An artillery unit or attack helicopter unit in a stack including units involved in an attack need not be involved in that attack.
8.33 The Phasing Player may use units in more than one hex in a single attack. Such an attack, called a multi-hex attack, may be conducted only if all the following conditions are met:
-
All the attacking units have expended no Operation Points thus far in the Player Phase.
-
All the attacking units are eligible to expend Operation Points in the current Player Phase.
-
A prepared attack (normal or mobile) must be declared, requiring all the involved non-artillery units to expend six Operation Points to participate in the attack.
-
If the Warsaw Pact Player is conducting the attack, all his involved units must be in the same division. Exception: Non-divisional units (those subordinate to an army) may be included with the units of a division.
-
If the NATO Player is conducting the attack, all of his involved units must be of the same nationality.
(The numbered conditions are reproduced with the numbering as printed in the scan; condition 2 is not present in the scan's text layer.)
8.34 If a multi-hex attack is conducted, the attacker receives one column shift in his favor on the Combat Results Table for each hex in excess of one that contains attacking units adjacent to the defending units' hex. For example, if the adjacent attacking units were in three hexes, the attacker would receive two column shifts in his favor. Artillery and attack helicopter units taking part in the attack do not count towards these column shifts.
8.35 After a multi-hex attack is resolved, and any advances after combat have been completed, the Operation Point expenditure of all the participating stacks, except for one stack (as deployed at the instant of combat) of the Phasing Player's choice, is considered completed (see 5.14).
8.4 Combat Modifiers
The column referred to on the Combat Results Table may be adjusted by modifiers, in terms of column shifts to the right or left. To calculate column shifts, locate the column corresponding to the determined combat ratio and then move right and/or left the appropriate number of columns. All combat modifiers and their resultant column shifts are explained on the Combat Results Table.
8.41 If column shifts for more than one type of modifier are being applied to a combat, the defender should add together all the shifts to the left while the attacker adds together all the shifts to the right. The lesser of these two totals is then subtracted from the greater to determine how many of the column shifts in the greater's direction will be applied.
8.42 If the column being used on the Combat Results Table reaches the highest (or lowest) ratio column, all further column shifts to the right (or left) are ignored.
8.43 Most terrain effects are built into the "integrated" Combat Results Table and are not expressed in terms of column shifts. Exceptions include towns and rivers, as noted on the Table. Also note that the participation of an engineer unit in an attack reduces the effects of rivers and cities.
8.44 NATO Surprise Attack Bonus. In any NATO attack in which the defending Warsaw Pact unit(s) is completely surrounded by NATO units or their ZOC's, the Attack Strength of all adjacent attacking units and supporting attack helicopters is doubled. When conducting a mobile attack, the Mobile Combat strength is doubled in this situation. This bonus is in addition to column shifts that may be applied for surrounding the defending unit and for conducting a multi-hex attack.
8.5 Combat Resolution
All combat is resolved using the Combat Results Table. After locating the proper ratio column on the Table (referring to the terrain in the defending unit's hex), and applying any column shifts called for, the attacker refers to the column on the left side of the table matching his declared attack type. He then rolls the die, locating the die result in the proper attack type column. The die result is then cross-referenced with the determined combat ratio column to yield a two-part combat result. The result to the left of the slash is the number of FP's the attacker gains; the result to the right is the number of FP's the defender gains.
8.51 A combat result calling for FP gain by the defender is applied to each and every defending unit.
8.52 A combat result calling for FP gain by the attacker is applied to each and every attacking unit.
8.53 An artillery unit conducting direct fire (see 11.1) is always affected by combat results. An artillery unit conducting indirect fire is never affected by combat results (see 11.2). An attack helicopter involved in a combat is always affected by combat results (see 12.0).
8.54 When a combat result is achieved, its effects must be implemented immediately, before conducting any other movement or attacks.
8.55 The defender (only) may reduce the FP gain required by a combat result if he elects to retreat his defending units. If he does so, however, the attacker's result may also be reduced (see 8.8).
8.56 If a unit gains an FP or FP's so that it possesses more than its maximum FP level, it is considered destroyed; remove it from play.
8.6 Combat Results Table
(see Charts and Tables)
8.7 Mobile Combat
If the Phasing Player is attacking in flat or broken terrain, without woods or any other type of terrain (except roads and Autobahns) in the hex attacked, he may choose to launch a mobile attack. If the attacker does choose a mobile attack, his own attacking units and the defending unit(s) use their Mobile Combat Strengths.
8.71 Artillery and attack helicopters, when supporting mobile combat, use a strength of 1, except Warsaw Pact artillery using direct fire, which is doubled to a strength of 2.
8.72 If a mobile attack is conducted while ground fog is in effect or when an involved artillery unit is projecting smoke, a shift of one column to the right is applied to the CRT.
8.73 Results against a defender in mobile combat is reduced by one.
8.8 Retreats
If the defender incurs an FP gain of two or more as a result of combat, he may choose to fulfill part of the result by retreating all the defending units, instead of gaining FP's. At least one FP must be gained whenever a combat result (except "0") is incurred. (Exception: See 8.87.) The Player may fulfill the remainder of the requirement by any combination of FP gain and hex retreat. For example, if the result is a 2, one FP could be gained and one hex retreated. If the result is a 4, one FP could be gained and three hexes retreated, or two FP's could be gained and two hexes retreated, etc.
8.81 Retreats are always conducted by the owning Player. However, if the defender chooses to retreat, he must retreat all his units involved in the combat. Retreating does not require the expenditure of Operation Points. The attacker may never retreat.
8.82 Retreating is never required; a unit may gain FP's instead (even if this would cause the elimination of the unit). However, a unit may not be retreated and eliminated to fulfill a single combat result.
8.83 A unit may be retreated into any adjacent hex, as long as the following restrictions are adhered to (in order):
-
A unit may not be retreated into an Enemy-occupied or controlled hex, or off the game-map.
-
A unit may not retreat across a river hexside, unless the hexside is traversed by an intact bridge.
-
A unit must retreat into a vacant hex, if possible. If no vacant hex is available, it may retreat into or through a Friendly-occupied hex, but not in violation of stacking restrictions.
-
A unit must retreat into a connected Autobahn or road hex, if possible (defender's choice, if more than one hex fulfills this requirement).
-
A unit must retreat into the hex requiring the fewest Operation Points to enter.
8.84 If no permissible retreat route is open to a unit, no retreat may be conducted; the unit must gain FP's.
8.85 A NATO unit may end its retreat in a hex occupied by a NATO unit of a different nationality only if no other hex is available. As long as they remain stacked, the units may defend together but may not be supported by any indirect fire (or attack helicopters), and may not attack.
8.86 If a stack is being retreated, it may not be split up (that is, it may not be retreated to any different hexes).
8.87 A unit with a soft target symbol must gain at least two FP's in a given combat before it may retreat. An attack helicopter unit, however, may never retreat.
8.88 If the defender chooses to retreat, any combat result incurred by the attacker is reduced by one (e.g., a 1 becomes a 0). Also see 8.92.
8.89 A unit must end up as many hexes away from its original hex as the number of hexes it retreats.
8.9 Advance After Combat
Whenever a defending unit is retreated or eliminated as a result of combat, it will leave a hex or path of hexes behind it called the path of retreat. After the attacker's combat result has been fulfilled (if any), any or all victorious attacking units are allowed to advance along the Enemy path of retreat, and may sometimes deviate from it. Advance after combat does not require the expenditure of Operation Points.
8.91 The permissible length of an advance after combat is equal to the number of hexes the defending unit retreated.
8.92 If all the defending units in a combat are eliminated, the length of the advance after combat equals the required FP gain of the defender's combat result that remains unfulfilled. For example, if a defending unit (with a maximum FP level of 5) possessing four FP's is required to gain four FP's as a result of combat, and is eliminated, the attacking units could be advanced two hexes. If the defender's entire combat result is fulfilled by unit elimination, no advance after combat is allowed. If part of an eliminated defender's combat result remains unfulfilled, the attacker's combat result is reduced by one, as if the defending unit retreated (see 8.88).
8.93 Advancing units may ignore Enemy Zones of Control as long as they are being advanced along the path of retreat.
8.94 If a unit is advanced after combat, the first hex entered in this advance must be the hex occupied by the defending unit at the instant of combat. If an advance of greater than one hex is allowed, the unit may then be advanced into any adjacent hex. However, if a unit deviates from the path of retreat, its advance must stop upon entering an Enemy-controlled hex. In the case of advancing after eliminating the defending unit(s), any hex entered beyond the first hex is considered deviating from the path of retreat.
8.95 Artillery units conducting indirect fire and attack helicopter units may not be advanced after combat. Artillery units conducting direct fire may advance after combat.
8.96 A unit that did not participate in the current combat, but that is stacked with a unit that did, may be advanced after combat.
8.97 The attacker may cease to advance his units at any point during their advance; he is never required to advance a unit. If more than one unit is being advanced, they may be advanced into the same or different hexes. However, stacking restrictions may not be exceeded at the end of any advance.
8.98 A unit may be advanced across an unbridged river hexside only if it is entering the hex occupied by the defending unit at the instant of combat.
9.0 Friction Points (FP's)
Commentary
A Friction Point (FP) is a measure of fatigue, wear and tear on equipment and personnel loss. A unit's "front line" combat strength never changes. Instead, the Friction Point system shows the reduction (and replenishment) of a unit's depth. When a critical point is reached, the unit ceases to exist as a cohesive combat force; but until that point, the unit will function close to its optimum capabilities.
General Rule
The number of FP's a unit possesses at any one time is called that unit's FP level. A unit's FP level is noted by the side of the unit that is currently face-up and by the use of FP markers. The Combat Strengths are printed in white on the back-side of each unit; when this side is face-down, the unit is on its non-FP side; when this side is face-up, the unit is on its FP side.
9.1 Maximum FP Levels
Each unit has a specific, maximum FP level which it cannot exceed without ceasing to exist. A unit that exceeds its maximum FP level is eliminated. Maximum FP levels, based on unit sizes, are as follows:
All Regiments, and all Artillery and Attack Helicopter units have a maximum FP level of 5.
All Battalions, including West German Territorial and Static Infantry Battalions, have a maximum FP level of 4.
All Companies have a maximum FP level of 3.
Example: A US battalion with a current FP level of 4 is eliminated the instant it gains one additional FP (for a total of 5).
9.2 How FP's Are Gained
The FP level of a unit (or stack) may be increased as follows:
9.21 When the Operation Point expenditure for a unit is completed for a single Player Phase, the FP level of the unit is increased by one. This is done for any unit that expends Operation Points, regardless of how many attacks it may conduct.
9.22 After any type of attack is resolved, the FP levels of all the involved attacking and defending artillery units (conducting direct or indirect fire) and attack helicopter units are increased by one, regardless of the outcome of the combat. Exception: If the defending units in a combat consist solely of artillery and/or attack helicopter units, the FP levels of the units in the hex under attack are not automatically increased.
9.23 When a combat is resolved, an FP level increase for the involved attacking and/or defending units may be called for by the combat result. The required increase may be reduced if the defending Player chooses to retreat his units (see 8.8). This increase does not apply to artillery units conducting indirect fire, but it does apply to attack helicopter units.
9.3 How FP's Are Removed
During the Friction Point Removal Segment of each Game-Turn, the FP level of every non-artillery unit in play may be reduced by one. The FP level of every artillery unit may be reduced by two. If a unit is out of supply (see 10.0) during the Friction Point Removal Segment, its FP level may not be reduced.
9.4 Recording FP's
At the beginning of the Initial Player Phase of each Game-Turn, all the units in play have their non-FP side face-up. If a unit expends Operation Points in the owning Player's Initial Player Phase of the Game-Turn, the FP it must gain for doing so is recorded by flipping the unit over. Under all other conditions, any FP's a unit gains are recorded by placing the appropriate FP marker under the unit. (Exception: See 9.44.)
9.41 Backprinted FP markers representing 1, 2, 3 and 4 FP's are provided. If the supply of FP markers is exhausted, similar markers of the Players' devising should be used.
9.42 The current FP level of a unit on its non-FP side is the value of its FP marker only. If such a unit has no FP marker, its FP level is "0." The current FP level of a unit on its FP side equals the value of its FP marker plus one. If such a unit has no FP marker, its FP level is "1."
9.43 When a unit (except an artillery or attack helicopter unit) is moved into a hex containing another Friendly unit (thus forming a stack), the FP levels of the units can be averaged together (see 7.3). Such a stack is considered to be one unit for purposes of FP gain and loss.
9.44 If a regiment on its non-FP side possessing a "4" FP marker must gain an FP, it is recorded by flipping the unit over, regardless of the Player Phase in progress.
9.45 The FP level of a unit that is out of supply during the Friction Point Removal Segment is not reduced (see 9.3). However, if the unit is on its FP side, it is flipped over (to its non-FP side) and the FP level shown by its FP marker is increased by one. (Exception: This is not done if the unit currently has reached its maximum FP level.)
9.5 Effects of FP's on Movement and Combat
A unit on its non-FP side may expend Operation Points in the owning Player's Initial Player Phase of the Game-Turn only. A unit on its FP side must expend one additional Operation Point for every hex it enters when being moved (see 5.12).
9.51 An artillery unit or attack helicopter unit may be used to support an attack or defense when on its non-FP side regardless of the Player Phase in effect.
9.52 During a Player's Initial Player Phase of the Game-Turn, he may flip over any of his units from their non-FP side to their FP side, without having them expend Operation Points, so they can move in later Player Phases. Any unit so turned gains an FP by being flipped over, of course.
9.53 A unit that has reached its maximum FP level may not expend Operation Points in any manner. If an artillery or attack helicopter unit has an FP level of five, it may not be used to support an attack or defense in any way. A unit that has reached its maximum FP level may defend when actually attacked. See also 11.13 and 11.33.
10.0 Supply
General Rule
In order to remove a Friction Point from a unit during the Friction Point Removal Segment, the unit must be in supply; if a unit is not in supply during this Segment, its FP level may not be reduced at all. This is the only effect of being out of supply. A unit is in supply if a Player can trace a supply line from the unit to a supply source during the Friction Point Removal Segment.
10.1 Line of Supply
A supply line consists of two segments. The first segment is composed of a path of hexes leading from the hex occupied by the tracing unit (exclusive) to a road or Autobahn hex (inclusive) which would not cost the unit more than 6 Operation Points to cross on its non-FP side (i.e., during an initial Player Phase). The second segment is composed of a path of connected road and Autobahn hexes leading from the last hex of the first segment to a Friendly supply source.
10.11 A supply line may not be traced through an Enemy-occupied hex. A supply line may not be traced through an Enemy-controlled hex unless that hex is occupied by a Friendly unit that exerts a Zone of Control.
10.12 A supply line may not be traced through an unbridged river hexside unless a Friendly engineer unit is adjacent to the hexside.
(Printed as an unnumbered fragment in the source, directly after 10.12:) swamp, marsh, or rough hex (unless traversed by a road or Autobahn), and a supply line may not be traced through an unbridged river hexside.
10.13 Refer to the Exclusive Rules of the game being played to determine Friendly supply sources.
10.14 A hex from which an Enemy unit has been exited may not be used as a Friendly supply source (see 5.45).
10.15 For victory purposes only, supply lines are not considered blocked by airmobile, airborne, and air-landed units and their ZOC's.
10.16 No NATO units may trace a supply line through any hex of East Germany or Czechoslovakia.
10.17 The Warsaw Pact Player may not trace a line of supply through a city hex which a Warsaw Pact unit was not the last to pass through.
10.2 Warsaw Pact Supply
If so noted in the Exclusive Rules of the game being played, Warsaw Pact units are automatically considered in supply for certain Game-Turns. When this is the case, a Friction Point may be removed from every Warsaw Pact unit during the Friction Point Removal Segment, regardless of its supply situation. Exception: Warsaw Pact artillery units are never considered automatically in supply. If a supply line cannot be traced for a Warsaw Pact artillery unit, Friction Points may not be removed from it.
11.0 Artillery
General Rule
Artillery units may participate in combat by conducting direct or indirect fire. Artillery units may also be used to release chemicals and smoke and conduct counterbattery fire. Rocket artillery may increase its effectiveness by incurring FP gains.
Procedure
The attacker and the defender declare use of their artillery units in a combat during Steps 2 and 3 of the Combat Procedure (see 8.0). The functions described in this Section that these units may perform do not require the expenditure of Operation Points. However, these functions do require the gain of Friction Points.
11.1 Direct Fire
An artillery unit that is stacked with a non-artillery unit may participate in an attack against an adjacent Enemy unit by conducting direct fire. Warsaw Pact artillery is doubled in strength in direct fire. An artillery unit in a stack containing at least one non-artillery unit that is attacked by Enemy units must participate in the defense by conducting direct fire.
11.11 An artillery unit conducting direct fire while attacking contributes its Attack Strength to that of the attacking non-artillery units. An artillery unit conducting direct fire while defending contributes its Defense Strength to that of the units under attack. If a mobile attack has been declared by the attacker, an artillery unit contributes its Mobile Combat Strength (1) when conducting direct fire (attacking or defending).
11.12 Any number of eligible artillery units may participate in a combat using direct fire (however, see 8.21).
11.13 An artillery unit that is under attack when alone in a hex, or stacked with only artillery or attack helicopter units, and/or when possessing five FP's is considered to have a Defense Strength of 1 (instead of its printed strength). Exception: A self-propelled artillery unit possesses a Defense Strength of 2 in these situations (unless its printed Strength is 1).
11.14 The Attack Strength of all Warsaw Pact artillery units (except rocket) is doubled when conducting direct fire. Their Defense Strength is unaffected. This bonus is applied when a mobile attack has been declared; however, the unit's Mobile Combat Strength (1) is doubled instead.
11.15 An artillery unit conducting direct fire is affected by any combat result incurred by the owning Player as a result of the combat.
11.2 Indirect Fire
An artillery unit that is not in an Enemy-controlled hex may participate in an attack against an Enemy unit by conducting indirect fire. In order to do so, the artillery unit must be within range of the Enemy unit. An artillery unit not in an Enemy-controlled hex may participate in the defense of a Friendly unit under attack by conducting indirect fire, if within range of the Friendly unit. The restrictions of 11.11 and 8.21 apply to indirect fire. Further restrictions inhibit use of indirect fire by the Warsaw Pact Player.
11.21 An artillery unit is within range of a unit if the distance (in hexes) between the two units is less than or equal to the artillery unit's printed range. Range is counted by including the hex containing the "target" unit but not the hex containing the artillery unit. Range may be traced through Enemy-occupied or controlled hexes.
11.22 An artillery unit that is in an Enemy-controlled hex and is not eligible to conduct direct fire may conduct indirect fire if all the Enemy units controlling the hex are involved in the current combat. (Exception: See 11.13.)
11.23 A Warsaw Pact artillery unit may conduct indirect fire only if all the following restrictions are met.
-
The artillery unit may not be stacked with a non-artillery unit.
-
A prepared attack is being conducted (this restriction applies only if the Warsaw Pact Player is attacking).
-
The artillery unit is in the same division as all the divisional non-artillery units in the combat (this restriction does not apply if the artillery unit is designated as a non-divisional unit).
11.24 A NATO artillery unit may not conduct indirect fire in a combat if any of the involved NATO non-artillery units are of a different nationality.
11.25 An artillery unit conducting indirect fire is not affected by any combat results.
11.26 A hex containing an artillery unit conducting indirect fire in a multi-hex attack does not count towards any column shift bonus received for that attack (see 8.34).
11.3 Artillery and Friction Points
Each and every artillery unit retains its own FP level; a separate FP marker is always used. Every time an artillery unit conducts direct or indirect fire, its FP level is increased by one. This increase is applied after any FP's the unit must gain because of a combat result have been applied.
11.31 During the Friction Point Removal Segment of each Game-Turn, the FP level of each artillery unit is reduced by two (unless it is out of supply, see 10.0).
11.32 An artillery unit gains an FP each time it is used to release chemicals and smoke (see 11.4). If an artillery unit is used to conduct direct or indirect fire, and to release chemicals and smoke in the same combat, it gains two FP's.
11.33 An artillery unit that currently possesses five FP's may not conduct direct or indirect fire (see 11.14). An artillery unit that currently possesses four FP's may not conduct fire and release chemicals/smoke. Such a unit may perform one, but not both of these functions. It is possible that an FP gain required of an artillery unit for conducting direct fire would cause the unit's elimination, if a combat result it incurred also increased its FP level.
11.34 If an artillery unit expends Operation Points in a Player Phase, it gains a Friction Point, just as a non-artillery unit would. (Direct fire, indirect fire, releasing chemicals and smoke, and retreating and advancing after combat do not require the expenditure of Operation Points.)
11.4 Chemicals and Smoke
Either Player may declare that an artillery unit is releasing chemicals and smoke in addition to or instead of conducting direct or indirect fire. Chemicals give the Player using them a certain number of column shifts in his favor on the Combat Results Table.
11.41 Any artillery unit that is eligible to conduct direct or indirect fire in a combat may release chemicals and smoke. Case 11.23 does not apply (except for part 3). When such a unit does so, it gains an FP. If an artillery unit conducts direct or indirect fire, and releases chemicals and smoke in the same combat, it gains two FP's.
11.42 A Player need not declare that an artillery unit is releasing both chemicals and smoke, if he wishes to use only one of these items. However, one Friction Point is gained regardless of whether chemicals or smoke or both are used.
11.43 The Exclusive Rules of the game being played list the number of column shifts a Player receives in his favor on the Combat Results Table when using chemicals. These shifts vary depending on the Game-Turn currently in progress. Furthermore, the NATO Player may be restricted from using chemicals in certain Game-Turns.
11.44 The release of smoke aids the attacker when he is conducting a mobile attack during a Game-Turn in which ground fog is not in effect. Smoke only aids the attacker under these conditions, and never aids the defender. If these conditions are met, the attacker receives a shift of one column to the right on the Combat Results Table when resolving the mobile attack.
11.45 The effects of chemicals and smoke last for the duration of the combat they are released in only.
11.46 A Player may receive the column shift bonuses applied for chemicals and smoke once per combat only, regardless of how many artillery units are releasing chemicals and smoke.
11.47 A Player may use Air Points to release chemicals, but not to release smoke. An attack helicopter unit may not be used to release chemicals or smoke.
11.48 The NATO Player may not release chemicals into a city hex.
11.5 Counterbattery Fire
Any number of Friendly artillery units may conduct counterbattery fire in a Friendly Player Phase, as long as none of them have yet expended Operation Points in the Phase and are not in Enemy ZOC's. Each artillery unit may conduct counterbattery fire against one Enemy artillery unit within its range. The Phasing Player declares and resolves each counterbattery attack, one at a time, as follows:
-
The Phasing Player declares that a given artillery unit is conducting counterbattery fire, increases its FP level by one (optionally more; see 11.6), and declares the Enemy artillery unit under attack.
-
The Attack Strength of the attacking artillery unit is compared to the Counterbattery Defense Strength of the Enemy artillery unit to determine a combat ratio. The Counterbattery Defense Strength is 1 if the defending artillery unit is soft, or 2 if it is hard.
-
The attacker rolls the die, cross-referencing the die result with the proper ratio column, as if a prepared attack were being conducted in flat terrain, to yield a combat result. Combat results incurred by the attacker are ignored.
-
If the defender's combat result is 1 or greater, the counterbattery fire succeeds (see 11.55).
11.51 When resolving counterbattery fire, neither the attacker nor the defending artillery unit gains any benefit from terrain, Air Points, smoke, fog, attack helicopters, or other modifiers. The attacking artillery unit may, however, use chemicals.
11.52 Counterbattery fire is selective. Any other artillery or non-artillery units stacked with the defending artillery unit are ignored when resolving counterbattery fire.
11.53 No more than one attacking artillery unit and one defending artillery unit may be involved in a single counterbattery attack.
11.54 Aside from gaining an FP, an artillery unit is not affected by conducting counterbattery fire. The unit may conduct additional counterbattery fire, expend Operation Points, and/or conduct normal fire during the Player Phase.
11.55 An artillery unit that incurs any combat result (except 0) in a counterbattery attack may not be used to conduct any fire for the duration of the current Player Phase. Furthermore, the artillery must satisfy the combat result by FP gain and/or retreat, as in a normal attack. If the artillery unit is hard, it must gain at least 1 FP before retreating; if the artillery unit is soft, it must gain at least 2 FP's (if the combat result is 2 or greater).
11.56 All Warsaw Pact non-divisional and DAG artillery units, and all NATO artillery units, may perform counterbattery fire.
11.6 Rocket Artillery
11.61 In any Friendly Player Phase, rocket artillery units may increase their attack strength by increasing the number of FP's they gain. The following chart shows the effect on the unit's attack strength according to the number of FP's the owning Player chooses to gain:
| FP's | Attack Strength |
|---|---|
| 1 | Normal |
| 2 | x2 |
| 3 | x3 |
| 4 | x4 |
| 5 | x5 |
Example: During the Warsaw Pact Player Phase, a rocket artillery unit with a strength of 5-5 is supporting an attack. The Warsaw Pact Player decides to triple the attack strength of the rocket artillery unit, making it a 15. He does so and conducts the attack, adjusting the unit's FP level to reflect an increase of 3 FP's.
11.62 Rocket artillery units may use this special increase in strength only when supporting an attack or conducting counterbattery fire.
11.63 Rocket artillery units do not have their strength doubled when conducting direct fire (exception to 11.14).
12.0 Attack Helicopters
General Rule
An attack helicopter unit may be used to support any type of attack or defense in a manner similar to indirect fire. The unit represents the base from which the helicopters operate. However, any time an attack helicopter unit is involved in a combat, it must gain any FP's required by the combat result.
12.1 Helicopters and Combat
12.11 An attack helicopter has a printed range which the unit must be within to participate in combat (see 11.21).
12.12 When an attack helicopter unit is attacked, it defends with a strength of 1, whether alone or stacked with other units. An attack helicopter unit (and any units stacked with it) may never be retreated; it must gain all FP's incurred by a combat result.
12.13 An attack helicopter unit that is in an Enemy-controlled hex may never be used in the support of a combat.
12.14 The restrictions of 11.24 and 11.26 apply to attack helicopters, while 11.23 does not. An attack helicopter may never be used to release chemicals or smoke.
12.2 Helicopters and FP's
Each attack helicopter unit retains its own FP level. The FP level of an attack helicopter is reduced by one (only) during the Friction Point Removal Segment (unless out of supply). The restrictions of Cases 11.33 and 11.34 apply to attack helicopters.
13.0 Airmobile Operations
General Rule
Both Players receive certain units, specified in the scenarios, that are considered airmobile or convertible to airmobile. An airmobile unit may be "flown" from one hex to another by transport helicopters (which are not represented by counters). Every attack helicopter unit in the game is considered to include sufficient transport helicopters to move one airmobile unit per Friendly Player Phase. A Player may move airmobile units in this manner only during Game-Turns in which the Enemy Player does not have Air Superiority. The Exclusive Rules list the unit types available for conversion to airmobile status.
Procedure
During the Friendly Player Phase, each attack helicopter unit may transport one airmobile unit a number of hexes up to the limit of the helicopter unit's range allowance. This range is counted from the hex occupied by the helicopter unit (exclusive) to the hex occupied by the airmobile unit (inclusive) and then to the destination hex of the airmobile unit (inclusive). The Phasing Player must actually trace this range on the map as a "flight path"; if the path passes through an Enemy-occupied or Enemy-controlled hex, the airmobile unit and the helicopter unit are subjected to Enemy air defense fire (see 13.2). After the Phasing Player has completed this move, the helicopter unit immediately gains an FP.
13.1 Converting Units to Airmobile Status
The conversion of units to airmobile status is limited by the number of substitute counters provided for each nationality. Conversion to airmobile may take place at any time during the Friendly Player Phase. The Phasing Player simply removes the eligible unit from the map and replaces it with an airmobile substitute counter (of the same nationality) on the same hex. If the unit to be replaced is a battalion, a single substitute unit is placed; if the unit is a regiment, it is replaced by three airmobile substitute counters. Both Players should note the hex number where the conversion of a unit takes place. This hex is considered to contain heavy equipment and vehicles of the converted unit. Should the hex be subsequently entered by an Enemy unit, the equipment in the hex is considered destroyed, leaving the converted unit with no opportunity to "reconvert" to its original unit.
In order to reconvert an airmobile unit to its original unit, move the unit back to the original conversion hex and substitute the original unit for the airmobile. In the case of Warsaw Pact regiments, three airmobile units originating from the same strength mechanized unit must be moved to the conversion hex.
13.2 Air Defense Fire
When an airmobile unit is being transported to its destination hex, it may be subject to Enemy air defense fire. If the flight path of an airmobile unit passes through an Enemy-controlled or Enemy-occupied hex, the airmobile unit and the transporting helicopter each gain one FP immediately. FP's are gained in this manner for every hex in the flight path which is Enemy-controlled or Enemy-occupied. Hexes in the flight path lying between the helicopter unit and the unit to be transported do not count for air defense fire.
13.3 Special Rules for Airmobile Units
13.31 An airmobile unit is considered a non-motorized, infantry unit and is subject to the provisions of 5.33.
13.32 An airmobile unit may expend only 6 Operation Points in any Phase in which it is transported (these may be expended before and/or after transport). A unit that is transported gains one FP, regardless of whether or not it expends Operation Points.
13.33 Airmobile units must trace either a normal supply line, or they may be supplied by airheads in the same manner as airborne units (see 15.5).
13.34 Warsaw Pact airmobile units are not subject to the restrictions of Soviet doctrine (see Exclusive Rules), or NATO Surprise Attack Bonus (8.44), unless they are stacked with non-airmobile or non-airborne Warsaw Pact units.
13.35 Airmobile units are considered non-divisional units for the purpose of 8.33 and 11.23.
13.36 Airmobile units may not exit the map.
13.37 A Warsaw Pact attack helicopter unit that is located off-map may not be used to transport airmobile units.
13.38 An airmobile unit may be transported to any non-Enemy-occupied hex.
13.39 Players may convert eligible units to airmobile status and simply use them as leg infantry units without initiating an airmobile operation. All normal airmobile rules apply to such units, which begin their movement in the hex of their conversion.
14.0 Air Power
General Rule
Air Points of either Player may be used in an indirect fire role. They may also be used by either Player to release chemicals.
14.1 Air Superiority
During the Airpower Segment of the Game-Turn Preparation Phase, the NATO Player rolls the die and refers to the Air Power Table to determine if either Player has air superiority this Game-Turn. A Player who has air superiority (only) may use a certain number of Air Points to aid his units that are involved in combat during the Game-Turn. Results received from the Air Power Table may also cause ground fog to be in effect during a Game-Turn (see 14.3).
14.11 The number of Air Points that a Player with air superiority receives is listed in the Exclusive Rules and should be jotted down on a separate sheet of paper when they are received. As the Player uses his Air Points, the number of Air Points at his disposal is adjusted.
14.12 A Player may not save Air Points from one Game-Turn to another. If Air Points are not used during the Game-Turn in which they are received, they are lost.
14.13 A Player may use Air Points to aid an attack or defense simply by adding any number of the Air Points he has available during the Game-Turn to the total strength of his units that are involved in the combat.
14.14 A Player may use Air Points to release chemicals in a combat, simply by declaring that he is expending the Air Points to do so. A Player may use no more than one Air Point for this purpose in any one combat (see 11.46), and if an Air Point is used in this fashion, it does not add to the strength of the Friendly units involved in the combat.
14.2 Air Interdiction
Air interdiction is another way that a Player may use his Air Points. Interdiction represents independent strikes conducted against units when they are most vulnerable, in transit. Air interdiction may be used only by the Player with Air Superiority. To undertake Air Interdiction, follow this procedure:
-
Immediately after determination of Air Superiority (during the Airpower Segment), the Player with Air Superiority may place FP markers (as Air Interdiction markers) of a value from 1 through 4 on any hex not occupied by an Enemy unit.
-
For each individual FP represented, the Player reduces his number of available Air Points for that Game-Turn by one.
-
During the remainder of the Game-Turn, the first Enemy unit or stack of units to enter the hex as a result of movement or combat gains the number of FP's represented by the marker, and the marker is removed from play.
-
Should no Enemy unit enter the hex during the course of the Game-Turn, the marker is removed from play at the end of the Game-Turn.
14.21 Air Interdiction Placement. Air Interdiction markers may be placed in any hexes on the map except those occupied by Enemy units. The number of hexes in which a Player may place Air Interdiction markers is limited only by the number of Air Points he has. However, no more than 4 FP's worth of Air Interdiction may ever be placed in a single hex.
14.22 Air Interdiction markers may be placed on a Player's own units in anticipation of Enemy movement into the hex through advance after combat or normal movement. Friendly units may always enter or leave a hex containing Friendly Air Interdiction without gaining the FP's.
14.23 Air Interdiction and Reinforcements. If the Enemy Player places an Air Interdiction marker on a reinforcement entry hex, Friendly units scheduled to enter at that hex may instead be brought into play at an alternate entry hex.
14.3 Ground Fog
On A.M. Game-Turns, it is possible to receive a ground fog result from the Air Power Table, in addition to an air superiority result. Ground fog has no direct effect on airpower, other than the listed result. If a mobile attack is conducted during a ground fog Game-Turn, the attacker receives a combat bonus. This is the only effect of fog.
14.4 Airpower Table
(see Charts and Tables)
15.0 Airborne Units
General Rule
Players receive airborne units as reinforcements as designated by scenarios. Airborne units enter play according to the air drop procedure. Once in play, airborne units may trace supply to an airhead, which may additionally be used as an entry hex for non-airborne Warsaw Pact reinforcements.
Procedure
At the beginning of the Phasing Player's initial Phase, each airborne unit that is eligible to enter play in the current Game-Turn is placed in a drop hex by the Phasing Player. After all such units are placed, the Phasing Player consults the Airdrop Table, rolling the die once for each unit, to determine how many FP's the unit gains as a result of the airdrop.
15.1 When Airborne Units Are Placed
The Phasing Player may bring airborne units into play during his initial Player Phase of any Game-Turn in which he possesses air superiority (see 14.1), or when neither Player has air superiority and ground fog is not in effect.
15.11 Airborne units must be placed in drop hexes before any other Phasing units have been moved in a Player's initial Phase. The airdrop procedure and any Operation Point expenditure by the units must be completed before moving other Phasing units or bringing normal reinforcements into play.
15.12 Entering airborne units into play does not require the expenditure of Air Points.
15.2 Drop Hex Restrictions
Any hex in play may be used as a drop hex, with the following exceptions:
-
A city or rough terrain hex.
-
An Enemy-controlled or Enemy-occupied hex.
-
A Friendly-occupied hex or a hex assigned as a drop hex for another airborne unit.
Any other hex may be used as a drop hex but, depending on the terrain in the hex, the FP gain required as a result of the airdrop procedure may be increased (see 15.3).
15.3 How to Use the Airdrop Table
After placing the airborne units, the Phasing Player consults the Airdrop Table (15.6). For each airborne unit placed, he rolls the die and locates the die result on the Table to determine how many FP's the unit immediately gains. The die result may be modified, depending on the terrain in the drop hex, as explained on the Table.
15.31 Each unit placed in a drop hex is rolled for individually by the Phasing Player. He may roll for these units in any order.
15.32 Any FP gain called for by the Airdrop Table is recorded with an FP marker, not by flipping the unit over (see 15.4).
15.33 When a unit is airdropped on a Game-Turn in which neither Player has air superiority, one is added to the die roll when using the Airdrop Table. This is in addition to any modifiers for terrain in the drop hex.
15.4 Restrictions on Airborne Units
During the Player Phase in which an airborne unit is first placed on the map, it may expend only 6 Operation Points. At the conclusion of that Phase, the airborne unit gains an FP (shown by flipping the unit over) whether it actually expended Operation Points or not.
15.41 Warsaw Pact airborne units are not subject to the restrictions of Soviet Doctrine, and the NATO Player never receives the Surprise Attack Bonus when attacking such units, unless they happened to be stacked with non-airborne Warsaw Pact units.
15.42 Warsaw Pact airborne units may only be supported by the artillery brigade organic to their division and by non-divisional artillery units.
15.43 Airborne units of both sides may always be supported by attack helicopter units and Friendly Air Points unless victims of EW.
15.44 Airborne units may never exit from the game-map.
15.5 Airheads and Airborne/Airmobile Supply
Any airfield hex that is occupied by a Friendly unit, or was once occupied by a Friendly unit and has not since been occupied or controlled by an Enemy unit, is considered a Friendly airhead. During each Game-Turn that the Friendly Player has air superiority (or neither Player has air superiority), an airhead is considered operative, and may be used as a supply source for airborne and airmobile units, and (for Warsaw Pact units only) as an entry hex for non-airborne/airmobile mechanized or artillery units.
15.51 An airborne/airmobile unit may trace a line of supply to any valid supply source (as listed in scenario instructions) or to an operative Friendly airhead.
15.52 During the initial Warsaw Pact Player Phase of any Game-Turn in which he has air superiority, he may place one motorized rifle unit or one artillery unit (only) on one operative Warsaw Pact airhead hex (assuming such a unit is scheduled to enter as a reinforcement in the current Game-Turn). A unit so placed is considered an air-delivered reinforcement.
15.53 An air-delivered reinforcement unit may not expend any Operation Points during the Player Phase of its entry, but is flipped over (to its FP side) upon being placed. A unit so placed is removed from the march order of its division (if assigned to one).
15.54 An air-delivered reinforcement must trace a line of supply to a valid supply source. Operative airhead hexes may be used to supply up to two air-delivered reinforcement units per Game-Turn (in addition to any number of airborne units). Regardless of how many airheads the Warsaw Pact Player controls, no more than two air-delivered units may use them as supply sources in a single Game-Turn.
15.6 Airdrop Table
(see Charts and Tables)
16.0 Engineers, Rivers and Bridges
General Rule
Both Players may attempt to destroy bridges. Friendly engineer units may be used to repair destroyed bridges and aid Friendly units in crossing unbridged river hexsides. Engineer units may also provide column shifts for Friendly attacks into city hexes or across river hexsides (see Combat Results Table).
16.1 Bridge Demolition
Each player may attempt to destroy any bridge in West Germany during any Friendly Player Phase. There are two forms of bridge demolition: close and long range demolition.
16.11 Each player may make one close range demolition attempt per Game-Turn on any bridge adjacent to a Friendly unit during any part of the player phase when the condition is met. When a Friendly unit is adjacent to the bridge that is to be destroyed the player rolls a die. On a die roll of 1-5 the bridge is destroyed. On a roll of 6, the bridge remains intact.
16.12 Each player may make one long range demolition attempt per Game-Turn on each bridge on the map, regardless of whether a Friendly unit is adjacent to it. The player announces during any part of his player phase that the attempt is being made, and rolls a die. On a die roll of 1 the bridge is destroyed. All other rolls leave the bridge intact.
16.13 No markers are provided to note a destroyed bridge hexside or failed demolition attempts. Players should keep track of this on a separate piece of paper or use a small coin.
16.2 Engineers and River Crossings
16.21 When an engineer unit or a stack containing an engineer unit is moved across an unbridged river hexside or a destroyed bridge hexside, only 1 Operation Point is expended, in addition to the cost of the terrain in the hex entered.
16.22 An engineer unit occupying a hex with an unbridged river or destroyed bridge as one of its hexsides reduces the cost to cross that hexside to 1 additional Operation Point for any Friendly unit moved through that hexside in either direction.
16.23 If an engineer unit remains adjacent to a destroyed bridge for one complete Game-Turn (i.e., it has not moved at all), and is adjacent to no Enemy units at the end of that Game-Turn, then the destroyed bridge is considered repaired when the Game-Turn is ended. In the event that an engineer unit is adjacent to more than one destroyed bridge hexside for a complete Game-Turn, all such hexsides are considered repaired. Once a bridge has been repaired, it may only be destroyed by the opposing Player through another successful bridge demolition attempt.
17.0 Reinforcements
General Rule
Both Players receive units as reinforcements during the course of the game. Reinforcements may appear during the owning Player's Initial Player Phase of their Game-Turn of entry. Units that are to appear as reinforcements, their Game-Turn of entry, and the hexes in which they may appear are listed in the Exclusive Rules.
Procedure
A reinforcement unit may be initially placed in any entry hex listed for it in the reinforcement schedule. All entry hexes contain either a road or Autobahn leading off the map. 1/2 of an Operation Point must be paid to place the unit in its chosen entry hex. The remaining Operation Point expenditure for that unit is then carried out, before moving another unit (or bringing on other reinforcements). Warsaw Pact reinforcement units are subject to the special restrictions of march order.
17.1 How Reinforcements Enter the Map
When more than one reinforcement unit is entering the map in the same hex in the same Game-Turn, the units should be imagined as a column of units entering the map from a chain of off-map road or Autobahn hexes. If an Autobahn leads off the map in the entry hex, the first unit brought onto the map expends 1/2 of an Operation Point, the second unit expends one Operation Point, the third unit expends 1 and 1/2 Operation Points, and so on. If a road leads off the map in the entry hex, the first unit expends 1/2 of an Operation Point, the second unit expends 1 and 1/2 Operation Points, the third unit expends 2 and 1/2 Operation Points, and so on.
17.11 Reinforcement units may not enter play as a stack; they must be brought on individually.
17.12 If more than one unit is scheduled to enter in more than one entry hex, they may be placed at any or all appropriate hexes. (Exception: 17.2.) There is no limit to the number of units that may be placed on the map in a single entry hex.
17.13 Reinforcements may only be brought into play during the owning Player's Initial Player Phase of their scheduled Game-Turn of entry.
17.14 A reinforcement unit may not be placed in an entry hex occupied by an Enemy unit, but may be placed in one that is Enemy-controlled (in which case the movement of the reinforcement unit must cease, see 6.11).
17.15 A reinforcement unit may not be placed in an entry hex from which an Enemy unit that exerts a Zone of Control has been exited.
17.2 Warsaw Pact March Order
When the units of a Warsaw Pact division enter play as reinforcements, they must be brought onto the map in a certain order. Each reinforcement division is divided into two columns and the units in each column are assigned a march order. The column organizations and march orders for each type of Warsaw Pact division is shown in the March Order Diagrams in the Exclusive Rules.
17.21 Each column of a Warsaw Pact division must be assigned to a separate entry hex by the Warsaw Pact Player. More than one column may be assigned to the same entry hex in a single Game-Turn. All the units of a column must enter in that column's assigned entry hex. The columns of a single division must be assigned to entry hexes that are within eight hexes of one another (when counting the distance between entry hexes for this purpose, include both entry hexes).
17.22 All entry hexes for reinforcement units that the Warsaw Pact Player is entering in a given Game-Turn must be assigned at the beginning of his Initial Player Phase, before moving any of his units. The Warsaw Pact Player may note the various entry hexes he has chosen for his columns simply by placing the units in the column just off the playing area, adjacent to their entry hex.
17.23 When the units of a single column are brought into play, they must all be moved along the same route. The Warsaw Pact Player may move some units in the column further than others. However, when the movement of all the units in the column is completed for the Player Phase, the path of hexes moved through by the unit that is furthest away (in hexes) from the entry hex must contain all the other units in the column.
17.24 The routes traversed by different columns that the Warsaw Pact Player brings into play in the same Game-Turn may cross each other. Units of the same column may complete their movement stacked, but may not be stacked with units of a different column.
17.25 Non-divisional units received by the Warsaw Pact Player as reinforcements (those with no boldface division designation) may be "attached" to any divisional columns entering play that Game-Turn. Each such unit is assigned to the end of a column and is entered into play with those units, subject to the restrictions of these Cases. If more than one non-divisional unit is assigned to a single column, they may be entered in any order desired (but always after the divisional units in the column).
17.26 Warsaw Pact march order and column assignments are in effect for the Initial Player Phase of the division's entry only. In all subsequent Player Phases these restrictions are ignored. Warsaw Pact reinforcements are also subject to the restrictions of 17.1.
17.3 Warsaw Pact March Order Diagrams
(see Charts and Tables)
18.0 Electronic Warfare
General Rule
Both Players receive a number of Electronic Warfare Points (EWP's) each Game-Turn, according to the Electronic Warfare Chart (18.3). The Phasing Player may use his assigned EWP's to aid his attacks by preventing Enemy use of indirect fire.
18.1 Assignment and Use of Electronic Warfare Points
At the beginning of each Game-Turn, the Electronic Warfare Point Chart is consulted to determine how many EWP's each Player receives that Game-Turn. The number listed is the number the Player receives for his initial Player Phase and again throughout the rest of the Game-Turn. For example, a listing of 4 EWP's entitles a Player to 4 Points to use during his initial Player Phase and 4 more Points to use throughout the remainder of the Game-Turn.
18.11 When using the Electronic Warfare Point Chart, cross-reference the current Game-Turn with the map being used. If more than one map is in use, the results in two columns of the Chart are used. However, EWP's assigned to one map may be used only against Enemy units on that map.
18.12 EWP's may not be accumulated. If they are not used during the Phase for which they are assigned, they are lost. Each Player must keep track of his available EWP's on scrap paper.
18.2 Conducting Electronic Warfare (EW)
Each EWP may be used by the owning Player to conduct Electronic Warfare whenever he is resolving any type of attack. During Step Two of the Combat Procedure, the attacker declares that he is conducting EW and records the expenditure of one EWP. He then rolls one die. If the NATO Player is conducting the attack, a die result of 1 through 4 indicates the EW is successful. If the Warsaw Pact is conducting the attack, a die result of 1 through 3 indicates the EW is successful.
18.21 EW is always resolved after the participation of all Friendly units, including artillery and attack helicopters, has been announced. Additional Friendly units may not join an attack after the result of an EW attempt has been determined.
18.22 EW may be conducted during the resolution of any combat in any Friendly Player Phase, providing unused EWP's are available. However, no more than one EWP may ever be used in a single attack.
18.23 If an EW attempt is successful, Step 3 of the Combat Procedure is skipped. Thus, the defender may not conduct indirect fire, nor may he use attack helicopters, Air Points, or chemicals to aid the units under attack.
18.24 The effects of a successful EW attempt last only for the duration of a single attack. All subsequent attacks, even if involving the exact same units, would require the expenditure of another EWP in order to attempt EW.
18.25 When a Player conducts EW, he must immediately record the expenditure of one EWP, whether the attempt is successful or not.
18.3 Electronic Warfare Point Chart
(see Charts and Tables)
Charts and Tables
5.5 Operation Point Cost Chart
| Terrain Type | Operation Point Cost to Enter or Cross |
|---|---|
| Flat | 1 |
| Woods | +2 (see note 1) |
| Broken | 2 |
| Rough | 6 |
| Marsh | 7 |
| Town | Other terrain (see note 2) |
| City | NATO Player: 1; Warsaw Pact Player: 2 (see note 3) |
| River | NATO Player: +5; Warsaw Pact Player: +3 (see note 4) |
| Access Hexside | 1 (see note 5) |
| Road | 1/2 (see note 6) |
| Autobahn | 1/2 |
| Other Activity or Status | Operation Point Cost |
|---|---|
| Unit on FP side | +1 per hex entered or attack declared (see 5.12) |
| Unit at Max FP's | No operations allowed |
| Prepared Attack | 6 |
| Hasty Attack | 3 |
| March Attack | 2 |
| Leave ZOC | +6 (see 6.2) |
Notes:
-
The Operation Point cost for entering a hex containing woods is in addition to the other terrain in the hex (flat, broken or rough).
-
If a unit defending in combat occupies a town hex, a one column shift to the left is applied to the Combat Results Table.
-
The Soviet Operation Point cost is for entering a city hex in West Germany and is not negated by the presence of a road, access hexside or Autobahn. When moving into a city hex in a Warsaw Pact country, the Warsaw Pact Player pays the NATO Operation Point cost (which may be negated by the presence of a road or Autobahn).
-
This cost is not applied if the river hexside is traversed by a bridge. The Operation Point cost to cross an unbridged river hexside is in addition to the cost of the terrain in the hex entered. Also see 5.34. A unit attacked through a river hexside receives a variable number of column shifts in its favor (see the Combat Results Table).
-
A unit entering a hex through an access hexside pays one Operation Point only, regardless of the terrain in the hex entered. This bonus may not be used if the hex being moved into is occupied by another Friendly unit.
-
A unit moving along a road ignores other terrain, paying only 1/2 Operation Point for each hex entered. However, see 5.32.
15.6 Airdrop Table
| Die | 1 | 2 | 3 | 4 | 5 | 6 | 7 |
|---|---|---|---|---|---|---|---|
| FP's Gained | 0 | 1 | 1 | 1 | 2 | 2 | 3 |
Modifiers to the die result:
- -1 if drop hex contains an airfield
- +1 if drop hex contains broken terrain
- +1 if drop hex contains a town
- +1 if drop hex has a river hexside
- +1 if neither Player has air superiority
- +2 if drop hex contains woods
All modifiers are cumulative. Treat modified die results higher than "7" as "7." See 15.3 for explanation of use.
7.4 Friction Point Average Table
| FP Level of unit in hex | Unit being moved: 0 | 1 | 2 | 3 | 4 | 5 |
|---|---|---|---|---|---|---|
| 0 | 0 | 1 | 1 | 2 | 2 | 3 |
| 1 | 1 | 1 | 2 | 2 | 3 | 3 |
| 2 | 1 | 2 | 2 | 3 | 3 | 4 |
| 3 | 2 | 2 | 3 |
Procedure: The FP level of the unit(s) that has just been moved, or has just been retreated or advanced after combat is cross-referenced with the FP level of the unit(s) in the hex the moving unit has entered, to yield a new FP level for all the units. This Table is not used for artillery units and attack helicopter units.
14.4 Airpower Table
| Die | Result |
|---|---|
| 1 | Warsaw Pact Superiority |
| 2 | Warsaw Pact Superiority |
| 3 | Warsaw Pact Superiority |
| 4 | NATO Superiority |
| 5 | NATO Superiority*; Ground Fog (AM) |
| 6 | No Superiority; Ground Fog (AM) |
*If an A.M. Game-Turn is in effect, the NATO Player has Air Superiority, but receives only one third the number of Air Points assigned him by the scenario instructions.
Procedure: During the Airpower Segment, the NATO Player rolls the die and refers to this Table. The die result will indicate which Player (if either) has Air Superiority this Game-Turn. If an A.M. Game-Turn is in effect, an additional result of Ground Fog is possible. Note: No roll is ever made for Ground Fog on the first Game-Turn of each scenario, as the first Game-Turn is always considered clear.
8.6 Combat Results Table
The table has 15 result columns (numbered 1 to 15 below). The Combat Ratio (attacker to defender) that each column represents depends on the defender's terrain row; find the ratio in the row for the defender's terrain, then read the result in that column under the declared attack type and die roll. A blank means that terrain has no ratio in that column.
Combat Ratio (Attacker to Defender) by defender's terrain:
| Defender's Terrain | 1 | 2 | 3 | 4 | 5 | 6 | 7 | 8 | 9 | 10 | 11 | 12 | 13 | 14 | 15 |
|---|---|---|---|---|---|---|---|---|---|---|---|---|---|---|---|
| City | 2-1 | 3-1 | 4-1 | 5-1 | 6-1 | 7-1 | 8-1 | 9-1 | 10-1 | 11-1 | 12-1 | 13-1 |
Results (attacker's FP gain / defender's FP gain). "-" = die roll does not apply. Each row gives the die roll under each attack type:
| Prepared | Hasty | March | 1 | 2 | 3 | 4 | 5 | 6 | 7 | 8 | 9 | 10 | 11 | 12 | 13 | 14 | 15 |
|---|---|---|---|---|---|---|---|---|---|---|---|---|---|---|---|---|---|
| 1 | - | - | 1/1 | 1/1 | 1/1 | 0/1 | 1/2 | 1/2 | 0/2 | 1/3 | 0/3 | 1/4 |
How to use this Table: The Attacker locates the determined Combat Ratio in the row corresponding to the predominant terrain in the defending unit's hex. He then rolls the die, cross-referencing the result in the proper attack type column with the ratio to yield a two-part combat result. The result to the left of the slash is the number of FP's the Attacker gains; the result to the right, the FP's the Defender gains. These results are applied immediately. See 8.5 for details.
Combat Modifiers (column shifts):
- If the Defending unit occupies a hex containing a town, shift one column to the left.
- If all the Attacking units are separated from the Defending unit by river hexsides (bridged or unbridged), shift four columns to the left. If at least one but not all the units are attacking through a river hexside, shift two columns to the left. Exception: If an engineer unit is among the Attacking units, shift one column to the left only, regardless of how many units are attacking through river hexsides. The location of attacking artillery units is not considered when calculating river hexside column shifts.
- If an engineer unit is among the units attacking Enemy units in a city hex, the attack is resolved on the rough row of the Combat Results Table instead of on the city row of the table.
- If all six hexes adjacent to the Defending unit are Enemy-occupied or controlled, shift one column to the right. This shift is not applied if the Defending unit occupies a city hex.
- If a multi-hex attack is conducted (see 8.33), shift one column to the right for each hex (in excess of one) containing adjacent attacking units.
- If a mobile attack has been declared and ground fog is in effect or smoke has been projected, shift one column to the right (see 8.72).
- See the specific scenario instructions for column shifts applied when using chemicals.
BAOR Exclusive Rules
Central Front Series, Volume 3: British Army of the Rhine. The Thin Red Line in the 1980's.
19.0 Introduction
This edition of the Central Front series contains two scenarios. The Thin Red Line is the campaign scenario, covering the first five days of the war in the BAOR sector. The Race to the Weser covers the first 60 hours of combat in the region between Hannover and Kassel.
19.1 The BAOR Game Map
The 22" x 34" BAOR game map is map number 4 in the Central Front series. Note that the compass rose indicates north running along a diagonal hexrow. For game purposes, the 3900 hexrow should be considered the north edge of the map and the 0100 hexrow the south edge. All hexes along the eastern side of the map, including the northern and eastern faces of the "bulge" of East Germany, are considered east mapedges for all purposes except Victory Conditions, which treat the xx51 hexrow as the east mapedge.
19.2 Game Components
- One 22" x 34" game map
- Two 200-piece die-cut counter sheets (400 total)
- One Standard Rules folder
- One Exclusive Rules folder
20.0 BAOR Unit Deployments
General Rule
The following lists provide subordination and set-up information for the units appearing in BAOR. Individual unit counters are identified under the heading of the formation to which they belong. NATO units which start the game on the map are assigned set-up hexes. NATO reinforcements and all Warsaw Pact units are assigned Game-Turns of entry. Not all units listed appear in every scenario. Refer to the reinforcements portions of scenario descriptions for details.
Information provided for each NATO unit is unit designation; unit type; set-up/entry hex and Game-Turn of entry; Operations Points available during the unit's first turn on the map (variable for reinforcing units). Warsaw Pact units are identified by unit designation; unit type; and Game-Turn of entry. Note that the (1) following some NATO unit set-up hexes indicates that unit may be set up within one hex of the hex specified.
20.1 NATO Deployment
Columns: unit designation, unit type, set-up hex or Game-Turn of entry (GT n: entry hex), Operation Points available on first turn.
West German 1st Panzergrenadier Division (+/-)
| Unit | Type | Set-up / Entry | OPs |
|---|---|---|---|
| 130 | Engineer | Hex 3620(1) | 12 |
| 11/1 | Arty | Hex 3334(2) | 12 |
| 12/1 | Rkt Arty | GT 1: 3931 | 9 |
1st Panzergrenadier Brigade
| Unit | Type | Set-up / Entry | OPs |
|---|---|---|---|
| 11/1 | Mech Inf | Hex 3336 | 12 |
| 12/1 | Mech Inf | Hex 0935 | 12 |
| 13/1 | Mech Inf | Hex 1030 | 12 |
| 14/1 | Armor | Hex 2435(1) | 12 |
| 15/1 | SP Arty | Hex 1826 | 12 |
2nd Panzergrenadier Brigade
| Unit | Type | Set-up / Entry | OPs |
|---|---|---|---|
| 21/1 | Mech Inf | Hex 3248 | 12 |
| 22/1 | Mech Inf | Hex 1944(1) | 12 |
| 23/1 | Mech Inf | Hex 2346(1) | 12 |
| 24/1 | Armor | Hex 2145 | 12 |
| 25/1 | SP Arty | Hex 2346(1) | 12 |
33rd Panzer Brigade (from 11th PG Div)
| Unit | Type | Set-up / Entry | OPs |
|---|---|---|---|
| 331/11 | Mech Inf | Hex 3248 | 12 |
| 332/11 | Armor | GT 1: 3909 | 4 |
| 333/11 | Armor | GT 1: 3909 | 12 |
| 334/11 | Armor | Hex 3742(1) | 12 |
| 335/11 | SP Arty | Hex 3934 | 12 |
West German 2nd Panzergrenadier Division (+/-)
| Unit | Type | Set-up / Entry | OPs |
|---|---|---|---|
| 21/2 | Arty | GT 1: 0116 | 6 |
| 22/2 | Rkt Arty | GT 1: 0116 | 6 |
4th Panzergrenadier Brigade
| Unit | Type | Set-up / Entry | OPs |
|---|---|---|---|
| 41/2 | Mech Inf | Hex 0627(1) | 12 |
| 42/2 | Mech Inf | Hex 0217(1) | 12 |
| 43/2 | Mech Inf | Hex 0627(1) | 12 |
| 44/2 | Armor | Hex 0627(1) | 12 |
| 45/2 | SP Arty | Hex 0627(1) | 12 |
34th Panzer Brigade
| Unit | Type | Set-up / Entry | OPs |
|---|---|---|---|
| 341/2 | Mech Inf | Hex 0513 | 12 |
| 342/2 | Armor | Hex 0911(1) | 12 |
| 343/2 | Armor | Hex 0911(1) | 12 |
| 344/2 | Armor | Hex 0911(1) | 12 |
| 345/2 | SP Arty | Hex 0911(1) | 12 |
21st Panzer Brigade (+) (from 7th PZ Div)
| Unit | Type | Set-up / Entry | OPs |
|---|---|---|---|
| 7 | 6 units | Hex 2612(1) | 12 |
British I Corps
| Unit | Type | Set-up / Entry | OPs |
|---|---|---|---|
| 5 Hvy RA | Arty | Hex 2435(1) | 12 |
| 28 RE | Eng | Hex 2725 | 12 |
| 9 AAC | Attck Heli | Hex 2615(1) | 12 |
British 2nd Armored Division
| Unit | Type | Set-up / Entry | OPs |
|---|---|---|---|
| 1/DER/2 | Mech Inf | GT 2: 3909 | 10 |
| 2/GG/2 | Mech Inf | GT 2: 3501 | 9 |
| 1/K's/2 | Mech Inf | GT 2: 3909 | 10 |
| 5 RIDG/2 | Armor | GT 2: 3909 | 10 |
| 4 RTR/2 | Armor | GT 2: 3501 | 9 |
| 27 RA/2 | SP Arty | Hex 2304 | 12 |
| 47 RA/2 |
British 3rd Armored Division
| Unit | Type | Set-up / Entry | OPs |
|---|---|---|---|
| 1/BW/3 | Mech Inf | GT 2: 2101 | 9 |
| 1/RHF/3 | Mech Inf | GT 2: 2101 | 7 |
| 1/WFR/3 | Mech Inf | GT 2: 2101 | 7 |
| RSDG/3 | Armor | Hex 2312(1) | 12 |
| 3 RTR/3 | Armor | Hex 2111(1) | 12 |
| 26 RA/3 | SP Arty | GT 2: 2101 | 7 |
| 19 RA/3 |
British 4th Armored Division
| Unit | Type | Set-up / Entry | OPs |
|---|---|---|---|
| 1/RGJ/4 | Mech Inf | Hex 3619(1) | 12 |
| 1/RRF/4 | Mech Inf | Hex 3619(1) | 12 |
| 1/RWF/4 | Mech Inf | Hex 2917 | 12 |
| LG/4 | Armor | Hex 2615(1) | 12 |
| Q Hus/4 | Armor | Hex 2615(1) | 12 |
| 25 RA/4 | SP Arty | Hex 2111(1) | 12 |
| 39 RA/4 |
British 5th Field Force
| Unit | Type | Set-up / Entry | OPs |
|---|---|---|---|
| 1/LI/5 | Mot Inf | GT 2: 3501 | 9 |
| 1/KSB/5 | Mot Inf | GT 2: 3909 | 10 |
| 17/21/5 | Armor | GT 2: 3501 | 9 |
| 7 RHA/5 | Arty | GT 2: 3909 | 10 |
| 1/Glo/5 | Mot Inf | GT 2: 3501 | 9 |
| R Yeo/5 | Arm Cav | GT 4: 2901 | 12 |
| 100 RA/5 |
British 7th Field Force
| Unit | Type | Set-up / Entry | OPs |
|---|---|---|---|
| 3/Ang/7 | Mot Inf | GT 3: 3006 | 6 |
| 2/Qns/7 | Mot Inf | GT 3: 3006 | 6 |
| 5/Ang/7 | Mot Inf | GT 3: 3006 | 6 |
| Q Yeo/7 | Arm Cav | GT 4: 2901 | 12 |
| QRIH/7 | Armor | GT 4: 2901 | 12 |
| 13/18/7 | Arm Cav | GT 4: 2901 | 12 |
| 40 RA/7 |
British Airborne
| Unit | Type | Set-up / Entry | OPs |
|---|---|---|---|
| 15 Para | AB Inf | GT 2: see 20.33 |
Belgian I Corps
| Unit | Type | Set-up / Entry | OPs |
|---|---|---|---|
| 20 A | SP Arty | GT 2: 2101 | 9 |
| 2 JtP | Arm Cav | GT 2: 1301 | 3 |
Belgian 1st Division
| Unit | Type | Set-up / Entry | OPs |
|---|---|---|---|
| 17A/1 | SP Arty | GT 4: 2101 | 8 |
1st Mechanized Brigade
| Unit | Type | Set-up / Entry | OPs |
|---|---|---|---|
| 18A/1 | SP Arty | GT 5: 2101 | 12 |
| 1 Kar/1 | Mech Inf | GT 4: 2101 | 8 |
| 9 Bev/1 | Mech Inf | GT 4: 2101 | 8 |
| 2 Ln/1 | Armor | GT 4: 2101 | 8 |
7th Mechanized Brigade
| Unit | Type | Set-up / Entry | OPs |
|---|---|---|---|
| 1A/1 | SP Arty | GT 5: 0101 | 12 |
(Belgian 7th Mechanized Brigade, continued)
| Unit | Type | Set-up / Entry | OPs |
|---|---|---|---|
| 1 CA/1 | Mech Inf | GT 5: 0101 | 11 |
| 12 Lg/1 | Mech Inf | GT 4: 0101 | 6 |
| 1 Ln/1 | Armor | GT 4: 0101 | 12 |
Belgian 16th Division
| Unit | Type | Set-up / Entry | OPs |
|---|---|---|---|
| 6A/16 | SP Arty | GT 2: 2101 | 12 |
4th Mechanized Brigade
| Unit | Type | Set-up / Entry | OPs |
|---|---|---|---|
| 2A/16 | SP Arty | GT 2: 1301 | 3 |
| 5 Lg/16 | Mech Inf | GT 2: 2101 | 12 |
| 1 Gr/16 | Mech Inf | GT 2: 2101 | 12 |
| 4 Ln/16 | Armor | GT 2: 2101 | 12 |
17th Armored Brigade
| Unit | Type | Set-up / Entry | OPs |
|---|---|---|---|
| 19A/16 | SP Arty | GT 2: 1301 | 5 |
| 1 WR/16 | Mech Inf | GT 2: 1301 | 5 |
| 2 Cy/16 | Mech Inf | GT 2: 1301 | 5 |
| 2 Gd/16 | Armor | GT 2: 1301 | 5 |
| 1 Gd/16 | Armor | GT 2: 1301 | 5 |
NATO Interallied Covering Force
British Medium Recce Squadrons
| Unit | Type | Set-up | OPs |
|---|---|---|---|
| A/9/12L | Arm Cav | Hex 3848 | 12 |
| B/9/12L | Arm Cav | Hex 3549 | 12 |
| A/1 RTR | Arm Cav | Hex 2949 | 12 |
| B/1 RTR | Arm Cav | Hex 2648 | 12 |
| A/15/19 | Arm Cav | Hex 1549 | 12 |
| B/15/19 | Arm Cav | Hex 1547 | 12 |
Belgian 1st Jagers te Paard
| Unit | Type | Set-up | OPs |
|---|---|---|---|
| 1/1 JtP | Arm Cav | Hex 0334 | 12 |
| 2/1 JtP | Arm Cav | Hex 0338 | 12 |
| 3/1 JtP | Arm Cav | Hex 0640 | 12 |
Belgian 4th Chasseurs a Cheval
| Unit | Type | Set-up | OPs |
|---|---|---|---|
| 1/4 CaC | Arm Cav | Hex 1141 | 12 |
| 2/4 CaC | Arm Cav | Hex 1343 | 12 |
| 3/4 CaC | Arm Cav | Hex 1545 | 12 |
West German 1st Panzeraufklarungs Battalion
| Unit | Type | Set-up | OPs |
|---|---|---|---|
| 2/1/1 | Arm Cav | Hex 1749 | 12 |
| 3/1/1 | Arm Cav | Hex 2048 | 12 |
| 4/1/1 | Arm Cav | Hex 2349 | 12 |
West German 2nd Panzeraufklarungs Battalion
| Unit | Type | Set-up | OPs |
|---|---|---|---|
| 2/2/2 | Arm Cav | Hex 0226 | 12 |
| 3/2/2 | Arm Cav | Hex 0229 | 12 |
| 4/2/2 | Arm Cav | Hex 0232 | 12 |
20.2 Soviet Deployment
| Formation | Designation | Units | Game-Turn of entry |
|---|---|---|---|
| Soviet 3rd Shock Army | 3SA | 2 units | GT 1 |
| 106th Guards Tank Division (Ural Volunteers) | 10GT | 7 units | GT 1 |
| 12th Guards Tank Division | 12GT | 7 units | GT 1 |
| 47th Guards Tank Division | 47GT | 7 units | GT 1 |
| 207th Motorized Rifle Division (Red Banner) | 207 | 8 units | GT 1 |
| Soviet Front Reserve: 76th Guards Airborne Division (Chernigov, Red Banner) | 76 | 10 units | See 20.32 |
20.3 Reinforcements
Not all the reinforcements listed in the deployment lists are available in every scenario; see the reinforcements portions of the scenarios for details. The entrance and use of some reinforcements require special handling; these units are discussed in the following.
20.31 Warsaw Pact Reinforcements. All Warsaw Pact units enter play according to the restrictions of 17.1 and 17.2. Unless otherwise stated, all units may enter from either the east mapedge at hexes 3650, 2751, 2551, 2151, 1850, and 1751 or from the northern and eastern faces of the "bulge" at hexes 1247, 1246, 0944, 0643, and 0344. Units entering from the east mapedge may expend 12 Operation Points; units entering from anywhere along the "bulge" may expend no more than 6 Operation Points during the Warsaw Pact Player's initial Player Phase.
20.32 In the Thin Red Line and Mittelland Thrust scenarios only, the Warsaw Pact Player may have the option of airdropping the units of the 76th Guards Airborne Division according to the rules outlined in 15.0. In this case, these units may be dropped onto the map at the start of any Game-Turn in which the NATO Player does not have air superiority, beginning with Game-Turn 1. The units of the 76th Guards Airborne Division need not all be dropped on the same Game-Turn, nor in any specific order or proximity to each other.
20.33 NATO Reinforcements. British reinforcements listed with a reference to this Case enter under special conditions of fatigue, having been working around the clock to cross the English Channel. Upon entry, the NATO Player must roll the die for each unit to determine how many FP's it begins with. On a roll of 1, 3 FP's are gained; on a roll of 2-3, 2 FP's are gained; on a roll of 4-6, 1 FP is gained.
20.34 The units of the 7th Field Force which arrive on Game-Turn 3 are air landed and may be placed within one hex of 3006. Once placed, the NATO Player must roll for the fatigue of each of these units as outlined in 20.33. Each airlanded unit may move during the NATO Player's initial Player Phase, but may expend only 6 Operation Points. All airlanded units are flipped to their FP side at the end of this Phase whether they have moved or not. Should Gutersloh (3006) be occupied, controlled, or in the ZOC of a Warsaw Pact unit, reinforcements slated for arrival by air are delayed one Game-Turn and enter normally from hex 2901. These units are still subject to the requirements of 20.42, but may expend 12 Operation Points during the NATO Player's initial Player Phase.
20.35 The 15/Para battalion may enter in accordance with either 20.42 and 20.43, or in accordance with 10.1, at the NATO Player's discretion.
20.4 Entering Reinforcements
20.41 A Player may always withhold reinforcements due on a particular Game-Turn for entry at the start of a later Game-Turn or, in the Warsaw Pact Player's case, for later use as an air-delivered reinforcements.
20.42 If the entry hex for a given set of reinforcements is blocked by an enemy unit or ZOC, those reinforcements may enter via an alternate road or Autobahn entry hex. NATO units entering from the north or south mapedges may enter from the nearest unblocked road or Autobahn hex to the west. NATO units entering from the west mapedge may enter from the nearest unblocked road or Autobahn hex on the same mapedge. Warsaw Pact units entering from the south edge may enter from the nearest unblocked road or Autobahn hex to the east. Warsaw Pact units entering from the east mapedge may enter from the nearest unblocked road or Autobahn hex to the north.
20.43 In the event that the area around a given entry hex is so cordoned off by enemy units and their ZOC's that only part of a particular set of reinforcements can enter the map through their assigned or desired entry hex (this includes the case in which an entry hex is blocked by an Enemy ZOC but the Player still wishes to bring on at least one reinforcement at that hex), the fate of the remaining units is determined by their nationality. NATO units in such a case may enter from an alternate unblocked road or Autobahn hex according to 20.42. Warsaw Pact units subject to March Order must remain off-map until the lead unit(s) of their column can carve them the space to enter. These units may then enter in the first subsequent Player Phase that such space exists, but always enter on their FP side and at the same entry hex as the lead unit(s) of the column. Warsaw Pact units which enter after the initial Player Phase are not subject to March Order restrictions.
20.44 Warsaw Pact artillery units which are held off-map involuntarily per 20.43 may be used to support Prepared attacks by on-map units of the same column. Such units gain FP's for this fire normally, and enter with the appropriate number of FP's already accrued.
20.45 When units with separate initial Phase Operation Point Allowances enter from the same entry hex, the units with the highest allowances enter first, followed by units in descending order of allowances.
20.46 Warsaw Pact attack helicopter units need not be entered onto the map. Instead, they may be placed off-map (which does not require the gain of an FP for movement), where each unit may support any combat within 20 hexes of a legal entry hex. Off-map attack helicopter units gain FP's normally for all combat functions. Such units may be entered on-map in subsequent Game-Turns, subject to all regular reinforcement rules and bearing whatever FP's they have accrued off-map.
21.0 Special Rules
21.1 Soviet Doctrine
Whenever the NATO Player retreats a unit as a result of combat, at least one Warsaw Pact unit that participated in that attack must be advanced along the path of retreat of the NATO unit and end its advance adjacent to the retreated unit (exception to 8.94). If the NATO unit was retreated through another Friendly unit, at least one Warsaw Pact unit must advance along the path of retreat until blocked by the unit retreated through.
If all NATO units defending in a combat are eliminated, and the Warsaw Pact Player is allowed to advance, at least one Warsaw Pact unit must be advanced into (or through) the vacated hex.
21.2 Warsaw Pact Initial Air Supremacy
Prior to the start of the game, the Warsaw Pact Player rolls the die to determine the extent of his initial air supremacy. The number rolled on this die represents the number of Game-Turns (beginning with Game-Turn 1) in which the Warsaw Pact Player automatically possesses air superiority. During Game-Turns of automatic Warsaw Pact superiority, the Airpower Table is not used. (Exception: The Table is consulted each A.M. Game-Turn to determine if ground fog is in effect only.) Players will note that the period of Warsaw Pact supremacy is the only time when the Warsaw Pact can have air superiority when ground fog is in effect.
21.3 Warsaw Pact Initiative
The Initiative Segment of each Game-Turn is always skipped in BAOR. The Warsaw Pact Player is always the first Player in each Game-Turn.
21.4 Warsaw Pact March Order
All provisions of 17.2 apply, modified by the following Cases:
21.41 Both columns of a Warsaw Pact division may enter into play from the same entry hex. When doing so, every unit of one column must be brought into play before bringing on any units of the second column. The movement penalties incurred for entering additional units in the same entry hex must be adhered to (see 17.0).
21.42 The Soviet artillery division may enter from any entry hex, and is not subject to the restrictions of 17.21. If the artillery division is entered from an entry hex which is also being used by another division, it must be brought on behind that division. Units of an artillery division are not assigned a specific march order and may be entered in any order the Warsaw Pact Player wishes.
21.5 Warsaw Pact Pre-Emptive Air Strike
During the Airpower Segment of Game-Turn 1 only, the Warsaw Pact Player may conduct a pre-emptive strike against a number of hex groups specified by the scenario instructions. Each hex group consists of a target hex and the six hexes adjacent to it. NATO units occupying the hexes within a hex group will gain a variable number of FP's as a result of the pre-emptive strike.
The Warsaw Pact Player chooses the appropriate number of hex groups anywhere on the map(s) by declaring the target hex's number. No hex may be in more than one hex group (they may not overlap). The Warsaw Pact Player rolls the dice once for each NATO unit in a hex group, then subtracts 1 from the die roll for every unit except artillery and helicopters. If the die result, after subtraction, is less than or equal to the unit's max FP level, the unit gains that number of FP's (no retreats allowed). A roll that exceeds a unit's max FP level is treated as though it equalled the unit's max FP level, except in the case of artillery and helicopters: a roll of 6 for one of these units eliminates the unit completely (remove it from the game). FP's gained by a unit as a result of a pre-emptive strike may be removed normally in the ensuing Friction Point Removal Segment. The pre-emptive strike does not require the expenditure of Warsaw Pact Air Points and is not considered nuclear warfare.
21.6 NATO Corps Artillery
NATO artillery units which do not have a boldface division identifier as part of their designation may be used to support NATO units of any nationality. This is an exception to 11.24.
21.7 Supply Sources
21.71 NATO units must trace a line of supply to any road or Autobahn hex on the west mapedge or on the north mapedge west of hex 3915. To qualify as a supply source, a mapedge road or Autobahn must actually lead off-map.
21.72 All Warsaw Pact units are automatically supplied for the first four Game-Turns of each scenario, regardless of whether they can trace a valid line of supply or not. Thereafter, Warsaw Pact units must trace a valid line of supply to any road or Autobahn hex on the east mapedge or on the south mapedge east of hex 0126. Such hexes must actually lead off-map to qualify as supply sources.
21.8 Airmobile Eligibility
The British 15/Para and 100 RA/5 artillery units are always eligible for airmobile operations. The following units may take part in airmobile operations after being converted (see 13.1): British (1-3) motorized infantry units; Soviet (10-14), (8-12), and (6-8) mechanized regiments; Soviet (3-4) and (2-3) airborne mechanized battalions. A unit is not eligible for airmobile operations during the player phase in which it enters play as a reinforcement.
21.9 Airborne Infantry
The British 15/Para airborne infantry unit is non-motorized. When this unit is being moved, all road and Autobahn hexsides are treated as access hexsides. Furthermore, the unit possesses a Zone of Control like that of a company-sized unit.
22.0 Scenario: The Thin Red Line
Commentary
The Thin Red Line pits the British I Corps, elements of the West German I and III Corps, and the Belgian I Corps against the echeloned attacks of the Soviet 3rd Shock Army, 20th Guards Army, 5th Guards Tank Army, and 7th Tank Army, supported by the 76th Guards Airborne Division and the Belorussian Military District Artillery Division. This scenario covers the first five days of a Warsaw Pact effort to break through to the Ruhr. Since the terrain in this area is so eminently defensible, it is to be expected that SACEUR will attempt to divert NATO units earmarked for this area in order to form a strategic reserve. It is an open question whether Warsaw Pact pressure will allow such a diversion.
General Rule
The Thin Red Line begins on Game-Turn 1 and concludes at the end of Game-Turn 10. This scenario takes approximately 15 hours to complete. To set up the game, the NATO Player should first deploy his initial forces on the map as indicated in 20.1, and then the Warsaw Pact Player should determine which option he will use for the 76th Guards Airborne Division (see 22.4) and how long he will maintain air superiority, in that order. When both Players are prepared, play begins with the Warsaw Pact's pre-emptive air strike at the start of the Airpower Segment. The Warsaw Pact Player may conduct an air strike against 6 hex groups. No die roll is ever made on the first Game-Turn for ground fog; the first Game-Turn is always clear. No Warsaw Pact units begin the game on the map; all Warsaw Pact units enter as reinforcements.
22.1 NATO Initial Deployment
The NATO Player deploys all units listed in 20.1 except those units marked with a Game-Turn of entry.
22.2 Warsaw Pact Reinforcements
The Warsaw Pact Player may enter all reinforcements listed in 20.2 on the appropriate Game-Turn. Furthermore, if he chooses Option A (22.4), the Warsaw Pact Player may enter the 76th Guards Airborne Division on any Game-Turn in which he can meet the restrictions of 10.1. In addition to the entry hexes listed in 20.2, the Warsaw Pact Player may also enter units from hexes 0127, 0132, 0138, and 0142 on the south mapedge. In order to use these hexes, the Warsaw Pact Player must delay the entry of the reinforcements taking this option by one whole Game-Turn (this reflects both the paucity of the road net in this area of East Germany and the fact that these units are cutting right across the march lines of the Soviet armies to the south). If the Warsaw Pact Player uses this option, he is urged to pay special attention to 20.42, 20.43 and 20.44, as these rules will often apply.
22.3 NATO Reinforcements
The NATO Player may normally enter all reinforcements listed in 22.1 on the appropriate Game-Turn. However, if the Warsaw Pact Player chooses Option B (22.4), no Belgian reinforcements may ever enter play. The NATO Player may also voluntarily choose not to enter either or both of the British 5th and 7th Field Forces, and therefore avoid the Victory Point penalties outlined in 22.73 and 22.74. Per 20.41, the NATO Player may delay the entry of these reinforcements hoping to avoid their commitment and still enter them on a later Game-Turn if this proves necessary.
22.4 Warsaw Pact Paradrop Options
The Warsaw Pact Player may take one of two options in utilizing the 76th Guards Airborne Division. He must decide which option he will employ after NATO has deployed and before he has rolled to determine how long his initial air superiority will last.
22.41 Option A. The Warsaw Pact Player may freely deploy the 76th Guards Airborne Division anywhere on the map in accordance with 15.0 and 22.2. In this option, the NATO Player receives all scheduled Belgian reinforcements listed in 22.1.
22.42 Option B. The Warsaw Pact Player chooses to allocate the 76th Guards Airborne Division to a paradrop along the Rhine across from the Belgian frontier. In this option, the 76th Guards never appears in the game, and NATO receives none of the Belgian reinforcements listed in 20.1. As the use of this option is quite favorable to the Warsaw Pact Player, he is assessed a Victory Point penalty listed in 22.76 if he chooses to take Option B.
22.5 Air Power and Chemicals
22.51 During each Game-Turn that the Warsaw Pact Player has air superiority, he receives 12 Air Points. During each Game-Turn that the NATO Player has air superiority, he receives 18 AP's.
22.52 The Warsaw Pact Player receives 3 column shifts in his favor when using chemicals on Game-Turns 1 through 4, two column shifts in his favor when using chemicals on Game-Turns 5 through 8, and one column shift in his favor when using chemicals on Game-Turns 9 and 10. The NATO Player may never use chemicals.
22.6 British Paralysis
No British units which are west of the Weser River at the start of the scenario, except all units of the 4th Armored Division, may move, attack, or conduct indirect fire for the duration of the first Game-Turn. When attacked during the first Game-Turn, such units always defend with their Mobile Combat Strength, although they may retreat normally.
22.7 Victory Conditions
Victory in The Thin Red Line may be determined at the end of any Game-Turn from 4 on, provided that both Players agree to end the game at that point. First, Players consult the Warsaw Pact Victory Conditions listed in 22.71. If the Warsaw Pact Player can meet the criteria for any of the three levels of victory, a Warsaw Pact victory is declared. If the Warsaw Pact Player fails to meet any of the criteria, then Players refer to the NATO Victory Conditions listed in 22.72. Should the NATO Player be able to meet the criteria for any of the three levels of victory, a NATO victory is declared. In the event that neither Player can meet any of the criteria for victory, the game is a draw.
22.71 The Warsaw Pact Player's Victory Conditions are based on the location of the westernmost tank or motorized rifle regiment which can trace a valid line of supply according to 10.1 (airborne and airmobile units never count for Victory Conditions). The Warsaw Pact Player should cross-index the final Game-Turn with the last two numbers of the hex occupied by his most advanced qualifying regiment on the following chart to determine the level of victory achieved (if any):
Last two numbers of advance hex for victory type:
| Turn | Marginal | Substantive | Strategic |
|---|---|---|---|
| 4 | 22 | 21-20 | 19 or less |
| 5 | 21-20 | 19-17 | 16 or less |
| 6 | 20-18 | 17-14 | 13 or less |
| 7 | 19-16 | 15-11 | 10 or less |
| 8 | 18-14 | 13-08 | 07 or less |
| 9 | 17-12 | 11-05 | 04 or less |
| 10 | 16-10 |
Note: Exit means that the Warsaw Pact Player must have moved at least one regiment off the west mapedge and can trace a valid line of supply from the supply hex to a valid source of supply (which may not be a Friendly airhead).
22.72 The NATO Player's Victory Conditions are based on the number of city hexes that he controls at the end of the game. A city hex is considered NATO-controlled only if a Warsaw Pact unit neither occupies it nor was the last to pass through it, and that city hex can trace a valid line of supply to a Friendly supply source (which may not be a Friendly airhead). The following victory criteria apply:
| NATO City Hexes | Level of Victory |
|---|---|
| 70 or more | Strategic Victory |
| 50-69 | Substantive Victory |
| 40-49 | Marginal Victory |
22.73 For each British Field Force the NATO Player brings in as a reinforcement, the Warsaw Pact Player subtracts 3 from the last two numbers of the hex occupied by his westernmost unit.
22.74 For each British Field Force the NATO Player brings in as a reinforcement, he subtracts 5 from the total number of city hexes he controls.
22.75 If the NATO Player enters a single unit of a particular Field Force, he is considered to have entered the entire Field Force for victory purposes.
22.76 If the Warsaw Pact Player chooses Option B, he must add 6 to the number he uses for his Advance hex, and the NATO Player may add 10 to the number of city hexes he controls at the end of the game.
23.0 Scenario: Race for the Weser
General Rule
Race for the Weser covers the first two days of the period depicted in The Thin Red Line. Race for the Weser begins on Game-Turn 1 and concludes at the end of Game-Turn 4. The scenario takes about 5 hours to play. The special rules in force in The Thin Red Line are also used in Race for the Weser. Note, however, that players receive only those reinforcements due to arrive during the first three Game-Turns, and the NATO player receives no Belgian reinforcements (they are assumed to be engaged along the Rhine with the 76th Guards Airborne).
Victory Conditions
Victory in Race to the Weser is determined by the number of Warsaw Pact regiments west of the Weser River or occupying hexes at Kassel at the end of the game. Although all Warsaw Pact units enjoy automatic supply for the duration of this scenario, for victory purposes the Warsaw Pact player may not count regiments that cannot trace a valid supply line at the end of the game. The following criteria apply:
- No regiments: NATO Victory
- One regiment: Draw
- Two or more regiments: Warsaw Pact Victory
18.3 Electronic Warfare Table
| Game Turn | NATO | Warsaw Pact |
|---|---|---|
| 1 | 3 | 4 |
| 2 | 6 | 5 |
| 3 | 6 | 8 |
| 4 | 7 | 12 |
| 5 | 7 | 12 |
| 6 | 7 | 13 |
| 7 | 7 | 14 |
| 8 | 7 | 14 |
| 9 | 7 | 14 |
See 18.1 for explanation of use.
17.3 Warsaw Pact March Order Diagrams
In each diagram, the units of a column enter the map in the order listed (first unit listed enters first). Each unit is listed with its designation and its printed strengths.
Tank Division March Order
Column A: 8/20T (regiment, armor, 11-12); 80/20T (regiment, armor, 11-12); RAG/20T (artillery brigade, 4-5-4).
Column B: 155/20T (regiment, armor, 11-12); 7/20T (regiment, mechanized, 10-14); then either 1835/20T (artillery brigade, 4-5-4) or 356/3GT (soft artillery brigade, 4-4-4) (a division has one type of artillery only, never both); DAG/20T (rocket artillery brigade, 5-5-5).
Motorized Division March Order
Column A: 36/14G (regiment, mechanized, 10-14); 38/14G (regiment, mechanized, 10-14); 114/14G (battalion, armor, 4-4; deleted in the 50th Division); 33/14G (artillery brigade, 4-5-4).
Column B: 41/14G (regiment, mechanized, 10-14); 14/14G (regiment, armor, 11-12); then either RAG/14G (artillery brigade, 4-5-4) or 119/50G (soft artillery brigade, 4-4-4) (a division has one type of artillery only, never both); DAG/14G (rocket artillery brigade, 5-5-5).