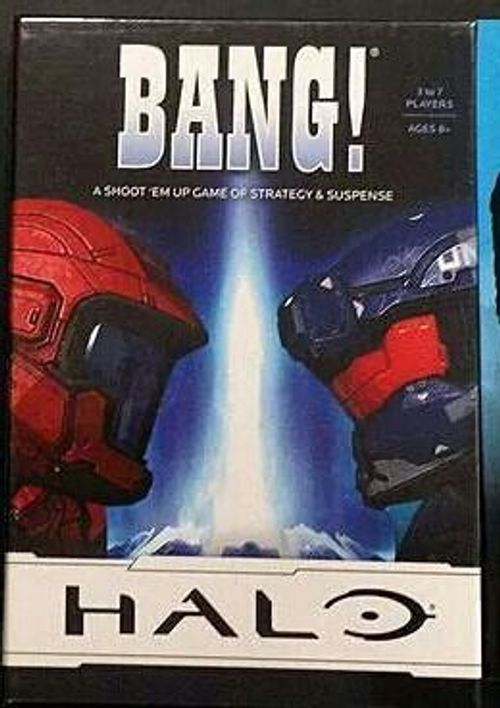
BANG!: Halo
BANG!: Halo Rulebook
Table of Contents
Table of Contents
Contents
- 109 cards:
- 7 Spartan cards: 1 Red Leader, 2 Red Team members, 1 Blue Leader, 2 Blue Team members, 1 ONI Operative
- 12 Specialization cards
- 90 Playing cards:
- 32 Weapons (red cards)
- 15 Enhancements (blue cards)
- 15 Shields (green cards)
- 28 Actions (purple cards)
- 28 Dog Tags
- 7 Game Boards
- 40 Overshield Tokens
- 6 Multiplier Tokens
- 7 Respawning Timers
- 1 Red / Blue Spartan Leader Pog
- These instructions
Object of the Game
Players are divided into three Teams:
- The Red Team
- The Blue Team
- The ONI Operative, who always plays for himself.
For each Team, the aim of the game is to gather the most Dog Tags or to have the last Spartan standing.
Setup
Each Player gets a game board. Take the Spartan cards and Multiplier Tokens as follows:
| Players | Team Leaders | Team Spartans | ONI Operative | Multiplier Tokens |
|---|---|---|---|---|
| 3* | — | 2 blue | Yes | — |
| 4 | Blue Leader, Red Leader | 1 blue, 1 red | — | Blue and red tokens, labelled 2x & 1x |
| 5 | Blue Leader, Red Leader | 1 blue, 1 red | Yes | — |
| 6 | Blue Leader, Red Leader | 2 blue, 2 red | — | Blue and red tokens, labelled 2x & 1x |
| 7 | Blue Leader, Red Leader | 2 blue, 2 red | Yes |
The Multiplier Tokens column is transcribed from the printed table icons, which show a blue and red token group labelled "2x & 1x" for 4 and 6 players.
Note: the following rules are for 4-7 players. Special 3-player game rules are on page 8.
- Shuffle the Spartan cards and deal one to each player. Each player looks at their Spartan card and places it face up on their playing board.
- In a 4 or 6 player game, shuffle the blue Multiplier Tokens and give one token face down to each person on the blue team, and then do the same with the red Multiplier Tokens. Each player secretly looks at their token, and then places it face down on their playing board.
- Shuffle all 12 Specialization cards and deal one to each player. Each player announces the name of his Specialization and reads his special ability aloud. Each player takes as many Overshield Tokens as the number shown on his Specialization card, and places them blue side up on his card in the overshield bar.
- All players start with 4 Dog Tags in a 6 or 7 player game, or 3 Dog Tags if playing a game with only 4 or 5 players. Place your Dog Tags on your game board.
- Flip the Red/Blue Spartan Leader Pog to determine which Team goes first.
- Shuffle the 90 Playing cards and deal cards to each player in clockwise order as follows:
- Starting Team Leader: 4 cards
- 2nd and 3rd player: 5 cards
- 4th and 5th player (if present): 6 cards
- 6th and 7th player (if present): 7 cards
This is your starting hand. The remaining cards form a draw deck in the middle of the table. Leave space for a discard pile. Put the Respawning Timers in a pile within reach all players. All extra components can be returned to the box.
Specializations
Your Specialization gives you a unique ability.
Each Specialization also has an Overshield value. This tells you how many Overshield Tokens to place on your Game Board, and how much damage you may suffer before being "Killed" and need to Respawn.
A Respawning Team Member
You are "Respawning" in either of these situations:
- You were killed (your Overshield Tokens have all been flipped to red); OR
- You have no cards in your hand.
If you are Respawning:
- place a Respawning Timer white side up in front of you
- you cannot be the target of Weapon cards
- you are unaffected by the Action cards Pulse Grenade and Flood
- you are not counted when determining the Range of an attack
Other than that, you are still "in play" for all purposes.
The Game
The game is played in turns in clockwise order. The Team Leader who won the Pog toss begins. Your turn is split into 4 phases, which you must play in order:
- Respawn: Flip over all of your Overshield Tokens, only if you were killed
- Draw: draw 2 cards
- Play: play any number of cards; but only one weapon
- Discard: discard down to 7 cards
1. Respawn
If you have one or more Overshield Tokens still blue, skip this phase. If you were killed (all of your Overshield Tokens have been flipped to red), flip them all back to blue.
2. Draw
Draw the top two cards from the deck. If the deck is empty, follow the rules in End of the Deck.
3. Play
You may now play cards from your hand, to either help yourself or against the other players, with the goal of trying to defeat those who belong to different Teams. You do not have to play any cards during this phase.
- Weapon cards are used to attack another player, and are then discarded.
- Action cards have an immediate effect when played, and are then discarded.
- Enhancement cards have long-lasting effects, and are played face up in front of you where they remain until a game effect forces you to discard them (e.g., the Active Camouflage card). Printed as is: Active Camouflage is an Action card on page 9.
You may play as many cards as you want, but you can only play one Weapon card per turn, unless your Specialization or an Enhancement card allows you to do otherwise. The effect of each card is shown on the card itself and is explained in the following sections.
Note: You can only play cards during your turn, except for the Hardlight Shield (This is explained in the Weapons and Hardlight Shield section).
4. Discard
At the end of your turn, your hand size limit is 7 cards. If you have more than 7 cards in your hand, you must discard down to 7.
Now your turn ends, and play passes to the player on your left.
Note: You may talk freely during the game. However, you may never ask other players about the cards in their hand, or whether a card in your hand will hurt them or not.
Attack Range 1-5
In order to target another player with a Weapon card, you must first determine the Range. The Range to attack a player is equal to the minimum number of places between the two players, clockwise or counterclockwise, as shown in the diagram.
If a player is Respawning, he is not counted when you determine the Range of an attack. So, some players may become "easier" targets temporarily because someone is Respawning.
The Stealth card changes the Range when other players target you with an attack. Each Stealth card you have in play increases their Range, or distance to reach you by 1. You can attack the other players at the normal Range.
Example: Player A has 2 Stealth cards, so players B and F have Range 3 if they attack A, C and E have Range 4, and D has Range 5. But, player A can attack the other players with the normal Range shown in the picture.
Weapons and Hardlight Shield
The main way to deal damage to other players is to attack them by playing a Weapon card.
Each Weapon card shows two numbers: The top number shows the maximum Range you may attack with that card; the lower number shows how much damage that Weapon will deal if it hits.
If you want to play a Weapon card to attack another player, you must:
a) Check the Range for the target player and
b) Check if your Weapon is good enough to equal or beat that Range.
If you are the target of a Weapon card, you may immediately play a Hardlight Shield—even though it is not your turn!—to Shield the attack. A shielded attack has no effect and deals no damage. If you do not use a Hardlight Shield, the Weapon hits and you lose the number of Overshield Tokens shown on the Weapon card. Note: You may only use a Hardlight Shield card on attacks that target you. You may not protect a teammate.
You lose one Overshield Token (flipped over to red) for each damage you take. If you lose your last Overshield Token, you have been "Killed" and are considered Respawning (see Killing a Player below). If you are Killed, excess damage is ignored.
The Weapon is then discarded, whether the attack was shielded or not.
Example: Player A wants to attack player D. An attack from A to D has a Range of 3 (D does not have a Stealth Card), so A will need a strong Weapon such as a Broadsword, Pelican Gunship, or DMR. A Magnum or Warthog will not be enough. If D did have a Stealth card, the Range would increase to 4, and even a Pelican Gun Ship wouldn't be enough! Player A uses her Broadsword card to attack. D does not play a Hardlight Shield, so he suffers 2 damage: he will be Killed unless he had at least 3 Overshield Tokens before he was attacked!
Remember: You can never play a Weapon card against a Respawning Player! Playing a Weapon Cache or Regeneration Field will allow you to give a card to someone who is respawning because they are without cards, making them a target again.
Killing a Player
If your last Overshield Token has been turned over to red, you have been "Killed"! You must give one of your Dog Tags to the player who Killed you. This applies to Weapon attacks as well as the Action cards Pulse Grenade or Flood. If you no longer have any Dog Tags left, the game ends immediately (see End of the Game).
If you are Killed, you are considered to be Respawning until the beginning of your next turn.
End of the Deck
When the deck runs out of cards every player must discard 1 Dog Tag back into the box (these are now out of play and are not used in the final point tally).
If this leaves any player with no Dog Tags, the game is over (see End of the Game section below) If all players still have at least one Dog Tag, reshuffle the discard pile and form a new draw deck.
End of the Game
At any time, if one or more players have no Dog Tags left, the game ends immediately.
In a game with the ONI Operative: Add up the score for all players on your team: The Red Team adds their Dog Tags together and Blue Team adds their Dog Tags together, each dog tag is worth one point. The ONI Operative plays alone and each dog tag he collects is worth 3 points.
In a game with only the Red and Blue Teams: Reveal your multiplier tokens. The team member with the 2x token doubles the value of all the Dog Tags he has collected. Add up the score for all players on your team.
Also score points for:
- Ordnance Pod cards: Each Ordnance Pod in your hand is worth +1 point. Ordnance Pod points are never tripled by the ONI Operative.
- Betrayal: If the game ends because you were Killed by a player on your team, your team suffers a penalty of -3 points.
The team with the highest score wins Victory!
If there is a tie between the Red Team and Blue Team, the team holding the most damage wins (add together the damage from Weapon and Firepower cards for each team).
If there is a tie between the ONI Operative and any other team, the ONI Operative wins.
"Last Man Standing"
If at any time there is only one player with any Overshield Tokens, the game ends immediately, and that player's team wins the game. This special victory is called a "Last Man Standing."
Important: The Last Man Standing is not awarded if the game ends because a player was Killed by a member of his own team! (The game ends anyway, but count your scores as above, including the -3 point penalty for a Betrayal.)
Special Rules for 3 Players
One player is randomly dealt the ONI Operative card. The other two players are members of the Blue Team.
The ONI Operative begins with 6 Dog Tags, and each Blue Team member starts with 3 Dog Tags.
The game is played as normal, with the following exceptions:
- The ONI Operative begins and draws 1 additional card per turn during his draw phase. (3 cards instead of 2)
- The ONI Operative may play an additional Weapon card during his turn. (2 cards instead of 1)
- The ONI Operative doubles the value of his Dog Tags at the end of the game.
- The ONI Operative never loses a Dog Tag due to the Odd Ball. If he would have to, he just discards the Odd Ball.
- "The Last Man Standing" rule does not apply.
Enhancement Cards
The golden rule: whenever a card contradicts the rules, the card takes precedence!
Damage Boost: When you hit another player with a Weapon card, you deal 1 additional damage for each Damage Boost you have in play.
Firepower: On your turn, you may play one additional Weapon card for each Firepower you have in play.
Stealth: Each Stealth card you have in play makes it harder for other players to attack you. For every card played in front of you, their Range (or distance to reach you) increases by 1. You can attack the other players at the normal Range.
Odd Ball: Play this card in front of any player, regardless of Range and even if he is Respawning. If Odd Ball is in front of you at the end of your Respawn Phase, you must reveal the top card in the deck. The effect of Odd Ball depends on the card you reveal:
- If it is NOT a Weapon: Odd Ball is passed to the player on your left.
- If it is a Weapon: you must discard a Weapon card from your hand.
- If you discard a Weapon, the Odd Ball remains in play and is passed to the player on your left.
- If you don't have a Weapon card, you must discard 1 Dog Tag (place it into the box). Then the Odd Ball card is discarded.
In both cases, your turn is then played as normal.
Only 1 Odd Ball in play is allowed. You cannot play Odd Ball if another Odd Ball card is already in play.
Action Cards
Remember the golden rule: whenever a card contradicts the rules, the card takes precedence!
Active Camouflage: Force one player to discard one card (regardless of Range). You may choose any Enhancement card in play, or one drawn randomly from the player's hand.
Flood: Each of the other players chooses to play one Weapon card or suffer one damage. Respawning players are not affected by the Flood.
Ordnance Pod: You may play this card to draw two cards from the deck. However, if this card is in your hand at the end of the game it is worth one point. Ordnance Pod points are never doubled or tripled.
Regeneration Field: You regain all your lost Overshield Tokens. Then, one other player of your choice (not you!) draws one card from the deck. You cannot heal other players. Regeneration Field can be played even if you have all of your Overshield Tokens.
Promethean Vision: Draw 1 random card from the hand of any other player (regardless of Range) and add it to your hand.
Pulse Grenade: Each of the other players chooses to play a Hardlight Shield or suffer 1 damage. Respawning players are not affected by the Pulse Grenade.
Weapon Cache: Draw three cards from the deck. Each of the other players draws one card from the deck.
Specialization Abilities
Unless your Specialization card says otherwise, you may use your abilities as many times as you wish (if possible).
- Assault (5): You may play 1 additional Weapon card during your turn. (e.g., if you have 1 Firepower in play, you may play up to 3 Weapon cards each turn.)
- Engineer (5): During your Play Phase, you may discard one Overshield Token to draw one card from the deck. You may not use your last Overshield Token in this way.
- Medic (4): You may play a Weapon card from your hand as a Hardlight Shield, unless it is the last card in your hand. You may use this ability even in response to cards such as Pulse Grenade.
- Operator (5): All other players have +1 Range when they attack you.
- Pathfinder (4): You take 1 damage less than normal when attacked by any Weapon, to a minimum of 1 damage. (e.g., a Pelican Gunship would deal 2 damages to you instead of 3, but a Battle Rifle still inflicts 1 damage.)
- Pioneer (4): You draw 1 card more than normal during the Draw Phase of your turn.
- Recon (4): Each time you suffer a damage from a Weapon card, you draw 1 card from the deck (e.g., 3 damage = 3 cards).
- Rogue (5): Your Weapons can attack any Range, regardless of the value on your Weapon card.
- Specter (4): You can only be damaged by Weapon cards. You are not affected by Flood and Pulse Grenade cards. You are affected normally by other Action cards, such as Weapon Cache.
- Stalker (5): If you successfully attack another Player with a Weapon card, you inflict 1 additional damage. This does not apply to cards that are not Weapons, like Flood and Pulse Grenade.
Strategy Tips
- Remember that a player with no cards in his hand is Respawning, and cannot be the target of most cards, especially Weapons. Try to empty your hand at the end of your turn so you are Respawning! If another player is Respawning because he has no cards in hand, you can play a Weapon Cache or Regeneration Field card to make him draw one, so he becomes a target again!
- Play your Enhancements! Their effects add together, and you can become very deadly with just a couple of Damage Boost or Firepower cards. Plus, they take up space and are of little use when in your hand.
- Beware of the ONI Operative! Keep in mind that he triples his Dog Tags. Never let any player have too many Dog Tags. And keep an eye on anyone who plays a Ordnance Pod to draw cards.
- When playing and discarding cards, always make sure to discard them in the order played i.e. Weapon, then Shield. This will keep valuable weapons out of the hand of the Tracker who can draw the top card from the discard pile.