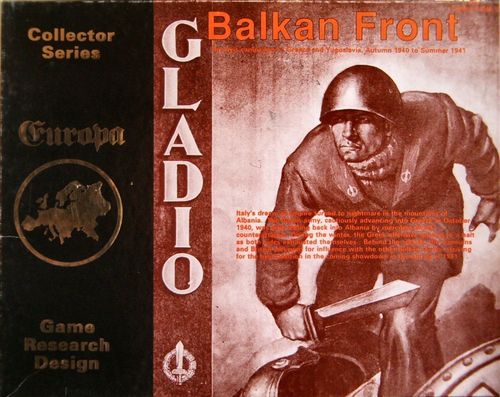
Balkan Front
Balkan Front Rulebook
Table of Contents
Table of Contents
- Rule 1 — Introduction
- Rule 2 — Game Components
- Rule 3 — Basic Game Concepts
- Rule 4 — Sequence of Play
- Rule 5 — Zones of Control
- Rule 6 — Movement
- Rule 7 — Transportation Lines
- Rule 8 — Stacking
- Rule 9 — Combat
- Rule 10 — Armor and Antitank Effects
- Rule 11 — Support
- Rule 12 — Supply
- Rule 13 — Overruns
- Rule 14 — Special Ground Rules
- Rule 15 — Unit Breakdowns
- Rule 16 — Air Rules Introduction
- Rule 17 — Airbases
- Rule 18 — Movement of Air Units
- Rule 19 — Patrol Attacks
- Rule 20 — Air Missions
- Rule 21 — Air Combat
- Rule 22 — Antiaircraft
- Rule 23 — Air Unit Repair
- Rule 24 — Special Air Rules
- Rule 25 — Airborne Operations
- Rule 26 — Naval Rules
- Rule 27 — Weather
- Rule 28 — Nations
- Rule 29 — Reinforcements and Replacements
- Rule 30 — Preparing for Play
- Rule 31 — Victory
- Rule 32 — Optional Rules
- Rule 33 — Scenarios
- Victory Point Chart
Rule 1 — Introduction
Balkan Front is a detailed simulation of the Axis campaigns of conquest in the Balkans, from autumn 1940 to summer 1941. It covers the failed Italian invasion of Greece, the German blitzkrieg that overran Yugoslavia and Greece, and the German airborne assault on Crete.
Rule 2 — Game Components
Players may copy portions of the rules, orders of battle, and charts for their personal use.
Rules and Order of Battle Booklets:
- This rules booklet, the Balkan Front 2nd Edition Rules.
- The Balkan Front Revised Order of Battle booklet.
Maps:
- Europa Map 14A. This may be either one large double-folded map (labeled as Map 14A) or 4 non-folded box-size map sections (labeled as 14A:NW, 14A:NE, 14A:SW, and 14A:SE).
- Europa Map 15B. This may be either one large single-folded map (labeled as map 15B) or 2 non-folded box-size map sections (labeled as 15B:NW and 15B:NE).
These maps cover Greece, Albania, Yugoslavia, and surrounding areas at a scale of 16 miles per hex. The hexes on the maps are numbered, and specific hexes are identified by map and hex number. For example, 14A:1506 refers to hex 1506 on map 14A.
Counters:
- Europa (Balkan Front) Sheet 20A R.
- Europa (Balkan Front) Sheet 21A R.
- Europa (Balkan Front) Sheet 22A R.
- Europa Universal Marker Sheet
These four counter sheets total 1120 counters. These countersheets contain approximately 120 counters not needed for the play of Balkan Front. Ignore these counters for Balkan Front. (The extra counters are for use with Wavell's War, available separately from GRD Games.)
Charts:
- One Combat Results/Terrain Effects Chart.
- One Unit Identification Chart.
- One Turn Record/Map Legend Chart.
- Two game charts (one Axis, one Allied).
- One Master Sequence of Play Chart.
Dice:
- Two six-sided dice are required for play.
Rule 3 — Basic Game Concepts
A. Units. The term units, when used by itself, refers to ground units only and does not include air units. The term forces refers to ground and air units collectively.
Units are rated based on their size, type, and capabilities. Typically, a unit has a unit size, a unit type, a combat strength (or separate attack and defense strengths), a movement rating, and a unit identification. The unit identification chart displays the layout of these symbols and ratings, as well as specialized symbols and ratings.
Some overall definitions apply to units.
-
Size. Units are divided into two general categories, based on their size:
- Divisional Unit. Any unit with the division or divisional grouping symbol, except for headquarters.
- Non-Divisional Unit. Any unit smaller than a divisional unit: brigades, regiments, battalions, cadres, and headquarters.
-
Class. Units are divided into three general classes, based on their types:
- Non-Motorized. All unit types listed as non-motorized on the unit identification chart. For example, a cavalry unit is non-motorized.
- Artillery. All unit types listed as artillery on the unit identification chart. Note that for game purposes antiaircraft and antitank units are not artillery. For example, a siege artillery regiment is an artillery unit.
- Combat/Motorized. All unit types listed as combat/motorized on the unit identification chart. For example, an armored brigade is a combat/motorized unit. In addition, any unit type that has the motorized symbol used in conjunction with its unit type symbol is combat/motorized. For example, an antitank battalion that also has the motorized symbol is a combat/motorized unit. Note: "Combat/motorized" is abbreviated "c/m" in the rules. "Non-c/m" units are those that are not combat/motorized: all non-motorized units and all artillery units that are not combat/motorized.
-
Regimental Equivalents. A regimental equivalent (RE) measures the size of a unit. REs are also used for any marker or other game feature that needs its size specified. RE sizes are as follows:
- 1/2 RE: Each battalion or point of position AA.
- 1 RE: Each brigade, regiment, cadre, or divisional headquarters.
- 3 REs: Each divisional unit.
Cavalry and c/m units count double their RE size for transport purposes: rail movement (Rule 7A) and naval transport (Rule 26B). For example, a cavalry regiment (1 RE) that moves by rail or sea counts as 2 REs for transport purposes.
-
Heavy Equipment. The unit identification chart lists the unit types that have heavy equipment. In addition, all units that have supporting arms (Rule 11) have heavy equipment.
B. Sides.
- Axis. The Axis player controls the forces and owns the territory of the Axis nations: Italy (Italian armed forces and Albanians), Germany (German Army, Luftwaffe, Waffen-SS, and Brandenburgers), Hungary, and Romania. Note: Although no Romanian forces are in the game, Romania is a member of the Axis, and Axis forces may operate on Romanian territory.
- Allied. The Allied player controls the forces and owns the territory of Greece, plus the forces of the British Empire (British Army, Australians, New Zealanders, Colonials, Royal Air Force, Royal Marines, and Polish exiles).
- Neutral. Bulgaria, Yugoslavia, and Turkey start the game neutral and are controlled by neither player. Bulgaria may join the Axis during play, while Yugoslavia may join the Axis or the Allies. A country that joins one side has its forces controlled and territory owned by that side's player.
C. Game Mechanics.
- Fractions. Unless stated otherwise, always retain fractions. For example, half of 7 is 3 1/2.
- Cumulative Effects. Unless stated otherwise, all effects to units' strengths and all modifications to die rolls are cumulative. For example, a unit halved in strength twice is quartered in strength.
- Die Rolls. All rolls requiring two dice are identified as such in the rules. All other rolls require only one die.
- Accumulation. Each player receives various abilities on a turn by turn basis. The player may not accumulate these abilities from turn to turn unless the rules specifically allow this. For example, the Allied player may move 10 REs of units by rail per turn (per Rule 7A2). The Allied player cannot accumulate this ability from turn to turn. For example, if the Allied player does not move any units by rail in a turn, he cannot move 20 REs in the following turn.
D. Ownership. A player owns a hex if: 1) his units occupy the hex, 2) his units exert an uncontested zone of control into the hex, or 3) his units were the last to occupy or exert an uncontested zone of control (ZOC) into the hex. (Zones of control are defined in Rule 5. A unit with a ZOC has an uncontested ZOC in a hex if the hex is neither occupied by nor in the ZOC of an enemy unit.)
E. Geography. The game map shows national borders at the start of World War II (1 September 1939) and changes that occurred during the war. The international borders show the September 1939 borders, and the internal borders show internal divisions of certain nations.
The map contains a large number of islands, which are parts of the various nations on the map. All islands in the Aegean Sea that are west of the international borders there are part of Greece. The Dodecanese Islands are owned by Italy. Any island that is connected directly or indirectly by narrow straits to a country is part of that country, unless indicated otherwise. For example, in the upper Adriatic Sea, Cherso and Losini are part of Italy, while Rab and Krk are part of Yugoslavia. All other islands have the names of their country printed next to their names. For example, Crete is part of Greece.
The following terms are used:
- A major city is any partial hex or full hex city.
- Greater Germany consists of the territory within the 1939 German borders. This territory, formerly part of the nation of Austria, is divided into two internal regions, which have no effect on the play of the game. For brevity, Greater Germany is called Germany in these rules.
- Greece refers to all of Greece: Mainland Greece and the Greek islands. Mainland Greece excludes the Greek Islands.
- Hungary consists of the territory inside the 1939 Hungarian international borders, plus the territory inside the internal border region that contains Oradea (14A:1304). (Hungary received this region from Romania in 1940.)
- Italy consists of the Italian peninsula, which is shown in two separate sections on Map 14A, Zara (14A:1928), and Cherso, Losini, and Lagosta Islands in the Adriatic Sea. Mainland Italy excludes Zara and these three islands. Mainland Italy is divided into several internal regions, which have no effect on play. Note: While Albania and the Dodecanese Islands technically were part of Italy, for game purposes they are separate areas under Italian control.
- Turkey refers to the part of Turkey on the map. While most of Turkey is off-map, five minor portions of Turkey appear on the eastern edge of the map in the Aegean Sea: the bordered area containing Gokce Island, the bordered area containing the city of Cesme, and the 3 bordered half-hexes east of the Dodecanesse.
- Yugoslavia refers to all of Yugoslavia: Mainland Yugoslavia and the Yugoslav islands. Yugoslavia has numerous internal divisions, such as Croatia and Serbia. These borders reflect the dismemberment of Yugoslavia by the Axis following the events depicted in this game, rather than its prewar internal divisions. They are sufficient for game purposes, with the following notes: Bosnia-Hercegovina consists of the following territory within the Croatian border: all territory south of both the Sava River and the 14A:1621-1625 hexrow, except for all islands, coastal hexes, and hexes adjacent to coastal hexes. Croatia consists of the adjoining regions of Croatia and Dalmatia, plus all Yugoslav islands. However, it excludes the region of Bosnia-Hercegovina, defined below. (The borders of Croatia reflect its expansion following the defeat of Yugoslavia, and they include the province of Bosnia-Hercegovina, which was not part of Croatia before the war.) Kosovo and Macedonia consists of the regions of Kosovo and Macedonia. (While these two regions were not politically integrated, this grouping reflects Yugoslav military organization.) Montenegro consists of the region of Montenegro and includes the two hexes labeled "to Alb." Serbia consists of the regions of Serbia, Backa, and the region labeled "to Bulg." Slovenia consists of the two adjoining regions that bear this name, plus the adjacent region labeled "to Hun." (These divisions reflect the partition of Slovenia among Germany, Italy, and Hungary following their invasion.)
Rule 4 — Sequence of Play
The game is played in a series of game turns. Each game turn consists of an Axis player turn followed by an Allied player turn.
A. Sequence. Each player turn consists of the following phases.
- Initial Phase. The phasing player receives reinforcements and replacements and may attempt to repair inoperative air units. Both players determine the supply status of their units.
- Movement Phase. The phasing player moves his ground units.
- Air Phase. Players deploy air units, resolve air combat, and execute air missions.
- Combat Phase. The phasing player resolves attacks made by his units.
- Exploitation Phase. The phasing player moves his c/m units.
The Master Sequence Of Play Chart shows the sequence of play in detail.
B. Phasing. During the Axis player turn, the Axis player is the phasing player and the Allied player is the non-phasing player. During the Allied player turn, these roles are reversed.
C. Restrictions. Unless noted otherwise, activities may not be conducted outside this sequence. The activities mentioned above are explained in the following rules.
Rule 5 — Zones of Control
The zone of control (ZOC) of a unit represents the control a unit exerts over surrounding terrain. ZOCs affect many activities in the game, as covered in the appropriate rules.
A unit exerts a ZOC through the six hexsides of the hex the unit occupies into the six surrounding, adjacent hexes. A unit prohibited from entering a specific terrain type or crossing a specific type of hexside does not exert a ZOC into that hex or through that hexside. For example, a unit prohibited from entering mountain hexes does not exert a ZOC into any mountain hex. (Rule 6 covers prohibited terrain in detail.)
Every divisional unit has a ZOC. Non-divisional units do not have ZOCs. For example, an infantry division has a ZOC, but an infantry regiment does not.
A unit with a ZOC may temporarily lose its ZOC, depending upon certain activities. For example, a unit which uses administrative movement (Rule 6B) loses its ZOC. When a unit undertakes such an activity, it loses its ZOC as specified in the rule. A unit which loses its ZOC does not have a ZOC for any game purpose until it regains its ZOC.
Rule 6 — Movement
All phasing units may move during the movement phase. All phasing c/m units may move during the exploitation phase. The phasing player may move any or all of his units in the appropriate phases, but he is never required to move any unit.
A unit's movement allowance is the number of movement points (MPs) the unit may normally spend in a movement or exploitation phase. A unit may move up to the limit of its movement allowance, as restricted by terrain, ZOCs, and supply.
A unit spends MPs as it moves from hex to hex. For each hex entered, the unit spends a varying amount of MPs, depending upon the type of terrain in the hex being entered. The terrain effects chart lists the movement effects of hexes: c/m and artillery units use one set of costs, other units use another set of costs, and exceptions use a third set of costs. For example, the following units entering a mountain hex spend: 6 MPs for an artillery unit, 3 MPs for an infantry unit, and 2 MPs for a mountain unit.
A unit must spend MPs to cross hexsides that have MP costs listed on the terrain effects chart. The MP cost to cross a hexside is in addition to the cost to enter a hex, as shown by the plus sign (+) in front of the cost. For example, it costs a unit 2 MPs to cross a narrow straits hexside, in addition to the cost of the hex it is entering.
A unit may not enter a prohibited hex or cross a prohibited hexside. Prohibited terrain is listed as such on the terrain effects chart. For example, no unit may cross a karst hexside.
In general, a unit may not enter a hex occupied by an enemy unit. Exceptions to this are covered in the appropriate rules.
A unit may always move a single hex (except into or across prohibited terrain) in a phase in which it may move. To do so, the unit spends all of its MPs and enters an adjacent hex, even if the cost to do so exceeds the number of MPs the unit has available that phase. It may move through enemy ZOCs when using this one hex movement ability. A unit may not spend MPs for any other purpose (such as breaking a rail line) when using this ability.
Overruns (Rule 13) may occur during movement. Special forms of movement, such as rail movement and naval transport, are covered in separate rules.
Weather affects movement, per Rule 27 and the terrain effects chart.
A. ZOCs. When a unit exits a hex that is in an enemy ZOC, it must spend a number of MPs to leave the hex, in addition to the terrain costs of movement. The ZOC costs are given on the ZOC movement costs table.
B. Administrative Movement. During the movement phase (only), a unit may use administrative (admin.) movement. Admin. movement allows a unit to move faster than regular movement, but imposes restrictions on the unit.
A unit pays half the regular MP cost of terrain when using admin. movement. For example, a unit using admin. movement to move on a road during clear weather pays 1/2 MP per hex.
A unit using admin. movement is restricted:
- It may not spend MPs for any purpose except admin. movement, rail movement, and naval transport.
- If it has a ZOC, it loses its ZOC for the entire movement phase.
- It may not start or move adjacent to an enemy unit during the entire movement phase in which it uses admin. movement.
- It may not enter an enemy-owned hex.
- It may not enter a mountain hex, cross a mountain hexside, or cross a major river hexside unless it is moving on a road.
Rule 7 — Transportation Lines
There are two types of transportation lines: railroads and roads. A unit may use the transportation line movement rate only when moving in hexes directly connected to one another by the line.
A. Railroads. Units may move by rail on rail lines. There are two types of rail lines: high-volume and low-volume. For rail movement, the only difference between the lines is their effect on rail capacity.
-
Rail Movement. Units of the phasing player may use rail movement only in the movement phase. A unit moving by rail moves at an accelerated rate, ignoring regular terrain costs. To use rail movement, a unit must be on a rail line. It moves several hexes for each MP spent, as given on the rate movement rate table. It may mix both rail movement and regular movement in a movement phase. For example, a unit could move overland to a rail line, move by rail, and then continue moving overland.
When using rail movement, a unit is under the following restrictions:
- It may not enter or leave a hex in an enemy ZOC. However, an enemy ZOC is negated for rail movement purposes (only) if a friendly unit occupies the hex in the ZOC throughout the movement phase. This unit must start in the hex and may not leave the hex during the movement phase.
- It may move by rail only in friendly-owned rail hexes, and only if a line of friendly-owned rail hexes can be traced from the unit to a friendly supply source.
- If it has a ZOC, it loses its ZOC from the instant it starts to move by rail to the end of its movement phase.
-
Capacity. Each player has a rail capacity, which is the maximum number of REs that he may move by rail in a turn. Cavalry and c/m units count double their RE size against rail capacity. For example, an infantry regiment moving by rail would count as 1 RE against the player's rail capacity, while a cavalry regiment would count as 2 REs.
If a unit uses a low-volume rail line at any time during its rail movement, it counts double its RE size against rail capacity. Note that c/m and cavalry units would be doubled twice, once for being c/m or cavalry and once for using a low-volume line.
The Allied player has a capacity of 10 REs per turn. The Axis player has a capacity of 30 REs per turn, which increases to 60 REs per turn upon German intervention. Yugoslavia and Bulgaria have capacities of 10 REs each. When one of these nations joins a side, its capacity is added to that side's capacity.
Note: A unit only counts against rail capacity once per turn, even if it made separate rail moves during its turn. For example, an infantry division moved by rail, then moved overland to another rail line, and then moved by rail again. It used high-volume lines at all times, and it counts as 3 REs against the player's rail capacity.
-
Albania. Units may not use rail movement in Albania.
-
Rail Breaks. A unit may break a rail line in a hex by spending 2 MPs in the hex. Bombing (Rule 20F2e) may also break rail lines. A unit may not use rail movement to enter or leave a hex in which the rail line is broken. Breaks may be repaired (Rule 14A), and a rail line may be used in the turn it is repaired. Use hit markers to mark broken rail lines.
B. Roads. A unit moving along a road pays the MP cost for clear terrain for each hex it enters; the actual terrain costs for hexes entered and hexsides crossed are ignored. Road movement has the same limitations as regular movement. For example, a unit moving along a road must spend additional MPs to leave a hex in an enemy ZOC.
A unit may use a road anywhere, unlike the use of railroads. Roads may be used in both the movement and exploitation phases.
Each rail line may also be used as a road. Even when a unit is prohibited from using a railroad in a hex, it may still use the rail line there as a road.
Note: Roads may not be broken.
Rule 8 — Stacking
A. Stacking Limit. Only a limited number of units may stack in a hex.
-
Regular. The maximum regular stacking limit for a hex is:
- Three units of any unit size and unit type, plus
- Three non-divisional units of any unit type, plus
- Two artillery units.
Examples: Each of the following combinations could stack in a hex: a) Three divisions, three mountain brigades, and two artillery regiments; b) three divisions, two mountain brigades, and three artillery regiments; c) one division, five cavalry regiments, and two artillery regiments.
-
Mountain. The maximum stacking limit for a mountain hex is:
- Two units of any unit size and unit type, plus
- Two non-divisional units of any type, plus
- One artillery unit.
B. Effects. The stacking limit is in force at the end of each movement, air, combat, and exploitation phase. A player may not move his units so that they violate the stacking limit in any hex at the end of these phases. If, as a result of combat, a unit must retreat in violation of stacking, it must continue to retreat until the stacking limit is no longer violated. If it cannot do so, it is eliminated instead.
The stacking limit of a hex is also the limit on the number of units that may attack that hex from an adjacent hex. Example: Units in two clear terrain hexes attack enemy units in a mountain hex. Since the hex under attack is a mountain hex, only units up to the mountain stacking limit may attack the hex from each of the two clear hexes, even though more units may be stacked in these hexes.
The stacking limit is not in force in the initial phase, when reinforcements and replacements enter play. Reinforcements and replacements may enter play in violation of the stacking limits during the initial phase, but only if the stacking limit will not be violated at the end of the following movement phase.
C. Corps/Army Markers. Players may use corps/army markers to help with stacking in congested portions of the map. Each player has a number of these markers, which have identifications and unit types, together with matching boxes on the game charts. To use a corps/army marker, simply remove a stack of units from the map, place a corps/army marker in its place, and place the stack in the marker's box on the game chart. Corps/army markers are used only for convenience for stacking; they do not increase the stacking limit of a hex or otherwise affect the play of the game. All units in a marker's box are treated for all purposes as being in the hex occupied by the marker.
Rule 9 — Combat
During the combat phase, the phasing player's units may attack adjacent enemy units. In this phase, the phasing player is the attacker and the non-phasing player is the defender.
A. Procedure. An attack consists of one or more phasing units attacking a hex that contains enemy units. In a combat phase, the attacking player may make a series of attacks, one after another, in any order. Attacking is voluntary; units are not required to attack.
For each attack, follow this procedure:
- Total the modified attack strengths of all units attacking an adjacent enemy-occupied hex. Terrain, supply, and support, as explained in later rules, can modify the attack strengths of units. To this total, add the bombing strength of any ground support bombing in the hex.
- Total the modified defense strengths of all units in the attacked hex. Terrain, supply, and support can modify the defense strengths of units. To this total, add the bombing strength of any defensive support bombing in the hex.
- Calculate the combat odds ratio. Compare the total attack strength to the total defense strength in the form attacker:defender. Round this ratio down in favor of the defender to correspond to a combat odds ratio on the combat results table. For example, an attack strength of 34 attacking a defense strength of 9 is 34:9, which rounds down to 3:1.
- Determine the combat result. Roll one die, and modify the number rolled by all appropriate terrain, armor/antitank, and special effects. Cross-index the adjusted die roll with the odds column to get the combat result. The combat result affects the units involved in the combat; implement it immediately.
B. General Restrictions. The following general restrictions apply to combat:
- No unit may attack or be attacked more than once per combat phase.
- No unit may attack into a prohibited terrain hex or across a prohibited terrain hexside.
- All units defending in a hex must be attacked collectively, with their defense strengths combined. Units in a hex may not be attacked individually.
- Each attack must be against the units occupying a single hex. Two or more enemy-occupied hexes may not be attacked in a single attack. Note that units stacked in the same hex may attack into different hexes, but even in this case, each attacked hex requires a separate attack.
- A unit may not split its attack strength so as to attack more than one hex.
- The stacking limit of the attacked hex limits the number of units in each adjacent hex that may attack the hex (see Rule 8B).
- Any attack at odds higher than 9:1 is resolved at 9:1 odds. Any attack at odds less than 1:4 is an automatic AE (attacker eliminated) result.
C. Combat Results. Combat results may affect the attacking units, the defending units, both sides, or neither side. When a combat result occurs, the owning players immediately apply it to their affected units.
- AE: Attacker Eliminated/DE: Defender Eliminated. Eliminate all affected units: reduce any unit with a cadre strength to its cadre strength; remove from play all other units. Retreat units reduced to cadre.
- AH: Attacker Half Eliminated/DH: Defender Half Eliminated. Eliminate units so that at least half of the total strength (attack strength for the attacker, defense strength for the defender) of the affected units is eliminated. All surviving affected units must retreat.
- AR: Attacker Retreats/DR: Defender Retreats. Retreat all affected units.
- AS: Attacker Stopped. The attack is inconclusive; neither side takes losses or retreats.
- HX: Half Exchange. Eliminate the side with the lower printed combat strength (or the defender if both sides are equal in strength). Retreat units reduced to cadre because of this result. From the other side, eliminate units so that the total strength loss at least equals one half the total strength loss of the eliminated side. Example: An attack of 15 attacking strength points against 10 defending strength points results in an HX result. The defender, being the weaker side, eliminates his 10 strength points. The attacker must eliminate at least 5 points.
- EX: Exchange. Eliminate the side with the lower printed combat strength (or the defender if both sides are equal in strength). Retreat units reduced to cadre because of this result. For the other side, eliminate units so that the total strength loss at least equals the total strength loss of the eliminated side. Example: An attack of 15 attacking strength points against 10 defending strength points results in an EX result. The defender, being the weaker side, eliminated 10 strength points. The attacker must eliminate at least 10 strength points.
D. Losses. Calculate all combat losses using the printed strengths of the involved units. Terrain, supply, and support may modify strengths for combat resolution, but these factors are not considered for losses. When determining losses, always use the attacker's attack strengths and the defender's defense strengths.
Air units may aid units in combat (Rules 20F2b and c). However, the bombing strengths of air units are not included when determining losses. Air units are never eliminated due to ground combat resolution.
E. Cadres. Various divisional units can take losses in combat and remain in play at reduced strengths. These units have cadres printed on the back of their counters. When such a unit is eliminated in combat, it is reduced to its cadre instead of being removed from play. When calculating the total strength loss in a combat, the strength of a divisional unit reduced to a cadre is counted fully. For example, an 8 strength point division reduced to a 3 strength point cadre is counted as a strength loss of 8, not 5.
F. Movement After Combat.
-
Retreats. When a unit must retreat, the owning player moves it one hex away from the hex it occupied during combat, in accordance with the following priorities:
- to a hex not in any enemy ZOC and not in violation of stacking.
- to a hex not in an enemy ZOC but in violation of stacking.
- to a hex in an enemy ZOC (regardless of stacking). A unit that retreats to a hex in an enemy ZOC is reduced to a cadre if it has a cadre. If it does not have a cadre (or already is a cadre) it is eliminated.
When a unit violates the stacking limit, it must continue to retreat, per the above priorities, until it reaches a hex where it does not violate the stacking limit. If it cannot do this, it is eliminated.
A unit with no retreat route except into or across prohibited terrain or into enemy-occupied hexes is totally eliminated, even if it has a cadre.
Defending units retreating to a friendly-occupied hex that is subsequently attacked in the same combat phase contribute nothing to the defense of the hex. These units are affected by the combat result of the attack, but their combat strengths are not counted at all for any exchange purposes.
-
Advances. Attacking units may advance after combat into the attacked hex, up to the stacking limit, if the attack clears the hex of enemy units. Advance after combat is voluntary. The units must advance immediately upon resolution of the attack, before any other attack is resolved. Defending units may not advance after combat.
G. Zero Strength Units. A unit with an attack strength of 0 may not attack by itself. It may participate in an attack made by other units, whereupon it is affected by the results of the attack (including advance after combat).
A unit with a defense strength of 0 is automatically eliminated when attacked, unless it is stacked with at least one unit with a defense strength greater than 0.
A unit with a combat strength of 0 is subject to all limitations of this rule.
H. Terrain Effects. The terrain of the defender's hex and the terrain of the hexside across which the attack is made may affect combat resolution. The combat effects column on the terrain effects chart summarizes these effects. AEC refers to armor capabilities, as explained in Rule 10. In general, terrain may affect combat by halving or quartering some or all of the attacking units or by applying modifications (such as –1) to the die roll used to resolve the attack.
I. Required Losses. Certain units with special combat abilities are required to take losses under some circumstances if their special abilities are used. (The special abilities and whether required losses are incurred are covered in later rules.) If such units use their special abilities in a combat that results in losses to their side, at least half of all losses must be taken from these units, if possible.
Example: In an attack, the attacker used full AEC to modify the attack and obtained an exchange against the defender. The defender lost 20 strength points in the exchange; the attacker must lose the same amount. Since required losses are incurred when 1/2 or more AEC is used (Rule 10H), half of the losses (10 strength points) must be taken from units capable of 1/2 or more AEC that participated in the attack.
Rule 10 — Armor and Antitank Effects
Various unit types have armor and antitank capabilities, as summarized on the unit identification chart.
A. Categories.
- AEC: Armor Effects Capability. AEC expresses the ability of an attacking or defending unit to use armor effects.
- ATEC: Antitank Effects Capability. ATEC expresses the ability of a defending unit to use antitank effects when the attacker has armor effects.
B. Values. Armor and antitank effects are calculated on a proportional basis, using regimental equivalents. To calculate the proportion, a player must know the value of each of his involved REs. There are four possible values a unit may have.
- Full. Each RE of the unit is counted as fully capable. For example, a German panzer division (3 REs) has as 3 REs of AEC.
- Half. Each RE of the unit is counted as one half capable. For example, an Italian light armored division (3 REs) is counted as 1 1/2 REs of AEC; its remaining 1 1/2 REs are counted as having no AEC.
- Neutral. The REs of the unit are not counted when determining the proportion. For example, the 1 RE of a Yugoslav artillery regiment is not counted when determining ATEC.
- None. All REs of the unit are counted in the proportion are counted as having no capability.
C. Proportions. To calculate the proportion in a category, total the number of REs that have a capability. Divide this number by the number of non-neutral REs involved. Express the resulting proportion as a fraction. For example, if two German infantry divisions (6 REs, no AEC), one panzer division (3 REs, full AEC), and one motorized infantry regiment (1 RE, neutral and hence not counted) are attacking, then three out of a total of nine REs have AEC, for a fraction of 1/3.
Use the proportion to determine the die roll modification to combat. If the proportion is less than one seventh (1/7), then there is no die roll modification.
- AEC in the Attack. When the AEC proportion of the attacking units is at least one seventh but less than one half, the die roll modification is +1 (0 in poor weather). When the AEC proportion is at least one half but less than one, the die roll modification is +2 (+1 in poor weather). When the AEC proportion is one, the die roll modification is +3 (+1 in poor weather).
- AEC in the Defense. When the AEC proportion of the defending units is at least one seventh but less than one half, the die roll modification is –1 (0 in poor weather). When the AEC proportion is one half or greater, the die roll modification is –2 (-1 in poor weather). The defender may not use AEC in a combat if the attacking units have (or are capable of) one half or more AEC. In this situation, the defender may use ATEC but not AEC.
- ATEC. ATEC is used only when the attacking units have (or are capable of) one half or more AEC. Note that ATEC is used if the attacking units are capable of one half or more AEC, even if the attacking units do not (or cannot) use AEC. When the ATEC proportion is at least one seventh but less than one half, the die roll modification is –1. When the ATEC proportion is at least one half but less than one, the die roll modification is –2. When the ATEC proportion is one, the die roll modification is –4.
- Weather. Note poor weather affects AEC but not ATEC.
The armor/antitank summary lists all AEC and ATEC modifications.
Example 1: A panzer division, two infantry divisions, and three artillery regiments are attacking in clear weather. The artillery units are AEC neutral and are not counted. Of the nine REs for the proportion, three of which are AEC. The proportion is 1/3, which is over 1/7 but less than 1/2. Thus, 1 is added to the die roll.
Example 2: One light tank cadre (1 RE) and one infantry cadre (1 RE) are defending in clear weather. The light tank unit is 1/2 AEC, giving a total of 1/2 RE of AEC in this case. There are two REs for the proportion, one half of which is AEC. The proportion is 1/4; 1 is subtracted from the die roll.
D. Cumulative Effects. In an attack where the attacker has AEC and the defender has AEC or ATEC, the modifications to the die roll are cumulative. For example, if the attacker is full AEC (+3) and the defender is full ATEC (–4), the net modification is –1.
E. Half Capability. Any unit listed as half capable in a category may be treated as neutral in that category, at the owning players option. Example: A German panzer division (full AEC) and an Italian light armored division (half AEC) are attacking together. By treating the light armored unit as neutral, its REs are not counted and the attack has 3 REs of AEC, out of 3 REs, for an AEC modification of +3. Otherwise, the attack would have 4 1/2 REs of AEC out of 6 REs total, for an AEC modification of +2.
F. Neutral Restriction. A player may have up to twice the number of neutral REs as he has of full and half capable units. Neutral units in excess of this limit are treated as having no capability instead of being neutral.
Example: One panzer division, two motorized divisions, and three artillery regiments are attacking. Of the total of twelve REs, three are AEC and the remaining nine are neutral. However, only six (twice three) of these may be used as neutral; the remaining three are considered to have no capability. Thus, there are six REs for the proportion, of which three are AEC. The proportion is 1/2.
Note that for this rule, all REs of half-capable units are counted. For example, 2 REs of neutral units may be used without penalty to armor effects in conjunction with a 1 RE unit having 1/2 AEC.
G. Terrain. The terrain effects chart lists several terrain types as no AEC. This means that AEC may not be used by a unit attacking into such a hex, attacking across such a hexside, or defending in such a hex. ATEC is unaffected and may be used in such a hex if the attackers are capable of one half or more AEC, even though AEC may not be used due to the terrain.
Example: A British armored brigade is attacking a German heavy antiaircraft regiment in a dot city. Due to the dot city, the attacking unit may not use AEC. Since the armored brigade is capable of one half AEC or more, the defender may use ATEC. Thus, the die roll is modified by –4, due to the full ATEC capability of the defending unit.
H. Required Losses. If the attacker used 1/2 or more AEC in an attack, at least half of all losses to the attacker as a result of the attack must be taken from units capable of at least 1/2 AEC. If the defender used 1/2 or more AEC or ATEC defending against an attack, at least half of all losses to the defender as a result of the attack must be taken from units capable of at least 1/2 AEC or ATEC, respectively.
Rule 11 — Support
All units possess an intrinsic combat ability as given by their printed combat strengths. However, certain units are unable to use their strengths fully by themselves, due to a lack of supporting arms. These units are unsupported units.
Most units have supporting arms. These units are:
- All divisional units.
- All artillery units.
- All divisional headquarters.
- All units with the self-supported indicator (a black dot) in the upper left area of their counters.
All other units are unsupported. An unsupported unit has its combat strength halved as long as it remains unsupported.
A supported unit provides support to all friendly unsupported units in its hex, unless the supported unit has the self-supported indicator. Units with the self-supported indicator do not provide support to other units.
When defending, the unit providing support must be in the same hex with the units it is supporting. When attacking, the unit providing the support must participate in the same attack as the units it is supporting, as well as being in the same hex with them.
Rule 12 — Supply
Supply affects the abilities of units in movement and combat. Units operate to their full extent if they are in supply; they operate less effectively if they are out of supply.
A. Supply Lines. The supply conditions of units depend upon the tracing of supply lines. A supply line may not be traced into a hex occupied by an enemy unit, into a hex in an enemy ZOC unless the hex is occupied by a friendly unit, into a prohibited terrain hex, or across a prohibited terrain hexside.
B. Tracing Supply. Both sides check the supply status of their units during the initial phase of each player turn, after all reinforcements and replacements appear. Units out of supply at this time are out of supply throughout the entire player turn.
A unit is in supply if a supply line can be traced from the unit to a supply source. The supply line may have three elements: overland, road, and railroad (both high and low volume railroads).
The lengths of overland and road elements vary depending upon weather. The supply line summary lists the maximum lengths, in hexes, of these lines.
- Overland. The overland element of a supply line may be traced to a road, a railroad, or a supply source. An overland supply line may be traced through both friendly and enemy-owned hexes.
- Road. The road element of a supply line may be traced to a railroad or a supply source. The maximum length of this line in hexes is given on the supply line summary. A road supply line may only be traced in friendly-owned territory.
- Railroad. The railroad element of a supply line may be traced to a supply source. It may only be traced in friendly-owned territory. It may be traced an unlimited length along high-volume rail hexes, but it may be traced through only a maximum of 7 low-volume rail hexes. Rail breaks do not block the tracing of the rail element.
C. Supply Sources. Each side has its own supply sources, as listed below. A supply source may be used only by its own side and only if that side owns it.
-
Full Supply Sources. Any and all units of a player may use a full supply source of that player, without restriction. Full supply sources are:
- Allied: Any standard, major, or great port in Greece.
- Axis: Any rail hex on any edge of the map except in Greece and any standard, major, or great port in Italy or Albania.
-
Restricted Supply Sources. A restricted supply source places limits on the nationality and (in one case) the number of units that may use it. Restricted supply sources are:
- Bulgarian: Sofiya (14A:3606) is a supply source for Bulgarian units (only).
- Greek: Any minor port in Greece is a supply source for up to 1 RE of Greek units (only). A Greek unit must trace an overland supply line (only) in order to use it as a supply source.
- Hungarian: Either hex of Budapest (14A:0712 and 0811) is a supply source for Hungarian units (only).
- Italian: Any port (of any size) in the Dodecanese Islands is a supply source for Italian units (only).
- Yugoslav: Any major, dot, or reference city in Yugoslavia is a supply source for Yugoslav units, if the city is connected to another major, dot, or reference city. A city is connected to another if a rail line can be traced from one city to the other, entirely through friendly-owned hexes. For example, if Beograd (14A:2211) and Nis (14A:3009) are connected, both are supply sources for Yugoslav units.
Once the enemy player owns a restricted supply, it no longer functions as a supply source, even if recaptured by the original owner.
-
Supply by Air or Sea. Transport air units may fly supplies to airbases and may air drop supplies, as covered in Rule 20E. Naval transport points may land supplies at ports and beaches, as covered in Rule 26. Air and naval transport carry REs of supplies. When supplies arrive at a hex by air or naval transport, note the amount of supplies delivered in the hex, by writing down the hex number and the REs of supply there or by placing hit markers in the hex equal to the REs of supply there. Supplies delivered to a hex by these methods remain there for the next two initial phases; they are removed at the end of the second initial phase. For example, if Luftwaffe transports land supplies in a hex in the Axis air phase of the May II 41 turn, the supplies remain in the hex through the Allied initial phase and player turn of May II 41 and to the end of the Axis initial phase of Jun I 41.
A unit may use friendly REs of supply if it can trace an overland supply line to the REs. Each RE of supply provides supply for 1 RE of units. For example, 2 REs of supply in a hex provides supply for up to 2 REs of units.
If an enemy unit gains ownership of a hex containing REs of supply, these REs of supply are immediately eliminated.
D. Supply Effects. A unit out of supply has its abilities restricted, as follows:
- Its attack and defense strengths are halved.
- Its movement rating is halved.
Rule 13 — Overruns
Phasing units may overrun enemy units in the movement and exploitation phases. The phasing player performs an overrun by moving units into a single hex adjacent to the enemy units to be overrun; the overrunning units may not exceed the stacking limit of the hex. All overrunning units must be able to enter the hex being overrun. The overrunning units must have a total attack strength sufficient to achieve at least 10:1 odds against the enemy units; the odds are computed in the same way that combat odds are, taking all terrain, supply, and support modifications into account except for defensive air support. Defensive air support (Rule 20F2c) is ignored for overrun purposes.
Units being overrun immediately lose their ZOCs. Each overrunning unit must spend MPs sufficient to enter the hex being overrun, paying all terrain, ZOC, and overrun MP costs. (Note that ZOC costs are not paid due to units in the hex being overrun, but are paid due to enemy units in adjacent hexes.) Overrun MP costs must be paid by each unit participating in an overrun, as given on the overrun MP costs table. The units in the hex being overrun are completely eliminated and removed from play (even if they have cadres), and the overrunning units may advance into the hex. This advance is optional, but each overrunning unit must spend the required MPs even if it does not advance. After executing an overrun, the units may continue moving if they have sufficient MPs.
A unit with insufficient MPs to pay the full MP cost for an overrun may not participate in the overrun, even if it has not moved at all in the phase.
Overrunning units may use the road movement rate when executing an overrun if all other considerations for road movement are met.
A unit with a defense strength of 0 may be overrun at 12:1 odds by any unit with an attack strength greater than zero.
Rule 14 — Special Ground Rules
A. Engineers.
-
Construction. Construction engineers and other construction units have a variety of construction abilities, as described below.
A construction unit may build a fort in any clear or rough hex, except one already containing a fort or fortified hexside. The unit begins building a fort during its initial phase and must be in supply. (Place a fort under construction marker on the unit to show the construction.) It takes one game turn to build a fort. For example, if a fort is begun during the Allied initial phase of the Apr I 41 turn, then it will be completed in the Allied initial phase of the Apr II 41 turn. (When completed, flip the fort under construction marker at the bottom of the stack in the hex.) If the construction unit leaves the hex at any time before the fort is built, the fort marker is removed from the map.
A construction unit may build a permanent airfield in any clear or rough hex (including such hexes containing other features such as reference cities or forts), except one already containing a permanent airfield. A permanent airfield is built in the same manner as a fort, taking one turn to build.
Each side is limited in the number of forts and permanent airfields it may build. The Allied player may start construction of no more than two forts/permanent airfields in his initial phase. The Axis player may start construction of no more than four forts/permanent airfields in his initial phase.
During the movement phase, a construction unit may build a temporary airfield in any clear or rough hex except one already containing any airfield. The unit must be in supply, and the airfield costs 6 MPs to build. Unlike a permanent airfield, a temporary airfield remains on the map only if there is a construction unit in its hex at all times. (The unit need not be the one that built the airfield.) If there is no construction unit in the hex, the airfield is removed from play. Note that a permanent airfield may be built in a hex containing a temporary airfield. In this case the temporary airfield is removed from the map when the permanent airfield is completed.
A construction unit may demolish the capacity of a port. For every 3 MPs the unit spends in the port's hex, the port takes one hit of damage.
A construction unit may repair damaged ports, airbases, and rail lines. In all cases, the general procedure is the same: the unit must spend a number of MPs in the hex of the item to be repaired. It costs a construction unit 2 MPs to remove one hit from an airbase, 4 MPs to remove one hit from a port, and 4 MPs to remove a hit from a damaged rail line.
Poor weather affects construction abilities. All MP construction costs are doubled. For example, 4 MPs are required to repair a hit on an airbase in poor weather. All construction costs based on turns are doubled. For example, two turns are required to build a permanent airfield during poor weather. Temporary airfields may not be built or repaired during poor weather.
B. Artillery. Artillery units do not defend with their full strength unless the number of non-artillery REs in a hex at least equals the number of artillery REs there. All artillery units in excess of this number defend with a total strength of 1. Example: A player has three 2-3-8 artillery regiments and one 2-6 infantry regiment defending in a hex. Since only 1 RE of non-artillery units is in the hex, only one artillery regiment may defend using its full defense strength. The other two artillery units defend with a total strength of 1. Thus, the defense strength of the hex is 6.
Artillery units do not attack with their full strength unless the number of non-artillery REs participating in the attack at least equals the number of artillery REs. All artillery units in excess of this number attack with a total strength of 1.
C. Headquarters. A headquarters unit has only a movement rating; its combat strength is 0. A headquarters unit is 1 RE in size, has heavy equipment, and does not have a ZOC. A headquarters is c/m if its unit type symbol is a c/m one. A headquarters is automatically AEC and ATEC neutral, regardless of the AEC and ATEC capabilities of its unit type symbol.
D. Mountain and Ski Units. Any unit with the mountain or ski symbol as part of its unit type symbol is a mountain unit. Mountain units have movement and combat advantages in certain types of terrain, as summarized on the terrain effects chart. These abilities are in addition to any other abilities of the unit.
E. Fortifications.
- Fortified Hexsides. When an enemy unit captures a hex containing a fortified hexside symbol, the fortified hexsides in the hex are destroyed. (Place a destroyed marker in the hex to show this.) A destroyed fortified hexside may not be rebuilt in the context of the game.
- Forts. When an enemy unit captures a hex containing a fort, the fort is destroyed and its marker is immediately removed from play.
F. Euboean Straits. A low-volume railroad crosses the hexside (15B:0610/0711) between Euboea Island and the Greek mainland. This hexside is treated as a narrow straits hexside crossed by a low-volume railroad.
G. Winterization. Some German units are winterized (these units are noted with a (w) in the revised Balkan Front order of battle and are printed in black and white on gray-green). The concept of winterization is not used in Balkan Front (it is used in some other Europa games). Treat German winterized units in Balkan Front for all purposes as if they were regular German Army units.
Rule 15 — Unit Breakdowns
Various divisional units may break down into component units. These component units may subsequently assemble to form the divisional unit.
A. Procedure. A phasing divisional unit may break down into its component units at the start of its movement phase. There is no MP cost to break down. Remove the unit from the map and place its breakdown components in its hex. The stacking limit may be violated when a unit breaks down, as long as the limit will not be violated at the end of the phase.
A phasing divisional unit may be assembled at the end of its movement phase, if its component units are stacked in the same hex at that time. Remove the component units from the map and place the unit in the hex.
C/m divisional units may break down and assemble during the exploitation phase the same as in the movement phase.
B. Game Charts. Each player's game chart shows which divisional units may break down and lists their component units. The charts detail, by nationality, unit type, and unit ratings, all allowed breakdowns. Divisional units not listed on this chart may not break down. A player may not break down more units than there are breakdown counters provided in the counter mix.
A divisional unit may break down into supported components or into a headquarters and unsupported components. Example: A German 7-6 infantry division may break down into three supported 2-6 infantry regiments or into an infantry division headquarters and three unsupported 2-6 infantry regiments.
When a unit is broken down, place its counter in the appropriate box on the game charts.
C. Breakdown Combinations.
- General. Most divisional units do not have specific breakdown counters. Instead, lettered breakdown counters of the appropriate nationality and unit type are used. Each set of lettered breakdown counters may be used to break down one divisional unit at a time.
- Specific. Certain divisional units have specific breakdown counters; these units are identified on the game charts. Such a unit may break down using only its specific breakdown counters, and these breakdown counters may not be used to break down any other unit.
Rule 16 — Air Rules Introduction
A. Air Units. Air units are shown on the unit identification chart. The air unit types table defines the three basic categories of air units: fighters, bombers, and transports.
B. Concepts.
- Operative. Under normal conditions, air units are operative and may function to the full extent the rules allow. Due to a variety of causes, air units may become inoperative. An inoperative air unit cannot function normally (such as fly missions or make patrol attacks) and must remain at its airbase until repaired. Place an inoperative air unit face down on its airbase to show its condition.
- Target Hex. The target hex of an air unit is the hex in which it is to perform its mission. For example, the target hex of a bomber flying the ground support mission is the hex occupied by the enemy units to be bombed.
- Terms:
- An interceptor is a fighter flying the interception mission.
- An escort is a fighter flying the escort mission.
- The mission force consists of all air units flying a mission in a target hex, except for escorts and interceptors.
C. Air Phase Sequence. Activity in the air phase occurs in this sequence:
- Phasing Player Air Movement Step.
- Non-Phasing Player Interceptor Movement Step.
- Air Combat Resolution Step.
- Mission Resolution Step.
- Non-Phasing Player Interceptor Return Step.
- Phasing Player Air Unit Return Step.
Rule 17 — Airbases
Air units take off from and land at airbases. When not flying a mission, an air unit must be on the ground at a friendly-owned airbase.
A. Capacity. The capacity of an airbase is the number of air units that may initiate missions from that airbase each air phase. There is no limit to the number of air units that may land or be present at an airbase. The capacities of airbases are shown on the airbase table.
B. Air Unit Escape. If an enemy ground unit gains ownership of an airbase hex, all operative air units there may try to escape. Airbase capacity is not considered (even if the capacity is 0) when air units attempt to escape. Roll a die for each air unit trying to escape.
On a roll of 1, 2, or 3, the air unit escapes. The air unit must immediately fly to an airbase within range, of three times its printed movement rating; it becomes inoperative upon arrival. If there is no airbase within range, the air unit is eliminated.
On a roll of 4, 5, or 6, the air unit does not escape.
Air units that do not escape are eliminated.
C. Airbase Capture. All enemy airbases except temporary airfields may be captured and used. An enemy airbase is captured when a friendly ground unit gains ownership of the hex. A captured airbase immediately becomes a friendly airbase and may be used from the instant of its capture.
A temporary airfield is immediately destroyed when an enemy unit gains ownership of its hex.
D. Airbase Damage. A ground unit may damage the capacity of an airbase by spending MPs to do so in the airbase's hex. The airbase takes one hit of damage to its capacity for every 2 MPs spent by the unit. Use hit markers to show this damage. The capacity of an airbase may be reduced due to bombing (Rule 20F2a).
Each hit on an airbase reduces its capacity by one. Damaged airbases may be repaired (Rule 14A). No airbase may be damaged beyond its capacity. Anytime during the player turn, the phasing player may abandon any airfield (permanent or temporary) at zero capacity, removing its marker from the map.
Rule 18 — Movement of Air Units
Air units fly to their target hexes through use of movement points. An air unit's movement rating is the basic number of MPs the air unit has. The actual number of MPs an air unit has depends upon the mission it is flying; the missions modify air units' movement ratings. The modified movement rating is the maximum number of MPs the air unit may use to fly from its base to its target hex during the air phase; it is the maximum number of MPs it may use when returning to base during the air return step.
An air unit spends 1 MP for each hex it enters as it moves; terrain has no effect on the movement of air units. Each air unit moves individually.
An air unit, depending upon its air unit type and the mission it is flying, may fly during an air movement step or an interceptor movement step. Only the air units of the player named in a movement step may fly during that step.
During the air return steps, air units return to base. An air unit must return to a friendly airbase (not necessarily the one it flew from) and is eliminated if it cannot do so.
Rule 19 — Patrol Attacks
Each operative fighter air unit on the ground at an airbase has a patrol zone. The patrol zone of a fighter covers every hex within one half the movement rating (round fractions down) of the fighter. For example, an Me 109E fighter (movement rating of 7) has a patrol zone extending out to three hexes.
Non-phasing fighters that have patrol zones may make patrol attacks during the enemy player's air movement step. A fighter may make a patrol attack against an enemy air unit that enters any hex in its patrol zone. Resolve the patrol attack as follows:
- Compare the air attack strength of the patrolling fighter to the air defense strength of the enemy air unit.
- Roll one die.
- If the patrolling fighter's strength is equal to or less than the enemy air unit's strength, a die roll of 6 turns back the enemy air unit.
- If the patrolling fighter's strength is greater than the enemy air unit's strength but less than twice as great, a die roll of 5 or 6 turns back the enemy air unit.
- If the patrolling fighter's strength is at least twice as great as the enemy air unit's strength, a die roll of 4, 5, or 6 turns back the enemy air unit.
The turn back result of patrol attacks is the same as the turn back result due to air combat (Rule 21B).
Fighters may make a patrol attack only during the enemy player's air movement step; they may not make patrol attacks during the interceptor movement or air return steps. Patrol attacks are not missions, are not air combat, and do not count against airbase capacity. A fighter making a patrol attack is not subject to any adverse effects.
The capacity of the airbase is the maximum number of patrol attacks that fighters at the airbase may make. For example, only three patrol attacks may be made from a temporary airfield, even if more than three fighters are there.
A fighter may make only one patrol attack per air phase. It is not required to make any patrol attack at all, and it need not make a patrol attack against the first air unit that enters its patrol zone.
An air unit may be subjected to only one patrol attack per hex entered; it may be subjected to a patrol attack in each hex it enters in enemy patrol zones.
Rule 20 — Air Missions
Air units may fly any of several missions, depending upon their air unit types. The rules for each mission list which air unit types may fly the mission, when the mission may be flown, and what the effects of the mission are. Unless otherwise stated, an air unit may fly only one mission per air phase.
A. Interception. A fighter may fly interception during its interceptor movement step. An interceptor (a fighter flying this mission) may fly to any hex within range of one half its movement rating (round fractions down); the hex must contain enemy air units flying missions. The purpose of the interception is to engage enemy air units in air combat.
B. Scramble. A fighter may scramble during its interceptor movement step, if the fighter's airbase is the target hex of enemy air units. A scrambling fighter may fly to an airbase within range of its printed movement rating, landing at the airbase during the air return step. A fighter may not scramble to an airbase that is the target hex of any enemy air units.
C. Escort. Fighters may fly escort missions during the air movement step. An escort (a fighter flying this mission) flies to a hex within range of its printed movement rating; the hex must be a target hex of at least one friendly air unit flying a different mission. The purpose of escort is to protect the other friendly air units in the hex during air combat.
D. Transfer. All air unit types may fly transfer missions during the air movement step. There are two different types of transfer missions.
- Regular Transfer. An air unit may fly to any airbase within range of three times its printed movement rating. If the airbase is not within interception range of any enemy fighter, the air unit may then transfer to another airbase within range of three times its printed movement rating. The air unit may continue to transfer in this manner any number of times. An air unit flying a regular transfer mission may not initiate a different mission in the same air movement step. Note that only the capacity of the airbase in which this mission is initiated is used.
- Staging. An air unit may stage to an airbase within range of its printed movement rating and then initiate a non-transfer mission in the same air movement step. The capacities of two airbases are used for each staging air unit: that of the airbase where the staging mission was initiated and that of the airbase where the second mission was initiated.
E. Transport. Transport air units may fly transport missions, carrying ground units and supplies as their cargo during the air movement step. A transport may not carry any ground unit that has heavy equipment; all other ground units may be carried. The ground unit to be carried must start the air movement step at the airbase of the transport. Supplies can be carried from an airbase if a supply line could be traced from the airbase to a full supply source in the player's initial phase. (Note that restricted supply sources cannot be used for this purpose.)
All air combat and antiaircraft fire which affect a transport also affect its cargo. If a transport is eliminated, its cargo also is eliminated. If a transport is aborted or turned back, its cargo returns to base with the transport. When two or more transports combine to carry a unit, then a result to any one of the transports also affects the cargo. Always use the most severe result to the transports as the effect upon the cargo. For example, if one transport is turned back and the other eliminated, the cargo is eliminated.
There are two types of transport missions.
-
Regular Transport. A transport may carry up to 1 RE of ground units or 2 REs of supply. A transport may fly to any airbase within range of twice its movement rating, landing there with its cargo during the air return step. Alternatively, a transport may fly to an airbase within range of its printed movement rating, land cargo there during the mission resolution step, and then return to any airbase within range of its printed movement rating during the air return step. It may not carry cargo during the air return step. Note that only the capacity of the airbase where this transport mission is initiated is used; the capacity of the airbase where the transport lands the cargo is not used.
-
Air Drop. Transports may air drop airborne units and supplies. The target hex of such an air drop may be any hex except for the following terrain types: prohibited terrain, mountain, swamp, or forest. The target hex may be in enemy ZOCs or occupied by enemy units. The effects of air drops are covered in Rule 25.
A transport may carry 1/2 RE of airborne units or 1 RE of supply. Thus, two transports are required to carry a 1 RE airborne unit on an air drop. A transport may fly to any target hex within range of its printed movement rating, dropping its cargo in the hex during the mission resolution step.
F. Bombing. Any air unit with a bombing strength greater than 0 may fly bombing missions. Air units fly bombing missions during the air movement step.
Most bombing missions are resolved during the mission resolution step, after air combat and antiaircraft fire in the hex has been resolved. Air units bombing a target may bomb it individually, or some (up to all) may combine their bombing strengths to make a single bombing attack. Exceptions to this general case are given in the specific bombing missions.
Several bombing missions require the use of the bombing table to resolve bombing attacks. For each bombing attack, use the bombing strength column that most closely matches (without exceeding) the bombing strength of the bombing attack. (If the bombing strength is less than 1, the bombing attack automatically misses.) For example, a bombing attack with a strength of 8 points uses the 5 column. Roll the die and modify the number rolled with the appropriate modifiers on the bombing table. Cross index the bombing strength column with the modified die roll to obtain a result. There are two possible results:
- M: Miss. A miss has no effect on the target.
- H: Hit. A hit affects the target, as described in each bombing mission.
Weather (Rule 27) affects bombing strengths. The bombing strengths (tactical and strategic) of an air unit are halved in poor weather.
-
Strategic Bombing. Air units with strategic bombing strengths greater than 0 may fly the following missions. a. Ports. The target of this mission is any enemy-owned port. Consult the bombing table for each port bombing attack. Each hit decreases the capacity of the port by 1 RE. Mark each hit achieved on the port with a hit marker. b. Terror. Axis air units only may fly this mission. The target of this mission is any enemy capital: at Athenai (15B:0911) and at Beograd (14A:2211) if Yugoslavia is Allied. Consult the bombing table for each terror bombing attack. Each hit yields the Axis player 1 victory point.
-
Tactical Bombing. Air units with tactical bombing strengths greater than 0 may fly the following missions. a. Airbases. The target of this mission is any enemy-owned airbase. A fighter's tactical bombing strength is increased by 1 when flying this mission. (For example, a fighter with a tactical bombing strength of 0 would have a strength of 1 when flying this mission.) Consult the bombing table for each airbase bombing attack. Each hit affects the airbase and one air unit on the ground there.
A hit on the airbase decreases the capacity of the airbase by 1 RE. When the capacity of an airbase is reduced to 0, all further hits against the airbase are ignored. Mark each hit achieved on the airbase with a hit marker.
A hit on an air unit renders it inoperative if it is operative. A hit on an air unit eliminates it if it is already inoperative. If several air units are at the airbase, the bombing player chooses which air unit is hit. b. Ground Support. Air units may fly ground support bombing missions, to aid attacks made by friendly ground units. The target hex of the mission is the hex occupied by the enemy ground units that will be attacked. The air units remain in the target hex until the end of the combat phase, returning to base at that time. During the combat phase, add the air units' tactical bombing strengths to the total attack strength attacking the hex. Terrain does not affect tactical bombing strengths. The total printed tactical bombing strength contributed to an attack may not exceed the total printed strength of the attacking ground units; ignore bombing strength points in excess of this. c. Defensive Support. Air units may fly defensive support missions, to aid friendly defending units. The target hex of the mission is the hex of the potentially defending friendly ground units. (This hex may be unoccupied or enemy occupied, in anticipation that friendly units will occupy the hex at a later point.) The air units remain in the hex until the start of the next friendly initial phase, returning to base at that time.
During the enemy combat phase (only), add the air units' tactical bombing strengths to the total defense strength of the hex. (Note that defensive support bombing has no effect during overruns, which do not occur in the enemy combat phase.) Terrain does not affect tactical bombing strengths. The total printed tactical bombing strength contributed by the air units may not exceed the total printed strength of the defending ground units; ignore bombing strength points in excess of this.
Rule 21 — Air Combat
Air combat occurs when non-phasing fighters (the interceptors) fly interception missions to hexes containing phasing air units flying missions (the mission force and escorts). Air combat is resolved during the air combat resolution step, hex by hex as chosen by the intercepting player. All air combat in a hex is resolved before any air combat in another hex is resolved.
There are two stages to air combat: preparation and resolution.
A. Preparation. Follow these steps to prepare for air combat:
- Abandoning Operations. The player with the mission force may abandon air operations. If he does so, all of his air units flying missions in the hex immediately return to base; they may not land at an airbase in the hex in which they abandoned air operations. These air units may not fly a new mission that phase. Air combat, antiaircraft fire, and mission resolution do not occur in the hex. Enemy interceptors in the hex remain in the hex until the interceptor return step, returning to base at that time. (Note that the interceptors do not engage in air combat in the hex and may not switch to air combat in any other hex.)
- Mission Force and Screen Preparation. If air operations in a hex are not abandoned, air combat preparation continues. The player with the mission force separates his air units into two groupings: the escort screen and the mission force. All escorts are placed in the screen. Fighters flying bombing missions may jettison their bombs at this point and join the escort screen (see Rule 24A).
- Interceptor Preparation. The intercepting player separates his air units into two groupings: those that will attack the screen and those that will try to bypass the screen to attack the mission force. The player may divide his interceptors between these two groups as he wishes.
B. Resolution. In air combat, opposing air units fire upon one another. An air unit may fire no more than once during air combat in an air phase, regardless of the number of enemy air units that fire on it.
-
Sequence. Follow these steps to resolve air combat: a. Screen Allocation Step. Interceptors allocated to attack the escort screen engage the screen in air combat. (Ignore all other air units in the hex during this step.) The intercepting player allocates one interceptor against each escort of the screen, to the extent possible. If one side has more air units than the other, the owning player may allocate these extra air units against enemy air units as he wishes. Example: Four interceptors attack a screen of two escorts. The intercepting player must allocate one interceptor against each escort. He may allocate the remaining two interceptors either one against each escort (having two against each escort) or both against one of the escorts (having three against one escort and one against the other escort).
If there are more escorts than interceptors, the owning player need not allocate them against the interceptors attacking the screen. Instead, he may have these unengaged escorts attack the interceptors attempting to bypass the screen (step c). b. Firing Step. Resolve air combat between the allocated air units.
When one air unit is allocated against one air unit, each air unit fires once upon the other air unit. Implement the combat results after both air units have fired.
When several air units are allocated against one air unit, the single air unit fires upon any one opposing air unit, firing player's choice. The several air units each fire upon the single air unit separately, in any order of the firing player's choice. However, stop firing when the first combat result (return, abort, or elimination) is achieved against the single air unit, even if all the air units haven't fired. Implement the combat results after the air units have stopped firing. Example: Three interceptors attack one escort. The escort attacks one of the interceptors, achieving an eliminated result on it. The interceptors fire on the escorts, one after the other. The first interceptor achieves no effect, but the second achieves an abort result. The exchange of fire is over at this point, before the third interceptor fires, and combat results are implemented. One interceptor is eliminated, and the escort is aborted.
When this step is done, all air units involved in air combat during this step have finished air combat and are ignored for the rest of the air combat resolution in the hex. c. Bypass Allocation Step. Resolve air combat between the unengaged escorts and the interceptors attempting to bypass the screen. The owning player allocates his escorts against the interceptors as he wishes. d. Firing Step. Resolve air combat as in step b, except that the interceptors may not fire. Interceptors that survive this step attack the mission force. Example: Three interceptors attempt to bypass the screen, and there are two unengaged escorts. The owning player allocates each of his escorts on a different interceptor. (He could have allocated both escorts against a single interceptor.) Each attacks, one turning back an interceptor and the other achieving no effect. One interceptor is turned back and two get through. e. Interceptors successfully bypassing the escort screen attack the mission force. The owning player allocates his interceptors against air units in the mission force as he wishes. Mission force air units not attacked by interceptors are ignored; they neither attack nor are attacked. f. Resolve air combat between the allocated air units as in step b. Upon completion of this step, all air combat in the hex is completed.
Air Combat Example: Two British Hurri 1 fighters (5F5) intercept an Italian force of two SM.79-1 bombers (2B3) escorted by two MC.200 fighters (3F3).
- Step a: The Allied player allocates one Hurri 1 against one MC.200, with the remaining interceptor trying to bypass the screen. The Axis player does not allocate the extra escort against the interceptor attacking the screen, so that he may have it fire on the bypassing interceptor.
- Step b: The Hurri 1 fires with a differential of +2; a 5 is rolled, aborting the MC.200. The MC.200 fires at -2; a 9 is rolled, for a no effect.
- Step c: The Axis player allocates the unengaged escort against the bypassing interceptor.
- Step d: The escort attacks the interceptor. The differential is -2; a 7 is rolled, for a no effect. The interceptor may not attack the escort.
- Step e: The Allied player allocates the bypassing interceptor against one of the bombers. The other bomber is ignored.
- Step f: The interceptor fires at +2; a 4 is rolled and is modified to a 3 (due to a fighter attacking a type B air unit), eliminating the SM.79-1. The SM.79-1 fires as –3; a 7 is rolled and is modified to an 8 (due to a type B air unit attacking a fighter), for a no effect.
Rule 22 — Antiaircraft
Air units undergo enemy antiaircraft (AA) fire when they fly certain missions. Various units, map features, and other items have AA strengths. Note: There are two types of AA: heavy and light. This distinction is used for ATEC purposes (heavy AA combat units have ATEC; light AA does not), but has no effect for AA fire itself.
A. Capabilities.
-
Intrinsic. Each Axis c/m division and headquarters has an intrinsic light AA strength of 1. Note: An Axis c/m cadre does not have an intrinsic AA strength.
Each Axis-owned airbase, except for permanent and temporary airfields, in Greater Germany and Italy has an intrinsic light AA strength of 3.
Each reference city in Yugoslavia has an intrinsic light AA strength of 2. Each dot city and major city hex in Yugoslavia has an intrinsic light AA strength of 3. Special: Cities in Yugoslavia lose their intrinsic AA strength (and can never regain it) when the city becomes enemy-owned for the first time.
-
Combat AA Units. A combat AA unit is any unit with the AA unit type symbol, a unit size, and a printed combat strength (even if that printed strength is 0). A combat AA unit has its AA strength printed in the upper left corner of its counter.
-
Position AA Units. A position AA unit has neither a printed combat strength nor a unit size; its AA strength is printed in the upper left corner of the counter. Position AA units function somewhat differently than do regular combat units:
- Each has a combat strength of 0.
- There may be any number of these counters in a hex, as the stacking limit does not affect them.
- For the purposes of transport and the like, each position AA strength point counts as 1/2 RE.
- Position AA units have heavy equipment but do not have any ATEC capability.
- A position AA unit may not break rail lines or damage airbases.
- A position AA counter that moves in a movement phase, whether by itself or by naval transport, may not fire AA during that player turn.
During the player turn, the phasing player may freely break down and build up his position AA units as long as the total AA strength in the hex does not change. For example, a 3-point position AA counter may break down into three 1-point position AA counters.
-
Naval AA. Each naval transport point has a light AA strength of 1. Each naval interdiction hex has a light AA strength of 3, when being bombed by air units flying the naval interdiction bombing mission. (See Rule 26 for details on naval transport and interdiction.)
B. Resolution.
-
Restrictions. Resolve AA fire during the mission resolution step (except as noted below), before air units perform their missions. The AA strength in a hex may fire upon air units flying air transport and bombing missions in the hex. It may not fire against air units flying any other missions. For example, AA may not fire against fighters flying escort in a hex.
In general, all AA strength in a hex may fire upon enemy air units flying the appropriate missions in the hex. The exceptions are:
- When air units fly the naval transport bombing mission, only the AA of the naval transport carrying the cargo being bombed may fire. Example: Enemy air units flying the naval transport mission bomb a division being transported by three naval transport points. The three naval transport points may fire their AA against the bombing air units. No other AA in the hex may fire—including the AA of the cargo itself, if it has an AA strength.
- When air units fly the naval interdiction bombing mission, only the AA of the naval interdiction hex may fire.
- The AA of a naval interdiction hex may only fire against air units flying the naval interdiction bombing mission.
Each AA strength point may fire once upon each enemy air unit it is allowed to attack. Example: Four enemy air units bomb a hex containing a 3-point position AA counter. The position AA may fire four times, making a 3-point attack upon each air unit.
-
Procedure. Follow this procedure to resolve AA fire:
- Total all the AA fired at a single air unit.
- Use this total to find the AA strength column used on the antiaircraft fire table. Use the column that most closely matches (without exceeding) the AA strength of the AA fire. (If the firing AA strength is less than 1, the AA fire automatically has no effect.) For example, 9 points of AA firing would use the 7 column.
- Roll two dice and modify the dice roll with the modifiers given on the antiaircraft fire table.
- Cross-index the modified dice roll with the AA strength column to obtain a result. Results are identical to those of air combat (Rule 21B). Implement results immediately.
-
Exceptions. Against air units flying defensive support missions, do not resolve AA fire during the mission resolution step. Instead, resolve AA fire against these air units during the combat phase in which the hex they are supporting is attacked, immediately before combat in the hex is resolved. When firing AA against these air units, total the AA strengths of the units attacking the hex and divide this total by the number of hexes containing the attackers. Note that the units must be attacking the hex in order to use their AA strengths in this manner.
Example: Yugoslav air units are flying defensive support over Sarajevo. The Axis player is attacking Sarajevo with units in three adjacent hexes; his attacking units have 3 AA points in one hex, 1 in a second hex, and 2 in the third. Divide the Axis player's total of 6 AA points by 3 (since the attackers occupy 3 hexes). Thus, a 2-point AA attack is made on each of the defensive air units.
Rule 23 — Air Unit Repair
During the initial phase of a player turn, the phasing player may attempt to repair his inoperative air units. Roll one die for each inoperative air unit. If the die roll is equal to or less than the repair roll number on the repair table, the air unit is repaired and immediately becomes operative.
Rule 24 — Special Air Rules
A. Fighters on Bombing Missions. A type F air unit flying a bombing mission has its air attack and defense strengths each reduced by 2 (but never below 1) for the duration of the mission. For example, an Me 109E fighter (7F5) flying a bombing mission would have an air attack strength of 5 and an air defense strength of 3.
A fighter flying a bombing mission may jettison its bomb load during air combat preparation, at the option of the owning player. Upon doing this, the fighter reverts to its printed air attack and defense strengths, but it may not complete the bombing mission. The fighter is treated as if it were flying an escort mission.
B. Extended Range. Air units may fly extended-range bombing missions by carrying reduced bomb loads. The air unit may fly to a target hex within range of twice its printed movement rating, but its bombing strengths are reduced to one-third of their printed values. A fighter may not fly an extended-range bombing mission.
Transports may fly extended-range transport missions by carrying half the standard cargo. A transport flying extended range may:
- fly to any airbase within range of three times its printed movement rating, landing there during the air return step.
- fly to any target hex within range of twice its printed movement rating, landing or dropping cargo there during the mission resolution step and returning to base during the air return step.
Fighters may fly extended-range escort missions. A fighter flying at extended range has its air attack and defense strengths each reduced by 2 (but never below 1). The fighter may fly to a target hex within range of twice its printed movement rating.
During the air return step, an air unit flying at extended range may return to an airbase within range of twice its printed movement rating.
C. Gliders. Glider transport (type GT) air units cannot fly by themselves; they must be towed by other air units. One transport (type T) air unit may tow one glider air unit; the towing transport may also carry a normal load of cargo. Stack the glider with its towing air unit. These two air units are treated as one for all purposes. Subtract the air defense strength of a glider from the air defense strength of its towing air unit. For example, a Ju 52 (1T2) towing a DFS 230 (0GT-1) has an air defense strength of 1. Any combat result (from patrol attacks, air combat, or antiaircraft fire) affects both the towing air unit and the glider.
A glider air unit has the following capabilities:
- It may carry cargo at the same rate as a transport.
- It never counts against the capacity of an airbase.
- It is expended (removed from play) immediately following its use in an air drop mission.
- When used in a regular transport mission, roll one die each time it lands at an airbase. On a roll of 5 or 6, the glider is expended. Note that a glider may be expended only for transport; it may transfer without risk of expenditure.
- An aborted glider may be repaired per the standard air unit repair rules.
D. Dive Bombers. When using the bombing table to resolve bombing attacks made by type D air units, modify the die roll by +1. If any other air unit type combines its bombing strength with a dive bomber to make a bombing attack, this die roll modification may not be used.
E. Night Air Operations. In general, air operations occur during the daytime. However, air operations during the night are possible. For the purposes of this rule, a night air unit is an air unit with an "N" prefix before its air unit type letter (such as NB); all other air units are day air units. The presence of the N prefix does not change the usual abilities of an air unit. For example, a type NB air unit is treated the same as a type B air unit in air combat and for AA fire. Night air units are not required to operate at night. Both day and night air units may fly night air operations, although day air units operate at a disadvantage at night.
Air units operating at night do not interact with air units operating during the day. For example, a bombing mission made at night may not be intercepted by fighters flying during the daytime.
Strategic bombing missions, transfer missions, and regular transport missions may be flown at night. All other air missions, including tactical bombing missions, may not be flown at night.
Patrol attacks may not be made against air units flying at night.
A day air unit flying a bombing mission at night has its bombing strength halved.
Day air units flying at night may crash land when returning to base. Roll a die when a day air unit flying at night returns to base. The air unit crash lands, immediately becoming inoperative, on a roll of 6.
F. Anti-Shipping Aircraft. Code "S" air units are anti-shipping aircraft. When using the bombing table to resolve naval transport or naval interdiction bombing attacks made by code S air units, modify the die roll by +1. If any non-code S air unit combines its bombing strength with an anti-shipping air unit to make a naval transport or naval interdiction bombing attack, this die roll modification may not be used.
G. Heavy Fighters. Type "HF" air units are heavy fighters. All rules pertaining to fighters also apply to heavy fighters except that the air combat die roll modifiers listed for type F do not apply to type HF; instead use the following:
- +1 type HF versus type F.
- –1 type HF versus type B or T.
- –1 type F versus type HF.
Rule 25 — Airborne Operations
The air drop mission (Rule 20E2) details how airborne units are transported to and dropped on a target hex. Parachute and air landing units are airborne units.
A. Disruption. An airborne unit may suffer disruption when making an air drop. During the mission resolution step, roll one die for each airborne unit making an air drop. Modify the die roll as follows:
- –1 for dropping onto enemy units and/or into enemy ZOCs.
- –1 for dropping into a non-clear terrain hex.
- –1 for dropping into a major city hex. (This is in addition to the non-clear terrain modifier.)
- –2 for dropping during poor weather.
- +1 if a unit uses a glider as part or all of its transport.
If the disruption die roll is:
- 1 or less, the unit is disrupted and has its attack and defense strengths halved.
- –1 or less, the unit has its attack strength reduced to 0, has its defense strength halved, and is immediately eliminated if in an enemy-occupied hex.
- –3 or less, the unit is immediately eliminated.
An airborne unit remains disrupted until the start of its next friendly initial phase. For example, an airborne unit disrupted during the Axis air phase would remain disrupted throughout the rest of the German player turn and throughout the entire following Allied player turn.
The disruption die roll is also used for each air dropped RE of supply. If the roll is 1 or less, the RE of supply has been scattered and is eliminated.
B. Ground Operations. An airborne unit does not gain full ownership of the hex it occupies during the player turn it makes the airdrop and during the following enemy player turn. If the hex is not occupied by enemy units, then undisrupted airborne units gain immediate ownership of any airbase in the hex. For all other cases and purposes, the airborne units do not gain ownership of the hex. For example, a supply line may be traced through a friendly-owned hex occupied by an enemy airborne unit.
Airborne units that jump in hexes other than enemy-occupied hexes may attack adjacent enemy units per the standard combat rules. They may attack in conjunction with other friendly units.
Airborne units which jump in enemy-occupied hexes must attack the enemy units in the hex during the combat phase. Adjacent friendly units may join in the attack.
When differing sides occupy the same hex, resolve combat as normal, except that AS (attack stopped) results are modified. If an AS result is rolled, the airborne units which dropped in the enemy-occupied hex treat the result as an AR (attacker retreat) and must retreat. All other units treat the result as an AS. Retreating units are subject to the effects of all ZOCs they enter, including the ZOCs of enemy units in the hex from which they retreat. Example: A parachute regiment drops in a hex occupied by an enemy division. During the combat phase, the parachute regiment must attack, and the combat result requires it to retreat. Since any hex it can enter is in the ZOC of the division in the drop hex, the parachute regiment is eliminated.
C. Planning and Preparation. Airborne operations involving airborne units (but not REs of supply) must be planned. The player must determine the target hex of an air drop mission and the unit to be dropped there one turn in advance.
During the player's initial phase in the game turn prior to an operation, the player writes down the identity of the unit involved in the operation and the target hex of the operation. He may plan only one operation at a time per airborne unit. Once planned, he may cancel an operation in his next initial phase and plan a new one for the unit at that time. He may also cancel an operation during the phase in which it is to occur.
During the initial phase, a player may not plan an operation for a unit that is in an enemy ZOC at that time. Once planned, the operation must be canceled if the unit enters an enemy ZOC, attacks, or is attacked at any time from the planning of the operation to its execution. If for any reason the unit is not able to participate in the operation during the phase in which it is to take place, the operation must be canceled. An operation may be planned for a unit on the turn it arrives as a reinforcement.
D. Air Landing Units. An air landing unit may make an air drop if at least one of its transports is a glider (that is, its entire transport need not be gliders).
E. Surprise. Due to the immense surprise effects airborne operations achieved during this period of the war, airborne units are treated as being supported on the player turn they make air drops.
Rule 26 — Naval Rules
A. Concepts.
-
Sea Zones. There are two sea zones:
- The Adriatic sea zone consists of all sea and coast hexes on Map 14A west of Yugoslavia, Albania, and Greece.
- The Aegean sea zone consists of the sea and coast hexes on Map 14A that are not part of the Adriatic sea zone and all sea and coast hexes on Map 15B.
-
Naval Capabilities. Both players have naval transport points, which they use to move units and REs of supply by sea. The Allied player also has a naval interdiction ability, which allows him to block some Axis naval transport.
-
Ports. Any hex containing a port symbol is a port. There are four types of ports: minor, standard, major, and great. Each type of port has a capacity, which is the maximum number of REs of cargo (units and supplies) that may embark/disembark at a port of that type in a player turn. A port may be damaged due to bombing (Rule 20F) or demolition (Rule 14A). Each hit of damage on the port reduces its capacity by 1 RE. A port may take a maximum amount of damage, based on its type. The port summary lists the capacities and maximum damage for each type of port. For example, a standard port has a capacity of 5 REs and may take up to 7 hits.
A player may use a port during a turn only if he controls it at the start of his initial phase.
-
Beaches. A beach hex is a coastal hex of any terrain type except mountain. An unlimited number of REs may embark/disembark at a beach hex in a player turn. Some coastal hexes contain both a port and beach, each of which may be used.
B. Naval Transport. Each player may move cargo (ground units and REs of supply) by sea during his movement phase, through use of naval transport points (NTPs). Players have NTPs based on sea zones. A player may use the NTPs of a sea zone only in that zone. NTP allowances and restrictions are:
- Axis Adriatic: 15 NTPs. The Axis player may use these to transport cargo only in the Adriatic sea zone.
- Axis Aegean: 3 NTPs initially. Add 3 NTPs to this ability once Germany intervenes. Add 2 NTPs to this ability each time the Axis player captures a Greek major (Thessalonike, 14A:4510) or great port (Athenai, 15B:0911) for the first time. The Axis player may use these NTPs to transport cargo only in the Aegean sea zone.
- Allied Aegean: 20 NTPs. Subtract 2 NTPs from this ability each time the Axis player captures a Greek major (Thessalonike, 14A:4510) or great port (Athenai, 15B:0911) for the first time. The Allied player may use these NTPs to transport cargo only in the Aegean sea zone.
- British Emergency: 15 NTPs. The Allied player may use the British emergency NTPs once a game, at a cost of 5 victory points. He announces in any Allied initial phase that he is using these NTPs, and he may then use them during that player turn. These NTPs may transport cargo only in the Aegean sea zone.
-
Regular Transport. A player uses his NTPs to transport cargo by sea during his friendly movement phase, between friendly-owned ports and/or beaches in the same sea zone. Each NTP carries 1 RE of ground units or 2 REs of supply. For bombing and interdiction purposes, trace the movement of the cargo on the map from its hex of embarkation to its hex of debarkation. This path must remain in the sea zone of its NTPs and may not cross land. Cargo may not remain at sea; it must land by the end of the movement phase.
Bombing and interdiction may sink NTPs. Reduce the player's appropriate NTP capability when an NTP is sunk, and eliminate any cargo it is carrying.
A unit is under no special restriction after moving by naval transport. For example, a unit may attack during the combat phase following its transport and does not have its attack strength reduced due to the transport.
When cargo is both embarked and disembarked at a port, the following rules are used. A unit must spend MPs in order to be transported: 2 MPs for a non-c/m unit and 4 MPs for a c/m unit. The unit may move both before and after its transport.
When cargo is embarked and/or disembarked at a beach, the following rules are used. Units with heavy equipment may not embark/disembark at beaches; only supplies and units without heavy equipment may. A unit spends all its available MPs in order to be transported and may not spend MPs for any other purpose.
-
Amphibious Landings. German and Italian units and the British marine commando unit may make amphibious landings by disembarking in enemy-owned beach hexes. The rules for regular naval transport to beaches are used, with the following exceptions:
- A unit making an amphibious landing counts double its RE size for transport purposes.
- Any unit except an amphibious unit (the marine and marine commando units) making an amphibious landing has its attack strength quartered in the following combat phase. An amphibious unit does not have its attack strength quartered.
- A supplied unit making an amphibious landing is automatically in supply in the following player turn.
- A unit may not make an amphibious landing during poor weather.
A unit may make an amphibious landing in an enemy-occupied hex. In this case, combat is conducted the same as for an airborne landing in an enemy-occupied hex (see Rule 25B).
Due to coastal defenses and other considerations not represented in the game, no units (of either side) may make amphibious landings in hexes of Mainland Greece or mainland Yugoslavia.
An amphibious operation must be planned in advance, similar to an airborne operation. Use Rule 25C for planning amphibious operations.
-
Naval Transport of Supply. NTPs can carry REs of supply. Supplies can be embarked at a port if a supply line could be traced from the port to a full supply source in the player's initial phase. (Note that restricted supply sources cannot be used for this purpose.)
C. Naval Interdiction. The Allied player may declare a naval interdiction zone in the Aegean sea zone. During the Allied initial phase, he may declare:
- A loose zone, which covers every sea and coastal hex that is south of weather line D in the Aegean Sea zone.
- A tight zone, which covers every sea and coastal hex within 2 hexes of Crete.
The Allied player need not declare an interdiction zone in his initial phase. If he does, the zone is in effect until the start of his next initial phase.
An interdiction zone interferes with Axis naval transport. As the Axis player moves cargo by sea, check to see if the cargo enters any hex of an interdiction zone while being transported. If it did, then roll one die when the cargo reaches its destination, and consult the naval interdiction table for a result. The results are:
- —: No Effect. The cargo reaches its destination safely.
- T: Turned Back. The cargo must return to the hex where it embarked and must disembark there. It may not move for the rest of the movement phase.
- S: Sunk. The cargo and the transporting NTPs are sunk. Eliminate the cargo from play and its NTPs from the Axis player's NTP capability.
The Axis player may bomb hexes in naval interdiction zones (see Rule 20F2i).
Rule 27 — Weather
Weather affects the operations of forces.
Weather line D divides the map into two weather zones. Weather zone D consists of all hexes on or north of the D weather line; weather zone E consists of all hexes south of the D weather line. Note: Although there is a C weather line on Map 14A, it is for use in Grand Europa and is ignored for the play of this game.
The weather table is on the turn record chart. Under the box for each turn are two columns, one for each weather zone. At the start of each turn, the Axis player rolls one die to determine the weather. Cross index the die roll with each column to find the weather for each zone. The weather results are:
- C: Clear. The zone has clear weather. Use the clear weather portion of the terrain effects table for the weather's effects on movement and combat.
- P: Poor. The zone has poor weather. Use the poor weather portion of the terrain effects table, including the non-parenthetical costs for mountain terrain.
- W: Poor (Winter). The zone has winter weather (snow) in mountain hexes and hexsides, with poor weather in all other hexes. Use the poor weather portion of the terrain effects table, and use the parenthetical costs for mountain terrain.
- N: No Change. The weather result for the zone is the same as that of the zone on the previous turn. For example, if zone D had poor weather on Jan I 41 and its weather result for Jan II 41 is no change, then the weather for zone D on Jan II 41 is poor.
Example: On the Nov II 41 turn, the Axis player rolls a "3" for weather. The weather in zone D is poor, while the weather in zone E is clear.
Weather affects the movement and combat effects of terrain, as shown on the terrain effects chart. Note that there is an overall combat modification for poor weather, in addition to the individual terrain effects for poor weather.
Weather also affects ground units in other ways, as covered in previous rules:
- AEC effects (Rule 10C).
- supply considerations (Rule 12).
- construction abilities (Rule 14A).
- airborne operations (Rule 25A).
- amphibious landings (Rule 26B2).
Weather affects air units. In poor weather, all bombing strengths of air units are halved.
When the two zones have different weather conditions, use these rules:
- The weather condition of a hex being entered or attacked by a unit is always that of the hex's weather zone, even if the unit is moving or attacking from a hex in the other zone.
- A hexside falling between two zones has the worse weather of the two zones.
- When tracing supply lines through zones with differing weather, the specific supply line element being traced is affected by the worse weather of the two zones.
Rule 28 — Nations
A. The Axis. Various Axis forces may only operate in certain areas of the map, as defined below. A ground unit may not voluntarily move or attack outside its operational area. If forced to retreat outside its operational area, it may not attack until it returns to its operational area. An air unit may not fly or exert a patrol zone over any hex outside its operational area.
Due to Axis defensive forces not represented in the game, Allied forces may not enter or attack any hexes in the following countries: Mainland Italy, Germany, Slovakia, Hungary, and Romania. Allied units do not exert ZOCs into these hexes. Note: Allied forces may operate in all other Axis territory.
-
Italy. The Italian operational area consists of Italy, Albania, the Dodecanese Islands, Greece, and Yugoslavia. Once Germany intervenes, the Italian operational area consists of the entire map. a. Yugoslav Defense Garrison. The Axis player must maintain a 3 RE garrison in Albania, on or north of the 14A:3700 hexrow, or suffer a penalty. The garrison may consist of any Axis ground units except for position AA or Albanian units.
Check the garrison at the start of each Axis initial phase. For each RE missing from the garrison, the Axis player loses 2 victory points.
The Axis player does not have to maintain this garrison, for the rest of the game, once either of the following conditions are met:
- The Allied player owns at least two cities in Albania.
- Yugoslavia joins the Allies. b. Zara Garrison. The Axis player must maintain a 1 1/2 REs garrison at Zara, or suffer a penalty. The RE may consist of any Axis ground units except for position AA or Albanian units.
Check the garrison at the start of each Axis initial phase. For each RE missing from the garrison, the Axis player loses 2 victory points.
The Axis player does not have to maintain the Zara garrison, for the rest of the game, once Yugoslavia joins the Allies. c. Rhodes. The island of Rhodes is the main island of the Dodecanese, just off map. For game purposes, Rhodes is:
- two hexes due east of hex 15B:2200.
- a standard port.
- an airbase with a capacity of 7.
Place Axis forces at Rhodes on the Rhodes holding box on the Axis game chart.
The Axis player must maintain a garrison at Rhodes. This garrison is listed on the Axis order of battle, and the Axis player may not move any of these forces from Rhodes until the garrison is released. The garrison is released when the Greek government surrenders to the Axis or is evacuated by the Allies. d. Albanian Revolt. At the end of each game turn, check for an Albanian revolt if the Allied player owns at least two cities in Albania. When checking for a revolt, the Allied player rolls one die and modifies the roll as follows:
- +1 for each Allied-owned city in Albania.
- +1 for each eliminated Albanian unit.
- -1 for each Axis-owned city in Greece.
On a roll of 6 or greater, Albania revolts. All Albanian units desert; remove them from play. All hexes in Albania except those occupied by or in the uncontested ZOCs of Axis units immediately become owned by the Allied player. If a hex containing an Axis airbase becomes Allied-owned, Axis air units at the airbase must immediately attempt to escape. During the next Axis player turn, Axis units that start the turn in Albania have their movement ratings halved.
B. The Allies.
-
Greece. a. Government. The government of Greece starts the game in Athenai (15B:0911). Use the Greek capital marker to mark its location.
During any Allied initial phase, the Allied player may evacuate the government, sending it into exile. When evacuated, remove the government's capital marker from the map. All forces of that nation except those on Greek or Yugoslav islands immediately surrender and are removed from play.
If the Axis player gains ownership of the hex containing the government, roll a die. On a roll of 1 or 2, the government escapes capture, and the Allied player must evacuate it in his next initial phase. On any other roll, the Axis captures the government. Remove the capital marker. All forces of that government, everywhere, surrender and are removed from play. The Axis player gains a victory award for capturing a capital.
Note: It does not cost the Allied player any rail or naval transport capacity to evacuate a government. b. Metaxas Line Garrison. The line of fortified hexsides in northern Greece is the Metaxas Line. The Greek player must garrison the Metaxas Line or suffer a penalty. Each hex of the line must contain at least one Allied unit, and there must be at least 15 REs of Allied units in any hexes of the line. The garrison may consist of any Allied units except position AA.
Check the garrison at the start of each Allied initial phase.
If the garrison requirements are not met, Greek forces in Mainland Greece operate under the following restrictions:
- Greek units east of the Vardar (Axios) River may not move west across the river or cross the Greek border.
- Greek units may not embark for naval transport in ports east of the Vardar River.
In addition, the chance of Bulgarian intervention is increased if the garrison requirement is not met (see Rule 28C1).
Once Bulgaria joins the Axis or Germany intervenes, the Allied player is not required to maintain the Metaxas Line garrison. c. Crete Garrison. The Allied player must garrison Crete with at least 3 REs of units or suffer a penalty. The garrison may consist of any Allied units except position AA.
Check the garrison at the start of each Allied initial phase. If the garrison requirements are not met, the Allied player loses 2 victory points for each missing RE.
Once any Axis ground units land in Crete by air or naval transport, the Allied player is not required to maintain the Crete garrison. d. Eastern Greece. The easternmost portion of Greece and some Greek islands are off map. For game purposes, Eastern Greece is:
- one hex due east of hex 14A:4701.
- a standard port.
- an airbase with a capacity of 3.
Place forces in Eastern Greece on the Eastern Greece holding box on the Allied game chart.
C. Neutrals. Neither side's forces may enter, pass through, or attack any hex of a country while it is neutral.
-
Bulgaria. Bulgaria is neutral at the start of the game but may join the Axis at either of three levels of participation:
- Active Participation: The Bulgarian operational area consists of Bulgaria, Greece, and Yugoslavia.
- Partial Participation: The Bulgarian operational area is Bulgaria, Thrace (in Greece), and Macedonia (in Yugoslavia).
- Passive Participation: The Bulgarian operational area is Bulgaria.
During an Axis initial phase once per game, the Axis player may call for Bulgarian active participation. He may do this on any turn except:
- on the first turn of the game (Nov I 40).
- on or after the turn Germany intervenes.
Roll two dice. On a modified roll of 15 or greater, Bulgaria immediately joins the Axis at active participation. On a roll of 14 or less, Bulgaria remains neutral. Modify the dice roll as follows:
- +1 for each city (including point cities) the Axis player owns in Yugoslavia (if Yugoslavia is an Allied nation) and Mainland Greece.
- +2 for each RE missing from the required garrison of the Metaxas Line.
- -3 for each city (including point cities) the Allied player owns in Albania.
If Bulgaria is neutral on the game turn Germany intervenes, Bulgaria immediately joins the Axis. During this game turn, Bulgaria is at passive participation. Thereafter, Bulgaria is at partial participation.
Example: On Nov II 40, the Axis player calls for Bulgarian participation, but Bulgaria remains neutral on the dice roll. On Apr I 41, Germany intervenes in the Balkans, and Bulgaria immediately joins the Axis, at passive participation. On Apr II 41, Bulgaria goes to partial participation.
-
Yugoslavia. Yugoslavia is neutral at the start of the game but later may be:
- Neutral: Yugoslavia is neutral.
- Pro-Axis Neutral: Yugoslavia is neutral. However, Axis units may trace railroad-element supply lines (only) through Yugoslavia.
- Pro-Allied Neutral: Yugoslavia is neutral. However, the Allied player may move Yugoslav forces within Yugoslavia. Yugoslav ground units may move but not attack. Yugoslav air units may only fly transfer missions and may not make patrol attacks. Yugoslavia begins mobilization on the turn it becomes pro-Allied.
- Axis: Yugoslavia is a member of the Axis, at war with Greece and Britain. Yugoslavia begins mobilization on the turn it joins the Axis. The Yugoslav operational area consists of Yugoslavia, Albania, and Greece.
- Allied: Yugoslavia is a member of the Allies, at war with the Axis. Yugoslavia begins mobilization on the turn it joins the Allies, if it isn't already mobilizing.
During an Axis initial phase once per game, the Axis player may voluntarily pressure Yugoslavia to join the Axis. He may do this on any turn except:
D. Occupation. The Axis player must garrison captured Allied cities or pay a penalty. The required garrisons are:
- 1 RE per Axis-owned reference city in Greece and Yugoslavia.
- 3 REs per Axis-owned dot and major city in Greece and Yugoslavia.
The garrisons may consist of any Axis units except position AA. Check the garrisons at the start of each Axis initial phase. For each RE missing from the occupation forces, the Axis player loses 2 victory points.
The Axis player must garrison a captured city starting with the game turn following the turn of its capture. For example, if the Axis player captures Athenai in the Apr II 41 turn, then the city must be garrisoned in the May I 41 turn.
Rule 29 — Reinforcements and Replacements
During the course of the game, the players receive reinforcements and replacements, convert units, and must withdraw units.
A player receives reinforcements and replacements during his initial phase. He may place these units on the map in violation of the stacking limit, but only if the stacking limit will not be violated at the end of his movement phase.
The orders of battle list the reinforcements and replacements in the game. On the orders of battle, unit identifications are given for historical interest and may be ignored.
A. Reinforcements. Players receive reinforcements during the game. A player places his reinforcements on the map during his initial phase, as specified on his order of battle. Reinforcements may be placed only in friendly-owned hexes; these hexes may be in enemy ZOCs.
Reinforcements unable to enter play as specified are eliminated instead.
Each player may receive conditional reinforcements. A player receives a conditional reinforcement when he meets the conditions for its appearance. These reinforcements and their conditions for arrival are listed on the orders of battle.
B. Replacements. Players receive replacement points (RPs), which replace eliminated ground and air units and rebuild cadres to full strength. A player receives and uses RPs during his initial phase. He may accumulate unused RPs for use in later turns.
Each infantry and mountain RP replaces 1 RE of ground units. Infantry RPs may replace infantry, static, fortress, or border units. Mountain RPs may replace mountain units or may be used as infantry RPs. Each armor RP replaces 1 RE of c/m units. Place replaced units like reinforcements, in any dot or major city in their home nation. For example, replaced Italian units appear in Italy.
It takes 2 RPs to rebuild a cadre to full strength. The cadre must be in supply and not in an enemy ZOC. If it meets these conditions, it may be rebuilt to full strength in the initial phase and may operate as usual thereafter.
Each air RP replaces one air unit. Place a replaced air unit at any airbase in its home country.
C. Withdrawals and Returns. The orders of battle occasionally require the players to withdraw ground and air units from play. When withdrawing a ground unit, the player may select any ground unit of the indicated nationality, unit size, unit type, and combat strength. If possible, the withdrawing unit should be in supply and not in an enemy ZOC. Simply remove the unit from the map. If no unit in play can be withdrawn, then the player loses 2 victory points.
When withdrawing an air unit, the player may select any air unit of the indicated nationality, air unit type, and model. If possible, the withdrawing air unit should be operational. Simply remove the air unit from the map. If no air unit in play can be withdrawn, then the player loses 2 victory points.
Some air units return to play after being withdrawn. The orders of battle list these air units as returning to play. They enter the same as air unit reinforcements. Ignore the listing for a returning air unit if it did not previously withdraw.
Example: On Jan II 41, the Axis player must withdraw the Italian Ju 87B/R air unit. However, this air unit has been eliminated in air combat and thus cannot be withdrawn. On Mar I 41, the Ju 87B/R would normally return to play. Since it didn't withdraw, the Axis player does not receive it on this turn.
D. Conversions. The orders of battle specify when the players may convert units, changing the unit from one type, size, or strength to another. The player may convert the indicated unit in any of his initial phases on or after the turn the conversion is specified on the order of battle. The player may convert a unit if it is in supply and not in an enemy ZOC. Remove the original unit from play and put the new unit in its place. Units removed from play through conversion may not be replaced.
E. Mobilization. Greek divisions and Yugoslav units may mobilize during the game. The Yugoslav order of battle covers Yugoslav mobilization. Greek divisions mobilize if their cadres, as listed on the Allied order of battle, are in play. Simply flip the cadre to its full strength side when a division mobilizes. Unlike converting units, a mobilizing division may be out of supply or in an enemy ZOC.
Rule 30 — Preparing for Play
Assemble the maps to form the Balkan Front game map as described below (and illustrated on the next page). If your game contains two large folded maps, skip steps 1 and 2, and proceed directly to step 3. If your game contains six non-folded box-size map sections start with step 1.
- Assemble Balkan Front map 14A by overlapping the non-folded box-size map sections 14A:NW, 14A:NE, 14A:SW, and 14A:SE. Each of the four map sections has a hex width of overlap with its adjacent map sections and the overlapping hexes are identical on each map section. For example, the easternmost hexrow on map section 14A:NW (hexrow 26xx) is identical to the westernmost hexrow on map section 14A:NE (also 26xx), and the southernmost hex column on map section 14A:NW is identical to the northernmost hex column on map section 14A:SW.
- Assemble Balkan Front map 15B (in the same manner as Balkan Front map 14A) by overlapping the non-folded box-size map sections 15B:NW and 15B:NE.
- Overlap the now assembled Balkan Front map 14A with the also assembled Balkan Front map 15B. The southernmost hex column on map 14A should overlay the northernmost hex column on map 15B. Hex 14A:5101 should overlay hex 15B:0101, and hex 14A:5133 should overlay hex 15B:0133.
Sort the counters by nationality, type, size, and strength. In general, ignore unit designations as they are for historical interest only. However, do not ignore the unit identifications of the Greek 5th and 13th divisions, as they are used for breakdown purposes.
The Balkan Campaign orders of battle specify the initial deployment for both sides. Each player deploys his initial forces as indicated on his order of battle. In addition, the Allied player deploys the Yugoslav neutrality watch forces as indicated on the Yugoslav order of battle. The players may not violate the stacking limits when deploying units. Units may be deployed broken down.
The Allied player deploys first, placing all of his initial forces and the Yugoslav neutrality watch forces. The Axis player deploys second, placing all of his initial forces.
After the players deploy their forces, the game begins with the Axis player turn of the Nov I 40 turn. During the game, use the Balkan Campaign orders of battles to determine reinforcements and replacements.
At the start of the game, the Axis player owns Italy, Germany, Slovakia, Hungary, Romania, Albania, and the Dodecanese Islands. The Allied player owns Greece. Bulgaria, Yugoslavia, and Turkey are neutral.
Rule 31 — Victory
A. Game Length. The game starts with the Nov I 40 turn and ends when the Axis player declares he is ceasing operations. The Axis player may declare he is ceasing operations at the end of any game turn, as long as the following conditions are met:
- The Greek government has surrendered or has been evacuated, per Rule 28B1a.
- If Yugoslavia joined the Allies, the Yugoslav government has surrendered or has been evacuated, per Rule 28C2a.
If not ended earlier, the game automatically ends at the end of the Aug II 41 game turn.
B. Victory Determination. At the end of the game, the players determine victory. Each player gains and loses victory points (VPs) based upon their actions and achievements. At the end of the game, each player totals his VPs. The victory chart (on the last page (page 32) of this rules booklet) lists the VP awards. Note: When totaling VPs for eliminated units, check for the presence of cadres in play at the end of the game. A divisional unit (3 REs) at cadre strength (1 RE) counts as having 2 REs eliminated.
If the difference between the players' VP totals is 4 points or less, the game ends in a stalemate. Otherwise, the player whose VP total is at least 5 points greater than his opponent's wins the game. Compare the winning player's total to the loser's, to determine the winner's level of victory, as follows:
- If the ratio is 3:1 or greater, the winner achieves a decisive victory.
- If the ratio is at least 2:1 but less than 3:1, the winner achieves a major victory.
- If the ratio is less than 2:1, the winner achieves a marginal victory.
Rule 32 — Optional Rules
The following rules are optional: use any or all of them only by agreement of both players. They increase the coverage or depth of the game, but at a cost of greater complexity and somewhat longer playing time. Since some of the rules slightly favor one side more than the other, players should decide which optional rules they will use before choosing sides.
A. Advanced Game Mechanics. The following rules cover certain game mechanics in greater detail than presented in the previous rules.
-
Ownership of Territory. Use the following exceptions to the rule on ownership of territory (Rule 3D).
ZOCs alone do not gain ownership of enemy-owned cities or airbases. To gain ownership of a hex containing an enemy-owned city or airbase, a friendly unit must occupy the hex.
By itself, a 1/2 RE sized unit cannot gain permanent ownership of a hex. When entering an enemy-owned hex, such a unit owns the hex only as long as it occupies the hex; upon leaving the hex, ownership reverts to the other player. It takes at least 1 RE of units (including, for example, two battalions together) or an uncontested zone of control to gain permanent ownership of a hex.
-
German Retreat Ability. Use the following exception to the rules on retreats (Rule 9F1).
German c/m units (only) ignore enemy ZOCs when retreating, if they retreat to a friendly-occupied hex. If they retreat to a hex unoccupied by friendly units, they are affected by enemy ZOCs as normal. Note: Only German c/m units have this special retreat ability. All other units, including units stacked with German c/m units, do not have this ability.
-
Terrain and Supply Lines. Each mountain, swamp, and wooded rough hex counts 2 hexes when tracing overland supply lines (see Rule 12B1). When tracing an overland line across a major river hexside, this hexside itself counts as 1 hex against the length of the supply line. These penalties do not apply if the overland line is traced along a road.
-
Incremental Construction of Temporary Airfields. When building a temporary airfield (see Rule 14A1), a construction unit may build it incrementally:
- It may spend 2 MPs and build a temporary airfield with a capacity of 1. Place a temporary airfield marker in the hex and place two hits on it to show that its capacity is 1.
- It may spend 4 MPs and build a temporary airfield with a capacity of 2. Place a temporary airfield marker in the hex and place one hit on it to show that its capacity is 2.
Once built at a capacity of 1 or 2, the temporary airfield may be built up to its standard capacity of 3 through the standard airbase repair rules (Rule 17D).
-
Spring Thaw. Use the following addition to the weather rules (Rule 27).
All rivers in weather zone D are in flood on the turn that zone D's weather changes from poor to clear. The MP costs to cross flooding hexsides are:
- River: +2 MP
- Major River: +4 MP.
-
Emergency Evacuation. British units with heavy equipment may embark for naval transport at beaches (see Rule 26B) if they abandon their heavy equipment. The Allied player announces when the unit embarks that it is abandoning its heavy equipment. The unit must be transported by sea to the Middle East holding box and may not leave that box for any reason for the rest of the game. (Place hit markers on these units to show that they've abandoned their heavy equipment.)
B. Special Unit Abilities.
-
Heavy Antiaircraft. A heavy AA unit does not have its attack strength halved when attacking across a fortified hexside.
-
Brandenburgers. The German commando unit has the following abilities.
It may attempt to leave or move through enemy ZOCs without paying ZOC movement costs. Each time the unit leaves a hex in an enemy ZOC (whether or not it enters another hex in a ZOC) without paying the ZOC costs, roll one die and consult the success table. If the attempt does not succeed, the unit must pay normal ZOC costs to leave the hex; if it does not have sufficient MPs to meet this cost then it must end its movement in the hex it currently occupies.
It may attempt to retreat through enemy ZOCs to a friendly-occupied hex. Consult the success table. If the attempt succeeds, the unit is not eliminated due to retreating through enemy ZOCs.
It may attempt to seize an enemy-owned bridge (see Rule 32C). It must be in a hex adjacent to the bridge and must spend 2 MPs for the attempt. Consult the success table. If the attempt succeeds, the Axis player immediately owns the bridge. If it fails, the unit is immediately eliminated.
C. Bridges. A transportation line crossing a river or major river hexside is a bridge. A player owns a bridge if he owns both hexes adjacent to the bridge hexside or if he was the last to do so. At the start of the game, neither player owns the bridges on Yugoslav international border hexsides. Bridges may be demolished.
Air units may demolish a bridge by bombing. (This is a tactical bombing mission.) The bombing air unit flies to either hex adjacent to an unowned or enemy-owned bridge hexside. It may be patrol attacked or intercepted by enemy fighters able to fly to either of these hexes. After air combat, AA is fired. AA fire may come from either or both of the two hexes adjacent to the bridge hexside, firing player's choice. (If from both hexes, divide the total AA strength firing by 2.) Surviving air units then bomb the bridge, using the bombing table. Three bombing hits demolishes the bridge.
A ground unit may demolish a bridge by spending 4 MPs in either hex adjacent to a friendly-owned or unowned bridge. It may not demolish an enemy-owned bridge.
A demolished bridge may not be used for any movement purposes, such as road movement, rail movement, admin. movement, etc. For example, a unit using a road to cross a river and enter a woods hex during clear weather normally pays 1 MP to do so; it must spend 3 MPs to do so if the bridge is demolished (1 MP for the river, and 2 MPs for the woods hex). Supply lines may be traced across a demolished bridge without penalty.
A construction unit may repair a demolished bridge or a bridge that has taken bombing hits. A player may repair a bridge only if he owns both hexes adjacent to the bridge. Repairing a bridge across a non-major river costs the construction unit 4 MPs. Repairing a bridge across a major river costs the construction unit 8 MPs. Repairing a bridge that has bombing hits but is not demolished is the same as repairing a demolished bridge.
The German commando unit may attempt to seize an Allied-owned bridge, as covered in Rule 32B2.
An airborne unit may attempt to seize one bridge when it air drops in a hex adjacent to an enemy-owned bridge. It must be undisrupted to seize the bridge. The dropping player rolls one die and consults the success table. If the attempt succeeds, the dropping player owns the bridges. If the attempt fails, the other player retains possession of the bridge. Note: If several airborne units drop next to the bridge, each may attempt to seize the bridge.
D. Italian Rail Connections. Rail lines running off the west edge of the map in Italy are connected. Axis units may move by rail off the map on one of these rail lines and re-enter the map on any connected rail line. It costs the unit 25 hexes of rail movement to do this.
E. Greek Morale. Due to the need to maintain morale in Greek front-line troops, the Allied player may not perform defeatist acts:
- move any Greek unit by naval transport from Mainland Greece to any island, unless there are Axis forces on that island.
- start construction of any fort in any hex in Greece that is more than 7 hexes from both the Greek international border and any Axis unit.
- voluntarily reduce the capacity of any airbase in Greece that is more than 7 hexes from both the Greek international border and any Axis unit.
The Allied player is released from these restrictions for the rest of the game once either of the following occurs:
- Germany intervenes.
- The Axis player owns 10 or more cities in Mainland Greece at the start of any Allied initial phase.
F. Rommel in North Africa. The British planned to send more reinforcements from North Africa to Greece in the spring of 1941, but their plans went awry when Rommel's surprise offensive swept across Libya and into Egypt. Had Rommel obeyed his orders to stand on the defensive in North Africa the British would have sent more forces to Greece. To explore the effects had this happened, when using this rule the Allied player receives the British optional reinforcements as listed on his order of battle for May I 41.
Rule 33 — Scenarios
The rules describe the Balkan campaign game, which covers the entire Axis 1940-41 campaign in the Balkans. In addition to the Balkan campaign game, several shorter scenarios can be played.
A. The Italo-Greek War. This scenario covers the period of the Italo-Greek War. Note: The Italo-Greek War is a good introduction to the game and to Europa as it tests each player's offensive and defensive abilities. It involves few forces but requires players to master the rules.
- Game Length. The scenario starts with the Nov I 41 turn and ends upon the conclusion of the Mar II 41 turn.
- Special Rules. Use all standard rules. Use the Balkan Campaign orders of battle.
- Victory. Determine victory per the standard victory rules (Rule 31).
B. Operation Marita. This scenario covers Operation Marita—the German blitzkrieg that overran Yugoslavia and Greece in April 1941.
-
Game Length. The scenario starts with the Apr I 41 turn and ends upon the conclusion of the Apr II 41 turn.
-
Special Rules. Use Maps 14A and 15B. Use the Operation Marita orders of battle for initial forces and reinforcements. When eliminating attack strength points as required, reducing a division to cadre counts as eliminating the full strength of the division. (Reducing a 5-6 Mtn XX to a 2-6 Mtn Cadre counts as eliminating 5 points.)
The Allied player sets up first. The Axis player sets up second. After this, play starts with the German surprise attack turn of Apr I 41.
Germany has intervened on Apr I 41. Bulgaria has joined the Axis and is at passive participation on Apr I 41. Thereafter, Bulgaria is at partial participation. Yugoslavia, previously a pro-Allied neutral, joins the Allies.
At the start of the game, the Allied player owns Greece, Yugoslavia, and the portion of Albania as listed in the Greek order of battle. The Axis player owns Italy, Germany, Slovakia, Hungary, Romania, Bulgaria, the Dodecanese Islands, and the portion of Albania as listed on the Italian order of battle. Turkey is neutral.
-
Victory. Determine victory per the standard victory rules (Rule 31).
C. Marita-Merkur. This scenario covers Operation Marita—the German conquest of Yugoslavia and Greece—and Operation Merkur (Mercury)—the German airborne assault on Crete.
- Game Length. The scenario starts with the Apr I 41 turn and ends upon the conclusion of the Jun II 41 turn.
- Special Rules. Use the special rules from the Operation Marita scenario (Rule 33B2).
- Victory. Determine victory per the standard victory rules (Rule 31).
D. Assault on Crete. Following the conquest of Greece in April 1941, Germany decided to eliminate Britain's last bastion in the Aegean—the island of Crete—by airborne assault. Taking Crete would strengthen the Axis position in the Mediterranean, as well as removing the threat of the British bombing the crucial Romanian oilfields from Crete.
Note: This is a short scenario, involving few forces. However, it is not a simple scenario, especially for the Axis player, as it requires expertise in airborne operations and in coordinating air and ground forces for maximum effectiveness.
-
Game Length. The scenario starts with the May II 41 turn and ends upon the conclusion of the Jun II 41 turn.
-
Special Rules. Use Map 15B only. Use the Assault on Crete orders of battle for initial forces, initial conditions, and reinforcements. The Allied player sets up first. The Axis player sets up second and then plans any airborne operations and amphibious landings for the first turn. After this, play starts with the May II 41 turn.
At the start of the game, the Allied player owns Crete and the nearby islands of Andikythera and Gavdos. The Axis player owns the Dodecanese Islands and all other Greek territory on the map. Turkey is neutral. Axis initial temporary airfields remain in play even if no construction units are present in their hexes.
-
Victory. The Axis player wins a major victory if he fulfills either of the following conditions:
- He owns all airbases on Crete.
- He eliminates at least 4 REs of British forces and does not lose more than 2 REs of airborne units. (Count British air units as 1 RE each. Do not count Greek units or any position AA.)
The Axis player wins a decisive victory if he fulfills both conditions.
The Allied player wins a major victory if the Axis player does not fulfill either condition.
E. Plan G. The Italians launched their attack on Greece with insufficient forces. An Italian staff study before the campaign recognized that they would need greater forces should Greece resist the invasion. This scenario explores the possibilities that the Italian high command heeded the realities of invading Greece.
-
Game Length. The scenario starts with the Nov I 40 turn and ends when the Axis player ceases operations in the Balkans, per Rule 31A.
-
Special Rules. Use the standard rules and the Balkan Campaign orders of battle, with the following changes.
Add the Italian regular reinforcements for Nov I 40, Nov II 40, Dec I 40, and Dec II 40 to the initial forces of the Albania Troop Command. No Italian regular reinforcements are received for Nov I 40, Nov II 40, Dec I 40, and Dec II 40.
At the start of the game, after initial deployment but before the Axis player turn of Nov I 40 begins, determine if Greece discovers Italy's invasion preparations. The Allied player rolls one die. On a roll of 1 or 2, Greece does not detect the preparations, and the game begins with the Axis player turn. On a roll of 3, 4, 5 or 6, Greece detects the preparations and reacts. The Allied player receives a special Oct II 40 mobilization turn. This turn consists of an Allied initial phase and movement phase. Greek Nov I 40 reinforcements are received on Oct II 40 instead. Greek units may move inside Greece. After this turn, the game begins with the Axis player turn of Nov I 40.
-
Victory. Determine victory per the standard victory rules (Rule 31).
F. Plan Y. The Italian invasion of Greece arose from Mussolini's dreams of empire and the hope of a quick victory over a weaker opponent. Italy's Plan Y detailed an invasion of Yugoslavia, and Italy just as easily could have turned on Yugoslavia instead of Greece. This scenario examines this possibility.
Note: This scenario assumes that Germany stays out of the campaign for as long as possible, in hopes of avoiding the war drawing in Greek, British, and even Soviet forces. The scenario ends when Germany must intervene in 1941 or risk disruption of its 1941 campaign plans. The scenario further assumes that Yugoslavia's isolation—surrounded by Axis and neutral nations—precludes any active British intervention.
-
Game Length. The scenario starts with the Nov I 40 turn and ends upon the conclusion of the Mar II 41 turn.
-
Special Rules. Use Map 14A only. Use the Plan Y orders of battle for initial forces and reinforcements. The Allied player sets up first. The Axis player sets up second. After this, play starts with the Nov I 40 turn.
At the start of the game, the Allied player owns Yugoslavia. The Axis player owns Italy and Albania. Germany, Slovakia, Hungary, Romania, Bulgaria, and Greece are neutral, although Hungary and Bulgaria may intervene.
At the start of the game, after initial deployment but before the Axis player turn of Nov I 40 begins, determine if Yugoslavia discovers Italy's invasion preparations. The Allied player rolls one die. On a 1, 2 or 3, Yugoslavia does not detect the preparations, and the game begins with the Axis player turn. On a roll of 4, 5, or 6, Yugoslavia detects the preparations and reacts. The Allied player receives a special Oct II 40 mobilization turn. This turn consists of an Allied initial phase and movement phase. Yugoslav mobilization starts with this turn, and Yugoslav units, to the extent allowed by mobilization, may move inside Yugoslavia. After this turn, the game begins with the Axis player turn of Nov I 40.
During any Allied initial phase, the Allied player may move the Yugoslav capital from the city it is in to any other connected city. A city is connected to another if a rail line can be traced from one city to the other, entirely through friendly-owned hexes. In this scenario, the Allied player may not evacuate the Yugoslav capital.
During any Axis initial phase from Nov II 40 on, the Axis player may call for Balkan intervention. Determine Balkan intervention the same as for Bulgarian participation in the Balkan Campaign (see Rule 28C1), except ignore the modifiers concerning the Metaxas Line. If Balkan intervention occurs, Hungary and Bulgaria join the Axis.
-
Victory. The Axis player wins by capturing the Yugoslav capital. He wins a decisive victory if he captures it on or before Jan II 41. He wins a major victory if he captures it on Feb I 41 or Feb II 41. He wins a marginal victory if he captures it on Mar I 41 or Mar II 41. If the Axis player does not capture the Yugoslav capital, the Allied player wins a major victory.
G. Greek Appeasement. Italy had intermittently staged incidents and confrontations with Greece, in the hopes of cowing the Greek government. This scenario examines the consequences had Greece conceded territory to Italy in an earlier crisis in an attempt to appease Italian demands. Note: While Greek appeasement seems unlikely in historical retrospect, it was little or no more unlikely than other acts of appeasement in the 1930s. This scenario assumes that the appeasement did not, of course, placate Italy for long and thus only deteriorated Greece's defensive position.
-
Game Length. The scenario starts with the Nov I 40 turn and ends when the Axis ceases operations in the Balkans, per Rule 31A.
-
Special Rules. The Cham region of Greece was earlier conceded to Italy. The Axis player owns the Cham region at the start of the game, which is treated for all game purposes as part of Albania. Treat the Cham-Greece border as the international border between Albania and Greece. Note: The island of Kerkyra is not part of Cham and remains part of Greece.
Other than the above, there are no special rules.
-
Victory. Determine victory per the standard victory rules (Rule 31).
Victory Point Chart
Axis VPs
| Award | Points |
|---|---|
| Each British c/m RE eliminated | +5 |
| Each British non-c/m RE eliminated | +3 |
| Each British RE that abandons its heavy equipment | +1 |
| Each Allied air unit eliminated | +3 |
| Each terror bombing hit | +1 |
| Each naval interdiction bombing hit | +2 |
| Each Allied NTP eliminated | +1 |
| Each enemy capital captured | +6 |
| If all cities in Mainland Greece and mainland Yugoslavia (if Allied) are Axis-owned at end of game | +12 |
| If all cities on Crete are Axis-owned at end of game | +5 |
| If the Axis ceases operations on or before Mar II 41 | +10 |
| If the Axis ceases operations on or after Jul I 41 | -15 |
| Each RE missing from a garrison (per turn) | -2 |
| Each non-c/m RE of German assistance | -1 |
| Each air unit of German assistance | -2 |
| If Germany intervenes | -12 |
| If German withdrawal is delayed to May II 41 | -10 |
| If Axis player takes conditional reinforcements that cost VPs | per OB |
| Unable to withdraw an air or ground unit per Rule 29C (per air or ground unit) | -2 |
Allied VPs
| Award | Points |
|---|---|
| Each Axis c/m RE eliminated | +2 |
| Each Axis non-c/m RE eliminated | +1 |
| Each Axis NTP eliminated | +2 |
| Each Axis air unit eliminated | +2 |
| If any city in Albania is Allied-owned at any time in the game | +2 |
| If all ports in Albania are Allied-owned (per turn) | +5 |
| Each Allied-owned city in Albania and Bulgaria (if Axis) at the end of the game | +2 |
| Each Allied capital neither captured nor evacuated | +5 |
| If all cities on Crete are Allied-owned at the end of the game | +3 |
| If Allied player takes conditional reinforcements that cost VPs | per OB |
| If British emergency NTPs are used | -5 |
| Each RE missing from a garrison (per turn) | -2 |
| Unable to withdraw an air or ground unit per Rule 29C (per air or ground unit) | -2 |