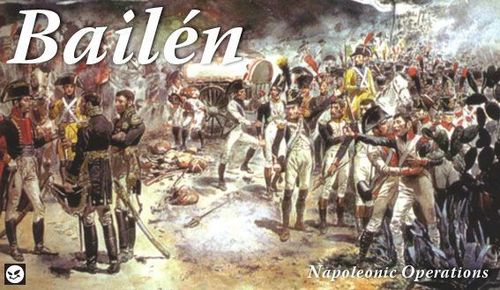
Bailen
Bailen Rulebook
Table of Contents
Table of Contents
1. General Special Rules
1.1 Stacking
Three divisions can stack in one hex. One train or three independent Units or all of the French independent Units acting as Dupont's Division count as one division each.
1.2 Weather
The random events aside there are no special weather rules in the game. Note that the Heatstroke and Sunstrorke effetcts only affect the current player turn. And yes, it can be hot during those Andalician nights.
1.3 The Andujar Box
This game's map features an Andújar Box that can be used to store some of all the Units that starts in Andújar. It has no effect on stacking.
1.4 Recovery Points
Recovery Points in this game may only be used to rebuild infantry Units.
Both draught animals and cavalry horses were scarce in northern Andalucia. So was water.
1.5 Mountain Supply
Neither side can trace supply through hex 11.26.
This is to prevent players from switching supply routes faster than any modern mechanized force could.
1.6 Cruz-Mourgeon's Secret Path
The bad road running from 6.02 to 2.21 may only be used by the Spanish Volante division.
2. Spanish Special Rules
2.1 Supreme Commander
The Spanish Supreme Commander is The Captain General of Andalucia, Francisco Javier Castanos Aragorri, 52 years old, from Biscay.
Castanos' mission is to defeat the French on the Guadalquivir and drive them north, out of Andalucia.
2.2 Special Staffs
The Reding Staff (1st Division) have a limited ability to generate orders. See the Army Structure Table for more details. Also, each Spanish turn one order starting the movement phase with the Reding Staff may leave Reding and move elsewhere.
2.3 Spanish Demoralization
If two "numbered" Spanish divisions are destroyed (as per series rule 21) all Spanish Units have their Quality Ratings reduced by one for the rest of the game one. The player also recieves one order less each turn. Rebuilding lost Units does not alter this.
This represents a Spanish loss of confidence as well much as a boost to the French morale.
2.4 The Linares Revolution
The Spanish Linares Unit can never move.
This counter and the "order intercepted" event represent the local Spanish resistance. In these early days of the war there ware no armies of guerillas in the mountains, just very local uprisings.
2.5 Irregulars
The Spanish Valdecenas Unit as well as those of the Volante division ignore all supply considerations as long as they are not stacked with other Spanish Units (they may stack with each other). They may be rebuilt in any rough hex. Furthermore, the Valdecenas unit may only move using initiative.
While the volunteer bullfighters and custom officers under Colonel Cruz-Mourgeon operated very successfully along the south slopes of Sierra Morena, Colonel Valdecenas little column got lost and never had any effect on the operation. They did show up in Linares on the 20th.
3. French Special Rules
3.1 Supreme Commander
The French Supreme Commanders is Divisional General Pierre Dupont D'Letang, 43 years old, from Chabanais. He was made a Count ten days before the game begins.
Dupont's mission is to save his corps, preferably without being driven into the mountains or losing his loot.
3.2 Special Staffs
The Vedel Staff (2nd Division) have a limited ability to generate orders. See the Army Structure Table for more details. Also, each French turn one order starting the movement phase with the Vedel Staff may leave Vedel and move elsewhere.
3.3 French Nerves
French Initiatives will be misunderstood on rolls of 2 AND 3.
The French a lot of time during the campaign chasing ghosts and making the wrong guesses. Mostly because they had not quite grasped what they were up against.
3.3 French Cavalry
(The source prints two sections numbered 3.3; both are kept here as printed.)
If stacked together the two independent French cavalry Units need only one order to move. They may go separate ways if they like to, using that one order.
3.4 French Independent Units
All or some French independent Combat Units may either move as part of the "Division Dupont" described below or be attached to one of the French Divisions. This attaching requires no orders, just that the attached Unit starts stacked with or adjacent to a Division before it starts moving. An attached Unit may be dropped off at any point during movement.
3.5 Division Dupont
Using the CoG HQ as a if it was a Staff the French player may move all or some of his independent Units (including the trains) as one division for the cost of one order.
4. Scenario
4.1 The Bailen Campaign
The game starts with the Noon turn, July 14th 1808.
The game ends after the Noon turn, July 20th 1808.
The Spanish Player is the First Player.
See each side's Army Structure Table for set up and order of arrival details.
5. Victory
Check for victory at the end of each player's segment. The Spanish player wins the game at the end of a French player segment if he has achieved four or more of the following goals. Achieving six or more goals will be considering a great embarrasment to the French player. He will be court-martalied and forced to retire and spend the rest of his days writing poetry about the art of war.
- Capturing Andújar.
- Capturing Bailen.
- Capturing Guarroman.
- Destroying the French Train.
- Destroying the French Loot Train.
- Destroying a French Division or the French HQ. Each destroyed division counts as one Goal.
- Each Spanish Division destroyed voids one of the above goals. Only "numbered" Spanish Divisions count for these purposes.
Only "numbered" Spanish Divisions can capture any of the three towns for victory purposes.
The French player wins the game by avoiding a Spanish victory, or the instant the Spanish are demoralized AND there are no Spanish Units from "the numbered divisions" north of the Guadalquivir. Now he only has to get back to Madrid with his troops in order and a good excuse at hand.
Bailen Player Aid: Events and Arrivals
This section transcribes the Bailen game's player aid sheet (the Events table, Table of Arrivals and Events, and Victory summary), which the Army Structure Tables and rules above refer to.
Events
Roll three dice.
- 3 = Loot Wagons Delayed. The French Loot Wagon will enter play one turn later. Once the wagon has entered play treat this event as "Vedel Freaks Out".
- 4 = Loot Wagons Ready Earlier. The French Loot Wagon will enter play one turn earlier. Once the wagon has entered play treat this event as "Swiss Revolt".
- 5 = Linares Revolt (Once - Spanish Player Only). Place the Spanish Linares unit in Linares, provided there are no French units in or adjacent to, the town.
- 6-10 = Nothing happens.
- 11 = Traffic Control (Only if you have Destination Markers on the board.). During this Command Phase you must either spend an order stacked with your Supreme commander or remove two Destination Markers (one real and one dummy) from the board.
- 12 = Quick Recovery. You receive one Recovery Point to be used this turn by an infantry unit. The Recovery Point can not be saved for a later turn.
- 13 = French Order Intercepted (Either side.). Return one randomly chosen French Order that is not stacked with any French unit to the order pool.
- 14 = Heatstroke (Day turns only. Count as "Nothing Happens" on the 14th.). No forced marches are allowed in your turn. You must roll to remove spent markers as if it was night.
- 15 = Command Problems (Day turns only.). Remove one Order permanently from your Order Pool. When rolling for orders this turn deduct two from the roll.
- 15 = Lost (Night turn only.). Your commander may only move two hexes.
If a "Once" event is rolled the second time treat it as a "Nothing Happens" event.
Table of Arrivals and Events
- 14th, Noon: the game starts. 1st Spanish Division arrive.
- 15th, Morn: Spanish Volante Division arrive.
- 17th, Morn: the French Loot wagon appears in Andújar.
- 20th, Noon: the game ends.
Victory (player aid)
The Spanish player wins the game by achieving four or more of the following goals at the end the French player's segment.
- Capturing Andújar.
- Capturing Bailen.
- Capturing Guarroman.
- Destroying the French Train.
- Destroying the French Loot Train.
- Destroying a French Division or the French HQ. Each destroyed division counts as one Goal.
- Each Spanish Division destroyed voids one of the above goals.
Only "numbered" Spanish Divisions count for destruction purposes or town capture.
The French player wins the game by avoiding a Spanish victory, or the instant the Spanish are demoralized AND there are no Spanish units from "the numbered divisions" north of the Guadalquivir.
Bailen Historical Notes
- Today the Bailen area is crisscrossed with freeways. We hope we got the cliffs underneath right. There probably should be more little villages or clustes of buildings on the map, but detailed 18th century maps of the Spanish countryside are few and far between.
- Andújar was perhaps at least partly walled. And there was a redoubt on the west side of the river. They have perhaps been downgraded a bit, but an Andujar cross-river attack is still murder.
- Arguably Junot, who had been sitting Lisbon for almost a year, was furhter away from France than Dupnt was. But he was not part of the same operation.
- Teodoro Reding was of Swiss decent, Felix Jones was an Irishman, and Antonio Malet, The Marquis of Coupigny, was born in Arras, France.
- Goberts division and its private cuirassier brigade was on loan from Moncey's Corps of Observation of the Ocean Coast and was not Dupont's third division at all. Furthermore the French cavalry was organized in a division under GD Fressia. Both these facts was ignored when building the OOB.
- The real life Spanish OOB actually looks very much like one in the game. The only icky thing is that Reding might or might not have had is division organised in two rather permanent brigades.
- The two flying columns aside the Spanish troops are mostly old regular Units. Though, several of them had taken in lots of new recruits and there was a great shortage of horses, they did function well. The bonus Quality Rating of the Walloon Guards in reduced state is meant to show this units bravery as rear guard in later battles.
- The Marines of the Guard had been sent along with Dupont to seize the Spanish Fleet in Cadiz. Them aside the French troops were mostly "Legions of Reserve" of this or that kind that had been formed the previous fall. They fought fairly, but lacked both the tactical finesse and stellar confidence of the Grande Armée.
- The Spanish army had thirty-odd guns, the French forty. The small number of icons (4 to 6) reflect the fact that both sides were short of horses and that the guns were dispersed among low level formations. The French guns "last" longer to show a qualitative edge.
- The low number of skirmishers on the French sides is due to spending to much time looting instead of training. When the real Grande Armée showed up in the fall their skirmishers ran all over the Spanish.
Series Rules: Napoleonic Operations 2.3
This is the Napoleonic Operations Series Rulebook 2.3, which contains the rules applicable to all games in the series and the Series Tables needed for play. The Bailen game rules above refer to it (for example, "series rule 21" and the Army Structure Tables). Source: the same official Gottick kit, "Series Rulebook 2.3" (Anders Fager & Gottick, 2021).
Introduction
Napoleonic Operations is about commanding 19th century armies on an operational level.
Version Note
This is the sixth public version of these rules. It was put together for the "let's get the stuff online-operation".
The plan for NapOp once was to kill of the worst mistakes using the Bailen kit and then move on to something a bit bigger. A strange career change stopped that. But here is the game, anyway.
1. The Components
1.1 The Rules
Every Napoleonic Operations game contains one series and one game rulebook. The Series Rulebook (this book) contains the rules applicable to all the games in the series as well as the Series Tables needed for play. The Game Rulebook gives the details needed for a specific game, such as special rules and setup information. Included in the game book are also the two Army Structure Tables that are used to keep track of how the opposing armies are organized and a Table of Arrivals and Events that keep tracks of arriving Units and other such things.
1.2 The Map
The map shows the area over which the campaign was fought. All terrain features are explained on the Terrain Effects Chart in the Series Tables. The chart lists each terrain type's effect on movement and zones of control and also qualifies it either as open, closed or fortified. Note that only groups of buildings with their name in CAPITALS have any effect on play.
A hex numbering system is used to identify individual hexes on the map. The first two numbers identifies the hex row and the second two the exact hex along the given hexrow. If the game uses more than one map, letters identify the map in question (such as A10.10).
Example - Map: Den Helder on the left is located in hex 10.11. And since the map says DEN HELDER the town of Den Helder affects play while Zand in 20.11 does not.
1.3 The Turn Track
There is a Turn Track printed on either the map or one of the play aid sheets. It is used to keep track of time in the game. Place the turn record marker on the turn track to show the current turn.
1.4 Counters
There are three kinds of counters in the game.
Units. This category includes all kinds of combat troops and support formations. Fighting units, regardless of type are called Combat Units. Trains, HQ's and Staffs that cannot attack but can be attacked are called Non-Combat Units.
All Combat Units and Trains have a Strength Value and a Quality Rating. Combat Units furthermore have Ability Icons indicating that the Unit has special skirmishing skills, a small cavalry component or some supporting artillery. These are known respectively as Skirmisher Icons, Cavalry Icons and Artillery Icons. Units that are capable of acting on their own accord have an Initiative Rating on the counter as well. Units move using either foot or cart movement.
Staffs have Leadership and Initiative Ratings. Some Staffs also have Ability Icons and can lend these abilities to their subordinate Units.
Most Units' can be flipped to show a weaker version of the same Unit. This is known as Reducing the Unit, or the Unit takes a Step Loss. The weaker side is marked with a horizontal band.
Note that any odd symbol or out of the normal-looking icon on a counter indicates a special ability of one kind or the other. Check the game rulebook for more details.
For historical reference unit names are either regimental names (Saxe-Coburg) or the name of the brigadier (Saxe-Coburg's).
Individuals. These are individual messengers or small groups of officers. These are referred together as Individuals and separately as respectively Orders and Commanders. All individuals move using foot movement. Commanders have Leadership and Initiative Ratings. Supreme Commanders do not have an Initiative Rating.
Markers. This category includes all kinds of markers used to keep track of functions or effects during play. These include the Turn Record Marker, Weather Marker, Destination Marker, Disorder Marker, Dummy Destination Marker, Resting Marker, Out of Supply Marker and Spent Marker.
2. Conventions
2.1 Game Scales
- 1 hex = 1500 meters
- 1 turn = Eight hours
- Two day turns & one night turn make up a day
- 1 Unit = One Division or Brigade
One strength point equals between 500-1000 men or one battery of guns. The median value would be that a strength point equals an 800-man French infantry battalion, a 500-man regiment of dragoons or eight 8lb guns. In terms of quality a Quality Rating of 2 or 3 signifies fair regulars, a rating of 5 units of the absolute highest quality, and a rating of 0 either civilian support units or raw levies.
2.2 Cumulative Effects and Rounding
When values are subject to multiple modifiers, all the effects are cumulative with any doubling or dividing done first. Retain fractions until after applying all modifiers. Then round fractions as per: .01 to .49 down, .50 to .99 up. This "round last" -rule holds true for odds as well.
2.3 Set Up Notes
Units can never start overstacked. Unless noted in the game specific rules Units start at full strength and in Good Order. Headquarters are always set up Stationary.
2.4 What Terrain?
Little itty bits of terrain from adjacent hexes leaking into a hex do not affect its main type of terrain. If in doubt use the "easiest" terrain type for movement and the "best" terrain type when defending.
3. Sequence of Play
Each game day consists of two day turns and one night turn. Each game turn consists of two similar Player Segments. When both players have gone through their segments, advance the Game Turn Marker and begin the process again.
Players must strictly follow the Sequence of Play. The game rulebook identifies who are the First and the Second Player. The player currently taking his turn is the Phasing Player doing things with friendly Units. The other player is the Non-Phasing Player doing things with enemy Units.
3.1 Outline Sequence of Play
First Player Segment
- COMMAND PHASE
- MOVEMENT PHASE
- INITIATIVE MOVEMENT PHASE
- ENEMY TACTICAL PHASE
- FRIENDLY TACTICAL PHASE
- RECOVERY PHASE
Second Player Segment
Repeat the above with the players switching roles.
3.2 Narrative Sequence of Play
Each player segment goes like this:
Command Phase. Roll for random events. The player then places new orders on the map (not during night turns) and can place Destination Markers.
Movement Phase. Place any reinforcements on the map. The phasing player can then move his Units by expending orders stacked with them. Moving Units can conduct combat as part of their moves, as well as carry out forced marches. At anytime a phasing Unit enters a hex in the ZoC of an enemy stack the enemy stack can attempt to react.
Initiative Movement Phase. The player may roll for initiative to try to move Units without using orders. A stack getting initiative can then move, conduct combat and force march. At anytime a phasing Unit enters a hex in the ZoC of an enemy stack the enemy stack can attempt to react.
Enemy Tactical Phase. Now all Good Order Non-Phasing Player Units that are part of a command that is adjacent to either an enemy Unit or the Non-Phasing Supreme Commander may move one hex (including into combat).
Friendly Tactical Phase. Now all Good Order Phasing Player Units that are part of a command that is adjacent to either an enemy Unit or the Phasing Supreme Commander may move one hex (including into combat). If an order is expended disordered Phasing Units may also move one hex.
Recovery Phase. On turns requiring a supply check the phasing player ensures that each of his Units are in supply. If not, mark them Out of Supply. Units resting since previous turns recover strength. Mark new Resting Units. Disordered Units may recover. Remove Spent Markers from the Phasing Player's own Units. Check if the Phasing Player have won an automatic victory. Advance the turn marker one box each time both players has completed their segments.
4. Random Events
In all games events may take place for reasons outside of the player's control. These are rolled for at the start of each player segment using the game's unique tables found on the Table of Arrivals and Events.
Things go wrong in wars. Like in all human endeavours. People get lost, orders are misunderstood and plans turns out to have been based on faulty maps and old informartion. These random events will add a bit of friction to even your best plan. And perhaps save you when everything else fails. Generals must be lucky.
5. Chain of Command
All Units and commanders in an army fit together according to the game rules. Each army's Army Structure Table and the particular Game Rulebook outlines who controls who, where new orders are placed and so on.
5.1 Terms
Supreme Commander. The commander in command of the entire army and his closest staff. The person who "writes" (places on the map) orders for the army, in effect the player.
HQ (Head Quarters). A non-combat Unit that represents the staff and aides of the Supreme Commander. A HQ is not an "individual". In game terms a HQ helps the Commander "write" more orders.
Command. A Unit or group of Units, a Corps or Division usually, bound to operate together.
Subordinated Units. Units that are subordinated to a certain command. For instance Divisions of the same Corps or units of the same Division.
Subordinate Commander. A commander in charge of an army's wing or other such subdivision of an army.
Staff. A non-combat Unit that represents a lower level commander, such as a Corps or Divisonal Commander, and his staff as well as the assets at his disposal. A staff is not an "individual". In the game a Staff serves as the hub of a Division or Corps.
Independent Units. Units not belonging to any special command. The Army Structure Tables and Game Rulebook describes how these Units may interact with other Units. In some cases, independent units may be attached to a division or corps. See the Game Rulebook for more details. HQ's and Trains units are not independent units.
5.2 Staffs and Commanders Ratings
All Staffs have two ratings. The Initiative Rating is the number printed in the top left circle on each Staff Counter. This rating (from 2-12) is used when the player wants to move the Staff's Command without using orders. The Leadership Rating is the number printed in the star in the bottom right on the counter. This rating (from 0-5) is used in combat.
Commanders have the same ratings as Staffs though, each side's Supreme Commander does not have an Initiative Rating.
A note on ratings. Though this era saw a some insanely gifted officers, making them all into telepathic supermen would short-circut this system. Most "normal" officers will have a 10-11 Initiative and 1 or 2 rating for leadership. A excellent independent commander such as Davout can probably count on an initiative of 7 as he will be very good at guessing your intentions. Meanwhile a stellar tactician such as Lannes or a charismatic leader such as Bagration would rate a 4 for leadership.
5.3 Command Span
To function as part of a command a Unit must be either stacked with or adjacent to its command's Staff. Units do not count as being adjacent if separated by impassable hexsides other than a major river crossed by a ford or bridge or a mountain hexside crossed by a road. This is known as being In Command. Units outside this "range" are Out of Command. Units may deliberately move out of command.
A command using road movement may violate the above as long as all Units of the command are lined up in one long, unbroken, chain, along one continuous path of road hexes.
Units starting a phase Out of Command need orders to move but will otherwise function normally (with one exception, see 14.1). Independent Units are never Out of Command.
(Diagram: "How a small Army may be organized": three commands (divisions) each with a staff and subordinated units, the Supreme Commander and the HQ, two independent units, and the train.)
6. Commanders & Orders
6.1 Commanders
Commanders represent higher officers and the Supreme Commander the player himself. A commander cannot be destroyed in any way.
6.2 Orders
Orders are used to make Units move and fight. Without orders to expend a player must rely on initiative rolls. An order cannot be destroyed in any way, but it can be returned to the Order Pool.
The orders represent not only couriers, ADC's and such, but the flow of orders also serve as a way to show how well or not different parts of an army keep in touch.
6.3 Available orders and the Order Pool
Each army has a limited number of order counters available. The Army Structure Tables specify how many orders are available during a given scenario. This number may be altered according to the Turn Track. Available orders not currently on the map are kept stored in each side's "Order Pool" printed on the Army Structure Table.
6.4 Getting New Orders
In most cases the fresh Orders for the Order Pool are placed where the Supreme Commander is. During his Command Phase a player may take order counters from his Order Pool and place them on the map in accordance with the game specific rules. Should the Order Pool be empty no new orders can be placed.
6.5 Moving Individuals
All Individuals - Commanders and Orders - move during the Movement Phase, counting MPs as Units do. All Individuals have 8 MP and may always move unless they belong to a certain stack, see below.
6.6 Individuals and the Enemy
Individuals moving on their own may never enter hexes containing enemy Units.
If an enemy Unit enters the hex of a commander not stacked with a unit the commander (or commanders) will displace to any one adjacent hex free of enemy Units (save for the hex the enemy Units entered from). Any orders with the commander are lost and returned to the order pool.
If an enemy Unit enters a hex containing one or more orders and nothing else, roll one die to see if the order has been intercepted. If the enemy force has cavalry (even an icon) the order will be intercepted on a roll of 3-6, if not on a roll of 5-6. An intercepted order is returned to the order pool. An unintercepted order will displace to any adjacent hex free of enemy Units (save for the hex the enemy Units entered from). An order trying to move through an EZoC without any friendly Units is intercepted using the same method as above, but does not have to displace. Roll for each EZoC entered.
6.7 Stacked Orders
An order starting a movement phase stacked with a staff is considered to "belong" to that staff and may not leave the staff and move on its own again. This means that orders may never be handled back and forth between different staffs.
As an exception to the above, the only time an order may leave a staff is when the order is sent to be instantly used by an out of command Unit of the staff's command.
6.8 Using Orders
Units must expend Orders in order to move and fight as well as other activities. To expend an order simply remove it from the map and return it to the Order Pool. If a Staff uses an order, all Units of the Staff's command may move, as long they were all In Command when the order was expended. Once the Units ordered to move starts moving they may or may not move in the same direction as the Staff that used the order.
The Supreme Commander never needs orders to move. Independent Units may need separate orders to move. See the Army Structure Table for details.
Orders may also be used to place destination markers. Placing a Destination marker cost two orders.
6.9 Getting Rid of Orders
At the start of a Command Phase any commander can burn (return to the order pool) all orders he is stacked with.
Example - Orders: In his Command Phase, playing Bailen the French Player rolls to place new orders on the map. Dupont is at his HQ (+1DRM) and rolls a 5, for a total of 6. Consulting the New Orders table, the result is three new orders. However, there are only two orders in the French Order Pool. The two orders are placed on the map stacked with Dupont, who will have to live without the third order.
During the Movement Phase, the French player has Dupont send one of the orders to Gobert at Bailén and the other to Barbou at Arjonilla. The order for Gobert leaves Dupont's stack in Andújar and moves its full 8 MPs (16 hexes) along the main road toward Bailén but cannot quite reach the town, remaining on the road until next turn. The other order can make it all the way to Arjonilla in the same phase and stacks with Barbou. The French player chooses use the order to activate Barbou immediately. The order is removed from the map and returned to the French Order Pool. Barbou's command then moves down the road toward Arjona.
7. Zones of Control
Zones of Control (ZoCs) represent a Unit's ability to affect enemy movement around them. The ZoCs of enemy Units are called Enemy Zones of Control (EZoCs).
Cavalry (including Units with Cavalry Icons) extend ZoC into adjacent Open terrain hexes. Artillery Units (not icons) extend ZoC into adjacent Clear terrain hexes (note the difference: clear, not open). Infantry Units with skirmisher icons extend ZoC into adjacent Closed and Fortified terrain hexes only. See the Terrain Effects Table for more details on who has ZoC where.
Some hex edges block ZoC. With the exception of artillery across rivers units cannot project ZoC across such features.
Furthermore:
- A hex can be in both friendly ZoCs and EZoCs simultaneously.
- Multiple ZoCs have no additional effect.
- Friendly ZoCs or Units do not have any effect on EZoCs, except when tracing supply.
- Friendly ZoCs does not extend into hexes with Friendly Units in.
7.1 ZoC Effects
- Units Pay +1 movement point to leave an EZoC. This includes when moving into combat.
- Non-combat Units may never enter EZoC unless accompanied by a combat Unit. Individuals may move into EZoC under the same premises as combat Units.
- When entering EZoCs orders are subject to being intercepted (see 6.6).
- EZoCs affect supply trace.
- Retreating Units take one extra step loss for each EZoC hex retreated into after the first.
- Anytime a Unit enters an EZoC the enemy Unit may react (unless it is disordered or resting).
8. Stacking
The number of counters/units that may occupy a certain hex is known as stacking limit. Each game will have its own stacking limit. Stacking is enforced at the end of each stack's movement. The player can arrange the Units in his stacks any way he likes. Game markers never affect stacking.
Regardless of game specific rules any number of individuals may stack in a hex, as well as one HQ.
It is perfectly ok to use the "division images" on the Army Structure Table as holding boxes for each division and just let the Staff be on the map.
Player's may only examine a stack belonging to the other players if he has a cavalry unit next to the stack. Looking under status markers and orders is always allowed, though.
See the road movement rules (10.4) for further stacking rules.
9. Unit Status
Units can be in one of four statuses. Units that are neither Resting, Spent or Disordered are known as being in Good Order and can for all purposes function normally. Note that being out of command or supply is not considered to be a status.
Units in different statuses can co-exist in one hex.
9.1 Resting Units
Resting Units are busy recovering and reorganizing themselves. Units are marked as resting during the player's Recovery Phase and the marker is removed during the player's next Recovery Phase. A resting Unit may not move or attack. Should it be attacked it ceases being Resting and is disordered before combat begins. Resting Units have no ZoC.
9.2 Spent Units
Spent Units have reacted to enemy movement. Spent markers are removed at the end of the player's Recovery Phase (Roll as for disordered units at night.). A spent Unit may not move or attack. Should a Spent unit or stack be attacked it remains Spent and suffers one extra hit during the combat regardless of the outcome. Spent Units have ZoC.
9.3 Disordered Units
Disordered Units have suffered damage and are in disarray. Units can recover from disorder during a player's Recovery Phase if the player can roll equal or less than either the best Quality Rating or Leadership Rating in the stack using one die. Add one to the roll if in an enemy ZoC. A disordered stack may only move one hex during the friendly tactical movement phase but need to expend an order or succeed using initiative to do so. If it attacks or is attacked it fights with halved strength and its Quality Rating reduced by one.
Disordered Units have no ZoC. Road movement is impossible through a disordered Unit.
If an already disordered Unit suffers another disorder result it remains just disordered.
10. Movement
During his movement phases, the phasing player can use orders and initiative to move as many or as few stacks of Units as he wants. He can move each moving Unit as far as he wants within the limits of each Unit's movement points. Once a unit or stack of unts has started moving it must finish its move before any other stack or unit can start moving. (Exception: 10.7 Entering Combat.)
There are two movement classes in this system: foot and cart. Foot includes HQs, staffs, infantry and cavalry Units; Cart all trains, and artillery Units. The Terrain Effects Chart shows which terrain that affect what types in what way.
A stack or Unit marked as Disordered may only move in the Friendly Tactical Movement Phase and must expend an order to do so. Resting and Spent Units may not move at all.
10.1 How to Move Units
For a Unit or a stack to move it must be given an order or act under initiative. Once under orders or initiative the Units in a stack may be moved in different directions. All movement must follow a contiguous path through the hex grid. The player moves his Units individually or as stacks and pays movement points (MPs) to enter new hexes. The cost to cross a hexside and enter a hex is shown in the Terrain Effects Table.
Units must have the requisite MPs to enter a hex, but a Unit under orders can always move one hex, regardless of the movement point cost involved. Still, such movement cannot be through impassable hexsides or into terrain the Unit may not enter.
Unless specifically allowed in a given game, Units cannot conduct any sort of off-map movement.
10.2 Movement Rates
All Units move at fixed movement rates. A Unit cannot save unused movement points or transfer them to another Unit.
10.3 Leaving ZoC
Units pay +1 movement point to leave an EZoC. This includes when moving into combat.
10.4 Road Movement
A Unit following a road to enter a given hex pay the road movement cost and ignore the MP costs of the hex entered or hexside crossed. Only one Unit using road movement may end its move in any given hex, but a unit that has previously used road movement may pay normal "off road" MP costs to enter a hex of unit that has moved by road. Units may not use road movement to enter a hex of a Unit that have used road movement, or hexes with disordered Units in them.
Example - Road Column: Two units are lined up on a good road. Both have been given orders to move. Knox moves first, spending half a movement point to enter the wooded hex, using the road. Then Paget moves down the road, paying one half movement point to enter the first hex. To enter the wooded hex with Knox, Paget canot use the road. Hence Paget has to pay the two movement point cost of entering a wooded hex. (The printed diagram marks the road costs as 1/2 and the wooded hex as +2.)
10.5 Fords and Bridges
The system makes no difference between fords and bridges. A unit crossing a major or minor river at a ford or bridge may take advantage of the ford or bridge regardless if using the road in the hex entered or not. A stack of units crossing a major or minor river at a ford or bridge may take advantage of the bridge or ford but must must pay the full regular cost for entering the hex on the other side of the river.
10.6 Forced Marching
Before a player starts moving a stack he may declare that the stack or part of it will make a "forced march." For each Forced March, roll one dice and add the marching Unit's Quality Rating. For each point rolles above five the Unit gains ½ movement point. Do not round this roll as half points may be used if the terrain (roads) permits it. If the force marcher is a cavalry only Unit or stack add two to the die roll.
An entire formation may force march as one Unit using the highest Quality Rating of the formation. In that case all Units of the formation (including its staff) each gain the extra movement points. This means that a road moving command strung out along a road only need to roll once for forced marching. No unit may move faster than the unit providing the Quality Rating, though.
Example - Forced Marches: Massena's division is rushing towards Castiligione. The best Unit in the division is the 14th with a Quality Rating of four. Rolling one dice the player rolls a five for a total of nine, four points higher than five. Two full MPs are added to the movement rates of all Massena's Units.
10.7 Entering Combat
Units cannot enter enemy occupied hexes except to fight. Entering the enemy stack's hex costs nothing extra but may not be done using road movement. If the defending Unit has a ZoC the attacker must pay to leave the ZoC before entering the hex of the Unit. Resolve the combat as soon as the stack has entered the hex.
It is legal for a Unit to halt just before entering combat and wait for other Units of the same Command to "catch up" - move into the unit's hex so they can all attack together. The newly created stack will have the movement points of the unit with the fewest remaining MPs.
10.8 Heroic Crossing
Individuals may spend their entire movement allowance to cross an otherwise impassable hexside, such as a major river.
11. Destination Markers
Destination markers represent the fact that most people can remember a destination and head for it for several days. One order can in effect last for days as long as nothing unexpected happens.
Destination markers can only be used by Commands able to do so according to the Army Structure Table.
At the end of the command phase a commands' Destination Marker may be placed anywhere on the map provided two orders are expended and the command is not out of supply. The orders expended may be located either at the staff of the Command involved or its Superior Commander.
11.1 Placing Destination Markers
Destination markers are always placed with the side showing a national flag and "Destination" facing up on the table, hiding who is supposed to go to the marker. When the marker is placed the player may also place a Dummy Destination Marker anywhere else on the map in order to hide his true intentions. Note that Destination Markers may be placed in what might be considered "enemy territory".
11.2 Marching
A command marching towards Destination Markers is known as being on march. A command on the march is not required to expend any further orders to move as long as it continues to march towards its Destination marker.
Starting the following movement phase and until the entire command reaches the Destination Marker the command must move towards the destination marker during both day-turn movement phases. The command must take the shortest route available via road (in hexes) without using forced marches. A command on march may not attack, but might use tactical "Hurry Up Boys" moves.
11.3 Removing Destination Markers
Destination Markers, real or otherwise, are never removed by the actions of enemy Units. A friendly Destination Marker can only be removed by the command expending an order in the Command Phase, or the instant the first unit of the command reaches the Destination Marker. When this happens one Dummy Destination Marker must be removed as well.
A command on march that reacts (by initiative or by ceasing moving) to enemy attacks or troops blocking its way instantly has its Destination Marker removed from the map. When this happens one Dummy Destination Marker must be removed as well. The same holds true should the command become marked out of supply.
Example - Destinations: Marmont expends two orders to get Clausel going. One order used was stacked with Marmont himself and the other with Clausel. He places Clausel's destination marker at Los Arapiles and, to keep the British player in the dark, he places a dummy destination marker at Arapile Chico.
12. Initiative
Once all Movement by orders are done, Commands and Units wishing to move without orders may try to do so by using initiative. Units and Commands that moved using orders may not move again in the same turn using initiative.
12.1 Initiative Ratings
All Units capable of using Initiative have an Initiative Rating printed in an orange circle on the counter. To successfully act on initiative the player must roll equal or higher than the number on the counter using two dice. If he succeeds the commander or Unit may then move as if he had used an order to move.
12.2 Initiative Failure
Should an initiative-roll result in "doubles" AND a failed roll one order currently on the map (players' choice) must be returned to the order-pool. If there are no orders on the map the order pool is reduced by one order.
Furthermore, should a player roll "2" on an initiative roll the commander or Unit has misunderstood things and is assumed to have come up with some idea of his own. Instead of making a normal move, the opposing player may move the commander and his Units during the phase. The opposing player may move the Units as he sees fit, but may not split them up or move them adjacent to one of his own Units.
Example - Initiative Failure: While rolling for initiative for Konstantin, the player rolls double-ones. Konstantin has blown it. One order is removed from the map and returned to the order pool. The other player then gleefully decides to march Konstantin's beloved Guards back the way it just came instead of heading for the battle Konstantin's player was trying to reach.
Designer's note: Why no straggling? Because in at this scale you don't lose battalions worth of people. Instead you lose speed while you wait for people to catch up. The problem is either somehow below the scale or above it. I'm considering adding a "fail" result on the forced march scale, but that will have to wait. For now the system shows that good troops are faster. The regular slog will be slightly less than 20.000 meters per day, a fair pace indeed. Most of the time it will be slower thanks to traffic jams or the lack of orders.
13. Reaction
During the movement phases, the instant a moving Phasing Unit enters the EZoC of a Good Order Non-Phasing enemy stack the enemy stack may react by expending an order or sucessfull rolling for initiative. A reacting stack may instantly move its full normal movement (including forced marches and attacks) and is then marked as Spent. During a phase a given stack may only try to react once to the movement of any one stack. If it fails an initiative roll it may ty again if another enemy stack moves near it. A Spent stack may not react again.
Reacting or retreating Units does not trigger reactions.
Example - Reaction: Another French unit move up next to Korff's cavalry (that has a ZoC) and Korff's player decide it is time to leave before Korff is surrounded. He tells the French player he wishes to react and expend an order Korff has saved for special occations. After Korffs troopers have moved clear out of the way and been marked as spent, the French units resume moving.
13.1 Cavalry Reaction
Regardless of phase, a stack made up of only Good Order cavalry units may react the instant it is attacked without using orders or initiative. The reaction in this case may only be to move one hex away from the attacker and the cavalry is not marked as Spent. All other reaction rules still apply. Should a cavalry unit retreat away from the same stack a third time during the stacks move, the cavalry unit is marked as Spent.
14. Tactical Movement
After regular movement and initiative movement first the non-phasing and then the phasing player may make tactical moves. Units or stacks making tactical moves may move one hex, into any kind of terrain it may enter during regular movement. If a stack enters a hex with enemy Units in a combat will immediately ensue (The attack will count as being Hasty.). Tactical movement might take place at night.
Enemy Tactical Phase. All Good Order Non-Phasing Player Units that are part of a command that has at least one Unit adjacent to either an enemy Unit or the Non-Phasing Supreme Commander (including the Commander himself) may move one hex.
Friendly Tactical Phase. All Good Order Phasing Player Units that are part of a command that has at least one Unit adjacent to either an enemy Unit or the Phasing Supreme Commander (including the Commander himself) may move one hex.
14.1 Who may not make tactical moves?
None of the following may make tactical moves.
- Stationary HQ units.
- Resting units.
- Spent units.
- Marching units (Exception, see below).
- Out of Command units unless they are adjacent to the Phasing Supreme Commander.
- Disordered units. Note that if one order is spent a stack of disordered phasing Units may also move one hex during the Friendly Tactical Phase, including into combat.
14.2 "Hurry Up Boys"
Instead of triggering any other tactical moves a Supreme commander may make all Units moving along a road move one hex provided he is stacked with one of them and they all remain together in one long chain. This might include commands marching towards Destination Markers.
14.3 Impassable Hexsides
Units separated by impassable hexsides do not count as adjacent for the purpose of triggering tactical moves, unless the impassable hexside is crossed by a road, bridge or ford.
15. Combat
Combat in this system is conducted during movement. One or more units enter the hex they wish to attack and conduct combat. Attacks may be any time during movement, but a stack must end its movement (and its attacks) before the next stack can move or attack. A hex or stack of enemy units may be attacked any number of times during a turn. Units can move through other friendly units to attack.
An attacker must pay normal movement costs to enter the hex he wishes to attack. At no extra movement point cost, a stack can conduct a Hasty Attack. At a two movement point cost, a stack can conduct a Deliberate Attack.
A unit or stack can always enter and attack a hex it starts its move next to, regardless of the movement point cost involved. (This of course provided that the attacker is allowed to enter the hex using regular movement.)
A note on odds: You can get fairly good results attacking at 3-2 odds and that might strike people as odd. Wargames often rely on the 20th-century tactical notion that "four to one is a good ratio" but there were no battles fought at such odds in the Napoleonic era. Because, if you bring 8000 men to fight 2000 you will push the other guy back by sheer numbers. The smaller force can simply be outflanked in ways it can't prevent and will be forced to fall back to preserve itself. The best way for a good, small force to avoid this problem was often to counterattack the larger, lower quality force.
15.1 Combat Procedure
Once a stack has entered a hex first the attacking and then the defending player designates a leading Unit to provide a Quality Rating for the combat. The attacker then determines the combat's odds and locates the correct odds column on the Combat Results Table. Then he rolls one die and modifies the roll according to the tactical situation. The players then read the result from the Combat Result Table and apply it.
15.2 Determine Odds
To determine the combat odds, compare the total modified attacking strength with the total modified defending strength. Neither Attacker nor Defender can withhold strength or Units from the combat. Divide both numbers by the smaller number of the two. Apply the rounding rule to the results and express the two numbers as a ratio Attacker to Defender. (For instance: the attacker's strength is 9 and the defender's strength is 4. The odds round to 2 to 1.)
A Unit defending in or attacking into a certain type of terrain might be "x2," or such meaning in that case that Unit's strength is multiplied by two. Normally only the terrain of the defender's hex and the hexside between the attacker and the defender affects combat. If both a hexside and a hex affect combat count both of them for strength calculation. If two terrain effects are in conflicting the defender choses which one to use.
Odds columns are limited to those printed on the Combat Results Table. Resolve attacks at odds worse than the 1-3 column on that column. Resolve attacks at odds better than the 4-1 column on that column.
- If the combat takes place in close terrain shift the odds column one column to the left.
- If the combat takes place in fortified terrain shift the odds column two column to the left.
- If the attack is Deliberate, shift the odds column one column to the right.
The shifts are cumulative.
15.3 Modifiers to the Die Roll
Quality. Compare the Quality Rating of each side's leading Unit and apply that difference as a modifier to the dice roll.
Leadership. Compare the Leadership Rating of each side's acting commander and apply that difference as a modifier to the dice roll. Units must be stacked with either their own Staff or the army's Supreme Commander to count the Leadership Rating.
Skirmishers. Compare the number of skirmisher icons on each side. The side with the most icons add or subtracts one in his favour from the die roll.
15.4 Combat Results
The Combat Results Table gives results that affect the attacker (left of slash), the defender (right of slash), or both. The results show the number of hits suffered either as disorder, steps to lose or hexes to be retreated. Execute the results immediately, starting with the attacker's result.
- A stack may only suffer disorder once (Including the disorder caused by retreating more than one hex.).
- An attacker may only take his first hit as a retreat. All other hits must be taken as steps lost, unless one hit is converted to a disorder result. Should the attacker chose to retreat his stack is returned to the hex he came from and may not continue moving. If the attacker retreats the defender suffers one less hit.
- The defender may take his hits as any mix of steps and retreats and one disorder. If the defender vacates the hex the attacker may keep on moving if it has MP's left, once the retreating is done.
- If both sides wish to remain in a hex another round of combat is fought.
15.5 Step Losses
A hit may be taken as a step lost (by "flipping") one of the Units involved in the combat. The first step lost must always be taken from the leading Unit. The same Unit my not be "stepped twice" in a row but may take "every other hit". Units with only one step are obviously destroyed after taking one step loss.
Step losses are always suffered before any retreats.
15.6 Retreats
Hits may be taken as hexes to retreat. The first hex retreated into must be either (for an attacker) the hex which the attacker entered the hex from, or (for the defender) one of the three hexes opposite from where the attacker entered the hex. Further retreats must be carried out according to the following priorities:
- Away from the attacker and any other enemy stacks.
- Along roads.
- Towards the stack's trains or supply source.
"A Unit may not retreat more hexes than its normal movement rate (that is: infantry can retreat a maximum of three hexes). Excess hits must be taken as step losses. Slower parts of stacks may be killed off to allow other units to get away as long as rule 15.5 is observed."
- A retreating stack that enters a closed or fortified hex without following a road suffers one extra step loss for each such hex entered.
- If your retreat crosses an unbridged minor river hexside all cart class units in the retreating stack must be destroyed.
- If your retreat runs through more than one EZoC you will take one extra step loss for each EZCO hex entered after the first.
- Stacks that retreats two or more hexes are disordered if they were not already disordered brefore the retreat.
Stacks may not split up during retreats. If all paths of retreat are blocked, a stack may not retreat.
Retreats may pass through friendly units without any ill effects.
Note: Yes, these rules allow players to choose long retreats before certain destruction. Liberal as this might seem it shows that formations facing overwhelming odds usually have the sense to pull out before they are crushed. Not that there are any wars won by constantly pulling out and your units will get disordered, but yes, the option is there.
15.7 Crossing Rivers And Mountains
Deliberate attacks crossing a Minor River (bridged or not) only suffer the terrain effect of the Minor River during the first round of attack. On subsequent combat rounds of a deliberate attack the attacking units are assumed to have crossed the river and ignore its effects.
Deliberate attacks crossing a Bridged Major River only suffer the terrain effect of the Major River during the first two rounds of attack. On the third and subsequent combat rounds of a deliberate attack the attacking units are assumed to have crossed the river and ignore its effects.
Mountain hexsides can not normally be crossed, but if crossed by a road they can be attacked across as if they were a major river.
15.8 Combat Special Cases
- Units with zero strength value can attack together with other non-zero strength Units. Such Units can help by adding leadership or icon effects, (but not Quality Rating) and they can take step losses.
- Any orders left alone because all Units in their hex were eliminated are returned to the order pool.
Combat Results Examples
1/1 can for instance be resolved as:
- The attacker retreats one hex. The defender suffers no loss.
- The attacker suffers one step loss. The defender retreats.
- The attacker is disordered. The defender suffers one step loss. A new round must be fought.
1/2 can for instance be resolved as:
- The attacker retreats one hex. The defender is disorderd.
- The attacker is disorderd. The defender retreats two hexes and is disordered.
- The attacker is disorderd. The defender is disordered and retreats one hex.
- The attacker retreats one hex. The defender retreats one hex.
- The attacker suffers one step loss. The defender suffers one step loss and is disordered. A new round must be fought.
3/0 can for instance be resolved as:
- The attacker suffers one step loss, is disordered and retreats one hex. The defender suffers no loss.
- The attacker suffers three step losses. The defender suffers no loss. A new round must be fought.
2/2 can for instance be resolved as:
- The attacker suffers two step losses. The defender suffers two step losses. A new round must be fought.
- The attacker retreats one hex and suffers one step loss. The defender suffers a step loss.
0/4 can for instance be resolved as:
- The attacker suffers no loss. The defender suffers two step losses, is disordered and retreats one hex.
- The attacker suffers no loss. The defender sufffers one step loss and retreats three hexes. He is then disordered, but the player wanted it that way.
Combat Example: Raging Marines
Due to a sizzling six on the force march roll the Guard Marines and their cavalry friends have five and a half MP to spend in teaching Felix Jones' Division a lesson and opening the Madrid Road as well.
First Attack. The Marines and cavalry spend two MP (one MP for the hex, one MP for leaving the Santiago Cavalry's ZOC) to enter the clear hex of the Guadix Militia and the Santiago Cavalry. The Spanish player can not react to leave the hex becase the stack need an order to do so. (Had the cavalry been alone it could have had auto-reacted out of harm's way.) Battle is joined.
- The French have a strength of 1+(2x2) = 5 (cavlary doubled in clear terrain.)
- The Spanish have a strength of 1+1 = 2.
- 5 to 2 rounds up to 3-1 odds. The terrain is open and therefore there is no shift to the odds column.
- The French gets a +3 modifier for the superior quality of the guardsmen (Guardsmen 4 vs Santiago 1). The net modifer is +3.
- The French player rolls a two and adds three giving a total of five reading - / 3 on the Combat Results Table. The Spanish player elects to takes his three hits by becoming disordered (one hit) and retreats two hexes (two hits). The retreat takes both the units into the hill/rough hex across the Escobar stream. Jones' stack is not affected by the retreat through his hex, but as there are disordered units in the hill/rough hex the road there is not usable for road movement.
Enemy (Spanish) Tactical Phase. The Spanish player contemplates his chances of striking back across the stream. As much as he wants the French dead, he doesn't feel too comfortable about the 1-2 attack (3 halved over minor river to 1,5 vs 3) at +/-0. On a roll of six he would cause a hit on the French. And be forced to take at least one hit himself. If Spanish player had been able to order the Guadix and the cavalry to join in the attack would hit at 2 vs 3 giving the Spanish player is a fifty-fifty chance of hurting the French.
The Spanish player decides to let the French come to him. He is on the Frenchman's road, after all.
Second Attack. The Marines and the Horsemen spend three more MP to enter Jones' hill hex (one MP for the hex and two for a deliberate attack - these guys are playing it safe and there is no way they can get into the hex of the disordered units for a third attack, anyway). The stack has now spent five out of five and a half MP. Jones cannot react as he has no orders to spend and for that matter he wants this fight and will not even try using his initiative. Again, battle is joined.
- The French have a strength of (1/2)+(1(/6) = 0,883 (Both halved for the river, the cavalry further reduced by rough.)
- The Spanish have a strength of 3+(1/2)+(1/6) = 3,66 (The disordered units are halved, the cavalry further reduced by rough.)
- At 1-4 odds, shifted to 1-5 for rough but still resolved on 1-3 due to the lack of columns in the table, the French player decides not to attack. The road is still closed.
Note: the example's second-attack figures are printed as shown above; the French strength is printed as (1/2)+(1(/6), and the example ends with the French player declining to attack.
16. Reinforcements
Reinforcements are Units that enter after play begins. They are placed on or next to the map at the beginning of the movement phase according to the Table of Arrivals and Events. Reinforcements always enter supplied.
Reinforcements entering the map are under orders and are assumed to have already spent enough orders for all Units to enter the map, and may move and attack as in any regular move. Reinforcements that enter from a road hex may use road movement. If they do so imagine the road extending off the map, if you need to handle any resulting queues. If enemy Units block the reinforcement's entry hexes, the reinforcements arrive in any hex within 5 hexes along the map edge.
Reinforcements listed as appearing in a hex just materialize there. They have no orders to do anything. Reinforcements are lost if the hex were the reinforcement was supposed to appear is occupied by an enemy unit.
When the Turn Track tells a player to add or remove a certain number of Orders from the Order Pool, this is done before rolling for new orders. If there is no order in the Order Pool when an order is called for to be removed, remove one order of the player's choice from the map.
17. Resting and Rebuilding
Units may recover from step losses or from being eliminated by using Recovery Points. Recovery Points are either received on certain turns or by random events.
17.1 Resting Procedure
In order to recover a step loss a unit must start the Recovery Phase not disordered and in command (or next to it's proper train unit) and it may not be out of supply or in an EZoC.
During your Recovery Phase place a Rest Marker on the stack that is to rest. The Recovery Point is spent at this point, though the Unit does not recover immediately. At the start of your next Recovery Phase remove the Rest Marker and flip the Unit to its full strength side.
17.2 Rebuilding Procedure
Destroyed Units may be rebuilt by using Recovery Points. One Recovery Points rebuilds one eliminated Unit to its reduced side (if any). Place the Unit you wish to rebuild on the next turn of the turn track and place a rest marker on either the Staff of the Unit's command or it's command's train.
The Staff or train must start the Recovery Phase not being out of supply, disordered, or in EZoC. A Staff or Train may rebuild several units at the same time. The train or Staff may not move while rebuilding.
17.3 Rest and Combat
Should any unit, staff or tran with a rest marker be attacked it is disordered before combat begins. The Recovery Point is lost and the Unit will not recover its lost step.
Tactical Hints
Keep Units Under Orders. Every unit that you intentionally move out of command will usually cost at least one order to get back in command. Never forget that. Ever.
Use Destination Markers. As soon as you know a formation will plow on in the same direction for more than two turns, place a destination marker. That will save you at least one precious order.
Keep Up The Daily Routine. As a commander you must start the day at HQ. Then you can go touring the battlefield. Make sure you place yourself to get those extra moves out of your boys. Then return to the HQ during the night turn. You don't want to miss the morning meeting.
Force March. Force march every time and with everyone that can do it. It is free and it can't backfire. It will give an edge to your good units. They will move faster, be able to attack deliberately and be able to push on after combat.
Move After Combat. Combat never ends movement unless you retreat. Your stack can enter the hex it started next to and then move on. Or perhaps enter a new hex to fight another battle, even with the units you just forced to retreat.
React - a Lot. Reaction movement is a good way to interrupt enemy movement. Either by simply walking away from an intended target hex or by striking back. There is nothing stopping you from reacting by attacking the unit triggering the reaction. And you will surprise the bejeezus out of your opponent. Just be sure not to get caught Spent in the middle of the enemy army.
Don't Panic... ...just because you are out of supply. It takes a while before it hurts. And if he is behind you, you must be behind the guys behind you!
18. Special Units
18.1 HQ Units
An HQ can never attack on its own, but may move along with an attacking stack.
An HQ defending alone has a Strength of one and a Quality Rating of one.
An HQ can only take one hit. A defending HQ that retreats is instantly flipped to its moving side.
HQ's have one stationary and one moving side. While stationary, a HQ need one order to start moving. It is flipped to its Moving side and can move about freely until the player decides to park it somewhere by flipping it over to its stationary side at the end of any Friendly Movement or Tactical Phase.
A stationary HQ may not make Tactical Moves.
A moving or spent HQ never gives any bonuses when rolling for new orders.
18.2 Staff Units
A Staff can never attack on its own, but may move along with an attacking stack.
While defending on its own a staff have a Strength of one and a Quality Rating of one. A staff does not add its strength when stacked with other units. Reduced combat staffs still have strength of one.
The icons on combat staffs can support - lend their icons - to any stack of the staff's command, provided that that stack is in command. Any given icon may only be used once per phase. Should the supported stack take a hit the staff can suffer the hit even though it is not in the hex.
Icons supporting other stacks than the stack the Staff is in do not get a ZoC because of a supporting icon.
Example - Staff: A command has a Staff with one artillery and one skirmisher icon and has its Units deployed in two hexes. During an enemy movement phase one of the hexes is attacked and the controlling player decides to use the skirmisher icon to aid his defense. The artillery icon is saved for now should more attacks materialize during the turn.
There is no horse artillery in the system, as these guns will be working as icons with cavalry Units. Also I am not sure how to handle 100% heavy shock cavalry formations such as the French Heavy Cavalry Divisions. Those guys did not dart around as scouts at any rate. We will see when they show up.
18.3 Train Units
Trains can never attack on their own, but may move along with an attacking stack.
A train defending alone uses its printed strength and quality rating.
Trains need orders every time they move. They may never force march, but may carry out tactical moves.
Destroyed Combat Units may be rebuilt at the train of its parent command, provided that the train is in supply.
A command that has lost its train can never be in supply.
Train Units represent a formation's supply trains. They should be thought of as showing the general direction of a formation's logistical trail.
18.4 Artillery Units
Artillery units function for all purposes as normal combat units except that artillery units not stacked with any other kind of Combat Unit may not attack. During combat the combat strength of artillery units is added to the combat strength of the stack as were it any other combat unit.
During combat both Artillery Icons and Artillery Units may also fire to try to cause additional hits on the enemy. Roll for these hits after rolling for the combat result and add the hits caused by the guns to each side's total hits suffered. Check on the artillery table to see what you need to roll to hit with each firer.
Artillery may not fire while carrying out a Hasty Attack.
Before firing the firing player may add up the strength of several firers to increase his chances of a hit. He may never split up the strength of unit to get more rolls.
Artillery Units have ZoC in Clear terrain. Artillery ZoC's extend across both minor and major rivers, even though major rivers are otherwise considered impassable.
Example - Gunnery: A stack with a one-point artillery unit in it makes a Deliberate Attack on a stack that has one two-point artillery unit and two artillery icons. As the defender is in closed terrain the attacker needs to roll a six to hit. A roll of four is a miss. The defender then fires back. As the attack came from open terrain the artillery hits on four or more and each icon on six or more. The defender elects to add the two icons together in one fire. A roll of two fives means two hits and a lot of hurt for the attacker.
19. Supply
On turns marked with a barrel (full of grain or brandy) on the turn track a supply check must be made. Mark every stack that cannot trace a line of supply with an out of supply marker. Units that can trace supply are referred to as being in supply.
If a stack marked out of supply is still out of supply the next supply check, one Unit per command in the stack must be reduced, i.e. lose one step. Independent Units in a stack may be reduced to satisfy these requirements. This reduction will be repeated the next supply check unless the Unit is in supply by then.
A marching Command that is marked out of supply instantly loses its Destination Marker (one dummy destination marker is removed too).
Each supply check that a HQ finds itself out of supply, one Order is permanently removed from its order pool. If there is no order in the Order Pool, remove one order of the player's choice from the map.
A line of supply is traced from a Unit adjacent to a road or adjacent to a staff adjacent to a road and along that uninterrupted road to the army's supply source. The road may be of any length. A road cannot be used for supply trace if it runs through an enemy unit or an enemy ZoC (unless voided by a friendly units in the hex).
A command that has lost its train can never be in supply.
Designer's note: The worst problem for units within a four or five-day operation will be to feed the horses. Unlike men horses cannot be told to hang on another day. And feeding horses calls for a lot of sideways movement to graze, something that will affect speed. Also ammunition will not be that much of an issue. One cart can re-supply a battalion.
20. Night
Night turns carry several penalties.
- No orders are placed.
- Units making any movement except tactical moves become spent.
- Spent units must roll as if they were disordered in order to remove the Spent Marker.
- Cavalry and Artillery have no ZoC.
- Artillery may not fire except when defending in fortified terrain or firing at an attacker crossing a major river at a bridge or ford.
- Night combat is always resolved on the Night Column of the Combat Results Table. (And yes, that table is a stupid and dangerous lottery. Deal with it.)
- Retreats at night must follow a continous road starting in the hex in which the battle was fought. For each hex entered that does not satify this requirement, the retreating stack sufferes one extra step loss.
- Cavalry Units may not attack.
21. Victory
Each game specifies who needs to do what in order to win. When computing victory requirements a division is destroyed when only one or none of its Units remain on the board. It is still considered destroyed should it later be rebuilt and it does not count as a new destruction should it be destroyed again. Independent units currently attached to a division do not matter in these calculations.
In order to capture a hex the player needs to have been the last player who passed through it with a Combat Unit.
Omitted from the source: the designer's essays on which historical periods and army sizes the system suits (end of page 15), and the closing index (page 16). They contain no rules.
Series Tables: Napoleonic Operations 2.2
These are the Series Tables (sheet 2.2 of the same Gottick kit, "Napop_table23.pdf"), which the Series Rulebook says are needed for play. Their contents are transcribed below as tables and lists.
Game Turn Sequence
First Player Segment
- Command Phase: Roll for random events. Generate new orders (Not at night). Place / remove destination markers.
- Movement Phase*: Place reinforcements. Expend orders to move and attack. Enemy units may react and become spent.
- Initiative Movement Phase*: Roll for initiative to move and attack. Enemy units may react and become spent.
- Enemy Tactical Phase*
- Friendly Tactical Phase*
- Recovery Phase: Check for supply (on certain turns). Resting units recover strength. Mark new units for rest. Roll for disordered units to recover. Remove spent markers (Roll as for disordered units at night.)
Second Player Segment: Repeat the above with the players switching roles. Then move the turn marker.
* = Combat may take place.
Initiative
Roll equal or higher than commander's or unit's Initiative Rating using two dice.
- A failed roll of doubles removes one order from the map.
- A roll of two allows the other player to move the rolling stack.
Order Interception
- A moving unit may try to intercept orders each time it enters an hex with an order in it.
- A moving order must roll for each EZoC entered.
If the enemy force has cavalry (even just an icon) in it the order will be intercepted on a roll of 3-6, if not on a roll of 5-6.
Forced March
By unit or formation; roll one dice and add the (best) marching unit's quality rating. For each point scored above five the unit gains ½ MP (no rounding down). Cavalry only units adds two to this die roll.
Movement Rates
| Unit type | Movement | Class |
|---|---|---|
| Infantry & Staffs | 3 MP | foot |
| Cavalry & HQs | 4 MP | foot |
| Artillery & Trains | 2 MP | cart |
| Individuals | 8 MP | foot |
Unit Status
Resting
- Mark during a player's Recovery Phase and then removed during the player's next Recovery Phase.
- It may not move or attack.
- If attacked it ceases being resting and is disordered before combat begins.
- It has no ZOC.
Disordered
- Remove during the Recovery Phase if the player can roll equal or less than either the best quality rating or leadership rating in the stack. Add one to the roll if in an enemy ZOC.
- May only move during the Friendly Tactical Movement Phase and need to expend an order to do so.
- Fights with halved strength and its quality rating reduced by one.
- No road movement through.
- Has no ZoC.
- An already disordered unit that suffers another disorder result is just a tad bit more disordered.
Spent
- Remove at the end of the player's Recovery Phase.
- May not move or attack.
- If attacked it remains spent and suffers one extra hit during the combat.
- It has ZOC.
Terrain Effects Chart
Movement cost is shown as Foot / Cart.
| Terrain Type | Foot | Cart | ZOC (b) | Class | Combat Effects |
|---|---|---|---|---|---|
| Clear | 1 | 1 | CAV+ART | Open | ATTACKING CAV x2 |
| Woods (w/wo Hill) | 2 | 2 | SKR | Closed | CAV /2 |
| Hills | 1 | 2 | CAV | Open | - |
| Rough (w/wo Wood) | 2 | NO | SKR | Closed | CAV /3 |
Leaving a ZoC costs one extra movement point. A deliberate attack costs two extra movement points.
Table notes
- (a) Only one unit using road movement may end its move in any given hex. Units using road movement may enter hexes of units that have used road movement. Disordered units in a hex prevents road movement.
- (b) Artillery Icons alone does not create a ZOC.
- (c) Artillery has ZoC across major rivers into Clear terrain.
- (d) Count class of defender's hex. Defender choses which combat effect to apply, either the river's or his hex.
- (e) When making a deliberate attack, minor river modifiers apply only to the 1st round, bridged major river modifier applies only to the 1st and 2nd rounds.
- (f) Treat as bridged major river when crossed by a road.
Combat Results Table
Rows are the modified die roll (after the modifiers listed below); columns are the odds, with the Night column used for night combat. Each entry is the number of hits on ATTACKER / DEFENDER.
| Roll | 1-3 | 1-2 | 2-3 | 1-1 | 3-2 | 2-1 | 3-1 | 4-1 | Night |
|---|---|---|---|---|---|---|---|---|---|
| -2 | 5/- | 4/- | 3/- | 3/- | 2/- | 2/- | 2/- | 1/- | 3/- |
| -1 | 4/- | 3/- | 2/- | 2/- | 1/- | 1/- | 1/- | 1/1 | -/1 |
| 0 | 3/- |
- Hits can either be taken disorder (once), steps lost or hexes retreated. Add any hits from artillery before resolving hits.
- Resolve the hits on the attacker first. The attacker may only retreat one hex. The rest of the hits must be taken as disorder or step losses.
- If the attacker retreats the defender will suffer one hit less.
- Spent defenders suffer one extra hit.
Shifts
- In closed terrain shift one step to the left.
- In fortified terrain shift two steps to the left.
- Deliberate attack, shift one step to the right.
Modifiers
- Quality rating difference between the leading units.
- Leadership rating difference.
- Most skirmisher icons add or subtracts one from the die roll.
Artillery Table
Consult after rolling for combat results. Strengths may be added up. Roll the equal to or higher than the number found in the table to score a hit. The hits are added to the opponent's total losses.
| Firer | Open | Closed | Fortified |
|---|---|---|---|
| Icon | 6 | - | - |
| 1 SP | 5 | 6 | - |
| 2 SP | 4 | 5 | 6 |
| 3-4 SP | 3 | 4 | 5 |
| 5+ SP | 3 * | 3 | 4 |
* = a roll of six (after modifiers) inflict two hits.
To find the right column use the defender's terrain when firing on the defender and the terrain the attacker attacked from when firing on the attacker.
Add one to the roll if firing out of a fortified hex or against units crossing any kind of river.
If adding firers together two icons count as one artillery strength point.
Artillery may not fire while carrying out a hasty attack.
Retreat Priorities
- Away from the attacker and any other enemy stacks.
- Along roads.
- Towards the stack's trains or supply source.
Retreat Problems
- A unit may never retreat more hexes than its normal movement allowance.
- A retreating stack that retreats two or more hexes is disordered as a "bonus" if it were not already disordered before the retreat.
- A retreating stack that enters a closed or fortified hex without following a road suffers one extra step loss for each such hex entered.
- A retreating stack that crosses an unbridged minor river hexside destroys all cart moving units in the stack.
- A retreating stack moving through more than one EZoC hex will suffer one extra step loss for each EZoC hex entered after the first.
Stacks may not split up during retreats.
No Tactical Moves
None of the following units may make tactical moves:
- Stationary HQ units.
- Resting units.
- Spent units.
- Out of command units (Except when next to a supreme commander).
- Marching units (except when hurried.).
- A stack of disordered phasing units may also move one hex during the Friendly Tactical Phase as long as they spend one order or succeed using initiative.
Night Effects
- No orders are placed.
- Units making any movement except tactical moves become spent.
- Spent units must roll as if disordered to remove the Spent Marker.
- Cavalry and Artillery have no ZoC.
- Artillery may not fire except when defending in fortified terrain or firing at an attacker crossing a major river at a bridge or ford.
- Night combat is always resolved on the "night" column of the Combat Results table.
- Retreats at night must follow a continuous road starting in the hex in which the battle was fought. For each hex entered that does not satisfy this requirement, the retreating stack suffers one extra step loss.
- Cavalry units may not attack.