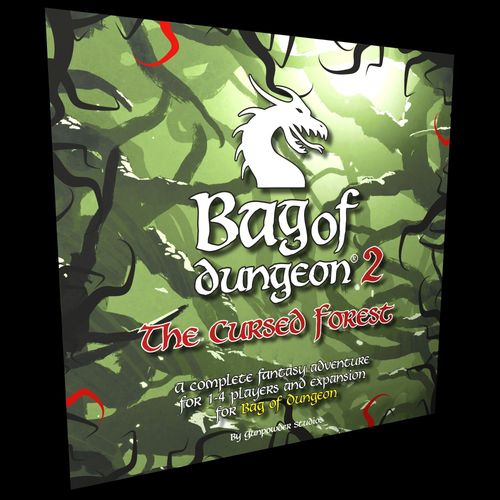
Bag of Dungeon 2: The Cursed Forest
Bag of Dungeon 2: The Cursed Forest Rulebook
Table of Contents
Table of Contents
- 1. Overview
- 2. Set-Up
- 3. Using Action Points
- 4. Building the Forest
- 5. Encountering Monsters
- 6. Combat (Melee)
- 7. Combat Steps
- 8. Ranged Attacks
- 9. Winning and Losing Fights
- 10. Tagging
- 11. Poisons and Cures
- 12. Inventory Management
- 13. Using Items and Spells
- 14. Special Tiles and Tokens
- 15. Endgame
- 16. Winning the Game
- 17. From Forest to Dungeon
- 18. Taking the Ring into the Forest
- 19. The Chronicles of the Ring
- 20. Solo Game
- 21. Combat Between Adventurers
- 22. One Rules Set to Rule Them All
- Game Contents
- Glossary of Special Items
- Quickplay Guide
1. Overview
In Bag of Dungeon 2: The Cursed Forest you play heroes on a legendary quest through a bewitched and deadly forest. To lift the curse and win the game, simply: survive the forest's murderous beasts and malevolent powers, find the four brood seeds, reunite them with the Maiden Tree and, finally, kill the all-powerful Morna Gûl. The Cursed Forest is easy to learn and play, but winning is no walk in the woods.
2. Set-Up
- Place the Start tile face up on your playing area. Place the Exit tile to one side.
- Shuffle the remaining forest tiles and place them face down in a single stack.
- Each player chooses a character card, an adventurer meeple and four cubes of the same colour. Place your meeple on the Start tile.
- Place a cube on the highest numbered Health space of your character card, one on the '3' space of your Lives track and one on your highest numbered AP space. The remaining cube is used to track monster health during combat.
The last person who walked in a forest goes first. Play moves clockwise.
3. Using Action Points
You have a number of action points (APs) available each turn, which you spend to draw and lay new forest tiles, move your adventurer, disarm traps, use items and cast spells.
AP costs. It costs one action point (1 AP) to move one space or reveal and lay a new forest tile. Some items also cost APs to use, as shown on the token. The Glossary of Special Items at the back of the rules provides more detail on items marked with an '*'.
You can spend APs in any combination. For example, you could draw and place a forest tile (1 AP), move to an adjacent tile (1 AP), draw and place another forest tile (1 AP), and cast a spell (3 APs), and so on until you have spent all your APs or you enter a fight.
Tracking APs. Each time you take an action, move the cube on your AP track one space towards 0. Your turn ends when you run out of APs or engage in combat. You can end your turn with APs remaining, but you cannot carry them over to your next turn.
Regaining APs. Your APs are reset to full at the end of your turn.
Combat uses no APs. APs are not required for combat (except when using an item during a fight that has an AP cost), so you can still fight even if you have no APs left. For example, you could spend all your APs to move to a tile with a monster on it, then fight the monster. Survival tip: Keep enough APs to escape!
4. Building the Forest
Forest tiles are drawn from the stack and laid face up, adjacent to your adventurer's current tile, placed so that an opening edge joins another, forming a logical path. No match? You are lost! Place the tile at the bottom of the stack and either spend more APs to try again, or end your turn.
Tiles must be laid so that an open edge joins another. Connect tiles to create paths through the forest. The F numbers on monster tiles are for later game expansions. Continuous forest edge.
Dungeonology
APs = action points; dmg = damage; rng = range; cbt = combat; LoS = line of sight; Boss = final enemy; spell symbol = spell; undead symbol = undead; poison symbol = poison.
That's all the rules you need for now! Enter the forest and check the rest of the rules as you play.
5. Encountering Monsters
When you lay a forest tile with a monster symbol, place a monster token on it to indicate an unrevealed monster. When an adventurer lands on the tile, replace the token with a monster drawn from the Monsters bag.
Monsters spawn once for each monster tile laid (do not draw another monster if you land there again).
Purple or green monsters? Each monster has a standard (green) and guardian (purple) side. The guardian monsters are tougher foes used when playing the original Bag of Dungeon and The Cursed Forest together (see 18. Taking the Ring into the Forest) and in the campaign game (see 19. Chronicles of the Ring).
6. Combat (Melee)
Melee (hand-to-hand) combat happens when opponents are on the same tile. APs are not required for melee combat unless you use an item that has an AP cost. You cannot use ranged weapons (e.g. a bow) against an opponent on the same tile. At the start of any combat round you may tag another adventurer to help you in the fight (see 10. Tagging), or you may escape if you have APs remaining (see 7.1 Escape).
7. Combat Steps
7.1 Escape. At the start of any combat round, you may spend 1 AP to escape to an adjacent tile, taking 1 direct damage (see below), or spend 2 APs to draw and escape to a new forest tile, taking 2 direct damage. Continue your turn.
7.2 Fight. Roll the number of combat dice shown for your character and add any modifier given. Next, add modifiers for weapons or items you are using in this combat round. Get another player to roll for the monster, rolling the dice shown on the monster token, adding any modifier.
7.3 Damage. The lower scoring opponent takes damage equal to the score difference. For example, you score 9 and the monster scores 5, so the monster takes 4 damage, losing 4 health.
Direct damage. If an attack states 'direct damage' deduct the damage direct from your health. Armour and shields do not protect you.
Critical hits (melee only). If all your dice rolls are identical (e.g. two 6s, three 4s) you have dealt a critical hit. Double your score, then add modifiers. Monsters cannot score critical hits.
7.4 Slug it out. Repeat the steps above until one of you is killed (its health reaches 0) or you escape. Your turn ends after a fight or an escape.
8. Ranged Attacks
You can use ranged items (e.g. a bow or spell) to attack a monster from a distance. When launching a ranged attack you must have line of sight (LoS), i.e. a straight line between you and the monster, and it must be in range of your weapon or spell (shown on the item). Count the range from the tile in front of you (see diagram below). Adventurers between you and the monster do not affect LoS.
Spend the APs required for the ranged attack and roll the number of dice shown for damage. Deduct the result from the monster's health. If you fire at an unrevealed monster (see 5. Encountering Monsters), draw a monster to replace the token, then deduct the result from the monster's health.
Monsters run at you! If a monster survives your ranged attack(s), it will immediately run to your tile, ignoring any special tile effects along the way (e.g. pit or web) and deal one dice of damage to any adventurer in its path. You must now fight the monster. If other adventurers are on your tile, choose one to automatically become your tag partner (see 10. Tagging).
9. Winning and Losing Fights
If you win a fight, place the defeated monster's token beside your character card and draw items from the Items bag. If the monster started with health 6-9, draw one item. If it started with health 10+, draw two. Place the items on an inventory space on your character card, face down if you want to hide them from other players (see 12. Inventory Management).
If you lose a fight, reduce your lives by one and place your inventory items (including brood seeds) on the tile where you died. Return to the Start tile, reset your health to full and remove any poison tokens. Your turn is over. If you lose your last life, your adventure is also over. Dropped items can be picked up by any adventurer on their turn if the tile is free of monsters. Monsters that are still alive at the end of a turn begin with full health when next attacked.
10. Tagging
You may spend 1 AP to call an adventurer to fight with you, as long as they have enough APs to reach your tile. If that player agrees (they don't have to decide until after you've spent the AP), they spend APs from their next turn to move to your tile (navigating any special tiles on the way). If they reach you, they become your tag partner and add one dice to your combat rolls for that fight. You may only have one tag partner per fight.
When you take damage, your tag partner takes half damage (rounded down). Adventurers cannot escape during a tagged fight, and tag partners cannot use APs, items or abilities. The active player draws any item(s) from defeating the monster, and can choose whether to keep them or reward their tag partner.
If the active player dies, the tag partner must complete the fight. They cannot escape or request tags, though they may now spend APs to use items and spells as they would in normal combat. After the fight, play continues with the player to the left of the original active player.
11. Poisons and Cures
If you land on a red-vine tile or you take damage from a spider, or from a monster showing a poison symbol, you are poisoned. Each time you get poisoned, place a poison token on one of your empty inventory spaces. You cannot place items there until the poison is removed.
You may reposition poison tokens on your inventory at any time. If all your inventory spaces are full when you become poisoned, you must replace an item with the poison token and drop the item.
You cannot be poisoned more than once per turn.
Poison can be cured by a healing item, at a bone yard (see 14. Special Tiles and Tokens) or by a character able to cure (e.g. Tamiel). If you are poisoned when you die, your poison tokens are removed.
12. Inventory Management
Each item occupies one inventory space. Items with a symbol are only active when placed in matching symbol spaces. Only armour and boots can be placed in those designated spaces. Any item can be carried in a hand or backpack space. Items can be freely switched between spaces, including during combat.
The inventory board shows four kinds of space (icons rendered as words):
- Items (including spells) – hand spaces (the hand and spell symbol).
- Boots – the boots space.
- Armour – the armour space.
- Two-handed weapon – occupies both hand spaces.
Also on the board: a backpack space, and the Monster Health track (Zero to 13), used to track the health of the monster you are fighting. The track is marked on the board with a single asterisk at 6 (*take one item on kill) and a double asterisk at 10 (**take two items on kill).
Example character card: Sirja the Hunter. Sirja is a skilled hunter, forester and scout. She is a friend of the elves and loyal to all who care for the land. Combat: 2 dice +2. Special 1: Disarm traps on 4-6 (1 dice). Special 2: Use crossbows one-handed (if two owned, can fire both for 5 APs). Special 3: Crossbow never breaks.
Trading, dropping and finding items (0 APs). Adventurers on the same tile may freely trade items, even when tagging. You may also drop unwanted items or pick up discarded items on your tile.
13. Using Items and Spells
Items (including spells) can be used at any time on your turn by spending the APs shown on the item. All spells and potions are single use, excluding Thalenor's Magi spells (see his character card).
14. Special Tiles and Tokens
Some of the forest tiles have unique characteristics, explained below.
Brood seeds. There are four brood seed forest tiles, each showing one of the precious brood seeds. You must release all four seeds in order to lift the curse and win the game (see 15. Endgame). The seeds are protected by the forest, tightly bound in its roots. You may walk past these tiles with no effect but if you choose to recover a seed, roll a dice. On a roll of 2-6 you acquire the seed. If you roll a 1, you must draw a monster and fight it.
When you release a brood seed, it is bound to you. It remains in your possession until you die, whereupon it will be bound to the next adventurer that picks it up. Each brood seed gives its bearer a special power:
- Athuil – cures poison; immunity to poison.
- Lauriel – use no APs to cast spells.
- Liantë – do not roll for spiders (protects all on tile).
- Marta – re-roll any one dice per turn.
Note: Brood seeds take up no inventory space.
Swamps (3 APs to use). When a swamp is revealed, place a swamp token on the tile. Adventurers may pass freely or spend 3 APs to stop and search the swamp. Remove the token and roll a dice:
- 1-3: Draw a monster and fight!
- 4-6: Draw an item (and continue turn).
Bone yards (2 APs to use). When you reveal a bone yard tile, place a bone yard token on the tile. Any adventurer now landing there may spend 2 APs, remove the token, then discard any poison tokens (cured) and heal back to full health. Alternatively, they can remove the token and discard 3 kills to draw an item. Either action ends the turn and the bone yard closes, becoming a normal tile.
Webs. When entering an unoccupied web tile, roll a dice. On a 3-6, continue normally. On a 1 or 2, spiders drop from the trees and attack! Roll a dice and place that number of spiders on the tile. They each have 1 health and attack together using two combat dice plus a modifier equal to their number (e.g. four spiders = 2 dice + 4). Reduce the modifier by one each time you kill a spider. Remove any surviving spiders after combat.
If a spider damages you, you become poisoned.
Web walking. You may travel directly between two web tiles for a cost of 1 AP, but you must check for spiders each time you land on an empty web tile.
Pit. You may attempt to jump across the pit. Roll a dice. On a 3-6 you succeed and may continue your turn. On a 1 or 2, you fall into the pit. If you are the first adventurer to enter the pit, you must draw two monsters and fight each in turn. You may not escape or request a tag. If you die, any surviving monsters remain in the pit. If you survive, you may climb out of the pit (remain on the tile) and continue on your next turn.
If you are playing The Cursed Forest (BoD 2) with Bag of Dungeon (BoD), you can use the pit to connect the two realms, landing on any crossroads tile that has already been laid in the dungeon (see 17. From Forest to Dungeon). As above, you must draw two monsters if you are the first to enter the pit.
15. Endgame
After the last forest tile is laid, the final phase of the game begins: the battle with Morna Gûl and the lifting of the curse. Proceed as follows:
- Lay the Exit tile adjacent to the last tile laid.
- Visit the Maiden Tree. Each player holding a brood seed must now move to the Exit tile where the Maiden Tree stands, and wait there. When all seed bearers are on the Exit tile, the Maiden Tree, recognising that her children have been found, removes all monsters and cures all poison (players can no longer be poisoned). The pit may be crossed freely and spiders no longer appear on webs.
- Morna Gûl (end-of-game boss) appears. Once the Maiden Tree has dispelled the forest of its hazards, place Morna Gûl on the Start tile.
- Place the brood seeds. The seed bearers must now race to the four red-vine tiles and place a brood seed on each. It costs 2 APs to place a brood seed.
- Morna Gûl hunts. After all players have moved, Morna Gûl will move towards the nearest seed bearer to attack them (see next step). If there is a non-seed bearer on his route, he will attack them instead and end his turn there.
- Morna Gûl rolls two dice for movement and ignores the effects of special tiles. He has 20 health and rolls 4 dice +10 in combat. Each time he kills an adventurer, he regenerates 5 health up to his maximum. Each time a brood seed is laid on a red-vine tile, his combat dice are reduced by one.
- When fighting Morna Gûl, you cannot tag another adventurer, and you may only escape with the help of the Maiden Tree (see 8. below). You may run past Morna Gûl on your turn, but he will strike out, inflicting 2 points of damage.
- Call for the Maiden Tree. Whenever you take damage from Morna Gûl, you may call upon the Maiden Tree to use the forest roots and lift you to the safety of an adjacent tile (your choice), ending your turn.
16. Winning the Game
You win the game if at least one adventurer survives and you have placed a brood seed in each of the four red-vine tiles or if you kill Morna Gûl.
Champion. If you wish to decide an overall winner, each player should add up the health ratings of the monsters they have killed. The player with the highest tally is declared Forest Champion.
17. From Forest to Dungeon
You can play BoD and BoD 2 as a single adventure, discovering the dungeon hidden beneath the forest.
When you draw the forest gateway tile (A), lay the dungeon Start tile (B) next to it. You may now play dungeon tiles from the BoD stack. Once the forest gateway and Start tiles are laid, you may also now use the forest pit tile (C) to go between forest and dungeon. The pit connects to the dungeon via a BoD crossroads tile (D) once a crossroads has been laid. Place the ladder token on the crossroads to identify the location. Special rules apply when drawing the pit tile for the first time (see 14. Special Tiles and Tokens).
Moving between realms. You may move freely between the forest and dungeon, via the gateway tile or the pit. It costs 1 AP to climb up from the dungeon to the forest pit tile.
When Morna Gûl appears, he casts a spell to seal the dungeon shut. You may no longer enter the dungeon from the forest. Adventurers still inside the dungeon are lost forever and their game is over.
When drawing items or monsters, use the bags for the realm you are in. When you die, return to the Start tile of the realm where you died.
18. Taking the Ring into the Forest
If an adventurer enters the forest with the Ring of Creation it will exert special powers over the ring bearer:
- Monsters are tougher. When you draw a forest monster, play it purple side up.
- The Ring rewards victory. Whenever you perform a kill, regain 2 health.
- Critical hits are deadly. If you roll combat dice of equal number (e.g. two 4s or three 5s), the monster you are fighting is killed instantly (does not apply to boss monsters).
19. The Chronicles of the Ring
The Chronicles of the Ring is an ongoing campaign spanning BoD, BoD 2 and future games.
In this first part of The Chronicles of the Ring you must carry the Ring of Creation from the dungeon into the forest. If you lift the curse of Calen Taur and return the forest to the elves, they will keep the Ring safe until ready for its onward journey.
The campaign is played by first entering the dungeon, where you must defeat the Red Dragon and escape with the Ring of Creation (see Bag of Dungeon rules for exiting the dungeon). Place your adventurer on the forest Start tile, then roll a dice and recover that much health. Keep any items you collected in the dungeon. End your turn. (See 18. Taking the Ring into the Forest.)
If you complete the forest quest and finish the game with the Ring, congratulations! You have placed the Ring in the safekeeping of the elves and are declared true friends of Calen Taur. The Ring's onward journey now lies west, over the perilous Sinda Edras mountain. Rest assured, the elves will seek your aid again before too many moons have passed.
20. Solo Game
For a single-player version of the game, you may send up to four adventurers, each with one life. For an extreme challenge, send just one brave adventurer into the forest to face Morna Gûl and his hordes.
Tagging. An adventurer may spend 1 AP to try and tag another adventurer to help them in a fight. The tag partner must have sufficient APs to reach the fight, and at least 5 health (or they are too weak to help). Roll a dice. On a 3-6, they spend APs to move to the tile and become the tag partner, adding one dice to the combat rolls. On a 1 or 2 they refuse to help and remain on their tile.
21. Combat Between Adventurers
We recommend that you play your first adventure as loyal friends. Later on, you may wish to turn against one another for a more treacherous and unpredictable game. Combat is the same as when fighting monsters, with some minor rules changes:
Escape. You may escape as many tiles away as you have APs available. You must also give one of your kills to your opponent or take 4 damage. If you have no kills to give, you must take the damage.
Using APs when attacked. When attacked by another adventurer on their turn, you may use your abilities and spend APs from your next turn in this fight (starting your next turn with fewer APs).
Defeat. If you are defeated, you must, if possible, give one of your kills to the victor.
22. One Rules Set to Rule Them All
In the event of conflict between the BoD 2 and BoD rules, these rules supersede the BoD rules.
Game Contents
Game bag, Monsters bag, Items bag, 43 forest tiles, 4 brood seeds, 30 monsters, 40 items, 8 character cards, 16 cubes, 4 meeples, 7 dice, 42 game tokens.
Glossary of Special Items
Some items (and one hazard and a monster) show an asterisk (*). These are explained below.
- Black Flame (4 APs, 1 use) – 2 dice dmg in a straight line*. The Black Flame spell races in a straight line until it hits a wall or pit (incl. a crossroads tile below - see 17. From Forest to Dungeon), causing two dice of damage to all on any tile it touches.
- Crossbow (3 APs, Rng 1-4) – 1 dice dmg. 6=12 dmg (breaks)*. The crossbow is a powerful weapon, capable of a killer strike. If you roll a 6, double the damage to 12, but this will also break the crossbow (discard it) unless wielded by Sirja the hunter.
- Crow – Re-roll dice once per fight*. The crow is a friendly companion. You may re-roll any monster dice once per fight (use the new result). The crow uses no inventory space.
- Dragon scent (2 APs, 1 fight, 1 use) – Reduce monster health by half*. Dragon scent strikes fear into monsters! Use it in a fight to reduce any monster's current health by half (rounded up). Has no effect on adventurers or boss monsters.
- Elven Boots – Jump across one tile per turn*. These fine elven boots allow the wearer to jump across a revealed tile (even around corners) once per turn, avoiding monsters and the effects of special tiles, e.g. pit, web or quicksand.
- Elven Rope – Cross quicksand and pits*. The elven rope is light but strong and may help save your life! You can use it to travel safely across quicksand and the pit. Leave in place to disable either for all adventurers.
- Enchant (1 AP, 1 fight, 1 use) – +5 to 1 weapon (destroyed)*. An Enchant spell is a rare and powerful combat spell. Use it once per game to enchant any weapon before a fight, adding +5 to your combat roll. Weapon is destroyed once used.
- Halfling fishing rod (3 APs, 1 use) – Search one swamp*. Halflings love to fish! Use this sturdy fishing rod to fish for an item in a swamp. Roll a dice. Success on 2-6. If you roll a 1, the fishing rod breaks (discard).
Quickplay Guide
- Set aside the Start and Exit tiles, shuffle the rest and form a face-down stack. Pick a character card, coloured meeple and four matching cubes.
- Place a cube on '3' lives, max health and max AP spaces (fourth cube is for monster health).
- Play goes clockwise. Use 1 AP to lay a tile and 1 AP to move. Continue until you have no APs left, ending your turn.
- If you draw a monster tile, when you enter the tile you must fight the monster.
- Fight monsters by rolling your combat dice and adding modifiers. Compare with their attack. The highest score inflicts damage equal to the difference in scores.
- Continue through the forest, find the four brood seeds and take them to the Exit tile to present to the Maiden Tree.
- Finally, race to the four red-vine tiles to place the seeds while attempting to avoid or defeat Morna Gûl,
- You win if you lay the four brood seeds or kill Morna Gûl. Good luck!