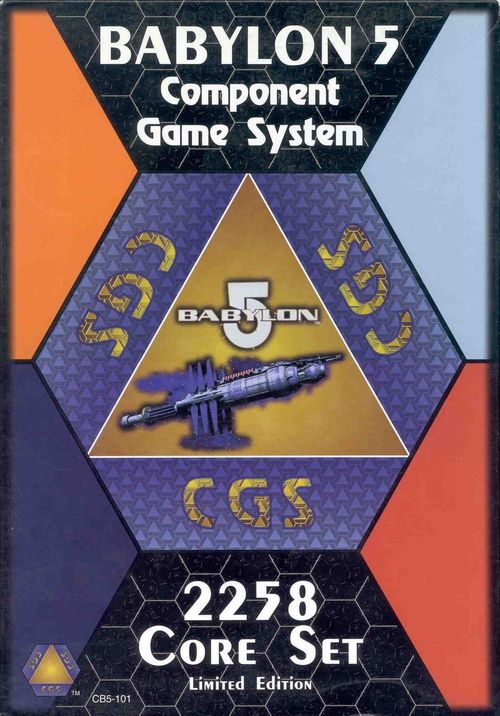
Babylon 5 Component Game System: Core Sets
Babylon 5 Component Game System: Core Sets Rulebook
Table of Contents
Table of Contents
A - Introduction
A1 Types of Products
The Component Game System (abbreviated CGS) is an expandable board game system consisting of multiple components. Players can begin playing with as little as 2 Starter Kits, or a Core Set.
A1.1 Starter Kit
A Starter Kit is a box which contains all the parts needed for 1 player to play in a game of 2 or more players. Each person needs a Starter Kit to play. Many expansion products come in Starter Kit format only. See page 25 and 26 for a complete list of available Starter Kits.
A1.2 Core Set
A Core Set is a 4-empire boxed set allowing 2 to 4 players to play. Starter Kits can be added to allow more players (1 Starter Kit per additional player). The 2258 and 2259 Board Games are Core Sets, see page 25 and 26 for a complete list of available board games.
A1.3 Reinforcement Pack
Reinforcements Pack #1 is the source for empire specific bases and generic ships such as Raiders (hired by many empires at one time or another) and the Dockers Guild. Other Reinforcement Packs are in development.
A2 Helpful Hints Before You Start
A2.1 Rule Organization
A2.11 Numbering: The rules are divided by section (letter) and topic (number). For example, A2 is the 2nd topic in the A section (Introduction). Rules within a topic are then numbered after a decimal point. This way a specific rule can be referenced by its Section, Topic, Number and sub-number (ST.Nn).
A2.12 Play Levels: There are 2 standard play levels. They are the Basic Game and the Standard Game (see A3.1 Game).
A2.13 Play Aids: Non-rules text is found in italics. Beginner's notes and examples are found in italics within [brackets]. These are NOT rules, but are examples made to clarify a specific rule.
[Example: Bob is playing the CGS. There are a number of examples through the rules that, if followed sequentially, may be mimicked, using your pieces, to learn the game mechanics.]
A2.14 Turn Sequence Chart: This guide is a reference page designed to speed an experienced gamer's understanding of the rules, and to function as a play sequence reference sheet for inexperienced players. It is on the back cover of this book.
A2.15 V1.2 Additions: V1.2 of this rulebook adds several new rules. These are found in dashed boxes (like this rule) to help players familiar with V1.1 find the changes and additions. New players should disregard the dashed boxes and focus on learning the basic rules (white) then advanced rules (gray, see A4 Adding Advanced Rules). Underlined text within a rule indicates a change in the text for clarity only and not an actual change in the rule.
A2.2 Separating Parts
Map pieces, tokens and currency come attached in die cut sheets. These parts are nearly separated, but have tabs holding them together to prevent damage during shipping. IMPORTANT: Use care when separating pieces to prevent ripping.
Beginner's Note: The size of this rulebook might seem intimidating to a new player. Because of this, we designed the rulebook to help the 'latent gamers' out there, by providing a multi-leveled play structure (you only need to learn a portion of the rules at a time). If you are a latent gamer, please do not attempt to use the entire rulebook in your first game. Please, follow the steps prescribed in A4 Adding Advanced Rules. Thank you and welcome to the Component Game System.
A3 Segments of Play
A3.1 Game
A game consists of as many rounds as are required for a player to win.
A3.11 Basic Game: When the rules refer to the Basic Game, they are referring to an introductory level of play. The Basic Game rules are on white (not shaded). Advanced rules are shaded.
[Beginner's Note: It is highly recommended that new players play 1 or more Basic Games before incorporating the advanced rules a few at a time. The advanced rules are not used in a Basic Game. To add advanced rules, see A4 Adding Advanced Rules.]
A3.12 Standard Game: The Standard Game is a level of play where all the advanced rules (shaded rules) are in effect and each player uses his own Play Set. Variant rules are not part of the Standard Game.
A3.2 Round
A round is once around the table, i.e. 1 turn for each player. From a given player's point of view 1 round is from the beginning of his turn to the beginning of his next turn.
A3.3 Turn
A turn consists of 1 player performing each of the 5 phases: Record Keeping, Vote, Allocate, Move and Fire. Players take turns sequentially, in clockwise rotation.
A3.4 Scenarios & Campaigns (Variant)
A3.41 Scenario: A game which will use the advanced rules and specially defined rules and/or mission cards. Scenarios will be found in some expansion products.
A3.42 Campaign: A series of scenarios defined by campaign rules. These are found in some expansion products.
A4 Adding Advanced Rules
Many advanced rules have the note 'Modular' after their title. After learning the Basic Game (non-shaded rules), add these rules one or more at a time.
- Hyperspace Jumps ........ D4.6
- Empire Discounts ........ D3.22
- Contested Space ........ D3.25, D3.33 & D3.4
- Territorial & Political Victory .. D1.13, D1.14
- Mines ........ D3.23 (Mines), D4.4, H5
- Squadrons ........ D1.6, D3.23 (Squadron), F & H2.2
- Factions ........ C3
After learning the above rules, add all the remaining rules (except empire specific rules for empires not being played (see A5 below)) and the playing cards.
[Note: To add the cards, all the rules must be used (as cards interact with most of the advanced rules).]
After you have learned how to use the cards, you can begin experimenting with variant rules ('Variant' in ( ) after the rules title).
A5 Adding Empire Specific Rules
Some advanced rules are specific to an empire and only need to be added if a player represents that empire.
- Shadows ........ G1, G3 and G4
- Vorlons ........ G2, G5
B - Nomenclature
The nomenclature section of the rulebook defines in detail the various aspects of each game piece in the CGS.
B1 Map Pieces
A map piece is a six-sided playing piece approximately 4 inches from edge to edge used by players to form the board (or map). A map piece has 7 hexes.
B1.1 Map Elements
Any feature of a map piece or token which causes a hex to have a rule is a map element.
[Examples of Map Elements: Economy Indicators (planets, etc.), Damage Indicators (asteroids, etc.), jumpgates, black holes, etc.]
B1.11 Economy Indicator: A white circle with a number in it (shown at right). Hexes with Economy Indicators are the only hexes where bases may be built (see D3.24 Building a Token - Base Token).
B1.12 Damage Indicators: A white ring with a white number in it. Any hex with a Damage Indicator causes damage to any token entering the hex. The number in the indicator tells you how many Babylon 5 dice to roll for damage (see E2 Applying Damage).
B1.13 Jumpgate: The jumpgate graphic indicates a jumpgate (see D4.61 Jumpgates).
B1.14 Minefields: Minefields are only found on map pieces. Minefields have a Damage Indicator, but do not cause additional jump damage (see D4.66 Jump Damage).
B1.15 Special Rules: Many map pieces have rules text on them. Whenever a unit (ship, base or squadron) enters a hex with special rules, that hex is activated as described on the map piece (D4.32).
B1.16 Babylon 5: The Babylon 5 hex contains a base and therefore units cannot enter the Babylon 5 hex, even when the map piece is unexposed. Babylon 5 (including refit token) cannot be damaged. No player controls Babylon 5. The 6 numbers around the Babylon 5 hex are for determining random direction (see H4).
B1.2 Terms Relating to Hexes
B1.21 Empty: An empty hex is a hex on an exposed map piece that has no token or map element.
[Example: The center hex on the 'Gravity Wave' map piece is the only hex which has a rule, the outer 6 hexes are empty (when no token is present) since a token entering 1 of these hexes does not activate a map element rule.]
B1.22 Occupied: Any hex with a ship or base of any player in it is an occupied hex. Hexes with your squadrons are considered occupied to you (but not to opponents) (see F5 Forced Recovery). Map elements and opponent squadrons do not cause a hex to be occupied, but do prevent a hex from being empty.
B1.23 Unoccupied: A hex which is not occupied by a ship or base of any player or by one of your squadrons.
[Example: A hex with an opponent squadron, a mine token, an asteroid token, etc. is unoccupied, (but is not empty).]
B2 Currency
The small diamond and triangular shape chits with denominations of 1 through 5 and 10. Currency is used to represent the amounts in each of the 4 Scoring Banks on your Empire Control Sheet.
B3 Empire Control Sheets
Empire Control Sheets are approximately 6" x 8.5" cards which have starting configurations for an empire, movement diagrams for that empire's ships and special rules and limitations for that empire. Additionally, there are 4 Scoring Banks for tracking your Gross Economy, Total Upkeep, Net Economy and Economy Reserve. Use the currency (provided) and/or dice (recommended) to show the current amount in each of your Scoring Banks.
B3.1 Scoring Banks
B3.11 Gross Economy: The sum of the Economy Indicators on all of your bases on the map. This Scoring Bank notes your starting Gross Economy. (Use green dice.)
B3.12 Total Upkeep: The sum of the upkeep costs of your tokens on the map and any tokens in your Scrap Yard. (Use red dice.)
B3.13 Net Economy: Net Economy equals Gross Economy minus Total Upkeep. (Use white dice.)
B3.14 Economy Reserve: The Economy Reserve is your treasury. It is the amount of money you currently have. Whenever you spend economy (build, repair, buy/play cards, etc.), it is immediately deducted from your Economy Reserve by removing currency. This Scoring Bank notes how much economy your empire has at the start of the game. (Use currency.)
B3.2 Starting Requirements & Options
The steps listed here on the Empire Control Sheet must be followed at the start of each game. This establishes a configuration for your homeworld map piece and defines your starting hand.
[Note: The Empire Control Sheet makes an exception to the requirement that a base's Economy Indicator equal the Economy Indicator of the hex (see D3.24 Building a Token - Base Token). This only applies at the start of the game. Should you wish to rebuild a base in that same hex later in the game, you could not exceed the limit of the Economy Indicator, even though you did at the start.]
B3.3 Movement Options Chart
This illustrates the movement options available to units of the empire. The hexes with arrows represent the hexes into which a unit can move and the direction of the arrows indicate the facing the unit can have when it moves to that hex (see D4.1 Movement).
B3.4 Special Rules (& Limitations)
Rules allowing the empire to perform special abilities. Some empires also have limitations indicated here.
[Example: The Earth Alliance Nova Dreadn. and Omega D. cannot sideslip (see D4.13 Alternative Movement).]
B3.5 Homeworld (Headquarters, etc.)
An illustration of the empire's homeworld or headquarters. This is also the illustration found on empire-specific base tokens.
B3.6 Ambassador (Agent, etc.)
An illustration of the empire's representative.
B3.7 Scrap Yard
An area which runs off the bottom of the Empire Control Sheet. This is where your ship tokens (and your other tokens with upkeep) are moved when destroyed. You can rebuild these tokens (without altering your Total Upkeep) instead of building a 'new' token from out of play.
B4 Tokens
Most tokens represent units (ships, bases and squadrons). Some other tokens represent asteroids, mines, jumpgates, moons, comets, declarations of war, etc.
B4.1 Token Features
B4.11 Undamaged Side: Labelled on the printed token: Defense Rating; Build Cost* (green circle); Heavy Weapons (red hexagon); Firing Arcs (red and yellow lines); Special Rules (above empire); Empire; Hull Class or Token Type (below empire); Upkeep Cost (blue circle); Lasers (yellow hexagon); Jump Engine Indicator.
B4.12 Crippled Side: Labelled on the printed token: Defense Rating; Repair Cost* (magenta circle); Heavy Weapons (red hexagon); Firing Arcs (red and yellow lines); Special Rules (above empire); Empire; Hull Class or Token Type (below empire); Upkeep Cost (blue circle); Lasers (yellow hexagon).
* The presence of the build cost (green) or repair cost (magenta) indicates whether the unit is undamaged or crippled (respectively).
B4.2 Definitions of Token Features
Not all tokens have every one of these features. Features not found on a given token indicate that the token does not have the feature in question.
[Examples: A token which does not have a Jump Engine Indicator does not have a jump engine and cannot jump on its own. A token with no defense rating cannot be damaged and therefore does not need a defense rating, etc.]
B4.21 Defense Rating: This number in the upper left corner indicates how many points of damage it takes to cripple an undamaged token (undamaged side) or destroy a crippled token (crippled side; see E2 Applying Damage).
[Note: Empire specific tokens have the empire's color in the defense rating symbol.]
B4.22 Jump Engine Indicator: This symbol in the upper right corner indicates that the token has a jump engine (see D4.6 Hyperspace Jumps).
[Note: Often the crippled side of a token will not have the Jump Engine Indicator, indicating that the token cannot jump on its own when it is crippled.]
B4.23 Economy Indicator: Bases (which generate economy) have this symbol in the upper right corner where the Jump Engine Indicator is also found. Your Gross Economy equals the sum of Economy Indicators on your bases on the map.
B4.24 Costs:
- Build Cost (green): The number in the green circle on the left corner of the token (undamaged side only). This is the amount of economy needed to build the token (see D3.2 Building Tokens). The presence of the build cost indicates that the token is undamaged.
- Repair Cost (magenta): The number in the magenta circle on the left corner of the token (crippled side only). This is the amount of economy needed to repair the token (see D3.3 Repair). The presence of the repair cost indicates that the token is crippled.
- Upkeep Cost (blue): The number in the light blue circle on the right corner of the token. Upkeep is the cost in economy required each turn to maintain a ship or other token (support industries, maintenance facilities, replacement parts, food, fuel, etc.).
[Note: The sum of the upkeep of all your tokens on the map and in the Scrap Yard is your Total Upkeep and should always be indicated in the Total Upkeep bank on your Empire Control Sheet.]
B4.25 Weaponry
- Heavy Weapons (red): The number in the red hexagon on the lower left side of the token. This is the amount of damage caused by the token's heavy weapons.
- Lasers (yellow): The number in the yellow hexagon on the lower right side of the token. This is the amount of damage caused by the token's lasers.
- Firing Arcs (red and yellow): These lines tell you in which directions the token can fire its heavy weapons (red lines) and lasers (yellow lines) (see D5.4 Firing Arcs).
B4.26 Identification & Notes
Special Rules: A brief note indicating a special ability of that token (see X2 Special Token Rules).
[Example: 'Carrier (1)' indicates the token is a carrier.]
Empire: The empire to which the token belongs (found in a heavier font (text style) from that of the special rules).
Hull Class or Token Type: Tokens are referenced by the hull class or token type. Tokens generally indicate their type (base, squadron, mine, etc.) in bold text. A base token has the word 'base' on it, etc. The only exception to this is that ship tokens may not indicate that they are ships, but instead tell you the hull type of the ship (freighter, destroyer, etc.).
B4.3 Positioning Tokens on the Map
B4.31 Placement: Tokens are positioned within hexes so that the edges of the token are parallel to the edges of the hex (see the diagram in C4.3 Starting Fleet).
B4.32 Ship Facing: The facing of a ship is the direction the forward part of the token (see B4.1 Token Features) is pointing.
B4.33 Docked: A ship facing a base in an adjacent hex is considered to be docked to that base. Only ships can be docked.
[Note: A squadron, base or other non-ship token adjacent to a base is not considered docked.]
B4.34 Docked Position: A ship is considered in a 'docked position' to a hex if it is adjacent to and facing the hex. For a ship to be able to build a base in a hex, the ship must be adjacent to and facing the hex. Only ships may be considered in a docked position.
B4.35 Stacking: A hex may 'contain' a maximum of 1 unit token (exception squadrons under a carrier (F1.2) and dormant Shadow vessels under a base (G3)).
B4.4 Map Element Tokens
Map element tokens represent terrain features, including natural and artificial hazards.
Map element tokens can only be placed into empty hexes (see B1.21 Empty) on exposed map pieces. A hex with a map element token is no longer considered empty (it now contains a map element). If a rule causes a map element token to be placed in a hex which already has a map element, the token supercedes the map element in the hex.
B4.41 Asteroid Tokens: Some cards call for the placement of an asteroid token on the map. Asteroid tokens have Damage Indicators (see B1.12 Damage Indicators) and are used to add a Damage Indicator to a hex. Some actions call for placing asteroid tokens in hexes (For example: Vorlon Planet Killers can 'rubblize' small planets (see G5 Vorlon Planet Decimation)).
B4.42 Jumpgate Tokens: These tokens are used to represent jumpgates (see D4.61 Jumpgates).
B4.43 Mine Tokens: Mine tokens are used to represent mines (see D4.4 Mines). Some mines have weapons.
B4.44 Moon Tokens: Some cards and variant rules call for the placement of moon tokens. A moon token has an Economy Indicator, therefore a base could be built on the moon token.
B4.45 Comet Tokens: Some cards and scenario rules call for the use of comets. If you have a ship in the same hex as a comet during your Record Keeping Phase, you gain a bonus (as indicated on the comet token).
B4.46 Proxy Required: If a map element token with a specific indicator value is required by a rule and no such token is available, a proxy must be used.
[Example: A '4' planet is rubblized by the Vorlons and no '4' asteroid is available, use currency instead.]
B4.5 Status Tokens
Status tokens are used to keep track of the status of alliances and declarations of war. They are not considered unit tokens or map element tokens.
B4.51 War Tokens: A War Token has the text 'Declaration of War' on it. Players only use the War Tokens of the empire found on their Empire Control Sheet (and must use proxies if they run out). Whenever a player fires weapons from any of his tokens at the unit of another player, the firing player must give that player one of his War Tokens, if that player does not currently have one (of the firing player's War Tokens). War Tokens given to you by other players are placed in front of you.
[Note: You can never have more than 1 War Token from each player in the game.]
[Note: A player who fires the weapons on one of his faction tokens must give out a War Token (if the target player does not have one) even though none of his empire tokens may have fired.]
[Note: A player who fires the weapons on an opponent token (which he took control of) must give out a War Token (if the target player does not have one) even though none of his empire tokens may have fired.]
B4.52 Shadow Influence Tokens: Found in the Shadow Starter Kit, Shadow Influence Tokens are used to indicate players who have been influenced by the Shadows (see G1 Shadow Influence).
B4.53 Vorlon Alliance Tokens: Found in the Vorlon Starter Kit, Vorlon Alliance Tokens are used to indicate players who have allied themselves with the Vorlon Empire (see G2 Vorlon Alliance).
B5 Dice
There are several types of dice found in the CGS. Each is defined below.
B5.1 Babylon 5 Die (B5)
The Babylon 5 Die is the white die with black lettering and the Babylon 5 logo. The Babylon 5 Die is rolled in many different instances, most prominently, when entering hexes with Damage Indicators (B1.12). Cards and rules often reference this die with the text 'nB5' where 'n' is a number indicating how many B5 dice are to be rolled. Most products contain B5 dice with the Babylon 5 logo replacing the 5 on the die face (some early releases did not have these cool logos on the dice, but all new releases should). When rolling this die, a result of 'Babylon 5' should be considered a result of 5.
B5.2 Defense Grid Dice (DG)
A defense grid is special defensive weaponry used by many ships to diminish incoming weapons fire or destroy small targets such as mines or fighters.
B5.21 Use: The Defense Grid Die is used when a ship or base is the target of a weapons volley or when a ship sweeps a mine (see H2 Defense Grid Die Rolls and H5 Minesweeping Rolls). Cards and rules often reference this die with the text 'nDG' where 'n' is a number indicating how many Defense Grid Dice are to be rolled.
B5.22 Empire Specific: Each empire has a unique Defense Grid Die which comes in the empire's color (the color in the defense rating circle at the top left of that empire's tokens and on the back of their Starter Kit boxes). It is required that you use the Defense Grid Die for your empire when rolling a Defense Grid Die Roll. The only exception to this is when the ship or base of another empire is under your control. In that event, roll a Defense Grid Die of that empire (i.e. with that empire's Defense Grid Die.)
B5.23 Empire Colors: The following are the colors for the Defense Grid Dice:
- Centauri Republic ........ orange die with black lettering
- Earth Alliance ........ blue die with white lettering
- League of Non-Aligned Worlds ........ purple die with white lettering
- Minbari ........ light blue die with black lettering
- Narn Regime ........ red die with white lettering
- Psi Corps ........ yellow die with black lettering
- The Shadows ........ black die with white lettering
- Vorlon Empire ........ green die with black lettering
- generic (not an empire) (bases, non-aligned factions, etc.) ........ black pearlescent die with white lettering
B5.24 Generic Defense Grid Die: The 2258 Edition released in December 1997 contained a Defense Grid Die (black die with white numbers). This die is (now) only used for generic tokens (bases (white defense rating) and non-aligned factions (gray defense ratings), includes: Docker Faction, Raider Faction, etc.) which do not have an empire specific Defense Grid Die.
[Note: If players do not have an appropriate Defense Grid Die, use a mutually agreed upon substitute.]
B5.3 Standard Die (D6)
The standard six-sided die (smaller) is white with black pips showing 1 through 6. Cards and rules often reference this die with the text 'nD6' where 'n' is a number indicating how many standard six-sided dice are to be rolled.
B6 Cards
There are several types of cards: Ability, Crew, Event, Gear and Vote cards. Later expansions will add other types to the CGS.
B6.1 Location of Card Features
Diagram labels (printed): Card Name; Play Cost; Play Phase; Unique - Year; Empire; Card Type; Crew Stats; Rules; Illustration; When Discarded; Flavor Text; Clarifier Text.
B6.2 Definition of Card Features
B6.21 Card Name: The name of the card. This distinguishes one card from another.
B6.22 Play Cost: The cost to play the card. This cost is paid from the Economy Reserve once when the card is first played.
B6.23 Play Phase: The phase of the turn when the card may be played (see C5.2 How Cards are Played). This is also the phase when the card's periodic function(s) may be performed.
B6.24 When Discarded:
- Discard After: Cards with 'Discard After: X', where X is a duration, are discarded after the duration.
- Discard: Some cards have 'Discard: when crew is' on them. This indicates that they are discarded when the crew card they are in play on is discarded.
B6.25 Unique Cards
Unique: If the card is unique, there may be only 1 card in play (by all players combined) with the card's name. Cards which are not unique are not limited to how many duplicates may be in play at the same time.
Year: Year is a mechanism of unique. You may play a unique card if there is already a card of the same name of an earlier year in play (by any player), discarding the version with the earlier year. A unique card may not be played if an equal or later year version of that card is in play (by any player).
B6.26 Illustration: A pictorial reference.
B6.27 Flavor Text: A quote or informative reference.
B6.28 Card Functions: The function(s) of the card.
- Periodic Functions: A '-' indicates a function that may be performed 1 time each round, on your turn, during the card's play phase as an action (not during another action). These functions cannot be used on other player's turns.
- Mandatory Functions: An '=' indicates a function that is always in effect and cannot be 'shut off' (even by a card which negates a function). These functions must be activated when the appropriate circumstances arise.
[Example: Some crew cards have council votes. These cards cast a vote every time a vote is called, no matter whose turn it is.]
- Conditional Functions: A '>' indicates a function which you may activate on any turn (of any player) each time the appropriate circumstances arise, but only once during an action (see C5.2).
[Example: 'Lennier' may substitute himself for a crew which must make a Health or Combat Roll. You may choose whether or not to use the function each time such a circumstance arises.]
B6.29 Clarifier Text: This text, found in [brackets], is not required on the card, but is presented only to help clarify the rules on the card.
B6.2a Empire: The empire to which that card belongs: Centauri, League, etc. Cards with the word 'Generic' do not have an empire.
B6.3 Card Types
B6.31 Crew: Crew cards are some of the more powerful cards since they usually remain in play performing their actions multiple times.
Location: See J1 Crew Location. The card is played in front of you showing that you control the card.
Stats: Crew cards have stats on them defining the attributes of that crew (the stat) and a rating for that stat (a number). Stats are used at various times (see H3 Stat Rolls).
V1.2 addition (dashed box): Cards Affecting A Crew: A card is defined as 'affecting a crew' when it causes a change in the crew's location, controller, play status (in play, in the hand, in the deck, discarded, etc.) or alters the use of a function of that crew [Example: changing a vote].
Crew Proximity: For a crew to affect another crew it must be at the same location (see J3.11).
B6.32 Event: Event cards represent events which affect play.
B6.33 Vote: Vote cards are only used in the Vote Phase (see D2 Vote Phase). The current player may call 1 vote during his turn by playing a vote card.
B6.34 Gear: Gear cards represent an assortment of tools used by crew. A gear card is played to 1 of your crew cards. If the crew is discarded, the gear card is discarded as well.
Use: Gear cards add functions to the crew card on which they are played. If the crew cannot function, it cannot use its gear.
Possession: Each of your gear cards in play may be relocated, once each round during your Record Keeping Phase, moving it to 1 of your crew in play (even a crew prevented from functioning). The periodic functions (if any) of the gear card may be used by the crew (with the gear) in the gear card's play phase.
B6.35 Ability: Ability cards represent a special ability or power gained by the crew. An ability card is played to 1 of your crew cards. If the crew is discarded, the ability card is discarded as well. Empire specific ability cards must be played to a crew of that empire.
Use: Ability cards add functions to the crew card on which they are played. If the crew cannot function, it cannot use its abilities. The periodic functions (if any) of the ability card may be used by the crew (with the ability) in the ability card's play phase.
V1.2 addition (dashed box): B6.36 Mission: A mission card is used to send crew on missions. Future releases will contain mission cards.
C - Starting the Game
C1 Pre-Game Set-up
At the beginning of each game, players should choose 1 of the 4 set-up options described below and follow that section's rules.
[Beginner's Note: Set-ups C1.1 and C1.2 are specifically designed to get you playing with ease. Read 1 of these sections for now, then after a few games, try C1.3 Standard Game Set-up (this requires that each player have sufficient parts to make a Play Set).]
C1.1 Basic Game Set-up - Starter Kits
C1.11 Product Requirements: Each player needs a Starter Kit.
C1.12 Parts: Starter Kits are presorted to contain an appropriate amount of parts needed to play the empire in a Basic Game. No pre-game set-up is required, proceed to C2 Map Creation.
C1.2 Basic Game Set-up - Core Set
The Core Set contains sufficient parts for 2 to 4 players to play a Basic Game. Divide the parts (plus any extra parts from add-on products) among the players as follows:
C1.21 Empire Control Sheets: Give each player the Empire Control Sheet for the empire they wish to represent.
C1.22 Map Pieces: Place the 'Babylon 5' map piece at the center of the table. Give each player his empire homeworld map piece (as defined in the starting requirements section of the Empire Control Sheet). Have each player place his homeworld map piece on the table in front of them. The remainder of the map pieces are shuffled and dealt to the players randomly with the back of the map piece (CGS logo side) showing. Do not expose these pieces to the other players, but you may look at the pieces you receive.
C1.23 Tokens: Give each player the tokens belonging to his empire. Place any tokens belonging to empires which are not being played back in the box (they are not used). Take the generic tokens (bases, asteroids, jumpgates, etc.) and place them in a central area. They may be used by any player.
C1.24 Cards: Give each player the cards belonging to his empire they represent. The empire is noted in the bottom left corner of the card just above the card type (each empire has its own unique background graphic which matches the graphic on the Empire Control Sheet). Shuffle the rest of the cards and deal them out. Your empire cards not selected for your hand are added to the random cards you were dealt to become your deck. You may not look at these cards.
C1.3 Standard Game Set-up
This is the standard set-up. Once you have learned the game you can quickly take out your Play Set and 'face off' against other players. Below are the guidelines for building a Play Set.
C1.31 Empire Control Sheet: Select the Empire Control Sheet of the empire you will use for the game.
C1.32 Map Pieces:
- Quantity: Select 5 or more map pieces from your collection. One of these must be the homeworld map piece of the same empire and year as your Empire Control Sheet. Put any extras away.
- Empire: A player may not use the 'Babylon 5' map piece or a homeworld map piece of another empire.
- Total Value: The total point value of these pieces (found after the name in parenthesis) may not exceed 25 points. The homeworld piece counts in this total.
- Duplicates: A player may not use duplicates of a map piece in a Play Set. Map pieces are considered identical if they have the same name (regardless of the year or configuration of the map piece).
[Example: A player could not select both a 'Time Quake' (2258 Edition) and a 'Time Quake' (2259 Edition) for his Play Set even though the 2 pieces are functionally different.]
[Note: The Timeline Game (future release) and other scenarios or cards may call for map pieces being changed based on the year.]
C1.33 Tokens:
- Empire: Each player may only use generic tokens and the tokens of his empire. However, the ability to use tokens of another empire may be granted on the Empire Control Sheet, the use of factions (see C3 Factions), or certain cards.
- No Proxies: You must have a given token to build it (i.e. no proxies allowed). This does not restrict you to one product or set.
C1.34 Cards: Players should have a legal Player Deck (see C5.1 Player Decks). At this point, remove any empire cards belonging to empires being represented by other players (except cards of your empire) and set them aside (they are not used).
[Note: Empire cards of other empires do not count for deck construction, so pulling them out should leave your deck legal.]
C1.4 Random Game Set-up (Variant)
C1.41 Empire Control Sheets: Each player selects an empire (by choice or at random).
C1.42 Map Pieces: Place the 'Babylon 5' map piece in the center of the table (see C2.31 Babylon 5). Place the homeworld map pieces (see C2.32 Homeworlds) in their positions. Randomize the rest and deal them face down into place completing the map so no player has viewed any of the map pieces.
C1.43 Tokens: Give each player the tokens needed for the empire they represent.
C1.44 Cards: Give each player the cards belonging to the empire they represent. The empire is noted in the bottom left corner of the card just above the card type (each empire has its own unique background graphic which matches the graphic on the Empire Control Sheet). Shuffle the rest of the cards and deal them out. After selecting your hand, any extra empire cards are added to the random cards you were dealt to become your deck. You may not look at these cards.
C1.45 Play: Skip C2 Map Creation and proceed to either C3 Factions or C4 Starting Forces (skipping C3 Factions).
C2 Map Creation
C2.1 Map Size
The diagrams on this page show the shape of the map to be used based on the number of players at the start of a game. Experienced players may use any size map they wish and scenario rules may dictate other sizes.
[Diagrams printed: 2 Player Map; 3 Player Map (Total: 13 map pieces; Players Place: HW+3, HW+3, HW+3); 4-6 Player Map (4 = 4 Players, 5 = 5 Players; for 6 Players, use the 6 corners; Total: 19 map pieces; Players Place: Varies).]
C2.2 Order of Play
At this point, each player announces which empire they represent. Then, randomly determine who will have the first turn by having each player roll a die. The player with the highest roll will play first. Turns will then proceed in a clockwise rotation. At this time, cards of empires represented by other players (on their Empire Control Sheets) must be removed from each player's Player Deck.
C2.3 Babylon 5 and Homeworlds
C2.31 Babylon 5: Place the 'Babylon 5' map piece in the center of the table. Babylon 5 is placed face up (jumpgate and firing arcs up). If using Starter Kits only, you might not have the 'Babylon 5' map piece (found in the Earth Alliance Starter Kit, Psi Corps Starter Kit and the Core Sets). In this event, Babylon 5 is presumed to be at a location that is not on the map. No player may use the 'Babylon 5' map piece as 1 of his starting map pieces.
C2.32 Homeworlds: The first player places his homeworld in position 1 (as shown on the map). The piece is placed face up (exposed) in any position (rotation) the player desires. The second player then places his homeworld in position 2 and so on.
C2.4 Place Starting Map Pieces
C2.41 Place Map Pieces: Starting with the player who will go last, then proceeding counter-clockwise (4th player, 3rd, 2nd, 1st), each player places 1 map piece adjacent to any map piece already on the map. Map pieces are two sided and are placed face down (CGS logo up). Map pieces may not be placed in an area outside the final map size (see diagrams). Any unplaced map pieces remaining after the map has been completed are set aside unexposed. They are not currently used, but may be used by means of certain cards. Only the owning player may view these pieces during the remainder of the game.
[Hint: Place map pieces with large Economy Indicators near your homeworld and build bases on them on your second turn.]
C2.42 Flip Babylon 5: The player who places the last map piece (completing the map) flips the 'Babylon 5' map piece over to its unexposed side (the large Babylon 5 graphic showing).
C2.43 View: Once placed, a map piece's unexposed side may not be looked at by any player until a unit has entered the map piece, causing it to be exposed (see D4.2 Exposing Map Pieces).
C3 Faction Tokens (Modular)
C3.1 Faction Operations
C3.11 Faction: Any empire not being represented by a player may be used as a faction. The Docker Faction and Raider Faction are also used as factions.
C3.12 Selection: To select a faction, a player chooses 1 or more tokens from 1 empire (not represented on another player's control sheet) as his faction.
C3.13 Announce: After all players have selected a faction, each player announces his faction and shows the token(s) selected.
C3.14 Auction: Starting with the first player, hold an auction for each faction (bid clockwise from the player whose faction is up for bid until all players have passed). The winner of each auction pays for the faction from his Reserve and is the player who may use the tokens of that faction. These are the only tokens of that faction used in the game (except by means of a card) (see D4.15 Moving Other Empire Ships).
C3.15 Duplicate Factions: If multiple players have selected the same faction, only bid once. The winner picks one of the configurations. The other duplicate factions are not used by any player.
C4 Starting Forces
C4.1 Starting Hand
Each player secretly selects a number of empire cards from his Player Deck (see C5.1 Player Decks), no duplicates (as indicated on the Empire Control Sheet), as his starting hand. Shuffle the remainder of your deck and have it cut by the player to the right.
C4.2 Starting Economy
Place currency in your 4 Scoring Banks (or dice in the first 3 banks and currency in the Economy Reserve) to represent the amounts currently there (see D1.9 Notes on Tracking Economy).
C4.3 Starting Fleet
After the map has been created and players have selected their starting hand, each player places empire-specific base(s) (as indicated on their Empire Control Sheet) on his homeworld map piece. Players, in the order of play, may then spend any or all of their starting Economy Reserve to place additional units (your empire, your faction(s), or generic) on their homeworld map piece (with any facing desired) (see D3.2). Your empire tokens are built using empire discounts (D3.22).
[Beginner's Example: Bob is playing Earth Alliance and has a starting Economy Reserve of 45. The Earth Base-8 is placed in the Earth hex and the Earth Base-2 in the Mars hex (see the Earth Alliance Control Sheet). Bob chooses to purchase a Hyperion Cr. for 13 (16-3 (see D3.22 Empire Discounts)) and a Transport for 4 (6-2), costing a total of 18. This leaves 27 in his Reserve.]
[Diagram printed: Example Homeworld Set-up (Earth Alliance). Labels: Earth Alliance Base-8; Earth Alliance Transport; E.A. Hyperion Cr.; E.A. Base-2; Earth Map Piece.]
C4.4 Begin Play
Proceed to D - Turn Sequence and start with the player who had the highest roll (see C2.2).
C5 Card Usage
C5.1 Player Decks
C5.11 Player Deck: Each player will have a Player Deck (or Starter Deck in a Basic Game) and will only draw cards from his own deck. A Player Deck consists of a Core Deck (see C5.12 below) plus (possibly) a selection of other empire cards (see C5.13).
[Beginner's Note: Players who each have an empire Starter Kit, may use the cards found therein as a Starter Deck. Players with just the Core Set should each take the empire cards of the empire they are playing and then deal out the rest of the cards to create Starter Decks. When using Starter Decks, skip C5.1 Player Decks. As you purchase additional expansions, you can add more cards to your Starter Deck, converting it into a Player Deck.]
C5.12 Building A Core Deck: A Core Deck is the main card selection of a Player Deck. It must contain at least 10 distinct cards (cards with different names). These cards must be generic or of the empire the player represents in the game (found on the Empire Control Sheet).
Duplication: For every 10 distinct cards in a Core Deck, you are allowed 1 level of duplication. The level of duplication is the maximum number of a distinct card that you may have in the deck.
[Example: In a Core Deck with 30 to 39 distinct cards, 3 levels of duplication are allowed. You can put no more than 3 Londo Mollari cards in this deck even if they are of different years, say 2258, 2259 and 2261 or any other combination.]
Card Types: No more than half (50%) of the Core Deck (including duplicates) may be of the same card type (event, crew, etc.).
C5.13 Other Empires Cards: Cards of other empires do not count as part of the Core Deck. They are added after the Core Deck has been completed making the Player Deck. In C2.2 Order of Play, cards of other empires represented by other players (on their Empire Control Sheets) must be removed from each player's Player Deck.
Duplication: The level of duplication, as determined previously, is the maximum number of distinct cards of another empire that you may have in a Player Deck.
[Note: This allows other empire cards to be easily added or removed upon learning the empires of the other players.]
C5.2 How Cards are Played
Cards are played during the phase indicated on the card. An action is the starting and completion of a step within the phase. Cards are played at any point in the phase before or after other actions (except OP Phase and Any Phase cards). The playing of a card and its resolution is an action.
C5.21 Record Keeping Phase: No cards are played in this phase.
C5.22 Vote Phase: A vote card may be played to call a vote (see D2.1 Council Vote). The playing of a vote card through to the completion of the vote is 1 action.
C5.23 Allocate Phase: Each allocation is its own action.
C5.24 Move Phase: Each movement of a token and its resolution is an action.
C5.25 Fire Phase: The declaration through completion of a volley is an action.
C5.26 OP 'Phase': These cards are played in response to another player's action taken on that player's turn. OP Phase cards are played during the opponent phase indicated on the card. They must be used when played, and are resolved just before the action to which they are responding.
C5.27 Any:
- Your Turn: See above for the phase in question.
- Opponent Turn: When played during an opponent's phase, or in response to an opponent action on your turn, they must be used when played, and are resolved just before the action to which they are responding.
C5.28 Unique Cards: Each player may play a maximum of 1 unique card each turn.
C5.29 Duration: Cards with a duration have the duration start when they are played. Some last a number of rounds, turns or phases, and are then discarded. Cards which are discarded after 'Use' must be used when played and then discarded.
C5.3 Hand Size Limit
A player may not draw cards from his deck to cause his hand to exceed 7 cards. In an instance where the hand would exceed 7 cards by drawing them, allow the hand to reach 7 and then stop drawing cards. The balance of additional cards are not drawn. In an instance where a rule would cause the hand to exceed 7 cards by means other than drawing, the hand may exceed 7.
C5.4 Negating Card Functions
C5.41 Mandatory Functions: A Mandatory function ('=') cannot be 'negated' by a card which negates a function.
C5.42 Entire Function: You cannot negate part of a function. You can only negate an entire function at the point when it is announced, before any part of the function has been resolved. A player is expected to allow other players a reasonable amount of time (several seconds) to react to an action just announced. So, if part of a function has been resolved, it's to late to negate the function.
C6 Game Variants
C6.1 Larger Maps (Master's Level)
V1.2 addition (dashed box): This rule replaces the previous rule with this number.
C6.11 Master's Level Play Set: Use standard Play Set rules except select map pieces as defined here.
- Quantity: Select 10 or more map pieces from your collection. One of these must be the homeworld map piece of the same empire and year as your Empire Control Sheet. Put any extras away.
- Empire: A player may not use the 'Babylon 5' map piece or a homeworld map piece of another empire.
- Total Value: The total point value of these pieces (found after the name in parenthesis) may not exceed 50 points. The homeworld map piece counts in this total.
- Duplicates: A player may not use duplicates of a map piece in a Play Set. Map pieces are considered identical if they have the same name (regardless of the year or configuration of the map piece).
[Example: A player could not select both a 'Time Quake' (2258 Edition) and a 'Time Quake' (2259 Edition) for his Play Set even though the 2 pieces are functionally different.]
C6.12 Master's Level Map Creation: The diagrams on these 2 pages show the shape of the map to be used based on the number of players. All map pieces (including the homeworld territory) are placed face down (except homeworld map pieces and Babylon 5).
[Note: D1.13 Territorial Victory requires 11 Map Pieces to achieve.]
C6.13 Homeworld Territory: After the map has been created and players have bid for factions (see C3) and selected their starting hand (see C4.1), each player places empire-specific base(s) (as indicated on their Empire Control Sheet) on his homeworld map piece. Then each player exposes the 3 map pieces adjacent to their homeworld map piece (shown in grey on the diagrams below). These 3 map pieces plus the homeworld make up your homeworld territory.
C6.14 Master's Level Starting Forces: Players, in the order of play, may then spend any or all of their starting Economy Reserve to place additional tokens in unoccupied hexes in their homeworld territory (with any facing desired) (see D3.2). Your empire tokens are built using empire discounts (D3.22). The starting fleet may consist of ships and/or squadrons. You may also build bases on any of the Economy Indicators in your homeworld territory without using a ship to build them (paying the build cost).
[Note: These bases can be of generic, faction or empire variety.]
[Note: No ships need be in a docked position with these base to have built them as part of Master's Level Starting Forces.]
[Hint: Build as many of the bases as you can, and then use those bases to build ships on turn 1.]
[Diagram key printed: Indicates total number of map pieces needed (Total: 'NN'). Indicates how many map pieces each player will place in addition to their homeworld (Players Place: HW+'n', HW+'n').]
[Diagrams printed: 2 Player Map (Total: 19; Players Place: HW+8, HW+8). 3 Player Map (Total: 25; Players Place: HW+7, HW+7, HW+7). 4 Player Map (Total: 35; Players Place: HW+8, HW+8, HW+7, HW+7). 5 Player Map (Total: 47; Players Place: HW+8, HW+8, HW+7, HW+7, HW+7). 6 Player Map (Total: 55; Players Place: HW+8, HW+8, HW+8, HW+8, HW+8, HW+8).]
C6.2 Chaotic Map (Variant)
At any point in the game, at the instant an exposed map piece has no unit tokens (ships, bases or squadrons) on it, remove that map piece from the map (along with any tokens on it) and place an unexposed map piece in its place from a random pile. The random pile is created from the remaining unexposed map pieces not used during map creation (see C2.4). To spice up this variant even further, let each player bring in 5 map pieces plus his homeworld map piece totalling no more than 30 points total (instead of C1.32 Map Pieces). Stop replacing map pieces when the random pile is gone.
C6.3 Mine Warfare (Variant)
Each time a map piece is exposed make 2 Random Direction Rolls (see H4). The results indicate hexes on the outside of that map piece that have mines (use Narn mines, or currency as Damage Indicators). If the 2 Random Direction Rolls have the same result place only 1 mine in the center hex. Roll 1B5 to determine the size of each mine and place a mine token of that size in the random hex(es). A result of zero indicates that no mine is placed. In this case, a mine may be placed in a hex that contains a map element. When a mine has been activated (by entering its hex), activate the hex after resolving the mine damage.
C6.4 Moon Token Gambit (Variant)
Each time a map piece is exposed, roll 1DG (of the empire played by the controller of the exposing token). If the result is a number other than zero, place a moon token with an Economy Indicator equal to the die result on the map piece. Make a Random Direction Roll (H4) with the result indicating in which outside hex on that map piece the moon is placed. In this case, the moon token may be placed in a hex that contains a map element and supercedes it.
C6.5 Circle of Death (6+ Players) (Variant)
Use the below map configuration for this game variant.
[Diagram printed: Circle of Death. Key: 1 = 9 Players; 8 = 8 Players; 7 = 7 Players. For 6 Players, use the corners. Total: 30. Players Place: 9 Players: HW+3, HW+3, HW+3, HW+2, HW+2, HW+2, HW+2, HW+2, HW+2; 8 Players: HW+3, HW+3, HW+3, HW+3, HW+2, HW+2; 7 Players: HW+4, HW+4, HW+3, HW+3, HW+3, HW+3, HW+3; 6 Players: HW+4, HW+4, HW+4, HW+4, HW+4, HW+4.]
C6.51 Borders: Your cards may only affect 5 players (the 2 to either side of you plus yourself). They may not affect other players. Your tokens may only fire weapons at the tokens of these 5 players. When you call a Council Vote, only these players may vote.
C6.52 Parallel Play: To start the game every third person starts their turn at the same time. Thus players 1, 4 and 7 will start their first turn simultaneously. When a player finishes his turn, the next player may begin his turn if no player within his borders is currently taking a turn.
C6.53 Victory Conditions: Economic Victory must be achieved over all of the players in the game.
C6.54 Surrender: If a player surrenders during the Victory Check of his Record Keeping Phase (see D1.12) and if 8 players or 5 players remain, the turn of the surrendering player is not passed on to the next player. It is deleted from the cycle.
[Example: If 3 players are taking turns in a 9 player circle of death and one surrenders, 2 players will be taking turns, in what is now, an 8 player game.]
D - Turn Sequence
Play the following phases in order on your turn:
- D1 - Record Keeping Phase
- D2 - Vote Phase
- D3 - Allocate Phase
- D4 - Move Phase
- D5 - Fire Phase
[Hint: During your first few turns, it will be useful to read this section as you take each step of your turn.]
D1 Record Keeping Phase
D1.1 Victory Check
No player may attempt any of the victory conditions on or before his 3rd turn (i.e. on the 4th and later turns, one or more of the victory conditions may be attempted).
D1.11 Economic Victory: If you have at least twice the Gross Economy of each opponent, you may attempt an 'Economic Victory' by declaring this to the opponents. If at the beginning of your next turn, during this phase, you still qualify for Economic Victory (at least twice the Gross Economy of each of the other players (not combined)) then you have won the game.
[Example: Bob has 10 Gross, Sally has 5 and Jim has 4. Bob could attempt Economic Victory at this point on his turn. If Bob only had 9, he could not attempt Economic Victory.]
D1.12 Surrender: If you have a negative Net Economy, you may (but are not required to) surrender at this time. Remove your units, cards and war tokens from play and yourself from the game. Your map pieces and map element tokens should not be removed until the game is over (or substitute equivalent parts belonging to another player).
D1.13 Territorial Victory: If, at the start of your turn, your Gross Economy exceeds the Gross Economy of each opponent and 6 or more map pieces are occupied by one or more of your units (ship, base or squadron) and are not occupied by any opponent units, you may declare a Territorial Victory. If at the beginning of your next turn, during this phase, you still qualify for Territorial Victory (the largest Gross Economy and 6 or more map pieces occupied by only your units) then you have won the game. For the purposes of this rule, in any game where players bring in a number of map pieces other than the standard minimum of 5 (see C1.32 Map Pieces), use the minimum number of pieces brought into the game plus 1.
D1.14 Political Victory (4 or more players only): If your Gross Economy exceeds the Gross Economy of each opponent, you may attempt a 'Political Victory' by declaring an attempt. Three vote cards from your discard pile must be removed from the game in order to make this attempt. If at the beginning of your next turn, during this phase, you still qualify for Political Victory (your Gross Economy exceeds the Gross Economy of each opponent) then a Council Vote is taken. If the Council Vote 'passes', you have won the game. Opponents may not voluntarily vote 'for' this Council Vote.
D1.2 Generate Economy
Your Economy Reserve is increased by an amount equal to your Net Economy (add currency).
[Example: Bob's Net Economy of 5 is added to his Economy Reserve of 27 bringing the Reserve to 32.]
[Note: If your Net Economy becomes a negative number, your Economy Reserve will be reduced at this time (to a minimum of 0).]
D1.3 Collect Bonuses
Bonuses you have in play are added to your Reserve.
D1.31 Freighters and Tugs: Freighters and tugs docked to Babylon 5 may give bonuses.
[Example: Bob has an E.A. Freighter docked to Babylon 5, giving him a bonus of 2 economy. His Reserve is increased from 32 to 34.]
D1.32 Cards: Some cards may generate bonuses.
D1.4 Pay Penalties
Any penalties affecting you must be paid from the Reserve.
D1.41 Map Pieces: Some map pieces require you to pay a penalty.
[Example: Bob has 3 ships on the 'black hole' map piece and therefore must pay a penalty of 3 economy, lowering his Economy Reserve from 34 to 31.]
D1.42 Shadow Influence: Shadow Influence penalties are paid (and added to the Shadow player's Reserve) to the owner of any Shadow Influence Token(s) under your bases.
D1.43 Cards: Some cards may generate penalties.
D1.44 Raiders: Raider penalties are paid (and added to the owner's Reserve) to the owner of any raider token(s) docked to your bases.
D1.45 No Debt Allowed: There are times when a player's Economy Reserve may not be sufficient to pay a penalty, card effect, etc. In these circumstances, the penalty or debt is ignored after it has reduced the Economy Reserve to zero. An Economy Reserve cannot be reduced to negative numbers.
D1.5 Cards with Duration
Some cards last for a defined number of rounds. This duration counts down at this point.
D1.51 Duration: Cards which have reached their duration are discarded.
[Example: A card played on your turn last round with a duration of 1 round is discarded this turn.]
D1.52 Count: Your cards in play which have duration count down.
[Example: A card played on your turn last round with a duration of 3 rounds has 2 rounds left this turn. Place a marker die (or currency) when the card is played with a 3 showing to indicate this. Change the marker to 2 this turn, 1 the next turn, etc.]
D1.6 Recover Squadrons
Deployed squadrons must be recovered by moving them (via squadron movement or jump) under a carrier which has not reached its carrying capacity. The act of recovering a squadron does not activate the carrier's hex nor does it count as the squadron's movement for this turn. If a squadron cannot be recovered, cripple it (if undamaged) or destroy it (if crippled).
D1.7 Discovery of Dormant Shadow Vessels
Any player who has a dormant Shadow vessel on his homeworld may attempt to discover it (see G3.22 Discovery).
D1.8 Move Gear
Each of your gear cards in play may be relocated, once each round at this time, moving it to 1 of your crew in play (including to or from a crew prevented from functioning) (see B6.34 Gear).
D1.9 Notes on Tracking Economy
Currency (or dice) are used to represent the current amounts in each of your Scoring Banks.
D1.91 Accumulation: Unused economy in your Economy Reserve is NOT lost and remains in your Economy Reserve until spent.
D1.92 No Financing: You cannot do anything that costs more economy than you currently have in your Economy Reserve.
D1.93 Spending: As you perform an action that has a cost, deduct the cost from your Economy Reserve by removing currency.
D1.94 Empire Control Sheet: Players should familiarize themselves with the mechanics of the Empire Control Sheet, particularly the 4 Scoring Banks for tracking economy (see B3.1 Scoring Banks).
D1.95 No Accumulating Debt: If a non-voluntary expense is imposed upon you by a card, etc. and you do not have a sufficient Economy Reserve to pay the total amount, your Reserve is reduced to zero. You are not required to pay any remaining amount. If the card reaches the end of its duration, discard the card. If the card has duration remaining, the expense may affect you again on a subsequent turn (and this rule may or may not apply again, depending on how much economy is in your Reserve).
[Example: You have an Economy Reserve of 3 and a player plays a card against you which states you must pay 5 economy. Your Reserve is reduced to zero and the card effect this turn is considered complete. Your Reserve is not reduced to -2, nor do you have to pay the 2 economy at any later point.]
[Note: This does not allow you to spend more than you have in your Economy Reserve.]
D1.96 Tournament Requirements: In a tournament, all players in the same game must use the same color dice for their first three Scoring Banks (Gross Economy, Total Upkeep and Net Economy). Currency must be used for the Economy Reserve. The recommended colors for the Scoring Banks are: Gross Economy - green dice, Total Upkeep - red dice, and Net Economy - white dice.
D2 Vote Phase
D2.1 Council Vote
You may call for a Council Vote by playing a vote card. Read the card aloud and designate the terms of the vote card (if any) should the vote pass. If you do not wish to call a vote, proceed to D3 Allocate Phase.
D2.2 Negotiate
D2.21 Discussion: Players may freely discuss the vote with each other, making any agreements or bargains they wish. Economy may be exchanged for the purchase of another player's vote(s). This process should not take longer than 2 minutes. Once all players are finished negotiating, take the vote.
D2.22 Agreements: Agreements made here are not binding and are upheld solely by player discretion, except that votes purchased from other players with economy ('bribes') are immediately binding and economy immediately changes hands. This is the only time economy may be exchanged between players (unless directed by a card or rule).
D2.3 Take the Vote
D2.31 Cast Votes in Play: Each vote is cast 'for', 'against' or 'abstain'. Each player casts his votes clockwise in the order of play with the 'vote caller' first.
- Cards able to cast votes do so.
- A crew must be on Babylon 5 to vote (or modify one).
- Each ship docked to Babylon 5 casts 1 vote.
D2.32 Modifier Votes: All players cast the following modifier votes in any order. Votes can be continually added in this step to sway the decision until all players state they are done voting.
- Some card functions may modify cast votes.
- Vote cards may be discarded from the hand, allowing the discarding player to cast 1 vote per vote card discarded (this does not count as playing a card and there is no cost to do this).
D2.33 No Changes: Once a vote has been cast by a player, it may not be changed by that player (except by means of a card).
D2.34 Result: If there are more votes 'for' than votes 'against', the vote card takes affect, otherwise it does not.
D2.4 Example of a Council Vote
[Example: Bob plays 'Balance of Wealth' and reads the card aloud "Take 1/3 (drop fractions) of 1 opponent's Economy Reserve and distribute it to 1 or more players as you see fit. Announce how you will distribute the economy prior to the vote." He then states that he will take 9 of Jim's 29 economy and distribute 6 to himself and 3 to Sally. He then casts his 1 vote in play ('G'Kar') 'for' the Council Vote. Sally, (who is next in clockwise rotation) casts her 1 vote ('Delenn') 'for' the vote since she will be getting 3 economy if it passes. Jim then casts his 2 votes in play ('Londo' and 'Sinclair') 'against' the vote. At this point the vote is tied and would fail if no further votes are cast or modified. Next, Bob uses 'Morden' to change 'Londo's' vote to 'for', bringing the total to 3 'for' and 1 'against'. Jim then offers Sally 4 economy as a bribe to discard a vote card 'against' the vote. Sally accepts and discards a vote card from her hand 'against' bringing the total to 3 'for' and 2 'against'. Jim pays her 4 economy from his Reserve. Jim then discards 1 vote card from his hand and casts the vote 'against' bringing the total to 3 'for' and 3 'against'. Bob then discards a vote card from his hand making the total 4 'for' and 3 'against'. At this point all players state they have no further votes and the vote passes. Bob adds 6 to his Reserve (raising it from 31 to 37), Sally adds 3 and Jim reduces his Reserve by 9 (in addition to the 4 he paid Sally earlier).]
D3 Allocate Phase
The Allocate Phase is when you make purchases.
D3.1 Allocations
The following allocations may be done in any order. Subtract economy from your Economy Reserve as it is spent.
D3.11 Build: You may build 1 or more of your tokens (see D3.2 Building Tokens).
[Example: Bob builds a Base-4 (build cost 9, Economy Indicator 4) lowering his Economy Reserve by 9 (from 37 to 28). This causes his Gross Economy to be increased by 4 (from 10 to 14) and his Net Economy to be increased by 4 (from 5 to 9). Bob builds an E.A. Transport (build cost 6, upkeep 2), lowering his Reserve by 6 (from 28 to 22). The Transport increases his Total Upkeep by 2 (from 5 to 7) and lowers his Net Economy by 2 (from 9 to 7).]
D3.12 Repair: Repairs may be conducted (see D3.3 Repair).
[Example: Bob repairs a crippled Earth Alliance Hyperion Cr. (repair cost 5) reducing his Economy Reserve by 5 (from 22 to 17).]
D3.13 Purchase Cards: Cards may be purchased from the top of your deck at a cost of 2 economy per card. Declare your total purchase before drawing any cards (i.e. you cannot buy 1 at a time, looking at each before buying the next). The purchased cards are then added to your hand. A player may not purchase cards in excess of the maximum hand size of 7 cards.
[Example: Bob has 4 cards in his hand. Bob pays 6 economy to buy 3 cards from his deck. This reduces his Economy Reserve by 6 (from 17 to 11). He then draws the purchased cards and adds them to the 4 currently in his hand. His hand is now at its maximum of 7.]
D3.14 Other Expenditures: Occasionally, other allocations are performed, such as playing cards (which are played in the phase indicated on the card).
D3.15 Shadow Influence and Vorlon Alliances:
- Shadow Influence: On a Shadow player's turn, the Shadow player may attempt to influence one or more of the other players (see G1 Shadow Influence).
- Vorlon Alliance: On a Vorlon player's turn, a Vorlon player may attempt to form alliances (see G2 Vorlon Alliance).
D3.16 Breaking Vorlon Alliances: A player involved in a Vorlon Alliance may make 1 attempt per base to remove a Vorlon Alliance Token from the base (see G2.3 Removing a Vorlon Alliance Token).
V1.2 addition (dashed box): D3.17 Away Missions: Crew may change location or perform an Away Mission (see J1 - J3).
D3.2 Building Tokens
D3.21 Cost to Build Your Tokens: You may build 1 or more of your tokens by paying the token's build cost (the value in the green circle) from your Economy Reserve.
D3.22 Empire Discounts: When a empire specific token builds an empire specific token (of the same empire), the build cost is reduced by an amount equal to the upkeep of the token built.
Example: A Minbari base building a Minbari Cruiser (build cost 14, upkeep 3) pays only 11 (14 minus 3) to build the ship.
D3.23 Scoring Bank Adjustments:
- Gross Economy: Your Gross Economy is increased when you build a token with an Economy Indicator (bases) by an amount equal to the Economy Indicator.
- Total Upkeep: Your Total Upkeep is raised by an amount equal to the upkeep cost of any token you build, unless the token was built from the Scrap Yard.
- Net Economy: If your Gross Economy or Total Upkeep changes, your Net Economy is adjusted by the same amount.
D3.24 Building a Token
- Ship Token: You may only build a ship token in an unoccupied hex adjacent to one of your bases, facing the base (docked).
- Base Token: You may only build a base token in an unoccupied hex which has an Economy Indicator. The base may only be built if one of your ships is adjacent to and facing the hex (docked position to the hex with the Economy Indicator). The Economy Indicator on the base token must equal the Economy Indicator of the hex.
- Jumpgate Token: A jumpgate token may only be built on an exposed map piece which does not currently have a jumpgate. A jumpgate can only be built in an empty hex directly in front of one of your ships.
- Squadron Token: You may only build a squadron token under a base which is a carrier or under a docked ship which is a carrier. The base is considered the building unit. Additionally, carriers may not exceed their carrying capacity (see F1.2 Carrier Capacity). Squadrons may be built under a ship (which is a carrier) which was built on the same turn.
- Mine Token: One mine token may be built during the Allocate Phase by each of your units with minelaying ability ('mines' on the token). They are placed on the map in any empty hex adjacent to the unit. The hex the mine is built in must be on an exposed map piece (as with all map element tokens). A maximum of 3 mines and/or mine-fields are allowed on a map piece.
- Activate Hex: Ships and bases (not squadrons) activate the hex they are built into.
D3.25 Restrictions on Building Tokens
- Empires: Players may not build tokens of empires other than their empire and the faction(s) they won by bidding in C3 Factions.
- Empire Tokens May Only Build that Empire or Generic: The empire specific tokens of one empire may only build tokens of that empire or generic tokens (i.e. a Vree ship could not build a Drazi base, a Narn ship cannot build a Centauri mine, an Earth base cannot build a Psi Corps ship, etc.).
- Generic: Generic tokens may be built by any player.
- Occupied Hexes: A token (except squadrons) cannot be built into an occupied hex (a hex with a unit token).
- Building While Being Built: A unit may not be used to build (or repair) a unit on the same phase that it is, itself, built.
- Contested Hexes: A ship or base may not be used to build if it is, itself, in a contested hex. Also, a token may not be built in a contested hex (see D3.4 Contested Space).
D3.3 Repair
Only bases can conduct repairs. When a base is repairing another unit, the base is considered to be 'conducting repairs', and the unit is considered to be 'being repaired'. You may not conduct repairs to opponent tokens.
D3.31 Cost to Repair Your Tokens: A crippled unit may be repaired by paying the repair cost (the value in the magenta circle on the left edge of the crippled side of the token). When repaired, simply flip the token back to its undamaged side.
D3.32 Conducting Repairs to Your Units
- Base Repair: A crippled base may repair itself.
- Ships Docked: A crippled ship can only be repaired if it is docked to one of your bases or to Babylon 5.
- Repair to Squadrons: (See F4 Repairing Squadrons.)
D3.33 Restrictions on Repair
- Repairing While Being Built: A unit may not be used to repair (or build) a unit on the same phase that it is, itself, built.
- Contested Hexes: A base may not conduct repairs (even to itself) if it is, itself, in a contested hex. A base may not conduct repairs to a unit which is in a contested hex (see D3.4 Contested Space).
D3.4 Contested Space (Modular)
It is unlikely for units to be built or repaired in combat.
D3.41 Free Space: If no opponent units are adjacent to a hex, the hex is automatically not contested and is considered free space.
D3.42 Contested Hex: A hex is considered contested if any player with a ship or base (not squadron) in an adjacent hex desires the hex to be contested. The current player must obtain permission from each player with a ship or base in an adjacent hex to build or repair in that hex.
[Example: "Bob, I want to build in this hex adjacent to your ship, O.K.?" Bob must then allow or deny the build.]
[Note: If the opponent denies your build, you can attempt to build elsewhere or not at all. No economy is paid if the build is denied.]
D4 Move Phase
This is the phase where movement is conducted.
D4.1 Movement
Each of your ships (note: bases cannot move and squadron movement is covered under F2 Squadron Movement) may make 1 standard movement during your Move Phase.
D4.11 Ship Movement: Each of the following is considered a standard movement for a ship and is represented in the diagram below by 1 or more arrows:
- Rotate 60° or 120° without leaving the current hex.
- Move straight forward 1 hex without changing facing.
- Rotate 60° (changing facing) and then move forward 1 hex.
- Move backward 1 hex without changing facing.
- Move forward-left or forward-right without changing facing. This is referred to as a sideslip.
D4.12 Movement Options Chart
[Diagram printed: Movement Options Chart. Legend: current location and facing (hex with arrow); new location and facing. Arrow options are numbered 1 through 5 as in D4.11, with the hexes around the ship showing the possible new locations and facings.]
This diagram, found on the Empire Control Sheet, illustrates the movement options available to ships of that empire. The hexes with arrows represent the hexes into which a ship can move and the direction of the arrows indicate the facing the ship can have when it moves to that hex.
D4.13 Alternative Movement: Several ships have enhanced movement options and some ships have diminished options. These alternative movement options are defined on the Empire Control Sheets for each empire.
[Examples: Earth Alliance Nova Dreadns and Omega Ds may not sideslip (option 5 above), Minbari ships may move at a speed of 2 (see Minbari Control Sheet), White Stars (2260 edition) can rotate 180° or rotate up to 120° and move forward, etc.]
D4.14 No Stacking: A unit may not be moved (or otherwise placed) into a hex that contains another unit (exceptions: Squadrons (see D1.6, F2.1 and F5) and Dormant Shadow Vessels (see G3)). There is a stacking limit of 1 unit token per hex.
D4.15 Moving Other Empire Ships: If you take control of a ship (by any means), you must obey any movement restrictions of the ship as given on the Empire Control Sheet of that ship's empire (if any).
D4.2 Exposing Map Pieces
D4.21 Exploration: A unit entering a hex on an unexposed map piece (the CGS logo showing) causes that piece to be exposed (flipped to the other side). When exposed, the player whose unit is entering the map piece determines which way the map piece will be flipped before viewing the other side. Map pieces are flipped from flat edge to flat edge. This means there are 3 correct ways to flip a map piece (see diagram).
[Diagram printed: three flip axes, numbered 1, 2 and 3.]
D4.3 Hex Activation
D4.31 Definition of 'Entering a Hex': Any action which causes a unit to 'occupy' a hex it was not occupying prior to the action. The following are all ways in which a unit enters a hex:
- A unit is built in the hex.
- A unit is placed in the hex at the start of the game.
- A unit moves (or jumps) into the hex.
- A unit is relocated or placed by a map rule or card into the hex.
- A unit is on an unexposed map piece (via cards) when it is exposed.
[Note: Non-unit tokens may not be built into unexposed hexes and therefore may not be used to expose a map piece.]
D4.32 Activation of Hexes: If a unit enters a hex with a map element, that map element is immediately activated and applied as defined on the map piece or in B1.1 Map Elements. Exception: A jumpgate hex is not activated upon entry (see D4.61 Jumpgates).
D4.4 Mines (Modular)
D4.41 Building Mines: Mines are built in the Allocate Phase (see D3.24 Building a Token - Mine Token).
D4.42 Mine Detonation: Any unit entering a hex with a mine detonates the mine. When detonated, roll a number of Babylon 5 dice equal to the number shown in the mine's Damage Indicator. Apply the die total to the unit as damage (see E2 Applying Damage). A mine token is removed from the map when it is detonated.
D4.43 Minesweeping: In addition to its movement, each of your ships may attempt to sweep a mine (see H5 Minesweeping Rolls).
D4.44 Jumping into Mine Hexes: Unlike other Damage Indicators, when a ship jumps into a mine (or minefield) hex, it does not sustain double damage (see D4.66 Jump Damage).
D4.5 Additional Movements
V1.2 addition (dashed box):
D4.51 After Regular Movement: Additional movements granted by cards or map pieces must be performed after the unit has made its regular movement (or jump).
D4.52 Movement Does not include a Jump: A card or map piece granting an additional movement does not grant a jump unless the card or map piece specifically says it does.
[Example: The 'Accelerated Movement' card (see illustration in B6.1) does not grant a jump, only an additional movement.]
[Designer's Note About Scale: The map is not designed to represent any sort of accurate scale. It represents active locations and points of interest (perhaps intersections in real time) where conflicts arise. It could be said that there are millions of hexes in between each of the hexes on the map, and that we took these less interesting hexes out allowing only for the pertinent ones. A future product will allow for a more strategic level of play, using the map piece system to represent combat situations only.]
D4.6 Hyperspace Jumps (Modular)
There are 2 ways to enter hyperspace and 'jump', reappearing some distance away: Jumpgates and jump engines. Within the CGS, hyperspace jumps are instantaneous and ships do not remain in hyperspace for any period of time.
D4.61 Jumpgates: A unit which is in a jumpgate hex (a hex with a jumpgate graphic in it, see illustration at right) may 'jump' to an unoccupied hex up to 3 hexes away, or to an unoccupied jumpgate hex up to 2 map pieces away.
D4.62 Jump Engines: Any unit equipped with a jump engine (see B4.22 Jump Engine Indicator) may 'jump' to an unoccupied hex up to 3 hexes away (no jumpgate is required on either end of the jump).
D4.63 Instantaneous: When a unit jumps, its token is picked up and placed into the unoccupied destination hex facing the same direction it had prior to the jump. A jump is not a movement, it is performed instead of movement. It does not move through the hexes in between and does not activate any of these hexes. It does activate the destination hex.
D4.64 Forward Facing: When a ship jumps (via gate or engine) it must be made into the forward 60° arc (see Example E below).
D4.65 Unexposed Map Pieces: A unit jumping into a hex on an unexposed map piece causes the map piece to be exposed and activates the hex entered. The center hex of the 'Babylon 5' map piece may not be jumped into even when it is unexposed.
D4.66 Jump Damage: When a unit jumps into any hex which has a Damage Indicator, that unit takes double damage. Roll the damage dice and then double the result after all other modifiers have been applied. Mine tokens and minefield hexes are an exception to this and only standard damage is taken when jumping into these hexes.
D4.67 Instead of Standard Movement: A jump (via gate or engine) takes place instead of a unit's standard movement, (i.e. a ship can make its standard movement or jump, but not both on the same turn). This also applies to ships that participated in a fleet jump (see D4.68 Fleet Jumps).
[Note: This means a ship cannot activate a jumpgate hex on the turn it entered the hex, but may do so on a subsequent turn.]
[Note: You are not required to activate a jumpgate hex.]
D4.68 Fleet Jumps: When any unit jumps (referred to as the primary jump unit), any adjacent ships (which have not yet moved) may jump with the primary jump unit. All ships participating in the fleet jump must be facing in the same direction as the jump. All ships participating in a fleet jump must jump the same direction and distance as the primary jump unit. Additionally, they must maintain the same positions relative to each other (see Example D below). Each ship in the fleet jump is jumping consuming its 1 movement for the turn.
[Note: Since only adjacent ships may jump with a primary jump unit, a maximum of 7 units may participate in a fleet jump.]
[Diagram of Jump Examples printed on page 17, with the following captions:]
- Example A: A jump from a jumpgate hex to a non-jumpgate hex. - Maximum Distance: 3 hexes.
- Example B: A jump via jump engine - Maximum Distance: 3 hexes.
- Example C: A jump from a jumpgate hex to another jumpgate hex. - Maximum Distance (between jumpgates): 2 map pieces.
- Example D: The jump of a ship in an adjacent hex that is jumping with the ship in example C. Note how ship D must jump to the same adjacent position with respect to ship C (ship C is still to its forward left).
- Example E: The 7 possible jumps a ship using a jump engine or jumpgate (to a non-jumpgate hex) can make. Dashed lines indicate the forward 60° arc.
- Example F: Legal jumpgate to jumpgate jump over non-map area.
D5 Fire Phase
The Fire Phase is the phase when weapons are fired.
D5.1 Volley Sequence
Volleys are declared 1 at a time (see D5.5 Declaring a Volley) and resolved in the following sequence:
- Declare Fire: Declare a target (any token in range with a defense rating). Declare your firing token(s).
- Give Your War Token: If target player does not have it.
- Roll Long Range Support Die: (for weapons firing at range 2+) Determine damage from each token.
- Determine Total Damage: (the sum of each token's fire)
- Play OP Fire or Any Phase Cards: All cards must be played prior to the DG roll.
- Opponent Rolls Defense Grid Die Roll: Reduce damage or attack a squadron. Adjust damage total if applicable.
- Apply Damage to Target: If crippled, flip to crippled side. If destroyed, remove from the map. Tokens with upkeep are moved to the Scrap Yard. Tokens without upkeep are set aside out of play.
Volleys may be declared until there are no more weapons to fire or eligible targets. Repeat the above steps as necessary.
D5.2 Weapon Types
There are 2 basic types of weapons: Heavy Weapons and Lasers. They are indicated on the tokens as follows:
- Heavy Weapons: The number in the red hexagon
- Lasers: The number in the yellow hexagon
The numbers indicates how much damage is caused by the weapons on the token.
D5.3 Range
D5.31 Heavy Weapons: Heavy weapons have a range of 2 hexes. They may be fired at a target at a range of 1 or 2 hexes. See H1 Long Range Support Die Rolls when firing at range 2 or greater.
D5.32 Lasers: Lasers have a range of 1 hex (they may only be fired at a token in an adjacent hex).
D5.33 Diagram: (In the illustration to the right):
- The 1 dark gray target is at a range of 1 hex.
- The 3 light gray targets are at a range of 2 hexes.
D5.4 Firing Arcs
D5.41 Restricted: Firing arcs are used to determine what directions a token may fire its weapons. Weapons are restricted to firing within the firing arcs shown on the token. If a target is not in arc (or in range) of some or all of your weapons, those weapons do not score damage when the token fires at that target.
D5.42 60° Arcs: Each token has 6 sides. Each side faces a different 60° arc. At right is an illustration of a 60° arc.
[Note: Arcs go on forever, but most weapons cannot fire further than 2 hexes away.]
D5.43 Hex Spines: Hex spines (indicated by the arrows in the diagram on the right) are used to determine arc. Any unit in a hex between the two spine lines or intersected by a spine line may be targeted.
D5.44 Range Within Arc: (In the illustration to the below):
- The 1 dark gray target is at a range of 1 hex.
- The 3 light gray targets are at a range of 2 hexes.
- The white targets are not in range of standard weapons, but are still in arc.
D5.45 Arc Indicators on Tokens: The firing arcs are indicated along the token's edge by red and yellow lines. If there is a line on that side of the token, those weapons can fire in that 60° arc.
- Red Lines: Represents available arcs for heavy weapons.
- Yellow Lines: Represents available arcs for lasers.
[Example: The ship at right has 4 heavy weapon arcs (red, shown here as dark gray) of 60° each, (3 arcs forward and 1 aft) and 5 laser arcs (yellow, shown here as light gray) of 60° each.]
D5.5 Declaring a Volley
D5.51 Declaring Fire: To fire a weapon volley you simply declare what tokens are firing weapons at what target (a token must have a defense rating to be targeted). This is done 1 target at a time, in any order you choose.
[Example: 'I will fire at that ship with these 2 ships and this base for 12 damage'.]
D5.52 Firing Token: Once a token has fired at a target, it cannot fire again on the same turn. Any weapons not in range or arc are lost. A token may only fire at 1 target per turn.
D5.53 Targeting Limit: Once a token has been targeted, it may not be targeted again on the same turn. You cannot add another token's fire later in the Fire Phase or fire another volley at that target.
D5.6 Effect of a Volley
The effect of weapons fire is damage. The sum of the damage caused by all the tokens that fired in the volley is applied to the designated target as damage (see E2 Applying Damage).
[Example: A ship with a heavy weapon output of 2 and a laser output of 3, plus a ship with a heavy weapon output of 1 and a laser output of 4, both fire at a base 1 hex away. The damage applied in this case is 10.]
[Diagram printed: 60° Arc.]
E - Damage
E1 Sources of Damage
E1.1 Hexes
E1.11 Damage Indicators: When a unit enters a hex with a Damage Indicator (whether its on a token or built into the map piece), roll that many Babylon 5 dice and apply the result as damage to the unit.
[Example: A ship enters a hex with a Damage Indicator of 3. Roll 3 Babylon 5 dice, totalling the result. This is how much damage is applied to the ship.]
E1.12 Jump Damage: If a unit jumps into a hex with a Damage Indicator, double the result of the Babylon 5 Die Rolls. Exception: Mine and minefield hexes do not cause double damage when jumping into their hex.
[Example: A ship jumps into a hex with a Damage Indicator of 3. Roll 3 Babylon 5 dice, totalling the result. Double this result and apply it as damage to the ship.]
E1.2 Weapon Volley
After the firing player has targeted a token, determine the damage and apply it to the target (see D5.1 Volley Sequence).
E1.3 Cards
If a card causes damage to a token, apply the damage when the card is resolved.
E2 Applying Damage
E2.1 Defense Rating
All units have a defense rating (the number in the top left corner of the token, see B4.21 Defense Rating). Only tokens with a defense rating may be damaged.
E2.2 Crippling an Undamaged Token
If an undamaged token takes damaged equal to or greater than its defense rating, it is crippled. Flip the token over to the crippled side (except for E2.4 Destroying an Undamaged Unit).
[Example: A token with a defense rating of 4 requires at least 4 damage to cripple.]
E2.3 Destroying a Crippled Token
If a crippled token takes damaged equal to or greater than its defense rating it is destroyed. If a crippled token is destroyed, remove it from the map. Tokens with upkeep are placed in the Scrap Yard when destroyed.
E2.4 Destroying an Undamaged Token
If applied damage is twice the defense rating of the token or more, the token is destroyed and removed from the map. Tokens with upkeep are placed in the Scrap Yard when destroyed.
E2.5 Insufficient Damage
If the damage applied to a token is insufficient (even by 1 point) to cripple (or destroy) that token, then the damage causes no harm to the token and is lost. The token remains in play in the condition it was in (undamaged or crippled) prior to the damage being applied.
Tactical Advice
Here are a few suggestions for tactics which some experienced players have adopted:
Maintain a Positive Net: If you Net Economy drops to zero or less you usually can forget any chance of recovery. You should strive to keep your Net Economy at about 1/2 of your Gross Economy.
Destroy Bases: Focus on destroying opponent bases when possible. This lowers their Gross Economy and Net Economy weakening them greatly. At the same time, prevent your bases from being destroyed.
Play Set: When designing your Play Set, work on a theme with an objective. If Political Victory is your goal, choose vote cards and voters. If combat is your objective, choose offensive and defensive cards that modify weapons fire. If Territorial Victory is your goal, choose movement affecting cards and map pieces which other players might not wish to enter. If your goal is to maintain a large battle fleet, select cards to save your ships, economy giving cards and map pieces, and cards which have lower play costs, but still suit your needs. There are many different themes and many will argue over the best selection of cards to accomplish a given theme. Be sure to choose the cards that suit your theme and not just a hodge podge selection.
First Turn Savings Plan: You can choose a small or non-existent starting fleet. This saves you the upkeep on turn 1. Then build your jump capable ships on turn one. Just be sure you can move them to their proper places to build bases on turn 2.
Squadron Explorers: Squadrons are a great way to expose map pieces that you didn't place. If they get destroyed, they are cheaper to replace than a ship.
Heavy Shadow Influence: Placing a dormant Shadow battlecruiser on an opponent's homeworld is a good way to encourage them to accept your influence, since you cannot target that player's tokens (except the base with the Shadow Influence Token) when you wake up the dormant battlecruiser if they are under your influence.
Preview
Encounter Decks (Modular)
Future products provide decks of encounter and mission cards from which players draw. These cards define various benefits or detriments which affect the current player.
F - Fighter Squadrons
F1 Squadron Tokens
F1.1 Tokens
F1.11 Units: Squadrons are units. Each squadron token represents a squadron of fighters. Some empires have several types.
F1.12 Carriers Required for Building: You may only build your squadron tokens under your docked carriers or your bases with carrier ability up to the capacity of the carrier.
F1.13 Separate Tokens: Squadrons are not considered as belonging to a specific carrier. When under a carrier, they are considered inside the carrier (not in the carrier's hex) and cannot fire weapons or be targeted.
[Note: The squadron token(s) under a carrier do not add any benefit to the carrier token (i.e. they do not add defense, weapons, etc.). If an opponent takes control of your carrier, he does not get control of the squadrons inside it (and they remain inside).]
F1.2 Carrier Capacity
Carriers are tokens with the note 'Carrier (n)' on the token where 'n' equals the maximum number of squadron tokens the carrier can carry.
F2 Squadron Movement
F2.1 Movement
Each of your squadron tokens may move 1 hex in any direction (or jump if it has a jump engine or if it is in a jumpgate hex). Your squadrons may move from the hex they are in (which may be under a carrier). Squadrons may move to an unoccupied hex or to a hex with one of your carriers in it.
[Note: Only the squadrons movement may cause it to move under a carrier or from under a carrier. Squadrons under a carrier which moves remain under the carrier (travelling with it).]
F2.2 Carrier Operations
IMPORTANT - The following rules have been deleted:
F2.21 Deployment: Squadrons deploy (as defined in F2.1) by normal movement or jump. There is no longer a deployment action.
F2.22 Recovery: Squadrons are now recovered during the Record Keeping Phase (see D1.6 Recover Squadrons). Squadrons which are not recovered are crippled or destroyed.
F2.3 Jumps
A squadron with a jump engine or in a jumpgate hex may jump in any direction (even if under a carrier). A squadron may jump (as its movement for that turn) a maximum of 1 time on your turn. The movement or jump of a carrier does not count as the movement or jump of the squadrons under it. They are still eligible to move or jump even though they traveled with the carrier.
[Example: A squadron is under a carrier while the carrier jumps (the squadron travels with it). The squadron may then move or jump (if it has a jump engine or in a jumpgate) if it has not already done so.]
[Note: Ships may jump with a squadron (see D4.68 Fleet Jumps).]
V1.2 addition (dashed box): F2.4 Empire Restrictions: Squadrons may only be carried by a carrier of the same empire as the squadron.
F3 Damaging Squadrons
Generally, squadrons are more maneuverable than ships. Therefore, when entering a hex with a hazard, it can be expected that some of the fighters in the squadron navigate the hazard successfully. Additionally, squadrons are more difficult to target with weapons since they actually represent multiple fighters.
F3.1 Applying Damage
No matter how much damage is applied to an undamaged squadron, it may only be crippled, not destroyed. Crippled squadrons may then be destroyed by subsequent damage per the standard rules.
[Note: This means an undamaged squadron cannot be destroyed in a single weapons volley (even by scoring twice its defense rating).]
[Example: Bob has an undamaged squadron in play with a defense of 2. Sally fires 5 points from a nearby ship (or 5 damage is sustained from a Damage Indicator). The squadron is crippled (not destroyed).]
V1.2 addition (dashed box): F3.2 Carrier Damage: If the carrier is crippled, the squadrons under it are not affected at all. If the carrier is destroyed, all squadrons under it are also destroyed (squadrons not under the carrier are not destroyed).
F4 Repairing Squadrons
F4.1 Squadron Repair
To 'repair' a crippled squadron, the squadron token must be under 1 of your carriers which is a ship and is docked to one of your bases or docked to Babylon 5.
F4.2 Squadron Merger
A carrier can merge 2 identical crippled squadrons currently under the carrier into 1 undamaged squadron (removing one of the tokens from the map) at no cost. This may be done at any time, even when in contested space or not docked to a base.
F5 Forced Recovery
A unit may force an opponent squadron to be recovered by entering (see D4.31 Definition of 'Entering a Hex') the hex the squadron is in. The squadron owner must move the squadron under a carrier. This must be done with 1 movement of the squadron or the squadron is destroyed (removing it from the map).
[Example: A squadron is in a hex adjacent to a carrier base. An opponent moves a ship into the squadron's hex, causing the squadron owner to move the squadron under the base.]
[Example: A squadron, under a carrier adjacent to an opponent squadron, is moved into that squadron's hex forcing its owner to recover it. Note that you may not move 1 of your squadrons into a hex already containing 1 of your squadrons.]
G - Empire Specific Rules
Rules in this section cover empire specific abilities and liabilities which are only needed when playing (or playing against) the empire covered in the given rule.
G1 Shadow Influence
G1.1 Falling Under Shadow Influence
G1.11 Conditional: A Shadow player (not a player using Shadows as a faction), during his Allocate Phase, may seek to influence another player by asking, "What do you want?" The other player may then select a target on the map. If the player selects a target and the selected target is removed from the map (by any means) before the Shadow player seeks to influence another player (by asking, "What do you want?"), the Shadow player places a Shadow Influence Token under any base of the player he successfully influenced (upon removal of the selected target).
[Hint: Place a piece of sticky note on the selected token to keep track.]
G1.12 Restrictions:
- Vorlons: A Shadow player may not form an alliance with a player currently allied with the Vorlons (see G2 Vorlon Alliance) or with a Vorlon player.
- Limit on Influence: A base may not have more than 1 Shadow Influence Token, even if there is more than 1 Shadow player.
G1.13 Placement of Shadow Influence Token: The Shadow player chooses which base is influenced by placing a Shadow Influence Token under a base of the player influenced. When a Shadow player places a Shadow Influence Token under a base, if the Shadow player has a War Token from that player, the Shadow player must return the War Token.
G1.2 Effects of Shadow Influence
G1.21 Shadow Influence: A player with 1 or more bases which have a Shadow Influence Token is considered to be under the influence of the Shadow player (or players) who placed the token(s).
G1.22 Shadow Targeting Restrictions: A Shadow player may not fire at the tokens of a player under his influence except:
- The Shadow player may fire at any base which has one of his Shadow Influence Tokens.
- The Shadow player may fire at any token adjacent to any of the Shadow player's bases.
- The Shadow player may fire at any player's tokens if they have that player's War Token.
G1.23 Penalty: A player under Shadow influence must pay a penalty of 1 economy for each of his bases with a Shadow Influence Token (see D1.4 Pay Penalties). This penalty is added to the Shadow player's Economy Reserve when paid.
G1.3 Removing Shadow Influence Tokens
A Shadow Influence Token may only be removed by the destruction of the base it is under.
G2 Vorlon Alliance
G2.1 Forming an Alliance
G2.11 Voluntary: During the Vorlon player's (not a player using Vorlons as a faction) Allocate Phase, the Vorlon player may petition any opponent(s) to form an alliance. If both players agree to a base (owned by the opponent), the Vorlon player places a Vorlon Alliance Token under the base. A maximum of one Vorlon Alliance may be formed on each of the Vorlon player's turns.
G2.12 Restrictions
- Shadows: A Vorlon player may not form an alliance with a player currently influenced by a Shadow player (see G1 Shadow Influence) or with a Shadow player.
- Limit on Vorlon Alliance: A base may not have more than 1 Vorlon Alliance Token, even if there is more than 1 Vorlon player.
G2.2 Effects of Vorlon Alliance
G2.21 Vorlon Alliance: A player with 1 or more bases which have a Vorlon Alliance Token is considered to be allied with the Vorlon player(s) (or players) who placed the token(s).
G2.22 Vorlon Technology: A base with a Vorlon Alliance Token may roll an additional Defense Grid Die Roll using a Vorlon Defense Grid Die whenever it is the target of weapons fire.
[Note: The base gets its regular Defense Grid Die Roll in addition to the Vorlon Defense Grid Die Roll.]
G2.23 Restrictions on Targeting: A base with a Vorlon Alliance Token may not target tokens belonging to the Vorlon player.
G2.3 Removing a Vorlon Alliance Token
G2.31 Eligibility: During the Allocate Phase, a player involved in a Vorlon Alliance (the Vorlon player or the opponent) may make 1 attempt to remove a Vorlon Alliance Token from each of the bases (involved in the alliance) within the following restrictions:
- Vorlon Player: The Vorlon player may attempt to remove any of his Vorlon Alliance Tokens if he has a War Token from the allied player.
- Allied Player: The opponent may attempt to remove any Vorlon Alliance Token from any of his bases if he has a War Token from the Vorlon player.
G2.32 Attempt: To attempt to remove a Vorlon Alliance Token, make a Stat vs. Stat Roll (the base's Defense Rating vs. the Combat Stat of a Vorlon crew card) belonging to the Vorlon player (selected by the Vorlon player). A single Vorlon crew may only attempt to resist the removal of a Vorlon Alliance Token once per turn. If the Vorlon player has no Vorlon crew, or he do not wish to use one of his crew, they have a default stat of zero.
G2.33 Result of the Attempt: Success for the player making the attempt removes the Vorlon Alliance Token. If the opponent succeeds by an amount equal or greater than the Vorlon crew's Health Stat, the crew (if used) is discarded. If the Vorlon player succeeds, apply the amount by which the Vorlon player succeeded to the base as damage.
G2.33 Destruction: A Vorlon Alliance Token is removed if the base it is under is destroyed.
[Note: G2.33 is printed twice in the source rulebook; both are transcribed as printed.]
G3 Dormant Shadow Vessels
The Shadows hid many of their vessels from the Armies of Light a thousand years ago. These dormant ships lay buried on hundreds of worlds and moons throughout the galaxy. Now the Shadows are gathering their forces and recalling their ships.
G3.1 Pre Game Set-up
G3.11 Optional: The Shadow player (not a player using Shadows as a faction) may choose to place dormant Shadow vessels as part of his starting fleet (C4.3 Starting Fleet).
G3.12 Cost: Any Shadow ship token may be purchased as a dormant Shadow vessel at a cost of 1/2 the normal build cost of the Shadow ship.
G3.13 Placement: Once purchased, a dormant Shadow vessel is placed on an opponent homeworld map piece underneath an empire base placed there by that opponent. A Shadow player may place a maximum of 1 dormant Shadow vessel on each opponent homeworld map piece.
G3.14 Restrictions: Dormant Shadow vessels may not be placed on the Vorlon Homeworld map piece.
G3.2 Activation During the Game
Dormant Shadow vessels do not function, cost upkeep, move, etc. until activated. They cannot be targeted by weapons fire or card actions, etc. They are treated as if they were not in play until activated. Once activated, they are treated as any ship in play would be.
G3.21 Adjacent Shadow Ship: When the Shadow player moves one of his ships (not squadrons) into a hex adjacent to a dormant Shadow vessel, the dormant Shadow vessel is activated. The Shadow player relocates the ship token (for the 'no longer dormant' ship) to the nearest unoccupied hex of his choice, with a facing of his choice.
G3.22 Discovery: Any player who has a dormant Shadow vessel on his homeworld map piece may roll 1 Babylon 5 Die (1B5) during the Record Keeping Phase (D1.7). If the result of this die roll is a 5, then that player has activated the dormant Shadow vessel. The discovering player places the ship in the nearest unoccupied hex of his choice, with a facing of his choice.
[Note: If there is more than 1 dormant Shadow vessel on the homeworld map piece (only in a game where there are 2 or more Shadow players), a roll may be made for each.]
G3.23 Destruction of the Base: If the base is destroyed prior to the activation of the dormant Shadow vessel, the dormant Shadow vessel is removed from the map (and is not placed in the Shadow player's Scrap Yard).
G3.24 Upkeep: If a dormant Shadow vessel is activated, it is no longer dormant and the Shadow player is then required to pay upkeep on the Shadow vessel and may use it normally.
[The Shadow player should increase his Total Upkeep and reduce his Net Economy at this time.]
G4 Telepaths vs. Shadow Ships
Telepaths had the ability to 'freeze' or 'stall' a Shadow vessels for short periods of time.
G4.1 Definition of a Telepath
A telepath is a crew card with a Psi Stat. Although a crew without a stat has a default of zero for that stat, a crew without a Psi Stat is not considered a telepath and may not be used to affect Shadow ships.
G4.2 Attempt to Freeze a Shadow Ship
Any player with a telepath in play may make 1 attempt on each of his turns to freeze a Shadow ship during the Allocate Phase.
G4.21 Stat vs. Stat Roll: If you have a unit adjacent to a Shadow ship you may make a Stat vs. Stat Roll (Psi Stat of 1 of your telepaths vs. the Upkeep of the Shadow ship). If the roll is successful, the Shadow ship has been frozen.
[Hint: Place a marker (currency) on the ship to remind the Shadow player when his turn comes around that the ship has been frozen.]
G4.22 Restrictions:
- Shadow Influence: A player influenced by a Shadow player (G1 Shadow Influence) may not use telepaths to freeze that Shadow player's ships.
G4.3 Effect of Being Frozen
If the attempt was successful, the player controlling the Shadow ship (on his turn) selects one of the following restrictions:
- Movement: The affected Shadow ship may not move or jump unless the telepath player (who froze the ship) consents to the movement. They may, however, participate in a fleet jump without consent.
- Weapons Fire: The affected Shadow ship may not fire weapons unless the telepath player (who froze the ship) consents to the weapons fire.
G5 Vorlon Planet Decimation (Modular)
The Vorlons eventually choose to eliminate Shadow Influence by eliminating the worlds corrupted by the Shadows.
G5.1 Procedure
Vorlon Planet Killers may fire heavy weapons at any unoccupied hex with an Economy Indicator. If the heavy weapon damage from the Planet Killer(s) is twice the Economy Indicator of the hex, place an asteroid token in the hex. The Damage Indicator of the asteroid should be equal to the value of the Economy Indicator (or of nearest value available, i.e. place a 5 asteroid in the 'Wolf' hex if it is decimated). The asteroid token supercedes the Economy Indicator.
H - Die Rolls
H1 Long Range Support Die Rolls
H1.1 Procedure
When firing at long range (2 or more hexes), weapons suffer diminished effects. When one or more of your tokens is firing weapons at range 2, roll a Babylon 5 Die (1B5) for each weapon type on the token doing so. The result on the die is the maximum amount of damage the weapon type on that token may score on the target this volley. This adjustment is made before any other modifiers are applied. At range 3 or greater use 1 Defense Grid Die (1DG) instead of 1B5.
[Examples: A ship is firing 3 points of heavy weapons at a base 2 hexes away. A Long Range Support Die Roll is made and the result is a 2, apply 2 (not 3) damage to the base. The same ship is firing on the same base but this time rolls a 5 on the Long Range Support Die Roll. Apply 3 damage to the base.]
[Notes: Long Range Support Die Rolls cannot increase the damaged caused by weapons. The damage will remain the same or be reduced. The Long Range Support Die Roll only sets a maximum for that token's weapons fire at range 2 or greater.]
H2 Defense Grid Die Rolls
When a ship or base is the target of a weapons volley, the controlling player may choose to fire its defense grid at the incoming volley or at a squadron participating in the volley.
Each empire has it's own unique color coded Defense Grid Die (see B5.23). Always use the Defense Grid Die of the empire of the token whose defense grid is firing. If the token is generic (white) or a non-aligned faction (gray) use the generic Defense Grid Die.
H2.1 Versus a Weapon Volley
All ships and bases have defensive systems used to diminish the incoming damage of an opponent's weapons volley.
When 1 of your ships or bases (not squadrons) is targeted by a weapons volley, roll 1 Defense Grid Die (1DG) and subtract the result from the volley before applying damage. If a unit is not controlled by any player it automatically selects to diminish damage.
H2.2 Versus an Attacking Squadron (Modular)
When a weapons volley consists of weapons from 1 or more squadrons, the defending player may choose to fire his defense grid at 1 of the squadrons instead of subtracting the die result from the volley. This is done by declaring your intent before rolling the die. The result is applied to the squadron as damage. If the squadron is crippled by this damage, use the weapons on the crippled side of the squadron token when totalling the damage of the volley. If the squadron is destroyed, do not include its damage when totalling the damage of the volley.
[Example: Your base (with a defense rating of 6) is about to sustain a weapons volley of 4 damage from a ship and 3 damage from a heavy squadron and you have announced your intent to fire your Defense Grid Die at the squadron (instead of subtracting its result from the incoming volley). You roll a 3 on the Defense Grid Die. This cripples the squadron (reducing its weapons from 3 to 1) and therefore reduces the total volley from 7 to 5. Since 5 is insufficient to damage a defense rating of 6, the base remains undamaged.]
H3 Stat Rolls
H3.1 Stat Roll (Previously B6.6)
A Stat Roll is simply a requirement that you roll a crew's stat or less on a standard six-sided die (1D6). The card or rule calling for the Stat Roll will specify the stat to be used and any modifier to be applied to the stat.
[Example: The card 'Shag Toth' reads "Select 1 opponent crew to make a Health Roll at -2. If that crew fails, discard the crew and this card". The player of 'Shag Toth' selects a crew card who must roll it's Health Stat -2 or less on 1D6. The defending player makes a single die roll. Lets assume the defending crew had a Health of 5, and a 1 is rolled on the die. 1 is less than or equal to 3 (a Health of 5 with a -2 modifier), so the crew remains in play.]
H3.2 Stat vs. Stat Rolls
Some cards or rules call for a Stat vs. Stat Roll.
H3.21 Procedure: 1D6 is rolled for each side, adding the indicated stat (or other number, i.e. upkeep, etc.) to the side's die roll. The higher score wins. A tie indicates that neither side wins.
[Example: The card 'Tu'Pari' states "Make a Combat vs. Combat Roll (an 'attack') against a crew card to discard it." Thus a crew is selected, for example, with a Combat Stat of 3. The roll for Tu'Pari is a 5, totaling 9 ('Tu'Pari' has a Combat Stat of 4 plus the die roll of 5) and the roll for the 'attacked' crew is a 2, totalling 5 (3+2). The crew is discarded.]
H3.22 Order: The first stat listed is the stat the acting player uses. The second stat is the stat used by the other side.
[Example: The card 'Talia Winters' reads "When an opponent crew attempts to affect any of your crew, make a Psi vs. Health Roll against the opponent crew. If successful prevents the crew's function." The acting player initiates the roll and uses Talia's Psi Stat and the other player uses his crew's Health Stat.]
H3.3 No Stat Shown
If a crew does not show a specific stat, that crew's rating in that stat is considered to be zero. This does not mean it cannot attempt a roll, only that it has a lower chance of success than a crew with a higher stat.
H4 Random Direction Rolls
When a card, map piece or rule calls for a Random Direction Roll, simply roll 1 six-sided die (1D6) and use the direction rolled as shown on the 'Babylon 5' map piece.
H5 Minesweeping Rolls
Minesweeping is done by declaring that a ship is sweeping a mine directly in front of it, and rolling a Defense Grid Die (1DG). The mine is detonated and the ship may take damage. Subtract the Defense Grid Die result from the mine's Damage Indicator and roll that many Babylon 5 dice as damage to the sweeping ship and remove the mine token.
[Example: Your ship is attempting to sweep a mine with a Damage Indicator of 3. You roll a 1 on the Defense Grid Die and then take the result of 2 Babylon 5 dice as damage to your ship (instead of the 3 dice you would have taken if you moved into the mine hex). You take this damage even though you did not enter the mine hex.]
J - Crew Locations and Away Missions
V1.2 addition (dashed box): This section describes how to track the locations of crew. It allows crew to leave Babylon 5 on starships and travel on the map to other locations. This rule will be of little use until you have purchased the encounter deck products (Feb '99) or other products containing Mission and/or Encounter cards. It is presented here so that when you obtain those products, you will already have a functional knowledge of the rules needed to use those products.
J1 Crew Location (Modular)
J1.1 Location
When a crew is played, it must be assigned a location by the player playing the crew. A location is a Ship, Base or Squadron. When played, the crew's location must be any unit which is owned by the player playing the crew. Links (triangular shaped currency with letters on them) are used to link the crew card to its location on the map. Links are not required for crew played to Babylon 5 (until such time as the crew leaves Babylon 5).
[Examples: A player plays a crew card. Selecting a pair of links (2 A's for example), the player places 1 link on the crew card and 1 on one of his ships. The crew is now considered on that ship.]
J2 Transportation (Modular)
All locations are considered to have transporters.
J2.1 Transportation
Transportation consists of life pods, shuttlecraft etc.
Transportation has a range of 0 or 1 hex. To use transportation, simply declare in the Allocate Phase that a crew is using transportation to move or perform an Away Mission.
J2.2 Changing Location
To change location, the new location must be in range of the transportation (0 or 1 hex) and must not be controlled by an opponent (i.e. you cannot move a crew over to an opponent ship and leave it there). You can move a crew to one of your ships, bases or squadrons (even from an opponent unit if the crew happens to be there.). When a crew leaves a location, for another simply move the link to the new location showing that the crew has changed location. Crew are assumed to be on Babylon 5 unless a link shows them to be elsewhere. The link can be removed from any crew changing location to Babylon 5.
J2.3 Location Capacity
There are no limits to the number of crew at a location.
J2.4 Simultaneous Use
When transportation is used in the Allocate Phase, it can be, but is not required to be, used by 1 or more crew simultaneously. You can send 3 crew on 3 different Away Missions to different locations, or you could send all 3 crew on the same Away Mission (or any combination thereof). Away Missions are performed 1 at a time and the crew going on the Away Mission are all declared when the Away Mission is declared. Crew must be at the same location in order to go on the same Away Mission.
[Example: A player declares that 2 crew are going on 1 Away Mission to the same location.]
J2.5 Emergency Evacuation
V1.2 addition (dashed box): When a location is destroyed, crew (and any abilities or gear) at that location may use transportation to evacuate the location 'just' prior to its being destroyed. If there are no locations in range to change location to, then the crew are discarded and the location is removed from play by the standard rules.
J3 Away Missions
J3.1 Procedure
An Away Mission consists of transportation to another location, the attempt at completing the action (mission card, crew function, etc.) and transportation back to the previous location of the crew.
[Example: A crew with 'Pain Givers' is currently on a ship. The crew transports to an adjacent opponent ship (Away Mission not change of location) with an opponent crew on it. If the Combat vs. Combat Roll is successful (see the 'Pain Givers' card) then the 'Pain Givers' card is placed on the opponent crew and that opponent crew is affected by the 'Pain Givers' card. The crew on the Away Mission returns to its ship.]
[Note: Links do not need to be moved to perform an Away Mission since the crew will be returning to the original location after the action(s) has been resolved.]
J3.11 Crew Proximity: For a crew to affect another crew (with a crew function (including gear and ability cards) or via a mission card) both crew must be at the same location. See B6.31 Crew: Cards Affecting a Crew.
J3.12 Change location -or- Away Mission: Each of your crew may go on 1 Away Mission on your turn or may change location once on your turn (not both).
J3.13 Timing of Crew Functions and Mission Card Attempts: Each crew may perform its periodic ('-') functions once on your turn and may attempt 1 mission card once on your turn during the Allocate Phase. These may be done in any order desired (before, during or after the use of transportation). These may also be performed without transportation (if the crew is at the appropriate location or a specific location is not required).
[Note: If a mission card were played to the above crew before it transported, the crew could attempt the mission card on the opponent ship as well as using its gear function.]
X - Appendices
X1 Errata
As with any published product there is a tendency for gremlins to sneak in and change things when you're not looking. What follows is errata (corrections) to prior releases:
V1.0 and V1.1 Rulebook: This rulebook (V1.2) is the errata to the V1.0 and V1.1 rulebooks. It supercedes any rules and errata previously published.
Cards:
- President Luis Santiago: The reference to 'President Clarke' should be 'President Morgan Clark'.
- Activate Defense Grid: The '-' should be treated as a '>'.
X2 Special Token Rules
Some tokens have short special rules which are defined in further detail here:
Carrier: A token that is a carrier may carry squadrons up to its limit (found in ( ) after the word carrier (see F1.2 Carrier Capacity)).
Mines: A token with the rule 'mines' can build 1 mine each round on your turn (see D3.24 Building a Token - Mine Token).
+2 economy if docked to B5 (printed as a circled-numeral bonus symbol): This indicates that when the token is docked to Babylon 5, the controlling player gets a bonus of 2 economy (or 1, 3, etc.) during his Record Keeping Phase (see D1.3 Collect Bonuses).
Can destroy 'planets': Indicates a ship which can destroy Economy Indicator hexes (see G5 Decimating Planets).
Steal 1 economy when docked (printed as a circled-numeral symbol): This indicates that when the token is docked to an opponent base, the base controller pays a penalty of 1 economy (or 2 or 3, etc.) during his Record Keeping Phase (see D1.4 Pay Penalties). The controller of the stealing token adds this economy to his Economy Reserve when the penalty is paid.
X8 Pregame Set-up Chart
Pre-Game Set-up (select one):
- Basic Game Set-up, Starter Kits (C1.1)
- Basic Game Set-up, Core Set (C1.2)
- Standard Game Set-up (C1.3)
- Random Game Set-up (C1.4)
Create Map (in order, once):
- Announce Empires and Determine Order of Play (C2.2)
- Players remove cards of other empires represented by other players from their decks (C2.2)
- Place Babylon 5 (C2.31)
- Place Homeworlds (C2.32)
- Place map pieces (C2.41)
- Flip Babylon 5 (C2.42)
Factions (in order, once) (C3):
- Show selected factions (C3.13)
- Bid on factions in the Order of Play (C3.14)
Homeworld Territory (Master's level only) (C6.13)
Starting Forces (in order once) (C4):
- Select starting hand (C4.1)
- Place currency to represent Starting Gross and Starting Economy Reserve (C4.2)
- Place Starting Fleets in Order of Play (C4.3) (C6.14)
- Adjust Scoring Banks base on these builds (D3.23)
Begin Play (Starting with the first player): Current player follows the Turn Sequence (see X10 Turn Sequence Chart) and then play passes clockwise.
X9 Play Aids
Dice as Markers: While the currency found in the CGS is useful, we recommend picking up a dice brick (if you don't already have dice) with 36 six-sided dice in 3 or 4 colors. Dice are the easiest way to track the first 3 Scoring Banks (see B3.1 Scoring Banks), using currency only for your Economy Reserve. This ensures that scores are kept accurately and that currency does not inadvertently slip from 1 bank to another.
[NOTE: This system is required in tournaments.]
Currency as Markers: Currency may be used as markers in several ways:
- Duration: Use currency to indicate how many rounds a card has left before its duration is up. The currency should always show how many rounds currently remain before the card is discarded.
Play Set: Players may wish to build a Play Set (a player defined selection of parts, see C1.3 Standard Game Set-up and C5.1 Player Decks). This allows players to begin play with less set-up time. These are usually empire specific (i.e. designed with 1 empire in mind). Starter Kit boxes and the enclosed plastic tray are ideal for storing a Play Set for the empire of the box.
Static Stickers: Players may wish to purchase some static stickers or sticky notes to stick to the face side of their map pieces. This will prevent the map pieces of different players from becoming mixed up. Move the sticky to the back side when exposing the map piece to keep it out of view.
X10 Turn Sequence Chart
This is the play sequence reference chart printed on the back cover of the rulebook (see A2.14).
Record Keeping Phase (in order, once):
- Victory Check (if appropriate) (D1.1)
- Economic Victory (2x other Gross Economies) (D1.11)
- Surrender (if negative Net Economy) (D1.12)
- Territorial Victory (6 map pieces) (D1.13)
- Political Victory (by Council Vote) (D1.14)
- Generate economy (D1.2)
- Collect bonuses (D1.3)
- Pay penalties (D1.4)
- Cards with durations (of rounds) count down (D1.5)
- Recover squadrons (D1.6)
- Attempt to discover a dormant Shadow vessel (D1.7)
- Move gear (D1.8)
Vote Phase (in order, once):
- Play Vote Phase cards (other than vote cards) (C5.22)
- Call for Council Vote (D2.1)
- Play a vote card & read it aloud (D2.1)
- Negotiate (D2.2)
- Take the Vote (D2.3)
- Apply effects if vote passes (D2.34)
- Play Vote Phase cards (other than vote cards) (C5.22)
Allocate Phase (in any order, repeating until done):
- Buy cards (1 time only) (D3.14)
- Build tokens (from your scrap yard or out of play) (D3.2)
- Repair your crippled tokens (D3.3)
- Play Allocate Phase cards (C5.23)
- Shadow players may attempt to influence (D3.15)
- Vorlon players may attempt to form alliances (D3.16)
- Crew may change location / perform Away Missions (J2.2, J3)
Move Phase (in any order, repeating until done):
- Each ship and squadron may move or jump once
- Movement (D4.1)
- Hyperspace jumps (D4.6)
- Resolve movement (for each unit after it moves)
- Exploring map pieces (D4.21)
- Hex activation (D4.3)
- Play Move Phase cards (before or after any movement or card play) (C5.24)
- Minesweeping attempts may be made (H5)
Fire Phase (in order, once per target, repeat for each target):
- Play Fire Phase cards (C4.25)
- Declare Fire (D5.51):
- Declare a target (a token in range with a defense rating)
- Declare firing token(s)
- Give War Token: If target player does not have yours (B4.51)
- Roll Long Range Support Die: (range 2+ weapons) (H1)
- Determine damage from each token
- Determine total damage (sum token's fire)
- Play OP Fire or Any Phase cards: (C5.2). All cards must be played prior to the DG roll.
- Opponent rolls Defense Grid Die Roll: (H2)
- Reduce damage or attack squadron
- Adjust damage total (if applicable)
- Apply Damage to Target: (E2)
- If crippled, flip to crippled side
- If destroyed, remove from the map
- Tokens with upkeep are placed in the Scrap Yard
- Tokens without upkeep are set aside