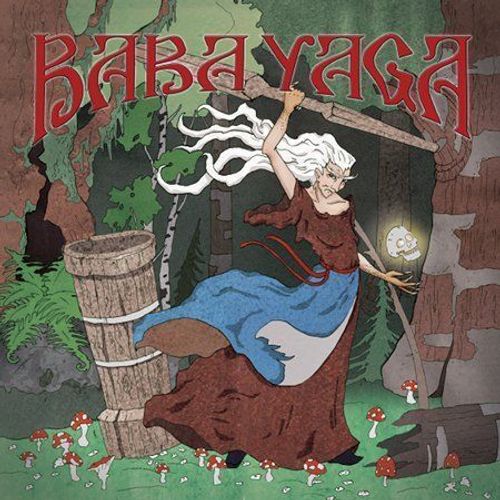
Baba Yaga (2010)
Baba Yaga (2010) Rulebook
Table of Contents
Table of Contents
- Object of the Game
- Game Components
- Locations and Quest Cards
- Encounter Cards and Tokens
- Character and Encounter Cards
- Taking Cards
- Gameboard and Movement
- Getting Started
- Basic Game Play
- Challenges
- Reputation
- Dying
- Winning the Game
- Quests
- Additional Rules
- Cooperative Play Too Easy?
- Solo Play
- Special Locations
- Appendix I: Glossary
- Appendix II: Pronunciation Guide
Object of the Game
In Baba Yaga, the players are young heroes seeking their fame and fortune. They accomplish this by moving from location to location and having encounters and/or fulfilling the requirements of Quest Cards, all while keeping a wary eye out for Baba Yaga and her minions.
The game of Baba Yaga is unique, in that it offers two different styles of game play. You can stick with the more traditional style of competitive play, wherein each player seeks to overcome the others and there is only one winner. Alternately, there are rules to play cooperatively, which means that the players work together against the game itself and win or lose together.
The win and lose conditions for the two different styles of game play are discussed in Section 6: Winning the Game, but here are the basics…
The game ends in one of three ways:
- Baba Yaga is defeated three times.
- Competitive: The player with the highest Rep. wins!
- Cooperative: The players win!
- Quest cards are completed.
- Competitive: The first player to complete their quest wins!
- Cooperative: The players win!
- Either of the encounter decks run out of cards.
- Competitive: The player with the highest Rep. wins!
- Cooperative: The players lose!
Game Components
- 1 gameboard
- 40 Wilderness Encounter cards
- 32 Town Encounter cards
- 6 Quest cards
- 3 Horseman Encounter cards
- 1 Hut Encounter card
- 3 Baba Yaga Encounter cards
- 6 Character cards
- 6 Character tokens
- 5 Game Element tokens: Hut, Horseman, Baba Yaga, Wolves, Solovey
- 5 six-sided dice
Tip: It is suggested that players use glass beads, stones, coins, or other small objects to use as marking tokens. Said tokens are not necessary, but can be useful for such things as marking locations on the board that your character must visit or how many steps have been completed in a Quest.
Locations and Quest Cards
The board's location names and their key are printed as follows (printed illustration, page 4):
- Wilderness Location – black text.
- Town Location – red text.
- Thick blue line – impassible river terrain.
- Thick red line – impassible mountain terrain.
- Location that has optional special text – see Special Locations.
The Quest Card illustration (page 4) labels its parts as: Quest Card, Quest Name, Starting Location, Initial Set Up, and Quest Steps. The Quest Card's first lines give the set-up; each following numbered step is one stage the character must complete in order (see Quests).
The printed example Quest card, "Slay the Dragon" (Starting Location: Ozerov), reads:
You are on a holy mission to rid Russia of its most evil creatures.
Before the game begins, go through the Wilderness deck and place the Solovey the Robber card beside the board and place the Solovey token on the Bandit Camp.
- Go to the Hut Token. Instead of the normal Hut encounter, you find the witch's daughter who attacks you with a sickle. Pass a Fight challenge: Diff 3 + Rep. Win: You overpower the witch's daughter. She says that her mother isn't home, but that defeating Solovey the Robber would help your quest. Place the Hut Token on the Bone Fence location. Lose: You are killed.
- The Solovey token must be removed from the board but not necessarily by you.
- Return to the Hut token but do not have an encounter this turn. The witch's daughter now tells you about the great twelve-headed dragon plaguing the lands. Place the Hut Token on Bone Fence location.
- Go to the Warrior's Rest location, where you are beset by a three-headed dragon. Instead of a normal Wilderness Encounter, Pass a Fight challenge: Diff 4. Win: You slay the dragon. Lose: You are Killed.
- Go to the Pass of Devils location, where you are beset by a five-headed dragon. Instead of a normal Wilderness Encounter. Pass a Fight challenge: Diff 5. Win: You slay the dragon. Lose: You are Killed.
- Go to the Dragon's Heart location, where you are beset by the twelve headed dragon. Instead of a normal Wilderness Encounter, Pass a Fight challenge: Diff 6. Win: You have slain the great dragon and its brothers and Russia is safer for it... Quest completed! Lose: The dragons continue to terrorize the land. You are killed and out of the game.
Encounter Cards and Tokens
The printed illustrations (page 5) show the following components: Wilderness Encounter cards; Town Encounter cards; the Hut Encounter card; the Horseman Encounter cards (White Dawn, Red Sun, Black Night); the three Baba Yaga Encounter cards (Baba Yaga #1 – The Tasks, #2 – The Escape, #3 – The Battle, each with a Side A); the Hut Token; the Horseman Token; the Baba Yaga Token; and the Game Element tokens for Solovey and the Wolves.
Character and Encounter Cards
Character card. Each Character card shows: the character's name and portrait; the character's move ability (boot icon); fight ability (crossed swords icon); cunning ability (head icon); a basic turn order breakdown; a character descriptor or special ability; and the Reputation marker (Rep.). Ilya Muromets, for example, is described as "renowned for his mighty strength."
The basic turn order on each Character card reads:
- Encounter game element if it is on your location.
- If there is no game element on your location, move up to your full movement.
- If a game element is on a location you enter, encounter it. Otherwise, draw an encounter card.
- Move Horseman or Hut as dictated by encounter.
Special Ability Cards. The Character card is the base for the character's abilities. Encounter cards won by the character are placed underneath it (see Taking Cards below). Added abilities are shown on those cards.
Encounter cards. Each encounter card shows:
- Encounter title and Story/situation text (the flavour narrative read aloud).
- Instructions that state what must be done in order to pass the encounter. Typically, this requires passing one or more challenges.
- Win/Lose conditions, if any.
- Directions for movement of the Horseman and/or Hut tokens.
- Card name and type. The possible types are: Ally, Deed, Item, and Event.
- Artwork that marks the card as a Town Encounter or a Wilderness Encounter.
- Additions to character abilities, where the card grants an ability bonus or special ability.
- Reputation marker (Rep.), where the card is worth Reputation.
Example Town Encounter, "The Tsar's Riddle": While visiting a wealthy tsar, you are posed a challenge: "A peasant told me that he earned eighty rubles for his harvest and that twenty went to taxes, twenty went to pay a debt, twenty he loaned, and the last twenty rubles he threw out the window. Tell me what he meant by this." Pass a cunning challenge: Diff 5. Win: The tsar is impressed by your cleverness and makes you his advisor. Take this card. Move Hut 1 space. Card name and type: Solved the Tsar's Riddle (Deed).
Example Wilderness Encounter, "The Priest in the Tree": Hearing cries for help, you come to a holy man up trapped in a tree, surrounded by wolves. "Help me!" he cries out as the wolves turn towards you. Pass a fight challenge: Diff 3 + Rep. Win: You slay the wolves and help the priest to the ground. In gratitude he hands you a white kerchief and tells you that if ever you feel weak to wipe your face with it and your strength will be renewed. Take this card. Lose: Mauled! –1 to all challenges (to a min. of 1) next turn. Move Hut 1 space. Card name and type: Enchanted Kerchief (Item). Discard this card to reroll all of the dice for any fight challenge.
Special ability granted by a card: some must be discarded to use, while others permanently affect the character for as long as they retain the card.
Taking Cards
During the course of the game, the bogatyrs will overcome various obstacles and reap rewards for their heroic deeds. These rewards come in the form of won encounter cards that can be placed underneath the character card to convey ability increases or special abilities gained.
For example, after a few rounds of play the Ilya Muromets card might look like this: Ilya has a total of one Move, two Fight, two Cunning, one point of Reputation, and an Item with a special ability.
Gameboard and Movement
The board consists of seven Town locations and forty-three Wilderness locations. The Towns are Ivangorod, Koldunoi, Vasilev, Tsarov, Ozerov, Khorov and Vilinsk and are distinguished from the Wilderness locations by their white walls and red-lettered names.
Some locations have optional special text, which may be done instead of simply drawing an encounter card. Additional information on these locations can be found in Special Locations.
Each location counts as a single space when moving. You may not move into a space via a diagonal corner, nor can you cross the mountain spaces marked with a red line or the river where marked by a thick blue line.
For example: If Ilya Muromets has a Move of 1 and is on the Home of Morozko location, then he may not enter the Crossroads or the Grasslands locations. He also cannot enter Tsarov from that space, as he cannot cross the red mountain line.
Additionally, the Town of Ozerov is considered adjacent only to the Ferryman's Glen and the Marshes locations, as indicated by the dashes. The lake around Ozerov does not count as a location.
Getting Started
- Decide whether you will be playing with the competitive or the cooperative rules.
- Place the gameboard in the center of the table and the two encounter decks face-down beside the board, leaving room for two discard piles, the Hut Encounter Card, the three Baba Yaga Encounter Cards (ordered 1, 2, 3 with the 1 on top), and each player's character card.
- Hand out the Character Cards. We recommend dealing them out randomly, but allowing players to pick them out is also fine.
- Randomly deal a Quest Card to each of the players. Place each of the Player Tokens on the town location written at the top of that player's Quest Card.
Check each character's special ability and the first lines of each quest. Some require pulling specific cards from the Encounter decks before game play begins. Shuffle each deck afterwards.
- Place the Horseman Token and the Hut Token on the Bone Fence location.
- Depending on number of players, remove the following number of cards at random from both the Wilderness and Town Encounter decks:
| # of players | # of cards removed |
|---|---|
| 2 | 10 |
| 3 | 5 |
| 4–6 | 0 |
- Decide who will be the first player. This can be done by means of arm wrestling, a recital of Russian poetry, or perhaps just rolling some dice. Whoever is selected as the first player takes the three Horseman Encounter Cards and places them in a face-up pile in front of him. The White Horseman should be on top, followed by the Red Horseman, and then the Black Horseman.
- Play proceeds clockwise.
Basic Game Play
Being First Player
The first player is in charge of cycling the Horseman cards. On his turn, before he moves, encounters anything (including the Horseman), or takes any actions, the first player must take the top Horseman Card and place it at the bottom of the pile. This is not done on the first turn of the game.
- The top Horseman card determines what time of day it is in the game.
The first player is also in charge of moving Baba Yaga if she is on the board. This takes place before any encounters on the player's turn, including encountering Baba Yaga, but after he has cycled the Horseman Cards. For rules on Baba Yaga's movement, see Encountering the Baba Yaga Token below.
Turn Order
- Resolve game element encounters. If any of the game element tokens are on your location at the start of your turn, then you have an encounter with them and cannot move or have a normal encounter. If more than one of the game tokens is on your location then resolve them one at a time in the following order: Wolves → Solovey → Horseman → Hut → Baba Yaga. Your turn ends after all game element encounter(s) have been resolved or your character is killed.
- Move. If there are no game element tokens on your location, move a number of board spaces up to your Move ability. If you enter a space with any of the game element tokens then you must stop moving and encounter them instead of drawing from the Town or Wilderness decks or resolving a Quest encounter. You may choose to remain at your current location and have an encounter there.
- Resolve board encounters. If you end your movement on a town location, then draw the top Town Encounter card. If you end your movement on a wilderness location, draw the top Wilderness Encounter card. Read the encounter card aloud and follow the directions, including any relevant win or lose conditions. Note: Not all encounter cards have win or lose conditions.
- Move Horseman/Hut. Move the Hut Token and/or Horseman Token as indicated on the bottom of the encounter card. Note: The Horseman Token and Hut Token cannot cross the river or mountains except at the passes or bridges and cannot enter Town locations. If either token is to move towards the "nearest player" and there are two or more player tokens equally close, then the player whose turn it is decides which direction the token moves.
Town or Wilderness Encounter Cards
- All encounters are considered mandatory. Your character must attempt to pass them, unless the word "Optional" is included within the encounter instructions. Some encounters cannot be completed until certain conditions are met, such as traveling to certain locations or having a requisite amount of Reputation.
- Whether or not an encounter is completed, the instructions for Hut Token or Horseman Token movement are followed at the end of the turn when the encounter card was drawn, unless the encounter card gets shuffled back into its deck. Cards that are not either collected by the player or shuffled back into the deck get discarded into separate Town and Wilderness discard piles.
Encountering the Wolves or Solovey
These tokens should only be on the board if the corresponding encounter cards have been drawn. Encountering one of these tokens should be treated as if you had just drawn the encounter card.
Encountering the Horseman Token
Instead of drawing a normal encounter card, use the card that is currently on the top of the Horseman Encounter deck. If a Horseman encounter card gets discarded, it gets inserted back into the Horseman Encounter deck in its proper order.
Encountering the Hut Token
Instead of drawing a normal encounter card, use the Hut Encounter Card. Follow the encounter instructions on the card. Afterwards, return the Hut Encounter Card to its spot on the side of the board.
Encountering the Baba Yaga Token
- The Baba Yaga token gets left off the board until someone accumulates 3 or more points of Rep. The token's default starting location is the Bone Fence. After Baba Yaga comes into play, she stays on the board, but does not pursue any of the characters if no one has a Rep. of at least 3.
- Instead of drawing a normal encounter card, draw the top Baba Yaga Encounter Card. Follow the encounter instructions on the card. If you fail the encounter, put it back on top of the Baba Yaga Encounter stack.
- If you successfully complete the third Baba Yaga encounter, it is worth three points of Reputation and the game is over.
Baba Yaga has special movement as follows:
- Baba Yaga does not move unless at least one character has a Reputation of three or more.
- Baba Yaga always moves towards the character with the highest Reputation. If two or more characters have equal Rep., then she moves towards the closest character. If there is a tie, then select randomly.
- Baba Yaga moves 2 spaces.
- Baba Yaga flies above the land in her mortar and pestle, and thus can cross any terrain unimpeded. She is not restricted by the mountains or the river, may enter towns and may enter Ozerov from any territory adjacent to it.
Challenges
- To pass a challenge, roll one or more six-sided dice and meet or exceed a target number between two and six on at least one of those dice.
- You must hit the target number on a single die – your dice are not added together.
- The challenges are based on the three character abilities: "Move", "Fight", and "Cunning". You determine the number of dice you roll for a challenge based on the number of symbols shown for that ability both on the character card and on any encounter cards underneath it. Cards that grant special abilities may further affect the roll, as can instructions on the card that the player is currently encountering.
- For example: Fyodor Lyzhnikov has two Move symbols printed on his character card; this means that during a "move challenge", his player rolls two dice and must meet or exceed the target number on at least one of them. Should the player acquire a card that has another Move symbol, then he will roll three dice during a move challenge and choose the single highest roll.
- The target Difficulty (or Diff) that must be met or exceeded is given on the encounter. This is frequently modified, usually by how much Reputation (abbreviated as "Rep.") you have accrued. The difficulty can never be higher than six, even if the base Difficulty+Rep adds up to a higher number.
- For more on Rep. and how it can work both for and against players see page 15.
Winning a Challenge
Whenever you roll at least one die that has a number equal to or higher than the difficulty, then you win the challenge and gain some benefit. This does not always end the encounter, however. Some encounters require passing multiple challenges or give you a choice of different challenges that you can face. In most cases, winning the final challenge on an encounter card lets you pick up the card and slip it underneath your character card, often granting a bonus to the character's abilities, a special ability, and/or adding to their Reputation.
Losing a Challenge
- Most encounters impose a lose condition that goes into effect whenever a challenge or other condition is not passed. Lose conditions apply at the end of the turn, after any re-roll attempts using Reputation have been made but before Horseman or Hut movement. If the lose condition involves missing a turn, then flip your character card face down. Your only allowed action on a skipped turn is to flip your card face up. You do not move or have any encounters on a turn that is being missed – not even Horseman, Hut, or Baba Yaga encounters. If you are the first player, however, the Horseman encounter cards still flip and the Baba Yaga token, if it is in play, still moves as normal.
- If the lose condition has a lingering affect, such as "–1 Move next turn" or "–1 die to next Fight challenge," keep the card in front of you as a reminder until the condition has been met.
Reputation
Reputation, or Rep, is gained by completing certain heroic encounters throughout the game. The cards that are worth a point of Reputation are indicated by a golden flag. Every card beneath your character card with a golden flag on it gives your character 1 Rep.
There are benefits to having a high Rep
- A high Rep will help you win the game if you are playing competitively.
- You may discard a card that grants Rep to reroll all your dice during a challenge. If necessary, you may continue to discard Reputation until you either win the challenge or run out of Rep. Regardless of how many cards you discard, the roll is made with the same penalties and bonuses of the original roll. This represents your character gathering himself after a failed attempt and trying again, although his reputation has ultimately been reduced because of his initial failure.
Example: Ilya Muromets, the famous bogatyr, is known for his great strength. He must move a rock from the road. (His player rolls his fight at a difficulty 5 and fails.) Ilya strains and struggles, but to his dismay is unable to dislodge the rock. (Ilya's player discards a card that gives Reputation.) The onlooking peasants shake their heads and comment about how he is perhaps not as strong as it is said. (Ilya's player rerolls the same number of dice at the same difficulty of 5 and this time succeeds.) Ilya steels himself again and grunting with effort moves the rock.
Having a high Reputation can also be dangerous
- First, as you get more Reputation, the people of Russia will come to expect more of you. You will be expected to deal with difficult tasks more handily and easily than they could. As a result, some tasks become more difficult as you gain more Reputation. Many rolls in this game are at a difficulty that is modified by your Reputation.
Example: Ilya Muromets is now tasked with helping to mend a fence. He is famous for his strength and so this task should be of no problem for such a great hero, but for that same reason, more is expected of Ilya then of someone with less Reputation. It should be a better fence, a stronger fence, etc. Ilya's player looks at his Reputation (2) and adds it to the base difficulty of the challenge (2 + Rep) for a challenge difficulty of 4.
- Having a high Reputation also attracts the attention of the grandmother witch of Russia. Once any character has a Reputation of 3 or higher (possessing three or more cards that add to Rep), Baba Yaga swoops down from the sky to try and steal the promising young hero away. For rules on Baba Yaga's movement and encounters, see page 12. Of course, if you're feeling confident (or foolish) enough, you may want Baba Yaga to come after you!
Dying
In "Baba Yaga," it is possible for your character to die. Usually, characters die by being eaten by the great witch herself or failing certain Quest Encounters. Additionally, a few normal encounter cards include death as a lose condition. However, having a character die does not usually mean you are out of the game.
When a character dies, the player discards all cards that add to Reputation, moves their token back to their starting city, and misses their next turn. This represents the character's child or younger sibling trying to pick up where your character left off. They might have some friends or treasures passed down to them, but have not yet earned a name for themselves. The number of steps that have been completed on a quest does not change.
Tip: In most cases a character dies as the result of failing a Challenge; since you'll be discarding all of your Rep. anyway when your character dies, you might as well spend it first in hopes of getting a lucky re-roll.
Note: The final step of each Quest includes a final encounter that, if lost, specifies that not only does the character die (or get banished), but that the player is eliminated from the remainder of the game.
Winning the Game
Competitive Play
There are three ways to win the competitive version of the game.
-
Once the three Baba Yaga Encounters have been beaten by one or more of the players, the game ends. Whoever has the highest Reputation at that point wins. In the event of a tie, whoever defeated the third Baba Yaga encounter is the winner.
Note: Beating the final Baba Yaga encounter just ends the game; it does not necessarily win the game. The player with the highest Reputation when the game ends is the winner. However, beating the final Baba Yaga encounter grants three points of Reputation that are counted towards victory.
-
The game also ends if there are no more cards in either the Town or the Wilderness Encounter deck. The player with the highest Reputation wins. In the event of a tie, there is no winner.
Note: If playing with 5 or 6 players, you may re-shuffle one of the decks once during the game.
-
The first player to complete all of the steps on their Quest Card wins the game, regardless of their current Reputation.
Cooperative Play
There are two ways in which all of the players can win the cooperative version of the game. In either case the players end the game with their characters victoriously sharing the mythic kingdoms of Russia amongst one another.
Win Conditions:
- If all three of the Baba Yaga encounters are successfully completed.
- If all active players have completed their Quest Card. See page 18 for more on Quests in cooperative play.
Lose Conditions:
-
There are no more cards in either the Town Encounter deck or the Wilderness Encounter deck.
Note: If playing with 5 or 6 players, you may re-shuffle one of the decks once during the game.
-
None of the players have any points of Reputation while the Baba Yaga Token is on the board.
-
All of the players have been removed from the game by means of having failed their Quests.
The tension from playing cooperatively comes from the possibility that none of the players will win. Three conditions exist in which all of the players lose. These conditions represent the players having failed to gain enough strength to prevent Baba Yaga and her servants from laying claim over the lands of Russia.
Quests
The Quest cards that each player receives represents a bylina, or epic poem, that is being told about your character and presents a driving goal and path towards victory other than facing off against the great witch. The steps on each quest must be completed in order.
In a competitive game, the first player to complete the last step on his quest automatically wins, no matter what his current Reputation is.
In a cooperative game, all of the players must complete their quests (or defeat all three Baba Yaga encounters). Every time a player completes his quest, all of the remaining players are considered to have automatically completed the next step in their quest, unless they are on the final step of their quest.
If some players have been removed from the game by failing the final step of their quest, only the remaining players must complete their quests in order to win the game.
Additional Rules
Stealing Items: During a competitive game, players may attempt to steal an Item card from another player whenever their character starts or ends a turn in the same location as another character. Stealing an Item requires making a fight challenge Diff 3 + the other character's Rep.
- Win: You may take an Item card that your opponent has in play. Lose: Miss your next turn.
Beguiling Allies: During a competitive game, players may attempt to beguile an Ally card away from another player whenever their character starts or ends a turn in the same location as another character. Beguiling an Ally requires making a cunning challenge Diff 3 + the other character's Rep.
- Win: You may take an Ally card that your opponent has in play. Lose: Miss your next turn.
Trading Items: During a cooperative game, players may freely exchange Item cards with one another whenever their characters start or end a turn in the same location.
Tip: One way to keep players involved when it isn't their turn is to have the player sitting across the table read the encounter card aloud for the player whose turn it is.
Cooperative Play Too Easy?
If the game is too easy then remove five (or more) random cards from both the Wilderness and Town Encounter decks. Remember that with three players you should already be removing five random cards from both decks and removing ten cards from each if there are two players. Removing more cards can be used for solo play as well.
Solo Play
Select a character and select a quest, then randomly remove fifteen cards from both the Wilderness and Town Encounter decks. Play like normal with the following exceptions:
- Whenever an Encounter card instructs that the Horseman or Hut Token is to move one space then it moves towards your character.
- Do not bother flipping the Horseman cards before taking every turn. Instead roll a die when it becomes relevant, such as when encountering the Horseman or when having an encounter where the time of day matters (including special location text). 1–2 = White Horseman; 3–4 = Red Horseman; 5–6 = Black Horseman.
- If you either complete your quest or defeat Baba Yaga three times then you win. If either the Wilderness or Town Encounter decks run out of cards then your lose. Optionally, if your character ever fails a Baba Yaga encounter then you lose; or even if your character is ever killed, if you want to make it extra difficult.
Special Locations
Some locations on the game board have special text, usually giving the option for a having a special encounter instead of drawing a normal encounter. The text on these locations is always optional. Following is the complete associated text, which was shortened on the board due to space constraints.
The Dead Forest
The peasant folk say that this wood is cursed and that here the voices of the past haunt the living. Instead of having a normal Wilderness Encounter you may draw any card from the Wilderness discard pile that asks for at least one challenge. You then encounter that card, but with all challenge difficulties increased by 1.
Forlorn Hills
Many are the dangers that infest this foreboding land. It is a place where the bleached bones of foolish travelers are as common as the rocks or trees. However, there is glory to be won by battling the foul creatures that dwell here. Instead of having a normal Wilderness Encounter, Pass a Fight challenge:
- Diff 3 if it is dawn
- Diff 4 if it is noon
- Diff 5 if it is night
Move the Horseman Token two spaces towards this player.
Win: Take the first card in either discard pile that adds Reputation. Lose: Miss your next turn.
The Golden Halls
A series of tunnels and caverns lead to mysterious underground cities with unearthly denizens and glittering halls. This is considered a Wilderness Location, but you may draw encounters from either the Wilderness Encounter deck or the Town Encounter deck.
Khorov
The people of Khorov are known for their piety and their faith is enough to keep some of the dark things away. You may draw 2 Town Encounter cards. Select one of them to encounter this turn and discard the other.
Koldunoi
A powerful sorcerer calls Koldunoi home. He is even capable of performing resurrection magic. For a price. Instead of having a normal Town Encounter you may remove one of your Item or Ally cards from the game (place it back inside the box) to draw any card from the Town discard pile. You then encounter that card.
Koshchey's Home
There are some who say that Koshchey was once a great hero, but that was before he gave his life to Baba Yaga and became Koshchey the Deathless. Now Koshchey is an unkillable warrior who lives outside the laws of normal men. Koshchey did learn some things from his service to Baba Yaga though and can be convinced to reveal some of her weaknesses. Instead of having a normal Wilderness Encounter you may discard an Ally to be his servant in exchange for one extra die for all challenges during the next Baba Yaga encounter.
(This bonus applies to this player in competitive play, but to the next player who encounters Baba Yaga in cooperative play.)
This may only be done once per game.
Move the Horseman Token 2 spaces towards this player.
You may, at the end of your turn, attempt to rescue your sacrificed ally. (This is an optional challenge that was wholly omitted from the board because of space constraints, but should still be considered as an option by players moving their token on to this space.)
Pass a move challenge Diff 5
Win: Retrieve the Ally card sacrificed to Koshchey. Lose: With unearthly speed Koshchey catches you and lops off your rash head with his flashing scimitar. You are killed and the bonus gained above is lost.
Spirit's Hollow
This is a magical and mysterious wood where many things are possible. You may draw 2 Wilderness Encounter cards. Select one of them to encounter this turn and discard the other.
Tsarov
A thriving merchant town, Tsarov is where many come to sell, trade, or barter. Instead of having a normal Town Encounter you may remove one of your Item cards from the game (place it back inside the box) to retrieve any Item card from either discard pile. This cannot be done at night (Black Horseman card). Do not move the Horseman token or the Hut token.
Appendix I: Glossary
- Ally: One of the primary types of cards that can be gained from encounter cards. Represents a person who accompanies or sponsors a character.
- Baba Yaga: The grandmother witch of Russia. Known for swooping about and stealing young men and women away to cook and eat. Lives in a hut that sits atop a pair of chicken legs. An antagonist to be wary of, but defeating her is a sure way to win the game.
- Bogatyr: Legendary heroes of Russian legend, represented in the game by the characters played.
- Challenge: Situations when characters must roll a number of dice equal to their ability rating in hopes that at least one of said dice will meet or exceed a given difficulty number.
- Cunning: A basic character ability that determines how many dice are rolled during cunning challenges. Denoted by an icon of a head.
- Deed: One of the primary types of cards that can be gained from encounter cards. Represents a heroic feat that a character has accomplished.
- Difficulty: A rating for how hard a task is. Frequently modified by the amount of Reputation a character has, but can never be greater than six.
- Encounter: What happens to a character on his turn. Determined by either a Town/Wilderness encounter card or one of the game elements.
- Event: One of a select few encounter cards, usually with its own special rules.
- Fight: A basic character ability that determines how many dice are rolled during fight challenges. Denoted by a sword icon.
Appendix II: Pronunciation Guide
The creators of this game do not speak Russian and themselves horribly butcher the pronunciation of most of the names used in this game. Here is a basic guide to pronounce some of the characters and places used in this game. But don't sweat it: Baba Yaga won't come for you in the night if you say her name wrong.
Our Heroes:
- Alyosha Popovich – [Ah-LYO-shah Pah-POH-vihch]
- Dobrynya Nikitich – [Dah-BRYN-yah Nee-KEE-tihch]
- Fyodor Lyzhnikov – [FYO-dur LYZH-ni-kohv]
- Ilya Muromets – [Ihl-YAH MUR-o-mehts]
- Marya Morevna – [MAR-yah Mah-YEHV-nah]
- Nastasya Mikulichna – [Nah-STAHS-ya Mee-KUH-lich-nah]
The Towns:
- Ivangorod – [Ee-VAHN-GOR-ohd]
- Koldunoi – [Kuhl-DOO-noi]
- Ozerov – [ah-ZYOR-ohv]
- Tsarov – [Tsar-OHV]
- Vasilev – [Vah-SIHL-yehv]
- Vilinsk – [Vee-LEENSK]
Friends and Fiends:
- Sukhman – [Sookh-MAHN]
- Svyatogor – [Svee-tah-GOR]
- Tugarin Zmeevich – [Too-GAH-rihn ZMAY-ah-vich]
- Byely Polyanin – [BYEH-lee Pol-YAH-nihn]
- Poludnica – [POL-ood-neets-ah]
- Semyon – [Seh-MYON]
- Domovoi – [Dah-mah-VOI]
- Rusalka – [Roo-SAHL-ka]
- Solovey – [Sah-lah-VAY]
- Vasilisa – [Vah-sih-LEE-sah]
- Leshii – [LYESH-ee]
- Vodianoi – [Vah-dee-NOY]
- Maryshka Paranov – [MAH-rysh-kah pa-RAHN-ov]
- Nikolai Chudotvorits – [Nih-koh-LAI Choo-dah-TVOR-ihts]
- Koshchey – [Kah-SCHEY]
- Ivanushka – [Ee-VAHN-yoosh-kah]
- Martinko – [Mar-TEEN-kah]