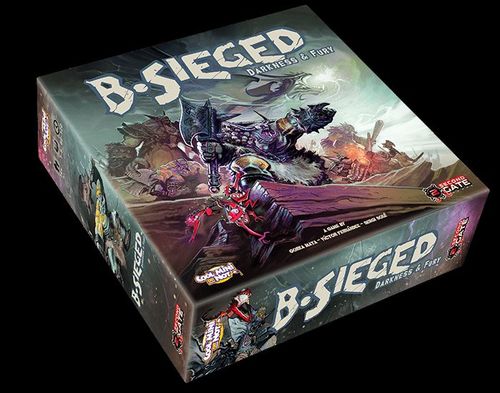
B-Sieged: Darkness & Fury
B-Sieged: Darkness & Fury Rulebook
Table of Contents
Table of Contents
Component List
- 2 hero dashboards
- 2 Heroes (Bjorn, Khaz Maghur) and 2 hero bases
- 30 Event cards
- 48 Enemy cards
- 60 Resource cards
- 16 Iron Orcs (12 standard and 4 elite)
- 4 Skullcrusher Trolls
- 7 Tyrannizer Trolls
- 8 Goblins
- 35 Mulfin tokens
- 4 Breach tokens
- 1 Mulfin die
- 1 Messenger token
- 1 Ikomoth, the Dragon token (plus plastic stand)
How to Use This Expansion
To prepare a game against the armies of the Orc Nation, simply follow the instructions detailed in the Core Game Rulebook, taking into account the modifications listed in the "Game setup" section of this rulebook, below. The game sequence, victory and defeat conditions are the same as in the Core Game.
The new enemy units and the new Avatar feature exclusive traits and rules which are explained in the corresponding sections.
Players may choose whichever heroes they want to play with, and the two heroes included in this expansion may also be used in games against the Abyssal armies of the Core Game.
Game Setup
Before starting your first game of B-SIEGED with the "Darkness & Fury" expansion, carefully punch out the new tokens from the punchboard and attach Ikomoth, the Dragon token to its plastic stand.
Then, follow the Game Setup steps laid out in the Core Game Rulebook, with the following changes:
- Build the Event deck using only the 30 Event cards included in this expansion. Shuffle them and place the deck facedown on the "Events" slot of the Card Sheet.
- Build the Enemy deck using only the 48 Enemy cards included in this expansion. Shuffle them and place the deck facedown on the "Enemies" slot of the Card Sheet.
- Build the four Resource decks combining the 60 Resource cards included in this expansion with the 120 Resource cards from the Core Game. Shuffle each deck by type and place them facedown on the "Resource" slots of the Card Sheet.
- Set aside the Mulfin tokens, the Breach tokens; the Ikomoth, the Dragon token; and the Mulfin die.
New Heroes
Bjorn, the Dwarf
Strength value: 2
Starting Ability: Martial Mastery and Epic Vigor
Khaz Maghur, the Renegade Orc
Strength value: 3
Starting Ability: Perfect Aim and Storm of Steel
The Hordes of the Orc Nation
All enemy units are spawned in Zone 3 of the four Enemy Fields during the Enemy Spawning step of the Setup phase. During the Enemies phase, they must either advance or attack, depending on the icons printed on the Zone the units are in.
Note: Just like in B-Sieged: Sons of the Abyss Core Game, if you need more enemy units than miniatures are available, you'll need to follow the replacement procedure: place all of the figures required by the Enemy card that might be available. Then, regardless of the number of additional figures needed, add extra figures according to the diagram below.
Enemy Card Anatomy
- A unit name and an Enemy type: Assault, Support or Heavy.
- Standard troop: the number of hits and resistance of standard troops of this unit.
- Elite troop: the number of hits and resistance of elite troops of this unit.
- Number of attacks: the number of automatic hits the unit inflicts when attacking.
- Resistance: the Strength of a card or a hero's attack must be equal to or greater than this value to destroy or affect the enemy unit.
- Number of units spawned each season: if the card shows the illustration of another unit instead of a number, one of those units is spawned instead.
Iron Orcs
The Iron Orc is an Assault unit and follows these rules:
- Whenever Iron Orcs are spawned in a Summoning roll, one will always be an elite Iron Orc, and the rest standard Iron Orcs.
- An Iron Orc must advance from Zone 3 directly to Zone 1.
- A standard Iron Orc performs 2 attacks and has Resistance 2.
- An elite Iron Orc performs 3 attacks and has Resistance 2.
- Once an Iron Orc is in a Zone 1, if there are heroes on the adjacent side of the wall, the Iron Orc must attack. If there are no heroes, the Iron Orc must advance from Zone 1 to the Citadel. If this happens, players immediately lose the game!
- Iron Orc attacks only hit heroes on the adjacent side of the wall. Players must split the hits among the heroes on that side of the wall.
Messenger Hunt
If the Messenger token is in a Zone 2 and during the Enemies phase there are Iron Orc enemy units in Zone 3 of the same Enemy field, those units will not advance from Zone 3 to Zone 1 as they should. Instead, they will advance to Zone 2.
Skullcrusher Trolls
The Skullcrusher Troll is an Assault unit and follows these rules:
- A Skullcrusher Troll must advance one Zone each round until it reaches Zone 1.
- A Skullcrusher Troll performs 4 attacks and has Resistance 3.
- Once a Skullcrusher Troll is in a Zone 1, if there are heroes on the adjacent side of the wall, the Skullcrusher Troll must attack. If there are no heroes, the Skullcrusher Troll must advance from Zone 1 to the Citadel. If this happens, players immediately lose the game!
- Skullcrusher Troll attacks only hit heroes on the adjacent side of the wall. Players must split the hits among the heroes on that side of the wall.
Note: During Winter rounds, Skullcrusher Troll Enemy cards show the number of Iron Orc units that appear that round instead of Skullcrusher Troll units.
Tyrannizer Trolls
The Tyrannizer Troll is a Heavy unit and follows these rules:
- A Tyrannizer Troll does not advance; it must attack from Zone 3.
- A Tyrannizer Troll performs one attack and has Resistance 3.
- To make a Tyrannizer Troll attack, roll the yellow die from the Core Game. The number rolled shows the number of Mulfin tokens that must be placed on the adjacent side of the wall.
Mulfins
- If at the beginning of the Enemies phase there are at least 6 Mulfin tokens stacked on one side of the wall, an explosion occurs, and a breach is opened. Remove all Mulfin tokens on that side of the wall and place a Breach token on it. Each hero on that side of the wall receives three hits. Repeat this process for all sides of the wall in which there are at least 6 Mulfin tokens before proceeding with the rest of the Enemies phase.
- If an Assault unit is in Zone 1 of an Enemy Field and there is a Breach token on the adjacent side of the wall, that Assault unit must advance to the Citadel during its turn, irrespective of whether there are heroes on that side of the wall or not. If this happens, players immediately lose the game!
- If there is at least one Mulfin token on the side of the wall adjacent to the Enemy Field through which the Messenger is traveling during the return stretch, the Messenger may not advance from Zone 1 to the Citadel. If there is a Breach token on a side of the wall, no more Mulfin tokens can be stacked on that side.
Note: Mulfin tokens are not considered "enemy units."
Seal a Breach
To remove a Breach token from a side of the wall, every hero in play must pay 2 Food and 2 Gold pieces and spend an action at the beginning of the Heroes phase. All heroes must do this in the same round, although they may be anywhere on the board.
Example: In a 4-player game, players control the Mercenary, the Archer, the Sorcerer and the Dwarf. During the first round of Summer, a breach opened on the Northern wall. During the second round of Summer, players would like to seal the breach at the beginning of the Heroes phase. The Archer has 3 Food and 2 Gold pieces; the Sorcerer, 2 Food and 2 Gold pieces; the Mercenary, 1 Food and 2 Gold pieces; and the Dwarf has 3 Food but no Gold pieces. Thus, it is not possible to seal the breach this round. The Mercenary's and the Dwarf's players better gather the resources needed during this Heroes phase if they want to seal the breach next round!
Exterminate Mulfins
A hero may exterminate Mulfins stacked on a side of the wall by spending an action. Place the hero on that side of the wall if he or she wasn't there already and roll the Mulfin die. If you obtain a Mulfin face, remove as many Mulfin tokens as the die shows (between 1 and 4.) If you roll a "YUCK!" or two "YUCK!" faces, the hero receives one or two hits, respectively.
Whenever a hero manages to exterminate at least one Mulfin with this action, he or she earns a Morale point (regardless of the number of Mulfins wiped out.)
Goblins
The Goblin is a Support unit and follows these rules:
- A Goblin must advance one Zone each round until it reaches Zone 2.
- Once a Goblin is in a Zone 2, it must attack.
- A Goblin performs one attack and has Resistance 1.
- Goblin attacks hit all heroes in the adjacent Quarter, i.e., the side of the wall and the two buildings in that Quarter. Each affected hero receives one hit per Goblin attack. If there are no heroes in the Quarter, the buildings become damaged. A damaged building is not destroyed if it suffers additional Goblin hits.
Disruption: Ikomoth, the Dragon
If while making the Summoning rolls you obtain the same symbol three times in a row, a Disruption takes place in the Abyss, through which an Avatar joins the battle. For the legions of the Orc Nation, the Avatar is none other than Ikomoth, the Dragon, one of the legendary creators of Orcs and Trolls alike.
Draw a Compass card to determine the Enemy Field in which the Avatar appears. Place the Avatar on the corresponding Zone 3. Enemy units in the Enemy Field for which the third roll was made are spawned as normal.
Ikomoth is an Avatar, so it is not considered an "enemy unit."
The Avatar has Resistance 4. Ikomoth may resist more than one hit, and has a Vinculum rating of 10. This Avatar follows the same rules as the Avatar of the Abyss from the Core Game regarding damage and the Vinculum track on the Summoning Boards.
The hero who destroys the Avatar earns 2 Morale points, in addition to any other points earned by the attack.
The Dragon's Wrath
Ikomoth is an Avatar of the Fire Realm, and its blazing attack may incinerate foes and scorch the earth.
During the Enemies phase, Ikomoth must perform two actions in this order: attack and movement.
Attack: The terrible flame blast automatically hits the adjacent Quarter of the Citadel. Each hero in that Quarter or the Catapult loses 2 Morale points, and buildings become damaged (or are destroyed if they were already damaged) even if they are protected by a hero. Reinforce tokens may be used normally against this attack.
Movement: Unlike other enemies, Ikomoth does not advance through the Enemy Fields towards the Citadel. Instead, after attacking, move the Avatar to Zone 3 of the Enemy Field to its right.
Devoured Messenger
If at the beginning of its turn during the Enemies phase Ikomoth is in a Zone 3 and the Messenger is also in that Zone 3, Ikomoth does not perform its mandatory attack action. Instead, the Messenger dies. Then, Ikomoth moves to the Enemy Field to its right, as normal.
Round Summary
The Setup Phase
- Events: The Time token advances one square in the Seasons Board. The player with First player token passes it to the player to his or her left. Discard current Event. Reveal new event from Events deck.
- The Messenger's Turn: The Messenger advances on zone, if able.
- Enemy Spawning: Choose an Enemy Field. Make a Summoning roll for each Spawning point. Place the spawned miniatures on Zone 3. Repeat the above steps for the other three Enemy Fields.
The Heroes Phase
Each hero must perform 3 of the following actions:
- Attack from the walls.
- Repair a damaged building.
- Obtain Resources at the Citadel.
- Use the Catapult.
- Exchange Resources cards with another hero.
The Enemies Phase
- Tactics: Resource cards with the Tactics icon are triggered.
- Attack: Choose an Enemy Field. Enemy units that must attack, attack in order (Z1, Z2, Z3). Repeat in the Enemy Field to the left.
- March: Choose an Enemy Field. Enemy units that must attack, attack in order (Z1, Z2, Z3). Repeat in the Enemy Field to the left.
The End of Season Phase
- Consume Rations: Each hero must pay 2 Food or die.
- Determine Enemies: Discard all Enemy cards and replace them.
- Renew Resources: Discard all remaining Resource cards on the Season Resource slots. Draw as many cards as heroes remain in play from each Resource Pool deck.
Target Preference
Listed as printed on the Round Summary sheet, left to right:
- Ikomoth
- Tyrannizer Troll
- Skullcrusher Troll
- Goblin
- Standard Orc
- Elite Orc