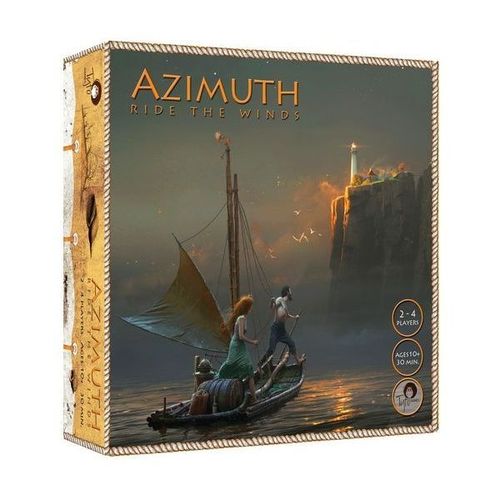
Azimuth: Ride The Winds
Azimuth: Ride The Winds Rulebook
Table of Contents
Table of Contents
Components
Game board, 24 rafts (6 each color), 28 wind tokens (7 each color), 4 wooden castaways, 16 coconut tokens, 4 wooden lighthouses (4 colors), 4 beach tokens, 1 island, 1 ocean die, game rules.
The ocean die enables co-op play. The printed booklet notes that the ocean die rules are available for download from the publisher's website and does not include them here; see the companion file for those rules.
Objective
Your goal is to be the first castaway to get back home. "Home" is your lighthouse. The first player to do so is declared "saved" and winner of the voyage. Others, who are then still at sea, are destined to a different fate…
You begin your journey either from a deserted island, or while drifting at sea. Home is where you want to be.
Basic Principles
In order to get back home the castaways use their rafts as means of sailing through the ocean. Castaways can stand on the raft, sail with it, and even swim from raft to raft.
Rafts' movements are determined by the winds. Each player has a number of winds which they control (place and direction). Thus, winds determine rafts' movements.
Wind tokens. Winds have a pointed edge indicating the wind's direction.
Rafts.
By use and control of the winds, players need to sail their rafts, save the survivors from the island and get them safely home.
Game Play
AZIMUTH is a turn based game where each player takes one of several actions per turn.
AZIMUTH is played in 2 phases:
Phase 1: After initial setup, players take turns placing all their winds. Every wind you place has an impact on the rafts. At this phase players are not allowed to move or turn their winds.
Phase 2: Wind changes – after a player finishes placing all his/her winds, that player can now further control them (turn and move) and continue to sail their rafts.
Players are not allowed to move or turn winds as long as they still have winds to place.
Note: players can also move their castaways anytime during both phases if they can and are willing to do so. This counts as the action taken by a player at their turn (see Castaways rules below).
Rafts and Winds
The board is an open sea. On it there are two kinds of markings:
- + Marks indicate raft possible positions. Rafts sail between these markings one leg only in every move. Rafts can move orthogonally only.
- One leg is the distance between one + sign and an adjacent + sign.
- O Marks indicate wind possible locations.
All rafts' movements are related and affected by the winds.
-
By placing their winds, players sail their rafts. The tip of the wind indicates the direction in which the wind is blowing, and the direction in which the affected rafts will sail. A wind affects all rafts of that wind's color that are at its adjacent locations.
Example: This red wind has an effect on all red rafts that might be located at any of the four possible raft locations around it (+ marks).
-
At any given time there can be only one wind located at any of the wind possible locations. Once a wind is placed, rafts move accordingly and the wind remains in place until phase 2 of the game.
-
When placing a wind, all rafts of that wind's color sail simultaneously.
Example 1: Placing a red wind at this location will result in these two red rafts sailing one leg in the direction of the wind: 1 – Place the red wind. 2 – Rafts sail accordingly.
Example 2: Placing a red wind at this location (1) will result in such red rafts' sailing (2). Only one red raft is affected by the wind. The beige raft (we call it Blondie) is not affected by the red wind and remains in place.
Example 3: At his/her turn, the Blondie player placed his/her wind (1). The two affected rafts sail one leg to the right (2).
-
If a player sails a raft to a location occupied by another raft, their raft is placed on top of the other raft – we call it stacking. There is no limit to how many rafts can be stacked on one another.
Example 1: Red player placed his/her wind (1). This will result in such movements of red's rafts (2). The top red raft rides on top of Blondie's raft, which remains in place.
Note: when stacking rafts, place the top rafts in such a way that the bottom rafts are visible. You can use the rafts' cross bar as a visual guide.
Example 2: Red player placed a red wind (1), which results in red rafts sailing and stacking, as such (2).
Example 3: Black player placed his/her wind (1). The black raft sails accordingly and is stacked on top of the other rafts (2).
Castaways
-
Players can take action with their castaways at any time in the game (both phases). If so, that is the action of the player in that turn. For example, you can't place a wind (or rotate it later on) and move your castaway in the same turn.
-
A castaway can only stand on a raft of his/her color (this raft can be in a stack as long as the top raft is the castaway's color).
-
A castaway can advance in two ways:
3A. A castaway can sail the raft it is on, by using the winds. Example: At his/her turn, Red placed a red wind (1). This will result in such movements of Red's rafts, where one is carrying and advancing the castaway (2).
3B. A castaway can move/swim to an adjacent raft of its color – orthogonally only and in any direction.
Example: The red castaway has a couple of swimming options. The rafts marked with an X are not an option. One is a diagonal movement, and one is too far (not adjacent to the castaway's raft). When swimming from raft to raft, rafts remain in place, only the castaway moves. You can also move to a stack of rafts as long as the upper raft is of your color.
-
Players can choose when they hop on their raft, leave the island and "go to sea" (you can also return to the island if you wish to do so). For a castaway to board a raft, a raft must be in the island's shallows when wanting to board it. These locations are defined as the four locations adjacent to the island (marked in green circles in the illustration below). If rafts are stacked, a castaway can board the stack as long as the top raft is his/her color.
Example: Both red and black are still on the island. Red can board a raft and leave the island. Note he/she can board only the right red raft – where the red raft is clear (the other red raft is under Blondie's raft and not at the top). Black, on the other hand, can't leave the island at this time since he/she doesn't have a raft in the shallows.
Remember: getting on the raft is that player's action for this turn.
-
When a castaway is standing on a raft, rafts moving to its location are stacked beneath the raft the castaway stands on. A castaway standing on a raft makes it "safe".
Phase 2: Wind Changes
After a player has placed all their winds, he/she can now control these winds to further achieve their tactical goals.
Note: players can reach this phase in different turns (since either boarding a raft or swimming to a raft constitutes a play). During this phase of the game, turning or moving a wind is that player's action of the turn.
When starting phase 2 of the game, players may choose to take one of 2 actions associated with the winds (as in phase 1 – players can always take an action associated with the castaways, in which case that would be their action for the turn):
-
Turn a wind – you can turn any of your winds 90 degrees only, to any direction. After turning a wind, rafts sail accordingly.
Example: It is Blue's turn. Blue chooses to turn his/her wind 90 degrees counter-clockwise (1), and the blue raft would sail in this new direction. Rafts follow all rules as before.
-
Move a wind – you can move a wind to any empty wind location which is one leg away from your current location. You can move the wind orthogonally or diagonally – only if there is no raft present in its path. When moving a wind it keeps its direction. A player cannot both move and turn a wind in the same move.
Example 1: It is Red's turn. Red can move his wind to the wind locations marked with green arrows (1). Note the diagonal move to the bottom left is denied by the presence of the blue raft. Red chooses to move diagonally to the bottom right, which will result in such raft's sailing (2). Both red rafts are affected and sail accordingly.
Example 2: Red moves his/her wind one leg to the left. This has an effect only on the raft carrying the castaway, which sailed one leg to the left.
Wind Control
"Wind Control" is an important aspect of the game.
During the second phase of the game, when players can turn and move any of their own winds, players also have the option to turn their opponent's winds (90 degrees only, in any direction).
Players are NOT allowed to move opponent's winds; opponent winds may only be rotated.
You gain control over your opponent's winds when any of your rafts are adjacent to these winds. In the image below, the blue player has control of his/her winds, as always, but also has control of the black and red winds since they are both adjacent to the blue raft.
Example 1: In the situation below it is Blondie's turn to play. Blondie's raft gives the Blondie player control over two more winds other than his/her own – blue and red winds, since they are adjacent to Blondie's raft (marked with green circles). Blondie can turn these winds if he/she chooses. Rafts will then sail accordingly.
If rafts are stacked, all the rafts in a stack give their players control over adjacent winds.
Example 2: In the situation below, it is Red's turn to play. Red can turn his/her wind, as always, but can also turn Blondie's and Blue's winds, since there is a red raft in the stack and these winds are at the raft's adjacent wind locations.
Coconut Tokens
Coconut tokens are recommended to be used in 3 & 4 player games only (2 player games are more challenging without the coconuts…).
Each player gets 4 coconut tokens.
As mentioned above, players can turn opponent's winds if they gain control over them. But… the number of times a player can take that action is limited to 4. Each time a player chooses to turn another player's wind it "costs" him/her a little energy, or one coconut token…
Starting a Game
Setup of the game is slightly different when playing 2, 3, or 4 players. We highly recommend diving in the water with a 2 player game to get a good sense of the basics.
2 Players Setup
-
Each player chooses a color to play. In a two player game each player gets 6 rafts, and 6 winds of his/her color and 1 wind of the opponent's color.
-
Place the island on the board as shown in the image below (the island covers one wind location). Since the board is symmetrical it doesn't matter on which side of the board you place it, just be sure it is located in the same manner as shown. The island has 4 shallow locations around it (from where castaways can board the rafts). On it, place the 2 playing castaways.
-
In AZIMUTH, the rafts' setup locations are fixed, but the layout (color-wise) changes from game to game. Place all the playing 12 rafts face down on the board and shuffle them. Now place the rafts face down in the 12 rafts' locations, as such. After all rafts are placed, turn them face up. The tactical situation is now revealed, for example:
-
After revealing the rafts composition on the board, players now choose where to locate their lighthouse/home – the destination of their journey. This is where you need to get your castaway to and finish the journey. The beach token and lighthouse on it are to be located just outside the board and at the board's opposite side to the island. Decide who goes first in locating the lighthouse.
The beach and, on it, the lighthouse are to be placed so they cover 2 landing spots. Landing spots are the two raft locations from where castaways can land on the beach. First player can place the lighthouse anywhere they wish along that side of the board. The second player can also place their lighthouse anywhere they wish with one restriction – it has to be one leg away from the first placed lighthouse.
Example 1: Black placed his/her beach and lighthouse first. Red then placed his/hers. Note there is a one leg distance between these locations. The black and red rings mark the rafts' landing spots to each beach/lighthouse.
Note: place the lighthouse between 2 raft position markings (so it covers one leg – from one + sign to an adjacent + sign).
Example 2: Again, Red placed his/her lighthouse second, this time farther away from Black's lighthouse.
When choosing where to place their lighthouse, players basically choose which will be their 2 landing spots. This is where you'll need to get your castaway to and finish the journey (see Getting Home – Landing below).
3 Players Setup
-
Each player chooses a color to play. In a 3 player game each player gets 6 rafts, 4 winds of his/her color and four coconuts.
Next, locate the island at the same location as the 2 player setup, and on it place the 3 castaways.
-
Place all 18 rafts face down on the board and shuffle them. Now place the rafts face down in the pattern illustrated below. After all rafts are placed, turn them face up. The tactical situation is now revealed, for example:
-
After revealing the rafts composition on the board, players now choose where to locate their lighthouse/home. When playing 3 players the lighthouses can also be placed at a portion of the sides of the board – marked in green in the image below.
-
As in the 2 player game: A – The beach and the lighthouse are to be placed so they cover 2 landing spots (between 2 + signs). B – Lighthouses have to be placed at least a distance of one leg between one another. C – Playing order is in the reverse order in which players placed their lighthouses.
Example of a 3 player game setup: Blondie placed his/her lighthouse as closest allowed to the island. (diagram)
4 Players Setup
A reminder: more than one player can place their lighthouse on the side of the board opposite to the island.
When playing 4 players, using the island is an option (explained below). When playing 4 players, castaways don't begin the game from the island, but are adrift at sea…
-
Each player chooses a color to play. In a 4 player game each player gets 5 rafts, 4 winds of his/her color and four coconuts.
-
Place 16 rafts (4 of each color) face down on the board and shuffle them. Leave one raft of each color on the side. Now place the 16 rafts face down in the pattern illustrated to the right. After all rafts are placed, turn them face up. The tactical situation is now revealed, for example:
-
Unlike before, now players take turns in locating their beach token and lighthouse, each on their side of the board. When playing 4 players, each beach and lighthouse have 3 landing spots, thus the lighthouse is now to be located not between 2 + signs, but at the center of the 3 + signs. For example: Red player placed his/her beach and lighthouse, both are placed next to the center + sign of the 3 landing spots. Possible landing spots are marked in red circles. Example of beach and lighthouse locations: (diagram)
-
Next, each player places their castaway on their remaining 5th raft, exactly opposite to the lighthouses' location at the other side of the board.
When playing 4 players your castaways are drifting at sea, aiming to reach home… and now have to cross the ocean in order to be saved and win the game.
-
It is an option to play with the island on the board, for a diverse play and different game experience. If you choose to do so, place the island in the middle. Players can now use the island as a landing place midway home, allowing the castaways to land on it and go back to sea from any of the island's 4 landing spots. Landing to the beach and boarding a raft is that player's action for his/her turn.
Getting Home – Landing
To finish the voyage and arrive safely home, players need to get their castaways to their lighthouse. To safely land on shore, the castaways first have to reach any of the 2 landing spots of their beach/lighthouse (3 landing spots if playing 4 players). In the following turn a wind has to be applied in the direction of the lighthouse/beach, giving the castaway and his/her raft a last push to shore, to safety and victory!
Tactical note: keep in mind – it is crucial that players control their "home wind" locations (i.e. wind locations that allow you the final action so you can land on the beach).
Example 1: It is Black's turn to play. Black successfully sailed his/her castaway to one of his/her landing spots (1). At his/her next turn, Black can now rotate his/her wind and land the castaway on to the beach/lighthouse – and win the game!
Example 2: It is Black's turn to play. Black successfully sailed his/her castaway to one of his/her landing spots (1). Black can move a wind, and land the castaway on to the beach/lighthouse – and win the game!
Note: if Black had rotated the other black wind (to the left of the one he/she moved), the castaway would not land on the beach…
ENJOY THE GAME!