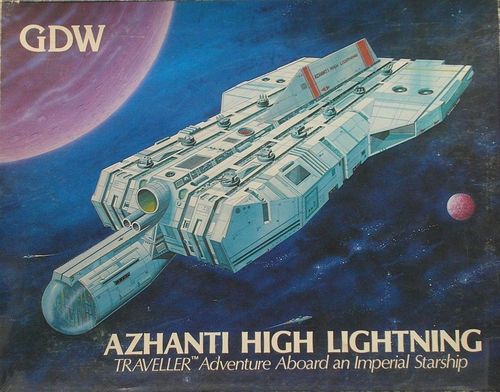
Azhanti High Lightning
Azhanti High Lightning Rulebook
Table of Contents
Table of Contents
- Introduction
- General Rules of Play
- Special Rules
- Advanced Rules
- Integrating With Traveller
- Charts and Tables
- Scenarios
- Incident I - The Battle of Kagukhasaggan
- Incident II - Perfidious Zhodani
- Incident III - Enemy Aboard!
- Incident IV - The Great Wine Heist
- Incident V - Dead Ship
- Incident VI - Brother Wolf
- Notes
Introduction
Scale
Scale is expressed in terms of time, distance, and forces involved.
Time: A time scale of 15 seconds per turn is used in Azhanti High Lightning. Each turn in the game represents 15 seconds (four turns equal one minute) of elapsed time.
Distance: The maps use a square grid; each square on a map measures one-half inch by one-half inch, just large enough to hold one of the die-cut counters. The width of one square represents a distance of 1.5 meters. While maintaining the same scale of 1.5 meters per square, other deck plans may be drawn up using a different-sized grid. Ship plans on smaller grids are given in the Journal of the Travellers' Aid Society and various Traveller adventures and supplements.
Forces: Each counter in Azhanti High Lightning represents one individual, animal, or wound marker. Each individual or animal is a character. Wound markers are used to indicate wounds on characters.
Characters
Each separate counter represents a person or animal. Persons are Traveller characters. If the enclosed deck plans are used in a Traveller adventure, Traveller characters from the on-going campaign may be used without change. An assortment of adventurer counters (without any backprinted factors) is included for this purpose. When used for the scenarios in the game, the standard counters (with their backprinted factors) are used. The term character refers to both animals and persons unless specifically stated otherwise.
Game Components
Azhanti High Lightning consists of this rules booklet, one sheet of 240 die-cut counters, fourteen large sheets of deck plans, a technical manual describing the Azhanti class of starships and explaining the deck plans in detail, one combat chart, and two six-sided dice. Counters: The 240 die-cut counters represent either characters, wine (for a special scenario), or wound markers. Counters representing individuals have a silhouette and an alpha-numeric identification code on the front; they may have an armor code designator. The back of the counter has a number of factors which are read according to the accompanying diagram. Weapon abbreviations and their meanings are listed below. Animals have only a silhouette on the front and a single number on the back (the only animals included in the game are the blobs, which function under somewhat modified rules, as explained in Rule 20). All counters are color coded for ease of recognition.
The back of each counter shows, in diagram form: the weapon abbreviation and weapon skill (for example "AR+1"), morale and melee (for example "16-4"), and the leadership bonus (for example "+2"). The front shows the silhouette, the identification code (for example "E7") and, where applicable, the armor designator.
Weapon Abbreviations
| Abbreviation | Weapon |
|---|---|
| Acl | Accelerator Rifle |
| ACR | Advanced Combat Rifle |
| AP | Automatic Pistol |
| AR | Automatic Rifle |
| BP | Body Pistol |
| FG | Fusion Gun |
| GR | Gauss Rifle |
| LAG | Light Assault Gun |
| LC | Laser Carbine |
| PG | Plasma Gun |
| SMG | Submachine Gun |
| SP | Snub Pistol |
Identification Abbreviations
- Naval Crew: O = Officer; W = Warrant Officer; R = Rating
- Zhodani: O = Officer; T = Technician; R = Rating
- Marine, Vargr, and Intruders: O = Officer; N = Noncommissioned Officer (NCO); E = Enlisted
Counter Color Codes
| Colors | Group |
|---|---|
| Black on Blue | Naval Crew |
| White on Blue | Marines |
| Black on Green | Intruders |
| Black on Gray | Vargr |
| Black on Red | Zhodani |
| Black on Light Green | Adventurers |
| Black on White | Wound Markers |
| Green on White | Animals and the wine |
Armor Codes
- Star: Battle Dress
- Circle (solid dot): Combat Armor
- Triangle: Cloth
Deck Plans: Fourteen sheets of deck plans are provided. The square one-half inch grid serves to assist in movement and range calculation as well as allowing precise definition of the location of counters. The various symbols on the deck plans are explained in the technical manual.
Combat Chart: The combat chart contains all the charts and tables required for the resolution of fire and melee.
Dice: The two dice are used to generate random numbers used in combat resolution and morale checks as well as other uncertain events.
Technical Manual: The technical manual contains basic background information on the Azhanti class of starships and a detailed explanation of the deck plans.
Rules Book: This rules book contains all of the basic information necessary for the play of the game as well as several advanced rules and the game scenarios. To ease comprehension, the rules have been organized in six parts. The first part is this general introductory section intended to familiarize players with the basics of the game itself. The section entitled General Rules of Play details the general game mechanics used. The Special Rules section covers unusual situations, actions, and weapons. The Advanced Rules section has those rules which are not necessary for the play of the game but which more experienced players may wish to add. The Scenarios section details specific game situations which may be played, giving forces, decks involved, and victory conditions. The last section provides information to enable the Azhanti High Lightning combat system to be integrated into an on-going Traveller campaign.
Die-Rolling Conventions
Azhanti High Lightning requires dice rolls for determining the outcome of firing, melee, morale, the extent of wounding, and various other situations. Unless specifically stated otherwise, dice rolls involve the throw of two dice, and the result is the sum of the numbers showing on each die.
Die Modifiers: A variety of modifications are required, to be applied to a dice roll. Such die modifications (abbreviated DM) are expressed as positive or negative numbers. For example, the instruction DM +4 indicates that four is added to the dice roll before consulting the appropriate chart. Similarly, the instruction DM -3 requires that three be subtracted from the dice roll before the chart is consulted.
Example: The tables indicate that a certain weapon will hit a target on a throw of 8 or better. In addition, a DM of +1 is allowed the firer for being skilled with the weapon, and a DM of -2 is allowed the target for cover. The net DM is -1. The dice are rolled, with a result of 8; the DM is then applied, reducing the result to 7, which indicates the target was missed.
General Rules of Play
1. Overview Of Play
Within each turn, each player may expend action points in order to move and to attack. Play proceeds through a number of phases providing an orderly sequence of play. The game is played in a series of turns until the end of the scenario is reached or until the victory conditions are achieved.
2. Stacking
There are specific limits to the number of counters which may be placed in any single square on the ship plans; such limits are called stacking restrictions. No square may contain more than four active characters at a time. Each robot counts as two active characters. Each blob counts as four active characters. Any number of inactive characters may be in a square; an inactive character is one who has been killed or rendered unconscious. Once a square has its maximum number of active characters in it, other active characters may not enter it. If one or more active characters later moves out of the square, this makes room for other active characters to enter the square. Friendly and hostile characters may occupy the same square, subject to the normal stacking restrictions (four characters total in a square). However, any character entering a square occupied by an enemy character must stop and move no further that phase.
3. Facing
All characters have a facing which indicates their forward direction. The top of each counter (as it is read) is the face (forward) of the character and should always be oriented to one side of the square occupied by the counter. Facing affects action point (abbreviated AP) costs and influences the firing of weapons. Facing is maintained during movement. That is, a character must keep the same orientation during n;ovement unless a movement action is performed that allows facing to be changed.
4. Sequence Of Play
The game is played in turns, each turn representing 15 seconds of elapsed time. All characters may move and/or fire in each turn. Both sides conduct action in a series of phases, which must be followed in order. The phases are: 1. Decision Phase. 2. First Action Phase. 3. Second Action Phase. 4. Third Action Phase. 5. Fourth Action Phase. 6. Fifth Action Phase.
5. Decision Phase
During the decision phase each player secretly decides what general action each of his characters will undertake. Three general actions are possible: cover fire, aim, and move. The decision made in the decision phase can easily be recorded on a piece of paper by writing C (cover fire), A (aim), or M (move) after the character's identification code. Once a character is committed to one of the three general actions, the character may not change to a different one. Certain contingency actions not listed above (such as melee or snap shot) are possible, and it is possible for a character to abort his or her planned action. A character that aborts his or her action may not, however, undertake a different action.
6. Action Points
Each character may spend up to a total of six action points per action phase. Thus, under optimal conditions, a character could spend a total of thirty APs in a single turn. A character is not required to spend any APs in a phase, but unused APs may not be transferred among characters nor may they be accumulated for use in later phases. APs are used to conduct movement and combat actions. Various actions require the character to expend all six APs in a phase; in this case, the character may perform no other action requiring the expenditure of APs in that phase.
7. Action Phases
All activity in an action phase is performed in the following sequence: 1. Covering Fire. 2. Movement. 3. Aimed Fire. 4. Snap Shots. Action is simultaneous within each step, but it is sequential from step to step. That is, first all characters firing covering fire are indicated, and the direction of the covering fires are indicated. Then, all characters plotted to move are either moved or have their movement aborted (based upon, perhaps, the indicated covering fires). Next, all aimed shots are resolved; all characters who were aiming may fire at targets they can see. Finally, all characters who are entitled to snap shots may resolve them. Action is sequential in the sense that a character may be entitled to a snap shot, for example, but if incapacitated by action in a previous step may not fire in the snap shot step.
8. Movement Actions
The following are movement actions which may be undertaken.
A. Normal Movement
1. Walk: A character may walk in open areas and along corridors. Only front squares (see diagram) may be entered. It costs 2 APs per square for the character to move directly forward (in the diagram, this would be the character moving to the center front square) and 3 APs per square for the character to move diagonally forward (in the diagram, this would be the character moving to either of the side front squares).
Diagram: a 3x3 grid around the character, whose face is toward the top. The top row (left, center, right) is Front squares, the middle row left and right squares are Side squares, and the bottom row is Rear squares.
2. Trot: A character may trot in open areas and along corridors in the same manner as walking. It costs a character 1 AP per square to trot directly forward and 1½ APs per square to trot diagonally forward.
3. Turn: A character may change facing 90 degrees (in the diagram, this would be the face of the character turning from the center front square to either of the side squares - doing so would of course redefine which squares were to the character's front, sides, and back) at a cost of 1 AP when stationary or walking and 2 APs when trotting. A character may turn more than once in a single square but must pay the turning costs for each 90 degree turn made.
4. Sidestep and Backstep: A character may move to the side or to the back (directly or diagonally) at a cost of 4 APs per square. Facing does not change.
5. Evade: A character may elect to move at a slow, quiet pace at a cost of 6 APs per square. The character may enter any square to the front, side, or rear and may assume any facing orientation upon entering the square. Alternately, the character may stay in the square he or she presently occupies but may freely change facing. By evading, a character is making maximum use of available cover and is allowed a favorable DM when attacked.
6. Stand Up: A character may become prone for various reasons and must stand up before resuming movement. It costs 6 APs to stand up. B. Portal Passage
B. Portal Passage
1. Open Sliding Door or Iris Valve: If a character begins an action phase adjacent to a sliding door or iris valve, he or she may activate the door mechanism at a cost of 2 APs. The door or valve is not open for passage until the beginning of the next action phase.
2. Open Hatch: A character adjacent to a hatch (or maintenance hatch) may open it at a cost of 6 APs; it is open for passage at the start of the next action phase.
3. Passage Costs: There is no additional cost in APs for a character to move through an open sliding door or iris valve. There is an additional cost for moving through an open hatch: crossing the line representing a hatch costs 4 APs for characters in vacc suits, combat armor, or battle dress and 2 APs for all other characters.
4. Close Portals: Portals are closed using the same procedures and AP costs as for opening them.
5. Climb Ladder: A character climbs (up or down) one meter per complete action phase spent climbing a ladder. The number of action phases required to climb one deck level depends upon the separation between decks (see the Technical Manual).
6. Activate Lift: If a character begins an action phase adjacent to the door of a lift (elevator), he or she may activate it at a cost of 2 APs. At the conclusion of that action phase and every subsequent action phase, one die is rolled. When a 6 is rolled, the lift has arrived at that level and the door will open. Characters may enter the lift the next action phase. If no character enters the lift, roll one die at the end of the phase and on each following phase. On a roll of 5 or 6 the doors close and the lift goes to a different level.
7. Cycle Airlock: If a character is adjacent to an airlock entrance, he or she may initiate the cycling procedure at a cost of 6 APs. Six complete action phases later, the airlock opens and may be entered. Once in the airlock 6 APs must be spent to close the door, which is then considered to be closed at the start of the next action phase. The airlock then cycles for six complete action phases, and the other door opens at the start of the next action phase.
8. Special Situations: When during a single action phase a sliding door, iris valve, hatch, or airlock is given conflicting commands (such as one character trying to open it and another trying to close it), all such commands are ignored for that phase (though the characters must still pay the AP costs) and the portal remains in the position it was in at the start of that phase. When characters on more than one level try to use the same lift, it arrives at the level that first rolls a six (if two or more do so in the same phase, determine randomly the level at which it actually arrives). While the door is open at a level or the lift is in use by a character, the die is no longer rolled to determine if the lift arrives at any other level. While an airlock is cycling, it ignores all other commands. If an airlock door is open but no character enters the airlock, then the door closes at the start of the action phase following the initiation of the cycling procedure by a character on the other side of the airlock. C. Special Movement Actions
C. Special Movement Actions
1. Jump Down One Level: In certain parts of the ship, it is possible to jump down one level. For example, a character on the upper deck of the power plant could jump over the balcony edge to the lower level of the power plant. A character must have at least 2 APs remaining to initiate this maneuver. These 2 APs are automatically spent; extra APs equal to the roll of two dice must also be spent. It is possible that the resulting expenditure will exceed the number of points remaining to the character that phase. If so, the additional points are recorded and that character continues to expend APs in the following phases until the required expenditure has been met. (This expenditure represents the time needed recover after the jump.) On a roll of 12, the character suffers a light wound and is unconscious. While expending points for the jump the character is considered to be stationary and not evading in the square where he or she lands.
2. Swing Down One Level: A character who begins adjacent to a drop may lower him or herself over the edge and swing down to the next level. Lowering over the edge requires 6 APs. In the next action phase, the character releases his or her hold and drops down to the next level at a cost of 4 APs. This is the only way a character could descend from a catwalk around the meson gun tube on one level to the next lower catwalk, as a normal jump (described above) would cause the character to fall down the middle of the tube.
3. Traverse Close Machinery: Close machinery consists of a fairly dense concentration of circuitry, small machinery, pipes, etc. While dense, it is not solid nor so dense as to completely deny passage. A character may enter a close machinery square at a cost of 6 AP.
4. Liquid Hydrogen: No character may enter an area containing liquid hydrogen. Immersion of a character in liquid hydrogen, even a character wearing a protective suit such as battle dress, results in the death of that character in the first action phase of immersion. Of course, should the liquid hydrogen storage area be empty, then characters may traverse it using normal rules.
5. Break Down Door: A closed, locked, or inoperative sliding door may be broken down by a character. An attempt to break down a door costs a character 6 APs and succeeds if the character's melee strength or less is rolled on two dice. Two characters may attempt to break down a door together, in which case each must spend 6 APs and their melee values are added together.
6. Move Through Congestion: A character entering a square already containing other characters must spend APs in addition to the normal cost to enter the square. This additional cost is equal to the number of other active characters that are present in the square. For example, a character entering a square containing two other characters must spend two additional APs. Stacking restrictions may not be violated.
7. Dive: A trotting character may dive. A dive may come at the end of any trotting move which ends a character in a square with a non-moving hostile character; this is an advantageous way to start a melee (see the melee rules). A dive costs no APs to perform (though the character must be trotting), and congestion costs (see above) for entering the square are not charged. If a character dives into a square already containing four characters, one of the characters will be knocked out of the square. Roll one die per character; a DM of -1 is applied to the character making the dive (only); the one with the highest roll is knocked out of the square. A character knocked out of a square is placed in any accessible adjacent square (owning player's choice). If two (or more) characters tie for highest roll, then all tied for highest are knocked out of the square. Any character knocked out of a square is prone and must spend 6 APs to get up.
8. Drag/Carry a Character: A character may drag or carry another character. Only persons may be dragged or carried (henceforth referred to as dragging); robots and blobs may not be dragged. Any unconscious or immobilized person may be dragged, and any conscious, mobile friendly person may be dragged. A character may drag a person at an additional cost of 2 APs per movement action undertaken, and that character may not trot. Two characters may drag a person at an additional cost of 1 AP per movement action undertaken. A character may never drag two or more persons at one time.
9. Enter Enemy Occupied Square: A character may enter an enemy occupied square (other than by diving, see above) by paying the normal AP costs (including congestion) to enter the square, subject to stacking restrictions. However, any character entering an enemy occupied square must immediately cease movement for the remainder of that action phase.
10. Minimum Movement: A player plotted to move may always enter any adjacent accessible square at a cost of 6 APs, even if the normal cost to enter that square is greater than 6 APs.
9. Combat Actions
The following are actions which may be undertaken to initiate fire combat.
A. Covering Fire: A character who was committed to provide covering fire fires once, at a cost of 3 APs, in the covering fire step of the action phase. A character may only fire one covering fire in a single action phase; remaining APs may be used for a snap shot. The effects of covering fire are explained in later rules.
B. Aimed Fire: A character who was committed to aiming may (but need not) conduct one aimed fire during the aimed fire step of the action phase, at a cost of 6 APs.
C. Snap Shot: Any character with sufficient APs remaining during the snap shot step may conduct one or two snap shots at a cost of 3 APs per snap shot.
D. Throw Grenade: Any character with sufficient APs remaining during the snap shot step may throw a grenade at a cost of 6 APs.
10. Line Of Sight
Attacks on targets by fire require a clear line of sight. Such a line of sight is a straight line from the center of the attacker's square to the center of the target's square. The line of sight may not pass through any obstruction (such as a wall, bulkhead, or closed portal). Each square passed through by the line of sight, both before and after passing through the target, until the line of sight encounters an obstruction is referred to as the danger space of the fire. All targets in a square in the fire's danger space are attacked by the fire, with the target closest to the firing character attacked first, then the next closest, etc. (Note: target in this sense means all active characters in the fire's danger space, regardless of hostile or friendly status). When a target is hit by fire from a semi-automatic weapon, no further targets in the danger space are attacked. When a first target is hit by automatic weapon fire, additional targets in the danger space are attacked until a second one is hit. In either case, no target may be attacked twice by one fire; thus, if an automatic weapon's fire hits its first target and then misses all other targets in its danger space, then there is no second hit. Fire by shotguns and flechettes may also cause a second casualty. If the line of sight passes through a square containing several active characters, each is attacked by the fire. If one is hit by semi-automatic fire, no others are attacked. If automatic fire, shotgun fire, or flechette fire passes through the square, all occupants are attacked regardless of how many casualties are inflicted. If two or more casualties are inflicted then targets in other squares in the danger space are not attacked. For semi-automatic fire, the order in which characters in a square are attacked may be important; randomly determine the order in which they are attacked.
11. Fire Combat Resolution
A. General Rules
1. Which Characters Are Attacked: An aimed shot or a snap shot may attack any character which was in the firing character's field of fire at the point when the fire is resolved. Covering fire is declared at the beginning of an action phase by indicating a target point (usually a point where the fire would encounter an obstruction). Any character who moves through the danger space of the fire is immediately attacked by it. Normal restrictions on number of casualties the fire may inflict are in effect (see Rule 10). The owning player may determine the order in which characters move through the danger space of a covering fire.
2. Field of Fire: A character's field of fire is illustrated in the accompanying diagram. The field of fire of a character is the three front squares of the character, the five squares to the front of these squares (i.e., the three squares directly and two squares diagonally to the front of the three front squares), the seven squares to the front of these squares, etc., up to the limit of the unobstructed line of sight and range of the weapon. A character may not fire his or her weapon outside his or her field of fire.
3. Stacking: When more than one character is in a square, no more than two characters in that square may fire through the same side of the square. When friendly and enemy characters are present in the same square, the only weapons characters in that square may fire are pistols (snub pistols, body pistols and revolvers). No other weapon may be fired.
B. When Attacks Take Place: Covering fire attacks take place in the covering fire step of the action phase (if directed at an exposed character) and during the movement step when a character enters a square in the fire's danger space. Snap shots take place in the snap shot step of the action phase and may be conducted under certain conditions during the movement step (see Rule 13). Aimed fire takes place during the aimed fire step of the action phase.
C. Determining Hits: The likelihood of hitting a target is a function of the range of the fire, the skill of the firing character, and the type of attack. Three ranges are possible: effective range, long range, and extreme range. Most attacks (but not necessarily all) will take place at effective range while within the confines of a starship, even one as large as the Azhanti High Lightning.
1. Determining Range: Range is determined by tracing the shortest possible path of squares between the firing character and the target of the attack. Each square traced directly forward counts as one square, and each square traced diagonally counts as 1½ squares. Any fractional results are rounded up. If a character is firing up or down a level, the distance between the levels in squares (one square equalling 1.5 meters) must be added to the range. The final range figure is then compared to the range listings on the weapons chart to determine the range used to resolve the fire. The first number listed in each range column is the maximum number of squares the weapon may fire to qualify for that range. For example, a snub pistol fires at effective range at any target up to 6 squares away. Any target 7 through 12 squares away is at long range. Any target 13 through 20 squares away is at extreme range. A target at a range greater than extreme range (20 squares for the snub pistol) may not be fired upon. Note that some weapons do not have an extreme range listing; these weapons may not fire at any target beyond long range.
2. Determining the Required Dice Roll: Weapons firing at effective range require a roll of 8 or greater on two dice to hit; weapons firing at long range require a roll of 10 or greater on two dice to hit; weapons firing at extreme range require a roll of 12 or greater on two dice to hit. The following modifications are made to the dice roll: a. Weapon Skill: Characters have printed on their reverse side their weapon skill, if any. If no number appears after the weapon type abbreviation, a DM of 0 is assumed and no modification is made to the dice roll. If a number appears it will be preceded by a plus or minus, indicating whether it is to added to or subtracted from the dice roll. Thus a plus number indicates proficiency with the weapon while a minus indicates a deficiency in weapon skill. Light wounds adversely affect weapon skill (see Rule 12). b. Automatic Fire: Certain weapons receive an automatic fire bonus, as indicated by a plus sign and a number following the parenthetical number on the weapons table. For example, a submachine gun receives an automatic fire bonus of +4 at effective range, +3 at long range, and +1 at extreme range. Shotguns receive an automatic fire bonus even though they are always fired on a semi-automatic setting. This represents the effect of multiple pellets fired from the weapon. All weapons capable of firing flechette rounds receive the same bonus when firing such rounds. Weapons capable of firing flechettes and automatic firing (as indicated by the presence of an automatic fire bonus for a non-flechette round from the weapon) double their automatic fire bonus when firing flechettes on the automatic fire setting. (Thus, a 4cm RAM grenader launcher firing flechette rounds on the automatic fire setting will receive a DM of +8, or enough to ensure a hit at most ranges unless other factors adversely modify the dice roll.) c. Types of Fire: All snap shots are resolved with a DM of -2. All covering fires are resolved with a DM of -1. d. Cover: If the target is under cover but exposed to fire (see Rule 14), the fire is resolved with a DM of -2. e. Evading: If the target character is evading, the fire is resolved with a negative DM. If the target is evading in the open, apply a DM of -1 to the dice roll. If the target is evading in a square at least one side of which is an obstruction (such as a wall, bulkhead, closed portal, etc.), apply a DM of -2 to the dice roll. A single fire may be modified for cover or evading but not both; the cover DM is always applied in preference to the evading DM.
3. Hit Determination: If the dice throw, as modified, is equal to or greater than the required throw, the target has been hit.
D. Ammunition: In the basic game, the following ammunition rules are used. At the start of the game, each player writes down next to the characters' identifications with what ammunition each of his characters' weapons are equipped. The ammunition types available to each type of weapon are listed on the weapons chart. For the duration of the scenario, the weapons fire the ammunition chosen. All weapons are assumed to have unlimited ammunition for the duration of the scenario and thus never need to be reloaded. All weapons capable of automatic fire are assumed to be at the automatic fire setting. The advanced rules place more flexibility and restrictions on ammunition (see Rule 24). Gas and tranq may not be selected as ammunition types. They are included on the weapons table for when the game is used in conjunction with Traveller.
12. Wounds
Once a target character has been hit, it is necessary to determine what, if any, damage was sustained. This is done by rolling two dice, modifying the roll as explained below, and comparing it to the results listed on the damage table.
A. Dice Roll Modifications
1. Weapon Penetration: Each weapon has a penetration rating listed for it at each of its ranges. This is the number in parentheses on the weapons chart. For example, a carbine has a penetration of 2 at effective range, 1 at long range, and 0 at extreme range. Add the penetration number to the dice roll.
2. Cover: While cover makes it more difficult to hit a target character, it will generally make a hit more serious as only the more vital areas of the target (notably the head and upper torso) are exposed. Thus, if a hit is obtained on a target under cover add 2 to the dice roll.
3. Armor: A variety of armor types is listed on the damage table. Only three are used in the game (although the others may be used in scenarios generated by the players, and all are necessary for integrating the system with Traveller). The values for Cloth (-6), Combat Armor (-8), and Battle Dress (-10) are used in the game. All characters in vacc suits are treated as if they were in cloth armor. Armor values are negative modifications to the dice roll. Example: A character fires an advanced combat rifle (ACR) using discarding sabot ammunition at a target in combat armor. The target character is not under cover. The firing player obtains a hit and rolls a 9 on the damage table. To this, the penetration of the weapon (4 at effective range) is added and the value of the enemy armor (8) is subtracted, for a net DM of -4, thus reducing the roll to a 5 and causing a light wound.
B. Types of Wounds: Several types of wounds are possible: light wounds, serious wounds (also referred to as heavy wounds), and death.
1. Light Wound: Each light wound reduces a character's weapon skill, melee value, and morale by 1. Each time a character receives a light wound roll one die; on a roll of 6 the character loses consciousness.
2. Serious Wound: A serious wound renders a character unconscious for the remainder of the scenario and incapable of further action. A second serious wound kills the character.
3. Death: Death removes the character from the game, to say the least.
C. Unconsciousness: An unconscious character may not perform any activity. Upon becoming unconscious, a character goes prone. At the start of each decision phase while a character is unconscious, roll one die. On a roll of 6, that character recovers consciousness and may perform normally (of course, the character will have to stand up before moving; see Rule 8).
D. HE and HEAP Wounds: All direct hits on a character from HE or HEAP rounds which cause wounds become one level more serious. Light wounds become serious wounds; serious wounds become death. No effect remains no effect. This applies only to direct hits, not wounds resulting from collateral damage (see Rule 15).
13. Adjacency
Regardless of normal sequencing restrictions, a character may defend him or herself from direct personal assault. If an enemy character moves adjacent to a character during movement, that character may conduct an immediate snap shot against the moving enemy character. Only a character who is not moving may exercise this option. For example, a character is aiming an ACR in anticipation of firing at a moving enemy character. The enemy character, however, runs towards the aiming character and dives at him. Normally, this would initiate a melee which would prevent the aiming character from getting off a shot. He may instead take a snap shot as soon as the enemy character comes adjacent. The number of snap shots at adjacent characters a character may take is limited by the number of APs the character has remaining at the point when the enemy character comes adjacent. Thus a character who previously fired a covering fire (3 APs) in the covering fire step could only get off one snap shot in the movement step, regardless of how many enemy characters rushed him.
14. Cover
Three main sources of cover are available: corners, consoles, and machinery.
A. Corners: Doorways and bends in corridors constitute corners for the purpose of determining cover. It is of course possible to use such obstructions to interrupt the line of sight completely, thus preventing any hits. A character behind such a corner may, however, lean out from behind it and fire (covering fire, aimed fire, or snap shot). For targeting purposes the character is considered to be under cover in the square into which he or she is leaning. Only one character per square can use a corner as cover (others in the square are considered to be behind the corner and thus are totally obstructed).
B. Consoles: Characters behind consoles (green computer/control areas with a seat adjacent to them) may crouch behind the console and thus be totally obstructed (unable to fire over it or be fired upon over it). Alternatively, they may partially expose themselves and fire (and be fired at), in which case they are considered to be under cover for any fire directed at them whose line of sight crosses part of the console.
C. Close Machinery: A character adjacent to close machinery may fire through it and be fired upon through it. The character adjacent to the close machinery square is considered to be under cover unless the firing character is adjacent to the same close machinery square as the target character or unless the characters are adjacent to one another (in either case, neither is considered to be under cover from fire from the other). A characters may not fire through close machinery if neither the firing character nor the target character is adjacent to the close machinery square through which the fire passes.
D. Effects: As explained in previous rules, cover makes it more difficult to obtain a hit on a character but tends to make any hit achieved more serious.
E. Cover and Evading: A character can not benefit both from cover and evading when he or she is fired upon. Only one of these effects may be used by a character. The cover DM is always used in preference to the evading DM.
15. Explosions And Collateral Damage
Explosions occur for a variety of reasons, mostly due to the impacting of a HE round. All explosions and some weapons hits cause collateral damage. The six causes of collateral damage are equipment explosions, grenade explosions, HE round impacts, plasma gun hits, fusion gun hits, and satchel charge explosions. Satchel charges are covered in Rule 24.
A. Equipment Explosions: Whenever the line of sight of a fire terminates against either a red- or green-coded equipment square, there is a possibility of an equipment explosion in that square. A hit is assumed in this case and damage is determined on the damage table. Green-coded equipment has an assumed armor rating equivalent to cloth (-6) while red-coded equipment has an assumed armor rating equivalent to battle dress (-10). If the damage rolled is a serious wound or death result, the equipment explodes. The explosion of green-coded equipment is equivalent to a grenade. The explosion of red-coded equipment is equivalent to the strike of a fusion gun.
B. Determining Collateral Damage: Whenever a HE round, plasma gun, or fusion gun strikes a target in a square, or a grenade, satchel charge, or piece of equipment explodes in a square, all characters (active and inactive) in the square suffer collateral damage and all characters (active and inactive) as far as two squares away may suffer collateral damage.
1. Who Suffers Collateral Damage: All characters two squares away suffer collateral damage on a roll of 12 or greater on two dice. All characters one square away (i.e., adjacent to the explosion) suffer collateral damage on a roll of 10 or greater on two dice. In either case, an unobstructed line of sight must be traced from the square of the explosion to the characters. All characters in the square of the explosion suffer collateral damage on a roll of 8 or greater on two dice, unless they are specified as automatically suffering collateral damage (see above). The dice roll for collateral damage is made separately for each character subject to the damage.
2. Extent of Damage: For impacting HE rounds, plasma guns, and fusion guns the extent of damage is rolled normally with all regular modifiers excluding penetration in effect (except that no characters are considered under cover or evading). Penetration is modified. In the square of impact, penetration is halved (round fractions down). One square away it is halved again (round fractions down). Two squares away it is halved again (round fractions down). If the penetration is reduced to zero, no collateral damage is suffered. For example, a fusion gun hits a target in a square. All other characters in the square automatically suffer collateral damage but with a penetration rating of 7 (instead of 14). One square away, characters suffering collateral damage do so with a penetration rating of 3; two squares away, those suffering collateral damage do so with a penetration rating of 1. The HE round of a snub pistol would cause collateral damage in the same square with a penetration of 1 and no collateral damage beyond that as its penetration rating reduces to 0. Grenades, satchel charges, and equipment explosions use their normal penetration ratings in the square of explosion, halve it (round fractions down) at one square away, and halve it again (round fractions down) at two squares away. Thus, exploding red-coded equipment uses a penetration of 14 in the square of explosion, 7 one square away, and 3 two squares away. Note that HEAP rounds do not cause collateral damage.
16. Throwing Grenades
As indicated in Rule 9, any player with 6 APs remaining in the snap shot step of the action phase may throw a grenade. The grenade hits the intended square on a roll of 8 or greater on two dice. For every ten squares of range over the first ten, apply a DM of -1 to the dice roll. If the character throwing the grenade is under cover, subtract 2 from the dice roll. If the grenade fails to hit the intended target, it scatters. Roll two dice and consult the scatter diagrams. The center square in these diagrams indicates the intended target square. The arrow indicates the next square entered along the line of sight of the toss. This square would be the first square of the scatter if a 7 was rolled; other numbers roUed would cause the grenade to scatter as indicated on the diagrams. The diagrams indicate the scatter patterns for grenades whose direction of toss is 1) directly forward and 2) diagonal to the target square.
Scatter diagram 1 - direction of toss directly forward. The center square is the intended target square; the arrow points to the next square along the line of sight (the square marked 7).
| 6 | 7 | 8 |
| 5 | (target) | 9 |
| 2, 10 | 3, 11 | 4, 12 |
Scatter diagram 2 - direction of toss diagonal to the target square. The arrow points to the upper-left square (the square marked 7).
| 7 | 8 | 9 |
| 6 | (target) | 4, 12 |
| 5 | 2, 11 | 3, 10 |
The grenade then scatters in a straight line for a number of squares, which is determined by rolling two dice and halving the result (round fractions down). If the grenade hits an obstruction (such as a wall or closed portal), it stops and scatters no further. If while scattering the grenade enters an occupied square, roll one die. If the die roll is equal to or less than the number of characters (active and inactive) in the square, the grenade ends its scatter in that square. If not, it continues to scatter (unless, of course, that square was the last square of its scatter move). The final location of the grenade is where it explodes, causing damage as indicated in Rule 15. All grenades use the 4cm RAM HE section of the weapons chart to determine damage.
17. Melee
All characters have their melee ratings printed on the reverse side of their counters. Melee takes place at the end of the movement step of the action phase and does not require the expenditure of any APs. However, a character engaged in melee may not fire in the aimed fire step of the action phase. A character adjacent to an enemy character may (but need not) melee that enemy character; of course, adjacent characters with an obstruction (such as a wall) between them may not engage the other in melee. A character may melee an adjacent enemy character only if that enemy character is in a front square of the attacking character (if each is in a front square of the other, then both may melee the other). When hostile and friendly characters occupy the same square, each player must allocate friendly characters in the square to attack in melee each hostile character present in the square. For example, if a square contained three friendly and one hostile characters, then the player with the three characters must allocate at least one of them to fight the hostile character and the other player must allocate his single character to fight one of the three. Within a square, all characters are considered to be to the front of all other characters in the square for melee purposes. Two or more characters can not combine to attack a single target character in a single melee. Instead, each must attack that character in a separate melee. A character may not attack two or more enemy characters at one time.
A. Order of Attacks: Characters with the larger melee factors attack first. If two or more characters have the same melee factor, randomly determine which attacks first. This is to aid players in the resolution of melee, as all action within the step is considered simultaneous as results of melee are applied only after all characters have engaged in melee.
B. Resolution of Attacks: The melee factor of the target character is subtracted from the melee factor of the attacking character, and the resulting number (either positive or negative) is the column used on the melee table. If the number falls between two values listed on the table, the lower is used. Roll one die and read the result. For a character meleeing an enemy character in the same square, apply a DM of -1 to the dice roll. If a character dived into the square, this DM is not applied, and, additionally, a DM of +2 is applied to the dice roll for the dive.
C. Results: Five results are possible: no effect, stun, light wound, unconsciousness, and death.
1. No Effect: The melee attack was unsuccessful and did not harm the target character in any way.
2. Stun: A blow was delivered which left the target character off balance and momentarily confused. For the remainder of the current action phase and for all of the next action phase treat the target as if he or she had received a light wound (but no roll is made for unconsciousness).
3. Light Wound: The target was injured; inflict one light wound and roll for unconsciousness.
4. Unconscious: The target was injured; inflict one light wound and automatic unconsciousness.
5. Death: A killing blow was delivered; the target is dead.
18. Morale
Each character has a printed morale factor and some characters have leadership bonuses. These values are used in making morale checks.
A. When to Check Morale: A character must check morale once for each of the following situations. If the situation occurs more than once in a phase, the character must check once for each occurrence.
1. Exposure to Covering Fire: A character under cover must check morale before exposing himself to covering fire. Exposing oneself to covering fire consists of leaning around a corner or rising above a console if this would place the character in the danger space of a covering fire. Additionally, a character intending to move through the danger space of a covering fire must check morale before doing so.
2. Moving Adjacent: A character who intends to move adjacent to an enemy character must check morale before doing so.
3. Friendly Casualties: At the end of each action phase, any character who saw (had a line of sight to) any friendly character who was killed, was seriously wounded, or lost consciousness must check morale. The line of sight can be in any direction and need not be through a front square.
4. Unexpected Fire: If a character is fired upon unexpectedly, a morale check must be made for that character. Unexpected fire is fire from an enemy character who was unseen prior to the current action phase. Unexpected fire morale checks are made at the end of each action phase.
B. Order of Morale Checks: Higher ranking characters must check morale first, followed in order by lower ranking characters. There are three general categories of ranks: 1) officers; 2) warrant officers/NCOs; and 3) enlisted persons/ratings/ technicians. Within each of these three categories, characters check morale in order of their identification numbers. Thus, character 01 would check morale before character 02 did, etc. While the order in which a player's characters move is determined by the player, all characters whose movement will require a morale check must take the morale check before any characters move.
C. Procedure: Roll two dice. If the number rolled is equal to or less than the character's modified morale value, the character passes the check. If it is greater than the character's modified morale value the character fails the check. All positive leadership bonuses are added to the checking character's morale value (not the dice roll), and all negative bonuses are subtracted from the checking character's morale value. A character with a leadership bonus (referred to as a leader) uses the bonus to modify the morale values of all friendly subordinates (all who check morale after that leader) within the leader's line of sight, but only if the leader did check morale that step. A leader may not apply his or her bonus to his or her own morale checks. If the leader passes all morale checks, that leader's bonus is added to all subsequent morale checks of friendly subordinates; if the leader fails a morale check then that leader's bonus is subtracted from all other morale checks of friendly subordinates. The effects of several leaders in the same area checking morale are cumulative. For example, Intruder officer 3 (bonus of +2) and Intruder NCO 2 (bonus of +3) are leading an assault party across an area swept by covering fire. Officer 3 fails his or her morale check and thus NCO 2 checks morale with 2 subtracted from his or her morale rating. Assuming NCO 2 passes the check, all of the other members of the assault party check morale with a positive modifier of 1 (+3 from NCO 2 and -2 from 0 2 for a net modifier of +1).
D. Effects of Failed Morale: Failure of an exposure to covering fire check causes the character to avoid exposing him or herself; any other movement (or allowable combat action) is permitted as long as the character does not enter a danger space of a covering fire. Failure of a moving adjacent check will cause the character to stop moving before coming adjacent. The character will stop with at least 3 APs left (if possible), and if 3 APs are left will execute a snap shot at the character to whom he or she was intending to move adjacent. Failure of a casualty or unexpected fire morale check will cause the character to panic and flee. Regardless of what was chosen for the character in the decision phase, the character must, in the action phase(s) immediately following the failed check, run away from the location of the enemy characters until he or she reaches a position of complete cover (referred to as cowering). The character will then remain there until he or she successfully makes a morale check. This morale check is made at the start of each decision phase. Any friendly leader who moves to the square containing the cowering character may apply his or her leadership bonus to that character's morale value. In this case, it is not necessary for the leader to pass a morale check before applying the bonus to the cowering character. Note that any leader may carry out this function for any friendly cowering character. This is the only time that the leadership bonus of a lower-ranking character may be used to assist a higher-ranking character in making a morale check.
Special Rules
19. High Energy Weapons
Plasma guns and fusion guns are high energy weapons. These weapons have more recoil than most conventional weapons and require that the gunner be well-braced to avoid injuring him or herself. Consequently, plasma guns may only be fired as a result of aimed fire or covering fire; snap shots may not be conducted, even when an enemy character moves adjacent. Covering fire for high energy weapons requires the expenditure of 6 APs.
20. The Blobs
The blobs lack most of the factors found on character counters; instead, they have only a single factor representing their life level. Blobs never check morale and have no weapons. A blob's life level times 2 is its melee value. Its unmodified life level is its armor rating. Thus, when a life level 5 blob is hit, 5 is subtracted from the damage dice roll. Blobs are unaffected by any damage result except death. Note however that a direct hit from a HE or HEAP round resulting in a serious wound is raised one level to death, as normal (see Rule 12). Blobs are capable of only one action: movement. Each action phase, a blob may move one square in any direction (but it may not move through an obstruction such as a wall). A blob may drop down one level in lieu of normal movement and suffers no adverse results for doing so. Once a blob has engaged a character in melee, the character must achieve at least a stun result on the blob in order to escape its grip. The only effect a stun has on a blob is to cause the blob to let go of its victim. All results (including death) on the melee table against blobs are converted to stun results.
21. Robots
Only the Zhodani have robots, and they have two types of robots: maintenance robots and warbots. Warbots are coded R 1 through R8 while maintenance robots are coded R9 through R16. Warbots are armed with fusion guns while maintenance robots are unarmed (although capable of melee). Warbots are semi-intelligent, at least to the extent that they do not require direct supervision to function aggressively. Maintenance robots must be supervised to attack a character. Supervision consists of the presence of an un-panicked command group (of at least one officer and one technician in the same square) on the same deck as the maintenance robot. The command group may not take any action during an action phase in which it is supervising the activity of robots. Warbots which are unsupervised are limited in the actions they can undertake. They may be committed to aimed fire in the decision phase only if they can see (trace a line of sight to) at least one hostile character at that time. They may never be committed to covering fire unless supervised. When supervised, they may conduct any normally allowed action. Robots (all types) may not climb ladders or jump down levels. Any melee attack against a robot is reduced by two columns (i.e., two columns to the left) on the melee table. Thus, a +1 attack would become a -2 attack. Stun and light wound results are treated normally. Unconscious, serious wound, and death results all destroy the robot. Direct hits from HE and HEAP rounds do not cause one higher level of damage against a robot. All warbots are treated as if in battle dress; all maintenance robots are treated as if in combat armor. Other than the preceding, robots are subject to all rules as regular characters are (including, for example, the rules on the use of high energy weapons).
22. Vacuum And Vacc Suits
Interior areas of the starship are normally pressurized and protective suits are not required. In any situation where internal pressure is lost (excluding normal use of airlocks), explosive decompression occurs. A character will suffer one wound (one roll on the damage table, unmodified) per turn until death occurs or the opening to vacuum is sealed to prevent further loss of pressure. Individuals in vacc suits, battle dress, and combat armor are immune to explosive decompression. Any wounds inflicted on characters wearing such suits while in vacuum become one level more serious. If a path of open hatches, doors (open or closed), walls (doors and walls are not air-tight), and/or holed bulkheads can be traced from a location in the ship to vacuum, then all locations along that path become vacuum, resulting in explosive decompression. Iris valves and hatches may not be opened if there is a pressure differential (i.e., if there is pressure on one side of the portal and vacuum on the other side). Donning or doffing vacc suits constitutes a special action which requires 8 cornplete turns (not phases) to accomplish. . Robots are unaffected by explosive decompression.
23. Illumination
Internal spaces within the starship are normally well-lit. Characters may turn off the lights using switches placed on walls and bulkheads near portals at the expenditure of 1 AP. The illumination for that area is then considered to be off at the start of the next step in that action phase and remains off until turned on again (at the expenditure of 1 AP). Scenarios may specify that portions of the ship be in darkness due to power or system failure. When an area is in darkness, vision is impaired. A DM of -1 applied to the basic hit dice roll for each square of range in the attack. The DM is not applied is the target is in a well-lit area or if the weapon is equipped with a vision enhancement device (see weapons chart). All robots are equipped with vision enhancement devices. All morale values are reduced by one for characters in darkness.
24. Structural Damage
A. Structural Damage: Explosions and certain weapons strikes may cause structural damage to portions of the starship, either intentionally or unintentionally. Whenever collateral damage is checked and whenever a structure of the starship is the target of the explosion or strike, players must check for structural damage. A weapon aimed at a structure of the starship is assumed always to hit that structure; likewise, collateral damage on structures is assumed to be automatic and no dice roll is required to hit, even at one or two squares from the square of the explosion.
Tossed grenades may scatter as normal. There are two types of structural damage: destruction of vacuum integrity and open/breach. When explosive decompression occurs in the starship, a path to vacuum can be traced through a structure that has its vacuum integrity destroyed. Certain structures have no values listed for destruction of vacuum integrity as these structures do not have vacuum integrity even when undamaged. Characters may move, see, and fire through a structure that has been opened/breached (hereafter referred to as breached). Moving through a breached structure costs the same as moving through an open hatch. Of course, a breached structure has had its vacuum integrity destroyed. The damage necessary to destroy vacuum integrity or breach a structure is given on the structural damage table; it is given as a number of damage points. A damage point is the penetration of the explosion or weapon strike (see the collateral damage rules, Rule 15) as modified by the penetration modifier for the type of structure. For example, a laser carbine strike on a door will cause one point of damage (4 is subtracted from the laser carbine's penetration of 5 when firing upon a door). Damage is cumulative, and players should keep a record of how much damage the various structures sustain, noting when destruction of vacuum integrity or breaching occurs on specific structures. (Note: Breaching a conduit means that the conduit has been cut, with effects as described in the technical manual).
Structural Damage Table
| Structure | Destroy Vacuum Integrity | Open/Breach | Penetration Modifier |
|---|---|---|---|
| Door | NA | 5 | -4 |
| Wall | NA | 25 | -4 |
| Iris Valve/Access Plate | 10 | 100 | -5 |
| Bulkhead/Hatch | 25 | 250 | -5 |
| Outer Hull/Deck | No | No | -5 |
| Conduit | NA | 6 | -3 |
B. Satchel Charge: Satchel charges are used for the express purpose of causing structural damage, as their characteristics make it unlikely they will be employed in regular combat. Emplacing a satchel charge is a special action which must be planned during the decision phase. A character plotted to place a satchel charge must spend the entire turn, performing no other action, emplacing the satchel charge in the square the character occupies. When a character is plotted to emplace a satchel charge, the owning player must also decide when the satchel charge will explode. The player writes down how many action phases following the turn of emplacement will pass before the satchel charge explodes. For example, writing down a 2 means that 2 action phases will pass after the satchel charge is emplaced, with it exploding during the next following action phase. A satchel charge explodes during the aimed fire step of an action phase. Once set, a satchel charge may be defused in the same manner as priming it: a character must be plotted to defuse it during the action phase and spends the entire turn defusing it. If it has not exploded by the end of that turn, it has successfully been defused. A satchel charge may detonate prematurely if, after it has been primed, it receives collateral damage of penetration 2 or greater. While primed, a satchel charge may not be moved. A satchel charge explodes with a penetration of 30.
Advanced Rules
The advanced rules in this section are included for greater detail, but they also add considerably to the game's complexity. As they require some bookkeeping it is suggested that they not be used unless A) both players are quite familiar with the basic rules section, B) relatively few characters are available to either side, or C) a multi-player game is to be played with each player controlling a few characters. These rules are essential for play in conjunction with Traveller.
25. Ammunition
Ammunition is largely ignored in the basic game, with characters always firing at the fastest rate of fire and no need ever to reload. In fact, the rates of fire in the basic game would soon empty a weapon and require the character to spend some time reloading it.
A. Ammunition Expenditure: The ammunition column of the weapons chart gives the number of rounds carried in a clip followed by the number of rounds (in parentheses) that the weapon fires in an automatic fire burst. A weapon may always be fired on a semi-automatic setting, in which only one round is fired at a time. For example, an ACR has a 20 round clip which enables it to fire 20 individual shots, 5 bursts of automatic fire (at 4 rounds per burst), or some combination thereof. A burst can not be fired at less than its stated number of rounds unless there are fewer than the required number of rounds remaining in the clip. However, as long as more than one round is fired in this "final burst", the weapon qualifies for automatic weapons fire. Each character should have an individual ammunition record. This record should include how many clips the character is carrying, what type of ammunition is in each clip, and what type of clip is currently in the weapon. For each round fired, make a small mark by the character's record, and when the total rounds fired equals the number of rounds in the clip the weapon is empty and must be reloaded. A reasonable maximum number of clips carried by character would be one clip in the weapon and 8 to 10 clips carried separately. For each clip allowed but not carried, the character may carry two grenades.
B. Reloading: Reloading is an additional action which must be planned and recorded in the decision phase. Most weapons take one complete game turn to reload, during which time the character is considered to be evading (but does not move). Snub pistols, revolvers, and shotguns may be reloaded in one turn but the character is not considered to be evading; alternately, such weapons may be reloaded in two full turns with the character considered to be evading. The plasma gun PGMP-12 may not be reloaded in the context of the game. Its power pack has sufficient energy for 40 shots, after which it is exhausted. Very heavy weapons (the auto-cannon and VRF gauss gun) may not be reloaded in the context of the game.
26. Zero-G
The starship is normally maintained at 1 G by the environmental artificial grav- ity system, but this system may fail under certain circumstances. When this situation arises, the following rules are used.
A. Handholds: Any square with an adjacent wall has handholds for use in zero-G. Squares with no walls adjacent do not. Machinery surfaces may be used as handholds.
B. Combat: When fighting in zero-G a character has a chance of becoming disoriented. At the end of each action phase in which a character fired a weapon or engaged in melee (attacked or was attacked), roll two dice. On a roll of 10 or greater, the character does not become disoriented; on any other roll, the character becomes disoriented. The following DMs are applied to the dice roll: Firing a snub pistol or accelerator rifle: -2 Firing a laser weapon: no modification Firing any other weapon: -4 Per light wound: -1 Involved in melee: -6 Using a handhold (not possible when firing a fusion or plasma gun): +5 Wearing battle dress: +2 Characters who become disoriented may not fire, make a melee attack, or change their movement (if drifting, they continue drifting; if not drifting, they remain stationary) until they have reoriented themselves. For each attempt, the character must spend 6 APs and roll 10 or greater on two dice. DMs apply as above, except handholds may not be used. Use of a handhold by a character causes all of his fires to have a DM of -1 applied on the hit determination dice roll. A character making a melee attack may not use a handhold. All results from melee attacks are reduced one level (death becomes unconsciousness, stun becomes no effect, etc.).
C. Movement: In zero-G, a character may propel him or herself along a wall using handholds at the same rate as walking. He or she may also propel him or herself across open areas by indicating a direction and launching him or herself in that direction. The character moves at either the walking or running rate (owning player's choice) but can not stop, change movement speed, or change movement direction until the character encounters a wall or other obstruction. The character then stops and must reorient him or herself. If a character drifts into an obstruction at the running speed, he or she receives the equivalent of a melee attack on the -2 column of the melee table. Firing and melee are possible while a character is drifting.
Integrating With Traveller
The Azhanti High Lightning combat system is designed to be integrated into Traveller with a minimum of difficulty. Some alterations are necessary, however, and they are detailed below.
A. Scale: If using this system for outdoor battles, it will be more convenient to use a meter scale rather than the current range listings (given in 1.5 meter squares). To convert the range in squares to range in meters, simply multiply the range listings by 1.5.
B. Melee Values: Regular Traveller characteristics and skills can be used to generate melee values compatible with those in Azhanti High Lightning. The formula used is (Strength + Dexterity)/4 + Brawling Skill = melee value.
C. Danger Space: The danger space of long range weapons should be altered for use in long-ranged encounters. An alternate method is used to determine the danger space of any weapon with an extreme range of 100 or more squares (150+ meters). A primary target is designated and then all targets along the weapon's line of sight and in the same range band are considered to be in its danger space; others in the line of sight but in different range bands are not. For example, a gauss rifle fires at a target in its long range; all other targets along its line of sight at long range are in its danger space, while targets along the line of sight but in the effective and extreme ranges are not. Weapons with an extreme range less than 100 squares maintain a danger space along their entire line of sight.
D. Number of Allowed Hits: Several weapons listed on the weapons table do not appear in Azhanti High Lightning and thus special rules for them were not included. In Traveller some attention to them is necessary. A light machine gun may hit up to three targets in its danger space. An auto-cannon, VRF gauss gun, or RAM autogrenade launcher firing flechette rounds may hit an unlimited number of targets in its danger space.
E. Skills: Due to the scope chosen for Azhanti High Lightning, no skills have been included and some rules (notably the zero-G combat rule) have been simplified accordingly. Where previous Traveller rules call for favorable DMs for skills, these should be used instead of the simplified DMs listed in the Azhanti High Lightning rules. Note that weapon skills and dexterity DMs have not been deleted, but rather have been combined into a single weapons skill rating on the counters. Morale and leadership bonuses on the counters are generated as specified in Traveller Book 4, Mercenary.
Charts and Tables
Weapons Table
Each range column gives the range in squares followed by the weapon's penetration rating in parentheses and, where listed, the automatic fire bonus (+N). "Effective (8+)", "Long (10+)" and "Extreme (12+)" give the dice roll needed to hit. The Ammo column gives the clip size and, in parentheses, the rounds fired in an automatic fire burst. A dot (*) indicates a vision-enhanced weapon (see Rule 23).
| Ammo | Weapon | Effective (8+) | Long (10+) | Extreme (12+) |
|---|---|---|---|---|
| 6 | Body Pistol | 6 (1) | 12 (0) | 20 (0) |
| 6 | Snub Pistol - Tranq | 6 (0) | 12 (0) | 20 (0) |
| - Gas | 6 (0) | 12 (0) | 20 (0) | |
| - HE | 6 (2) | 12 (2) | 20 (2) | |
| - HEAP | 6 (4) | 12 (4) | 20 (4) |
Damage Table
| Die Roll | Effect |
|---|---|
| 3 or less | no effect |
| 4 | light wound |
| 5 | light wound |
| 6 | light wound |
| 7 | light wound |
| 8 | serious wound |
| 9 | serious wound |
| 10 | serious wound |
| 11 | serious wound |
| 12 or more | dead |
Note: All direct hit wounds (not collateral damage) from HE or HEAP rounds become one level more serious. Light wounds become serious; serious wounds become death. No effect remains the same.
Die Roll Modifications: Damage. General: Plus weapon penetration rating. Armor: Mesh, -2. Flak Jacket, -4. Cloth, -6. Combat Armor, -8. Battle Dress, -10. Ablat, -6 (laser fire only). Reflec, -10 (laser fire only).
Melee Table
Columns are the melee factor differential (attacker's melee factor minus target's). LW = light wound; Unc = unconscious; "--" = no effect.
| Die Roll | -6 | -4 | -2 | 0 | +1 | +3 | +5 | +7 | +9 |
|---|---|---|---|---|---|---|---|---|---|
| 1 | -- | -- | -- | -- | -- | -- | Stun | Stun | LW |
| 2 | -- | -- | -- | -- | -- | Stun | Stun | LW | LW |
| 3 | -- |
A melee factor differential of less than -6 is no effect. A melee factor differential of greater than +9 is treated as +9. If in vacc suit, move result down one column. If robot defender, move result down two columns. If combat armor, move result down two columns.
Scenarios
The scenarios in Azhanti High Lightning are grouped in a series of incidents. Each incident covers a conflict fought on board one of the Azhanti class ships and includes one or more specific scenarios. Each scenario covers the actions of a single group of characters within the ship, and generally on a single deck. Where multiple groups of characters are struggling in different parts of the ship at the same time, each struggle is represented as a separate scenario for ease of play, but may be run simultaneously with the aid of a referee. Often additional counters may be required to run several scenarios at one time. The incident description itself sets the background for the scenarios which follow. Each scenario then lists the deck plans used, the forces on both sides, special rules (if any), and victory conditions. Forces used will give the counter group (crew, marines, intruders, Vargr, Zhodani, blobs) the forces are drawn from and whether they are drawn randomly or selected for optimal value. If drawn randomly, the group of counters specified should be placed in a cup and mixed thoroughly and the specified number of counters then drawn without examination of front or back of the counter. If selected for optimal value the factors may be examined and the characters chosen as the owning player sees fit. Special rules cover specific set-up of the scenario, any limitations on the actions of the characters, alterations in the deck plans used, and any other considerations unique to the scenario at hand.
Incident I - The Battle of Kagukhasaggan
Year of the Imperium 1002
The Loss of the Bard Endeavour: In the closing stages of the Solomanl Rim War, an Imperial task force built around the fleet intruder Bard Endeavour was ambushed while refuelling in the Kagukhasaggan system by the Solomani dreadnought Retaliation and a large number of accompanying warships, together forming Strike Force Daring. Several of the smaller Imperial escorts in the high guard position were destroyed covering the disengagement of the Imperial task force from the system's gas giant's gravity well and those ships already refuelled headed out-system at maximum G's to make a jump. To cover the withdrawal, the Bard Endeavour (its tanks nearly dry) remained behind to delay the enemy and sell itself as dearly as possible. The heroic stand of the Bard Endeavour enabled most of the task force to escape, but left the fleet intruder a glowing wreck in decaying orbit over Kagukhasaggan 2, one of the small inner worlds of the system. Those crew still living began evacuating the doomed vessel, although many were cut off in the interior of the striken vessel. Within an hour most of the survivors were off and many had been picked up by Solomani vessels in the area. Interrogation of the drive room crew survivors indicated that the jump drives were not damaged beyond repair and that enough fuel remained for a very short in-system jump. Although there was a greater than 60% chance of a catastrophic mis-jump from a position that deep in the gravity well, Vice-Admiral Smith, commander of the Solomani strike force decided that the risks were worth it if only a small force of volunteers were involved. Recovery of the Bard Endeavour relatively intact with its high amperage tritium accelerator and sophisticated meson screens could mean the difference between victory and defeat for the Solomani independence movement. Three strike teams were quickly assembled. One would enter through the rear doors of the boat dock deck, clear the jump drive decks, and repair the jump drives, if possible. A second team would force their way into the ship via the fighter recovery lock on deck 69 to cripple the four remaining operational fighters on board (and prevent their use against the Bard Endeavour in an Imperial last-ditch effort to prevent enemy recovery of the ship). A third part would force the air locks on deck 41 (the upper power plant deck) and clear deck 40 immediately above it. Everything forward of the third fuel area (deck 26 to 34) was either flooded with liquid hydrogen or heavily irradiated, thus eliminating the running bridge from consideration. A small emergency crew was known to be on the auxiliary bridge, however, directing the evacuation, and they would have to be dealt with before the jump. The assault went according to plan initially, and both the hangar deck and the bridge assault parties gained their objectives. A handful of marines and crewmen of the Bard Endeavour, however, resisted complete clearance of the jump drive decks and prevented salvage of the ship. The bridge party did manage to extract a number of valuable operational codes from the ship's computer and the strike teams evacuated. Three hours later the Imperial Fleet Intruder Bard Endeavour, with 43 of her defenders still aboard, suffered catastrophic reentry into the atmosphere of Kagukhasaggan 2.
Scenario 1 - The Drive Decks
Deck Plans Used: Boat Dock Deck (Deck Plan 13) and Jump Drive Deck (Deck Plan 12) are used in this scenario.
Forces Used - Solomani: The Solomani player uses the entire Intruder counter mix.
Forces Used - Imperials: The Imperial player has a variable number of characters based on a die roll. All Imperial marine counters and all crew counters wearing vacc suits (coded cloth armor) are placed in a cup and randomly mixed. Roll two dice for the number of characters initially waiting on the boat dock deck for evacuation. As each new deck is entered by the Solomani player, roll one die for the number of characters on that deck. These are drawn from the remaining crew and marine characters in the cup.
Special Rules: The following special rules apply.
1. Setting Up The Scenario - The Imperial player places his initial forces anywhere desired on the Boat Dock Deck. The Solomani troops enter through any air lock or deck hatch in the first action phase. All characters of both sides must be plotted to move in the first decision phase. Imperial characters may not conduct any action during the first action phase due to surprise.
2. Lifts - Before the game starts the Imperial player places all alien (blob) counters in a separate cup and draws one for each lift, starting with lift A and proceeding through lift G. As the counter is drawn, it is placed face up (number down) on the lift. The Imperial player may examine the number when doing so, but the Solomani player is not allowed to see it. Any lift with a counter on it numbered 3 or 4 is still operational. All others are out of commission (doors jammed shut and the shaft blocked). An operational lift will respond normally as indicated in the rules. A lift which is out of commission will not respond at all and its status will become obvious to the Solomani player as soon as any one of his characters attempts to activate it.
3. Vacuum - The entire interior of the ship is in vacuum and all normal rules apply.
4. Clearing Decks - The Solomani player must proceed one deck at a time and clear the boat dock deck and the decks above it. He may not proceed to a higher deck until all hostile characters on the deck have been killed. Imperial characters may leave a deck and go one deck higher or lower. Whenever an Imperial character leaves a deck the character counter is removed from the deck plan and placed to the side. The Imperial player may secretly note whether he has gone up or down. As each new deck is entered by the Solomani player, any additional Imperial crew or marines are added to the Imperial force. The additional crew and marines are not rolled for until the Solomani player enters a deck. It may prove necessary for the Solomani player to double back to clear a deck again and if so, no new Imperials are added on that deck. The Solomani player may leave guard detachments on a cleared deck to deal with Imperials who decide to double back. He may find it useful to leave guards in operational lifts as well.
Objectives: The Solomani player must clear all jump drive decks (there are eleven, numbered 73 to 83) of Imperial survivors to win. The Solomani player must achieve this objective within 120 game turns (30 minutes) to leave sufficient time for the repair of the jump drives. Failing accomplishment of the Solomani objective, the Imperial player wins.
Scenario 2 - The Hangar Deck
Deck Plan Used: Only the Hangar Deck (Deck Plan 11) is used in this scenario.
Forces Used - Solomani: From the Intruder counter mix, two officers, three NCOs, and nine enlisted men (all drawn randomly). Intruders with battle dress should be left out of the available mix.
Forces Used - Imperial: Roll two dice for the number of crew and/or marines present on the deck. This number is then drawn randomly from all marines and crew members in vacc suits (coded as cloth armor).
Special Rules: The following special rules apply.
1. Setting Up the Scenario - Sixteen alien (blob) counters are used to represent the four remaining operational fighters. Each group of four counters represents one fighter, and must be placed somewhere in the fighter launch track. Each such group is positioned to form a large square, two squares by two squares in dimension. A fighter obstructs line of sight. The Imperial player then sets up at least one character adjacent to each fighter. All remaining characters may be freely placed. The Solomani troops enter from the fighter lock (room 16) in the first action phase. In the initial decision phase all characters of both sides are committed to movement, and the Imperial characters may not conduct any action due to surprise.
2. The Fighter Well - It requires one complete action phase (6 APs) to climb out of the fighter well. Characters may jump down into the fighter well as described in the rules for jumping down one level.
3. Satchel Charges - The Solomani player has six satchel charges. One charge, when attached to a fighter, will disable it.
4. Additional Imperial Troops - At the beginning of each decision phase, roll two dice. On a roll of 12, one more Imperial crew/marine appears, drawn randomly. This character arrives from any overhead hatch or iris valve.
5. Vacuum - The entire deck is in vacuum. Normal rules for vacuum apply.
Objective: The Solomani player wins if he kills everyone on the deck or disables all four fighters with satchel charges. Failing this, the Imperial player wins.
Scenario 3 - The Bridge
Deck Plans Used: The Power Plant Deck Upper Level (Deck Plan 7) and the Bridge Deck (Deck Plan 4) are used.
Forces Used - Solomani: From the Intruder counter mix, two officers, three NCOs, and nine enlisted men, drawn randomly, with the intruders in battle dress left out and not available.
Forces Used - Imperial: All eleven crew in vacc suits (coded cloth armor) plus two dice worth of marines, drawn randomly.
Special Rules: The following special rules are used.
1. Setting Up The Scenario: The one crew officer (010) is placed in bridge position 1, and one crewman is placed on each of the five environmental/damage control stations, the fighter launch control station, the supernumerary station, the gunnery officer station, and the XO's station. Up to four marines are placed on the upper power plant deck and the rest are placed on the bridge deck anywhere. The Solomani troops enter through the airlocks on the upper power plant deck. All characters of both sides are committed to movement in the first decision phase and no Imperial character may conduct any action in the first action phase due to surprise. After the first action phase, if any marines on the power plant deck remain conscious all Imperial characters are alerted to the threat. All Imperial marines may move freely. All crew characters remain at their stations until Solomani troops are sighted on the bridge deck, and then may move freely. On the turn of sighting on the bridge deck crew characters may only move.
2. Lifts - All lifts are out of commission. Only ladders may be used to gain access to a higher deck.
3. Vacuum - All decks are in vacuum. Normal rules apply.
4. Multiple Deck Action - Since only two decks are involved, both deck plans may be used simultaneously, and action may take place on both at the same time.
Objectives: The Solomani player wins if he clears the bridge deck of all Imperial characters. The Solomani player has 120 game turns (thirty minutes) in which to achieve this in order to leave sufficient time to take over operation of the bridge. As soon as he clears the deck, he has won, even if Imperial characters remain alive on the power plant deck. At the end of the time limit, the Imperial player wins if the Solomani player has not achieved his goal.
Incident II - Perfidious Zhodani
Year of the Imperium 1042
The Vermillion Stance: Long the flagship of the Imperium's Five Sisters Flotilla, the Vermillion Stance was retired from active service in 1040, being replaced by several ships of greatly smaller tonnage. Transferred to the Imperial Interstellar Scout Service, it underwent refit and refurbishment for 16 months at Mora/Mora, and then returned to the Five Sisters subsector preparatory to a long range penetration into the client-states to spinward. The mission included large-scale use of the on-board libraries and labs to enhance local technology "as a gift from the Emperor." Zhodani intelligence acquired the itinerary of the ship, and arranged a clandestine reception for the ship in the Garconne system. When it arrived, all went normally until the reception on the quarters deck during the third week in-system. The Zhodani had produced a variety of data acquisition modules which were actually warbots in disguise. Programmed to act clumsily, they gave an image of a race intent on looking very advanced, while obviously having more show than substance. These modules were shipped to the Stance to acquire much of the technological data being given away. The ruse worked, as each group of modules wandered in selected areas of the ship, accompanied by Zhodani leaders and warriors surgically altered to prevent detection. The takeover was set for four minutes to midnight (midnight exactly would have been too straightforward for the devious Zhodani). The hostilities began as planned, marred only by a curious ensign on a fuel deck who saw through the disguise on a warbot. His alarm rang through three other decks and gave the ship's crew at least a slight upper hand.
Scenario 1 - Marine Country
Deck Plan Used: The Gunnery Deck (Deck Plan 6) is the only one used in this scenario.
Forces Used - Imperial: One officer (drawn randomly), all four NCOs, and all twelve enlisted men, drawn from the marine counter mix, and excluding marines in battle dress. One warrant officer and three ratings, drawn randomly from the vacc-suited naval crew counter mix.
Forces Used - Zhodani: Three officers, two technicians, drawn randomly from the Zhodani counter mix, plus all eight Zhodani warbots.
Special Rules: The following special rules apply to this scenario.
1. Setting Up This Scenario - All four crew characters must be in room 16, 18, 19, and/or 20, as they represent the onduty maintenance watch. The marines may be set up anywhere desired on the deck. Zhodani warbots enter by way of the lifts; Zhodani officers and technicians may enter by any means desired. The marines have been alerted and prepared to defend the deck against intruders, and thus may be plotted for any action in the initial decision phase. All Zhodani units must be plotted to move during the first decision phase.
Objectives: By tradition, a part of the armament of a ship is manned by its marine contingent. By fortunate coincidence, the one gun deck on alert when the Zhodani attack came was the marine deck, and the warning came just in time to enable the marines to prepare the deck for defense. If the one alert deck could be put out of action, reinforcing ships could approach and board the Vermillion Stance. The marines win if they successfully repel the Zhodani attack on the gunnery deck. To do so, they must keep one dorsal and one ventral turret manned at all times during the scenario. One marine per turret in the fire director's seat is sufficient to keep the turret manned (the crew cannot man the guns, as they are maintenance personnel, not gunners). If, at any time, both turrets are unmanned (or out of action due to the destruction of their consoles from warbot plasma gunfire) on either the dorsal or ventral side, and there is at that time a functioning Zhodani command group on the deck, the Zhodani win. If the Zhodani attack is repulsed, the Imperial player wins. If neither condition is met (the Zhodani warbots take the deck, but no command groups survive to report it) neither side wins.
Scenario 2 - The Running Bridge
Deck Plan Used: The Bridge Deck (Deck Plan 4) is used.
Forces Used - Imperial: Five officers, three warrant officers, and five ratings, all drawn randomly from the crew counter mix. Two NCOs and four enlisted men drawn randomly from the marine counter mix, excluding marines in battle dress. All marines in battle dress.
Forces Used - Zhodani: Three officers and three technicians, all drawn randomly. All sixteen Zhodani robots.
Special Rules: The following special rules are used.
1. Setting Up This Scenario - The highest ranking naval crew officer present (the officer of the watch) is placed in the command station on the bridge. The other four officers are placed, one each, on the engineering, maneuvering, environmental control, and gunnery stations on the raised central portion of the bridge. One warrant officer is placed at the helm and one rating is placed at the tactical display station. The remaining six naval crew, six non-vacc-suited marines, and two marine enlisted men in battle dress (drawn randomly) are placed anywhere on the bridge deck according to the procedure listed below. All eight Zhodani maintenance robots, one Zhodani officer, and one Zhodani technician of the Zhodani player's choice are also placed anywhere on the deck except in enclosed rooms not already occupied by an Imperial character. No Zhodani character may be placed in either of the two security areas. For those counters which may be placed freely, counters are placed by the Imperial and Zhodani players in an alternating order. The Zhodani player places one counter of his choice and the Imperial player places two of his choice. They alternate until the Imperial player has placed all of his counters, at which point the Zhodani player places all of his remaining counters. All remaining Zhodani warbots enter the deck at the start of the scenario from any lift or combination of lifts. The two remaining officers and two technicians may enter on turn one by any means, or after turn one by ladder (only). All characters must be committed to movement the first turn, but neither side is hampered by surprise.
2. Imperial Reinforcements - A few heavily-equipped marine guards in various parts of the ship survived scattered Zhodani surprise attacks and converged on the bridge to help fight off the Zhodani assault. At the beginning of the decision phase of each turn, starting with turn two, the Imperial player rolls one die and subtracts 4 from that roll. If the result is a number greater than zero, that is the number of marines in battle dress who arrive on the bridge deck that turn. If the number is zero or less, no marines arrive that turn. This is repeated until all marines in battle dress have arrived or the bridge deck has been cleared by the Zhodani player. Arriving marine reinforcements may enter the map by any means desired and in any action phase, but must be committed to movement their turn of arrival.
Objectives: The Zhodani player wins by seizing the bridge deck. He accomplishes this by killing or incapacitating all Imperial characters on the deck. As soon as this occurs, the scenario ends and the Zhodani player wins. The Imperial player wins by preventing this.
Incident III - Enemy Aboard!
Year of the Imperium 1090
Jolly Roger: Arriving at Lewis/Aramis in 1090, the Loathesome Reverie was responding to an appeal to the Duke of Regina from several shipping lines that their trade was being raided by pirates under the guise of trade regulation and tariffs. Once there, however, the locals proved quite polite and proper, welcoming the ship and its crew to their small world and isolated cities. Unknown to the ship, visitors placed at least one explosive device on board, and detonated it at a crucial point in their negotiations- and then they attempted to board, ultimately succeeding in placing only a small band. If that band could disable the power plant deck, the ship would die under the fire of the pirate vessels. The small pirate raiding party worked its way through the ship from a fuel deck where they boarded undetected some hours before, and were stopped short of the drive decks only by an alert security team.
Scenario - Through The Maze
Deck Plans Used: Fuel Deck (Deck Plan 2), the Gunnery Deck (Deck Plan 6), the Upper Power Plant Deck (Deck Plan 7). and the Lower Power Plant Deck (Deck Plan 8) are used in this scenario.
Forces Used - Pirates: One officer, two NCOs, and six enlisted men, all drawn randomly from the intruder counter mix, including in battle dress.
Forces Used - Imperial: Variable (as indicated below), but all drawn randomly from the marine and crew counter mix.
Special Rules: The following special rules are used in this scenario.
1. Setting Up This Scenario - All pirates begin on the fuel deck (deck 61 of the naval cruiser). There are no Imperial characters on this deck and it is empty of liquid hydrogen. The Imperial player draws four officers, four warrant officers, and ten ratings from the non-vacc-suited crew (drawn randomly) and places them on the lower power plant deck An additional one warrant officer and three ratings are drawn randomly from the remaining non-vacc-suited crew and placed on the upper power plant deck. A security detachment of seven marine enlisted men is drawn randomly from the marine counters and placed anywhere desired on the lower power plant, upper power plant, and/or gunnery deck. All Imperial characters are set up out of view of the pirate player, and the deck plans specified are not used until the pirate arrives at that deck.
2. Satchel Charges - Each pirate has a satchel charge. To disable the ship's drives, one satchel charge must be placed on each of the two large power plant housings that run up through the power plant decks. The charges must be placed on the base of the housings on the lower power plant level.
3. Changing Decks - Because the ship is still on low-level alert, the lifts cannot be used. Routine security scans are still being conducted and the ship's computer is still operating under an intruder alert. The pirates begin on deck 61 and must climb to deck 46 to plant their satchel charges. They may do this by any ladder leading through a hatch or iris valve, or may split into several parties and go by different routes. While fuel deck 61 is empty, all fuel decks between it and the power plant are full of liquid hydrogen, thus limiting the ability of the pirates to change routes once the ascent is begun.
Each time the pirates enter a room on a deck other than the one they started on, they may encounter crew or marines. If they enter a room in which the Imperial player has stationed a marine guard, the encounter is automatic. If no marine guard is stationed in the room, roll two dice. On a roll of 11, one crewmanlmarine is present. On a roll of 12, two crewmen/marines are present. In either case, the required counters are drawn randomly from the total remaining crew and marine counters (placed together in one cup). Upon entering a room, both the Imperial character(s) and the pirates must be committed to a movement action and the Imperial character(s) may not conduct any action the first action phase, due to surprise. If at the start of any decision phase a crewman or marine who has seen the pirates remains conscious, the alarm is sounded and Imperial characters encountered from then on do not suffer from the one phase paralysis due to surprise.
Objectives: The pirate player wins if he disables the power plant. In any other situation, the Imperial player wins.
Incident IV - The Great Wine Heist
Year of the Imperium 1092
Wine Connoisseurs: The wines for the Imperial table have always been imported from Terra (old Earth), partly due to tradition, partly due to snobbery, but mostly because the finest varieties of grapes have never adapted well beyond the limited areas where they are found on Earth (with the notable exceptions of the Riesling and Chasselas varieties). Although the practice of importing Terran wine declined, of necessity, during the height of the Solomani independence movement. Strephon (the current Emperor) has a taste for the white wines of Terra, particularly Tokaj Eszencia, and he has reinstituted regular wine runs. Produced exclusively in the small Tokaj-Hegyalja district on the northern slopes of the Carpathian mountains, Tokaj is primarily a product of the outstanding but rare Furmint grape. The reservation of all Tokaj Eszencia (the highest grade) for the Imperial table, and the right of final bid on all other Tokaj of a grade Aszu 4 Puttonyos or higher has driven the price of even common grades of Tokaj to incredible levels, far beyond their true worth. Tokaj Eszencia, unattainable at any price normally, commands fortunes when an occasional bottle finds its way to the marketplace. Thus, in 1092, a small band of adventurers, financed by wealthy backers whose identities have never been discovered, pulled off the crime of the century, the Great Wine Heist, by stealing three complete cases of Tokaj Eszencia from the Imperial scout cruiser Imperial Reaumur. Well aware of the great temptation posed by such valuable cargo, the regular wine runs from Terra to the capital had been assigned to two converted scout cruisers of the Azhanti High Lightning Class. On 023-1092, the ISC Imperial Reaumur prepared to leave Earth orbit with its hold full of wine, including four cases comprising the target of the heist. The plan was simple. Eight criminals were hidden in crates and loaded in the hold with the wine. After loading of the hold was completed, they would emerge, seize the wine, and make their way to the boat deck. Once there, they would surprise the crew on duty, steal a pinnace, and make good their getaway. The presence of large numbers of cargo lighters, fuel shuttles, and routine maintenance craft moored to the Reaumur's outer hull or in close matching orbit provided sufficient dead spots in the cruiser's field of fire to allow the pinnace an escape of the immediate vicinity of the ship. By the time the cruiser's captain had ordered all auxiliaries to stand off and a squadron of fighters to be launched, the pinnace had disappeared.
Scenario - Twenty-Four Bottles of Wine
Deck Plans Used: The Cargo Deck (Deck Plan 5) and the Boat Dock Deck (Deck Plan 13) are used in this scenario.
Forces Used - The Thieves: One officer, two NCOs, and five enlisted men, all from the Intruder forces and selected for optimum value. No more than one character may be in battle dress.
Forces Used - The Crew: On the cargo deck, two marine enlisted men, not in battle dress, selected randomly. On the boat dock deck, four marine enlisted men and twenty naval crew (mixed ranks), all drawn randomly. Other marines and crew drawn randomly as called for.
Special Rules: The following special rules apply to this scenario.
1. Setting Up the Cargo -- The twenty-six alien (blob) counters are used to represent crates of cargo. The naval player sets up the cargo crates randomly (not examining the numbers) on the cargo deck. Only one crate may be in each square and each crate must be placed so as to have at least one side accessible to open area. Those crates with a 2 on the back contain wine. Each crate is the height of a normal person, thus providing cover and blocking line of sight. The crate fills the square; thus characters may not occupy a square containing a crate except as specified below.
2. Setting Up The Crew - The two marine guards on the cargo deck are placed anywhere, but not adjacent to a lift, hatch, door, or iris valve, nor directly above or below an overhead or floor hatch or iris valve. The crew and guards on the boat dock deck are placed anywhere desired on the deck, but at least one crewmember must be placed adjacent to each hatch into a docking port. This deck should be set up in a location where the thief player cannot view it, as he does not know the location of the guards and crew on the deck until he arrives there.
3. Setting Up The Thieves - The thief player places his characters in crates (on top of them; to indicate that they are inside). Two thieves may normally be placed in a crate, but only one thief wearing battle dress may occupy a crate.
4. Starting Play - Play starts when the thieves break out of the crates, presumably with guns blazing. Each thief spends the entire first action phase breaking out with the exception that a thief in battle dress expends 3 APs doing so. Both the guards and the thieves may only be committed to movement in the initial decision phase. The guards may not conduct any action (due to surprise) in the first action phase.
5. Locating The Wine - Assuming the guards are disposed of, the thieves must find the wine. Each thief may examine one crate per action phase. The thief must begin the action phase adjacent to a side of a crate in order to examine it. At the end of the action phase, turn over the counter representing the crate and, if a 2 is present, replace it with one of the four wine crate counters. Each thief may carry one crate of wine, but may not use any weapon while doing so. If a thief carrying a wine crate receives a light wound, roll one die. On a roll of 5 or 6, the wine is destroyed (either shattered by a bullet or dropped by accident). If a character receives a serious wound, unconscious result, or death result, the wine is automatically destroyed. During each decision phase while the thieves are still on the cargo deck, roll for a random encounter as specified in 6 below (throw 11 or 12 on two dice). This represents a party of crew and/or marines arriving on the cargo deck to check cargo, relieve the guards, etc. After the number of characters has been determined, roll one die to discover which lift they arrive in. A roll of 1 or 2 indicates lift C, 3 or 4 indicates lift D, and 5 or 6 indicates lift E. Neither side is surprised, but both sides must be committed to movement that decision phase, the arriving crew must exit the lift, and the lift is assumed to close and depart after they have exited. Neither side may shoot in the first action phase.
6. Moving To The Boat Dock Deck - The thieves start on deck 21 of the cruiser and must descend to deck 84 (the boat dock deck). Roll two dice for each deck descended; if an 11 or 12 is rolled, the thieves have an encounter. If descending by a lift, the doors open and there are crewmen and/or marines waiting to board the lift. If descending by ladder, crewman and/or marines enter the com- partment or are already in that compartment when the thieves enter. Roll one die for the number of crew and/or marines encountered and draw that many characters from the total of all marines and crew counters left (after the initial draw for crew forces on the two decks used originally). In the event of an encounter, both sides are committed to movement in the initial decision phase and the encountered crew/marines may not conduct any action (due to surprise) in the first action phase.
7. The Alert - If any crew or marine character escapes from a random encounter or from the cargo deck the alert is sounded. The alert is automatically sounded at the conclusion of the first turn of combat on the boat deck. The thieves have five minutes (twenty game turns) from the time the alert is sounded to make their escape. After that time, the cruiser's defenses are sufficiently alerted to prevent escape. Descending one deck by lift requires one action phase.
8. Pilots - The thief player must designate two of his characters as small craft pilots. At least one of these characters must be with the thieves when they seize a small craft for the thieves to make good their escape. The pilot may be lightly wounded but must be conscious.
Objective: The thieves win by making their escape with at least one case of wine. Making their escape is considered to be occupying one of the pinnaces in the boat dock deck and having the iris valve close behind them. Escape with one case of wine yields a marginal victory; two or three cases of wine yield a substantial victory; four cases yield an overwhelming victory. The estimated value of the wine is Cr1,000,000 per bottle, or twenty-four million per case, of which the thieves can expect to realize about one-sixth. The crew player wins by preventing the thieves' victory. Both players lose if all of the wine is destroyed. If the alarm is sounded and the thieves cannot make good their escape, they may be assumed to have turned over the wine to the naval player in return for personal amnesty, resulting in a win by the naval player; the thief player may not intentionally destroy the wine to prevent a naval player victory.
Incident V - Dead Ship
Year of the Imperium 1101
Salvage Mission: With the outbreak of the Fourth Frontier War, the commander of the Haunting Thunder was on routine neutrality watch off Zircon in the Jewell subsector. Upon notification by emergency dispatch boat, she opened sealed orders and jumped to Rapp's World via Frond. Operating in conjunction with two Kinunir class battle cruisers (Enki Kalarnrna and Markashi) and four Gazelle class close escorts (Abracone, Cillien, Kudebeck, and Swiftie), the Haunting Thunder began commerce raiding among the Zhodani cluster of worlds in Querion subsector. The region is a perfect setting for hit-and-run raiding, as all are within jump-2 of each other, and have gas giants. The task group would enter a system, raid, and then refuel if possible. Generally they carried a reserve of fuel to enable an emergency jump out-system if unexpected resistance was encountered. Gradual attrition picked off the Gazelles and the Haunting Thunder detached the two battle cruisers on emergency orders from 212th Fleet in Rhylanor. Soon thereafter, Haunting Thunder met with disaster. Jumping with half-empty tanks, Haunting Thunder hit Querion just as a Zhodani fleet was massing, and an emergency refuelling proved necessary at Querion's secondary gas giant. With all turrets and sensor arrays retracted, Haunting Thunder ran directly into the ambush of a flight of system defense gunboats lying doggo deep inside the gas giant. As the skim began, they made their move and riddled the ship. Its back broken, the Thunder never pulled out of its long arching dive. The Haunting Thunder lies adrift, tail down, in an ammonia sea on the surface of the gas giant, buoyed up by its empty fuel tanks and assumed destroyed beyond chance of recovery by the Zhodani. From deck 70 down, it is flooded with ammonia and the forward goose-neck (decks 1 to 9) is gone. Deck 10 is torn open. One of the four fighter squadrons of the Haunting Thunder was equipped with a new model fighter, the Rampart RF-128, and this squadron was located in the hangars on deck 69. Even given its violent end, there is a high probability that if the cruiser itself has remained intact, at least one of the Ramparts may be in close to operational condition. Numerous factions would pay a fortune to examine a reasonably intact Rampart, and so a small party of adventurers undertakes the dangerous salvage mission. Access is gained through the damaged front of deck 10 and a large hoist tower and winch erected over the now useless fighter launch tube. The winch will be used to lower the adventurers into the ship and hoist the fighter out. The adventurers reach the hangar deck and locate the fighter. A temporary mechanical failure delays extraction of the fighter, and while the winch is being repaired, the salvage crew notices movement in the fighter well, awash with ammonia.
Scenario - The Blobs
Deck Plans Used: Conceivably, all deck plans could be used, with the exception of the plan for the three small forward decks, the jump drive deck plan, and the boat dock deck plan, all of which are either gone or submerged in ammonia (and densely inhabited by the blobs). All of the interior hatches and iris valves are jammed open, and the blobs have spread throughout the ship.
Forces Used - Salvage Party: Six counters, drawn randomly from the intruder counter mix.
Forces Used - Blobs: The number is variable, but drawn from the blob counter mix.
Special Rules: The following special rules are used in this scenario.
1. Setting Up This Scenario - The blob player initially rolls two dice and receives that number of blobs, drawn randomly from the counter mix. All blobs are placed in the fighter well (the launch track). All adventurers are placed anywhere on the hangar deck not in the fighter well and within eight squares of the fighter launch tubes. All characters are committed to movement first turn, and the salvage party may not conduct any action the first action phase due to surprise.
2. Changing Decks - With the winch out of action, the salvage crew may only change decks using ladders (the lifts are completely out of order and blocked). On each new deck, there are two dice worth of blobs, set up anywhere desired by the blob player. The blob player should set up the blobs before the deck in question is required and not allow the salvage party player to examine it.
3. Gravity - Due to the high gravity of the gas giant, the salvage party characters may not trot. Climbing one level is very tiring, and characters must rest at least one full game turn (no movement at all) before climbing another level. Characters in battle dress function normally.
4. Blob Reinforcements - Blob reinforcements only appear on the hangar deck and may only be used on that deck. One additional blob appears each action phase of every turn after the first turn is completed.
5. Demolition Charges - The salvage party has four demolition charges (one each to four characters) intended for removing any blocking structural members in the fighter launch tube. A charge may be thrown as a grenade, but to a maximum of eight squares and does not scatter; its effects are the same as a satchel charge.
6. Exiting The Ship - All outer air locks are fused shut. The adventurers may only exit the ship by climbing to deck 10. Once they reach deck 10, they are safe.
7. Morale - The first appearance of the blobs will strike terror in the hearts of the salvage crew and cause an immediate morale check by the entire party, conducted as if caused by casualties and done at the end of the first action phase. All members of the party who panic from this morale check and any later morale check will trot (despite the high gravity) to the nearest ladder unblocked by blobs, and climb to the next deck. At that point, the character is paralysed by exhaustion for one die roll of action phases, during which time the character is extremely vulnerable to attack. If the character, after recovering from his exhaustion, does not recover from his panic he continues his flight up the ladder.
Objective: The salvage party's sole objective is to survive. If any member of the party escapes, the salvage party player wins a marginal victory. If any member of the party not in battle dress escapes, the salvage party player wins a substantial victory. If two or more members of the party not in battle dress or a total of four members whether or nor in battle dress escape, the salvage party member wins a major victory.
Incident VI - Brother Wolf
Year of the Imperium 1105
Among the Vargr: In late 1049, with the memory of the Solomani Rim War fading in the minds of the citizenry and the admiralty alike, three CruDivs of the Azhanti High Lightning class were declared surplus and disposed of to commercial interests. These six ships went to transport lines in all areas of the Imperium, primarily for fast transport of high-quality cargos. All had their armament removed. Oberlindes Lines, of Regina, procured one ship: FI-6326, the Sparkling Distress, and renamed it Emissary. Through a convoluted, irregular, slightly shady, and completely unprecedented procedure, the complete weaponry array of the vessel was left intact. Oberlindes rightly felt that the weaponry was necessary for trading expeditions into the Vargr Extents. Due to the technical breach of Imperial demilitarization regulations, the ship could not be based within the Imperium. Oberlindes Lines instead established a trading center in the Uthe subsector, beyond Imperial law, and operated the Emissary from there (at Pandrin/Uthe 0610). In addition to numbers of cultural items exchanged back and forth (literature, art, and music, primarily) the Emissary hauled high-tech machinery into the Vargr Extents and brought back bulk loads of lanthanum ore from the rich mines of Scangen. The ship was altered somewhat, with the number of crew decks reduced in favor of cargo space and one hangar deck supplanted by cargo as well (although the other remained functional for small craft maintenance and operations). The heavy armament of the Emissary was sufficiently impressive as to command respect by the Vargr and discourage interference by the privateers of rival Vargr governments. In its entire tenure of service, the Emissary's guns were never called upon to speak in anger. In 1105, however, the crew of the starship hatched a bold plot to seize the ship and sell it to one of the Vargr states more openly hostile to the Imperium than those with which Oberlindes Lines deals. Sergei hault-Oberlindes, son of the owner of the lines and acting master of the Emissary, along with loyal members of the crew, was overpowered and captured, but later escaped and foiled the plot.
Scenario 1 - The Take-Over
Deck Plans Used: The Bridge Deck (Deck Plan 4) is the only one used in this scenario.
Forces Used - Loyal Crew: Adventurer counters A12 and A13 are used as are all crew counters not in vacc suits (not coded as cloth armor).
Forces Used - Mutineers: Both marine officers and ten other marines, drawn randomly, and excluding marines in battle dress. All are treated as if in flak jackets, not combat armor.
Special Rules: The following special rules are used in this scenario.
1. Sergei and Zinovia: Character A12 represents Sergei hault-Oberlindes and character A13 represents Zinovia, his wife. Zinovia is a native of the planet Ruie and was rescued from prison there by Sergei and a small band of adventurers three years previously. Sergei and Zinovia are initially equipped with automatic pistols, but may pick up and use any weapon dropped by a wounded character. Sergei is treated as +1 with any pistol, +2 with any rifle, and -2 with any energy weapon (fusion or plasma gun). Zinovia is treated as +3 with any pistol and -2 with any other weapon Sergei has a morale of 10, melee of 5, and leadership bonus of +3. Zinovia has a morale of 12, melee of 3, and no leadership bonus unless Sergei is killed or unconscious, in which case she receives a leadership bonus of +2. Zinovia has a permanent leadership bonus of +2 for rallying Sergei if he become panicked. Sergei outranks all other friendly characters for morale purposes. If Sergei dies, Zinovia outranks all other friendly characters for morale purposes.
2. Setting Up The Scenario - Sergei is placed at the command station and Zinovia at the supernumerary station. Stations on the central raised portion of the bridge are manned by officers. All engineering and maneuvering stations and the three stations of the Combat Information Center are also manned by crew of the loyal player's choice. All other crew may be placed anywhere on the deck desired. Mutineers enter from any lift or hatch. Characters must be committed to movement in the first decision phase, and loyalist crew may not conduct any action the first action phase due to surprise.
3. Surrender - The loyalist player may, at any time, surrender his forces, thus ending the scenario and all combat.
Objectives: The mutineers must take over the starship by clearing the bridge, forcing a surrender, or killing both Sergei and Zinovia. The loyalist player must either maintain control of the bridge by killing or incapacitating (either serious wound or unconscious) all mutineers, or foil the plan by the escape of Sergei and Zinovia. If Zinovia is alive, Sergei will not escape without her; if she is dead, Sergei will not attempt to escape. If Sergei and Zinovia are both killed, the mutineers win a total victory. If the loyalists surrender, the mutineers win a marginal victory. If Sergei and Zinovia escape, the loyalists win a marginal victory. If the loyalists kill or incapacitate all mutineers and both Sergei and Zinovia survive, the loyalists win a total victory. If the loyalists kill or incapacitate all the mutineers but either Sergei or Zinovia is killed, neither side wins.
Scenario 2 - The Escape
Deck Plans Used: The Bridge Deck (Deck Plan 4), the Cargo Deck (Deck Plan 5) and the Crew Quarters Deck (Deck Plan 3) are used in this scenario.
Forces Used - Loyalists: Adventurer counters A11, A12, and A13 are used, along with twelve Vargr counters, drawn randomly.
Forces Used - Mutineers: All marine counters, except those in battle dress, are used. All marine counters are treated as wearing flak jackets, not combat armor.
Forces Used - Neutral Crew: All crew not in vacc suits are used.
Special Rules: The following special rules are used in this scenario.
1. Sergei and Zinovia - Both Sergei and Zinovia have the same characteristics as in scenario 1. Sergei begins the scenario with one light wound.
2. Arrlanroughl - Assuming that the small Vargr trade mission on board the Emissary would see their loyalty with others of their race rather than with the Imperial-based Oberlindes, the mutineers left them free of restraint. Council Speaker Arrlanroughl, the head of the delegation, saw things differently. The rim coalition he represented had no real quarrel with the Imperium, stood to make no profit from the acquisition of the Emissary by an economic rival (even if Vargr), and had benefitted materially from the frequent visits of the Oberlindes trading vessel. Furthermore, he had come to like Sergei and Zinovia and had little stomach for mutiny. Arrlanroughl armed his delegation, freed Sergei and Zinovia, and helped them reclaim the ship. Adventurer counter All represents Arrlanroughl, who is armed with a gauss rifle (+1 skill level). He has a morale of 10, melee of 3, and leadership bonus of +1. Arrlanroughl outranks all other Vargr for morale purposes.
3. Vargr Characters - Only Vargr characters affect leadership bonuses of other Vargr characters. Vargr leaders affect only other Vargr morale rolls. If Arrlanroughl and all Vargr officers and NCOs are killed, the remaining Vargr will surrender.
4. Neutral Crew - The crew joined with the mutineers out of fear after Sergei surrendered. When firing begins on a deck, all neutral crew will take cover. During the next decision phase, roll one die for each crew member. Each will join the loyalists on a roll of 5 or 6, otherwise remaining neutral for the remainder of the scenario. However, Sergei will automatically rally any crew members he is adjacent to. The mutineer moves neutral crew until they rally; neutral crew will not move if under cover (not in the field of fire of any character of either side). The mutineer may fire at neutral crew; but if he fires at any neutral crew or at any recent convert to loyal crew who has not yet committed a hostile act, all neutral crew on the deck become loyalist. Committing a character to covering or aimed fire in a decision phase, conducting a snap shot or melee attack in an action phase, or moving toward a mutineer all constitute hostile acts.
5. Setting Up The Scenario - Sergei and Zinovia are prisoner in the cargo hold on deck 38 (converted from a troop quarters deck). The loyalist player places all alien (blob) counters on the cargo deck, no more than one per square, to represent crates. A crate occupies all of a square and blocks line of sight. The mutineer places Sergei and Zinovia, plus two gauss rifle-armed mutineers, anywhere on the deck, no more than one per square. Mutineer officer 0 1 is placed in the command station of the bridge; all other bridge stations manned in scenario 1 must be manned either by mutineers or neutral crew, at the option of the mutineer player. All remaining neutral crew are placed anywhere on the crew quarters deck, no more than two crew per stateroom. Remaining mutineers may be placed on the bridge or crew quarters deck. Arrlanroughl and his escorts enter the cargo deck by any lift(s) desired. All characters on the cargo deck and all Vargr must be committed to movement in the first decision phase and the two guards may not perform any action in the first action phase due to surprise, with the exception of snap shots against characters moving adjacent to them.
6. Moving From Deck To Deck - Sergei, Zinovia, and the Vargr start on deck 38 and are attempting to move down to deck 40, the auxiliary bridge, where Sergei's knowledge of the ship's override codes will enable them to retake control of Emissary. Any normal means (lifts, ladders) may be used to reach the auxiliary bridge. Once the alarm has been given (special rule 7) the lifts may not be used.
7. Sounding the Alarm - If either guard on the cargo deck remains conscious at the start of the decision phase of turn two, the alarm is sounded. Once any firing takes place on the crew quarters or bridge deck the alarm has been sounded. If Sergei and company arrive on the bridge or crew quarters deck before the alarm is sounded, they achieve surprise, and the same first turn rules are in effect on that deck as were specified for the cargo deck in 5 above.
Objectives: The loyalists must gain control of the bridge deck or kill the ringleaders (marine officers and NCOs) of the mutiny. The mutineers must prevent this. Loyalist victory after achieving the above depends on adventurer survival: three surviving gives total victory, two surviving gives marginal victory, one gives a draw.
Notes
Traveller and Azhanti High Lightning scenarios in addition to those presented here can easily be generated by both players and referees. Such scenarios depend only on imagination and the background information already available.
Format
The scenario format should follow that given in the scenarios presented: Situation,
Deck Plans Used,
Forces Used for both sides, Special Rules, and Objectives. Itshould be written out before the game begins, even if in fragmentary form, in order to produce a concrete structure with which to begin the game.
Inspiration
The backgrounds and reasons for scenarios can be drawn from any number of sources. Much of the background for the Azhanti class cruisers still remains to be used in scenarios: for example, sections of a scrapped ship have been used as scientific outposts on the surface of a world. Other scenarios can include piracy, boarding parties, battles, mutinies, rescue attempts, and many more.
The Conduits
One part of the ship plans that can be included in scenarios are the conduits. At strategic locations on each deck are small circles filled with color, one or two per square. These are conduits carrying wires, gas, or liquid throughout the ship. Any boarders or contending parties can use these conduits as goals in a certain deck. Tapping one can yield computer information or control, interfere with ship operation, or otherwise affect the ship. The color coding provides an opportunity to vary the conduits' identity. They are red, green, blue, light blue, yellow, etc, and can be assumed to carry material or information similar to their color coding. Or a simple table can be devised, with the defending player secretly determining which conduit carries the information or material which is of importance. The attacker would be required to be in a square before he could determine if the conduit was the correct one.