Azacru
Azacru Rulebook
Table of Contents
Table of Contents
Contents
- 1 Pacru gameboard.
- 16 chevron-shaped pieces: 4 of each colour.
- 200 markers (small columns): 50 of each colour.
- 1 booklet.
- 1 box of each colour for the chevrons and markers.
Terminology
This section is just for reference if a word or phrase in the rules is puzzling or ambiguous. You can skip it and go straight to the rules of Azacru.
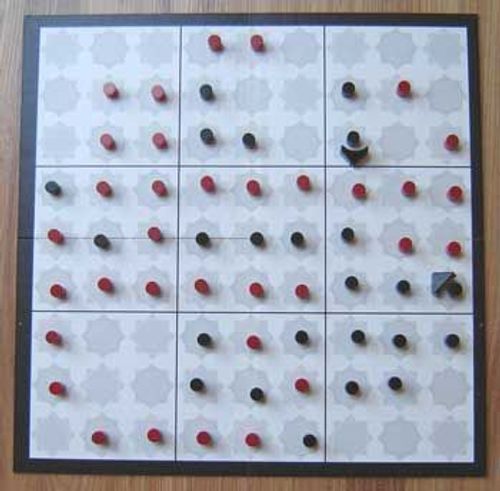
The whole board is divided into nine borderlands by the black borders. Each borderland contains nine fields. A field is shaped as an eight-pointed star containing a circle. There is no difference in play between the fields with a light circle and the fields with a dark circle; the variation just makes the diagonals more obvious.
When a marker is placed on a field it should be located in the centre of the field (inside the circle). When a chevron is placed on a field its outer edges should be lined up with one of the points of the star to make it clear which direction it is facing.
A field with no markers in it is called a neutral field. At the start of each game all the fields are neutral fields. A field with, for example, a red marker on it is called a red field. So "change the fields to your colour" simply means remove markers of any other colour (if there are any) on the fields and put down markers of your colour. A field with no chevron on it (whether there is a marker on it or not) is called an unoccupied field. A field with a chevron on it is called an occupied field.
Sometimes players refer to fields as "squares", "stars" or "positions", call markers "columns" or "tiles", refer to chevrons as "pieces" or "arrows" or call borderlands "areas". All of these uses are perfectly acceptable.
Shared Rules: Shacru Page One
The Azacru rules begin by telling you to read the Shacru rules page one (only) and then return to the Azacru rules. That page is transcribed here as printed, with its own rule numbers, because the Azacru rules depend on it.
Shacru: Starting The Game {S-R1}
Each player is represented by a colour and uses the chevrons and markers of that colour. The order of play between the different colours is a matter of choice. You can decide which player uses which colour, and the order of play, by any reasonable means.
Setting up the the opening position
If there are three or four players, each player starts with three chevrons. For the two player game, each has four. Follow the diagrams on the back page of this guide (see Starting Positions below).
Taking Turns {S-R2}
Players take turns and move one chevron at a time. You can only pass on a turn if you cannot move any of your chevrons. You may find that you have to pass on each subsequent turn until the end of the game but you could still win the game if the other players cannot get more fields than you.
Moving {S-R3}
You can move a chevron one field straight ahead, or one field forty five degrees to the right or the left of the direction the chevron is pointing. As you complete your move forwards, set the chevron down pointing in the direction it has travelled. Each time you move a chevron you change the neutral field in which you are setting down the chevron (not the field you are leaving) to your own colour by placing one of your markers on it.
Diagram caption: You have three options for moving the red chevron. In each case it will end up pointing in the direction you have moved it.
Diagram caption: You always have just three potential directions in which you can move your chevron, whether it points out of a corner or a side.
Azacru Rules
Starting The Game {A-R1}, Taking Turns {A-R2}, Moving {A-R3}
Read the Shacru rules page one (only) and then return here. Azacru only differs as regards the power of movement a chevron may have (see below).
Power of Movement {A-R4}
Each of your chevrons has a particular power of movement which depends on the borderland in which it starts its move. Count the markers of your colour in the borderland and that number is the power of movement of the chevron. If there are no markers, the power of movement is one. A chevron can move any number of fields between one and its power of movement.
Diagram caption: The red chevron has a power of movement of two because there are two red markers in the borderland. The outline red chevron symbols in the diagrams below show all the fields to which the chevron could move on this turn.
Long Move {A-R5}
When you move your chevron more than one field (a long move), you cannot change direction in the middle of the move. You must move in a straight line (directly forwards, or forwards and 45 degrees to left or right). Set down the chevron pointing in the direction it has travelled (unless you can do a borderland twist).
Borderland Twist {A-R6}
When you move a chevron across a border, you can set it down as normal after the move (leaving the chevron pointing in the direction it has travelled) or twist the chevron forty five degrees to the left or the right before completing your turn.
Diagram caption: If you cross a border you can leave the chevron facing in the direction it has moved, or twist it forty five degrees to the left or the right. The full red chevron symbols below show the result of the chevron being twisted to left or right, or not being twisted.
Connection Change {A-R7}
When you make a long move from one field of your colour to another field of your colour (a connection), and you are not jumping any chevrons, you must change all the intervening fields to your colour.
If your connection change involves changing one or more fields belonging to another player, your chevron is taken off the board as soon as the move is made.
Diagram caption: In this example the red chevron has two possible moves which would be connections: each starting on a red field and finishing on a red field. In the second case since an opposition field has been changed to red, the red chevron must be also be removed at the end of the move.
Connection Jump {A-R8}
When you move a chevron from one field of your colour to another field of your colour, you are allowed to jump any intervening chevrons. However when you make a connection jump, you do not make a connection change and so no intervening fields are changed.
Diagram caption: Any chevron can be jumped if the move is a connection, but with the jump fields in between are not changed by the connection.
What Is Forbidden in Azacru {A-R9}
- You may not move onto a field of another player's colour.
- You may not move onto a field occupied by another chevron.
Except for a connection jump:
- You may not jump over any chevron.
Diagram caption: The red chevron has a power of movement of two because there are two red fields in the borderland. Only one move is now possible for the red chevron because of the position of the other chevrons and markers.
Winning the Game {A-R10}
Eventually one player in the game will not be able to make a move on their turn: either all their chevrons have left the board, or none of their remaining chevrons can move. When this happens the player must pass on the turn. After this any players who can move take one further turn each.
The winner of the game is the player with most markers on the board at the end of the game. It is possible to use each player's total as a score and then play several games as a set, totalling the score from each game.
Example of the end of a game: If players are playing in the order red, green, yellow.
- Red moves.
- Green moves (and removes the last remaining green chevron from the board).
- Yellow moves.
- Red moves.
- Green announces "cannot move" or "pass".
- Yellow moves.
- Red moves.
So the game is now finished, and the markers on the board are counted for each colour.
Starting Positions
The back page of the booklet gives the starting positions for Azacru, Shacru and Pacru as diagrams for four, three and two players. The chevron counts for each player number are:
| Players | Chevrons per player |
|---|---|
| Four | Three |
| Three | Three |
| Two | Four |
The diagrams showing where each colour's chevrons start on the board for each player count are not reproduced in text; refer to the back page of the booklet.