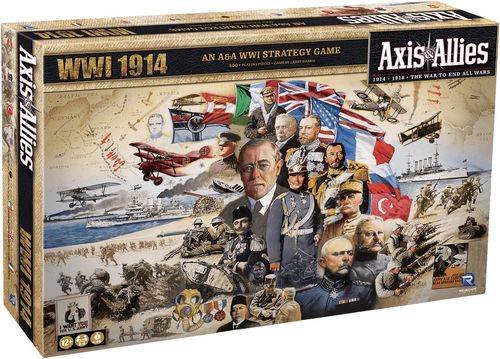
Axis & Allies: WWI 1914
Axis & Allies: WWI 1914 Rulebook
Table of Contents
Table of Contents
Game Components
Game Board:
- 1 Two-Piece Game Board
Game Charts/Aids and Storage Boxes:
- 8 National Storage Boxes
- 1 General Storage Box
- 1 Battle Board
Rulebook
Plastic Chips and Dice:
- 70 Light Red Chips
- 25 Dark Red Chips
- 70 Light Blue Chips
- 25 Dark Blue Chips
- 36 Dice
Markers and Tokens:
- 120 National Control Markers (15 for Each Power)
Plastic Miniatures (406 total):
- 102 Infantry
- 80 Artillery
- 32 Tanks
- 32 Fighters
- 32 Battleships
- 48 Cruisers
- 32 Submarines
- 48 Transports
Ages 12+, 2–8 players, 4–6 hour playtime.
How the War Is Won
On the map are the capitals of the eight major powers. The Allies' capitals are Moscow, Paris, London, Rome, and Washington, DC. The Central Powers' capitals are Vienna, Berlin, and Constantinople.
To win the game, an alliance must capture two enemy capitals and hold them until the end of a round of play. One of the captured Allied capitals must be either London or Paris. One of the captured Central Powers capitals must be Berlin.
The Combatants
Up to eight people can play Axis & Allies: WWI 1914. One or more players take the side of the Central Powers (Germany, Austria-Hungary, and the Ottoman Empire), and one or more play the Allies (the Russian Empire, France, the British Empire, Italy, and the United States). Note: The British Empire is considered to include all the Commonwealth countries that participated in the war.
On your turn, you build, deploy, maneuver, and command army corps and naval fleets. On your opponents' turns, they will bring their forces against you. The more territories you hold, the more income you generate and the more units you can mobilize—and the more powerful you become.
If fewer than eight people play, some will control more than one power. If a player controls more than one power, those powers must all be on the same side (Central Powers or Allies). If you control more than one power, keep track of those powers' income and units separately. You can conduct operations for only one power at a time. If there are less than eight players, split control of the powers between them as follows:
Two Players
- Player 1: Central Powers
- Player 2: Allied Powers
Three Players
- Player 1: Central Powers
- Player 2: Russian Empire, Italy, United States
- Player 3: France, British Empire
Four Players
- Player 1: Austria-Hungary, Ottoman Empire
- Player 2: Germany
- Player 3: Russian Empire, Italy, United States
- Player 4: France, British Empire
Five Players
- Player 1: Austria-Hungary, Ottoman Empire
- Player 2: Germany
- Player 3: Russian Empire, United States
- Player 4: France, Italy
- Player 5: British Empire
Six Players
- Player 1: Austria-Hungary
- Player 2: Germany
- Player 3: Ottoman Empire
- Player 4: Russian Empire, United States
- Player 5: France, Italy
- Player 6: British Empire
Seven Players
- Player 1: Austria-Hungary
- Player 2: Germany
- Player 3: Ottoman Empire
- Player 4: Russian Empire, United States
- Player 5: France
- Player 6: British Empire
- Player 7: Italy
Setup
Once you have decided who will play which power(s), set up the game for play. It contains the following components.
Game Board
The game board is a map of the world extending from Bombay in India to Washington, DC in the United States, circa 1914. It is divided into a number of spaces, either territories (on land) or sea zones, separated by border lines.
National Storage Boxes
Take the storage box for your power, which has its setup chart on the top. The chart shows the name of the power, its units' color, its emblem, and the side it's on. It also lists the starting numbers and locations of that power's units on the game board.
Combat Forces
Take the plastic miniatures that represent your power's combat units. Each power is color-coded as shown in the following table, which also shows the power's starting income level and treasury in Industrial Production Credits (see "Industrial Production Credits" below). Place all of your power's starting units on the game board as listed on your power's setup chart.
| Power | Starting Income | Color |
|---|---|---|
| Austria-Hungary | 26 | Green |
| Russian Empire | 25 | Maroon |
| Germany | 35 | Dark Gray |
| France | 24 | Dark Blue |
| British Empire | 30 | Light Green |
| Ottoman Empire | 16 | Dark Teal |
| Italy | 14 | Brown |
| United States | 20 | Dark Green |
Plastic Chips
Use the chips to save space in overcrowded territories and sea zones. There are two basic colors – red for the Central Powers and blue for the Allies. Light-colored chips, whether red or blue, represent one combat unit each, and dark-colored chips represent five units each. If Germany, part of the Central Powers, wanted to place seven infantry on a space, it would stack one dark red chip for 5, one light red chip for 1, and place a German infantry on top of the two chips. The number of stacks is not limited by the number of plastic pieces available. If you do not have enough pieces to top off all of your stacks, use any agreed-upon method for identifying them.
If you run out of your side's plastic chips, you can temporarily use your opponents' chips. For good order, you should replace the borrowed chips as soon as yours become available. It is important, however, that you always have your colored chips showing at the top of a stack of chips.
National Control Markers
National Control Markers (NCMs) are used to indicate status in the game. They mark conquered territories and indicate national production levels. Take all of the National Control Markers that belong to your power (printed with its emblem).
National Production Chart
This chart tracks each power's national production level (income) during the game. It is located on the game board, specifically on the Sahara Desert in Africa. The national production level is based on the combined Industrial Production Credit (IPC) values of all of the territories a power controls. As territories are won and lost, the production levels are updated with the back and forth movement of National Control Markers on the chart. At the beginning of the game, each power's player should place their NCMs on the chart to indicate their power's starting national production level, as shown in the table above. There are two rows of numbers on the chart. The top row, numbered from "10" to "70", is where a power will place its NCM indicating how many tens of IPCs it earns per turn. Germany, for example, would place its NCM on the "30". This represents three tens, or thirty. The bottom row, numbered "1" to "9", is for tracking the ones. Again, using Germany as an example, it would place a second NCM on the "5". With an NCM on the "30" of the top row, and a second NCM on the "5" of the bottom row, we can conclude that Germany is receiving 35 IPCs per turn. Each player should keep track of their powers' production levels separately.
Industrial Production Credits
Industrial Production Credits (IPCs) are the money of the game, representing capacity for military production. Each power has a beginning national production level, shown as Starting Income on the table above. Each power also begins the game with that many IPCs in its treasury to spend on its first turn. During the game, each power will spend IPCs on new units and collect more IPCs as income from territories that it controls. Have one player act as a banker and track each power's current IPC treasury on a piece of paper, or use another means agreed upon by your group. A power can't lend or give IPCs to another power, even if both powers are on the same side.
Mobilization Zone
The Mobilization Zone, located on the game board next to the National Production Chart, includes a chart that shows each unit's cost in IPCs. Newly purchased units are placed here until they are mobilized.
Battle Board and Dice
The battle board and dice are used to resolve combat in embattled spaces.
Spaces on the Game Board
Units can move between adjacent spaces (those that share a common border). Spaces that meet only at a point (such as London and sea zone 8) are not adjacent to one another, as they do not share a common border.
Territories
Each major power's original territories have their own color and only the national emblem of that power. Taking a look at Germany on the map, we notice that all the German territories share the same dark color and national emblem. Capital territories have a larger version of the power's national emblem and have a red square next to their name. The territory named "Berlin", having a red square and the large Imperial German emblem on it, is Germany's capital territory. Almost all of the major powers have both capital and regional territories (the United States being the exception). A few of the powers, such as the British Empire, have colony territories throughout the map. The British Empire controls territories in Canada, Africa, and the Middle East.
Regional territories, together with the capital, make up the entire country of a major power. With Berlin being the German capital, the German regional territories are Ruhr, Alsace, Kiel, Hanover, Munich, Prussia, and Silesia. Regional territories can trace a line across contiguous adjacent original territories directly to their capital territory. Germany also has four colonies: Togoland, Kamerun, South West Africa, and German East Africa. Colonies are not adjacent to regional territories or the capital.
On the map are also several minor powers, which are not originally controlled by players. Like major powers, each has its own dedicated national emblem and a capital territory indicated by its larger emblem (see Portugal, Bulgaria, or Sweden). Unlike major powers, the names of minor powers' capital territories do not have a red box next to them. Most minor powers do not have regional territories or colonies. Belgium, Portugal, and Spain, with their African colonies, are the three exceptions.
Most minor powers are neutral and are light tan in color, but some are politically aligned with major powers (see "The Political Situation" below). In addition to their own national emblem, aligned minor powers also have a smaller national emblem indicating which major power they're aligned with and are the same color as the territories of that power. Bulgaria and Romania are examples of minor aligned powers. Bulgaria is aligned with the Central powers. We know this by its color and the presence of the small Ottoman Empire emblem located on the Bulgarian territory. Romania, with its brown color and small Russian Empire emblem, is aligned with the Allies.
Most territories have an income value ranging from 1 to 8 printed on them, with the United States having the exceptionally high income value of 20 for its only represented territory on the map. This is the number of IPCs they produce each turn for their controller. A few territories, such as Corsica, have no IPC value.
All territories exist in one of four conditions:
Friendly: Controlled by you or a friendly power, or an unmobilized minor aligned power on your side (see "The Political Situation" below)
Hostile: Controlled by an enemy power, or an unmobilized minor aligned power on the other side
Contested: Not controlled by any power, and occupied by units of one or more powers on each side
Neutral: Not controlled by any power and not aligned with either side
Sea Zones
Sea zones are either friendly or hostile. Friendly sea zones contain no surface warships (this doesn't include submarines and transports) belonging to an enemy power. Hostile sea zones contain surface warships belonging to an enemy power.
Some sea zones contain naval base symbols. Each of these sea zones shares its naval base symbol with an adjacent territory. The naval base is controlled by the power that controls the territory. If the territory is contested, the naval base is controlled by the power that originally controlled the territory (unless its capital is controlled by the enemy, in which case no one controls it). Naval bases allow the controlling power to mobilize new sea units (original territories only) and repair its battleships in the corresponding sea zone.
Islands
An island is a single territory surrounded entirely by one or more sea zones. A sea zone can contain more than one island, but each is considered one territory with its own name and national emblem. Islands that have no name label, such as those in sea zone 2, are not game spaces and may not have units move onto them.
The Suez Canal
The Suez Canal connects the Mediterranean Sea (sea zone 19) to the Indian Ocean (sea zone 28). The canal is located inside the territory of Egypt, so no land or air movement is required to cross the canal within Egypt, and land units and fighters can move freely between Egypt and Trans-Jordan.
If you want to move sea units through the canal, your side (but not necessarily your power) must control Egypt.
Constantinople
Constantinople, containing the Turkish Straits, is one territory, so no land or air movement is required to cross the straits within Constantinople. Sea units may move freely into and out of sea zone 20, regardless of which side controls Constantinople.
The Political Situation
Minor powers, whether neutral or aligned (see "Territories" above), begin the game unmobilized, which is to say not involved in the war. As the game progresses, these powers may become involved in the war, either through mobilization by a friendly major power or invasion by an unfriendly one.
The Austria-Hungary player, going first, is required to attack Serbia during their opening turn, and in effect begin the Great War. This involves moving land units into Serbia.
Mobilizing A Minor Power
As you will immediately notice, Serbia has no standing army to defend itself. Only major powers have standing armies on the map at the beginning of the game. When a major power's forces are moved into a minor power's capital territory for the first time, one of two events occurs. The minor power either mobilizes to join the entering forces, or it mobilizes to resist the invasion. The reaction depends on the political relationship between the major and minor powers involved.
The number of units that a minor power mobilizes is twice the IPC value of the capital territory. One of these units will be an artillery, and the rest will be infantry. Serbia is worth two IPCs, so three infantry and one artillery are placed there. The nationality of the placed units depends on the political status of the minor power (see below). A minor power can only be mobilized once during the game.
Important Note: Mobilization is only conducted for minor powers' capital territories. To emphasize this point, let's take a look at the following: A small British force is moved into Belgian Congo from Rhodesia. The first thing that should be recognized is that the territory "Belgian Congo" is not a minor power. It does not have a large national emblem. It has a small Belgium emblem. This indicates that territory is simply a Belgian colony, so no units are mobilized in it. Also, it is not considered to be aligned with France (there is no small France emblem), so the British Empire takes control of it.
All mobilization must be done at the end of the movement phase, after all movements have been completed. The only exception is if a minor power is being mobilized as a result of an amphibious assault or reinforcement (see "Amphibious Assault and Reinforcement Movement" below) that involves a sea battle. In this case, the mobilization is done immediately before the moving land units are offloaded into the territory.
Mobilizing a Minor Aligned Power
When the capital of a minor aligned power is entered by land units of a major power, whether friendly or enemy, the minor power's forces are represented by pieces of the major power with which it's aligned. If the entering units are friendly, control of the territory (but not of any colonies) is immediately given to the major power with which it is aligned (see "Taking Control of a Territory" below), regardless of which power the entering units belong to. In the opening move, Austria-Hungary and Serbia belong to opposing alliances. Serbia's allegiance is indicated by the Imperial Russian Eagle emblem located in the territory. This small Russian Empire national emblem indicates that Serbia has a military alliance with the Russian Empire. Serbia will be resisting the Austro-Hungarian invasion. Russian pieces will be used to represent the newly mobilized Serbian forces, which will be controlled by the Russian Empire player.
Mobilizing a Minor Neutral Power
If a major power moves units into a minor neutral power's capital territory, the invaded neutral power will mobilize forces against the invading force. Serious consideration should be given to which power will represent the mobilized forces. It can be any of the powers that are on the opposite side from the power that is performing the invasion (but may not be the United States unless it is at war – see below). For example, if Germany (Central Powers member) invaded Holland, one of the Allied players would place their infantry and artillery. It should also be noted that if Holland ends up being controlled by the Allies, the ally who originally mobilized in Holland would most likely gain Holland's 2 IPCs if the territory ends up in their control. The players in the defending alliance should decide which of them should represent the Dutch mobilization in Holland and in effect control Holland. If the alliance cannot come to an agreement about who will represent defending forces, then the attacker will make the decision for them.
The neutrality of a territory can only be violated once. Once violated, it is either controlled by one side or the other or contested from then on.
United States Isolationism
The United States begins the game neutral, but with Allied sympathies. While it remains neutral, the United States is not considered to be either friend or enemy to any other power, and it may not move land or air units out of the United States of America (including onto transports) or attack Central Powers sea units. It will not enter the war unless either its units are attacked by the Central Powers or it loses income to a German submarine attack (see "Collect Income" below). (Note that if the United States is still neutral and its sea units share a sea zone with units belonging to other Allied powers, a Central Powers attacker may choose to ignore the US units, leaving them out of the battle and thus not bring the United States into the war.) However, if it is not yet at war at the beginning of its fourth turn, the United States will enter the war at that time.
Optional Rule - The Russian Revolution
The Russian Empire, already under great social and economic stress, may incur such desperate conditions that a Bolshevik revolution ignites. The revolution will occur at the end of any Russian turn starting in round four if the Russian Empire is losing the war. The Russian Empire will be considered to be losing the war if all of the following conditions are met:
- Three or more territories adjacent to Moscow are controlled by the Central Powers.
- Moscow is controlled by the Russian Empire or contested.
- At least one other original Russian territory is controlled by the Central Powers or contested.
If the revolution occurs, the Imperial government is replaced with a republic. As a consequence of this, an armistice will be immediately offered to the Central Powers. If it is declined by any of the Central Powers players, the game will continue as normal, with no change in the operations of the Russian Empire as a power (the revolution can only occur once per game). However, if it is accepted by all of the Central Powers players, the armistice will effectively remove the Russian Empire from the war, and the game. This will have the following effects:
- The Russian Empire will no longer have a turn, and will no longer be considered to be either friend or enemy to any other power.
- Serbia and Romania will be treated as minor neutral powers (see above) for the remainder of the game.
- All Russian units outside of original Russian territories will be immediately removed from the board. Any Allied units on Russian transports will be lost.
- The Russian Empire will immediately relinquish control of any non-original territories it may hold, including those of formerly aligned minor neutral powers. If units belonging to other Allied powers are in these territories, control will be established using the rules for moving all units on one side out of a contested territory (see "Land Units" below), otherwise these territories will be uncontrolled (place any National Control Marker face down on such a territory to denote this status) until another power moves into them and will not mobilize units when entered.
- Any original Russian territories that are contested at the time of the revolution will be considered to be shared for the remainder of the game (the Russian Empire retains control of any naval bases in them). Shared territories that have no Russian units in them will each have one Russian infantry added to them to represent the Russian Empire's interest in them.
- Attacks may no longer be made by either side in original Russian territories that are either controlled by the Russian Empire or shared between the Russian Empire and the Central Powers.
- The Central Powers may no longer move units into territories controlled by the Russian Empire. Central Powers forces can move into or out of territories shared between them and the Russian Empire at any time, but the Central Powers must maintain at least one infantry unit in each such territory at all times. Central Powers do not collect income from shared territories. Rules restricting land unit movement out of contested territories (see "Land Units" below) will not apply to these shared territories.
- Other Allied powers may no longer move units into original Russian territories that are either controlled by the Russian Empire or shared between the Russian Empire and the Central Powers. Any such units remaining in those territories at the end of their next respective turn will be removed from the board at that time.
- Original Russian territories (and naval bases) that are controlled by the Central Powers at the time of the revolution are considered to have no original controller for the remainder of the game. If such a territory is captured by an Allied power, that power takes control rather than returning it to the Russian Empire. If such a territory is left without units in it after a battle due to both sides being eliminated, it will not be controlled by any power (place any national control marker on it face down to denote this status) until a power moves units into it.
If this optional rule is used, one Allied player should control both the Russian Empire and the United States.
Order of Play
Axis & Allies: WWI 1914 is played in rounds. During a round, each power takes a turn, in the following order:
- Austria-Hungary
- Russian Empire
- Germany
- France
- British Empire
- Ottoman Empire
- Italy
- United States
Your power's turn consists of five phases, which take place in a fixed sequence. You must collect income if you can, but all other parts of the turn sequence are voluntary. When you finish your Collect Income phase, your turn is over. Play then passes to the next power in the turn order.
When every power has completed one turn, the round ends. If no side has won, a new round begins.
Turn Sequence
- Purchase and Repair Units
- Movement
- Conduct Combat
- Mobilize New Units
- Collect Income
Phase 1: Purchase Units
In this phase, you can spend IPCs to purchase additional units for use in future turns. You can also repair damaged battleships.
Purchase Units Sequence
- Order units and repair battleships
- Pay for units
- Place new units in Mobilization Zone
Step 1: Order Units and Repair Battleships
You can purchase as many units of any type as you can afford, but you must choose all the units you wish to purchase during this phase. Tanks may not be purchased before the fourth round of play. You don't have to spend all of your IPCs.
Repair: A battleship, which can take two hits, is laid on its side after the first hit. During this phase, your damaged battleships can be repaired, but only if they are in sea zones that have a naval base that is controlled by either you or a friendly power (see "Sea Zones" above). There is no cost to repair damaged battleships.
Step 2. Pay for Units
Pay IPCs to the bank equal to the total cost of the units purchased (have the banker adjust the number of IPCs in your power's treasury).
Unit Cost:
| Unit | Cost |
|---|---|
| Infantry | 3 IPCs each |
| Artillery | 4 IPCs each |
| Tank | 6 IPCs each |
| Fighter | 6 IPCs each |
| Battleship | 12 IPCs each |
| Cruiser | 9 IPCs each |
| Submarine | 6 IPCs each |
| Transport | 6 IPCs each |
Step 3: Place Units in Mobilization Zone
Place your newly purchased units in the Mobilization Zone on the game board. You cannot use these units right away. You will deploy them later in the turn (in the Mobilize New Units phase).
Phase 2: Movement
The Axis & Allies: WWI 1914 game has one movement phase. In this phase, you can move any or all of your units. All movements must be concluded during this phase, with the exception of amphibious movement of land units and fighters (see "Amphibious Assault and Reinforcement Movement" below). After all movements are completed, minor aligned or neutral powers are mobilized, if necessary.
Land Units
All land units (infantry, artillery, and tanks) can move to an adjacent territory. They cannot enter sea zones, unless being transported by transport ships (see "Sea Units" below). Land units can move into friendly or contested territories to reinforce them, or they may move into hostile or neutral territories to attack them.
If you move units into a hostile or neutral territory that contains units, that territory becomes contested. When a territory is contested, it is controlled by no power and generates no IPC income. The controlling player immediately removes their control marker from the territory, covers the original emblem with a face-down control marker, and reduces their income on the National Production Chart by the IPC value of the territory.
Land units that begin your turn in contested territories can only be moved to territories that at the beginning of your turn were either controlled by your power or contained units belonging to your power. If they are moved by transport, they may also remain at sea.
An army in a territory must contain at least one infantry unit. If you move units into a territory, you must move at least one infantry unit in if you don't already have one there. If you leave units behind, at least one of them must be an infantry, or another infantry must move in. To put it another way, at the end of this phase you must have at least one infantry unit in each territory in which you have land units and/or fighters. Infantry belonging to a friendly power in the same territory do not fulfill this requirement.
If you move all of your units out of a territory you control, you still retain control of that territory until an enemy moves into and captures it.
If you move all of your units out of a contested territory and leave only units from the other side there, the other side will claim the territory at the end of the Movement phase (see "Taking Control of a Territory" below). If the territory was originally controlled by a power on the other side, that power will take control (even if it has no units present). Otherwise, if there are units belonging to only one enemy power in the territory, that power will take control, but if there are units belonging to more than one enemy power, they must decide between them who will take control of the territory (if they can't decide, you decide).
Fighters
Fighters in territories can move up to two spaces. Being in a contested territory has no effect on where a fighter may move. When moving two spaces, the first space can be a sea zone, a friendly or contested territory, or even a hostile territory, but it can't be a neutral territory. However, a fighter must end its move in a territory containing land units belonging to your power. Fighters on transport ships cannot move; they can only offload (see "Sea Units" below).
Sea Units
Sea units can move up to two sea zones, except for cruisers, which can move up to three. However, most sea units must end their movement when they encounter a hostile sea zone after they begin to move (not counting the sea zone they started in). Sea units can never enter territories.
Enemy submarines and/or transports don't make a sea zone hostile, so they do not block any of your units' movement, nor do they prevent your transports from loading or offloading in that sea zone. As the moving player, you have the option of attacking an enemy submarine and/or transport that shares a sea zone with you. However, if a warship makes such an attack, even against an unescorted transport, that warship must end its movement in that sea zone.
It is possible for some of your units to stop in a sea zone and attack while others continue moving through the sea zone, assuming that conditions there don't require them to stop. (The cruiser must stop in this zone; however, the submarine can pass through safely.)
Submarines: Submarines are capable of moving undetected due to their ability to submerge and thus have special movement rules. A submarine can move through a hostile sea zone without stopping.
Transports: A transport may not move into a hostile sea zone without being accompanied by at least one warship belonging to the same power. This escorting warship may move into the sea zone at the same time as the transport or already be in the same zone.
A transport can carry land units and/or fighters belonging to your power or to friendly powers. A transport's cargo capacity is any two land units and/or fighters. These units must use their entire move to load onto and/or offload from a transport – they may not move before loading or after offloading. A transport can load land units and/or fighters from an adjacent territory while in any friendly sea zone along its route, including the sea zone it started in. It can load units in more than one sea zone as it moves. Place the loaded units alongside the transport in the sea zone. Any units aboard a transport are considered cargo until they offload. Cargo cannot take part in sea combat and is destroyed if the transport is destroyed.
Your units can offload from your transport in the same turn in which it loaded them (whether or not the transport moves), or the units can remain at sea until a future turn. As with loading, offloading can only be done to an adjacent territory from a friendly sea zone. Once units offload from a transport, the transport may not move any further and no other units may be loaded onto it in that turn. A transport may not offload into more than one territory in the same turn, but it can offload one unit while the other remains on board. A transport may not transfer units directly to another transport.
Units belonging to friendly powers must load on their owner's turn, be carried on your turn, and offload on a later turn of their owner. This is true even if the transport remains in the same sea zone.
A transport can offload units into a hostile territory as part of an amphibious assault or into a contested or friendly territory as part of an amphibious reinforcement (see below). A transport that is part of an amphibious assault or reinforcement must end its movement in a friendly sea zone (or one that could become friendly as a result of sea combat) from which it can conduct the assault or reinforcement. However, a transport cannot ignore enemy submarines to offload units for an amphibious assault unless at least one warship belonging to the attacking power is also present in the sea zone at the end of the Movement phase.
Naval Mine Fields
All sea zones that have a naval base symbol are considered to be mined. While the naval base is under the control of either its original controller or another power on the same side (see "Sea Zones" above), any enemy sea unit that moves into or through such a sea zone may strike a mine. At the end of this phase, the player controlling the naval base rolls one die for each of your sea units that moved into or through each enemy minefield sea zone. Each sea unit is called out one at a time and one die is rolled. A roll of 1 will mean the removal of the sea unit, except for undamaged battleships, which instead become damaged. If a loaded transport strikes a mine, any units that were loaded onto it after it entered the mined sea zone are returned to the territory or territories from which they were loaded and may not move in the current turn.
Amphibious Assault and Reinforcement Movement
An amphibious assault takes place when you attack a hostile or neutral coastal territory (a territory bordering a sea zone) from an adjacent sea zone by offloading units from transports into that territory (or make a joint attack with both offloading units and other units from one or more adjacent territories). An amphibious reinforcement takes place when you move units to a contested or friendly coastal territory from an adjacent sea zone by offloading units from transports into that territory. In either case, the sea zone can be friendly or hostile, but if it is hostile, it must be made friendly through sea combat before the amphibious assault or reinforcement can commence. Also if you are moving units into a territory by both sea and land, you must move at least one infantry unit in by land if there is not already one of your infantry units in the territory.
If the sea zone from which you're launching the assault or reinforcement is already friendly, you simply offload your units into the territory being assaulted or reinforced at the end of this phase. You can roll for any mines (see above) that your sea units may have encountered before making the decision to offload. However, if the sea zone is hostile, you will have to clear it through sea combat before your units can offload. If the sea zone contains only enemy submarines and/or transports and you wish to attack them rather than ignore them, you must also conduct sea combat before your units can offload.
If there will be a sea combat, you simply declare your intent to offload your transports afterward. Your units remain on the transport(s) for now, and will offload into the declared territory during the Conduct Combat phase (see "Amphibious Assault and Reinforcement Combat" below) if the sea combat is successful.
General Movement Rules
Units from the same side can freely share territories, sea zones, and space on transports with one another as long as both powers agree (see "Multinational Forces" below).
All movement is considered to take place at the same time, and must be completed in this phase. Thus, once the Conduct Combat phase has begun, no further movement is possible. The only exception to this is an amphibious assault or reinforcement that is preceded by a sea battle since the transported units must offload after the sea battle is successfully completed.
Phase 3: Conduct Combat
Combat occurs when your units share the same space with units belonging to one or more opposing powers and you decide to commit your units to an attack. Combat also occurs when your units move into an unoccupied hostile or neutral territory. Only enemy units or territories may be attacked. When attacking, all units in the space belonging to your power must attack. You are required to attack only in territories that have become contested this turn due to your movement of units into them and in unoccupied hostile or neutral territories that you have moved units into. Attacks in territories that were already contested at the beginning of the turn and in sea zones are always optional, even if you have moved units into them this turn.
Only one power can attack while in a sea zone or contested territory, but all enemy forces that may be present in such a space must defend together (see "Multinational Forces" below). Players must always defend with all units in the space if attacked.
During your turn, you can conduct attacks in as many contested territories and sea zones as you wish. Combat in each space takes place at the same time, but you conduct combat in each contested territory or sea zone separately and completely before conducting combat in the next embattled space. Attacks may be resolved in any order that you wish; however, if an amphibious assault or reinforcement (see below) involves a sea battle, the sea battle and subsequent land battle, if any, must be resolved one after the other.
Attacking and defending units in each space are considered to fire at the same time, but for ease of play dice are rolled in sequence: attacker first, then defender. Subject to certain adjustments, the number of hits the attacker scores is the number of units the defender will lose, and the number of hits the defender scores is the number of units the attacker will lose. Casualties are not removed until both sides have rolled.
Land Combat
The battle board is used only for land battles, not for sea battles. How to conduct sea battles will be explained in the Sea Combat section (see below).
If you moved any land units into hostile territories that were unoccupied, you do not have any actual combat to conduct. Simply skip to step 6 (Conclude Combat) for each of these territories.
Important Concept: The struggle for a contested territory can last for any number of rounds, but each attack only lasts for one round of die rolling (the attacker rolls their dice and then the defender rolls theirs). The casualties are then removed and the attack is over.
Combat Sequence
Depending on the type of units participating in a battle, certain events will occur. Each battle consists of several steps:
- Place Dice on the Battle Board
- Determine Air Supremacy
- Attacking Units Fire
- Defending Units Fire
- Remove Casualties
- Conclude Combat
Step 1. Place Dice on the Battle Board
The battle board is divided into several boxed areas. At the top of the chart (the area marked "Defender") is where the defender will place the dice they will be rolling during the battle. Units are not moved from the map board to the battle board. Dice are used as proxy representatives of the units on the map. This is referred to as "loading the battle board".
Both players load their sides of the battle board simultaneously. You, as the attacker, count the number of infantry you have and place one die for each of them in the box that reads "Attacking Infantry". You then place one die for each of your artillery into the box with the image of the artillery piece where it reads "Attacking Artillery" (bottom center), one die for each of your tanks into the box that reads "Attacking Tanks", and one die for each of your fighters in the box containing the images of the flying aircraft. Finally, if the battle is an amphibious assault (see "Amphibious Assault and Reinforcement Combat" below), you place one die for each bombarding battleship into the box that reads "Battleship Offshore Bombardment".
Some of your battling infantry and tanks are going to be "promoted" on the battle board. They will be moved to boxes that give them higher combat values. This shift represents the advantages that combined arms provided during the war. For each artillery piece that you have in the "Attacking Artillery" box, one infantry or tank is moved from its original attack box to its "with Artillery Support" box. The Artillery Supported boxes (for infantry and tanks) each have a higher combat number posted (3 in both cases). In this way, when the dice representing these units are rolled you will be looking for a 3 or less rather than a 2 or less.
The defender, following the same procedure, fills up the defending side of the battle board. However, the defender's units receive no promotions for combined arms, and the defender will never have battleship bombardment.
Step 2. Determine Air Supremacy
If fighters are present on both sides, there must be an air battle to determine who has air supremacy. Each side rolls one die for each of their fighters. For each die roll of 2 or less, one enemy fighter is removed (after both players have rolled). Unlike the land battle itself, the air supremacy battle continues until one side has established air supremacy by eliminating all the enemy's fighters. Additional rounds of fire are conducted until one or both sides have no fighters remaining.
If one side gains air supremacy, either by being the only one with any fighters left or being the only one to have any fighters at all, that side gains air supremacy. The side with air supremacy immediately promotes all of its artillery to the box that reads "Artillery with Air Supremacy Support". Air supremacy provides your side with a high altitude reconnaissance advantage... a bird's eye view of the battlefield if you will.
In addition to gaining promoted artillery, the side with air supremacy also gets to roll for their remaining fighter(s) against the enemy's land units in one of the next two steps.
Step 3. Attacking Units Fire
You, being the attacker, roll all your dice first. The boxes automatically assign combat values. You roll all the dice in each box together, one box at a time, scoring a hit with each die that shows the number on its box or lower. You place each die that scores a hit along the defender's side of the battle board.
Step 4. Defending Units Fire
The defender, following the same basic system as the attacker, rolls all their dice and places any dice that scored a hit on your side of the battle board.
However, attacking (but not defending) tanks have a special ability to cancel hits. You, as the attacker, reduce the number of hits scored against you by the number of tanks you have in the battle (to a minimum of zero). For each tank you have, you remove one die that scored a hit from your side of the battle board.
Step 5. Remove Casualties
Starting with the attacker, the players each remove one unit from the contested territory for each remaining hit scored against them.
Each player can select any unit in their attacking or defending force as a casualty, including fighters. However, at no time can an army not have at least one infantry unit present. In other words, if a player has one infantry, one tank, and one artillery unit left and is required to remove two of these three units, the infantry unit cannot be selected as one of the casualties because this would leave them with no infantry. Infantry belonging to a friendly power in the same territory do not fulfill this requirement.
Step 6. Conclude Combat
If there is still at least one unit from each side in the territory, it remains contested.
However, if all of the units on one side have been eliminated, the other side takes control of the territory (see "Taking Control of a Territory" below). If you, as the attacking power, still have units remaining, you will claim the territory. In the case that you have no units remaining, if all of the units remaining in the territory are owned by a single power, that power will claim the territory; otherwise, the powers still owning units in the territory must decide between them who will take control of it (if they can't decide, you decide).
In the rare event that no units from any power remain in the territory, the original controller of the territory will assume control. If the territory is the capital of a minor aligned power, the power that it is aligned with will assume control. If the territory is a minor neutral power or a colony of a minor aligned power, no power will assume control.
Taking Control of a Territory
If your power takes control of a territory, whether through the mobilization of a minor power aligned to your power, by capturing it in combat, or through all enemy units moving out and leaving your units in possession of it, you place your power's control marker on it and adjust your power's national production level. Its national production increases by the IPC value of the captured territory.
Liberating a Territory
If you capture a territory that was originally controlled by another power on your side, you "liberate" the territory. Rather than you taking control of it, the original controller regains the territory and adjusts that power's national production level accordingly.
However, if the original controller's capital is in enemy hands at the end of the phase in which you would otherwise have liberated the territory, you capture the territory instead. You adjust your national production level instead of that power's.
Capturing and Liberating Capitals
If you capture an enemy power's capital (Vienna, Moscow, Berlin, Paris, London, Constantinople, Rome, or Washington, DC), follow the same rules as for capturing a territory above. Add the captured territory's income value to your national production level. In addition, you collect all unspent IPCs from the treasury of the original controller of the captured capital. If the original controller loses control of their capital to you on their own turn, any units they have purchased are returned to their storage box and you also collect the refunded IPCs. For example, if Germany captures Moscow while the Russian Empire player is holding any IPCs, those IPCs are immediately transferred to the Germany player. You collect these IPCs even if your own capital is in enemy hands.
The original controller of the captured capital is still in the game, but cannot collect income from any territories they still control and cannot purchase new units. The player skips all but the Movement and Conduct Combat phases of the turn until that capital is liberated.
If that power or one on its side liberates the capital, other territories that were originally controlled by the newly liberated capital's controller but are currently in the hands of friendly powers also revert control immediately. The original controller can once again collect income, including from territories reverting control to that power.
You do not collect IPCs from the controlling power when you liberate a capital. For example, if the British Empire player takes Paris from Germany, the Germany player does not surrender any IPCs.
Sea Combat
When you have warships (not transports) in a sea zone containing enemy ships, you can elect to attack them or not attack them. Unlike a land battle, a sea battle can go on for multiple rounds of combat as long as the attacker wants to continue. You, as the attacker, can stop the battle at the end of any combat round.
Sea Unit Combat and Movement Values
| Unit | Attack | Defend | Move |
|---|---|---|---|
| Battleship | 4 | 4 | 2 |
| Cruiser | 3 | 3 | 3 |
| Submarine | 2 | 2 | 2 |
| Transport | – | – | 2 |
Combat Sequence
Depending on the type of units participating in a battle certain events and number of dice rolls will occur. Each battle round consists of several steps.
- Attacking Units Fire or Submerge
- Defending Units Fire or Submerge
- Remove Casualties
- Press or Break Off Attack
Step 1. Attacking Units Fire or Submerge
You, being the attacker, roll all your dice first. First, you roll one die for each submarine you have. With this roll, all rolls of 2 or less score a hit. Next, you roll one die for each cruiser you have, hitting on all rolls of 3 or less. Finally, you roll one die for each battleship you have, hitting on all rolls of 4 or less. Transports do not fire. After all dice are rolled, the total number of hits is recorded.
Submarines and Submerging: Whenever a submarine, attacking or defending, has the ability to roll a combat die, it can elect to submerge instead. If it does so, it is placed on its side, indicating that it has used its ability to submerge and is withdrawing from the battle. The submarine, although submerging rather than firing, is still subject to the results of that round's enemy combat die rolls. If they roll a hit, the submarine may be chosen as a casualty, or must be the casualty if it is the only target. If the submarine survives the die roll and submerges, it is considered to have broken off from the battle and may not fire or be taken as a casualty in any subsequent round of the battle. At the end of the battle it is turned back over and takes on its normal status. A player may choose to submerge all, some, or none of their submarines.
Step 2. Defending Units Fire or Submerge
The defender, following the same system as the attacker, rolls for all their units and records any hits that result.
Step 3. Remove Casualties
Starting with the attacker, the players each remove one unit from the sea zone for each hit scored against them.
Each player can select any unit in their attacking or defending force as a casualty, including submarines that elected to submerge this round (but not in prior rounds). However, transports must be chosen last as casualties, after all warships have been sunk or have submerged (but they may be chosen before submarines that have submerged in the current round).
Battleships: Battleships can take two hits. On the first hit, a battleship is placed on its side rather than removed. A second hit will cause it to be removed. A damaged battleship can only be repaired during the Purchase and Repair Units phase of the owning power's turn (see "Phase 1: Purchase Units" above).
Step 4. Press or Break Off Attack
Combat rounds (steps 1–4) continue until either all units on one or both sides have been destroyed or the attacker (never the defender) breaks off the attack. After the battle, all surviving units from both sides remain in the sea zone.
Amphibious Assault and Reinforcement Combat
If you offload units from one or more transports into a territory, you are performing either an amphibious assault or an amphibious reinforcement (see "Amphibious Assault and Reinforcement Movement" above). If there is no sea combat, you will have already offloaded your units during the Movement phase and can proceed to the land combat (see below). However, if you declared an amphibious assault or reinforcement in the Movement phase and it is necessary or desired to clear the sea zone before your land units can be offloaded, a sea combat must be fought and won before that can occur.
Note: The attacker may normally conduct combats in any order that they wish. However, if there is an amphibious assault or reinforcement that requires a sea combat, you must conduct the sea combat before any land combats in the territories into which the seaborne units may offload, and you must conduct land combats in those territories immediately after all seaborne units have offloaded into each territory. Only one land combat may be conducted in each territory, so all seaborne units must be offloaded into the territory before the combat can be conducted.
Sea Combat
The sea combat is conducted in the same manner as any other sea combat (see "Sea Combat" above). What happens next depends on the outcome of the combat.
If you clear the sea zone of all enemy units except transports and submarines that submerged to withdraw from the combat, you must immediately offload your transported units into the declared territory. You may then conduct land combat if desired (land combat is required in the case of an amphibious assault). However, if after offloading you would not have at least one infantry unit in the territory, you may not offload. Since any battleships you may have in the sea zone have already been involved in combat, they may not support any amphibious assault with offshore bombardment (see below).
If you fail to clear the sea zone, your units must remain on the transports. In the case of an amphibious assault, any units that moved into the targeted territory from other territories must still attack on their own.
Multinational Forces
Units on the same side can share a territory or sea zone, constituting a multinational force. Such forces can defend together, but they cannot attack together. (This does not mean powers can share income; only the power that controls a territory collects income for that territory.)
Attacking
A multinational force cannot attack in the same space together, because each power attacks with its own units only on its own turn. In a space where a battle occurs, any units that belong to a power friendly to the attacker (other than cargo on an attacking transport) cannot participate in the battle in any way. Such units cannot be chosen as casualties in the combat. A unit can amphibiously assault or reinforce a coastal territory from a friendly power's transport, but only on the land unit's owner's turn.
Defending
When a space containing a multinational force is attacked, all units in that space defend together. If the defending units belong to powers under the control of different players, those players mutually determine the casualties. If they cannot agree, the attacker chooses.
Transporting Multinational Forces
Transports belonging to a friendly power can load and offload your land units and/or fighters. This is a three-step process:
- You load your units aboard the friendly transport on your turn.
- The transport's owner moves it (or not) on that power's turn.
- You offload your units on your next turn.
Land Combat - Assault
If you offloaded units from transports into a hostile or neutral territory (making it contested, and initiating an amphibious assault), you must conduct land combat there. Immediately before the combat is resolved, any defending artillery present in the attacked territory can make a pre-emptive strike against all of your offloading land units and fighters as they come ashore. Any other units attacking the same territory that did not enter it by sea are not affected by this strike.
The defender rolls one die for each defending artillery unit, scoring a hit on each roll of 3 or less. You must then immediately remove one unit for each hit scored. Attacking tanks do not cancel hits (see "Step 4. Defending Units Fire" above) as they are being brought ashore. The last offloading infantry unit may not be selected as a casualty unless either it is the last remaining offloading unit of any kind or you also attacked the territory by land (in which case you will still have infantry in the territory). Surviving attacking units then land in the territory and move on to land combat.
The land combat is conducted in the same manner as any other land combat (see "Land Combat" above), with one exception. If there was no sea battle, any of your battleships that are in the sea zone(s) from which you offloaded units from transports can conduct offshore bombardment. However, the number of battleships that can bombard is limited to the number of units that offloaded from transports. If more than one amphibious assault is being conducted from the same sea zone, each battleship may bombard in only one territory.
Land Combat - Reinforcement
If you offloaded units from transports into a contested territory (an amphibious reinforcement), you may conduct combat there, but it is not required that you do so. If you do, it is the same as any other land combat (see "Land Combat" above). Any defending artillery in the territory cannot make a pre-emptive strike against your offloading units, and any of your battleships that are in the sea zone(s) from which units offloaded from transports cannot conduct offshore bombardment.
Phase 4: Mobilize New Units
All units that you purchased at the beginning of the turn and are presently located on the Mobilization Zone circle on the game board must now be put into play. Place all of your new land units and fighters on your power's capital territory. The British Empire player may also place any number of land units and fighters in India, which represent troops from the Pacific British Crown colonies staging in Bombay, if India is not enemy-controlled. If, after mobilizing new units in a territory, that territory doesn't have at least one of your power's infantry units on it, you must return one land unit or fighter of your choice that you mobilized this turn to your storage box and replace it with an infantry unit (you do not receive an IPC refund for the difference in cost).
Place all of your new sea units in any sea zone that has a naval base that you have controlled since the beginning of your turn and is located in a territory that you originally controlled (has only your power's emblem). If there is more than one such sea zone, you may split your new sea units between them in any way that you wish. In the event that you purchased sea units that you can't actually mobilize due to not having an eligible naval base, you must return those units to your storage box, and the cost of the units is reimbursed to you.
New units can enter play even in a contested territory or hostile sea zone. No combat occurs because the Conduct Combat phase is over.
Phase 5: Collect Income
In this phase, you earn production income to finance future attacks and strategies. Look up your power's national production level (indicated by your control marker) on the National Production Chart. This is the amount of IPC income you have generated. Collect that number of IPCs from the bank by having the banker add it to the total number of IPCs in your power's treasury.
If your capital is under an enemy power's control, you can't collect income.
Unrestricted Submarine Warfare
The Germany player can declare that they will begin unrestricted submarine warfare at any time during the game. Once this is declared, Germany will conduct submarine attacks against both the United States' and the British Empire's shipping routes during their respective Collect Income phases. On each of these powers' turns, the Germany player will roll 1 die for each German submarine in sea zones 2, 7, and/or 8. For each die roll of 1 or 2 the attacked power will deduct 1 IPC from the income it collects during this phase (to a minimum of zero).
Winning the Game
If the Allies control Berlin and at least one other Central Powers capital at the end of the Ottoman Empire player's turn, they win the war. If the Central Powers control at least two Allied capitals, one of which must be either Paris or London, at the end of the United States player's turn, they win the war.