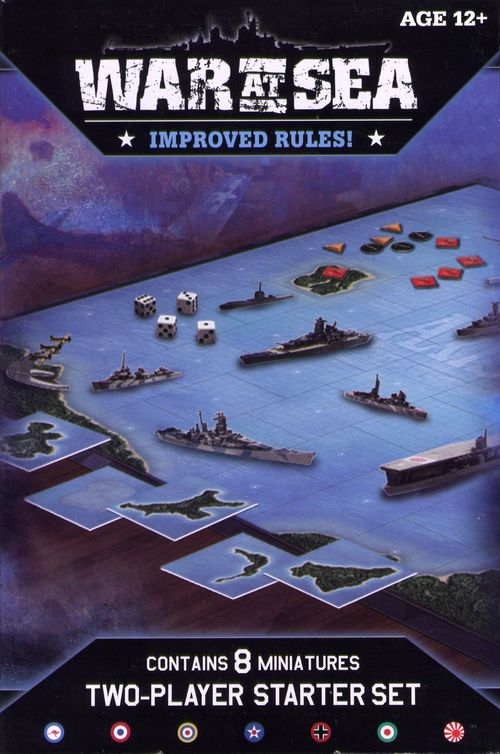
Axis & Allies: War at Sea
Axis & Allies: War at Sea Rulebook
Table of Contents
Table of Contents
Miniatures Game Rules
The World War II naval war was composed of three vast theaters. In the Atlantic, the German Kriegsmarine challenged the Royal Navy, US Navy, the Marine Nationale of France, and the Soviet Navy, seeking to disrupt the vital sea lines of communication linking Europe and America. In the Mediterranean, the Allies battled against the Italian Regia Marina. In the Pacific, the Allies struggled against the Nihon Kaigun, the Imperial Navy of Japan, in the greatest and most terrible naval confrontation in history. This booklet provides the rules for fast, tactical miniatures battles (called scenarios) set in any of these theatres of World War II. In a miniatures battle, an Axis fleet and an Allied fleet battle each other. The winner is the player whose fleet either takes control of the battle zone's objectives or destroys the enemy fleet.
For other scenarios, see Scenarios on page 33.
Setting Up
To start playing the Axis & Allies Naval Miniatures game, you'll need to do the following:
1. Build a Fleet. One player creates an Allied fleet that costs 100 points or less. The other creates an Axis fleet that costs 100 points or less.
2. Select a Battle Zone. Roll a die and set up your battle map sections to match the appropriate battle zone diagram that you choose. Place the Island cards and Objective markers in the sectors indicated by the diagram. The different configurations are shown on pages 6 and 7. You may find it helpful to use paper clips or drafting tape to secure the two map sections together.
3. Flip a Coin. The winner sets up first.
4. First Player Deployment. The first player picks one end of the battle map and deploys his or her fleet there. You can deploy your Ships anywhere in the row of sectors on your edge of the map. You can deploy your Submarines anywhere on your half of the map (the first five rows of sectors). You can't set up Ships or Submarines in a sector containing an island. You must place your Aircraft in the same sector as a Carrier (if you have one) or at the land airbase in your corner of the map.
5. Second Player Deployment. The second player now deploys his or her fleet on the other side of the battle map.
6. Start Playing! Follow the Sequence of Play on page 12.
The half-sectors on the sides of the battle map are impassable and aren't used in play. You can't set up on a half-sector or move into one. (Whole sectors formed by two half-sectors of adjacent map sections are treated as normal sectors.) You can't move units off the outside edges of the map—there is no way off the battle map.
Battle Maps 01–06 show six numbered battle-zone diagrams for setup, each a two-section map with Player 1 and Player 2 set-up areas, ship and submarine deployment areas, islands, objective markers, and airbases in the corners; the diagrams are selected by rolling a die (1–6).
Choosing Sides
In an Axis & Allies Naval Miniatures game, one player is the Axis player and the other is the Allied player. While you can build fleets of any nationality, only units from Axis countries can be part of an Axis fleet, and vice versa for Allied units.
Axis: Germany, Italy, Japan, Vichy France, or other Axis countries.
Allies: United States, United Kingdom (including Australia, Canada, and other dominions), Soviet Union, Free France, or other Allied countries.
If you and your opponent can't agree on which side each player is going to play, flip a coin. The winner chooses.
Fleet Exercises: Normally, Allied fleets don't fight Allied fleets, and Axis fleets don't fight Axis fleets. However, you may find that you don't have enough Ships of one side or the other. If this happens, you can fight Allied vs. Allied or Axis vs. Axis—think of it as a fleet exercise or war game.
How to Win
The first player to score 150 points wins the game.
You score points in two ways:
- When you destroy an enemy unit, you score points equal to the cost of the destroyed unit.
- When you seize an objective sector, you score 50 points. There are three objective sectors on the battle map.
It's possible that both players might reach 150 points or more in the same turn. In that case, the player who achieves the higher score wins.
If, at any time, your opponent has no units left at the end of a phase, the game ends and you win.
Claiming Objectives
To control an objective sector, you must have one or more Ships in the sector, and your opponent can't have any Ships in or adjacent to the sector. Submarines and Aircraft don't count for controlling objective sectors (although those units can help you deny control of a sector by sinking your opponent's Ships).
Once you claim an objective sector, remove that marker from the battle map and put it face up in front of you. Your opponent can't take it from you, even if his or her units later occupy that sector.
Other Ways to Win
You can also use the Axis & Allies Naval Miniatures rules to play out a number of different scenarios. Many of these scenarios have specific objectives or scoring goals. For example, you might need to escort a convoy across the battle zone and exit your Ships off the opponent's end of the map, while your enemy is trying to destroy your cargo Ships. See Scenarios on page 33 for more options.
Units
Each miniature represents a Ship, Submarine, or Aircraft squadron from World War II. A Ship or Submarine model represents a single Ship (with the exception of the PT Boat and Motor Torpedo Boat, which represent several of these small craft). An Aircraft model represents a squadron of up to 25 aircraft. These rules refer to all miniatures as "units." Each unit has a corresponding stat card that lists its game statistics.
How to Read a Stat Card
Here's a sample stat card: USS Enterprise (CV 6) — Cost 25, Ship — Carrier, Year 1941, Speed 2, Attacks (Gunnery: point-blank 5, short 5, medium 4, long —; Antiair: point-blank 8), Armor 4, Vital Armor 10, Hull Points 4, Special Abilities (Expert Dogfighter, Expert Bomber 2, Survivor), Set Icon/Collector Number 25/64, Rarity Symbol star.
Name: This is the name of the unit.
Nationality: Each unit belongs to a specific Axis (Red) or Allied (Blue) country. The nationality symbol tells you which country the unit is from.
Type: The three basic types of units in the game are Ship, Submarine, and Aircraft. The unit type affects how the unit resists attacks and interacts with other units. Most units also have an additional subtype that provides more information on what exactly that unit is. The types and subtypes are:
- Ship: Battleship, Carrier, Cruiser, Destroyer, Torpedo Boat, Auxiliary
- Submarine: none
- Aircraft: Patrol Bomber, Dive Bomber, Torpedo Bomber, Fighter
Patrol Bomber, Dive Bomber, and Torpedo Bomber are Aircraft subtypes. For ease of use, when a rule refers to Bombers, it means these three subtypes of Aircraft.
Year: The year that this unit became available. For some scenarios, you can use only units that were available by a particular year or earlier.
Cost: The number of points you pay to add the unit to your fleet. The standard fleet has units costing 100 points or less. A unit's cost is also added to your Victory Point total to see if you win the game.
Speed: The number of sectors the unit can move in one turn. Aircraft don't have a speed (they have an "A" on their stat cards), because you can move them to any sector on the battle map each turn.
Flagship Bonus: On Flagships, the number you add to your initiative roll each turn to determine which player act first and second.
Basing Capacity: On Carriers, the number of Aircraft units you can base on that Carrier.
Armor: The number of successes that an attacker needs to roll to hit (and damage) this unit (or abort it, if it's an Aircraft).
Vital Armor: The number of successes that an attacker needs to roll to destroy this unit with a single attack.
Hull Points: The number of times a Ship or Submarine must be damaged to destroy it. For example, a Ship with 3 hull points is destroyed the third time it's hit. (Since Aircraft only have 1 hull point, when they are hit they are either aborted or destroyed.)
Gunnery: The number of attack dice you roll when the unit attacks a Ship. There is a value for point-blank, short, medium, and long range (0, 1, 2, or 3 sectors). Each attack die that comes up a 4 or 5 is one success; each attack die that comes up a 6 is two successes.
Many Ships have Secondary Gunnery or Tertiary Gunnery. These are batteries of lighter guns that the Ship can employ. Secondary and Tertiary Gunnery attacks work just like Main Gunnery attacks. Many Aircraft also have a Main Gunnery attack, which represents their ability to strafe enemy Ships.
Antiair: The number of attack dice you roll when the unit attacks an Aircraft. Antiair attacks normally have a range of 0, so only units in the same sector as the Aircraft can attack it. Fighters have a good Antiair attack in order to attack other planes.
Bomb: The number of attack dice you roll when the unit attacks a Ship. Bomb attacks work like Gunnery attacks. Each attack die that comes up a 4 or 5 is one success; each attack die that comes up a 6 is two successes.
ASW (Anti-Submarine Warfare): The number of attack dice you roll when the unit attacks a Submarine. ASW attacks normally have a range of 0, so only units in the same sector as the Submarine can attack it. ASW attacks work like Gunnery attacks. Each attack die that comes up a 4 or 5 is one success; each attack die that comes up a 6 is two successes.
The only way you can attack a Submarine is by making an ASW attack. If a unit doesn't have an ASW value, it can't attack enemy Submarines, unless it has a special ability that allows it to do so.
Torpedo: The number of attack dice you roll when the unit attacks a Ship. There is a value for point-blank, short, medium, and long range (0, 1, 2, or 3 sectors). Torpedo attacks are different from standard attacks, since they ignore a unit's armor and vital armor. Each attack die that comes up a 6 is a hit, and each hit deals 2 points of hull damage.
Special Abilities: Most units have one or more special abilities (see Special Abilities on page 32).
Flavor Text: Most stat cards include a brief description of the unit's history or specifications.
Set Icon/Collector Number/Rarity Symbol: The set icon tells you what set a miniature belongs to, such as the Base Set. The collector number lists the miniature's order in the set, as well as the total number of miniatures that set contains. The rarity symbol indicates how easy the miniature is to find. There are three levels of rarity: common (dot), uncommon (triangle), and rare (star). The best way to identify a miniature is by comparing the collector number on the miniature to the collector number and other information on its stat card.
Scale: The Axis & Allies Naval Miniatures game uses the following scales.
Miniatures (Ships and Submarines): 1 to 1,800, or 1 inch = 150 feet. Each miniature represents 1 Ship or Submarine.
Miniatures (Aircraft): 1 to 900, or 1 inch = 75 feet. Each miniature represents a 3-plane element (Patrol Bombers) or a squadron of about 25 planes (all other Aircraft).
Map: Each sector is about 5,000 yards.
Turn: Each turn is about 10 minutes.
Building a Fleet
In a battle, one player builds an Axis fleet, and the other player builds an Allied fleet. You can't spend more than 100 points to build your fleet. Each unit has a cost shown on its stat card. Your fleet can't have more than 15 units in it.
Sample Fleet
Here's an example of an Allied fleet that costs 100 points:
| Cost | Unit Name |
|---|---|
| 16 | USS Princeton (CVL23) |
| 13 | SBD Dauntless |
| 7 | F4F Wildcat |
| 48 | HMS Hood |
| 7 | USS Fletcher (DD445) |
| 9 | Le Terrible |
Fleet Construction Etiquette
Construct your fleet in secret, using the stat cards. Don't identify which units you're using yet; just keep your hand of stat cards ready. You reveal your fleet when setting up the battle. If you deploy second, you can't change the composition of your fleet in response to your opponent's deployment and unit selection.
Different units contribute different strengths to any particular fleet. Destroyers are cheap and good against Submarines, but they're not very robust. Submarines are very hard to attack, but they're expensive. Battleships can take a lot of damage and blow weaker ships out of the water, but they've very expensive. Carriers and their Aircraft squadrons can attack enemy units anywhere on the battle map, but you'll have to pay for them twice: once for the Carrier, and once for each squadron you assign to it. Land-based Aircraft without a Carrier aren't terribly effective on their own, but they can help you swamp an enemy's air defenses or provide your own fleet with limited air cover if you don't bring a Carrier to the fight. Overall, you get to decide what mix of unit types makes the best fleet.
Designer's Notes: Ships of each nation have distinctive paint schemes. For example, many US ships are shown in Camouflage Measure 32—a "dazzle" pattern of light gray, dark gray, and sea blue. Similarly, we've shown some of the German ships in their Baltic paint scheme, with distinctive white and black stripes. Before German ships traveled into the Atlantic, they would normally have had the stripes painted over. We made some historical paint choices so that it would be easier to tell ship models apart at a glance. You can easily customize your models' paint schemes with any sort of water-based modeling paint.
Sequence of Play
The game is played in turns. During each turn, players follow a sequence of play consisting of the following phases:
A. Initiative phase
B. Sea Movement phase
- First Player's Sea Movement step
- Second Player's Sea Movement step
C. Air Mission phase (players alternate placing Aircraft)
D. Air Defense phase
- First Player's Air Defense step
- Second Player's Air Defense step
E. Air Attack phase
- First Player's Air Attack step
- Second Player's Air Attack step
F. Surface Attack phase
- First Player's Surface Attack step
- Second Player's Surface Attack step
G. Torpedo Attack phase
- First Player's Torpedo Attack step
- Second Player's Torpedo Attack step
H. Air Return phase
- First Player's Air Return step
- Second Player's Air Return step
I. End of Turn
First and Second Player: In each phase, actions within the same phase are considered to be simultaneous. For purposes of timing for units' special abilities, however, each phase has been further sub-divided into steps to identify when the first player and second player get to act.
For example, if the first player's Battleship Bismarck fires on the second player's Cruiser Exeter in the First Player's Surface Attack step and destroys it, the Exeter still gets to make its own surface attacks in the Second Player's Surface Attack step—everything in the Surface Attack phase happens at the same time, even if a player has to roll his or her attacks second.
At the end of the Surface Attack phase (after both players have had their steps and acted), the Exeter is removed from the battle map. It won't get to make any Torpedo attacks in the Torpedo Attack phase, because it was destroyed in the Surface Attack phase.
A. Initiative Phase
Roll two dice and add the sum to your best Flagship bonus to determine initiative.
The Initiative phase determines the order in which players will act each turn. At the beginning of each turn, each player makes an initiative roll by rolling two dice and adding the sum to his or her best Flagship bonus. Crippled Flagships don't count for this bonus. If you don't have any Flagships in your fleet, or all your Flagships have been crippled or destroyed, add zero.
The player with the higher result wins initiative. If you and your opponent both have the same initiative total, the player with the better Flagship bonus wins. If you still both have the same initiative bonus, it's a tie—reroll until one player or the other wins.
If you win initiative, you're the second player to act for that turn and your opponent is the first player. Going second is better because you can see where your opponent moves his or her units before you have to decide where to move your units.
B. Sea Movement Phase
You can move Ships and Submarines a number of sectors equal to that unit's speed.
The Sea Movement phase consists of two steps: the First Player's Sea Movement step and the Second Player's Sea Movement step. In your Sea Movement step, you can move any, all, or none of your Ships and Submarines. Move your units one at a time. Each unit can move a number of sectors equal to its speed. (See Movement and Position on page 16.) The first player moves all of his or her units first (in the First Player's Sea Movement step), and then the second player moves all of his or her units (in the Second Player's Sea Movement step).
C. Air Mission Phase
You can place Aircraft units in any sector on the map. Alternate placing Aircraft with your opponent.
In this phase, the first player and second player alternate placing Aircraft in sectors:
- First player places one Aircraft unit.
- Second player places one Aircraft unit.
- Continue alternating placement until both players have assigned all their air missions.
- Aircraft can be placed in any sector on the battle map.
- Land-based Aircraft with Rearming counters can't be placed. They'll be available for air missions on the next game turn.
Tactical Tip: Place your Fighters last, after you've placed all your other planes. You want to see where your enemy's strike planes are going before you commit your Fighters to escorting your own attacking planes or defending your Ships against enemy attacks.
D. Air Defense Phase
Use your units' Antiair attacks to attack enemy Aircraft occupying their sectors.
The Air Defense phase consists of two steps: the First Player's Air Defense step and the Second Player's Air Defense step. In your Air Defense step, you may attack enemy Aircraft using your units' Antiair attacks. (See Attack and Defense on page 18.) Most units have range 0 for their Antiair attacks, so you can only attack enemy Aircraft that occupy the same sector as one of those units. Each unit may attack one enemy Aircraft.
Escort: Fighters have a special ability called Escort. If a friendly Fighter and Bomber are in the same sector, the Fighter's Escort ability makes it more difficult for enemy Fighters to attack the friendly Bomber. If they do, each Fighter that makes an Antiair attack against a Bomber gets a −1 penalty to each attack die (so only rolls of 5 or 6 are a success). However, natural 6s always count as two successes. This ability represents the fact that the friendly Fighter is escorting and protecting the Bomber.
Tactical Tip: The best way to defeat a strong air defense is to swamp it with more attacking Aircraft than your enemy can deal with at one time. Consider concentrating your air strikes against one or two key targets a turn, rather than spreading your air attacks around multiple targets.
E. Air Attack Phase
Attack enemy Ships or Submarines with your Aircraft, using ASW, Bomb, Gunnery, or Torpedo attacks.
The Air Attack phase consists of two steps: the First Player's Air Attack step and the Second Player's Air Attack step. In your Air Attack step, you may attack enemy Ships or Submarines with your Aircraft. (See Attack and Defense on page 18.) Most Aircraft attacks have range 0, so you can only attack enemy Ships or Submarines in the same sector as those Aircraft. Aircraft that were aborted in the Air Defense phase can't attack in this phase unless they have a special ability to do so. Even if your Aircraft has multiple attack types available, you can only use one attack per Aircraft in this phase.
F. Surface Attack Phase
Attack enemy Ships or Submarines with your Ships, using ASW or Gunnery attacks.
The Surface Attack phase consists of two steps: the First Player's Surface Attack step and the Second Player's Surface Attack step. In your Surface Attack step, each of your Ships may fire on an enemy target within range using its Gunnery attack, or attack a Submarine using its ASW attack. (See Attack and Defense on page 18.) If a Ship has both Gunnery and ASW attacks available, you can only use one attack per Ship in this phase. However, Ships that have Secondary and Tertiary Gunnery values may attack with each of their Gunnery attacks in the same turn—so a Ship like the Yamato can attack three times in one Surface Attack phase, using its Main, Secondary, and Tertiary Gunnery values. No Gunnery attack can be used more than one time, unless a unit has a special ability that allows it to do so.
G. Torpedo Attack Phase
Attack enemy Ships with your Submarines and Ships, using Torpedo attacks.
The Torpedo Attack phase consists of two steps: the First Player's Torpedo Attack step and the Second Player's Torpedo Attack step. In your Torpedo Attack step, each of your Ships and Submarines with a Torpedo Attack value may attack enemy Ships in range. (See Attack and Defense on page 18.) Some Submarine units may also attack other Submarines if they have a special ability that allows them to do so.
H. Air Return Phase
Return your Aircraft to a Carrier or land airbase. Place/remove Rearming counters for land-based Aircraft. Remove Aborted counters from aborted Aircraft.
The Air Return phase consists of two steps: the First Player's Air Return step and the Second Player's Air Return step.
In your Air Return step, return all of your Aircraft units from the sectors where you placed them to an Aircraft Carrier or a land airbase. Place a Rearming counter next to any Aircraft you return to a land airbase. If an Aircraft already has a Rearming counter (usually because it rearmed this turn instead of performing a mission), you may remove that counter. The Aircraft is now rearmed and available to fly missions on the next game turn. Some Aircraft can't base on Carriers. (See Carriers on page 31.) At the end of your Air Return step, remove any Aborted counters from your Aircraft units.
I. End of Turn
Claim an Objective marker if you have a Ship in that sector and no enemy Ships are in or adjacent to that sector. Check your score.
If you have a Ship in an objective sector, and no enemy Ships are in or adjacent to that sector, you may claim the Objective marker. Check to make sure you've recorded the Victory Points for destroying enemy units and claiming objectives this turn.
You win if you reach or exceed 150 points.
In some games, it may be possible to reach a stalemate before one player wins the game. (For example, if one player has only Submarines remaining while the other player has only Fighters remaining.) In cases where the game has reached a stalemate, the player with the most points worth of units remaining is the winner.
Movement and Position
The sectors on the battle map mark the position of each of your units and regulate movement. Finding the right range to engage enemy units is a key part to winning most naval battles.
Speed and Movement
Once each turn, each Ship and Submarine can move a number of sectors equal to its speed. For example, a Cruiser with speed 2 can move two sectors in one Sea Movement phase. You don't have to move a unit if you don't want to. Ships and Submarines can maneuver freely within the limits of their movement—the turn represents about 10 minutes of real time, and in that time even the biggest Battleship can execute several turns. Similarly, facing doesn't matter, since over the course of the turn it's assumed that your Ships and Submarines can maneuver to bring their batteries to bear. All that matters is the number of sectors your units enter.
Aircraft and Movement: Aircraft units don't move the same way other units do during the Sea Movement phase. Instead, you assign your Aircraft to any sector you want during the Air Mission phase.
Enemy-Occupied Sectors: You can move into or pass through enemy-occupied sectors freely. Enemy units don't have any sort of attacks of opportunity or defensive fire against your units—no unit can attack or be attacked in the Sea Movement phase or Air Mission phase.
Stacking
A unit can only enter a sector if there's room for it in that sector. In a single sector, each player may have:
- Up to two Ships.
- One Submarine.
- Up to four Aircraft units.
Enemy Ships and Submarines don't count against your limit for a sector (but do count against your opponent's stacking limit, of course).
A Ship or Submarine can't enter a sector if that movement would break stacking restrictions. If you want to move a Ship into a sector containing two other friendly Ships, you must first move one of the other friendly Ships already in that sector to make room.
Some miniatures are too big to completely fit in a sector. However, they still count as only being in one sector.
Battle Map Features
While naval battles often take place in wide-open stretches of water with excellent visibility, most of the battle map layouts shown on pages 5-6 feature at least some degree of "terrain." Features such as islands, shoals, or even areas of local bad weather may interfere with movement and visibility. (See Line of Sight on page 28 for more info on "terrain".)
Islands
You can't move Ships or Submarines into a sector containing an island unless the unit in question has a special ability that allows it. (Even if the island doesn't fill the whole sector, it's surrounded by dangerous reefs and shallows that do.) Islands also interfere with line of sight.
Shoals
Shoals prohibit movement in the same way as islands. However, shoals don't interfere with line of sight.
Fog, Squalls, and Smoke Screens
Fog, squalls, and smoke screens have no effect on movement, but do interfere with line of sight. Fog, squalls, and smoke screens are considered to completely fill the sector that they occupy. A sight line is blocked if it passes through any part of a sector that contains a smoke screen, squall, or fog.
Attack and Defense
Attacks are divided into four distinct phases: Air Defense, Air Attack, Surface Attack, and Torpedo Attack. Each of these phases is further divided into two steps: one for the first player and one for the second player. Depending on the phase, your units may be attacking enemy Aircraft, Ships, or Submarines, and using bombs, torpedoes, guns, or depth charges. Attacks within the same phase are simultaneous with each other—so opposing ships blazing away with guns in the Surface Attack phase don't suffer damage until the end of the phase. The second player has a small advantage in that he or she can see how the first player allocates attacks and how those attacks go.
Here's a quick summary of the basics of attack and defense:
- Range and Attack Dice: Count the number of sectors from the attacker to the target. Check the attacking unit's stat card to see how many attack dice you roll against a target of that type at that range.
- Attack Roll: Roll your attack dice. For most attacks, each attack die that comes up a 4 or 5 is one success; each attack die that comes up a 6 is two successes. Compare the number of successes to the target's armor and vital armor ratings. If you equal or beat the armor rating, you get a hit and deal 1 point of hull damage to the target; if you equal or beat the vital armor rating, you destroy the target.
Some abilities (like the Escort ability on some Fighters) give a −1 penalty to each attack die. In these cases, you would only score a success on a 5 or 6. Note, however, that a "natural" 6 always counts as two successes.
- One Attack per Phase: Most units can only make one attack per phase. (Ships with extra Gunnery batteries can attack with all batteries in the Surface Attack phase.)
- Torpedo Attacks: Roll your attack dice. Torpedo attacks ignore the enemy's armor and vital armor. Each attack die that comes up a 6 is a hit, and each hit deals 2 points of hull damage.
- Line of Sight: The firing unit must have an unobstructed line of sight to the target it's attacking. If the line between the center of the attacker's sector and the center of the target's sector crosses through a blocking terrain feature (such as an island or smoke screen), the firing unit can't attack that target. Normally, this only matters for Gunnery and Torpedo attacks; most other attacks have range 0, so you must be in the same sector as the target. (See Line of Sight on page 28.)
- Submarines: Only units with an ASW attack may attack Submarines, unless the unit has a special ability that allows it to use a different type of attack.
- Aircraft: Only units with an Antiair attack value may attack Aircraft in the Air Defense phase, unless the unit has a special ability that allows it to use a different type of attack.
You may fire on any enemy unit within range, as long as your unit has line of sight to it and an attack value against it. If a unit has a dash on its stat card instead of a numerical attack value for a particular range, it can't make an attack using that type of attack at that range. If multiple enemy units are within range, you may choose which target your unit will attack. You can shoot "through" sectors containing friendly or enemy units without penalty. If the sector you're shooting at contains two enemy units, you can pick which one you want to fire at.
Range, Attack Type, and Attack Dice
Units have attack values that rate their effectiveness against different types of targets.
| Attack Type | Unit Affected |
|---|---|
| Antiair | Aircraft |
| ASW | Submarines |
| Bomb | Ships |
| Gunnery | Ships |
| Torpedo | Ships |
Attack values often vary with range. In general, Gunnery and Torpedo attacks made at short range are more accurate, so the number of attack dice is higher for short-range attacks than long-range attacks. When counting the number of sectors, count the sector that the target is in, but don't count the sector that the attacking unit is in (so an attacker and target in the same sector are at range 0).
Most Antiair, ASW, and Bomb attacks are range 0 only—you must be in the same sector as the target in order to attack.
Gunnery and Torpedo attacks have a longer range and may allow you to attack a target as far away as 2 or 3 sectors (or even more, in the case of Ships that have the Extended Range special ability).
Resolving Attacks
Attacks within each phase are simultaneous. However, the first player resolves all of his her attacks first, followed by the second player. Effects (such as damage and destruction) are then applied at the end of phase after both players have acted.
See Charts on the next pages for examples of Resolving Attacks.
Resolving ASW, Bomb, and Gunnery Attacks
To resolve an ASW, Bomb, or Gunnery attack, roll a number of attack dice equal to the firing unit's attack value for that type of attack against the target. Gunnery attacks vary with range, so make sure you use the correct Gunnery value for the target's range. Each attack die that comes up a 4 or 5 is one success; each attack die that comes up a 6 is two successes.
Compare the number of successes you score against the target's armor and vital armor and check to see the result:
- If you roll fewer successes than the target's armor, you miss.
- If you roll successes equal to or greater than the target's armor, you hit and deal 1 point of hull damage to the target. Place a face-down Damage counter by the target Ship or Submarine.
- If you roll successes equal to or greater than the target's vital armor, you destroy it! Place a face-up Destroyed counter by the target Ship or Submarine.
At the end of the current phase (Air Attack or Surface Attack), flip Damage counters face up and apply their effects. Remove units with Destroyed counters from the game.
Air Combat Example: The Allied player decides to attack the Carrier Shokaku with the Cruiser USS Atlanta in the Surface Attack phase. The Axis player won initiative this turn, so the Axis player is the first player for the turn.
Surface Attack Phase — First Player's Surface Attack Step: It's the start of the First Player's Surface Attack step. The first player (Allies) has only one unit that can attack—a Cruiser, the USS Atlanta. The Cruiser is one sector away from the opponent's Carrier, the Shokaku. The Allied player attacks with the Atlanta's Main Gunnery attack and rolls 6 attack dice (because its Gunnery attack value is 6 at range 1).
The first player rolls a 1, 2, 4, 5, 5, and 6, which equals five successes (the 6 is worth two successes). The opponent's Carrier has an armor rating of 4 and a vital armor rating of 10, so you get a hit on the Shokaku, but don't have enough successes to get past its vital armor rating and destroy it. The Axis player puts a face-down "1 Damage" counter next to the Shokaku. Since you're done attacking, the First Player's Surface Attack step ends and your opponent's (the second player) Surface Attack step begins.
Second Player's Surface Attack Step: The Axis player returns fire. The Shokaku also has a Main Gunnery attack value of 6 at range 1, so the Axis player rolls 6 attack dice. He rolls 1, 2, 2, 4, 5, and 5, which is three successes. The USS Atlanta has an armor rating of 4, so the Shokaku's attack misses.
Now that both of you have completed your Surface Attack steps, you apply the effects of the attacks. Your opponent flips over the face-down "1 Damage" counter and applies 1 point of hull damage to the Shokaku. It's now "damaged."
Resolving Antiair Attacks
To resolve an Antiair attack, roll a number of attack dice equal to the firing unit's Antiair attack value. Each attack die that comes up a 4 or 5 is one success; each attack die that comes up a 6 is two successes.
Compare the number of successes you score against the target Aircraft's armor and vital armor and check to see the result:
- If you roll fewer successes than the target's armor, you miss.
- If you roll successes equal to or greater than the target's armor, you hit and abort the Aircraft from its current mission. Place a face-up Aborted counter by the target Aircraft.
- If you roll successes equal to or greater than the target's vital armor, you destroy it! Place a face-up Destroyed counter by the target Aircraft.
Once an Aircraft is aborted by one Antiair attack, additional Antiair attacks against it have no further effect on that unit. Aborted Aircraft can't attack in the Air Attack phase.
At the end of the Air Defense phase, remove units with Destroyed counters from the game. Aborted Aircraft suffer no permanent damage, but can't do anything else this turn unless they have a special ability to do so. Aborted counters are removed during the Air Return phase.
Air Combat Example: The Allied player decides to mount a major attack on the cruiser Myoko in the Air Mission phase, and the Axis player responds by sending his A6M2 "Zeke" to protect the cruiser. The Allied player won initiative this turn, so the Axis player is the first player for the turn.
At the beginning of the Air Defense phase, the following Aircraft are in the Myoko's sector: An SBD Dauntless (Allies), an F4F Wildcat (Allies), a Swordfish Mk. II (Allies), and an A6M2 "Zeke" (Axis).
Air Defense Phase — Antiair Attacks — First Player's Air Defense Step: In the First Player's Air Defense step, the Axis player chooses to have the Myoko make an Antiair attack against the Swordfish. The Myoko's Antiair attack value at range 0 is 6. The Axis player rolls 1, 2, 2, 4, 5, 6, for a total of 4 successes. The Swordfish has armor 3 and vital armor 6. Four successes isn't enough to destroy the Swordfish, but it is enough to hit and abort it. The Allied player places an Aborted counter next to the Swordfish.
Next, it's the Zeke's turn to attack. The Axis player can have the Zeke attack the Wildcat normally, or he can have the Zeke attack the Dauntless (a Bomber). However, if he does, the Wildcat will be "escorting" the Dauntless. (Many fighters have the Escort ability, which gives enemy Fighters attacking an escorted Bomber a penalty on each attack die.)
The Axis player decides to try for the Dauntless anyway. The Zeke's Antiair attack value is 7, and the Axis player rolls 1, 2, 3, 3, 4, 6, 6. Normally this would be 5 successes, but because the Wildcat is escorting the Dauntless, each attack die gets a −1 penalty and therefore the "4" becomes a "3", resulting in 4 successes. (Note that "natural" 6s always count as 2 successes regardless of penalties.) The Dauntless has an Armor value of 5, so the attack misses.
Second Player's Air Defense Step: The Axis player is finished attacking so the First Player's Air Defense step ends and the Second Player's Air Defense step begins. The Allied player has only one target in this sector (the Zeke) and only one unit with an Antiair attack value (the Wildcat), so he has the Wildcat attack the Zeke. The Wildcat's Antiair attack value is 7, and he rolls 1, 2, 3, 3, 4, 5 or only 2 successes—nowhere close to the Zeke's Armor value of 6.
At the end of the phase, damage effects are assigned. No units were damaged or destroyed, but the Swordfish was aborted—it won't take any part in the Air Attack phase to follow.
Air Attack Phase — Aircraft attack Ships with Bombs and Torpedoes — First Player's Air Attack Step: There are no Axis Ships in this sector for the Zeke to attack, so the step ends.
Second Player's Air Attack Step: The Swordfish was aborted, but the Dauntless is still in the sector. The Allied player uses the Dauntless's Bomb attack value of 10 to attack the Myoko. He rolls 1, 1, 2, 2, 2, 2, 4, 5, 5, which equals 4 successes. The Myoko has Armor 4, so this is a hit. The Axis player puts a "1 Damage" counter face down next to the Myoko.
At the end of the phase, damage effects are assigned. The damage counter is flipped over and 1 point of hull damage is dealt to the Myoko. It's now "damaged."
Later in the turn, in the Air Return phase, all Aircraft remaining in the sector return to their home bases and have any Aborted counters removed.
Resolving Torpedo Attacks
To resolve a Torpedo attack, roll a number of attack dice equal to the firing unit's Torpedo attack value at the appropriate range. Each attack die that comes up a 6 is a hit.
- Each Torpedo hit deals 2 points of hull damage to the target Ship, ignoring armor. Place a face-down "2 Damage" counter by the target Ship (or Submarine).
- When a Ship's hull damage equals or exceeds its hull points, you destroy it! Place a face-up Destroyed counter by the target Ship.
At the end of the Torpedo Attack phase, flip Damage counters face up and apply their effects. Remove units with Destroyed counters from the game.
Torpedo Attack Example: A Japanese I-19 (Submarine) and the Tone (Cruiser) are fighting it out against the USS Barb (SS 220) (Submarine) and the USS Boise (CL 47) (Cruiser). The Allied player won initiative this turn, so the Axis player is the first player for the turn. It's the beginning of the Torpedo Attack phase and all the units present are undamaged.
Torpedo Attack Phase — Ships and Submarines attack with their Torpedoes — First Player's Torpedo Attack Step: In the First Player's Torpedo Attack step, the Axis player chooses to attack the USS Barb with the I-19. Like many Submarines, the I-19 has the Submerged Shot ability, which allows it to make Torpedo Attacks against Submarines that are in the same sector. (Normally a unit must have an ASW attack value to attack a Submarine.) The I-19's Torpedo attack value at range 0 is 3, and the Axis player rolls 1, 4, 6. Torpedo attacks don't use successes: instead, each 6 is a "Torpedo Hit" that deals 2 points of hull damage to the target. The USS Barb only has 2 hull points, so it will be destroyed at the end of the phase. The Allied player places a face-up Destroyed counter next to the USS Barb.
The First Player then makes a Torpedo Attack against the USS Boise with the Tone. The Tone has a Torpedo attack value of 2 at range 1. The Axis player rolls 3, 6—another Torpedo hit! Luckily, the USS Boise has 3 hull points, so the attack doesn't destroy it. The Allied player places a face-down "2 Damage" counter next to the USS Boise.
The Axis player has no other units to attack with so the step ends.
Second Player's Torpedo Attack Step: The Second Player begins his Torpedo Attack step and chooses to attack the I-19 with the USS Barb. The USS Barb's Torpedo attack value at range 0 is 3, and the Allied player rolls 4, 5, 5. For other types of attacks, these would be great rolls, but since Torpedo attacks only hit on a 6, the USS Barb misses.
The USS Boise doesn't have a Torpedo Attack value, so it can do nothing right now. The Allied player has no other units to attack with so the step ends.
At the end of the phase, damage effects are assigned. The USS Barb has a destroyed counter so it is removed from play. The "2 Damage" counter is flipped over and 2 points of hull damage is dealt to the USS Boise. Since it now only has 1 hull point left, it's now "crippled."
Line of Sight
A unit can only make a Gunnery or Torpedo attack against an enemy unit if it can see that unit. Units that can see each other are said to have line of sight to each other. Islands, smoke screens, and fog or squalls can obstruct line of sight.
To determine whether two units have line of sight to each other, draw an imaginary line from the dot in the center of the attacking unit's sector to the dot in the center of the target's sector. If you can draw the line without crossing any part of an island, or crossing any part of a sector containing a smoke screen, fog, or squalls, the unit can see the target and attack. If the line of sight runs exactly along the side of an obstructed sector or exactly touches an island without crossing it, the line of sight isn't blocked.
Islands Don't Fill Sectors: Only the part of the Island card that isn't water blocks line of sight. You can trace line of sight through an island sector just fine, as long as the line doesn't actually cross over the artistic rendition of the island. Island sectors that have representations of small islets are much less likely to block line of sight than island sectors containing larger islands.
Fog, Smoke, and Squalls: You can trace line of sight into or out of a sector containing fog, smoke screens, or squalls, but not through it. Fog, squalls, and smoke screens are considered to completely fill the sector that they occupy. A sight line is blocked if it passes through any part of a sector that contains a smoke screen, squall, or fog. Units in a sector filled with fog, smoke screens, or squalls can fire out of the sector without penalty. Enemy units firing into a sector with fog, smoke screens, or squalls attack with no penalty, but the target is allowed a concealment roll to make the attack miss. To make a concealment roll, roll a die. On a 5 or 6, the attack misses the target regardless of how many successes the attacker rolls. If both the attacker and the target are in the same sector, the concealment roll succeeds only on a roll of 6.
Units in the Island's Sector: Some units can enter island sectors. A unit in an island sector has its line of sight into and out of the sector blocked—and therefore can't attack or be attacked.
Line of Sight Example: In the example diagram, the Yamato, a PT Boat, and three American Battleships/Carriers (USS Iowa, USS Enterprise, USS Washington) are arranged around two islands.
- The Yamato does have line of sight to the USS Washington (BB 56). Line of sight isn't blocked if it runs exactly along the side of obstructing sector.
- The Yamato doesn't have line of sight to the USS Enterprise (CV 6). The line of sight is blocked by the artistic rendition of the island.
- The Yamato does have line of sight to the USS Iowa (BB 61). In this case, the line of sight crosses the island sector, but not the artistic rendition of the island.
- The Yamato doesn't have line of sight to the PT Boat. A unit in an island sector has its line of sight into and out of the sector blocked, and therefore can't attack or be attacked.
Effects of Damage
Ships and Submarines are destroyed when they take hull damage equal to or greater than their hull points, or when a single attack equals or exceeds their vital armor rating.
Damage Steps
Each type of damage has a counter to indicate when a unit has suffered that damage. Types of damage include:
Damage: Ships and Submarines that take hull damage are "damaged."
A Ship or Submarine can withstand damage equal to its normal hull point rating before it's destroyed.
A damaged Ship or Submarine suffers no other penalties until it is reduced to 1 hull point, when it becomes crippled. (Ships and Submarines with 2 hull points are therefore damaged and crippled as soon as they take 1 point of hull damage.) Some special abilities may be lost when a Ship becomes damaged.
Aborted: Aircraft squadrons don't get damaged; instead, they're forced to abort when an Antiair attack succeeds against their armor rating. An aborted Aircraft ends its current mission with no further action. An Aircraft can't be aborted twice in the same turn—as soon as it receives its first aborted result, it's immune to any further attacks. It's possible for two Aircraft fighting each other in the Air Defense phase to abort each other. Aborted counters are removed during the Air Return phase.
Crippled: Damaged Ships and Submarines that have only 1 hull point remaining are "crippled."
A crippled Ship or Submarine suffers a −1 penalty to its armor, vital armor, and speed ratings (to a minimum of 1). Those units also roll one less attack die when making Torpedo attacks.
Crippled Ships (and Submarines) get −1 on each attack die (although a "natural" 6 still counts as two successes) when making Gunnery, Antiair, or ASW attacks.
After damage effects have been applied at the end of a phase, place a face-up Crippled counter next to any unit that's crippled to help you remember to apply these penalties.
Destroyed: A Ship or Submarine that accumulates damage equal to its hull point rating is destroyed.
If an attack against an Aircraft results in successes equal to or greater than that Aircraft's vital armor, then that Aircraft is destroyed.
In addition, a single attack that has successes equal to or greater than a unit's vital armor destroys that unit regardless of how many hull points it has remaining.
Remove destroyed units from play at the end of the current phase, and score Victory Points equal to the destroyed unit's cost.
Timing of Damage
Damage within the same phase of the game turn is considered to be simultaneous and doesn't go into effect until the end of that phase. In other words, it doesn't matter if you're the first player or the second player—a Ship the first player destroys with his or her attacks in the First Player's Surface Attack step, for example, still gets to shoot back in the Second Player's Surface Attack step. The destroyed Ship isn't removed from play until the end of the phase.
Aircraft and Airbases
Dive Bombers and Torpedo bombers are just as deadly to Ships and Submarines as enemy Ships and Subs. A well-balanced fleet includes bombers to attack enemy vessels anywhere on the battle map, and Fighters to protect its own Ships from enemy air attack. All Aircraft begin the game at their airbase: either aboard an Aircraft Carrier, or at the land airbase in the corner of the map.
Carriers
Carriers can only base Fighters, Dive Bombers, and Torpedo Bombers. A Carrier can base a number of Aircraft units equal to its basing capacity (given on the stat card). You can't base or rearm a Patrol Bomber on a carrier.
Destroyed Carriers: If your Carrier is destroyed, you may lose Aircraft units too. Choose a number of friendly Dive Bombers, Torpedo Bombers, or Fighters equal to the lost Carrier's basing capacity. You can't choose an Aircraft unit more than once. Roll a die for each unit you choose. On a 1, that unit goes down with the Ship and is destroyed at the end of the phase (giving your opponent points for those Aircraft). Otherwise, Aircraft remain in play when the Carrier is lost and return to your land airbase. They must rearm in the turn after they flew their last Carrier-based mission, but can return to play the following turn.
The Land Airbase
Your land airbase can base or rearm any type of Aircraft, but it's not as good as a Carrier because it takes longer to turn around the planes. An Aircraft at your land airbase requires one full turn to rearm after performing an air mission. The land airbase can base up to 5 Aircraft units.
If you are forced to exceed your airbase capacity (because your Carrier has been destroyed, for example), you have to eliminate Aircraft squadrons until you have 5 or less. You can choose which ones you eliminate.
Designer's Notes: For the standard scenario, we assume that any land airbase is far enough away that Aircraft based there must spend considerable time getting to and from the battle zone. An Aircraft Carrier, on the other hand, is only a few miles away from any spot on the battle map. That's why carrier-based Aircraft can perform missions every turn, while land-based Aircraft must wait one turn between missions.
Special Abilities
Many units have special abilities. Most special abilities are defined on the stat cards. Those that require more explanation are described here or in the glossary at the end of this rulebook.
Extra Attack Dice: When a special ability grants extra attack dice, it increases the number of dice that unit rolls when making a particular type of attack. For example, the Shokaku can add one die to the Torpedo attack value of one Torpedo bomber. If this ability is applied to the Kate, its Torpedo attack value increases from 3 dice to 4 dice.
Penalties to Each Attack Die: When a special ability grants a penalty to each attack die, you subtract that penalty from each attack die. This results in most units scoring a success on a 5 or 6 instead of a 4, 5 or 6. For example, the Escort ability can make enemy Fighters get −1 on each attack die when attacking the Bomber that is being escorted. In this case, the enemy Fighters would score successes on a 5 or 6 only.
Note, however, that regardless of any penalties, an attack die that comes up as a "natural" 6 always counts as:
- two successes if you're making an Antiair, Gunnery, Bomb, or ASW attack;
- a Torpedo Hit (which deals 2 points of hull damage) if you're making a Torpedo attack.
Negative Special Abilities: Some special abilities are disadvantages rather than advantages. You must observe a negative special ability; you can't choose not to use it.
Abilities Trump Rules: When a special ability and a general rule say different things, the special ability wins.
"Can't" Trumps "Can": Sometimes, one special ability says a unit can do something while another unit's special ability prohibits it. When this happens, the ability that prohibits the action "wins."
Extra or Additional Actions: Some special abilities allow a unit to make additional attacks, move extra sectors, or otherwise do extra things. Complete any such extra actions as part of activating that unit. You can't save the extra actions to use in another part of the turn.
Special Abilities of the Same Name Don't Add Together: A unit can only benefit once from a specific special ability. For example, if you have two Carriers in your fleet that both provide an Expert Dogfighter bonus to a Fighter's Antiair attack, the Fighter can only benefit from one of those Expert Dogfighter bonuses—they don't stack together.
Scenarios
When you play the Axis & Allies Naval Miniatures game, you and your opponent choose one of the following scenarios to play. (If you don't know which scenario to play, we recommend the Standard Scenario.) You can also play with any fleets, maps, and victory conditions that you and your opponent agree on.
Standard Scenario
In the standard battle scenario, you build a fleet and fight it out against another player who builds his or her own fleet.
Fleets: You can spend 100 points or less to build your fleet. Each unit has a cost shown on its stat card. Your fleet can't have more than 15 units in it. Consider the limitations of your airbases before you build a fleet with a large number of Aircraft; you can base 5 Aircraft units at your land airbase, plus Aircraft units equal to the total of your Aircraft Carriers' basing capacity (if included in your fleet). Normally, one player builds an Allied fleet while the other player builds an Axis fleet.
Battle Map: Roll a die and arrange the islands, shoals, and other terrain features on the battle map as shown on the appropriate battle zone diagram (see pages 5-6).
Setup: Flip a coin. The winner goes first and chooses one side of the battle map to set up his or her fleet. You can deploy Ships in any sector adjacent to your side of the map. You can deploy Submarines anywhere on your side of the map (the middle row of sectors is nobody's side). You can deploy Aircraft with Aircraft Carriers or at the holding area for your land airbase. You can't deploy Ships or Submarines in sectors containing islands or shoals.
Start Playing! Follow the Sequence of Play outlined on page 12.
Winning the Standard Scenario: You win the standard scenario when you score 150 points. You score points equal to the cost of an enemy unit when you destroy it. You score 50 points when you claim one of the Objective markers. If both players reach 150 points or more in the same turn, the player with the highest score wins. If, at any time, a player has no units left at the end of an attack phase, the game ends and the other player wins.
Convoy Scenario
On numerous occasions during World War II, furious naval engagements broke out when one side or the other was trying to move troops or supplies through contested waters. This scenario recreates a typical convoy battle. There are no terrain objectives, and the losses of Aircraft and Ships don't matter—only the convoy counts toward victory.
Fleets: Decide which player is escorting the convoy and which player is intercepting the convoy. (Flip a coin if you can't decide.) You can spend 100 points or less to build your fleet, as described in the Standard Scenario. In addition, the player escorting the convoy receives 5 convoy Ships (Ships with the Auxiliary subtype) at no point cost. If you have models such as the Jeremiah O'Brien, Nordmark, or Kinai Maru, use them. Otherwise, any token or marker (a coin, a glass bead, etc.) can serve to mark a convoy Ship. See the sidebar below for information on convoy Ships.
Battle Map: Use the battle map configuration shown here; simply roll a die and place the island in the appropriate location. (Most convoy battles took place in relatively open waters, so there isn't much terrain to clutter things up.)
Setup: The escorting player sets up first and chooses one side of the battle map to set up his or her fleet. You can deploy Ships in any sector adjacent to your side of the map. You can deploy Submarines anywhere on your side of the map (the middle row of sectors is nobody's side). You can deploy Aircraft with Aircraft Carriers or at the holding area for your land airbase. You can't deploy Ships or Submarines in sectors containing islands or shoals. The intercepting player sets up second.
Start Playing! Follow the Sequence of Play outlined on page 12.
Special Rule: When a convoy Ship ends the turn in a sector in the last row of the battle map on the enemy player's side, the escorting player may move it off the map on the following turn. That convoy Ship now counts toward victory and is no longer in play. Keep track of the game turns in this scenario. Any convoy Ship that isn't in the last row of sectors on the enemy's side of the battle map by the end of turn 15 is destroyed and counts toward the intercepting player's victory score.
Winning the Convoy Scenario: The player escorting the convoy wins by moving his or her convoy Ships to the opposite end of the battle map. If the escorting player moves three or more convoy Ships off the enemy's side of the map, he or she wins. The intercepting player wins if he or she sinks at least three of the convoy Ships (including convoy Ships sunk at the end of turn 15).
Transports in the Convoy Scenario: All convoy Ships in this scenario have the following characteristics:
| Stat | Value |
|---|---|
| Armor | 1 |
| Vital Armor | 4 |
| Hull Points | 3 |
| Speed | 1 |
| Antiair | 3 (range 0) |
These stats are identical to the Liberty Ship Jeremiah O'Brien. The normal Victory Point bonus for convoy Ships doesn't apply in the Convoy Scenario. You may find it useful to keep track of the convoy Ships' damage on a piece of scratch paper.
Major Engagement Scenario
The Standard Scenario best reflects a small- to medium-sized engagement involving no more than 1 or 2 Capital Ships on a side. Some of the most famous naval battles of the war naturally involved many more Ships than that. To play out a major engagement, use the following guidelines:
Fleets: Agree on a point total for each side's fleet—200, 300, or 500. Build a fleet totaling that number of points, as described in the Standard Scenario. You may have up to 20 units in your fleet for a 200-point fleet, 25 for a 300-point fleet, or 40 for a 500-point fleet.
Special Rules: The capacity of your land airbase increases to 7, 9, or 13 Aircraft units for a 200, 300, or 500-point game. In a 500-point game, stacking limits are relaxed; you may have up to 3 friendly Ships in the same sector.
Battle Map: Roll a die and arrange the islands, shoals, and other terrain features on the battle map as shown on the appropriate battle-zone diagram (see pages 5-6).
Setup: Flip a coin. The winner sets up first and chooses one side of the battle map to set up his or her fleet. You can deploy Ships in any sector adjacent to your end of the map. You can deploy Submarines anywhere on your side of the map (the middle row of sectors is nobody's side). You can deploy Aircraft with Aircraft Carriers or at the holding area for your land airbase. You can't deploy Ships or Submarines in sectors containing islands or shoals.
Start Playing! Follow the Sequence of Play outlined on page 12.
Winning the Major Engagement Scenario: You win the major engagement scenario when you score 250 points (for a 200-point scenario), 400 points (for a 300-point scenario), or 600 points (for a 500-point scenario). The value of each objective marker increases to 75 points, 100 points, or 200 points, respectively.
Constructing Your Own Scenarios
You can create scenarios of your own that reflect particular engagements or battles. For example, you could build a scenario that pits the Graf Spee against the Exeter, Ajax, and a second Ajax in order to recreate the Battle of the River Plate.
Year Restrictions
You can restrict fleet construction by specifying a year for your scenario. For example, if you choose 1943 as the year in which your scenario takes place, then units that have a "Year" entry of 1944 or 1945 aren't allowed in your fleet.
Historical Fleet Restrictions
When designing scenarios, you can decide whether or not to apply historical limits. Historically, some nations never operated together. If you want to enforce historical restrictions to fleet construction, apply the following guidelines:
- Japanese units can't go in a fleet with any other nationality.
- Vichy France: You may include French Ships in an Axis navy. These represent Ships with crews loyal to Vichy France, or Ships taken over by the Germans and used against the Allies.
- Post-surrender Italy: You may include Italian Ships in an Allied navy in 1943 or later scenarios.
- Unique Ships: You can't include multiple identical units in excess of the number of Ships actually commissioned in that class. (See the sidebar below.) For example, you can't include two Akagi-class Carriers in your fleet, because the Japanese only built one.
- Carriers: Fighters, Dive Bombers, and Torpedo Bombers from the United States can base on a United Kingdom Carrier. All other Carriers can only base Aircraft of their own nationality.
While the European Axis and Japan didn't collaborate in any land-based campaign, there was somewhat more naval cooperation. Similarly, the navies of the United States and Great Britain worked much more closely with the Soviets than the armies of those countries did.
Ships with Class Limitations: Only classes from Ships of four or fewer vessels are noted here. The number of Ships in the class is noted in parentheses. If you're following the historical limits, don't include more than that number of that Ship in your fleet. You may include as many as you like of Ships not on this list.
| Class | Limit | Class | Limit | Class | Limit | Class | Limit |
|---|---|---|---|---|---|---|---|
| Akagi | 1 | Ark Royal | 1 | Bismarck | 2 | Bolzano | 1 |
| D'Aosta | 2 | Enterprise | 3 | Exeter | 2 | Graf Spee | 3 |
| Hood | 1 | Iowa | 4 | Jintsu | 3 | Köln | 3 |
Glossary
Main Gunnery: A type of attack.
Secondary Gunnery: A type of attack.
Tertiary Gunnery: A type of attack.
Antiair: A type of attack.
Bomb: A type of attack.
ASW: A type of attack.
Torpedo: A type of attack.
Flagship Bonus: The number you add to your initiative roll each turn to determine which player acts first or second.
Basing Capacity: The number of Aircraft units that base on a unit.
Aborted: An Aircraft hit by an attack whose successes are equal to or greater than its armor rating is aborted. Aircraft don't get damaged; instead, they're forced to abort when an Antiair attack succeeds against their armor rating. An aborted Aircraft ends its current mission with no further action. An Aircraft can't be aborted twice in the same turn—as soon as it receives its first aborted result, it's immune to any further attacks. It's possible for two Aircraft fighting each other in the Air Defense phase to abort each other. Aborted counters are removed during the Air Return phase.
adjacent: One sector away in any direction.
Aircraft: A unit type. A unit that consists of a squadron of Aircraft such as Dive Bombers or Fighters.
Aircraft Carrier: A subtype of Ship whose primary armament is its air wing—the Bombers and Fighters it embarks. Aircraft Carriers are divided into fleet carriers, light carriers, and escort carriers.
allies: Units fighting in an Allied army (usually from the United States, United Kingdom, Free France, or the Soviet Union).
armor: A unit's resistance to attacks (other than Torpedo attacks). If the number of successes scored by an attacking unit equals or exceeds the defending unit's armor, the defending unit suffers 1 point of hull damage (or is aborted, in the case of Aircraft). If the number of successes scored by an attacking unit equals or exceeds the defending unit's vital armor, the defending unit is destroyed.
ASW: Anti-Submarine Warfare.
ASW attack: A type of attack that can damage or destroy a Submarine. Not all units have an ASW attack.
attack: A unit can attack an enemy unit in the Air Defense, Air Attack, Surface Attack, or Torpedo Attack phases of the game turn. When you attack, you roll a number of dice equal to the attacking unit's attack value for the corresponding type of attack at that range. For most attacks, each attack die that comes up a 4 or 5 is one success, and each attack die that comes up a 6 is two successes. (For Torpedo attacks, each attack die that comes up a 6 is a torpedo hit.) If the number of successes you roll equals or exceeds the target's armor rating, you hit and deal 1 damage to that target. If the number of successes you roll equals or exceeds the target's vital armor rating, you destroy that target. (Torpedo attacks ignore armor and deal 2 points of hull damage per hit.)
attack value: The number of dice a unit rolls when it fires on an enemy unit. Attack values are divided into Gunnery (Main, Secondary, and Tertiary), Bomb, ASW, Antiair, and Torpedo attacks, and divided again into point-blank, short, medium, and long range.
Axis: Units fighting in an Axis army (usually from Germany, Japan, or Italy).
battle map: The playing area on which the game is played.
Battleship: A subtype of Ship. Battleships displace about 30,000 to 70,000 tons and are armed with 12- to 18-inch guns. Battle Cruisers are counted as Battleships in the game.
Bomber: A general term for Aircraft with the Patrol Bomber, Dive Bomber, or Torpedo Bomber subtype.
Carrier: A subtype of Ship. See Aircraft Carrier.
concealment: Units located in a sector with fog, smoke screens, or squalls gain concealment from enemy attack. When you attack a unit that has concealment, the defender can make a concealment roll to negate the attack's effect.
concealment roll: The roll a unit in a sector with low visibility makes when attacked. If the defending unit rolls a 5 or 6 (or a 6 only, if the attacker is in the same sector), the attack is a complete miss.
Crippled: A Ship or Submarine that has taken damage and has only 1 hull point remaining is crippled. Crippled Ships and Submarines suffer a penalty of −1 to armor, vital armor, and speed (to a minimum of 1). Those units also roll one less attack die when making Torpedo attacks, if they have one (minimum of 1). Crippled ships and Submarines get −1 on each attack die (although a 6 still counts as 2 hits) when making Gunnery, Antiair, or ASW attacks.
Cruiser: A subtype of Ship. Cruisers are medium-sized ships that displace about 5,000 to 15,000 tons and carry 6- to 8-inch guns. Ships carrying 6-inch guns are known as light Cruisers, and ships carrying 8-inch guns are considered heavy Cruisers.
Damaged: A Ship or Submarine that loses at least 1 hull point is damaged. A Ship or Submarine can become damaged in two ways. If a Gunnery, Bomb, or ASW attack rolls successes equal to or greater than the unit's armor rating, the unit suffers 1 point of hull damage. If a Torpedo attack successfully hits the unit, it suffers 2 points of hull damage per torpedo that hits. Damage may cause a Ship or Submarine to lose some special abilities (see the special ability descriptions on the unit stat card), but has no other effect until the Ship or Submarine becomes crippled.
Destroyed: A unit hit by an attack whose successes are equal to or higher than its vital armor rating is destroyed. A Ship or Submarine that accumulates damage equal to its hull points is also destroyed. When a unit is destroyed, remove it from the battle map at the end of the current phase and score Victory Points for the attacker equal to its cost (if your scenario uses standard scoring).
Destroyer: A subtype of Ship. Destroyers are fast, relatively small ships that displace about 1,500 to 2,500 tons and carry 4- to 6-inch guns. They are usually good at Torpedo and ASW attacks. Destroyer Escorts are counted as Destroyers in the game.
Dive Bomber: A subtype of Aircraft. An Aircraft that carries a large bomb and attacks by diving steeply down on its target.
enemy: A unit in the opponent's fleet.
Fighter: A subtype of Aircraft. An Aircraft designed to engage other Aircraft in air-to-air combat.
fleet: A group of units fighting for one player in a battle.
Fog: A terrain effect. Units may move through fog without penalty. Fog blocks line of sight. A unit in a sector containing fog has concealment.
friendly: A unit in your fleet.
fleet: A group of Axis or Allied naval units and aircraft. In the standard scenario, a fleet must cost 100 points or less.
hit: A successful attack that places damage on a unit (or aborts an Aircraft).
hull damage: Damage taken from an attack that hits.
immediate: An immediate effect happens right away. Immediate combat results don't wait until the end of the phase to take effect.
initiative roll: A dice roll at the start of the turn to determine who is the first player and who is the second player for that turn. Each player rolls two dice and adds the best Flagship bonus of any Flagship in his or her fleet. The best total wins initiative—ties go to the fleet with the best Flagship initiative bonus (reroll any ties after that). The player who wins initiative gets to go second that turn, giving the player an opportunity to see what his or her opponent does before he or she has to commit his or her own units.
island: A type of terrain. You can't move Ships or Submarines into a sector containing an island unless the unit in question has a special ability that allows it. (Even if the island doesn't fill the whole sector, it's surrounded by dangerous reefs and shallows that do.) Islands also interfere with line of sight.
line of sight: A unit can attack an enemy unit only if it has line of sight to that unit. Two units have line of sight to each other if an imaginary line between the centers of each unit's sector doesn't pass through any islands, or pass through a sector containing a smoke screen, fog, or squalls. If the line of sight runs exactly along the side of a feature or sector that would block line of sight, that feature or sector doesn't block line of sight. Ignore the attacker's and the target's sectors.
local: In the same sector as another unit.
Patrol Bomber: A subtype of Aircraft. A large, multi-engined Aircraft designed for extreme long range. Patrol Bombers usually carry torpedoes or bombs for attacking enemy ships and Submarines, but are very vulnerable to enemy Fighters.
phase: One part or segment of the turn. The turn is broken into the Initiative phase, Sea Movement phase, Air Mission phase, Air Defense phase, Air Attack phase, Surface Attack phase, and Torpedo Attack phase. Some phases are further broken down into two steps: one for the first player and one for the second player.
rating: A term used to describe a unit's stats for armor, vital armor, speed, or hull points.
sector: A square on the battle map.
Ship: A unit type. A unit consisting of a single specific surface Ship, such as a Battleship, Carrier, Cruiser, or Destroyer.
shoal: Shoals function like islands for movement. However, shoals don't interfere with line of sight.
simultaneous hits: All hits caused by attacks in any particular phase are simultaneous—so a unit belonging to the second player that is crippled or destroyed by one of the first player's attacks still gets to activate normally on the second player's part of that phase before it suffers the effects of the attack.
Smoke screen: A terrain effect. Units may move through smoke screens without penalty. Smoke screens block line of sight. A unit in a sector containing a smoke screen has concealment. Some units have special abilities that create smoke screens.
Squall: A terrain effect. Units may move through squalls without penalty. Squalls block line of sight. A unit in a sector containing a squall has concealment.
step: A part of a phase. The Sea Movement, Air Defense, Air Attack, Surface Attack, Torpedo Attack, and Air Return phases each have two steps: one for the first player and one for the second player.
Submarine: A unit type. A type of unit consisting of a single Submarine. (The Navy considers Submarines to be ships, of course, but for purposes of the game they're different types of units.)
subtype: A descriptor that is part of the unit's type, such as "Dive Bomber" in "Aircraft—Dive Bomber" or "Battleship" in "Ship—Battleship". Subtypes indicate which units are subject to particular effects or interactions with other units, especially in many special abilities.
Torpedo Bomber: A subtype of Aircraft. An Aircraft that carries an air-dropped torpedo for attacking enemy ships. Some Torpedo Bombers can also be used as Dive Bombers or ASW Aircraft, carrying a bomb payload instead of a torpedo.
type: A basic characteristic of a unit, indicating whether it is considered an Aircraft, Ship, or Submarine. A unit's type determines what sort of attacks can be used against it; for example, Submarines can usually only be attacked with an ASW attack, and ASW attacks don't do anything to units other than Submarines.
unit: A Ship, Submarine, or Aircraft squadron represented by a single miniature.
value: A term used to describe a unit's stats for Gunnery, Bomb, Torpedo, or Antiair attacks.
Victory Points: The points you get from destroying your opponent's units and obtaining Objective markers. Objective markers give you 50 Victory Points, and your opponent's destroyed units give you Victory Points equal to their cost in a standard scenario. The first player with 150 Victory Points wins the game.
vital armor: A unit's resistance to catastrophic damage. (See armor.) A unit with a low armor rating but high vital armor rating is relatively easy to damage, but hard to sink outright. A unit with a high armor rating but relatively low vital armor rating is generally hard to damage, but may have a critical vulnerability or weakness that could lead to its destruction with a single lucky hit.
within: Including or encompassing the indicated value. If a special ability affects all units within 2 sectors, it affects units 0, 1, or 2 sectors away.