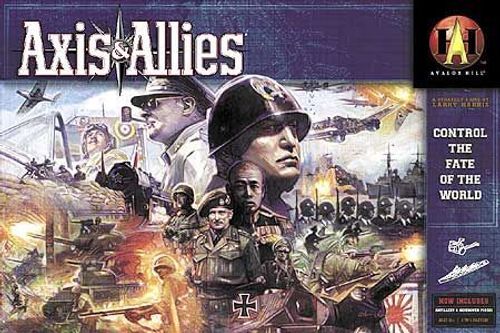
Axis & Allies: Revised Edition
Axis & Allies: Revised Edition Rulebook
Table of Contents
Table of Contents
Your World at War
How the War is Won
Axis & Allies can be played by up to five players. Each of you will control one or more world powers. On your turn, you build, deploy, maneuver, and command army divisions, air wings, and naval fleets to loosen your foes' hold on their territories. On your opponents' turns, they will bring their forces against you. The more territories you hold, the more weapons you can build — and the more powerful those weapons can be.
At the start of the game, decide whether you want to play to a minor victory, major victory, or total victory (depending on how long you want to play). On the map are twelve victory cities crucial to the war effort. As the game begins, each side controls six of these cities. The Allies begin the game controlling Washington, London, Leningrad, Moscow, Calcutta, and Los Angeles. The Axis powers begin the game controlling Berlin, Paris, Rome, Shanghai, Manila, and Tokyo. When, at the end of a turn, your side controls a set number of victory cities, you win the war.
| Victory Cities Controlled | Victory Conditions |
|---|---|
| 8 | Minor |
| 10 | Major |
| 12 | Total |
What victory condition should we choose? That depends on how long you want to play. You can often achieve a minor victory in an hour or two, while playing to total victory can keep you occupied for many hours. Decide as a group how long you want the game to run, then set the victory condition accordingly.
The Combatants
One or more players take the side of the Axis, and one or more play the Allies. In a five-player game, each player controls one world power. If fewer people play, some will control more than one power. If you control more than one power, keep those powers' income and units separate. You can conduct operations for only one power at a time.
Two-Player Game
- Player 1: Soviet Union, United Kingdom, United States
- Player 2: Germany, Japan
Three-Player Game
- Player 1: Soviet Union, United Kingdom, United States
- Player 2: Germany
- Player 3: Japan
Four-Player Game
- Player 1: Soviet Union, United States
- Player 2: United Kingdom
- Player 3: Germany
- Player 4: Japan
Five-Player Game
- Player 1: Soviet Union
- Player 2: Germany
- Player 3: United Kingdom
- Player 4: Japan
- Player 5: United States
Which power should I play? That depends on how you like to play. Each world power has different strengths and challenges.
The Soviet Union is weak economically and faces immediate threats. Still, it has a strong starting position and can make quick gains early on. If you relish the prospect of a massive land war, the Soviet Union may be for you.
Germany is strong economically but surrounded on all sides. It begins close to key victory cities and can win very early if not immediately turned back. If you want to be the focus of attention, Germany may be your best choice.
The United Kingdom holds the most territory in the world but is greatly spread out. It faces attacks by land, air, and sea, but it can deliver all these types of attacks as well. If you want a balanced force, consider the United Kingdom.
Japan starts in control of most of the Pacific, with footholds in mainland Asia. Its massive fleet can strike at all three Allies, but it needs to be wary of spreading itself thin. If you look forward to a serious naval and air campaign, try Japan.
The United States is the strongest economically, but it begins far from the action. It must gear up to get its troops mobilized or it will be contained in its own hemisphere. If you want to play patiently but forcefully, consider the United States.
Overall, the Axis powers begin stronger militarily but inferior economically to the Allies. They start with many combat forces in play but comparatively little buying power. The Allies individually have fewer combat forces, but with their combined incomes they have more resources than the Axis.
Under these conditions, the Axis should attack swiftly before the Allies can build up their land, sea, and air forces. The Soviet Union must fend off German assaults. The United Kingdom must hold London while fighting to keep its many territories around the world. The United States is forced to fight on two fronts: in the Pacific, wearing away at Japan; and in Europe, trying to get a foothold on the continent to attack Germany.
Setup
Once you've decided who will play which power, prepare the game for play. It contains the following components.
Game Board. The game board is a map of the world, circa 1942. It is divided into spaces, either territories (on land) or sea zones, separated by border lines. Place the game board in the center of the table. The Allied players should sit near its top (northern) edge, and the Axis players should sit along the bottom (southern) edge.
Battle Board and Dice. The battle board is a large card with columns that list attacking and defending units and their combat strength. When combat occurs, the players involved place their units on the battle board. Combat is resolved by rolling dice. Place the battle board next to the game board, and the dice next to the battle board.
Control Markers. Control markers indicate status in the game. They mark conquered territories and record other information on the game's charts. Punch out and take all control markers that belong to your power, as shown on the previous page.
Victory Cities Chart. This chart shows which cities each power controls. For each power you're playing, place one of your control markers on each of the matching circles. Ownership may change during the game.
National Production Chart. This chart keeps track of each power's industrial production income during the game. Place the National Production Chart next to the game board. For each power you're playing, place one of your control markers on the matching space on the chart. This is the power's starting national production level. (It matches the total of the circled numbers in territories you control.) Choose one player to be in charge of tracking changes in national production throughout the game.
Industrial Production Certificates. These are the money of the game, representing capacity for military production. Separate the Industrial Production Certificates (IPCs) by denomination (1, 5, and 10) and distribute a starting total to each power as follows. (These amounts are equal to each power's beginning national production level.) Choose one player to be the banker, and give all remaining IPCs to that player.
| Power | IPCs |
|---|---|
| Soviet Union | 24 |
| Germany | 40 |
| United Kingdom | 30 |
| Japan | 30 |
| United States | 42 |
Weapons Development Chart. This chart tracks each power's technological advances in weaponry. Whenever you develop new weapons, place a control marker beside the appropriate weapon type on the chart.
Reference Charts. Take the Reference Chart for your power. A Reference Chart shows the name of the power, its alliance (Axis or Allies), its piece color, its emblem, and order of play. It also lists the available units, their statistics, and their starting numbers and locations in the game.
Combat Forces. Take the plastic pieces that represent your power's combat units. Each power is color-coded as follows.
| Power | Color |
|---|---|
| Soviet Union | Red |
| Germany | Gray |
| United Kingdom | Tan |
| Japan | Orange |
| United States | Green |
Two other kinds of units, antiaircraft guns and industrial complexes, are light gray and not color-coded to a particular power. These can change hands during play.
Your Reference Chart tells you the number and kind of units to be placed in your territories and sea zones. In the example of Germany's Reference Chart, you can see that the first box lists three infantry in the territory of Germany. Place all the indicated units as listed. The shaded bar on the line with the words SEA UNITS lists numbered sea zones. Place the sea units listed below those numbers in the corresponding sea zones.
See Appendix 1: Unit Profiles on page 24 for detailed information about how each combat unit moves, attacks, defends, and interacts with other units.
Plastic Chips. Use these to save space in overcrowded territories and sea zones. White chips represent one combat unit each and red chips, five units each. For example, if you wanted to place seven infantry on a space, you would stack up one red chip, one white chip, and one infantry unit on top. (If you don't have enough pieces to top off all your stacks, simply use any identifying item, such as a piece of paper with the unit type written on it. The number of stacks should not be limited by the number of plastic unit pieces available.)
Marshaling Circles and Cards. Punch out the ten numbered marshaling cards and place them in a stack next to the game board. Punch out the circles with matching numbers and place them next to these. When you want to put more units in a space than will fit, instead place one of the numbered marshaling circles in that space. Then place your excess units on the corresponding marshaling card near the game board. These units are considered to be in the space containing the matching numbered circle.
Spaces on the Game Board
The colors of the territories on the game board show which power controls them at the start of the game. Each power has its own color, as follows.
| Power | Color |
|---|---|
| Soviet Union | Red |
| Germany | Gray |
| United Kingdom | Tan |
| Japan | Orange |
| United States | Green |
All other spaces are neutral, not aligned with any power. Most territories have an income value ranging from 1 to 12. This is the number of IPCs they produce each turn for their controller. A few territories, such as Gibraltar, have no income value.
Units can move between adjacent spaces (those that share a common border). The game board "wraps around" horizontally. Territories and sea zones on the right edge of the board are adjacent to territories and sea zones on the left edge, as indicated by corresponding letters along the board edges (A connects to A, B to B, and so on). The top and bottom edges of the board do not wrap around.
All territories exist in one of three conditions.
- Friendly: Controlled by you or a friendly power (one on your side).
- Hostile: Controlled by an enemy power (one on the opposing side).
- Neutral: Not controlled by any power. Control of neutral territories never changes.
Sea zones are either friendly (contain friendly units) or hostile (contain enemy units). They are never neutral. An unoccupied sea zone is friendly to everyone.
Neutral Territories. Neutral territories (such as Turkey, Mongolia, or Sahara) are pale colored. They represent areas that are impassable for political or geographic reasons. You cannot attack neutral territories, move through them, or move over them with air units. Neutral territories don't have income values.
Islands. Islands are territories located inside of sea zones. A sea zone can contain at most one group of islands, which is considered one territory. It is not possible to split up land-based units so that they're on different islands in the same group.
Canals
There are two canals on the game board, artificial waterways that connect two larger bodies of water. The Panama Canal connects the Pacific Ocean (sea zone 20) to the Atlantic Ocean (sea zone 19), while the Suez Canal connects the Mediterranean Sea (sea zone 15) to the Indian Ocean (sea zone 34). A canal is not considered a space, so it doesn't count against the number of spaces a unit can move.
A canal doesn't block land movement: Land units can move freely between Trans-Jordan and Anglo-Egypt.
If you want to move sea units through a canal, your side (but not necessarily your power) must control it at the start of your turn (that is, you can't use it the turn you capture it). The Panama Canal is controlled by the side that controls Panama. The Suez Canal is controlled by the side that controls both Anglo-Egypt and Trans-Jordan. If one side controls Anglo-Egypt and the other controls Trans-Jordan, the Suez is closed to sea units.
Order of Play
Axis & Allies is played in rounds. A round consists of each power taking a turn, and then a check to see if one side or the other has won the game.
Order of Play
- Soviet Union
- Germany
- United Kingdom
- Japan
- United States
- Check for victory
Your power's turn consists of seven phases, which take place in a fixed sequence. You must collect income if you can, but all other parts of the turn sequence are voluntary. When you finish the collect income phase, your turn is over. Play then passes to the next power. When every power has completed a turn, if no side has won, begin a new round of play.
Turn Sequence
- Develop weapons
- Purchase units
- Combat move
- Conduct combat
- Noncombat move
- Mobilize new units
- Collect income
Phase 1: Develop Weapons
In this phase, you can develop sophisticated weaponry to use this turn and for the rest of the game. You do so by buying research dice that give you a chance for a scientific breakthrough. Each research die you roll gives you an additional chance for new weapons development. Any number of powers may develop the same weapons, but powers can't share their technology.
Each research die you buy costs 5 IPCs.
Develop Weapons Sequence
- Choose a development
- Buy research dice
- Roll research dice
- Mark developments
Step 1: Choose a Development. Refer to the Weapons Development Chart and decide which weapons development you wish to research this turn (such as Super Submarines). You can choose only one development each turn.
Step 2: Buy Research Dice. Each die costs 5 IPCs. Buy as many as you wish. Research dice don't carry over to later turns.
Step 3: Roll Research Dice. Roll all your dice for the turn (at the same time), then check the Weapons Development Chart. If you rolled the required number for the chosen development on any die, you've made the technological breakthrough. (For example, if you want the Super Submarines development, you need to roll a 3.) If you fail to roll the number you need, your research has failed, and you must wait until your next turn to try again.
Step 4: Mark Developments. If your research was successful, place your control marker in the column on the Weapons Development Chart under the appropriate development. From now on (including this turn), any units you have in play will be affected by those developments, if applicable.
Weapons Developments
- Jet Fighters. Your fighters are now jet fighters. Their defense increases to 5.
- Rockets. Your antiaircraft guns are now rocket launchers. In addition to their normal combat function, they can reduce enemy industrial production. See Special Attacks in Phase 4: Conduct Combat for more information.
- Super Submarines. Your submarines are now super submarines. Their attack increases to 3.
- Long-Range Aircraft. Your fighters are now long-range fighters, and your bombers are now long-range bombers. Your fighters' range increases to 6. Your bombers' range increases to 8.
- Combined Bombardment. Like battleships, your destroyers now can conduct bombardment during an amphibious assault. (Their attack is 3.)
- Heavy Bombers. Your bombers are now heavy bombers. They roll two dice each in an attack or strategic bombing raid (see Special Attacks in Phase 4: Conduct Combat), but still only a single die on defense.
Should I spend IPCs on weapons development? Trying to develop weapons is risky. It could cost you so many IPCs that you may not have enough to purchase much-needed combat units for later assaults. More importantly, an investment in research doesn't guarantee results. The money you pay is just a research fee. You must then roll a specific number to actually develop the weapons. Once secured, however, such weaponry could turn the tide of the war in your favor.
The decision is yours: Take a risk and spend part of your income for research, or forsake weapons development and use all the IPCs you can to purchase more units.
Phase 2: Purchase Units
In this phase, you may spend IPCs for additional units to be used in future turns. All the units on your power's Reference Chart are available for purchase. A unit's price in IPCs is listed in the Cost column next to the unit's name.
See Appendix 1: Unit Profiles on page 24 for complete information about units and their capabilities.
Purchase Units Sequence
- Order units
- Pay for units
- Place units in mobilization zone
Step 1: Order Units. Select all the units you wish to buy. You may buy as many as you can afford of any units, regardless of which units you started the game with.
Step 2: Pay for Units. Give IPCs to the bank equal to the total cost of the units. You do not have to spend all of your IPCs.
Step 3: Place Units in Mobilization Zone. Place the purchased units in the mobilization zone on the game board (located in the South Atlantic Ocean). You cannot use these units right away, but you will deploy them later in this turn.
Which units should I purchase? Purchasing units is one of the big challenges of Axis & Allies, because it asks you to rearm now for future assaults. You need to consider which powers you want to strike and when. Try to anticipate your enemies' next moves and purchase units that will help you fend off their attacks. Appendix 1: Unit Profiles on page 24 provides complete information on each type of unit.
Land Units: Infantry are a good buy for a defensive position, because each costs only 3 IPCs and scores a hit on a die roll of 2 or less when defending (in game terms, they "defend on a 2"). Tanks cost more than infantry (5 IPCs) but attack and defend on a 3. They can also move farther than other land units. Artillery, at a cost of 4 IPCs, splits the difference, attacking and defending on a roll of 2. Artillery supports attacking infantry units, improving their attack to 2. Antiaircraft guns, which cost 5 IPCs, have special defenses against attacking fighters and bombers.
Industrial complexes, which cost 15 IPCs, are units, but they aren't combat units. They can't attack or move, but they are gateways for placing new units on the board. Each industrial complex allows you to mobilize a number of new units equal to its territory's income value.
Air Units: Fighters, at 10 IPCs, are strong on attack and defense but have a limited flying range of 4 spaces. Bombers can fly farther (up to 6 spaces) and can conduct special strategic bombing raids to hinder enemy production, but they cost 15 IPCs and are much weaker on the defense than fighters.
Sea Units: Battleships are powerful, attacking and defending on a die roll of 4 or less, and requiring 2 hits to sink. But they cost 24 IPCs each! Destroyers are half as expensive at 12 IPCs, attack and defend on a 3, and limit enemy submarine capabilities. Cheap submarines (8 IPCs) attack and defend on a 2, but they have a deadly opening fire shot and can move through hostile sea zones. Aircraft carriers, which cost 16 IPCs, have strong defensive capabilities and allow your fighters to land far from shore. Transports, at 8 IPCs, carry land units to embattled territories but are sitting ducks for enemy attacks.
Phase 3: Combat Move
In this phase, you may move as many of your units into as many hostile territories and sea zones as you wish. To do this, move your attacking units into the desired spaces on the game board; these may be occupied (contain enemy combat units) or enemy-controlled but unoccupied. You must make a combat move to enter an unoccupied hostile space. Attacking units can come from different spaces to attack a single hostile space, as long as each can reach it with a legal move.
A unit may move a number of spaces up to its movement (or "move"). Most units must stop when they enter a hostile space. Thus, a unit with a move of 2 could move into a friendly space and then a hostile space, or just into a hostile space.
You can move units into friendly spaces en route to hostile spaces during this phase, but they can end their move in friendly spaces only during the noncombat move phase.
Remember that units can never move into or through neutral territories. At no time may an Allies power attack another Allies power, or an Axis power attack another Axis power. Units from the same side can freely share spaces with one another, though.
Exception: During this phase, you may move any of your units out of spaces containing enemy units that were there at the start of your turn. (This normally occurs only in sea zones.) Doing so allows you to end the units' combat move in a space that doesn't contain enemy units. Units that remain in spaces containing enemy units will initiate combat in the next phase.
Generally, each attacking unit can be involved in only one combat per turn. (There are some exceptions to this rule, such as an air unit being fired on by multiple antiaircraft guns at different points during its move.) All combat movement is considered to take place at the same time: Thus, you cannot move a unit, then conduct combat, then move that unit again during this phase. For the same reason, you cannot conduct an amphibious assault (see Special Combats on page 19) with the same transport into two different enemy territories. You cannot move additional units into an embattled space once an attack has begun.
Land units must end their movement when they encounter enemy units, including antiaircraft guns and industrial complexes.
Air units may move through hostile spaces as if they were friendly. However, they are exposed to antiaircraft fire whenever they enter a hostile territory that contains an antiaircraft gun.
Sea units other than submarines must end their movement when they encounter enemy units. However, they may move through if those enemy units consist of only submerged submarines. Destroyers immediately reveal submerged submarines, which ends the destroyers' movement.
Submarines may move through hostile sea zones as if they were friendly. However, enemy destroyers immediately end submarines' movement.
Should I attack? In general, you should attack when you think you can win and still have enough surviving units to keep whatever you've taken. If you can overwhelm a foe's ground defenses and retain the territory, you'll earn more IPCs at the end of your turn.
Sometimes it's a good idea to attack even when you probably won't win. Trading units may disrupt your opponent's strategy. If you retreat after scoring more casualties than you took in return, it was probably a worthwhile attack.
Whenever you can, conduct strategic bombing raids or rocket strikes (see Special Combats on page 19) against your opponent's industrial complexes. The IPC loss will hinder your opponent when his or her turn comes around.
Special Combat Moves. A number of combat units can make special moves (and even some attacks) during this phase. These are described in detail below. (For complete information on each combat unit's capabilities, see Appendix 1: Unit Profiles.)
Air Units. Air units (fighters and bombers) can fly over hostile spaces as if they were friendly, but they are subject to the following special rules.
Antiaircraft Guns: Antiaircraft guns can never move in this phase; they can make noncombat moves only. However, they can make a special attack in this phase only. Whenever an air unit moves into a hostile territory containing an antiaircraft gun, the gun gets a chance to shoot it down.
The air unit's controller plots its path using the numbered punchout markers to indicate each space in which combat may occur (the first space is 1, the second 2, and so on). Whenever an air unit encounters enemy antiaircraft guns, resolve combat separately in each space along its path, starting with the first.
Every time an antiaircraft gun in a territory is overflown by air units, it shoots once at each air unit that enters. (Only one antiaircraft gun per territory can fire, however.) If the gun misses, the air unit may continue its move.
Resolve all combats involving a given air unit or group of air units before moving onto the next.
Aircraft Carriers. Aircraft carriers can move during this phase, but first they must "launch" any of their fighters that are to engage in combat this turn. (You don't have to launch all fighters on a carrier.) The fighters can then make a combat move from the carrier's sea zone. Fighters that you don't launch before moving the aircraft carrier are cargo (generally, these are fighters belonging to a friendly power). Cargo cannot take part in combat and is destroyed if the carrier is destroyed.
Whether it moves during the combat move or noncombat move phase, an aircraft carrier allows friendly fighters to land on it in the sea zone where it finishes its move.
Submarines. Submarines may move through hostile sea zones as if they were friendly, and they do not have to engage enemy sea units in those zones. However, a submarine that ends its combat move in a hostile sea zone must enter combat. In addition, the presence of a destroyer in the same sea zone ends the submarine's move.
Tanks and Blitzing. A tank can move into two adjacent hostile territories ("blitzing"), but only if the first territory is unoccupied. It establishes control of the first territory (place one of your control markers there) before it moves to the next. Remember to adjust the national production levels as you blitz. A tank that encounters enemy units in the first territory it enters must stop there, even if the unit is an antiaircraft gun or industrial complex.
Transports. At any point during the combat move phase, a transport may load or offload land units. However, as soon as a transport encounters hostile sea units or offloads, it must end its move. A transport that offloads units into a hostile territory begins an amphibious assault (see Special Combats on page 19).
A transport may end its combat move carrying land units, but these are considered cargo until they offload. Cargo cannot take part in combat and is destroyed if the transport is destroyed. A transport may not load or offload in a territory adjacent to a hostile sea zone, unless the enemy units consist only of submerged submarines (see the rules for submerging submarines in Phase 4: Conduct Combat).
You may blitz a tank through two territories if the first is hostile but unoccupied — place your control marker on the hostile territory as you capture it, take control of it, and then either continue the tank's movement into the second territory or move the tank back to the territory in which it originated. You must stop the tank's movement when it encounters any enemy units. If the units consist of only antiaircraft guns and/or an industrial complex, you take control of the territory and become the new owner of those units, but you must still stop the tank's movement. You may also blitz a tank through two territories if the first is a friendly territory.
Phase 4: Conduct Combat
In this phase, you resolve combat in each space that contains units from opposing sides. Complete all combat moves before resolving any combat. (An exception is an amphibious assault, in which sea combat must be handled before land combat. See Special Combats on page 19.)
You resolve combat by rolling dice (also known as firing) according to a standard sequence. All combat takes place at the same time, but each affected territory or sea zone is resolved separately. The attacker decides the order. No new units may enter as reinforcements once combat has begun.
Attacking and defending units are considered to fire at the same time, but for ease of play you roll dice in sequence: attacker first, then defender. A few units get special "opening fire" attacks that can destroy enemy units before they can fire back.
When a unit fires, you roll a die. An attacking unit scores a hit if you roll its attack or less. A defending unit scores a hit if you roll its defense or less. For example, a defending unit with a defense of 2 scores a hit only on a roll of 1 or 2; it "defends on a 2." When one of your units scores a hit, the opposing player decides which enemy unit it applies to. Most units are destroyed by one hit and become casualties. The opposing player may designate casualties in any order.
Example: Two US fighters and a bomber fly into a German territory containing an antiaircraft gun. Place all units on the battle board. In the opening fire step, the defender rolls one die against each aircraft. If you roll a 1 against an air unit, it is destroyed. A single antiaircraft gun can fire at aircraft in any number of groups. Roll one die against each aircraft. It fires at all aircraft in each group each time it is overflown. Only one antiaircraft gun in each territory can fire.
In what order should I conduct combats? In general, resolve the combats that are most important to you first. If you fare poorly in a key battle, you should know those results before deciding how hard to press your other forces.
You must resolve any combat involving air units in "flight path order." (You mark the path of air units using numbered punchout markers, as described under Phase 3: Combat Move.) For example, if a group of bombers encounter an antiaircraft gun, then make a strategic bombing raid against an industrial complex, you must resolve both those combats in that order before moving on to another combat.
In an amphibious assault (see Special Combats on page 19), you must resolve sea combat before any transport involved in that combat can offload its land units.
Combat Sequence
- Place units on battle board
- Conduct opening fire
- Remove opening fire casualties
- Attacking units fire
- Defending units fire
- Remove casualties
- Press attack or retreat
- Capture territory
Step 1: Place Units on Battle Board. The battle board has two sides, labeled "Attacker" and "Defender." Place all attacking units and defending units from a space on their respective sides, in the numbered columns that contain their names and silhouettes. The number in a unit's column identifies that unit's attack or defense value.
Step 2: Conduct Opening Fire. Certain units can fire before all others. Only these specially designated units may fire in this step. There is no return fire during this step.
Antiaircraft Guns: If the defender has an antiaircraft gun present and the attacker has air units in the attack, then the antiaircraft gun fires during this step. The defender rolls one die (only one antiaircraft gun fires) for each attacking air unit. For every roll of 1, one attacking air unit is destroyed; its controller moves it into the casualty zone of the battle board. If there are no aircraft present, ignore this step.
You can also attack enemy production with your antiaircraft guns during this step, if you have the Rockets development. (See Rocket Strikes on page 20 for more information.)
Battleship Bombardment: In an amphibious assault (see Special Combats on page 19), your battleships in the same sea zone as the offloading transport can conduct shore bombardment. Each battleship fires once during this step against enemy land units in the territory being attacked. If there are no enemy land units present, ignore this step and leave the battleships on the game board. (This step is used only in the land combat portion of amphibious assaults. A battleship that is involved in the sea combat portion of an amphibious assault cannot fire in this step.)
If you have the Combined Bombardment development, your destroyers can also fire during this step, following the same rules as for battleships.
Submarines: Both attacking and defending submarines fire in this step. If submarines are present on both sides, they are considered to fire simultaneously. Roll for attacking submarines before defending submarines. Submarines can fire only on sea units.
Step 3: Remove Opening Fire Casualties. Clear both casualty zones, destroying all units there. (Return them to their owners' inventories.) Return all antiaircraft guns to the game board, as well as battleships that conducted shore bombardment. Do not remove submarines from the battle board.
Destroyers and Submarine Casualties: If a destroyer is present in a combat involving enemy submarines, the destroyer's player skips this step. The submarines' casualties can fire back at the normal time in the combat sequence. (The destroyers provided enough advance warning to allow return fire.)
Step 4: Attacking Units Fire. All the units on the attacker's side fire during this step. Roll one die for each attacking unit. Roll for all units of a given attack at once. For each hit scored, the defender must choose one of his or her units and move it to the casualty zone. These units are not out of the game just yet. They will be able to counterattack.
Step 5: Defending Units Fire. All the units on the defender's side fire during this step. Roll one die for each defending unit (including casualties). Roll for all units of a given defense at once. For each hit scored, the attacker moves one unit to his or her casualty zone.
Step 6: Remove Casualties. Clear both casualty zones, destroying all units there. (Return them to their owners' inventories.)
Which units should I choose as casualties? You normally remove the pieces with the lowest combat ratings first, saving those with the highest for last: infantry before artillery, artillery before tanks, submarines before destroyers, destroyers before battleships, and fighters before bombers.
This is far from an ironclad rule, though. You might decide to lose an expensive bomber instead of your last infantry if you need that infantry to capture a territory. You might sink a destroyer rather than a transport carrying units you need for an amphibious assault. You might lose bombers instead of powerful jet fighters. It all depends.
Also remember that battleships take 2 hits to sink. Thus, in any combat involving a battleship, you probably should take the first hit on it. (But think long and hard before taking that second hit.)
Step 7: Press Attack or Retreat. Combat continues automatically unless one of the following conditions occurs:
a) Attacker retreats; b) Attacker loses all units; c) Defender loses all units; or d) Both sides lose all units.
As long as combat continues, repeat steps 2–6. (Units previously returned to the game board cannot reenter combat.) Each such set of steps constitutes one cycle of combat.
Attacker Retreats: The attacker (never the defender) can retreat during this step. Move all attacking land and sea units in that combat to a single adjacent friendly space from which at least one of the attacking units moved. All such units must retreat together to the same territory, regardless of where they came from.
Air Units: Air units can retreat to any friendly territory within movement range. A fighter can retreat to a friendly aircraft carrier or to a friendly sea zone, as long as a carrier moves there in the noncombat move phase (you must declare the intent to move an aircraft carrier at this time). Retreating air units are subject to fire from enemy antiaircraft guns in any territories they move over.
Amphibious Assaults: Only air units can retreat from the land combat portion of an amphibious assault. All land units must continue combat.
Submarines: Submarines on both sides may retreat during this step by submerging. Return the submarine to the game board and tip it onto its side to mark it as submerged. It remains submerged until the end of the noncombat move phase. (Submerged submarines do not stop enemy sea units from moving through their sea zone.)
Example — Sea Retreats: The U.S. destroyers are attacking the German battleship. They enter its sea zone from two different sea zones. After a round of combat in which no units were destroyed, the U.S.'s player decides to retreat. All attacking units must retreat to a single adjacent sea zone, which must be a zone from which at least one of the attacking units moved.
Example — Land Retreats: The Japanese units are attacking China from two directions. After a round of combat in which no units were destroyed, the Japan player decides to retreat. All attacking units must retreat to a single adjacent territory, which must be a territory from which at least one of the attacking units moved. (Note that Japan was able to move all its units together to the other side of China, which may have been the original intent.)
Attacker or Defender Loses All Units. Once all units on one or both sides have been destroyed, the combat ends. If a player has units remaining, that player wins the combat. If the defender has units remaining, return those units to the appropriate space on the game board.
Step 8: Capture Territory. If you win a combat as the attacker in a territory and you have one or more surviving land units there, you take control of it. If all units on both sides were destroyed, there is no winner and the territory doesn't change hands. Sea units cannot take control of a territory; they must stay at sea.
Air units can never capture a territory. If your attack force has only air units remaining, you can't occupy the territory you attacked, even if there are no enemy units remaining. They must return to a friendly territory. If air units move through spaces containing enemy antiaircraft guns on their return trip, mark these with numbered punchout markers as in the combat move phase, and resolve any resulting combats in numerical order. Fighters can move to a friendly aircraft carrier or friendly sea zone, provided a friendly carrier will move there during the noncombat move phase. (You must declare now that the carrier will move to that zone during the noncombat move phase.)
Remove surviving land units from the battle board and place them in the newly conquered territory, place your control marker on the territory, and adjust the control markers on the National Production Chart. Your national production increases by the value of the captured territory; the loser's decreases by the same amount.
Any antiaircraft gun or industrial complex in the captured territory remains there but now belongs to you. (If you capture an industrial complex, you cannot mobilize new units there until your next turn.)
Completing Air Units' Move. An air unit may end its move ("land") only in a space that was friendly at the start of your turn. Air units cannot land in a hostile territory or in a territory you just captured. A fighter can land on a friendly aircraft carrier or in a friendly sea zone, as long as a carrier moves there in the noncombat move phase. If a fighter has no carrier to land on at the end of the noncombat move phase, it is destroyed. You must have a carrier move to pick up a fighter that would end its combat move in a sea zone. You cannot deliberately move a fighter into a sea zone that is out of the range of your aircraft carrier (a kamikaze attack). You must declare now that the carrier will move to that zone during the carrier's noncombat move phase, and you must follow through unless the fighter or the carrier is destroyed before then.
Liberating a Territory. If you capture a territory that was originally controlled by another member of your side, you "liberate" the territory. You do not take control of it; instead, the original controller regains the territory and its income.
If the original controller's capital is in enemy hands when you liberate the territory, you collect income for the newly captured territory and can use any industrial complex there until the original controller's capital is liberated.
Capturing and Liberating Capitals. If you capture a territory containing an enemy capital (Washington, Moscow, London, Berlin, or Tokyo), follow the same procedure as for capturing a territory. Add the captured territory's income value to your national production. In addition, you collect all unspent IPCs from the former owner of the captured capital. For example, if Germany conquers Moscow while the Soviet Union's player is holding 18 IPCs, these are immediately transferred to Germany's player.
The former owner of the captured capital is still in the game but cannot collect income from any territories he or she still controls and cannot buy new units until the capital is liberated. That player skips all but the combat move, conduct combat, and noncombat move phases. If that power or one on its side liberates the capital, the owning player can once again collect income from territories he or she controls, and from any original territories that are now occupied by friendly units (see Liberating a Territory, above). Even so, the player cannot yet purchase new units. It's a long road back from losing a capital.
Capturing a Victory City. When you capture a territory containing an enemy victory city, replace that power's control marker on the Victory Cities Chart with one of yours. If at the end of the round your side controls enough victory cities to achieve the victory condition you decided upon at the start of the game, your side wins.
Do I have to use the battle board? The combat sequence described above assumes that you are using the battle board for all combats. However, experienced players often conduct simple combats without it. If it's easy to resolve the combat without removing the units from the game board, feel free to do so. If any player wants to use the battle board, though, you should.
You may also skip using the battle board for combat steps that occur one after the other without activity. For example, air units hit by antiaircraft guns move to the casualty zone before they are cleared. But since the air units can't return fire, you can skip this step and just remove them from play.
Example of Combat
Germany attacks the United Kingdom in India, which contains the victory city of Calcutta.
Step 1: Place Units on Battle Board. Germany is the attacker. Its infantry, tank, and fighter are placed in the appropriate columns on the attacker's side of the battle board (1, 3, and 3, respectively). The United Kingdom's tank, infantry, and antiaircraft gun are placed in the appropriate columns on the defender's side (3, 2, and 1, respectively).
Step 2: Conduct Opening Fire. The U.K. antiaircraft gun fires on the German fighter. The U.K.'s player rolls a 1 — a hit! Germany's player moves the fighter to the attacker's casualty zone, and the U.K.'s player returns the antiaircraft gun to the game board.
Step 3: Remove Opening Fire Casualties. The German fighter is destroyed and removed from the battle board.
Step 4: Attacking Units Fire. Germany's player rolls one die for the infantry and gets a 4, a miss. But rolling one die for the tank produces a 2, which is a hit. The U.K.'s player chooses the infantry as a casualty and moves it to the defender's casualty zone.
Step 5: Defending Units Fire. The U.K.'s player rolls one die for the tank, which has a defense of 3, and one for the infantry, with a defense of 2 (even though it is in the casualty zone). The U.K.'s player rolls a 4 and a 5, both misses.
Step 6: Remove Casualties. The U.K. infantry is destroyed.
Step 7: Press Attack or Retreat. Germany's player doesn't want to retreat, so a new cycle of combat starts again at step 2. There is no activity in steps 2 and 3, however, since there are no units left capable of opening fire.
(Second) Step 4: Attacking Units Fire. Germany's player rolls one die for the infantry and rolls a 1, a hit. The U.K.'s last remaining piece, the tank, must become a casualty. Germany's player does not roll for the tank because the defender has no units left.
(Second) Step 5: Defending Units Fire. The U.K.'s player rolls for the tank (now a casualty) and scores a 2, a hit. Germany's player chooses its infantry as the casualty.
(Second) Step 6: Remove Casualties. The U.K. tank and the German infantry are destroyed.
(Second) Step 7: Press Attack or Retreat. The U.K. has lost all units, so Germany wins, and the combat is over.
Step 8: Capture Territory. Germany has captured India, a territory with an income value of 3. Germany's player positions the surviving tank next to the captured antiaircraft gun in the territory and places a German control marker there. Germany's marker on the National Production Chart moves up by 3; the United Kingdom's marker moves down by 3. Germany has also captured the victory city of Calcutta. Germany's player removes the U.K. control marker from the space by Calcutta on the Victory Cities Chart. The Axis is one step closer to victory.
Special Combats
Some special actions and situations occur during this phase. These are described in detail below.
Amphibious Assaults. In an amphibious assault, land units offload from transports and attack an enemy coastal territory (one that borders a sea zone) or island group. The attacker must declare the target of an amphibious assault during the combat move phase. During the conduct combat phase, that player may call off the landing but cannot redirect the attack to a different territory.
Sea Combat: If there are enemy sea units in the sea zone where the transport(s) will offload, you must first conduct a sea combat. This is handled like any other combat, except that only sea and air units can participate. All your sea units (including your transports) attack all enemy sea units and fighters in that sea zone. If you clear the sea zone of enemy units, your surviving transports can offload the attacking land units. The land combat portion of the amphibious assault then begins.
If a sea combat occurs, your battleships fire at the same time as your other attacking units, not in the opening fire step.
Example: In one amphibious assault, the Japanese battleship may conduct bombardment in the opening fire step, as there are no enemy sea units to engage. On a roll of 4 or less, it destroys one U.S. infantry. But in another, all the Japanese sea units must first engage the U.S. aircraft carrier, so the battleship cannot conduct bombardment in the opening fire step. The attacking land units cannot retreat, though the fighter can.
They cannot support the assaulting land units (see below). You must declare in advance which of your attacking air units will engage in the sea combat and which will engage in the land combat portion of the assault, before conducting sea combats and cannot change their assignments later. Attacking air units, whether involved in the sea or land combat, may retreat according to the normal rules. Defending fighters on aircraft carriers can defend only in the sea combat. Defending air units in a territory can defend only in the land combat.
Land Combat: The land combat is handled like any other combat, except that attacking land units cannot retreat (not even if they came from adjacent territories or moved there over land). If no sea combat occurred, battleships can support an amphibious assault force with shore bombardment (see Conduct Opening Fire above). Each battleship fires once during the opening fire step against enemy land units in the territory being attacked.
Air Units: A given air unit may participate in the sea combat or the land combat portion of the amphibious assault; it may not do both. The attacking player must declare the air units involved in the land and sea combats and cannot change their assignments later.
Artillery Supporting Infantry. When an infantry attacks along with an artillery, the infantry's attack increases to 2. Each infantry must be matched one-for-one with a supporting artillery: If your infantry outnumber your artillery, the excess still have an attack of 1.
Battleship Damage. Unlike other combat units, a battleship requires 2 hits to destroy. If a battleship is hit, turn it on its side to mark its damaged status but do not move it to the casualty zone unless it takes a second hit in the same combat. If a battleship survives a combat having taken 1 hit, return it upright to the game board. Its damage is "repaired," and it is unharmed at the start of the next combat.
Multinational Forces. Units on the same side can share a territory or sea zone, constituting a multinational force. Such forces can defend together, but they cannot attack together.
Multinational Defense: When a space containing a multinational force is attacked, all its units defend together. The attacker fires first as usual. If a hit is scored, the defenders mutually determine the casualty; if they cannot agree, the attacker chooses. Each defender rolls separately for his or her units.
Multinational Attack: A multinational force cannot attack the same space together. Each attacking power moves and fires its own units on its own turn. A fighter may launch from an aircraft carrier owned by a friendly power, but the carrier may not move until its controller's turn. Similarly, a carrier can carry a friendly fighter as cargo, but the fighter cannot participate in an attack involving that carrier. A land unit can assault a coastal territory from a friendly transport, but it is offloaded on its owner's turn.
Transporting Multinational Forces: Transports belonging to a friendly power can load and offload your land units. This is a three-step process.
- You load your land units aboard the friendly transport on your turn.
- The transport's controller moves it (or not) on that player's turn.
- You offload your land units on your next turn.
Rocket Strikes. If you have the Rockets development, your antiaircraft guns can act as rocket launchers. You can conduct an economic attack against an enemy industrial complex to "destroy" IPCs. During the conduct combat phase, declare which antiaircraft guns are making rocket strikes. There is no defense against this attack. Choose an industrial complex within 3 spaces and roll one die for each gun; however, each gun can inflict no more IPC loss than the territory's income value. The opponent must surrender that many IPCs to the bank (or as many as the player has, whichever is the greater amount).
Strategic Bombing Raids. A strategic bombing raid is an economic attack against an enemy industrial complex to "destroy" IPCs. Only bombers may conduct strategic bombing raids.
Resolve a strategic bombing raid in the same way as a regular combat. However, it involves only attacking bombers and defending antiaircraft guns, although you may also conduct another (conventional) attack on the same territory this turn. You cannot use the same bombers in a strategic bombing raid and another attack on the same territory in one turn.
During the opening fire step, an enemy antiaircraft gun fires on each attacking bomber. Any bombers that survive may attack the industrial complex. Roll one die for each surviving bomber; however, each bomber can inflict no more IPC loss than the territory's income value. The opponent must surrender that many IPCs to the bank (or as many as the player has, whichever is the greater amount).
The strategic bombing raid now ends. Remove all bombers involved in the attack from the battle board; they cannot participate in any other combats in that territory. The bombers return to a friendly territory.
Phase 5: Noncombat Move
In this phase, you can move any of your units that did not move in the combat move phase or participate in combat during your turn. This is a good time to gather your units, either to strengthen vulnerable territories or to reinforce units at the front. You cannot move into hostile territories in this phase.
Where Units Can Move
Land Units: Land units can move into any friendly territories. They can never move into hostile territories (not even those that contain no combat units but are enemy-controlled).
Air Units: Air units can land in any friendly territories. They cannot end their move in hostile territories or in any territories you captured this turn. Fighters can land on any friendly carrier, even those that move during this phase (but not in the middle of the carrier's move; see below).
Sea Units: Sea units can move through any friendly sea zones. They cannot move through hostile sea zones, except when the enemy forces consist of only submerged submarines. Transports can move to friendly coastal territories and load or offload cargo, unless they moved during the combat move phase. Transports that have been in combat may either load or offload (not both) during this phase, but not if they have retreated from combat this turn.
Aircraft carriers can move to sea zones that contain friendly fighters to allow landing. Remember that declaring the intent to do so is mandatory in the combat move phase if a fighter ends its combat move in a sea zone. An aircraft carrier must end its move once a fighter has landed on it.
Submarines cannot end their noncombat move in hostile sea zones. At the end of this phase, all submerged submarines resurface. This does not trigger combat, even if there are enemy units in that sea zone — this turn's conduct combat phase is over. However, a player who begins a combat move phase with units in a sea zone containing enemy submarines may choose to not move and instead attack the submarines.
Where should I move? This is when you should prepare for the future. Move units to defend territories and sea zones you value, especially your side's capitals and victory cities. Place sacrificial units in the way of enemy forces to slow them down. Reinforce victorious units that have conquered territories. Move your transports and aircraft carriers to where they can pick up and move friendly units to critical areas. Get poor defensive units such as bombers out of harm's way. Stock up around captured and soon-to-be-built industrial complexes. Above all, don't leave anything where it won't be useful later.
Phase 6: Mobilize New Units
During this phase, you deploy all the units you purchased during the purchase units phase. Move the newly purchased units from the mobilization zone on the game board to territories containing industrial complexes you have controlled since the start of your turn. (You can't yet use industrial complexes that you captured this turn.)
Restrictions on Placement. You can mobilize only a number of units up to the income value of the territory containing the industrial complex. You cannot place your new units at an industrial complex owned by a friendly power, unless its capital is in enemy hands (see Liberating a Territory on page 18).
Place land units and bombers only in territories containing eligible industrial complexes. They do not enter play on transports or aircraft carriers. However, fighters can enter play on newly built aircraft carriers.
Place sea units only in sea zones adjacent to territories containing eligible industrial complexes. New sea units can enter play even in a hostile sea zone. (No combat occurs because the conduct combat phase is over.) Newly built carriers can enter play with fighters aboard, whether those fighters were built this turn or were already in the territory containing the industrial complex.
Place new industrial complexes in any territory that you have controlled since the start of your turn and that has an income value of at least 1. You can never have more than one industrial complex per territory.
Phase 7: Collect Income
In this phase, you earn production income to finance future attacks and strategies. Look up your power's national production level (indicated by your control marker) on the National Production Chart, and collect that number of IPCs from the bank. Double-check your income by counting up the value of all the territories you control.
If your capital is under an enemy power's control, you cannot collect income. (See Capturing and Liberating Capitals on page 18.) A power cannot lend or give IPCs to another power, even if both powers are on the same side.
Ending Your Turn
Once you have completed the collect income phase of your turn, the next player now takes his or her turn. Once all powers' turns are complete, check for victory.
Check for Victory
At the end of the round, after all five powers have taken a turn, check to see if either side has achieved the victory conditions set at the start of the game: minor victory (control 8 victory cities), major victory (control 10 victory cities), or total victory (control 12 victory cities). If your side controls enough victory cities to achieve the predetermined victory condition, you all win the war. Otherwise, start a new turn and continue the conflict.
Individual Winner. Although Axis & Allies is a team game, it's also possible to declare an individual winner. (This is optional, as many players value the team aspect of the game more than individual glory.) Subtract the beginning national production level for each member of the winning side (as marked on the National Production Chart) from its final national production level. The player of the power that has increased its national production level the most is the individual winner.
Appendix 1: Unit Profiles
This section provides detailed information for each unit in the game. Each entry has a short description, including national identification, then lists the unit's cost in IPCs, its attack and defense values, and the number of territories or sea zones it can move. Each unit type also has special abilities, which are summarized below these statistics.
Land Units
Infantry, artillery, tanks, and antiaircraft guns can attack and defend only in territories. Only infantry, artillery, and tanks can capture hostile territories. All but industrial complexes can be carried by transports. Industrial complexes are located in territories but cannot move, attack, defend, or be transported.
Infantry
Description: Soldiers who make up the backbone of any ground force. (U.S.S.R.: Soviet Red Army; Germany: German Army; U.K.: British National Army; Japan: Imperial Japanese Army; U.S.: U.S. Army)
- Cost: 3
- Attack: 1 (2 when supported by artillery)
- Defense: 2
- Move: 1
Special Abilities
Supported by Artillery: When an infantry attacks along with an artillery, the infantry's attack increases to 2. Each infantry must be matched one-for-one with a supporting artillery: If your infantry outnumber your artillery, the excess still have an attack of 1. For example, if you attack with two artillery and five infantry, two of your infantry have an attack of 2 and the rest, 1. Infantry are not supported by artillery on defense.
Artillery
Description: Heavy gun batteries that can support infantry attacks. (Allies: 105 mm howitzer; Germany: 88 mm; Japan: Model 92 (1932) 70 mm howitzer)
- Cost: 4
- Attack: 2
- Defense: 2
- Move: 1
Special Abilities
Support Infantry: When an infantry attacks along with an artillery, the infantry's attack increases to 2. Each infantry must be matched one-for-one with a supporting artillery. Artillery does not support infantry on defense.
Tanks
Description: Armored units that pack a major punch. (U.S.S.R.: T-34; Germany: Panther; U.K., U.S.: Sherman; Japan: Type 95 Kyugo light tank)
- Cost: 5
- Attack: 3
- Defense: 3
- Move: 2
Special Abilities
Blitz: In the combat move phase, a tank can move into two adjacent hostile territories, but only if the first territory is unoccupied. It establishes control of the first territory before it moves to the next. This is called "blitzing." The second territory can be friendly or hostile, or even the space the tank came from. A tank that encounters enemy units in the first territory it enters must stop there, even if the unit is an antiaircraft gun or industrial complex.
Antiaircraft Guns
Description: Gun batteries that shoot down invading air units.
- Cost: 5
- Attack: — (1 die IPC loss with Rockets)
- Defense: 1 (Opening fire only)
- Move: 1 (Noncombat only)
Special Abilities
Cannot Attack: An antiaircraft gun can never move during the combat move phase (other than being carried on a transport). It cannot attack, other than to launch a rocket strike (see Rocket Strikes on page 20).
Shoot Down Air Units: Antiaircraft guns can shoot down attacking air units. Whenever an air unit enters a territory containing an enemy antiaircraft gun, the antiaircraft gun fires during the opening fire step of combat. Roll one die for each attacking air unit (but only one antiaircraft gun in a territory can fire, even if they are controlled by different powers). For every roll of 1, one attacking air unit is destroyed.
Usable by Invading Forces: If a territory is captured, any antiaircraft guns there are also captured. They can be used by the capturing player in future combats. Antiaircraft guns are never destroyed, except when a transport carrying one is sunk. If you move an antiaircraft gun into a friendly territory, place one of your control markers under it. If you liberate a territory containing a captured antiaircraft gun, control reverts to the original owner.
Weapons Development — Rockets: If you have the Rockets development, your antiaircraft guns can act as rocket launchers: You can attack enemy production with your antiaircraft guns during the opening fire step of combat. This is the only situation in which antiaircraft guns can attack. Choose an industrial complex within 3 spaces and roll one die per rocket launcher (the maximum each rocket can inflict is the territory's income value). The opponent must surrender that many IPCs to the bank.
Industrial Complexes
Description: Factories that produce new units.
- Cost: 15
- Attack: —
- Defense: —
- Move: —
Special Abilities
Cannot Attack, Defend, or Move: An industrial complex can never attack, defend, or move. It cannot be transported. It is never placed on the battle board. When struck by rockets or a strategic bombing raid, the industrial complex is not destroyed; instead, its controller surrenders IPCs.
Mobilization Sites: You may mobilize units only in territories containing industrial complexes you have controlled since the start of your turn. You can mobilize only a number of units up to the income value of the territory containing the industrial complex (for example, an industrial complex built in Eastern Canada may mobilize up to three units per turn). You can place new industrial complexes in any territory that you have controlled since the start of your turn and that has an income value of at least 1. There can never be more than one industrial complex per territory.
Usable by Invading Forces: If a territory is captured, an industrial complex there is also captured. It can be used by the capturing player on the turn after it is captured. Industrial complexes are never destroyed. You cannot place your new units at an industrial complex owned by a friendly power, unless its capital is in enemy hands (see Liberating a Territory on page 18). Even if you liberate a territory with an industrial complex in it, you cannot use the complex; the original controller can use it on his or her next turn.
Air Units
Fighters and bombers can attack and defend in both territories and sea zones. They can land only in friendly territories or (in the case of fighters) on friendly aircraft carriers. Your air units cannot land in territories you just captured, whether they were involved in the combat or not. Air units can move through hostile territories and sea zones as if they were friendly. However, they are exposed to antiaircraft fire whenever they enter a hostile territory that contains an antiaircraft gun.
To determine range, count each space your air unit enters "after takeoff." When moving over water from a coastal territory or an island group, count the first sea zone entered as 1 space. When flying to an island group, count the surrounding sea zone and the island group itself as 1 space each. (An island is considered a territory within a sea zone; air units based on an island cannot defend the surrounding sea zone.) When moving a fighter from a carrier, do not count the carrier's sea zone as the first space — your fighter is in that sea zone. To participate in combat, a fighter must take off from its carrier before the carrier moves; otherwise it is cargo.
You cannot send air units on "suicide runs," deliberately moving them into combat with no place to land afterward. You cannot deliberately move a fighter into a sea zone that is out of the range of an aircraft carrier (a kamikaze attack). You must have a carrier move to pick up a fighter that would end the combat move phase in a sea zone. You must declare at that time that the carrier will move to that zone during the noncombat move phase, and you must follow through unless the fighter or the carrier is destroyed before then.
Example — The Sinking of a Defending Carrier: The attacking Japanese submarine sinks the U.K. carrier, then submerges after the defenders fire. Both the U.S. and U.K. fighters can fly 1 space to safety. They can land at New Zealand (a friendly territory), or on the U.S. carrier (a friendly carrier). Otherwise they are destroyed.
Example — The Sinking of an Attacking Carrier: The attacking U.K. carrier is destroyed by the Japanese submarine, which then submerges. The U.S. fighter is treated as cargo and is destroyed with the carrier. But the U.K. player can launch the U.K. fighter before the attack, so it still can fly 4 spaces. Among its options are New Zealand, Australia, the Solomon Islands, and the U.S. carrier. It cannot stay in its sea zone, because it will be destroyed before the U.S. carrier has a chance to pick it up (on the next U.S. turn).
Fighters
Description: Small, fast aircraft that threaten everything on land or sea. (U.S.S.R.: Yak; Germany: Ju-87 Stuka; U.K.: Spitfire; Japan: A6M2 Zero-Sen "Zero"; U.S.: P-38 Lightning)
- Cost: 10
- Attack: 3
- Defense: 4 (5 with Jet Fighters)
- Move: 4 (6 with Long-Range Aircraft)
Special Abilities
Land on Aircraft Carriers: Fighters may be carried by aircraft carriers. Up to two fighters may be on a friendly aircraft carrier at a time. A fighter must be launched from the carrier's initial position to participate in combat this turn. However, it may land on a carrier after combat (even if retreating) or a noncombat move. (A fighter may not land on a carrier during the carrier's move, however.) Your aircraft carrier can move to a sea zone where one of your fighters has ended its move (and in fact, it must do so) but cannot move any farther that turn.
A fighter based on a defending carrier that is destroyed in combat must try to land. It must move 1 space to a friendly territory or aircraft carrier, or be destroyed. However, a fighter based on an attacking carrier can launch before combat, and if it survives, can retreat to a friendly territory or carrier within range. If the fighter has no place to land by the end of noncombat movement, it is destroyed.
Weapons Development — Jet Fighters: If you have the Jet Fighters development, all your fighters defend on a 5 instead of a 4.
Weapons Development — Long-Range Aircraft: If you have the Long-Range Aircraft development, all your fighters can move 6 spaces instead of 4.
Bombers
Description: Mammoth, long-range aircraft that drop bombs on their targets. (U.S.S.R.: Petlyakov PE 8; Germany: Ju-88; U.K.: Halifax; Japan: G4M2E Model 24J "Betty"; U.S.: B-17)
- Cost: 15
- Attack: 4 (Roll twice with Heavy Bombers)
- Defense: 1
- Move: 6 (8 with Long-Range Aircraft)
Special Abilities
Strategic Bombing Raids: A bomber can make an economic attack against an enemy industrial complex. During the opening fire step of combat, bombers that survive any antiaircraft fire may attack the industrial complex. Roll one die for each surviving bomber (the maximum each bomber can inflict is the territory's income value). The opponent must surrender that many IPCs to the bank.
Weapons Development — Heavy Bombers: If you have the Heavy Bombers development, all your bombers roll two dice on an attack instead of one. That means each bomber can score 2 hits in a regular attack, or inflict two dice of IPC loss in a strategic bombing raid. (It still cannot inflict more loss than the territory's income value.)
Weapons Development — Long-Range Aircraft: If you have the Long-Range Aircraft development, all your bombers can move 8 spaces instead of 6.
Sea Units
Battleships, destroyers, aircraft carriers, transports, and submarines attack and defend in sea zones. They can never move into territories.
All sea units can move up to 2 friendly sea zones. They cannot move through hostile sea zones, except when the enemy forces consist of only submerged submarines (see Submarines, below). If a sea zone is occupied by enemy units other than submerged submarines, your sea units end their movement and enter combat. Submarines are an exception: They can pass through a hostile sea zone without stopping, unless there is a destroyer present (see Destroyers, below).
Some sea units can carry other units. Transports can carry only land units. Aircraft carriers can carry only fighters.
Battleships
Description: Powerful and nearly indestructible monarchs of the sea. (U.S.S.R., U.K.: Royal Oak class; Germany: Bismarck class; Japan: Yamato class; U.S.: Iowa class)
- Cost: 24
- Attack: 4
- Defense: 4
- Move: 2
Special Abilities
Two Hits to Destroy: A battleship requires 2 hits to destroy. If a battleship is hit, turn it on its side to mark its damaged status but do not move it to the casualty zone of the battle board unless it takes a second hit in the same combat. If a battleship survives a combat having taken 1 hit, return it upright to the game board.
Shore Bombardment: In an amphibious assault, your battleships in the same sea zone as the offloading transport can conduct shore bombardment. Each battleship fires once during the opening fire step against enemy land units in the territory being attacked (the enemy units do not fire back). A battleship cannot conduct shore bombardment if it was involved in a sea combat prior to the amphibious assault.
Destroyers
Description: Small, fast warships that hunt submarines. (Allies: Johnston class; Germany: Friedrich Eckholt class; Japan: Fubuki class)
- Cost: 12
- Attack: 3
- Defense: 3
- Move: 2
Special Abilities
Submarine Disruption: A destroyer cancels the special abilities of submarines (see Submarines, below). Enemy submarines cannot move freely through a sea zone containing your destroyer. If you have a destroyer in a combat, the casualties of enemy submarines can return fire. Also, enemy submarines cannot submerge while your destroyer is present.
Weapons Development — Combined Bombardment: If you have the Combined Bombardment development, in an amphibious assault your destroyers in the same sea zone as the offloading transport can conduct shore bombardment, just like battleships. Each destroyer fires once during the opening fire step (using its attack of 3) against enemy land units in the territory being attacked (the enemy units do not fire back). A destroyer cannot conduct shore bombardment if it was involved in a sea combat prior to the amphibious assault.
Aircraft Carriers
Description: Giant seaborne platforms from which fighters can take off and land. (U.S.S.R., U.K.: Illustrious class; Germany: Graf Zeppelin class; Japan: Shinano class; U.S.: Wasp class)
- Cost: 16
- Attack: 1
- Defense: 3
- Move: 2
Special Abilities
Carry Fighters: An aircraft carrier can carry up to two fighters, including those belonging to friendly powers. Fighters from friendly powers can take off and land from your carriers, but only during that power's turn. A fighter must be launched from the carrier's initial position to participate in an attack this turn. If the carrier moves first, the fighters on board are cargo. Fighters belonging to friendly powers on attacking carriers are always treated as cargo, as it is not their turn. Your aircraft carrier can move to a sea zone where one of your fighters has ended its move (and in fact, it must do so) but cannot move any farther that turn.
Fighter Defense: Whenever a carrier is attacked, its fighters (even those belonging to friendly powers) are considered to be defending in the air and can be chosen as casualties rather than the carrier. (However, a fighter can't be chosen as a casualty from a submarine hit, because submarines can attack only sea units. See Submarines, on page 32.)
Transports
Description: Vessels that carry land units to combat. (Allies: Liberty Ship; Germany: Danzig class; Japan: Hakusan Maru class)
- Cost: 8
- Attack: 0
- Defense: 1
- Move: 2
Special Abilities
No Attack Fire: A transport has an attack value of 0, so it can never fire in the attacking units fire step. However, it may be part of an attacking force. If it is the only attacking unit left, it must survive the defender fires step before it can retreat. If a transport is destroyed, its cargo is destroyed as well.
Carry Land Units: A transport may carry land units belonging to you or to friendly powers. Its capacity is any one land unit, plus one additional infantry. Thus, a full transport may carry a tank and an infantry, an artillery and an infantry, an antiaircraft gun and an infantry, or two infantry. A transport can never carry an industrial complex. Land units on a transport are cargo; they cannot attack or defend while at sea. They are destroyed if their transport is destroyed.
Example — Transporting Friendly Units: Getting U.S. infantry from the West Indies to Panama on a U.K. transport is a three-step process.
- On the U.S. turn, the U.S. infantry are loaded on the U.K. transport.
- On the next U.K. turn, the transport moves to Panama.
- On the next U.S. turn, the U.S. infantry are offloaded in Panama.
Example — Transporting Your Units: This German transport has a number of options. It could:
- Load the infantry from Algeria, move, and load one artillery from Southern Europe;
- Load the infantry from Algeria, move, and load the infantry from Libya;
- Move, then load one artillery from Southern Europe and the infantry from Libya; or
- Load any one of those units.
It could then:
- Hold onto its cargo and remain at sea (noncombat);
- Offload one or more units in Western Europe, Southern Europe, Algeria, Libya, or Balkans (noncombat);
- Conduct an amphibious assault on Gibraltar (combat); or
- Engage the UK destroyer in sea zone 15 (combat).
However, it cannot:
- Load the tank from Germany if the tank moved there (it can't move first);
- Load both artillery in Southern Europe (it can't carry that much);
- Offload in two territories (it can offload only in one, and then it must stop);
- Offload in a territory adjacent to sea zone 15 (the destroyer prevents loading and offloading);
- Conduct an amphibious assault on Anglo-Egypt (due to the enemy destroyer);
- Offload in Spain or Turkey (neutral territories);
- Transfer its cargo to another transport (not allowed);
- Have any of its cargo move after offloading (their movement is over); or
- Have its cargo retreat after an amphibious assault (they cannot retreat).
Land units belonging to friendly powers must load on their controller's turn, be carried on your turn, and offload on a later turn of their controller.
Being carried on a transport counts as a land unit's entire move; it cannot move before loading or after offloading. Place the land units alongside the transport in the sea zone.
Loading and Offloading: A transport can load cargo before, during, and after its move. A transport can pick up cargo, move 1 sea zone, pick up more cargo, move 1 more sea zone, and offload the cargo at the end of its movement. It may also remain at sea with the cargo still aboard. A transport can offload into a hostile territory only during an amphibious assault (see below).
Whenever a transport offloads, it cannot move again that turn (except when retreating). A transport can never offload in two territories during a single turn, nor can it offload cargo onto another transport.
A transport that has been in combat may load or offload after combat, but never both. If a sea zone contains hostile units, the transport may not load or offload in that sea zone.
Bridging: A transport can load and offload units without moving from the sea zone it is in. This is referred to as "bridging." Each such transport is still limited to its cargo capacity. It can offload only in one territory, and once it offloads it cannot move or load cargo until the next round. A transport cannot bridge in a sea zone that contains hostile units.
Amphibious Assaults: A transport may offload its cargo during the combat move phase into a hostile territory, beginning an amphibious assault. If enemy sea units are present in the sea zone in which the transport is to offload, a sea combat must be fought first. If the transport survives that combat, then after all defending sea units are destroyed, it may offload into the hostile territory. (See Amphibious Assaults on page 19.)
Submarines
Description: Predators that attack from beneath the surface. (Allies: Ray class; Germany: U-Boat Type VII; Japan: I class)
- Cost: 8
- Attack: 2 (Opening fire step)
- Defense: 2
- Move: 2
Special Abilities
Treat Hostile Sea Zones as Friendly: A submarine can move through a sea zone that contains enemy units. However, if it ends its combat move in a hostile sea zone, combat will occur. A submarine cannot end a noncombat move in a hostile sea zone. The presence of an enemy destroyer in the same sea zone forces a submarine to stop moving.
Sneak Attack: Submarines always fire in the opening fire step, whether on attack or defense. They can fire only on sea units. Casualties from this attack will be destroyed before they can return fire, unless an enemy destroyer is present. (Any sea or air unit can hit a submarine.)
Submerge: A submarine may submerge in combat after the attacker and defender have fired, regardless of what other units do. It is returned to the game board and remains submerged until the end of the noncombat move phase. The submarine then resurfaces regardless of whether enemy units are still there; this does not trigger combat. Enemy sea units may move freely through a sea zone containing a submerged submarine, and enemy transports may load or offload there.
The presence of an enemy destroyer in combat prevents a submarine from submerging.
Appendix 2: A Sample Turn
Our Soviet Union player, Katarina, is taking her first turn, which is the first turn of the game. She starts with 24 IPCs and all the units listed on her Reference Chart. She is already threatened by Germany to the west. The illustrations below show only the relevant units.
Phase 1: Develop Weapons. Katarina decides to try researching the Rockets development. She spends 5 IPCs to buy a single research die. She rolls and gets lucky — a 2! Her antiaircraft guns are now able to fire on enemy industrial complexes.
Phase 2: Purchase Units. Katarina has 19 IPCs left. She thinks she'll need more tanks to deal with the German threat. So she purchases three tanks, as well as one artillery, and places them all in the mobilization zone.
Phase 3: Combat Move. Katarina cannot wait for Germany to build up further, when it already has troops right next door to her capital of Moscow. She strikes the German forces in West Russia. Three infantry and a tank attack from Archangel, and two infantry and a fighter join them from Karelia S.S.R. In a separate attack, she uses her antiaircraft gun in Russia to attack the industrial complex in Germany.
Phase 4: Conduct Combat. First, Katarina resolves the rocket strike. Germany has no defense against this, so Katarina rolls one die during the opening fire step, getting a 3. Franz, Germany's player, surrenders 3 IPCs to the bank.
Then Katarina resolves her attack against West Russia. She puts her five infantry in column 1 on the attacker's side of the battle board and her tank and fighter in column 3. Franz puts his artillery and infantry in column 2 and his tank in column 3 on the defender's side.
No units in this combat can conduct opening fire, so Katarina (the attacking player) now rolls for her units. She handles the infantry first, getting two 1s out of the five rolls for two hits. Next she rolls for the fighter and tank. She gets a 2 and a 4, for one hit. Germany has taken three casualties; Franz moves a tank and both infantry to the defender's casualty zone.
Franz now rolls as the defender. He rolls three dice for the infantry (even though they are both casualties) and one for the artillery, needing a 2 on each. One comes up a 1, a hit. He rolls one die for the tank but misses with a 5. Katarina moves one infantry to the attacker's casualty zone. Then both players remove their casualties.
As the attacker, Katarina could choose to retreat now, but she senses victory and presses the attack. She rolls four dice for her infantry and gets three 1s — overkill! Franz moves his remaining units to his casualty zone. He fires back and hits with a 2 for the artillery but misses with a 6 for the luckless tank. Katarina moves one of her infantry to her casualty zone. After both players remove their casualties, Katarina places all her surviving attackers in West Russia (except the fighter, which lands in Russia). She now takes control of West Russia, placing one of her control markers in the territory. Her control marker moves up 2 spaces on the National Production Chart, indicating her new production of 26, and Germany's moves down 2 spaces to 38.
Phase 5: Noncombat Move. Archangel looks a little bare to Katarina, so she moves two infantry and one artillery into Archangel from Russia. She moves both tanks from Russia to Karelia S.S.R. Then she moves her submarine 2 spaces into sea zone 6.
Phase 6: Mobilize New Units. Katarina places the three tanks and one artillery that she bought earlier in the Caucasus, next to one of her industrial complexes. This is the maximum number of units she can mobilize in this territory, which has an income value of 4.
Phase 7: Collect Income. Katarina collects 26 IPCs from the bank.
It's now Germany's turn, and Franz is itching for payback.
Appendix 3: Optional Rules
Veteran players may wish to vary the play experience. The following optional rules set out national advantages for each power in the game, simulating its historic strategies or benefits. A power may not share its national advantages with friendly powers.
A number of these advantages apply to a territory controlled by a given power at the beginning of the game and can take effect only if that territory is still controlled by that power. For example, the Soviet Union begins play controlling the red territories on the game board, so a national advantage that refers to a "red territory" can take effect only if that territory is still controlled by the Soviet Union.
If you want to use these optional rules, decide on the number of national advantages each power will get. Each player chooses that many advantages for his or her power. If you prefer, you can roll randomly that number of times for each power on the National Advantages Table below.
National Advantages Table
| Die Roll | Soviet Union | Germany | United Kingdom | Japan | United States |
|---|---|---|---|---|---|
| 1 | Russian Winter | U-Boat Interdiction | Radar | Tokyo Express | Island Bases |
| 2 | Nonaggression Treaty | Atlantic Wall | Joint Strike | Kamikaze Attacks | Chinese Divisions |
| 3 | Mobile Industry | Panzerblitz | Enigma Decoded | Kaiten Torpedoes | Marines |
| 4 | Salvage | Wolf Packs | Mideast Oil | Lightning Assaults | Mechanized Infantry |
| 5 | Lend-Lease | Luftwaffe Dive-Bombers | French Resistance | Dug-In Defenders | Fast Carriers |
| 6 | Trans-Siberian Railway | Fortress Europe | Colonial Garrison | Banzai Attacks | Superfortresses |
Soviet Union National Advantages
1. Russian Winter
Russia's greatest ally was its winter cold. Germany's invasion stopped dead as the snows came down.
Once during the game in your collect income phase, you can declare a severe winter. Until the start of your next turn, your infantry defend on a 3.
2. Nonaggression Treaty
The Japanese refrained from attacking the Soviet Union during most of the war. They already had one bear coming at them from the east.
The first time in the game that Japanese forces attack any red territory, you may place four of your infantry for free in that territory before resolving combat. If you attack Japan before it attacks you, you lose this advantage.
3. Mobile Industry
In response to the threat from the Russian front, the Soviets moved their factories east. They produced 5,000 tanks east of the Urals in 1942.
Your industrial complexes each may move 1 territory during your noncombat move phase. They cannot move during the combat move phase. If they are captured by an opponent, that opponent cannot move them.
4. Salvage
After the Battle of Kursk in 1943, the Germans left the shells of their wrecked tanks behind. The Soviets found interesting uses for them.
If you win a combat against attacking tanks in a red territory and at least one attacking tank is destroyed, you may place one free tank in that territory.
5. Lend-Lease
With the Ukraine lost and factories moving east, the Soviet Union could neither feed nor rebuild itself. The Allies came to its rescue.
During your purchase units phase, you can convert units belonging to a friendly power into your units if they begin in or move into red territories. Remove the affected units from play and replace them with the same units of your own color.
6. Trans-Siberian Railway
The Trans-Siberian Railway spanned 10,000 kilometers from Moscow to Vladivostok, the longest main line in the world.
Your infantry, antiaircraft guns, and artillery may move 2 territories per turn only among these territories: Russia, Novosibirsk, Yakut S.S.R., and Buryatia S.S.R.
Germany National Advantages
1. U-Boat Interdiction
The Untersee boats swarmed Allied shipping lanes, sinking ships regardless of their cargo. Some "cargo" were noncombatants.
During the collect income phase of the U.K. and U.S. turns, subtract 1 IPC from the collecting power's national production total for each of your submarines on the game board.
2. Atlantic Wall
The Germans fortified the European Atlantic coast with massive defensive systems from Norway to Spain.
During any amphibious assault against a gray territory, all your infantry defend on a 3 during the first cycle of combat.
3. Panzerblitz
The colossal Panzers rumbled across Europe and North Africa. They would breach enemy lines, then turn and wreak havoc on the defenders.
If your attacking forces destroy all defending units in a territory in one cycle of combat, any of your surviving tanks in the attacking forces may move 1 territory during the noncombat move phase.
4. Wolf Packs
Wolf packs of U-boats prowled the Atlantic, working together to down Allied convoys. The only sure thing about a U-boat was that there always was another nearby.
If at least three of your submarines make a combat move into a single sea zone, they attack on a 3 (4 if you have the Super Submarines development). They may come from different sea zones, but they must attack the same sea zone.
5. Luftwaffe Dive-Bombers
During the Blitz, Londoners came to fear the Ju-87 Stuka dive-bomber, a small plane armed with precision bombs and a screaming siren.
Your fighters may conduct strategic bombing raids, following the same rules as bombers. They are subject to antiaircraft fire as normal. Roll one die for IPC loss per fighter involved in a strategic bombing raid, but divide each die roll by 2, rounded up. The maximum IPC loss per fighter still cannot exceed the territory's income value.
6. Fortress Europe
Hitler ordered the Gustav Line in Italy to hold at all costs. Those costs included tens of thousands of men on all sides.
Your artillery in gray territories defends on a 3.
United Kingdom National Advantages
1. Radar
Britain's radar alerted it to the threat of German planes crossing the channel. It used this warning to make sure the Luftwaffe never made it to the other side.
Your antiaircraft guns in tan territories hit air units on a roll of 2.
2. Joint Strike
The most powerful strike in the war was the joint Allied assault on Normandy. The planning required to launch this simultaneous invasion has never been equaled.
Once during the game, on your turn, you may declare a joint strike. You complete your turn as normal, except you skip your combat move and conduct combat phases. (Any of your units may move on your noncombat move phase.) On the U.S.'s turn, the U.S.'s player can move any of your units during his or her combat move phase and conduct combat with them, as if they belonged to the U.S. You and the U.S.'s player must agree on attacking casualties, or the opposing player gets to choose them.
3. Enigma Decoded
Working in a secret facility in Bletchley Park, Alan Turing's cryptographers broke the codes of the Nazi Enigma machines. They could then send false messages back.
Once per game, when Germany finishes its combat move phase but before its conduct combat phase, you may make one special move. You may move any number of your units from an adjacent space into any one friendly space being attacked by Germany. Alternatively, you may move any number of your units from a space being attacked by Germany into an adjacent friendly space, but you must leave at least one unit behind. This special move otherwise follows the rules for a noncombat move. If your units survive, they remain in the space to which they were moved.
4. Mideast Oil
The United Kingdom's 1920 division of the Middle East tapped into the power from the sands. The Germans tried to get that power for themselves.
If an air unit you own lands in Anglo-Egypt, Trans-Jordan, or Persia during your noncombat move phase, it may then move an additional number of spaces equal to its normal movement.
5. French Resistance
France fell quickly to the Germans. Thousands of French patriots who would otherwise have died in battle on the frontlines later rose up against the occupiers.
Once per game, if Western Europe becomes controlled by the Allies, you may place three of your infantry there for free.
6. Colonial Garrison
World War II represented the height of the United Kingdom's colonial empire. Two decades later, the Commonwealth was a shadow of its world-spanning former self.
You begin the game with one additional industrial complex in any tan territory with an income value of at least 1. (You still can't have more than one industrial complex in a territory.)
Japan National Advantages
1. Tokyo Express
The Japanese High Command used destroyer convoys to ferry infantry. Allied sailors dubbed this the "Tokyo Express."
Each of your destroyers may act as a transport for one infantry. These destroyers follow the same rules for loading and offloading units as transports do.
2. Kamikaze Attacks
A terrifying development was the willingness of Japanese pilots to fly their planes directly into U.S. ships. They even developed "flying bombs" piloted by the soldiers inside.
Your air units may make a combat move without having to land in a friendly space afterward. You must declare during the combat move phase that an air unit is making a kamikaze attack. Each such air unit attacks during the opening fire step of combat, and only an enemy sea unit can be chosen as a casualty. That air unit automatically becomes an opening fire casualty in addition to any other casualties inflicted in this cycle of combat.
3. Kaiten Torpedoes
Like the Yokosuka MXY7 Ohka "flying bomb," the kaiten torpedo had a human pilot inside. Once the pilot closed the hatch, he would never open it again.
When you have a defending submarine in a sea zone that borders an orange territory or island group you control, you may designate it as a kaiten torpedo. It defends on a 3 (4 if you have the Super Submarines development). The submarine automatically becomes an opening fire casualty in addition to any other casualties inflicted in this cycle of combat.
4. Lightning Assaults
In the early part of the war, Japan strung together a series of invasions that shocked the world. They conquered island after island until they controlled nearly every Far East seacoast.
Your transports may make more than one amphibious assault per turn: They may move, attack a coastal territory, then move again and attack a second coastal territory. They still must stop their movement in the first hostile sea zone they enter. A transport's capacity is unchanged; it still cannot load or offload more than one land unit plus one infantry in the turn.
5. Dug-In Defenders
Many Japanese troops defending Pacific islands elected to die in their bunkers rather than surrender.
All your infantry on islands defend on a 3.
6. Banzai Attacks
A fearsome rallying cry of the Imperial Japanese Army, "Banzai!" meant "May you live ten thousand years."
When you begin an attack with only infantry, all those infantry attack on a 2. This also applies to any amphibious assault in which your attacking land units consist of only infantry.
United States National Advantages
1. Island Bases
MacArthur's forces built many airbases on the islands they conquered. From these bases, they could launch attacks deeper into Japanese-held territory.
When moving your air units, you may treat island groups as part of the sea zones containing them. For example, a fighter (move 4) could travel from Hawaii to the East Indies in one turn, assuming your side controlled both island groups.
2. Chinese Divisions
The Chinese had three hundred divisions in 1942. President Roosevelt spent much of the war trying to get Chiang Kai-Shek to do something with them.
During your mobilize new units phase, you may place one of your infantry for free in one of the following territories if you control it: China, Sinkiang, Kwangtung, or French Indochina.
3. Marines
"Send in the Marines!" was a popular U.S. rallying cry in World War II.
Your infantry attacks on a 2 in the first cycle of the land combat portion of an amphibious assault.
4. Mechanized Infantry
With its fleets of trucks, the U.S. Army was the most mobile force of soldiers in World War II.
Your infantry have a move of 2 and may blitz just as tanks do.
5. Fast Carriers
The U.S.S. Independence was the first of nine light carriers constructed on Cleveland-class cruiser hulls.
Your aircraft carriers have a move of 3.
6. Superfortresses
The B-29 Superfortress flew higher and packed more of a punch than any other plane in the U.S. arsenal.
Your bombers are immune to antiaircraft fire. An enemy antiaircraft gun can roll one die against only each attacking fighter. (If no fighters are in the attacking force, the antiaircraft gun cannot fire.)