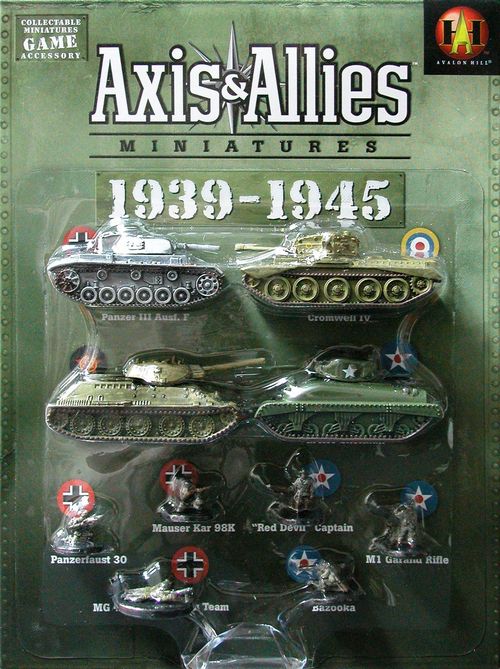
Axis & Allies Miniatures
Axis & Allies Miniatures Rulebook
Table of Contents
Table of Contents
The Miniatures Game Rules
World War II pitted the forces of the Axis—Germany, Japan, Italy, and other associated countries—against the Allies, consisting primarily of the United States, the United Kingdom and her dominions, France, and the Soviet Union. This booklet provides the rules for fast, tactical miniatures battles (sometimes called scenarios) set in World War II. In a miniatures battle, an Axis army and an Allied army battle each other. The winner is the player whose army either takes control of the battlefield's objective or destroys more of the enemy army. For other scenarios, see Scenarios on page 27.
Getting Started
This starter set contains miniatures, dice, stat cards, and four two-sided map sections, each a laminated sheet overlaid with a grid of 2-inch hexagons (or hexes). To start playing the Axis & Allies Miniatures game, you'll need to do the following.
- Build an Army. One player creates a 100-point Allied army. The other creates a 100-point Axis army.
- Select a Battle Map Layout. Roll a die, and set up your map sections to match the appropriate battle map diagram. Place the objective counter in the hex indicated by the diagram. The different configurations are shown below and on the next page.
- Flip a Coin. The winner decides whether to be the first player or the second player.
- First Player Deployment. The first player picks one end of the battle map and deploys his or her army there. You can deploy your units anywhere within five hexes of your end of the battle map (half-hexes don't count). You may deploy your units in difficult terrain, but you may not deploy units in hexes that they can't enter, such as Vehicles in marsh hexes.
- Second Player Deployment. The second player now deploys his or her army on the other side of the battle map.
- Start Playing! Just follow the Sequence of Play on page 11.
The half-hexes on the sides and ends of the battle map are completely impassable. You can't set up on a half-hex or move into one. (Whole hexes formed by the two half-hexes of adjacent map sections lining up are treated as normal hexes; you can deploy in them or move your units into them normally.) You can't move units off the outside edges of the map—there is no way off the battle map.
Six numbered battle map diagrams show how to arrange the four double-sided map sections (labeled Able, Baker, Charlie, and Dog, each with a 1 side and a 2 side): Configuration 1 (Half and Half), Configuration 2 (Knife Fight), Configuration 3 (High Ground), Configuration 4 (Urban Combat), Configuration 5 (Hill 107), and Configuration 6 (Tiger Heaven). Roll a die to pick which configuration to use.
Choosing Sides
In an Axis & Allies Miniatures battle, one player is the Axis player and the other player is the Allied player. While you can build armies of any nationality, only units from Axis countries can be part of an Axis army.
Axis: Germany, Japan, Italy, or other Axis countries.
Allies: United States, United Kingdom, Soviet Union, France, or other Allied countries.
If you and your opponent can't agree on which side each player is going to play, flip a coin. The winner chooses.
How to Win
At the end of turn 7, the player who controls the objective wins the game.
Keep track of turns. You control the objective if you are the only player with a unit adjacent to it.
If neither player wins on turn 7, keep playing. At the end of each turn, see if either player controls the objective. A player who controls the objective at the end of a turn wins the game.
If neither player has won at the end of turn 10, count the point costs of the units on the battle map. The player whose units are worth the most points is the winner.
If you're still tied, play until a turn ends with one player controlling the objective or with one player ahead in points.
You can also use the Axis & Allies Miniatures rules to play out a number of different scenarios. Many of these scenarios have specific objectives or scoring. For example, you might need to move all your pieces off the enemy's side of the battle map, while your enemy is trying to stop you from doing that. See Scenarios on page 27.
Units
Each miniature represents a fighting unit from World War II. These rules refer to all miniatures as "units." Each unit has a corresponding stat card that lists its game statistics.
How to Read a Stat Card
A sample stat card is shown with these labeled fields: Nationality, Name, Cost, Year, Type, Speed, Attack vs. Soldiers, Defense, Attack vs. Vehicles, and Special Abilities.
Nationality
Each unit belongs to a specific Axis or Allied country. The nationality symbol tells you which country the unit is from.
ALLIES: France, Soviet Union, United Kingdom, United States.
AXIS: Germany, Italy, Japan.
The color of each unit's stat card also identifies which side it can fight for—Axis units have gray stat cards; Allied units have green stat cards.
Type
This identifies the basic type of the unit (either Soldier or Vehicle), which affects how the unit resists attacks and operates in difficult terrain. Some units also have additional terms that identify the specific subtype of unit. For example, the Panzer IV Ausf. G is a Vehicle—Tank, while the 6-Pounder Antitank Gun is a Soldier—Artillery.
Year
The year that this unit became generally available. For some scenarios, you can use only units that were available by a particular year (see Scenarios on page 27).
Cost
The number of points you pay to add the unit to your army. The standard army has up to 100 points of units.
Speed
The number of hexes the unit can move. Since a unit can move in the movement phase and choose to move again in the assault phase, the unit can actually move twice this distance in a single turn.
Defense
The number of successes that an attacker needs to roll to hit this unit. Some Vehicles have two defense numbers separated by a slash—the first number (front defense) applies to frontal attacks and the second number (rear defense) applies to other attacks.
Attack vs. Soldiers
The number of attack dice this unit rolls in attacks against Soldiers. The unit has a value for short range (in the same hex or 1 hex), medium range (2–4 hexes), and long range (5–8 hexes). Each attack die that comes up 4 or higher is a success.
Attack vs. Vehicles
Like Attack vs. Soldier, but used for attacks against Vehicles.
Special Abilities
Special attacks, qualities, limits, or commander abilities the unit has (see Special Abilities on page 26).
Flavor Text
Some stat cards include a brief description of the unit's history or specifications. This information follows the unit's special abilities.
Set Icon/Collector Number/Rarity Symbol
The icon tells you what set a miniature belongs to, such as the Base Set.
The collector number lists the miniature's order in the set, as well as the total number of miniatures the set contains.
The rarity symbol indicates how easy the miniature is to find. There are three levels of collectability: common (●), uncommon (◆), and rare (★).
Match the name on each stat card to the name on the base of the miniature.
Scale
The Axis & Allies Miniatures game uses the following scales.
- Miniatures: 15mm, or 1/120.
- Vehicles: Each Vehicle miniature represents 1 vehicle.
- Soldiers: Each Soldier miniature usually represents several soldiers.
- Map: 1 hex is about 100m, or about 1/2000.
- Turn: 1 turn is about 1 minute.
Building an Army
In a battle, one player builds an Axis army, and the other player builds an Allied army. You can spend up to 100 points to build your army. Each unit has a cost shown on its base and on its stat card. Your army may not have more than 15 units in it.
A stat card's face indicates whether the unit is an Axis or Allied unit—Axis units have gray stat cards; Allied units have green stat cards.
Sample Army (Allies)
| Unit | Cost |
|---|---|
| M4A1 Sherman | 21 |
| 6-Pounder Antitank Gun | 9 |
| "Red Devil" Captain | 7 |
| Bazooka | 4 |
| M1 Garand Rifle | 4 |
| Vickers Machine-Gun Team | 8 |
| KV-1 | 32 |
| M3 Stuart | 15 |
| Total | 100 points |
Army-Building Etiquette: Construct your army in secret, using the stat cards. Don't identify which units you're using yet; just keep your hand of stat cards ready. You reveal your army when setting up the battle. If you deploy second, you may not change the composition of your army in response to your opponent's deployment and unit selection.
Different units contribute different strengths and weaknesses to any particular army. Antitank guns are very good against tanks, but fare poorly against enemy infantry and aren't very mobile. Riflemen are weak against enemy armor, but they're cheap and plentiful, and can be very useful for holding difficult terrain or seizing the battlefield objective. Tanks are fast and hard-hitting, but they're expensive, and they need open terrain to operate at full effectiveness. You may favor a balanced army that mixes unit types well, or you can gamble with an army that's heavy in one type of unit and light in others.
Sequence of Play
An Axis & Allies Miniatures game is played in turns. During each turn, players follow a sequence of play consisting of specific phases.
- A. Initiative phase (both players)
- B. First player's movement phase
- C. Second player's movement phase
- D. First player's assault phase
- E. Second player's assault phase
- F. Casualty phase (both players)
- G. End of turn
Initiative Phase
At the beginning of each turn, each player makes an initiative roll to determine who is the first player and who is the second player for that turn. Roll two dice and add them together, and then add the best initiative bonus of any commander in your army. (Disrupted commanders don't count.) The player with the highest result wins the initiative roll. If you have no commander in your army, or if all your commanders are disrupted, add zero. If you and your opponent each reach the same initiative total, the player with the better initiative bonus wins. If you have the same initiative bonus, reroll the tie.
First and Second Player: If you win the initiative roll, you choose whether you will be the first player or the second player for this turn. Sometimes it's better to go second, since you can see where your opponent is moving and respond, but sometimes you'll find it advantageous to go first. Attacks and damage are applied simultaneously to both sides in the casualty phase, so going first doesn't mean that you will be able to shoot your opponent's units before they have an opportunity to shoot back.
Movement Phases
On your movement phase, you can move any, all, or none of your units one at a time. Each unit can move a number of hexes equal to its speed (see Movement and Position on page 13).
Assault Phases
On your assault phase, you can activate any, all, or none of your units. Each unit can either move, as in the movement phase, or attack an enemy unit (see Attack and Defense on page 15).
Scoring Hits: If you score hits on an enemy unit, place face-down hit counters on it to record the hits. The first hit counter placed on a unit in the opponent's assault phase is a Disrupted counter. The second hit counter placed on a Vehicle is a Damaged counter. The second hit counter placed on a Soldier or a damaged Vehicle is a Destroyed counter. The third hit counter placed on a Vehicle is a Destroyed counter. Once a unit has received a Destroyed counter, further hit counters aren't necessary. Hits add together this way even if they come from more than one attacker.
Hits, however, don't take effect until the casualty phase. Place new hit counters face down and flip them up during the casualty phase (see below). For example, if the first player deals enough hits to the second player's tank to destroy it during the first player's assault phase, that tank can still act normally on the second player's assault phase. The tank isn't actually destroyed and taken off the board until the casualty phase.
Casualty Phase
In the casualty phase, both players apply the effects of damage dealt by enemy fire in the assault phases. Take these steps in the following order.
- Remove current face-up Disrupted counters. Don't remove existing Damaged counters.
- Flip over new hit counters.
- If a unit has a Destroyed counter, it's destroyed. Remove it from the battle map.
- If a Vehicle has a single Damaged counter, it's now damaged (see Attack and Defense on page 15).
- If a unit has a Disrupted counter, it's now disrupted (see Attack and Defense on page 15).
Multiple Actions
If more than one thing can happen at the same time, the acting player decides what order they happen in. For example, you can activate your units in any order you please.
Movement and Position
The hexes on the battle map mark the position of each of your units and regulate movement. Firepower is great, but most battles are won or lost by maneuver—the side that gets its units into a strong position and uses the terrain to its best advantage has a big edge in any fight.
Speed and Movement
A unit can move a number of hexes equal to its speed. For example, an M4A1 Sherman tank with a speed of 4 can move up to four hexes in the movement phase, and up to another four hexes in the assault phase. If it moves through difficult terrain, however, it can't move that far (see Terrain on page 23).
Stacking
A unit can only end its movement in a hex if there's room for it in that hex.
Stacking with Friendly Units: You can only have two friendly units in a single hex, and no more than one of those units can be a Vehicle.
Stacking with Enemy Units: A hex can contain up to two units of each army. Only one of those four units can be a Vehicle.
Stacking While Moving: The stacking limit applies only at the end of each unit's move. In other words, you can ignore the limit while moving a unit, and drive or move through full hexes as long as you end in a hex that isn't overstacked.
Breaking Stacking Rules: Your unit can't be forced to stop in a hex where stopping would break the stacking limit. For example, if your Vehicle is disrupted by defensive fire before it can move out of a hex containing a second Vehicle, stopping in the hex would break the stacking rule. In such a case, retrace the unit's path and leave it in the last hex where it can legally stop.
Terrain and Movement
Battlefields aren't uniform stretches of clear, open terrain. Hills, towns, marshes, streams, and forests break up the battlefield and present significant obstacles to movement (see Terrain on page 23).
Vehicle Facing
At the end of a Vehicle's movement, position it so that it faces one of the six hex sides.
Front and Rear Defense: If the Vehicle has two defense numbers, attacks from the front apply to the Vehicle's front defense. Other attacks apply to the Vehicle's rear defense.
Moving Zero Hexes: A unit can change facing as its movement. It doesn't have to move from one hex to another first.
Facing and Disruption: A disrupted unit may not change facing.
Facing and Attacking: If a unit attacks instead of moving in the assault phase, it can't change facing that phase.
Facing and Stopped Movement: If something stops a Vehicle's movement, such as a failed terrain movement roll, the Vehicle ends its movement facing the hex it tried to enter.
Defensive Fire: Facing can be important during movement when a Vehicle provokes defensive fire (see Defensive Fire on page 21).
Attack and Defense
In your assault phase, your units can fire on enemy targets with machine guns, antitank guns, mortars, flamethrowers, or whatever other weapon each of your units happens to be armed with. You might also gain opportunities to fire during the other player's movement or assault phases if enemy units provoke defensive fire from your units (see Defensive Fire on page 21).
When you attack, consider these rules:
- Range and Attack Dice: Count the hexes from the attacker to the target. Check the attacker's stat card to see how many attack dice you roll against a target of that type (Soldier or Vehicle) at that range.
- Attack Roll: Roll your attack dice. Each roll of 4 or higher is a success. If you score a number of successes equal to or greater than the target's defense, you've scored one or more hits.
- Line of Sight: The firing unit must have an unobstructed line of sight to the target it's attacking. If the line between the center of the attacker's hex and the center of the target's hex crosses through a hex with blocking terrain, the attacker can't attack that target.
- Cover Roll: If the target is located in difficult terrain, the defending player can make a cover roll to try to limit the effect of your attack. See Terrain on page 23 for more information on cover rolls.
You may fire on any enemy unit within range, as long as you can see it and have an attack value against it. If multiple enemy units are within range, you may choose which target your unit will attack—you don't need to shoot the closest enemy. You can shoot through enemy units and through your own units without penalty.
Two Targets in the Same Hex: If two enemy units are located in the same hex, you can pick which one you want to fire at.
Range and Attack Dice
Units in the Axis & Allies Miniatures game have attack values that rate their effectiveness against Soldiers and against Vehicles. The target unit's type determines whether you use the attacking unit's anti-Vehicle or anti-Soldier attack value. Attack values also vary with range; for most units, shorter-ranged attacks are more accurate and have a better chance of penetrating the target's armor, so the number of attack dice is higher for short-range attacks than long-range attacks.
When counting the number of hexes to the target, count the hex that the target is in, but don't count the hex that the attacking unit is in. There are three ranges.
- Short Range: 0 (in the same hex) or 1 hex
- Medium Range: 2–4 hexes
- Long Range: 5–8 hexes
Rolling an Attack
To attack with a unit, roll a number of dice equal to that unit's attack value against the target. Each die that comes up 4 or higher is a success.
Disrupted and Damaged Attackers: If the attacking unit is disrupted or damaged, it suffers a –1 penalty on attack rolls. Only 5s and 6s count as successes. If the attacker is both disrupted and damaged, the penalty is still only –1.
An attack example diagram shows a Sherman firing at a Panzer 4 hexes away (medium range), rolling 11 dice against the Panzer's Vehicle attack value, scoring 6, 6, 6, 5, 4, 4, 3, 3, 3, 1, 1 (six successes) against the Panzer's front defense of 5—since 6 successes exceed 5 defense, the Allied player scores two hits and places face-down Disrupted and Damaged counters by the Panzer.
Successes: Compare the number of successes you score to the target's defense.
- If you roll fewer successes than your target's defense, you miss.
- If you roll successes equal to your target's defense, you score one hit.
- If you roll successes higher than your target's defense, you score two hits.
- If you roll successes equal to or greater than twice your target's defense, you score three hits.
| Attack Successes | Hits |
|---|---|
| Less than enemy's defense | Zero |
| Equal to enemy's defense | 1 hit |
| Greater than enemy's defense | 2 hits |
| Double the enemy's defense | 3 hits |
Hits: If you score hits against an enemy unit during your assault phase, place face-down hit counters next to it.
- The first hit counter received by each of your opponent's units during your assault phase is a face-down Disrupted counter.
- The second hit counter received by a Soldier is a face-down Destroyed counter.
- The second hit counter received by a Vehicle is a face-down Damaged counter.
- The third hit counter received by a Vehicle is a face-down Destroyed counter.
Once a unit has received a Destroyed counter, further hit counters aren't necessary. Hits add together this way even if they come from more than one attacker.
| Hits Scored on Enemy Unit During Your Assault Phase | Face-Down Hit Counters on Vehicles | Face-Down Hit Counters on Soldiers |
|---|---|---|
| 1st hit | Disrupted counter | Disrupted counter |
| 2nd hit | Damaged counter | Destroyed counter |
| 3rd hit | Destroyed counter | — |
Vehicle Facing: If the target has two defense ratings, use the first number (front defense) when making an attack against the unit's front; otherwise use the second number (rear defense). The Vehicle must face one of its hex's six sides. Attacks against Vehicles in the same hex are against the unit's rear defense, as are attacks from hexes directly to the right or left of the Vehicle.
A facing diagram shows a Panzer with attackers in shaded hexes (such as a Sherman, in front) attacking against the Panzer's front defense, and attackers in unshaded hexes (such as a 6-Pounder and a Bazooka, behind and to the sides) attacking against the Panzer's rear defense.
Cover from Defensive Terrain
If the target is in a town, forest, hill, or marsh hex, the defending player can make a cover roll to try to limit the effect of the attack. See Cover on page 24 for more information on cover rolls.
Line of Sight
A unit can attack an enemy unit only if it can see that unit. Units that can see each other are said to have line of sight to each other.
Determining Line of Sight: To determine whether two units have line of sight to each other, draw an imaginary line from the dot in the center of the attacking unit's hex to the dot in the center of the target's hex. If you can draw the line without crossing any part of a hex containing towns, hills, or forests, the unit can see the target and attack. If the line of sight runs exactly along the hex side of a terrain hex that would block line of sight, that hex doesn't block line of sight.
Attacker and Target Hexes: When determining line of sight, ignore terrain in the attacker's hex and in the target's hex.
A line of sight diagram shows an MG-42 Machine-Gun Team, a PAK 38, a Panzer, a "Red Devil" Captain, a Sherman, a Bazooka, and an M1 Garand Rifle arranged around two hill hexes. Line of Sight between two units is blocked if a hill, forest, or town hex lies between them. Draw an imaginary "sight line" between the centers of the units' two hexes. If the sight line passes through a hill, forest, or town hex, line of sight is blocked. The hex that the attacking unit is in and the hex that the target unit is in do not block line of sight. If the sight line touches a blocking hex without entering it, that hex doesn't block line of sight. The MG-42 Machine-Gun Team has line of sight to the Bazooka and the M1 Garand Rifle. The hills, however, block line of sight to the "Red Devil" Captain and the Sherman. The PAK 38 has line of sight to the "Red Devil" Captain, but hill hexes block line of sight to the Sherman and the Bazooka. The Panzer has line of sight to the Bazooka and the M1 Garand Rifle, but not to the Sherman or the "Red Devil" Captain. Line of sight works in both directions.
Attack Effects
At the start of the casualty phase, flip over any hit counters that have been placed on your units.
Disrupted
A unit with a face-up Disrupted counter is "disrupted"—panicked, pinned down, disoriented, or generally unhappy.
A disrupted unit:
- suffers a –1 penalty on each attack die;
- suffers a –1 penalty to defense;
- can't move; and
- can't make defensive-fire attacks.
Recovery: A unit with a face-up Disrupted counter recovers from being disrupted at the start of the next casualty phase. In other words, disruption normally lasts 1 full turn.
Damaged
A Vehicle that receives two simultaneous hits during the assault phase gets a face-down Disrupted counter and a face-down Damaged counter.
When hit counters are flipped over during the casualty phase, a Vehicle with a face-up Damaged counter becomes "damaged." Damaged Vehicles continue to function, but not as well.
A damaged Vehicle:
- suffers a –1 penalty on each attack die;
- suffers a –1 penalty to defense; and
- suffers a –1 penalty on speed.
If a damaged Vehicle would receive another Damaged counter, it gets a Destroyed counter instead.
Soldiers don't receive Damaged counters—two simultaneous hits results in a Destroyed counter instead.
Disrupted and Damaged: A Vehicle that is both disrupted and damaged at the same time suffers each penalty only once. It has a –1 penalty on each attack die and on defense.
Destroyed
A Soldier that receives two or more simultaneous hits gets a Destroyed counter.
A Vehicle that receives three or more simultaneous hits gets a Destroyed counter.
If a damaged Vehicle would receive another Damaged counter, it gets a Destroyed counter instead.
When hit counters are flipped over during the casualty phase, remove all units with Destroyed counters from the battle map.
Defensive Fire
It's dangerous to get too close to enemy units or try to move past them as if they weren't there. Defensive fire is a special attack that a unit gets to make when an enemy moves into or past its hex. A successful defensive-fire attack disrupts the target.
A defensive fire diagram shows a Sherman moving between two hexes both adjacent to a PAK 38: 1) The Sherman provokes defensive fire from the PAK 38 when it moves from one hex adjacent to the gun into another. The Axis player can choose to attack the Sherman in either hex. Since the Sherman must face the direction it is moving, an attack into the first hex would be against its front armor and an attack into the second hex would be against its rear armor. In either case, the Sherman gets to make a cover roll to attempt to negate the defensive-fire attack. The Axis player takes neither shot, deciding to save the PAK 38's defensive-fire attack until later in the phase. 2) The Sherman turns and moves into another hex. It provokes defensive fire again because it is moving from one hex adjacent to the PAK 38 into another hex adjacent to it. The Axis player chooses to open fire when the Sherman is clear of the town hex, so the PAK 38 can get a rear shot with no cover. The PAK 38 rolls 11 attack dice against Vehicles at close range. If the Axis player rolls at least 4 successes (to match the Sherman's rear defense), the Sherman is stopped and disrupted immediately.
Provoking Defensive Fire
A unit provokes defensive fire when it moves from one hex adjacent to an enemy unit into another hex adjacent to that same enemy unit. The hex a unit is in counts as adjacent to that unit.
Soldiers and Vehicles: Soldiers don't provoke defensive fire from Vehicles. They can move around an enemy tank or even enter its hex without getting shot at by that Vehicle. Soldiers can exploit enemy Vehicles' blind spots to move safely around them, but enemy Soldiers see them just fine.
Defensive-Fire Limit: A given unit can make only one defensive-fire attack per phase. For example, a US bazooka team fires defensively against a German tank in the Axis player's movement phase, but when a second German tank moves into the bazooka team's hex in the same movement phase, the bazooka team can't use defensive fire—it's already fired defensively this phase. During the Axis player's assault phase, the bazooka team will be able to use defensive fire again.
Optional Defensive Fire: You aren't required to use your defensive fire if you don't want to. For example, if your opponent moves a weak unit to provoke defensive fire from one of your units, you can choose to "hold your fire" and let the weak unit pass in order to be able to use defensive fire against a more dangerous enemy moving later in the phase.
Multiple Defensive Fire: If more than one unit has the option to take defensive fire, you can make one unit's attack before deciding whether the other units also attack.
Defensive-Fire Attacks
A defensive-fire attack is a lot like a normal attack except that the best result is disruption and that effect takes place immediately instead of taking place in the casualty phase.
Target's Hex: A unit can make a defensive-fire attack against the moving unit either in the hex it started in or the hex it is moving into. For example, if an enemy unit started in a clear hex next to you and moved into a forest hex next to you, you decide whether to make the defensive-fire attack while the enemy unit is in the clear hex or in the forest hex.
Vehicle Facing: If the unit provoking defensive fire is a Vehicle, face it so that it points toward the hex it is entering or away from the hex it is leaving. Use that facing to determine whether defensive-fire attacks apply to its front defense or rear defense.
Defensive Fire Causes Immediate Disruption: If a defensive-fire attack scores a number of successes equal to or greater than the target's defense, the target ends its movement in its current hex and is disrupted immediately. Place a face-up Disrupted counter on the unit. Face-up Disrupted counters are removed at the start of the next casualty phase, as normal.
Multiple Defensive Fire: If the target provokes defensive fire from more than one enemy unit, then more than one unit can attack. Multiple disruption results, however, don't add together. If more than one Disrupted counter is placed on a unit, they all are removed at the beginning of the next casualty phase. If more than one unit can make a defensive-fire attack, all units that are shooting at the moving unit while it's in the first hex attack first. Then any units making attacks at the unit in the second hex make their attacks.
Cover against Defensive Fire: If the target is in defensive terrain and succeeds at a cover roll, then the effect of that defensive-fire attack is negated.
Terrain
Making the best use of the battlefield is one of the oldest and most effective ways to secure victory. Terrain features have three major effects on the Axis & Allies Miniatures battlefield: they block line of sight, they impede movement, and they provide protection for units concealed in that terrain.
Some types of terrain, like hills, streams, marshes, forests, and ponds, make it difficult to move around the battlefield. See the Terrain Effects table below for a summary of terrain effects.
Double-Cost Terrain
When a Vehicle enters a hill or forest hex, it counts as two hexes of movement. If a Vehicle can only move 1 more hex in a phase, then it can't enter a hill or forest hex.
Minimum Movement: A Vehicle with a speed of 1 moving in the movement phase can move into a hill or forest hex even though it would normally count as two hexes. A Vehicle doesn't benefit from this exception in the assault phase. When moving into a forest hex, the Vehicle still has to succeed at a movement roll (see below).
Movement Roll
A unit can't cross a stream without succeeding at a movement roll. In the same way, a Vehicle can't enter a forest hex without succeeding at a movement roll. If you roll 4 or higher on its movement roll, it moves normally. If you roll 3 or less, it stops moving in the hex it was attempting to leave.
Multiple Movement Rolls: If moving into a hex requires two movement rolls, the unit must succeed at both. A Vehicle crossing a stream into a forest hex has to succeed at two movement rolls. Failure on either roll stops the unit in the hex it was attempting to leave.
Movement Rolls and Defensive Fire: Attempting to leave a hex and failing doesn't provoke defensive fire even if succeeding would do so.
Impassable Terrain
Vehicles can't enter marshes or ponds. Soldiers can't enter ponds.
Roads
If a unit moves along a road, each hex only counts as one hex even if the prevailing terrain in the hex is double cost. A unit doesn't need to make movement rolls when moving along a road even if it crosses a stream or enters a forest. A unit moving along a road can enter a hex of impassable terrain. It can only exit the impassable hex along the road.
Road Bonus: Each phase, the first hex that a Vehicle moves along a road is free. It doesn't count against the number of hexes the unit can move.
Cover
When you attack an enemy unit that is in defensive terrain, the defending player may make a cover roll to try to limit the effect of your attack.
Making a Cover Roll: When you are attacking a unit in a forest, hill, marsh (Soldiers only), or town hex, the defending player may make a cover roll. If the defending player succeeds on the cover roll, the effect of your attack is limited to disruption. To succeed on the cover roll, the defending player must roll 4 or higher if the target is a Soldier, and 5 or higher if it's a Vehicle. Each individual unit attacked while in defensive terrain makes a separate cover roll each time it's attacked.
Effect of a Cover Roll: If the opponent succeeds at the cover roll, then the effect of your attack is limited to disruption. If you roll the target's defense or higher, place a face-down Disrupted counter on the unit. If the unit already has a face-down Disrupted counter, don't place another counter.
Target in the Same Hex: If the attacking unit is in the same hex as the target, the target suffers a –1 penalty on the cover roll.
Cover and Defensive Fire: A successful cover roll against defensive fire negates the attack instead of limiting its effect to disruption.
Roads: Roads have no effect on cover.
Terrain Types
The Axis & Allies Miniatures game battlefields include clear hexes, forests, hills, towns, marshes, ponds, streams, and roads.
Clear: Clear hexes represent open fields, meadows, plains, or similarly open ground. Clear hexes have no effect on movement or line of sight, and don't provide cover.
Forests: Forest hexes include woods, orchards, hedgerows, or heavy brushland.
Hills: Hill hexes include rolling hills, broken terrain, rocky or stony slopes, and other generally rough terrain.
Marshes: This sort of terrain consists of wetlands, swamps, bogs, and other muddy areas.
Roads: Roads may be dirt, gravel, or paved.
Towns: Any collection of buildings could be represented by a town hex, from farmhouses and grain elevators to a picturesque French or German village.
Streams: Streams on the map represent significant obstacles to movement, small rivers that might be 30 or 40 feet wide and 3 to 5 feet deep.
Ponds: These hexes represent ponds or lakes deep enough to prevent the passage of anyone who isn't in a boat.
Terrain Effects
| Terrain | Vehicle Movement | Soldier Movement | Vehicle has Cover? | Soldier has Cover? | Blocks Line of Sight? |
|---|---|---|---|---|---|
| Clear | Normal | Normal | No | No | No |
| Hills | Double cost | Normal | On a roll of 5+ | On a roll of 4+ | Yes |
| Forest | Double cost, must roll 4+ to enter | Normal | On a roll of 5+ | On a roll of 4+ | Yes |
| Town | Normal | Normal | On a roll of 5+ | On a roll of 4+ |
Special Abilities
Many units have special abilities.
Special Ability Definitions
Most special abilities are defined on the stat cards themselves. Those that require more explanation are described in the glossary at the end of this rulebook.
Attack Dice: When a special ability grants a bonus or penalty to "each attack die," the bonus or penalty applies to each die roll. For example, an attack roll of 4, 4, 3, 1 (two successes) becomes 5, 5, 4, 2 (three successes) if a unit gets a +1 bonus on each attack die.
Negative Special Abilities: Some special abilities are disadvantages rather than advantages.
Abilities Trump Rules: When a special ability and a general rule say different things, the special ability wins.
"Can't" Trumps "Can": Sometimes, one ability says a unit can do something while another unit's ability prohibits it. When this happens, the ability that prohibits the action "wins."
Some special abilities prohibit actions by letting a unit ignore cover, hit counters, or other effects. If an attack ignores cover, the defending unit doesn't get to make cover rolls.
For example, the sIG 33's Bombardment ability says that "this unit's attacks ignore cover" (meaning that units it attacks can't make cover rolls), while the Type 95 Ha-Go's Forest Camouflage ability says, "While this unit is in a forest hex, it automatically succeeds at cover rolls against long-range attacks." In this case, if the sIG 33 attacked a Ha-Go in a forest hex at long range, the Ha-Go wouldn't get to make a cover roll, even though the Forest Camouflage ability says it can.
Extra or Additional Actions: Some special abilities allow a unit to make additional attacks, move extra hexes, or otherwise do extra things. Complete any such extra actions as part of activating that unit. You can't save those extra actions to use in another part of the turn.
Special Abilities of the Same Name Don't Add Together: For example, if two commanders with the commander ability called Tally-Ho! could both provide a bonus to a single Soldier's speed, use only one commander's bonus instead of both of them.
Commander Abilities
Commander abilities are a type of special ability. They usually affect other Soldiers as well as the commander itself.
Commander Abilities Affect Commanders: A commander ability affects other commanders as well as noncommanders. Commander abilities can affect the commander itself.
Commander Abilities and Disruption: A disrupted commander's commander abilities don't function.
Scenarios
When you play the Axis & Allies Miniatures game, you and your opponent agree on one of the following scenarios. You can also play with any armies, maps, and victory conditions that you and your opponent agree on.
Standard Scenario
This is the default battle scenario. You build an army and battle against another player who builds his or her own army.
Armies: In a battle, one player builds an Axis army, and the other player builds an Allied army. You can spend up to 100 points to build your army. Each unit has a cost shown on its base and on its stat card. Your army may not have more than 15 units in it.
A stat card's face indicates whether the unit is an Axis or Allied unit—Axis units have gray stat cards; Allied units have green stat cards.
Battle Map: Roll a die, and arrange the map sections into the corresponding battle map configuration (see pages 5 and 6).
Setup: Flip a coin. The winner decides whether to be the first player or the second player.
The first player picks one end of the battle map and deploys his or her army there. You can deploy your units anywhere within five hexes of your end of the battle map (half-hexes don't count). You may deploy your units in difficult terrain, but you may not deploy units in hexes that they can't enter, such as Vehicles in marsh hexes. The second player then deploys his or her army on the other side of the battle map.
Start Playing! Just follow the Sequence of Play on page 11.
At the end of turn 7, the player who controls the objective wins the game.
Keep track of turns. You control the objective if you are the only player with a unit adjacent to it.
If neither player wins on turn 7, keep playing. At the end of each turn, see if either player controls the objective. A player who controls the objective at the end of a turn wins the game.
If neither player has won at the end of turn 10, count the point values of the units on the battle map. The player whose units are worth the most points is the winner.
If you're still tied, play until a turn ends with one player controlling the objective or with one player ahead in points.
Assault Scenario
This scenario recreates a typical attack, in which the defender has fewer units than the attacker but doesn't have to seize territory—all the defender has to do is buy time.
Armies: Decide which player will be the attacker and which player will be the defender. The attacker builds an army consisting of up to 120 points of units. The defender takes the opposing side, and builds an army consisting of 80 points of units. Both armies have the standard 15-unit limit.
Battle Map: The defender chooses the battle map configuration (see pages 5 and 6). The defender also chooses one hex to be the objective hex. That hex may not be adjacent to the edge of the battle map or to a half-hex. Put the objective counter in that hex.
Setup: The defender chooses which end of the battle map to defend and deploys his or her units first. The defender deploys units anywhere on the two map sections of his or her half of the battle map. Next, the attacker deploys units within five hexes of his or her end of the map (half-hexes don't count). You may deploy your units in difficult terrain, but not in hexes that they can't enter, such as Vehicles in marsh hexes.
Victory: The attacker wins if he or she controls the objective at the end of turn 10.
Constructing Your Own Scenarios
You can create scenarios of your own that reflect particular campaigns or engagements. For example, you could build scenarios that pit the Soviet Union against Japan, based on the Russian invasion of Manchuria in 1945. Or you could design a 1941 North Africa scenario pitting the United Kingdom against Germany and Italy.
Historical Army Limits
When designing scenarios, you can decide whether or not to apply historical army limits. Historically, German and Japanese units never operated together. Similarly, units from the United States never fought side by side with Soviet units. If you want to enforce historical army limits, apply the following restrictions to army building.
- German and Italian units can go in the same army.
- Soviet units can't be in an army with any other nationality.
- Japanese units can't be in an army with any other nationality.
- Units from the United States, United Kingdom, and France can go in the same army.
Year Restrictions
You can also restrict army construction by specifying a year for your scenario. For example, if you choose 1942 as the year, then only units that were introduced by 1942 are legal.
Glossary
This glossary explains game terms and key special abilities that appear on stat cards.
adjacent: One hex away or in the same hex.
Allies: Units fighting in an Allied army (usually from the United States, the United Kingdom, France, or the Soviet Union).
antitank gun: A wheeled high-velocity gun designed to engage enemy armored vehicles.
army: A group of units fighting for one player in a battle.
assault gun: An armored vehicle with a mounted direct-fire howitzer for engaging enemy strongpoints, bunkers, pillboxes, and other such fortifications.
attack: A unit can attack an enemy unit in the assault phase or with defensive fire. When you attack, you roll a number of dice equal to the attacking unit's attack value against the corresponding type of target at that range. Rolls of 4 or higher are successes. If the number of successes you roll equals or exceeds the target's defense rating, you succeed in scoring hits on the target.
attack value: The number of dice a unit rolls when it fires on an enemy unit. Attack values are divided into anti-Vehicle and anti-Soldier attacks, and divided again into short, medium, and long range.
Axis: Units fighting in an Axis army (usually from Germany, Italy, or Japan).
battle map: The playing area on which the game is played. The battle map consists of four map sections.
Blast (special ability): When a unit with this ability attacks, it makes a separate attack against each other unit in the target hex. Friendly units in the hex are also affected. Roll your attacks against each unit separately. If the targets are in defensive terrain, the defender makes cover rolls for them separately. A unit with this ability uses it even when making defensive-fire attacks.
Bridge Demolition (special ability): Instead of moving or attacking in its assault phase, a unit with this ability can attempt to destroy a bridge in its hex. If the bridge is destroyed, units must make movement rolls to cross the stream it spanned. The road is considered to be "broken" at this point.
commander ability: The special bonus or advantage conferred by a commander. Some commander abilities have a limited range.
Duplicate bonuses from commander abilities never stack. A single unit can benefit from any number of commander effects at the same time, but if more than one grants a bonus to the same roll or statistic, only the highest bonus applies.
A commander's commander abilities don't function when the commander is disrupted.
cover: A unit located in a hex filled with defensive terrain gains cover. When you attack a unit that has cover, the defender can make a cover roll to limit the attack's effect.
cover roll: The roll a unit in defensive terrain makes when attacked. If the defending unit succeeds on its cover roll, the attack is limited to disruption for regular attacks and negated for defensive-fire attacks. Vehicles succeed on 5 or higher and Soldiers succeed on 4 or higher. If the attacking unit is in the same hex as the target, the target suffers a –1 penalty on the cover roll.
damaged: A Vehicle that receives two simultaneous hits gets a face-down Damaged counter as well as a face-down Disrupted counter. When hit counters are flipped over during the casualty phase, a Vehicle with a face-up Damaged counter becomes "damaged."
A damaged Vehicle's speed and defense (front and rear) drop by 1. A damaged Vehicle suffers a –1 penalty on each attack die. If a damaged Vehicle would receive another Damaged counter, it gets a Destroyed counter instead.
Attack and defense penalties from disruption and damage don't add together. A Vehicle that is both disrupted and damaged still has only a –1 penalty on attack dice and defense.
Soldiers don't get damaged—two simultaneous hits result in a face-down Destroyed counter instead.
defense: A unit's resistance to attack. If the number of successes scored by an attacking unit equals the defending unit's defense, the unit suffers one hit and usually gets a Disrupted counter.
If the number of successes scored by an attacking unit is higher than the target's defense, the unit suffers two hits. Two hits usually result in a face-down Damaged counter for a Vehicle, a face-down Destroyed counter for a Soldier, or a face-down Destroyed counter for a damaged Vehicle.
If the number of successes scored is equal to or greater than double the unit's defense, the unit suffers three hits and gets a face-down Destroyed counter.
Some Vehicles have two defense numbers separated by a slash (/). The first number is the Vehicle's front defense and the second number is its rear defense.
defensive fire: A free, immediate attack that a unit provokes if it moves from one hex adjacent to an enemy unit to another hex also adjacent to that enemy. The effects of defensive fire are resolved immediately. If a unit is hit by a defensive-fire attack, it gets a face-up Disrupted counter that takes effect immediately. If a move provokes more than one defensive-fire attack, determine the results of the attacks one at a time.
Attackers may attack the moving unit either before it leaves the first hex or after it arrives in the second. If more than one unit can make a defensive-fire attack, those units attacking the moving unit while it's in its original hex attack first. If the moving unit is stopped in its hex, such as by being disrupted, then enemies can't attack it in the next hex—it never gets there.
Soldiers don't provoke defensive-fire attacks from Vehicles.
defensive terrain: Terrain that grants cover, such as forests, hills, marshes, and towns. A unit that is attacked while in defensive terrain can make a cover roll to limit the effect of the attack to just disruption, or negate it entirely if it's a defensive-fire attack.
destroyed: A Vehicle that receives three or more simultaneous hits gets a Destroyed counter. A Soldier that receives two or more simultaneous hits gets a Destroyed counter. If a damaged Vehicle would receive another Damaged counter, it gets a Destroyed counter instead.
When hit counters are flipped over during the casualty phase, remove all units with Destroyed counters from the battle map.
disrupted: The first simultaneous hit counter that a unit receives during an opponent's assault phase is a face-down Disrupted counter. Hit counters are turned face up during the casualty phase. If a unit is hit by a defensive-fire attack during its movement phase, it gets a face-up Disrupted counter. If a unit has a face-up Disrupted counter, it is considered disrupted.
A disrupted unit is pinned down, confused, or generally disorganized by the effects of the incoming fire. Disrupted units can't move, suffer a –1 penalty on each attack die, and suffer a –1 penalty to defense.
The attack dice and defense penalties aren't cumulative with the effects of being damaged. Disruption ends at the beginning of the next casualty phase.
double-cost terrain: Terrain that is difficult for Vehicles to move through, such as forests and hills. When a Vehicle enters a hill or forest hex, it counts as two hexes of movement. (If a Vehicle attempts to enter a forest hex, it must also make a movement roll.)
enemy: In the opponent's army.
facing: A Vehicle with two defense ratings has a "front" and a "rear." Attacks from anywhere in front of the Vehicle are against its front defense. Attacks from behind the Vehicle, from directly to the right or left, or from the same hex are against the Vehicle's rear defense.
friendly: In your army.
hex: A six-sided space on the battle map.
hit: A successful attack places one or more hits on a unit. Hit counters are placed face down near the units that are hit and then flipped face up during the casualty phase. Hits from defensive fire, however, are applied immediately.
hit counters: Cardboard counters that indicate disruption, damage, and destruction. Normally, the first hit counter that a unit receives in the assault phase is a Disrupted counter. The second is a Destroyed counter (for Soldiers) or a Damaged counter (for Vehicles). The third is a Destroyed counter (Vehicles only).
ignore: Some special abilities let a unit ignore cover, hit counters, or other effects. If an attack ignores cover, the defending unit doesn't get to make cover rolls. If a unit ignores a hit counter, treat that hit counter as if it weren't there.
immediate: An immediate effect happens right away. Immediate combat results don't wait until the casualty phase to take effect.
Defensive fire is resolved immediately. Hits from more than one unit making a defensive-fire attack at the same time aren't simultaneous.
initiative roll: A dice roll at the start of the turn to determine who is the first player and who is the second player for that turn. Each player rolls two dice and adds the best initiative bonus of any commander in his or her army. The best total goes first—ties go to the army with the best commander initiative bonus (reroll any ties after that). The player who wins initiative decides which player is the first player that turn.
line of sight: A unit can attack an enemy unit only if it has line of sight to that unit. Two units have line of sight to each other if an imaginary line between the centers of each unit's hex doesn't pass through any town, hill, or forest hexes. If the line of sight runs exactly along the side of a terrain hex that would block line of sight, that hex doesn't block line of sight. Ignore the attacker's and the target's hex.
movement roll: Any unit attempting to cross a stream, and Vehicles (but not Soldiers) attempting to enter a forest hex, must succeed on a movement roll to do so. A movement roll is a roll of one die; if the die comes up 4 or higher, the unit succeeds. Otherwise the unit fails to enter the hex or cross the stream and stops moving in its current hex.
phase: One step or segment of the turn. The turn is broken into the initiative phase, movement phases, assault phases, and casualty phase.
road bonus: Each phase, the first hex that a Vehicle moves along a road is free. It doesn't count against the number of hexes the unit can move.
simultaneous hits: All hits from a single attack and all hits caused by normal attacks in the assault phase are simultaneous. Hits from defensive fire aren't simultaneous.
For example, suppose that two enemy units fire at your Soldier during your opponent's assault phase. The first enemy unit scores one hit, so you place a face-down Disrupted counter next to your Soldier. The second enemy unit also attacks your Soldier. Your Soldier doesn't yet suffer the –1 penalty to defense for being disrupted because the two attacks are considered to be simultaneous. If the second attacker also scores a hit, that's the second simultaneous hit to your Soldier. The second hit counter is a face-down Destroyed counter, just as if those two hits came from a single attack. During the casualty phase, your unit will be destroyed.
Soldier: A unit consisting mostly of soldiers on foot, possibly equipped with a weapon such as a howitzer or antitank gun. In rules text, such a unit is called a "Soldier" even though the unit represents multiple individual soldiers.
stacking limit: Each hex can contain up to two units of each army. Only one of those four units can be a Vehicle.
subtype: A descriptor that is part of the unit's type, such as Tank in Vehicle — Tank.
tank: An armored fighting vehicle, usually armed with a cannon and one or more machine guns.
tank destroyer: An armored fighting vehicle, usually armed with a high-velocity antitank gun. Tank destroyers are often more lightly armored but faster than tanks.
transport (special ability): A Vehicle with this ability can carry a Soldier. A Soldier in the same hex as this Vehicle can use its move in the movement phase to "board" it, and a Soldier that starts its movement phase boarded can use its move in the movement phase to "dismount" it. For example, on one turn, a transport Vehicle could move into a Soldier's hex and the Soldier could board it. Then, on the next turn, the Vehicle could move, and then the Soldier could dismount. While a Soldier unit is boarded, it can't move, fire, or defend for itself—it relies entirely on the carrying Vehicle.
If the transport Vehicle is destroyed, any Soldier on it is destroyed too. If the transport Vehicle is disrupted or damaged, any Soldier on it is unaffected.
You can start the game with a Soldier already mounted on a transport Vehicle.
A Soldier on a transport Vehicle doesn't count against the stacking limit. If dismounting breaks the stacking limit, your opponent chooses the location for the Soldier that doesn't fit from among the nearest legal hexes.
Transport Vehicles can't carry Soldiers with the subtype "Artillery."
type: A basic characteristic of a unit, indicating whether it is considered a Soldier or a Vehicle. A unit's type determines whether enemy units firing on it use their anti-Soldier or anti-Vehicle attack values.
unit: A vehicle, squad, team, or individual represented by a single miniature.
Vehicle: A unit consisting of a single vehicle such as a jeep, halftrack, or tank and its crew.