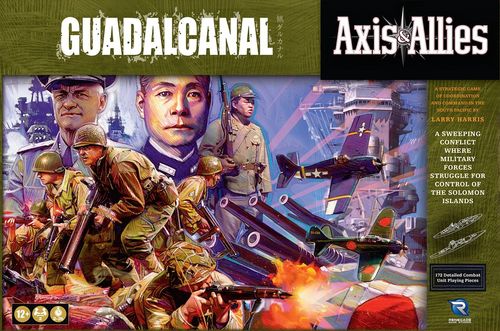
Axis & Allies: Guadalcanal
Axis & Allies: Guadalcanal Rulebook
Table of Contents
Table of Contents
Object of the Game
Summary of Play
An Axis & Allies: Guadalcanal game generally lasts 4 to 6 turns. Each turn, the players alternate moving their units, one unit type at a time. Combat occurs in contested zones in three stages — air, sea, and then land — in an attempt to seize control of the island zones and the all-important airfields. Finally, the players will call for reinforcements and build more airfields.
How to Win
The first player to reach 15 victory points wins. You earn victory points by controlling airfields and destroying capital ships (battleships and aircraft carriers).
Ages 14+. 2 players. 2-3 hour playing time.
Game Components
- 1 Game Board
- 1 Rulebook
- 1 Storage Tray
- 1 Battle Box
- 12 Dice
- 2 Base Cards (Rabaul and New Caledonia)
- 2 Reference Charts
- 1 First-Player Token
- 2 Victory Point Markers
- 6 Control Markers
- 9 Airfield Markers
- 9 Damaged Markers
- 20 Supply Tokens
- 16 Advantage Tokens
- 70 Plastic Chips (10 red, 60 grey)
- 85 Total Allies Playing Pieces (green): 6 Battleships, 5 Aircraft Carriers, 10 Destroyers, 8 Cruisers, 10 Transports, 8 Submarines, 8 Fighters, 7 Bombers, 10 Infantry, 7 Artillery, 6 Antiaircraft Guns
- 87 Total Axis Playing Pieces (brown): 6 Battleships, 5 Aircraft Carriers, 10 Destroyers, 8 Cruisers, 10 Transports, 8 Submarines, 8 Fighters, 7 Bombers, 12 Infantry, 7 Artillery, 6 Antiaircraft Guns
Game Board
The game board is a map of the Solomon Islands in the South Pacific.
Route to Base
The United States and Japan have route-to-base zones on opposite ends of the game board. These sea zones connect with the waters on the appropriate base card.
Sea Zone
These are marked with the letters A through M for reference. Sea and air units can enter sea zones. Land units can enter sea zones only if they're being carried by destroyers or transports.
Island Zone
Each of these has a name and an airfield capacity. For example, up to 2 airfields can be put on Guadalcanal. Controlling island zones will grant you more reinforcement points.
Victory Track
The first player to reach 15 victory points wins. You earn victory points by controlling airfields and destroying capital ships.
Base Cards (Rabaul and New Caledonia)
These serve as each country's launching point for the Solomon Islands campaign. Each card represents a base that is much further away than a normal sea zone, but moving from its sea zone to its connecting route-to-base sea zone on the board (or vice versa) takes just 1 movement. Your base also houses damaged units for repair and is where you place your reinforcements when you purchase them.
Airfield Markers
If you control the airfields, you control the war. Each undamaged airfield can hold up to 2 air units and is worth 1 victory point per turn.
Damaged Markers
Use these to indicate which airfields are damaged.
Supply Tokens
Use these for building and repairing airfields, repairing damaged sea units, and for expediting the deployment of reinforcements. They can be carried on destroyers and transports. Spent supply tokens are returned to the game box.
Battle Box and Dice
Use the battle box to determine the results of combat. Place the 12 dice in the neck of the battle box, and then slide it in.
Plastic Chips
Use these to save space in overcrowded zones (or if you run out of a particular unit type or supply tokens). Putting a grey chip under a unit shows that there is an additional unit of that unit type in the zone. Putting a red chip under a unit shows that there are an additional five units of that unit type in the hex.
Example: A destroyer with 1 grey chip under it counts as 2 destroyers. An infantry with 1 grey and 1 red chip under it counts as 7 infantry.
Control Markers
Use these during the final phase of each turn to indicate control of the island zones on the game board.
First-Player Token
The player who has this will move each type of unit first and will choose the order of zones when resolving combat.
Advantage Tokens
Use these for optional rules to add a twist to game play. (See Appendix 1: Optional Rules.)
Game Setup
- Decide who will play the Axis and who will play the Allies. Sit on the appropriate side of the board.
- Give the Axis player the first-player token.
- Put your base card adjacent to your route-to-base zone(s).
- Put the victory-track markers on the victory tracks.
- Put 1 Allies airfield marker on Guadalcanal and 1 Axis airfield marker on Bougainville.
- Put an Allies control marker on Guadalcanal and Axis control markers on each of the other islands.
- Put units and supply tokens on the board and base cards as indicated by the printed silhouettes, using plastic chips as needed.
- Put the 12 dice into the battle box.
Units
This section includes detailed information for each unit in the game. Keep any units you aren't using in your game box. Whenever a unit gets destroyed, put it back into the game box.
There are three categories of units in the game: land, sea, and air. Each unit type is defined by the following characteristics:
Cost: This number is the unit's cost in reinforcement points.
Attack: This is how many dice a unit contributes to an attack against the indicated unit category (land, sea, and air). Also, land attack power is used to determine control of island zones.
Special Abilities: Some units have special abilities.
Land Units
Land units can attack only when in an island zone. They can be carried by transport or destroyer across sea zones.
Infantry (Axis: Japan / Allies: United States)
Infantry is the basic land unit of war. They are not effective against air and naval units but are key in capturing and controlling the disputed islands. It is easy to deploy a large number of infantry onto the battlefield.
Cost: 1. Air Attack: 0. Sea Attack: 0. Land Attack: 1.
Artillery (Axis: Type 92 70mm Howitzer / Allies: 105mm Howitzer)
Artillery is the most powerful land unit in the Solomon Islands campaign. It can influence the tide of battle both on land and at sea.
Cost: 2. Air Attack: 0. Sea Attack: 1. Land Attack: 1.
Special Abilities — Ranged Fire: May attack into 1 adjacent sea zone each turn during the Attack Sea Units step of Combat.
Antiaircraft Guns (Axis: 75mm type 88 / Allies: 90mm M1)
Antiaircraft guns provide a powerful umbrella that helps protect your airfields and land units from aircraft assaults.
Cost: 2. Air Attack: 3. Sea Attack: 0. Land Attack: 0.
Sea Units
Each sea unit can move 1 sea zone per Movement phase. They can never move into island zones.
Transport (Axis: Yamazuki Maru class / Allies: Liberty Ship)
Island warfare is all about the transports. Land troops can't maneuver between islands without them. All the other ships and planes are there to make sure these key units can carry the war to the enemy.
Cost: 2. Air Attack: 0. Sea Attack: 0. Land Attack: 0.
Special Abilities — Transportation: A transport has 2 spaces for transporting land units and supplies. Each unit or supply token takes up 1 space.
Submarine (Axis: Kaichu type / Allies: Ray class)
This unit has its own particular way of conducting war. These lone wolves can target specific sea units and cause great problems for an unsuspecting target.
Cost: 4. Air Attack: 0. Sea Attack: 0. Land Attack: 0.
Special Abilities — Torpedo Attack: After moving (or deciding not to move), a submarine makes a 1-die attack on the target of your choice in the same sea zone. This special attack happens during the Movement phase, so a unit damaged or destroyed by this attack will be removed from the zone before it can attack.
Destroyer (Axis: Fubuki class / Allies: Johnston class)
A naval task force with a good ratio of destroyers will always prove to be a deadly force. Intentionally limited in both land and air attack abilities — jobs best left to the cruisers and battleships — destroyers are the infantry in a world where the oceans are the battlefields.
Cost: 5. Air Attack: 1. Sea Attack: 1. Land Attack: 0.
Special Abilities — Makeshift Transport: A destroyer has 1 space for transporting a land unit or supply token. Resilience: Damaged instead of destroyed on a hit roll of 2.
Cruiser (Axis: Takao class / Allies: Portland class)
With the ability to participate in land, sea, and air battles, these warships will have a lasting impact on all three dimensions of this struggle.
Cost: 7. Air Attack: 1. Sea Attack: 2. Land Attack: 1.
Special Abilities — Ranged Fire: May attack into 1 adjacent island zone each turn during the Attack Land Units and/or Airfields step of Combat. Resilience: Damaged instead of destroyed on a hit roll of 2.
Aircraft Carrier (Capital Ship) (Axis: Akagi class / Allies: Wasp class)
Capable of transporting fighter aircraft to any island or sea zone on the battlefield, these capital ships are indeed the heart and soul of the fleet. Protect them well!
Cost: 7. Air Attack: 0. Sea Attack: 0. Land Attack: 0.
Special Abilities — Flight Deck: Up to 2 fighters can land on a friendly aircraft carrier. Capital Ship: Your opponent earns 1 victory point for destroying a capital ship. Resilience: Damaged instead of destroyed on a hit roll of 2.
Battleship (Capital Ship) (Axis: Kongo class / Allies: Iowa class)
These capital warships are the cornerstones of power. The presence of a battleship in a given sea zone will always signal the ultimate effort and center of activity.
Cost: 12. Air Attack: 1. Sea Attack: 3. Land Attack: 2.
Special Abilities — Ranged Fire: May attack into 1 adjacent island zone each turn during the Attack Land Units and/or Airfields step of Combat. Heavy Armor: Ignore the first hit on each battleship each turn (a roll of 1 or 2). Capital Ship: Your opponent earns 1 victory point for destroying a capital ship. Resilience: Damaged instead of destroyed on a hit roll of 2.
Air Units
Fighters and bombers can move into and attack island zones or sea zones. They can land on undamaged airfields you control and on the land zone of your base card. Fighters can also land on your aircraft carriers.
Bomber (Axis: G4M2E Model 24J "Betty" / Allies: B-17 Flying Fortress)
Transporting powerful payloads over great distances, bombers can turn the tide of any battle — be it on land, sea, or air. They will be your powerful fist ready to strike where and when they are needed.
Cost: 5. Air Attack: 1. Sea Attack: 2. Land Attack: 2.
Special Abilities — Range 3: Can move up to 3 zones during Movement and up to 3 zones during Regroup.
Fighter (Axis: A6M2 Zero-Sen "Zero" / Allies: F-6 Hellcat)
Land-based or flying off the decks of carriers, these weapons will dictate the terms of any engagement. In the end, these machines replaced ships as the dominant weapons of the time.
Cost: 3. Air Attack: 2. Sea Attack: 1. Land Attack: 1.
Special Abilities — Range 2: Can move up to 2 zones during Movement and up to 2 zones during Regroup.
Sequence of Play
Axis & Allies: Guadalcanal is played in turns. A turn consists of 3 phases, followed in order.
Turn Order
- Phase 1: Movement
- Phase 2: Combat
- Phase 3: Regroup
Phase 1: Movement
In this phase, the players alternate moving their units by unit type. How an individual unit moves depends on whether it's a sea, air, or land unit.
- Sea unit: May move 1 sea zone.
- Air unit: May move multiple zones, can move into sea and island zones, can move through zones that contain enemy units, and are considered to be "in the air" even if they don't move.
- Land unit: May only be moved by transport or destroyer.
The sea zone on your base card is one move away from the route-to-base sea zone(s) indicated on the board.
Movement Sequence
- Load and Move Transports
- Move Battleships
- Move Aircraft Carriers
- Move Cruisers
- Load and Move Destroyers
- Move and Attack with Submarines
- Move Bombers
- Move Fighters
For each step of the movement sequence, the first player completes that step for his or her own units, and then the other player does the same. Then go to the next step of the sequence.
When you finish a given step, let your opponent know it is his or her turn.
1. Load and Move Transports
You may load land units and supplies from adjacent island zones onto transports. Each transport has 2 spaces for transporting land units and supplies. Each unit or supply token, which may be loaded from different adjacent island zones, takes up 1 space.
Put the units you wish to load on a transport into the sea zone next to the transport. If you're loading multiple transports in the same sea zone, indicate exactly how you're splitting up the units and supplies among the transports. This is important in case any of the transports are destroyed and you need to determine which cargo is lost.
When you move a loaded transport to a different sea zone, keep the loaded units next to the transport.
Transports may not load after moving.
2. Move Battleships
Battleships don't have any special movement rules. They can simply move 1 sea zone.
3. Move Aircraft Carriers
Any fighters that are loaded on the carrier move along with the carrier for free into the new zone it moves into.
4. Move Cruisers
Cruisers don't have any special movement rules. They can simply move 1 sea zone.
5. Load and Move Destroyers
Load and move destroyers like you did transports, except destroyers have less space. Each destroyer has only 1 space for transporting a land unit or supply token.
6. Move and Attack with Submarines
A submarine attack is a special 1-die attack on a sea unit of your choice in the zone the submarine is in. The submarine may make this attack even if it does not move, but it happens after you move, or declare that you're not moving, the submarine. Choose a sea unit in the zone and roll the dice in the battle box. Apply the result of the first die in the box to the target you chose. Casualties are not removed until after all of your Submarines have attacked, so a damaged unit may be attacked again by another submarine. A battleship that ignores a hit from a submarine may not ignore another hit during the combat phase of the same turn (turn it on its side or mark it with a counter to indicate it has already done so). Read more about attacks and how they work under "How to Attack" below.
7. Move Bombers
A bomber moves up to 3 zones.
8. Move Fighters
A fighter moves up to 2 zones.
Examples of Sea Movement
This cruiser moves 1 zone from the U.S. base card to sea zone J.
This battleship can't move through New Georgia from sea zone I to sea zone G, because the island zone is between those zones. Likewise, a sea unit couldn't move from sea zone C to sea zone H, and an air unit would have to move through Santa Isabel to get to sea zone H from sea zone C.
Example of Air Movement
You have a fighter on New Caledonia and you want to move it onto the game board. The first move is into the sea zone on the New Caledonia card, and the second is into sea zone J. Later in the turn, during the Regroup phase, the fighter can move another 2 zones to land, allowing it to land on your Guadalcanal airfield.
Phase 2: Combat
In this phase, resolve combat in each zone that contains opposing units.
Combat Sequence
- Attack Air Units
- Attack Sea Units
- Unload Transports and Destroyers
- Attack Land Units and/or Airfields
For each step of the combat sequence, the first player chooses the order in which zones are resolved. For details on how attacks are resolved, see "How to Attack" below.
1. Attack Air Units
The first player attacks the opposing air units in the zone of his or her choice. Then the other player attacks the opposing air units in that zone. After both players have rolled their attacks, then remove the destroyed air units from the board. Repeat this process for each zone in which air units can be fired upon.
2. Attack Sea Units
Do what you did for air units in step 1, but this time for each sea zone in which sea units can be fired upon. Also, some sea units can be damaged instead of destroyed. Put them on the damaged area of their base cards at the same time you remove destroyed sea units.
Each artillery in an island zone may fire into only 1 adjacent sea zone each turn. The attacker must declare if the artillery is part of the attack for each sea zone adjacent to it (multiple artillery in the same zone may fire into different sea zones). Once declared as part of an attack on a sea zone, an artillery can't attack another sea zone this turn (turn it on its side or mark it with a counter to indicate it has already done so).
3. Unload Transports and Destroyers
The first player may unload units and supply tokens from transports and destroyers onto adjacent island zones. A transport carrying 2 units and/or supply tokens may unload them onto different island zones. The other player then does the same.
4. Attack Land Units and/or Airfields
Do what you did for air and sea units in steps 1 and 2, but this time for each island zone in which land units and/or airfields can be fired upon. For each of your air units and sea units participating in the attack (not land units), decide whether it will attack the enemy's land units or airfields. It can't attack both.
When attacking airfields, the attack is made with the combined attack power of each unit chosen to attack the airfields in the island zone. Ignore the unit types listed on the neck of the battle box when attacking airfields. Simply look at a number of dice in a row — starting with the outside tip of the neck — equal to the attack power. For every 2 hits scored on those dice (a roll of 1 or 2) damage one enemy-controlled airfield in the zone. Place a damaged marker on the airfield marker to indicate that it is damaged (an airfield can never have more than 1 damaged marker).
Each cruiser or battleship may fire into only 1 adjacent island zone each turn. The attacker must declare if the cruiser or battleship is part of the attack for each island zone adjacent to it (multiple cruisers and/or battleships in the same zone may fire into different island zones). Once declared as part of an attack on an island zone, a cruiser or battleship can't attack another island zone this turn (turn it on its side or mark it with a counter to indicate it has already done so).
How to Attack
Use the following sequence for resolving attacks against each category of unit — air, sea, and land:
- Determine Total Attack Power
- Roll Dice in the Battle Box
- Declare Your Hits
1. Determine Total Attack Power
Add up all the attack powers of the attacking units. That is your total attack power and determines how many dice you will be rolling for that attack.
Each unit has 3 attack numbers. Each number tells you how many dice it rolls against the indicated category of unit — land, sea, and air.
Example: A battleship has an air attack power of 1. This means it will add 1 die to your air attack against all the enemy air units in the same zone as the battleship. The battleship also has a sea attack power of 3, so it will also add 3 dice to your attack against the enemy sea units in the same zone. Finally, the battleship has a land attack power of 2, so when it is time to attack land units in an adjacent island zone, you may add its 2 dice to your attack in that zone.
A battleship or cruiser may add its land attack power to an attack on 1 adjacent island zone per turn. Similarly, an artillery in an island zone may add its sea attack power to an attack on 1 adjacent sea zone per turn. In either case, this may be done even if there are no friendly units in the attacked zone. Other units add their attack powers only to attacks in their own zones.
2. Roll Dice in the Battle Box
Make sure all 12 dice are in the battle box and the neck is fully inserted. Shake the box to randomize the dice, tilt the box slightly downward, and then pull the neck out. The dice will come out in a straight line in the neck.
If you have an attack of greater than 12 dice, you'll need to use the box again until you have rolled enough dice.
3. Declare Your Hits
Starting with the first die at the tip of the neck, check a number of dice in a row equal to the power of the attack. Each die result of 1 or 2 is a hit. The inside of the neck of the box is numbered to make this easier.
Tell your opponent which specific unit types are hit by reading them off from slot 1 and counting up. To do this, look at the outside portion of the neck of the box where your hit is positioned. Then read off the unit type indicated on that slot for the category of unit you are attacking (air, sea, or land).
Hitting Units the Enemy Doesn't Have
During an attack, it's possible you'll hit a unit type your opponent doesn't have in that zone or a type for which all units in that zone have already been destroyed. In that case, the hit still counts, but it will hit a different unit type in that category.
To find out what it hits, look at the unit types listed on the neck of the battle box. Starting with the unit listed for slot 1, look to see if there is an undestroyed enemy unit of that type present in the zone. If so, the hit goes to that unit. Keep reading up the neck from slot to slot until you reach a type of unit in that zone that can take the hit.
Battle Box Example: Let's say you attack with a total attack power of 8, and you are firing at air units. Since it is an attack with 8 dice, you only need to pay attention to the first 8 dice in the neck of the box. The first hit was with the first die rolled! Look at the neck of the box in the slot where that hit is located. There are three units listed there: fighter, destroyer, and infantry. Since you are firing at air units, this hit is going to be on a fighter. Let your opponent know about it so he will remove it from the board after firing at air is finished. This hit is also on a fighter. This hit is on a bomber! Nice shooting.
Loss of Cargo
If a transport or destroyer gets hit, the units and supply tokens it was carrying are destroyed.
If a carrier gets hit, the fighters that were on it are not destroyed. They stay in that sea zone but will need to find a new place to land during the Regroup phase.
When assigning hits, on a result of a 2 the defender chooses which unit of the appropriate type actually takes the hit. On a 1, the attacker chooses. This is important in cases involving multiple transports or destroyers carrying different units. However, if there are multiple battleships involved, 1 hit will be ignored for each one before any hits are assigned to them.
Example: You make an attack and roll a 1 in the transport slot of the dice box. Your opponent has 2 transports in the zone. One of them has no units on it, and the other has 2 supplies. You can now choose to assign the hit to the one with 2 supplies because you rolled a 1. If it was a 2, the opponent could have it go to the empty transport.
Damaging and Destroying Units
Most units in the game are destroyed on any hit of a 1 or 2. When a unit is destroyed, you remove it from the board at the end of the combat step in that particular zone.
Destroyers, cruisers, battleships, and aircraft carriers have the ability to sustain damage but not be completely destroyed. If any of these units are hit by a roll of a 1, then they are destroyed just like any other unit. However, if they are hit by a roll of a 2, then instead of being destroyed, they are damaged.
When a unit is damaged, instead of returning it to the game box when you are removing casualties, place it on the damaged area of your home base card. This represents the unit returning for repairs. The unit will remain there until you spend 1 supply token during the Regroup phase to repair it.
When a unit is damaged in combat, it is still possible for it to be destroyed during the same attack. If the damaged unit is hit with a second hit (be it 2 or 1), then it is destroyed. Hits are applied to undamaged units before damaged ones, so this will only happen when all the other units of the same type as the damaged unit have also been damaged or destroyed.
Example of a Sea Attack
You are making a 10-power attack in a sea zone containing the following enemy sea units: 2 destroyers, 1 cruiser, 1 battleship, and 2 transports. One of the transports has a supply token and 1 artillery on it, and one of the destroyers is carrying 1 infantry.
You shake up the battle box and roll across 10 slots. Okay, nice rolling! Let's assign these hits. Start from the first slot and make your way up, only counting the first 10 dice.
- Slot 1: "2" — Damage a destroyer. Your opponent chooses which one because you rolled a 2. He chooses the one without the infantry, since the infantry would be destroyed otherwise.
- Slot 2: "1" — Destroy the cruiser!
- Slot 3: "1" — Hit the battleship, but due to its special ability of ignoring the first hit per turn, this hit is ignored.
- Slot 4: "1" — This hit would destroy an aircraft carrier, but there isn't one, so the hit is assigned to the first unit available listed on the battle box, starting with slot 1 at the tip of the neck. It hits the undamaged destroyer and destroys it because it was a roll of a "1." This also destroys the infantry on it.
- Slot 5: "2" — Hit and destroy a transport of the defender's choice. He chooses the one with nothing in it.
- Slot 6: "3" — Miss.
- Slot 7: "2" — This hits the damaged destroyer, because it is the only destroyer left, destroying it!
- Slot 8: "6" — Miss.
- Slot 9: "3" — Miss.
- Slot 10: "2" — This would hit and damage an aircraft carrier, but there isn't one, so the hit is assigned to the first unit available listed from left to right on the battle box neck, starting with slot 1. The first listed unit available is found in slot 3 — the battleship. The battleship is damaged.
The end result is that you damaged a battleship, sending it home for repairs, and destroyed everything else except a lone transport delivering an artillery and supply.
Phase 3: Regroup
This is the final phase of the turn.
Regroup Sequence
- Determine Control of Island Zones
- Land Air Units
- Build Airfields
- Reinforce, Repair, and Deploy
- Score Victory Points and Check for Victory
- Pass the First-Player Marker
1. Determine Control of Island Zones
For each island zone on the game board (you can't lose control of your base island zone), total up the players' respective land attack powers of land units in the zone to determine who controls it. Land power is determined by the number of land attack dice the units in that zone would roll. For example, an artillery has 1 land attack power, and an antiaircraft gun has 0 land attack power. Air units and supply tokens do not contribute to controlling an island zone.
If you have at least 1 land unit in the island zone, your adjacent cruisers and battleships also exert their land attack power on that zone. Unlike firing on island zones, battleships and cruisers can exert their attack power on all adjacent island zones at once for the purpose of determining control.
Whichever player has the highest total land attack power in the zone controls it, but not necessarily any airfields on it (see below). In a tie, the person who has control keeps it. Mark the island zone with the appropriate control marker.
Example: The Allies player unloads 5 infantry into Axis-controlled New Georgia, where the Axis player controls an airfield and 4 infantry. After combat, the Allies player has 4 infantry remaining, and the Axis player has 2. The Axis player loses control of the island zone, but retains control of the airfield because there are still Axis units on the island.
Capturing Airfields and Supplies
If there are no enemy land units remaining in an island zone you control during this step, capture all enemy airfields (flip them over, retaining any damaged markers) and supply tokens (replace them with your own) in that zone. Treat them as if you had built them. You can spend the supplies and land air units on the airfields (if they are undamaged) in the same turn you capture them. You will also score the victory points for the undamaged airfields.
Because you have to eliminate all opposing units on an island to capture any enemy-controlled airfields there, it's possible for a player to control an island zone but not one or both of the airfields on it.
2. Land Air Units
Fighters and bombers must land now. Bombers may move up to 3 zones and can land only on their home base or on any controlled airfield. Fighters may move up to 2 zones and can land on their home base, a controlled airfield, or on a friendly aircraft carrier. Any air unit that can't land is destroyed.
An air unit can't land on a damaged or enemy-controlled airfield, even if it didn't move from that island zone this turn.
Landing Capacities
- Home Base (Rabaul or New Caledonia): Any number of air units
- Airfield: 2 air units per airfield marker
- Aircraft Carrier: 2 fighters (no bombers)
3. Build Airfields
Starting with the first player, players may build airfields. To build an airfield, spend 3 supply tokens you control on an island zone that has an empty airfield slot. Place an airfield marker on that island zone, with the appropriate side up. You control the airfield you build, even if you don't control that island.
Guadalcanal, Bougainville, and New Georgia can each have up to 2 airfields. Santa Isabel, Malaita, and Choseul can each have no more than 1 airfield.
On each island that can hold 2 airfield markers, it's possible for each player to control an airfield marker on the same island.
4. Reinforce, Repair, and Deploy
In this step, players will bolster their forces, repair their damaged units, and stage their attack for the following turn.
Reinforce
Each player gets 10 reinforcement points to spend each turn plus 4 points per island zone on the game board (not on the base cards) he or she controls. Thus, a player controlling 3 islands would get 22 reinforcement points.
Starting with the first player, spend reinforcement points. Put any reinforcements bought onto the appropriate base card, with land units, air units, and supply tokens going on the land zone and sea units going in the sea zone.
If you have any new or existing transports, destroyers, and/or aircraft carriers in the sea zone, you may immediately load new and/or existing units onto them from your base card.
Any reinforcement points you do not spend are lost. Spend them wisely!
Reinforcement Costs — Infantry: 1. Artillery: 2. Antiaircraft Gun: 2. Transport: 2. Submarine: 4. Destroyer: 5. Cruiser: 7. Aircraft Carrier: 7. Battleship: 12. Bomber: 5. Fighter: 3. Supply Token: 2.
Repair
Starting with the first player, each player may repair airfields and sea units.
You may spend 1 supply token at your home base to repair a damaged sea unit there. Put the repaired unit into the sea zone on your base card, and you may then load units and/or supply tokens onto it (if applicable), as with a new sea unit. You may do this for each damaged sea unit you control.
You may spend 1 supply token on an island zone to repair a damaged airfield you control on that island. Remove the damaged marker from the airfield marker. You may do this for each damaged airfield you control.
Example: You have 1 battleship, 1 transport, and 3 supply tokens at your base at New Caledonia. Your transport is loaded with 2 infantry. You decide to spend 1 supply token to put the transport (with its cargo) into sea zone J, and then spend another 2 supplies to put the battleship into sea zone I.
Deploy
Starting with the first player, players may deploy any or all of their sea units from their base cards directly onto the game board by spending supply tokens at the home base.
The sea zones on the sides of the board have deployment numbers on them. You may deploy each sea unit from your home base card to one of those zones on your side of the board by spending a number of supply tokens equal to the deployment number in that zone.
Any units loaded on that sea unit move with it at no extra supply cost. This can be an effective way for getting troops or fighters into combat where they otherwise wouldn't reach.
5. Score Victory Points and Check for Victory
Each player scores 1 victory point for each undamaged airfield he or she controls. Adjust the victory tracks accordingly.
When a player reaches 15 victory points during this step, that player wins the game. (If a player goes to 15 points or above during the Combat phase because he or she destroyed a capital ship, that player doesn't win the game until this step.)
If both players reach 15 victory points in the same turn, the player with more victory points wins the game. If they are tied, the game continues until the tie is broken during this step.
6. Pass the First-Player Marker
The player with the first-player marker passes it to the other player. That player is now the first player. Start the next turn of the game.
Appendix 1: Optional Rules
Once you've played a few games, you may want to try out one or both of the two optional rules: advantages and hidden movement.
Advantages
Axis & Allies: Guadalcanal comes with 16 advantage tokens — 8 per player — that you may use to add a twist to your games. You can spend an advantage token at the appropriate time to generate the effect of the advantage. Once expended, the token can't be used again for the rest of the game.
You may choose to include all the advantages in a single game, or use only some of them. Each player should get the same number of tokens, though.
Axis Advantages
- Command Decision (1 token) — When used: At the beginning of Combat, before any attacks are made. Effect: Choose a zone and choose air, sea, or land. After both players make their attacks against the chosen category of unit in the chosen zone and take casualties, both players attack again against that unit category in that zone.
- Banzai Charge (1 token) — When used: During Combat, before the Attack Land Units and/or Airfields step begins. Effect: Choose an island zone. Each 3 you roll against land units counts as a hit in that zone this turn.
- Night Fighting (2 tokens) — When used: During Combat, before the Attack Sea Units step begins. Effect: Choose a sea zone. Each 2 you roll against sea units in that zone this turn counts as a "destroy" hit, just like rolling a 1.
- Quick Drop (2 tokens) — When used: At the end of the Movement phase. Effect: Choose a sea zone. You may unload all your destroyers and transports in that zone onto an adjacent island zone.
- Superior Fighters (2 tokens) — When used: During Movement, before you move your fighters. Effect: Your fighters may move up to 3 zones during Movement and Regroup this turn instead of up to 2.
- PT Boats (2 tokens) — When used: During Combat, before the Attack Sea Units step begins. Effect: Place this token in a sea zone where you have at least one unit. This token counts as a sea unit — a PT boat — that has 1 sea attack power and may move in the Load and Move Destroyers step of the Movement phase. If your opponent attacks your sea units in the zone with your PT boat and hits a type of unit you don't have there, your PT boat takes that hit and is destroyed. (This token stays in play until hit.)
- Coast Watchers (2 tokens) — When used: During Movement, before moving a specific unit type of your choice. Effect: You do not move that unit type until after all other units have moved this turn.
Allies Tokens
- Command Decision (1 token) — When used: Use at the beginning of Combat, before any attacks are made. Effect: Choose a zone and choose air, sea, or land. After both players make their attacks against the chosen category of unit in the chosen zone and take casualties, both players attack again against that unit category in that zone.
- Good Logistics (1 token) — When used: During Regroup, before you buy reinforcements. Effect: Whenever you buy a supply or artillery this turn, get a second one of the same type free.
- Amphibious Assault (2 tokens) — When used: During Combat, between the Unload Transports and Destroyers step and the Attack Land Units step. Effect: Make an attack against the land units in 1 island zone of your choice with the units you unloaded there this turn. Resolve the effects of this extra attack immediately, without the enemy returning fire.
Hidden Movement
A factor to consider in World War 2 naval warfare was that often unit movements went undetected. Smart commanders could keep the enemy second guessing about their true objectives.
If you'd like to simulate this effect, replace the steps of the Movement phase with the following steps:
- Load Transports and Destroyers — Starting with the first player, each player loads his or her transports and destroyers, using the normal rules.
- Hidden Sea Movement — Both players secretly write down the movements of their sea units on paper by indicating the letter of the sea zone the units originated from, and the letter of the sea zone they are moving to. If you want to split up a force in one zone and have it move to two separate places, simply write the units that are splitting off and their new destination. Once both players are done, reveal your plans and move your units as you pre-determined.
- Attack with Submarines — Starting with the first player, each player may attack with his or her submarines.
- Move Bombers — Starting with the first player, each player moves his or her bombers.
- Move Fighters — Starting with the first player, each player moves his or her fighters.
Appendix 2: Battle Box Results Chart
For reference, the slot lineup on the neck of the battle box lists a unit type for each slot, used to determine which unit type takes a hit when the defender has none of the unit type the attacker rolled against — see "Hitting Units the Enemy Doesn't Have" above.
Appendix 3: Designer's Notes
A Guadalcanal Diary
Some of you know that my father was an infantryman in the South Pacific and fought in the Solomon Islands as well as New Guinea and the Philippines. I usually don't miss an opportunity to write or talk about this whenever I have an audience. I'm sure my pride in my dad comes shining through each time.
On the surface, the South Pacific was nothing short of paradise. Think of what it must have been like.... An 18-year-old kid from New England, back in the 1940s when the world was a much bigger place, was getting a tropical vacation all paid for by Uncle Sam. All the transportation, food, and ammo you would need would be provided. There were white sandy beaches, palm trees, and lush jungles. It was just like in the movies. It must have been confusing when the enemy artillery and bombs began to fall.
My father kept a wartime diary of his experiences. His diary was just a small book with probably two hundred or so, now yellowed pages. Nonetheless, it is a big book in so many other ways. It is amazing that it has survived after so much and for so long. Many of the pages show wear. On a couple of them, rain drops that fell many years ago formed blue spots where the ink and water met. They serve as a testimony of a rainy day on Guadalcanal. This small book is now one of my most cherished possessions.
Axis & Allies®: Guadalcanal is indeed a very special game to me. It of course takes on a deeper meaning. The islands and the names on the map take on more significance than usual. They now have a more personal context. Guadalcanal is a place where Japanese warships and planes bombarded my father's position. A quote from his diary (these quotes appear as they were, with the raw language of wartime):
"At night and especially under the full moon, the bombers came over and dropped their bombs and the Jap destroyers came down the slot and poured their huge shells into us. A shell coming in sounded just like a freight train."
The island of Rendova and the town of Munda, both part of the New Georgia Islands group, were places where Corporal Harris made two of what would prove to be many beachheads.
"It was dawn when we went over the side of our transport, down the landing nets, and into our Higgins boats. Before we headed in, our ships bombarded the beach with 16-inch shells and scores of rockets. Our planes were swarming in over our heads strafing the beach. The thoughts running through my head were: 'This is it.... When that ramp goes down, you'll probably run right into a Jap machine gun nest. If you live through today, nothing can ever worry you again, because you will be living on borrowed time.'"
Being bombed by enemy aircraft is always, I'm sure, a terrifying experience. For the Americans, new to the war in the Pacific, this happened with a certain painful regularity. The Guadalcanal and Solomon Islands campaigns were among the few campaigns in which the two opposing forces could be considered on an equal par. After this battle the Japanese would never again be equal to the American air force, but for the moment the contest for air supremacy had not yet been resolved.
"I was looking up to what was thought to be low-flying American bombers. Suddenly I spotted the Jap rising sun markings. That's when all hell broke loose. The bombers came flying in low, hopping over a small mountain that hid their approach. The planes were strafing and bombing our beachhead. They were doing a devastating job of blowing up everything. In addition to the blast of the bombs, the stacks of ammunition and shells were exploding. The drums of gasoline were bursting into flaming liquid, shooting high into the air. Hundreds of men were running every which way and being cut down by the explosions."
Manning the jungle perimeter during the rainy season, when the nights were so black that one could not see his own hand in front of his face, the sounds of the killing were muffled by the falling rain and everything seemed to move in slow motion.
"We tied the empty ration cans together and strung them out and around our foxholes so if the Japs were moving around us in the dark they would rattle the cans and then we could open up with our rifles and machine guns. This happened almost every night because the Japs were strongly entrenched in the jungle and were all around us. They tried to infiltrate our perimeter at night and bayonet our men. You could swear that every bush around you was moving with a Jap behind it."
The diary also speaks of more uplifting events. It talks about when his troop train crossed the country from the east coast to the west coast and how at every small town and railroad crossing local people came out to wave at the soldiers . . . how they tossed cases of cold beer and cola onto the slow passing train . . . how there were more cookies and cakes then they could eat and more books and magazines they could ever read.
The diary talks about crossing the Pacific on an unescorted troop ship filled to capacity with 5,000 people and tons of equipment badly needed on Guadalcanal. Upon entering a channel to the island of Espiritu Santo the ship suddenly shuddered and shook. Not once but twice. The ship had hit two mines in the harbor and sunk within minutes. With but a handful of casualties, 5,000 U.S. Army troops found themselves shipwrecked with no equipment and late for their scheduled appointment at Guadalcanal to join the Marines already fighting there.
Axis & Allies: Guadalcanal and the other games in the Axis & Allies series are what could be called an artistic interpretation of the historical battles they represent. I use the word artistic because I'm a designer and sincerely see games to be an art form. If these games were paintings they would have been painted with a broad brush indeed. Nonetheless, they bring information and often shine a bright light on the subject.
All the games are a result of a sincere effort on my part to recapture the significance and meaning of the struggles they portray. It is my hope that they honor your friends and relatives that may have participated in these epic events.
It is my hope that once you have played Axis & Allies: Guadalcanal, you will have a better understanding and appreciation for what occurred on that great battlefield of ocean and jungle. I think this game offers something different from the written text of a dedicated book on the subject. When such a text is combined with the playing of this game, a greater insight of the subject can be had. Historical games permit you to be in the drivers seat and steer the events. You can experiment with them. You can study "what ifs." You are in charge!
I for one have learned much about the struggle for the Solomon Islands while designing this game. This has been a personal voyage of discovery as well. Being better informed, I walk away from this project even more proud of my father than I was before. How could that be possible? Enjoy!
— Larry Harris