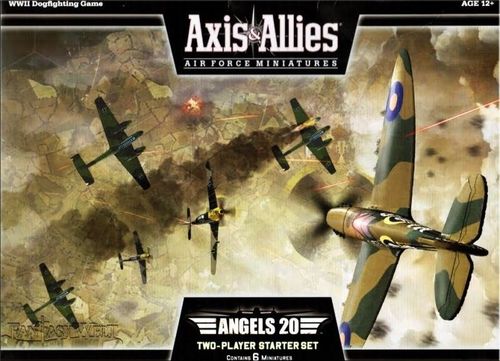
Axis & Allies Air Force Miniatures: Angels 20
Axis & Allies Air Force Miniatures: Angels 20 Rulebook
Table of Contents
Table of Contents
Miniatures Game Rules
In a miniatures battle, a flight (or group) of Axis aircraft fights it out against a flight of Allied aircraft. The winner is the player whose flight either shoots down the aircraft in the enemy flight or forces them to retreat from the battle.
Setting Up
To start playing the Axis & Allies Air Force Miniatures game, follow these steps:
- Choose a Scenario. For your first game, use the Battle of Britain: Dogfight scenario below. For future games, try out different Battle of Britain scenarios (see Scenarios) or use the Standard Scenario.
- Set Up the Battle Map. Lay out the map sections as shown for your scenario.
- Choose Sides. Decide who will be the Allied player and who will be the Axis player.
- Deploy Aircraft. Place the aircraft miniatures listed in the scenario in the positions indicated on the scenario set-up map. Find the correct aircraft stat cards and take a moment to read them so that you know what your planes can do. Keep the stat cards in front of you during the battle.
- Start Playing! Follow the Sequence of Play below.
Battle of Britain: Dogfight
During the Battle of Britain, the mission of the British Spitfire fighters was to take on the German Messerschmitts, sweeping the Bf 109s out of the way so that pilots in Hurricanes could go directly after the German bombers. This scenario is a simple contest of air superiority: Defeat the enemy fighters while taking the least amount of damage possible.
Aircraft Flights: British: Use the Spitfire Mk I Ace and the Hurricane Mk I. German: Use the Bf 109E Ace and the Bf 109E Wingman.
The Battle Map: Set up the map sections and deploy aircraft as shown.
The half-hexes along the edges of the battle map aren't in play—you can't set up in a half-hex or move into one. Whole hexes formed by two half-hexes in adjacent map sections are treated as normal hexes. You can move an aircraft off the map, but if you do, that aircraft is considered to have retreated from the battle and contributes to your opponent's victory points.
Winning the Scenario: The first player to shoot down an enemy aircraft or force an enemy aircraft to retreat from the battle during a game turn wins the game.
Starter vs. Booster Packs: This Starter includes six British and German aircraft for fighting out different scenarios based on the Battle of Britain. However, you can find 25 more aircraft miniatures—including famous US, Soviet, French, Italian, and Japanese fighters—in the Axis & Allies Air Force Miniatures Angels Twenty booster packs. If you're collecting miniatures from the booster set, you can use them in the Standard Scenario, or construct your own scenarios.
Aircraft Stats
In a miniatures battle, a flight (or group) of Axis aircraft fights it out against a flight of Allied aircraft. The winner is the player whose flight either shoots down the aircraft in the enemy flight or forces them to retreat from the battle.
How to Read a Stat Card
A sample stat card shows an aircraft's name, nationality, pilot quality, cost, normal speed and high speed, attack values at ranges 1–3, armor, vital armor, hit points, and its Turn, Roll, Climb, and Dive maneuver bonuses, along with any special abilities, its set icon, and its collector number.
Name: This is the name of the aircraft.
Nationality: Each aircraft belongs to a specific Axis or Allied country, shown by the nationality symbol.
Year (appears on card back): The year that this aircraft became available. For some scenarios, you can't use aircraft that weren't available at that time.
Type (appears on card back): Most aircraft in the game are fighters, heavy fighters, or naval fighters. Other types include bombers of various sizes.
Cost: The number of points you pay to add the aircraft to your flight.
Pilot: The quality of the aircraft's pilot. From worst to best, pilot quality is Poor, Average, Veteran, or Ace. Pilot quality influences your aircraft attacks.
Normal Speed: The speed (in hexes) the aircraft can choose for its move while remaining at normal speed. For example, "2–4" means that the aircraft can move 2, 3, or 4 hexes in a game turn at normal speed.
High Speed: The speed (in hexes) the aircraft can choose for its move if it chooses to move at high speed. For example, "5" means that the plane can move 5 hexes in a game turn, but it's at high speed. Planes moving at high speed don't maneuver as well as planes at lower speeds.
Climb: The aircraft's bonus to maneuver checks for Climb maneuvers.
Dive: The aircraft's bonus to maneuver checks for Dive maneuvers.
Turn: The aircraft's bonus to maneuver checks for Turn maneuvers.
Roll: The aircraft's bonus to maneuver checks for Roll maneuvers.
Armor: The number of hits that an attacker needs to roll with a single attack to deal 1 point of damage to this aircraft.
Vital Armor: The number of hits that an attacker needs to roll with a single attack to destroy this aircraft outright.
Hit Points: How many points of damage it takes to destroy the aircraft. For example, an aircraft with 3 hit points is destroyed when it has accumulated 3 points of damage (unless of course it's destroyed outright by a number of hits that equals or exceeds its vital armor rating).
Attack Values: The number of attack dice you roll when this aircraft attacks. The number varies for attacks at a range of 1, 2, and 3 hexes.
Special Abilities: Most aircraft have one or more special abilities.
Flavor Text (appears on card back): A brief description of the aircraft's history or noteworthy facts about it.
Set Icon/Collector Number: The set icon tells you which set a miniature belongs to. The collector number lists the aircraft's order in the set and how many total miniatures there are in that set.
Sequence of Play
The game is played in game turns. During each game turn, players follow a sequence of play consisting of the following phases and steps:
A. Initiative Phase
Roll for initiative. The winner of the roll gets to move second—which is usually an advantage in this game—and is the "second player" for the game turn. The loser of the roll has to move first, and is the "first player" for the game turn.
B. Movement Phase
- The first player chooses one of his or her aircraft to activate and conducts its move.
- The second player chooses one of his or her aircraft to activate and conducts its move, unless the second player's aircraft are outnumbered (see Unequal Numbers below).
- Alternate activating aircraft until all aircraft remaining in the game have moved this game turn.
- Mark each aircraft that's finished its move with a "Move Finished" marker.
C. Attack Phase
- The first player chooses one of his or her aircraft to attack with and resolves its attack.
- The second player chooses one of his or her aircraft to attack with and resolves its attack.
- Alternate attacking with your aircraft until all attacks are resolved.
- Mark each aircraft that's made an attack with a "Fire Resolved" marker.
D. End of Turn
- Score victory points.
- Pick up "Move Finished" and "Fire Resolved" markers.
Multiplayer Games: If you have more than one player on a side, then "first player" or "second player" means "first side" or "second side." Each player on a side moves or attacks with one plane when that side moves or attacks. If one player on a side controls more aircraft than other players on the same side, then the player with fewer aircraft moves his first plane when his partner moves the first plane—he simply "runs out" of planes to move or attack with before his partner does.
Unequal Numbers
When one side in the battle outnumbers the other side, the Movement phase is a little different.
You win initiative and have more planes: Your opponent moves a plane first, then you move a plane. Alternate normally. When your opponent runs out of planes to move, keep activating your planes and moving them one at a time until you've moved all your planes.
You win initiative and have fewer planes: Your opponent activates and moves planes one at a time until you have more planes left to move than your opponent does. You then move your first plane of the game turn. Alternate normally after that.
To put it another way, if you win initiative, you always get to be the last aircraft to move in the Movement phase, regardless of numbers. If you lose initiative, you always have to be the first aircraft to move.
Unequal numbers have no effect on attack resolution—the first player chooses an aircraft to attack with, and attacks alternate normally.
Initiative Phase
The Initiative phase determines the order in which players act each game turn. Each player makes an initiative roll by rolling two dice and adding any bonuses that apply. (Some aircraft have special abilities that provide initiative bonuses in different situations.) For multiplayer games, one player per side rolls initiative.
The player with the better result wins initiative. If you and your opponent have the same initiative total, the player with the better initiative bonus wins initiative. If it's still tied, roll again until one player wins.
If you win initiative, you're the second player for the game turn. Your opponent is the first player. Moving second is an advantage, since you can see where your opponent moved his or her aircraft and position yourself to avoid attack or make an attack of your own. However, moving first means that your attacks are resolved first, so losing initiative isn't always bad.
Movement Phase
You'll move each aircraft in your flight each game turn. Move them one at a time, alternating with your opponent.
To move an aircraft, choose a speed in the moving aircraft's speed or high-speed range; for example, an aircraft with Speed 2–3/High Speed 4 can move 2 or 3 hexes at normal speed, or 4 hexes at high speed. A moving aircraft usually moves into the hex its nose is pointed at, but you can turn after moving into a new hex or attempt a maneuver check to execute various tactical maneuvers such as Breaks, Tight Turns, or Power Dives (see Difficult Maneuvers).
Place a "Move Finished" marker by the aircraft's base when you're finished with its movement.
Attack Phase
Take turns attacking with your aircraft, one aircraft at a time.
You may attack enemy aircraft using your aircrafts' attack values (see Attack and Defense). Most planes have range 3 for their attacks; the closer you are, the more attack dice you get to roll. An aircraft can't attack an enemy in its own hex. You don't have to attack, but it's almost always better to take your shots when you get them.
To resolve an attack, declare which of your aircraft is firing, which enemy aircraft it's attacking, and make an attack roll. Alternate resolving attacks with your opponent. If you decline to attack, you can't make any more attacks in this phase. Each aircraft can only attack once per game turn.
Aircraft damaged or destroyed by an enemy attack are affected immediately, and may be destroyed before they get to attack.
End of Turn
Check to see if you've met the victory conditions for the scenario you're playing.
Victory Points: Some scenarios (for example, the Standard Scenario) award victory points for destroying enemy aircraft or forcing them to retreat from the battle (usually by flying off a map edge).
| Result | Victory Points |
|---|---|
| Enemy aircraft destroyed | VP = aircraft cost |
| Enemy aircraft retreats | VP = 1/2 aircraft cost |
If your scenario uses victory points to track victory, you win at the end of the game turn when your score reaches or exceeds the total specified in the scenario and you have more points than your opponent.
Movement and Position
The hexes on the battle map mark the position and facing of each aircraft. Getting into a strong firing position without giving your opponent a good shot at you is the key to success in a dogfight. Here's what you need to know about how aircraft move on the battle map.
Aircraft Must Move: Each aircraft in the battle moves once each game turn during the Movement phase. You must move each aircraft each game turn.
Alternate Movement: Move aircraft one at a time during the Movement phase. The first player picks one of his or her aircraft to activate, and conducts its move. Then the second player picks one of his or her own aircraft to activate, and conducts its move.
Facing
The direction that an aircraft is pointed is its facing. An aircraft always faces one of the six sides of its hex; its facing is the side its nose is currently pointed at. Aircraft can't change facing unless they turn or perform a maneuver.
Clock-face Directions: If you need to identify which hex side you're referring to, you can use clock-face terms to be precise. The six hex sides around your aircraft are 12 o'clock (straight ahead), 2 o'clock (ahead right), 4 o'clock (behind right), 6 o'clock (dead behind), 8 o'clock (behind left), and 10 o'clock (ahead left).
Altitude
Aircraft can be at one of six different altitude bands: altitude 1, 2, 3, 4, 5, or 6. The higher your altitude number, the higher your aircraft. Your scenario provides you with a beginning altitude, but your altitude changes through the battle as your aircraft climbs or dives.
Optional Rule: Midair Collision. Midair collisions were not uncommon in large engagements. If two aircraft end up in the same hex and at the same altitude at the end of the Movement phase, each aircraft rolls a die. A roll of 1 is a possible collision (1 or 2 for a poor pilot). If both planes involved roll possible collisions, the planes collide. Both planes are immediately destroyed.
Managing the Battle Map
The half-hexes on the edge of the map aren't in play. At any time during play, any player may adjust the positions of all aircraft on the battle map toward the center of the map (usually because a moving plane is about to fly off the map sheet).
To adjust positions, move all aircraft on the map the same number of hexes in the same direction, keeping each plane's orientation the same. If you can't adjust the map to give a plane room to maneuver without pushing another plane closer to the map edge than the moving plane's current position, then you can't adjust the map—the moving plane must maneuver to remain on the board.
Planes that exit the battle map are considered to have retreated from the battle, and are removed from the game.
If you and your opponent agree, you can also add or shift map sections to put a fresh map in front of a plane that's about to move off the board.
Moving Aircraft
Aircraft move a number of hexes equal to the speed you choose. If you don't turn or maneuver, your aircraft simply moves straight ahead. In one game turn, an aircraft's movement can include any number of normal turns and one difficult maneuver.
Choose Speed: An aircraft moves a number of hexes equal to the speed you announce. When you begin moving an aircraft, choose a speed from the aircraft's speed or high-speed ranges, which appear on its stat card. High speed affects an aircraft's ability to maneuver.
Normal Movement: Aircraft can move straight or perform normal turns as they move. An aircraft at normal speed can turn once per hex it enters; an aircraft at high speed can't turn or maneuver in consecutive hexes.
Turn (normal): You may perform a normal turn of 1 hex side (60 degrees) each time you enter a hex, unless you attempt a difficult maneuver in that hex. You can't turn before you start moving for the game turn.
Difficult Maneuvers: Once per move, an aircraft can attempt a difficult maneuver when it would leave a hex. A difficult maneuver requires a maneuver check.
High Speed: If you are at high speed, you can't turn or maneuver in consecutive hexes.
Maneuver Checks
Roll two dice + maneuver bonus. Success = 10 or higher at normal speed, or 13 or higher at high speed.
To execute a difficult maneuver, you must succeed on a maneuver check. To make a check:
- Announce the maneuver you're attempting when you would leave the preceding hex.
- Determine the check's success number: 10 if you chose a speed in your aircraft's normal speed range, or 13 if you chose high speed this game turn.
- Roll two dice and add them together. Add your aircraft's relevant maneuver bonus—Climb, Dive, Roll, or Turn—depending on the type of maneuver you're attempting.
- Your check succeeds if your result equals or beats the success number. Your check fails if your result is less than the success number.
Difficult Maneuvers
In addition to normal movement, aircraft can attempt difficult maneuvers. Difficult maneuvers are divided into climbs, dives, rolls, and turns. You can't attempt a difficult maneuver and perform a normal turn in the same hex (but you can move into a hex, make a normal turn, and then announce an attempt to perform a difficult maneuver in the next hex you're moving into).
Difficult maneuvers include:
Break (Roll) — Make a Roll maneuver check. Success: Sideslip to the hex at your 10 o'clock or 2 o'clock and turn 1 hex side (60 degrees). Failure: Move straight 1 hex.
Barrel Roll — Make a Roll maneuver check. Success: Sideslip to the hex at your 10 o'clock or 2 o'clock. Failure: Move straight 1 hex.
Climb — Make a Climb maneuver check. Success: Move straight 1 hex and increase altitude by 1. Failure: Move straight 1 hex.
Power Dive — Make a Dive maneuver check. Success: Move straight 1 hex and decrease altitude by 1 or 2. Failure: Move straight 1 hex and decrease altitude by 1.
Split S (Roll) — Make a Roll maneuver check. Success: Move straight 1 hex, decrease altitude by 1, and turn 2 or 3 hex sides (120 or 180 degrees). Failure: Move straight 1 hex and decrease altitude by 1.
Scissors (Turn) — Make a Turn maneuver check. Success: Remain in current hex, counting it as 1 hex of movement. Failure: Move straight 1 hex.
Tight Turn — Make a Turn maneuver check. Success: Move straight 1 hex and turn 2 hex sides (120 degrees). Failure: Move straight 1 hex and turn 1 hex side (60 degrees).
Movement and Special Abilities
Some aircraft have special abilities that allow them to adjust their positions at the end of the Movement phase. Conduct all aircraft movement normally, and after the last plane of the game turn has taken its move, check to see if any of them are using special abilities to modify their final positions. In general, the first player declares whether he or she is using a special ability after the Movement phase first. Declare the use of special abilities one at a time, alternating between players, until both players have used all special abilities they wish to use.
Stacking
If two or more aircraft of the same side end up in the same hex with the same altitude at the end of the Movement phase, all planes of that side after the first that moved into that hex return to their previous hex, retaining their same facing. An aircraft that is forced to adjust its position this way may not attack this game turn (the pilot's busy avoiding collision). Friendly aircraft at different altitudes can be in the same hex, as can aircraft of opposing sides.
Movement Examples
Example 1: The player controlling the A6M2 Zero wants to get around behind the P-40 and set up a good shot. He chooses a speed of 3 for the game turn. The Zero begins by moving forward 1 hex, and turns left in that hex. Then it moves ahead 1 hex, and attempts a Tight Turn, which requires a Turn maneuver check. The Zero is at normal speed, so the success number for the check is 10. The Zero's Turn bonus is +6. The Zero's player rolls two dice, getting a 6. The check total is 12, so the Tight Turn succeeds, and the Zero turns left hard. Then the Zero completes its movement by moving forward 1 more hex, getting right behind the P-40. Zeroes are dangerous in turning fights!
Example 2: The player controlling the P-40 wants to get on the Messerschmitt's tail. She chooses a speed of 5 for the game turn, which is high speed for the P-40. At first, the player tries a path that won't require any maneuver checks, but she realizes that she can't get into the hex behind the Bf 109 and then turn, because she has to turn in the previous hex too—you're not allowed to maneuver in consecutive hexes at high speed. So she tries a different plan, beginning her move by making a Break maneuver to the right. The P-40 has a Roll rating of +5; she rolls two dice and gets an 8, for a total of 13—exactly what she needs for success in a high-speed maneuver check. From that point the P-40 player can easily get behind the Messerschmitt by moving straight and making two normal turns to the left.
Example 3: The Bf 109 is at altitude 4, and the Spitfire is at altitude 3. The Bf 109 player sees an opportunity to dive down right on the Spit's tail. He starts by choosing speed 3, and attempts a Split-S for his first hex of movement. The Split-S is a Roll maneuver, and the Bf 109's Roll rating is +4. He rolls two dice and gets a 4, totaling 8—not enough! The Split-S doesn't work out, and instead the player has to follow the maneuver's failure result. He moves the Bf 109 straight ahead, but on the bright side he still loses the altitude he wanted to lose. The player would like to try a Tight Turn to correct for his previous bad roll, but you're only allowed one difficult maneuver per move, so he can't. Now at altitude 3, the Bf 109 executes two normal turns in its remaining movement, and finishes up just out of range of the Spitfire.
Attack and Defense
Aircraft fire at enemy planes in the Attack phase. The overall effectiveness of an aircraft's offensive armament is measured by its attack rating, which accounts for its machine guns, automatic cannons, and other factors such as sight quality, stability, and rate of fire.
One Attack per Game Turn: Even if an aircraft is in position to fire on multiple targets, it only attacks once per game turn.
Alternate Attacks: Attacks alternate between the first player and the second player.
Firing Arc and Altitude: An aircraft can only attack a target in its front firing arc and at the same altitude.
No Range 0 Attacks: An aircraft can't attack a target at range 0.
Immediate Effect: Attacks take effect immediately, so an aircraft destroyed by an aircraft that fires before it does is removed from the game before it can fire back.
Firing Arc
Most single-seat fighters can only attack enemy aircraft in their "firing arc." The firing arc is a zone of hexes in front of the plane's nose. (The game assumes that planes can make minor adjustments to their heading in order to take a shot at enemies that aren't straight ahead of them.)
Resolving Attacks
To resolve an attack, follow these steps.
- Determine Range and Attack Dice: Count the number of hexes from the attacker to the target. Check the attacking aircraft's stat card to see how many attack dice you roll against the target at that range.
- Check the Target Aspect: Determine which side of the target's hex the attack is coming from. The target aspect determines the base target number for your attack roll; see the Target Aspect section, below.
- Compare Pilot Quality: Compare the pilot quality of the attacking aircraft and the target aircraft. If the attacking aircraft has a better pilot, it gets an attack bonus. From worst to best, pilot quality is Poor, Average, Veteran, or Ace.
- Check Special Abilities: Many aircraft have special abilities that modify their attack dice.
- Roll Your Attack: Roll your attack dice, modifying results for any attack bonus or penalty that applies. High rolls are better. Each die result that's equal to or higher than the target number for this attack is one hit. An unmodified roll of 6 always counts as 2 hits, regardless of your target number and attack penalties.
- Compare Hits to Target Armor. Total up the hits of your attack dice, and compare them to the target aircraft's armor. If you equal or beat the target's armor rating, you deal 1 point of damage to it. If you equal or beat the target's vital armor rating, you destroy it outright.
| Hits vs. Armor | Result |
|---|---|
| Hits < Target Armor | Miss |
| Hits ≥ Target Armor | Hit! Deal 1 point of damage. |
| Hits ≥ Vital Armor | Target destroyed! |
Target Aspect
Target aspect is the target's facing relative to the attacking aircraft. Attacks from behind the target are more accurate than shots from straight ahead or from the sides. Target aspect determines the basic target number for the attack.
The Target Aspect diagram divides the six hex sides around a target into three bands, giving the base target number for an attack coming from each direction: 12 o'clock (front) needs a 6, 10 o'clock and 2 o'clock (sides) need a 5+, and 8 o'clock, 6 o'clock, and 4 o'clock (rear) need a 4+.
In-between Shots Use the Less Favorable Attack: If the attacking plane is firing from a hex that is exactly halfway between two target aspects, the higher target number is the minimum hit number for the attack. For example, if an attacking P-40 is exactly at a Zero's 3 o'clock position, the attack hits the Zero's 2 o'clock, not its 4 o'clock, so the hit number is 6, not 5.
Attack Bonuses and Penalties
The base target number for an attack is determined by the target aspect, as shown in the Target Aspect section above. Some circumstances provide a bonus or penalty to your attack roll:
Pilot Quality: If the attacking aircraft has a higher-quality pilot than the target aircraft, it gets an attack bonus. From worst to best, pilot quality is Poor, Average, Veteran, or Ace.
Crippled: If the attacking aircraft is crippled, it gets an attack penalty. If the target aircraft is crippled, the attacking aircraft gets an attack bonus.
Calculate bonuses and penalties as follows:
Attack Bonus (+1 per die): Add 1 to the result of each die in your attack roll. For example, if you rolled an attack of four dice that came up 1, 3, 5, and 6, an attack bonus makes those results 2, 4, 6, and 6 (but only the unmodified 6 counts for two hits).
Attack Penalty (–1 per die): Subtract 1 from the result of each die in your attack roll. For example, if your attack roll is 1, 3, 5, and 6, an attack penalty changes those results to 0, 2, 4, and 6 (the penalty doesn't affect the unmodified 6, which counts as two hits).
Multiple Bonuses and Penalties Stack: Each factor contributing a bonus or penalty is applied. For example, if you have two factors providing a bonus and one providing a penalty, the net effect is an attack bonus of +1 per die. If you have two factors providing a penalty, the net effect is an attack penalty of –2 per die.
Effects of Damage
An aircraft is destroyed when it takes damage equal to or greater than its hit points, or when a single attack equals or exceeds its vital armor rating. Accumulating damage affects an aircraft's ability to maneuver and attack.
Damaged: An aircraft with 1 point or more of damage is damaged. Damaged aircraft have no special penalties until they have only 1 hit point left, at which point they become crippled.
Crippled: A damaged aircraft that is down to its last hit point is crippled. Crippled aircraft take a –2 penalty to all maneuver checks, and can't choose high speed. Enemy aircraft attacking a crippled aircraft gain an attack bonus. Crippled aircraft take an attack penalty when they attack.
Destroyed: An aircraft that accumulates damage equal to its hit point rating, or that is hit a number of times equal to or more than its vital armor in a single attack, is destroyed. Remove destroyed aircraft from play.
Destroyed? For game purposes, destroyed aircraft are immediately removed from the map. However, "destroyed" covers a lot of different outcomes of an attack. An aircraft might explode and break up in midair, or the pilot might be killed—or the aircraft might have crucial controls shot away, its engine knocked out, an oil line severed, or it might catch fire. A destroyed aircraft could go into a spin, climb or dive uncontrollably, or slowly lose power and coast to a relatively soft landing many miles away. "Destroyed" really means that the aircraft is no longer combat worthy and has begun to crash; it's not under the pilot's control and takes no more part in the action. The exact way the plane crashes isn't that important in the game.
Example of Play
The players have decided to try a Far East scenario. The Axis player's flight consists of an A6M2 "Zeke" and a Ki-61 "Tony." The Allied player's planes are a P-40C Flying Tiger and a Hurricane Mk I (this might be a duel over the skies of Burma in early '42).
Turn 1
Initiative Phase: The Axis player rolls 10 on two dice; the Allied player rolls 6. The Axis player wins initiative, and is the second player for this opening game turn.
Movement Phase:
- The Allied player begins by moving his weaker plane into position to threaten a patch of sky the opposing player might want to use, knowing that it's unlikely he'll actually get a shot. He chooses speed 4 (high speed) for the Hurricane, and moves it straight ahead.
- The Axis player now has to move a plane. She decides to move the Tony into position for a shot on the Hurricane from outside the Hurricane's firing arc, and begins her move by declaring speed 3 and attempting a Break, which is a Roll maneuver. The Tony's Roll rating is +5. She rolls an 8 on her maneuver check, +5 for a total of 13, which easily succeeds. She moves 2 more hexes and makes a normal turn to get in on the Hurricane's 10 o'clock—not a very good attack angle, but at least it's a safe one.
- The Allied player moves the P-40. He sees an opportunity to take a decent shot at the Tony, and chooses speed 4. Two normal turns let him set up 2 hexes from the Tony.
- The Zeke moves last. There's no good way to get at the P-40, so the Axis player decides to double up on the Hurricane. She chooses speed 4 (high speed) for the Zeke, and starts to work behind the Hurricane. In her last hex of movement, she attempts a Tight Turn. This is a Turn maneuver; the Zeke's Turn rating is +6. The Axis player rolls a 7 on her maneuver check, adds 6, and gets a 13—just enough to succeed at a high-speed turn.
Attack Phase: That concludes the Movement phase, so now the players move on to the Attack phase. The first player gets to attack first in this phase. The Hurricane has no shots, but the P-40 has a decent one on the Tony. At range 2, the P-40 has five attack dice. The shot is exactly between the Tony's 2 o'clock and 4 o'clock, and ties go against the attacker in this case—it's treated as a shot at the 2 o'clock, so the target number for the attack is 6. The P-40 is a Veteran pilot attacking an Average pilot, so he'll get a +1 on each attack die. The Allied player rolls 6, 6, 4, 4, and 2, scoring 4 hits (unmodified 6's always count as two hits each). This beats the Tony's armor of 3, but doesn't top its vital armor of 6, so the Tony takes 1 point of damage.
Now it's the Axis player's turn. She begins with the Tony. It has six attack dice at range 1, but it's attacking the Hurricane's 10 o'clock arc, so the target number is 6. The Axis player rolls 5, 4, 4, 3, 2 and 1, scoring no hits.
The Zeke has a much better shot. It has four attack dice at range 2, and it's shooting at the 4 o'clock arc (target number 5). The Zeke has a better pilot than the Hurricane, so it gets a +1 bonus on each attack die. The Axis player rolls 5, 5, 4, and 1, which becomes 6, 6, 5, and 2. However, these 6's don't count as two hits each—only unmodified 6's count double. Still, that totals 3 hits, which equals the Hurricane's armor 3 and deals 1 point of damage to it.
That concludes Turn 1, so it's on to the Initiative phase of Turn 2.
Turn 2
Initiative Phase: The Allied player rolls a 5; the Axis player rolls 11. The Allied player is first player again.
Movement Phase:
- The Allied player begins by moving the Hurricane, choosing speed 2 and attempting a Tight Turn in the second hex. Unfortunately, he rolls a 3, so even with the Hurricane's +5 Turn bonus, he fails the Tight Turn and executes a normal turn instead.
- The Axis player chooses to move the Tony next. She chooses speed 2, and decides to try a Tight Turn. The Tony's Turn bonus is +4. The Axis player rolls an 8, totaling 12, which succeeds, and then gets in behind the Hurricane.
- The Allied player moves the P-40 next. He chooses speed 2, and begins with a Break maneuver. The P-40 has a +5 on Roll checks, but the Allied player rolls snake eyes and fails. He settles for moving ahead 2 hexes and turning to keep the Tony in his arc of fire.
- The Zeke decides to continue to concentrate on the Hurricane, and chooses speed 2. The Axis player begins the move with an attempt to perform a Scissors maneuver and rolls a 9, +6 for the Zeke's Turn rating—an easy success. That allows her to move the Zeke just one hex forward this move, and turn in behind the Hurricane.
Attack Phase: Now it's time for the Attack phase. Again, the Hurricane has no shots, so the Allied player takes the only shot he has, the P-40 on the Tony. The P-40 has five attack dice at range 2, and the target number for shooting at the Tony's 8 o'clock is 5. The P-40 gains +1 on each die because it's a Veteran pilot attacking an Average pilot. The Allied player rolls 6, 6, 4, 4, and 1, which becomes 6, 6, 5, 5, and 2. Two unmodified 6's and two 5's give him 6 hits, which beat the Tony's vital armor, destroying it outright. The Tony is shot down in flames!
Because the Tony was destroyed before it could fire, it doesn't get to attack this game turn. The Axis player resolves the Zeke's attack. It has four attack dice at range 2, and is shooting at the 4 o'clock arc, target number 5. However, the Hurricane is now damaged, so the Zeke's Killer Instinct special ability now applies, giving it a bonus attack die. The Zeke gains a +1 bonus per die because of the comparative pilot quality. The rolls are 5, 4, 3, 2, and 1, which become 6, 5, 4, 3, and 2—only 2 hits (only unmodified 6's count double), which isn't enough to beat the Hurricane's armor 3. It's close, but the Hurricane is a sturdy plane, and the Zeke can't quite get enough rounds on target this time.
Turn 3
Initiative Phase: The Axis player wins initiative yet again with a roll of 11 to 4. Because the Axis player won initiative, she gets to move the last plane in the Movement phase—both Allied aircraft must conduct their moves before she does.
- The Hurricane chooses speed 3, and succeeds in a Tight Turn check.
- The P-40 chooses speed 2, and makes a normal turn so that its guns are covering the Hurricane's tail, and vice versa.
- Then the Axis player moves the Zeke. She chooses speed 3, and tries to get on the P-40's tail with another Tight Turn, which she easily succeeds on (Zekes are nimble). The Allied player may have made a serious mistake by trying to cover the Hurricane with the P-40!
Attack Phase: The Allied player gets the first shot. The P-40 has no shot, of course, but the Hurricane can fire. It only has two attack dice at range 3, and it's shooting into the Zeke's 12 o'clock arc (target number 5). The Zeke's Expert Dogfighter ability means that the Hurricane takes a –1 penalty per die. The Hurricane rolls a 4 and a 3, and scores no hits.
Then the Axis player gets to make her attack with the Zeke. The Zeke has seven attack dice at range 1, and it's right on the P-40's tail (target number 4). Both pilots are the same quality, and no special abilities apply. She rolls 6, 5, 5, 4, 4, 3, and 2, totaling 6 hits. That certainly beats the P-40's armor of 4, and falls one short of its vital armor 7. A lot of other fighters would go down under that kind of punishment, but P-40s are very rugged planes, and it stays in the air after taking 1 point of damage.
After three game turns, it's one veteran Zeke against a damaged Hurricane and a damaged P-40. The Allies hold the edge, but it's still anybody's game!
Advanced Rules
When you've mastered the basics of movement and attack, you're ready to add a couple of new rules elements to your games. Tailing provides an initiative bonus, making it more likely that an aircraft in an advantageous position will be able to set up an attack by moving after its target moves. Status allows you to position your aircraft for banking, climbing, or diving, giving you some very useful benefits in movement, attack, and defense.
Advanced Initiative Rules
When you play a game under the advanced rules, add two new rules to the Initiative phase: Tailing and Choosing Turn Position.
Tailing: Getting behind your opponent is the most fundamental air combat tactic—you can attack him, and he can't attack you. This is represented in the game by tailing. To determine which aircraft are in tailing positions, check the map at the beginning of each Initiative phase. An aircraft is tailing an enemy plane if:
- The tailing aircraft is 1 to 4 hexes from the tailed aircraft.
- The tailing aircraft is in the rear half of the tailed aircraft's facing.
- The tailed aircraft is in the front half of the tailing aircraft's facing.
- Both aircraft are within 1 altitude of each other.
If you are tailing more of your enemy's aircraft than your enemy is of yours, you have the tailing advantage, and you get a +2 bonus on your initiative roll. If you're each tailing the same number of aircraft, no one gets this bonus.
Choosing Turn Position: When you win initiative, you can choose whether you are the first player or the second player for the game turn. It's usually more advantageous to be the second player, but the first player gets to make the first attack of the Attack phase, and in some circumstances that's better than being able to move after your opponent moves.
Advanced Movement Rules
The advanced rules add an important new component to aircraft movement: status.
Aircraft Status
An aircraft's status is shown by banking or inclining the miniature on its base: Diving (nose down), Climbing (nose up), or Evading (banking left or right).
When you finish moving an aircraft, you may set up for your attacks this game turn and maneuvers next game turn by banking or inclining the model on its base. You don't have to choose a status if you don't want to—if you don't choose any status, your aircraft is simply in a neutral status, with no advantages or drawbacks. An aircraft retains its current status until it moves again on the next game turn.
Required Maneuver: Aircraft that begin the Movement phase with a status are required to perform or attempt specific maneuvers before they do anything else in their current move. You must meet (or attempt to meet) a required maneuver in the first hex you enter during your plane's move. After that, you are free to continue your move normally, but of course you may have already used your one difficult maneuver for the move in performing the required maneuver.
Diving Status (nose down):
- You can attack an enemy 1 altitude below you. You get a +1 bonus on each attack die when attacking an enemy below you.
- If you begin your move in diving status, you are required to Power Dive.
- You can't select Diving status at altitude 1.
Evading Status (banking left or right):
- Enemies get a –1 penalty on each attack die when attacking you.
- You get a –1 penalty on each attack die.
- If you begin your move in Evading status, you are required to turn or attempt a Tight Turn in the same direction you're evading.
Climbing Status (nose up):
- You can attack an enemy 1 altitude above you.
- Enemy aircraft with a better Climb bonus than yours get a +1 bonus on each attack die when attacking you.
- If you begin your move in Climbing status, you are required to Climb. You get a +4 bonus on your Climb maneuver check.
- You can't select Climbing status at altitude 6.
Design Notes: Status
Choosing a status allows you to gain a powerful benefit, usually this game turn, in exchange for giving your opponent information about what your aircraft is going to have to do next game turn. It adds a little touch of extra realism to the game's movement rules, since aircraft with status choices have to commit to fairly realistic behaviors. If you nose over on an enemy below you, you're likely to dive past him after your attack; if you try to out-climb an enemy whose plane climbs better than yours, you're asking for trouble.
The different modes also provide you with more tactical gameplay. For example, if you find you're the first player for the game turn, you can be reasonably sure that an aircraft you move early in the Movement phase isn't going to get a good shot at an enemy plane—so, if you have to move early, it's a good idea to choose Evading status for the extra defense. Diving status offers an excellent attack bonus, but to use it you'll have to get an altitude advantage over your prospective target, which means that on any given game turn climbing might be a good idea.
Best of all, adjusting your miniature's pose just looks cool!
Advanced Attack and Defense Rules
The statuses described under Advanced Movement Rules also affect your aircraft's ability to attack and avoid attack.
Firing Arc and Altitude: An aircraft with Diving status can attack targets at its altitude or at the altitude 1 lower.
Attack Bonuses and Penalties: In addition to pilot quality and severe damage, your attack roll can also be modified by the status of the attacking aircraft and the target aircraft.
- Evading Status: If the target or the attacking aircraft have the evading status, you take an attack penalty of –1 per die (or two attack penalties if both are evading).
- Climbing Status: If the target aircraft has the Climbing status and your attacking aircraft has a better Climb rating than the target, you get an attack bonus of +1 per die.
- Diving Status: If your attacking aircraft has the Diving status and the target aircraft is 1 altitude lower, you get an attack bonus of +1 per die.
Scenarios
When you play the Axis & Allies Air Force Miniatures game, you and your opponent choose a scenario. You can use one of the Battle of Britain scenarios designed for play with miniatures included in the Starter, or you can choose a standard scenario for use with any Axis & Allies Air Force Miniatures aircraft.
Battle of Britain: Intercept the Interceptors
British doctrine called for their Hurricanes to attack the German bombers, while the Spitfires were supposed to engage and destroy the Bf 109s. The Hurricanes usually tried to avoid the enemy fighters when they could. In turn, the German Bf 109s had the mission of intercepting and destroying the British fighters before they reached the German bombers. Things didn't always go as planned.
Flights: The Axis player starts with 2 Bf 109E aircraft at altitude 3. The Allied player starts with 2 Hurricane Mk I aircraft at altitude 2.
Battle Map: Set up the map sections and deploy aircraft as shown.
Winning the Scenario: The Allied player wins if both of his or her aircraft reach altitude 5 without taking any damage. Otherwise, the first player to shoot down an enemy aircraft wins.
Battle of Britain: Limited Fuel
One of the serious challenges confronting the Luftwaffe was the fact that the air battles took place over British soil, at some distance from the German bases. The Bf 109E was an excellent fighter, but didn't have a very long range. In some missions the German fighters had to turn back after only 10 minutes of fighting over the target area. When the Bf 109s had to leave early, the German bombers were very vulnerable to attack from the British defenders.
Flights: The Axis player starts with 2 Bf 109E aircraft, a Bf 110, and 2 bomber tokens at altitude 4. The Allied player starts with 2 Hurricane Mk I aircraft and a Spitfire Mk I Ace at altitude 3.
Bomber Stats: The bomber tokens in this scenario represent two-engine Heinkel He 111 medium bombers. They have the following characteristics: Armor 3, Vital Armor 8, Hit Points 5, Speed 2, Point Value 40. The bombers can only turn or fly straight, and can't perform any other maneuvers. Each bomber has defensive machine guns: Attack 3 at range 1, and Attack 2 at range 2. It can attack in any direction.
Battle Map: Set up the map sections to create a battle map. The map is fixed in place—any plane that flies off the edge is considered to have retreated, but the Bf 109s are allowed to leave by the south edge of the map without giving the British player victory points.
Special Rules: This scenario ends after 5 game turns. The Bf 109s have to leave the south edge of the map by the end of game turn 4 or they count as destroyed. Until they are attacked, the bombers can't turn.
Winning the Scenario: The Axis player wins if neither bomber is damaged by the end of the scenario. Otherwise, the player with the most victory points at the end of game turn 5 wins.
Battle of Britain: Schnellbomber
Early in the war, the twin-engine Bf 110 was quite successful fighting against countries that didn't have the most modern equipment, or when it struck with the advantage of surprise. However, the Germans didn't have much success using it as a fighter during the Battle of Britain. While the Bf 110 had excellent firepower, good range, and good speed, it lacked the maneuverability of the modern single-engine fighters. After the Germans discovered its vulnerability in dogfights, they employed the Bf 110 as a light attack aircraft in so-called Schnellbomber ("fast bomber") missions. It couldn't carry as much ordnance as the Heinkel He 111, but it was better able to defend itself against interceptors.
Flights: The Axis player starts with a Bf 109E and a Bf 110 at altitude 3. The Allied player starts with 2 Spitfire Mk I Aces at altitude 3.
Battle Map: Set up the map sections and deploy aircraft as shown.
Winning the Scenario: The first player to score 60 victory points wins the scenario. At the end of each game turn, the Bf 110 ends at altitude 1 without attempting any difficult maneuvers, and the Axis player scores 10 victory points from strafing targets on the ground.
Standard Scenario
If you collect additional Axis & Allies Air Force Miniatures aircraft (available in booster packs), you can add more aircraft types to your collection, including famous planes such as the American P-40 Warhawk or P-51 Mustang, the Soviet Yak-1, the Italian Macchi C.202, and the Japanese A6M2 Zero. In the Standard Scenario, you choose a flight of fighters from your collection, and take on another player who selects his or her own flight of enemy fighters.
- Build a Flight. One player creates an Allied flight that costs 100 points or less. The other player creates an Axis flight that costs 100 points or less.
- Set Up the Battle Map. Lay out the map sections.
- Roll for Advantage. Roll a die to determine which player has the starting advantage.
- Roll for Starting Situation. Roll a die and use the starting situation of that number; see the Starting Situations section below.
- Deploy Aircraft. The player without the starting advantage places his or her aircraft within the blue setup area, facing in the marked direction. Then the player with the starting advantage places his or her aircraft within the red setup area, facing in the marked direction.
- Start Playing! Follow the Sequence of Play above.
Choosing Sides: In an Axis & Allies Air Force Miniatures game, one player is the Axis player and the other is the Allied player. You can build flights of any nationality, but only aircraft from Axis countries can be part of an Axis flight, and vice versa for Allied aircraft.
- Axis: Germany, Italy, Japan, Romania, Finland, Vichy France, and other Axis nations.
- Allies: United States, United Kingdom (including Australia, Canada, South Africa), Soviet Union, France, Poland, and other Allied nations.
Building Flights: You can spend up to 100 points to build your flight. Your flight must have at least two aircraft, and can't have more than five. Normally, one player builds an Allied flight while the other builds an Axis flight.
Starting Situations: The following diagrams show six different starting situations for the battle, along with the setup positions for each side.
Six numbered starting-situation diagrams show the battle map layout and each side's setup area and starting altitude. In Situations 1–3, neither side has an advantage. In Situations 4, 5, and 6, one side sets up in a marked red advantaged position with a better starting position, and the disadvantaged player (in the blue position) begins the game with bonus victory points—10 in Situation 4, 20 in Situation 5, and 30 in Situation 6.
Advantaged Position: In scenarios 4, 5 and 6, one side begins with a better position than the other. The better position is marked as the red advantaged position. If you set up in the advantaged position, you're the advantaged player for the game. You need to score more victory points to win as the advantaged player than as the disadvantaged player.
Winning the Standard Scenario
The first player to score 60 points wins the game. If both players reach 60 points in the same game turn, then the player who achieves the highest score wins. You score points for the following:
- Whenever you destroy an enemy aircraft, you score victory points equal to its cost.
- Whenever an enemy aircraft retreats from the battle, you score victory points equal to half its cost.
- In three of the starting situations, the disadvantaged player (in the blue position) begins the game with bonus victory points.
The game ends when one player wins, or when one player has no aircraft remaining. If neither player has reached 60 points by the time the game ends (usually because one player's aircraft retreated), then the player with the most aircraft remaining in the game wins.
Pilot Survival
It's not important in a standard scenario, but some custom-designed scenarios or campaigns track pilot attrition. If it's important to know what happens to the pilot of a destroyed aircraft, roll a die. On a 4 or higher, the pilot survives. Add +1 if the battle takes place over friendly territory, or –1 if the battle takes place over enemy territory. Pilots who don't "survive" aren't necessarily killed—they might be captured, or injured badly enough to be out of the war for a long time.
Bomber Escort Scenario
The primary means for projecting airpower in World War II was the bomber. Any serious attack on enemy ground forces, infrastructure, or naval units required the delivery of heavy bomb payloads. Enemy fighters often intercepted bomber missions, which were in turn protected by fighter escorts. In the bomber scenario, one player protects a large, slow bomber as it makes its way across the battle map, while the other player attempts to shoot it down.
Bomber Stats: The bombers in this scenario are medium-sized, two-engine bombers such as the B-25 Mitchell, G4M "Betty," or Junkers Ju 88. They have the following characteristics: Armor 4, Vital Armor 9, Hit Points 5, Speed 2. The bombers can only turn or fly straight, and can't perform any other maneuvers. Each bomber has defensive machine guns: Attack 3 at range 1, and Attack 2 at range 2. They can fire in any direction.
Building Flights: Both players have 100 points to construct flights of fighters. In addition, the player escorting the bomber gets 2 bombers. You need to score more victory points to win as the advantaged player than as the disadvantaged player.
Setup: The escorting player sets up first in the blue area. The bombers must be at least 3 hexes apart. Use proxy models to represent the bombers (anything that can serve as a marker will do).
Winning the Bomber Escort Scenario: If both bombers reach the opposite side of the map, the escorting player wins. If neither reaches the opposite side, the intercepting player wins. If one bomber reaches, then the player who destroys the highest point value of enemy fighters.
Optional Rules
You may use the optional rules in this section to add further depth and realism to your games.
Constructing Your Own Scenarios
You can create scenarios of your own that reflect particular engagements or battles. For example, you could create a scenario that pits French aircraft against German aircraft to recreate an engagement in the Battle of France, or Japanese aircraft against US aircraft to represent an air battle over the Solomon Islands in the South Pacific.
Year Restrictions: You can restrict flight building by specifying a year for the scenario. For example, if you choose 1942 as the year your scenario takes place, then any aircraft with an availability of 1943 or later wouldn't be eligible for use in either player's flight.
Historical Theater Restrictions: Of the many air forces involved in World War II, most only operated in one or two of the grand theaters of action. For example, German aircraft never flew in the Pacific theater. By choosing a theater for your scenario, you can require players to build flights of aircraft that would at least have had a chance of being present in the same patch of sky at some point during the war.
- Europe, Western Front: Axis: Germany, Italy, Vichy France. Allies: Britain, Canada, France, Netherlands, Poland, United States.
- Europe, Eastern Front: Axis: Germany, Finland, Romania. Allies: Poland, Soviet Union.
- China and Southeast Asia: Axis: Japan. Allies: Australia, Britain, China, France, Netherlands, United States.
- Mediterranean: Axis: Germany, Italy, Romania, Vichy France. Allies: Australia, Britain, France, United States, South Africa.
- South Pacific: Axis: Japan. Allies: Australia, Britain, United States.
Special Conditions
Not all air battles took place in bright daylight and clear skies. Weather often played a crucial role in shaping the aerial battlefield, and many air raids took place at night. Antiaircraft fire from flak batteries presented aircraft with a constant threat over important ground targets or enemy warships. These special conditions aren't included in the standard scenario, but you can incorporate them in your games to provide more realistic aerial encounters.
Clouds
Clouds can play an important role in an aerial encounter, offering a pilot in trouble a safe refuge, or hiding nearby enemies from sight.
Clouds come in four basic types: solid, heavy, light, and clear. Solid clouds offer few stretches of clear air, and are very easy to hide in. Heavy clouds have large open breaks or gaps. Light clouds are just as thick as solid or heavy clouds, but they're smaller and farther apart, leaving more clear air between them. Clear air is pretty much devoid of clouds.
Cloud cover often varies at different altitudes. For example, a battle area might be clear at altitude 1, solidly covered at altitude 2, lightly cloudy at altitude 3, and clear at altitude 4 and 5. Changing altitude allows pilots to take advantage of these changing conditions—a pilot could dive down into a solid layer to get away from trouble, or climb up into intermittent clouds to keep from being noticed by an enemy he intends to attack.
If you want to know exactly where clouds are in your scenario, you can mark their locations on your battle map by using cotton balls, paper cutouts, or other markers. In general, an isolated cloud is 1 to 4 hexes long, 1 to 2 hexes wide, and covers 1 to 3 altitude bands, usually with its base at altitude 2 or 3. For game purposes, you can assume that all the clouds in the same area are about the same height and begin at the same altitude. In areas of light cloud cover, clouds are about 5 to 10 hexes apart; in heavy cover, clouds are about 2 to 5 hexes apart. In the time scale of the Axis & Allies Air Force Miniatures game, clouds stay in place and don't change for the duration of the battle.
To determine whether an aircraft is "in the clouds," follow the rules below:
- Solid: An aircraft in a solid cloud band at the end of its move is in the clouds.
- Heavy: An aircraft in a heavy cloud band at the end of its move can attempt to move into the clouds. Roll a die; on a roll of 3 or higher, the aircraft is in the clouds.
- Light: An aircraft in a heavy cloud band at the end of its move can attempt to move into the clouds. Roll a die; on a roll of 5 or higher, the aircraft is in the clouds.
- Clear: An aircraft in a clear band at the end of its move is not in the clouds.
If you want to stay in a cloud, you must attempt to move into the clouds again on your next game turn.
Effects of Being in the Clouds: An aircraft that is "in the clouds" follows these rules:
- It can't tail enemy aircraft or be tailed.
- It can't attack or be attacked.
- It remains in the clouds until it moves again.
Random Cloud Arrangement: If you want to add clouds to your air battles, roll a die when you set up your scenario and consult the following chart:
| Altitude | 1 | 2 | 3–4 | 5–6 |
|---|---|---|---|---|
| Altitude 1 | Light | Clear | Clear | Clear |
| Altitude 2 | Solid | Solid | Heavy | Light |
| Altitude 3 | Heavy | Heavy | Light | Light |
| Altitude 4 | Heavy | Light | Clear | Clear |
| Altitude 5 | Light | Clear | Clear | Clear |
| Altitude 6 | Clear | Clear | Clear | Clear |
Flak Fields
While light antiaircraft fire is generally targeted at specific enemy aircraft, heavy antiaircraft batteries often employ the tactic of making a piece of the sky a dangerous place by creating a flak field. In specific scenarios, one side may have one or more flak fields to place during the course of the battle.
Flak fields follow the rules below:
- Area Affected: A flak field covers an area of seven hexes—one central hex, and all six adjacent hexes.
- Altitude: A flak field exists at a specific altitude (altitude 2, 3, or 4).
- Aircraft Attacked During Its Move: Any aircraft entering a hex of a flak field may be attacked. Make a flak roll in each hex of a flak field that an aircraft moves through.
- Flak Roll: Roll a die. On a roll of 1, the moving aircraft is immediately attacked. Roll a die again to determine the number of attack dice in the flak attack.
- Resolve Attacks Normally: The target number for a flak attack is 4. If the attack equals or exceeds the moving plane's armor, the moving aircraft takes 1 point of damage. If the attack equals or exceeds the plane's vital armor, the moving aircraft is destroyed.
Flak fields attack all aircraft that enter, regardless of whether they're friendly. It was common for defending fighters to break off when a bomber formation entered a flak field, only to resume their attack once the bombers had passed through.
Barrage Balloons
Barrage balloons are large, tethered balloons that help to guard an area against low-level air attack by creating an obstacle over the area. The strong wires between ground and balloon could damage or destroy an aircraft colliding with them. Some barrage balloons were fitted with small bombs that "slid" down the wire on contact to ensure the aircraft's destruction.
Barrage balloons follow the rules below:
- Area Affected: A barrage balloon guards 1 hex.
- Altitude: A balloon only threatens aircraft at altitude 1.
- Aircraft Attacked During Its Move: Any aircraft entering a barrage balloon hex may be attacked. Make a balloon roll when an aircraft enters the hex.
- Balloon Roll: Roll a die. On a roll of 1 or 2, the moving aircraft is immediately attacked by the balloon. Roll a die:
| Roll | Result |
|---|---|
| 1–2 | No effect |
| 3–4 | Aircraft takes 1 point of damage |
| 5–6 | Aircraft is destroyed |
Barrage balloons threaten all aircraft that enter, regardless of whether they're friendly.
Night Combat
Air-to-air combat at night posed many challenges in World War II. Spotting enemy aircraft in darkness with the unaided eye was nearly impossible. Both sides developed a variety of techniques and technologies to deal with the challenge of intercepting enemy bombers attacking at night—listening posts and searchlight networks, fighter direction by ground-based radar stations, and increasingly capable airborne radars. Fighter-on-fighter combat during the hours of darkness was very unusual in the early years of the war, but by the war's end highly capable night fighters routinely engaged in deadly games of cat-and-mouse in the skies over Germany or the Pacific.
Night combat falls into two categories: moonlight or darkness.
Effects of Moonlight: All attacks suffer an attack penalty (–1 per die).
Effects of Darkness:
- No Tailing: Ignore tailing in night combat.
- Requirements to Attack: An aircraft can't attack unless it has a special ability allowing it to attack in darkness, it is under direction, or the target is illuminated.
- Attack Penalty: All attacks suffer an attack penalty (–1 per die).
Fighter Direction: Ground-based radar installations can track enemy aircraft in darkness and vector interceptors into place through fighter direction procedures. In a night combat scenario, one side or the other may have fighter direction available. Fighter direction is described in terms of capacity—the number of friendly fighters that can be guided to targets in the area at the same time. For each point of direction capacity available, you can provide fighter direction to one friendly fighter.
Assigning Direction: After the Initiative phase, assign fighter direction to friendly aircraft. Your aircraft receives direction until you choose to reassign direction to a different aircraft in a subsequent Initiative phase.
Illumination: Batteries of searchlights can track enemy aircraft at night, illuminating them for friendly fighters to find and attack. In a night combat scenario, one side (usually the one defending the battle area against an enemy raid) may have searchlight batteries deployed on the ground below.
Illumination Roll: Immediately before the Attack phase, make an illumination roll for each aircraft. Roll a die:
| Target Type | Illuminated On |
|---|---|
| Heavy bomber | 2+ |
| Medium bomber | 3+ |
| Light bomber | 4+ |
| Heavy fighter | 4+ |
| Fighter or Naval Fighter | 5+ |
Target Illuminated: If the illumination roll succeeds, the searchlight illuminates the target until the end of the game turn.
Appendix
Using Axis & Allies Air Force Miniatures Planes in the Axis & Allies Miniatures Land Game
If you play the Axis & Allies Miniatures land game, you can use the miniatures from the Axis & Allies Air Force Miniatures game with the land game rules. The table below sums up the cost, defense, anti-personnel, and anti-tank attack ratings for aircraft that have appeared so far in this game.
| Name | Nation | Intro | Cost | Def | Anti-Personnel S | Anti-Personnel M | Anti-Tank S | Anti-Tank M | Rules |
|---|---|---|---|---|---|---|---|---|---|
| A6M2 "Zeke" | JP | 1940 | 12 | 3 | 8 | 6 | 4 | 3 | Aircraft; Antiair; Agility |
| A6M2 Zero Ace | JP | 1941 | 14 | 4 | 9 | 7 | 4 | 3 | Aircraft; Ace; Agility |
| Bf 109E Ace | GE | 1939 | 17 | 4 | 9 | 7 | 4 | 3 | Aircraft; Ace; Steely Resolve 2 |
| Bf 109E Wingman | GE | 1939 | 14 | 4 | 8 | 6 | 4 | 3 | Aircraft; Antiair |
| Bf 109F "Friedrich" | GE | 1940 | 13 | 4 | 7 | 5 | 3 | 2 | Aircraft; Antiair; Agility |
| Bf 109G "Gustav" Ace | GE | 1942 | 17 | 4 | 8 | 6 | 3 | 2 | Aircraft; Ace; Ruthless |
| Bf 110C | GE | 1939 | 17 | 4 | 9 | 7 | 5 | 4 | Aircraft |
| C.200 Saetta Rookie | IT | 1940 | 9 | 4 | 7 | 5 | 3 | 2 | Aircraft; Antiair; Inaccurate 1 |
| C.202 Folgore | IT | 1941 | 12 | 4 | 7 | 5 | 3 | 2 | Aircraft; Antiair |
| C.202 Folgore Ace | IT | 1941 | 15 | 4 | 8 | 6 | 3 | 2 | Aircraft; Ace; Agility |
| Channel Front Fw 190A | GE | 1942 | 15 | 4 | 9 | 6 | 4 | 3 | Aircraft; Antiair; Agility |