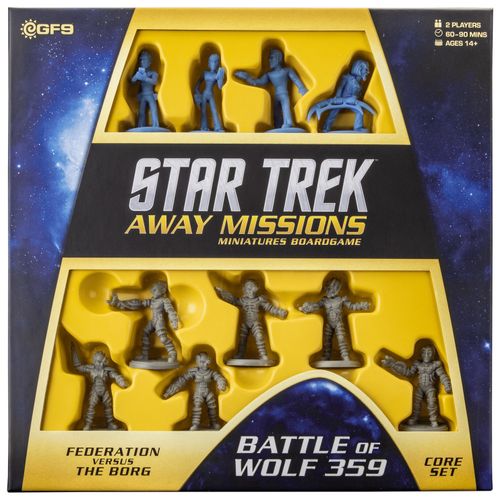
Star Trek: Away Missions – Battle of Wolf 359: Core Set
Star Trek: Away Missions – Battle of Wolf 359: Core Set Rulebook
Table of Contents
Table of Contents
Away Teams at Wolf 359
The Battle of Wolf 359 has attracted starships from across the galaxy. Each of these vessels sends away teams aboard the wreckage of Starfleet's armada, bent on learning the secrets of the Federation and the Borg, or on keeping those very secrets safe.
Riker's Away Team
With the loss of Captain Picard, his executive officer, Commander William T. Riker, now commands the U.S.S. Enterprise, Starfleet's finest starship. On learning of the defeat at Wolf 359, Riker hastened to the system to find out if anyone had discovered any previously unknown weaknesses in the Borg cube.
Riker takes an away team of his best Borg specialists aboard the wreckage at Wolf 359, hunting for clues as to how the Borg can be defeated. The positronic brain of his android science officer, Lieutenant Commander Data, is equally good at analyzing anomalous readings and running targeting calculations in combat. Lieutenant Worf, the Klingon security officer, is just as deadly with a phaser, and even more so with his bat'leth sword. The final member, Commander Shelby, Starfleet's leading expert on the Borg, has already come up with several engineering tweaks that have proved effective.
With the Borg Collective set on assimilating Earth, any edge that Riker can gain will be essential in defeating them.
Roster: Shelby, Data, Riker (Commander), Worf.
Locutus's Unimatrix
When the Borg Collective assimilated Captain Picard, transforming him into Locutus of Borg, its mouthpiece for the assimilation of the Federation, it added all of his knowledge to its vast store acquired from countless civilizations. The Locutus of Borg combines Picard's vast intellect with relentless drive and pitiless rationality. The unimatrix assigned to Locutus has five additional members, known with typical Borg efficiency as One through Five of Five. Like all Borg, Locutus has almost infinite computing power to call on, using nearby drones from its unimatrix as an extension of the body that it occupies.
In the aftermath of the Battle of Wolf 359, the Locutus of Borg assimilates ship after ship, gathering the last of Starfleet's secrets before assimilating Sector 001, the Solar System, and Earth itself.
Roster: Locutus of Borg (Commander), One of Five, Two of Five, Three of Five, Four of Five, Five of Five.
An Expanding Galaxy
The Federation has contacted countless civilizations throughout the galaxy. Some in peace, some in commerce, and some in conflict. Expansions to Star Trek: Away Missions bring new affiliations to your gaming table, starting with the fearless Klingon warriors of Gowron's Honor Guard, and the scheming Romulan agents of Sela's Infiltrators, with many more to follow.
Gowron's Honor Guard
When the news of the Borg invasion of the Federation arrives, Gowron gathers his best warriors and scientists, racing to Wolf 359. Should the Federation fall, the Klingon Empire may be the next in line for assimilation. Gowron must control the wreckage so that his scientists can learn how to defeat his foes. With the honor of Klingons everywhere at stake, he cannot fail.
Roster: Gowron (Commander), Kromm, Kurak, Lukara.
Sela's Infiltrators
The destruction of the Federation fleet at Wolf 359 created a unique opportunity to discover the secrets of three species. Leading a crack team of Romulan infiltrators, Sela sneaks aboard the wreckage, and even the Borg cube itself. Through manipulating the opposition as they strip the ships' systems, her Romulans pursue plans within plans, preparing for the eventual downfall of their enemies.
Roster: Sela (Commander), Salatrel, Ptol, Taibak, Vox.
Core Rules
Components
Character Cards. Each character in the game has a card showing its affiliation symbol, name, role, ship, specializations, keywords, weapon (with attack dice, damage, and rules), special abilities, a picture of the figure, and its Attack, Defense, Skill, and Move ratings.
Borg Drone Overlay. A Borg Drone is represented by an overlay card that shows only a weapon profile (Assimilation Tubules) and the Hivemind ability, allowing a Borg character to act through a nearby drone.
Mission and Support Decks. Each away team has its own Mission Deck and Support Deck.
Terminal Tokens. Science, Command, Medical, and Operations terminal tokens mark terminals on the board.
Bonus Action Token. Marks a character that has been granted a bonus action.
Bonus Points Tokens. Come in values of 20, 10, and 5 points, used to track bonus points earned during the game.
Activated Token. Marks a character that has already activated this round.
Lockdown Token. Marks a terminal that has been locked down.
Stun Token. Marks a character that has been stunned.
Pattern Enhancer Token. A special terminal effect token.
Take Cover Token. Marks a character that has taken cover.
Adapt Token. A special Borg effect token.
Thermal Deflector Token. A special terminal effect token.
Assimilation Token. Marks a character that has been assimilated.
Federation and Borg Dice. Star Trek: Away Missions uses normal six-sided dice. The dice included in this core set have a faction symbol for the six.
Reading a Character Card
In Star Trek: Away Missions, players will lead their own landing parties to complete missions, conduct espionage, fight in glorious battle, or assimilate distinctiveness. The objective is to score points by completing missions over the three rounds. Each completed mission earns you points. Score the most points to win the game!
Away Teams. An away team is a landing party that you have assembled to beam down and complete your missions. When you play a game of Star Trek: Away Missions, you choose an away team from those available to you.
Mission Specialists. Some expansions contain mission specialists that can be used to tailor your away team. These characters have the Specialist keyword. You can swap any mission specialist for another mission specialist as long as they are from the same affiliation.
Alternative Commanders. Expansions may also contain alternative commanders for your away team. These replace the original commander, and often come with instructions on how to change the composition of the away team as well.
Characters. Each member of your away team is represented by a figure that will move about the board to complete missions with an associated card that describes that character's strengths, skills, and other important characteristics including which away team they belong to.
All characters in your away team are considered friendly characters. All characters in other away teams are considered hostile characters.
A character card is read as follows:
- Your crew member's affiliation symbol.
- Your crew member's name, role, and ship's name.
- Your character's Specializations. Roll an extra die when taking a test of this type (see Deck Building).
- Your character's Keywords identifying their species, role, and other attributes. Some cards in the game only affect characters with a particular keyword.
- Your character's Attack Action (or actions) showing the number of extra Attack Dice they roll, any extra Damage they do if they hit, and the weapon's special rules.
- Your character's special abilities.
- A picture of your crew member's figure.
- Your character's Attack rating.
- Your character's Defense rating.
- Your character's Skill rating.
- Your character's Move rating.
Card Decks
Each away team has a Mission Deck of 20 Mission cards, and a Support Deck of at least 20 Support cards. As the leader of your away team, you choose which cards go into each deck. Choose wisely, as these cards will be essential in determining your away team's success or failure!
First Games: For your first few games, we suggest using the ready-made starter decks found in this box set. These are constructed specifically for Riker's Away Team and Locutus's Unimatrix. Once you have played a few games and are familiar with the rules, you can customize your deck using the extra cards included in the box. When you are ready, you can learn more about building your decks on page 12.
Mission Cards. Your Mission Deck reflects your away team's orders. Mission cards are how you earn points to win the game. Each has a point value that you will score once you complete the mission's requirements.
Support Cards. Your Support Deck represents the resources that your ship can spare to help you on your mission and the resourcefulness of your away team. Use these to gain an edge on your missions.
The Support Deck has two types of cards in it: Events and Equipment.
Event Cards. Event cards are special occurrences that happen when the card is played. They give you the chance to trick the enemy, call the crew on your ship for help, or do other things that will improve your chances. They typically have an immediate effect and then are discarded.
Equipment Cards. Equipment cards help characters achieve their mission, either by arming them with a powerful weapon such as a phaser rifle, or by giving them scanners, pattern enhancement beacons, and other technological aides. Equipment cards give permanent bonuses to your characters and remain in play.
Playing Cards
Each card will tell you when it can be played. You can play any Event, Equipment, and Mission cards in your own Activations, but only Interrupt cards in an opponent's Activation. In addition, some Mission cards are played at the end of the game.
Mission Cards. To play a Mission card, reveal the Mission card and follow the Mission card's instructions to score it. If you succeed, place the Mission card in your scoring area, otherwise place the card face up in your Mission Deck discard pile.
Play on Table. Certain Mission cards have a Special Action to play them on the table separate from your scoring area. This must be the first Action taken with this card. You will then need to take further Special Actions on the card to score them. Once scored they are placed into your scoring area.
A Mission card shows: Card Name; Game Text; Keyword; Mission Points; and an Affiliation icon.
Event Cards. To play an Event card, simply reveal the card and follow any instructions or conditions on it. Once the game effect has been completed (usually at the end of the Action), place the card face up in your Support Deck discard pile.
Permanent Events. Some Event cards have the Permanent keyword. These cards remain in play for the duration of the game, or until they are scored.
Trait. Event cards with the Trait keyword are played on a character and placed beside that character's card in a similar way to Equipment cards. They remain on that character until the character is Neutralized, when they are discarded.
Equipment Cards. Equipment cards can only be played at the start of your characters' Activations. Place the Equipment card next to one of your characters in the mission area (not necessarily the one being Activated). That character gains any bonus from their attached equipment and may use any Attack or Special Actions on the card in addition to their normal actions. If an Equipment card is removed from a character and set beside the mission area for reference, it can no longer be used as Equipment for that character.
An Equipment card shows: Card Type; Supply Number; Card Name; Game Text; Keyword; and an Affiliation icon.
Event cards are a different color to Equipment cards to make them stand out in your hand. Both make up the Support Deck.
Keywords. Some cards refer to specific keywords, such as the Repair Mission cards that score bonus points in Riker's Repair Ship core mission.
Requirements. Some cards have a requirement that must be met to play them.
Supply #. Some cards have Supply #. This indicates how many copies of that card you may have in your deck.
Actions on Cards. Some cards give your characters a Special Action. You may take this Action instead of a normal Action. Reveal the card before taking an Action with a character and take the Special Action.
Free Actions. Some cards tell characters to take a free Action, such as taking an Attack Action immediately after taking a Move Action. These Actions are taken immediately after the trigger, and do not require the character to Activate to do so.
Multiple Actions. Cards with more than one Action on them give your character several Special Actions that they can take. They can take one of these Special Actions when they take an Action. If the card remains in play, the Special Actions remain available.
Additional Effects. Some cards have additional effects that can be triggered.
Adapt. Borg cards may have a variation that makes it more effective if the Borg player has more Adapt tokens.
Bonus. Many cards provide a bonus when you succeed. You receive the bonus stated when you successfully complete the Action or meet the conditions to score the card.
Challenge. Some cards allow Skill tests to be challenged by an opposing player.
Deck-Building
When you are ready to start customizing the game to match your play style, you can build your own decks using the following rules.
Deck Size
- Mission Decks must include exactly 20 cards.
- Support Decks must include at least 20 cards.
Affiliation
- All of the cards included your decks must be of your away team's affiliation.
Uniqueness
- You may only have one copy of each card in a deck, unless it has a Supply number, in which case you may have as many copies as the Supply number.
- You may not have an Event Card with the same name as a Character in your deck.
Affiliation Symbols. All of the cards in your deck must have the same affiliation symbol. There are currently four affiliations in Star Trek: Away Missions: Federation, Borg, Klingon, Romulan.
Cards Always Take Priority. Some cards will allow you to do things that the rulebook would not normally allow you to do. In these cases, the card's game text always take priority over the rulebook.
Interrupt. Some Event or Mission cards allow you to interrupt an Action or react to something in the game. You can declare the interrupt when the conditions for it are met. When this happens, play is momentarily suspended while you resolve the interrupt. Once that has been resolved, play continues from the point where it was interrupted. If this was part way through resolving an Action or effect, finish resolving it, unless the interrupt has made it impossible. In that case, the Action or effect ends without being resolved.
Timing Conflicts. If a player has two or more special rules that would occur at the same time, such as at the end of an Action, that player may choose the order those abilities are resolved.
If two players have special rules that would occur at the same time, both players roll a die. The player with the higher result resolves their special rule first, then the other player resolves theirs. They then alternate resolving any other special rules in the same order. If a player chooses to pass rather than resolve another special rule, then they cannot resolve any more special rules.
Same Action, Different Card. Sometime you will have two of the same card or two different cards with the same Special Action on them. In this case, you must choose one card to take the Action from, and only receive the benefits of completing it on that card.
Game Sequence
A game of Star Trek: Away Missions has three rounds in each of which players replenish their hands of cards and then activate all of their characters. At the end of the game, they add up the scores from their missions.
Mission Preparation
- Scan Mission Area
- Choose Core Mission
- Beam Down
- Shuffle Decks
Round 1 / Round 2
Draw Phase
- Discard Unwanted Cards
- Draw Support Cards
- Draw Mission Cards
- Clear the Board
Action Phase 5. Assign Bonus Actions 6. Roll for First Activation 7. Activate a Character - Take Two Actions 8. Opponent Activates a Character - Take Two Actions
Repeat step 7 and 8 until all Characters have activated, then move onto the next round.
Round 3
Draw Phase
- Discard Unwanted Cards
- Draw Support Cards
- Draw Mission Cards
- Clear the Board
Action Phase 5. Assign Bonus Actions 6. Roll for First Activation 7. Activate a Character - Take Two Actions 8. Opponent Activates a Character - Take Two Actions
Repeat step 7 and 8 until all Characters have activated, then Beam Up and Debrief.
Beam Up and Debrief
- Play End of Game Missions
- Add up Scores
- Decide Winner
Mission Preparation
Scan Mission Area
The players roll a die each. The player with the higher result places either the Borg or Federation side of the Main Corridor board in the center of the playing space and the four matching Mission Boards nearby.
If a tie is rolled when determining which player goes places the first board, simply roll again until the results are different.
The same player then chooses one of the Mission Boards and places it so that it connects to the Main Corridor. The other player then chooses and places two Mission Boards, then the first player places the final Mission Board.
Mission Boards must be placed so that:
- all edges are flat up against each other,
- at least one door must connect to the Main Corridor, and
- as many doors as possible connect to doors on the Main Corridor and other Mission Boards, and as few doors as possible are blocked.
Finally, place Turbolift spaces beside all unconnected doors on the Main Corridor board.
Together, the Main Corridor, Turbolifts, and the Mission Boards define the mission area.
The Mission Area. All of the Mission Boards form the game's mission area. This is where the mission takes place for both players.
The mission area is divided into spaces. They determine the position of objects and characters within the mission area, as well as the distance between them. Anything placed on the mission area must be clearly placed in one space.
Mission Area Examples: in each of these examples the boards were placed in the numerical order shown. If the next Mission Board to be placed was the Bridge, it would have to be placed here as it connects to the Main Corridor, and connects as many doors as possible (in one example, Engineering was the first Mission Board to be placed; in another, the Bridge couldn't be placed in either of two other spots because there are fewer doors connected — so connect as many doors as possible).
Choose Core Mission
Place a Core Mission card from your affiliation showing your chosen mission beside your Mission Deck. This shows your overall mission for the game, and the extra score you will gain for achieving it.
Beam Down
You now place your characters in the mission area.
Select Starting Areas. Both players roll a die to determine who will beam down first. The player with the higher result picks one of the Mission Boards (not the Main Corridor or a Turbolift space) as the first part of their starting area. The other player then picks two Mission Boards as their starting area. The first player then takes the final Mission Board as the remainder of their starting area.
Place Characters and Health Pegs. Starting with the same player, they take turns placing characters on any space in their starting area. If a player runs out of characters to place, the other player continues placing characters until all of their away team have been placed. No more than two characters can be placed in the same space.
Place Health pegs in all holes in each character's Attack, Defense, Skill, and Move ratings.
Shuffle Decks
Once the Mission Boards are all set up, its time to get the card decks ready. Both players shuffle and place their Support and Mission Decks face down in their play area.
Draw Phase
Your hand will consist of a mix of Mission cards and Support cards. Keep the cards in your hand secret until you play or discard cards. In the Draw Phase, both players replenish their hands for the coming Action Phase.
Discard Unwanted Cards
At the start of the second and third rounds, discard any Support and Mission cards in your hand that you do not wish to keep. As you have no cards yet, you can't do this in the first round.
Draw Support Cards
Draw cards from your Support Deck to bring your hand up to five Support cards.
Draw Mission Cards
Draw cards from your Mission Deck to bring your hand up to five Mission cards.
Reverse Polarity (Round 1). If you don't like your hand at the start of the first round, you can return any or all cards from your hand to your decks and then shuffle both the Support and Mission Decks. Then draw cards to bring your hand back up to five Support and five Mission cards.
No Cards Left! When a deck runs out of cards, a player cannot draw from it.
Clear the Board
At the start of the second and third rounds, both players remove Activated Tokens from characters. As no characters have activated yet, you won't need to do this in the first round.
Action Phase
In the Action Phase, the players take turns to activate characters and perform actions with them. If they are outnumbered, their plucky heroes gain bonus actions to help them regain the initiative.
Assign Bonus Actions
At the beginning of the Action Phase, the player with fewer characters in play takes as many Bonus Action tokens as their opponent has more characters than they do.
Example: The Federation player only has Data and Worf still in play, while the Borg player has five of their characters on the mission area, so the Federation player takes three Bonus Action tokens to make up the difference (player gains three Bonus Action tokens).
Roll for First Activation
Next, both players roll a die. The player with the higher result will Activate a character first.
Subsequent Activations
Once you have Activated one of your characters (or used a Bonus Action token), it is now the turn of the other player to Activate one of their characters and so on until both players have Activated all of their characters and used all of their Bonus Action tokens. You can only Activate each of your characters once in each Action Phase.
Activating a Character
- Select a Character
- Take First Action
- Take Second Action (unless using a Bonus Action)
- Place Activated Token (unless using a Bonus Action)
Select a Character. You can either select one of your characters that has not yet activated or play a Bonus Action token and select any of your characters (even if they have already been Activated).
Take First Action. You then take an Action with the chosen character.
Actions that characters can always take are:
- Move Actions (see Move Action)
- Attack Actions (see Attack Actions)
- Take Cover Actions (see Take Cover Actions)
- Special Actions (see Special Actions)
Take Second Action. You then take a second Action with the same character. This may be the same or a different Action to the character's first Action.
If you are using a Bonus Action token, the character doesn't get a second Action.
Place Activated Token. Once they have taken their two Actions, place an Activated token on that character's card or discard the Bonus Action token.
Draw Instead of Taking Actions. Sometimes you might not want to take the normal Actions with your characters or Bonus Actions. Instead, you can do one of the following instead of an Action:
- Draw a card from your Support Deck.
- Discard a Mission card from your hand and draw a new one from your Mission Deck.
- Pass (do nothing).
Bonus Actions. At the start of the Action Phase, a player with fewer characters gains Bonus Action tokens to make up the difference.
They can use a Bonus Action token instead of Activating a character. If they do so, they choose a character (even one that has already Activated or taken Actions with Bonus Action tokens) and take one Action with that character. The character does not gain an Activated token from this, and can still Activate later in the turn.
You cannot keep Bonus Actions for the next Round, so you must use them — even if you just use them to draw cards.
Move Action
When one of your characters takes a Move Action, they can move up to a number of times equal to their current Move rating.
Movement cannot take characters into a space that:
- contains hostile characters
- is blocked by a Blocking edge (marked as a thick black line)
Characters cannot end their movement in a space already occupied by two friendly characters.
Turbolifts. Characters in a Turbolift space can move to any Turbolift space on a different Mission Board as if moving to an adjacent space. Players can never use Turbolift spaces to move to another Turbolift space on the same game board—they must always move to another game board.
Placing Characters. Sometimes you will be told to place a character in a space (as opposed to moving them, perhaps as a result of using a transporter or something similar). When you place a character, you cannot place them in a space that already has two friendly characters or that contains any hostile characters.
Measuring Distances
When measuring distances, simply add up the spaces from the first object to the second. You cannot measure through a blocked edge, so you must measure through another space that connects the spaces together instead.
Things are adjacent if they are in the same space or are one space apart.
Example: A and B are one space apart, so are adjacent. C and D are two spaces apart. E and F are three spaces apart.
Movement
Some spaces in the mission area have terrain in them that make moving through them difficult, if not impossible.
When moving, a space's edges follow these rules:
Open Edge. Open edges are marked by a White Line. Characters can move and see across an open edge.
Blocked Edge. Blocked edges are marked by a Thick Black Line. Characters cannot move or see across a blocked edge.
Door Edge. Doors are indicated by a Dashed White Line. When there are no characters in a space bordering the door, it is closed and is a blocked edge. When characters are in a space bordering a door, it is an open edge and characters can move and see across it.
Turbolift Spaces. Turbolift spaces are marked by the Black and White symbol. Characters can only enter or exit a Turbolift space through the door. Characters in a Turbolift space can move to any Turbolift space on a different Mission Board as if it were an adjacent space.
Transporter Spaces. Transporter spaces are marked by the Black and Yellow symbol. These spaces have no effect unless stated in an Event or Equipment card (which will typically use them to move your characters around the mission area).
Movement Examples. Riker can normally move 4 spaces in an Action. However, he has been injured, reducing his movement to 2. By using both of his Actions for movement, Riker can reach the Operations Terminal in the Corridor.
Worf is in the Armory and wants to get to the Operations Terminal on the Bridge. He moves into the Turbolift, then from there to one of the Turbolifts on the Bridge, then two more spaces to the Operations Terminal, moving a total of four spaces.
Blocked Doors. When generating the mission area, sometimes it is impossible to match up all of the doors on two adjacent Mission Boards. In this case, any doors that don't have a matching door on the adjacent Mission Board are blocked and cannot be used.
Attack Actions
When your characters take an Attack Action, they use one of the Attack Actions described on their card. Each of your characters have at least one Attack Action. They can gain additional Attack Actions with Support cards.
Reading Attack Actions
An Attack Action shows:
- The name of the weapon being used for the Attack Action.
- How many dice to add to your Attack rating when using this Attack Action.
- How much additional Damage this weapon causes if this Attack Action is successful.
- Additional effects or limitations of this Attack Action.
- A character can have multiple Attack Actions on their card and on Support cards. These can represent different weapons or different settings for their weapons. When taking an Attack Action, you must choose one of the available Attack Actions, and ignore the rest.
Line of Sight
Characters can only attack a target if they have line of sight to the space the target occupies (regardless of where in the spaces the characters are positioned).
If you cannot draw a line from the attacker's space to the target space without passing through a blocked edge, there is no line of sight between those spaces.
Spaces with friendly characters in them block line of sight. However, you can shoot through spaces with hostile characters in them.
Line of Sight example: Because Two of Five is in a space bordering the door, the door is open. This gives Riker a line of sight to the space occupied by Two of Five, so Riker can see Two of Five. Riker also has a line of sight into the space that Five of Five occupies, so can see Five of Five. Riker does not have line of sight to Locutus.
Intervening characters: Worf does not have a line of sight to either One of Five, Three of Five, or Locutus, because there is a friendly character in an intervening space. Hostile characters do not block line of sight, so Data has line of sight to all of the Borg characters.
Combat
When characters take an Attack Action, follow these steps to resolve the action:
1. Choose an Attack Action
Your Character might have several weapons available to them that give them different Attack Actions, but you can only use one Attack Action at a time. You can choose a different Attack Action each time you take an Action if you wish.
2. Choose a Target
The target of this Attack Action must be in Line of Sight (see Line of Sight). You cannot target friendly characters.
3. Roll Attack Dice
Roll a number of Attack dice equal to the attacker's current Attack rating plus any additional dice granted by their Attack Action. Line up their dice, highest to lowest on the Dice Board.
Backup. An attacker gains an extra Attack die if they have a friendly character in the same space.
4. Opponent Rolls Defense Dice
Your opponent rolls a number of Defense dice equal to the target's current Defense rating. Line up their dice, highest to lowest beside the Attack dice on the Dice Board.
Backup. A defender gains an extra Defense die if they have a friendly character in the same space.
No More Than Six Dice. No matter how many cards you play to add dice to your roll, you can never roll more that six dice in an Attack, Defense, or Skill roll.
5. Compare Results
Compare each pair of Attack and Defense dice. Any Defense die that equals or exceeds the corresponding Attack die cancels that Attack die. Any remaining paired Attack dice are not canceled and cause one Damage each.
If any Attack dice were not canceled, add the Attack Action's Damage rating to the amount of Damage caused.
Uncontested Attack Dice. In the event that the attacker is rolling more Attack dice than the defender has Defense dice, any uncontested die roll of 4 or greater causes Damage. Uncontested rolls of 1, 2, or 3 are canceled and do no Damage.
Uncontested Defense Dice. If more Defense dice are rolled than Attack dice, the lower, uncontested, Defense dice are ignored.
6. Take Damage
Any Damage taken is resolved immediately. Remove one Health peg from the Character card for each point of Damage taken. The owning player may reduce any of their ratings (Move, Attack, Defense, or Skill) in any combination as they apply the Damage from an Attack, but the total reduction in ratings must equal the Damage done.
Neutralized. The owning player may not reduce any rating below 1 (unless it is already 0). If they have to reduce a rating already at its lowest value (marked with a diamond), the Character has been Neutralized and is removed from the mission area. Discard any Equipment and Trait cards on the character's card.
Example: Shelby has taken three Damage, reducing her Move, Defense, and Skill ratings. If she takes one more Damage, she can reduce her Attack rating. A further Damage will Neutralize her as she will have to reduce a rating below its lowest value.
Attack Action Example. Lukara takes an Attack Action against Riker. Since Riker is in an adjacent space, Lukara chooses to use her Bat'leth (a Bat'leth is a melee weapon, so can only attack into an adjacent space).
Lukara has three Attack dice and her Bat'leth adds one Attack die, so her player will roll four dice. They score 6, 4, 2, and 2.
Riker has a Defense rating of three, so his player will roll three dice. They score 5, 4, and 1.
Note: If he had a Take Cover token, he would have rolled four dice. If he also had Worf in the same space for backup, he would have rolled five Defense dice!
When we compare the dice, pair by pair, the first pair has a 6 against a 5, so that attack die causes damage. The second pair has a 4 against a 4, so that attack die is canceled. The third pair has a 2 against a 1, so that attack die also causes damage. The final attack die is uncontested, but since the roll is not 4 or greater, it fails to cause damage. The attack causes two damage.
Because the Bat'leth has a Damage rating of +1, it causes an extra Damage, so Riker takes a total of three Damage. Riker's player needs to remove three Health pegs from Riker's Character card. Since Riker is where he needs to be and needs to pass a skill test to score an important mission, the player chooses to reduce Riker's Move and Defense ratings.
Discard to Re-roll. You may discard a Support or Mission card to re-roll any or all dice in an Attack, Defense, or Skill roll (but not any other roll).
If both players wish to discard, they take turns, starting with the player whose Activation it is, either discarding a card and re-rolling their dice or passing. Once both players pass in succession, neither player can discard and the current rolls are final.
When you re-roll a die, the new result replaces the old result, even if it is worse.
Take Cover Actions
When a character takes a Take Cover Action, place a Take Cover token on their card to remind you they have taken this Action. Characters marked with a Take Cover token gain an additional Defense die when attacked. If the character leaves the space that they are in, they must discard their Take Cover token.
Special Actions
Some characters, events, equipment, and missions have their own Special Actions. If characters take these Actions, the effect described occurs. Special Actions that require a Skill test are resolved in the same way as Skill Actions.
Skill Test
Some Special Actions on character, Mission, and Support cards require characters to take an Skill test to trigger their effects. The Special Action will state the effect that will happen if you pass or fail that test.
When a character takes a Skill test, roll a number of dice equal to their current Skill rating. Each die that scores 4 or more is a success. Unless otherwise stated, one or more successes is sufficient to pass the Skill test. No successes means that the Skill test is failed. Some cards give bonuses for additional successes beyond the first.
Using Specializations. Some Skill tests specify a Specialization (Command, Medical, Operations, Science, Security etc.). Characters with that Specialization on their card roll an additional die for that Skill test. If a character has a Specialization twice or even three times (shown as Specialization x2 or x3), they gain an additional die for each time they have that Specialization.
Failed Skill Tests. When characters fail Skill tests, the effect is not triggered (although sometimes a penalty effect is triggered instead).
Opposed Skill Tests. Some Skill tests are stated to be opposed by other characters. In this case the character taking the Skill test becomes the tester, and the opposing character becomes the challenger.
Instead of needing to roll 4 or more to succeed, your opponent rolls a number of Skill dice equal to their challenger's current Skill rating. Both players then line up their dice, highest to lowest, on the Dice Board in the same way as Combat (see Combat).
Compare each pair of Skill dice. Any challenger die that equals or exceeds the corresponding tester die cancels that Skill die, otherwise the paired Skill dice are successes.
Uncontested Skill Dice. In the event that the tester is rolling more Skill dice than the challenger, any uncontested Skill Dice roll of 4 or greater is a success. Uncontested rolls of 1, 2, or 3 are canceled and do not succeed.
Uncontested Opposing Dice. If the challenger rolls more Skill dice than the tester rolled, the lower, uncontested, Skill dice are ignored.
Backup. Characters taking or challenging Skill tests roll an extra Skill die if they have a friendly character in their space.
Opposed Skill Test Example.
Initial Opposed Skill Test: Riker takes a Command Skill Action opposed by One of Five. Riker has a Skill rating of two and the Command specialization, so rolls three dice. One of Five does not have the Command specialization, so rolls their Skill rating of three dice.
One of Five discards to Re-roll: With only one of Riker's Skill dice canceled, One of Five's player decides to discard a card from their hand and re-rolls two of their dice.
Riker passes: Riker's player is happy with this roll, so choses not to discard to re-roll any dice.
Riker discards to Re-roll: One of Five has now canceled all of Riker's Skill dice, so Riker's player discards a card to re-roll one of their dice, the three. Scoring a five, they reorder their dice so that they are once again highest to lowest.
Final Result: One of Five's player would like to re-roll again, but doesn't have any more cards that they are willing to discard, so they pass. Riker's player can't improve their position by re-rolling as they can't beat a six, so they pass too. The final result is two successes for Riker.
Terminals. Missions are typically (but not always) more complicated than just neutralizing your opponent's away team. Terminals represent critical places in the mission area that the away teams will need to access. A character in the same space as a Terminal can access it.
The four types of Terminals: Command, Operations, Science, Medical.
Terminals do not affect movement or attacks.
Beam Up and Debrief
Once you have completed three Rounds, the game ends and it's time to see who won.
You can now score any End of Game Mission cards that you have in your hand for which you have met the scoring conditions, then check your Core Mission card to see how many points you scored for it.
Add the points on the Mission cards and Bonus Points tokens in your scoring area. Whichever player has the highest point total is the winner of the game. If both players have the same points total, the away team that scored the most mission cards wins. If there is still a tie, the game is a draw.
Not Dead, Jim. Keep in mind that you can have your entire away team Neutralized, yet still have a chance at winning the game. A game always goes for three rounds, even if all the characters of one or more away teams have been Neutralized. Since your opponent still needs to beat your score, you may have a chance if your away team was able to score some Mission cards before its unfortunate fate. Meanwhile, you can continue the fight with Events from your Support Deck.
Special Rules
Assimilate. When a character is Neutralized by an Assimilation weapon, they are Assimilated by the Borg and becomes a Borg Drone under the Borg player's control.
- The Borg player places the character's model adjacent to the Borg character that Assimilated it (or as close as possible).
- They remove all Health pegs, Activated, Honor and other tokens, and all Equipment and Trait cards, from the character's card and place it with their Borg characters. They then place a Borg Assimilation Overlay over its Attack Actions, special rules and ratings to show its new capabilities. It keeps its specializations.
- Place Health pegs in all of the holes on the rating tracks of the overlay (regardless of the health of the character before assimilation).
- Give the character a Stun token.
They can now be Activated by the Borg player this Round.
If an Assimilated character is Neutralized, remove the Borg Assimilation Overlay and return the character card to its owner.
Defensive. A character with a Defensive weapon rolls one additional die for Defense rolls against Attack Actions by Melee weapons.
Escalation #. Characters with the Escalation rule do not start the game in play and are not placed in the mission area in the Beam Down step of Mission Preparation. They remain out of the game until the start of the Round indicated by # (so a character with Escalation 2 will arrive at the start of Round 2). At the start of the indicated Round, after the Draw Phase, but before the start of the Action Phase, the character is placed in the mission area.
If both players have Escalation characters coming into play at the same time, the roll a die to see who places the first character and alternate placing characters until they are all placed.
Hivemind. When a character with the Hivemind rule is Activated, it can take Actions (other than Move Actions) with any friendly Borg Drone characters as if they were the Activated character.
Melee. A character using a Melee weapon can only attack targets in adjacent spaces.
Search. When a rule allows you to search for a card, you search your Mission Deck (for Mission cards) or Support Deck (for Event or Equipment cards) for a card that has the specific keyword and place it in your hand. Shuffle the deck that you searched. Some searches specify that you can search your discard pile as well. In that case the player may take the card from the discard pile instead of their deck.
Stun. Characters can gain Stun tokens by being hit by a Stun weapons, as an effect of an Event, and for other reasons.
Stun Weapons. A character (other than a Borg) that takes Damage from a Stun weapon gains one Stun token in place of all Damage that they would have taken.
Borg characters do not gain Stun tokens when hit by Stun weapons, treat Stun weapons just like any other weapon with a +0 Damage modifier, as if the weapon did not have the Stun rule, instead.
Activating While Stunned. While a character has a Stun token, the only Action that it can take is a Recover special action which removes one Stun Token.
Defending While Stunned. If a character with Stun tokens defends against an Attack Action, it reduces its Defense rating for this Action by the number of Stun tokens it has.
Incapacitated by Two Stun Tokens. Characters with two Stun tokens are Incapacitated and cannot be given further Stun tokens. Incapacitated characters cannot Move, Attack, or take Skill tests. They no longer prevent hostile characters from moving through their space (although hostile characters cannot end their Move in that space), and cannot give Backup to friendly characters.
Three and Four Player Games
Three or Four Player Free-for-All Games
If you have two boxed sets, you can play games with three or four players. Most of the rules work the same way as they do for a normal two-player game, with the exception of the changes below.
Scan Mission Area. Place two Bridge and Engineering Mission Boards and one Mission Board of each of the other two types beside the playing area.
The players roll a die each. The player with the highest result places a Main Corridor board in the center of the playing space. They then choose one of the Mission Boards and place, matching side up, it so that it connects to the Main Corridor. The remaining players, in descending order of their scores, then choose and place a Mission Board each.
Once all of the players have placed one Mission Board, the players then reverse this order, starting with the last player to place a Mission Board and finishing with the first player to place a Mission Board, and place another Mission Board each (or until all six Mission Boards have been placed).
Mission Boards must be placed so that:
- the edges of two boards are flat up against each other,
- at least one door must connect to the Main Corridor (if possible), and
- as many doors as possible connect to doors on the Main Corridor and other Mission Boards, and as few doors as possible are blocked.
You do not place any Turbolift spaces in a multi-player game.
Beam Down. When you select starting areas, each player rolls a die to determine who will beam down first. The player with the highest result picks one of the Mission Boards (but not the Main Corridor) as their starting area. The remaining players, in descending order of their scores, choose a different Mission Board as their starting area.
If there are only three players, the players then choose another Mission Board to be part of their starting area in the reverse order, starting with the last player to choose a starting area and finishing with the first player to choose a starting area.
The players then take turns to place a character on any space in their starting area, in the order that they first picked their starting areas, until all characters have been placed. If a player runs out of characters to place, the other players continue placing characters until all of them have been placed. No more than two characters can be placed in the same space.
Action Phase. In the Action Phase, all of the players take turns to activate characters and perform actions with them.
Assign Bonus Actions. At the beginning of the Action Phase, determine which player has the most characters in play. All other players take as many Bonus Action tokens as that player has more characters than they do.
First Activation. The players roll a die each. The players will Activate characters in descending order, starting with the player with the highest roll, then the player with the next highest roll, going down to the player with the lowest roll.
Subsequent Activations. Once all of the players have Activated one of their characters (or used a Bonus Action token), the players continue to take turns Activating one character apiece (or playing a Bonus Action token) in this order until all players have Activated all of their characters.
Definitions
Opponent. When a card or rule refers to an opponent, you must choose one of the other players as the opponent affected by that card or rule.
Hostile Characters. All other players' characters are hostile characters and are affected by any rule that refers to hostile characters.
Resolving Ties. If a tie is rolled when determining the order in which players take their turn, all of the tied players will go as a group before lower scoring players. The tied players roll again to set the order in which they will go within their group. If there are ties within the group, the players who are still tied roll off again, and so forth until there are no more ties.
Four-Player Team Games
With two boxed sets and four players, you can play a team game with two teams. Each player controls their own away team in alliance with another player. Most of the rules work the same way as they do for a normal two-player game, with the exception of the changes below.
Scan Mission Area. Place two Bridge and Engineering Mission Boards and one Mission Board of each of the other two types beside the playing area.
The teams roll a die each. The team with the highest result places a Main Corridor board in the center of the playing space. They then choose two of the Mission Boards and place them, matching side up, so that they connect to the Main Corridor. The other team then chooses and places three Mission Boards, and then the first team places the final Mission Board.
Mission Boards must be placed so that:
- the edges of two boards are flat up against each other,
- at least one door must connect to the Main Corridor (if possible), and
- as many doors as possible connect to doors on the Main Corridor and other Mission Boards, and as few doors as possible are blocked.
You do not place any Turbolift spaces in a team game.
Beam Down
Select Starting Areas. The teams roll a die each. The team with the highest result picks two of the Mission Boards (but not the Main Corridor) as their first part of their starting area. The other team then picks three Mission Boards as their starting area. The first team then takes the final Mission Board as the remainder of their starting area.
Place Characters. Starting with the same team, teams take turns placing their characters on any space in their starting area. A team can place their characters in any order, swapping between players or placing multiple characters from one player as they wish. If a team runs out of characters to place, the other team continues placing characters until all of them have been placed. No more than two characters can be placed in the same space.
Action Phase. In the Action Phase, each team take turns to Activate a character and perform Actions with them or use a Bonus Action token.
Assign Bonus Actions. At the beginning the Action Phase, determine which player has the most characters in play. All other players take as many Bonus Action tokens as that player has more characters than they do.
First Activation. Both teams roll a die. The team with the higher result will Activate a character from one of their away teams.
Subsequent Activations. Once they have Activated one of their characters or used a Bonus Action token, it is the turn of the other team to Activate one of their characters or use a Bonus Action token. A team can Activate their characters in any order, swapping between players or activating multiple characters in a row from one player. The teams take turns at Activating characters until all players have Activated all of their characters and used all of their Bonus Action tokens.
Definitions
Opponent. When a card or rule refers to an opponent, you must choose one of the players on the other team as the opponent affected by that card or rule.
Hostile Characters. All members of your own away team and your teammate's away team are friendly characters. All members of the opposing team's away teams are hostile characters.
Borg Cube. In any game when playing with the Borg ship side of the Mission Boards, you can agree to create a square arrangement of the Mission Boards with no corridor to create a 'Borg cube' feel.
No Main Corridor. If you do this, there are no Turbolifts on the board, and any reference to the Main Corridor now refers to the Armory, Medical Lab, Science Lab, and Transporter Room board.
Tactics
Playing the Federation
The United Federation of Planets may have started with the humans of Earth, but it now contains many species living together in harmony. Despite their peaceful intentions, the Federation Starfleet is always ready to defend itself if attacked, and few threats have been as dire as that presented by the Borg.
Your Goals. As a Federation player, your main missions will be to repair the starship, recovering information on the Battle of Wolf 359 to enable you to defeat the Borg, and to defeat all threats to Sector 001 — the Earth, home of the Federation. You have the flexibility to tailor your strategy to match your play style. In addition, many Federation missions give you bonus points for extraordinary levels of success.
Your Secret Weapons. The Federation has some of the most powerful and flexible equipment. Their phasers are set to stun by default (except against the Borg). This allows you to temporarily disable even the toughest enemy character with a couple of shots, disrupting the enemy plan and preventing them from interrupting yours. If a more aggressive response is required, Riker can order the crew to set their phasers to kill, giving you the best of both worlds.
Your transporter technology such as your pattern enhancers gives you unparalleled mobility. If you find yourself trapped in the wrong part of the ship, you can often beam straight to where you need to be.
Good Tactics. The flexibility of the Federation can lead you to lose sight of your missions, but you need to stay on track and make good use for your technology and the assistance of your crew on the U.S.S. Enterprise to win. If one route to victory is blocked, use your flexibility to switch to another.
Playing the Borg
The Borg drones of the Borg Collective are completely interchangeable, sharing their identity and knowledge. To the Borg, growth comes through assimilating the biological and technological distinctiveness of other civilizations.
Your Goals. The Borg are attempting to assimilate the starship and any opposing characters into the Collective. As a Borg player, the fate of individual Borg drones is of little concern, as long as you succeed in your mission. Your opponent's futile opposition simply triggers your Borg to adapt and respond to the threat with greater force.
Your Secret Weapons. Being a hivemind, the Borg Collective has several powerful advantages. You should always be looking to gather adapt tokens, enhancing your drones and opening up new powers as you respond to the developing situation. Locutus of Borg can guide your adaption through issuing new subcommands focusing on the greatest threats and opportunities open to you.
The Borg hivemind allows you to focus your actions where they are needed. If a particular drone is busy assimilating the bridge, other drones can forfeit their actions to add processing power to the effort, even if on the other side of the starship.
Your ability to assimilate characters allows you to weaken the opposition while strengthening yourself. Immediately you assimilate them, they are ready to serve the Collective.
Good Tactics. The Borg start with just a small and expendable scouting force. Use this to start the assimilation and your adaption. As your force escalates, focus your rapidly increasing strength on resolving missions quickly and moving on to the next. If the enemy interfere by neutralizing your drones, simply send replacements to continue the task.
Playing the Klingons
The Klingon Empire values honor above all else, and honor is gained in glorious battle against a worthy foe, ideally face-to-face and hand-to-hand. That does not discount the value of gaining new technology to defeat your foes, and that too can be a victory.
Your Goals. Gaining honor and entering Sto'Vo'Kor, the Klingon afterlife, through death in battle is the fundamental goal of all of your characters. Simply slaughtering your foes like a wild animal, although easy for your fearsome warriors, is not enough to achieve this goal. You must defeat them in honorable battle.
Your Secret Weapons. Klingons are warriors trained from birth to fight. They are deadly and tough, and their weapons are brutal. Few others can stand up to a Klingon in a one-on-one fight. Even if badly wounded, your Klingons can still surprise the enemy, charging into combat, then dispatching them in a berserk rage.
Should your warriors die in battle, it doesn't matter too much, so long as they gained honor. A dead Klingon in Sto'Vo'Kor is far better than a live Klingon without honor.
Good Tactics. As a Klingon player, you can't go wrong by simply getting up close and personal with the enemy (unless they are Borg, where the risk of dishonor through being assimilated is something to bear in mind). Seek out honor and the death of your foes, but don't overlook the possibilities of gaining control of the ship and recovering enemy technology.
Playing the Romulans
The Romulan Star Empire prefers brains over brawn, achieving their aims by deception and turning their enemies against each other rather than direct combat. Make no mistake, the Tal Shiar, their intelligence service, has no qualms about dispatching troublesome opposition quickly and efficiently, they simply prefer to work behind the scenes.
Your Goals. The Romulans are always after more intel on their foes, learning their strengths and weaknesses and how to defeat them. While doing so they will be running plots within plots, planning assassinations and devious stratagems to derail their opponent's plans.
Your Secret Weapons. Romulans are some of the most skilled characters in the game, but also the least physical. They need use their logic and reasoning to gather intel on their opposition.
As a Romulan player, you can never have too much intel. With enough intel, your characters can quickly move into position, and sneak away from approaching enemy. Good intel allows you to set up deadly sneak attacks and assassinations to kill your foes, or to avoid incoming attacks.
Good Tactics. Romulans should always attempt to control the situation, avoiding conflict until they have a decisive advantage. Instead, they work behind the scenes gathering intel, then make a well-directed surgical strike. Don't spend all your intel though, it can be worth a lot at the end of the game as well.
Glossary
Action (pages 16-24): When you Activate a Character, they take two Actions. These can be standard Actions like Move or Attack, Actions on a Support or Mission card, or a Special Action on their Character card.
Action Phase (pages 13, 16): Each Round has an Action Phase, in which the players alternate Activating one of their Characters until all Characters have been Activated once.
Activation (pages 13, 17): Each Character has an Activation in each Action Phase. In their Activation, a Character takes two Actions to Move around, Attack other Characters, and score Missions.
Adapt (page 12): Borg players acquire Adapt tokens as they complete Missions. Adapting to their opposition improves the effectiveness of their Characters.
Adjacent (page 18): A Character is adjacent to everything that is in the same space or within one space of them.
Affiliation (page 12): Your away team will be affiliated with the Federation, Borg, Klingons, or Romulans.
Assimilate (pages 20, 25): Some Borg Attack Actions Assimilate a hostile Character if they Neutralize it. Assimilated Characters become Borg Characters and have the ratings of a Borg Drone, but retain their Specializations.
Attack Action (pages 20-22): Each Character has at least one Attack Action on their card, and may gain additional Attack Actions from Support cards. Use Attack Actions to Incapacitate or Neutralize hostile Characters.
Attack Rating (pages 9, 20): A Character card has an Attack rating that shows how many dice they can roll in an Attack Action.
Attack Dice (Weapon) (page 20): An Attack Action has an Attack Dice rating. A Character taking an Attack Action rolls the number of additional dice shown on the Attack Action.
Away Team (page 9): Each player leads their away team into Missions aboard the wrecks created by the Battle of Wolf 359. An away team has a set of Characters with their own unique capabilities, and a set of Missions to achieve and various Event and Equipment cards to achieve them with.
Backup (pages 21, 23): A friendly Character in the same space as another Character gives them Backup, allowing them to roll an extra die in Attack, Defense, and Skill rolls.
Blocked Edges (page 18): Characters cannot move or see through Blocked Edges (defined by a black line).
Bonus (on a card) (page 12): You receive the bonus stated when you successfully complete the Action or meet the conditions to score the card.
Bonus Action (pages 8, 17): A player with fewer Characters than their opponent(s) receives Bonus Action tokens. Use a Bonus Action to take a single Action with any friendly Character (whether they have already Activated or not) instead of Activating a Character.
Bonus Points Token (page 8): Players record additional points that they scored when completing Missions Bonus Points tokens.
Challenger (page 23): The hostile Character opposing an opposed Skill test is called the Challenger.
Character (page 9): Each Character is represented by a figure and a Character card. A Character can be friendly or hostile. If a rule doesn't specify which, then it refers to both friendly and hostile Characters.
Damage (page 21): Each uncanceled Attack die from an Attack Action causes one Damage to the target. Each point of Damage removes a Health peg, reducing the rating. If there are no more Health pegs to remove, the Character is Neutralized.
Damage (Weapon) (pages 20, 21): An Attack Action has a Damage rating. If a Character causes any Damage with an Attack Action (i.e. one or more of their Attack dice were not canceled by the Defense dice), they cause the amount of additional Damage shown on the Attack Action.
Debrief (pages 13, 25): At the end of the game, the players add up the points values of any Missions that they have scored (plus any points tokens they have). The player with the highest score wins.
Deck (pages 10-12): Each player has two decks of cards: their Support Deck and their Mission Deck. Shuffle each deck at the beginning of the game and place it face down beside the Mission Area. Discards are placed face up beside their deck. When a deck runs out of cards, a player cannot draw cards of that type.
Defense Rating (pages 9, 20): A Character card has a Defense rating that shows how many dice they can roll to Defend against an Attack Action.
Defensive (Weapon) (page 20): The weapons used in some Attack Actions are defensive as well, giving the wielder an additional Defense die against Melee Attack Actions.
Door (page 19): Doors are indicated by a dashed white line. Doors are closed unless a Character is in an adjacent space.
Draw Phase (pages 13, 16): Each Round starts with a Draw Phase in which players replenish their hands.
Equipment card (pages 10-12): Equipment cards are a type of Support card that give Characters the tools they need to fight or complete Missions more effectively. A player can play an Equipment card on one of their Characters at the start of any of their Activations. That Character keeps that Equipment for the rest of the game, unless they are Neutralized.
Escalation # (page 25): Characters with the Escalation special rule don't start the game in the Mission Area. Instead, they enter the game after the Draw Phase of Round #.
Event Card (pages 10-12): An Event card is a type of Support card that is either played as a Special Action during a Characters Activation, or as an interrupt when the specified conditions on the card are met.
Friendly Character (page 9): Any Character in your away team.
Free Action (page 11): Some Special Actions combine multiple Actions. After you complete the first Action, take the additional Action, treating the whole combined Action as a single Action for your Activation.
Hand (page 16): Each player has a hand of Mission and Support cards that they keep concealed from the other player(s) until they are played or discarded.
Hivemind (page 25): When a Borg Character Activates, it can take Actions (other than Move Actions) with another Borg Drone instead of itself. This allows the Activating Borg to take Skill Actions with another Borg Drone to complete its Mission faster.
Hostile Character (page 9): Any Character that is not in your away team.
Incapacitated (page 25): When a Character receives two Stun tokens, it is Incapacitated and cannot give friendly Characters Backup, and doesn't stop hostile Characters from moving through its space.
Interrupt (page 12): Some cards have interrupts that tell you when you can play that card. The effect on that card takes place immediately, interrupting the normal flow of the game. Once the effect is resolved, the normal flow of the game is resumed.
Main Corridor (pages 14, 26, 27): The main corridor links the Mission Boards to form the Mission Area.
Melee (Weapon) (page 20): An Attack Action with a Melee weapon must target an adjacent hostile Character.
Mission Area (pages 14, 26, 27): The Mission Area is normally four Mission Boards, a main corridor, and two turbolift spaces.
Mission Board (pages 14, 26, 27): A Mission Board represents a particular part of the ship, such as the bridge, engineering, etc. It is divided into spaces, some of which contain Terminals.
Mission Card (pages 8, 10, 12, 16, 25): Each player has a Mission Deck of 20 Mission cards. Mission cards state how the Mission is completed and the points scored for completing it. If a Mission card has a Special Action on it, a Character will usually have to succeed at that Action to complete it. Some Mission cards give a bonus on completion in addition to the points scored. When the Mission is completed the player places the Mission card in their Scoring Area.
Move Action (page 17): A Move Action allows a Character to Move into an adjacent space up to their Move rating. They cannot Move through hostile Characters or blocked edges, and cannot end in a space that already has two friendly Characters in it.
Move Rating (pages 9, 17): A Character card has a Move rating that shows how fast they can Move.
Neutralized (page 21): When a Character has lost their last Health peg and is required to remove another, they are Neutralized and removed from the game.
Opposed Skill Test (page 23): Some Skill Actions are opposed by a hostile Character. In that case, both players roll their Skill dice and compare them highest to lowest, with the Challenger canceling a Tester's success each time they equal or exceed the Tester's roll.
Placing Characters (page 17): You cannot place a Character in a space that already contains two friendly Characters or any hostile Characters.
Re-roll (pages 22, 24): When a rule tells you to re-roll a die, pick it up and roll it again, replacing the previous result with the new one. This may require you to rearrange your dice so that they remain ordered from highest to lowest. You can discard a Mission or Support card to re-roll any or all dice in any of your Attack, Defense, or skill rolls.
Requirement (page 11): A card with a Requirement can only be played if that Requirement is met.
Round (page 13): Each game is made up of three Rounds, each made up of a Draw Phase and an Action Phase.
Search (page 25): When a special rule tells a player to search for a card, they look through the appropriate deck (or discard pile if the rule allows) and place the card in their hand, then shuffle the deck.
Skill Action (page 23): Skill Actions are found on cards. They allow Characters to trigger special rules or to score Missions. To take a Skill Action, the player rolls the Character's Skill dice, with any roll of 4 or greater being a success.
Skill Rating (pages 9, 23): A Character card has a Skill rating that shows how many dice they can roll to succeed in an Skill Action.
Space (pages 14, 17, 18): The Mission Area is divided into spaces that determine where Characters and terminals are and the distance that Characters can Move.
Specialization (pages 9, 23): Characters have Specializations that add an additional die to Skill tests of that type.
Stun (pages 20, 25): A Character hit by an Attack Action using a Stun weapon does not take Damage, but gains a Stun token. If they are Stunned twice (by two separate Attack Actions), they will take a second Stun token and become Incapacitated and cannot be Stunned further.
While they have a Stun token, a Character can only take a Recover Action to remove one Stun token. Stunned Characters roll one less Defense die for each Stun token.
Borg Characters are not Stunned by Stun weapons, taking Damage as normal instead.
Supply # (page 11, 12): Some cards have a Supply number. You may not have more than # copies of this card in your Support and Mission Decks. You may only have one copy of cards without a Supply number in your Support and Mission Decks.
Support Card (page 10, 12): A player's Support Deck consists of at least 20 Event and Equipment cards.
Take Cover Action (page 23): A Character that takes a Take Cover Action gains a Take Cover token. This gives them an extra Defense die against all Attack Actions. This lasts until they take a Move Action, when they remove the Take Cover token.
Terminal (page 8, 23): There are four types of Terminal: Command, Medical, Operations, and Science. Characters often need to be at a specific type of Terminal to take a Skill Action.
Turbolift (page 14, 18, 26, 27): Characters can Move from one Turbolift space to another as if they were adjacent spaces.
Uncontested (page 21, 23): A die is uncontested if the opponent has more Attack or opposed Skill dice than the Defender or Challenger. Uncontested dice are canceled on a roll of 1, 2, or 3, and succeed on a 4 or more.
Quick Reference
Mission Preparation
- Scan Mission Area
- Choose Core Mission
- Beam Down
- Shuffle Decks
Round 1 / Round 2 / Round 3: Draw Phase, Action Phase
Beam Up and Debrief
Draw Phase
- Discard any or all cards from your hand
- Draw back up to five Mission cards
- Draw back up to five Support cards
- Remove Activated tokens
Action Phase
- Assign Bonus Actions
- Roll for First Activation
- Activate Characters
Assign Bonus Actions. Player with fewer characters in mission area takes Bonus Action tokens to make up the difference.
Activate Characters. Player's take turns Activating a character for two Actions (marking them as Activated) or using a Bonus Action to take one Action with a character (whether Activated or not).
Actions
Move Action: Move up to two spaces for each point of current Move rating.
Attack Action: Attack a hostile character using an Attack Action on the character card or an Equipment card.
Take Cover Action: Place a Take Cover token on the character card. Roll additional Defense die against all Attack Actions until they leave their space, when they remove the Take Cover token.
Special Action: As specified on the card.
Draw Support Card: Draw a Support card to add to your hand.
Discard and Draw Mission Card: Discard a Mission card and draw a new Mission card to add to your hand.
Attack Action
- Attacking player rolls the number of dice given by their current Attack rating with any additional dice given by the Attack Action's Attack Dice rating.
- Defending player rolls the number of dice given by their current Defense rating.
- Arrange each player's dice, highest to lowest.
- Defense dice cancel matching Attack dice if they are equal or greater. Uncontested Attack dice are canceled if they roll 1, 2, or 3.
- Uncanceled Attack dice cause one point of Damage each.
- If the attack caused any damage and the Attack Action has a Damage rating, this is added to the Damage done.
- The defending player reduces their ratings by one for each Damage. If any rating is reduced below 1, the character is Neutralized and removed from the game.
Backup. Roll an additional die if there is a friendly character in the same space.
Discard to Re-roll. Discard a Support or Mission card to re-roll any or all dice.
Skill Test
Unopposed
- Player rolls the number of dice given by their Skill rating with any additional dice given by their specializations.
- Each score of 1, 2, or 3 is canceled. Any score of 4 or greater is a success.
Opposed
- Testing player rolls the number of dice given by their current Skill rating with any additional dice given by their specializations.
- Challenging player rolls the number of dice given by their current Skill rating with any additional dice given by their specializations.
- Arrange each player's dice, highest to lowest.
- Challenger's dice cancel matching Tester's dice if they are equal or greater. Uncontested Tester's dice are canceled if they roll 1, 2, or 3.
- Uncanceled Tester's dice are one success each.
Backup. Roll an additional die if there is a friendly character in the same space.
Discard to Re-roll. Discard a Support or Mission card to re-roll any or all dice.