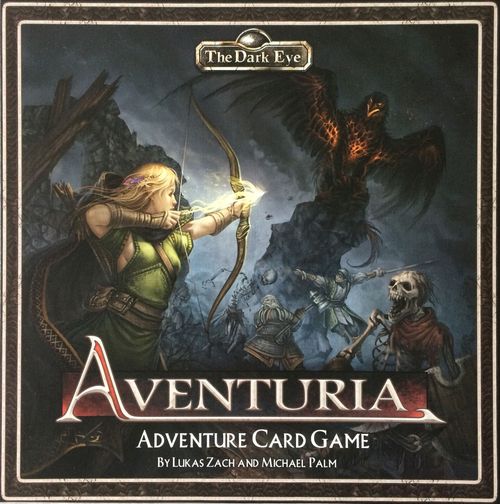
Aventuria: Adventure Card Game
Aventuria: Adventure Card Game Rulebook
Table of Contents
Table of Contents
The World of Aventuria
What is a Dark Eye?
A Dark Eye is a powerful magical item. Such Eyes are extremely rare, and only a few spellcasters of ages past were able to enchant the special metal to allow viewers to see across distance and even time. To create a Dark Eye, a creator needs magic, but also meteorite iron that has fallen from the sky. When enchanted, the lump of iron takes a round or eye-like shape.
What is Aventuria?
Aventuria is a continent of diverse regions ranging from rainforests and swamps ruled by lizardfolk to the mountain kingdoms of the dwarves, and from the northern wastelands of the orcs and the forests of the elves to the cold lands of the Fjarning Barbarians. Aventuria offers adventures, challenges, and dangers for every kind of hero, from a questing knight to a powerful archmage.
A World of Adventure
The Middenrealm (1) stretches through the heart of Aventuria. It is an empire nominally ruled by the young Empress Rohaja, but is in reality controlled by powerful regional lords and ladies. The land is home to chivalrous knights as well as grim dwarves that live in huge underground cities. The capital of the realm is Gareth, by far the largest city in all of Aventuria. Gareth alone is so huge and diverse that the city can spawn hundreds of interesting, dangerous, and entertaining adventures.
In the plains along the northwestern border of the Middenrealm lie the Orclands (2), where the orcs of Aventuria make their home. Called "coal pelts" by many humans due to their heavy black fur, orcs are always at war with the neighboring empire, and are usually thought to be barbaric, cruel, brutal, and willing to test their strength against anyone stupid enough to challenge them.
West of the Orclands sits the land of Thorwal (3), home to fearless sailors and raiders who worship a whale god called Swafnir and whose longboats threaten the western Aventurian shores.
South of Thorwal are the two small kingdoms of Nostria (4) and Andergast (5). Most people believe those realms to be somewhat antiquated and underdeveloped. They have a long and very tangled history of border disputes and wars, as they consider themselves "dearest enemies."
South of the Middenrealm, the progressive Horasian Empire (6) is home to artists and poets. The cities of this fertile land are ruled by patricians, nobles, and councilors who strive constantly to outdo their rivals or weaken them via intrigue. The ruler of the realm is called the Horas, a man who, as the son of a dragon, governs with uncanny foresight.
Just off the Horasian coast lies the archipelago of the Cyclops Islands (7), wooded home of cyclopes, minotaurs, and fairies. Politically, the islands belong to the Horasian Empire, but their human population has a unique culture of their own, very different from their cousins on the mainland.
In the south lies the Empire of Al'Anfa (8). Its capital of the same name, sometimes called the Boil of the South, is filled with intrigues and decadence. There a stranger's life is worth only what it can fetch in the slave markets. Most slaves are sold to great landowners, and work farms and groves to increase their owners' wealth.
The jungles of the Far South (9) and the Forest Islands are home to the Utulus and the Forest Folk, whose daily struggles for survival include facing threats from Al'Anfan manhunters and other slavers. Off the coast, the Southern Sea (10) is dotted with countless small, self-governed islands ruled by colonists or pirates. Here, it is rumored, one can find legendary buried treasures or even set sail for the unexplored continent of Uthuria.
Beyond the mountains to the east of the Horasian Empire, Novadi tribes rule the huge Khôm Desert. Many caravans fall victim to the unforgiving Khôm and these nomadic warriors of the Caliphate (11). The Novadi people worship a single god named Rastullah, and just sneer at polytheistic outsiders (whom they consider ignorant heathens.)
Even further east are the Lands of the Tulamydes (12), ruled by sultans and emirs. The many small city-states of this region are famous for their djinn summoners, wily thieves, and bazaars full of exotic goods.
The largest realm of the Tulamydes, excluding the Novadi Caliphate, is Arania (13). It is a very fertile land that once belonged to the Middenrealm before it gained autonomy. Here the traditions and cultures of both the Tulamydes and the Middenrealm blend in a unique mix, and while Aranian men dwell in idleness, Aranian women wield true power in the realm.
Beyond the Lands of the Tulamydes and the Tuzak Bay lies the large island of Maraskan (14). The Tulamydes believe the island to be cursed due to its many poisonous animals and plants, mysterious assassins, and the strange dualistic religion of its inhabitants, who worship the Twin Gods Rur and Gror.
The Shadowlands (15) was once a province of the Middenrealm. Some years ago they fell under the rule of demon summoners and necromancers, the servants of powerful archdemons. It is a dangerous land where unscrupulous nobles pursue their own agendas, unfettered by either human or divine law.
The northern forests and grasslands around the Salamander Stones (16) are the natural habitat of the elves. Orcs and humans stay away from the mountains and the woods surrounding them, for the elves resent intruders. While praised for their beauty and elegance, the elves are also feared for their cruel treatment of those who inadvertently trespass in their realm. They are magical beings who seemingly originate from light itself and are rumored to be blessed with an immortality filled with music and song.
The Valley of the Svellt (17) separates the elven hunting grounds from the Orclands. Some time ago, a league of merchant cities prospered in this area, but orcs have raided the valley for many years, demanding tribute from the human settlers. Only the strong survive in this region, and those who dare to travel through this land would do best to arm themselves.
The northeastern part of Aventuria is Bornland (18). Consisting mostly of vast, dark forests, this kingdom is ruled by the Bronnjars, Bornland's poverty-stricken nobility. Life here is hard and full of suffering, especially for the bondsmen. Many mysteries are hidden deep in the woods, secrets that date back to the time of the long-gone Order of the Theater Knights, whose successors are believed to be the Bronnjars.
North of the Bornland lies nothing but snow, frost, and icy wastes. Few people wander the High North (19), some of them trappers, some gold prospectors. The Fjarnings, a barbaric tribe, are the only humans who brave the ice deserts, along with yetis, dark elves, and some of the land's oldest mysteries and secrets.
Aventuria is just one of many continents on the world of Dere. Beyond the Eternal Edge, one of the highest mountain ranges in all of Aventuria, is the legendary Riesland, which some scholars call Rakshazar. And only a short while ago, explorers found a huge land mass beyond the Southern Sea. Uthuria, called the realm of the 12,000 gods, is filled with unimagined adventures and riches.
Beyond the ocean to the west of Aventuria lies Gyldenland, the original home of the Thorwalers and all other Aventurian humans, waiting for brave sailors to visit. It is a strange continent, hard to reach because of unfavorable winds and dangerous currents. Ships sailing for Myranor—Gyldenland's name in the tongue of its inhabitants—usually sink before reaching their destination, but now and then, one actually lands on its shores. No one in Aventuria knows what other shores wait to be explored beyond the seas, or beneath the surface, or even above the clouds, though legends claim there is much more to discover.
A World of Magic
Aventuria is saturated with magic. Three-headed dragons, slavering ghouls, emerald spiders, and many other monstrosities inhabit the continent and are a danger to the people. But there are not only monsters. People born with Mada's Gift to control and manipulate magic study mysterious powers in academies or with private teachers. Magicians and wizards might control a person's free will, or vanish, reappear, and throw fire at their enemies. And there are many more magical traditions. For example, witches call themselves Daughters of Satuaria and view magic as a gift from their goddess. They are usually accompanied by magical familiars such as cats, crows, or toads, with which they can converse. Elves have a more intuitive connection to magic, viewing it as part of Nature and using it to aid hunting and survival.
A World of Gods
Magic is not the only source of supernatural powers. The Blessed Ones, priests of the Aventurian gods, can work miracles and invoke wonders. Their gods lend them the powers they need to perform such feats. Most people in Aventuria firmly believe in the Twelvegods. These gods are twelve siblings. Praios, the god of Law and Order, is their lord. A simple peasant might never see a mage or a monster, but will witness the wonders of the Twelvegods through the miracles performed by the village's Blessed One, be they in the form of rain that comes in response to prayer, or the healing of an extreme wound.
But the gods also have enemies. The Shadowlands in the east are ruled by demon summoners and necromancers, who in turn serve archdemon lords. Together they defy order and fight against the gods themselves. Armies of undead march from the Shadowlands to spread fear among the servants of the Twelvegods and destroy the free realms of Aventuria.
And then there is the Nameless One, the so-called thirteenth god, who secretly plots against the Twelvegods and sends forth servants to spread his will. The land conceals forgotten magical societies, strange legends that might be true, and religious mysteries that are as old as time itself.
The Gods of Aventuria
The following table lists the Twelvegods, their individual aspects, and their holy animals or items. The Twelvegods are worshipped almost everywhere, though in some places their churches exist alongside, or even blend with, those of other deities. The greatest nemesis of the Twelvegods is the Nameless One, known to most cultures as the embodiment of Evil and—ironically—by many different names. The archdemons are also fierce enemies of the Twelvegods. Dwarves worship Angrosh (called Ingerimm in the faith of the Twelvegods) and his daughter Simia. The elves have no gods, and instead worship aspects of Nature, namely nurdra (life, growth, becoming), zerza (death, decay, leaving), and dha (existence). The concept of dhaza, the eternal foe, is their version of the Nameless One.
Aside from these gods, there are other deities of some importance. Rastullah is the sole god of the Novadi desert people. The people living on the island of Maraskan worship the Twin Gods, Rur and Gror, who are both male and female. The whale god of the Thorwalian pirates is called Swafnir. The people of Nivese worship the Sky Wolves, the Forest Folk worship a jaguar-like god called Kamaluq, the druids worship the earth mother Sumu, and Satuaria is the goddess of witches and warlocks.
| Twelvegods | Aspects | Holy Animals/Items |
|---|---|---|
| Praios | Justice, Magic Ban, Truth | Griffon |
| Rondra | Honor, Combat, Courage | Lioness |
| Efferd | Storms, Water, Wind | Dolphin |
| Travia | Honor, Hospitality, Fidelity | Wild Goose |
| Boron | Sleep, Death, Oblivion | Raven |
| Hesinde | Artistic Craftwork, Magic, Knowledge | Serpent |
| Firun | Ice, Hunt, Nature | Polar Bear |
| Tsa | Youth, Life, Rebirth | Lizard |
Arch-Demons
| Arch-Demons | Aspects | Secondary Name |
|---|---|---|
| Blakharaz | Torture, Darkness, Revenge | Tyakra'Man |
| Belhahar | Bloodlust, Cunning, Massacre | Xarfai |
| Charyptoroth | Sea Monsters, Storms, Tainted Water | Gal'k'Zuul |
| Lolgramoth | Restlessness, Unrest, Infidelity | Thezzphai |
| Thargunitoth | Nightmares, Necromancy, Undead | Tijakool |
| Amazeroth | Illusions, Deception, Madness | Iribaar |
| Nagrach | Mercilessness, Cold, Relentlessness | Belshirash |
| Asfaloth | Chaos, Chimeras, Transformation |
Calendar
The kingdoms of Aventuria use various calendars and measure time in different ways. The most common method, used by the followers of the Twelvegods, reckons time before or after "the Fall of Bosparan" (FB, for short). Over a thousand years ago, Bosparan was the most powerful city on Aventuria, but decades of intrigue, war, and uprisings led to its destruction. The current year in the official campaign is 1038 FB.
Money and Currency
The currency of the Middenrealm is accepted almost everywhere in Aventuria. The Horasian Empire even uses the same coinage but with different images. The coins are made of gold (ducat), silver (silverthaler), bronze (haler), and iron (kreutzer). A golden ducat is worth 10 silverthalers, 100 halers, or 1000 kreutzers.
Silverthalers and halers are the most common currency in the Middenrealm and throughout Aventuria. Most peasants won't even see a gold coin in their entire lives, as they will never deal in goods worth that much.
Duel Rules
Hello and welcome to Aventuria, the duel and adventure card game from the world of The Dark Eye!
In this booklet, we'll explain the basic rules of the game, which allow you to face other heroes in exciting duels. We will teach you about the abilities of the heroes and their equipment, which are both represented by the Action Cards in their hero decks. Each hero has their own deck with their own set of cards, and some of them are special cards that are only available to that hero. This results in individual strengths and weaknesses that make each hero unique.
During the game, some of the Action Cards become Endurance Cards. When this happens, they can no longer be used with their normal game effect, but instead provide their hero with endurance which they can use to play cards and activate abilities to defeat their opponent.
In this way, your hero becomes stronger from turn to turn, but so does your opponent. From the first turn to the last, you must try to maintain the edge and win by reducing your opponent's life points to 0 before your hero suffers the same fate.
The second Adventure Rules booklet builds on the basic rules described here and takes you into the vast, adventurous world of Aventuria. Instead of competing in duels, your heroes go on adventures together and take on dangerous monsters and henchmen.
However, we recommend that you start by playing a few duels so that you fully comprehend the rules before embarking on your first quest. Have fun and good luck!
2nd Edition changes: This is the 2nd Edition of the Aventuria Basic Box. See 2nd Edition Changes below for what was changed from the previous edition.
Game Material
In Duel mode, only use the game materials mentioned on this page. Put all other cards and tokens back into the game box.
4 Hero Decks. This box contains the four Hero Decks: Arbosh the Dwarf Blacksmith, Layariel the Elf Scout, Carolan the Half Elf Rogue, and Mirhiban the Tulamydian Mage. Each Hero Deck consists of 1 Hero Card and 30 Action Cards. (The Skill Cards are not used in Duel mode.)
You can recognize the Hero Cards by the hero's picture and the hero's full name listed underneath. To the right of the name is the abbreviation used for this hero. In Layariel's case it is "ES" for "Elf Scout."
Each hero also has a preconstructed deck of 30 Action Cards. Each of these cards also has the hero's abbreviation to indicate which deck they belong to. All Action Cards belonging to Layariel therefore have the abbreviation "ES."
In the game, Action Cards are sometimes placed face down to be used as Endurance Cards. Endurance is the most important resource in the game. It allows heroes to play new Action Cards and to activate cards already played.
8 Life Point Cards. Each hero has 2 Life Point Cards that are used to show their current health.
8 Fate Points. Each duel uses 2 Fate Points for each participating hero. These can be used to make rerolls or activate other effects. In the rules and on the cards, Fate Points are represented by the eye symbol.
8 Dice. The box contains four 6-sided dice (abbreviated as "D6" in the rules and on the cards) and four 20-sided dice (abbreviated as "D20" in the rules and on the cards).
Hero Card layout: Edition (the edition to which the card belongs, in this case the Aventuria Basic Box); Card Type (indicates what kind of card it is, in this case a Hero Card); Hero Abbreviation (the two-letter hero abbreviation indicates which hero the card belongs to — this lets you assign Action Cards to the correct Hero Card); Hero's Name (the full name of the hero); Profession (the profession of the hero from which their hero abbreviation is derived); Basic Equipment (each hero begins the combat with an attack listed here — this attack cannot be taken away by game effects); Special Ability (each hero has a special ability that may be used once per game — once a hero has used their special ability, turn the Hero Card over to the side without the ability; this special ability also cannot be taken away by game effects); Close Combat Value (the hero rolls on this value to attack in close combat); Ranged Combat Value (the hero rolls on this value to attack in ranged combat); Magic Value (the hero rolls on this value to attack with magic or liturgical chants — some heroes have a "-" instead of a number, meaning this attack is not available to them during the game); Dodge Value (the hero rolls on this value to dodge enemy attacks).
Action Card layout: Card Title (the full name of the card); Hero Abbreviation (the two-letter hero abbreviation shows which hero the card belongs to — this lets you assign Action Cards to the correct Hero Card); Endurance Cost (this number indicates how much endurance a hero must pay to play the card); Card Type (the card type indicates what kind of card it is, in this case a spell and a free action — this affects how the card is used in the game); Card Category (the category of an action card is represented by a symbol and affects deck construction — in this case, a Simple Spell); Card Effect (the game effect of the card — some cards have an effect that is executed immediately when they are played, others only have an effect during the rest of the game); Card Effect in an Adventure (if a card with such a box is used in the adventure mode, the effect specified in the box applies instead of the normal card effect); Edition (the edition to which the card belongs, in this case the Aventuria Basic Box); One-Shot Card Symbol (this symbol indicates that the card is a one-shot card — this is also indicated by the red card frame).
Different kinds of Action Cards:
- Permanent Card (black frame): Place the card "Weapon Poison" under the card "Dirk" to indicate that it improves that card. Place cards that permanently improve attributes under the hero so that their bonus is visible next to the basic value.
- One-Shot Card (red frame and symbol).
- Free Action (red frame, symbol, and white endurance costs on dark background).
When turned face down, an Action Card becomes an Endurance Card.
Life Point Cards
A hero's Life Point Cards consist of two cards that are placed on top of each other to indicate their current life points. The card on top indicates the tens digit and the card below the ones digit.
At the start of combat, the players set their heroes' Life Point Cards to a starting value of 40.
Every time a hero loses or regains life points during the game, adjust the Life Point Cards to show the current life points. Change the tens digit number by turning the top card. The upright number is the current tens digit. Change the ones digit by moving the top card into the appropriate position. The number next to the top card's edge is the current ones digit.
Game Preparation
The Goal of the Game. Improve your hero by playing Action Cards and reduce your opponent's life points to 0 through attacks and other effects.
Before the First Game. In Duel Mode, use only the game material listed above. Organize the four preconstructed Hero Decks according to their Hero Abbreviations:
- DB = Dwarf Blacksmith (Arbosh, Son of Angrax)
- ES = Elf Scout (Layariel Treetopglint)
- HR = Half Elf Rogue (Carolan Calavanti)
- TM = Tulamydian Mage (Mirhiban al'Orhima)
Each of these Hero Decks consists of 1 Hero Card, 30 Action Cards, and 2 Life Point Cards. Each hero also has 1 Skill Card, which uses the same portrait as the Hero Card. Set these aside right now, as they are not used in Duel Mode. The Life Point Cards do not have the Hero Abbreviations, but they do include a portrait of the hero.
Preparation. In a 2-player duel, prepare the game as follows (games with more than 2 players are explained under Multiplayer Sessions):
- Each player selects a Hero Deck and places their Hero Card face up in front of them so that their special ability is visible.
- Each player sets their Life Point Cards to display 40 Life Points.
- Players then shuffle their Action Cards and place them face down to create a draw deck.
- Each player draws 5 cards from their draw deck.
- Each player may place any number of cards from their hand face down and replace them with new cards from the draw deck. The face down cards are then shuffled back into the deck.
Example: Arbosh's player draws the cards "Battle-Axe," "Orc-Nose Axe," "Warhammer," "Ox-Herd," and "Carousing" at the beginning of the game. The player decides this is too many melee weapons for the beginning of the game, so they decide to place the Battle-Axe, Orc-Nose Axe, and Ox-Herd face down and draw three new cards. They draw the cards "Iron Forest Crossbow," "Helmet," and "Feat of Strength." They then shuffle the face down cards back into the Hero Deck.
- Each player takes one D6 (6-sided die) and one D20 (20-sided die).
- Place 4 Fate Points in the middle of the table (2 for each player in the game).
All players may look at any discard pile at any time. They are not allowed to change the order of the cards.
Determine Starting Hero. Each player rolls a D6. The player with the highest roll is the starting hero. If there is a tie, roll again. The opponent of the starting hero takes 1 Fate Point from the middle of the table to compensate for going second.
The starting hero then plays a complete first turn, playing all phases in order. The opponent then takes their first turn, playing all phases in order. Play alternates in this way until one hero is reduced to 0 life points, ending the game.
How to Play
1. Start the Turn. Some Action Cards have optional or mandatory effects that happen at the beginning of your turn. If there are several of them in play, you decide in which order you want to resolve them. If there are no such cards in play, move on to the next phase.
2. Draw 2 Cards from the Deck. Draw 2 Action Cards from your Hero Deck and place them in your hand. If there are no more cards in your draw deck, you may not draw any more cards. DO NOT start a new draw deck with your discard pile.
3. Ready Exhausted Cards. Ready all your exhausted Endurance Cards or previously activated Action Cards by turning them to an upright position. They are now ready to be used again this turn.
4. Play up to 2 Endurance Cards. You may play up to 2 cards face down in front of you as Endurance Cards. Place these new Endurance Cards upright on the table to show that they are not yet exhausted. The new Endurance Cards may be cards from your hand or cards that you had previously played as permanent cards. (Permanent cards are explained below.)
Tip for the game: The best Endurance Cards to choose are the ones you currently need the least, because a card played as endurance can no longer be used as a normal Action Card. Its normal playing effect can no longer be used during the current game. You may look at your own Endurance Cards at any time.
By playing Endurance Cards each turn, you have access to more endurance, allowing you to play more powerful Action Cards. If you think that you already have enough endurance, you can decide to play one or zero cards as endurance during this phase.
5. Actions. You can now perform the following actions in any order and any number of times: playing Action Cards, activating permanent cards, and performing attacks.
6. End of Turn. Once you have completed all your actions, your turn ends. If you have more than 7 cards in your hand, discard cards until you have only 7 left. Some Action Cards have optional or mandatory effects that happen at the end of your turn. If there are several of them in play, you decide in which order you want to resolve them. If there are no such cards in play, move on. The opponent now begins their turn with phase 1.
Actions (Phase 5)
In the fifth phase of your turn, you may play Action Cards, activate permanent cards, and carry out attacks in any order.
Play Action Cards. If you want to play an Action Card, you must pay the endurance cost shown at the upper left corner of the card. Exhaust the necessary number of Endurance Cards (turn them sideways) to show that you have used them to pay for a card. Each Endurance Card has a value of 1. You only exhaust the Endurance Cards once you play the relevant Action Card. Endurance costs of X mean that you decide how much endurance to use; X can also be 0.
After paying the Endurance Cost, place the Action Card face up in front of you. Read the card's effect aloud.
The card's text describes whom it may target:
- If the text mentions a hero, you may play the card on your hero or the opposing hero (or any other hero in a multiplayer game).
- If the text mentions an opponent, you may use the card only on the opposing hero.
- If there is no information given, you may use the card only for your own hero.
Some cards include directions for "In an adventure." These rules are only used when the heroes team up to face an adventure (see Adventure Rules).
Requirements. Both permanent and one-shot cards may have a requirement listed with their effect. Some cards have multiple requirements. You must fulfill all requirements before using the card's effect. If several requirements occur in combination, they must be fulfilled in the order in which they are listed on the card. The following procedure is the same for both permanent and one-shot cards:
- Fulfill the Requirements. If the text of the Action Card mentions a requirement such as "Play after an enemy plays a card," then the requirement must be met before you can play the Action Card. You must play the Action Card immediately after the requirement is met.
- Exhaust the Action Card. You must exhaust the Action Card (turn it sideways) to show that you have used it. An effect that requires exhausting the card may be used only if it is ready. Permanent cards that do not have an exhaust requirement may be used more than once in a turn.
- Pay Additional Endurance. A number in front of the effect (an endurance cost followed by a colon) indicates the endurance cost every time you want to use the effect. This is separate from the endurance cost of playing the card in the first place. Endurance costs of X mean that you decide how much endurance to use; X can also be 0.
- Make a Test. If you must make a test, roll a D20. You succeed on any result that is equal to or lower than the value of the relevant attribute. If the test includes a number with a plus sign (+), raise the value of the attribute by that amount for this test (making it easier). A minus sign (-) lowers the value of the attribute by that amount (making it harder). If you are rolling a magic test+5, add 5 to your current magic attribute and try to roll equal to or under that number. If you are successful, apply the card's effect. Discard one-shot cards after the test, even if the test was not successful.
Activate Permanent Cards. Many permanent cards offer game effects that can be used in this phase by activating the card, using the procedure described above. However, a permanent card remains in play (but is often exhausted), unless the card text says otherwise. Note that some permanent cards have effects that can (and must) be played outside of this phase (such as "Vigilance," which allows you to reroll a failed Dodge test). You must still fulfill all listed requirements to activate permanent cards outside of your own Action phase.
One-Shot and Permanent Cards. Many cards have an effect that is resolved immediately after playing the card. The card is then discarded face-up on the player's discard pile. These One-Shot cards are indicated by a red card frame and the one-shot symbol.
A black card frame means that the Action Card is a permanent card that stays in play.
Most one-shot and permanent cards are played on your own turn, but some may be played out of turn (see Free Actions). These are indicated by a dark background and white text for the endurance cost in the upper left. Read the card carefully for its specific timing requirements.
Important note: You cannot play a duplicate of a permanent card you already have in play.
Some permanent cards may be played on another permanent card in play to improve it. If the improved card is discarded or taken back into the player's hand, discard the improvement into the discard pile of the player who originally played it.
Place permanent cards that improve a hero's attributes under the Hero Card to show the improvement.
Making an Attack
The hero's basic equipment and many permanent cards (like weapons and spells) allow the player to make an attack. Each attack is defined by a type, either Close Combat, Ranged Combat, or Magic. Each turn, you may make no more than one of each type of attack. You may make one close combat, one ranged combat, and one magic attack per turn! If you have more than one card that allows the same attack type, you may only attack with one of them.
An attack is made up of the following steps:
1. Choose Target. Choose which opponent will be the target of the attack. In a duel, this is always the opposing hero.
2. Meet Requirements. Fulfill the requirements of the attack, as specified on the attack card.
3. Roll Attack Test. Roll the attack test (see Tests below) against the attribute value of the attack. For example, if it is a Ranged Combat attack, roll against the hero's ranged combat attribute. If you fail the test, your attack has no effect and ends here. (See Fate Points below.) If you succeed at the attack test, you hit your opponent and continue with the next step.
Example: Arbosh attacks Mirhiban with his Battle-Axe. He has a close combat attribute of 14, so he needs to roll a 14 or less to hit. He rolls a 3 and is successful.
4. Roll Damage. The attacker determines the damage of the successful attack by rolling the dice indicated on the attack card and adding the sum of the dice to the fixed value shown (e.g. "2D6+3").
Example: The Battle-Axe causes 1D6+4 damage. Arbosh rolls a 5 and would cause a total of 9 damage.
5. Roll Dodge Test. The opponent now rolls a test (see Tests below) against their dodge value. If the test is successful, the attacker's damage is halved (round up). If the test fails, the attack deals full damage.
Example: Mirhiban dodges the attack by rolling a 5, which is equal to or below her dodge stat. This reduces the damage caused by the Battle-Axe to 5 (9 / 2 = 4.5, rounded to 5).
6. Determine Life Point Loss. Subtract the remaining damage of the attack directly from the opponent's life points. If they have a way to reduce the damage, such as armor, apply that now. The hero hit by the attack sets their Life Point Cards to show their current number of life points.
Tests
Whenever Aventuria requires a test, the player must roll a D20. If the result is less than or equal to the tested attribute (close combat, ranged combat, magic, or dodge), then the test is successful. If the result is higher than the tested attribute, the test has failed.
If the test includes a number with a plus sign (+), raise the value of the attribute by that amount for this test (making it easier). A minus sign (-) lowers the value of the attribute by that amount (making it harder). If, for example, a card requires a "close combat-test +2," the player adds 2 to their current value and then tries to roll equal to or below the new value. If a card requires a "close combat-test –4," the player subtracts 4 from their current value and then tries to roll equal to or below the new value.
Additional Rules
The following rules complete the basic rules. Please note that these rules are not optional. They are essential rules of the game.
Armor. Armor is a type of permanent card that provides a protection value (abbreviated PRO). To use the protection of armor, as well as any additional effects, you must meet the requirements indicated on the armor card. Note that armor is typically played on your turn but then used outside of your turn. You may not play it in response to an attack.
Subtract the protection of the armor from the damage of an attack during the Determine Life Point Loss step. If this reduces the damage to 0 or less, your hero is unharmed. If not, subtract the remaining damage from your hero's life points.
Important note: If you have more than one armor card in play, you may only select one of them to reduce the damage of the attack. Only that armor's protection and effects may be used. You may not use more than one armor card per attack to reduce damage.
Armor only reduces the damage of attacks, never the life point loss of other card effects (see Life Point Loss below).
Example: Mirhiban hits Arbosh with an Ignisphaero (magic attack). Arbosh fails to dodge and Mirhiban rolls 10 damage. The Dwarf wears Chain Mail (PRO 4) and a Helmet (PRO 3). He decides to use the Chain Mail to reduce the damage by 4. Since he only has 5 left, he also decides to use the Chain Mail's special effect, discarding the Chain Mail to reduce the damage by another 3. He loses 3 (10 – 4 – 3 = 3) and continues the game with 2 damage. He could not have discarded the Helmet to reduce the damage further, because you may only use one armor card per attack.
Armor protects a certain location of your hero's body: head, chest, arms, or legs. You may only have one armor card in play per body location. If you want to change the armor on a body location by playing a new card, you must discard the armor already in play.
Critical Failure. If you roll a 20 on the D20 for an attack or test, it is always considered a failure. In addition, your opponent draws a random card from your hand and discards it. Only a natural die roll result of 20 causes a critical failure. If the result becomes a 20 due to a game effect or modifier, this does not count as a critical failure. If a game effect causes you to make an immediate reroll (such as using a Fate Point, as explained below), then the last result you roll is the one that counts.
Critical Success. If you roll a 1 on the D20 for an attack or test, it is always considered successful. In addition, you may immediately draw a card from your draw deck. Only a natural die roll result of 1 causes a critical success. If the result becomes a 1 due to a game effect or modifier, this does not count as a critical success. If a game effect causes you to make an immediate reroll, then the last result you roll is the one that counts.
Important note: The Aventuria box includes D20s with a dark eye symbol instead of a 1.
Fate Points. If your attack fails due to a failed attack roll (after any re-rolls or other effects), you may take a Fate Point from the middle of the table. This includes critical failures (see above). You may not gain Fate Points from failed tests that are not attacks. If there are no Fate Points in the middle of the table, you may take a Fate Point from another player.
You may discard a Fate Point back to the middle of the table to get one of the following three advantages:
- Draw a Card. At any time during your own turn or that of your opponent, you may draw 1 card from your draw pile for each discarded Fate Point.
- Gain One Endurance. At any time during your own turn or that of your opponent, gain 1 additional endurance for each discarded Fate Point. This endurance may only be used to pay the costs for cards and effects during the current turn.
- Reroll an Attack. Discard a Fate Point to reroll a failed attack. You may continue spending Fate Points for additional rerolls, but the last result you roll is the one that counts. If the attack fails despite rerolling, you do not receive another Fate Point, because you used a Fate Point for the reroll. Fate Points only flow in one direction at a time—you are either spending them or receiving them, never both on the same action.
Example: Mirhiban has no Fate Points. She exhausts her last endurance to make a magic attack. She fails her attack roll but gets 1 Fate Point for it. There are no Fate Points in the middle of the table, so she can take one of the 4 Fate Points belonging to her opponent. Mirhiban cannot use her new Fate Point to reroll the attack, because she received it during this action.
Later in the game, Mirhiban has 2 Fate Points but no endurance left. She spends 1 of her 2 Fate Points to gain endurance, which she uses to make a magic attack. The attack roll is not successful, so she spends her second Fate Point to reroll the test. The attack fails again. Mirhiban does not receive a Fate Point for the failed attack, because she already spent one to repeat the test.
Free Actions. Usually, you may only play Action Cards during the Action phase of your turn. Action cards marked as a free action are an exception. They are indicated by the endurance cost written in white on a dark background in the top left of the card. You may play them at any time, during any phase in your turn or an opponent's turn, as long as you have enough endurance to pay for them and any requirements are fulfilled. If more than one player wants to play or use an Action Card, the first player to say so aloud may use their effect first. If both players speak at the same time, the player whose turn it is determines the order.
Example: Carolan loses 10 life points to an attack from Layariel. He has saved endurance for this situation and plays Hidden Dagger as a free action. The requirements allow him to play this card when he loses life points due to an opponent's attack. Layariel loses 5 life points.
Healing. Many cards allow a hero to regain life points. Track both damage and healing using your Life Point Cards. You may never have more life points than your starting amount.
Life Point Loss. Some game effects do not cause damage but cause a direct loss of life points. This is indicated by the use of the life point icon instead of the damage icon. Life Point Loss effects do not count as attacks and often include the reminder text "This does not count as an attack." (If an effect causes Life Point Loss but does not include this reminder, it still does not count as an attack.) The target may not dodge or use armor (see above) to reduce the damage taken.
Example: Layariel loses 5 life points because of the Hidden Dagger card. Since this is not an attack, she may not dodge or use armor.
Special Ability. Each hero has a special ability that you may use once per game. If there is no other requirement listed, you may use the special ability at any time on your turn or an opponent's turn. After you use your hero's special ability, turn the Hero Card over. The back does not list the special ability, so this shows that it has been used.
End of the Game
If your hero's life points drop to 0 or below, you fall unconscious and are eliminated from the game.
If both heroes' life points drop to 0 or below at the same time, the winner is the player with the hero whose life points are equal to or closest to 0. If there is a tie, then the game is a draw.
Multiplayer Sessions
You can also play the Aventuria Duel Mode with more than 2 players. Two different variants are available, the Skirmish and the Team Duel.
Skirmish. In a Skirmish, each hero faces off against all the other heroes. All other heroes are considered opponents. Any number of heroes may play. The following additional rules apply to Skirmishes:
- After determining the starting hero, each other hero receives 1 Fate Point. Play passes clockwise from the starting hero.
- When a hero is eliminated, remove all their cards from the game and continue playing with the remaining heroes.
- The game ends when only one hero has life points remaining. This hero is the winner.
- If all remaining players' life points drop to 0 or below at the same time, the winner is the player whose life points are equal to or closest to 0. If there is a tie, the game ends in a draw for the heroes that tied and a loss for any heroes eliminated prior to the tie.
- In a skirmish, the text of a card determines its target as normal. Cards that refer to "hero" may be played on any hero. Cards that refer to "opponent" may be played on any opponent. If there is no indication, the player can only play the card on their own hero.
Team Duel. This variant must be played with an even number of players. Divide the participating heroes into two equal teams and sit alternating around the table. The following additional rules apply:
- After determining the starting hero, each other hero receives 1 Fate Point. Play passes clockwise from the starting hero.
- Close Combat, Ranged Combat, and Magic attacks can only target the opposing team's hero that has the most life points remaining. If two or more opponents have the same number of life points remaining, the attacker may choose.
- The team that manages to defeat one hero of the opposing side first wins. If more than one hero is eliminated at the same time, the team with more heroes remaining wins. If there is a tie, the team that has the most total life points remaining wins.
- You may spend Fate Points for other players on your team to allow them to draw 1 card, receive 1 endurance, or reroll 1 attack.
- In a Team Duel, the text of the card determines its target as normal. Cards that refer to "hero" may be played on any hero. Cards that refer to "opponent" may be played on any opponent (following the attack restrictions described above). If there is no indication, the player can only play the card on their own hero.
Deck Building
You may create your own Hero Decks from all available cards, according to the following rules:
- Your deck must always include exactly 30 Action Cards.
- You may include no more than two copies of any card in your deck.
- Hero-specific cards have the hero abbreviation highlighted in black. These cards may only be used in a deck with the hero that matches the abbreviation. General cards have the hero abbreviation highlighted in white and may be used in all decks that can use that category (see below).
- Promotional cards (such as the Dark Eye card in this box) count as general cards of their category and be used in any hero's deck accordingly.
- Each Action Card has a category symbol in the lower left corner (such as for Light Close Combat Weapons). On the back of a hero's Skill Card (see Adventure Rules), you can see the maximum number of cards allowed in each category for that hero. If a category is not listed, that hero may not use that type of card at all.
- You may only use Reward Cards if agreed upon by all players. Note that tournaments should clearly indicate whether Reward Cards are allowed. As in an Adventure, the maximum number of Reward Cards in a Hero Deck is 3 no matter what.
Card category symbols: Light Close Combat Weapon, Medium Close Combat Weapon, Heavy Close Combat Weapon, Light Ranged Combat Weapon, Medium Ranged Combat Weapon, Heavy Ranged Combat Weapon, Light Armor, Medium Armor, Heavy Armor, Equipment, Advantage, Talent, Free Action, Simple Spell, Complex Spell, Simple Liturgical Chant, Complex Liturgical Chant.
Rules Questions and Answers
We do everything in our power to present the Aventuria rules as detailed and unambiguous as possible, but there are still frequently asked questions that we will answer here. If you have additional questions or wish for extended rules examples, you can always contact us at [email protected]. We are happy to answer all your requests and maintain a regularly updated FAQ at: http://www.ulisses-us.com/games/aventuria-adventure-card-game/
Using Fate Points after a Critical Failure. If I roll a 20 with a die, can I use a Fate Point to prevent the consequences by re-rolling? Yes, this is allowed. However, only in the case of such rolls where Fate Points may be used (see Fate Points above). In the case of dodge rolls, for example, no Fate Points may be used for a re-roll, so a result of 20 cannot be prevented by a Fate Point during a dodge roll.
Ability "Follow-up Attack" versus "Alertness." In the duel mode, Carolan fights against Arbosh. Both may use their special ability after the damage roll. Which of the two must first use or announce their ability? Arbosh first uses Follow-up Attack, because this modifies his damage roll. Carolan may then decide whether he wants to use Alertness.
Armor, Armatrutz, Martyr's Blessing. When are the effects of these applied—before or after the dodge? In other words: In the event of a successful dodge roll will the hit points first be halved and then modified, or the other way around? You always make the dodge test first and halve the damage if successful. "Armatrutz" and "Martyr's Blessing" act as armor, so they are applied after the dodge.
Snare. The Snare can be triggered after the attack of a hero. Will its damage take effect before the damage of the attack that triggered it, and can this result in the attacker being defeated and thus no longer able to cause the attack's damage? If the Snare causes enough damage to defeat the attacker, the attacker does not apply damage.
Bannbaladin. 1) As an example, in a team game two against two Arbosh and Carolan play against Layariel and Mirhiban. Arbosh and Layariel have the most life points of their respective teams. Layariel casts the "Bannbaladin" spell on Arbosh. Who can the elf now target with her attacks? 2) Are actions which are not considered attacks (e.g. "Throwing Hatchet," "Call Djinn") affected by the Bannbaladin? 3) In adventure mode: What if an opponent determines a hero as target who has played a Bannbaladin on him?
- In this case, Layariel cannot attack anyone, since Carolan is not a valid target due to having fewer life points and Arbosh is not a valid target due to Bannbaladin.
- The Bannbaladin only refers to attacks. All other effects that do not count as attacks may be used normally.
- If it is an attack (hit point symbol), it has no effect. Other game effects (life point loss, discarding, etc.) take place normally.
Fixed Matrix. Can this card be used as often as you want, even on the same roll? During the roll, can I also take a Fate Point for each time I roll a failure? And if I have a magic value of 19, can I draw a card even though the roll is successful? The card can be used as often as you want, as long as the die result is an 18 or 19. After a failed magic attack (die result 18 or 19), you may decide whether you want to repeat the die roll. If you decide to take a re-roll, you do not receive a Fate Point, but you do roll again. If you decide against the re-roll, you may draw a card and receive a Fate Point. After a failed magic roll (die result 18 or 19) you don't receive a Fate Point, because you only receive Fate Points for failed attacks. If you roll an 18 or 19 in a magic attack or magic roll, but succeed anyway because of a very high magic value, you may decide to either draw a card and then apply the effects of the successful attack or roll, or to make a re-roll (for any reason whatsoever).
Invocatio Minor and Invocatio Maior. The Invocatio Minor and Invocatio Maior spells are described as magical attacks on the deck of the Tulamydian Mage. Does this mean that you can not perform another magic attack on the same turn? The text also states: "This attack does 12 damage." Do you still have to make an attack roll? The two Invocatios are magic attacks and therefore considered an attack for the current turn. By contrast, "Throwing Hatchet" or "Call Djinn" are not considered attacks and therefore a further attack of their type can take place in the same turn. The hit points caused by these spells are fixed and are therefore not rolled—but a normal attack roll has to be made for them, with all related game effects.
Covenant Garb. The Covenant Garb has the category "Complex Spell" and the type "Armor (Chest)." Which of those to apply in the game? Both. Firstly, this card can only be used by heroes who are allowed to add complex spells to their deck (and are counted as such against the maximum of complex spells that can be added to the hero's deck). At the same time the card has the type "Armor (Chest)." This means that during the game it can not be used simultaneously with other chest armor. In addition, the card may be stolen by means of the "Pickpocket" card or by opponent's abilities in adventures.
Powerful Scepter. Must the second attack target the same opponent as the first? No, any valid opponent may be selected.
Protective Amulet. Can I prevent enemy spells like Balsam or Armatrutz in duel mode with the Protective Amulet? Yes. One-Shot spells like Balsam must be discarded without effect, while permanent spells like Armatrutz only lose their effect for one round but remain in the game.
Pickpocket. Can the Half Elf Rogue steal and use armor by means of "Pickpocket" that he could not choose for his deck during deck construction? Yes, the Rogue can also steal and use heavy armor.
Adventure Mode FAQ
The following questions and answers refer to the Aventuria adventure mode and a variety of adventures that were released for Aventuria. They only become relevant once you start playing with the adventure rules.
Removing Henchmen. Is there a difference between a henchman being removed from the game or a combat? Yes. "From combat" means that the cards are shuffled back into the Henchman draw pile, as described in the rules. "From the game" means that the card is not shuffled back into the Henchman draw pile.
Time Scale. On many time scales (Saving Silvana, Random Encounter, Forest of No Return I, etc.), it is written that certain opponents are allowed to perform "twice as many actions" during that round. However, the time scale effect takes place after all opponents have already acted. How is this handled? If an effect of the time scale allows an opponent additional attacks (e.g. by doubling the number of attacks—see Kobold in Saving Silvana), they take place when the time scale effects are triggered (step 4 of the turn order). If multiple opponents can perform additional attacks, they do so in the same order in which they performed their regular attacks.
Card Question: Raise Skeleton. When the Baron of Wildenstein draws the "Raise Skeleton" leader action from the "Forest of No Return" expansion box in the second act of "Legacy of Wildenstein," there are no skeletons in the henchman draw pile. How is this handled? The players can choose one of the following: a) The "Raise Skeleton" card is discarded without effect and you immediately draw another Leader Action Card. b) You create an additional pile of skeleton henchmen and draw a card from that pile.
Werewolf of Andergast with "Mysterious Strengthening." The leader "Werewolf of Andergast" in the second act of "Forest of No Return" would receive 3 life points through the "Mysterious Strengthening" event card, which would make him extremely strong. Is this intended? This is another example of how two cards of different sets can be combined in the adventure mode to generate a lethal synergy. The answer is yes, that really happens. One possible solution is to avoid lethal synergies by removing the corresponding card(s)–in this case the "Mysterious Strengthening"–before the start of combat. The other possibility is to leave the card in play and heroically face the danger that comes with it.
Curse of the Werewolf. When the card comes into play, the hero to the right of the triggering player suffers direct damage. What happens if this player: a) counts as defeated? b) is already a Werewolf Cursed? Ignore defeated heroes in the target selection (Adventure Rules) and heroes that have become a Werewolf Cursed are ignored because they become an opponent in the row of villains. This means that both defeated heroes and Werewolf Cursed heroes are ignored for the attack of the "Curse of the Werewolf" card. This can result in a hero attacking themself.
Editor's note: The more cards we release for Aventuria, the more combinations will become available, which can lead to similar exceptions as with "Raise Skeleton." We will try to provide a clear answer to all the questions that may arise, and present these answers in a constantly updated FAQ list. This will definitely be the case for all questions concerning the duel mode. The same goes for the adventure mode, but with the following note: In case of a controversial rule question, there are two possible answers: one which benefits the players and one which benefits the opponents. In this case, we suggest to always favor the players and keep the game running. After the game you can still discuss whether this was the right decision or not—if it is of any importance at that point. If this approach leads to the game becoming too easy for the players, then you can compensate for this by going up a difficulty level. As mentioned before, this comment only applies to the adventure mode. In the duel mode, on the other hand, two or more players with equal rights compete against each other, so we will give unambiguous answers to all frequently asked questions to protect the fairness of the game.
2nd Edition Changes
The following game rules and components have changed compared to the previous Aventuria Basic Rules:
- The heroes' previous Life Point Counters have been replaced with more convenient Life Point cards.
- The Brief Respite has been completely revised and two new card types have been added: Training and Practice.
- At the end of an Adventure combat, heroes discard all remaining Fate Points—they can no longer keep them.
- Acquired Reward Cards are no longer placed on top of the Hero Deck, but shuffled in, and for each Reward Card added, the hero must discard a regular card from their Deck, so a Hero Deck always contains 30 cards.
- The following Basic Box cards have been changed: Hero card Half Elf Rogue, Carousing, Fulminictus Thunderbolt, Connections, and Feint.
Hero Backgrounds
Arbosh, Son of Angrax. The oldest son of the famous mushroom grower Angrax and the well-respected blacksmith Valoschgra, Arbosh was born under an unusual sign. Unlike his three brothers, who were all black-haired, Arbosh was born with white hair, a sign that the blessed ones of Angrosh interpreted as the god's benevolence. It is even said that Arbosh already had a beard in his infancy, but in fact he was beardless until his twenty-fifth birthday and suffered greatly because of his smooth cheeks.
After his baptism of fire, Arbosh learned the craft of forging from his mother, and his self-confidence grew with his growing beard. Despite his big hands, he showed an astonishing skill, even in the production of chain rings or fine mechanical devices.
Although he was talented, his profession did not fully satisfy him. From his youth, he devoured all the stories about the courageous heroes of the Age of Dwarves, and the idea of exploring the world outside his home grew. Arbosh dreamed of traveling through Aventuria and having adventures, at least for a few decades, until he would return home as a made Dwarf to take the hand of a Dwarven wife. From a trader of Kosh who occasionally visited the Arbosh family he learned of the human tradition of going on the road as a journeyman. Fascinated by this custom, he decided to leave his homeland after the end of his teachings and go on a journey.
During his voyages, Arbosh joined groups of other adventurers, and often acted in the service of High King Albrax, who valued the blacksmith not only for his excellent weapons and armor but also for his courage.
He gained particular fame through a struggle with a Cyclops, who Arbosh wanted to ask to teach him the secret of Cyclopic forging. The meeting ended in bloody carnage, from which the Dwarf emerged victorious against all odds.
Layariel Treetopglint. Layariel grew up in a small village south of the Salamander Stones. She learned her way around the natural world in local pastures and forests, and she developed a great skill in archery and hunting. From the first time she saw a human, she grew curious about the strange people with the rose-shaped ears, whose manners were both disgusting and fascinating to her. As early as her parents allowed, she traveled to nearby Donnerbach to study the "rose ears."
A major turning point in her life was the disappearance of her brother Edorion ten years ago. At that time, Layariel and he had traveled to Donnerbach to exchange furs for other goods. Her brother disappeared without a trace during their stay in the city. Edorion's disappearance caused great grief in Layariel's family. All efforts to find him were in vain, and the Treetopglint Clan ended the search after a few days. Only Layariel did not give up. She left her family, moved on to the south, followed every little trace and overcame numerous obstacles during her journey. Her brother, however, was lost.
Layariel no longer wanted to return to her clan, as she resented her family for giving up on Edorion so easily. In addition, the world beyond her home offered a great many miracles that she still wanted to discover. Her journey took her to Gareth, where she saw more people in one place than she had seen in all her life, to Punin, where she befriended the Elven bowyer Noiona Evenbreeze and received the magnificent Elven Bow Zavril, and to the Realm of Horas, where she became a well-liked, exotic guest at festivals, in spite of her strange manners.
Carolan Calavanti. Calavanti is Carolan's favorite name—but he uses a different one in every city. In Kuslik he is wanted for fraud and is called Ramirez Zotti; in Grangor he is known as the impostor Lorenzo Dicora; and in Vinsalt the Guard searches for theft under the name Furio Faruzzi. The rogue with the pointed ears grew up as a foundling child in the Tsa temple of Vinsalt, where the blessed ones found him at the gate almost thirty years ago. Soon the blessed ones realized that one parent was probably of Elven blood, but this circumstance did not prevent them from being good parents and offering him a new home.
His foster parents' somewhat chaotic everyday life as blessed ones of Tsa allowed him to occasionally act as a contact for the underworld of Vinsalt at a young age. At first he became a member of a children's gang. Then later the queen of the underworld, Niam of Bosparan herself, turned to him and used his services. Carolan's skill made him a master thief and the horror of the city guards.
Carolan has thought about his unknown parents for all of his life, although he accepts his Elven legacy calmly and without much thought for the children who used to call him "pointy ears."
However, his time as a criminal is over. He watched as his companions became more and more brutal in their raids and did not even shy away from sacred temples. He finally decided to change sides and become an informant to the city guard. Because he feared Niam's revenge, he decided to flee from the Horas Empire. He has been living an adventurer's life ever since. He earns his money as a Boltan player or juggler in taverns, and now and then he joins a group of heroes who hire him for his ability to get around easily in every city. In addition, he is a true charmer, able to seduce both men and women with his words.
Again and again Carolan stumbles into dangerous situations. Phex nevertheless seems to stand by the Half Elf, as often sheer coincidence allows him to get out of any kind of pinch. He himself does not resent the fox god for his changing fortune. As someone who lived in a Temple of Tsa for many years and understood the doctrines of the goddess of the new beginning, Carolan knows that every situation offers a new opportunity—you just have to take it, and take it with humor.
Mirhiban al'Orhima. Although both Fasar-based magic academies strive to track down magically gifted children to allow them to meet their potential, in Mirhiban's case it was the non-affiliated mage Halid abu'l Ketab who became aware of her gift. Nobody in her small home village could have imagined that the child of rice farmers would one day study the art of magic in the luxurious dwelling of a mage. From the first exercises onwards she showed that she had a special talent for the fire element: she was quickly able to ignite candles and extinguish their flames, she succeeded at casting an Ignifaxius on her first try (thereby scorching the tail of the household's cat), and in the conjuration of fire elementals Mirhiban soon showed an even greater talent than her master.
In the years after her graduation she studied the history of the Mage Moguls of Gadang, whose secrets had sparked Mirhiban's fascination during her youth. But even a mage does not live by studies and air alone, so Mirhiban began traveling to distant countries, taking assignments to pay for her livelihood. Fortunately, her master had taught her not only how to conjure fire, but also the foundations of magic. Like her, he was an adventurer in his youth and knew which spells would prove useful to his student.
Outside of the lands of the Tulamydians, Mirhiban shied away from other mages, as her first encounters with her colleagues from Punin and Gareth were overshadowed by prejudices. In Mirhiban's environment the Codex Albyricus is of little importance, in particular the dress codes, while in the Middle Realm she often angered the other mages with her non-standard clothing.
In addition to researching the Mage Moguls, Mirhiban's other hobby is the search for a real Dark Eye. As a child, she listened to the stories of the Haimamudin about the legendary artifacts, and she would give anything to inspect one of these magnificent objects.
Duel Rules Summary
Setup
- Set Life Point Cards to 40 life points.
- Put down Hero Card (with special ability side face-up).
- Shuffle Action Cards and draw a starting hand of 5 cards (replace cards and reshuffle if desired).
- Place 2 Fate Points per player in the middle of the table.
- Draw hero counter to determine starting hero (all other players receive 1 Fate Point).
Game Turn Summary
Each player's turn goes through the following phases:
- Resolve "At the start of the turn" cards.
- Draw 2 cards from the Hero Deck.
- Ready any exhausted cards.
- Put up to 2 cards face down as Endurance Cards (from your hand or permanent cards in play).
- Actions (any order): Play Action Card (pay endurance cost, discard one-shot cards, keep permanent cards); Activate permanent card (fulfill requirements, perform game effect); Make an attack (attack card required, only once per type of attack) — fulfill requirements, roll equal or below the attack attribute (close combat, ranged combat, or magic). Failure: Take Fate Point. Success: Roll weapon's damage; Dodging — opponent rolls equal or below their dodge attribute (if successful, damage is halved and rounded up); Reduce damage by armor value; the remaining damage is subtracted from opponent's life points.
- Resolve "At the end of the turn" cards and reduce cards in hand to 7 if applicable.
Fate Points. Discard to get one of the following advantages: Draw a card (any time); Receive 1 endurance until the end of the turn (any time); Reroll an attack (you don't receive Fate Points for failing again).
Additional Rules. Special ability: Use once per game, at any time during your own turn or opponent's turn. Free actions: The only action you can play at any time. All other actions can only be played during one's own turn. Roll a 1: Critical Success! Success and draw a card from your Hero Deck. Roll a 20: Critical Failure! Failure and an opponent draws 1 random card from your hand and discards it.
Adventure Rules
Cooperative adventures for 1-4* Aventurian Heroes of age 14 and up by Lukas Zach, Michael Palm, Markus Plötz, and Christian Lonsing.
The contents of this box allow up to 4 players to participate in the following adventures. Later supplements allow for larger parties.
The Goal of the Game. The heroes join up as a group to face adventures in the world of Aventuria. This requires you to coordinate your strategies and help each other out if necessary. Only as a team will you be able to reach your goal and gain precious treasure and experience, to become able to face even greater challenges.
Important note: We recommend you play at least one Duel game before going on the first adventure.
Prepare Your Heroes. The players prepare their Hero Decks and Life Point Cards as described in the Duel Rules. They also take their hero's Skill Card. Place 2 Fate Points per player in the middle of the table, along with an adequate number of dice. The players decide which hero will become the starting hero. That hero gains the Starting Hero Token. Unlike the setup for a Duel, the other players do not receive any Fate Points.
Game Material (Adventure Mode)
The following game material is used in the Aventuria Adventure Mode:
All Materials from Duel Mode. The Adventure Mode uses all Hero Decks, Life Point Cards, Fate Points, and dice from the Duel Mode.
Skill Cards. Add your hero's Skill Card to your Hero Card. On the front of this card are the hero's skill values, and on the back the maximum number of cards the hero may use in each card category (see Deck Building, Duel Rules).
Adventure Cards. These blue cards are often only used for a single, specific adventure or act of an adventure and have the name of the adventure and the number of the act to which they belong at the bottom of the card. Adventure Cards include Time Scale Cards, Story Cards, Leader Cards, and other supplementary cards such as Grave Cards.
Henchman Cards. The Henchman Cards are used to represent enemies that the heroes can encounter in large numbers in many different adventures.
Reward Cards. Reward Cards are special Action Cards that can be acquired during an adventure or received as a reward at the end of an adventure. They increase a hero's combat prowess and can be added to their Hero Deck during campaign play.
Special Cards. The green special cards are cards that can be used in various combats, making them more varied and deadly. Special cards include Event Cards, Leader Action Cards, Demon Ability Cards, and other cards that are usually compiled into draw piles.
Practice and Training Cards. The heroes can acquire these cards during a brief respite, to indicate that they have prepared for coming challenges.
Game Tokens. In Adventure Mode, all tokens are used:
- Starting Hero Token: This token shows the current starting hero. It is passed on at the end of each round.
- Hero Tokens: The Hero Tokens are used in certain adventure situations. They can also be used to randomly select a hero.
- Life Point/Adventure Tokens: The Life Point Tokens are used to display the current life points of enemies. The Adventure Tokens are used for game effects on adventure cards.
- Time and Doom Counters: The Time Counters are used with the time scale, while the Doom Counters are used in the game effects of opponent cards, and are often used in conjunction with the defeat condition of adventures.
Combat Plan. This fold-out display helps you organize all cards used in Adventure Mode.
The Adventure
Unlike the Duel Mode, the Adventure Mode is not comprised of a single combat, but a complete adventure. The objective here is to slip into the role of your heroes, experience the story through their eyes and master the challenges as a group. In the second part of this book there are three adventures of different length and complexity. You don't have to read through them before the game starts. On the contrary, it is even more exciting when the story of the adventure unfolds during the actual game.
Each adventure consists of two components, the narrative and the combat. The narrative is the framework story of the adventure, while combats are based on the Aventuria basic rules from Duel Mode (see Duel Rules), extended by the combat rules of the Adventure Mode.
Short adventures usually consist of a narrative followed by a final combat. Longer adventures, such as the "Legacy of Wildenstein" adventure, are often divided into multiple acts. Each individual act usually consists of a narrative, followed by a combat, and thus has about the length of a short adventure.
Difficulty. Each adventure has four levels of difficulty: easy, normal, difficult and legendary. At the start of the adventure, you must choose one of them. If the difficulty level becomes relevant, the adventure text will explicitly indicate it.
Narrative. In order to guide the heroes through the story of the adventure, the narrative uses narrative texts and game instructions. The narrative texts form the framework, whereas the game instructions determine the game mechanics. Narrative texts are written in italics, game instructions are arranged in boxes.
Decide who from the group will read the narrative texts aloud. Sometimes there are several texts to choose from, depending on which of several possibilities has occurred (e.g. victory or defeat in a fight); read only the text that is appropriate for your results.
Example — Narrative Text and Game Instructions: Before you begin your journey, you visit the archives in the temples and in the Council of Perainefurten to find out more about the Wildenstein barony. Maybe this information can be of help to you later on? Each hero makes a Knowledge roll. Critical Success: You are very well prepared. Take 2 Fate Points. Success: You find some useful information. Take 1 Fate Point.
Read aloud all game instructions and make sure that all players follow them. This often includes skill tests—see below. The beginning of a combat is a special set of game instructions. Again, read them aloud and execute them as directed. Further details are explained in The Combat.
Important note: Do not use the Hero Decks as normal during the narrative part of the adventure. For example, heroes cannot heal themselves during the narrative using the "Healing Potion" Action Card, even if it is included in their deck. However, you should shuffle your Hero Deck and set it to the side before you begin, as some game instructions may cause you to interact with it.
Skill Tests. If the narrative calls for a skill test, the player or players indicated must roll a D20 and compare it to their skill value (found on the hero's Skill Card). If the test includes a number with a plus sign (+), raise the value of the skill by that amount for this test (making it easier). A minus sign (-) lowers the value of the skill by that amount (making it harder). If, for example, a card requires a "Knowledge test +5," the player adds 5 to their current Knowledge value and then tries to roll equal to or below the new value.
The skill test can lead to four different results:
- Critical Success: The player rolls a 1 (the eye on the Aventuria D20).
- Success: The player rolled equal to or below their skill value (after any modifications) but did not roll a 1.
- Failure: The player rolled above their skill value (after any modifications) but did not roll a 20.
- Critical Failure: The player rolled a 20.
Each hero that rolled should then follow the play instruction indicated by their result.
Important note: The heroes may use Fate Points to reroll a die during skill tests. However, they may only gain Fate Points through the adventure itself. If they have not gained any Fate Points yet, they may not reroll.
The Combat (Preparation)
The combat portion of the Adventure Mode follows most of the rules of Duel Mode, except that the heroes do not fight against each other, but instead work together against the adventure's opponents.
First, place the combat plan in the middle of the table and read the game instructions box for that specific combat. Follow these instructions to place the following cards on the combat plan:
- Time Scale Card
- Leader Card
- Story Cards
- Special cards
- Henchman Cards
Card types 1 through 3 are specific to each adventure and always contain the name of the adventure, including the number of the act for full-length adventures.
Leader Card layout. Opponent Name (the full name of the leader); Keywords (these keywords identify the exact type of opponent — they are used in conjunction with game effects); Special rules of the opponent (a grey box contains special rules that apply to this leader); Adventure Name (the name of the adventure and, if available, the number of the act to which the leader belongs); Life Points (the leader's life points at the beginning of the combat — put them on the card in the form of Life Point Tokens; for leaders, these are often calculated from the number of participating heroes); Dodge (the dodge value of the leader works the same as for heroes); Armor (this value is subtracted from all damage the leader suffers from attacks by heroes); Actions (the number of actions the leader is allowed to perform when it is their turn — for leaders, this number is often calculated from the number of Heroes participating); Action Table (this dice table covers all numbers from 1 to 20 that the opponent can achieve on a die roll and describes the game effects that they trigger by doing so).
1) Time Scale Card. Most adventures have two Time Scale Cards that cover the four difficulty levels. Choose the side of the card that corresponds to the level you have chosen and place it on the appropriate field in the combat plan. Place the specified number of Time Counters on this card.
Time Scale Card layout: Card Title (the complete name of the card); Time Counters at the start of combat (indicates how many Time Counters are placed on this card at start of combat); Game Effects (when you remove a time counter in step 4 of a round, the number of time counters remaining indicates which effect is activated); Adventure Name (the name of the adventure and, if available, the number of the act to which this time scale belongs).
2) Leader Card. Take the Leader Card and place it on the designated field in the combat plan. Some adventures may include multiple Leader Cards or no Leader Card at all. If there are several leaders, place them from left to right according to their order in the game instructions.
The Leader Cards form the beginning of the row of villains, which usually then continues with Henchman Cards (see below). Next, place Life Point Tokens on each Leader Card to indicate the leader's initial life points. Many leaders have a variable number of life points that depends on the number of heroes.
Story Card layout. Card Title (the complete name of the card); Sub-title (if it is a two-sided Story Card, the title that applies to this side of the card is indicated here); Who and how often (on a hero Action Card, this sentence indicates which heroes or how many heroes may perform this action in each round and how often it may be performed); Skill Test (here you can see which skill a hero has to roll on when facing this hero action — if the action has endurance costs, these are also listed here); Game effects (this section describes the game effects that occur when a hero faces the action and passes the skill test — failure to do so usually has no special consequences, unless specifically mentioned; in this case there are two paragraphs, one with "Success:" and one with "Failure:"). Many game effects are based on Adventure Tokens. These are either placed on the card when the card is placed and must be removed by hero actions, or the heroes receive them by succeeding at hero actions and must collect a certain number of them on this card. Adventure Name (the name of the adventure and, if available, the number of the act to which this story card belongs).
3) Story Cards. If the combat calls for specific Story Cards, read them aloud before placing them on the designated fields of the combat plan according to the game instructions. Place Adventure Tokens on the cards that require them—this is determined on the card itself or in the combat's game instructions.
Some Story Cards only come into play later in the fight. Set these aside next to the playing area at the beginning of combat.
Special Card layout. Card Title (the complete name of the card); Keyword (this keyword identifies the exact type of card — game instructions will specify which keywords to include in the draw pile); Narrative text (read this text aloud when drawing the card); Game Effect (read and apply the game effects here after reading the narrative text aloud).
4) Special Cards. Many adventure combats call for special card draw piles. Follow the game instructions to set these up before the combat begins. Each card has keywords, and the game instructions indicate which keywords to include in the draw pile. Shuffle the pile and place it on the combat plan. Some combats call for more than one draw pile during play. Place each one separately with its own discard pile.
5) Henchman Cards. These cards are used to represent common enemies the heroes will be dealing with during combat. They supplement the Leader Cards (see above) to add to the row of villains.
At the beginning of combat, compile a deck of Henchman Cards whose keywords correspond to those in the combat's game instructions. Then shuffle this Henchman Deck and draw cards one at a time, placing them from left to right into the row of villains on the combat plan.
Each Henchman Card has a Threat Points (TP) value in the top right. Draw cards and place them in the row of villains until their total value equals or exceeds the threat value specified in the game instructions.
Example — Placement of Leaders and Henchmen: The game instructions of the second act of "Legacy of Wildenstein" note that "Henchman cards with the key words 'Guard' and 'Servant' are used. In the basic box this is the case for the cards 'Evil Maid,' 'Fearful Watchman' (two cards), 'Hunchback,' 'Crossbowman' (three cards), 'Loyal Bodyguard' (three cards), and 'Tough Watchman' (three cards). Assemble these 13 cards into the Henchmen Draw Pile for this act. The threat value is 'Number of heroes x 6,' so in a game with 2 participating heroes the total threat value would be 2 x 6 = 12. At the start the leader 'Baron of Wildenstein' is put up on the left. Then the players draw their first henchman from the Henchmen Draw Pile. It is a 'Loyal Bodyguard.' The total threat value of cards on the table is now 5 (the Loyal Bodyguard's TP), which is below the required 12, so another card is drawn. It is another Loyal Bodyguard, so the total threat value rises to 10. It's still below 12, so another card is drawn. It's a Tough Watchman! His TP is 7, so the total of the threat value on the table is now 17. This is higher than the required 12, so the placement of henchmen is finished."
Place the remaining Henchman Deck next to the combat plan, in case you draw more henchman during the fight.
Next, place Life Point Tokens on each Henchman Card, indicating the henchman's initial life points. Some henchmen may have a variable number of life points that depends on the number of heroes or other factors.
Henchman Card layout. Opponent's Name (the full name of the henchman); Keywords (these keywords identify the exact type of opponent — they decide whether the card may or may not be included in the henchman deck of a combat, and are used in conjunction with game effects); Special rules of the opponent (a grey box contains special rules that apply to this henchman); Threat Points (these points indicate how dangerous this henchman is and are mainly used when placing the row of villains); Life Points (the life points of the henchman at the beginning of the combat — place them on the combat plan in the form of Life Point Tokens); Dodge (the dodge value works just like it does for heroes — most henchmen have a "—" here, which indicates that they are not allowed to dodge); Armor (this value is subtracted from all damage the henchman suffers from attacks by the heroes); Actions (the number of actions which the henchman may perform when it is their turn); Action Table (this dice table covers all numbers from 1 to 20 that the opponent can achieve on a die roll and describes the game effects that he triggers by doing so); Time-related events (these game effects occur in certain rounds, just like the game effects on the time scale).
Additional Preparations. After you have placed all the cards needed for the adventure, place the remaining tokens in reserve near the game area. These include Doom Counters, Adventure Tokens, and any other special tokens mentioned in the game instructions.
Each player then draws 5 cards from their Hero Deck and may replace some of them per the usual rules (see Duel Rules).
Combat Sequence
The combat sequence in Adventure Mode differs in a few essential ways from that of the Duel Mode. Unlike in duels, all the heroes' and villains' turns form a single round in sequence rather than alternating between individual turns.
Each round consists of the following steps:
- Preparation
- Hero Turns
- Opponent Turns
- Time Effects
- End of the round
1. Preparation. This step comprises phases 1 through 4 of the Duel Rules ("Start the turn," "Draw 2 Cards from Your Draw Pile," "Ready Any Exhausted Cards," and "Play Up to 2 Endurance Cards"). The main difference is that all heroes resolve these phases simultaneously. All players draw 2 Action Cards, ready their exhausted cards, and then decide which cards to put face down as Endurance Cards. If the adventure itself has any exhausted cards, ready them during this step.
2. Hero Turns. Now each hero takes their turn, starting with the current starting hero (as indicated by the Starting Hero Token), playing Action Cards, making attacks, and performing actions on Story Cards. (This step comprises phases 5 and 6 of the Duel Rules — "Actions" and "End of Turn.")
During a hero's turn, act according to the usual rules for dueling, with the following additional rules:
- Attack villains the same way you would attack an opposing hero in a duel. An "opponent" in this case is any Leader or Henchman not prohibited as a target by game instructions or card text. Choose which opponent you are targeting before you make the attack.
- For Action Cards in your Hero Deck that include a text box with the words "In an adventure," use only the rules in that text box instead of the normal rules of the card. If there is no such text box, use the normal rules on the card during an adventure, ignoring any text that does not apply. As stated above, any card effect that mentions an "opponent" may target a Henchman or Leader Card. If it mentions a "hero," then the effect may only target heroes.
- A player may use Fate Points to allow another player to reroll a failed attack or skill roll. They may not use the Fate Point for any other effects. (Important note: This is an intentional deviation from the Team Duel rules!)
- Many combats include cards that provide "hero actions." You can use these as if they are permanent Action Cards belonging to your hero. Most hero actions require you to succeed at a skill roll to achieve the listed effect. The card may also specify additional costs, conditions, and effects, so read each hero action carefully.
- Villains with a dodge value of "–" may not dodge. Subtract the opponent's armor value from the damage for each and every Close Combat, Ranged Combat, and Magic attack that hits them. The remaining damage then reduces the opponent's life points.
- If this reduces the opponent's life points to 0 or below, then the villain is defeated. Place defeated henchmen in the Henchmen Discard Pile. Remove defeated Leaders from the game. Some Henchmen are removed from the game or even shuffled back into the Henchmen Deck instead of being discarded. The Henchman Card will make it clear if there is an exception.
- Gain 1 Fate Point from the middle of the table (or another hero if the pool is empty) for each villain you defeat. You do not gain Fate Points for villains that leave combat without being defeated.
Example: It is Carolan's turn, and he decides to attack with his rapier. He selects one of the henchmen as his target—a "Tough Watchman." He rolls his attack test and scores a hit. He makes his damage roll and gets a total of 7 damage. The Tough Watchman has a dodge value of "–," so he may not dodge the attack. His armor value is 3, reducing Carolan's damage to 4. The Tough Watchman loses 4 life points. Since he only had 3 left, his life points value drops to 0 and he is defeated. Carolan's player places the Henchman Card in the discard pile, and Carolan receives 1 Fate Point.
Example for "In an adventure": When using the card "Blinding Flash" in an adventure, completely ignore the card effect "Raise an opponent's attack roll by 5." (In an adventure, the opponents make action die rolls instead of attack rolls.) Instead, use the text in the box: "Raise opponent's action die roll by 3."
3. Opponent Turns. The heroes' opponents in an adventure are represented by the row of villains, which usually consists of one or more leaders accompanied by a group of henchmen. They act from left to right, starting with the leader.
Each villain card notes the number of actions that opponent takes in a combat round. Some opponents (especially leaders) have a variable number of actions that depends on the number of heroes. Roll one D20 for each action the opponent has and look up the result on the card's action table.
Opponent's Critical Success. A result of 1 on an opponent's action die means that they gain another action that turn, in addition to the effect listed on the action table. Roll the action die again after resolving this effect.
Opponent's Critical Failure. A result of 20 on an opponent's action die means that their turn ends immediately after resolving the effect of the roll. If the opponent has additional actions, they are ignored.
Attacks. Many actions on the villain card represent attacks. They indicate which kind of attack they are (Close Combat, Ranged Combat, or Magic) and how much damage they cause. Attacks by villains are subject to the same rules as attacks made by heroes, except that the villain makes no attack test. The attack is automatically considered successful.
A hero hit by an attack may make a dodge test as usual and use Action Cards to mitigate the damage (e.g. armor) or react to attacks (e.g. "Hidden Dagger").
Target Selection. Many actions on the villain card are aimed against specific targets. The target may be determined in a variety of ways:
- Starting hero: The target of the attack is the hero with the Starting Hero Token.
- Random hero: Determine the target at random. Place the Hero Tokens of all the heroes currently in the game face down on the table. Mix them up and reveal one at random to select the target. You can also do this with a die roll if you prefer (by assigning numbers to each hero).
- The hero with the most/least: Some villains target the hero with the most or least Fate Points, life points, cards in hand, or something else as the target of their attack. If one or more heroes have the same number of whatever the villain is using to select a target, choose one of those tied heroes at random, as explained above.
- Special criteria: Depending on the opponent or adventure, there may be other special selection criteria for a given effect. In this case, follow the instructions on the villain card or in the game instructions.
Special Opponent Rules. Like the heroes, henchmen and leaders may not normally raise their life points above their starting value through healing. However, some game effects cause them to increase their life points above their starting value, but only when the card text states this explicitly.
Example — Opponent's Turn: During the second act of "Legacy of Wildenstein" the opponents resolve their turn. The Baron of Wildenstein goes first. His actions entry lists the symbol for "number of heroes." This means that he may roll a number of action dice equal to the number of heroes participating in the combat. In a combat with 2 heroes, he has 2 actions. A player rolls his action die and scores a "1," so the Result "Close Combat-Attack" is resolved and the Baron receives an additional action, so he is allowed to roll two more times. The next roll is a "15," meaning that the Baron smiles balefully but other than that nothing bad happens. Afterward an "8" is rolled, so a Leader Action Card is drawn from its draw pile and resolved. This ends the Baron's actions. After he has acted, it is time for the first Loyal Bodyguard, then the second Loyal Bodyguard, and finally the Tough Watchman to roll one action die each. After that the opponent's turn ends.
4. Time Effects. Remove a Time Counter from the Time Scale Card and resolve the effects of the time scale that correspond to the current number of Time Counters on the card (such as drawing an Event Card or placing a new Henchman Card). If there are no Time Counters on the Time Scale Card, the effects listed at "0" now occur each round.
Note that any henchmen that enter play during this phase do so after the Opponent Turns, so they do not act this round.
Next, check if any villain cards or story cards have effects that are triggered by the number of Time Counters and resolve those effects.
5. End of the Round. Finally, the current starting hero passes the Starting Hero Token to the player sitting to their left. Begin the next round.
End of Combat
The combat ends with either a victory or a defeat. The game instructions (and sometimes cards in play) will specify the criteria that determine both.
Defeat. After a defeat, the heroes have failed and the adventure ends. However, the heroes may try again after taking the following steps: Discard any reward cards the heroes gained during the adventure. Reset all game materials, such as Fate Points and life points, and restart the adventure or act according the game instructions.
Victory (If the Adventure Continues). If the heroes are victorious in one act of a multi-act adventure with further acts remaining, proceed as follows:
- If your hero's current life points are below 30, you may raise the life points back to 30 (not 40). Return all Fate Points to the middle of the table.* (*This is a rules change from previous version of the Aventuria adventure rules!)
- Pick up all your Action Cards and shuffle them back into your Hero Deck.
- If you used your hero's special ability during combat, flip your Hero Card face up so that you can use it again.
- If a victorious combat includes a reward for the heroes, you now receive that reward. Usually this includes drawing a certain number of Reward Cards from the Reward Card Deck and distributing them among the heroes. You can freely decide which hero gains which Reward Card. If you cannot agree on who gains which card, each hero picks one, beginning with the starting hero.
If one or more heroes cannot use the Reward Cards or choose not to take one, discard the remaining cards. Each hero who chooses not to take a Reward Card gains one additional recovery point during the "Brief Respite" (see below).
Example: In a game with three heroes (Mirhiban, Arbosh, and Carolan), the heroes draw the Reward Cards "Flittermouse," "Barbed Club," and "Strong Healing Potion." The heroes agree to give the Healing Potion to Arbosh, which will allow him to heal his fellow heroes in an emergency. Mirhiban is unable use either of the other two cards, so she settles for an additional recovery point during the respite. This leaves Carolan the choice between the two weapons, and he decides to take the Flittermouse. They discard the Barbed Club.
Victory (End of the Adventure). If the adventure is complete after this victory (whether because it is a short adventure or the last act of a multi-act adventure), proceed as follows:
- If a victorious combat includes a reward for the heroes, see step 4 above.
- Additionally, at the end of an adventure, the heroes receive experience points. For each experience point, a player may choose one of the following options: a) Select one of the Reward Cards you gained during the adventure and note it on your Hero Document. (See Reward Cards and Campaign Play below.) b) Permanently raise one of your skill values by +1. You cannot raise any individual skill by more than 4 points over its starting value. If you receive multiple experience points, you may use them in any combination of these two options you like. For example, if you receive 3 experience points, you may note one Reward Card on your Hero Document and raise two skill values by +1 each. You may also save experience points to use later.
- In the next adventure, the heroes automatically reset to 40 life points and 0 Fate Points.
Between each act of a multi-act adventure, the heroes have time for a brief respite, which allows them to regain some of their vitality and prepare for upcoming challenges.
Brief Respite
Each hero receives a number of recovery points equal to the number of Time Counters left on the Time Scale Card after the previous combat, plus 2.
Example: Carolan, Mirhiban, and Arbosh finish a combat with 2 Time Counters on the Time Scale Card. Each hero gains 4 recovery points to use during the brief respite.
Each hero may use their recovery points for the following options in any combination:
- Rest: Heal 2 life points per recovery point you spend on this option. This cannot raise your life points above the starting value of 40.
- Pray to the Gods: For every 2 recovery points you spend on this option, take 1 Fate Point. You may choose this action as long as there are Fate Points remaining in the middle of the table.
- Prepare: This option costs 4 recovery and only be chosen once by each hero. At the beginning of the next combat, search your Hero Deck for any card and add it to your hand, in addition to your normal starting hand of 5 cards.
- Practice: For 2 recovery points, you may take one of the four "Practice" cards and place 5 endurance on it. For each additional recovery point you spend, you may place 2 more endurance on the card.
- Train: For 2 recovery points, you may take one of the four "Training" cards and place 4 endurance on it. For each additional recovery point you spend, you may place 2 more endurance on the card.
After every hero has spent their recovery points, the adventure continues with the next act.
Additional Rules (Adventure Mode)
Unconscious Heroes. A hero's life points cannot sink below 0. If a hero's life points are reduced to 0, they are knocked unconscious. All further opponent attacks ignore this hero, the Starting Hero Token skips to the next hero, and they cannot intervene in combat in any way. Their permanent cards and Fate Points remain in play, and their hand, draw pile, and discard pile remain unchanged. If a hero is knocked unconscious while acting as the starting hero, pass the Starting Hero Token to the next active hero to the left.
Unconscious heroes can be brought back into combat by raising their life points above 0. This requires an action that heals 5 or more life points at once (such as a Healing Potion), or a reanimation roll (see below). A hero that was brought back into combat counts as unconscious for the remainder of the current round. They return to the game at the beginning of the next round and resume combat normally.
Reanimation Roll. During your turn, you may try to reanimate an unconscious hero as follows: Exhaust X Endurance Cards and roll one D20 for a reanimation attempt. If the die result is equal to or below X, the unconscious hero is brought back into combat with X life points. If the die result is higher than X, the hero remains unconscious. The reanimation roll is not a skill or attribute roll, so you cannot use a Fate Point to reroll it.
Removed from the Game. Some game effects can remove cards or Fate Points from the game. In a short adventure, they are only gone for the current adventure, and in an adventure with more than one act, they are only gone for the current act. At the start of the next act, return all removed Fate Points to the middle of the table. Return all removed cards to their original decks.
Reward Cards. When using Reward Cards, you must adhere to the same deck construction restrictions as with Action Cards (Duel Rules, Deck Building). Your hero may not use Reward Cards of categories that are not listed on the back of the hero's Skill Card, and they may not exceed the maximum number of cards within a category. When adding a Reward Card to your deck, remove another card of your choice and then shuffle in the Reward Card.
Hero Title. In some adventures and game supplements, you can earn Hero Titles for your heroes. These are special cards held by a hero that do not count toward the 30 Action Card maximum. Instead, place them next to the Hero Card at the beginning of each adventure in Adventure Mode (they are not used in Duel Mode). The hero may use the special rules provided by their Hero Title Cards throughout the adventure.
Campaign Play. After you have overcome an adventure, received Reward Cards, and increased your hero's skill values, you may note these changes on your Hero Document and play more adventures with the same hero. Before each new adventure, you may select up to three of your collected Reward Cards to include in your Hero Deck. For each Reward Card you include, you must remove one regular card from the deck so that it remains at 30 cards. In addition, you must follow all "Deck Building" rules (Duel Rules) when adding Reward Cards.
Chance Encounter. The chance encounter is a special game mode that allows the heroes to fight against a randomly selected group of enemies instead of going on an adventure. May the better party win!
A chance encounter is handled like a normal adventure's combat. Decide on a difficulty and place the relevant "chance encounter" time scale in the middle of the table. Then place a number of Henchman Cards until the sum of their threat points is equal to or higher then the number of heroes x 7. This concludes the preparations and the battle can start!
There are no Leader Cards in a chance encounter. For all game effects that refer to a leader, the henchman with the highest threat value is considered the leader. If there is more than one henchman with the highest value then the one furthest to the left is considered the leader.
A classic chance encounter is played with all available Henchman Cards, but you could also build a themed draw pile with your "favorite" henchmen. You can also design your own time scales, use Event Cards and so forth, to make the encounter more interesting.
A victorious chance encounter usually doesn't win you any experience points, but you can of course gain some experience for them if you want.
Short Adventure: Saving Silvana
Havena, in the year 993 BF
Your friend Alrik has asked you to help him rescue his friend Silvana, who was abducted by vicious pirates. He shows you some tracks that lead down a ladder and into a system of subterranean cellars.
As you prepare to head in, Alrik suddenly remembers that had another urgent matter to attend to. He says a hasty goodbye before you even make it far enough to kick in the first door.
When you burst through the door, you stare into the wrinkled face of a blue-skinned Kobold in a bright yellow loincloth who is talking to a group of Goblins. The Kobold recovers quickly from the shock of your interruption. He yells at the Goblins, "Go get them!" and quickly turns himself invisible.
The Goblins look at each unsurely…and take flight! Quickly you try to intercept them.
Each hero makes a Body Control roll.
- Critical Success: You catch one of the Goblins and squeeze some information out of him before letting him escape. He is completely cowed and won't cause you any more trouble. Gain 1 Fate Point.
- Success: You catch one of the Goblins, but he breaks away from your grasp and runs away up the ladder and onto the street, where he vanishes into the mists of the undercity. One Goblin less for you to fight later.
- Failure: You are not fast enough and one of the Goblins escapes! For each hero that fails the Body Control roll, take one "Cowardly Goblin" from the Henchman Cards and place it nearby. He will take part in the next combat as an additional opponent.
- Critical Failure: You try to capture one of the Goblins but instead hit your head on the low ceiling. As Failure above, and you lose 2 life points.
You venture into the depths of the dungeon. The racket must have startled the other denizens, because you don't see another soul. You discover abandoned quarters and a row of jail cells that turn out to be empty apart from the crumbling skeleton of an unfortunate former inmate.
One hero makes a Perception roll. Decide as a group who of you will make the roll.
- Critical Success: You find a carefully hidden object. Draw cards from the Reward Card Deck until you draw an equipment card. You may shuffle it into your Hero Deck or place it on top of your draw pile. Shuffle the other Reward Cards back into the Reward Card Deck. If you cannot or choose not to use the card, discard it and take 1 Fate Point instead. In addition, you find a secret tunnel (see Success below).
- Success: You find a secret tunnel! This will provide you with an advantage over your quarry. At the beginning of the following combat, each hero may draw an additional card. As a reminder, each hero should now draw an Action Card and place it face down in front of you.
- Failure: There is nothing here! No effect.
- Critical Failure: During your search, you fall through a hole in the ground and sprain your ankle. Lose 5 life points.
You look everywhere but cannot find any trace of Silvana or her captors. The only thing that catches your eye is a big mural covering one of the walls. Behind it you can make out faint noises, as if there were a secret room. One of you should take a closer look.
One hero makes a Knowledge roll. Decide as a group who of you will make the roll.
- Critical Success: After a quick search, you figure out that the eyes of one of the warriors depicted on the mural hides a mechanism that opens a secret door. You point it out to your companions and silently ready your weapons. You push the door open and storm into the room. At the beginning of the following combat, each hero may draw an additional card. As a reminder, each hero should now draw an Action Card and place it face down in front of you.
- Success: After searching for a while, you find a mechanism that opens a secret door. Without wasting any more time, you open the door and storm towards your unsuspecting foes.
- Failure: It's no good. You'll have to hack your way through the wall! In doing so, you obviously lose your element of surprise. At the beginning of the following combat, each hero draws one less card.
- Critical Failure: You make so much noise during your search that your enemies use the distraction to circle around and attack you from all sides. At the beginning of the following combat, remove 1 Time Counter from the Time Scale Card and each hero draws one less card.
All of a sudden, you find yourself in front of a motley band of pirates, Orcs, and the Goblins that slipped past you earlier. They attack you immediately.
Among ranks of enemies you spot the Kobold, who laughs at you mockingly and makes your life difficult with his vicious magic spells.
You don't know why he is acting in this vile way. All you know is that he is protected by powerful Kobold magics that blocks all attacks if you can't figure out his name. In order to do so, you can either try to make some wild guesses using your knowledge of magical creatures, challenge the Kobold to a singing contest and trick him into revealing more information, or butter him up with charming words to get him to spill his name.
Of course, the other villains won't leave you in peace while you do that.
A combat begins. Assemble all "Saving Silvana" cards, including the Time Scale Cards, "??? the Kobold," and "Hero Action: Guess Name." Place "??? the Kobold" on the combat plan with the ??? side up.
Henchmen: Form a pile of Henchman Cards of your choice. All cards must have the keyword "Pirate" or "Orc."
Threat Value: Number of heroes x 5. If some of the heroes failed the first Body Control roll, add the "Cowardly Goblin" cards that you set aside to the end of the row of villains.
Hero Actions: Guess Name — Every hero max. 1x per turn. Craft roll (you sing) or Knowledge roll (you take a guess) or Persuade roll (you flirt with him). Place a number of adventure counters equal to 3x the number of heroes on this card. For every successful roll remove one counter. When all counters are removed, the heroes learn the Kobold's name and can attack him like a normal opponent.
Defeat: Every time a hero is knocked unconscious, you receive a doom counter. When you have a number of doom counters equal to the number of heroes, you lose.
Victory: You are victorious when you defeat or put to flight all opponents.
Reward: Reward cards equal to the number of heroes.
After a defeat: The pirates and Orcs overwhelm you and throw you into a dark jail cell. You are close to starvation when you stumble upon a secret passage that leads you to a freedom, but by that time the kidnappers and their victim are long gone. Read the effects of a defeat in the Adventure rules (see End of Combat).
After a victory: Your opponents try to stand up to you, but they are no match for your combat prowess and determination. You manage to play some tricks on the Kobold to find out his name and give him a sound beating. A few minutes later you are victorious, and your enemies have fled or lie dead at your feet. From the pirate hideout you hear a fearful cry. There you find Silvana deeply frightened but otherwise unharmed. You explain that you have come to help her, and she gives each of you a thankful hug. You feel like real heroes, unlike Alrik…
You have overcome the adventure. Each hero receives 1 experience point. Read the Victory (End of Adventure) procedure under End of Combat. If you want, you can play this adventure again with a higher difficulty or face one of the other adventures in this book.
Short Adventure: The Non-Gambling Kind
Chorhop, in the year 1024 BF
The city of Chorhop is a dangerous place at night. An anonymous client has hired you to escort a veiled person known as the "Idol of Fortune" to a gambling house named the "Carbuncle Stone." This client specifically asked for people of "the non-gambling kind" for this mission—heroes who do not give in to gambling or other kinds of games. You push your way through narrow alleys and dark streets full of shady characters until you reach your destination mostly undisturbed.
Upon entering the "Carbuncle Stone," you realize this must be a former library. Bookshelves line the walls, but the center of the room has been cleared to make space for gambling tables and wheels of fortune. The Idol of Fortune allows you to escort them to a huge golden dragon statue in the center of the room. Once there, they drop their veil and begin dancing gracefully. It seems that the Idol is a woman with an athletic physique, although she keeps her head enclosed in a heavy stone fox head mask. You and the other guests are mesmerized by her dance. You may leave if you want to, or you may stay and keep on watching this one-time spectacle.
Each player decides if their hero wants to stay or leave. The ones who want to stay take 1 damage point.
At that moment, the golden statue in the center of the room begins to weep. Huge round tears fall from its eyes and take the form of golden coins as they clatter to the ground.
Each player decides if their hero wants to get rich on the gold or not. This applies to everyone regardless of whether they wanted to leave or not. Those who want to get rich on the gold take 1 damage point.
An enchanting melody seems to drift from far away. Some of the books on the shelves start to glow and hum. They drop to the ground and open, freeing monsters and terrors that had been trapped in their pages. The gold at your feet continues to tempt you, but the creatures move slowly toward you.
Each player decides if their hero wants to keep on getting rich on the gold or withstand the temptation. Those who keep getting rich take 1 damage point.
The monsters and villains charge at the guests, who are mostly still mesmerized by the Idol. Even you must focus your will to defend yourself against the attack.
Each hero must make a Willpower roll. They roll a number of dice equal to the number of damage points they have taken and use the worst result. If they have taken no damage points, apply the result "Critical Success."
- Critical Success: You completely resist the influence of the Idol of Fortune.
- Success: After a short time, you successfully resist the spell. You lose 1 life point.
- Failure: You manage to break the spell, but only after one of the creatures deals a solid blow. You lose 1D6 life points.
- Critical Failure: As with Failure, but you take even longer. You lose 2D6 life points.
Bravely, you throw yourself into combat with the monstrosities and defend the vulnerable guests with your life.
Put the following cards on the combat plan: All "The Non-Gambling Kind" cards, including the Time Scale Card, "Environment: Risk and Profit," "Idol of Fortune," "Hero Action: Raise the Stakes," and "Taking Part in the Game." A draw pile with Event Cards of your choice. A draw pile with Leader Action Cards of your choice. Place the card "Taking Part in the Game" on the combat plan with the side "Hero Action: Playing the Game" face up.
A combat begins—read the section "Combat Sequence" above. Each player may draw additional Adventure cards equal to the amount of damage points they have taken. Then, place all of their damage point tokens on the card "Risk and Profit."
Henchmen: Form a pile of Henchman Cards of your choice.
Threat Value: Number of heroes x 4, plus damage points on the card "Risk and Profit." Then, discard all damage points on this card.
Defeat: You lose if the last Time Counter is removed.
Victory: You win if you successfully perform the "Hero Action: Quitting the Game."
Reward: Everyone gains 1 experience point.
After a defeat: As you come to your senses, you find yourself lying on the street—totally exhausted but otherwise unharmed. Later you learn that the "Carbuncle Stone" burned to the ground the survivors do not remember anything.
After a victory: You are successful at breaking the Idol of Fortune's spell just in time to notice that the "Carbuncle Stone" is on fire. You move quickly to rescue the guests from the burning gambling house. You're not sure who or what the Idol of Fortune was, but maybe your next adventure is waiting for you here.
Adventure: Legacy of Wildenstein
Act 1: An Unexpected Message
Perainefords, in the late autumn of 1039 BF
Your voyage has led you to Perainefords, the capital of the province of Tobrien. To your great dissatisfaction, this northern town turns out be little more than a small settlement with not much to offer. It seems that the city's only purpose is to serve as the Tobrian duke's provisional seat of government until the Middenrealm can reconquer the surrounding lands from treacherous demon worshipers. This puts you into a tight spot, as your money and supplies are running out. How will you make through the winter? In your privation, you are ready to accept any assignment that might come along.
But then fortune favors you as one of you receives a very special letter.
Randomly decide which hero receives the letter. They read the following paragraph aloud:
My beloved child,
I am sorry that I haven't sent you any messages lately. Since our falling-out, many things have changed in my life. I agreed to marry the Baron of Wildenstein to take care of me in my old age. I am sure that your deceased father would not have objected a man of such high birth, and I hope you agree. But with this good news comes painful news as well, as my new husband died after only two years of marriage from a mysterious sickness. I am writing you from his deathbed. As he died without an heir, and I am reaching my twilight years, I want you to set aside the bad things between us and hurry here. Present yourself as the heir to his title before the greedy gentry and warlords of the Shadowlands can stake their claims.
Your loving mother
Gather all the "Wildenstein I" cards and locate the "Heir" card. The hero who received the letter places this card face up in their play area. For the rest of the adventure, that hero is considered the heir.
Before you begin your journey, you visit the archives in the temples and Council Hall of Perainefords to find out more about the Wildenstein barony. Maybe this information will be of use to you later on?
Each hero makes a Knowledge roll.
- Critical Success: You are very well prepared. Take 2 Fate Points.
- Success: You find some useful information. Take 1 Fate Point.
- Failure: You don't find anything useful. No effect.
- Critical Failure: You collect misleading information. Remove 1 Fate Point from the middle of the table.
The next day, you pack your belongings, saddle your horses, and ride south towards the Wildenstein barony, eagerly awaiting your inheritance. Despite some unpleasant weather, you make good progress on the country road, spending your first few nights in cozy inns and farmsteads of friendly peasants whose lands have already been freed by Middenrealm forces. After a time, though, you enter deserted land where you meet almost no one. Only a swarm of crows seems to follow you. An approaching thunderstorm catches you by surprise and you build a provisional shelter for the night.
Each hero makes a Survival roll.
- Critical Success: You build a great shelter. One other hero may reroll a failed Survival roll.
- Success: You manage to shelter well enough to sleep through the storm.
- Failure: You sleep in damp clothing and catch a cold. Lose 2 life points.
- Critical Failure: You get stuck in a mud hole, and the others have to help you out of it in the middle of a downpour. You lose 5 life points and every other hero loses 1 life point.
One day's ride before arriving at Castle Wildenstein, you reach a ford leading through a wild river. You dismount to lead your horses through the rushing water. An odd silence surrounds you…
Each hero makes a Perception roll.
- Critical Success: It's a trap! You react with lightning fast reflexes and may draw an additional card at the beginning of the next combat. As a reminder, draw an Action Card and place it face down in front of you.
- Success: It's a trap! Fortunately, you see it coming and are well prepared for the danger ahead.
- Failure: You are surprised. At the beginning of the next combat, draw 1 less card.
- Critical Failure: You are startled and lose your footing on the slippery stones, suffering an abrasion that makes you lose 2 life points. Also, at the beginning of the next combat, draw 1 less card.
A ragtag band of dirty figures breaks from cover and chargers towards you.
Assemble the "Wildenstein I" Time Scale Card with a difficulty of your choice and "Gripbeard Goutgroves" and place them on the combat plan. Then create an Event Card deck using all Event Cards with the keywords "General," "Waters," and "Forest."
The largest attacker barks orders from the other side of the river, "Go get them! And you know which one has to die!" He points one of his gout-ridden fingers at the heir.
A combat begins.
Henchmen: Form a pile of Henchman Cards of your choice. All cards must have the keyword "Bandit."
Threat Value: Number of heroes x 5.
Defeat: You immediately lose the combat if the heir falls unconscious.
Victory: You are victorious when you defeat or put to flight all opponents while keeping the heir alive.
Reward: Reward Cards equal to the number of heroes.
After a defeat: The heir sinks to the ground and you must make a hasty retreat. You have failed and will never be able to claim the Baron's legacy.
After a victory: You look around, gasping for breath, and see the ground littered with your dead enemies. You tend to your wounds and recapture your horses. Before you continue on your way, you search your enemies for any clues. Read the Victory (if the Adventure Continues) procedure in End of Combat.
You look up and realize that nightfall is upon you. You don't intend to spend another night in the wilderness of the Shadowlands, even though their dark heart is still a ways off. You saddle your horses and ride to the next village, where you are relieved to be greeted by friendly villagers. They know nothing about the bandits who ambushed you, but they can tell you that you will be able to reach Castle Wildenstein the next day. Curiosity and anticipation make it hard for you to sleep, but the exhausting journey weighs heavily on you. Soon you find rest in Boron's arms.
Continue with Act II.
Act II: Castle Wildenstein
If you play the second act without playing the first act, begin this act with 40 life points, but without any Reward Cards or the brief respite advantages from the previous act. Randomly select one hero at random to become the heir, indicated by the "Heir" card from Wildenstein I.
Wildenstein village, in the late autumn of 1039 BF
You are woken at sunrise by the croaking of ravens. You look out of the window and see a flock flying towards Castle Wildenstein, whose imposing silhouette is visible on a distant rocky cliff. Seeing it for the first time, you are overcome by a strange sense of trepidation.
Each hero makes a Willpower roll.
- Critical Success: You take heart and feel certain that you are on the right path. Take 1 Fate Point.
- Success: You try not to let yourself get too worked up over this. Let's see where this is going.
- Failure: Full of doubt and nervousness you look towards the castle. Discard 1 Fate Point. If you don't have any Fate Points, then instead remove 1 Fate Point from the game.
- Critical Failure: We are all going to die here! Discard 1 Fate Point. If you don't have any Fate Points, then instead remove 1 Fate Point from the game. Also, at the beginning of the next combat, draw 1 less card.
You stretch your limbs, still weary from the previous day's attack. You share the villagers' simple meal and return the favor by helping them out with some small repairs. It's the least you can do, even as your curiosity drives you onwards.
Gather all the "Wildenstein II" cards and separate the "Amulet of the Twelvegods" cards.
Each hero must make a Craft roll.
- Critical Success: You are a truly gifted craftsman. Take 1 Fate Point and an "Amulet of the Twelvegods" card. Place it face up in front of you.
- Success: The villagers thank you for your competent help. Take an "Amulet of the Twelvegods" card. Place it face up in front of you.
- Failure: Unfortunately, you are of no great help.
- Critical Failure: You botch your efforts and do some damage, but fortunately only to yourself. Lose 1 life point.
Remove the remaining "Amulet of the Twelvegods" cards from the game.
When you arrive at the castle in the early evening, the well-fortified building appears completely deserted. No one is in sight except the ravens watching you from the rooftops. But as you lead your horses into the courtyard, an old man with snow-white hair greets you, saying, "Welcome to Castle Wildenstein! We have been waiting for you! Please, follow me to your quarters, where you can prepare for the ball." You exchange bewildered looks as you follow the crooked shape across the courtyard and past a small Boronyard with several fresh graves.
The man leads you to a set of magnificent chambers and then tells you, "At the tenth chime, we will await your presence in the ballroom. There will be a feast in your honor." Time to dress up!
Each hero makes a Persuasion roll.
- Critical Success: You look absolutely dashing. Take 1 Fate Point and draw an additional card at the beginning of the next combat. As a reminder, draw an Action Card and place it face down in front of you.
- Success: You look very elegant and may take 1 Fate Point.
- Failure: You look like you always do.
- Critical Failure: You try your best but end up overdoing it. Discard 1 Fate Point. If you don't have any Fate Points, remove 1 Fate Point from the game.
As the tenth chime sounds, you cross the torchlit hallways and enter a large ballroom with a magnificent chandelier. To your surprise, the room is crowded with people. Their mumbling ebbs as you draw closer until suddenly, as if by command, all the faces turn towards you at once. The crowd splits and opens a path directly to a beautifully adorned throne. The ballroom doors shut with a bang and a tall older gentleman sits up from the throne to address you, "My wife is currently unavailable, and so I have the sole honor of properly greeting the heir."
You are surprised to hear that the Baron is still alive, considering the letter that told you of his recent demise. But before you can work through your astonishment at this turn of events, the next one is already happening. The Baron shouts, "Seize them!"
Upon hearing these words, the assembled crowd circles you, all of them with a manic glint in their eyes. It appears the Baron is controlling them! Fortunately, they aren't very good fighters, so you can keep them at arm's length while closing on the Baron. But then your luck changes again, as a group of armed guards charges through the room towards you.
Assemble all "Wildenstein II" cards, including the Time Scale Card with a difficulty of your choice, "Baron von Wildenstein," "Mingle with the Crowd," "Jump onto the Chandelier," and "Break Hypnosis." Place them on the combat plan as appropriate. Then create a Leader Action deck using all Leader Action Cards with the keywords "General," "Supernatural," and "Necromancy."
The screaming crowd tries to hold you, but, in their frenzy, they get in the way of the Baron's soldiers. The Baron himself remains at the far end of the room, making it difficult to reach him. Your only option is to climb onto one of the banquet tables and jump from there onto the chandelier so that you can swing above the crowd towards your enemy.
A combat begins.
Henchmen: Form a pile of Henchman Cards of your choice. All cards must have the keyword "Guard" or "Servant."
Threat Value: Number of heroes x 6.
Hero Actions: Mingle with the Crowd, Jump onto the Chandelier, Break Hypnosis.
Defeat: You immediately lose the combat if the heir falls unconscious.
Victory: You are victorious as soon as you defeat the Baron as long as the heir is still alive.
Reward: Reward Cards equal to the number of heroes.
After a defeat: The henchmen seize you and throw you into the castle dungeon. It takes many months for you to finally escape. You may never be able to uncover the Baron's secret.
After a victory: You take out the henchmen one by one, and even the Baron's own end seems nigh. However, at the last possible moment, he dodges away from you. With hate in his eyes, he flees through a hidden doorway behind the throne. It closes right behind him and you cannot find the mechanism to open it again. The ballroom falls dead silent. Your enemies are gone, and you take the opportunity to catch your breath. Read the Victory (if the Adventure Continues) procedure in End of Combat.
You cannot let it end like this! What happened to the heir's mother? Why is the Baron still alive? Now is not the time to sleep, so instead you start your final perilous search for the Baron.
Continue with Act III.
Act III: The Conjurer's Ritual
If you play the third act without playing either of the previous acts, begin this act with 40 life points, but without any Reward Cards or the brief respite advantages from the previous acts. Randomly select one hero at random to become the heir, indicated by the "Heir" card from Wildenstein I.
Wildenstein Boronyard, in the late autumn of 1039 BF
You search every inch of the castle until you finally find the exit of the secret passageway. The Baron's tracks lead you through an ornamental garden near the back of the castle and onto a guard's walkway along the battlements. Here, it seems that the Baron has attached a rope to a pole and rappelled down into the dark forest beyond the castle walls. The descent looks quite perilous, but if you want to catch up to the Baron, you have no other choice.
Every hero makes a Body Control roll.
- Critical Success: You rappel down like a professional climber and are even able to lend a hand to a less skilled companion. One other hero may reroll a failed Body Control roll.
- Success: You successfully rappel down.
- Failure: You slip and sprain an ankle. Lose 2 life points.
- Critical Failure: You lose your grip and tumble down headfirst. Lose 5 life points.
You find yourself deep in the undergrowth of an eerie forest. This is exactly the kind of Shadowland forest you were warned to avoid. You expect to face a terrible demon, bizarre plant monster, or angry treeman any second. The darkness and your constant worry make it difficult to concentrate on following the Baron's tracks.
Every hero makes a Survival roll.
- Critical Success: You find a shortcut! Take 1 Fate Point. If at least one hero rolls a Critical Success, add 1 extra Time Counter on the Time Scale Card in the next combat.
- Success: You follow the tracks without any difficulty. Take 1 Fate Point.
- Failure: You are useless in this search. If none of the heroes achieve a Success in this roll, apply the results of a Critical Failure below.
- Critical Failure: You find a shortcut! Unfortunately, it leads in the wrong direction. You waste precious time discovering your error. If at least one hero rolls a Critical Failure, remove 1 Time Counter from the Time Scale Card in the next combat.
Eventually, you reach a clearing that is littered with boulders and derelict graves. It's an old, forgotten Boronyard that looks like it hasn't received a Boron priest's blessing in many decades. You spot two figures in the middle of the clearing. If you want to identify them and find out what they are doing you'll need to sneak closer.
Every hero makes a Stealth roll.
- Critical Success: Silent as a shadow, you close in on the figures. You may draw an additional card at the beginning of the next combat. As a reminder, draw an Action Card and place it face down in front of you.
- Success: You sneak towards your targets without being noticed.
- Failure: You awkwardly stumble through the underbrush. At the beginning of the next combat, draw 1 less card.
- Critical Failure: You get stuck in a root and fall on your stomach. Lose 2 life points. At the beginning of the next combat, draw 1 less card.
You recognize one of the figures as the Baron, who is holding a richly adorned coffer in his hands. The other figure is an elderly woman in a nightgown matted with mud, her straggly hair hanging across her tear-stained face. After a moment, you realize that she is the heir's mother!
You watch as the woman digs a hole into one of the graves. You spot similar holes in some of the other graves nearby. When she is done, she tosses aside her shovel and folds her arms in front of her chest. "You killed my beloved husband to take his place," she cries, "and now you are trying to subjugate me. But I will not allow it, you spawn of the netherhells!"
The Baron lets out an evil growl, "Shut your mouth, woman! You will obey my orders or I will make you dig those holes with your bare hands!" He caresses the coffer in his hand and you can now see his pointy fangs glitter in the moonlight. The coffer starts to glow with a ghoulish light and the woman's limbs stiffen. Without saying another word, she grabs the shovel and continues her work.
As you draw your weapons to attack the false Baron, you notice the gaunt figures standing in the shadows of the trees, observing you with their lifeless eye sockets. Skeletons!
Assemble and place the following cards on the combat plan:
- All "Wildenstein III" cards, including the Time Scale Card with a difficulty of your choice, "Grautax, the False Baron," "Heir's Mother" (with the "Bewitched Mother" side face up), "The Demon of Wildenstein" (with the "Foreshadowing" side face up), "Hero Action: Free Mother" (with the "Open Coffer" side face up), "Hero Action: Consecrate Grave," and "Hero Action: Consecrate Weapon."
- The Demon Card "Irrhalk" and a Demon Ability deck of all Demon Ability Cards with the keywords "Horned," "Flying," and "Fire." Place the demon and its deck under the card "The Demon of Wildenstein."
- A number of Grave Cards equal to the number of heroes, with the "Trembling Grave" side face up.
- A Leader Action deck of all Leader Action Cards with the keywords "General," "Supernatural," and "Necromancy."
- An Event Card deck of all Event Cards with the keywords "Conjure Demon" and "Conjure Undead."
The false Baron spins around and points you angrily. "You again! Well, just wait and see what your annoying persistence will get you. This time you won't escape so easily!"
The skeletons react to his gesture and move towards you. With them is the heir's mother, controlled by the Baron's evil magic. You see that same manic glint in her eyes that you saw in the eyes of the ballroom guests. The Baron carefully places the coffer on the ground and draws a magic wand. He traces complex magical symbols in the air and recites demonic and necromantic conjuration spells.
A combat begins.
Henchmen: Form a pile of Henchman Cards of your choice. All cards must have the keyword "Skeleton."
Threat Value: Number of heroes x 3.
Demon Summoning: When the demon "Irrhalk" appears, turn over the card "The Demon of Wildenstein."
Hero Actions: Mingle with the Crowd, Jump onto the Chandelier, Break Hypnosis.
Defeat: Every time a hero is knocked unconscious, you receive a doom counter. When you have a number of doom counters equal to the number of heroes, you lose.
Victory: You are victorious as soon as you defeat "Grautax, the False Baron."
Reward: Reward Cards equal to the number of heroes, and every hero receives experience points (see below).
After a defeat: The Baron and his henchmen turn out to be a bigger challenge than you can handle, and you hastily retreat from this godsforsaken Boronyard. Hopefully, some other heroes will come and put an end to the Baron and his villainous deeds.
After a victory: The Baron collapses to the ground with a rattle in his throat. You put an end to his undead existence by setting his body on fire and burning it to ash. His remaining henchmen crumble to dust. The heir's mother gives her child a heartfelt and tearful embrace.
You did it! You unmasked the false Baron von Wildenstein and ended his evil reign. You may now claim your well-deserved inheritance. You return to the castle with the heir's mother in tow, as the early morning sun washes away much of the forest's threatening appearance.
The servants and guests in the castle have come to their senses. They apologize for their actions of the previous evening. Whether you exercise leniency towards these poor souls is now entirely up to you, though it seems obvious that they were merely victims of the false Baron's magic.
You are now in possession of the means and resources of a whole castle—but also subject to the responsibilities that come with it. And don't forget that your castle lies very close to the Shadowlands, which means that terrible dangers may threaten at your very doorstep. It seems only natural that you would go out there and drive those enemies from their caves and dungeons!
You have overcome the adventure. Each hero receives 2 experience points. If you managed to free the heir's mother with the hero action "Free Mother," each hero receives 1 additional experience point. Read the Victory (End of Adventure) procedure in End of Combat.
Hero Document Template
The Hero Document records a hero's name and their skill values (Body Control, Craft, Knowledge, Perception, Persuade, Stealth, Survival, Willpower), each with a start value, any raises, and the current value, along with a list of collected Reward Cards.
Game Symbols: Close Combat, Ranged Combat, Magic, Dodge, Fate Point, Life Point, Damage Point, Adventure Token, Endurance, Exhaust Card, Number of Heroes, Actions, Time Counter, Doom, Red One-Shot Card.
Combat Sequence in Adventure Mode (Reference)
Preparation
- Place time scale card.
- Place leader card(s) and add tokens.
- Place story cards.
- Compile special cards into draw piles and place them.
- Place henchman cards and add tokens.
- Prepare additional tokens (doom counters, adventure tokens, hero tokens, etc.).
- Every hero draws action cards as usual.
Round Sequence
- Preparation: All heroes simultaneously perform phases 1 to 4 of the duel rules.
- Hero turns: In a clockwise order, starting with the starting hero, each player performs phase 5 and 6 of the duel rules.
- Opponent turns: The opponents act in the order in which they are assembled.
- Time effects: A time counter is removed from the time scale card and the relevant time effect on the card is resolved. Time effects on opponent's cards are also resolved, if applicable.
- End of the round: The current starting hero hands the starting hero counter to the player sitting to her left and the next round begins.
Brief Respite between Acts (Reference)
- Rest: 2 life points per recovery point.
- Pray to the Gods: 1 Fate Point per 2 recovery points.
- Prepare: 4 recovery points. Pick 1 card from your deck and add it to your hand.
- Practice: 2+ recovery points. Take 1 Practice Card.
- Training: 2+ recovery points. Take 1 Training Card.