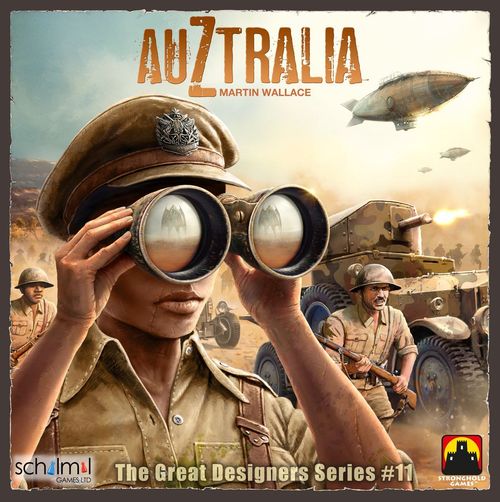
AuZtralia
AuZtralia Rulebook
Table of Contents
Table of Contents
- Game Overview & Objective
- Components
- Old One Cards Explained
- The Board
- Setting Up the Game
- Playing the Game
- Resolving Combat
- Example of Combat
- Activating the Old Ones
- Example of Old One Movement
- Recruiting Help with the Personality Cards
- Description of the Personalities
- Description of the Old Ones
- Game Variants
- Ending the Game
- Scoring
Game Overview & Objective
AuZtralia is a military/economic/adventure game for one to four players. You start with a port on the coast of Australia. From there you will build railways into the hinterland, to allow you to mine resources and establish farms. You have a Player Board that represents the resources and military units that are present in your port.
Everything you do in the game costs time. You become the active player when your disc is the lowest placed one on the Time Track. You then take one of your cubes from your HQ and place it in one of the Action Boxes on your Player Board and perform the corresponding action. That action will have a Time Point cost, which will move your disc that number of spaces along the Time Track. Once a cube is in an Action Box, you can still perform that action again but it will cost you additional Gold to do so. Eventually you will need to expend a Time Point to retrieve all of your cubes from your Action Boxes.
Australia is a big country and railways are critical for many things, such as mining, establishing farms, and allowing your military units to attack the Old Ones. Building railways requires coal and iron, which you can gain by mining or importing. Establishing farms will reward you with Gold and victory points, but you must be careful not to allow the Old Ones to blight them. Gold is useful for buying military units and allowing you to repeat actions.
At some point in the game you will need military units to find out exactly what nightmarish beings are lurking in the Outback. Having a range of different types of units is good as this will make your attacks more effective. Military units have an off-rail movement range, which limits how far they can operate from your railway network.
There are a number of important personalities who have skills, abilities, and resources to help you to achieve your goals.
Players may have to work together to defeat the most dangerous Old Ones, launching multiple attacks over a period of time.
At a point in time, the Old Ones will wake and effectively become another 'player', with a disc on the Time Track and will begin to reveal themselves and move. The Old Ones always move towards the closest settlement, whether it be a farm or a port. If they reach a farm, they will blight the land, while if they reach your port and you fail to defeat them, the game will end immediately.
The game ends when everybody has expended a certain number of Time Points (or a port has been destroyed). Your performance in the game is measured with victory points, which you gain from establishing farms, defeating Old Ones, and from specific personalities. The Old Ones also score points depending on how many of them are left at the end of the game and how many farms they have blighted. Who has the highest total wins the game, which may well be the Old Ones!
Components
Player pieces — There are four sets of player pieces, in four colours. Each set comprises: 1 Port disc, 20 cubes, 3 discs, 20 Railway Tracks, 7 Cattle Farms, 7 Corn Farms, 7 Sheep Farms (each with a Productive Side and a Blighted side).
Old One pieces — 1 Old One disc, 10 Old One Damage cubes, 35 Old One tiles (15 Level 1, 10 Level 2, 10 Level 3), 8 Spawning Temple tiles (see variant on page 19). Each Old One tile shows its Victory Points and Damage capacity.
Resources — 50 Coal, 50 Iron, 50 Gold, 7 Phosphate.
Player Board (Port) — Shows Action Spaces marked with Time Point cost; the Expeditionary Force (showing the Gold cost to buy the unit); a place to store your Sanity; a Barracks to house your Military Units; a Warehouse to store resources; and an HQ to store your cubes. Use the reverse side when playing the Western map.
Game board — Described on page 6. Main map (Eastern Australia) and Variant map (Western Australia, see page 19).
Military Units — Infantry x10, Armoured cars x5, Airships x3, Artillery x3, Armoured trains x4. Each unit shows its Off-rail range and Damage capacity.
Cards — 36 Personality cards, 40 Old One cards, 30 Revelation cards (10 of each level), 10 Solo objective cards, 5 Two-player variant cards. For game variants — see page 19.
Other Pieces — 20 Survey tiles, Player Aid, 17 Victory Point tokens, 13 Sanity tokens, 1 Combat marker + 1 Combat token (your choice).
Old One Cards Explained
The Old One cards are used in two different ways:
- To determine Old One movement
- To resolve combat.
Each card shows the direction the Old One moves, if there is a choice of equidistant targets. This is used in conjunction with the compass printed on the board. A circled Old One indicates that it moves ONE hex.
Damage you inflict on each Old One is shown on the left, if you have that Unit type present in the Combat. Damage you receive is shown on the right: Sanity loss, Airship damage, and Non-Airship damage.
The Board
The board shows the Time Track, with the Old Ones disc starting on 22. Starting spaces are based on player count. Survey tiles are placed at the start (13 in total). Revelations occur whenever the Old One marker lands on an Illuminated space. Each hex shows a Hex Number and, where relevant, the Old One tile level (1, 2, or 3). The board shows potential Port locations, the Major Old Ones Display, the Available Military Units, and the three hex terrain types: Outback, Hills, and Coastal. There is also an End of Game marker.
Setting Up the Game
-
Set the board to show the Eastern map (as shown above). Select a colour and take the corresponding set of pieces. You will have seven of each type of Farm (Sheep, Cattle, Corn), twenty Railway tiles, twenty cubes, three discs, one Port marker, and one Player Board. Place your Player Board in front of you with the 'Eastern Barracks' showing and place your cubes in the HQ box. The rest of your pieces are placed by the side of your Player Board.
-
Place the resources in a supply by the side of the board. There are four resource types, which are: Coal, Iron, Gold, Phosphate.
-
You start the game with two Coal, two Iron, and four Gold. These are placed in your Warehouse. Place three Sanity markers on your Player Board.
-
Set aside the eight Old One tiles with X or XX on the front. Then separate the rest into stacks of the same level (one, two, and three). Shuffle each stack and place them face down by the side of the board.
-
Shuffle the twenty Survey tiles face down. Draw and place one tile in each hex marked with a Survey triangle (there are thirteen in all). Flip each tile face up and orientate so that the arrow is pointing to the top of the board.
-
Now place resources and Old One tiles as indicated. If an Old One tile is due to be placed in a hex, the level of the tile must match the level indicated on the map. Old One tiles are placed face down. This symbol indicates the placement of a face down Old One Tile. The hex level determines if it is a 1, 2, or 3 tile.
The hex where a Survey tile is located does not receive an Old One if it is in the Hills. Resources are never placed in COASTAL hexes. Old Ones are never placed in HILL or COASTAL hexes. In some cases there will be an overlap: more than one type of resource can be placed in a hex. Similarly, resources can be placed in a hex with an Old One tile.
If an Old One tile is due to be placed in a hex that already has one, then remove the existing tile and replace it with a tile of the next level up, e.g. if another level one tile is due to be placed in a hex, replace the existing level ONE tile with a single level TWO tile.
Level three tiles are not upgraded; one of the tiles is simply not placed. If you run out of tiles of a certain level, place one of the next level up.
Remove each Survey tile after placing all the surrounding resources and Old Ones. Continue until all of the Survey tiles have been removed.
Example for Step 6 — Conducting the Survey: (A) After the Survey tiles have been flipped. This symbol indicates the placement of a face down Old One tile. The hex level indicates if it will be a level 1, 2, or 3 tile. (B) After the board has been seeded and the Survey tiles removed. Note that a level three Old One tile has been placed in level two hex number 28, which was due to have two tiles placed in it, so an upgrade occurred. Note also that NO Old One tile has been placed in Hills or Coastal hexes, even though the Survey tiles indicated to do so. Also, no resources are placed in Coastal hexes.
Playing the Game
The player whose disc is in the lowest numbered position on the Time Track is the active player. If there is more than one disc in a space, the player whose disc is highest in the stack is the active player.
Example - Red is the active player. Once Red and Blue pass Green, Green will be the active player.
- When you are the active player, you take one of your cubes from your HQ and place it in an Action Box of your choice on your Player Board. You then perform the corresponding action.
- Each action has a Time Point cost. You move your disc this number of spaces along the Time Track. If your disc ends up in a space with other discs, you place your disc on top. If your disc reaches or passes space 53, you cannot take any more actions.
- You can select an action that you have already performed, but you must pay one Gold for EACH cube you already have in that box.
Available Actions
- Build Railway
- Mine
- Recruit Help
- Buy Military Unit
- Import/Export
- Farm
- Attack
- Retrieve Cubes
Action: Build Railway
There are two boxes for this action. The first box has a cost of two Time Points and allows you to build track in Coastal and Outback hexes. The second box allows you to build in all three types of terrain. Thus, if any of your track has to be built in Hills, the action will cost you three Time Points.
- You must spend one Coal and one Iron, returning them to the supply. You can now place TWO of your Railway tracks.
- The first piece must connect to your Port. After that, tracks must connect to other track of your colour, or your Port, i.e. your rail network must be contiguous.
When you build a track, place it so that it crosses the border of two hexes. These two hexes are now connected to each other by Railway.
Example - you move your red cube to the 'Build Railway' action, which has a Time Point cost of two. If you wish to perform this action again, you have to spend one Gold, or spend a Time Point to retrieve your cubes.
Example - you place two Railway tracks linking your Port to the Iron deposit.
- There can only ever be one Railway across a single hex side.
- A hex can have Railways from different players connecting into it.
- You cannot build a Railway into a hex containing an Old One tile, whether face up or face down.
- To be able to extend your Railway network, you must be able to trace a path that is free from Old Ones back to your port via your existing network.
- The number of tracks you have is the maximum you can place. You cannot remove tracks once placed.
Action: Mine
You take all of one type of resource from a hex that you are connected to by your Railway. Place them in your Warehouse. The Railway line from your Port to the hex you wish to mine must be free from Old Ones.
- If there are two types of resources in the hex, you choose which type you wish to take.
- If you take Phosphate, you also take one Gold from the supply. Keep the Phosphate for end-game scoring, it is worth 3 VP.
Example - Red has the choice of mining three Iron or three Gold.
Action: Buy Military Unit
The cost of each Military Unit is shown in the corresponding box of your Expeditionary Force, and on the main board. You pay this cost in Gold.
- Take the Military Unit and place it in your Barracks.
- You can only buy one Unit in a single action. However, if you chose to buy Infantry, you can buy either one or two units at a cost of one Gold per unit.
Note that there are only a limited number of Military Units available.
Example - An Artillery Unit costs five Gold. It has an off-rail range of 1 and a damage capacity of 2.
Action: Farm
There are three types of Farm tiles: Corn, Sheep, and Cattle. You can place a maximum of one of each type in a single action. Thus the most you can place in an action is three Farms, each of which must be different.
- Farms must be placed in a hex that matches the type of farm, e.g. Sheep can only be placed in Outback hexes.
- You place your Farms on hexes that connect to your rail network.
- The hex must be empty, it cannot contain any other pieces apart from Railway tracks. Thus you cannot place a farm in a hex containing resources, a Port, another Farm, or Old Ones.
- You must be able to trace a path along your rail network that is clear of Old Ones between the Farm and your Port.
The Time Point (TP) cost is equal to the number of Farms you place.
For each Farm you place, take one Gold from the supply. This is money you earn from the sale of food.
The number of Farm tiles you have is the maximum you can place. You cannot remove a Farm once placed.
Example - you have three hexes where you can place Farms. Two are Hills hexes and one is Outback. You cannot place a Farm in your Port hex, nor the one containing Iron. You place one Cattle and one Sheep Farm and take two Gold from the supply.
Action: Recruit Help
You take one Personality card from the display.
After taking a card, move the remaining display cards to the right to fill the empty space, and draw a new card to place to the left of the line.
Alternatively, you may pay 1 Gold to take two cards from the draw pile. Look at them, take one and replace the other face down on top of the deck. You may exchange the one you took with one from the display.
There is no limit to the number of Personality cards you can have, and no limit to how many you play on your turn.
A detailed explanation of the Personalities appears on page 16.
Action: Import/Export
You can perform two of these sub-actions, in any combination you wish:
IMPORT – Take one Coal or one Iron from the supply and place it in your Warehouse.
EXPORT – Take one Coal or Iron from your Warehouse and place it back in the supply. Take one Gold from the supply and place it in your Warehouse.
Action: Attack
This action consists of a number of steps:
First, you must decide which Military Units to send out as part of your Expeditionary Force. You select some or all of the units from your Barracks and move them to the matching unit types in the Expeditionary Force area of your Player Board. Multiple units of the same type must be placed in a stack.
You then select a hex containing an Old One tile (either face up or face down) to attack. You can only attack hexes that are within range of your Expeditionary Force, which is determined by the lowest off-rail range of the units in your force:
- Infantry and Artillery have an off-rail range of one hex.
- Armoured Cars have an off-rail range of two hexes.
- Airships have an off-rail range of four hexes.
- Armoured Trains do not have an off-rail range, for obvious reasons. This means they can only be used to attack hexes that are on your rail network.
You can attack any hex that is within this distance from your rail network or your Port.
In effect, your force starts by moving along your rail network and then strikes out across country.
You cannot trace movement through an Old One hex to attack one further away, unless you are attacking with just airships, in which case you can move through hexes occupied by Old Ones.
You declare which hex you are attacking. You may use the combat marker to denote this hex. If the hex contains a face down Old One tile, it is flipped face up.
You can attack a hex on your rail network that contains an Old One. However, you cannot use any part of your rail network that is blocked by an Old One, i.e. you have to be able to trace a path of hexes on your rail network that is free of Old Ones from your Port to the hex where you intend to 'jump-off'.
The Time Point cost for this action depends on which unit types are in your Expeditionary Force.
ONLY Infantry, Armoured Cars, and Artillery are counted for this cost, these are the three unit types in the top row of your Expeditionary Force.
- The Time Point cost is equal to the number of different types of such units in your force, e.g. if you moved a force containing Infantry and Armoured Cars, the Time Point cost would be two. Thus the maximum cost will be three Time Points.
- Armoured Trains and Airships do not add to the Time Point cost of attacking. However, you must always pay a minimum cost of one Time Point.
- Note that the number of each type of unit you move does not impact on the cost of movement, so you can move as many Infantry units as you wish and the cost for doing so will always be one Time Point.
Example - you decide to move all four units. This will cost two Time Points: (Infantry and Armoured Cars). The Airship does not add to the Time Point cost.
Resolving an attack is explained under 'Resolving Combat'.
Note that your Military Units are never actually placed on the board, they go from your Barracks to your Expeditionary Force area, then back again once combat has been resolved.
Example - You attack the hex containing the level one Old One tile. You flip it and discover that it is a Zombie. You must now decide whether to stay and fight or withdraw.
Action: Retrieve Cubes
Move ALL of the cubes from the Action boxes on your Player Board back to your HQ, including the one you used to perform this action.
If you have no cubes left in your HQ, you can retrieve them all at a cost of two Time Points.
Resolving Combat
Combat occurs when you attack a hex or when one or more Old Ones move on to your Port hex. There are some minor differences in the way combat is handled between these two, as will become clear below.
Combat involves:
- Checking your Sanity
- Flipping Old One cards
- Deciding when/if to withdraw
At the start of every combat, make sure you have three Sanity tokens next to your Expeditionary Force.
If you attack a hex containing a face down Old One, then after turning it face up you have the option to withdraw (see Withdrawal on this page). If you decide not to withdraw, you must enter into combat.
Flip over the top Old One card from the deck. This card will indicate whether any damage is inflicted on your force and/or the target of your attack. After resolving the effect of the card, it should be placed on the discard pile.
First, locate the Old One that you are fighting in the central column. The symbols to the left indicate which of your units will inflict damage. For each symbol that matches a unit type in your Expeditionary Force, you inflict one damage on the Old One. Note that the number of such units in your Force is not relevant, only the fact that you have that type of unit. Having additional units of the same type only helps you to absorb more damage.
The symbol to the right of the Old One you are fighting indicates damage inflicted on your force. A purple cube means that you must place one purple Damage cube on one of your stacks of units on your Expeditionary Force. You cannot place this cube on an airship, otherwise, you choose which stack to place it on. If the number of cubes on a stack equals the Damage Capacity of that unit type, then the top unit in that stack is eliminated. It should be removed from your Force and placed back with the supply of Military Units. The cubes on the unit are returned to the supply.
Note that damage cannot be shared amongst units of the same type, e.g. if you had two Infantry in your Force then once two damage had been inflicted against them, one of the units would be eliminated.
An Airship symbol indicates that one damage is inflicted against your Airships, if present. If you have no Airships in your Force, ignore this result.
A Sanity symbol requires you to remove one of your Sanity tokens from your Board. If you do not have a Sanity token remaining, then you are defeated. See Defeat rules below.
All results on an Old One card are implemented simultaneously.
When you inflict damage on an Old One, you take the corresponding number of YOUR coloured cubes from your HQ and place them on the Old One tile. If the Old One in question has a Damage Capacity of six or more, you may place your cubes on the matching space on the Major Old Ones display.
You can replace five cubes with a disc if necessary, which represents five points of damage.
After resolving the effect of the Old One card, you check whether you destroyed the Old One(s) or were defeated (see Destroying Old Ones, Defeat). Otherwise you have the option to withdraw (see Withdrawal). If combat did not end, you draw the next Old One card. If the deck of Old One cards is exhausted, shuffle the discard pile to make a fresh deck.
Combat continues until:
- You Destroy the Old One(s),
- You choose to Withdraw (leaving no units in combat), OR
- You are Defeated
Afterwards, proceed to End of Combat Resolution.
Destroying Old Ones
An Old One is eliminated if the amount of damage inflicted against it is equal to or more than its Damage Capacity, as indicated in the grey shield.
If you were the only player to inflict damage on it, you take the Old One tile and retain it. It may score you Victory Points at the end of the game.
If more than one player inflicted damage on the Old One, the Victory Point value of the tile should be divided equally by the number of players who have one or more of their cubes on the tile. Each player receives that number of Victory Points, taken as Victory Point tokens. Any remainder is awarded to the player who inflicted the most damage. If there is a tie for this honour, the remainder should be split evenly if possible, or if that is not possible, the remainder is not awarded to any player.
All player cubes return to the owner's HQ.
If you destroy all the Old Ones on the hex, the combat ends.
Withdrawal
Before drawing a new Old One card, you have the option to withdraw units from your Expeditionary Force. You may choose to withdraw:
- All of your Airships
- All of your non-Airship units, OR
- Both (i.e. all of your units)
If any of the withdrawn units have Damage cubes on them, remove these cubes, then return all withdrawn units to your Barracks. If no units remain in your Expeditionary Force, the combat ends.
Defeat
You are defeated if after resolving an Old One card:
- You have no military units left in the combat, OR
- You are required to lose a Sanity token and have none left on your display.
Note that you resolve all effects of the Old One card before the combat ends. This means it is possible to destroy an Old One and suffer defeat at the same time.
End of combat resolution
If you were defeated, destroy all units in your Expeditionary Force that have one or more Damage cubes on them, they go to the supply. Then return the rest of your units to your Barracks.
Otherwise, remove all Damage cubes (you do not destroy damaged units), and return all of your units to your Barracks.
If any Old Ones survived the combat, any damage you inflicted on them remains there. Zombies are an exception; any damage on Zombies is removed and returned to your HQ (see Description of the Old Ones on page 18).
Your action is done.
Defending your Port
If your Port is attacked by the Old Ones, i.e. one or more Old One tiles move into your Port hex, combat is resolved in almost the same manner as described above. All of the units in your Barracks should be moved to your Expeditionary Force, i.e. everything fights.
- This does not cost any Time Points.
- You cannot choose to withdraw.
- If, after End of Combat Resolution, any Old Ones remain on your Port hex, you lose your Port and the game ends immediately. Scoring then happens.
Note: if you eliminate all of the Old Ones at the same time that you are Defeated, you still suffer eliminations due to damage, BUT you do not lose your Port. The game continues.
If two Ports are attacked simultaneously, the combat is resolved in player order.
Combat with more than one Old One
When sending an expedition out to attack a hex which has more than one Old One, you must fight all of them, you cannot choose to fight just one.
You use the same Old One card to resolve combat for each Old One present (even if they're of the same type), handling each as an independent combat. These combats should be regarded as being simultaneous with each other.
If there are two or more Old Ones of the same type, any damage you inflict on them will be inflicted on each Old One, e.g. if you were fighting two Zombies and inflicted one damage, one cube would be placed on each Zombie tile. Conversely, any damage inflicted by the Old Ones will be multiplied by the number of that type involved, e.g. if the two Zombies inflicted one damage, that would become two damage, which you can assign as you wish against your force. This would also mean that any Sanity loss would be multiplied by the number of Old Ones of that type. See example on next page.
Effectiveness of Units
The Old One cards are designed to reflect the effectiveness of Military Units against different targets. There are a few rules of thumb which will help you to decide which units to send against which Old Ones:
- Infantry and Armoured Cars are good against Zombies and Mi-go, but less effective against Shoggoths and Cthulhu.
- Infantry and Artillery are good against Temples.
- Artillery and Armoured Trains are good against Cthulhu and Shoggoths.
- Airships are vulnerable to Mi-go, and are poor against Zombies.
- Loyalists fight in an orthodox manner, so all unit types are good against them. Loyalists will never cause you to lose Sanity.
- Armoured Cars can never inflict damage on Temples, (exception: Lt. Singh.)
There is an Effectiveness summary on the last page of this book and on the Player Aid.
Example of Combat
You decide to stay and fight the Zombie.
- The first card drawn inflicts one damage on you, which you decide to place on your Infantry. You also lose one Sanity, but decide to stay and fight.
- The next card has the same result, so you place the damage cube on your Armoured Car.
- The third card results in one damage against the Zombie, inflicted by the Infantry.
- The fourth card inflicts another damage on the Zombie, which eliminates it. However, another damage has been inflicted on you, and you decide to allocate it to Infantry, thus losing one Infantry unit. Note that you cannot allocate it to your Airship.
End of Combat. You lose the top Infantry tile due to the two Damage. You take the Zombie tile and return your Armoured Car and Airship to the Barracks, removing the Damage cube from the Car at the same time.
In this example, if you had been fighting the Zombie and a Mi-go, then combat would have gone as follows:
- The first card would have resulted in one damage against the Mi-go, one damage against you, and the loss of one Sanity.
- The second card would have resulted in one damage against the Mi-go, one damage against you, and the loss of two Sanity.
- The third card would have resulted in one damage against your Airship and one damage against the Zombie. You decide to keep your Airship in the combat.
- The final card would result in one damage against the Mi-go, one against the Zombie, one against you, and one against your Airship. It would also mean the loss of a Sanity when you have already lost all of yours.
You manage to destroy both the Zombie and Mi-go. However, you lost your Airship due to the second damage, and lost one Infantry due to the damage from the Zombie. Your Defeat means your remaining units are at risk; as the Armoured Car had one damage on it, this would also be eliminated.
Activating the Old Ones
When every player disc has passed the purple disc that is waiting at no.22 on the Time Track, the Old Ones become the active player.
This involves:
- Moving the purple disc one Time Point along the track.
- Revelation. If purple moves to an illuminated space, draw one Revelation card and resolve it.
- Old One Movement. If there are any face up Old Ones on the board capable of moving (Temples cannot move) then draw TWO Old One cards and resolve any movement.
Note that the Old Ones may enjoy a number of consecutive activations as long as the purple disc is furthest back on the Time Track.
Revelations
- If the card tells you to reveal the Old One in the lowest numbered hex, check which tile this is and flip it face up. If the tile is Empty, it is removed from play. Otherwise the tile is left in position. Each hex has a number in the lower left-hand corner.
- If the card tells you to reveal AND draw six movement, those six cards only affect the newly revealed Old One. You still draw two more to check for movement of ALL the revealed tiles.
- If the card tells you to assassinate, remove the two Personality cards furthest to the right on the display. You then move the remaining cards along and draw two replacement cards.
- If the card tells you to draw and place Old One tiles on Temples, draw one level THREE Old One tile for each face up Temple on the board, going from the lowest to the highest numbered hex. The Old Ones are revealed, so put them face up. If there are not enough level three tiles remaining, use level two tiles.
- If the card says 'No Event', you still do the movement check.
Assassinations kill the two farthest from the deck.
Benefits
Benefits on the Revelation cards apply to all players except the Old Ones.
Movement of Old Ones
To check whether the Old Ones will move, draw an Old One card to see which Old Ones on that card appear in a circle. All Old Ones of that type are then moved ONE hex.
- An Old One must move towards the closest Port or un-blighted Farm.
- If there is more than one Port/Farm the same distance away or more than one equal route to the closest target, then check the number indicated on the top of the card. Refer to the compass plan at the bottom of the map.
- If that direction is not one of the equivalent routes, then go clockwise or anti-clockwise (as indicated) from the direction on the card until you reach the first hex that the Old One could potentially move to.
Temples never move, so do not bother to check for movement if they are the only revealed Old Ones on the board.
You must carry out this movement check TWICE each time the Old One disc is moved on one space.
- If an Old One moves into a hex occupied by a Farm, turn that Farm to its blighted side. Railways are not affected by the Old Ones.
- Any Damage cubes on an Old One tile stay on the tile when it moves.
- If two Old Ones move onto a Farm, they do so simultaneously, before it is blighted.
- If an Old One moves into a Port hex, combat will occur after all remaining movements have been resolved. The Old One in question will not move any further than the Port. See page 12 regarding Defending your Port.
- The final check for Old One movement occurs when the purple disc lands on '53'.
Movement Rates
The Old One cards are designed to reflect the different movement speeds of each type of Old One. In general, Zombies move slowly, Mi-go move quickly, and everything else moves at an average rate.
Example of Old One Movement
The purple Old One disc on the Time Track has been passed by every other Player disc, so is now activated. It is moved one space, to an illuminated space which results in the draw of a Revelation card. The card results in an Old One tile on the board being flipped face up, which reveals a Mi-go. (1)
Two Old One cards are drawn, which result in it moving one hex, as the first card has the Mi-go circled.
First card: Mi-go moves. Second card: Mi-go does not move.
There are two Farms equidistant from the Mi-go. The card that moves the Mi-go has '1' at the top. The blue farm is at direction 2 clockwise so the Mi-go moves towards the blue Farm, as shown in illustration (2).
The Old One disc is still in last place on the Time Point track, so is moved another space. This is not an illuminated space, so no Revelation card is drawn. For the movement check, two Old One cards are drawn, resulting in the Mi-go moving another hex. This time its movement is clear, it moves on to the blue Sheep Farm. The Farm is flipped to its blighted side. (3)
(1) A Revelation card flips an Old One tile, it is a Mi-go. (2) The movement check causes the Mi-go to move towards the target. (3) The Mi-go moves onto a Farm, the Farm is flipped to its blighted side.
Recruiting Help with the Personality Cards
When you Recruit Help, you place the card in front of you. Each Personality card will inform you how it is to be used.
- Persistent - The effect described on the card is ongoing in nature. (P)
- Once per combat - You can only use this effect when you are in combat. When you apply the effect on the card, rotate or flip it to show it has been used. Return it to its original state once combat is concluded. (C)
- One-use - You can use the card at any point when you are the active player. After using the card, remove it from the game. (1)
- End game scoring - The card will grant you additional Victory Points. (VP)
NOTE: One-use cards must be deployed before you run out of time, but Persistent ones could be triggered afterwards by other player's actions.
Description of the Personalities
Agent Davies (1) — You flip two Old One tiles of your choice so they are face up. Apply the same rules as if they had been revealed normally. You also take two Victory Points.
Alanza Castro (P) — Whenever an Old One attacks one of your Farms, it suffers two damage. If the Old One is killed, do not blight the Farm.
Alexander Proust (P) — Your Armoured Cars can take three damage before they are eliminated.
Billy Kneebone (P) — Increase the off-rail range of all of your Military Units by one.
Bombardier Milligan (C) — If you have Artillery present in combat, you inflict one damage automatically. If there is more than one Old One, you choose which to damage.
Boris Krupp (P) — Your Armoured Trains can take four damage before they are eliminated.
Captain Flounder (1) — Take one Military Unit of your choice.
Colonel Khouri (C) — You inflict one damage on one Old One that you are fighting.
Corporal Jones (C) — You can use this card after an Old One card has been flipped, but before its effects are resolved. You can choose to withdraw instead of resolving the effects on the card. You can use this card to withdraw just your Airships or everything except your Airships. In this case, the effects on the card would still be resolved, but only for those units remaining in combat.
Count Jago (C) — You start each combat with four Sanity tokens instead of three.
Dagmar Krauss (P) — You can place two Farms of the same type in a single action, e.g. two Sheep Farms. You are still limited to placing three Farms in total.
Desta Danger (1) — You select one revealed Temple on the board to remove from play. Any Old Ones on the Temple tile are also removed. No Victory Points are scored for any of these removed tiles, even if damage had already been done to some of them.
Donald McDonald (1) — Take two Iron, two Coal, and two Gold from the supply and place them in your Warehouse.
Ferdi Cassan (1) — Place two Farms of your choice, following the usual rules. They do not cost Time Points. You still earn one Gold per Farm.
Franz Neumann (C) — If one of your Military Units is eliminated in combat, you can return it to your Barracks rather than losing it permanently.
General Takanashi (C) — Eliminate one of your units in your force to inflict two damage against the Old Ones. If you are fighting more than one Old One, you decide which ONE to inflict the damage against.
Harry Bones (P) — When you mine, you take one extra of the resource you have just mined. It comes from the supply. Does not apply to Phosphates.
Ivan Karpov (P) — If one or more Old Ones attack your Port, each immediately suffers two damage. If the Old Ones attacking your Port are automatically destroyed, you are still regarded as having fought a combat, so cannot use Kapena Alika to defend a Farm that may have been attacked at the same time.
Jenny Appleseed (1) — Flip one or two of your blighted Farms to their productive side. Jenny must be used before you reach 53 on the Time Track. In cooperative games you may flip another player's Farms.
Juliet Verne (C) — If you have an Airship present in combat, you inflict one damage automatically. If there is more than one Old One, you choose which to damage.
Kapena Alika (P) — If the Old Ones move on to one of your Farms, they cease moving. After all remaining movement has been resolved, you can perform an Attack action to send units to the hex before the Farm is blighted. The Action is as usual, i.e. you must spend Time Points, place a cube in the Attack box, which may mean spending Gold. You cannot do this if you've reached 53 on the Time Track. All other rules apply.
Kitchener (1) — Take ONE Personality Card from the display.
Lady Carter (1) — Take four Coal from the supply and add them to your Warehouse.
Long Range Outback Group (1) — Inflict two damage on any revealed Old One (including Temples).
Lord Blackstock (1) — Take four Gold from the supply and place them in your Warehouse.
Lt Singh (C) — If you have Armoured Cars present in combat, you inflict one damage automatically. If there is more than one Old One, you choose which to damage. Note that you can damage a Temple in this way!
Luigi Caproti (C) — Remove one Damage cube from one of your units. You must use this card after resolving the effect of the Old One card, thus you cannot stop damage from being inflicted.
Mad Johnson (VP) — Score one extra Victory Point for each Old One tile you have claimed. Note that this means you will not score bonus Victory Points for shared kills.
Mr Merino (VP) — Score one extra Victory Point for each non-blighted Sheep Farm you have on the board.
Mrs Bradshaw (VP) — Score one extra Victory Point for every three Railway tracks you have on the board.
Merinda Sweet (VP) — Score one extra Victory Point for each non-blighted Corn Farm you have on the board.
Professor Guyonne (P) — When you perform an Attack action, you reduce the Time Point cost by one, although the minimum cost is still one.
Tex McGuire (VP) — Score one extra Victory Point for each non-blighted Cattle Farm you have on the board.
Timothy Brassey (1) — Place two Railway tracks on your rail network. You must still spend one Coal and one Iron. All other rules apply, apart from the Time Point cost.
Yvette Quilla (1) — Take four Iron from the supply and place them in your Warehouse.
Zhu Xiang (P) — Your Airships can take three damage before they are eliminated.
Description of the Old Ones
Cthulhu — The Great Cthulhu was the only Old One not accounted for in the Restorationist War. Many suspected that Cthulhu had retreated to the frozen wastelands of Antarctica (another region that humanity had only recently discovered). However, events in Australia were to prove to the contrary. With his giant octopus-like head and humanoid stature, Cthulhu is the Old One most feared by the settlers of Australia.
| Tile Level | VP Values |
|---|---|
| Level 1 | - |
| Level 2 | - |
| Level 3 | 12 |
Shoggoth — These were, and continue to be, the builders of the Old Ones. They are also fearsome creatures in their own right, a nightmarish amoeba-like being with no defined form. One could say they were made from the very fabric of madness.
| Tile Level | VP Values |
|---|---|
| Level 1 | 4 |
| Level 2 | 5, 6 |
| Level 3 | 7, 8 |
Mi-go — Although not as massive as Cthulhu or Shoggoths, Mi-go are still a terrible enemy to confront. Around the size of a human, they look like crustaceans with wings. They can fly through space, travelling between the worlds of the cosmos. Although flying in our atmosphere is harder for them, it still allows them to move quickly, taking settlers by surprise.
| Tile Level | VP Values |
|---|---|
| Level 1 | 1, 1, 2 |
| Level 2 | 2 |
| Level 3 | 3, 3 |
Zombies — The Old Ones required additional labourers when constructing their great temples and bases in the outback of Australia. Over the years they shipped re-animated humans (hence 'zombies') to these desert lands to be their servants. Now that humanity has reached the shores of this great continent, these creatures have been let loose to create havoc and destruction. You must be careful to make sure a Zombie is thoroughly destroyed, as they have the power to regenerate.
| Tile Level | VP Values |
|---|---|
| Level 1 | 0, 1, 1, 1 |
| Level 2 | 1, 2 |
| Level 3 | 2, 3 |
Loyalists — Many humans fought for the Old Ones, for reasons psychologists are still trying to understand. It is safe to say that some people preferred their old bosses to the human usurpers. After the war, many surviving Loyalists made their way to Australia to continue the struggle.
| Tile Level | VP Values |
|---|---|
| Level 1 | - |
| Level 2 | 3, 3 |
| Level 3 | 4, 4 |
Temples — The Old Ones are a spacefaring race, having the ability to move between dimensions. Their temples are portals between these different worlds. Where possible, a temple should be destroyed before something terrible can enter through the mysterious gateway.
| Tile Level | VP Values |
|---|---|
| Level 1 | 3, 3, 3 |
| Level 2 | 3, 4 |
| Level 3 | - |
Empty Tiles — There are places in Australia that just feel wrong, but upon investigation turn out to be devoid of any Old Ones.
| Tile Level | Count |
|---|---|
| Level 1 | 4 tiles |
| Level 2 | 1 tile |
| Level 3 | 1 tile |
Game Variants
Solo Mode
- Proceed as above, starting your Time Point marker on Position 1 of the Time Track.
- When taking the Recruit Help action, you may also pay one Gold to discard as many cards as you wish to refresh the display. Do this before selecting the person to recruit.
- Choose a difficulty level and start with these resources.
Note: In solo mode, hex number 14 is NOT always surveyed, i.e. no Survey tile is placed there during setup, unless specified.
| Level | Gold | Iron | Coal | VP Tokens Valued | Survey Hex 14? |
|---|---|---|---|---|---|
| Easy | 6 | 4 | 4 | 8 | No |
| Hard | 4 | 3 | 3 | 4 | No |
| Insane | 4 | 2 | 2 | 0 | Yes |
Solo Objectives
Choose, or select at random one of the Solo Objective cards.
If you meet the objective, you gain the stated Victory Points at the end of the game.
Two-Player Variants
You can either draw one card at random and choose one of the two variants, or draw two cards at random and choose two of the four variants.
Western Australia
Use the Western map and the Player boards flipped to the 'Western Barracks'.
Survey stage
- Do NOT place Coal or Phosphates.
- Resources CAN be placed in the green Farmland hexes.
- In addition to the survey, at setup, place 3 VP and 5VP tokens in the hexes indicated.
Rule changes
- Player ports can be located adjacent to each other.
- Any farm can be placed in a green Farmland hex. You cannot farm in the yellow Desert.
- The 3 and 5 VP tokens are mined in the same way as any other resource.
Full Cooperation
Apply these rule changes to make the game a fully cooperative experience:
- Start all player discs FOUR time spaces closer to the Old Ones disc.
- You may use each other's Railways if connected. Pay one extra time point for each other player's Railway you use. However, you cannot build Railway that does not connect back to your port solely on your colour tracks.
- Import export allows you to gift imported resources or Gold received from exporting to another, so that the recipient is free to use them on their turn.
- When you take a personality card you choose who receives it.
SCORING: The human players win if all of them reach a higher score than the Old Ones.
3-4 Player Challenges
If, after a few games you find it too easy to defeat the Old Ones, you can ramp up the difficulty level.
MEDIUM: Spawning Temples
- Find the eight Old One tiles that have 'X' or 'XX' marked on the front. During setup, shuffle the two 'XX' Temple tiles into the stack of level 2 Old One tiles.
- Keep the other six 'X' tiles aside, do not place them during the Survey.
- When a Spawning (XX) Temple is revealed, place the three 'X' tiles of its kind (Mi-Go or Zombie) on the Temple. Then move each Old One two hexes away from the Temple in a direction determined by the draw of an Old One card. Refer to the number at the top of the card, and the compass plan at the bottom of the map e.g. if the card has '4' at the top, move the Old One two hexes to the south. Each Old One tile has one card draw so they may go in different directions.
- The Temples spawn like this once only, when they are revealed.
- Thereafter, these Temples act like other Temples and may spawn Level 3 Old Ones if a Temple Revelation card comes up.
HARD: As above plus toughen the Old Ones
- Before setup, remove all the 'Empty' tiles from the game.
- If you run out of a tile of a certain level, place a tile of the next level up.
INSANE: As above plus sift the Survey
- Before setup, remove the seven Survey tiles that have a red clip. You will find you have more Old Ones to deal with.
If you thought that the "Z" in the title of the game was for the Zombies you guessed right!
According to Martin Wallace, the name was intended to be self-explanatory: "Australia, but with Zombies, as a metaphor that something familiar has changed, although not for something good." In the myths of H.P. Lovecraft's stories, zombies appear recurrently.
Ending the Game
The game ends immediately when any of these occur:
- All discs (including the Old One's disc) have reached or passed 53 on the Time Track. Once a player has reached or passed 53, that player cannot take any further actions.
- One player has lost his Port to the Old Ones. Scoring commences straight away.
Scoring
Players calculate their Victory Points, as follows:
- Each non-blighted Farm is worth TWO VPs.
- Each Phosphate in hand is worth THREE VPs.
- Bonuses from Personality cards.
- Victory Points on Old One tiles you have acquired.
- Victory Point tokens in hand.
The Old Ones also score Victory Points. These are calculated as follows:
- Each revealed Old One tile still on the board is worth the number of points indicated on it.
- Each un-revealed Old One tile is worth double the number of points indicated on it.
- Each blighted farm is worth ONE VP.
Record Victory Points using the player discs on the Time Track. If a score goes over 55, move the marker to 0 and keep scoring from there. No points are scored for unused resources and/or Gold.
The player with the highest total is the winner. Note that this might be the Old One 'player'.
If there is a tie with the Old Ones, the Old Ones take precedence.
If tied, the tied players share the victory.