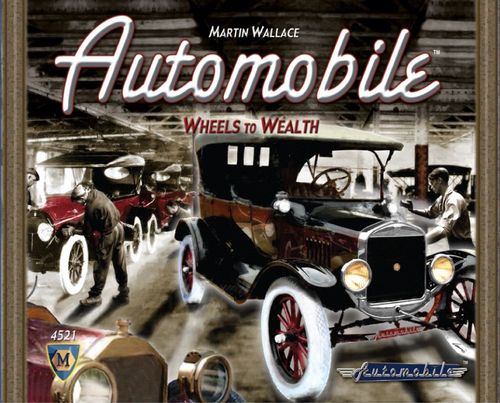
Automobile
Automobile Rulebook
Table of Contents
Table of Contents
- Components
- Starting the Game
- Course of Play
- Winning the Game
- Example of Play
- Summary
Components
Each copy of Automobile contains:
- 1 game board
- 6 character tiles
- 16 demand tiles (4 each of 2, 3, 4, 5)
- 140 automobile tiles in five player colors (28 each per player)
- 40 salesman tiles in five player colors (8 each per player)
- 30 factory tiles in five player colors (6 each per player)
- 5 parts factory tiles in five player colors (1 per player)
- 13 closed factory tiles
- 10 player tokens in five player colors (2 each per player)
- 50 black loss cubes (40 small cubes, 10 large cubes)
- 40 white R&D (research & development) cubes
- 3 advertisement markers
- 4 discount markers
- 1 black turn marker
- 1 black turn phase marker
- Paper money
- 1 cloth bag
- 1 rules booklet
Note: In addition to the standard version of Automobile, we also make a "deluxe version." It contains 144 wooden cars and 40 wooden salesmen (in addition to the cardboard cars and salesmen) that may be used alternatively.
You have purchased a game of the highest quality. However, if you find any components missing, please contact us for replacement pieces at: [email protected]
The Game Board
The game board features different areas.
- The frame is comprised of 26 production spaces (clockwise arrayed) depicting different car models. The starting production space and least advanced model is the Duryea. The most advanced model is the Cord 810. Each space shows the building costs per factory and the market segment of the cars—mass-market (oval) A, middle-class (rectangle) B, or premium-class (fancy) C. You build your factories here.
- The Turn track indicates how many demand tiles are drawn and shows the cost of loss points.
- The Turn phase track helps to keep track of the nine different phases within each turn.
- The Salesroom consists of 3 showroom boxes and is used for placement of the salesmen, who will help you to sell cars.
- The two Loan boxes track the number of loans taken by each player—up to two per player.
- The General Market is divided into three market segments—premium-class D, middle-class E and mass-market F cars. Premium-class models sell always at $200 per car. Middle-class and mass-market models sell either for standard prices or reduced prices. There are sale boxes for each market segment.
- The Production costs overview shows the cost per car in the three segments and the number of cars that will be produced depending on the number of factories on a production space.
- The six Character spaces each show one of the great car industry pioneers. Each character gets a tile to remind players about their special actions. This chart is also used to show turn order for subsequent actions of the turn.
- Each player uses one of his or her player tokens on the Selection Order Chart.
- Finally, the Executive Decisions Display holds the advertisement and discount markers and a closed factory piece.
Market Segments and Car Models
Middle-class – sells at either $150 or $100 per car. Cost per factory for the model shown is $450.
Premium-class – sells at only $200 per car. Cost per factory for the model shown is $450.
Mass-market – sells at either $100 or $70 per car. Cost per factory for the model shown is $400.
Factories, Cars, and Salesmen
During each turn each player can produce a maximum of 28 cars in up to six factories.
A parts factory reduces the production costs for a certain car model.
General Information: Parts factories can only be built on a production space already containing one or more factories of the same player. A parts factory may never be the only factory on a production space.
Additionally up to eight salesmen help each player to sell his cars.
Besides the factories in player colors there are 13 closed factory tiles used by all players.
Character Tiles
At the start of each turn the character tiles are placed on the character spaces. When you choose a character, take the corresponding tile as a reminder of the special actions that character confers for this turn.
Demand Tiles
The 16 demand tiles have values between two and five. During each turn the players secretly draw Demand Tiles out of the cloth bag. You may look at the tile(s) you drew. After all cars are produced, place the demand tiles face up to show the overall demand for the cars.
Loss Cubes and R&D Cubes
During the game, you may receive black loss cubes, which cost you money. The small black loss cubes each have a value 1, while the big black loss cubes have a value of 5.
The small white R&D cubes represent technical breakthroughs.
Player Tokens
The player tokens are used to determine character selection, turn order and indicate the number of loans (if any) taken by the players.
Turn Marker and Turn Phase Marker
The turn marker and turn phase marker (black) are used on the appropriate tracks (on the game board) to show the current game turn as well as the phase of that turn.
Advertisement and Discount Markers
Executive decisions allow players to get advertisement markers (white) and discount markers (gray). Advertising increases your car sales. Discounting increases your sales, but reduces the income from those sales.
Money
Automobile contains bank notes in denominations of $10, $20, $50, $100, $200, $500, $1000 and $2000.
Important: During the game you must always keep all of your money visible to all other players.
Starting the Game
-
Each player selects a set of pieces, which consists of: 28 automobiles, 8 salesmen, 2 player tokens, $2,000, 6 factories, 1 parts factory, and R&D cubes, based on the number of players.
# of players # of R&D cubes 3 5 4 4 5 3 -
Place any unused sets of pieces back in the box.
-
Place all of the demand tiles in the cloth bag.
-
Next to the board, place:
- The loss cubes, to form a stock (i.e., a reserve).
- The remaining R&D cubes, to form a stock.
- The closed factory tiles, to form a stock.
- The money, to form a bank.
-
Prepare the Executive Decisions display:
- Place 1 closed factory piece on the marked space.
- Place 1 Advertisement marker (white) on each space as shown.
- Place 2 Discount markers (gray) on the 1st space and one on each of the other spaces.
-
Place the six character tiles and indicated # of R&D cubes on the character spaces.
-
Place one of the black markers on the first space of the turn track.
-
Place the other black marker on the first space of the Turn Phase track. As you complete each phase move the marker one space forward.
-
Randomly determine the starting player, or let the youngest player be the starting player. The order of play for the first turn goes clockwise from the first player.
-
Mark the order of play by placing one player token for each player on the Selection Order track.
Course of Play
Automobile is divided into four turns. Each turn you must complete these phases in the order shown below:
- P1. Draw Demand Tiles
- P2. Select Characters
- P3. Player Actions (3 action rounds)
- P4. Sell Cars via Howard
- P5. Sell Cars via Distributors
- P6. Executive Decisions
- P7. Sell Cars Via Demand Tiles
- P8. Losses and Interest For Loans
- P9. End Of Turn
P1: Draw Demand Tiles
The demand tiles are used to simulate the demand for cars of a certain market segment.
Each player draws either one or two demand tiles from the cloth bag, depending on the turn. You may look at the tiles you drew, but keep the values a secret from the other players. You know some of the potential demand for cars, but you do not have complete information.
- In the 1st turn each player draws one tile. These tiles will determine the demand for middle-class cars.
- In the 2nd turn each player draws two tiles. For each player, your higher value tile is used to determine demand for middle-class cars, your lower value tile is used to determine demand for mass-market cars.
- In the 3rd and 4th turns each player draws two tiles. Your higher value tile is used to determine demand for mass-market cars, your lower value tile is used to determine demand for middle-class cars.
You never draw a 3rd demand tile for premium class cars yourself. Instead, during the 3rd & 4th turns one tile is drawn to determine demand for premium-class cars. This tile is drawn during Phase 7, when all demand tiles are revealed. During the 4th turn only, after the tiles placed by the players, one additional demand tile is drawn and placed in the mass-market demand area in addition to increase the demand for mass-market cars.
The turn track is also a visual reminder of how many demand tiles are drawn, and which type of car receives the higher value tile.
P2: Select Characters
There are six characters in Automobile. Each confers a special ability upon the player who selects him. The order of the characters is also important, as it determines the order of play.
The order in which each player can select a character is shown on the Selection Order Track. Going from left to right on that track, each player should take his player token from the Selection Order Track and place it in a Character box. Each player can only select one character each turn. Player tokens stay on the character boxes until phase 6 (Executive Decisions).
When you select one of the characters, take the matching tile to remember its special action.
With the exception of Howard, you receive between one and three R&D cubes when you select your character (as shown on the character tile).
The Characters
Ford – Henry Ford (1863-1947), renowned for his development of mass production techniques.
You may build one factory, or parts factory, in a location that you already have one or more factories in. You may do this when it is your turn to perform an action and you must pay the normal costs for this additional factory. You complete this special action in addition to your normal action, either before or afterwards. Once you complete the action, turn the Ford marker so that it faces away from you. Ford also gives you 1 R&D cube.
Kettering – Charles Kettering (1876-1958), one of the foremost innovators of the time, owning more than 300 patents.
Kettering gives you 3 R&D cubes.
Sloan – Alfred P. Sloan (1875-1966), organized the disparate companies that were part of General Motors into an efficient corporation. Sloan effectively wrote the book on management theory.
Discard half, rounded up, of the loss cubes you have during phase 8, after loss cubes have been allocated but before players have to pay for them. Sloan also gives you 1 R&D cube.
Howard – Charles Howard (1877-1950), the most successful car salesman of the period. At one point in time he was responsible for selling one out of every eight cars sold in California.
During the Sell Cars phase you must sell two of your cars to Howard (place them on the Howard Character space to indicate this sale). You get the highest price for doing so. You cannot pass on this action!
Durant – Billy Durant (1861-1947), a financial genius, who pulled together the companies that formed General Motors.
You must immediately build one factory in an unoccupied production space. You must still expend R&D cubes if you wish to build in a space ahead of the most advanced factory. You must still pay to build the factory. Durant gives you 1 R&D cube that you can immediately use to pay for the new factory.
Chrysler – Walter Chrysler (1875-1940), an excellent manager and innovator, founder of the Chrysler Corporation.
During the loss phase, you discard a number of loss cubes equal to the present turn number (e.g., in the third turn you get to discard 3 loss cubes). Chrysler gives you 2 R&D cubes.
This phase ends once all players have selected a character. The order of play for the following phases is determined by the characters selected, going from top to bottom. A player choosing Ford will always play first, while a player choosing Chrysler will always play last.
Example: The order of play shown here would be: Green – Red – Blue – Yellow. Neither Ford nor Sloan is in play this turn.
P3: Player Actions
The Player Action phase is the main part of Automobile and consists of three rounds. In a single round each player must perform only one action—so during each turn of the 4 turns a player performs 3 actions.
The order of play is determined by the characters selected in phase 2, going from top to bottom on the Character display.
When it is your turn to perform an action, you must choose and take one of the following actions:
- I. Build factory
- II. Place salesmen
- III. Take two R&D cubes
- IV. Produce cars
- V. Close down a production space
You can choose to perform the same action in different rounds.
Loans
You may find yourself in a situation where you need additional cash. You can take up to two loans during the game, at any point when you want. You mark how many loans you have taken by placing your second player token in one of the two Loan boxes. For each loan that you take out you receive $500 in cash from the bank. Each turn, during the Losses phase (see page 12), you must pay $50 interest on each loan.
In addition, at the end of the game you must pay off all loans you have at $600 per loan. You may not pay back any loans until the end of the game.
I. Build Factory
You may build one or two factories in one production space. This may be an empty production space or one already containing your factories. The cost to build one factory piece is shown in the production space. There may also be a cost in R&D cubes.
Important: A production space can have a maximum of three factories and one parts factory built in it. You cannot build in a production space containing a closed factory piece.
Production spaces generally have to be built in order, starting with the car model Duryea and going clockwise around the board. Once a space is built in, the next production space along becomes available to be built in. In the case of the Duryea, this would be the Buick Model B.
You may skip production spaces, if you so choose, and if you can afford the R&D cost. To build in a space that is one box ahead on from the most advanced occupied space, (i.e., a space with one or more factories), costs one R&D cube, in addition to the financial cost of building each factory. Each additional space forward adds an R&D cube cost equal to the number of spaces ahead that you build. So building two spaces ahead costs 1+2 R&D cubes, three spaces cost 1+2+3, and so on (i.e., 1, 3, 6, 10, 15, ...).
This R&D cube cost is paid to allow you to build in a production space, it is not the cost per factory built.
Note: The R&D cost for building ahead is shown above (i.e., 1, 3, 6, 10, 15, ...). You pay the cube cost for each space skipped plus the number of spaces ahead that you build. Thus at the start of the game it would cost one R&D cube to build in the Duryea space, three cubes to build in the Buick Model B space, and six cubes to build in the Jackson Model 40 space. There is no upper limit to the number of spaces that you can skip (except for the number of R&D cubes you have).
Example: When Blue selected Durant at the start of the turn, he built one factory for the Duryea. When Green takes his build factory action, he chooses to skip a space and build on the Jackson Model 40 space. He builds two factories, spending $600 and 3 R&D cubes. If a production space has been skipped over then it can still be built in. There is no R&D cost for doing so. A production space can only have factories belonging to one player built in it.
Parts Factory
Each player has one parts factory. You can build a parts factory instead of one or both factories. A parts factory costs $500 to build, regardless of the cost of the production space you are building it in. A parts factory reduces the cost to produce cars of that model. As you only have one such factory, you can only have one on the board at any one time. You must build the parts factory on a production space containing one or more of your own factories. If you close down a production space containing your parts factory, it goes back into your stock of pieces. You can rebuild it during a subsequent action.
Note: You can have a maximum of three factories and one parts factory in a single production space. The factories determine the number of produced cars while the parts factory reduces the production costs of the cars (see IV. Produce Cars). During a single action you can build one factory, or two factories, or one parts factory, or both a factory and a parts factory.
II. Place Salesmen
You can increase your sales potential by establishing a national distribution network.
As a single action you can place up to three of your salesmen on the Salesroom display. This is divided into three large boxes (showrooms), corresponding with the three price segments for cars.
You place each of your salesmen within one of the large boxes. You can place them in the same or different boxes. There is no upper limit to the number of salesmen that can be placed in a showroom. A box can contain pieces belonging to different players. Eight is the maximum number of salesmen you can place.
Hint: It always makes sense to place salesmen in the box for middle-class cars initially, as when you use them later they can move up or down one level. Take care not to place too many, as each salesman that does not sell a car will be removed from the display and earn you one loss cube.
Note: In the first turn the only way to sell premium-class and mass-market cars is via your salesmen (or via Howard). This is because there are no demand tiles drawn for these two classes on the first turn. This also applies to your premium-class cars on the second turn.
III. Take Two R&D Cubes
Take two R&D cubes from the stock. There is no upper limit to the number you can hold. However, if the stock becomes depleted, no more R&D cubes can be taken.
IV. Produce Cars
If you select this action then you can produce cars in every production space where you have factories.
The number of cars that you can produce in a production space depends on the number of factories you have in that space.
The Production table tells you the minimum and maximum number of cars that can be produced, depending on the number of factories in the space. Note that the range varies depending on the market segment.
If you do produce cars in a space then you must build at least the minimum stated on the Production table. You cannot build more than the maximum allowed, as shown on the table. You can choose not to produce cars in one or more production spaces.
The cost to produce one car is shown at the top of the Production table. This is the cost per car produced in a space. If you have a parts factory in a space then the cost per car is reduced by $20 (e.g., it only costs $30, instead of $50, to produce one mass-market car). The cars produced by each factory must be placed in the space where they were produced.
Example: Blue produces the maximum of three middle-class cars and pays $210, while Green has opted to produce the minimum of four middle-class cars for his two factories and pays $280.
You need to think carefully about how many cars you produce. Unsold cars generate loss cubes, in addition to costing money to produce.
The minimum and maximum production restrictions only affect the number of cars that you build in a single action phase at a single production space. However, even if you build cars on multiple action phases and/or at multiple spaces, you cannot build more than 28 cars per turn, as that is the limit of your stock.
V. Close Down A Production Space
As an action you can close down all of your factories in one production space.
Important: Each time you close down factories with this action, you discard half the number of loss cubes you have, rounding up.
For each factory (including a parts factory) that you remove from the space, you take an amount of money equal to the cost of building it less $100 (i.e., for a closed parts factory you always get $400).
When you close down a factory, place a closed factory piece in the location. This stops anybody else building there and counts as a factory when calculating losses. Your factory pieces go back into your stock and may be reused on other production spaces.
Cars produced earlier in the same turn stay in that production space and can be sold during the following car selling phases.
The number of closed factory pieces in the game does not limit the number of times this action can be taken. If all 13 are on the board and more are required, use closed factory pieces from the earliest points on the production track (their removal should not impact the game).
Example: Green decides to close down the factories in the Jackson Model 40 space. He removes both factories and places a closed factory piece in the space. Green receives $400 from the bank. Note that during phase 8 Blue will still receive loss cubes as if Green's factories were still open.
P4: Sell Cars Via Howard
If you have the Howard tile, you must now sell two of your cars to the Howard box. These cars may be from different production spaces. You sell at the higher price if the car is middle-class or mass-market (i.e., either at $150 for a middle-class car or $100 for a mass-market car, while premium-class cars are always sold at $200). The seller takes the money immediately. The cars should then be returned to his stock.
Important: The player choosing Howard does not need to produce cars during this turn. However, if he produced at least one or two cars, he must sell them to Howard.
P5: Sell Cars Via Salesmen
In order of play, going from top to bottom on the Character display, each player has the opportunity to sell one car through one of his or her salesmen. This procedure is repeated until all players have sold as many cars as they can through their salesmen.
All of your salesmen must start this phase in the three large showroom boxes to the right. When it comes to your turn to sell a car, you can move one of your pieces to one of the sales tracks to the left. The piece must be moved to an empty box. The three sales tracks correspond with the three market segments for cars. The sales track you move to allows you to sell one car of that segment.
Before selling a car a salesman can be moved up or down a maximum of one segment. A salesman in the premium-class showroom box can be moved over to the premium-class sales track or down to the middle-class track. A salesman in the middle-class showroom box can be moved over to any of the three tracks. A salesman in the mass-market box can be moved over to the mass-market track or up to the middle-class track.
When you move a piece to a sales track, take one of your cars from a production space that matches the market segment and place it in one of the corresponding sales boxes. You always sell for the highest price within that market segment (similar to Howard, page 8).
Repeat this process until all players have used all of their salesmen or until all boxes are full.
Important: You cannot choose to pass if one of your salesmen can sell one of your cars!
Important: You cannot move a salesman to a sales track if you have not produced a matching car to sell. A salesman must always sell a matching car!
The number of potential sales increases as the game progresses. In the first turn only boxes marked '1-4' can be sold to. In the second turn only boxes marked '1-4' or '2-4' can be sold to. From the third turn onwards all boxes can be sold to.
If you cannot use all of your salesmen, remove those that are unused and return them to your stock. You also take one loss cube for each salesman removed in this manner.
Players now collect money for the cars they have sold. The cars sold should now be removed from the sales boxes. The salesmen should be moved to the large showroom box to their immediate right (e.g., pieces in the mass-market sales track are moved to the mass-market showroom box).
Example: During the second turn, the following salesmen are on the big boxes of the salesroom: Yellow has three mass-market salesmen, Red has four middle-class salesmen, Green has three middle-class salesmen, and Blue has two middle-class salesmen.
Yellow is the first player and has the option to sell middle-class or mass-market cars. She decides to sell a middle-class car. Red and Blue do the same and Green sells a premium-class car. Note that Yellow could not use any of her salesmen to sell premium-class cars, as that would mean moving up two 'levels' rather than one.
The sales proceed with each player using one salesman at a time. As it is the second turn only six middle-class cars can be sold. Yellow and Red both have mass-market cars and can sell those at the end. Green is left with one unused salesman, which means he takes one loss cube and removes the salesman.
The cars are sold: Yellow earns $400, Red earns $500, Blue earns $300, and Green earns $400. Afterwards all sold cars are placed back in the players' storages and the remaining salesmen are then moved to the right in the salesroom, as shown.
P6: Executive Decisions
This phase allows players to increase their cars' sales potential, as well as determining the next turn's order of play. In order of play, going from top to bottom on the Character display, each player has the opportunity to make one executive decision. This procedure is repeated until all players have passed.
The executive decisions that a player can choose are:
- A) Close one production space
- B) Buy one advertisement marker
- C) Take two/one discount marker(s)
- D) Pass
Note: Advertisement and Discount markers increase the number of cars you sell in each round of selling, although they still do not guarantee that you will sell everything.
A) Close One Production Space
Only one player can select this action. The action works in exactly the same way as described in the Action Phase (see page 3). If you select this action, take the closed factory marker from the Executive Decisions display and use this tile to mark the model space in which you closed your factory(s).
B) Buy One Advertisement Marker
These markers represent concerted executive decisions to advertise a certain car model, so that more cars of this model are sold to customers.
There are three advertisement markers available for purchase. The first marker costs two R&D cubes; the remaining two markers cost one R&D cube each. As an executive decision you can buy one such marker at a time. When you buy an advertisement marker you place it immediately on one of the production spaces where you produced cars this turn. You can only have a maximum of one advertisement marker in a single car model space. If you choose this action more than once, the two advertisement markers must be placed on different production spaces.
Important: The first player to buy an advertising marker must buy the one that costs two R&D cubes.
C) Take Two/One Discount Marker(s)
These markers represent considerations of the executive, to raise the attractiveness of a car by reducing the prices.
There is one stack of two discount markers and two individual markers. As an executive decision you can take either the stack of two markers or one of the individual markers, and then place them/it on one of your production spaces where you produced cars. You cannot place these markers on a space without produced cars. If you take the set of two markers you must place them in the same space. Once you have placed discount markers in a production space, you cannot place any more such markers there this turn.
Note: Remember, you cannot place discount markers in a premium-class production space. Premium-class cars can only be advertised.
Important: It is possible for a space to contain both one or two discount markers and an advertisement marker.
D) Pass
If you do not choose one of the above executive decisions then you must pass. You move your player token from the Character box it is in to an empty space on the Selection Order track. You place it on the first empty space from left to right. As tokens are transferred to this track, the order of character selection is determined for the following turn.
P7: Sell Cars Via Demand Tiles
Players now reveal their demand tile(s).
- In the first turn players only have one demand tile each. These tiles are placed in the middle-class sales boxes of the General Market.
- In the second turn each player have two tiles. The tile with the higher value is placed in the middle-class sales boxes. The lower value tile is placed in the mass-market sales boxes.
- In the third and fourth turns the higher value tile is placed in the mass-market sales boxes and the lower value tile is placed in the middle-class sales boxes. In the third and fourth turns one additional tile is drawn from the bag and placed in the premium-class sales box. In the fourth turn one tile is also drawn from the bag and placed in the mass-market sales boxes.
The sum of the values of these demand tiles dictate the total number of cars that can be sold in each market segment. There are two sub-boxes for middle-class and mass-market cars, as it is possible for players to reduce their selling prices. The total demand for cars in one of these market segments applies to both sub-boxes within the market segment.
Example: In the second turn the higher of each pair of tiles is for middle-class demand, while the lower value one is assigned to the mass-market demand. Total demand for middle-class cars is 16 cars; total demand for mass-market cars is 11 cars.
The order of selling cars is determined by the position of the cars on the production track. Cars are sold from the most advanced production space, going backwards to the least advanced space. Normally, only one car is sold from each space. Each single advertisement or discount marker allows you to sell one extra car in each round of selling (e.g., if you have one advertisement marker and two discount markers in a production space you can sell 4 cars from this space). If the space contains one or two reduced price markers then all cars in that space must be sold at the lower price ($100 for middle-class cars, $70 for mass-market cars). If a space contains both an advertisement marker and 1+ discount markers, again, all cars must be sold for the lower price!
You then go to the next occupied production space, going backwards, and the owner of that production space must now sell one or more cars, depending on advertisement and discount markers. If you reach the least advanced space and there is still demand for cars, return to the most advanced production space and repeat this process until the demand for each market segment is met (see demand tiles) or until all produced cars are sold. This may take several sales rounds.
Each player then takes cash from the bank for each car he or she has sold, depending on which sales box it is in. Each player also takes one loss cube for each unsold car he or she produced but did not sell.
Players now retrieve all of their cars from the board. All advertising and discount markers are removed from the board and returned to the Executive Decisions track.
Example: The order of selling would go Yellow, Red, Green and Blue. Each space would sell one car, except for Red's, who would sell two cars during each 'pass through' thanks to his advertisement.
P8: Losses and Interest For Loans
The emerging car companies became some of the largest industries of the era. Managers were not used to running such massive organizations, which led to inefficiencies, represented by loss cubes in this game.
You now check to see which production spaces receive loss cubes. You go backwards from the most advanced car model space in each of the different market segments. The first occupied space receives no loss cubes, the next occupied space receives one loss cube, the next one two loss cubes, and so on. A space with a closed factory piece in it will affect the number of loss cubes given to spaces further back, (i.e., it counts as an occupied space even though it does not directly receive loss cubes). After all loss cubes are distributed, the players place them in front of themselves.
Example: Yellow's factory is on the most advanced mass-market space, so he takes no loss cubes. Red's factory is on the most advanced middle-class space, so he takes no loss cubes. Green's factories are on the 2nd most advanced middle-class space, so he takes one loss cube. Blue's factory is on the 3rd most advanced, so he takes two loss cubes.
Each loss cube is worth one point. If necessary you can exchange them for bigger cubes with a value of five loss cubes.
If you selected Sloan, discard half the loss cubes you take (rounding up). E.g., if you had 9 loss cubes you would discard 5 of them, leaving you with 4.
If you selected Chrysler, discard loss cubes equal to the turn number (e.g., in the first turn one loss cube, in turn three three loss cubes).
You must now pay an amount between $10 and $40 per loss cube you hold, depending on the turn. The exact amount is shown above the present turn box (at right). You retain these cubes. You can only get rid of them by selecting Sloan or Chrysler, or by closing down factories in a production space.
If you have one or more loans then you must pay $50 interest per loan you have taken out.
P9: End of Turn
Remove all demand tiles from the board and place them back in the bag. Make sure all cars have been returned to their owning players. The character tiles are placed back on their respective Character boxes.
Make sure the Executive Decision display is restocked as necessary, as shown during the set-up of the game. Also restock the Character display with R&D cubes. Unclaimed R&D cubes do not carry over between turns.
Move the turn marker forward one space on the turn track.
Automobile ends after the fourth turn. If it is the fourth turn, skip this phase and determine final positions.
Winning the Game
At the end of the game, you receive the full cash value of each factory you have on the board. The value of a factory piece is the amount it cost to place it on the production space. If you built a parts factory, you also receive its full cash value ($500). Cash for your factories is added to cash you already hold.
You must now repay loans, at a cost of $600 per loan.
The player with the most cash left is the winner. In the case of a tie, the tied player earliest in the order of play wins—that is, the player who passed first during executive decisions (phase 6).
Example of Play
In this section we present an illustrated sample game turn of a four-player-game of Automobile. Please take note that it is the first game for all four players. Therefore, do not expect "perfect play." The write up will hopefully assist you in learning the game.
The players are Red, Yellow, Green, and Blue. This is also the initial order of play. After preparing the game (see page 4), the first turn of the game begins.
Draw Demand Tiles: Red draws a 4, Yellow a 2, Green and Blue both a 3. These demand tiles will later determine the total demand for middle-class cars.
Select Character: Red selects Howard and will be able to sell two cars automatically later in the turn (see page 4). Yellow selects Durant, takes one R&D cube and immediately builds one factory on the Duryea production space (by paying $200 and one R&D cube). Green selects Kettering and takes three R&D cubes. Blue finally selects Chrysler, and takes two R&D cubes. Later in the turn he will be able to discard one loss cube (because it is the first turn of the game). The order of play for the following player actions will now go Green – Red – Yellow – Blue.
First Action Round: Yellow has already built in the Duryea production space using the Durant character action. Green builds one factory in the Buick Model B production space. This costs $250 and one R&D cube. Red decides to take two R&D cubes. Yellow builds one factory in the Buick Model 10 production space, for a cost of $350 and three R&D cubes. Blue pays $300 and one R&D cube to build one factory in the Maxwell Model EA production space.
Second Action Round: Green builds two factories in the Overland Model 40 production space, at a cost of $800 and one R&D cube. Red pays $400 and three R&D cubes to build one factory in the Pathfinder 40 production space. Yellow and Blue both choose to place three salesmen on the Salesroom display.
Third Action Round: Green produces 10 cars in all, at a cost of $700. Red produces 2 cars at a cost of $200. Yellow produces 6 cars at a cost of $420 and Blue produces 3 cars at a cost of $150.
Sell Via Howard: Red must sell both of his cars via Howard. Each car sells at $200. Red takes $400 from the bank.
Sell Via Salesmen: Yellow and Blue are not competing with each other and so automatically sell three cars each via salesmen. Yellow sells her cars at $150 each, making $450. Blue sells his cars at $100 each, making $300. Afterwards the salesmen move back to the boxes to the right of the salesroom.
Executive Decisions: Green and Red decide against taking an Executive decision and so move their tokens to the Selection Order display. Yellow decides to close a production space down. She takes her factory from the Duryea space and replaces it with the black closed factory piece. She takes $100 from the bank. Blue passes. Yellow then passes. Selection order for next turn is now determined: Green – Red – Blue – Yellow.
Sell Via Demand Tiles: The players reveal their Demand tiles. Only Green and Yellow now have any cars to sell. Selling will start with the Overland Model 40 and work backwards, with one car from each space being sold. Each car will be sold for $150. There are thirteen cars in all and only demand for twelve. One car is left unsold on the Overland Model 40 space. Green will take one loss cube for this. Yellow sells all three of her cars, taking $450 from the bank. Green sells nine of his cars, taking $1350.
Losses and Interests for Loans: Allocate loss cubes as shown. Red and Blue avoid taking any losses. Yellow takes 1 loss, since her middle-class factory is the second most advanced and pays $10. Green has the 3rd place middle-class factory, so he takes two loss cubes, plus the one taken for the unsold car, making three in all. He pays $30 to the bank.
Now play three more turns to complete your game. Have fun exploring the Automobile game and the underlying world of car making.
Summary
Turn Sequence
Automobile is divided into four turns. Each turn consists of nine phases (and phase 3 consists of 3 action rounds):
- Draw demand tiles
- Select characters
- Player actions (3 action rounds). Take 1 of these 5 available actions:
- I. Build factory
- II. Place salesmen
- III. Take two R&D cubes
- IV. Produce cars
- V. Close down a production space
- Sell cars via Howard
- Sell cars via distributors
- Executive decisions
- a) Close one production space
- b) Buy one advertisement marker
- c) Take two/one discount markers
- d) Pass
- Sell cars via demand tiles
- Losses and interests for loans
- End of turn
The Characters
Ford: Build one factory, or parts factory, in a location where you already have one or more factories. Pay the normal building costs. Complete this special action in addition to your normal action, either before or afterwards. One R&D cube.
Kettering: Three R&D cubes.
Sloan: During phase 8 discard half, rounded up, of the loss cubes you have, after loss cubes have been allocated but before players have to pay for them. One R&D cube.
Howard: During phase 4 sell two of your cars to Howard. Always get the highest price for doing so.
Durant: Immediately build one factory in an unoccupied production space and pay the normal building costs. One R&D cube.
Chrysler: During phase 8 discard a number of loss cubes equal to the present turn number. Two R&D cubes.
The Player Actions
I. Build factory: One or two factories on a single production space. The price for a factory is printed on the production space. The first factory in a production space further on from the most advanced occupied space, costs additional R&D cubes (one cube for the first space, three cubes for the second, six for the third, etc.). There is no R&D cost for a factory built in a production space that has been skipped over earlier in the game. You can build a parts factory for $500 instead of one or both factories in a location that you already have one or more factories.
II. Place salesmen: Up to three salesmen in the salesroom.
III. Take two R&D cubes: From the stock.
IV. Produce cars: You may produce cars in every production space in a location where you already have one or more factories. Depending on the number of factories you must produce between a minimum and maximum number of cars (see the production overview). The overview also shows the production costs for producing cars in the three market segments. The parts factory reduces the costs per car by $20 per car.
V. Close down a production space: Remove your factories on a production space and place a closed factory tile on the space. You get rid of half of your loss cubes, rounded up. You receive each factory's building costs reduced by $100.