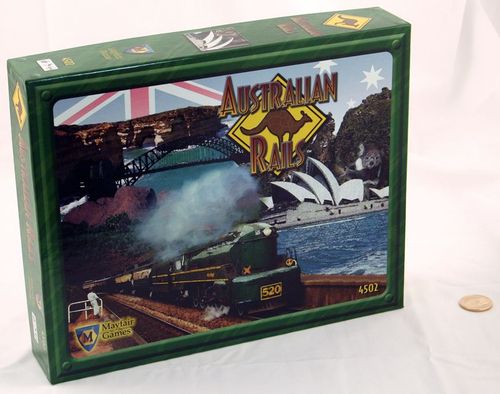
Australian Rails
Australian Rails Rulebook
Table of Contents
Table of Contents
Game Parts
Australian Rails contains:
- 1 puzzle-cut board (map)
- Wipe-off crayons
- Playing pawns
- Load chips
- A deck of cards, including demand cards, event cards, and two-sided loco (locomotive) cards — more than 100 cards in all
- 1 pack of money
- 1 rulebook
The rules in this booklet use components from the North American game (Empire Builder) in examples and illustrations, since they are reprinted from the shared Empire Builder series rules booklet.
Board and Map
The board shows a map of Australia. The map has a grid of dots, called mileposts, in several shapes representing different terrain — including clear mileposts, mountain mileposts, and the desert mileposts of the outback. The mileposts regulate rail building and train movement.
The map shows 45 cities, including 5 major cities: Perth, Adelaide, Melbourne, Sydney and Brisbane. Each major city is marked with a red hexagon, while each other city is marked by a smaller red square (medium city) or red circle (small city). Near each city are symbols representing the goods available for pickup in that city. The map also shows the relative location of the seacoasts, ocean inlets, and Australia's major rivers.
Important: The board is covered by a thin plastic coating to allow for easy cleanup between games.
- Do not use abrasive cleaners to clean the board. Use a dry paper napkin or towel. Using water will not speed cleanup.
- Do not use other markers than those recommended. Pencils, pens, regular crayons, and dry markers will permanently color the playing surface and ruin the board.
- Whenever using any marker other than those provided, first mark the board away from the playing surface and leave it overnight. If the mark can then be wiped off without leaving a stain, the marker is usable. Each individual color has to be tested. Keep the special wipe-off crayons away from direct heat.
- Always clean the board immediately after play!
Crayons
Special wipe-off crayons let players draw on the board during play and clean the board afterwards. Players should not use any marker other than those supplied unless it is first tested for erasability on a section of the board away from the playing area. The crayons in this game are plastic based, not wax based.
Load Chips
Each load chip represents a load which can be carried on a player's train. To show that a load is being carried, place the load chip on the player's loco card.
The unused loads remain in the tray, where players can see what loads are available for pickup. When a player delivers a load, drops a load without delivering it for payoff, or loses a load due to an event card, the load chip is returned to the tray.
The load chips are limited to those provided in the game — additional load chips should not be made (except as replacements). See the Reference Charts section below for the cities shown on the map.
Cards
There are three types of cards: demand cards, event cards, and loco cards. Before playing, separate the loco cards from the other cards. Shuffle together the demand cards and event cards to make the draw deck. Place the loco cards and the face-down draw deck near the board.
Demand Cards
Each demand card shows demands for three cities, and each demand shows:
- The city needing the goods.
- The money payable on delivery of the goods to that city.
- The goods needed.
If a player has fewer than three demand cards, he must draw a replacement demand card immediately, even if it is not his turn.
Event Cards
Event cards can affect normal game play. When drawn, an event card is immediately shown to all players and immediately takes effect. General event card effects are described in the Event Card Effects section below. After an event is resolved, the drawing player continues to draw until he has three demand cards in his hand.
Loco (Locomotive) Cards
Each player has one loco card, showing the player's type of train, its maximum speed, and its load capacity. There are four standard types of trains:
- A freight may carry up to 2 loads and may travel up to 9 mileposts per turn.
- A fast freight may carry up to 2 loads and may travel up to 12 mileposts per turn.
- A heavy freight may carry up to 3 loads and may travel up to 9 mileposts per turn.
- A super freight may carry up to 3 loads and may travel up to 12 mileposts per turn.
Each player starts with a freight. At the end of his turn, he may upgrade his train instead of building track. An upgrade costs 20 million for a fast freight or a heavy freight. If a player has a fast freight or heavy freight, he may pay 20 million to upgrade this train to a super freight. When upgrading, a player takes the new loco card and returns the old locomotive to the bank.
Preparation
Before beginning, each player should have:
- 3 demand cards (face up)
- 1 freight locomotive (loco) card
- his starting cash (see The Start below)
- 1 pawn and 1 crayon of the same color
The players sit around the board. One player acts as banker who manages the loco cards and load chips.
Each player starts the game with some money, a loco card, a pawn, and a crayon as specified above.
After shuffling the draw deck, deal three demand cards face up to each player. Any event cards dealt are discarded and replaced until each player has three demand cards.
Note: Event cards are discarded only at the beginning of the game — event cards drawn later in the game are displayed and immediately take effect.
Each player now looks at his demand cards and finds the single largest payout for a demand. The player who has the largest single payout goes first (break ties based on the next largest payout).
Before beginning play, shuffle the discarded event cards back into the draw deck, and place the draw deck on the board. If the draw deck runs out during the game, reshuffle the discard pile and form a new draw deck.
The Start (Australian Rails specifics)
Printed on the Australian Rails board, read from official BGG product photographs.
- Starting Cash: 60 million dollars
- Number of Building Turns: 3
- Switchback Start: Yes
The Finish (Australian Rails specifics)
Printed on the Australian Rails board, read from official BGG product photographs.
- Ending Cash: 250 million dollars
- Number of Major Cities Connected: Perth, plus at least 3 of the remaining 4 major cities (Adelaide, Melbourne, Sydney and Brisbane)
How to Play
A game turn is divided into two phases:
- The first is the operations phase, where the player's train moves (paying user fees if needed), loads and unloads goods, and collects payoffs.
- The second is the building phase, where the player may spend up to 20 million either to build track or to upgrade his train.
Note: The first three turns for each player are devoted to building track — there are no operation phases during those turns (see Initial Building Phases below; the Australian Rails board calls for three building turns rather than the series' usual two).
Instead of taking his normal turn, a player may discard his entire hand and draw three new cards, resolving and replacing any event cards drawn. Event cards drawn take effect immediately. A player who loses his turn because of an event card may not discard his hand during the lost turn.
A player must always have three (3) demand cards. If a player has fewer than three demand cards, he must draw a replacement demand card immediately, whether or not it is his turn.
A player ends his turn by paying the bank any money spent or by declaring that he is not spending any money that turn. Then the player to his left takes his turn.
Initial Building Phases
The board begins without any track on it. At the start of the game, each player takes two turns with no operation phase to start building his rail empire. Each player may spend up to 20 million (of his initial money) in each of his two turns to build track or upgrade his train.
Australian Rails note: the Australian Rails board prints "Start — 60 Million Dollars, 3 Building Turns, Switchback Start," so in Australian Rails each player takes three initial building turns (of up to 20 million each) rather than two, and each player begins with 60 million. The exact printed wording describing how the order of play alternates across all three building turns was not legible in the available source photographs; the base two-turn Switchback pattern is described below.
For the first round, the first player takes his turn, and play progresses clockwise. After completing the first round, the player who played last in the first round goes first in the second round. The order of play then continues counterclockwise until the last player (the original first player) takes his turn. (This is known as the Switchback Start.) From this point, players will take normal turns, starting with the first player, with play continuing in a clockwise direction.
Building Railroads
During a player's turn, he may spend money to build track between mileposts on the board. When a player's track connects the appropriate cities, he is able to run his train on his track to deliver loads and make money.
A player builds his railroad by drawing a line with his color crayon from one milepost to the next. For each section of track, the player must pay the cost for the milepost to which he is building.
Building Costs (Australian Rails)
| Milepost | Cost |
|---|---|
| Clear | 1 million |
| Mountain | 2 million |
| Small City | 3 million |
| Medium City | 3 million |
| Major City | 5 million |
| River Crossing | +2 million |
Australian Rails note: the standard series costs above (Clear, Mountain, Small/Medium/Major City, River) are printed on the Australian Rails board and confirmed against this app's other Empire Builder-series entries. The board also prints costs for the outback's Desert mileposts and for seasonal river/lake ("billabong") hexes, but the printed dollar figures next to those terrain types were too small to read reliably in the available source photographs, so they are not reproduced here rather than guessed — see Component Notes below. Unlike some other series maps (see British Rails), the Australian Rails board does not print an Ocean Inlet crossing cost; see Australian Rails Specific Rules below.
Beginning Construction — A player may build track from any major city milepost or from any milepost to which the player has already built track.
Right of Way — Only one section of track may be built between any two mileposts.
Rivers — The cost for building track across a river is in addition to the regular building cost.
Example: Blue builds inland from Sydney toward Canberra — to four clear mileposts (1M each), to a clear milepost across a river (1M+2M), and finally into a medium city (3M). Blue's total cost so far is 10M.
Right to Enter Major Cities
Every player has the right to build at least one segment of track to each major city. No track may be built which blocks any player from connecting all the major cities. No track may be built in the red area of a major city.
Limits on Building from Major Cities
During his turn, a player may not build more than two track segments from major city mileposts. These mileposts may be from the same major city, or from multiple major cities.
However, a player may build an unlimited number of track segments into major city mileposts at a cost of 5 million each. With proper planning, players can avoid building track into major cities (and the 5M expense!).
Limits on Entry into Medium and Small Cities
Only three players may build track into a medium city (squares), and only two players may build track into a small city (circles). No player may build more than three track sections to a medium or small city. No track may be built which would prevent a second player from building at least one segment of track into a small city, or which would prevent a second or third player from building track into a medium city.
No Credit / No Loans
A player may not build track for which he cannot immediately pay. Track drawn which cannot be paid for is immediately erased.
Renting Track
A player pays nothing to run his train on his own track. A player may run on an opponent's track, but must pay 4 million per turn to each opponent upon whose track his train will run. A player may not use an opponent's track unless he has the cash to pay before using it. These fees do not count toward the spending limit in the building phase of the turn.
Australian Rails Specific Rules
The following differences from the base Empire Builder series rules are described in a rules summary written by the creator of a Tabletop Simulator adaptation of Australian Rails for the Steam Workshop, who owns the physical game. The exact printed wording of the Australian Rails-specific booklet could not be sourced, so these rules are described rather than quoted verbatim.
Ocean Inlets
Unlike some other Empire Builder series maps, no track may be built across an ocean inlet on the Australian Rails map.
Sandstorms
Australian Rails' deck replaces (or supplements) the series' regional weather event with Sandstorm cards affecting the outback's desert mileposts. When a sandstorm occurs, any train sitting on a desert milepost when the card is drawn loses a turn and one load, and is placed back in the last city it passed through. All track built to or from desert mileposts is removed. Track may not be built or rebuilt to desert mileposts until the Sandstorm event card is discarded.
Hauling Freight
Starting Your Train
At the beginning of the game, a player may start his train (represented by his pawn) in any city on the map.
Note: A player must begin building track from a major city, but he may begin his train at the beginning of the game in any city.
Running the Train
A player moves his train by traveling on track built on the board and counting the mileposts reached, up to the maximum movement of the train. A train's speed is shown on its loco card: freight and heavy freight locos may move up to 9 mileposts each turn. Fast freight and super freight locos may move up to 12 mileposts each turn. The type of milepost does not matter — each milepost costs one movement point to move to, regardless of terrain.
There is no limit to the number of trains that may end a turn on one milepost or use the same track. A player's train does not block another player's train movement; two trains may pass each other on the same track (it is assumed that there are sidetracks available).
A train may only reverse direction if it is in a city (including all major city mileposts). A train may change direction at a junction during its move. A train may change direction in this way as many times as a player wishes each turn, as long as it still has movement points remaining.
Each player may treat the red areas of the major cities as his track. This represents local belt or terminal rail systems. Any train may travel across the city using the red area as its own track. Loads may be picked up or dropped off at any milepost in the major city. The center milepost is counted for movement.
Expanding Track
After finishing movement, a player proceeds to the Building Phase of his turn. A player may spend up to 20 million to build track or to upgrade his train. Adding new track follows the rules described in Building Railroads above.
Picking Up Loads
A load may be picked up by a train passing through a city where the load is available. If there is no load chip of that type available, then a player may not pick up that load until one is returned to the bank.
Trains may carry up to two or three loads, depending on the type of loco card the player has. The maximum number of loads that can be carried at one time is shown on the loco card. Trains may carry different types of loads, or multiples of the same type.
A train may pick up and carry loads whether or not there is a demand for those loads. It may be profitable to carry such loads in case a demand card for them is drawn.
A load may be dropped without payoff at any city. A player picking up or dropping off a load incurs no movement penalty and may still travel up to his full movement allowance. During the Operation Phase, a player may load, unload, and move his train any number of times in any order. Movement is limited only by the type of train and any event cards in play. A train may not move more than its maximum movement during the Operation Phase, regardless of the number of starts and stops it makes.
Delivering Loads
When a player delivers a load to a city with a demand for that load on one of his demand cards, the player must then:
- Return the load chip to the stock of available loads.
- Receive from the bank the amount stated on the card.
- Discard the demand card. Only one load can be delivered for payoff with each demand card.
- Draw a new demand card. If an event card is drawn, it takes effect immediately, and another card from the deck is drawn. The event may prevent the player from making other deliveries.
Important: Only one demand is filled on a demand card.
After delivery, the player continues his turn, including, if he can: delivering another load for payoff, dropping a load, picking up a load, and moving. The player may continue until his movement allowance is used up.
When making multiple deliveries to the same city, each load must be resolved separately. A player must complete all of the above steps for each load delivered, before making the next delivery.
Planning Routes
Before building any track, each player should look at the nine demands on his three demand cards — finding where the loads are available for pickup by looking on the chart and matching each of them to the corresponding city on the board. The player should then plan a route for his railroad to connect the cities where the loads can be delivered for payoff. The player begins to build track.
Important: Only one demand is filled on a demand card.
Note: Keep in mind that a player will only be able to deliver one demand on each card. When filled, the demand card is discarded and replaced. So try to fill demands on more than one card if possible.
Losing Turns
A player may not move his train, deliver or pick up any loads, or build track or upgrade a loco on a lost turn. A player may also not discard all his demand cards and draw new ones on a lost turn.
A player who draws an event card that causes him to lose his turn, loses the rest of the current turn and all of his next turn. For this reason, it is important to resolve any event drawn right away. If a player was trying to deliver two loads to the same city, and an event caused him to lose his turn after he delivered the first load, then he would have to wait until after his next turn before he could deliver the second load.
Event Card Effects
An event card takes effect immediately when it is drawn. Some event cards remain in play until the end of the drawing player's next turn (in the next round) and affect all players. Some events stay in play until the requirements on the card are fulfilled. Players must obey the directions on all event cards while they are in effect.
General Effects
Explanations of general effects that are common to a variety of event cards:
Counting Mileposts — Mileposts are counted the same way train movement is counted. To count mileposts from a major city, count from the city center and not from the outer mileposts. To count mileposts from a seacoast, count from the milepost nearest the seacoast.
Half Rate — When trains move at half rate, freights and heavy freights move 5 mileposts per turn and fast freights and super freights move 6 mileposts per turn. When an event card causes the drawing player's train (which had already moved) to move at half rate, or a player's train moves into an area of bad weather, the train's remaining movement is halved, rounding all fractions up.
Lost Loads — When a train loses a load, the player operating the train chooses which load is lost from those the train is carrying. The event card does not affect any loads picked up after the card is drawn.
Common Event Cards
Here are more complete explanations of the effects of various common event cards found in most Empire Builder series games:
Derailments — Each derailment card lists a number of cities on the map. If a train is within 3 mileposts of one of the cities listed, the player owning the train must return one load of his choice that is on the train to the bank. The player also loses his next turn.
Floods — Each flood card indicates which rivers are flooded by that event. Flood cards usually have two effects:
- All bridges built over the indicated flooded rivers are destroyed. Erase all the bridges over those rivers.
- The rivers continue to flood until the end of the drawing player's next turn. No one may build any track over a flooded river, and no one may move his train over a flooded river, until the event leaves play.
When a river floods, each player must be given an opportunity to rebuild his bridges once the flood ends. A player may not build where another player's bridge was located until after that player has had one turn to rebuild it.
Rail Strikes — A Rail Strike makes it impossible to pick up or deliver any loads at mileposts touching the affected border. Strikes usually last until the end of the drawing player's next turn.
Sandstorms — See Australian Rails Specific Rules above.
How to Win
In most Empire Builder series games, a player declares victory when he fulfills some variation of the following two requirements:
- Connect a number of the major cities with one continuous line of track. This track can have any number of loops and branches, but must be unbroken. In Australian Rails, the winner must have a continuous line of track connecting Perth plus at least 3 of the other 4 major cities (Adelaide, Melbourne, Sydney and Brisbane).
- Have at least a set amount of cash on hand at the end of his turn. Only cash is counted; the money spent on building railroads or upgrading locomotives does not count toward winning. In Australian Rails, this is 250 million dollars.
When a player declares victory, play continues until the current round ends, that is, once each player has completed an equal number of turns. If two or more players all declare victory in the same round, the one with the most cash wins. In the event of a tie, the cash requirement is raised by 50 million (to 300 million in Australian Rails). Play then continues, with all players still eligible to win. Both requirements still need to be fulfilled in order to win.
Courtesy in Play
A player's demand cards and loco cards (together with the load chips on the loco cards) must be face up in front of the player for all to see. In most Empire Builder series games, a player need not show his money until after a Rail Tax event card (or similar card) appears, after which the amount of each player's money is also public information.
Variant Rules
Empire Builder Series Variations
Here are some optional rules that players might want to try when playing Empire Builder series games. All players must agree to any optional rules that are used before the game begins.
Be Alert: Some of these optional rules radically alter the play of the game.
Mercy
Sometimes new players will find themselves trapped and unable to move or build to make money. Sometimes, the solution comes from merely discarding the player's hand and getting new cards; more often the position is untenable. To let the player continue enjoying the game, try one of these rules:
- Borrowing — A player may take a loan up to 20 million from the bank. He must repay twice the borrowed amount as soon as he has the money to do so.
- Late Payment of Use Fee — A player may use another player's track and pay the track usage fee from delivery payoffs obtained by delivering loads while on the other player's track.
- Backtracking — A player may reverse his train's direction on any milepost (not just a city milepost) at the cost of losing one full turn. A train which backtracks can move in any direction in its next turn. A train may not backtrack when the player has discarded his cards during the same turn; a train may backtrack if it cannot move for any other reason (e.g., derailment). A player whose train backtracks while on an opponent's track is assessed the use fee for that turn.
Fast Trains
Note: Recommended for beginners.
New players (or old hands who want a quicker game) can play with fast trains. When using this rule, freight and heavy freight trains can move up to 12 mileposts per turn. Fast freight and super freight trains can move up to 16 mileposts. Half Rate is 6 and 8 mileposts respectively.
Fast Game
To speed up the play, use the Fast Trains rule above and/or any or all of the following rule changes:
- Each player starts with 70 million and 3 pre-movement turns.
- Discard the event cards dealt during the initial deal; do not shuffle them into the deck.
- The Excess Profits Tax event card has no effect and is removed prior to play.
- Deal 5 cards to each player at the beginning of the game, replacing event cards normally. After completing the first 2 building turns, each player discards 2 demand cards, and then play continues normally.
Special Tournament Rule — Time Limits
During tournament play, it may be necessary to enforce a time limit for each game. All players should be made aware of the time limit before the game begins. If any player wins before the time limit is reached, then he is the winner. Otherwise, play continues until the stated time limit is reached. Once time has expired, play continues for one last round (so all players get an equal number of turns). The player who has a continuous line of track that connects the required major cities, and who has the most cash on hand, is the winner. If no player's track connects enough major cities, the player with the most cash wins. If the tournament awards second or third place, then having the required connection takes precedence over having the most money for those positions as well.
Crossgrading
A player may crossgrade from a fast freight to a heavy freight, or vice versa, for 5 million. When a player crossgrades, he may also spend up to 15 million to build track in the same turn. There is no limit to the number of times a player may crossgrade. Money spent on crossgrading does not count towards the upgrade to a superfreight.
Challenge Game
To create a more challenging game for experienced players, use any or all of the following rule changes:
Open Contracts — Whenever a player discards his hand, the discarded demand cards are not placed on the discard pile, but are placed on the board.
- These cards are open contracts available to all players. The first player to deliver a load on an open contract picks the card from the table, discards it, and receives the payoff for the delivery in the usual way.
- Only four open contracts may be face up on the table at any time; additional cards are immediately discarded.
Field Warehousing — Loads dropped off in a city without a payoff remain at that city for 4 turns. During that time, any player may pick up that load by passing through the city and picking it up normally. At the end of the dropping player's fourth subsequent turn, the load is returned to the tray.
Cost to Move — Each player must pay 1 million per turn that his train moves on its own track. The 4 million cost for moving on the other players' track remains the same.
Cost to Load — Each player uses one milepost of movement to pick up or drop off one load. For example, if a player both picks up 1 load and drops off 1 load, or if a player picks up 2 loads, the player has used 2 mileposts of movement.
Reshuffle — When the "Tax" card is drawn, reshuffle the deck and remove the "Tax" card from the game.
Selling and Trading Track — Instead of building track, a player may purchase track from another player for whatever price both players agree to. The purchase may take place only in the purchasing player's turn. Players can agree to trade track for track, with no money involved. In both trading and selling, the selling player replaces his colored lines with lines of the new owner's color.
Additional Trains — Each player starts with two trains, a freight and a fast freight, which may be upgraded in the usual way. Both move and may move in the same turn. Players may (by mutual agreement) have four demand cards instead of three.
Reference Charts
The Australian Rails board and box both advertise 45 cities on the map. The list below gives their names and rough state/territory grouping, sourced from official BGG product photographs of the board. No reliable source for the map's per-city goods (the Available Loads chart) could be found — the only candidate source, a Wayback-preserved fan site's self-generated demand-deck statistics chart, does not reproduce the game's actual printed Available Loads chart and is not used here. The list is therefore names and grouping only.
Cities
| City | State / Territory |
|---|---|
| Perth (major) | Western Australia |
| Albany | Western Australia |
| Bunbury | Western Australia |
| Esperance | Western Australia |
| Geraldton | Western Australia |
| Kalgoorlie | Western Australia |
| Leonora | Western Australia |
| Paraburdoo | Western Australia |
| Port Hedland | Western Australia |
| Derby | Western Australia |
| Wyndham | Western Australia |
Component Notes
- This transcription is based on the Australian Rails Second Edition (©2005 Mayfair Games Inc.; box copy MFG4502, ISBN 1-56905-125-6), photographed for BGG by the publisher and by owners of the physical game. The original edition was published in 1994 and won the 1994 Origins Award for Best Modern-Day Boardgame.
- The five major cities — Perth, Adelaide, Melbourne, Sydney and Brisbane, Australia's five largest cities — are inferred from the board's own printed population/payoff coding (all five carry a distinctly higher population figure than every other city in a fan-made demand-deck statistics chart derived from the game) and from the board's Finish condition ("Perth plus 3 other major cities"), which implies exactly five majors in total.
- The Building Costs for Desert mileposts and seasonal river/lake ("billabong") hexes, and the exact printed wording of the Ocean Inlet and Sandstorm rules, could not be read reliably or sourced from any mirror checked (BGG files, 1jour-1jeu/cdn.1j1ju.com, api.tesera.ru, desktopgames.com.ua, Tabletopia, Wayback replay of mayfairgames.com, and a Tabletop Simulator Workshop mod's linked rules document, which had gone dead). They are described qualitatively above rather than quoted or guessed at numerically.
- BGG lists Larry Roznai and Loren Roznai as designers of Australian Rails, distinct from the Peter Bromley / Darwin Bromley / Bill Fawcett design team credited on some other Empire Builder series maps (e.g. India Rails).