Ausonia
Ausonia Rulebook
Table of Contents
Table of Contents
Components
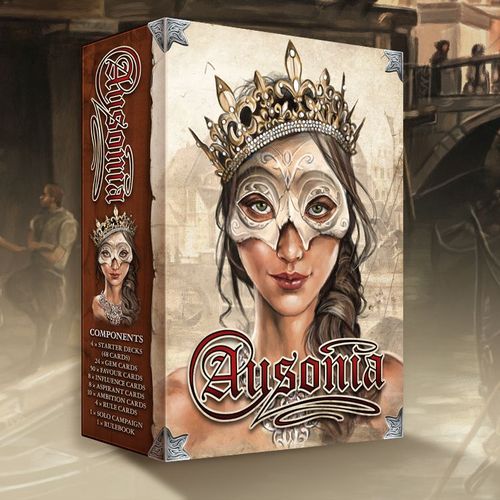
- 1 x Cardbox
- 4 x Starter Decks (12 cards per deck)
- 4 x 2 Influence Cards
- 4 x Influence Trackers (Collectors Box content)
- Power Deck (24 Gem cards)
- Favour Deck (50 Favour cards)
- 8 x Aspirant Cards
- 10 x Ambition Cards
- 1 x Rulebook
- 24 x Token (Collectors Box content)
- 1 x Solo Campaign
- 4 x Rule Cards
Setup
Choose the starting player randomly. The starting player receives the Starter Deck I.
Each player receives a Starter Deck that includes 12 cards. Each Starter Deck can be identified by the text on the bottom of the cards: I, II, III and IV.
Shuffle your Starter Deck and put it face down in front of you to serve as the Draw Pile. Leave space beside it for your Discard Pile. Throughout the game you will place your played and discarded cards face up into your Discard Pile.
Each player starts with 10 Influence points, and the game is played until someone reaches 60 Influence points. The round continues, and the player with the most Influence points at the end of that round wins the game.
Influence points cannot go below 0.
Create the Power Deck by shuffling the Power cards and placing them in a face up stack. The visible top card is available to be purchased during the game.
Create the Favour Deck by shuffling the Favour cards and placing them in a face down stack.
Draw the top 4 Favour cards and place them face up in a row. These cards form the Offer Row and can be purchased during the game. When a card is purchased (or leaves the Offer Row for any reason), replace it immediately so there are always 4 face-up Favour cards.
At the start of the game, each player draws 6 cards from their Draw Pile. At the end of their turn, each player refills their hand back up to 6 cards. Players can have more than 6 cards at any time during the game, or, due to certain effects, they can start their turn with less than 6 cards.
Gameplay and Card Types
Each player's turn consists of two phases:
1. Action Phase
During the Action Phase, the active player can play cards, purchase cards, activate abilities, and construct sources. These actions can be performed in any order. Played cards are put face up on the table, which forms the Play Area. Two types of cards can be played:
Gem Cards
These provide the players with gemstones as resources to buy Favour and Power cards.
The game uses 3 types of gemstones: Sapphire, Emerald and Bloodshard. Rainbow-coloured gemstones are wild and can be used as any other colour. By spending gemstones, players can pay for the abilities on Favour cards or purchase new cards from the Offer Row or Power Deck. If a Gem card offers multiple resources, the player can split them and spend them on different actions.
Example: Adam plays the Power card from hand which gives him 2 Bloodshards. He spends one gem to buy Heir from the Offer Row. Then, he takes a card from the top of the Favour Deck to make sure the Offer Row has 4 cards in it. He then spends the remaining 1 Bloodshard to draw the Double Sapphire Gem card from the top of the Power Deck. Both of the bought cards go into his play area, but their abilities cannot be used that turn. At the end of his turn, he places the 2 Bloodshard Power card and the 2 new cards into his Discard Pile.
Purchased cards are immediately put face down in the Play Area and cannot be used in the same round in which they are purchased. Do not get rid of your spent Gem cards. They will be put in your Discard Pile during the End Turn Phase.
Favour Cards
The Gem card resources can also be used for more than purchasing new cards.
Many Favour cards require resources in order to use their abilities. Gem resources spent on purchases cannot be used to activate abilities and vice versa. Also, if the ability has a rainbow gem as cost, any unused played Sapphire, Emerald, or Bloodshard gem can be used to pay that cost.
You can use these active abilities of played Favour cards at any time during the Action Phase of your turn as long as you have the resources to activate them. Each ability can be used only once per turn.
In case you can activate more than one keyword with one gem, you decide their order, but you'll have to fulfill all of them.
A Favour card is laid out as follows: Cost (top left), Name (top center), Guild (top right), Illustration (center), and Ability (bottom).
Example: Clark plays the Reserve card and activates its ability for 1 Bloodshard (Foresight 2 + Draw 2). He can either check the first two cards on the top of his deck, decide whether he leaves them there or put them into the Discard Pile and only draw 2 cards after that - or the other way around. He can draw 2 cards first and then the upper two cards. But he cannot check the upper card, draw a new one, then discard and draw again.
You can even use one ability from a card, perform other actions, and then use another ability from the same card.
Condition Abilities
If the ability of a card does not include a resource as a cost but has a red background instead, that ability has a condition, not a cost.
- A gem icon with a number: you used gems of this type and amount. (You need to use the gem of the same colour, you cannot use a rainbow gem.)
- Corruption: you used a keyword of this type.
- A skull icon: you activated an ability on a card belonging to this guild.
Example: Bella plays a Masquerade card from hand and pays a two Bloodshard for its abilities (Discard 2 + Influence 6). Then, she plays a Sapphire gem and a Fealty (Influence 4), so she gains 4 Influence points. Since Fealty also belongs to the Nobel guild, she activates the Masquerade's condition ability and gains 5 more Influence points.
If the condition ability with the red background is met during the turn (even if the card is still in hand), the ability is automatically unlocked and you can activate it at any time during your Action Phase. If a condition is met more than once, the ability can still only be activated once. Also, a card cannot fulfill its own condition.
When you play a Gem or Favour card, you are not obligated to use it fully or immediately. You place it in your Play Area, where it does not count as held or discarded. You can use the abilities or resources on the card at any point until the end of your turn.
Guilds
| Guild | Description |
|---|---|
| Nobles | Historical houses that still have prestige to determine the fate of hundreds. |
| Merchants | Prosperity only comes to those who dare to invest in risky enterprises. |
| Magicians | Students of the long lost arts, who rely on knowledge above everything else. |
| Underworld | In such a chaotic world permanent favours are rarely without a price. |
| Engineers | New inventions are even worth dying for these days. |
Tokens (Collectors Box Content)
Use the tokens to keep track of which ability of the Favour cards you used in that round, and to make sure you know how many of the double Gem cards you've used.
Purchasing
You can purchase cards from the Offer Row or from the Power Deck by paying the resource cost found in the upper left corner of the card. You must pay the full cost by placing Gem cards that match the cost. Costs that show rainbow-coloured gems can be paid with any coloured gems.
Cards can be played and purchased at the player's discretion. Then, the player Passes and starts the End Turn Phase.
End Turn Phase
- Put all the cards from your Play Area into your Discard Pile.
- You can put any number of cards from your hand into your Discard Pile.
- Draw cards from your Draw Pile until you have 6 cards in your hand.
The round continues clockwise to the next player.
Constructing Sources
Use the Raise keyword to create permanent gem Sources and to make sure that your deck only has the most useful cards in the endgame, making you able to create powerful and stable combinations.
- Play a Favour card from your hand (or from your Seal Area) which has the Raise keyword and pay the cost of the ability in gems.
- Choose any card (Starter, Power or Favour) from your hand or from your Discard Pile and place it face down into the Raise Area.
- When you have at least two cards in the Raise Area and one of them is a star-marked Gem card, you can create a Source. Turn the star-marked Gem card face up and put it vertically across the other card that was raised (keep that one horizontally face down. This serves as the foundation, which can even be another star-marked Gem card as well). From now on, use the Source as you would a Gem card in your hand (you can already use it in the turn it was created!)
- You cannot undo the Source you've built.
Tips & Tricks
- If you want to show the Source has been used, turn the face up Gem card by 90 degrees. At the end of your turn, make sure you turn it back, to show it is active again.
- Cards with the Raise 2 keyword enables you to create a Source immediately.
- You can also construct a source from the rainbow gems with the star symbol on them.
Rules Always in Effect
All paid (active & condition) ability actions must be completely finished before you are allowed to use another action.
If your Draw Pile runs out of cards and you must draw, discard, or check cards from your Draw Pile, immediately shuffle your Discard Pile and place it face down to create a new Draw Pile.
Example: Bella plays a Whispering card from hand and activates its ability with a Bloodshard (Draw 2). There is only 1 card left in her Draw Pile. She draws that 1 card, shuffles the Discard Pile and she draws from the top of the new deck. Then she continues her turn.
If a player reaches 60 Influence points at any point in the game, the game ends at the end of that round. In this case, the game carries on until everyone has had their turn in that round. This way you can make sure that everyone has had the same number of turns.
From that point the Corruption keyword is counted as Influence, so you can increase your own Influence with it, not decrease others. This rule already applies in the turn of the player reaching the 60 Influence points. The player with the most Influence points wins. In case of a tie, the player earlier in turn order for the round wins.
Example: Adam reached 72 Influence points by the end of his turn. Then Bella starts her final turn. She has 63 Influence points. Bella plays the Treachery card from hand, gaining 10 more Influence. This way, Bella wins the game!
Instead of short descriptions, the cards mostly have ability keywords, which have direct rules.
Keywords
Round
A full round consists of all players playing one full turn (Action Phase and End Turn Phase).
Influence X
The player gets X number of Influence Points. These are collected to win the game.
Corruption X
The player chooses an opponent who loses X number of Influence Points.
Discard X
The player chooses an opponent, who must discard X number of cards, of their own choice, from their hand.
Draw X
The player draws X number of cards from their Draw Pile.
Manipulation X
The player can choose X number of cards from their Discard Pile and put them on top of their Draw Pile in any order they choose.
Foresight X
The player can draw X number of cards from their Draw Pile and decides for each card to put it into their Discard Pile or back on top of their Draw Pile in any order they choose.
Raise X
The player can draw X number of cards from their hand or Discard Pile to be put in the Raise Area face down. Later, these cards can be used to construct Sources.
Seal
The player can move an other played Favour card from their Play Area into their Seal Area. On a later turn, the seal can be broken, and these Seal Cards can be put back into their Play Area as if they were played from your hand. (The ability costs must be paid). These used cards cannot be sealed again in the same turn.
The best way to explain the Seal mechanics is through an example.
- You've played the Amazement Favour card, paid the cost of Emerald and gained 4 Influence Points. The card is placed in the Play Area horizontally, signalling that you've already used the Influence ability in this turn.
- You then play the Secrecy Favour card from your hand and pay a Sapphire cost for the Seal ability. Now, you have to name a Favour card you've already played. Choose Amazement and place it horizontally, face up in the Seal Area. This card is now sealed.
- At the end of your turn, the cards in your Seal Area are not moved to your Discard Pile, but instead become activated (turn them vertically). These cards remain there until you decide to play them again, thereby breaking the seal. Basically, these sealed cards behave as if they were constantly in your hand but without taking up space.
- Since sealed cards behave like cards in your hand, you will have to pay the gem cost to activate their abilities.
IMPORTANT! If you play a card from the Seal Area, you cannot Seal that card in the very same turn again. The same goes when you Seal a card, you cannot break the seal and play it in the very same turn.
Tips & Tricks
The Seal mechanism is very useful if you want to decrease the size of your deck, but you still want to have control over a card that might be useful later on and therefore should not be 'banished' into the Raise Area.
You cannot seal cards with their own Seal abilities. Meaning, if you play a Favour card's Seal ability, you can only Seal an other card that has already been played.
You can only Seal cards which have the FAVOUR signature on them. Starter cards cannot be sealed.
Ambition Variant
Ambition Cards
At the beginning of the game every player draws 2 cards from the previously shuffled Ambition Deck.
Ambitions are hidden, so players can only see their own Ambition cards. The player must fulfill at least one of the requirements of their own Ambition card in order to win the game.
When the last round is over, each player reveals their Ambition cards, and the player who collected the most Influence points and fulfilled an ambition requirement becomes the winner.
An Ambition card shows a Name (e.g. Investor), an Illustration, and a Requirement (e.g. "Have at least five Power Cards").
The requirement must be met taking into account all the cards in the player's possession, except the ones in the Raise Zone.
If someone scored more than 60 Influence points, but none of the players fulfilled any of their Ambition cards, there is no winner.
In case of a tie of Influence points, the one who fulfilled more ambitions wins the game. In case this is also a tie, there is no winner.
Solo Rules
Follow the Basic Rules, but with the following changes.
After Setup - choose one of the Aspirant cards and put it in front of you. The Aspirant also starts with 10 Influence points.
Each round you are the starting player, and the Aspirant plays after you.
During the Aspirant's turn, there are 2 to 3 stages. During the 1st, it takes the leftmost card in the Offer Row. The resource cost of the Favour card triggers the Aspirant's abilities. Resolve each gem in the cost separately.
In the 2nd stage, read the text on the Aspirant's card to determine if the Aspirant can keep the taken Favour card or must put it into its Discard Pile face up. If kept, put the card beside the Aspirant. (Cards with at least the icons shown in their cost are kept.)
In the 3rd stage, the Aspirant's - kept card - ability may be triggered. (After he keeps a card, he gains Influence 2 for each kept card.)
If you or the Aspirant takes a card from the Offer Row, shift the remaining cards to the left and put the replacement card in the rightmost position.
If the Favour Deck is empty, shuffle the Aspirant's Discard Pile and use it as the new Favour Deck.
In the Campaign Mode, although your Influence goal is increased by 10 points gradually, the Aspirant always wins when reaching 60 points.
Changes in Ability Keywords
If you play DISCARD, remove a random kept card from the Aspirant and put it into its Discard Pile as well. This affects the - kept card - abilities as well! You can keep them under control this way.
Burn X: Only used in Solo Play! The player must put X number of cards from their Draw Pile into their Discard Pile. If there are not enough cards available in the Draw Pile, the player loses as many Influence points as the number of cards that could not be put into the Discard Pile.
Remove These Cards When Playing the Solo Mode
Experiment, Threaten, Collect, Puppeteer (base game); Scheme, Sermon (expansion cards).
Example: Your opponent is the Usurper. Following your 1st turn, it is his turn. The 1st card in the Offer Row is Taint. The Usurper gets 2 Influence points for Sapphire gems. For an Emerald gem, you take 2 cards from the top of your Draw Pile and place it in your Discard Pile. Then, for two Bloodshards, you discard 2 cards and lose 4 Influence points. Since the cost of the Taint does not include 2 Sapphire gems, you put the card into the Aspirant's Discard Pile, so that he cannot activate its 3rd ability.
Tips & Tricks for Aspirants
The Mageking: The gem cost based abilities of the Mageking should be triggered from the top to the bottom. So when they keep a card for the first time, their extra ability with the Bloodshard is not triggered.
The Bloodvassal: This Aspirant raises the cost of Favour cards with not only the type but also the number of the gems of his kept cards. For example, having two Emerald kept cards, the cost of Favour cards in the Offer Row is raised by two Emerald.
The Bishop: After having two kept cards, the Aspirant draws +1 card every turn (in the case of 4 cards, +2, and so on). This increases his chances to draw a card that he will keep, which can quickly put the player in a very difficult position.
The Magequeen: The abilities given to the Player by the Aspirant's gem cost abilities must be immediately used when triggered.
Lore
It is the middle of the 17th century. Magic has awakened and the world is overrun by hordes of the undead revived by the Witchplague. Entire nations have disappeared, and their people are scattered all over the continent. The old traditions can now only be found at small cultural refuges.
Those who survived gathered in Havens, refuges scattered throughout the borderless lands of this new world. Enclosed valleys still capable of sustaining life, and regions less roamed by the rotting hordes. Everywhere else is desolation and barren lands - the realm of the dead.
After long lasting wars and the great plague sweeping through Europe, the Italian provinces were left in disarray, just to be struck again by an unfamiliar menace unleashed by the Fracture, the magical Witchplague. Unstoppable hordes of the undead swept through the helpless provinces, effortlessly leaving only chaos and ruins.
But a few cities managed to survive. As the leaders of the old world were either vanquished or turned, control of the remaining territories has fallen to the surviving powerful families.
Milan managed to keep the plague under control by means of radical but highly effective methods and using their impenetrable walls and moats as a last defence. Venice has fallen apart, but it's surviving fleet was able to retake governance over the city and the surrounding areas. Florence, with the unbreakable morale of paid mercenaries hired by the Medici family, has fended off the undead menace one after the other.
Bereft of all hope, these three cities became the last safe havens of northern Italy, being under the constant siege of the undead, becoming weaker day by day. They were liberated by "The Last Crusade" led by the Vatican, but at a high price: the surviving cities were obliged to pay a war tax to the Vatican, and the new Pope declared the region to be called with it's unusual old Greek name "Ausonia" from that moment on. Nevertheless, receiving their almost unlimited sovereignty, these city states could again develop, expand, rival and of course… scheme.
The first strife started between smaller families; noblemen, merchants and guilds alike; to achieve as much influence as possible in the courts of these high ranking rulers of the new realms.
Card Clarifications
Claim: The Influence 1 and the Corruption 1 keywords are given to every other activated ability as well, not just the Influence and the Corruption. If you use a gem to activate 2 different keywords, you still only receive 1 Influence point and you still only make the other players lose 1 Influence point.
Conjunction: After you use the 2nd ability and the card is placed on the top of your deck, you cannot play it again even if you draw it in your turn. Every card can only be played once in a turn.
Contacts: You can use the abilities of all 4 Favour cards in the Offer Row provided that you paid their gem costs.
Plans: If you decide to Raise a card from your deck, shuffle the deck after choosing the card.
Puppeteer: The card which was raised with its 1st ability goes into your Raise Zone instead of the opponent's. You basically 'stole' their card.
Reserve: Consider your activated Sources double gems. Even if you already used it, it results in another active one.
3 Wild Gems: After the turn it was used, the card raises itself for free, so it goes face down to your Raise Zone instead of the Discard Pile.
Draw 1 Wild Gem: It is up to you whether you activate the Draw's ability before or after you use the gem itself, but if you played it, you must draw 1 either way.