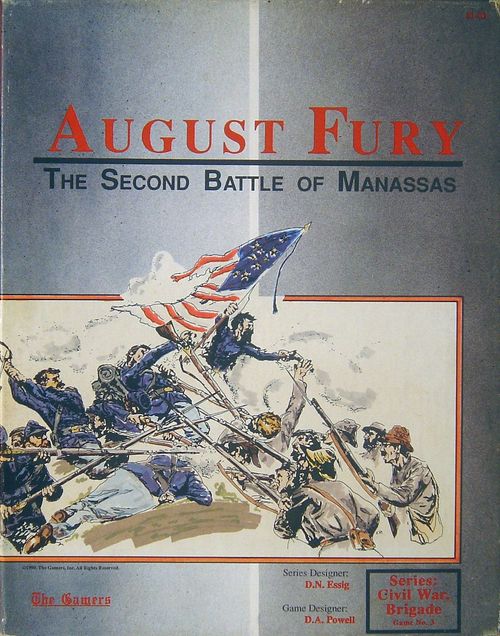
August Fury: The Second Battle of Manassas
August Fury: The Second Battle of Manassas Rulebook
Table of Contents
Table of Contents
- Introduction
- Terrain and Map Notes
- Union Special Rules
- Confederate Special Rules
- Command and Control Special Rules
- Minor Variants
- Victory Conditions
- Set Up Notes
- Historical Scenarios
- Historical Notes: The Second Bull Run Campaign
- Designer's Notes
- Union Player's Notes
- Confederate Player's Notes
- Confederate Personality Sheet
- Union Personality Sheet
- Scenario Starting Strengths
- Union Order of Appearance
- Confederate Order of Appearance
- Loss Charts
Introduction
August Fury is The Gamers' third game in its Civil War, Brigade Series. It follows games on Gettysburg and Antietam. For the first time, the series turns its focus onto a lesser-known battle, recreating the course of events during the Second Battle of Bull Run, which lasted from the evening of August 28th until nightfall on August 30th, 1862. Using two maps, I have attempted to recapture all of the critical elements of this battle, which ranged from Bull Run Creek almost to the foot of Thoroughfare Gap.
Terrain and Map Notes
-
The Unfinished Railroad Cut provides a natural defensive trench for units which occupy it. Any unit fired on solely through railroad cut protective hexside(s) receives one column shift to the left on the Fire Combat Table, as well as plus (up) three rows on the Morale Table (in addition to other modifiers for which they might be eligible.) Movement for all unit types across such a hexside costs one additional movement point. Not all parts of the railroad cut provide this benefit/cost, as some parts of the roadbed do not form a trench or fill. Otherwise, the unfinished railroad is considered a secondary road.
-
All map edge, half-hexes are playable.
-
The urban hexes of Gainesville and Hay Market are marked by red building symbols. No other hexes, despite the presence of buildings (black), are considered to be urban. All urban hexes are connected to all adjacent hexes with primary roads.
-
The Turn Record Track is used to record the passage of time during the game. A marker is used on one track to record the time, while another is placed on a second track to record the particular day. The first and last few turns of daylight have a single number in the corner of the time box which gives the visibility in hexes for that turn.
-
The Entry Hexes, used for the arrival of reinforcements, and for map exit in some cases, are marked with a single red letter. For instance, entry hex A corresponds to hex A21.01.
-
The Casualty Records are used by each player to record battle losses from the Fire Combat Table. No straggler losses are recorded on them. These tracks, one for each player, use three markers (x100, x10, x1) to record losses in hundreds, tens and ones, respectively.
-
The Artillery Ammunition Tracks, one provided for each player, use three markers each to record the expenditure of artillery ammunition for each army. These tracks are marked using the same x100, x10, and x1 system as is the Casualty Records mentioned above. Each scenario specifies the amount of ammunition available to each player at start, and one is subtracted from the track each time a battery of five gun points (or fraction thereof) fires.
Union Special Rules
Acting Army Commanders
Due to the confusion that hampered the Union army in the opening phases of the battle, no Union corps commander can assume temporary army command before Pope's arrival on the battlefield. Each corps and divisional commander may only attempt to give himself new orders using initiative during this period. If Pope is killed or wounded, the following order of succession among corps commanders is used to appoint the highest ranking, surviving corps leader to army command. This order is:
- McDowell
- Sigel
- Banks (if in play)
- Sumner (if in play)
- Heintzelman
- Franklin (if in play)
- Porter
- Reno
Union Anti-Initiative Ratings
There was much animosity among the Union leaders at Second Bull Run, especially among the Army of the Potomac men now forced to work with Pope. The following anti-initiative ratings reflect some of these troubles.
For the following leaders, Pope has an anti-initiative rating of -1: Heintzelman, Franklin, and Sumner. For the following leaders, Pope has an anti-initiative rating of 0: McDowell, Sigel, Banks, and Reno. For Porter, Pope may have one of two effects. If Porter is attempting to change his orders, i.e. stop what he is doing, in order to do something else, Pope has an anti-initiative rating of -2. If, on the other hand, Porter is trying to cancel his orders, in order to do nothing, Pope has an anti-initiative rating of 0.
McDowell is the only corps commander with his own anti-initiative rating (all others merely pass downward Pope's) and it is -1.
If Pope is replaced due to loss, the entire army has an anti-initiative rating of -1.
Plus Weapons Units
The three Union Cavalry brigades are rated as "+" weapons units and are so marked. There are no other Plus weapons units in the game.
Corps and Army Designations
Elements of two separate Union armies were present at the Battle of Second Manassas. The 1v, 2v and 3v Corps belong to the Army of Virginia. 2p, 3p, 5p, 6p and 9p Corps were all part of McClellan's Army of the Potomac which were assigned to support Pope. The Army of Virginia units are marked with a red stripe in order to facilitate their identification. These designations are for historical purposes only and have no effect on Pope's ability to command any particular unit.
Attachments and Detachments
No Union divisions or brigades may be attached or detached outside the corps they belonged to at the beginning of the game.
Separate Brigades
There are two Union separate brigades in the game. Ind/1v and Piatt/5p each belong to their respective corps, and not to any particular division. These units may never be attached to any division, nor do they affect the wrecked status of any division. These units trace command radii directly to the Corps HQ, just as if they were "one-counter" divisions of that corps. If these brigades become wrecked, they use the -6 modifier on the Morale Table. These troops may be assigned divisional goals by Pope or their respective corps commanders.
Cavalry Brigades
The three cavalry brigades each belong to a Union corps. They are subject to the same special rules as the separate brigades listed above. If no other units of 2v Corps are in play, Cav/2v may be assigned to another corps.
Reno and the 9th Corps
Major General Reno commands both the 9p Corps and the 2/9p Division. There is no separate leader for the 2/9p troops. 2/9p always traces its divisional command radius to Reno himself, and may not be given a divisional goal that would violate this radius. Reno is not required to stack with a brigade of this division, as are other divisional commanders.
The 5p Corps and the Union Order of Appearance
The 5p Corps is subject to severe restrictions when it appears on the map which are due to confusion between its commander and Pope. This rule is in effect for 5p Corps in scenarios 2, 5, and 6; except where specifically superseded by the scenario rules themselves. The 5p Corps arrives at entry hex D. When it enters, it is called upon to fulfill certain orders unless it comes within two hexes of a Confederate combat unit, then it must halt and defend in place, and await further orders. If there is a CSA unit within 2 hexes of entry hex D, the 5p Corps does not enter the map, but is assumed to be waiting off-map for orders. Pope may send orders to 5p Corps while they are off-map by tracing normally to entry hex E and adding two turns to the delivery time. The remaining order acceptance procedure remains the same.
The only two orders Pope can give to the 5p Corps while off-map are: to attack onto the map at entry hex D, by deploying in line and entering the map at or within 5 hexes of hex D; or to move to entry hex E and enter in column there. If ordered to enter via entry hex E, 5p Corps enters the map at E three turns after the order is accepted.
Confederate Special Rules
The Confederate Wing Structure
Lee divided his army into two "wings"--the Right, commanded by Longstreet; and the Left, led by Jackson. These two wings function exactly as army corps, and each wing has a headquarters that acts like a corps HQ.
Evans' Separate Brigade
E/Rw is a separate brigade in Longstreet's Wing, and is issued orders by Longstreet or Lee. Evans may be assigned divisional goals. This brigade, when not under divisional goals, traces command radius to the Rw HQ just as if it were a division. Also, E/Rw may be attached to a division in Longstreet's Wing, and, then, acts as an integral part of that division. This attachment does not affect that division's wrecked status in any way. If E/Rw becomes wrecked, its morale modifier for that status is -6, not -4.
D.H. Hill's Provisional Corps (Optional)
If Hill's Provisional Corps is being used in the game, it functions as any other corps in the game and acts as a third Army of Northern Virginia "corps." Additionally, Hill commands both the corps and his division. This division must trace command radii directly to Hill, and may not be given a divisional goal that would violate this radius. Hill is not required to stack with a brigade of his division. H/Cav is attached to Hill's Corps, and it enters the game with the rest of that corps.
The Left Wing Supply Wagons
Jackson's Left Wing starts the game with two supply wagons (each containing 5 supply points.) One wagon (identified by the player at the beginning of the game) is removed from play when empty and cannot be replenished from the Army Supply Train. This rule simulates the extra supplies Jackson plundered at Manassas Junction before the beginning of the game.
Independent Cavalry Artillery
The Cav artillery unit, nominally part of Stuart's division, is an independent unit and is not subject to any command radii or orders restrictions.
Stuart's Cavalry Division
Stuart's three brigades of cavalry are a separate division which act under the direct command of the army commander. Lee issues orders to Stuart directly, or he can assign each brigade a divisional goal, etc. Stuart may also use his initiative.
Command and Control Special Rules
Attachments and Detachments
The Confederate player may detach divisions from either wing, and re-attach them to the other wing or the army commander. If Hill's optional corps is in play, its divisions may be handled in the same way. No cavalry unit may be attached or detached. Individual brigades within a division may not be separated from their parent divisional command. No Rebel corps may attach more than one extra division at a time.
Emergency Retreats
Any corps, Union or Confederate, may conduct an emergency corps retreat as stated in the Series rules. In addition, a division that is acting independently from its corps HQ (divisional goals, etc.) may also conduct an emergency retreat. Any units that exit the map via this rule are permanently removed from play. Exception: see the special Union orders, Scenario 5.
Out of Command Units
In some of the scenarios, several Confederate brigades (and in scenario 5, the Union 1/1/1v brigade) are set up at start in positions that place them outside command radii. In all such cases, these units may remain out of radius as long as they do not move. In this condition, they may conduct fire combat normally. Should they move, for any reason, they can only move in a direction that will re-enter the unit into their command radius. In no way are these units considered to have divisional goals or to be independent units.
In individual scenarios, these units are marked with the notation "ocr" indicating that they are to be set up outside command radius. The player should note that these units may move at any time desired, but that the only legal move they are allowed to conduct is one that would put them back into command. Their parent divisions may move and fight normally and have no obligation to "retrieve" these brigades. Only units listed as "ocr" may remain in place outside command radius, all other units are required to use all movement in order to reenter radius.
Minor Variants
Union Options
- (2v Corps Variation #1) At 11:00am, August 29th, allow the Union 2v Corps to arrive on Map A, entry hex C. The corps is ordered to move to Gainesville and defend (with any other Union troops present.) This option gives the Rebel player 10 victory points.
Historically, this Union corps remained at Bristoe Station, south of the game map, throughout the three days of fighting. It was guarding Pope's main supply trains, and, (after the destruction of the depot at Manassas), Pope was hypersensitive to the possible loss of these trains. However, an easy march could have brought these 5300 troops to the actual battlefield.
- (2v Corps Variation #2) At 2:00pm, August 29th, allow the 2v Corps to arrive on Map B, entry hex E. It is ordered to move to the army HQ and await orders. This option gives the Rebel player 7 victory points.
A less effective use of this corps would have been for Pope to concentrate them with the rest of his army against Jackson. They could have guarded the trains as far as Manassas, and then turned north to the battlefield while the wagons went on to Centerville.
- (2v Corps Variation #3) At 11:00am, August 30th, allow the 2v Corps to arrive on Map B, entry hex E. Their orders are to move to the army HQ and await orders. This option gives the Rebel player 5 victory points.
The historical rationale for this option is similar to #2 above, but gives a more lethargic response time between Pope and Banks.
- At 9:00pm, August 29th, allow the Union 6p Corps to arrive at entry hex F. It is ordered to move to the army HQ and await further orders. This option gives the Rebel player 5 victory points.
Historically, this corps arrived at Alexandria by the 27th, but a lack of direction from either Washington or General McClellan himself allowed these troops to waste two days, and, then, only arrive in Centerville on the night of the 30th, in time to cover the disastrous retreat of Pope's beaten army. More energetic direction from the Union high command could have enabled these troops to participate in the fighting on the 30th.
This option, a variance of #1 above, supposes that these troops force marched, leaving behind their supply and artillery trains, and the die roll simulates the loss of men due to this severe march, and who are now unavailable for combat. While, by exercising this option, the Rebel player receives D.H. Hill's Corps even earlier, the above losses may make the trade a poor one.
- At 8:00am, August 30th, allow the 2p Corps to enter the map at entry hex F. They are ordered to move to the army HQ and await orders. This option gives the Rebel player 6 victory points.
The rationale applied to the 2p Corps is the same as that above for the 6p Corps. These troops, more of McClellan's men, were also at Centerville by the night of the 30th. A lack of horses forced the Corps' supply train and artillery to be left behind at Alexandria. Pope, however, desperately needed the use of the infantry of the corps in his efforts to crush Jackson.
- When the 9p Corps arrives, allow K/9p to arrive with it. This unit is subject to all the same orders as the rest of 9p and, in addition, is held to all the restrictions enumerated in the Union special rules concerning separate brigades. This option gives the Confederate player 1 victory point.
On the 27th of August, this provisional brigade, comprised of troops from the Kanawha Division, participated in the abortive reconnaissance against Jackson at Manassas Junction. Following that affair, the unit returned to Alexandria and sat out the rest of the battle. However, they were within reach of the fighting, and I have theorized their participation in the rest of the action. A few days after Second Bull Run, these men were incorporated into the 9th Corps for the Maryland Campaign, and so I have done the same here.
Confederate Options
- At 9:00am, August 30th, all elements of Hill's Provisional Corps arrive at entry hex B, Map A. The corps is ordered to move to the army HQ and await further orders. This option gives the Union player 15 victory points.
Historically, these troops spent most of August guarding Richmond while the rest of the Lee's army maneuvered against Pope. However, on the 26th, Lee ordered these three divisions north to join him.
- At 5:00pm, August 29th, all of the infantry brigades and leaders (only) of Hill's Provisional Corps arrive at entry hex B. They are ordered to move to the army HQ and await orders. As each brigade enters the map, roll one die and subtract one from it. The result is the number of steps permanently lost by that brigade, which are promptly marked off the Loss Chart. These losses are never regained via straggler recovery. The H/Cav unit does not make this roll. This option gives the Union player 7 victory points.
Use of These Options
By prior agreement, the players may decide on any, and all, options to be used before the beginning of the game. Or, as an alternative, allow each player to exercise each option independently, in effect surprising his opponent when these troops are due to arrive. In either case, any options to be used must be determined before play begins and never changed afterward. Players must agree, again beforehand, if any options are to be used and which of the above methods are to be used (open or secret.)
Victory Conditions
Historically, neither side actually achieved their objectives in this battle. Pope's stated goal was to crush Jackson before Lee could arrive, in which he obviously failed. Lee, for his part, desired to put Pope's army out of action before any unification with McClellan's forces from the Peninsula. While Lee did drive Pope's troops from the field, enough soldiers from McClellan's army were close by to save Pope from complete destruction, and many men of the Army of Virginia were able to take to the field in the Maryland Campaign a week or two later.
In game terms, victory is determined by assigning point values to three separate determinants; the difference in total casualties, the number of army corps that have been wrecked, and certain terrain features that have been captured by one side or the other.
Points for Losses
To determine the points awarded to one side or the other, the players must calculate the total number of losses inflicted on each side (do not count straggler losses). Then, subtract the Confederate from the Union total, which will yield a positive or negative number. Compare this number to the following chart, and award the indicated side the number of victory points shown.
Loss Differential to VP Point Chart:
- 60 or more: 15 VP to the CSA player
- 30 to 59: 10 VP to the CSA player
- 11 to 29: 5 VP to the CSA player
- -10 to 10: 0 VP to either player
- -11 to -21: 5 VP to the USA player
- -22 to -35: 10 VP to the USA player
- -36 to -49: 15 VP to the USA player
- -50 or less: 20 VP to the USA player
Points Awarded for Wrecked Corps
These points are awarded to the players for wrecking 50% or more of the brigades in a given corps or wing. These brigades must be considered wrecked when counting their actual casualties only. Ignore all straggler losses when making this determination. The points are awarded as follows:
To the CSA Player (Wrecked Corps: VP's):
- 1v: 3
- 3v: 8
- 3p: 5
- 5p: 5
- 9p: 4
- 2v (optional): 3
- 2p (optional): 5
- 6p (optional): 4
To the USA Player (Wrecked: VP's):
- Right Wing: 12
- Left Wing: 10
- H Corps (optional): 7
Points Awarded for Terrain
These points are awarded to the player who was the last to occupy all hexes of the given terrain feature.
- The hexes of Gainesville: 5 VP
- The hexes of the Unfinished RR: 5 VP
For the USA player only, 15 VP's are awarded for control of entry hexes A and B. To meet the conditions of this award, there must be Confederate forces east of the Union troops occupying the entry hexes.
For the CSA player only, 15 VP's are awarded for control of either hex of the Stone Bridge over Bull Run. If there are no Union troops west of Bull Run, the CSA player only gets 5 VP for this control of the bridge.
Determining the Winner
These victory conditions are in effect for scenarios 2 through 6. Scenario 1 has its own victory conditions which are listed in the scenario rules.
To calculate victory, total the VP's awarded for the three categories above for each side. Then, subtract the Union point total from the Confederate point total to determine a single (positive or negative) number. Use the chart below to determine the final level of victory. Players should note that in all scenarios except number one, the CSA historically won a major victory.
Final Victory Chart:
- 26 or more: CSA Massive victory
- 16 to 25: CSA Major victory
- 6 to 15: CSA Minor victory
- -5 to 5: Draw
- -12 to -6: USA Minor victory
- -21 to -13: USA Major victory
- -22 or less: USA Massive victory
Set Up Notes
On the set up and reinforcements lists, the following abbreviations are used:
- #b(x): Battery of corps #, with x gun points.
- Db(x): Detached battery with x gun points.
- xx.x1 ex xx.x2: Unit is placed in hex xx.x1, with extended line in hex xx.x2.
- w/i x of: Unit is placed within x hexes of hex listed.
All units are in Column or Limbered formation.
Union Orders: 1/3v is to move along the Warrenton Turnpike and exit the map at entry hex F. If attacked, 1/3v is to defend in place as long as possible. 1/3v may conduct emergency retreats.
Confederate: J/Lw and E/Lw as per Scenario 5; Lwb B21.06, B22.04, B17.11; Lw HQ B19.05; Jackson B22.04; Lw Supply (One wagon) stacked with or adjacent to any CSA unit.
All units set up in desired formation, unless otherwise noted. Artillery units set up with 5 gun points unless a strength is specifically given as above. Leaders, or their replacements, always set up or enter with their divisions or other of their units, unless otherwise noted.
Confederate Orders: CSA troops are to attack Union forces on the Warrenton Turnpike. CSA troops may not move south of the Turnpike. This order may be changed by initiative, but under no circumstances may any Confederate unit move East of the Bxx.20 hexrow.
Listed units are set up in the bold hex number following their listing, if set ups are not in a table format. If more than one hex is listed, one of the given unit is placed in each listed hex. The player is not free to pick and choose his use of multi-hex listings, but must place one unit of the correct ID in each. If more than one unit is listed for the same hex number, these units must stack there. The player is free to determine facing as desired when setting the game up.
Supply wagons are fully loaded (5 supply points each) unless specifically stated otherwise.
Historical Scenarios
Scenario 1: The Battle of Brawner Farm
On the night of August 28th, Jackson attacked a lone Union division along the Warrenton Turnpike. There were two results of this battle: one, Jackson announced to the world his exact whereabouts, and two, Gibbon's Union brigade experienced its first taste of combat. This brigade was, of course, the Iron Brigade, which was soon to be famous for its performance at South Mountain, Antietam, and Gettysburg. In the fight at Brawner Farm, Jackson made little effort to actually destroy Hatch's division, but seemed content to merely draw the attention of Pope's whole army down on himself. Fortunately for the audacious Rebel General, Pope was unable to organize effectively to crush the unsupported Rebel corps before Lee and Longstreet arrived to re-unite the Confederate army. For players interested in a short scenario, I offer up this action between two of Jackson's divisions and Hatch's troops.
- First Turn: 5:00pm, August 28th.
- Last Turn: 8:00pm, August 28th (7 turns)
- Artillery Ammunition: Unlimited for both sides.
Set Up
- Union: 1/1/3v B25.10; Hatch, 3vb B26.07; 4/1/3v B27.06; 3/1/3v B29.01; 2/1/3v B28.03
There are no reinforcements in this scenario for either side.
Victory: The player that wrecks more of his opponent's brigades (by casualties, not stragglers) wins this scenario. Any other result is a draw.
Scenario 2: The Second Day's Action, August 29th
After the sharp and bloody fighting on the evening of August 28th, "Stonewall" Jackson's position was at last revealed to the Union army. Pope, certain that the two halves of Lee's army were still separated and Jackson was now in full retreat, decided to concentrate his forces and crush the enemy. Sigel's Corps, present on the field, was ordered to launch a holding attack on Jackson while Heintzelman, McDowell, and Reno brought their troops up. Porter was instructed to take his corps, 5p, to hold Gainesville to prevent Longstreet's arrival on the field. Unfortunately for the Union cause, Longstreet's Confederates arrived sooner than expected, joining Jackson around noon. The rest of the Union plan deteriorated into a series of piecemeal assaults on the Rebels' Unfinished Railroad position, with little success. Pope, refusing to acknowledge Longstreet's presence, became violently angry with Porter for not attacking Jackson's flank, later preferring court-martial charges against the corps commander. The day ended in Union frustration.
- First Turn: 5:00am, August 29th.
- Last Turn: 8:00pm, August 29th. (32 Turns)
- Artillery Ammunition: Union: 345 points; Confederate: 290 points
Set Up
- Union: Reynolds, PaR/3v, 3vb, 3v Supply w/i 1 of B31.27; Sigel, Schurz, 3/1v, 1vb, 1v HQ B23.25; 1v Supply B23.26; v. Steinwher, 1/2/1v B25.25; Ind/1v B23.22; Schenk, 2/1/1v B27.20; 1/1/1v B28.22; 1vb B22.21, B26.20
- Confederate: H/E/Lw (ocr) B25.01; L/E/Lw B18.10 ex B19.10; E/E/Lw (ocr) B27.01; T/E/Lw B16.12 ex B17.12; Stwl/J/Lw B21.07; 2/J/Lw B19.08; 3/J/Lw B21.06; 4/J/Lw B20.07; B/LD/Lw B6.16; G/LD/Lw B8.17 ex B9.17; A/LD/Lw B9.16; P/LD/Lw B12.14; T/LD/Lw B10.16 ex B11.16; F/LD/Lw B12.15 ex B13.15; Lwb B21.05, B19.10, B17.12, B13.15, B8.17; Lwb(2) B22.04; Lw Supply B18.05, B10.14; Lw HQ B14.10; Cavb(2) B23.02; Stuart, R/Cav A16.21. Ewell's repl may set up with either L/E/Lw or T/E/Lw. All other leaders of the above commands set up with any of their subordinate units. Ewell and Taliaferro are wounded and have been replaced by repl's.
Union Orders: 1v Corps is to attack the Unfinished Railroad between Groveton Road and Bull Run, starting at 6:30am. The attack objective is to seize as many hexes of the Unfinished Railroad as possible. PaR/3v is to attack at the same time as 1v Corps, attacking between the Groveton Road and Pageland Lane, with the objective of capturing the Unfinished Railroad.
Confederate Orders: Lw is to defend the Unfinished Railroad. R/Cav is to move to Hay Market, await the arrival of Rw, and then move with Rw to join Lw.
Reinforcements
- Union: All reinforcements based on the Union Order of Appearance on or after 5:00am, August 29th. The 5p Corps is subject to all its special rules as given in the Union Special Rules.
- Confederate: All reinforcements listed on the Confederate Order of Appearance for August 29th, except for the 11:00pm arrival of A/Rw and accompanying troops.
Scenario 3: The Third Day's Action, August 30th
August 29th had closed with hard fighting but no real change in either army's position. Both the Union and Confederate losses had been moderately heavy, but the two sides had plenty of fresh troops on hand to renew the action. Pope, however, still labored under some serious delusions about the intentions and deployments of his opponent. The Union commander believed that Jackson was still unsupported, and was retreating to the northwest. Accordingly, Pope chose to concentrate his troops for a pursuit, spearheaded by the unscathed 5th Corps under Porter. Porter was ordered to move his men from the Union left flank to the center, and to move against Jackson with the support of the 3rd and 9th Corps of the Army of the Potomac. Lee, for his part, watched these activities with interest, but was content to remain inactive throughout the morning, awaiting the Union attack. The morning and early afternoon passed with little fighting, and Lee began to think that Pope would refuse to strike, but at last the Union commander bestirred himself, and the Union columns marched out to renew the contest.
- First Turn: 5:00am, August 30th.
- Last Turn: 8:00pm, August 30th. (32 Turns)
- Artillery Ammunition: USA: 210 points; CSA: 180 points
Set Up
- Union: 1v Corps (all) w/i 2 of B20.23; 3v Corps (all) w/i 4 of B23.24; 9p Corps (all except K/9p) w/i 2 of B15.21; Heintzelman, 3p HQ, 3p Supply B11.23; Hooker, 2/3p w/i 1 of B19.21; 1/1/3p B11.20; Kearny, 2/1/3p B10.20; 3/1/3p B9.21 ex B8.21; 3pb B11.21; Pope, A of V HQ, Cav/2v, A of V Supply B19.24
- Confederate: Jones, T/J/Rw B38.08; D/J/Rw B44.08; J/J/Rw B35.08; Kemper, J/K/Rw B28.03; P/K/Rw B30.09; K/K/Rw (ocr) B39.09; Anderson, W/A/Rw B24.11; A/A/Rw B27.10; M/A/Rw B23.12; Hood, L/H/Rw B25.08; Tex/H/Rw B27.08; E/Rw B28.05; Wilcox, W/W/Rw B25.06; F/W/Rw B24.06; P/W/Rw B26.06; Stuart, R/Cav B38.11; Longstreet, Rw HQ, Rw Supply B28.02; Rwb B27.06, B26.05, B23.05, B22.05; Rwb(2) B36.09; Lee, ANVa HQ, ANVa Supply B22.02; Cavb(2) B21.04; J/Lw in line along Unfinished RR from B20.07 to B17.11 (inclusive); T/E/Lw B17.13; L/E/Lw B16.13 ex B15.14; Repl Leader, E/E/Lw B14.14 ex B13.15; H/E/Lw (ocr) B1.12; A/LD/Lw, T/LD/Lw, G/LD/Lw in line along Unfinished RR from B12.15 to B7.18 (inclusive); F/LD/Lw B10.13; P/LD/Lw B8.16; B/LD/Lw B6.16; L/Cav B1.19; Lw Supply B16.12; Jackson, Lw HQ B16.12; Lwb B21.06, B18.10, B17.12, B12.15, B7.18; Lwb(2) B6.18
Special Reinforcements
- The 5p Corps enters the map at entry hex E, at 6:30am. It is ordered to move to the army HQ and await orders.
- For the following units: Morell, 1/1/5p, Piatt/Res, and Res Battery; the Union Player must roll one die before they enter the map with the 5p Corps. Only one die roll is made for the entire group. On a roll of 1 to 4, these units may not enter with the 5p Corps and remain out of the game forever. On a 5 or 6, the units enter normally. If Morell does not enter the map, 1/5p is commanded by a Repl leader.
There are no other Union reinforcements.
Union Orders: No Union units have any orders, other than the 5p Corps special instructions above.
Optional 5p Corps Arrival: If both players agree, the Union player may bring the 5p Corps in at entry hex D, at 5:00am, August 30th. These troops may be under any orders condition the Union player desires, with such orders being already accepted. In addition, the units specified to make the die roll do not do so and automatically enter with the rest of the corps.
Ewell and Taliaferro are wounded, their units are commanded by Repl leaders.
The second Lw Supply wagon has been expended and is not used in this game.
Confederate Orders: A/Rw is to move west along the Warrenton Turnpike to the Rw HQ and await further orders. No other Confederate units have any orders.
There are no Confederate reinforcements.
Scenario 4: The Afternoon of the 30th
By noon on August 30th, Pope's plans had been finalized. McDowell had been given all except one corps of the Union army in order to "pursue" the Confederates. Porter's corps was to lead off, and McDowell was to call on his other troops in order to support 5p's effort. Pope retained control of only 1st Corps, Army of Virginia, as the army reserve. This plan, however, fell apart almost from the start. Porter's men delayed until mid-afternoon, finally stepping off around 1:30pm. Almost immediately, the Federals discovered that Jackson was still in position. The Union pursuit dissolved into repeated frontal attacks on the Unfinished Railroad. A powerful artillery concentration of Longstreet's batteries made things especially difficult for attacks made by the Union left. Then, when the Union forces appeared to be fully engaged against Jackson, Longstreet unleashed his infantry in a crushing counterattack. Pope, still convinced that Jackson was alone on the field, had placed only one Union division in Longstreet's path. By dusk, the Union army had been swept from the field, retreating to Centerville where two fresh Union Corps protected the retreat. Lee could claim another spectacular victory over his confused and uncoordinated opponents.
- First Turn: 12:00 noon, August 30th.
- Last Turn: 8:00pm, August 30th (17 Turns)
- Only map B is required in this scenario. Players may use this one or both maps as they desire.
- Artillery Ammunition: USA: 200 points; CSA: 150 points
Set Up
- Union: 1v Corps (all, except Cav/1v) w/i 2 of B21.24; 1/PaR/3v B23.18; Reynolds, 2/PaR/3v B24.17; 3/PaR/3v B25.18; 1/1/3v B16.24; 2/1/3v B16.22; Hatch, 3/1/3v B16.23; 4/1/3v B16.21; 2/2/3v B17.22; Ricketts, 1/2/3v, 4/2/3v B17.23; 3/2/3v B17.24; McDowell, 3v HQ, 3v Supply B15.23; 3vb B16.20, B17.20, B15.20, B25.18; 1/1/3p B8.23; 2/1/3p B10.20; Kearny, 3/1/3p B9.20; 3/2/3p B11.22; Hooker, 1/2/3p B13.21; 2/2/3p B14.20; Heintzelman, 3p HQ, 3p Supply B12.24; 3pb B14.19; 5p (all, except Morell and 1/1/5p, which are not in play. 1/5p division is commanded by a Repl leader) w/i 2 hexes B21.21 on or north of Warrenton Turnpike; Stevens, 1/1/9p B15.20; 2/1/9p, 3/1/9p B15.21; 1/2/9p B17.20; 2/2/9p B18.20; Reno, 9p HQ B17.21; 9p Supply B18.21; 9pb B18.20; Cav/3v B17.26; Cav/2v B18.26; Cav/1v B19.26; Pope, A of V HQ, A of V Supply B18.21
- Confederate: J/J/Rw B36.08 ex B37.08; Jones, T/J/Rw B38.08; D/J/Rw B46.09; Kemper, J/K/Rw B28.03; P/K/Rw B30.09; K/K/Rw (ocr) B40.09; Hood, Tex/H/Rw B27.08 ex B28.08; L/H/Rw B25.08 ex B26.08; Wilcox, W/W/Rw B21.06; F/W/Rw B22.06; P/W/Rw B23.06; Anderson, W/A/Rw B29.02; M/A/Rw B30.02; A/A/Rw (ocr) B27.11 ex B26.10 and ex B28.10; E/Rw B29.07; Longstreet, Rw HQ, Rw Supply B28.04; Rwb B22.06, B24.06, B26.05, B27.06; Rwb(2) B36.09; Lee, ANVa HQ, ANVa Supply B30.03; Stuart, R/Cav, Cavb(2) B38.12; L/Cav B1.19; J/Lw in line along the Unfinished Railroad, from B20.08 to B17.12 (inclusive); E/Lw (except H/E/Lw) in line along Unfinished Railroad, from B16.12 to B12.15 (inclusive); H/E/Lw (ocr) B1.12; F/LD/Lw B9.14; AP Hill, P/LD/Lw B8.16; B/LD/Lw B6.17; A/LD/Lw B11.16 ex B10.16; T/LD/Lw B9.17; G/LD/Lw B8.17 ex B7.18; Jackson, Lw HQ, Lw Supply (one of) B16.12; Lwb B21.07, B20.07, B19.10, B16.13, B8.17; Lwb(2) B7.18
Special Reinforcement
- At 4:00pm, Piatt/Res and Resb arrive at entry hex F. They are ordered to join the 5p Corps.
Ewell and Taliaferro are wounded; their divisions are commanded by Repl leaders, who may stack with any one of their subordinate brigades, except for H/E/Lw. The second Lw supply wagon is not used in this scenario.
Union Orders
- 5p Corps is to attack the Unfinished Railroad between the Groveton Road and hex B21.05 (inclusive), in order to capture the Unfinished Railroad and drive Jackson's Wing off the north edge of the map.
- 3v Corps is to support 5p's attack, at the same time, with the same goals.
- 3p Corps is to attack the Unfinished Railroad between the Manassas-Sudley Road and the Groveton Road (inclusive), in order to capture the Unfinished Railroad and drive Jackson's troops off the north map edge. These orders are currently in "D2" status.
- PaR/3v has been given a divisional goal to advance to Lewis Lane and defend, in order to protect the left flank of the 5p Corps. These troops may not move south of the B30.xx hexrow.
- The three cavalry brigades have each been given divisional goals to remain in place and await further orders from the army HQ. They do not rejoin or carry out the orders of their respective corps.
- 9p and 1v Corps do not have any orders at this time.
There are no other Union reinforcements.
Confederate Orders
- L/Cav has a divisional goal to defend the Bull Run crossing it occupies.
- Stuart and R/Cav are to defend the flank of Longstreet's Wing against a possible attack along the Old Warrenton-Alexandria Road.
- No other Confederate units have orders.
There are no Confederate reinforcements in this scenario.
Scenario 5: Battle of Second Bull Run
This scenario recreates the full Battle of Second Bull Run, from 5:00pm, August 28th until 8:30pm, August 30th. The strictly historical version uses no variations, and all units appear according to the Master Arrival Schedules, subject to their historical orders. Players are free to modify this scenario with whatever minor variants they wish in order to test out different possibilities, but should use none of them to experience the actual battle.
- First Turn: 5:00pm, August 28th.
- Last Turn: 8:30pm, August 30th (86 Turns).
- Artillery Ammunition: USA: 350 points; CSA: 300 points
- All special rules are in effect. All units start this scenario at full strength.
Set Up
- Union: Sigel, 1v HQ B23.25; 1/1/1v B20.26; Schenk, 2/1/1v (ocr) B27.20; v. Steinwher, 1/2/1v B23.25; Schurz, 1/3/1v B22.24; 2/3/1v B21.25; Ind/1v B23.22; 1vb B22.21, B26.20, B20.25; 1v Supply B23.26
- The following units set up in either Column or Limbered formation, as is appropriate: 1/1/3v B25.10; Hatch, 3vb B26.07; 4/1/3v B27.06; 2/1/3v B28.03; 3/1/3v B29.01; 1/PaR/3v B37.28; Reynolds, 2/PaR/3v B39.29; 3/PaR/3v B41.29; 3vb, 3v Supply B43.30
Union Orders
- 1v Corps is to attack as follows: At 6:30am, August 29th, the corps is to attack the Confederate forces in the Unfinished Railroad, anywhere east of the Groveton Road, with the objective of capturing the Unfinished Railroad. They have no other orders.
- PaR/3v is to move within one hex of B31.27, go into line, and halt for the night. Then, on August 29th, it is to attack at the same time as 1v Corps, to capture the Unfinished Railroad between the Groveton Road and Pageland Lane (inclusive). When McDowell and 3v HQ arrive, this order becomes the corps order, and all 3v units then on the map must try to fulfill it.
- 1/3v is to move along the Warrenton Turnpike until they reach the Manassas-Sudley Road, and, then, move to within one hex of B31.27, where they will be subject to the same orders as PaR/3v. If 1/3v is attacked by Confederate infantry units, the following conditions apply: 1/3v halts and defends in place until midnight, August 28th, and then retreats off the map via entry hex D, moving in column using the Pageland Lane and the Manassas-Gainesville Road. These order conditions may be changed using Hatch's initiative, but only during a full night turn before midnight, August 28th. (See "Initiative Special Rules" below). Once 1/3v exits the map, it is subject to the normal Order of Arrival Schedule.
- 2/3v, Cav/2v, and Cav/3v are subject to orders similar to those of 1/3v. These units enter Map A according to their first mention in the Union Order of Arrival Schedule. Thereafter, 2/3v will move into or adjacent to any urban hex of Gainesville and, there, halts and defends. The two cavalry brigades move to Hay Market, where they halt and defend. If 1/3v was not attacked as indicated above, then 2/3v may start at 4:00am, August 29th, and move along the Warrenton Turnpike to join the rest of 3v Corps within two hexes of B31.27. If 1/3v was attacked, then 2/3v and the cavalry brigades must also exit the mapboard, at Midnight, August 28th, by moving in column along the Manassas-Gainesville Road to entry hex D. This order may be changed by using Ricketts' initiative, but only during a full night turn before midnight, August 28th, see below. Once these units exit the map, they may not reenter until called for by the Union Order of Arrival Schedule.
Players should note that when 1/3v, 2/3v, Cav/2v, and Cav/3v move to exit the mapboard, they must move as quickly as possible via the designated routes to exit the map via the given entry hex.
Initiative Special Rules
Union initiative in the opening phases of the full battle game is subject to a number of special conditions. As mentioned above, 1/3v, 2/3v, Cav/2v, and Cav/3v can only roll for initiative to change their orders above on certain turns (namely: 9:00pm, 10:00pm, and 11:00pm, August 28th). Each division (the cavalry brigades are included in the 2/3v roll) may roll once on each of the indicated turns. If they do not succeed, they must comply with the orders above and leave the map. If they do succeed, however, all further restrictions and orders for the successfully rolling units are removed and they may, thereafter, roll for initiative normally. All other Union troops may use initiative normally.
Furthermore, any emergency retreats that may be conducted by Union units do not change any of the above orders, restrictions, or initiative rules. If such an emergency retreat causes the units to retreat off the mapboard, and those units are scheduled to arrive later in the game on the Order of Arrival, then they may re-enter the map normally at that time. Other units forced off the map in this way do not re-enter and remain off the game map for the rest of the game.
Straggler Recovery Special Rules
The Union troops which are required to leave the map and subsequently re-enter it, re-enter having regained any strength points they might have lost to stragglers during their earlier sojourn onto the map.
Historical Note
The Union command was extremely disorganized on the night of August 28th, and hence all the Union restrictions concerning initiative and movement. McDowell, for one, was actually lost during the night, and was unable to find any of his three divisions until morning. Should players desire, the Union player may ignore the initiative restrictions, and roll for initiative in any Command Phase he desires, which includes turn one. This option should be used when exploring alternatives to the historical battle.
Confederate Set Up
- T/LD/Lw B5.18; G/LD/Lw B8.17 ex B7.18; AP Hill, P/LD/Lw B10.14; B/LD/Lw B10.13; A/LD/Lw B11.14; F/LD/Lw B12.13; Stwl/J/Lw B20.06; 2/J/Lw B17.13; 3/J/Lw B18.06; Taliaferro, 4/J/Lw B21.05 ex B22.04; Ewell, T/E/Lw B19.08; L/E/Lw B19.09 ex B20.08; E/E/Lw B18.10 ex B19.10; H/E/Lw B17.10; Lwb B2.17, B21.06, B22.04, B17.11; Lwb (limbered) B14.12; Lwb(2, limbered) B13.13; 2xLw Supply on or adjacent to any other Lw unit; Lw HQ B19.05; Jackson B22.04; Stuart, R/Cav (mounted), Cavb(2, limbered) B19.04
Confederate Orders
- E/Lw, and J/Lw are to attack the Union 1/3v division on the Warrenton Turnpike, between the Groveton Road and the Pageland Lane, in order to control the turnpike and prevent the movement of Union troops eastward to join 1v Corps and PaR/3v. These troops may not attack south of the Warrenton Turnpike, but may enter its hexes, if desired. At nightfall, these two divisions must fall back to the Unfinished Railroad and defend that position along with LD/Lw.
- LD/Lw is to defend the Unfinished Railroad between the Groveton Road and Bull Run.
- R/Cav, and Cavb(2) are given the divisional goal of moving to Hay Market via the secondary road north of the Little Creek, and holding that town until the arrival of Lee and Longstreet. When these two forces are united, R/Cav and the battery are subject to the same orders as the Right Wing.
The Confederates are under no initiative restrictions, and may use initiative normally in all cases, during any Command Phase.
Scenario 6: Second Manassas (One Map Version)
This scenario is similar to scenario 5, in that it covers the full battle of Second Manassas, but does so on only one map. The Union player will find this version much more restrictive and difficult to play. Instead of making choices about where and when to fight the separate halves of Lee's army, the Union player is forced to make the same assumptions under which Pope labored, and try to crush Jackson before Lee appears. The Union player can do nothing to arrest Longstreet's progress, and will not even know exactly when the rest of the Confederate army will arrive. Historically, Pope thought that Jackson was alone, and turned a blind eye toward the threat of Longstreet until it was too late. In this scenario, the Union player has been placed under a series of restrictions that attempt to simulate this blindness.
- First Turn: 5:00am, August 29th.
- Last Turn: 8:00pm, August 30th (70 Turns).
- Artillery Ammunition: USA: 345 points; CSA: 290 points
- Only Map B is in use.
Set Up
- Union: Same as Scenario 2.
- Confederate: Same as Scenario 2, except for Stuart and R/Cav, who arrive according to the special CSA arrival rules for this scenario.
Orders: Orders for both sides are the same as Scenario 2.
Union Special Rules
The Union player may not deploy more than three infantry brigades south of the B33.xx hexrow. Units that enter from the south edge of the map must move north of this hexrow as soon as possible. Pope may not issue attack orders to any troops whose objective is not the attack of Jackson's command. If three or more Confederate Right Wing brigades become involved in fire combat with any Union forces in the same Confederate Fire Phase, these restrictions are no longer in effect.
Except for 5p Corps, as outlined below, no Federal unit may move south of the Warrenton Turnpike and west of Lewis Lane. Units may move west of Lewis Lane only if they are north of or on the Warrenton Turnpike. This condition is also applied to the three brigades mentioned above, and is also removed at the same time as and for the same reasons as that above.
The 5p Corps orders are changed from those given in the Order of Appearance. It arrives at the same time, at entry hex D. 5p Corps is ordered to move to the Pageland Lane, and then north to attack Jackson's right flank along the Unfinished Railroad. If it comes within 2 hexes of any CSA unit while still south of the Warrenton Turnpike, these orders are cancelled and the corps halts, defends in place, and awaits further orders. If forced to halt by these conditions, these troops, only, are exempted from the restrictions on Union troops south of the B33.xx hexrow, but the only orders that can be issued to 5p Corps is to either resume their original instructions or to move to the army HQ and await new orders. Unless otherwise contradicted by the above, the 5p Corps is still subject to all of the conditions described in the main body of the game rules.
Any desired Union Minor Variant may be used in this scenario, except for the 2v Corps, variation #1.
Confederate Special Rules (Scenario 6)
Instead of the regular Order of Arrival's listings, Longstreet's Right Wing may appear at the Confederate player's discretion, subject to the following restrictions. First, the Confederate player must roll two dice to determine the first turn on which these troops can appear.
| Dice | Longstreet can arrive at... |
|---|---|
| 2 | 9:00am, August 29th |
| 3 | 10:00am |
| 4 | 11:00am |
| 5 | 11:30am |
| 6 | 12:00 noon |
| 7 | 12:30pm |
| 8 | 1:00pm |
| 9 | 2:00pm |
| 10 | 3:00pm |
| 11 | 4:00pm |
| 12 | 5:00pm |
Once the arrival time has been determined, the Confederate player can bring Longstreet's Wing onto the map according to the following restrictions:
- A. On the turn indicated, Longstreet's Wing can arrive in column along the Warrenton Turnpike; or,
- B. One turn after that rolled, Longstreet can arrive in line or column along the west edge of Map B, at or within 5 hexes of the Warrenton Turnpike; or,
- C. Two turns after that rolled, the same as B except at or within 10 hexes of the Warrenton Turnpike; or,
- D. Three turns after, same as B except 15 hexes; or, (finally)
- E. Four or more turns after, same as B except anywhere along the west edge of Map B.
Note: A/Rw and all the units appearing at 11:00pm, August 28th, do not arrive as indicated above with the rest of Rw. Instead, these units may appear on or after 4:00am August 30th, on the Warrenton Turnpike. These units may be held off-map, at the CSA player's option.
It is entirely up to the Confederate player which of the above options he uses, and he may bring Longstreet on at any time he desires (as long as it is on or after the turn rolled for above.) The CSA player may elect to bring on all, some or none of these troops on any given turn, subject to the dice roll, of course. The dice roll should be kept secret from the Union player.
On the first turn after three or more brigades from Longstreet's Wing attack any Union units, Lee may make a panic demand on Pope with an automatic modifier on Pope's status of -1. Note that this modifier is applied to Pope's status itself and not to any die roll. Pope's status then remains at this lowered level, to be adjusted later in the game in the normal way. This demand is counted as one of Lee's allotment of Panic Demands. It is not required to be used.
If the CSA player chooses to use the Hill's Provisional Corps option, add 5 turns to their arrival times. They, then, appear following the same rules as Longstreet's Wing as listed above, with the same options. They do not make the time dice roll, but adjust their regular arrival time (+5 turns as mentioned above) to fit whatever deployment option the CSA player picks.
If, when the CSA player attempts to bring on Longstreet's Wing, he finds the entry hexes blocked by Union troops, he can set up Map A, and use the last 5 hexrows along the east edge of Map A to set up and move his troops onto map B using normal movement. The set up zone allowed Longstreet is 5 hexes deep and a width equal to that allowed by the above deployment/entry time option. Therefore, if he is allowed to enter at or within 5 hexes of the Warrenton Turnpike, the entry zone would be 11 hexes wide and 5 hexes deep.
On Map B, the small portion of hex B35.00 is considered to be playable and is connected by road to both B35.01 and B34.00.
Historical Notes: The Second Bull Run Campaign
In the spring of 1862, the cause of Southern Independence seemed close to extinction. Between February and April, Union armies in the West advanced their lines from the Ohio River Valley to Northern Alabama and Mississippi, while George B. McClellan's massive Army of the Potomac transferred its base of operations to the Virginia Peninsula and threatened the Confederate capitol at Richmond. The South's great hope in the West, General Albert Sidney Johnson, was killed in the bloody battle at Shiloh. His counterpart in the East, General Joseph E. Johnston, had lost the confidence of President Davis through constant quarrelling and his seemingly endless retreats. However, in a few short months, the Rebel fortunes would be completely reversed, both East and West.
Military history has focused on this reversal, especially in Virginia, where Confederate success prolonged the Civil War into 1865 and gave birth to a military legend, the Lee-Jackson team. At the end of May, 1862, General Robert E. Lee replaced Joseph Johnston at the head of the Confederate army in front of Richmond, when the latter commander was wounded at the Battle of Seven Pines. Thomas J. "Stonewall" Jackson rose to prominence at the same time, as he began a campaign in the Shenandoah Valley that would be studied endlessly by soldiers and students of military history as one of tactical genius. Jackson succeeded in paralyzing the Union troops in Northern Virginia with no more than 20,000 men, frightening the Lincoln government in Washington and halting operations of 50,000 Federals. McClellan, who expected the support of these troops during his campaign to take Richmond, was left unsupported.
Lee assumed command of the Confederate forces with aggressive determination. Initially, he embarked on an extensive plan of building defensive works in front of the Southern Capitol, earning the derisive nickname of "The King of Spades" from his troops, who resented being put to work as common laborers. However, Lee also renamed the Southern forces the Army of Northern Virginia, signifying his intention to return the seat of war to that locale.
When his defensive works were ready, Lee prepared his counterstroke. First, by gathering troops from North Carolina and recalling Jackson's hard marching forces, he strengthened his army to 80,000 men, which opposed the 100,000 Federals under McClellan. The Federal army sat astride the Chickahominy River, and Lee planned to crush it with a combined frontal and flanking attack on McClellan's exposed right. Jackson was to provide the flanking force, by using railroads and forced marches he was to concentrate his troops with Lee's on the eve of battle.
These battles happened the last week of June, 1862, and became known as the Seven Days' Battles. The fighting was fierce, but McClellan escaped destruction, due mostly to poor Confederate coordination and an unusual tardiness on Jackson's part throughout the week. McClellan struggled to change his supply base from the York to the James Rivers, in the face of violent Confederate attacks, which finally ended on July 1st at Malvern Hill with a bloody Confederate repulse. The week cost 20,000 Rebel and 15,000 Union casualties. McClellan, believing he faced 200,000 enemy troops, licked his wounds and continually demanded reinforcements from Washington.
President Lincoln, frustrated by McClellan's caution, had made two changes in the Federal command structure which altered the course of the campaign. First, Lincoln had brought Major General Henry W. Halleck from the West to assume the command of all Federal forces, East and West. This post had been left vacant since McClellan was removed from it before the beginning of the Peninsular Campaign. Secondly, Major General John Pope, another Westerner, was given command of all Union forces in Northern Virginia. These two new men, it was hoped, would give the Union forces the unity of command that had been previously lacking.
After McClellan's defeat in the Seven Days, Halleck decided the best course of action was to unify the two Union forces: the Army of the Potomac and Pope's newly created Army of Virginia. Pope also wanted to establish some kind of tactical cooperation, but McClellan still did not move. While Pope concentrated his troops in and around Fredericksburg, the "Young Napoleon" remained inactive on the Peninsula.
The Confederates were not, however, so obliging. General Lee, recognizing the danger inherent in Pope's activities, decided to defeat the smaller Union force before the two Union armies could unite against him. At the beginning of August, once the Army of Northern Virginia had recovered from it's bloody losses in June, Jackson was sent north with three divisions to operate against Pope. On August 9th, Jackson collided with one Union corps under Major General Nathaniel Banks. Banks, with 9,000 men, attacked Jackson's 24,000 Confederates and was repulsed with 25% losses. Jackson, for his part, conducted a confused battle, and the day ended indecisively.
Meanwhile, Lee, now convinced that McClellan was no longer a serious threat to Richmond, left three divisions to cover the Capitol and took the rest of the army north to join Jackson. By August 15th, Lee had concentrated his army at Gordonsville, which was now over 50,000 men strong and divided it into two provisional corps (called "wings") under Jackson and Longstreet. The Rebel commander decided to defeat Pope's Federals, now numbering some 52,000 troops, before McClellan could send large numbers of reinforcements.
There now began a campaign of extensive maneuver between the Federal and Rebel forces. Lee attempted to flank Pope to the north, but the Union General used the Rappahannock and Rapidan Rivers to good advantage, and blocked each of Lee's flanking attempts. General Halleck, in Washington, repeatedly attempted to recall McClellan from his base on the James, but the Army of the Potomac commander continued to delay. Finally, McClellan did embark some troops on transports and sent them to Pope's aid.
Lee, with his initial strategy foiled, now decided on a bolder course of action. Mindful that McClellan was beginning to move, Lee sent Jackson's entire corps on a march that would place 24,000 Confederates in Pope's rear, and capture the enormous Union supply depot at Manassas Junction. Jackson departed on August 25th, and by the 27th was directly between Pope and Washington D.C. After pillaging the Federal supplies at Manassas, Jackson took up a defensive position northwest of the old First Manassas battlefield, along an unfinished railroad right of way. The position was a strong one, with Jackson's left anchored by Sudley Mountain and his right extended to link up with the rest of the Rebel army approaching from Thoroughfare Gap via Gainesville.
Pope now began to show signs of confusion. The 3rd and 5th Corps had reached him from McClellan's army, as well as the 9th Corps from coastal North Carolina. Unfortunately, he had lost track of Jackson, and issued a series of conflicting orders attempting to locate the rampaging Rebel column. The only net effect of these instructions was to irritate and confuse his subordinate corps commanders, without pinning down the position of the enemy.
The actual situation was quite favorable to the Union army. McDowell's strong corps of 18,000 men was located between Jackson and Thoroughfare Gap, the speediest route available for Lee to reunite his army. These Federals were in an ideal position, defending on favorable ground, to hold off Lee while Pope's other five corps (those of Sigel, Banks, Porter, Heintzelman, and Reno) of about 50,000 men concentrated to destroy Jackson's Rebels. Unhappily for the Union cause, and Pope's career, the Union commander was badly mistaken in his impression of the situation. Pope believed Jackson had 50,000 men, not 20,000, and was retreating to the northwest.
Jackson, in the meantime, had become impatient with Pope's blundering. On the evening of the 28th, when Brigadier General Rufus King's division, of McDowell's Union Corps, marched up the Warrenton Turnpike in front of Jackson's concealed position, Jackson attacked. This action was to become known as the battle of Groveton or Brawner's Farm, and one Union brigade had their first taste of battle here. This was Brigadier General John Gibbon's brigade of Wisconsin and Indiana men, soon to become famous as the Iron Brigade. These four regiments, plus two from Abner Doubleday's brigade, fought two of Jackson's three divisions, engaging in a close range action that lasted almost two hours.
Again, this action produced no concrete result, other than a couple of thousand casualties. Nevertheless, Pope took this fight to mean that Jackson was indeed retreating, and that King had engaged his rear guard. At last, Pope was sure he had found the enemy, and began concentrating all his available troops on Jackson's position. Unfortunately, Pope ordered McDowell's Corps to concentrate on blocking Jackson's supposed retreat route west along the Warrenton Turnpike, instead of holding the Thoroughfare Gap to prevent the rest of Lee's army from interfering with Jackson's destruction. Even this order was not carried out, because McDowell spent the night of the 28th lost between Manassas and Gainesville. Without superior leadership, McDowell's divisions retreated to Manassas, leaving the road between Lee's two wings completely clear. As a final straw, a Union cavalry dispatch reporting the arrival of Longstreet's Confederates at Gainesville was not forwarded to Pope due to McDowell's disappearance.
On the morning of the 29th, Pope's plan began to unfold. Union forces began to arrive on the field from Centerville to the east, and from Manassas to the south. Throughout the morning, Major General Franz Sigel's Corps launched a series of piecemeal attacks on Jackson's line, with one or two brigades at a time. This fighting made little impression on Jackson's positions, succeeding only in wearing down the Union forces that were committed. By midday, Sigel was moved back to rest, and was replaced by Heintzelman's 3rd Corps from the Army of the Potomac.
While Pope was wasting time with these fruitless assaults, Lee and the rest of the Confederate army arrived. Longstreet reported that by 10:30am, the head of his column reached Jackson's right flank, and that by noon, the Rebels had four more divisions in line astride the Warrenton Turnpike. Pope had, by then, directed another Union force, Major General FitzJohn Porter's 5th Corps, to advance and attack Jackson's flank across the very ground Longstreet now occupied. Pope, of course, was still under the impression that Longstreet was a long distance off, and Jackson was still fighting alone. Porter, with only 10,000 men, declined to attack the 30,000 Rebels positioned to his front, a decision that caused Pope to court-martial him after the battle.
The afternoon's action was a replay of the morning, with more Union piecemeal attacks until about 5:00pm. Finally, when yet another Federal corps (Reno's) added its weight to the assault, the Union troops succeeded in pushing back Jackson's left, out of the railroad grade. Jackson retook the ground with the help of his reserves, mainly due to a lack of support sent to the forward Union troops.
Throughout the day, Lee made several suggestions to Longstreet that the latter general attack to relieve the pressure on Jackson's weary line. Longstreet was reluctant, realizing such a move would expose his own flank to the Union force under Porter that had, so far, remained inactive. In addition, Pope still had many Federal troops unengaged, which could easily block such a thrust. Lee apparently agreed, and did not actually order the advance. In the end, Jackson held, and the only action taken by Longstreet was to send Hood's two brigades forward at dusk for a reconnaissance in force. After some sharp fighting in the twilight, Hood returned to his starting line.
Amazingly enough, Pope, by all accounts, was still unaware of Longstreet's presence on the field. Indeed, due to Hood's retirement and some of Jackson's forward troops pulling back to stronger positions, Pope convinced himself that the Rebels were in full retreat, and sent a wire to Washington proclaiming a great victory. The Union commander now prepared to pursue his "defeated" foe on the 30th.
The morning of the 30th passed bloodlessly, but about noon Pope began his pursuit. Porter's Corps was moved over to lead the advance, to be supported by Heintzelman and McDowell's commands. The rest of the Union army was to follow. When this force stepped off, it presented quite a spectacle, with columns of Federal troops advancing over the Manassas Plain in parade ground order. Almost immediately, however, the Union men collided with Jackson's main line, which had not retreated. The battle was renewed with a vengeance, and Jackson was hard pressed. Jackson sent a message to Lee and Longstreet to provide support for his troops, and they responded quickly. Longstreet realized that, before his infantry could come to Jackson's aid, Rebel artillery could help much more rapidly. Accordingly, S.D. Lee's battalion of cannon was moved to fire on Pope's left flank. They shattered several Union attacks.
Pope still seemed to be unaware of Longstreet's presence. The Union commander now committed his last remaining reserves to the attack Jackson's position, thus leaving almost no troops to guard his exposed flank. Lee was now presented with an almost unbelievable opportunity. Longstreet's patient waiting had paid off. Lee ordered the attack, and Longstreet was proud to report that even as Lee spoke, his troops were advancing. Five Rebel divisions, 30,000 men, slammed into Pope's open flank; the Union commander was no longer in the dark concerning the location of the rest of the Confederate army. Reynold's division of Pennsylvania reserves was all that was initially available to hold off Longstreet's attack. These troops fought hard, but were too few to save Pope's army from their leader's folly. As the entire Union line crumbled, Pope ordered a general retreat to Centerville, where fresh Union troops waited. The Federals fell back in confusion, and several thousand stragglers clogged the roads. The retreat did not become a rout, thanks to several Federal commands that fought desperate delaying actions. The final stand was made on Henry House Hill, and as night fell the Union army made its escape.
The weather also intervened, as rain poured down on the night of the 30th. The Confederates broke off pursuit, and the Union army retreated to Washington to reorganize.
It was this campaign which launched Lee's amazing reputation. On the 30th of June, the Rebels were locked in a desperate struggle to save Richmond, and by the 30th of August, they were threatening the Federal Capitol instead. The month of September would see Confederates invading the North. McClellan managed to stop Lee at Antietam, but allowed his opponent to escape intact. Over the next year a procession of Union Generals would suffer two major defeats. Not until Gettysburg, in July of 1863, would the Rebels be dealt a serious blow. Finally, in 1864, Lincoln would call on another successful western commander, U.S. Grant, to lead the Union to final victory.
The campaign from the Union side had been a disaster. Pope attempted to justify his loss by claiming treachery by McClellan and his friends in the Army of the Potomac. Certainly, McClellan's supporters did little to actively help Pope. Porter was cashiered from the army for his delays and disobedience to orders. McClellan, himself, viewed Pope as a dangerous rival, instead of a fellow Federal commander, and did much to delay the arrival of his 2nd and 6th Corps on the Manassas battlefield. Both of these commands were available near Washington by the 27th of August, but never reached the battlefield because of petty delays over transportation. In the final analysis, it was the Confederate quality and unity of leadership which triumphed over the much larger but mutually antagonistic Union armies.
Designer's Notes
When I first approached the subject of Second Bull Run, my initial thought was one of perplexity. The salient feature of this battle has to be the confusion which permeated the Union leadership. Pope stubbornly refused to accept the presence of Longstreet on the field until forced to by the defeat of his own army. How does one recreate some of this confusion without hamstringing the Union player, and yet still create an enjoyable game for both sides?
Thankfully, the Command system used in this series lends itself somewhat to recreating this confusion. However, I felt another layer of tactical thinking could be revealed here. Pope thought, mistakenly, that Longstreet wasn't on the field because Ricketts' division had successfully repulsed the Rebels at Thoroughfare Gap. Unfortunately for Pope's future military career, this was not the case, and Longstreet had succeeded in clearing the Gap by the night of the 28th. However, once he lost the Gap, Ricketts did not attempt any more delaying tactics, but retreated to join the rest of the Federal forces. What if Ricketts had, instead, chosen to delay at Gainesville? Hatch's division was close by, and could have come to Ricketts' aid. Furthermore, Pope had actually planned to make a greater effort to keep the Rebels divided, as borne out by his original orders to Porter's 5th Corps, telling him to proceed to Gainesville and block the roads linking Longstreet and Jackson. In reality, Longstreet easily won the race, linking with Jackson before Porter got near Gainesville. Nevertheless, the possibilities inherent in the Union position on August 28th and on the morning of the 29th needed to be investigated.
The result of all this theorizing was the two map game, covering both the original battlefield and the Gainesville-Hay Market area. In the historical game, I placed enough restrictions on the Union player to make any decision to stand at Gainesville until Porter arrives a chancy proposition. With luck, the Union player can hold off Longstreet with a corps while the rest of the Federal army turns on Jackson. This was Pope's original plan, and highlights some of the risks Lee took when he divided his army. The more I looked at this situation, the more I became convinced that the game I was to design must include this possibility and that, without this extra map area, players would be cheated out of logical historical alternatives, or artificially forced to fight the battle the way Pope did, like it or not.
Once this decision was reached, the rest of the design work could proceed. The strengths and numbers were fairly easy to assemble, there are only a few cases where the brigade strength's weren't easily deduced. As for placement of troops at the start of any given scenario, my task was greatly simplified by using the volume by John Hennessy, entitled Historical Report of Troop Movements, consisting of 16 maps of the battle, with supporting text. On the whole, it was invaluable in setting up the scenarios.
At the start of each scenario, I have tried to recreate the orders that the various corps and divisions labored under, without becoming excessively complex. In some cases, the orders I ended up writing were only rough approximations of the original instructions. The historical orders at the start of the full battle game are the most onerous to the Union player, but I think they reflect in some measure the severe confusion that was in the Union senior command at the start of the battle. Historically, the three divisions of McDowell's Corps (Ricketts, Hatch, and Reynolds), while all present on the field almost from the start of the battle, had little or no knowledge of the positions or orders of each other. The Union Corps under Sigel, watched the Battle of Brawner Farm without doing a thing to help, primarily because Sigel had no idea who was doing all that fighting in the distance. As a topper to this disorganization, McDowell himself spent most of the night of the 28th-29th lost in the woods, looking for his command.
The optional troops were another interesting game design choice. By rights, all of the Union options should have reached the battlefield by the 30th at the very latest. The failure of Halleck in Washington to hurry the two corps from McClellan's army forward was inexcusable, in my mind, while Pope's own failure to bring on Bank's Corps was foolish. Over 20,000 valuable Union troops played no role in the desperate fighting, a situation that did much to ensure the survival of Jackson's Rebels until Lee could arrive. The Confederate option, the three divisions under D.H. Hill, is a little more far-fetched, but I chose to include them for play balance and excitement. They did arrive late on the 31st, and could have had a part in the battle.
On the whole, I tried to remain faithful to the tenants of both In Their Quiet Fields and Thunder at the Crossroads, attempting to pose valid historical questions regarding the conduct of the battle. I feel that this game has succeeded, especially in that it provides the viable maneuver areas just outside the actual battlefield which are usually ignored. I believe the real key to winning this battle and the game is the effective use of this western map area.
Finally, I should say something about victory. In the end, neither commander accomplished any lasting results with this battle. Lee did manage to send Pope reeling back to Washington to regroup, but when the Confederates invaded Maryland a few days later, many of the Federals defeated at Second Bull Run took the field in pursuit, and proved themselves still combat effective at Antietam. Even though Lee fought a sloppier set of battles in the Seven Days, the results of that campaign were greater. McClellan away from Richmond and transferring the war northward. In the end, Lee won a major Confederate victory (speaking in game terms) at Second Bull Run. Pope, for his part, allowed great opportunities to slip away. Jackson's survival was at great risk early in the battle, if only the Federal commander had been more aggressive in holding off Longstreet while using some of the idle Union troops to concentrate attacks on Jackson. I hope this game helps the players answer some of these "what-ifs".
Union Player's Notes
The Union player has a difficult job in this game. Without using any optional troops, the Union force isn't all that much stronger than the Confederate. Additionally, some of the Union corps are not very well suited to an offensive role, as they will suffer from corps attack stoppage quickly. The Union, however, has certain advantages. The Confederate army is separated, and the Union player should do his utmost to maximize this situation. Jackson is alone for the first part of the battle, and the Federals should try to concentrate their attacks on him. Ideally, the Union player should try to delay the arrival of Longstreet as long as possible, while attempting to crush Jackson.
While I will not try to dictate any specific plans to the player, I do feel the first few turns will be more critical to the success of Union arms than is the case in a lot of games. Failure to take control of the tactical situation early on will spell a long game of frustration ahead. The Federal leader must gamble early, in order to get the big pay-off in the end. For the most exciting game, I recommend playing the scenario 5 version of the full battle rather than scenario 6. Scenario 6 is designed to examine Pope's failings more than allow the Union player a full range of choices.
Finally, I hope the Union player gets a chance to employ the various optional forces included in the game. These troops can change the balance of the game dramatically, giving the Union player a great opportunity to shatter the Southern forces. Lee gambled heavily on Pope being too confused to properly use his assembled strength, and historically it paid off. With all of these troops in play, the Union army will heavily outnumber the Confederates, and the Rebel player will be able to do little more than absorb punishment and wait for Federal mistakes.
Confederate Player's Notes
The Confederate player enjoys the advantage of reacting to Federal moves, rather than carrying the burden of the offensive himself. Since the Federals have a small numerical advantage, the Confederates are best served by adopting Lee's historical policy of allowing the Union troops to wear themselves out, and then follow up with a counterattack.
Jackson starts out isolated in this game, but fortunately his wing occupies a defensive position which is very strong. Using the trench/berms of the Unfinished Railroad, Jackson can defend against all except the strongest Federal assaults, thereby buying time until Lee and Longstreet arrive.
When Jackson exploded in the Union rear, however, Pope became badly confused, and didn't recover his grasp of reality until his army was swept from the field on August 30th, by which time it was too late to avoid disaster. Only the presence of three uncommitted corps from the Army of the Potomac saved the Union army from total defeat.
Confederate Personality Sheet
Robert E. Lee, General Commander, Army of Northern Virginia
- Rating: 4
- Starting Army Status: 3
- Anti-Initiative for Lee and his Wing Commanders: 0
Background: The Second Manassas campaign proved to the world that Robert E. Lee was not afraid to gamble on his subordinate's abilities. Violating one of the primary tenets of military theory (dividing his army in the face of the enemy) by sending Jackson off around Pope's flank, Lee nevertheless managed to win a smashing victory over the Federal forces which confronted him. While it is doubtless that Lee benefitted from the fortuitous ineptitude of Pope at critical moments in the battle, the Rebel commander's trust of, and skill in using, his wing commanders paid handsome dividends. Jackson, too, greatly redeemed his reputation, which had been damaged somewhat in the Richmond fighting. Perhaps the only ill effect of Second Manassas (aside from the loss of thousands of lives) was that Lee, buoyed by his success using divided tactics here, scattered his forces severely in Maryland in the next month, which resulted in the near-run Battle of Antietam. In final estimation, however, Confederate leadership proved ultimately superior to that practiced by the Union.
Panic Rolls: # of Divisions Wrecked (with optional troops)
| # of Divisions Wrecked | 0-2 | 3-4 | 5-6 | 7-8 | 9 or more |
|---|---|---|---|---|---|
| Status of 2, roll | 13 | 12 | 11 | 10 | 9 |
| Status of 1, roll | 12 | 11 | 9 | 8 | 7 |
or more on two dice to panic.
Modifiers:
- When using Hill's Provisional Corps, shift one column left if that corps has no wrecked divisions.
- +1 to the dice each for Longstreet and/or Jackson if they are killed or wounded.
- +2 to the dice if Lee is killed or wounded.
On Panic: If Lee panics, he has determined that the army must retreat behind the Bull Run Mountains in order to avoid destruction. All Confederate troops must exit the map via either entry hexes A or B. If Jackson is unable to execute these orders due to the position of Union forces, the Confederate Left Wing may exit the map via hexes A1.12 or A1.15. If the latter option is used, the Union player is awarded 5 extra victory points for keeping the Rebel army divided. These orders are automatically issued by Lee on the first Command Phase after panic is triggered, ignoring order costs. These orders are never lost and automatically accepted by the receivers.
Panic Demands: Lee may make three (3) panic demands on Pope during scenarios 5 or 6, but never before Pope is actually on the game map. Two panic demands are available in scenario 4, and one is available in either scenario 2 or 3. No panic demand is available in scenario 1.
Union Personality Sheet
John Pope, Major General Commander, Army of Virginia
- Rating: 1
- Starting Army Status: 3
- Anti-Initiative:
- for Heintzelman, Franklin, and Sumner: -1
- for McDowell, Sigel, Reno, and Banks: 0
- for Porter: -2
- McDowell is the only corps commander with an anti-initiative and it is: -1
- See Game Rules for a complete explanation of these anti-initiative ratings.
Background: Pope arrived from the West to coordinate the various Union forces left behind to guard Washington when McClellan embarked on his Peninsular Campaign. Once Lee was satisfied that McClellan had been neutralized, he turned his attentions to Pope's fledgling Army of Virginia. During the initial stages of the Second Manassas campaign, Pope conducted operations well, avoiding several moves by Lee to out flank him.
Panic Rolls: # of Wrecked Div's (Used when Opt troops are)
| # of Wrecked Div's | 0-3 | 4-6 | 7-8 | 9-10 | 11-12 | 13-15 | 16 or more |
|---|---|---|---|---|---|---|---|
| Status of 2, roll | 12 | 11 | 10 | 9 | 8 | 7 | 6 |
| Status of 1, roll | 10 | 9 | 8 | 7 | 6 | 5 | 4 |
or more on two dice to panic.
Modifiers:
- When using the optional troops of 2v, 2p, and/or 6p Corps; for each optional corps in play that has no wrecked divisions, shift one column to the left on the above table. No more than two such shifts may be applied, no matter if all three optional corps qualify.
- +1 to the dice roll if two or more of the following leaders are killed or wounded: Heintzelman, Reno, or McDowell.
- +2 to the dice roll if Pope is killed or wounded.
On Panic: If Pope panics, he has determined that a retreat to the Washington defenses is necessary to save the army. All Union troops must exit the map at entry hex F. Troops may use entry hex E, as an alternate if they cannot exit at F for some reason. Pope automatically issues these orders without paying costs, they are never lost, and are automatically accepted when received.
Panic Demands: Pope may make two (2) panic demands on Lee in scenarios 5 and 6, but may not use them until Lee enters the map. In scenarios 2, 3, and 4, Pope may make one panic demand on Lee, after the latter enters the map. No panic demands are available in scenario 1.
Scenario Starting Strengths
Before starting any scenario, use the chart below to determine the beginning strength of all units. The numbers given below represent the starting strength of that unit for the specified scenario. For instance, 4/1/3v starts scenario 2 with a strength of 12. Therefore, the player must cross off eight 0's before starting.
All other brigades and all batteries begin each scenario at full strength.
Union
| Unit | Scenarios 1 & 5 | Scenarios 2 & 6 | Scenarios 3 & 4 |
|---|---|---|---|
| 1/1/1v | 16 | 16 | 15 |
| 1/2/1v | 10 | 10 | 8 |
| 1/3/1v | 12 | 12 | 11 |
| 2/3/1v | 14 | 14 | 12 |
| Ind/1v | 20 | 20 | 17 |
| 1/1/3v | 15 | 15 | 8 |
| 2/1/3v | 14 |
Confederate
| Unit | Scenarios 1 & 5 | Scenarios 2 & 6 | Scenarios 3 & 4 |
|---|---|---|---|
| H/H/Rw | 20 | 20 | 17 |
| L/H/Rw | 18 | 18 | 17 |
| L/E/Lw | 21 | 17 | 17 |
| T/E/Lw | 12 | 9 | 8 |
| H/E/Lw | 19 | 19 | 18 |
| E/E/Lw | 20 | 19 | 19 |
| Stwl/J/Lw | 8 |
Union Order of Appearance
| Time | Entry Hex | Orders | Units |
|---|---|---|---|
| 7:00pm, 28th | A | 1 | Ricketts, 2/3v, 2x3vb |
| 7:30pm | A | 2 | Cav/2v, Cav/3v |
| 5:00am, 29th | E | 3 | McDowell, 3v HQ, 3v Supply |
| 7:30am | E | 4 | Cav/1v |
| 9:30am | F | 5 | Kearny, 1/3p |
| 10:30am | F | 5 | Heintzelman, Hooker, 3p HQ & Supply, 2/3p, 3pb |
| 11:30am |
Order Explanations:
- Move along road to Gainesville and defend. See also special orders for Scenario 5.
- Move along road to Hay Market and defend. See also special rules for Scenario 5.
- Move to join PaR/3v, and carry out orders given to PaR/3v in either scenario 5 or 2. If any other 3v troops are present with PaR/3v (see scenario 5) these troops are also subject to PaR/3v's orders.
- Move to join corps HQ.
- 3p Corps is to attack the CSA line in order to capture the Unfinished Railroad, between Bull Run and the Groveton Road (inclusive).
- Move to occupy Gainesville, and defend it from any CSA advance. If the 5p Corps comes within 2 hexes of any Confederate unit, this order is automatically cancelled, the corps defends in place and awaits further orders.
- Join in attacking with 3p Corps. Attack the Unfinished Railroad between Bull Run and hex B14.15 (inclusive).
- Move to hex B38.18 and await further orders. See Special Note below.
- Move to Bald Hill (B28.23) and await further orders. See Special Note below.
- Move to army HQ and await orders. See Special Note below.
- Move to join 5p Corps and follow their orders.
- Move to 3v Corps HQ and await further orders. See Special Note below.
Special Note: When playing, 1/3v, 2/3v, Cav/2v, and Cav/3v may not be able to enter for the second time due to earlier orders or initiative use. They may only enter the map for this second time if they have previously exited the map according to the special rules given them in Scenario 5. In other scenarios, these troops are subject to the Order of Appearance and orders above.
Optional Union Arrivals
| Time | Entry Hex | Orders | Units |
|---|---|---|---|
| 11:00am, 29th | C | 1 | 2v Corps (all, variation #1) |
| 12:00 noon | F | 2 | K/9p |
| 2:00pm | E | 3 | 2v Corps (all, variation #2) |
| 9:00pm | F | 3 | 6p Corps (all) |
| 8:00am, 30th | F | 3 | 2p Corps (all) |
| 11:00am | E | 3 | 2v Corps (all, variation #3) |
Optional Orders Explanations:
- Move to Gainesville and defend, with any other Union forces there.
- Same as the rest of 9p Corps.
- Move to army HQ and await further orders.
The exact arrival time of the 2v Corps is subject to the exact variant chosen by the Union player, each has a differing cost in victory points. See the Union Minor Variants section for details.
Confederate Order of Appearance
| Time | Entry Hex | Orders | Units |
|---|---|---|---|
| 8:30am, 29th | A | 1 | Hood, Kemper, H/Rw, K/Rw, E/Rw, Rwb |
| 9:00am | A | 1 | Lee, Longstreet, Jones, Wilcox, A of NVa HQ, Rw HQ, J/Rw, W/Rw, 2xRwb |
| 11:00am | G | 2 | L/Cav |
| 11:00pm | A | 3 | Anderson, A/Rw, A of NVa Supply, Rwb, Rwb(2) |
Optional Arrivals:
- Variation #1: 6:00pm, 29th; B; 4; Hill's Provisional Corps (all)
- Variation #2: 9:00am, 30th; B; 4; Hill's Provisional Corps (all)
Order Explanations:
- Longstreet is to move to join Jackson's command, and assume a defensive position along Jackson's right flank. Units can either enter the map at entry hex A in column, or wait one turn, and enter in line within 10 hexes (inclusive) north or south of A along the west map edge of Map B. If enemy troops are encountered before reaching Jackson, Longstreet must attack through them in order to reach Jackson.
- L/Cav is to move to Jackson's left flank and assume a defensive position around Sudley Church.
- Move to Rw HQ and await further orders.
- Move to army HQ and await further orders.
Loss Charts
The printed loss charts list each unit's morale, strength, fire levels and commander. In the Fire Levels column each 0 is a casualty box, and a "/" separates the boxes as printed. The Margin column reproduces the small tracking boxes printed beside certain units, as they appear on the sheet. The loss charts print each side's units twice in the booklet (once within the rules pages and once as a removable copy); the table below is the single transcription.
Union Loss Chart
| Unit | Morale | Str | Fire Levels | Commander | Margin |
|---|---|---|---|---|---|
| 1/1/1v | C | 16 | AB 00000 A 000/00 B 000 C 000 | Stahel | |
| 2/1/1v | B | 10 | A 0000 B 0/00 C 000 | McLean | 1/1v 0/0 |
| 1/2/1v | B | 10 | A 0000 B 0/00 C 000 | Koltes | 2/1v 0/ |
| 1/3/1v | C | 12 | AB 0 A 00000/ B 000 C 000 | Schimmelfennig |
Confederate Loss Chart
| Unit | Morale | Str | Fire Levels | Commander | Margin |
|---|---|---|---|---|---|
| A/A/Rw | A | 25 | AAB 0000 AA 00000 AB 00000 A 0/0000 B 000 C 000 | Armisted | |
| M/A/Rw | B | 22 | AAB 0 AA 00000 AB 00000 A 0/0000 B 000 C 000 | Mahone | |
| W/A/Rw | B | 18 | AA 00 AB 00000 A 000/00 B 000 C 000 | Wright | A/Rw 00/0 |
| T/J/Rw | B | 10 | A 0000 B 0/00 C 000 | Toombs |