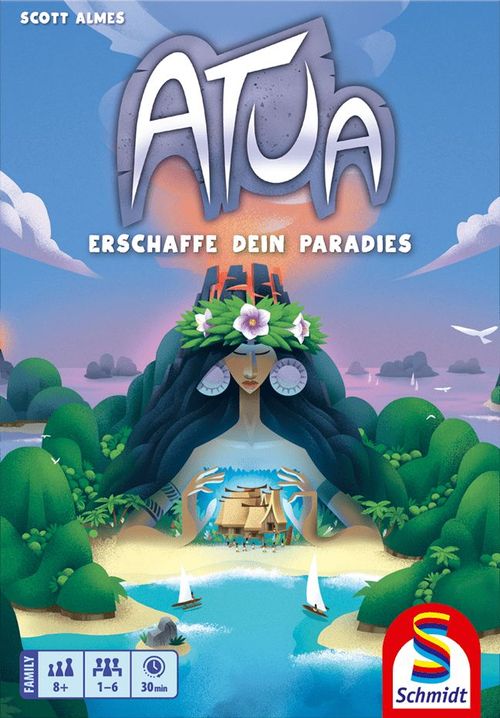
Atua
Atua Rulebook
Table of Contents
Table of Contents
Components
- 58 island cards
- 6 village cards
- 1 solo game card
- 6 resident tiles
- 10 fate tiles
- 36 coconuts
- 1 volcano ruler
- 40 double-sided scoring sheets
Setup
For your first games of ATUA: We recommend playing without resident and fate tiles. So skip steps 4 and 5 of the setup.
For the solo game: First keep reading here, then read the additional rules at the end of the rulebook.
- Everyone receives 1 random village card (recognisable by the symbol on the back of the card). Lay your village card face up in front of you, and make sure there is still a little space left all around it. This is the first card of your island. All remaining village cards go back in the box.
- Shuffle the island cards. Lay 4 island cards face up in a row.
- Form 3 piles A, B and C of island cards and place them to the right of this row. Pile A is closest to the row and pile C is farthest from it. The number of island cards in each pile depends on your number of players. Take them from the table below. Remaining cards go back in the box.
| Number of players | Pile A | Pile B | Pile C |
|---|---|---|---|
| 2 | 8 | 6 | 4 |
| 3 | 12 | 9 | 6 |
| 4 | 16 | 12 | 8 |
| 5 | 20 | 15 | 10 |
| 6 | 24 | 18 | 12 |
- Shuffle the resident tiles and give everyone 1 face down. Remaining tiles go back in the box. Place your resident face down in front of you.
- Shuffle the fate tiles and then take a number of tiles equal to your number of players plus 1 (e.g. 4 fate tiles if you play with three). Lay them face up on the table. All remaining tiles go back in the box.
- Everyone receives 5 coconuts. Remaining coconuts go back in the box.
- Take a scoring sheet and write your name at the top.
- Finally, place the volcano ruler ready. Now you can get started!
Goal of the Game
A game of ATUA lasts 9 rounds. The person who most recently set foot on an island begins. Play then continues clockwise.
Take a card from the row and add it to your island by placing it on one or more other cards already lying there.
During the game there are three interim scorings in which you determine your victory points. We call them harmony points. At the end of the game there is a final scoring.
Whoever of you has collected the most harmony points created the most wonderful island and wins the game!
Course of Play
On your turn you perform, in the following order, 3 mandatory actions and 2 optional actions. In rounds 4, 7 and 9 there is additionally an interim scoring in which you receive harmony points.
- Take an island card
- Expand the island
- Refill the row
- Buy a fate tile (optional)
- Play a resident (optional)
- Only rounds 4, 7 and 9: carry out an interim scoring
1. Take an Island Card
Choose 1 of the four island cards in the row. To take this card, you must place 1 of your coconuts on each card that lies to the left of it.
Example: To take the 3rd card of the row, you must place 1 coconut each on the 1st and 2nd cards.
Don't have enough coconuts? Then you cannot take this card and must choose another one.
The 1st card of the row is always free, since there are no cards to its left on which you could place a coconut.
If there are already coconuts on the card you take this turn, you receive them in addition to the card.
2. Expand the Island
Place the new island card on top of one or more other island cards already lying in front of you. On the first turn only your village card lies in front of you. Follow these 3 placement rules:
- Cover at least 1 symbol completely.
- Beach sections must be connected.
- Sea must not border mainland.
Cover at least 1 symbol completely: Place the new island card so that it completely covers at least 1 symbol. You may also cover several symbols with the same card. After placing, all symbols must be either completely visible or completely covered.
ATTENTION: The star in the middle of the village or of the volcano must not be covered.
Beach sections must be connected: If you add a beach to your island, each end of this beach must "stick out" from the island. Beach ends may border neither the mainland directly nor the sea.
Sea must not border mainland: If you add a sea section to your island, the water must not border the mainland directly. It must be separated from the mainland by a beach.
3. Refill the Row
After you have expanded your island, slide the open cards in the row to the left. Fill the space freed up at the far right with a new card. For this, draw 1 card from the pile closest to the row (pile A, B or C, depending on which round you are in).
If the last card of a pile has been added this way, this triggers an interim scoring. (The last card of a pile is always drawn by the person sitting to the right of the start player.)
4. Buy a Fate Tile (optional)
You may buy 1 fate tile by paying its cost in coconuts.
If you decide on this action, place the coconuts from your supply one at a time, from left to right, onto the island cards in the row. Then take one of the fate tiles and place it in front of you. You can only buy 1 fate tile on your turn.
If at the end of the game you have the majority in the category shown on the tile (this also applies in case of a tie), you receive the harmony points as indicated.
ATTENTION: Otherwise you lose some!
Each fate tile shows its cost, its category and its harmony points.
Fate tile texts as printed in the rulebook's illustrations (costs and category icons appear only as pictures):
- Receive 8 points or lose 5 points.
- Receive 4 points or lose 3 points.
- Receive 10 points if you have the majority in both categories, or 2 points if you have the majority in only one category. Otherwise lose 8 points.
- If you have the majority of totems (all types), receive 6 points. Otherwise lose 4 points.
- If you have the most beach cards, receive 6 points. Otherwise lose 4 points.
- If you have the most coconuts, receive 4 points. Otherwise lose 3 points.
- If you have the most volcanoes, receive 6 points. Otherwise lose 4 points.
5. Play a Resident (optional)
Turn your resident tile to its front side.
You immediately receive the harmony points shown at the bottom right of the resident tile, for pairs of symbols or cards in the row.
Enter the points in the resident row of your scoring sheet.
The symbols at the bottom left of the tile count from now on in addition to the symbols or coconuts in your supply.
ATTENTION: The coconuts only count as symbols for scorings. You do not receive coconuts that you can use for paying!
Resident tile texts as printed in the rulebook's illustrations:
- Add 1 canoe and 1 fish to your island. Receive 3 points for every 2 beach cards in the row.
- Add 1 huntress and 1 palm to your island. Receive 3 points for every 2 totems (of all types) in the row.
- Add 1 palm and 2 coconuts to your island. Receive 4 points for every 2 palms in the row.
- Add 3 fish to your island. Receive 2 points for every 2 fish in the row.
Example: You reveal Akroa. On the 4 cards in the row 5 birds can be seen. You immediately receive 6 harmony points (3 points for every 2 birds). For the rest of the game you count the two birds on Akroa itself as part of your island.
6. Interim Scoring
As soon as a pile is empty, an interim scoring takes place immediately. In it you receive points for harmony sources on your island. You may choose which sources you score and when. The 6 harmony sources and their scoring are marked green on the scoring sheet and are described in the table below.
Depending on which pile was emptied, the following rules apply to all players:
- Pile A was emptied = score 1 source out of all 6 available
- Pile B was emptied = score 2 of the 5 sources you have not yet scored
- Pile C was emptied = score the 3 remaining sources you have not yet scored
Note that before the first scoring you will each have played 4 cards, before the second scoring 7 cards, and before the last scoring a total of 9 cards.
As a reminder: each source can be scored exactly 1 time in the game.
As soon as you have all noted your harmony points on the scoring sheet, move the next pile closer to the row and play on.
Sources
Fisherman/Fish: Receive 2 points per pair of fisherman and fish. ATTENTION: If you have more fishermen than fish, you receive 0 points for this source!
Huntress/Bird: Receive 3 points per pair of huntress and bird. ATTENTION: If you have more huntresses than birds, you receive 0 points for this source!
Canoe/Palm: Receive 4 points per pair of canoe and palm. ATTENTION: If you have more canoes than palms, you receive 0 points for this source!
Coconut: Receive 1 point for each coconut in your supply and, where applicable, on your revealed resident tile.
Totems: Receive points according to the number of unique, different totems on your island.
| Different totems | 1 | 2 | 3 | 4 | 5 | 6 | 7 |
|---|---|---|---|---|---|---|---|
| Points | 0 | 2 | 4 | 7 | 11 | 16 | 22 |
ATTENTION: If you have 2 identical totems on your island, you may not use either of them for scoring!
Volcano/Village: Use the volcano ruler to measure the distance between the centre of each volcano on your island and the centre of your village. Each volcano can bring you up to 5 additional points. Then add up the points for all your volcanoes. (Example: "This volcano is worth 3 points.")
End of the Game and Final Scoring
After pile C has become empty and all of you have played your 9th island card, the interim scoring of your 3 not yet scored harmony sources takes place. Then the game ends and the final scoring follows.
Final Scoring
Add your harmony points for the 6 sources from the interim scorings.
In addition you receive points for your resident, (minus) points for your fate tiles, as well as the beach bonus and the coconut bonus, if applicable.
Points for resident: If you played your resident, you have already entered harmony points here.
Points or deductions for fate tiles: Add the plus or minus points for each of your fate tiles to your harmony points, depending on whether or not you have the majority in the categories shown on the tiles. In a tie you receive the plus points.
Beach bonus: Determine your longest beach (the one consisting of the most island cards). Whoever of you has laid the longest beach receives 5 additional harmony points. In a tie, all those involved each receive 5 harmony points.
Coconut bonus: Whoever has the most coconuts in their own supply (including the symbols shown on the resident cards) receives 5 additional harmony points. In a tie, all those involved each receive 5 harmony points.
Do you have the most harmony points? Congratulations, your island is in full harmony and you win the game!
In a tie, the majority of coconuts decides. If there is still a tie, you share the victory.
Solo Game
In this variant you can also play Atua alone. You compete against your virtual adversary "Tahuma".
Solo Setup
(The fate and resident tiles are not needed and stay in the box.)
- Place the solo game card in the middle of the table and then place 3 coconuts on the hut on the card.
- Shuffle the island cards and form from them 3 piles A, B and C of the following size: A = 16 cards, B = 12 cards and C = 8 cards. Place them next to the solo game card. There is no row of 4 face-up cards.
- Take 6 coconuts and the volcano ruler.
- Take 1 random village card and lay it face up in front of you.
- Take a scoring sheet. The first column is for you, the second for Tahuma.
Enter in the first field of Tahuma's column his starting score, depending on your desired difficulty level:
- Easy = 20 points
- Medium = 28 points
- Hard = 35 points
- Legendary = 42 points
(Tahuma's pile builds up during play, above the solo game card; the solo game card with its 3 coconuts lies in the middle; island cards are laid during play; piles A, B and C lie to the side.)
Solo Course of Play
-
Draw the top two cards of the current pile (A, B or C) and lay them face up under the solo game card.
-
Take 1 of them. Whenever you choose the left card, you must pay 1 coconut and place it on the hut. Can't pay? Then you cannot take this card. Whenever you choose the right card, you receive 1 coconut from the hut. If the hut is empty, take the card anyway, but you receive no coconut.
-
Then expand your island with the chosen card according to the usual rules.
-
The card you do not choose goes face down onto Tahuma's pile, which lies above your solo game card.
You may pay 3 coconuts to avoid this card being placed onto Tahuma's pile. If you do, discard the card and place the 3 coconuts on the hut.
-
As soon as a pile (A, B or C) is empty, carry out an interim scoring. You receive harmony points according to the usual rules. Then continue the game.
ATTENTION: Unlike in the normal game, you may also score identical totems. Simply count the total number of totems on your island, whether identical or different.
End of the Solo Game
The game ends as soon as pile C is empty. Carry out your last interim scoring and calculate your total score according to the usual rules. Then calculate Tahuma's total score.
Tahuma's total score: Lay all cards of Tahuma's pile face up in front of you. You do not have to assemble an island from them as you otherwise would. Calculate the harmony points of ALL sources taking ALL symbols into account.
Each source normally yields harmony points, but the following special rules apply:
- If Tahuma has more fishermen than fish, he receives points for half of the fishermen (rounded down) instead of receiving zero points. The same applies to huntresses and birds, and to canoes and palms.
- Tahuma scores totems as in the normal game (he only receives points for different totems; duplicate totems are not scored).
- Each coconut on the hut of the solo game card (Tahuma's supply) counts 1 point for Tahuma.
- If Tahuma has more volcanoes in his pile than you have on your island, he receives 7 harmony points. Otherwise his volcanoes bring him no points.
- For the beach bonus, count each of Tahuma's cards with a beach as a section of one connected beach.
- Ignore the coconut bonus. Then add the harmony points of all of Tahuma's sources and add them to his starting score (see the first field of his column). This gives you his total score.
Compare your total score with Tahuma's. Whoever has more points wins the game. In a tie, the majority of coconuts decides. If there is still a tie, you win.
Did you defeat Tahuma? Then you are ready for a new challenge with a higher difficulty level! (See point 5 of the solo setup.)