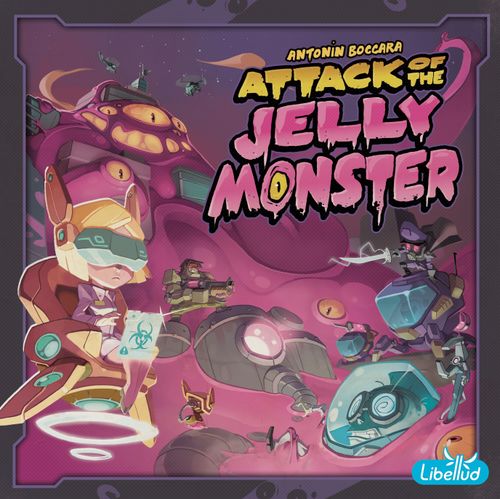
Attack of the Jelly Monster
Attack of the Jelly Monster Rulebook
Table of Contents
Table of Contents
Components
- 5 Player Screens
- 35 Dice (7 of each color)
- 1 10-second Sand Timer
- 8 District Boards (double-sided)
- 7 Target Markers
- 1 City Center Board (3 pieces, to assemble)
- 80 Jelly Tokens (45 1-point tokens, 25 5-point tokens, and 10 10-point tokens)
- 1 Drone (the round tracker) and 1 Round Marker
- 30 Jelly-pod Tokens
District Layout
For the sake of simplicity, the rules use the following game terms:
- District Entrance: This is where players place their dice. Each district entrance is located above its district, across the yellow and black outer wall.
- Zones: Each district has 3 zones, each showing a different reward.
- First Zone: The first zone is always the zone that is the closest to the district entrance.
- Target Reward: This is the reward shown in the zone that is next to the district's Target marker. In the example, the target reward is worth 7 Jelly.
- Controlling Player: The player with the highest dice total in a district is the controlling player. In the example, players have the following dice totals: Gina 7 - Sam 4 - Charlie 3. Gina is the controlling player of the district.
Setup
- Connect the city center pieces based on the number of players (3, 4 or 5 players) and place the assembled city center in the center of the table.
- Attach a District board (with either side up) to each connector of the city center. Note: If this is your first game, we recommend using only districts with green lights on the outer wall.
- Place the Drone between any two districts, with its arrow pointing to the district on its right.
- Place the Round marker on space "1" of the Drone.
- Place a Target marker next to the first zone of each district.
- Create a stack of facedown Jelly-pods on the city center and place the sand timer next to it.
- Each player chooses a color and takes the player screen and the seven dice of that color.
- Sort the Jelly tokens by value (1, 5, and 10 points) and place them near the board to create the supply.
- Each player takes two 1-point Jelly tokens.
Object of the Game
Each round, players simultaneously deploy their squads to the different districts, by rolling and placing their dice, to collect jelly. At the end of each round, players determine who gains jelly by comparing dice total for each district. At the end of the fourth round, the player with the most jelly wins.
Overview
- Take control of a district by having a higher dice total than your opponents. But be careful, your opponents are playing at the same time as you!
- At any time, place a "1" or a "2" to remove a die from the district... and place a "3" or a "4" to change the district's reward.
- Spread your dice over multiple districts to gain more rewards or ruin an opponent's strategy with a single action.
- After placing all your dice, lock down a district and flip the sand timer: 10 seconds left until the end of the round!
Playing a Round
Each round, players act simultaneously, in no specific turn order. Each player grabs their seven dice. When players are ready, the oldest player starts counting down out loud to announce the start of the round.
When the round starts, each player acts as follows:
1. Roll and Place Dice
Repeat this step until you have placed all your dice:
- Roll all your available dice inside your player screen.
- Either: place one of your dice on a district entrance. Then, use the die's effect (optional). OR do not place a die.
Tips:
- The inside of your player screen shows a summary of die effects. Make sure it is always facing you.
- Feel free to lift your player screen to more easily grab the dice.
2. Placing Your Last Die
After placing your last die, you MAY lock down a district by placing your player screen around the dice placed on that district entrance. Until next round, players cannot place dice on THIS district entrance.
Note: Once placed, you cannot remove your player screen from that district.
After a player has placed all their dice, they MAY flip the sand timer. If they do, the remaining players have 10 seconds to roll and place their dice. (The sand timer may be flipped only once per round.)
3. Running Out of Time
When the sand timer runs out, all players must immediately stop rolling and placing dice. All dice that players did not place are not taken into account for the rest of the round.
Players then score the round.
Placing a Die
When you place a die, place it on a district entrance of your choice. Then, you MAY use the effect matching the die's value.
Using a die effect is optional but, when using a die effect, you must resolve it immediately after placing the die, not later during the round. Once placed, you cannot retrieve or move your die to another district entrance.
Reminder: You cannot place a die on a district entrance if that district is locked down by a player's screen.
Tip: When scoring a district, dice of the same color showing the same value cancel each other. Place your dice carefully!
Die Effects
- 1 or 2: You MAY remove any other die already placed on THIS district entrance. Place the removed die on the city center. Example: Sam places a "1" on the district entrance. He chooses to use its effect: he takes Gina's "5" from this district and places it on the city center.
- 3 or 4: You MAY move THIS district's Target marker to an adjacent zone. Example: Gina places a "4" on the district entrance. She chooses to use its effect: she moves the Target marker to the adjacent zone.
- 5 or 6: These dice have no effect. Note: Even if they do not have an effect, these die values are high!
Scoring a Round
After the sand timer runs out, return any player screen placed on the district entrances to their players. Then, score each district and the city center as follows:
District Scoring
Starting with the district indicated by the Drone and proceeding clockwise, score each district as follows:
- Canceled Dice: If multiple dice of the same color show the same value, they cancel each other out: return those dice to the corresponding player and place them inside their player screen. Those dice are not taken into account for the rest of the round.
- Reward: The controlling player immediately gains the target reward. In case of a tie, each tied player gains the reward. See "District Rewards" below for more information about rewards.
Note: Be careful! Certain rewards have negative effects for the controlling player.
Example: Charlie placed two "6" on the district. He removes these two dice and places them inside his player screen. Then, players compare their dice totals: Sam 4 - Charlie 3 - Gina 1. Sam is the controlling player: he gains the target reward and takes 6 Jelly.
City Center Scoring
The player with the most dice on the city center takes the top Jelly-pod from the stack, secretly looks at it, and places it facedown in front of them.
In case of a tie, each tied player takes a Jelly-pod from the stack.
Important: When scoring the city center, look at the number of dice, not the dice values (unlike scoring districts).
Example: Gina has three dice on the city center and Charlie has two. Gina takes the top Jelly-pod from the stack, looks at it secretly, and places it facedown in front of herself.
Prepare the Next Round
If it is the end of the fourth round, the game ends. Otherwise, proceed with the following steps:
- Return the 7 dice to each player.
- Rotate the city center and the Drone 90 degrees so that each player is facing a different district.
- Place each Target marker back next to the first zone of each district.
- Advance the Round marker one space.
End of Game
At the end of the fourth round, the game ends. Each player calculates their final score by adding the total value of their Jelly-pods to their Jelly tokens.
Jelly-pods: At the end of the game, roll a die for each Jelly-pod you have to determine its value. The die result is the number of Jelly contained in that Jelly-pod.
The player with the most Jelly wins. In case of a tie, the tied players share the victory.
District Rewards
This is a summary of the icons representing the rewards of the different zones. Some rewards show multiple icons, in which case, resolve them one at a time, from left to right.
- Jelly (number icon): Take the indicated number of Jelly from the supply. Note: a "0" icon = 0 Jelly.
- Jelly-pod: Take the top Jelly-pod from the stack. Secretly look at it, and place it facedown in front of you. Note: If there are not enough Jelly-pods for all tied players, none of them takes a Jelly-pod.
- Discard a Jelly-pod: Choose one of your Jelly-pods and return it to the box.
- 2 Jelly per Jelly-pod: Take 2 Jelly from the supply for each Jelly-pod you have.
- Adjacent district (arrow): Gain the target reward from the adjacent district. Score the district following the normal rules. The arrow indicates which adjacent district you gain the reward from (left or right) or if you choose the adjacent district (either). Example: Gina is the controlling player in district A. She gains the target reward from the adjacent district B, as indicated by the arrow: she takes 6 Jelly. Note: In case of a tie for the "either" reward, the tied controlling players choose together which district to gain the target reward from. If they cannot agree, the reward is treated as 0 Jelly.
- Each player gives you 1 or 2 Jelly: In case of a tie, the tied controlling players do not give Jelly to each other.
- Give 1 Jelly to each other player: In case of a tie, the tied controlling players do not give Jelly to each other. Note: If you do not have enough Jelly to give to the other players, choose who you give your Jelly to.
- Number of dice: This reward changes depending on the number of dice placed by the controlling player. In example C, if the controlling player placed 1 or 2 dice, they take 7 Jelly. If they placed 3 or more dice, they take a Jelly-pod.
Podium Rewards
The following rewards can be gained by more than just the controlling player(s) based on their ranking. Examples:
- Each player with the highest dice total gains 2 Jelly. Each player with second highest dice total gains 4 Jelly (regardless of the number of players with the highest dice total).
- Each player with the highest dice total gains 4 Jelly. Each other player with at least one die on this district entrance gains 1 Jelly (regardless of their dice total).