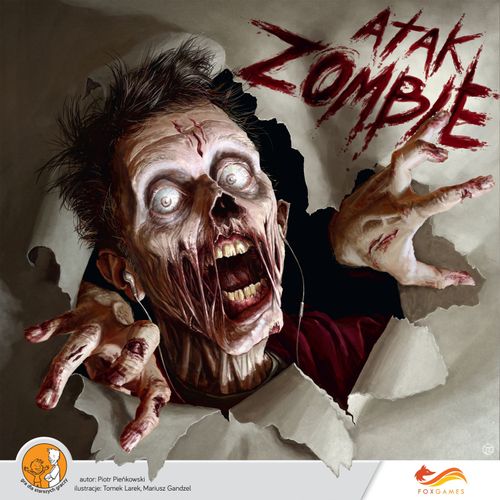
Atak Zombie
Atak Zombie Rulebook
Table of Contents
Table of Contents
Goal of the Game
The goal of the game is to survive 15 days (15 game turns). The player who at the end of turn 15 has the most people and goods and the best-fortified base will be rescued by the army and win the game.
Game Components
- 1 city board
- 4 player base boards
- 25 fuel tokens
- 25 ammunition tokens
- 25 medicine tokens
- 25 food tokens
- 36 event cards
- 40 find cards
- 1 four-sided die
- 1 starting player token
- 32 barrel tokens
- 4 player aid cards
- 32 human pawns, 8 in each of 4 colours: black, red, blue, yellow
- 1 turn marker
- 1 zombie activity marker
- 80 zombie tokens
City Board
- Zombie activity track.
- Pharmacy - medicine, food and fuel can be obtained there.
- Petrol station - fuel, food and weapons (ammunition) can be obtained there.
- Information about the number of goods placed in the four buildings (depending on the number of players).
- Police station - weapons (ammunition), medicine and fuel can be obtained there.
- Minimarket - food, medicine and weapons (ammunition) can be obtained there.
- Time track.
Time track notes:
- In turns 1-4 the starting player takes 2 event cards - discards one of them and lays one on the table.
- In turns 6-9 the starting player takes 3 event cards - discards one of them and lays two on the table.
- In turns 11-14 the starting player takes 4 event cards - discards one of them and lays three on the table.
- In turns 5, 10, 15 (zombie horde attack) no event cards are drawn.
- In turns 6 and 11 one new human with a drawn find card and any goods token joins each player.
Player Base Board
- Barricade defence fields, on which people fight the zombies.
- Each base has 3 barricades. You build them from barrels.
- In the workshop you produce barrels for the barricades.
- Thanks to the kitchen you double the amount of food you have.
- In the storage you gather goods produced in the base and obtained in the city or during scouting. Its maximum capacity is six tokens.
- In the isolation ward you produce medicine and treat sick people.
- Armed shooting points (in the corners of the base) will let you eliminate more zombies.
- The guard will protect goods against theft.
- The vehicle will let you make a trip to the city.
- The pen and the garden beds will provide food.
- The scout can find useful items or recruit new people.
- In the laboratory you produce fuel and weapons (ammunition).
- The residents track shows the number of people in your base.
Player Aid Cards
Four player aid cards ("How to survive the apocalypse - turn sequence") summarise the turn; their text is reproduced at the end of this rulebook.
General Description of Play
Each player has their own base. They will fortify it in case of zombie attack. They will also look after the people in it. These people must be provided with food and medicine and equipped with weapons to fight zombies. The player must also have fuel for the vehicle.
The game lasts 15 turns. In each of them the players decide what tasks they will assign to the people in their bases. Players may assign them the following tasks:
- trip to the city,
- scouting,
- posting a guard,
- producing barrels for barricades,
- producing fuel and/or weapons (ammunition),
- producing medicine,
- fighting on the barricades,
- producing food,
- working in the kitchen.
Many actions performed by people will attract zombies to the players' bases (for example the noise of producing barrels, a trip to the city, scouting the area), so with every moment more and more of the living dead will accumulate around the bases. At the end of each turn the zombies will try to get into the bases, and only then (not earlier) will the players check whether their numbers are enough to breach the barricades. If a player does not have adequate fortifications, the zombies will break into the base and kill some of the people in it.
That is not the end of the dangers. The most dangerous will be turns 5, 10 and 15, because zombie horde attacks occur in them! In these turns we do not draw event cards (so tricks cannot be used either), we do not plan actions, we do not go to the city, we do not scout, we produce and make nothing, and we neither feed nor treat. These possibilities are frozen, and players only send their active people to the barricades, arm the base (ordinary find cards may be used) and fight the horde until the last zombie around the base.
Task illustrations:
- People sent to the barricades will fight zombies.
- A person sent to the kitchen will double the value of the food delivered this turn by your people.
- A person sent to the garden beds will return with food worth 1.
- A person posted as a guard will guard the goods in your base.
- A person sent to the isolation ward will produce a medicine.
- You may send 1-2 people to the workshop. Each of them will produce a barrel that will be used to reinforce a barricade.
- A person sent to the pen will return with food worth 2.
- You may put 1-2 people in the vehicle. They will go to the city for goods. Fuel is necessary to start the vehicle.
- A person sent scouting may recruit a new person for your base. They may also obtain very useful items.
- You may send 1-2 people to the laboratory. Each of them will produce fuel or a weapon (ammunition). Both may produce the same thing or each something different.
Game Setup
A Place the city board in the middle of the table.
B Depending on the number of players, place the appropriate number of goods on the board:
4 players:
| Building | Food | Fuel | Medicine | Ammunition |
|---|---|---|---|---|
| Police station | - | 7 | 7 | 11 |
| Minimarket | 11 | - | 7 | 7 |
| Petrol station | 7 | 11 | - | 7 |
| Pharmacy | 7 | 7 | 11 | - |
3 players:
| Building | Food | Fuel | Medicine | Ammunition |
|---|---|---|---|---|
| Police station | - | 5 | 5 | 9 |
| Minimarket | 9 | - | 5 | 5 |
| Petrol station | 5 | 9 | - | 5 |
| Pharmacy | 5 | 5 | 9 | - |
2 players:
| Building | Food | Fuel | Medicine | Ammunition |
|---|---|---|---|---|
| Police station | - | 3 | 3 | 7 |
| Minimarket | 7 | - | 3 | 3 |
| Petrol station | 3 | 7 | - | 3 |
| Pharmacy | 3 | 3 | 7 | - |
Put the remaining goods tokens back in the box. They will not take part in the game.
C Place the barrel tokens, zombie tokens and human pawns next to the city board. We will call this place the resource pool. Later in the game, used goods and traps, destroyed barrels and killed people will also end up here.
D Place the turn marker on the time track on the city board, on the space marked with an X.
E Place the zombie activity marker on the zombie activity track on the city board, on the space marked with an X.
F Shuffle the event cards thoroughly and place them next to the city board. They will form the event deck. Leave space next to the event deck for a pile of used event cards (or simply put them in the box).
G Shuffle the find cards thoroughly and place them next to the city board. They will form the find deck. Leave space next to the find deck for a pile of used find cards (or simply put them in the box).
H Each player draws 3 find cards from the top of the find deck, looks at them, and then puts 1 of them into the box without showing it to anyone (this card will not take part in the game). The remaining 2 cards are the finds with which the player starts the game. Do not show them to anyone either.
I Each player takes their base board and places it in front of them.
Note! Each player board shows a different base (a farm, a factory, a school, a church), but the fields on them are the same. Each base gives players the same possibilities of action during the game.
J Each player takes 1 human pawn from the resource pool and places it on the base's residents track, on the space numbered -4. This pawn symbolises the player, who has just hidden in the base.
K Next each player chooses, at their own discretion, the set of other elements with which they will start the game. Each player has 10 points to spend according to the following "price list":
- each further human pawn = 2 points
- each goods token (ammunition, fuel, medicine, food) = 1 point
- each barrel token = 1 point
Players who play Atak Zombie for the first time are advised to start the game with the following set:
- 1 human pawn (the player who hid in the base)
- 1 human pawn = 2 points
- 6 barrels = 6 points
- 1 fuel token = 1 point
- 1 medicine token = 1 point
Note! Place human pawns on consecutive spaces of the base's residents track, barrels on barricades, and goods in the storage (each kind), in the vehicle (fuel only) or in the shooting points (ammunition only). Because the storage has limited space (6 slots), it is recommended to place fuel in the vehicle and ammunition in the shooting points, from where they can always be moved to the storage.
L Each player places around their base the appropriate number of zombie tokens. It depends on the number of people we have placed in the base:
- 1 human = 3 zombies
- 2 people = 2 zombies
- 3 people = 1 zombie
- 4 people and more = 0 zombies
After the game starts, zombies are always added at the barricades, according to the rules presented in the box below.
Here Come the Zombies!
During the game zombies will appear at the barricades of the players' bases. They will be lured by the noise connected with producing various goods (barrels for barricades, weapons, fuel, medicine, food). Another element attracting zombies is the number of people in the base: the more people, the more zombies will arrive at the barricades of that base.
Each newly arrived zombie must be added to one of the barricades according to the balance rule, which states that zombies should be distributed evenly at all three barricades. So each new zombie must be placed at the barricade where there are the fewest zombies. If there are no zombies at the barricades yet or their number is the same at each of them, the player may choose the barricade at which to add the zombie.
Example: At barricades A and B Piotr has 4 zombies each, and at barricade C none. This turn 5 zombies arrived at Piotr's base. Piotr distributes them according to the balance rule:
- he places 4 zombies in front of barricade C - thanks to this there are 4 zombies at all barricades,
- the fifth zombie Piotr may add to any barricade. He chooses barricade A.
Course of Play
The youngest player starts the game. They receive the die and the starting player token.
The game consists of 15 turns - 12 normal and 3 special (5, 10 and 15). Each normal turn is divided into two phases: day and night. During the day players obtain goods, fortify their bases, fight on the barricades, raid rivals, and feed and treat their people, and at night they verify how well their barricades coped with the pressure of the zombies. During special turns (5, 10, 15) there is neither a day nor a night phase - there is only the fight against the zombie horde, which proceeds in a specified way (described in detail in the chapter "Special Turn").
Normal Turn (except turns 5, 10 and 15)
Day
The day phase consists of the following stages:
- Wake-up,
- Day planning,
- Carrying out the planned actions (trip to the city, scouting, posting a guard, production, fighting on the barricades, feeding/treating),
- Arming the base.
Wake-up
Wake-up is the stage that begins every normal turn, during which - and only then - event cards are drawn and activated and trick cards are played.
At the beginning of each normal turn the starting player draws the appropriate number of event cards from the top of the event deck:
- In turns 1-4: 2 event cards - 1 of them is discarded to the pile of used event cards, and 1 is laid on the table.
- In turns 6-9: 3 event cards - 1 of them is discarded to the pile of used event cards, the other 2 are laid on the table.
- In turns 11-14: 4 event cards - 1 of them is discarded to the pile of used event cards, the other 3 are laid on the table.
The starting player does not show anyone which event cards they discarded. This gives them a certain advantage over the other players, because they know which event will certainly not appear later in the game.
The starting player lays the event card of their choice on the table and all players - starting with the starting player and continuing clockwise - carry out the action described on that card. If the starting player must lay more than one event card, they lay them one at a time in an order of their choice. All players in turn carry out the actions described on them.
Example: It is turn 7. Piotr draws 3 event cards: "Damaged Barricade", "Rats!" and "Restless Neighbourhood". He must discard one of them. He discards the last one. Then he lays "Rats!" on the table, and all players, in turn, carry out the action described on the card. Finally Piotr lays the "Damaged Barricade" card and all players again carry out the action described on it.
Note! Unless the description on the card indicates otherwise, its effect applies to all players and takes effect immediately or lasts until the end of the current game turn.
Among the event cards there are location cards marked with a location icon. If the starting player decides to bring any of them into the game, they should place it next to the city board. Only in this turn will all players be able to use this location in turn, by "wandering" to it during scouting (the actions available during scouting are described in the Scouting subchapter). At the end of the turn the card is removed from the game.
Note! In some cases, when activating event cards, players will be asked to determine which of them is the strongest or the weakest. In both situations count points the same way as when choosing starting elements (a human is 2 points; a goods token, a barrel and a find card are worth 1 point each). People in the isolation ward are not counted, just as they are not in the case of cards referring to groups of 3 or more people and 4 or more people, or in the final count! In case of a tie the card affects all tied players.
During the Wake-up stage - and only then - you may also play the find cards you hold that are tricks. They are marked with a trick icon. They may be activated at any moment of this stage, but regardless of this rule the starting player is obliged at the end of the Wake-up stage to ask the other players whether they want to play any more tricks. Only when everyone says no may play proceed to the next stage of the turn.
During the Wake-up stage no other find cards may be played (this is allowed at all other moments of the game). Barricades also cannot be armed (that is, goods cannot be turned into traps).
Day Planning
Starting with the starting player and continuing clockwise, all players assign tasks to their people. If we want our person to perform a task, we place their pawn on the appropriate space (human symbol) on the base board. Placing pawns, players plan each task in turn, clockwise. So first they decide whether they go to the city, then whether they go scouting, then whether they post a guard, and so on.
Trip to the City
The goal of a trip to the city is to obtain goods.
- a player may send 1 or 2 people to the city,
- their pawns are placed on the vehicle spaces at the base's gate,
- the vehicle must have fuel in its tank (1 fuel token placed on the vehicle),
- assigning people to the vehicle requires discarding the fuel in the tank to the resource pool.
Scouting
The goal of scouting the area is to perform one of the following actions:
- obtaining finds,
- recruiting new people to the base,
- stealing goods from a rival's base (raid),
- using location cards.
A player may send only 1 person scouting.
Posting a Guard
The purpose of posting a guard is to make it impossible for other players to raid.
- a player may post only 1 person as a guard.
Producing Barrels
Place of production: workshop
The purpose of producing barrels is to obtain barrels, which are used to build barricades.
- a player may send 1 or 2 people to the workshop (each of them will produce 1 barrel),
- barrels cannot be stored - immediately after being produced they are placed on the barricades.
Producing Ammunition and/or Fuel
Place of production: laboratory
The purpose of producing ammunition and/or fuel is to obtain ammunition and/or fuel, which have various uses.
- a player may send 1 or 2 people to the laboratory (each of them will produce 1 ammunition or 1 fuel).
Ammunition
- is stored in the storage or in the shooting points,
- is used to fight zombies: thanks to it we fire from the shooting points and use it to build traps on the barricades.
Fuel
- is stored in the storage or in the vehicle,
- is used for trips to the city by vehicle and to build traps on the barricades.
Producing Medicine
Place of production: isolation ward
The purpose of producing medicine is to obtain medicine, which is used to treat people and to build traps on the barricades.
- a player may send 1 person to the isolation ward (they will produce 1 medicine),
- medicine is stored in the storage.
Fighting on the Barricades
- a player may post from 1 to 5 people to fight on the barricades (1 human kills 1 zombie),
- going out onto the barricades serves to kill the zombies standing behind the barricades,
- on one barricade defence field one human may be posted.
Producing Food
Place of production: pen and garden beds
The purpose of producing food is to obtain food, which is used to feed people and to build traps on the barricades.
- food produced in the pen and on the garden beds is not turned into tokens, which means it cannot be stored and must be used in the same turn (surplus food is always lost).
Pen
- a player may send 1 person to the pen (they will produce 2 food).
Garden beds
- a player may send 1 person to the garden beds (they will produce 1 food).
Working in the Kitchen
Place of production: kitchen
The purpose of working in the kitchen is to double the food produced in the pen and on the garden bed and stored in the storage or obtained from immediately playing a find card/cards.
- a player may send 1 person to the kitchen,
- doubled food cannot be stored and must be used in the same turn (surplus food is lost).
When players have placed all the people available to them on the spaces of their choice, they may proceed to the next stage of the game: carrying out the planned actions.
Carrying Out the Planned Actions
Players carry out their planned actions point by point. This means that you cannot proceed to the next action until all players have fully completed the previous one.
Actions are resolved in the following order:
- Trip to the city.
- Scouting.
- End of the guard's service.
- Production.
- Fighting on the barricades.
- Feeding and treating.
1. Trip to the City
In the case of a trip to the city the order of actions is as follows:
A) The starting player rolls the die and moves the marker on the zombie activity track down by as many spaces as the pips rolled.
B) Starting with the starting player and continuing clockwise, each player who assigned people to the vehicle takes them from the vehicle space on their base board and places them on the building spaces in the city (pharmacy, petrol station, police station and minimarket). Remember to first discard the fuel token, which is the "cost" of the trip to the city.
Note! If a player sent 2 people to the city, they may place both pawns in one building or assign one pawn to each of two different buildings.
C) Players take goods in order of arrival in the city, moving them to the storages of their bases. If the player wishes, they may immediately place 1 fuel token on the vehicle space, and 1 ammunition token on each of the four shooting points in the corners of their base.
The number of goods taken depends on the colour of the zombie activity track space on which the marker stands:
- Red: 3 goods for each human pawn
- Yellow: 2 goods for each human pawn
- Green: 1 good for each human pawn
D) After taking goods, players add in front of their barricades the appropriate number of zombie tokens, whom they dragged along on the way back from the city. Their number depends on the position of the marker on the zombie activity track.
- Red: 1 human = 2 zombies; 2 people = 3 zombies
- Yellow: 1 human = 1 zombie; 2 people = 2 zombies
- Green: 1 human = 0 zombies; 2 people = 1 zombie
Zombies should be added to the barricades according to the balance rule.
E) At the end of the trip to the city the human pawns return to the base and are set standing on the residents track (they occupy consecutive places, starting from the left side).
Note! If in a given turn no player went to the city, the marker on the zombie activity track must be moved up by 3 spaces.
2. Scouting
Players who went scouting, in turn - starting with the starting player or the one sitting closest to their left - perform one of the following actions.
Obtaining a Find
The player takes 1 card from the top of the find deck and adds it to the find cards they already have. These cards, if they are not tricks, may be used at any moment of the game. In every case they work solely to the benefit of their owner.
Note! Each player, regardless of circumstances, may hold at most 5 find cards. If this number is exceeded, the surplus must immediately be used or discarded to the pile of used cards.
Recruiting a New Person
The player takes from the resource pool 1 human pawn in their colour and places it on the first free space of the residents track lying down, which is meant to remind that in the feeding and treating phase it does not need feeding (because it is resting).
Each person recruited during scouting arrives at the player's base with hand luggage. Therefore, with each new pawn obtained, 1 goods token of any kind is taken from the resource pool and placed in the storage, on the shooting towers (ammunition only), in the vehicle (fuel only) or at once on a barricade as a trap. If none of these placement options for the resource is available, it must immediately be discarded to the resource pool.
Note! Remember that the storage can hold only 6 goods tokens. If a player cannot place a new goods token in the storage, on the shooting towers (ammunition only) or on the vehicle (fuel only), they must at once place it on a barricade as a trap or discard it to the resource pool.
Stealing Goods from Another Player's Base (Raid)
The player designates one of the rivals who has 5 or more people (sick people in the isolation ward are never counted!) and takes from them 3 goods of any kind located in their storage, shooting points or vehicle.
Note! If a player posted a guard in their base, they cannot be robbed.
Visiting a Location on a Card
If at the beginning of the turn the starting player laid on the table an event card or cards with a location icon, players may use them during scouting (they perform the action described on the given card).
In each of the above cases (obtaining a find, recruiting a new person, stealing goods from another player's base, and visiting a location) scouting attracts 1 zombie to the base, unless an event or find card indicates otherwise. The zombie must be added according to the balance rule.
After returning from scouting, the human pawn is set standing on the residents track, occupying the first free space.
3. End of the Guard's Service
After scouting is finished, when rivals' bases could be raided, players who posted a guard end his service. His pawn returns from the base's defence field to the residents track, where it is set standing on the first available space from the left.
4. Production
Starting with the starting player, players in turn produce goods in the buildings of the base to which they sent their people.
Workshop
- each human assigned to the workshop produces 1 barrel.
- the barrel produced must be placed at once on a barricade of the player's choice,
- production in the workshop attracts 1 zombie to the base (regardless of whether 1 or 2 people work in it); it must be added according to the balance rule.
Laboratory
- each human assigned to the workshop [sic - the laboratory] produces 1 ammunition or 1 fuel.
- the goods produced must be placed in the storage, in the shooting points (ammunition only), in the vehicle (fuel only) or mounted on a barricade as a trap,
- production in the laboratory attracts 1 zombie to the base (regardless of whether 1 or 2 people work in it); it must be added according to the balance rule.
Isolation Ward
- a human sent to the isolation ward produces 1 medicine.
- the medicine produced must be placed in the storage or mounted on a barricade as a trap,
- production in the isolation ward attracts 1 zombie to the base; it must be added according to the balance rule.
Note! Goods produced are always taken first from the resource pool; if they are not available there, we take them from any building in the city (which means that in the first turns produced goods will be taken only from the city, and only later in the game does this rule settle down).
At the end the pawns are set standing on the residents track on the first available space from the left.
5. Fighting on the Barricades
Each human sent by the player to the barricades kills 1 zombie standing on the other side of the given barricade. Then each pawn returns to the base's residents track and, standing, takes the first available place from the left.
6. Feeding and Treating
At the end of each stage of carrying out the planned actions, players must provide the appropriate amount of food to the people in their bases. Each human whose pawn is standing on the residents track and on the pen, garden bed or kitchen space needs 1 food. Food can be obtained in 6 different ways:
- going to the city,
- sending someone scouting to a location card,
- recruiting a new person and choosing 1 food,
- using an appropriate find card,
- sending someone to the pen (2 food),
- sending someone to the garden beds (1 food).
The first three actions are performed in earlier stages of the turn, and the food tokens meant to feed people are placed in the storage. The fourth action is used in earlier stages and in the feeding and treating stage, exchanging the given find card for food (or medicine) and placing the tokens obtained this way in the storage. The last two actions take place solely during the feeding and treating stage - and the food produced this way is never exchanged for tokens; rather, the number of food obtained is added to the food tokens held and used to feed all people who are standing on the residents track, in the pen, in the garden and in the kitchen.
When playing, it is worth remembering that during the day planning phase a player may send 1 person to the kitchen, thanks to which in the feeding and treating phase they will double the portions of food delivered in that turn to feed people (this applies both to food from the storage and food from the pen and garden bed).
When feeding people, medicine may be used instead of food, but it is not doubled in the kitchen.
At the end of the feeding phase the food or medicine tokens used must be put back into the resource pool, and the people who produced food in the pen or on the garden beds or cooked in the kitchen return to the residents track.
Note! To feed people, you must make food available to them directly from the pen, garden beds and storage, or process it in the kitchen, doubling the portions. In the latter case the player will sometimes receive a surplus of food. These portions can never be exchanged for tokens and stored - such surplus is always lost.
Example: Piotr has 5 people and 2 food in his storage. In the day planning stage he sent one person to the pen, which in the feeding/treating stage will give him 2 food, and another to the kitchen, which will double the food produced this way to 4 portions. He is still 1 portion of food short for 1 person. Piotr could have sent another person to the garden beds in the day planning stage, which would have given him an additional 1 food, but he prefers to assign that person to another task. Remembering that he keeps food supplies in the storage, in the feeding/treating stage he takes 1 food from there, adds it to the food produced in the pen and passes the whole to the kitchen. In total he therefore has as many as 6 portions ([2+1] x 2 = 6). As a result there is enough food for all his people, and even a surplus remains, which, however, according to the rules is lost. Of course the 1 food token in the storage that Piotr did not use stays in its place.
If a player is unable to feed one of their people, that person goes to the isolation ward as lightly sick (see below).
Note! Unlike healthy people, there is no obligation to feed or treat lightly or seriously sick people in the isolation ward. It is worth remembering, however, that such conduct will lead to a worsening of their health or even to their death!
There are 2 places for the sick in the isolation ward. Each human pawn may be put there in 2 ways (depending on the situation or an event card).
Lightly sick
The human pawn is placed standing on one of the two spaces for the sick. If in the nearest feeding and treating stage it does not receive food or medicine, its condition worsens and it becomes seriously sick.
Seriously sick
The human pawn is placed lying on one of the two spaces for the sick. If in the nearest feeding and treating stage it does not receive medicine (and only medicine!), it dies.
Note! If there is no room in the isolation ward for another sick person, that sick person dies immediately.
Treatment
To cure a sick person, we must take their needs into account. As already mentioned, a lightly sick person can be cured by including them when feeding the group, or by providing them right afterwards with food or medicine, while a seriously sick person can be cured only with medicine. After curing a sick person we move them at once to the residents track, setting them standing on the first free space from the left. They no longer need additional feeding in that turn.
Death of a Human
If as a result of illness or lack of room in the isolation ward one of the people dies, their pawn is put into the resource pool and 1 zombie token is added in front of one of the barricades (according to the balance rule). To avoid this, the player may spend 1 ammunition, eliminating the dead person before they manage to turn into a zombie.
Note! If at any moment a player has no people at all, they immediately drop out of the game!
Arming the Base
Reinforcing barricades and equipping shooting points with ammunition is possible at every moment of a normal turn, except Wake-up and the zombie attack - which means that this stage is the last chance to build any defences. When night falls, none of these actions will be possible any more.
Shooting Points
In the corners of each base there are 4 shooting points. Their range covers the barricades located on the fences adjacent to the given shooting point.
The player arms each shooting point by placing 1 ammunition on it. If necessary the player may also disarm a shooting point and move the token on it to the storage, to another shooting point, or onto a barricade as a trap.
Note! It is worth remembering that outside the Wake-up stage the player may activate an armed shooting point at any moment of the turn, and it is they who decide which barricade is fired upon (according to the range rules).
After a shooting point is activated, remove the ammunition token and, together with the eliminated zombie, put it into the resource pool.
Barrels
Barrels are placed on the barricade fields. They are the basic form of defence and at the same time the foundation for traps. Barrels cannot be stored, so we must decide at once where to place them. 1 barrel withstands the pressure of 1 zombie.
Note! Arming the base is the last moment in a given turn to use a find card with barrels and complete a barricade with them.
Traps
Traps are prepared from available resources. Goods tokens that have their ordinary use may also be used to reinforce barricades. They then cease to be goods and become traps.
Building a trap, the player places 1 medicine, ammunition, fuel or food token on a barrel located on a barricade. Only one trap may be on one barrel.
A trap cannot be dismantled, which means that a good used this way cannot return to the storage, shooting points or vehicle tank, nor be stolen by other players. The only exceptions allowing a trap to be destroyed are:
- the find card "Sniper Rifle",
- the event cards: "Stale Gunpowder", "Expired Medicine" and "Spoiled Food".
Each trap is activated automatically and may be triggered only by zombies, when they try to break into the base during a zombie attack or horde attack.
Information about activating traps is in the Zombie Attack subchapter later in the rulebook.
There are 4 kinds of traps in the game:
Barrel with a medicine trap - Defence strength: 2
Offensive trap. It withstands the pressure of 2 zombies; when this number is exceeded an acid explosion eliminates 2 zombies on that side of the barricade. After the explosion remove the medicine token from the barrel and 2 zombies and put them into the resource pool. The barrel stays in its place.
Barrel with an ammunition trap - Defence strength: 2
Offensive trap. It withstands the pressure of 2 zombies, and when this number is exceeded it explodes and kills with shrapnel all the zombies at the barricade. The explosion of the ammunition trap destroys the barrel on which it was mounted and all other traps on that barricade (without destroying the barrels on which they were mounted).
Barrel with a fuel trap - Defence strength: 3
Defensive trap: it does not eliminate, but only holds back 3 zombies. To destroy the barrel with this trap, 4 or more zombies must press on it, of which 3 are put with the barrel and trap into the resource pool, and the "surplus" will enter the base.
Barrel with a food trap - Defence strength: 2
Defensive trap. Each time the player adds zombies to their base, they may break the balance rule and add the last 2 zombies to the barricade on which this trap is located. To destroy the barrel with this trap, 3 or more zombies must press on it, of which 2 are put with the barrel and trap into the resource pool, and the "surplus" will enter the base.
The strength of barrels and traps is summed on a given barricade, which means that if we have next to each other a barrel with medicine and a barrel with ammunition, its defence strength is 4 zombies and only the 5th activates one of the traps, and the player decides which.
Note! In the game it is recommended to use combos, that is, various arrangements of traps on the barricades.
Night
In the night phase the zombie attack occurs, during which players verify whether their defences and traps worked in practice. At this stage of the game barricades and shooting points can no longer be armed; however, offensive find cards may be used.
Zombie Attack
The zombie attack on the barricades proceeds in two steps:
- Arrival of new zombies.
- Resolution of the zombie attack.
1. Arrival of New Zombies
The number of zombies that reach the barricades depends on the die roll and on the number of people in the player's base. The more people (the bigger the noise), the more zombies will come to the barricades. In practice this is verified by the so-called modifier, the negative or positive number visible on each space of the residents track. The number of arrived zombies is determined as follows:
a) The starting player rolls the die.
b) Each player checks what value the space has that is occupied by their last human on the residents track (regardless of whether lying or standing) and modifies the die result by that value (adding or subtracting the given value).
c) Players take the appropriate number of zombie tokens from the resource pool and add them according to the balance rule in front of their barricades or, conversely, put zombies from the barricades back into the resource pool.
Example A: The die shows 4. Piotr has 2 people on his residents track, which means his modifier is -3. Only 1 zombie will arrive at Piotr's base, because 4 - 3 = 1.
Example B: The die shows 3. Piotr has 6 people on his residents track, which means his modifier is +2. 5 new zombies will arrive at Piotr's base, because 3 + 2 = 5.
Example C: The die shows 2. Piotr has 1 human on his residents track, which means his modifier is -4. As a result as many as 2 zombies will leave Piotr's base, because 2 - 4 = -2.
(Printed modifier values in the examples: 2 people = -3, 6 people = +2, 1 human = -4.)
2. Resolution of the Zombie Attack
After each player has added new zombies in front of their base, check whether the barricades withstood the attack. Each barricade is checked separately as follows:
Checking the barricade's defence strength:
- 1 barrel = 1 defence point
- 1 barrel with an ammunition, medicine or food trap = 2 defence points
- 1 barrel with a fuel trap = 3 defence points
Note! For a better view of the situation on the board, we recommend placing zombies at the barricades so that they group at the barrels according to their defence strength. For example, at a barricade built of two barrels and a fuel trap, place: 1 zombie at each empty barrel and 3 zombies at the barrel with the fuel trap. When 1 more zombie reaches the barricade, it will at once be visible that the zombies have destroyed the whole barricade and 1 of them has broken into the player's base.
Checking whether the number of zombies at the barricade exceeds its strength
a) If the number of zombies is less than or equal to the barricade's defence strength, nothing happens (the living dead did not break through, but still remain at the barricade).
b) If the number of zombies is greater than the barricade's defence strength, we may use shooting points to eliminate the surplus attackers, or let them trigger the ammunition/medicine traps, if any were previously mounted on that barricade:
- the player designates a shooting point which they use to eliminate 1 zombie, removes the ammunition token from it, and removes 1 zombie token from in front of the barricade and puts both tokens into the resource pool,
- the player designates a trap being activated and then removes it from the barricade (in the case of the ammunition trap also removes the barrel on which it was mounted and the other traps on that barricade) and puts it, along with the tokens of the eliminated zombies, into the resource pool.
Note! If the player has the possibility of triggering several shooting points or several traps, the decision in what order to activate them is theirs.
c) If the above actions made the number of zombies again less than or equal to the barricade's defence strength, the zombie attack ended in failure and, as in point a), surviving living dead stay at the barricade. Players finish the given game turn and begin the next.
If there are still more zombies than the barricade's defence strength, they destroy all empty barrels and barrels with traps. At the same time as many zombies die as the barricade's defence strength was. All remaining zombies break into the base and kill people at a ratio of 1 to 1 (that is, 1 zombie kills 1 human). The eliminated tokens of barrels, traps, people and zombies (those destroying the barricade and those killing people) are put into the resource pool and the next game turn begins.
Note! A situation cannot occur in which only the barrel is destroyed while the trap that was on it remains untouched, just as - with one exception - a trap cannot be destroyed without destroying the barrel on which it was mounted. The mentioned exception to this rule is the medicine trap, because in that case first only the trap and the 2 zombies it eliminated are removed, and only later - if that was not enough - also the barrel, which will eliminate 1 zombie.
Each player performs the above actions for each of their barricades. Players may do them simultaneously or in turn, depending on what they agreed before the game began.
Example A: Piotr checks one of his barricades. On it are a barrel with a fuel trap (3 defence points), a barrel with a medicine trap (2 defence points) and a barrel without a trap (1 defence point). The barricade's defence strength is 6. At the barricade there are 7 zombies, 1 more than the barricade's defence strength. In this situation Piotr should first use shooting points, but he has none armed, so he must rely on the previously mounted medicine trap. With it he kills 2 zombies (removes the medicine token and 2 zombie tokens from the board and moves them to the resource pool). 5 zombies remained in front of the barricade, which means their attack was repelled, because the barricade's current defence strength is also 5. The zombies did not break through to Piotr's base, though they still remain in front of the barricade and in the next turn will try to break in again.
Example B: Piotr checks another barricade. He has 2 barrels on it (2 defence points), and in front of it 4 zombies. The barricade is therefore too weak to hold off the attack. Piotr reduces the number of zombies using a shooting point (removes 1 zombie token from in front of the barricade and the ammunition token from the shooting point). Because there are still more zombies than the barricade's defence strength, 2 zombies destroy two barrels (one each), and the last one breaks into the base, killing 1 human. From the base board Piotr removes two barrels (the barricade is empty and in the next turn, if he does not rebuild it, zombies will break into the base without any problem), 1 human pawn and 3 zombie tokens, putting them into the resource pool.
Example C: Piotr checks his last barricade. He has on it an empty barrel (defence strength 1), a barrel with an ammunition trap (defence strength 2) and a barrel with a medicine trap (defence strength 2). Behind the fence stand 10 zombies, that is 5 too many. The 2 shooting points that could help are unarmed. In this situation activating the medicine trap seems pointless, because the remaining zombies will destroy the rest of the barricade anyway, and the surplus (1 zombie) will break into the base. It is better therefore to choose to activate the ammunition trap. This way the barrel on which it was installed is destroyed, as well as the medicine trap (but not the barrel it was on), but all the zombie tokens behind the barricade will be eliminated. Additionally Piotr will start the next turn with two empty barrels, which will let him arm the barricade anew.
After the zombie attack ends, the starting player passes the starting player token to the player on their left. That player will be the one who begins every stage in the next turn.
Special Turn (Turns 5, 10 and 15)
Horde Attack
In turns 5, 10 and 15 of the game there is no division into day and night; instead a zombie horde attack follows at once. It is so destructive that it will eliminate all defences, which means that to survive, players will have to remove all attackers at the barricades.
The horde attack proceeds according to the following scheme:
- Sending people to the barricades.
- Arming the base.
- Arrival of the horde.
- Resolution of the horde attack.
Sending People to the Barricades
Each player sends their people to the barricades to fight the living dead hand to hand. On each barricade defence point 1 human pawn may be placed. When resolving the horde attack each of them will eliminate 1 zombie (unless a played find card indicates otherwise). The surplus of people stays on the residents track.
Arming the Base
As in arming the base in an ordinary turn, here too it is the last moment to prepare for the approaching attack. Players may therefore extend barricades with new barrels (but only by playing find cards), arm barricades with traps (using goods from the find cards they hold, the storage, vehicle or shooting points) and equip shooting points with ammunition.
Arrival of the Horde
The starting player rolls the die twice and adds the results. This sum is the number of zombies that will attack each player in this turn.
Note! During the horde attack the die results are neither decreased nor increased by the modifier from the residents track (this is done solely during the zombie attack in a normal turn).
Players place the arrived zombies in front of their barricades according to the balance rule.
Resolution of the Horde Attack
- Hand-to-hand combat. All players in turn eliminate zombies using the human pawns they posted on the barricades. As standard each human eliminates 1 zombie, and then at once returns to the residents track, taking the first free position from the left.
- Checking the barricades' defence strength. As during the zombie attack, all players check whether traps were activated and decide which of them and in what order are activated. At the same time, at any moment during the checking of barricade defence strength, they may support themselves with fire from shooting points or by using some find cards.
If after all these actions zombies still remain behind the fence, they launch an assault, destroying barrels and the traps mounted on them, even when their number is lower than the barricade's defence strength. In other words, if at a barricade with 1 barrel equipped with a fuel trap there are 1 or 2 zombies, then although such a barricade normally withstands the pressure of as many as 3 zombies, in the case of a horde attack in a special turn the barrel and trap will be completely destroyed, although this will at the same time completely remove the threat (that is, it will remove the 1 or 2 zombies). If the zombies break through the barricade anyway, they attack people and kill them as standard at a ratio of 1 to 1 (that is, one zombie kills one human).
Example A: Piotr has on one of his barricades 2 barrels, each with a medicine trap. On the other side of the barricade there are 5 zombies. Piotr lets the first trap activate, so he removes the medicine token and 2 zombies and puts them into the resource pool. 1 empty barrel and 1 barrel with a medicine trap remain, and on the other side of the fence 3 zombies. During an ordinary turn the zombie attack would end at this point, but during a horde attack the zombies still attack and will keep doing so until Piotr eliminates them all or they break through into his base. In this situation he is forced to continue the fight. So he activates the second trap and removes another 2 zombies. 1 zombie remained, who by dying destroys 1 barrel. The horde attack ended, and Piotr is left with 1 empty barrel on the barricade.
Example B: After using traps and fire from shooting points, 2 zombies still remain in front of Piotr's barricade. The barricade consists of 2 empty barrels and a barrel equipped with an ammunition trap. In an ordinary turn Piotr's actions would end there, but because this is a special turn, the zombies still press on the fence. Piotr must decide whether to sacrifice the two empty barrels and leave the barricade with the trap (A), or eliminate the barrel with the ammunition trap and leave two empty barrels (B). In either case he will completely clear the area behind the barricade, so he will be able to finish his actions in this turn.
The horde attack ends at the moment when the board of each player's base has been completely cleared of zombies.
After turns 5 and 10, 1 human joins each player, with a goods token chosen by the player and a drawn find card. This human, unlike the one recruited during scouting, is active from the moment of joining and may at once be assigned to perform specified tasks, though at the same time he requires feeding during the nearest feeding and treating stage.
After resolving the horde attack, the starting player becomes the player sitting to the left of the previous starting player. A new game turn begins.
End of the Game
The game may end in 2 ways:
- at any moment of play, when only 1 player with at least 1 human in their base remains in it; they then become the winner,
- at the end of turn 15 - victory points are then counted.
Victory points are counted as follows:
- each surviving human (not counting those in the isolation ward) is worth 2 points,
- each goods token (also one that is a trap) is worth 1 point,
- each barrel is worth 1 point,
- each find card is worth 1 point (therefore sometimes it is worth exchanging it earlier for 2 goods, if it offers such a possibility).
The player with the most points becomes the winner.
In case of a tie the winner is the player who has more find cards.
If there is still a tie, nobody wins and everyone is devoured by zombies.
Example: Piotr counts the points he has gained: 4 people are worth 8 points, 5 goods tokens are another 5 points, 3 barrels give 3 points, and 2 find cards bring 2 points. Piotr therefore gained 18 points in total.
Aggressive Variant of the Game
In this variant there is more interaction between players. Play is extended by 2 new actions: Fighting in the City and Murder during a raid on another player's base.
Fighting in the City
Players arrive in the city as standard in order (the first rolls the die to check by how much the marker on the zombie activity track has dropped). If any of them, while placing their human pawns, finds that they have superiority in a given building, they may attack at once (they do not have to, however). With 2 players this happens only once, with 3 and 4 players it may happen more times. An attack looks as follows:
A The attacker removes one rival's human pawn from the space of the building in which the fight took place (that human was killed) and puts it into the resource pool.
B The attacker lays down one of their own human pawns to mark that they have already performed an action with it in that building (killed a human belonging to another player).
C If 3 or 4 players take part in the game, sometimes more attacks than just one will be possible. In such a situation the 3rd or 4th player to arrive in the city may attack both a rival who has only one human in the given building, because they travelled with only that one or has already been attacked once (then the attacker as standard removes that single pawn and lays down their own), and one who attacked earlier themselves (has a standing and a lying pawn), because when counting superiority only standing pawns are taken into account. In this latter situation the lying pawn (that is, the earlier killer) is killed first.
D At the end players proceed to the standard taking of goods, taking into account only standing human pawns (killers do not take goods), and then add zombies to their base, this time taking into account all returning people (that is, the killers too).
Note! A lying pawn is not counted when checking superiority in a building!
Murder During a Raid
- A player who went scouting, instead of performing standard actions, designates one of the other players who has 5 or more people and attacks them. The attacked player chooses which human pawn to remove from the base board (it may also be one that has just returned from the city or is in the isolation ward), and the attacker designates 1 goods token from the storage, shooting points or vehicle, which they take to their base.
- After the killer returns to the residents track, 1 zombie must as standard be added in front of their base (as with every scouting).
Note! It is worth remembering that if a given player posted a guard in their base, they cannot be raided.
In the case of Fighting in the City and a Raid (both murder and theft), the find cards "Revolver" and "Defibrillator" are especially helpful, as they can turn the fate of a skirmish, acting to the detriment of the attacker.
In the case of Fighting in the City the "Revolver" makes it impossible to carry out the murder (the attacker does not lay down a pawn and can normally take goods with it), while the "Defibrillator" after the action is carried out lets the attacked player at once restore the mortally wounded to full health and take goods with them normally (the attacker in turn lays down a pawn and cannot take goods with it).
In addition the "Revolver" also protects against theft resulting from the use of find cards that are tricks, and the "Defibrillator" allows bringing back to life also persons who died naturally in the isolation ward - but does not bring back to the living people who died when zombies broke into the base.
In the case of a raid the "Revolver" makes it impossible to carry out both murder and theft, but the attacker still "takes" 1 zombie for performing the scouting. The "Defibrillator" in turn during a murder at once restores the victim to life (that is, simply nobody dies), but the attacker still takes 1 goods token (and 1 zombie for scouting), and during theft it has no use.
Such operation of both cards makes bluffing possible during play, since their effect can deter an attacker even when he merely suspects that the victim holds them.
Player Aid: How to Survive the Apocalypse - Turn Sequence
1. Day
Wake-up
- Move the marker on the time track.
- Lay out event cards.
- Use trick cards.
Day planning
- Assign tasks to your people.
Carrying out the planned tasks
a) Trip to the city
- determine zombie activity -> die roll
- use up fuel and place people
- fighting in the city (aggressive variant)
- take goods
- return to the base to the residents track
- attract zombies to the base
b) Scouting (perform one of the following actions)
- obtain a find
- recruit a new person with a good
- steal goods from another base
- raid and murder (aggressive variant)
- go to a location card
- return to the base to the residents track
- attract 1 zombie to the base
c) Production
- workshop = barrel, +1 zombie
- laboratory = ammunition and/or fuel, +1 zombie
- isolation ward = medicine, +1 zombie
- after production people return to the residents track
d) Fighting on the barricades
- 1 human = 1 zombie killed
- after the fight people return to the residents track
e) Feeding and treating
- 1 human = 1 food
- kitchen = food x 2
- lightly sick in the isolation ward = 1 food or 1 medicine
- seriously sick in the isolation ward = 1 medicine
Arming the base
- Shooting point = 1 ammunition
- Barricades = barrel, traps (ammunition, fuel, medicine, food)
2. Night
Zombie attack
a) Arrival of new zombies
- die roll + modifier for the people in the base
- add zombies in front of the barricades (according to the balance rule)
b) Effect of the zombie attack
Checking barricade defence strength:
-
barrel = 1 pt
-
barrel + ammunition / medicine / food trap = 2 pts.
-
barrel + fuel trap = 3 pts.
-
If the barricade's defence strength is equal to or higher than the number of zombies attacking it - you are safe (nothing happens).
-
If the barricade's defence strength is lower than the number of zombies attacking it - the zombies rush the barricade, activating traps. Traps (and possibly shooting points) kill the appropriate number of zombies:
- if the number of attacking zombies falls to or below the barricade's defence strength, the attack is repelled - you are safe;
- if the number of attacking zombies does not fall to or below the barricade's defence strength, the zombies destroy the barricade in a suicidal attack (1 zombie = 1 barrel) and the rest break into the base (1 zombie kills 1 human).
3. Horde Attack (turns 5, 10 and 15)
- send people to the barricades
- arm the base
- 2 die rolls and add zombies without applying the modifier
- resolve hand-to-hand combat (1 human kills 1 zombie)
- check the barricades' defence strength