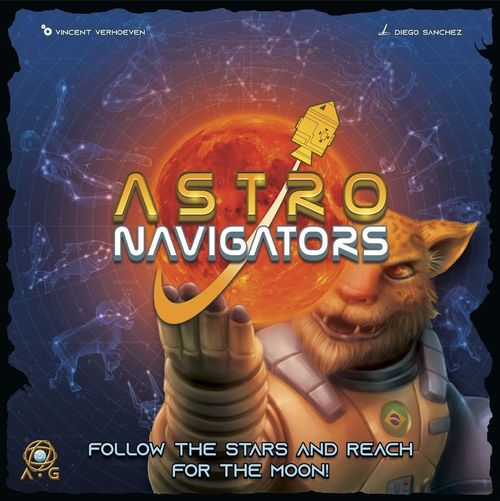
AstroNavigators
AstroNavigators Rulebook
Table of Contents
Table of Contents
Game Theme
Astronavigators is a board game themed around real astronomy, historical instruments, and celestial navigation, blending scientific accuracy with an adventurous race from Earth to the Moon. You can play the base game in Astronomer Mode (without space race) or in full Astronavigator Mode.
- Real Star Maps & Celestial Mechanics. The game uses an authentic star map that changes over time, reflecting the actual motions of stars and planets. Players must interpret these celestial patterns to plan observations and navigate effectively.
- Historical Astronomical Instruments. The theme heavily features old astronomical tools—armillary spheres, orreries, telescopes, and other mechanical devices used throughout history to understand the heavens. These instruments influence gameplay and are represented with detailed artwork and miniatures.
- Exploration Across Earth. Players travel across a world map to find the best observation sites. The theme emphasizes the global nature of astronomy—different latitudes and longitudes reveal different skies.
- Race to the Moon. While players gather knowledge, the main thematic arc is a daring race to reach the Moon and return. It's not just about points—it's about bluff, calculation, and tactical navigation.
- Asymmetric Characters with Cultural & Scientific Backgrounds. Each character represents a different type of astronomer or navigator, with unique abilities tied to their historical or cultural background. The artwork emphasizes global astronomical traditions.
- Science Popularization & Education. The game reflects a background in astronomy outreach, with real science, authentic instruments, accurate celestial motion. The theme aims to teach astronomy through play.
- What the Theme Feels Like in Play? Imagine combining the wonder of stargazing, the precision of celestial navigation, the thrill of a space race and the beauty of historical scientific instruments. The result is a thematic experience that's both educational and adventurous, grounded in real-world astronomy rather than science fiction.
Main Components
- 1 Earth map
- 1 Star map
- 1 Action board
- 1 Trajectory map
- 2 Armillary tiles
- 2 Daylight tiles
- 63 Continent tiles
- 74 Basic Observation cards
- 100 Trajectory tiles
- 7 Quest cards
- 7 Instrument discs
- 8 Rocket cards
- 6 Launch Site tokens
- 1 First Player token
- 1 Timer token
- 1 Sun disc
- 2 Heliport tokens
- 3 extra action tokens
- 15x 1RP tokens
- 6x 10RP (9x 5RP on backside)
- 12 Emerald tokens (for Sol Ange Module)
Main Setup
-
Place the Earth map on the table.
-
Place the Star map to the right of the Earth map and with the same orientation. Then:
- a. Place the Sun disc on the rightmost symbol of the Ecliptic Wave Line.
- b. Place the two Daylight tiles as shown in the image.
- c. Place the two Armillary tiles to the right of the Star map, one above the other, so the black arrow points towards the Sun disc.
- d. Place the Timer token on the top-left corner of the map, showing the Earth side.
-
Sort the Continent tiles according to the continent image on their back into seven separate stacks. Shuffle each stack and place them face up near the Earth map.
-
Place the Action board on the table. Shuffle the Observation cards and place them in a face-down deck next to this board. Then, place one card from the Observation deck face up in the designated space in each of the four Action board areas. Next, turn the topmost card of the Observation card deck face up.
-
Place the Trajectory board on the table and all the Trajectory tiles nearby with the red circle face down. Then:
- a. Sort the trajectory tiles into stacks of the same face-up circle colour (blue or yellow) and value. Shuffle each stack and place it near the Trajectory board.
- b. Place the topmost tile of each stack in the Trajectory board space with a matching number and colour without looking at its back.
-
Take the Saturn V Rocket card from the Rocket deck and place it face up nearby.
-
Shuffle the Quest cards and place them face down on the table, with the Instrument discs nearby.
Player Components
- 4 Player boards
- 7 Character cards
- 7 Character discs
- 7 Vehicle dice (6 faces)
- 7 Lunar Module tokens
- 14 Hidden Agenda cards
- 40 Set tokens
- 24 Vehicle tokens
- 4 Abort tokens
- 4 Abort Stage tokens
- 16 Moon tokens
- 4 Set cards
- 4 Cheat Sheet folders
Player Setup
- Each player takes the following components and places them on the designated spaces on their player board: 10 different Set tokens (white side up), 6 different Vehicle tokens (vehicle icon up), 4 different Moon tokens (Moon phase icons up), 1 Abort token and 1 Abort Stage token (letters up).
- The player who most recently observed the sky with a telescope becomes the starting player and takes the First Player token. Otherwise, each player rolls the 7 vehicle dice and counts the number of spacecraft icons. The one with the most becomes the 1st Player. Repeat if necessary.
- Add Extra Action tokens to the Action board depending on the amount of players. In a 4-player game, all three Action tokens are used. In a 3-player game the Travel action bonus is left in the box. In a 2-player game both the Travel action bonus and the Scheduling/Planned Observation action tokens are left in the box.
- The last player to do the action selection in a round, which is the player on the right-hand side of the 1st player chooses and takes one of the remaining Extra Action tokens. Each next player to the right does the same until the next player to the right is the 1st player.
- Shuffle the Character cards into a face-down stack. In anti-clockwise order, starting with the player to the right of the 1st player, each player draws two cards from the stack, chooses one to keep, and shuffles the other into the stack. Once all players have chosen their character card, reveal the card and place your chosen card, indicating your Character in the game, in the corresponding slot above your player board. Return the remaining Character cards to the box.
- Each player takes the two Hidden Agenda cards matching their character, chooses one in secret, and places it face down in the slot on top of their player board. Return the unselected cards to the box. You can check your Hidden Agenda card at any time.
- Each player takes the matching Character disc, the Vehicle die and the Lunar Module token in the corresponding color, and a Set card. Return the remaining Character discs and Vehicle dice to the box. Then:
- a. Place your Character disc next to your Character card.
- b. Locate the continent shown on your Character card and place your Vehicle die in the space with green corners on that continent.
- c. Place the Lunar Module token and the Set card near your Player board.
You are now ready to start your exploration!
Game Overview
Objective
You aim to become the most reputed space explorer by the end of the game. To achieve that coveted status, you must collect observation sets, visit different continents, use several transportation modes, and complete quests, each earning you reputation points. But, even more importantly, you want to be the first astronaut to land on the Moon and safely return to Earth.
The game is played in a series of rounds until the end of the game is triggered. Each round comprises the following phases:
- Action selection phase. Each player selects one main action on the Action board and may add an extra action token for an secondary action which is diffrent from the main action, in clockwise order starting with the First player. There are four actions to choose from:
- Direct Observation
- Travelling
- Scheduling
- Planned Observation
- Action resolution phase. Each player resolves their selected main action followed by their extra action, if any, in ascending Week order, starting with the player taking action in Week 1 on the Action board.
- Calibration phase. In this phase, players can change their character status from Astronomer to Astronaut and improve their spacecraft. Only Astronauts can move on the Trajectory map.
- Month Shift phase. Advance the Sun disc one space to the left along the Ecliptic Wave Line on the Star map and prepare for the next round.
The end of the game is immediately triggered when one of the following conditions occurs:
- All the players are 'lost in space'.
- All the players went to the Moon and returned to Earth.
- The Sun disc is in the leftmost space on the Star map for the first time (Astronomer mode) or the second time (Astronavigator mode).
When one of these conditions occurs, proceed to the End of the Game phase, where players will assess the outcome of their mission and earn additional points for their achievements.
The player with the most Reputation Points (RP) wins the game. The End of the Game phase specifies all the possible outcomes and a series of tiebreakers to use if necessary.
Action Phase
The Action board has four areas, numbered 1 to 4, each representing a Week.
Each Week has four spaces showing the possible actions: Direct Observation, Scheduling, Travelling, and Planned Observation.
1. Action selection phase
In turn order, each player chooses a Week with no Character disc and an action space in that Week to select the corresponding action. They place their Character disc, without flipping it, in the chosen action space.
Note: Your Character disc starts the game on the Astronomer side and can be flipped to the Astronaut side using Calibration (see page…).
If you place your Character disc in the Travelling action space and your Vehicle die is on an Earth map space showing transportation mode icons, choose one of those modes to use and turn the die to show the matching icon. You will resolve the travelling action later.
After you have launched your rocket and while travelling in the Trajectory map (explained in Space Travel, see page 33), you must always select the Travelling action.
Hereinafter, the Vehicle die will simply be called the 'Vehicle'.
After all players have placed their Character disc on an action space, proceed to the Action Resolution step.
2. Action resolution phase
Resolve all the selected actions in ascending Week order, starting with the lowest Week number with a Character disc. First resolve the selected Main action depicted on the Action board and then the Secondary action by a possible Extra Action tok[en] (text cut off as printed)
Direct Observation
With this action, you attempt to observe the astronomical object shown on the topmost Observation card in the Week area where your Character disc is, either the Moon or a Constellation.
Observing the Moon
Compare the Lunar Phase number on the Observation card and the number of the Week with your Character disc: If they are equal, your observation is successful, and you should resolve the following steps:
- Take the topmost Observation card from that Week's area and place it vertically in the designated slot to the left of your player board. If you already have cards there, overlap them, keeping the Lunar Phase icons visible.
- If there is a Moon token on your player board showing the card's Lunar Phase icon, flip it to its Crescent side: This token is now active. Every Moon token can only be activated once per game this way.
- Gain the Navigation Knowledge points (NK) indicated in the Observation card, if any, by rotating the green dial on your player board to show the new NK total.
If the Observation card and the Week number are different, your observation is unsuccessful, and your action has no effect.
Example: The card displays Lunar Phase '1', and therefore it matches the Week's number (1). Example: The card displays Lunar Phase '1', and therefore it does not match the Week's number (3).
Observing a Constellation
To successfully observe a Constellation, you must first confirm that it is fully visible in the night sky for the current time of the year and from your location on Earth by following these steps:
- Identify the Constellation on the Star map using the coordinates on the Observation card. The Constellation extends across all the vertical and horizontal spaces indicated by the coordinates.
- Take note of the number to the right of the Earth map's row where your Vehicle is (for example, '+2').
- If your Vehicle is not in the '+3' or '-3' rows:
- a. Move the two Daylight tiles up or down, if necessary, so they both show the number determined in step 2 on the same row as the Sun disc.
- b. If the Daylight tiles are over any of the Constellation spaces, the observation fails, and the action has no effect. Skip the remaining steps.
- c. Move the two Armillary tiles up or down, if necessary, so the black arrow points to the same row number on the Star Map's right. The rows aligned with the arrow and the [eye icon] icons represent the sky area visible from your location.
- d. If any of the Constellation spaces is in a row different from those identified in the step above, the observation fails, and the action has no effect. Skip the remaining steps.
- e. If you reached this step, the observation is successful. Proceed to step 5.
Both the rows on the Star map (in reality called Declination) as the rows on the World Map (in reality called Latitude) have an observational connection whith each other. The current Latitude row is linked to the same row on the Star Map as the field row passing right above your head (Zenith, 90° from the Horizon).
Make sure that:
- The arrow of the Armillary tiles point at the row of your Declination Zone (DZ), like +2 in the first image. Slide the Daylight tiles so the daylight number corresponding to you DZ is next to the Sun disk.
- The yellow and orange lines on the Daylight tiles align with one of the declination lines on the star map like depicted on the right. The depiction in the left is wrongly placed.
- When the Sun disk is on the equator line, keep the line close to the EQ-line on the Daylight tiles on the EQ-line on the Star Map. In both DZ -1 and +1 both EQ-lines overlap. In DZ -2, the lower orange line covers the EQ-line on the Star Map, while in DZ +2, the upper orange line covers the EQ-line.
Play Example: Observations
Jarrah travels to Asia (+2), Sphen crosses the Antarctic land mass (-3) and both want to observe, while Leo stays in Africa on (-1) not sure if he wants to observe as well.
The options are Ursa Major (A), Carina (B) and Eridanus (C). The sun disc has reached the Summer solstice in the northern hemisphere in the constellation of Gemini.
In principle, we don't have to check the column, just the row of the Declination Zones (DZ) of everyone's location.
- Jarrah is able to see DZ +3 to -1. Constellation Ursa Major (A) is the only one completely visible to her. The other two are below the horizon and blocked by daylight tiles.
- Sphen is within the South Pole Circle (-3). You only need to spot the absence of the Sun below the equator to be able to see everything below the celestial equator. Only Ursa Major (A) is not visible and behind the horizon.
- Leo has a big field of view, but also more sunlight to deal with, making only Carina (B) visible for him.
Neil landed in Hawaii (+1), Xiongmao arrived in Greenland, NA (+3) and João arrives by train in Patagonia, SA (-2).
The options are Cygnus (A), Cassiopeia (B), Aquila (C) and Octans (D). The sun disc is positioned on the start of an astronomical year with Spring in the northern hemisphere in the constellation of Pisces.
In principle, we don't have to check the column, just the row of the Declination Zones (DZ) of everyone's location.
- Neil is able to see DZ +3 to -2. Constellation Cygnus (A) and Aquila (C) are the only one completely visible to him. The other two are below the horizon or blocked by daylight tiles.
- Xiongmao is within the North Pole Circle (+3). You only need to spot the absence of the Sun above the equator to be able to see everything above the celestial equator. Unfortunately, the sun disk is on the equator. So no visibility at all.
- João can observe Aquila (C) and Octans (D). The other two are too far north.
Background info: Armillary tiles
The tiles in the game mimic the mechanical latitude ring slide of an actual armillary sphere. The manipulation of the ring is done to check the celestial axis position which extents into space out of the Earth's axis on both Northpole and Southpole.
The other rings, like the Tropics, Equator, Polar circles and the Ecliptic band (the Sun's route through the Zodiac constellations, yellow in image) are fixed on the latitude slide. Once the latitide slide is moved up or down, the entire construction of rings changes position. This indicates how latitude positions dictate what part of the sky is above the Horizon and thus visible to the observer. When closer to the Equator, the higher the Sun's position at noon. The Polar axis rotates to indicate the month in the year to mimic the seasonal variations in the nightsky. To understand the Sun's position we will take a closer look at the daylight cards.
Background info: Daylight tiles
The Daylight tiles are in the game to simulate the area in the sky that will always be engulfed with sunlight at a certain month and will not be part of any morning or evening that period. This range is limited to 6 hours at the Equator and varies from other latitude zones depending on the seasons dictated by the sinusoidal shape of the Ecliptic Lane. To compensate for longer or shorter nights in the Declination/Latitude Zones, the Daylight tiles need to slide up or down depending on the observer's latitude. The polar regions only have one day and one night per year, changing during equinox. That is why we don't use the daylight cards for the Sun's position in the sky at Zones +3 and -3. It is either under the Equatorial horizon or above.
Observing a Constellation (continued)
- If your Vehicle's die is in the '+3' or '-3' rows:
- a. Move the two Armillary tiles up or down, if necessary, so the black arrow points to that same row number on the Star map. The rows aligned with the arrow and the [eye icon] icons represent the sky area visible from your location.
- b. If the Sun disc is on the Equator line or in the sky area visible from your location, there is no night sky, and your observation fails, and the action has no effect. Skip the remaining steps.
- c. If you reached this step, the observation is successful. Proceed to step 5.
- If your Constellation observation is successful:
- a. Take the topmost Observation card from that Week's area and place it vertically in the designated slot below your player board, tucked beneath your Set card but showing its leftmost icons. If you already have cards there, overlap them in the same way.
- b. Gain the NK indicated in the Observation card, if any, by rotating the green dial on your player board to show your new NK total.
- c. Check if you have completed one or more new Sets. A set is completed when the number of identical icons on your Observation cards equals or exceeds the number next to the matching icon on your Set card. If so, immediately score 10 NK for each new Set completed. Then, flip the matching Set tokens on your player board to their green side to indicate you cannot score them again (each Set scores only once per game).
Travelling
Move your Vehicle on the Earth map or the Trajectory map.
At the beginning of the game, you can only move on the Earth map and use the transportation mode chosen during the Selection phase.
After reaching the Launch space on the Earth map (see space [+1], [-90/-60°]) and choosing the Spacecraft, you can launch your rocket and start moving on the Trajectory map. You can only move on the Trajectory map from then on, unless a Mission abort occurs. The rules for moving on the Trajectory map are described in the Space Travel section (p32).
When travelling, you can move your Vehicle any number of spaces up to their movement allowance, indicated at the bottom of the Earth map.
Standard movement on the Earth map
The following rules apply:
- The start and end spaces for the movement must show the icon of the chosen transportation mode, except for boats.
- Move your Vehicle from a space to an adjacent space, orthogonally or diagonally, complying with any specific restrictions.
- Columns '+11' and '-11' are considered adjacent, and you can exit the Map to the right side, entering the opposite side and vice-versa, as indicated by the outward pointing arrows.
- When using a car, you must always follow the single white lines.
- When using a train, you must always follow the double-line rail tracks.
- When using a boat, you must always move into directly connected ocean or sea spaces (brown spaces on the map). Large blue arrows indicate canal routes that allow passage across continental areas.
- Boats can end their movement in a brown space without the boat icon and continue moving in a following movement action. However, you can only switch transportation modes in a space with the boat icon.
- When using a helicopter or airplane, you can move across land or water spaces.
- On the +3 row, all spaces are considered adjacent for boat, helicopter, or airplane movement; therefore, after entering that row, you can move from one space to any other on the +3 row as a one-space step.
- On the -3 row, all spaces are considered adjacent for helicopter or airplane movement (but not for boat movement due to blocking Antarctica continent).
- If you select the spacecraft at the Launch site, you will leave Earth and start moving on the Trajectory map. Refer to the Space Travel section (page …).
A. Continent-based Travel Chain
- Choose a transportation mode shown both on the space where your Vehicle is and on a Continent tile in your player board.
- Flip that Continent tile to its back (to show the Continent again), indicating it has been used. You can use each Continent tile only once.
- Move your Vehicle using the standard movement rules, including those that may earn you NK.
- You can use a Continent tile you have just received after entering a new Continent as part of a Travel Chain.
B. Vehicle-based Travel Chain
- Roll your Vehicle die. If you roll an icon shown in any other Vehicle die in the same space, you can move again using any transportation mode shown in that area. Otherwise, place your Vehicle back in the same space with the last icon used face up.
C. Compass-based Travel Chain
- Roll your Vehicle die. If you roll an icon shown in your current space on the Map, you can move again using any transportation mode shown in that space. Otherwise, place your Vehicle back in the same space with the last icon used face up.
You can perform multiple Travel Chains in sequence, regardless of the outcome of each of them, as long as all the required conditions are met. Add all the earned NK points to your NK dial.
Play Example: Travel Chain
- Sphen is using his private heliport to cross Antarctica on Latitude Zone -3 to a public heliport with a helicopter (+5NK).
- Sphen uses a Continent Tile (CT) with a boat icon to cross the water by boat (+3NK) to Africa (+4NK and CT) meeting Leo (black). This meeting results in a chain die roll and succeeds (boat).
- Continuing the chain travel by car (+2NK) towards the position of Neil (red).
- Although chain die roll was unsuccesful, Sphen uses another CT with a plane icon (+2NK) towards Europe (+4NK). Meeting Yuri, another chain roll fails and Sphen decides to stop the travel action. Don't forget to turn the die face back up to the last used vehicle icon. Here this is a plane icon.
Scheduling
Reserve the topmost Observation card in the Week where your Character disc is for a future Direct Observation.
Take the topmost card of that Week's stack and place it in the Schedule slot to the right of your Player board. Only one card can be in that slot. If another card is already there, swap the new and existing cards.
Planned observation
Use a card from your Schedule slot.
Resolve the action using the card in your Schedule slot as if it were a Direct Observation.
Note: A Planned Observation is not considered a Direct Observation. For instance, if an ability specifies a Direct Observation, it does not apply to a Planned Observation.
Background info: Map projections
Sometimes we forget that the Asian and North American continent are nearly connected in the Bering Sea and not that far away from each other than our perception seems to fool us due to how world maps are presented to us in many cases. Once we get passed this misinterpretation, our mind still interprets that Greenland is far away from the European or Asian copntinent due to the flat projections of the many world maps we encounter. In fact, the map in the game is one that makes it easy to see the entire planet, by using a false projection. If we would use an orb, we would have the correct shape, but half of it would fall behind our horizon.
In order to use the right physical feature of the world while traveling in the game and use a flat board at the same time, we have to train our brain to see the real projection. For this reason, arrows and other visual aids will guide the player to be imersed in the real physical environment and still give the overview of the entire world at the same time to take tactical travel decisions.
Unlike in some of the game board worlds where left is connected to right and up is connected to down, the latter wouldn't be possible in our physical world. Unless you drill a hole from top to bottom, you can't travel from Europe to the Antartic region in one step.
The North Pole region is smaller than projected and connected with each other. It has no land mass, but frozen water that can be opened up by ice breaker ships. The South Pole region is also connected, but due to the Antarctic continent, no ships can cross the polar region in the South.
Travelling (continued): Earning NK
When you use a transportation mode for the first time, flip the corresponding token on your player board to its number side and immediately gain that number of NK. This is a one-time bonus, regardless of the number of times you use the same transportation mode.
When you enter a continent for the first time, take the topmost tile from the matching Continent tile stack and place it face-up on the designated space on your Player board. Immediately gain the number of NK shown. You can only gain one tile of each Continent.
Note: Each continent is in a different colour, and specific spaces have two colours. When you move to such a space, check the colour circling the transport icon: it indicates to which continent that space belongs. The train, car and airplane icons in the circle are all situated in Asia.
If you flip the 5 basic vehicle tokens (spacecraft excluded) or the 7 continent tiles while the Timer token shows the Earth side, immediately gain 20 NK, as indicated by the bonus reward icon on your player board.
Travel Chains
Upon ending your movement, you can perform a Travel Chain and move again if meeting any of the following conditions:
- A. The transportation mode icon on the space where your Vehicle is matches the icon of one or more of the face-up Continent tiles on your player board. Flip the tile to use the chain.
- B. You end up in a space with one or more Vehicle dice.
- C. You have the Compass ability.
If you choose to perform a Travel Chain and move again, follow the procedure for the condition that applies (if you meet multiple conditions, select one).
Quests
You can start a Quest at any time during your turn and have any number of simultaneous ongoing Quests.
To start a quest, flip a Continent tile with a flag icon or two other Continent tiles (to show the Continent side) on your player board and choose one of the following options:
- Search the Quest deck for the card matching the continent on your Character card. If another player has already taken that Quest card, you cannot start a Quest this way..
- Draw the two top cards from the Quest deck, choose one to keep, and shuffle the other into the deck. Then, tuck the selected card under your Character card so that only the quest part remains visible.
If you have ongoing Quests, check whether you complete one or more of them each time you move your Vehicle one space on the Map.
To complete a Quest, you must fulfil one of the two observation-related conditions on the card, and your vehicle must be in one of the indicated spaces on the Earth map.
To fulfil an Observation condition, you must have observed 1 to 3 of the Constellations specified on the card. Completing all observations earns you more NK.
When you complete a Quest:
- Gain the NK shown on the card for the Constellation observations completed.
- In the Astronavigator Game, earn double the NK if scored within the first year (Timer Token showing the Earth icon).
- Turn the card to show its Instrument side. From now on, you can benefit from that Instrument ability (see list of instrument abilities).
Here Yuri scores the quest for the Armillary Sphere and gains the instrument ability and the corresponding instrument token.
All the Quests are detailed in the Reference booklet.
Calibration Phase
Selecting Calibration
At the end of every player's resolution, that player indicates if they want to choose options in the Calibration Phase by moving their Character disc to the centre of the action selection area, covering the Moon icon. Otherwise the player just retreives their character token from the action board.
If you do choose to partake in the Calibration Phase, you can take one or more of the following options:
- Change the character status
- Calibrate your spacecraft
- Voluntary Abort ("Abort Stage")
Resolving Calibration Options
In Week order, each player with their Character disc in the centre space resolves all the actions they want to take in the order of their choice.
Changing the Character Status
Your Character disc starts the game on the Astronomer side. By selecting this option, flip your Character disc to the Astronaut side, with the following effects:
- You can still move your Vehicle on the Earth Map until performing a Rocket Launch (see page 34). Thereafter, the Vehicle will move on the Trajectory map.
- While the Character disc is on the Astronaut side, you cannot conduct Direct or Planned observations.
- You can only change the Character status to Astronomer upon an Abort Mission event that brings your Vehicle back to Earth (see page 31 and 39).
Calibrate your Spacecraft
You want to calibrate your space vehicle as efficiently as possible for faster and safer space travel, using the three calibration spaces on your player board:
- The Sextant space (SXT)
- The Scanner Telescope space (SCT)
- The Attitude Indicator (AI) space of the gyroscope, in the centre of the Set token area
To activate these spaces, you can do one or more of the following for the same calibrate option:
- Move one activated Moon token (with the crescent symbol side up) to the SXT space on your player board.
- Move one Set token to the SCT space on your player board.
- If you have an activated Set token in the SCT space, you can choose to move another to the AI space on your player board. This token however, must be part of the AI instrument. The Polar Axis and Precession sets are not part of the AI-instrument.
The benefits of activating these spaces are described in the Space Travel section (see page ...).
The effects of activated SXT and SCT spaces last for the current turn only.
Voluntary Abort ("Abort Stage")
If your Vehicle is on the Trajectory map and your Abort Stage token doesn't show the unavailabilty icon, you can abort the mission during the Calibration Phase.
Follow the rules described in the Check for the Mission Abort Event section in Space Travel, with one difference: You flip back any used Moon or Set tokens.
Therefore, a voluntary abort enables you
- to reset your DV dial and
- to recover any Moon or Set tokens you used.
- Turn the Stage Abort token to its unavailability side
Background info: Space instruments
In the game characters and quests teach you about navigation (astrolabe, sextant and octant), celestial markings (armillary spheres) and magnification (telescopes), each portraying their function with utilities in the game. The space navigation endgame is the culmination of instrument and observation knowledge.
The player board has a sextant (SXT) and scanner telescope (SCT) where the invested knowledge of the astronomy part of the game can be spent to reach the Moon safely and as fast as possible. During the Calibration phase, astronauts can spent a lunar phase and a constellation set token to mitigate difficulty values during the different stages and accelerate the journey if a matching set icon appears in the observation zone next turn.
The images showcase astronaut and first space navigator Jim Lovell in the first ever human voyage towards the Moon with the Apollo 8 mission, followed by midcourse navigational measurement info together with visual and technical details of the onboard instruments.
During the Apollo program astronaut training astronomy was included for navigation purposes. In the following image below, a customized star map was made where prominent stars were numbered in order for the astronauts to dial them into the computer to position themselves with the thrusters. Normally the position can be read from the gyroscope, but in an event that the computer was hacked (by the Russians that time) or during gimbal lock (gyroscope failure), analogue sighting was necessary to keep track of your way to the Moon.
The Command Modules have a gyroscope in the size of a footbal (soccer) with three gimbals. This device can measure any deviation of pitch, yaw or roll the module is making, which can be minitored through the Attitude Indicator (AI). The astronauts needed to watch the gimbals to avoid all their axes from aligning in the same plane, which could lead to "gimbal lock". When gimbal lock occurred, resetting the gimbals with the initial positioning of the stars required astronavigation. Gimbal lock can be prevented and kept an eye on, but did happen when abrupt positioning occurred, like after the explosion of the oxygen tank during Apollo 13, which was also manned by a.o. Jim Lovell (first astronaut on the left in picture right). Although Lovell had the misfortune of having never landed on the Moon, he went to the Moon and back twice, while conducting experimental (Apollo 8) and emergency (Apollo 13) sightings.
This is why I would consider him as the biggest astronavigator in space ever, and Neil Aquila is more a reference to Lovell, than to Armstrong, in this regard. For the first landing and lunar module (LM) "the Eagle", Neil takes the lead as a reference.
Astronavigation is also embeded in the general Apollo mission logo with the constellation of Orion symbolizing the lunar orbit in the sky passing through its belt on the celestial equator.
Space Travel
Travelling to the Moon and back takes place on the Trajectory Map, with your Vehicle showing the spacecraft icon.
Space Travel Basics
A blue line and the spaces with a blue border numbered 1 to 5 in the Trajectory map represent the outbound path from Earth to the Moon. Likewise, a yellow line and the spaces with a yellow border numbered 1 to 5 represent the inbound path from the Moon to the Earth.
Space movement along those lines starts on the blue space '1' and proceeds in ascending order, one space at a time: the spacecraft has a movement allowance of 'one'. From the blue space '5', you advance to the Moon landing sequence, then to the yellow spaces in ascending order, and finally to the splashdown space back on Earth.
The maximum number of Vehicle dice that can simultaneously be on the same Trajectory tile (numbered stage) depends on the number of players in the game:
- 1 or 2 players: each numbered stage can contain 1 Vehicle only.
- 3 or 4 players: each numbered stage can contain up to 2 Vehicles.
If the stage where your Vehicle should end its movement is already at its maximum capacity, skip it by jumping to the next stage. Repeat the process if necessary, and always place your Vehicle in the first available stage. Moonlanding and Return to Earth stages have no number or Trajectory tile, but a printed ranking on the Trajectory board.
Rocket Launch
To start your Space Travel, you must fulfil all of the following conditions:
- Your Character disc shows the Astronaut side (see Calibration, page….).
- Your Vehicle is in the Launch space on the Earth map.
- You choose the Travelling action and the spacecraft side on your Vehicle.
Every time a player launches their rocket, all the players with Vehicles on the Earth map collect a Trajectory tile, starting with the launch player and proceeding clockwise (the players already on the Trajectory map do not collect a Trajectory tile).
You can only have one Trajectory tile from each stack, i.e., you cannot have two Trajectory tiles with the same number and colour. Take the topmost tile from the chosen stack and place it in front of you with the face-up stage number. You can check the tile back anytime, but do not reveal it to the other players. The use of these tiles is explained below.
Then, execute the Travel Sequence below.
Travel Sequence
Resolve the following steps when moving on the Trajectory map due to the Rocket Launch or subsequent space movement.
1. Move your Vehicle
Advance your Vehicle to the next available space along the Trajectory Map.
If you reach or pass blue space '3', your Lunar Module (LM) token enters play:
- When your Vehicle reaches or passes the blue space '3', place your Lunar Module (LM) token on top of your die, showing the full LM (a).
- In your next movement after reaching blue space '5', place your Vehicle in the red space with the Spacecraft icon (b) and the LM on the Moon Landing area. If another LM token is already there on rank 1, place yours on the next ranking space.
- Place your Vehicle in the yellow space '1' (c) in your next movement after landing on the Moon and turn your LM token showing only the landing module legs (d).
- The final movement in the Trajectory map is from yellow space '5' to the splashdown ranking space on Earth.
- The Spacecraft icon can hold unlimited vehicle dice and is thematically a lunar orbit area for the command modules. The Moon landing and Earth splashdown stages have ranked spaces.
2. Reveal the Trajectory tile and adjust your DV dial
If the Trajectory tile where you placed your Vehicle is unrevealed, flip it to show the Difficulty Value (DV).
Add the DV shown on the Trajectory tile where your Vehicle is to the DV dial in your Player board (the red dial), even if the Trajectory tile was already flipped.
Example: 10 + 30 = 40
If you have an unspent Moon Phase token on the SXT space on your Player board, you can spend it to negate the DV effect of the Trajectory tile: Flip the Moon Phase token and do not add the Trajectory tile DV to your dial. Put the Moon Phase token back on its spot on the left of the NK-dial.
Play Example: Trajectory movements
- In a 4-player game, Neil launches with the Saturn V and gains 10NK from the rocket. The vehicle die is leaving the World Map onto the Trajectory board. Directly moving to stage 2 because stage 1 has already 2 other vehicles. He adds the 15 DV value to his red dial.
- Because Neil completed his Apollo Star Map agenda, he skips stage 3 when applying a calibrated constellation set via his Attitude Indicator to take an additional step. Arriving next to João and takes 30 DV. He puts his LM token on top. He uses a stage 4 Trajectory Tile (drawn during a launch) which is also a 30, places it on top of the other tile and gets a boost for the same DV to stage 5.
- There, he flips the still covered tile and to his relief it has 0 DV. He uses a continent tile with a CSM icon on it to chain the trajectory with a moonlanding.
- He puts the vehicle die in the orbit zone and his LM-token on the first landing spot on the Moon.
Background info: Lunar-Earth trajectory
Especially manned Moon missions follow a free-return trajectory. This kind of trajectory guarantees a sling shot back from a second body (the Moon in this case) without the need for extra propulsion. A clever mindset to have a calculated back-up plan when things go sideways like during the Apollo 13 mission. The first lunar test mission without landing, Apollo 8, was programmed in this fashion. The consequent missions added lunar orbit insertion, small position thrusts and Earth injections as add-on upgrades to the main lunar voyage. To this day, manned lunar missions are still prepared (such as Artemis) with the basic physics priciple of a free-return trajectory.
Although technology, purpose and costs evolve over decades of research and development, the Apollo missions are still to this day the blueprint for future missions. The current endeavours of building moon bases and lunar space stations are still just modern upgrades to the free-return physics on which 9 Apollo mission (of which 6 with landing) have relied on succesfully. This Lunar-Earth trajectory was automated with gimbals and rehearsed thrust calculations, but any deviation needed to be monitored with the Attitude Indicator and adjusted when necassary by astronavigational sightings with the scanner telescope and space sextant.
The mission stages illustrated: launching to escape Earth's gravity, ejecting rocket stages with empty fuel; orbiting Earth and positioning to burn engines for translunar injection; Command Service Module (CSM) ejects and turns to dock with Lunar Module (LM); reverse burn to enter lunar orbit, 2 of the 3 astronauts enter the LM; 1 astronaut in CSM remains in lunar orbit and LM separation for landing; LM ascent stage towards rendez-vous with CSM; 2 astronauts enter the CSM, then jettisoned LM ascent stage to crash on the Moon; orbiting Moon and positioning to burn engines for transearth injection; CSM separation: 3 astronauts in Command Module (CM) ejecting Service Module (SM); CM enters Earths atmosphere and lands in sea.
3. Check for the Abort Mission Event
If the DV value in your red dial exceeds the NK in your green dial, you must abort your mission.
If your Abort token is already on its unavailable side, you cannot safely abort the mission, and you become Lost in Space, meaning you are out of the game. Take note of the stage on the Trajectory Map in which that occurs.
Otherwise, flip your Abort token to the unavailable side and reset your DV dial to zero. Then:
- If you are on the blue outbound trajectory, return your Vehicle with the spacecraft icon face up to the Earth map's Launch space you used. If the LM token is on your die, place it next to your Player board.
- Choose to continue as an Astronomer (to make further observations) or Astronaut (to relaunch into space) and ensure your Character disc is on the appropriate side.
Do not flip back any used Moon or Set tokens. (This sentence applies to the Abort Mission event above, including the inbound-trajectory case.)
- If you are on the yellow inbound trajectory, return your Vehicle to the red space near the Moon (lunar orbit) and continue as an astronaut.
Benefits of Calibration
If a Set token on the SCT or AI spaces on your Player board matches an icon on any of the cards on the Action board, you can advance your Vehicle again, regardless of where your Character disc is. Treat this as a new movement and follow all the steps of the Travel Sequence.
Travel Chains
While moving on the Trajectory Map, you can only make Travel Chains with continent tiles (the Compass ability and sharing space with other Vehicle dies do not apply). Flip any face-up Continent tile with a spacecraft icon on your player board to move again. Treat this as a new Space Travel movement. Apply the space availability and tile revealing rules as explained above.
Using Trajectory Tiles
Once per game, during your Space Travel and regardless of the location of your Vehicle, you can place one of your Trajectory tiles on the tile of the corresponding stage on the Trajectory Map.
If the value of both tiles is the same, advance your Vehicle one additional space following the Travel Sequence (see page 34). Otherwise only the DV-value changes, possibly affecting the Trajectory tile you are on. In that case, decide to add the old value first or to use the new value to increase the DV on your dial.
Play Example: Calibration and Trajectory
- João launches with the ascent stage to stage 1 of the inbound trajectory (yellow path to Earth) with a 0 DV. He switches the LM-token to the side without the ascent stage.
- The moon token doesn't need to be used for a 0 DV stage.
- Since the Milky Way set has been calibrated succesfully, João uses it to make an additional movement.
- He moves to stage 2 of the inbound trajectory with a 30 DV and he decides to spent his calibrated moon token to reduce the DV to 0.
Month Shift Phase
If the Sun disc is in the leftmost position of the Ecliptic Wave Line on the Star Map for the first time (Astronomer mode) or the second time (Astronavigator mode), proceed to the End of the Game phase.
Otherwise, prepare for the next turn by following these steps:
- Take your Character disc back and place it next to your Character card.
- If the Sun disc is in the leftmost position for the first time, flip the Timer token to show the Parachute icon and place the Sun disc on its starting space. Otherwise, advance the Sun Token one position to the left along the Ecliptic Wave Line. No Vehicle and Continent bonuses are granted anymore. Normal vehicle points are still valid.
- Shift both Daylight tiles two hours to the left, as shown in the image. This way, the sun disk will always cover a zodiac sign.
- Draw and place one Observation card face up on each of the four Observation card stacks on the Action board in week order, and then turn the topmost card of the Observation card deck face up. If there are not enough cards left in the observation deck (less than 5) to refill the weeks, first gather all the observation cards on the action board and shuffle them into a new deck put them underneath the cards that were left.
- The current Start Player passes the Start Player token to the player on their left. That player becomes the Start Player for the next turn.
Next, start a new turn.
End of the Game
For the Astronomer game, proceed to the Final Scoring step in Astronomer mode.
For the Atronavigator game, start by determining the outcome of each player's mission. In most cases, this will not be sufficient to specify the winner. In such circumstances, and to better assess your performance, proceed to the final scoring step.
Mission Outcome
When the end of the game is triggered, the following mission outcomes are possible, from most to least successful:
- Success: You return to Earth safely.
- Ongoing: Your Character is still in play.
- If no player succeeds, the player in an Ongoing mission whose Vehicle is nearest to the splashdown space wins the Space Race for RP.
- Disaster: You have become lost in space.
- Players whose mission ends in a disaster can never win.
Final Scoring
If your mission was a Success, deduct any existing DV from your NK. Your NK cannot fall below zero during a Success.
Then, each player adds the Reputation Points (RP) for their achievements during the game to their current score.
Astronavigator mode
| Category | 4 players | 3 players | 2 players |
|---|---|---|---|
| Most leftover NK with earth return | 2/1/0/0 | 2/0/0 | 2/0 |
| Most Foreign Instruments (>0+) | 2/1/0/0 | 2/0/0 | 2/0 |
| Space Race | 3/2/1/0 | 2/1/0 | 2/0 |
| Lunar Landing | 2/1/0/0 | 1/0/0 | 1/0 |
| Hidden Agenda | 1 RP for each player who completed it |
The player with the most RP is the winner. In case of a tie (for RP calculation or final winner), use the first tiebreaker that applies from the following:
- The first player to Land on the Moon.
- The player with the most leftover NK.
- The player with the most Sets.
If the tie persists, the tied players share the same position.
Astronomer mode
| Category | 4 players | 3 players | 2 players |
|---|---|---|---|
| Most NK | 3/2/1/0 | 2/1/0 | 2/0 |
| Most Foreign Instruments (>0+) | 2/1/0/0 | 2/0/0 | 2/0 |
| Constellations | 1 RP per set | ||
| Lunar Phases | 0 / 1 / 2 / 4 RP for having flipped 1 / 2 / 3 / 4 Moon tokens | ||
| Continents | 3 RP if you have all seven Continent tiles | ||
| Vehicles | 3 RP if you have flipped all five Earth vehicles |
The player with the most RP is the winner. In case of a tie (for RP calculation or final winner), use the first tiebreaker that applies from the following:
- The player with the most NK.
- The player with the most Sets.
If the tie persists, the tied players share the victory.
Module: Alternative Launch Site
The Alternative Launch Sites (ALS) is a module for a more advanced play and is not mandatory for the base game.
When playing with this module the other rocket cards (other than the Saturn V) should be shuffled into a deck and put near the World Map.
You can reveal the top card of the ALS-deck after activating the continent tile with a CSM vehicle icon (red background) on it. Add an alternative launch site token or miniature rocket on the designated square on the world map. If a you activate the continent tile with a rocket icon (white background) on it, you draw the 2 top cards of the ALS-deck, choose 1 and shuffle the other back in that deck. You reveal the ALS whenever you decide to use it.
Like with quests, this mode offers the same choice for characters to directly choose a rocket of their own continent. Africa and Antarctica do not have that choice, because they don't have their own rockets. The characters without direct access to rockets are compensated with special Hidden Agenda ability combinations. Although the standard rocket Saturn V still grants you +10 NK during launch, the other rockets only trigger their ability in this mode while calibrating or aborting. Calibrating a Luna token for H2A-2022 or a specific set icon for other rockets gives you +1 movement regardless of set appearance on the lunar phase board. Other set applications during calibration still count and may result in a total of +2 movement. While using the Falcon Heavy, the Abort reaction triggers resetting used calibration tokens like an Abort Stage reaction. The Starship triggers an immediate relaunch with +2 movement after any Abort or Abort Stage reaction. Sphen Easydive's "Slippery Boost" does work with this rocket.
More rocket abilities can be found in the reference book.
- The rocket ability is available as soon as the vehicle token is switched to the engine icon.
- Only revealed rockets at your current launch sites can be activated.
Module: Solo
Objectives and setup
The solo variant follows the Astronavigator mode rules. Additionally, the Bad Timing Token starts in week 1 and the Shadow Token enters play in the second round. The Shadow's vehicle die enters play when the Space Race is initiated (see Space Race Trajectory).
Win and survive the space race from the game's AI system, while fulfilling a quest, successfully meeting the sphinx and reaching the requirements for your hidden agenda. The latter three depend on the difficulty settings.
The aim of the game for your first game (NEWBIE) is to return back from the Moon first (before the "shadow" character) within 2 years. Story-wise it is more like mastering all the spacecraft and navigation techniques, because a return trip takes only about 6 days (3 towards the Moon and 3 back to Earth). The other condition is that you must have completed your hidden agenda in a MEDIUM level game. In a ADVANCED level game have at least 1 quest fulfilled on top of it, in EXPERT level make sure you also track down the sphinx (see Module Sol Ange for setup). Only use the emerald tokens if you plan on going for expert mode.
Two tokens are constantly blocking half of the week options. The "bad timing token" (use the back of the sextant token) moves each round (month) to the next moon phase (starting the game in the first week), while the "Shadow Token" (use another character token) takes the moon phase you chose last round or the one before the "Bad Timing Token" if already occupied by bad timing. Always move the "bad timing token" first before the shadow token in the Month Shift phase. In the first round the shadow is not placed. The next round you only have two options. There is room to anticipate, because you always know where the tokens are going to block you. The shadow is the one you can manipulate the most.
Space Race Trajectory
Once the second year starts and the parachute token is being revealed, the AI spacecraft launches (use the vehicle die or spacecraft miniature of the shadow player). If either the bad timing or the shadow token precedes your character in the weeks on the lunar phase board, the shadow spacecraft moves first. If both the bad timing and the shadow token are preceding your week, the shadow player gets one additional step. Both you and the shadow also make use of skipping stages due to spacecraft housing rules for 1-2 players on the trajectory. The shadow never flips an unrevealed stage, so you cannot abuse the shadow for scouting. The shadow also never gains navigation knowledge nor does it tackle difficulty values. In this solo variant, launching does not trigger the draw of trajectory tiles like in the multiplayer game.
Difficulty Settings
- NEWBIE: [1st < 2y]
- MEDIUM: [1st < 2y] + [Hidden Agenda]
- ADVANCED: [1st < 2y] + [Hidden Agenda] + [Quest]
- EXPERT: [1st < 2y] + [Hidden Agenda] + [Quest] + [Sol Ange]
Module: Sol Ange
During setup of an Astronomer Game or Astronavigator Game, the module with Sol Ange can be added for an instresting cat and mouse game mechanic.
Tokens with a unique number from 1 to 12 will be randomly added on areas on the World Map containing a minimum of one and a maximum of two vehicle icons from which one needs to be at least a car or a train. Setup is done by the First player.
All numbers except one will be revealed. At the beginning of every turn, before the first action selection, check which month the round symbolizes and turn the corresponding numbered emerald to the sphinx wing side, while the previously revealed wing is turned back to the numbered side. Nothing happens if the die result doesn't match a corresponding emerald value still present on the World Map. Players can collect the emerald tokens during travelling resolutions, diminishing the pool of emerald numbers on the map. This will limit Sol Ange's mobility. Once you have 2 emerald tokens, a meeting with Sol Ange is possible. Among the collected emeralds of the player, the sum or subtraction of two emerald values need to match the number of the current sphinx location token.
In Astronomer mode
Once you meet the sphinx you can choose to fulfill one of your quests automatically or gain another Quest card from the quest deck of your choice to try and complete. If you choose the latter, shuffle the Quest deck and place them back face down on the table.
In Astronavigator mode
Once you meet the sphinx you can choose to fulfill your current Hidden Agenda automatically or gain another Hidden Agendas to try and complete. If you choose the latter, shuffle all the Hidden Agendas not in the game from all characters, forming a new face down deck to draw from. Draw 4 cards and choose one to keep as a second Hidden Agenda. You will gain 1 RP per Hidden Agenda scored at the end of the game.
Catching the sphinx will not only require emerald collections but also timing and vehicle chain travel preparations to get to Sol Ange when the occasion occurs. Players may not end or pass locations with the sphinx when the aformationed conditions of their collected emeralds are not met.
Use the reference book to discover all the Quest and Hidden Agenda cards.
Background info: Star Map Orientations
In the board game, I tried to indicate groups of constellations that have common position features. This way sets can be collected. Three of these sets are linked to these coordinate systems. Whenever a set is a reference to a hemisphere, the celestial poles or even precession, the player has the opportunity to understand the equatorial coordinate system. The most important instrument to represent this system is the armillary sphere. But after a brief overview of the equatorial, and thus the classical, coordinate system, we take a look at the ecliptic coordinate system embedded in the set collections, which is important to understand the Solar System and its orrery designs, and we conclude with the galactic coordinate system. The latter is crucial to study star positions in the Milky Way, star population groups, stellar evolution, migration and proper motion.
- Equatorial coordinate system. This model helps us understand astronavigation on Earth and time-keeping (calendar). The armillary sphere explaination on p.19 shows you how the seasons and the hours are tracked with constellations Pisces as year's starting point with Spring, Gemini and Sagittarius as solar Summer and Winter points today. Due to precession (Earth axis wobble), names like tropic of Cancer and tropic of Capricorn get outdated). About 2000 years ago, with the birth of the first star maps, Aries was the sarting point and Cancer and Capricorn the solstices. This system also splits the celestial globe into a Northern and Southern hemisphere.
- Ecliptic coordinate system. On the Geocentric star map the tilted base position is about 23° which is the plane for the Ecliptic coordinates. This model helps us understand the planetary motions and astronavigation in the Solar System. It brought a cosmological revolution for human understanding and gave a better sense of time-keeping, which resulted in several corrections (calendar leap years). Today it serves as a map for interplanetary discoveries and spaceflight.
- Galactic coordinate system. On the Geocentric star map the tilted base position is about 63° which is the plane for the Galactic coordinates. This model helps us understand astronavigation in the Milky Way. It resulted from the 1920s cosmological revolution on a galactic scale, but the catalogue of stars was really evolved thanks to ESA's space telescopes Hipparcos (launch 1989) and Gaia (launch 2013). The understanding of interstellar mechanics was the start of the age of interstellar discoveries (20th century), during the 1990s the first extrasolar planets were discovered.