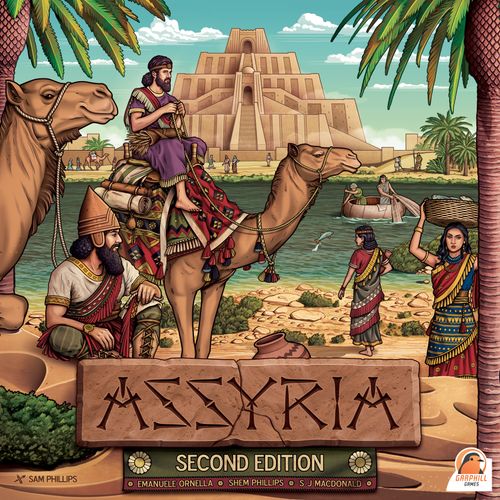
Assyria: Second Edition
Assyria: Second Edition Rulebook
Table of Contents
Table of Contents
Aim of the Game
The aim of Assyria is to be the player with the most Victory Points (VP) at the game's end. Points are gained primarily by building Huts and Ziggurats, making Offerings, and increasing in Influence. Each Round players will bid for turn order, expand on the Map, and take various actions. After the third and sixth Rounds, a Flood will occur, wiping away everything along the two rivers. After the final Flood, the player with the most points will be crowned the winner!
Components
In each player colour: 12 Ziggurat Pieces in 3 sizes, 1 Leader, 10 Huts, 1 VP Marker, 1 Offerings Marker, 1 Influence Marker, 3 Wells, 4 Action Tiles, and 2 Ploughs.
8 Expansion Markers in 2 different colours, 4 Camel Markers, 12 Farmers, 25 Gold, 12 Ships, 8 Ziggurat Roofs, 6 Food Tokens.
40 Food Cards, 30 Favour Cards, 20 Solo Scheme Cards, 2 Solo Reference Cards, 4 Player Boards.
10 Civilisation Boards.
1 Main Board.
Setup
Follow these steps to set up Assyria:
-
Place the Main Board in the centre of the play area.
-
Shuffle the Civilisation Boards into a facedown Draw Pile. Reveal 3 of these from the top of the Draw Pile, placing 1 next to each of the 3 Tribute areas along the left edge of the Main Board.
-
Shuffle all Food Cards into a facedown Draw Pile near the right end of the Main Board. Do the same for the Favour Cards. From the top of the Food Card Draw Pile, reveal a number of Cards faceup equal to players plus 1. There are 3 columns for Cards to sit on the right end of the Main Board. Place these Food Cards into the left column. Sort them using their printed values, with the lower numbers at the top of the column, and higher numbers towards the bottom. If there are multiple Food Cards of the same value, place those revealed earlier, higher up in the column.
-
Mix the Expansion Markers facedown, randomly returning 1 of each colour to the box without revealing their values to any players. Place the remaining 6 Expansion Markers facedown on the Round Track in the top-right corner of the Main Board. Place the 3 Green Markers on the left spaces, and the 3 Brown Markers on the right spaces.
-
Place all Food Tokens, Gold, Farmers, Ships, and Ziggurat Roofs into a Main Supply within reach of all players.
-
From the Main Supply, place 1 Food Token on each of the outlined spaces of the Influence Track (left edge of the Map). Place 2 Ziggurat Roofs on the square spaces of the top 2 Tribute areas along the left edge of the Main Board. Also place 3 Ziggurat Roofs on the indicated spaces of the Offerings Track (right edge of the Map).
-
Each player takes 1 Player Board and all components in their chosen colour. a. Place all 12 Ziggurat Pieces on the Player Board. b. Place the 3 Wells on the right-most spaces of the Camel Track. Also place 1 Camel Marker on the left-most space. c. Place 1 Hut at the top of the Player Board. Also place 1 Gold here from the Main Supply. This space is a player's Personal Supply. Place all other Huts nearby as part of the Main Supply. d. Place the VP Marker on the 10 space of the VP Track. e. Place the Influence Marker on the bottom space of the Influence Track. f. Place the Offerings Markers on the bottom space of the Offerings Track. Note: The stacking order of the above 3 Markers does not matter between players. g. Place the 4 Action Tiles faceup in their numbered spaces along the bottom of the Player Board (their green sides should be visible). h. Place both Ploughs on their spaces in the top-right corner of the Player Board. Players all start the game with 1 faceup Plough (showing a Wild Food icon), and 1 facedown.
Starting Bid
Before starting the game, players need to do an opening bid for turn order, Food Cards, and starting Ziggurats. This bidding follows the same rules as bidding throughout the game. This will be explained in full now.
To start the bidding, the player whose Leader is highest on the Turn Order Track moves their Leader to an empty space on 1 of the Card rows. For the Starting Bid, there is only 1 Food Card per row. During the game there will be 3 Cards per row: 2 Food Cards and 1 Favour Card.
After selecting a row, the player must place their Leader onto 1 of its 3 available spaces. The highest space has no cost, the middle space costs 1VP, and the lowest space costs 3VP. If they select 1 of the lower 2 spaces, they must immediately move their VP Marker backwards on the VP Track. Players can never go below 0VP.
Once the first player has placed their Leader, the next highest player on the Turn Order Track then places their Leader in the same manner. If they select a different row, the next player goes, and so on. If, however, a player selects the same row as another player, this "outbidding" must be resolved immediately.
To place a Leader in a row where another Leader is present, a player must place their Leader on a lower empty space within that row. In other words, if a Leader was already on the highest space, another player could place their Leader on 1 of the lower 2 spaces. But if a Leader was already on the middle space, a player may only place their Leader on the lowest space. If there is already a Leader on the lowest space, no other players may place a Leader in that row.
If a player places their Leader on a lower space in the same row as another Leader, the Leader belonging to the other player must immediately move to a different available space. This could be to a different row, or to a lower space within the same row.
Example: Purple first placed their Leader in the middle space of the third row, losing 1VP immediately. Blue then placed in the highest space of the second row. Red chose to outbid Blue by placing on the middle space of the same row, losing 1VP. Blue must now move their Leader. They could move to any row, and can even choose to outbid Red or Purple if they wish.
Once all Leaders have been placed in different rows, the bidding ends. Players now resolve each row from top to bottom. If there is no Leader in a row, that row is skipped. When a row with a Leader needs to be resolved, the owner of that Leader does the following:
-
They collect the Food Card from that row, placing it faceup alongside their Player Board.
-
They move their Leader to the highest empty space on the Turn Order Track.
-
They place their starting Ziggurat onto the Map, following the rules outlined below.
Once all players have done this, place the Food Card from the unselected row alongside the Main Board, forming the Food Card Discard Pile. Players are now ready to begin the game. Note that while bidding throughout the game is the same as explained above, how each row is resolved will vary from what is explained above.
Placing Starting Ziggurats
When it is their turn to place their starting Ziggurat, players must follow these steps:
-
Select the largest piece from 1 of the 4 columns of Ziggurat Pieces on the bottom of their Player Board. Which column they select from will have more meaning after reading further. But for now, just know that this decision will give them a slight starting advantage in a particular area of the game.
-
Place their chosen Ziggurat Piece onto a single space (hex) of the Map. This must be on the left or right sides of both rivers. It cannot go between the rivers, and cannot go on river spaces. If they are the first to place, that is the only restriction. If other players have already placed their starting Ziggurat, an additional rule applies: Players must place their starting Ziggurat at least 3 spaces away from other Ziggurats on the Map. This means that there must be at least 2 empty spaces between each starting Ziggurat.
Example: Red and Purple have already placed their starting Ziggurats. The spaces with the white check marks indicate the only remaining legal spaces for Blue to place their Ziggurat.
Gameplay Overview
Assyria is played over 6 Rounds, with Floods taking place after Rounds 3 and 6. The flow of the Rounds is shown in the top right corner of the Main Board: Flood Events (Clear Rivers, Score Influence, Score Offerings) happen after Rounds 3 and 6. Each Round consists of these Phases, in order: Growth, Bidding, Expansion, Actions, Clean Up.
Cards
Food Cards and Favour Cards both show icons along their top edge as a reminder for when they can be used. Food Cards always show the Feeding step of the Expansion Phase. Favour Cards may show 1 or 2 different icons. Players may use any number of Cards on their turns in the appropriate Phases.
Whenever a Card is used for any reason, it must be placed faceup into its appropriate Discard Pile. Should either Draw Pile ever run out, shuffle all its discards to form a new Draw Pile.
Favour Cards also show a single Camel icon along their bottom edge. This is a reminder that they may always be discarded to gain 1 Camel during the Actions Phase.
Players' Cards are always kept faceup alongside their Player Boards. There is no limit to how many Cards each player may have.
Phase 1: Growth
Each Round starts with a Growth phase where players carry out the following steps:
-
Turn over the left-most facedown Expansion Marker. This will show the number 2, 3, or 4. All players take that many Huts of their player colour from the Main Supply, and place them in the Growth area of their Player Board (top-left corner).
Note: Each player starts the game with 1 Hut in their Personal Supply (top-centre area of their Player Board). This Hut does not count as 1 of the new Huts they gain during this Phase.
Players must always add the required number of Huts to their Growth area if possible. These first come from the Main Supply, and then from their Personal Supply if needed. If they still do not have enough Huts available, they simply take what they can.
-
Fill the Card rows. Reveal a number of Food Cards from the top of the Draw Pile equal to players plus 1. Place these faceup into the left column, sorting them using the same rules as explained in Setup. Do this again for the middle column. Then place 1 Favour Card from the top of the Draw Pile faceup into the right column for each row being used. Favour Cards do not need to be sorted. They should just be placed from top to bottom as they are revealed.
Phase 2: Bidding
During this Phase, players use their Leaders to bid for the rows of Food and Favour Cards, as well as the new turn order. This bidding follows all the same bidding rules as described under Starting Bid.
Phase 3: Expansion
During this Phase, players take turns in order. This order is resolved using the positions of players' Leaders in the Card rows from top to bottom. The Expansion Phase consists of 6 distinct steps, as seen below.
When it is time for a player's turn, they first collect all 3 Cards from their Leader's row, placing them faceup alongside their Player Board. Their leader stays where it is for now. They then carry out all 6 steps before proceeding to the next player's turn: Build Huts, Feed Huts, Destroy Huts, Dig Wells, Gain Camels, Gain VP.
Build Huts
Players must build all Huts gained during the Growth Phase, and may build any number of Huts from their Personal Supply if they wish. When building each Hut, players must follow these placement rules on the Map:
- Huts must be built in a space containing no other Huts or Ziggurats. It may contain Farmers or Ships.
- Huts must be built in a space adjacent to a player's own previously built Hut or Ziggurat. Wells are not considered when looking for adjacencies.
- Huts may be built outside of the rivers, on river spaces, or between the rivers.
If players have any Ships in their Personal Supply, they may freely place them on the Map when building Huts. Ships may only be placed on river spaces not already containing a Ship. It does not matter if there is a Hut or Farmer present. Once placed, Ships allow all players to treat all spaces surrounding the Ship as adjacent, even if there is an opposing Hut in the same space as the Ship. If multiple Ships are adjacent to each other, they help extend these adjacencies.
Example: Purple has used 2 Ships in this example. This allowed them to expand out from their Ziggurat to build the 3 new Huts shown. While this may have been a great way to spread out, it has unfortunately given Blue more access on their turn, as they will also be able to make use of these Ships if they wish.
Feed Huts
Players must now feed all their Huts on the Map. This includes any newly built Huts, and also those still present from previous Rounds. Ziggurats do not need to be fed. Each space on the Map shows a single Food icon. In order to feed a Hut, players must spend the indicated Food type. There are a few ways to do this:
- Discarding a Food Card showing the indicated Food icon or a Wild Food icon. Note that Food Cards showing more than 1 Food icon may be used to feed multiple Huts. No change is given, however. For example, if a player used 2 of the 3 Food icons shown on a Food Card to feed 2 Huts, the third Food icon would be wasted.
- Using a Plough. Players may turn over a Plough showing a Wild Food icon to feed any 1 Hut. Once used, Ploughs will need to be flipped back in order to be used again. Players can use both Ploughs to feed 2 different Huts if able.
- Spend a Food Token. Players holding Food Tokens may spend these back to the Main Supply to feed any 1 Hut.
If players have any Farmers in their Personal Supply, they may freely place them on any space of the Map not already containing a Farmer or Ziggurat. Farmers must be placed in such a way that they cover the Food icon of their space. Farmers allow any Food type to be used when feeding Huts in the same space. Note that Farmers do not belong to any player once placed. If a player vacates a space where a Farmer is present, another player could build a Hut there to benefit from the Farmer.
Important Rule: Players cannot withhold Food Cards if they could be used to feed Huts. For example, if they had a Food Card showing 3 Grapes, but had only 1 Hut requiring Grapes, they could not choose to starve that Hut in order to preserve their valuable Food Card for a later Round. The same rule, however, is not true for Ploughs and Food Tokens. Players are never forced to use these.
Example: Red has 3 Huts to feed, requiring 1 Wheat, 1 Grape, and 1 Meat. They have 1 Plough and 2 Food Cards available. They could spend both Food Cards, using the Wild Food icon to feed the Hut requiring Grapes, but this would cause the second Wheat to be wasted on their other Food Card. Instead, they decide to use their available Plough to feed the Hut requiring Wheat, saving their 2-Wheat Food Card for a later Round.
Destroy Huts
Once players have finished feeding their Huts, they must remove any Huts they did not feed. These must be returned to the Main Supply.
If players have a lot of Huts on the Map, it can be hard to keep track of which Huts have been fed, and which haven't. Before feeding, players can use this method to help track their Huts if they wish: Move all Huts to the bottom half of their spaces. After feeding each Hut, move them to the top half of their space. Now it will be clear which Huts have not been fed, and therefore need to be removed.
Dig Wells
Players now check to see if they can dig any new Wells. These can only be dug on the small circular sites outside of both rivers. In order to dig a Well, players must have Huts on all 3 spaces surrounding the Well site. Players can dig multiple Wells during this step, but can never dig more than 3 Wells in total throughout the game.
To dig a Well, players take the left-most Well from their Camel Track, and place it on a legal site of the Map. Digging Wells is always optional.
After digging a Well, players immediately gain 2 Camels. This is done by moving their Camel Marker 2 spaces to the right on their Camel Track. There is a reminder of this on the Player Boards.
In addition to providing 2 Camels, each Well dug also increases the limit of the Camel Track, and can provide some Victory Points from the Offerings Track during each Flood. Once placed, Wells are never removed.
Example: Blue has created 2 legal sites to dig Wells. They decide to place both, immediately gaining 4 Camels, and increasing their Camel limit by 2.
Gain Camels
Players then gain Camels for their Huts on river spaces. Each Hut on either river provides 2 Camels. In addition to this, players also gain 1 more Camel for each river where they have at least 1 Hut. Another way to think of this is that the first Hut on each river provides 3 Camels, and all additional Huts on the rivers provide 2.
Players move their Camel Marker along their Camel Track to indicate gaining Camels. Players are limited by the length of the Camel Track, and any Wells still present. Any Camels that players would gain beyond their limit are wasted.
Gain Victory Points
After gaining Camels, players then gain Victory Points. They gain VP for the following:
-
1VP per Ziggurat Piece they have on the Map. This is each individual Piece, not the individual spaces where they have Ziggurats. This includes a player's own coloured Ziggurat Pieces, and also any Ziggurat Roofs they have built.
-
1VP per Hut they have outside of the rivers.
-
2VP per Hut they have between the 2 rivers.
Players indicate gaining Victory Points by advancing their VP Marker around the VP Track. Note that Huts on river spaces do not gain any Victory Points.
End of the Expansion Phase
Once all players have finished their turn in the Expansion Phase, play proceeds to the Actions Phase. At this point, all Leaders should still be standing in the same spaces they were placed during the Bidding Phase. There should also still be one complete row of Cards remaining on the Main Board.
Phase 4: Actions Phase
During this Phase, players take turns in the same order as they did during the Expansion Phase. Much like the Expansion Phase, each player completes their turn in full before the next player takes their turn. On their turn, players will primarily spend Camels to take a variety of actions. Once a player can no longer afford to take any actions, or wishes not to take any further actions, their turn ends. When spending Camels, players indicate this by moving their Camel Marker to the left along their Camel Track. Players are allowed to carry over any number of Camels between Rounds. It is, however, often more beneficial to spend as many as they can.
When it is their turn, players first move their Leader to the highest empty space on the Turn Order Track, then carry out all their chosen actions. The actions available include:
- Gain Ploughs.
- Build a new Ziggurat.
- Build an existing Ziggurat higher.
- Make Offerings.
- Purchase a Hut, or a Ship and Farmer.
- Gain a Card.
- Gain Gold.
- Make a Tribute.
- Build a Hut.
- Place a Ship.
- Use a Favour Card.
Most actions can be carried out any number of times, so long as their costs can be paid. Actions 4, 5, 6, and 7, however, can only be carried out once per Actions Phase. These 4 actions are shown on players' 4 Action Tiles. To show that an action has been taken, players must turn over the corresponding Action Tile to its other side.
1. Gain Ploughs
For this action, players are spending 3 Camels to flip both their Ploughs. After paying 3 Camels, players turn both Ploughs to their faceup side. While not optimal, players are allowed to pay this cost to flip only 1 Plough (in the case where they already had one turned over).
There are a lot of effects that can flip Ploughs outside of this action. Any time players gain this reward, they flip 1 Plough at no cost.
2. Build a New Ziggurat
In order to build a new Ziggurat, players must have a legal space on the Map, and an available Ziggurat Piece on their Player Board that they can afford.
New Ziggurats must be built on non-river spaces containing a player's own Hut. Ziggurats cannot be built on a space directly adjoining Wells of any players.
The cost to build a new Ziggurat is 7 Camels, minus 1 per previously built Ziggurat. This cost is shown along the lowest Ziggurat row of the Player Boards. Since the first Ziggurat is built for free during Setup, this means that the second Ziggurat will cost 6 Camels, the third 5, and the fourth only 4.
After paying its cost, players select any 1 of the remaining Ziggurat Pieces from their lowest row, and place it on a space containing 1 of their Huts. The Hut from this space must be returned to the Main Supply. If there was a Farmer on this space, it is also returned to the Main Supply.
Example: The white check marks in the above example show the only legal placements for Red to build a new Ziggurat. The Red Hut on the left cannot be used, as it is connected to a Well, The Red Hut on the right cannot be used as it is in the river.
Note that new Ziggurats are allowed to be built adjacent to existing Ziggurats on the Map, regardless of who owns those Ziggurats.
3. Build an Existing Ziggurat Higher
Ziggurats can be up to 4 levels tall. The first 3 levels are built from Player Boards, while the fourth level, known as a Ziggurat Roof, comes from the Main Board.
Regardless of which level is being built, there is 1 important restriction that must be followed: Each Ziggurat can only be increased by 1 level per Actions Phase. This restriction applies to both the Ziggurats on the Map (each space cannot have more than 1 Ziggurat Piece placed), and to the columns of Ziggurat Pieces on the Player Board (each column cannot have more than 1 Ziggurat Piece removed).
Each level of a Ziggurat must be built in order, and levels cannot be skipped.
The cost to build the second level of a Ziggurat is 4 Camels, minus 1 per previously built second level. This cost is shown along the middle Ziggurat row of the Player Boards.
The cost to build the third level of a Ziggurat is always 3 Camels.
Example: Blue just built a new Ziggurat between the rivers. They would like to build its second level, but this is against the rules. They also have another Ziggurat which is 3 levels tall. The last piece of this Ziggurat was built in the previous Round, so they would be allowed to build a Ziggurat Roof here if they wished.
The cost to build a Ziggurat Roof is always 2 or 3 Camels. This cost is shown on the Civilisation Board directly adjacent to each Ziggurat Roof available on the left edge of the Main Board.
The first and second levels of each Ziggurat give players more advantages in a particular area of the game. These will all be explained shortly. The third level of each Ziggurat instead comes with an immediate effect when built. When resolving these effects, players should do the following:
- Advance their Offerings Marker 1 space higher on the Offerings Track.
- Draw the top Food Card from the Draw Pile, placing it faceup alongside their Player Board.
- Gain 1 Farmer and 1 Ship from the Main Supply, adding it to their Personal Supply.
- Gain 1 Gold from the Main Supply, adding it to their Personal Supply.
Building a Ziggurat Roof also provides an immediate effect. These effects are shown on the Civilisation Boards adjacent to where the Ziggurat Roof is being built from.
Example: Building the highest Ziggurat Roof would cost 2 Camels, and immediately earn them 2 Gold from the Main Supply. Building the middle Ziggurat Roof would also cost 2 Camels, and immediately advance their Marker 1 space higher up the Offerings Track. There is no Ziggurat Roof on the lowest space at this time, so this option is not available.
Note: When building the second or third level of a Ziggurat, the new Ziggurat Piece can come from any column on the Player Board, so long as it is the lowest Piece in that column. In other words, Ziggurats on the Map are not inherently tied to a specific column of the Player Board.
4. Make Offerings
For this action, players are spending Camels to advance their Offerings Marker higher on the Offerings Track. Once they have taken this action, players must turn over the associated Action Tile to show that they cannot take this action again this Round. The ratio of Camels to Offerings is limited by how many Ziggurat pieces have been built from the associated column on a Player's Board. While building more of these Ziggurat pieces provide higher exchanges, players may also choose to use a lower exchange if they wish.
- 2+ levels = Spend 3 Camels to advance 3 spaces higher on the Offerings Track.
- 1 level = Spend 2 Camels to advance 2 spaces higher on the Offerings Track.
- 0 levels = Spend 1 Camel to advance 1 space higher on the Offerings Track.
During Setup, and after the first Flood, Ziggurat Roofs are placed on the Offerings Track. The first player to reach these spaces immediately moves the Ziggurat Roof to any empty Roof space in the Tribute areas along the left edge of the Main Board. They resolve the effect of the space that they cover (gain 1 Farmer, 1 Ship, or 1 Gold). If all 3 spaces already have Ziggurat Roofs present, and a new Roof needs to be placed, first return all 3 to the Main Supply before choosing where to place the new Ziggurat Roof.
5. Purchase a Hut, or a Ship and a Farmer
For this action, players are spending Camels to gain either a new Hut, or a Ship and a Farmer. Once they have taken this action, players must turn over the associated Action Tile to show that they cannot take this action again. The cost for this action is decreased by how many Ziggurat pieces have been built from the associated column on a Player's Board.
- 2+ levels = Spend 1 Camel.
- 1 level = Spend 2 Camels.
- 0 levels = Spend 3 Camels.
When gaining a Hut, or a Ship and a Farmer, players collect these from the Main Supply, and place them in their Personal Supply.
6. Gain a Card
For this action, players are spending Camels to gain 1 of the faceup Food Cards or Favour Card from those remaining on the Main Board. Once they have taken this action, players must turn over the associated Action Tile to show that they cannot take this action again. The cost for this action is decreased by how many Ziggurat pieces have been built from the associated column on a Player's Board.
- 2+ levels = Spend 1 Camel.
- 1 level = Spend 2 Camels.
- 0 levels = Spend 3 Camels.
Cards collected this way must be kept faceup alongside Players' Boards.
7. Gain Gold
For this action, players are spending Camels to gain Gold. Once they have taken this action, players must turn over the associated Action Tile to show that they cannot take this action again. The ratio of Camels to Gold is limited by how many Ziggurat pieces have been built from the associated column on a Player's Board. While building more of these Ziggurat pieces provide higher exchanges, players may also choose to use a lower exchange if they wish.
- 2+ levels = Spend 2 Camels to gain 3 Gold.
- 1 level = Spend 2 Camels to gain 2 Gold.
- 0 levels = Spend 1 Camel to gain 1 Gold.
When gaining Gold, players collect it from the Main Supply, and place it in their Personal Supply.
8. Make a Tribute
To gain Influence among surrounding empires, players may wish to make Tributes of Gold, and Ships for trade.
The cost for this action is always 3, 2, or 1 Camels for the highest, middle, or lowest Civilisation. This cost is shown on the green banners that connect the Civilisation Boards to the Main Board. After paying this cost, players may place either 1 Gold or 1 Ship from their Personal Supply onto an empty space in that Tribute area. After doing so, they immediately gain Influence equal to the Camels they just spent. There is a reminder of this on each space where Gold and Ships can be placed.
Note that Gold can only be placed on the yellow spaces, and Ships can only be placed on the brown spaces (the highest space in each Tribute area). These spaces can be filled in any order.
When gaining Influence, players advance their Influence Marker up that many spaces on the Influence Track. If a player reaches a space with another player's Influence Marker, stack the Marker being moved on top. Influence Markers beneath others are considered to be ahead for ties. The first player to reach a space containing a Food Token collects it, keeping it alongside their Player Board for later use. Players can also gain 2VP immediately when crossing between certain spaces on the Influence Track. Any Influence gained after reaching space 15 is wasted.
After spending their Camels, placing their Gold or Ship, and gaining Influence, players may then optionally resolve the Tribute Bonus of the associated Civilisation. This is the effect shown near the top of each Civilisation Board. These are also explained under Civilisation Board Reference below.
Players can make as many Tributes as they wish during each Actions Phase, granted they have the Camels, and Gold or Ships to do so. Once a Tribute area has been filled with its Ship and maximum Gold, players can no longer make Tributes there.
9. Build a Hut
If players have any Huts in their Personal Supply, they may build these on the Map. They must still follow all adjacency rules, just as when building Huts during the Expansion Phase. There are a few reasons why players may build a Hut during the Actions Phase:
- While it does not earn any Camels or VP that Round, it also does not need to be fed right away.
- It can provide a legal space for players to build a new Ziggurat.
- It can give players control of key spaces ahead of the next Round's Expansion Phase.
10. Place a Ship
If players have any Ships in their Personal Supply, they may freely place these on the Map. The reason players might do this would be in conjunction with building or moving a Hut, to help them reach a space they are not currently adjacent to.
11. Use a Favour Card
As explained under Cards, players can use any Favour Cards that feature the Actions Phase icon. Each Favour Card uses both iconography and text to explain its use. These are also clarified under Favour Card Reference below. Once used, Favour Cards should be placed faceup in the Favour Card Discard Pile.
Favour Cards also show a single Camel icon along their bottom edge. This is a reminder that they may always be discarded to gain 1 Camel during the Actions Phase.
End of the Actions Phase
Once all players have finished their turn in the Actions Phase, play proceeds to the Clean Up Phase. At this point, all Leaders should now be standing on their spaces of Turn Order Track.
Component Restrictions
Gold, Ships, and Farmers are all intended to be unlimited. Should they run out, find a suitable replacement. All other components are intentionally limited. There is also no limit to how many components players may hold in their Personal Supplies at any point during the game.
Phase 5: Clean Up
During this Phase, carry out the following:
-
The rise and fall of empires: Discard the top Civilisation Board, slide the remaining 2 Boards up, and refill the bottom space with a new Civilisation Board from the Draw Pile.
-
Discard any Food Cards and Favour Card still remaining on the Main Board.
-
All players turn any facedown Action Tiles back to their green side.
Note that these steps can be skipped in Round 6, as they have no effect on the final steps of the game.
If this was the end of Rounds 1, 2, 4, or 5, proceed to the Growth Phase of the next Round. If this was the end of Round 3 or 6, proceed to the Flood.
The Flood
During each Flood, carry out the 3 events shown above the Round Track on the Main Board: Clear Rivers, Score Influence, Score Offerings.
1. Clear Rivers
Remove all components from both rivers. Huts, Farmers, and Ships are all returned to the Main Supply.
2. Score Influence
Players score Victory Points based on their positions on the Influence Track. If multiple players are on the same space of the Influence Track, those beneath (those that reached the space earlier) are considered to be ahead on the Influence Track. Players with no Influence cannot qualify for any scoring during this step.
The player with the most Influence (the furthest ahead on the Influence Track) scores Victory Points equal to the sum of the values of all 3 revealed Expansion Markers. After doing so, they remove 1 of the Expansion Markers of the highest value. The player with the next most Influence scores Victory Points equal to the sum of the values of the remaining 2 Expansion Markers, then also removes 1 of the highest remaining Expansion Markers. Finally, the player with the third most Influence scores the value of the final Expansion Marker before removing it.
Example: first place would score 9VP, second would score 5VP, and third would score 2VP.
In games with only 2 players, the player with the lowest Influence compares the value of the first Expansion Marker to be removed with the difference between them and their opponent on the Influence Track. If the difference is equal to or lower than the Expansion Marker, they score the values of both remaining Expansion Markers. If they are further behind on the Influence Track, remove the next highest Expansion Marker. Now check the difference compared to both removed Expansion Markers. If the difference is equal to or lower than the values of both removed Expansion Markers, they score the value of the last remaining Expansion Marker. If not, they score no Victory Points for their Influence.
After scoring Influence, carry out these steps:
- Removed Expansion Markers can be set aside, or returned to the box.
- Return all Influence Markers to the bottom of the Influence Track.
- Add Food Tokens from the Main Supply to any outlined spaces of the Influence Track where they are missing.
- Return all Gold and Ships from the Tribute areas to the Main Supply, being sure to keep any Gold there required for the player count (see Setup).
Note that these steps can be skipped during the second Flood, as they have no effect on the final steps of the game.
3. Score Offerings
Players score Victory Points for their Wells and Ziggurats based on how far they have advanced on the Offerings Track. Ziggurats score for each space on the Map containing a Ziggurat, regardless of how many levels it has.
If players did not advance at least 1 space on the Offerings Track, they will not score any Victory Points during this step. The maximum players can score is 9VP from Wells (3x3) and 16VP from Ziggurats (4x4).
Example: Blue scores 3VP per Well and 4VP per Ziggurat, Purple scores 2VP per Well and 3VP per Ziggurat, and Red scores 1VP per Well but nothing for their Ziggurats.
After scoring Offerings, carry out these steps:
- Return all Offerings Markers to the bottom of the Offerings Track.
- Add Ziggurat Roofs from the Main Supply to any indicated spaces of the Offerings Track where they are missing.
Note that these steps can be skipped during the second Flood, as they have no effect on the final steps of the game.
End of the Flood
If this was the first Flood, proceed to the Growth Phase of Round 4. If this was the second Flood, proceed to End of Game.
End of Game
After the second Flood, players carry out 1 final scoring Phase. There is a reminder of these steps at the right end of the Round Track. These steps are:
- Feed Huts (see Phase 3: Expansion)
- Destroy Huts (see Phase 3: Expansion)
- Gain Victory Points (see Phase 3: Expansion)
As the references suggest, these steps are carried out exactly as they are during the Expansion Phase. Players can carry out these steps simultaneously.
Once all players have finished these steps, the player with the most Victory Points is declared the winner! If tied, the tied player who is higher up on the Turn Order Track wins.
Solo Rules
Overview
The solo game plays much like a 2 player game. Your turns function as normal. Your opponent will take turns in a simpler fashion, dictated by their deck of Scheme Cards. You will be competing to beat your opponent's score at the end of the game.
Setup
Follow the Setup rules for a 2 player game, with a few exceptions for your opponent's play area:
- Select an unused player colour for your opponent.
- Do not give your opponent a Player Board, Camel Marker, Ploughs, Action Tiles, or any starting Gold.
- Place 1 starting Hut in their Personal Supply. Keep their other Huts nearby in the Main Supply.
- Place all their Ziggurat Pieces and Wells nearby.
- Place their VP Marker, Influence Marker, and Offerings Marker on the corresponding Tracks as normal.
- Place their Leader on the second space of the Turn Order Track, with your own Leader on the first space.
- Shuffle their Scheme Cards into a facedown Draw Pile.
- Choose a difficulty level (1-4 stars), and place the matching Solo Reference Card nearby with the correct side faceup.
Starting Bid
Do not perform the opening Bid as described under Starting Bid above. Follow these steps instead:
-
Draw 3 Food Cards from the top of the Draw Pile. Choose 1 to add faceup alongside your Player Board, and discard the other 2.
-
Place your opponent's starting Ziggurat on any space outside of the rivers that is adjacent to exactly 3 river spaces.
-
Place your starting Ziggurat following the normal rules, remembering to keep it at least 3 spaces away from your opponent's Ziggurat.
Scheme Card Anatomy
Each Scheme Card features a variety of different sections to help your opponent make their decisions. For every decision they make, your opponent will reveal a new Scheme Card. Should you ever need to reveal a Scheme Card, and the Draw Pile is empty, shuffle the Discard Pile to form a new Draw Pile.
A Scheme Card shows an Area Focus, a Food Focus, an Outbid Focus, a Terrain Focus, and up to 3 numbered Actions (1st Action, 2nd Action, 3rd Action).
Growth Phase
Add the number of Huts shown on the revealed Expansion Marker to their Personal Supply. If there are not enough Huts in the Main Supply, simply add what you can.
Bidding Phase
When it is their turn to Bid, reveal a Scheme Card from the top of the Draw Pile. They want to place their Leader in the Card row featuring the most Food icons on both Food Cards (including Wild icons) that match their Food Focus.
- If there are multiple choices, use their Area Focus to move their Leader to either the highest or lowest of these options, depending on the arrow on their Scheme Card.
- If there are no matching Food Icons (including Wild icons), use their Area Focus to determine a row.
- If they choose a Card row where your Leader is present, they will outbid you. If your Leader is on the highest space, they will use their Outbid Focus to determine which space to place their Leader. If your Leader is on the middle space, they will place their Leader on the lowest space. They still lose 1VP or 3VP when outbidding.
- Your opponent will ignore a Card row if your Leader is already on the lowest space within that row.
- If you outbid your opponent, reveal a new Scheme Card for them, and move their Leader following the same rules.
Expansion Phase
When it is their turn, follow these steps:
-
Discard all 3 Cards from their Leader's row.
-
If they have at least 1 Hut on the Map, they will remove 1 Hut, placing it back into the Main Supply. To do this reveal a new Scheme Card from the top of the Draw Pile. Which Hut they remove follows their Map Priority Rules.
-
Build all Huts from their Personal Supply. These should be built 1 at a time, revealing a new Scheme Card from the top of the Draw Pile for each. Follow their Map Priority Rules to determine where they build each Hut.
-
Your opponent does not need to feed Huts, and therefore, does not destroy any Huts after finishing their building step.
-
If your opponent has any legal sites available for digging Wells, they will do so. As reminded on the Solo Card, they gain 2 Gold to their Personal Supply for each Well dug.
-
Your opponent gains 1 Gold to their Personal Supply for each Hut they have on the rivers, plus an additional 4-7 Gold depending on the difficulty chosen during Setup.
-
Your opponent scores Victory Points for all their Ziggurat Pieces and Huts on the Map, just as you would.
Map Priority Rules
Your opponent follows all normal adjacency rules. They never place Ships, but can make use of Ships that you place. In the rare case that there are no legal adjacent spaces, they will break all adjacency rules when building a Hut. They prioritize in the following order:
-
Your opponent will first use their Food Focus, selecting a space with that Food icon if possible. Farmers count as all Food types for them.
-
If there are multiple choices, or no choices, they will use their Terrain Focus to narrow down a selection. Each Scheme Card shows 3 Terrain icons along the bottom, depicting river spaces, spaces outside of the rivers, and spaces between both rivers. They favour the left-most available of these options.
-
If there are still multiple choices, they will use their Area Focus to make their final selection. Each Scheme Card shows both horizontal and vertical arrows. They use the left icon first, which will point to the highest, lowest, left-most, or right-most option on the Map. If still tied, they will use the right icon to narrow it down further.
Example: Using the Map Priority rules, a Scheme Card wants to find a space with Meat. If there are no Meat spaces, or multiple Meat spaces, use the Terrain Focus to narrow down further. First look between the rivers. If there are no options there, look at the rivers. If there are still no options, look outside of both rivers. Whether the Terrain Focus helped or not, if there is still not a single legal space, use the Area Focus. First look for the left-most space among the remaining options. If there are still multiple options, choose the lowest of those options on the Map.
Actions Phase
During the Actions Phase your opponent will use their Scheme Cards to spend all the Gold they collected during the Expansion Phase. When it is their turn, reveal a new Scheme Card from the top of the Draw Pile. Each Scheme Card depicts 3 possible actions. They will resolve the highest possible action that they can complete in full. They never perform more than 1 action per Scheme Card. Each action has a Gold cost on the left, and the effects to be resolved on the right.
If they cannot perform any of the 3 actions for any reason, reveal a new Scheme Card and repeat. If they have any Gold remaining after performing an action, reveal another Scheme Card for their next action. Keep repeating this until they have spent all their Gold.
Example: When taking actions with a given Scheme Card, they first want to spend 5 Gold to build a new Ziggurat, and make 1 Offering. If they cannot afford this, or cannot carry out both actions in full, they will try spending 3 Gold to build a level 3 Piece. If they cannot do that, they will try to spend 1 Gold to Tribute to the lowest Civilisation.
The possible actions are:
- Build a new Ziggurat. Use their Map Priority Rules when determining which space to build on. Return the removed Hut to the Main Supply.
- Build the second/third level of a Ziggurat. It does not matter which space they build on. They also have no restrictions around building the same Ziggurat more than once.
- Build a Ziggurat Roof using the priority numbers on the icon to determine which Roof they will build (highest, middle, or lowest Civilisation). They favour lower numbers over higher numbers. They ignore all immediate effects from Civilisation Boards. It does not matter which space they build on. They also have no restrictions around building the same Ziggurat more than once.
- Tribute using a Gold or Ship (only whichever is depicted) from the Main Supply to the depicted Civilisation. They will only do so for the depicted Tribute area (highest, middle, or lowest Civilisation). They gain Influence as normal, but ignore all Tribute Bonuses. Furthermore, they gain VP from the Influence Track as you do, and discard Food Tokens that they reach first.
- Gain 1VP and discard a faceup Card from the Main Board. Use their Area Focus to remove the left-most or right-most remaining Card.
- Advance their Marker 1 space up the Offerings Track. Use their Area Focus to place Ziggurat Roofs from the Offerings Track on the highest or lowest available space if needed.
The Flood
Your opponent follows all the same rules as you during each Flood. They remove all their Huts from the river, and can Score Victory Points from Influence and Offerings. Be sure to use the 2 player rules when scoring Influence.
End of Game
Your opponent does not need to feed or destroy Huts, but they still score Victory Points for their Ziggurat Pieces and Huts still on the Map, just as you would.
Civilisation Board Reference
| Civilisation | Tribute Bonus | Ziggurat Roof Build Effect |
|---|---|---|
| Amorites | Spend 1 Gold or lose 1VP to advance your Marker 1 space up the Offerings Track. | Gain 1 of the faceup Food Cards or Favour Card from those remaining on the Main Board. |
| Babylonians | Spend 1 Fewer Camel to immediately make another Tribute to a different Civilisation, following all the normal rules for making Tributes. | Advance your Marker 2 spaces up the Influence Track. |
| Canaanites | Gain 1 Ship to your Personal Supply. | Gain 1 Hut to your Personal Supply. |
| Cimmerians | Move 1 of your Huts to an adjacent space containing no other Huts or Ziggurats. Ships can be used to extend adjacencies. | Advance your Marker 1 space up the Offerings Track. |
| Egyptians | Destroy 1 of your Huts from a river space to advance your Marker 1 space up the Influence Track, and gain 1VP. | Gain 1 Ship to your Personal Supply. |
| Elamites | Gain 1 Farmer to your Personal Supply. | Gain 2 Gold to your Personal Supply. |
Favour Card Reference
- Gain 1 Ship to your Personal Supply.
- Gain 1 Gold to your Personal Supply.
- Gain 1 Farmer to your Personal Supply.
- Gain 1 Hut to your Personal Supply.
- Advance your Marker 1 space up the Offerings Track.
- Advance your Marker 2 spaces up the Influence Track.
- Treat all Food icons on 1 Food Card as a different type.
- Treat a 1-2 valued Food Card is if it has 3 Food icons.
- Draw 1 Food Card from the top of the Draw Pile.
- Build any Ziggurat Piece paying 2 fewer Camels.
- Make a Tribute paying 2 fewer Camels.
- Pay 1 Camel to flip 1 or 2 Ploughs.
- Avoid losing 3VP during the Bidding Phase.
- 1 Hut may be built adjacent to an opposing Ziggurat.
- Ignore the usual restrictions for the second build.
- Flip 1 Plough faceup.
- Turn an Action Tile to its green side to be used again.
- Resolve the printed Tribute bonus of 1 Civilisation.
- Move 1 of your Huts to an adjacent space containing no other Huts or Ziggurats. Ships can be used to extend adjacencies. This may cause the Hut to no longer be adjacent to any other Hut or Ziggurats, which is permitted.