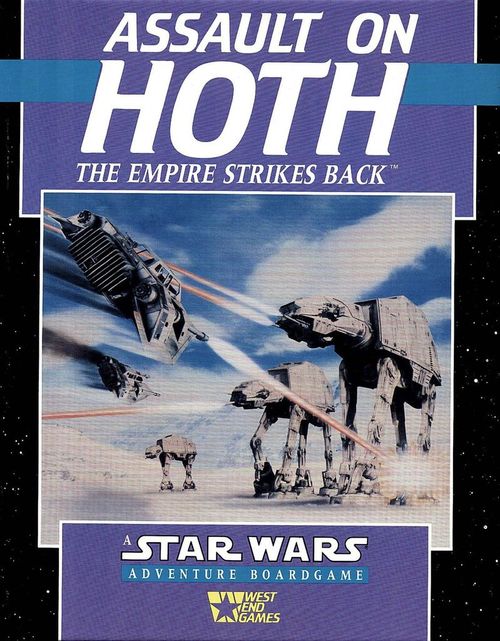
Assault on Hoth: The Empire Strikes Back
Assault on Hoth: The Empire Strikes Back Rulebook
Table of Contents
Table of Contents
1. The Battle for Hoth
How the Game is Played
Each player has cardboard pieces, called units, representing the men and vehicles which took part in the battle of Hoth. The players maneuver their units across a map of the northern defensive perimeter of Echo Base, where the battle was fought.
The Imperial Forces consist of several All Terrain-Armored Transports (AT-ATs) or Walkers. These huge, beast-like vehicles wield extremely powerful blasters and are so heavily armored as to be almost impervious to fire. In addition the Imperial player controls several All Terrain-Scout Transports, or AT-STs, which, while not as heavily armed as their larger cousins, move quite rapidly across the frozen tundra around Echo Base. Finally, the Imperial player commands elite heavy and light Snowtrooper (Trooper) units.
The Rebel player's forces consist of Laser Towers, which are fixed-position, heavy blasters, and Rebel light and heavy Trooper units, representing the valiant men and women who tried so desperately to destroy Imperial Walkers with puny hand weapons. Completing the Rebel forces are Snowspeeders, fast-attack, low-altitude repulsorcraft armed with medium blasters. The Snowspeeders must close with the massive Walkers and strike an effective blow with their medium blasters or use their unorthodox — but highly-effective — secondary weapons: the Harpoons.
Assault on Hoth is played in a series of turns. During a turn, each player has opportunities to perform actions (that is, to move or fire his units). The order in which units move and fire changes from turn to turn because it is determined by drawing cards from the Action Deck.
Combat is fast and furious. Each unit has a fire strength, showing how powerful its blasters are, and an armor strength, reflecting how well it stands up to enemy fire. When one unit fires at another, the attacking player rolls a number of fire dice equal to the firing unit's fire strength; if he rolls a number of "relevant symbols" (see 2.3, The Dice) equal to or greater than the target's armor strength, he has hit (damaged or destroyed) the defending unit.
The Imperial player is racing against time. Cards drawn from the Event Deck, determine when the Rebel Transports make their escape, and two Event Cards are drawn each turn. Thus, as the game progresses and more and more Transports make their escape, the Imperial player is under increasing pressure to destroy the Shield Generator before the fifth one gets away.
In addition to determining when the Rebel Transports escape, draws from the Event Deck also detail when Rebel and Imperial reinforcements arrive and when other unusual events — The Force, lucky shots, Repair Droids, and the like — come into play. Thus, important aspects of the game vary each time you play, making each game different and exciting!
How to Use this Rules Booklet
Assault on Hoth is not a complicated game but the Rules of Play must be presented in a format that allows the players to learn the game when first read and to find answers to questions during play. For this reason, many rules contain parenthesized numbers that refer you to other parts of the booklet for clarification. When reading the rules for the first time, ignore the references as much as possible. When a question arises during play, however, you may find the references very useful.
2. A Look at the Game Parts
A complete copy of Assault on Hoth contains:
- One map board
- 59 counters
- 60 plastic stands
- 40 markers
- Ten dice (eight fire dice and two normal)
- 42 cards
2.1 The Game Board
Most of the game board contains the terrain over which the dramatic battle for Echo Base Hoth was fought.
The game board also includes Walker and Snowspeeder displays (which you use to record the condition of those vehicles) and several charts and diagrams for easy reference during play.
Macrohexes and Hexes
The map shows the northern section of the Rebel Defense Perimeter of Echo Base. It is divided into macrohexes, which you use to determine the range between firing and target units in fire (7.2). Each macrohex is further divided into seven hexes, which you use in movement of your units (6).
Terrain on the Map
Hoth is an ice planet, primarily snow-covered plains, but the battlefield around Echo Base contained several other types of terrain that played an important role in the battle. (Refer to the Terrain Key on the map while reading the following.)
There are three types of terrain on the map: clear, rough, and cliffs.
- Clear terrain: The clear terrain on the map represents rock-hard, snow-covered permafrost. It is easy for all units to move through, but your Troopers are more vulnerable to fire there.
- Rough terrain: Rough terrain represents rocky hills where the Rebels dug trenches and other defensive emplacements. It slows the movement of Walkers (who have to move carefully to avoid tripping), and the boulders and trenches provide good defensive cover for Troopers and AT-STs.
- Cliffs: Cliffs represent escarpments that are too steep for Troopers, AT-STs, and Walkers to climb — but Snowspeeders can fly over them.
Reinforcement Sectors
The Imperial player's reinforcements arrive in the Imperial Reinforcement Sector along the northern end of the map; Rebel reinforcements arrive at one of three points — the two Rebel Reinforcement Sectors (along the southern and western map edges), or the Rebel Base.
The Base Box
Echo Base Hoth was an underground warren, carved out of the permafrost that covers the planet to a depth of 20 or more meters. Conditions on the ice planet's surface are incredibly dangerous at night (temperatures descend to -67 degrees centigrade), so the defensive positions around the base were connected by a complex of tunnels. During the battle, Rebel forces used these tunnels to move safely and quickly around the battlefield.
The Base Box represents the underground Haven, and the various Base Entry hexes are entrances into the tunnel complex (see 6.6 for details of how to use the tunnels).
The Fire/Armor Strength Charts
These list the fire and armor strengths of all units in the game. The armor strengths of the Shield Generator and Power Grid are also listed (7.2).
Walker and Snowspeeder Displays
Imperial Walkers and Rebel Snowspeeders are your most powerful units. Each can take more punishment than other units before being destroyed. If you're the Imperial player you'll use the Walker Displays to record damage to Walkers during play; if you're the Rebel player use the Snowspeeder Displays (7.3).
The Damage Tables
You will use the Damage Tables to determine the extent of damage that fire causes to Walkers and Snowspeeders when they are hit (see 7.3).
Luke Skywalker's Force Points Track
Luke Skywalker was an important factor in the Rebellion's defense of Hoth. His innate talents and command of The Force made him a formidable fighter.
If you are the Rebel player, you will use the Force Points Track to record the expenditure of Force Points, which you spend to improve Luke's performance in the battle.
Walker Field of Fire Diagram
Since a Walker's blasters are mounted on its head and the great machine-beasts cannot turn quickly, a Walker may fire only at targets in front of it. The Walker Field of Fire diagram shows where a Walker's blasters may and may not fire.
2.2 Playing Pieces
In Assault on Hoth, each player has playing pieces (units) representing his forces. Rebel units (Snowspeeders, Troopers, and Laser Towers) have a blue background; Imperial units (Walkers, AT-STs, and Snowtroopers) have a purple background. Each piece fits into a plastic stand so that it will stand upright.
In addition, the smaller square pieces (markers) are placed on the various displays to record damage (7.3) and on the Force Points Track to record Force Point expenditures (9).
Before play begins, assemble your units.
- First, punch out the pieces from their boards.
- Put each piece in a plastic stand.
Units in the game: Rebel Snowspeeder, Rebel Heavy Trooper, Rebel Light Trooper, Rebel Laser Tower, Imperial Heavy Snowtrooper, Imperial Light Snowtrooper, Imperial AT-ST, Imperial Walker.
2.3 Fire and Damage Dice
There are two kinds of dice in Assault on Hoth: Eight fire dice and two damage dice.
Fire Dice
The eight odd-looking dice are called fire dice. Two faces of each fire die display a picture of Darth Vader's helmet, called Vader symbols, and two others contain a picture of a Jedi Lightsaber, called Saber symbols. The other two faces of each fire die are blank.
When the Imperial player fires with one of his units at the enemy, he rolls fire dice, hoping to get enough Vader symbols to hit the target. When the Rebel player fires, he rolls fire dice and looks for Saber symbols.
- Vader symbols are always irrelevant to the Rebel player and Saber symbols are irrelevant to the Imperial player (7.2).
Damage Dice
You use these standard 6-sided dice to determine the extent of damage done when one of your Snowspeeders or Walkers is hit (7.3).
2.4 Cards
There are three types of cards in Assault on Hoth: Action Cards, Event Cards, and a Hero Card.
- Action Cards determine when units may move and fire (5, 6, and 7).
- Event Cards describe important occurrences during the battle (8).
- The Hero Card is used by the Rebel player to secretly assign Luke Skywalker to a Snowspeeder (9).
This is an Action Card. An Action Card shows the Type of Action Round ("Imperial Action"), the Unit type/Action type ("Walkers Move or Fire"), and the Details of Actions and Restrictions:
- 5 MPs.
- Costs 3 MPs to enter rough.
- Costs 1 MP to turn 1 hexside.
- Fire Strength 6.
- Fire through front hexes.
This is an Event Card. An Event Card shows the Event ("Hotshot Gunner") and its Effects and Restrictions: "One Snowspeeder with an unhurt gunner (Rebel player's choice) has its fire strength increased by 2 for remainder of game, or until the gunner is killed."
This is the Hero Card. The Hero Card shows the Card Type ("Hero Card"), the Hero's Name ("Luke Skywalker"), and the Details of Use and Effects: "The Rebel player secretly places this card under one of his Snowspeeder displays at beginning of game to indicate which Speeder Luke is flying. Reveal first time Luke uses The Force."
3. Setting Up the Game
To begin play, do the following:
- Pick Sides: Decide who will control the Rebel Defense Forces and who will control the Imperial Ground Assault Group.
- Bring out the Board: Lay the board in the middle of a table. The Rebel player sits on the side with the Snowspeeder Displays, the Imperial player sits opposite him.
- Set Up the Card Decks: Remove the blank cards and give the Rebel player the Luke Hero Card. Separate the remaining cards into two decks: the Action Deck and the Event Deck. Shuffle each deck individually and place them in a convenient place.
- Set Up Your Units: You are now ready to place your units on the map and begin.
Most of the Rebel player's units begin the game in position on the map or in the Base Box; the majority of the Imperial player's units begin in the Imperial Reinforcement Sector.
3.1 Imperial Set-up
The Imperial player begins play with the four Walkers numbered 1-4, two AT-STs, eight light Snowtroopers, and four heavy Snowtroopers.
- Walkers and AT-STs: Place your Walkers and AT-STs in the Imperial Reinforcement Sector, one to a hex. The Walkers may begin the game "facing" any direction (6.3).
- Snowtroopers: Assign your Snowtroopers to Walkers (they are carried into battle by the Walkers). Each Walker carries three Snowtroopers of either type. To indicate which Troopers are assigned to each Walker, place them in the Carried Troops box of the appropriate Walker Displays (Display 1 corresponds to Walker 1, Display 2, to Walker 2, and so on).
3.2 Rebel Set-up
The Rebel player's starting forces consist of the five Snowspeeders numbered 1-5, ten light Troopers, four heavy Troopers, and six Laser Towers.
- Snowspeeders: Place your Snowspeeders in Rebel Reinforcement Sector 4, one per hex.
- All other units: Place all your other units on the map anywhere south of the Rebel Forward Line (one per hex). No unit may be placed in cliff hexes. You may place any or all Rebel Troopers in the Base Box.
- Luke: Assign Luke to one of the Snowspeeders by secretly placing the Luke Hero Card under the board, beneath one of the Snowspeeder displays.
4. Turn Sequence
The game is played in a series of turns. Each turn is divided into a number of Action Rounds.
You initiate each Action Round by drawing the top card from the Action Deck. The card indicates what units may perform actions and what actions they may perform during the round. Following is an outline of a turn:
Turn Outline
Draw an Action Card
- If it is a Draw Event card, draw an Event Card (8).
- If it is not, one player moves or fires with any or all units of the type indicated on the card (5, 6, and 7).
After the actions indicated on the card have been performed, place the card to the side and perform another Action Round.
- If no Action Cards remain to be drawn, the turn is over; shuffle the Action Deck back together and begin another turn.
Play continues in this manner until one or the other player wins (10).
5. Using Action Cards
At the beginning of each Action Round, draw the top Action Card. The Action Card drawn determines what happens during the current Action Round. After the last Action Card is drawn, the turn is over. Shuffle the Action Cards together and begin the next turn.
5.1 Draw Event Cards
If the Action Card revealed says Draw Event Card, turn over the top card in the Event Deck. Section 8 explains how to resolve Events.
5.2 Action Cards
If the card revealed is not a Draw Event Card, all of one player's units of the listed type may perform the action indicated on the card. Note, though, that a player is never required to do anything with his units just because an Action Card allows it.
- If only one action is listed on the card, each unit of the listed type may perform that action.
- If more than one action is listed, each of the listed units may do any of the actions.
Example: At the beginning of an Action Round, a Walkers Move or Fire card is drawn. The Imperial player may move some Walkers and fire others, or move all Walkers, or fire all Walkers. He may, if he wishes, choose not to move or fire some or all of his Walkers.
6. Moving Your Units
All units in the game may move when the appropriate Action Card is drawn. Units are moved from hex to hex, using a system based upon Movement Points (MPs) to determine how far a unit may move.
Each unit receives 5 Movement Points when an Action Card permitting it to move is drawn. In general, it costs a unit 1 MP to move 1 hex, so units may move up to 5 hexes during an Action Round. Units may move in any direction or combination of directions. Most are unaffected by the terrain type they are moving through; however, because they are extremely large and difficult to maneuver, Walkers are restricted as outlined below.
6.1 General Rules of Movement
You move units one at a time, completing one unit's move before beginning another's. During their move, all units may spend up to 5 MPs. Each unit may spend some, none, or all of its MPs to move during an Action Round. Any MPs not spent during an Action Round are lost, they may not be saved.
Movement Costs
- Clear: All units pay 1 MP to enter clear hexes.
- Rough: Walkers pay 3 MPs to enter rough hexes; all other units pay 1.
- Cliffs: Snowspeeders pay 1 MP to enter cliff hexes; no other unit may enter cliff hexes.
- Turning: Walkers pay 1 MP to "turn" one hexside (6.3).
- Mounting/Dismounting Snowtroopers: Snowtroopers pay 1 MP to enter or leave a Walker (6.4).
- The Base: Rebel Troopers pay 1 extra MP to enter or leave the Base (6.5).
Prohibited Moves
- No unit may end its move in a hex occupied by another unit.
- No unit may ever leave the map (but see 6.5).
- No unit (except Snowspeeders) may enter Cliff hexes.
- Walkers may not enter the Power Grid or Shield Generator hexes.
6.2 Troopers, Snowspeeders, and AT-STs
Troopers, Snowspeeders, and AT-STs have many movement characteristics in common; Walkers are different.
Direction of Movement
You may move Troopers, Snowspeeders, and AT-STs in any direction or combination of directions.
Moving Through Units
Troopers, Snowspeeders, and AT-STs may be moved through friendly or enemy units without restriction, but you may never end their move in a hex with another unit.
Movement Diagram 1 example: It is the beginning of a turn. A Snowspeeders Move card is drawn. The Rebel player may spend up to 5 MPs to move each of his Speeders. He moves Speeder 1 as shown, expending all of its MPs. Note that Speeder 1 passed through another unit without penalty, though it could not stop there. The next Action Card drawn is an AT-STs Move card. The Imperial player moves the AT-ST as shown, choosing to expend only 2 MPs. The 3 unused MPs are lost: they may not be saved for another Action Round or transferred to another unit.
6.3 Walker Facing and Movement
Because of their awkwardness and limited "field of fire" (7.1), it is important to show exactly which way a Walker is heading. Thus, your Walkers must always face a specific hex.
Direction of Movement and Turning
A Walker must always be moved to the hex directly in front of it; it may not enter a hex it is not facing. If you want a Walker to move into another hex, it must turn to face that hex first. It costs 1 MP to turn a Walker (change its facing) one hexside. (Thus, a Walker that enters a hex directly behind it, pays 4 MPs to do so — 3 MPs to turn 3 hexsides, and 1 MP to enter the new hex.)
Movement Through Units
Like other units, a Walker may freely move through other units. But because of its tremendous size, this has a bad effect on the units being moved through — even other Imperials.
- If you move a Walker into a Trooper's, Tower's, or AT-ST's hex, that unit is destroyed (remove it from play).
- If you move a Walker into a Snowspeeder's hex, the Snowspeeder is displaced to any empty adjacent hex of the Rebel player's choice (even the hex from which the Walker entered). This move does not cost the Snowspeeder any MPs.
- A Walker may not ever move through another Walker.
Movement Through Rough Hexes
It costs a Walker 3 MPs to enter a rough hex (they must move slowly and cautiously to avoid falling). If the Walker has fewer than 3 MPs remaining, it may not enter a rough hex.
Movement Diagram 2 example: A Walkers Move card is drawn.
- Walker 1 moves directly forward 5 spaces, expending all of its movement points (and, incidentally, stomping a Snowtrooper — these things happen).
- Walker 2 moves into a rough hex (costing 3 MPs), turns one hexside to the right (1 MP), then expends its last MP to move into the clear hex and crush the Rebel Laser Tower.
- Walker 3 moves forward one hex (1 MP), turns one hexside to the left (1 MP), moves forward (1 MP), turns one hexside to the right (1 MP), and moves forward (expending its last MP).
The Snowspeeder in the Walker's way is displaced. The Rebel player decides to move it to the rough hex; this costs the Speeder (and the Walker) no MPs.
6.4 Walker Transport of Snowtroopers
A Walker may transport up to three Snowtroopers. This has no effect upon the Walker's movement or combat capabilities.
Mounting and Dismounting Snowtroopers
Snowtroopers mount or dismount from Walkers during the Snowtroopers' movement. A Snowtrooper spends 1 MP to mount or dismount a Walker. (Thus, a Snowtrooper could dismount, then move up to 4 MPs during its move; or it could move up to 4 MPs into a Walker's hex, then mount.)
- Snowtroopers dismount into the hex their Walker occupies and then must move to an unoccupied hex; take the dismounting Snowtrooper from the Walker's Carried Troops box and place it on the map.
- A Snowtrooper must enter a Walker's hex in order to mount; place the Snowtrooper into the Carried Troops box of the appropriate Walker display.
6.5 The Rebel Base
The defensive positions of Echo Base Hoth are connected by a series of tunnels and are joined to a central underground Base. Rebel Troopers (only) may use these tunnels to move quickly and safely around the battlefield. Entrances to the tunnel system are located at the Base entry hexes (indicated by the word Base and a door symbol).
An unlimited number of Rebel Troopers may occupy the Base Box simultaneously. Place all Rebel Troopers who are underground in the Base Box.
Movement To and From the Base
A Rebel Trooper in a Base entry hex may spend 1 additional MP to enter the Base. Simply pick up the Trooper and place it in the Base Box. After entering the Base, the Trooper may move no further during that Action Round.
It costs a Trooper 1 MP to leave the Base Box and move to any Base entry hex. The Trooper may continue moving with its remaining 4 MPs.
- A Trooper may not enter or leave the Base from a Base entry hex occupied by an Imperial unit.
Movement Diagram 3 example: A Rebel Troopers Move card is drawn.
- The Rebel light Trooper moves to the Base entry hex (expending 2 MPs to do so), then enters the Base (expending another MP). Though the light Trooper has spent just 3 MPs, and has 2 remaining, it may not move any farther.
- The Rebel heavy Trooper in the Base moves to the Base entry hex (1 MP), then spends its remaining 4 MPs as shown.
- Note: If the Imperial light Snowtrooper was occupying the Base entry hex, no Rebel Troopers could enter or leave the Base via that entry hex.
7. Firing at the Enemy
When an Action Card permitting units to fire is drawn, any or all units of the listed type may do so. Each unit fires individually, and any result is applied to the target before another unit may fire. A player may fire the units in any order he wishes.
Each unit may fire only once during a round, but an enemy unit may be the target of any number of fires. Rebel Troopers in the Base Box and Snowtroopers aboard Walkers may never fire nor be fired at. Snowspeeders which occupy cliff hexes may neither fire nor be fired at.
- No unit is ever required to fire.
7.1 Walker Fields of Fire
Because their blasters are mounted on their heads and their heads can turn only so far, Walkers may fire only at targets which are in their field of fire. No other unit in the game is restricted in this way.
The Walker Field of Fire diagram (on the map) shows this field of fire. A Walker may fire at any Rebel unit within the black area; any outside this shaded area may not be fired at.
Note: The Diagram shows a Walker's Field of fire extending only four hexes. This does not indicate a limit to the Walker's range; you must imagine that the black area on the diagram extends an unlimited number of hexes in the directions indicated.
7.2 Resolving Fire
When a unit fires, the player controlling the firing unit rolls fire dice to determine if the fire hits its target.
Fire and Armor Strengths
The number of dice the firing player rolls depends upon the firing unit's fire strength. He rolls a number of fire dice equal to the firing unit's fire strength in an attempt to get a number of "relevant symbols" (Sabers for the Rebel and Vaders for the Imperial) equal to or greater than the target's armor strength.
- All fire and armor strengths are listed on the Fire/Armor Strength Charts.
Example: The Imperial player is firing. His firing unit's fire strength is 6 and the target's armor strength is 3. The Imperial player rolls 6 fire dice; if he gets 3 Vader symbols, the target is hit.
Fire Strength Modifiers
Each time a unit fires, its fire strength is modified according to the range to the target and the terrain the target occupies.
- Range: Range is determined by counting the number of macrohexes between the firer and target (including the target's macrohex but not the firer's). The fire strength is reduced by a number equal to the range. (For example, a Snowspeeder (fire strength of 5) firing at a target 2 macrohexes away would have its fire strength reduced to 3: that is, 5-2=3.)
- Terrain: The only terrain that affects a unit's fire strength is rough. If a unit fires at a Laser Tower, AT-ST, or Trooper occupying rough terrain, its fire strength is reduced by 1. Fire at a Walker or Snowspeeder in rough terrain is not affected.
Fire Diagram 1 example: A Walkers Move or Fire card is drawn. The Imperial player chooses to fire with Walker 1.
If Walker 1 were to fire at the Laser Tower, Walker 1's modified fire strength would be 3: that is, 6 (the Walker's normal fire strength) minus 2 (for range) minus 1 (the tower is in Rough terrain). Thus, the Imperial player would have to roll two or more Vaders (the Laser Tower's armor strength is 2) with three fire dice (the Walker's modified fire strength) to hit the tower.
If Walker 1 were to fire at Snowspeeder 4, Walker 1's modified fire strength would be 4, that is, 6 (the Walker's normal fire strength) minus 2 (range). Though the Snowspeeder is in Rough terrain, Snowspeeders receive no benefit for this. Thus, the Imperial player would have to roll two or more Vaders (the Speeder's armor strength is 2) with four dice to hit the Speeder.
If the Walker were to fire at the light Rebel Trooper, its fire strength would remain 6: the range is 0, and the Trooper is in clear terrain. The Imperial player would have to roll one or more Vader symbol with six fire dice — a very easy shot.
The Walker could not fire at Snowspeeder 5; it is out of the Walker's field of fire.
Impossible Shots
If the target's armor strength is greater than the firer's modified fire strength the fire cannot possibly hit the target. (For example, a Rebel light Trooper firing at a Walker one macrohex away could not possibly hit: the Trooper's fire strength would be 2 and the Walker's armor strength, 3 — it is impossible to roll three Sabers with only two fire dice.)
Rolling the Fire Dice
After determining the fire strength of a shot, the firing player rolls a number of fire dice equal to the firing unit's modified fire strength. If a player rolls a number of relevant symbols (Sabers for the Rebel, Vaders for the Imperial) equal to or greater than the defending unit's armor strength, the fire hits the target.
Example: A Snowspeeder is firing at a Walker in the same macrohex. The Rebel player rolls five fire dice. The dice turn up two Sabers, two Vaders, and one blank. Since the Walker's armor strength is 3 and the Rebel player rolled only two Sabers, the fire misses.
A Walkers Fire card is drawn next and the Walker fires back at the Snowspeeder. The Imperial player rolls six dice: he gets three Vaders and three Sabers. Since the Snowspeeder's armor strength is 2 and the Imperial player rolled at least two Vaders, the fire hits.
7.3 Results of Fire
Against lightly armored targets — Laser Towers, Troopers, and AT-STs — the awesome fire power carried by Rebel and Imperial forces is devastating; such targets are destroyed if hit. However Walkers and Snowspeeders are tougher to knock out.
Destroying Towers, Troopers, and AT-STs
If a Laser Tower, Trooper, or AT-ST is hit by enemy fire it is destroyed; remove it from the board.
Walker Damage and Effects
When a Walker is hit by enemy fire, the Rebel player must check the extent of damage he has done by rolling the damage dice. He adds them together and consults the Walker Damage Table.
If the result is 2 or 3, the fire has hit the Walker's blasters.
- If this is the first time the Walker's blasters have been hit, place a Blaster Damage marker in the Blaster Damage box of the appropriate Walker Display to indicate that the Walker's fire strength is reduced by 3 for the remainder of the game.
- If this is the second blaster hit, flip the Blaster Damage marker over to its Blaster Destroyed side to indicate that the Walker may not fire for the remainder of the game.
- Any subsequent blaster hits are treated as body hits (see below).
If the result is 4-9, The shot has hit the Walker's body.
- If this is the Walker's first body hit, place a Body Damage marker in the box marked 1st Hit.
- If it's the second, place a new Body Damage marker in the box marked 2nd Hit, and remove any carried troops from the Carried Troops box (they have been destroyed). In addition, a Walker with two body hits may not mount Snowtroopers for the remainder of the game.
- If it's the third body hit, flip the 2nd Body Damage marker to its Walker Destroyed side, and remove the Walker from the map; it is destroyed.
If the result is 10-11, the shot has hit the Walker's legs.
- If this is the Walker's first leg hit, place a Leg Damage marker in the Leg Damage box to indicate that the Walker's movement allowance is reduced by 2 for the remainder of the game.
- If this is the second leg hit, flip the Leg Damage marker to its Immobilized side to indicate that the Walker may not move or change facing for the remainder of the game.
- Any subsequent leg hits are treated as body hits.
If the result is 12, it's a critical hit.
The Walker (and any troops it carries) is destroyed immediately; remove it from the map.
Walker Display Summary
BLASTER DAMAGE
- 1st Hit: Fire strength -3
- 2nd Hit: Blaster destroyed
- Subsequent Hits: Body Damage
LEG DAMAGE
- 1st Hit: -2 MPs
- 2nd Hit: Immobilized (may not move)
- Subsequent Hits: Body Damage
BODY DAMAGE
- 1st Hit: No effect
- 2nd Hit: Carried troops destroyed
- 3rd Hit: Walker destroyed
Snowspeeder Damage and Effects
When a Snowspeeder is hit, the attacker rolls the damage dice, adds them together, and consults the Snowspeeder Damage Table to determine the extent of the damage.
If the result is 2-4, the Snowspeeder's gunner is hit.
- Place a Gunner Killed marker in the Gunner Killed box of the appropriate Snowspeeder display to indicate that the Snowspeeder's fire strength is permanently reduced by 2 and that the Speeder may not use its Harpoons.
- Any subsequent gunner hits are treated as body hits.
If the result is 5-10, the shot hit the Snowspeeder's body.
- If this is the Snowspeeder's first body hit, place a Speeder Damage marker in the Body Damage box of the appropriate Snowspeeder Display.
- If it's the second body hit, flip the Speeder Damage marker over to its Speeder Destroyed side and remove the Snowspeeder from the map; it is destroyed.
If the result is 11-12, it's a critical hit.
The Snowspeeder is destroyed immediately; remove it from the map.
Snowspeeder Display Summary
GUNNER KILLED
- 1st Hit: Fire strength -2
- Subsequent Hits: Body Damage
BODY DAMAGE
- 1st Hit: No effect
- 2nd Hit: Speeder destroyed
7.4 Firing Harpoons
One of the Action Cards says "Snowspeeders Move, Fire, or Harpoon." If a Snowspeeder is in the proper position when this card comes up, its attack can be deadly. If a Harpoon attack fails, there is no effect. But if it hits, the Walker is destroyed immediately.
Which Snowspeeders May Harpoon
Only Snowspeeders with a live gunner that are adjacent to a Walker may make Harpoon attacks. (Note that it is possible for a Snowspeeder to be adjacent to a Walker yet occupy a different macrohex.)
- Only Walkers may be harpooned.
How Harpoon Attacks are Resolved
Harpoon attacks are resolved the same as normal fire attacks. If the Snowspeeder is in the same macrohex as the Walker it is attempting to harpoon, the Rebel player rolls 5 dice; if not, he rolls 4.
Harpoon Diagram example: The Snowspeeders Move, Fire, or Harpoon card is drawn.
- Snowspeeder 2 is adjacent to the Walker; it may attempt to Harpoon. Since it is in a different macrohex, its modified fire strength is 4 (-1 for range). If it rolls 3 Sabers, the Walker is destroyed.
- Snowspeeder 3 is not adjacent to the Walker (even though it is in the same macrohex); it may not make a harpoon attack. Of course, it may still fire at the Walker.
- Snowspeeder 4 is adjacent and may make a harpoon attack. If it rolls 3 Saber symbols on 5 dice, the Walker is destroyed.
- Note: If either Speeder 2's or Speeder 4's gunner were killed, that Speeder could not make a harpoon attack; it could still fire, though, with reduced fire strength.
8. Using Event Cards
Two Action Cards say "Draw Event Card." When you draw one of these Action Cards, pick up the top Event Card and take a look. Place used Event Cards aside; the Event Deck is never reshuffled.
There are 3 kinds of Events: Reinforcements, Transports Away! and special effects.
Reinforcements
When a Reinforcement Event is drawn, immediately place the listed units in any hexes of the indicated Reinforcement Sector (or in the Base Box).
- Place Imperial Troopers arriving aboard a Walker in the Walker's Carried Troops box.
Once on the map, reinforcements may move or fire whenever the appropriate Action Card is drawn.
Transports Away!
These cards detail when the Rebel transports make their run for freedom. If the fifth Transport Away! appears before the Imperial player destroys the Shield Generator, the Rebel player wins the game.
- There is a small chance that the first five cards in the Event Deck will be Transport Away! cards. Should this unlikely event occur, you may want to re-shuffle the last one back into the deck and continue playing.
Special Effects
These cards detail unusual occurrences on the battlefield — Combat Repair Droids successfully repairing damage to a Walker, The Force aiding a Rebel gunner, and so on. Each card contains an explanation of how it is used.
9. Luke Skywalker
Because of his training at the feet of Obi Wan Kenobi (and, as events proved, his parentage), Luke Skywalker is strong in The Force. This mystical ability makes him an extremely dangerous opponent. The Imperial player will be hard-pressed to defeat this young Jedi Warrior.
Assigning Luke
Before the game begins, the Rebel player secretly slips the Luke Hero Card under the board, directly beneath a Snowspeeder Display. This shows which Snowspeeder Luke is flying. The Rebel player may keep Luke's location a secret until Luke "uses The Force."
Using The Force
Luke may use The Force for three purposes: to increase his Speeder's fire strength, to increase his Speeder's armor strength, or to reduce the effect of a critical hit against his Speeder.
At the beginning of the game, Luke has 10 Force Points. Each time he uses The Force, Force Points are spent. When they're all gone, Luke may not use The Force for the remainder of the game.
Increase his Fire Strength
For each Force point spent, increase Luke's fire strength by one — for one fire only. He may spend Force points to increase his fire strength in a harpoon attack as well (assuming his gunner is unhurt).
- Luke may spend as many points as he wishes each time he fires.
Increase his Armor Strength
For each point spent, Luke's armor strength is increased by one against all subsequent enemy fire in the current Action Round. The Rebel player announces that Luke will use The Force (and how many points will be spent) after the Imperial player announces he is firing at Luke, but before the Imperial player rolls fire dice.
- Luke may spend as many points as he wishes during a single Action round.
Reduce the effect of a Critical Hit
If Luke's Snowspeeder receives a critical hit, Luke may spend a Force Point to reduce it to a Body hit. (Of course, if that were Luke's second Body hit, it wouldn't do much good...)
Luke Skywalker's Force Points Track
Luke Skywalker's Force Points Track contains a summary of how and when Luke may use The Force. In addition, it contains a track which the Rebel player uses to record the number of Force points Luke has spent during the game.
- At the start of play, place the Luke's Force Points marker in the 10 box of the Track. When Luke spends a point, move the marker one box down the track. When the marker reaches 0, Luke may not use The Force for the remainder of the game.
Example: A Walkers Fire card is drawn. The Imperial player announces that a Walker is firing at Luke's Snowspeeder. The Rebel player announces that Luke will spend 2 Force Points, raising his Snowspeeder's armor strength from 2 to 4 for that entire round — thus, any and all Walker attacks will require 4 Vaders to damage Luke's Snowspeeder during this Action Round. The Rebel player moves Luke's Force Points marker two spaces down Luke's Force Points Track from the 10 to the 8 box.
When the next Action Card is drawn, Luke's armor strength is back to normal — unless the Rebel player spends more points.
10. Winning the Game
10.1 Imperial Victory
The Imperial player wins if he destroys the Shield Generator before the fifth Transport Away! card is pulled from the Event Deck.
Destroying the Shield Generator
The Shield Generator is destroyed in the same way as a unit. It has an armor strength of 3, and if hit, it is destroyed. (Note that it is in rough terrain, and it does benefit from being there.)
The Imperial player may reduce the Shield Generator's armor strength to 2 by destroying the Power Grid.
The Power Grid
The Power Grid, which supplies power to the Shield Generator's Ground Defense Shield, has an armor strength of 3. If the Imperial player destroys the Grid, the Shield Generator's armor strength is reduced to 2.
- When the Power Grid is destroyed, place the Power Grid Out marker in the hex.
10.2 Rebel Victory
The Rebel player wins if the 5th Transport Away! card is drawn before the Imperial player destroys the Shield Generator. Alternatively, the Rebel wins if he destroys all Imperial forces currently on the map.