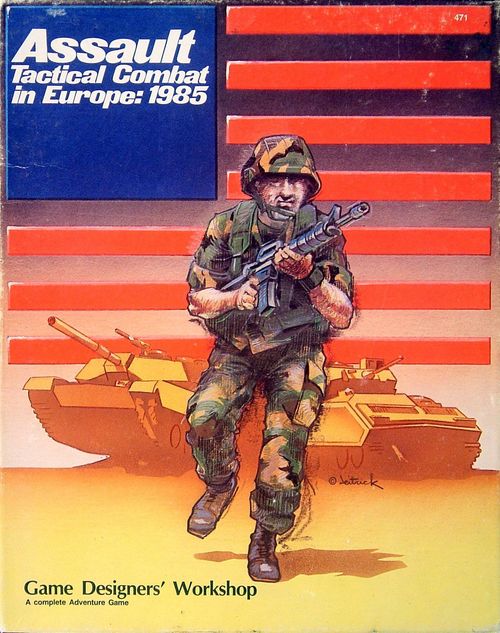
Assault: Tactical Combat in Europe – 1985
Assault: Tactical Combat in Europe – 1985 Rulebook
Table of Contents
Table of Contents
- Rule 1: Game Components
- Rule 2: Sequence of Play
- Rule 3: Unit Organization
- Rule 4: Command Control
- Rule 5: Headquarters Units
- Rule 6: Tactical Operations Centers (TOCs)
- Rule 7: Movement
- Rule 8: Transport
- Rule 9: Stacking
- Rule 10: Spotting
- Rule 11: Combat Results
- Rule 12: Direct Fire
- Rule 13: Anti-Armor Fire
- Rule 14: Conventional Fire
- Rule 15: Opportunity Fire
- Rule 16: Close Assault
- Rule 17: Morale
- Rule 18: Entrenchments
- Rule 19: Artillery and Indirect Fire
- Rule 20: Smoke
- Rule 21: Soviet Fire Timetable
- Rule 22: Cannon-Launched Guided Projectiles (Optional)
- Rule 23: Ammunition Supply (Optional)
- Rule 24: Scenarios
- Expanded Sequence of Play
Rule 1: Game Components
Assault contains the following components.
A. Maps: The two 17" x 22" maps depict areas representative of central Germany. A hexagonal grid is superimposed over the maps to regularize movement and placement of units. Each hexagonal cell (hereafter referred to as a hex) covers 250 meters of actual terrain from side to side.
The maps are laid out in such a way as to be geomorphic; that is, map edges with the same grid pattern may be butted together and the terrain will match.
B. Charts: A complete set of game charts is included. Their use is explained in later rules.
C. Counters: Three counter sheets (480 counters total) are included representing the game units and a variety of non-unit markers. Each unit counter represents either a platoon (3-5 vehicles or weapons or 30-40 men) or a section (about half of a platoon). Sections have white, instead of black, numbers and/or letters on the bottom of the counter. Counter format is detailed on the unit identification chart.
Certain terms are used in conjunction with units throughout the rules: full-strength, half-strength, and step. A platoon initially has two steps and is called a full-strength unit. When it loses a step, it becomes a half-strength unit. A section initially has one step and is called a half-strength unit. These concepts are used and expanded upon in the rules.
D. Reference Folders: The reference folders provide doctrinal and organizational background on the belligerents. While not absolutely essential to play, they are designed to aid understanding and enjoyment of the game.
E. One Decimal Die: The die is used to generate random percentile numbers. In all cases, a roll of 0 is read as a roll of 10.
F. Scenario Sheets: Each player has scenario sheets, the use of which are explained in the scenario rule.
G. Rules: These rules are laid out to ease comprehension of the mechanics of play. General rules which affect the overall course of play come first followed by more specific rules covering less common occurrences. Read the rules through once to get a general feel for the game and then reread them for specific details.
Rule 2: Sequence of Play
Each turn in Assault represents five minutes of real time. A great deal can happen in five minutes on the battlefield, and the sequence of play reflects this. All activity in a turn is divided into phases. All activity in one phase must be completed before a new phase begins. The order of phases in a turn is:
Artillery Phase: Both players write down artillery fire missions for later turns and then resolve all fire missions due to arrive in the current turn.
Soviet Player Turn
First Soviet Movement Phase: The Soviet player moves any or all of his units. The U.S. player conducts opportunity fire against moving Soviet units.
Fire Phase: Both players resolve fire from any or all of their direct fire units.
Second Soviet Movement Phase: The Soviet player moves (again) any or all of his units. The U.S. player again conducts opportunity fire.
U.S. Player Turn
First U.S. Movement Phase: The U.S. player moves any or all of his units. The Soviet player conducts opportunity fire against moving U.S. units.
Fire Phase: Both players resolve fire from any or all of their direct fire units.
Second U.S. Movement Phase: The U.S. player moves again and the Soviet player conducts opportunity fire again.
During the Soviet player turn, the Soviet player is the phasing player and the U.S. player is the non-phasing player. During the U.S. player turn the roles are reversed.
Rule 3: Unit Organization
A. General Explanation: Each counter in the game bears a unit identification in its upper left corner. For U.S. units this consists of a platoon, company and battalion identification; for Soviet units this consists of a company and battalion designation and, in some cases, a regimental designation. Unit identifications are important for determining to which command unit a counter is subordinated.
The rules on command control rely heavily on the concept of subordination. For U.S. units, all counters are subordinate to the company HQ unit bearing the same company and battalion designation and to the HQ and TOC units bearing the same battalion identification. For example, a platoon of B company of the second battalion is subordinate to the B company HQ, the second battalion HQ, and the second battalion TOC. The same is true for Soviet units, except that the Soviets have battalion and regimental HQ and TOC units instead of company and battalion. No Soviet battalion unit has a regimental designation; subordination of battalions to a regimental HQ and TOC is listed in the particular scenario.
B. U.S. Units: Most U.S. units have a unit identification consisting of a number followed by a letter followed by another number. The first number is the platoon identification, the letter is the company identification, and the second number is the battalion identification. For example, a unit identification of 2C1 designates the second platoon of C company of the first battalion.
There are several exceptions to this rule.
-
Mortars: Any U.S. unit with a company designation of M is actually a battalion-level mortar platoon or part of such a platoon. For example, a unit with the designation of M3 is the mortar platoon of the third battalion. A unit with the designation 1M2 is the first section of the mortar platoon of the second battalion (even though the unit may be platoon-size).
-
Scouts: Any U.S. unit with a company designation of S is actually a section of a battalion-level scout platoon. Thus, a unit with the designation 3S1 is the third section of the scout platoon of the first battalion.
-
Anti-Tank: Any U.S. unit with a company designation of AT is actually a section of a battalion-level anti-tank platoon. Thus, a unit with the designation 7AT3 is the seventh section of the anti-tank platoon of the third battalion.
-
TOCs: Any U.S. unit with the designation TOC in place of the normal platoon and company designation is the tactical operations center of a battalion. For example, a unit with the designation TOC1 is the tactical operations center of the first battalion.
-
HQs: Any U.S. unit with the designation HQ is a headquarters unit. If the HQ designation is followed by a company letter, it is the headquarters of a company. If the HQ designation is followed only by a battalion number, it is the headquarters of a battalion. For example, a unit with the designation HQE2 is the headquarters of E company of the second battalion. A unit with the designation HQ2 is the headquarters of the second battalion.
Note that in mechanized companies and battalions there are two units with the headquarters designation: an HQ unit and an armored personnel carrier (either an M-2 or an M-113). The actual HQ unit is the unit headquarters while the armored personnel carrier is merely the transport unit assigned to carry it.
C. Soviet Units: Soviet units do not have platoon designations. Instead, each unit has a letter designation followed by a number. The letter designation is the company to which the unit belongs and the number is the battalion to which the unit belongs. For example, a unit with the designation C3 would be a unit of C company of the third battalion. (Actually, Soviet companies are numbered, not lettered, but the convention of lettered companies was adopted for greater clarity on the counters.)
As with U.S. units, there are several exceptions to this general rule.
-
Regimental Units: While most Soviet units in the game are part of a battalion, some platoons and companies are controlled directly by regiment. These units bear a regimental designation instead of a battalion designation. A regimental designation differs from a battalion designation in that all regimental designations are two-digit numbers beginning with 9. For example, a unit with the designation AT6 is part of the anti-tank company of the sixth battalion. A unit with the designation AT-91 is part of the anti-tank company of the ninety-first regiment.
-
HQs: Soviet headquarters units are identical in designation to U.S. HQ units except that the Soviet player does not have company HQs; he has only battalion and regiment HQs.
-
TOCs: Soviet tactical operations centers are identical in designation to U.S. TOCs except that only a Soviet regiment has a TOC.
Rule 4: Command Control
A. General Explanation: Proper command control on the battlefield is essential to survival and success. In Assault command control problems are simulated through the use of operations points. Each player receives operations points from a variety of sources in each friendly movement phase. These are then spent to enable units to carry out certain functions.
B. Sources of Operations Points: Operations points are received from four sources: commanders, staffs, off-board, and by default.
- Commanders: At the start of the game, each player must generate the command rating of each of his HQ units. Roll the die once per HQ unit and consult the command rating table. The resulting command rating is recorded on a separate sheet of paper.
The command rating of the headquarters unit is the number of operations points that HQ unit may use each friendly movement phase.
- TOCs: At the start of the game each player must generate the command and planning ratings of each of his tactical operations center (TOC) units. Roll the die once per TOC unit and consult the command rating table. The resulting two numbers are the command (first number) and planning (second number) ratings and are recorded on the same sheet of paper as the headquarters' command ratings. The detailed function of TOC units is explained in Rule 6: TOCs.
The roll for command ratings and command/planning ratings is done in plain view of the other player, and the exact ratings of the HQ units and TOC units is not confidential. Since there are a variety of force levels available in the scenarios and these are confidential, players should roll the ratings up for more units than will appear in the scenario to avoid giving away their actual force level. The U.S. player should roll up the ratings of all three battalions while the Soviet player should roll up a complete regiment. The battalions within the regiment should be numbered from one through five. The scenario instructions will explain which actual game battalion holds which position. For example, the scenario instruction may say that the fifth Soviet battalion is the first battalion of the regiment actually on the board.
-
Off-Board: Some scenarios specify that off-board operations points are available. These may be used exactly as any other operations points, and represent additional direction from higher headquarters.
-
Default: If no operations points are available from any other source, a player may always expend two operation points per friendly movement phase.
C. Uses of Operations Points: Units never need operations points to fire, nor do they need them to move in march formation (see Rule 7: Movement). However, operations points are required when changing formation, moving in combat formation, replacing HQ casualties, and cross-attaching units.
An HQ or TOC unit may only use operations points to move, change the formation of, and cross-attach units which are subordinate to it. For example, the HQ unit of the Soviet first battalion could only use operations points to move units of the first battalion; it could not do so for units of any other battalion. Operations points may also be used to replace eliminated HQ units, as detailed below.
Often more than one HQ and TOC will be able to use operations points to affect a particular unit. If the operation desired requires two operations points, one may be expended by each of two HQ or TOC units. For example, a platoon of B company, second U.S. battalion is not visible to any HQ or TOC unit. As explained below, two operations points are required for it to move. The U.S. player could expend one from the B company HQ unit and one from the second battalion HQ unit. Of course, either unit could expend both of the required points if it has them to expend.
-
Change Formation: One operations point is required for all the units in a hex to change from march to combat formation or vice versa, provided the hex is visible to the TOC or HQ unit expending the operations point. If not visible, two operations points are required. A hex is visible if an unobstructed line of sight, as defined in Rule 10, can be traced to it from the TOC or HQ unit.
-
Move in Combat Formation: One operations point allows all the units in a hex to move in combat formation, provided the hex is visible to the TOC or HQ unit expending the operations point. If the hex is not visible, two operations points are required.
When operations points are expended to move units in a hex, all units must move together as a stack and must all face the same direction while moving (see Rule 7: Movement). If a player wishes to break up a stack by moving it in different directions or different distances, the operations point cost must be paid separately for each unit or stack of units moving together.
- Replace HQ Casualties: If an HQ unit is eliminated it may be replaced.
U.S. company and Soviet battalion HQ's are replaced from other units in the company or battalion. For example, if the HQ section of a U.S. tank battalion is eliminated, it is replaced by placing the HQ section back on the board in the same hex as any other full-strength platoon of the company and reducing the platoon to half strength with a hit marker. Alternatively, a half-strength unit could be removed from play and the HQ unit placed in its former hex.
Replacement of a U.S. company or Soviet battalion HQ requires the expenditure of one operations point by an HQ or TOC unit to which the eliminated HQ was subordinated, provided the replacement hex is visible to the HQ or TOC unit. Replacement requires two operations points by the superior unit if the replacement hex is not visible to it. All off-board and default operations points are considered to be from a superior HQ.
If a U.S. battalion or a Soviet regimental HQ is eliminated, it may be replaced from the unit's TOC. The HQ counter is placed on the board in the same hex as the TOC. The Soviet counter receives a UAZ-469 for transport while the U.S. counter receives an M-151 (jeep). No loss is suffered by the TOC. If the unit's TOC has been eliminated, the HQ may not be replaced.
When an HQ unit is replaced, re-roll the command rating of the HQ.
- Cross-Attaching Units: Cross-attachment merely means that a unit has been assigned to the command of a headquarters to which it is not normally subordinate. For example, the U.S. quite often will cross-attach a mechanized company to a tank battalion, or vice versa. In the game, cross-attachment allows players to treat units as if they were subordinated to a headquarters.
Both players may cross-attach units in the game. A player may cross-attach before the scenario begins and/or during the scenario. If a unit is cross-attached to a different HQ prior to the scenario, there is no penalty or cost. Cross-attachment during the scenario may only be done at the start of a friendly movement phase and requires the expenditure of two operations points by the HQ to which the unit was originally subordinated.
The Soviet player may cross-attach up to one company or three platoons to each battalion HQ. The U.S. player may cross-attach up to two platoons to each company (with any three sections counting as one platoon) and may cross-attach up to two complete companies or six platoons (with any three platoons counting as one company and any three sections counting as one platoon) to each battalion.
D. Special Cases:
- Exceptions: Recon units, HQ units, OP units and TOC units do not require operations points to move or change formation. These units are marked with an asterisk (*) on the counter. In addition, units stacked with HQ units, regardless of the subordination of the unit stacked with the HQ unit, may change formation and move without requiring operations points, provided they move with the HQ unit as a stack.
Although an OP unit does not allow units it is stacked with to move in combat formation or change facing, it does allow any vehicle transporting it to do so.
- Soviet Battle Drill: While Soviet units do not have as extensive a command control arrangement as comparably-sized U.S. units, their reliance on well-rehearsed battle drills and formation movement allow large units to move at a relatively low cost in command or staff effort. Instead of addressing a move or formation change order to a hex, the Soviet player may do so for an entire platoon, company, or battalion. Such an order still requires one operations point if the platoon/company/battalion, or any counter of it, is visible to the TOC or HQ issuing the orders, and two if not. All counters of the platoon/company/battalion, with the exception of indirect fire units, must assume the same formation, assume and maintain the same facing, and expend the same number of movement points, moving in effect in formation. If it is not possible for all counters of the platoon/company/battalion, then Soviet battle drill movement may not be used.
Rule 5: Headquarters Units
The headquarters (HQ) unit of a company, battalion or regiment represents the commanding officer and a small command group.
At the start of each friendly movement phase the player must declare how many operations points each HQ unit is expending and which subordinate unit or units they will be spent on. For example, the U.S. player has a company HQ which has a command rating of three. At the start of the movement phase he might declare that one operations point is being expended to change the third platoon from march to combat formation, a second point expended to allow the same platoon to move in combat formation, and the third point expended to allow the first platoon of the company, already in combat formation, to move.
As indicated previously, a HQ unit need not expend operations points to enable units to change formation or move if they are stacked with the HQ unit and remain stacked with it throughout the movement phase.
HQ units may move and/or fire in the same turn in which they expend operations points. HQ units may expend operations points while suppressed and/or shaken, but HQ units which are broken (see Rule 17: Morale) may not expend operations points.
Rule 6: Tactical Operations Centers (TOCs)
A. Function: The tactical operations center of a battalion or regiment is the brain of the unit. While commanding officers can direct individual units, the TOC provides planning, coordination, and command support to the unit commander that multiplies his effectiveness.
At the start of each first movement phase of a player's turn, the player must declare which of the following actions each of his TOC units is performing: command, plan, or execute plan.
-
Command: A TOC unit may function the same as an HQ unit, expending operations points equal to its command rating. A TOC, like an HQ, may move in the same movement phase in which it expends operations points.
-
Plan: A TOC which does not move in a movement phase may plan. A TOC which plans may not expend operations points that movement phase. Instead, operations points equal to its command rating are accumulated for later use.
Accumulated operations points are recorded on the planning track of each player's command control sheet using the markers provided. The 0 marker is used to record ones and the 00 marker to record tens of points. The planning rating of the TOC unit is the maximum number of operations points that it may accumulate.
- Execute Plan: A TOC unit allocated to execute may expend as many operations points desired, up to the total number accumulated. A TOC may move in the same movement phase it executes.
B. Limitations:
-
Suppression: A suppressed TOC may not plan but may command and execute.
-
Firing: A TOC may not fire in the same player turn that it plans, but may fire in the same player turn that it commands or executes.
-
Losses: Once eliminated, a TOC may not be replaced. However, the unit HQ may use the accumulated operations points of the TOC. Each turn following elimination of the TOC, the accumulated operations points total is reduced by two in addition to any used by the commander. This reduction takes place at the end of the owning player's player turn.
The loss of one step has no effect on the TOC.
- Loss of Command: A TOC may not plan or execute if the unit HQ is not in play. If the unit HQ of a U.S. battalion or a Soviet regiment is eliminated, it must be replaced before the TOC can plan. The TOC may command in the absence of a unit HQ.
Rule 7: Movement
A. General Explanation: Units move during the movement phases of a turn. Each player may move his own units in each movement phase of his own player turn. Each unit may be moved as many hexes as desired, up to the limits of its movement allowance. While a player is moving a unit, it may be subject to opportunity fire (see Rule 15: Opportunity Fire) or pass through fire (see Rule 19: Indirect Fire). If so, this fire is resolved before the unit finishes movement.
B. Procedure: Units may be moved individually or in stacks. Each individual unit or stack of units must complete its movement before another unit or stack of units begins moving.
Each unit or stack of units is moved by tracing its path of movement through hexes, expending movement points for each hex as it is entered. A unit's movement allowance is the maximum number of movement points it may expend per friendly movement phase. The movement point cost per hex is determined by the formation of the moving unit, the mobility class of the moving unit, and the terrain type of the hex.
A unit may always move one hex, even if it has insufficient movement points to do so, provided it is not into prohibited terrain or across a prohibited hexside.
A unit may enter a hex occupied by enemy units, but immediately ends its move upon so doing. A unit which begins its movement phase in the same hex as an enemy unit may change formation (see section C, formations), enter cover (see section G, cover), or move out of the hex in any direction the owning player wishes.
C. Formations: Each unit must be in one of two formations at all times: march or combat. (Exception: Units whose morale has broken are in no formation. See Rule 17: Morale.) Units may change formation at the beginning of a friendly movement phase. There is no limit to the number of units which may change formation at the start of a friendly movement phase, provided the appropriate operations point cost is paid. In general, units must be in march formation to use roads for movement, and do not require operations points to move. However, units in march formation may not fire except during a close assault (see Rule 16: Close Assault).
A unit may change formation and move in the same movement phase. A unit which changes from march formation to combat formation and then moves must have operations points expended separately for the formation change and the movement.
Units in march formation are so designated by placing a march formation counter on them. As facing (see section F) is an additional means of showing formation, march formation counters are not strictly necessary, but are provided as an aid to memory.
D. Mobility Category: There are five mobility categories: T (tracked), W (cross-country wheeled), R (road-bound wheeled), L (leg), and S (static). T, W, and R units (hereafter referred to as vehicle units) also have a movement allowance which they expend to move as explained above. S category units may not move on their own, but may be transported by other units (see Rule 8: Transport). L category units (hereafter referred to as leg units) do not have or expend movement points. Instead, each leg unit may move one hex in a friendly movement phase. Leg units which move in the second friendly movement phase of a player's turn are fatigued, and may not move in the first friendly movement phase of the next turn. To mark fatigued units, place a fatigued marker on them.
E. Terrain: Terrain effects vehicle units and leg units differently. Vehicle units pay a variable movement point cost to enter certain terrain types. Leg units must make a die roll of a given number or less to enter certain terrain types. The terrain effects chart details the movement point cost for vehicle units and the die roll necessary for leg units to enter a hex. Certain hexsides also have a movement point cost or die roll associated with crossing them. For vehicles this cost is added to the cost to enter the hex; for leg units, the most difficult die roll of the two required (if both the hex to be entered and the hexside to be crossed require die rolls) is used.
-
Amphibious Units: Some vehicle units have the letter A in addition to their normal mobility category, indicating that they are amphibious. Amphibious units can cross certain hexsides and enter certain terrain types prohibited to other units, as noted on the terrain effects chart.
-
Steep Slopes: A steep slope is defined as a hex containing two contour lines of different elevations. The terrain effects chart lists the effect of climbing a steep slope, which is in addition to the regular cost to enter the hex. Climbing a steep slope is defined as entering the hex from a hex of lower elevation. Vehicle units pay a cost to climb a steep slope if a movement point cost is listed. If the notation P appears, the unit is prohibited from entering the hex at all. Leg units have the notation F for steep slope, which means that a leg unit becomes fatigued climbing a steep slope. Leg units may only climb steep slopes in the first friendly movement phase of a turn. Units which are not prohibited from entering a steep slope hex pay no special cost for entering it unless they climb it.
F. Facing: Units always must be faced in a specific direction. A unit is faced in the same direction as the top of the counter if spotted or the direction of the arrow on the back of the counter if unspotted. Units in march formation always face a hexside, while units in combat formation face a hex vertex, as illustrated below.
Illustration: Unspotted unit in march formation (arrow points to a hexside); Unspotted unit in combat formation (arrow points to a hex vertex); Spotted unit in march formation (a unit counter showing its identification and combat values facing a hexside).
A unit must always face in the direction it is moving. A unit in march formation moves across the hexside it is facing, while a unit in combat formation may move across either hexside it is facing. A unit may change facing without movement cost immediately before entering each hex of its move. When it is finished moving it retains the facing of its last hex moved unless it expends an additional movement point in which case it may change facing.
Facing affects the fire of enemy units on the unit in question, as explained in the direct fire rules.
Note that facing is also an additional means of determining the formation of a unit.
G. Cover: Any unit in combat formation may enter cover in any friendly movement phase. Entering cover requires the entire movement phase and counts as movement for spotting purposes (see Rule 10: Spotting). A unit in cover is designated by placing a cover marker on the unit with the point of the marker faced toward the same hex vertex the unit faces.
Cover affects the chance of spotting a unit and the chance of causing losses or suppression in direct fire, as explained in later rules.
If a unit in cover moves out of the hex, the cover marker is removed.
Rule 8: Transport
A. Which Units May Be Transported: All units with a mobility category of L (leg) and S (static) may be transported.
B. Which Units May Transport Units: All transport units have a circle, either open or filled in, on the counter. Units with an open circle may transport only leg units. Units with a filled in circle may transport either leg or static units. Each transport unit may transport as many steps as its current strength level, but never more.
C. Procedure: Units being transported are placed under the transport unit, move at the rate of the transport unit, may not be fired at, and do not count against stacking.
In order for a leg mobile unit to mount or dismount a transport, either the transport unit or the leg unit must spend the entire movement phase in the mounting hex. That is, a leg unit could move to a hex containing a transport unit and mount, or a transport unit could move to a hex containing an infantry unit and allow it to mount. Once mounted, no further movement is allowed that phase.
In order for a static unit to mount or dismount, both the static unit and the transport unit must spend the entire movement phase in the same hex. Static indirect fire units which are deployed (see Rule 19: Artillery and Indirect Fire) may not mount transport units. Mounting and dismounting are considered movement for both spotting and opportunity fire.
D. Fire From Transport Units: Transporting units may fire normally. Only infantry may fire while being transported. It may only do so with small arms ammunition from unsuppressed vehicles and has its conventional fire value halved.
E. Fire at Transporting Units: Transporting units are fired at normally. If a full-strength transporting unit suffers one step loss, the mounted unit also suffers one step loss. If a full-strength unit is destroyed, the mounted unit suffers one step loss and is suppressed in the hex where the transport unit was destroyed. If a half-strength transport unit is destroyed, the mounted unit is suppressed in the hex where the transport unit was destroyed but does not take a step loss.
If a full-strength unit is carrying two half-strength units and suffers one step loss, determine randomly which half-strength unit is eliminated.
Rule 9: Stacking
More than one unit may occupy the same hex in a process referred to as stacking. There is no limit to the number of units which may occupy a hex. However, only a limited number of units may use road movement through a hex at a time, and only a limited number may fire from a hex.
A. Road Movement: A unit in march formation using road movement is assumed to be spread out along the length of the road in a hex. If more than one unit is in the hex, the interval between vehicles is shortened. A maximum of six steps of units may move together as a stack in march order using road movement. (A full-strength unit has two steps; a half-strength unit has one step.) No unit or stack of units may use road movement to enter a hex containing a unit which has already used road movement that movement phase, nor may it enter a hex in which a friendly unit in march order suffered a loss from opportunity fire that movement phase.
B. Firing: A maximum of ten steps may fire from a hex.
Rule 10: Spotting
A unit may not be fired at by direct fire unless it is spotted. All game units are backprinted with their national color and a facing arrow. Units start each scenario flipped over so that opponents do not know the actual strength and location of enemy forces. Units remain flipped until they are spotted, at which time they are turned face up. They remain face up until the end of a friendly movement phase in which they are no longer visible to any enemy unit.
A. When Spotting Takes Place: A player may attempt to spot as many enemy units as he desires at the end of each movement phase. A player may attempt to spot every enemy unit which fires at the end of each fire phase. Any player who wishes to fire missiles from a previously unspotted unit (see Rule 13: Anti-Armor Fire) must so declare at the beginning of the fire phase in which he will do so. The opposing player may attempt to spot the missile-firing unit before the fire is resolved. If successfully spotted, the missile-firing unit may be fired upon that fire phase.
B. Line of Sight: A player may only attempt to spot enemy units which are in the line of sight of one of his own units. A line of sight exists if the enemy unit is within the maximum spotting range of the spotting unit, and if the line of sight is not blocked. The line of sight is a straight line between the center of the spotting unit's hex and the center of the target unit's hex.
- Maximum Spotting Range: The normal maximum spotting range is 18 hexes. This may be increased due to elevation.
Both the elevation of the spotting unit and the target unit can increase the maximum spotting range. There are nine basic terrain elevations on the map, each representing 25 meters of elevation. The elevation levels are shown in the table below.
| Level | Color | Height |
|---|---|---|
| 0 | Full Lt. Green | 0m |
| 1 | Partial Lt. Brown | 25m |
| 2 | Full Lt. Brown | 50m |
| 3 | Partial Med. Brown | 75m |
| 4 | Full Med. Brown | 100m |
| 5 | Partial Med-Dark Brown | 125m |
| 6 | Full Med-Dark Brown | 150m |
| 7 | Partial Dark Brown | 175m |
| 8 | Full Dark Brown | 200m |
For each level above light green that the spotter and the target are in, add four to the maximum spotting range. Thus a spotting unit on level 4 could spot a target unit on level 2 at up to 42 hexes (18 hexes plus 6 x 4 hexes).
A unit is always assumed to be on the highest terrain in the hex. In addition, non-vehicle, dismounted units in a town hex or urban strip hex, and which are attempting to spot, are considered to be one level higher than the hex occupied.
- Blocking Terrain: A line of sight is blocked if it passes through terrain higher than the line of sight itself. When both the spotter and the target are on the same elevation, this is an easy determination to make. When they are on different elevations, the line of sight graph is used.
Take out the line of sight graph and examine it. The vertical axis represents range measured in hexes. The horizontal axis represents height measured in elevation levels. To use the line of sight grid, first locate the position of the spotting unit. The spotting unit is always located on the zero hex range point of the range axis and the correct elevation on the height axis. Next, locate the target unit by cross-indexing the range to the target unit and its elevation. The intersection of these two lines is its position on the graph. Lay a straightedge on the graph connecting the two lines. The straightedge is the line of sight from the spotting unit to the target unit. Finally, determine the range and elevation of any potential blocking terrain. Determine its point on the graph in the same manner as if it were a target unit. If its location on the graph is above the line of sight, the line of sight is blocked. If it is exactly on or below the line of sight, the line of sight is not blocked.
All terrain is evaluated on the basis of the highest elevation in the hex. Town hexes and woods hexes are considered to be one elevation higher than the terrain level of the hex for line of sight blocking purposes.
Note that the terrain the spotting unit is in and the target unit is in never constitute a block to the line of sight.
C. Number of Spotting Attempts: Only one spotting attempt may be made per enemy unit per phase, conducted by the friendly unit of the spotting player's choice. Usually, but not necessarily, this will be the unit with the greatest chance to spot the enemy unit.
D. Procedure: Five elements determine the likelihood of a successful spotting attempt: range, target type, terrain, target status, and spotter status.
The range from the spotting unit to the target unit determines the basic chance of spotting the target. This is listed on the spotting table as the number or less which must be rolled on the die to spot.
The terrain the target unit is in modifies the basic chance of a successful spotting attempt. The terrain table next to the spotting table lists the target type (personnel, weapon or vehicle) and indicates the modifier applied against the spotting number. Note that without such a modifier some spotting attempts are impossible. Two modifiers appear in each cell of the table. The first modifier is used if the target unit is not in cover; the second is used if it is in cover. The notation Auto means that a unit in that terrain type is automatically spotted by any enemy unit at any range provided it has an unobstructed line of sight to it.
The target status table lists additional modifiers based on the action of the target unit, making it easier to spot units which are moving, are firing missiles, or have just fired. The moving modifier is used only during the movement phase. The firing modifier is used during the fire phase and, in the case of non-phasing units conducting opportunity fire, the movement phase.
Finally, the spotter status table lists modifiers based on the type of spotting unit.
All modifiers are cumulative with the exception that a recon armored vehicle unit does not suffer the adverse modifier for being an armored vehicle but does receive the favorable modifier for being a recon unit. All units with asterisks other than HQs, OPs, and TOCs are recon units.
E. Autospots: If at any time during a movement phase either player has an unobstructed line of sight to an enemy unit which is not under cover and is in a terrain type with the notation Auto on the terrain spotting chart, that unit is automatically and immediately spotted.
F. Dummies: Dummy counters are included as listed in the scenarios and are used to confuse the opposing player as to a player's exact strength and disposition. Dummies move as normal units, with whatever mobility category and movement allowance desired by the player. Dummy counters may spot and may do so as non-recon armored vehicles if desired. They may not be treated as recon units.
A dummy counter, once spotted, is removed from the board. A player may return a dummy counter to play at the start of any subsequent friendly movement phase by placing it inverted in the same hex as any unspotted friendly unit.
G. Unspotting: If, at the end of any movement or fire phase a previously spotted unit is not within the line of sight of any enemy unit, it is flipped over to its unspotted side again. Some units may become incapable of spotting due to suppression (see Rule 11: Combat Results) or morale (see Rule 17: Morale). Although these units may not make spotting attempts on unspotted units, a spotted unit in their line of sight remains spotted.
Rule 11: Combat Results
All results of all types of fire are expressed as either suppression, hit, elimination, or no effect.
A. Suppression: A unit which is suppressed has not suffered sufficient losses to permanently affect its performance in game terms but has temporarily been rendered less effective, either due to losses or fright.
- Effects of Suppression: A suppressed unit may not spot enemy units nor may it observe for indirect fire. Units suffer additional effects from suppression which vary depending on their defense class.
AFV class units may not mount or dismount units, have their conventional fire values halved at ranges of 0 and 1 hex, and subtract one from their base hit number on all anti-armor fires at all ranges.
Suppressed personnel class units immediately go to ground, and thus have a cover marker placed on them. In addition, they may not fire, nor may they move toward a spotted enemy unit.
Suppressed weapons class unit may not fire or move.
Suppressed non-armored vehicle units may not move. Any personnel class units in the vehicle automatically dismount and are suppressed. Any weapons class unit in it is also suppressed and may not dismount.
- Recovery From Suppression: A unit remains suppressed until rallied (see Rule 17: Morale). The one exception to this is that if an unsuppressed personnel or heavy weapons class unit mounts a suppressed non-armored vehicle, the vehicle unit automatically recovers from suppression.
B. Hit: A unit that suffers a hit result loses one step of strength. All units begin the game with either one step or two steps of strength. A unit with two steps of strength which suffers a hit has a hit marker placed under the counter and is from then on treated as a unit with one step of strength. A unit which has one step of strength and which suffers a hit result is removed from play. Note that a unit which starts the game with two steps of strength and which suffers two hit results, either at the same time or at different times, is removed from play.
A unit which suffers a hit result is also suppressed.
C. Eliminate: A unit which suffers an eliminate result is removed from play, regardless of how many steps of strength it has.
D. No Effect: A no effects result has no effect on the strength of a unit, but does require the unit to check morale, as explained in Rule 17: Morale.
Rule 12: Direct Fire
There are two types of direct fire: anti-armor fire (directed only at armored vehicles) and conventional fire (directed at all units, including armored vehicles). Direct fire takes place during the fire phase and may take place during the movement phases (see Rule 15: Opportunity Fire.)
A. Which Units May Fire: Any unit which has direct fire weapons may conduct direct fire. These units are listed on the fire data charts, along with the characteristics of those weapons. The characteristics listed are ammunition type, rate of fire, effectiveness at range, and ammunition supply. The ammunition supply value is used only if Rule 24: Ammunition Supply (Optional), is used.
B. Limitations: Several considerations limit the ability of units to fire.
-
Range: The fire data charts give the effectiveness of various types of ammunition for a unit at various ranges. The presence of an X indicates that the unit may not fire that ammunition type at that range with any effect. Generally, the greater the range, the less effective the fire. No unit may conduct direct fire at ranges greater than those listed on the chart.
-
Line of Sight: The target of the fire attack must be in the line of sight of the firing unit. Line of sight is determined in the same manner as for spotting, except that dismounted personnel-class units in town and urban strip hexes may, at the owning player's option, fire from one elevation higher than the elevation of the hex. (In other words, they are firing from rooftops and upper stories of the tallest buildings in the hex.) If they do so, they may be spotted and fired at this higher elevation.
-
Formation: Only units in combat formation may fire. (Exception: See Rule 16: Close Assault.)
-
Movement: A player may not fire a unit in the fire phase of his own player turn if it moved in the first movement phase. Movement in the second movement phase does not affect fire.
-
Units: Although units do not block line of sight for spotting purposes, they sometimes do block line of sight for firing purposes. A unit may never fire through a hex containing friendly units, nor may it fire conventional fire through any hex containing enemy units. A unit may fire anti-armor fire through a hex containing enemy units provided the hex contains no enemy AFV units.
A unit may always fire over both friendly and enemy units with direct fire if it is on a higher elevation and the line of sight passes above, rather than through, the elevation of the hex being fired over.
C. Ammunition Types: There are a number of different ammunition types listed on the fire data charts. Their specific effects are detailed in the rules on anti-armor and conventional fire. However, a brief description of their actual function will aid in a general understanding of later rules.
- Anti-Armor Rounds:
a) KP: Kinetic penetrator ammunition is an anti-armor round designed to punch through armor by virtue of the kinetic energy generated by extremely high velocities. The main kinetic energy penetrator round for both sides is the hyper velocity armor piercing fin-stabilized discarding sabot (HVAPFSDS) round.
b) TP: Thermal penetrator ammunition relies on the explosion of a shaped charge warhead to burn through armor. Thermal penetrator rounds are usually referred to as high explosive anti-tank (HEAT) rounds.
c) Msl: Guided anti-tank missiles are extremely accurate anti-armor weapons which rely on thermal penetrator warheads to burn through armor. Missiles are differentiated from other thermal rounds since there are special rules relating to missile fire. These are found in rules 10 (spotting), 13 (anti-armor fire) and 15 (opportunity fire).
d) API: Armor piercing incendiary rounds are small-caliber kinetic energy rounds fired by heavy machine guns and small cannons. API rounds are differentiated from other kinetic penetrator rounds due to their lower chance of a kill on an armored vehicle once they achieve a penetration.
- Conventional Rounds:
a) HE: High explosive rounds are used against non-armored targets. Note that the U.S. ammunition supply column of the fire data chart lists a single total for TP and HE rounds combined for the M-1 tank. This is because the TP round is used as an HE round against unarmored targets.
b) SA: Small arms fire consists of automatic weapons (machine guns and assault rifles) and grenade launchers.
c) APERS: The anti-personnel round fired by U.S. tanks consists of a round which is packed with thousands of flechettes. The gunner selects a range (up to 1500 meters) at which the round will detonate. When it detonates, the flechettes are released as a cloud of lethal projectiles still travelling at high velocities along the ballistic path of the round with devastating effect on non-armored targets.
d) IS: Incendiary smoke rounds may be fired at either armored or non-armored targets. Incendiary smoke rounds are filled with white phosphorus which not only creates a good deal of smoke but also burns at extremely high temperatures. An exploding white phosphorus round thus is an extremely deadly weapon.
D. Rate of Fire: Each step of a unit may fire as many times per phase as its rate of fire as listed on the fire data chart. Also, each step of a unit has its full rate of fire for both opportunity fire and for close assault, even when both activities occur in the same movement phase. Personnel-class units may always fire every ammunition type available at its listed rate of fire. Other units with more than one type of ammunition available may fire one or several types in a phase, but the total number of fires may not exceed the lowest ROF number of the ammunition types being fired.
For example, a U.S. M-1 unit could fire twice with KP ammunition or twice with SA ammunition or once with each. A Soviet BMP-B unit could fire twice with API ammunition or once with Msl ammunition. A U.S. infantry unit could fire once with TP ammunition, once with Msl ammunition and twice with SA ammunition.
Each fire attack may be directed at any spotted enemy unit; all shots may, but need not be, directed at the same enemy unit. The targets of all fires from all friendly units must be declared before any fires are resolved.
E. Strength of Firing Unit: All fire data is listed per step. Since full-strength units have two steps, each fire from such a unit enables the unit to make two attacks. These two attacks must use the same ammunition, but may be directed at different targets.
For example, a full-strength Soviet T-80 platoon fires once with KP ammunition and once with HE ammunition. Since the platoon has two steps, it actually makes two attacks with HE and two with KP.
Rule 13: Anti-Armor Fire
Anti-armor fire is directed at armored vehicle units. Ammunition types which may be used for anti-armor fire are those which, on the fire data chart, have two numbers separated by a colon in each column of the effectiveness at range section of the chart. These include KP, TP, API, and Msl ammunition.
A. Hit Procedure: The first number in the effectiveness at range section of the fire data chart is the base chance of achieving a hit on a target unit at a given range. Roll the decimal die; if the number rolled is equal to or less than the base chance to hit, the fire attack results in a hit. Several factors modify the base hit number.
-
Cover: If a unit is under cover and is being fired at across one of the two covered hexsides, divide the base hit number by two, rounding fractions down.
-
M-901 Units: If a U.S. M-901 unit is under cover and is being fired at across one of the two covered hexsides, divide the base hit number by three, rounding fractions down.
-
Multiple Targets in Hex: Divide the number of enemy AFV steps in the hex by two, rounding fractional results down, subtract one, and add the total to the base hit number. For example, a unit has a base hit number of four and there are six steps of enemy AFV units in the target hex. Add (6/2 − 1 =) 2 to the base hit number, giving a new hit number of 6.
-
Missile Fire: If a unit is firing missiles at units in a woods hex, divide the base hit number by two, dropping fractions.
After the final hit number is determined, roll the die. A roll equal to or less than the hit number means that the target unit suffers one hit. A roll equal to or less than the hit number minus two means that the target unit suffers two hits. For example, a firing unit's final modified hit number is seven. If a seven or six is rolled, the target unit suffers one hit; if a five or less is rolled the target unit suffers two hits.
A target unit which suffers one or more hits will lose steps, provided the hits penetrate.
B. Penetration: Once a hit has been achieved, determine whether or not the ammunition used is capable of penetrating the vehicle's armor. To do so, compare the penetration of the ammunition used to the armor of the target. If the penetration is equal to or greater than the armor, the hit may penetrate. If it is less than the armor, the hit does not penetrate, and instead causes the target unit to be suppressed.
-
Penetration Value: Locate the correct column of the effectiveness at range section of the fire data chart. The second number (i.e. the number following the base hit number) is the penetration value of the ammunition at that range. For example, a Soviet T-80 firing KP ammunition has a penetration value of 15 at a range of eight hexes.
-
Armor Value: Each AFV unit has two armor values; the first value is for frontal shots and the second is for flank shots. If the line of sight crosses the hexside (march formation) or hexsides (combat formation) the unit is facing, the frontal armor is used. If the line of sight crosses any other hexside the flank value is used. If the firing unit is in the same hex as the target unit the flank value is always used.
-
Hit Confirmation: A hit from KP ammunition which is capable of penetrating the target's armor automatically causes a loss of one step. Hits from other ammunition must be confirmed. Roll the die once. If the number rolled is equal to or less than the difference between the penetration value of the ammunition and the armor value of the target, the hit causes a one step loss. If not, the target is suppressed but otherwise unharmed.
In most cases, an addition to the difference between armor and penetration is made (thus making it easier to confirm the hit). If the target unit is protected by chobham armor, no addition is made. If the target unit is protected by laminate armor, two is added to the difference. In all other cases four is added to the difference. All vehicles protected by chobham or laminate armor are listed on the hit confirmation table.
For example, a U.S. infantry unit firing TP ammunition achieves a hit on the front of a T-80 unit. The T-80 has a frontal armor value of 15 while the infantry's TP ammunition has a penetration of 17, or a difference of two. Since the T-80 has laminate frontal armor, two is added to the difference, for a final difference of four. The U.S. player must roll a four or less on the die to inflict a step loss on the T-80.
C. White Phosphorus: A few weapons have the capability of firing incendiary smoke rounds (white phosphorus). These weapons may fire at armored vehicles with white phosphorus using the base hit number of their least accurate anti-armor round minus one. For example, the U.S. M-1 tank can fire incendiary smoke and wishes to do so at a range of six hexes. Its least accurate round at six hexes is TP with a base hit number of three. Subtracting one gives a base hit number for the white phosphorus round of two.
Whether or not a hit is achieved on the target, an incendiary smoke screen is placed in the target hex in the manner explained in Rule 20: Smoke. If the round hits the target AFV unit, the target is eliminated. If the round missed the target, the target is suppressed.
Rule 14: Conventional Fire
Conventional fire may be directed at any unit. However, conventional fire cannot inflict losses on armored vehicles; any result other than no effect merely suppresses the AFV unit. Conventional fire is resolved by the following procedure.
A. Determine Target Defense Value: Each target has a defense value against conventional fire which is determined by the target defense class, the terrain it is occupying, and whether or not it is in cover. Consult the conventional fire defense table and cross-index the target defense class with the terrain of the hex it occupies. At the intersection there are two numbers separated by a slash. The first number is the defense value of the unit if it is in the open (i.e. not under cover) while the second number is the value if the unit is under cover. Subtract 1 from the defense value for each step in the hex in excess of two. However, a unit may never have its defense value reduced below half the value listed on the chart.
For example, a U.S. infantry platoon is in a woods hex under cover. Also in the hex are two other platoons, one of which has already suffered a one step loss. The U.S. infantry unit is a P (personnel) class unit, and thus would normally have a defense value of fifteen. Since there are a total of five strength points in the hex, however, three is subtracted from the defense value giving a modified value of twelve.
B. Determine Fire Value: Add the fire values of all conventional fires being directed at the target unit from all enemy units firing at it that phase. Thus if two enemy units, each with an ROF of 2 and two steps each, were firing at the unit, a total of 8 shots would be added together. If both firing units had a value of 4, the total fire value would be 32.
C. Resolve the Attack: Compare the fire value to the defense value and convert it to one of the simple odds ratios found on the conventional fire combat results table. If rounding is necessary, round in favor of the target unit. Thus, a fire value of 32 versus a defense value of 7 would be a 4:1 attack. Roll the die and consult the conventional fire combat results table. The intersection of the odds column and the row corresponding to the die roll lists the result of the attack. Implement the result as explained in Rule 11: Combat Results.
Rule 15: Opportunity Fire
Opportunity fire takes place during the movement phase. Only units of the non-phasing player which are under cover may conduct opportunity fire, and only at units which are moving.
A. Limitations: Since units are moved individually or in stacks, the non-phasing player must choose whether or not he will conduct opportunity fire each time the phasing player moves a unit or stack. There is no limit to the number of opportunity fires a player may make in a movement phase, provided no unit exceeds its normal rate of fire for a phase. Fire is conducted based upon the facing of the target unit as it enters the target hex.
All weapons may conduct opportunity fire at any enemy unit within four hexes. Missiles may not conduct opportunity fire beyond four hexes. At up to a range of eight hexes, units may only conduct opportunity fire against enemy units as they enter the second or any subsequent, consecutive hex under observation. That is, a unit cannot be fired on in the same hex as where it is first visible to the firing unit. At up to a range of twelve hexes, units may only conduct opportunity fire in the third or any subsequent, consecutive hex under observation. No unit may conduct opportunity fire beyond a range of twelve hexes.
An enemy unit which begins the movement phase visible to the firing unit may be fired at in any hex of its movement up to a range of twelve hexes.
A unit normally eligible to conduct opportunity fire may do so against enemy units entering or leaving the hex the unit occupies.
B. Resolution: Opportunity fire is resolved as anti-armor or conventional fire as appropriate and resulting morale checks are resolved immediately. After they are resolved, movement proceeds.
Rule 16: Close Assault
Close assault takes place during the movement phase and is resolved after all movement is completed. A close assault takes place when, at the end of movement, there are units of both players in the same hex.
If a close assault takes place, all units in the hex fire simultaneously. Close assault fire is resolved using the normal rules for anti-armor and conventional fire. Unlike fire conducted in a fire phase, units in march formation may fire in a close assault.
It is possible that after all fires are resolved, both players may still have units remaining in the hex. No special actions are required by these units. If at the end of the next movement phase there are still units of both sides in the hex, another close assault is resolved. No unit may fire during a fire phase if there are enemy units in the hex it occupies.
Rule 17: Morale
Units under fire suffer from extreme stress, and this can turn into morale problems, especially when casualties are suffered. Units whose morale deteriorates become either shaken or broken.
A. Morale Checks: Units check morale by company. Units which do not belong to a company (a battalion HQ unit, for example) check morale separately. Each phase in which any unit of a company is fired at, the company must check morale. Regardless of how many times the company is fired at, it is never required to check morale more than once per phase. To check morale, roll the die once. If the result is equal to or less than the current morale level of the company, the company passes the check, otherwise it fails the check.
Platoons and sections which have been cross-attached to another company are treated as part of that company for morale purposes.
-
Morale Levels: All companies have an initial morale level of 10 except for mechanized infantry companies (all those companies which consist of both infantry units and armored personnel carrier units) which have an initial morale level of 12. A company's morale level is reduced by 1 for every step loss suffered.
-
Failed Morale Checks: If a company fails a morale check it is shaken. A shaken company which fail a morale check are broken.
Units of a shaken company may not move toward any spotted enemy units.
Units of a broken company are in no formation; they move as if in march formation but all shots against them are considered to be flank shots. Units of a broken company may not fire, spot or observe for indirect fire. They must move away from the nearest spotted enemy unit to the extent of their movement ability, so long as they do not come closer to any spotted enemy unit than they were to the closest spotted enemy unit at the beginning of the phase. For example, a broken unit is three hexes away from the closest spotted enemy unit. Each hex it enters must move it further away from that enemy unit, but it may not come within two hexes of any other spotted enemy unit while doing so. If unable to move farther away from the original enemy unit without approaching too close to another enemy unit, the broken unit may not move.
Any unit which becomes broken in the same hex as occupied by an enemy unit is removed from play (surrenders).
B. Rally: A player may attempt to rally broken and shaken companies at the start of a movement phase. Rallying a company costs 1 operations point if any part of the company is visible to the HQ or TOC unit expending the operations point, and 2 point if it is not visible. TOCs may not rally companies while executing plans.
To rally a company, roll one die. If the result is equal to or less than the company's current morale level, the company rallies. Broken companies which rally become shaken. Shaken companies which rally become normal. Broken companies which became shaken immediately are assumed to be in combat formation, with any facing desired by the player.
Players may attempt to rally suppressed units at the start of each friendly movement phase as well. The procedure for rallying suppressed units is identical to that for rallying shaken and broken units except that it does not require the expenditure of operations points.
The player attempts to rally broken and shaken companies before attempting to rally suppressed units. If the company rallies, then all suppressed units of the company also rally and are no longer suppressed. If the company doesn't rally, then the player may attempt to rally each suppressed unit of the company individually.
C. HQs and TOCs: HQs and TOCs are considered separate companies for morale purposes, with a morale level of 8. HQs and TOCs which are shaken must attempt to rally themselves each friendly movement phase by expending one operations point. Broken HQs and TOCs may not expend operations points.
Rule 18: Entrenchments
Certain scenarios will call for one side to have several entrenchments. These must be placed on the board with the initial placement troops and, once placed, may not be moved. Each entrenchment may hold up to two steps of personnel or heavy weapons class units.
A unit must spend its full movement phase in an entrenchment hex to enter the entrenchment. A unit in an entrenchment is noted by placing the unit under the entrenchment marker. Dummy units may occupy entrenchments. A unit may not occupy an entrenchment already occupied by an enemy unit.
Units in entrenchments defend against indirect fire and conventional fire as listed on the conventional fire defense tables. For spotting purposes, entrenched units are considered covered.
Entrenchments may not be placed in marsh hexes.
Rule 19: Artillery and Indirect Fire
A. General Explanation: Indirect fire represents the firepower of mortars and artillery, which deliver high trajectory plunging fire. Indirect fire units are all units which are included on the indirect fire data chart. Artillery forward observers radio or telephone fire missions back to indirect fire units, which in turn fire on the requested target. The process of requesting fire takes time, as the following rules indicate.
B. Requesting Fire: Indirect fire is requested at the beginning of each artillery phase. Both players secretly write down their fire missions on separate pieces of paper. The left-hand margin of the paper should be numbered from 1 up to the number of turns specified by the scenario. Each turn's fire missions are written on the line of the turn in which they will arrive.
-
Writing Fire Orders: When writing fire orders, the player must specify the target hex number, the firing unit, and the ammunition being fired. A sample fire order might read, "A2121, 122mm bty 1, HE". This means that the target is hex number 2121 on map A, the firing unit is the first battery of 122m howitzers, and it is firing high explosive rounds.
-
Observing Fire: Except as noted in Rule 21: Soviet Fire Timetable, a hex must be under observation by a unit capable of calling fire in order for a fire mission to be written for the hex. All U.S. units are capable of calling fire as are all Soviet HQ and OP units. An indirect fire unit may also observe for itself. For a hex to be under observation, an unobstructed line of sight must be traced from the observing unit to the target hex. Procedures for tracing line of sight are explained in Rule 10, Spotting.
-
Delay: Indirect fire is subject to a delay of one or more turns. This varies depending on which unit is observing for the fire and, in the case of the Soviets, which unit is firing the mission. The indirect fire delay chart lists the number of turns of delay for various observing units. In addition, when spotting with other HQ or OP, the Soviet player suffers an additional delay of one turn per command level separating the firing unit from the observing unit. Command levels are shown at right for the Soviets: Battery, Battalion, Regiment, Division, Army, Front.
The command level of an artillery unit is defined by the non-artillery unit to which it is subordinated. Thus, the mortar battery of a motorized rifle battalion is considered a battalion-level unit. The artillery battalion of a motorized rifle or tank regiment is a regimental-level unit.
For example, a scenario calls for the Soviet player to have army-level artillery available in support. A battalion HQ observes for a fire mission. Total delay would be 5 turns; normal delay of 2 turns plus 3 command levels difference.
After the proper delay time is calculated, the mission is recorded on the artillery mission sheet. It is recorded next to the turn number in which the mission will arrive, not the turn it was requested.
- Cancelling Missions: A fire mission may be cancelled at the beginning of any artillery phase. Another order may be written for the unit at that time, but it is subject to delay starting in that artillery phase; it may not be simply substituted for the cancelled fire order.
C. Indirect Fire Procedure: After all fire missions are recorded, fire missions due to arrive in the current turn are resolved. All artillery firing at a hex is added together and attacks all units (enemy and friendly) in the hex.
-
Fire Mission Markers: When a fire mission arrives on the board, take a numbered fire mission marker and place it in the target hex. This marker will remain in place until the next artillery phase.
-
Fire Value: The indirect fire data chart lists the fire value for each indirect fire unit in the game. The value listed is per step. Each full-strength counter has two steps and each half-strength counter has one. Since the fire value is per step, multiply it by two for full-strength units. All offboard artillery consists of full-strength units.
-
Target Defense Value: The indirect fire defense chart lists the defense value of various units in various terrain.
-
Resolution: The fire values of all artillery units firing in a hex are added together. This is then compared to the defense value of the top unit in the stack and expressed as a simple odds ratio as found on the conventional fire combat results table. If rounding is necessary, always round in favor of the target unit. After locating the correct column of the combat results table, roll a die and implement the result.
Repeat this procedure for each unit in the target hex. Note that the fire strength will be the same each time, but the defense value may change.
- Results: Three results are possible: suppress, loss, and eliminate. All are explained in Rule 11: Combat Results.
D. Special Cases:
- Max ROF: Each indirect fire weapon may fire at its maximum rate of fire for one turn per scenario. In that turn the fire value is modified by the max ROF multiplier on the indirect fire chart. The firing unit suffers no adverse effect from firing at its max ROF.
For example, the Soviet D-30 howitzer has a factor of 4 when firing HE ammunition. Once during the game it may fire at max ROF. Since its max ROF multiplier is 6, its factor for that turn would be 24.
-
ICM: The U.S. player has a choice of firing either HE (High Explosive) or, with some weapons, ICM (Improved Conventional Munitions). ICM may not be fired at town, urban strip, woods, full lake, or swamp hexes. When firing ICM the fire value is modified by the ICM multiplier on the indirect fire chart. If the max ROF option is taken with ICM, multiply the fire value both by the max ROF modifier and by the ICM modifier.
-
Smoke: An indirect fire unit may fire smoke instead of HE or ICM. Smoke missions are plotted using the same procedure as any other fire mission, except that units capable of laying more than one smoke screen may plot as many target hexes as smoke screens. The indirect fire chart indicates what type of smoke may be fired (chemical or incendiary) and how many smoke screens may be fired per step per turn. Incendiary screens last one turn; chemical screens last two turns. Screens are removed at the start of the artillery phase. The effects of smoke are detailed in Rule 20: Smoke.
For example, a U.S. M-125 mortar is plotted to fire an incendiary smoke mission. Since it may fire four incendiary smoke screens per turn, the U.S. player writes down only up to four target hexes.
If there are units in the target hex the turn the smoke arrives, they may be subject to an attack. Chemical smoke missions do not attack units in the target hex but incendiary smoke missions do. Resolve the attack as if it were an HE fire mission but with a factor of 10 per incendiary smoke screen targetted on the hex. For example, a U.S. M-109 mortar can fire up to three incendiary smoke screens per turn per step, or a total of six per turn if a two-step unit. If all six were fired at a single hex, each unit in the hex would be attacked with a fire value of 60.
- Pass-Through Fire: Indirect fire is assumed to be taking place over the course of the turn. Thus, the fire mission marker is left in place and any unit moving through the hex during a movement phase is attacked by the fire mission as well. All units suffering pass-through fire are fired at as if in clear terrain.
E. Deployment: In order to conduct indirect fire, or to be given a fire mission, units must be deployed. After all indirect fire in the phase has been resolved, players may have any indirect fire units deploy. This is done by placing a deployed marker on the unit. (A unit may be in either march or combat formation when it deploys.) Off-board artillery should be noted as deployed on the artillery firing sheet.
Indirect fire units which are deployed may not move. Deployed units may fire in the direct fire phases only if they did not fire in the artillery phase.
Indirect fire units may leave deployment during a friendly movement phase, paying their entire movement allowance to do so. Self-propelled artillery units may do so in either friendly movement phase; towed units may do so only in the second movement phase. Units may not leave deployment during a turn in which they conducted a fire mission.
F. Range: Indirect fire is limited by the range of the firing unit. The indirect fire data chart lists the range of the various firing units in hexes. Most artillery fire will be from off-board units, and the scenario information will list both the types of artillery available and how many hexes off-board the unit is. Subtract this from the printed range to determine how many hexes of range on-map the unit has.
Rule 20: Smoke
Smoke may be delivered by those indirect fire weapons so noted on the indirect fire data charts. There are two types of smoke: incendiary smoke and chemical smoke.
A. Placement on the Board: Smoke missions are plotted using the same procedure as any other fire mission, except that units capable of laying more than one smoke screen may plot as many target hexes as smoke screens. In the artillery phase in which the smoke mission arrives, place one smoke marker on the map for each smoke screen.
-
Wind Direction: At the start of each scenario, roll the die and consult the wind direction diagram in the U.S. player's scenario sheet. This is the direction of the wind for the entire scenario.
-
Wind Velocity: At the start of each scenario, roll the die and consult the wind velocity table. The result will either be light, moderate, or strong. Smoke missions may not be fired in strong winds.
-
Orientation: Each smoke marker is placed in a hex but actually blocks two hexsides. The marker is faced toward a hex vertex, indicating that the two hexsides adjacent to that vertex are blocked. Smoke markers may only be faced in such a way that the line of blocked hexes is parallel to the wind direction.
Illustration: a diagram shows "Wind Direction" as an arrow, and four sample orientations of an incendiary smoke marker on a hex — two labeled "Not Correct" (the blocked-hexside line running across the wind direction) and two labeled "Correct" (the blocked-hexside line running parallel to the wind direction).
- Duration: On the turn of arrival of incendiary smoke, place an incendiary smoke marker on the target hex. At the start of the next artillery phase, remove the marker.
On the turn of arrival of chemical smoke, place a chemical smoke 1 marker in the hex. If in a light wind condition, flip the marker to its chemical smoke 2 side at the start of the next artillery phase and remove it at the start of the following artillery phase. If in a moderate wind condition, flip the marker to its chemical smoke 2 side and add one additional chemical smoke 1 marker one hex downwind at the start of the next artillery phase. At the start of the following artillery phase remove the chemical smoke 2 marker and flip the downwind marker to its 2 side. In the next artillery phase, remove the remaining marker.
B. Effects:
- Incendiary Smoke: Incendiary smoke blocks line of sight for spotting and fire purposes for all units. Incendiary smoke is considered to be one elevation level tall and is calculated as if in the center of the hex for purposes of the line of sight graph. However, the line of sight must cross one of the two blocked hexsides to be blocked.
Incendiary smoke may also cause casualties if units are in the target hex the turn of its arrival. See Rule 19: Artillery and Indirect Fire.
- Chemical Smoke: Chemical smoke has the same effect as incendiary smoke except that units equipped with thermal sights ignore the effects of chemical smoke. All U.S. M-1s, M-2s, M-3s, and M-190s are equipped with thermal sights. In addition, U.S. Dragon gunners have thermal sights, and thus U.S. infantry may spot units through chemical smoke and fire Msl ammunition through it. They may not observe artillery fire through smoke or fire SA or TP ammunition through smoke.
C. Direct Fire Smoke: A few direct fire units are listed as having IS (incendiary smoke) ammunition. This may be used to attack armored or non-armored targets, as detailed in the rules on anti-armor and conventional fire. In addition, whenever IS ammunition is used to attack a target in direct fire, an incendiary smoke screen is placed in the target hex, regardless of the result of the fire attack. The incendiary smoke screen lasts for one complete game turn starting in the artillery phase after it appears. Thus, a smoke screen which appears in any direct fire phase of turn 4 would be removed at the start of the artillery phase of turn 6.
Rule 21: Soviet Fire Timetable
Some scenarios will call for the Soviet player to have a fire timetable. A fire timetable is several turns worth of pre-planned fire. The Soviet player writes down in advance fire missions for as many of his indirect fire units as he wishes for as many turns as he wishes. He may leave gaps in the timetable for certain units and note "on call" for them, indicating that they may be used to fire normal observed fire missions.
Target hexes of the fire timetable, unlike normal indirect fire, need not be under observation. The fire timetable must be written before the U.S. player places any units on the map.
Once play begins, the fire timetable may not be altered. It may, however, be aborted by so declaring at the start of an artillery phase. No fire missions may be written in the phase the fire timetable is aborted, nor may any mission be written before it is aborted except for "on call" units and units not covered by the fire timetable.
Rule 22: Cannon-Launched Guided Projectiles (Optional)
Cannon-Launched Guided Projectiles (CLGPs) are currently in the final stage of development and may be fielded within the time frame of this game. If players wish, they may include the use of CLGPs in any scenario.
A. Firing CLGPs: Only U.S. 155mm howitzers may fire CLGPs. CLGP fire is recorded as a normal fire mission with a specified target hex.
B. Directing Fire: CLGPs impact during the artillery phase and count as a normal HE attack on the target hex unless they are directed by a designator unit. They may be directed to any hex within four hexes of the target hex provided the designator unit has an unobstructed line of sight to the designated hex. The CLGP attack is then resolved against any one AFV unit in the hex as an anti-armor fire with a base hit number of 8. Hits automatically penetrate and do not need to be confirmed. If the CLGP attack is directed against an AFV unit, the HE attack is not run.
C. Designator Units: One counter in each U.S. company may be noted as containing the company's laser target designator. The laser designator is not capable of penetrating smoke, and thus the smoke always blocks the line of sight for purposes of directing fire, even if the designator unit has thermal sights. Any casualty in the designator unit eliminates its ability to direct CLGP fire.
Rule 23: Ammunition Supply (Optional)
Given the time scale of Assault, it is possible for most units in the game to burn through their basic load of ammunition. This is particularly true of most units equipped with missiles. However, the mechanics involved in keeping track of each game shot are such that this rule is not recommended for players until they are thoroughly familiar with the game mechanics. At that point, players may keep track of ammunition in those weapons which have 3 or fewer shots available. Finally, experienced players may wish to keep track of all ammunition expenditures.
A. Ammo Supply: The direct and indirect fire charts list the ammunition available to units in terms of game fires that may be made. Each time that a unit fires, regardless of the number of steps it has, it uses one unit of ammo.
Indirect fire units consume one unit of ammo per turn that they fire unless they fire at max ROF or they conduct direct fire. If they fire at max ROF, they consume units of ammunition equal to their max ROF multiplier. If they conduct direct fire, they consume one unit of ammunition per fire.
Note that the U.S. M-1 tank has a combined ammunition supply number for HE and TP rounds. This is because the same round can be used for both purposes.
B. Ammo Use: Both players should have a separate piece of paper available to record ammunition use. Each counter should have a separate line on the sheet, and each fire should be noted as using one unit of ammunition. Once a unit has exhausted its basic load of ammo, that ammo type may not again be fired by that unit.
Units may not resupply during the course of the game.
Rule 24: Scenarios
Assault contains a number of scenarios. Players should decide by mutual consent which scenario is played. Beginning players should start with the Probe scenario, as it has fewer units in play and is thus more manageable.
The scenario sheets list a variety of information necessary to the play of the scenario, as specified below.
A. Maps and Wind Direction: The scenario sheet will list the maps used, their orientation in relation to each other, and the compass directions of the assembled map. Soviet units always enter from the east, and U.S. units enter from the west. Note that the orientation of the map number on the scenario sheet corresponds to the orientation of printed town names on the actual map.
The U.S. scenario sheet also shows a wind direction compass for determining wind direction in the scenario.
B. Force Level Options: Each side has six counters numbered from 1 to 6. These should be shuffled face down and each player draws one of his own counters. The other counters are placed aside. The counter drawn indicates the forces available to the player for the scenario.
The force level section of the scenario sheet also lists the entry schedule of reinforcing units and the victory point multiplier for that force level. The victory point multiplier is explained below.
C. Off-Board Artillery: This section lists how much, if any, off-board artillery is available, its type, distance from the map edge, and any special rules for its use.
D. Off-Board Command: This lists the number of operations points available per movement phase each turn from a superior HQ off-board.
E. Victory: This section lists those objectives for which the player receives victory points. This is generally expressed in terms of towns captured, enemy units eliminated, and friendly units exited off the map.
At the end of the scenario, both players add up the victory points gained and then multiply them by the victory point multiplier of their force level. The player with the higher victory point total is the winner.
Expanded Sequence of Play
Artillery Phase
- Record fire missions.
- Adjust smoke markers from previous turns.
- Resolve indirect fire.
- Deploy artillery units.
Soviet Player Turn
First Movement Phase
- Declare TOC action for turn.
- Allocate operations points.
- Attempt to rally broken or shaken units.
- Attempt to rally suppressed units.
- Change formation.
- Move units, resolve all pass-through fire and opportunity fire, and check morale.
- Mark fatigued units (those which climbed a steep slope this phase).
- Remove fatigue markers (unless unit climbed steep slope this phase).
- Attempt to spot.
- Resolve close assaults.
Fire Phase
- Declare all missile fire.
- Attempt to spot units firing missiles.
- Resolve all remaining fires.
- Resolve all fires.
- Check morale.
- Attempt to spot firing units.
Second Movement Phase
- Allocate operations points.
- Attempt to rally broken or shaken units.
- Attempt to rally suppressed units.
- Change formation.
- Move units, resolve all pass-through fire and opportunity fire, and check morale.
- Mark fatigued units.
- Attempt to spot.
- Resolve close assaults.
- Reduce accumulated operations points by 2 for all eliminated TOC units.
U.S. Player Turn
The U.S. player turn is identical to the Soviet player turn in sequence.