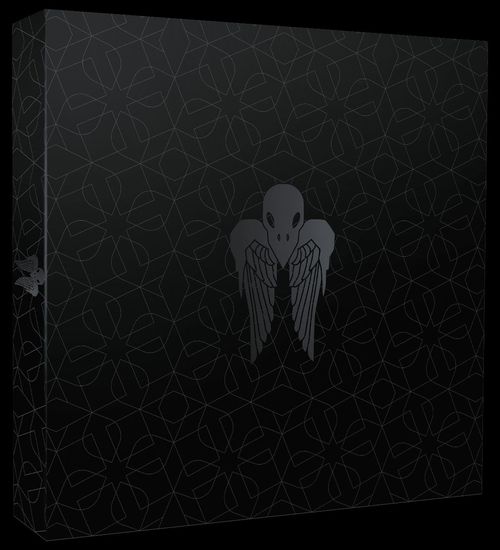
Assassin's Creed: Brotherhood of Venice – Creed Versus Crows
Assassin's Creed: Brotherhood of Venice – Creed Versus Crows Rulebook
Table of Contents
Table of Contents
Before You Start
To play with this expansion, you must have played Memories 0.1 to 0.4 from Assassin's Creed: Brotherhood of Venice, and have mastered rule points 1 to 33, and rule point 45.
Crows are played using the same rules as Assassins (stealth, actions, etc.).
Introduction
This competitive expansion pits a small group of Assassins against the Crows, a secret faction of Templars created by Cesare Borgia, in a hypothetical series of confrontations to gain control of a region of Veneto. One or two players control two Assassins who will go against two Crows controlled by one or two opposing players.
All Missions are independent of each other and you can play them in any order you like. Note: You do not keep any equipment between each game, the characters do not evolve, etc.
C1 — Goal of the Game
You win as soon as:
- You destroy the opposing Tower.
OR
- You have Eliminated the 4 Characters of the opposing faction.
If neither of these conditions occurs before the end of the 5th game turn, the winner is decided by counting the XP points collected by each faction.
C2 — Rules
The rules from Assassin's Creed: Brotherhood of Venice also apply to this expansion, with the exception of the following and a few others detailed in the next rule points:
- For the sake of simplicity, "the player" is written as singular, although it is possible to play this expansion with three or four players.
- "Opponent" refers to any member of the opposing faction (Assassin or Crow). "Enemy" refers only to Guards and Bosses (not your Opponents). "Ally" refers to any member of your faction.
- Equipment and Chest cards picked up on the Map must be placed face down when they are on the inventory slot of your Character board. Note: Cards placed on the other slots are placed face up.
- When one of your Characters is attacked or undergoes a Detection Test, the opposing player rolls the dice.
- You must Eliminate any Opponent (and any Enemy) on your square if you are exposed and want to do one of the following: Search 1+ Bodies, retrieve the contents of a Chest, climb a Tower or enter a Hiding Spot.
- You cannot Synchronize at the top of a Tower, but you can climb it, even if you are carrying an Automaton.
C3 — The Crows
Crows are played using the same rules as Assassins (stealth, actions, etc.).
The Crows are a small group of fierce Templars who aim to fight the Assassins with their own methods. Their former leader, Sirus Favero, was nicknamed il corvo (the raven). The Assassins will have to face the four Crows led by Cesare Borgia, including the formidable Matteo Favero, son of the historic leader of the Crows.
C4 — Initiative
In order to determine which faction has the Initiative, a player takes the Initiative blade, then, with their arms under the table, places it secretly in their right or left sleeve, leaving the tip protruding.
The opposing player must guess which arm the Initiative blade is attached to. If they succeed, they have the Initiative for the first turn of the game. Otherwise, it goes to the opposing player.
The player with the Initiative:
- Chooses which faction they will control: Assassins or Crows.
- Starts playing at the start of a game turn.
- If there are choices to be made for the Enemies, the player with the Initiative decides. For example, 2 Guards are on a square and one of them must Hunt an Opponent, it is the player who has the Initiative who decides which Guard will Hunt.
- At the end of the turn, he or she gives the Initiative blade to the opposing player who will have it for the next turn.
C5 — Setup
Items with a number in a blue square come from the Assassin's Creed: Brotherhood of Venice box. Those with numbers in a white square are inside this expansion's box.
Enemy Reserve
Create the Enemy Reserve with the 30 Crossbowmen and the 10 Seeker miniatures.
Enemy Board
Place the compass and Enemy boards. Place 1 Alert State token, inactive side up (green bell), and the 8 Enemy Reinforcement cards, the Crossbow Guard card and the Seeker card.
Decks
Shuffle the Event cards, keep 5, and form the Event deck. Note: Leave the other cards inside the game box (they will not be used during this game).
Shuffle the Chest cards then form the Chest deck.
Set aside the 4 "roman armor" Equipment cards, then shuffle the remaining cards to form the Equipment deck.
Shuffle the Secret Objective cards then form the Secret Objectives deck.
Dice and Red Bases
Place all the dice between the players and the 4 Crow dice near the player controlling the Crows. Place the red bases near the players.
Map
- Choose a Mission from this booklet and set up its Map.
- Take the required street (small and medium) tiles, roof tiles and interior tiles.
- Then place the ladder miniatures, the Chests, the Objective bases and necessary tokens.
- Place 8 health cubes on the dedicated spaces of the 2 Towers.
IMPORTANT: Once you've set up the Map for your first Mission, go back to this page to continue reading the rules that are specific to this expansion.
Leaders and Secret Objectives
- Place the card and miniature of your Leader near you (Ezio Auditore for the Assassins, Cesare Borgia for the Crows).
- Each faction then draws 2 Secret Objective cards, reads them and places them face down on their side of the table.
Choosing the Assassins / Crows
Place in front of you the 2 Assassin or Crow boards according to your faction. On each board: Place 3 health cubes and 3 action cubes, as well as 1 action cube to its side.
- Assign 2 of the 4 Roman Armors previously set aside to each faction. Place them on the inventory slot of each Character board and add 1 health cube on each board for this armor.
- Each faction then draws 4 Equipment cards, keeps 2 face down on the board(s) of their choice and discards the other 2.
- Choose 2 Character cards from your faction and place them face down on each board.
- Place 1 Poison Blade card from your faction on each of your boards.
- The faction which has the Initiative takes the 3 "Initiative" cards. The other faction takes the 3 "No Initiative" cards and splits them up between both of their boards.
- Place your 4 Automaton miniatures between both boards to form your Stock of Automatons. Form your Automaton deck with the 4 face down Automaton cards (shuffle these 4 cards).
- The player with the Initiative places the Initiative blade in front of them.
Start
Once everything is in place, reveal the Character cards on both your boards. Place their miniatures on one of the four squares at the foot of their Tower in the following order:
- The player with the Initiative places 1 miniature.
- Their opponent places their 2 miniatures.
- The player with the Initiative places their second miniature.
Note: Any miniature placed on a square containing 1+ Enemies must perform a Detection Test.
C6 — Game Turn
In this expansion, game turns will proceed a bit differently:
Event Phase
See rule point C8.
Assassin / Crow Phase
- Step 1/2 of the faction with the Initiative. This player plays the action cubes of their 1st Character. Their 2nd Character cannot yet play their 3 action cubes but can use 1 saved action cube that they have saved.
- Step 1/1 of the faction without the Initiative. The other player plays both of their Characters' action cubes.
- Step 2/2 of the faction with the Initiative. This player plays the action cubes of their 2nd Character. Note: Their 1st Character can also use 1 saved action cube.
You cannot use a saved action cube in a step where the opposing player plays their Characters, except if you react after having been attacked (see box below).
Note: If you have the Initiative and want to perform a Coordinated Attack, one of your Characters must use 1 saved action cube.
USE 1 ACTION CUBE AFTER AN ATTACK. Each time one of your Characters survives an attack by an Opponent, by their Leader or by an opposing Automaton (see rule point C10), you can interrupt the opposing player and use 1 of the 3 action cubes or 1 saved action cube that the attacked Character has saved to perform 1 action of your choice.
Enemy Phase
- During the Enemy Reinforcement step, the player with the Initiative places the Guards.
- If there are not enough Guard miniatures in the Enemy Reserve during a Reinforcement step, the game does not end. In this case, the player with the Initiative decides through which Entrances the available Enemies will arrive.
- A saved action cube can be used between each of the Enemy steps according to the usual rules. Any action cube played during this phase cannot be used to attack 1+ Opponents nor the opposing Tower.
- If both factions want to use saved action cubes at the same time during the Enemy phase, whoever has the Initiative decides in what order each is played.
End of Turn Phase
- At the end of the turn, the player who did not have the Initiative takes the Initiative blade: They will have the Initiative during the next game turn.
C7 — Towers
Each faction has their own Tower. Each Tower has 8 hit points represented by the health cubes placed on the Tower. As soon as a Tower loses its last health cube, it is destroyed and the opposing faction immediately wins the game. Only certain Automatons or Explosive Bombs (Equipment cards) can damage a Tower. Note: It cannot be damaged by blade, melee or ranged weapons.
C8 — Events
The player with the Initiative draws 1 Event card, reads it aloud and decides before playing it if they are going to keep it or give it to their Opponent. The text in the "You" section of the card applies to the player who has the card in hand, the "Opponent" section applies to the opposing player. Each player must follow the text that applies to them at the time indicated.
Example Event card: 30 Second Delivery.
- YOU: 1 of your Characters, anywhere on the Map, can immediately spend 3 action cubes to take 1 card and 1 Automaton miniature from the Stock.
- OPPONENT: During this turn, 1 of your Characters ignores any 1 hit following 1+ Guards' attacks.
C9 — Secret Objectives
Each faction starts the game with 2 optional Secret Objectives. Each completed Secret Objective brings additional XP at the end of the game.
C10 — Automatons
When Leonardo da Vinci was forced to create war machines for the Borgias in 1499, his creative genius took over and he invented a whole system of combat automatons. They can be set up in advance so that they travel a certain distance before setting off the bomb they are harboring. Overcome by remorse, he managed to hide his blueprints, but the Borgias were finally able to get their hands on them and turned them over to the Favero, who managed to finalize them. Fortunately, the Brotherhood also managed to create working prototypes thanks to Leonardo.
Automaton Explosion
An automaton explodes (Automaton explosion icon) when the condition written on its card is fulfilled. For example: As soon as 1+ Enemies or Opponents enter the square where it is located.
IMPORTANT: If an Automaton explosion is triggered by 1+ Enemies during the Enemy Movement step, wait until they have all moved before triggering it.
Reveal the Automaton card and apply the effect of the explosion to all the red or green squares shown on the diagram. If the squares are green, the explosion releases a gas which also affects the squares separated by a wall. That is not the case for the red squares. (The three Automaton Explosion area diagrams are graphics on the printed page and are not reproduced in text.)
ALL Characters, including Allies and those who are incognito, on a square touched by the explosion icon endure the damage indicated on the right of the Character icon. Likewise, any Tower in contact with 1+ squares touched by the explosion icon endures the damage indicated on the right of the Towers icon. If an Automaton explodes on several squares in contact with a Tower, the Tower is only damaged once.
Example: Bastiano has placed a Suicidio Automaton on a square at the foot of the Crows' Tower. Crow Carestia enters the square, causing the Automaton to explode. The Explosion area affects several squares: The player who controls the Crows rolls 1 Enemy attack die and adds 1 hit for their Tower (only once although the Tower is in contact with 3 affected squares), they also roll 1 Enemy attack die and add 1 hit for their Character (Carestia). The player controlling the Assassins must also roll 1 Enemy attack die and add 1 hit for Bastiano who is also in the area of Explosion.
New Actions: Take and Place an Automaton (1 action cube)
Each faction has a Stock of 4 Automatons. An Assassin / Crow on one of the 4 squares in contact with their Tower can spend 1 action cube to take 1 Automaton. Place 1 Automaton miniature on the Character miniature's base. Then determine the type of bomb inside it by drawing 2 Automaton cards from your Automaton deck. Choose 1 of these cards and place it face down on one of the five inventory slots of the Assassin / Crow's board, provided there isn't one already on it, then put the other card back under the Automaton deck.
The Assassin / Crow moves with the Automaton until they decide to place it on their square for 1 action cube, with the Automaton card placed nearby face down. The effect and the squares affected by the explosion are indicated on the Automaton card.
Example Automaton card: Suicidio Automaton. Place the Automaton on your square (1 action cube). As soon as 1+ Enemies or Opponents enter its square (Automaton explosion icon).
You cannot pick up an Automaton that was placed on the Map by you or your opponent.
Note: You can place an Automaton even if you are exposed and 1+ Enemies or Opponents are on your square.
Reminder: It is possible to climb a Tower while carrying an Automaton.
Poison Blade (card)
Each faction's Poison Blade card is placed on each of its boards during setup (see C5). Its printed text reads:
If you are incognito: Eliminate 1 Guard on your square OR remove 3 [cube icon] from 1 Assassin. Become exposed if they survived. The eliminated Character performs 1 attack with his [weapon icon] / [weapon icon] dice on 1+ Crossbowmen on their square.
Transcription note: the cube type and the two weapon icons on this card are graphic symbols that the source text layer does not expose, and the card is printed too small on the setup page to read them reliably. They are left as bracketed placeholders rather than guessed. Verify against the physical card before relying on this text.
Source placement note: the source prints the following sentence directly after the Poison Blade card text, and it is transcribed in that position: "The owner then discards the card and the Automaton miniature."
Note: 2 Assassins or 2 Crows on the same square can trade an Automaton under the same conditions as an Equipment trade.
C11 — Stealth
- If you enter a square with 1+ Characters from the opposing faction, simultaneously perform 1 Detection Check for each Character from both factions. Reminder: You roll the detection dice for your Opponent's Detection Tests.
- If an Assassin / Crow becomes exposed because of an Opponent, the Alert State is triggered.
- If 1+ Enemies are on a square where a Detection Test takes place between 1+ Assassins and 1+ Crows, each faction performs only 1 Detection Test altogether (Opponents and Enemies). Example: An Assassin moves to a square containing 2 Guards and 1 Crow. The Assassin performs 1 Detection Test: The opposing player rolls 3 detection dice (1 for each Guard + 1 for the Crow). The result of one of the dice is an eye (exposed): The Assassin is exposed. The Crow also undergoes 1 Detection Test (1 detection die) because of the Assassin entered their square.
- An exposed Assassin / Crow who enters a square with 1+ Opponents remains exposed.
C12 — Combat
Combat Between Assassins and Crows
You can attack a Character of the opposing faction only if they are exposed. Roll your Assassin / Crow attack die, then choose how to allocate the hits between the exposed opposing Characters present on the target square.
Note: If you are attacking with a blade or ranged weapon, ignore any Retaliation (crossed swords) on the Assassin / Crow attack die.
Reminder: Exposed AND incognito Assassins / Crows can be hit by an Automaton explosion.
Combat Between the Two Factions and the Enemies
If a player targets a square with 1+ exposed opposing Characters and 1+ Enemies, they must choose how to allocate the Assassin / Crow attack dice before rolling them.
If 1+ Enemies attack a square containing 1+ exposed Assassins and 1+ exposed Crows, allocate the Enemy attack dice between them before rolling them. If an equal split is not possible, the player with the Initiative decides how to allocate the remaining Enemy attack dice.
When you attack a square containing 1+ Enemies, if you roll 1+ Retaliation (crossed swords), the remaining Enemies on the target square Retaliate.
Eliminated Character
An Assassin / Crow who loses their last health cube is immediately Eliminated. As soon as this happens:
- Remove their miniature and red base from the game.
- Give their card to the player who Eliminated them (for the XP count at the end of the game).
- If they were carrying an Automaton, discard the miniature and card without revealing it.
- If they had placed an Automaton that has not yet exploded, it remains in place, ready to explode.
- Remove the saved action cube from their board if they had one.
The Eliminated Character is permanently removed from the game and replaced by another available Character of their faction. You only have 4 playable characters during each game. Reminder: If all 4 of your Characters are Eliminated, you immediately lose the game.
The new Character will appear during the next game turn on one of the 4 squares at the foot of their Tower when their player decides to play them. If the arrival square contains 1+ Enemies and / or Opponents, perform 1 Detection Test. The new Character comes into play with their 3 health cubes and their armor's health cubes, 3 action cubes, as well as all the Equipment on their board.
C13 — End of Game
At the end of the 5th Game turn, if no player has succeeded in destroying the opposing Tower or in Eliminating their 4 Opponents, the game is over. Count the number of XP points to determine the winner:
- Each health cube withdrawn from the opposing Tower = 1 XP.
- Each Objective completed = the XP value shown on the back of the Objective token.
- Each Opened Chest = 1 XP.
- Each Eliminated Opponent (by your faction, by Enemies or by an Automaton) = 2 XP.
In the event of a tie, the player who did not have the Initiative at the start of the game is declared the winner.
Missions
The eight Missions are independent of each other and can be played in any order. For each Mission, the Map layout and component-count line printed under the diagram are graphics on the printed page and are not reproduced in text; build the Map from the printed diagram. Objective tokens are numbered as printed on the diagram and on the Objectives page; the number on an objective token is the number of action cubes needed to complete it, as in the base game.
1 — What Happens in the Tower Stays in the Tower
The influence of the Crows in the region continues to grow. This is undoubtedly thanks to their heinous methods, such as blackmail and their constant threats of plunder and violence. Documents detailing some of these methods have been identified by the Assassins. If they get their hands on them and reveal them to the Templars' allies, some might reconsider their alliance with the Crows.
I - Setup: Build the Map as shown on the printed diagram.
II - Objectives
- Assassins: Complete the Objectives before the Crows to expose their questionable methods.
- Crows: Collect the documents before the Assassins can grab them.
Reminder: You also win the game if you destroy the opposing Tower or if you manage to eliminate all your Opponents.
2 — Brothers in Arms
Assassins and Crows learned of the existence of weapon caches in a fortified village. After entering the premises, the two factions must destroy as many weapons as possible in order to prevent the other faction from getting a hold of them. The informants mentioned there were crossbows and halberds, but most importantly a cannon!
I - Setup: Build the Map as shown on the printed diagram.
II - Objectives
- Objective 1: Destroy the warehouse that houses the crossbows.
- Objective 2: Destroy the stock of halberds.
- Objective 3: There's the cannon, sabotage it!
3 — Families Reunion
Confrontation sometimes also involves the acquisition of valuable allies. Crows and Assassins face off in a race for allies. Important families are in the middle of a council meeting in the Veneto region. Assassins and Crows will have to approach their emissaries to convince them. The latter are well protected, but once you meet them, it will be much easier. Anything goes.
I - Setup: Build the Map as shown on the printed diagram.
II - Objectives
- Objective 1: Convince the Vitelli emissary.
- Objective 2: Convince the Catalina and Perdotti emissaries.
- Objective 3: Convince the Pope's emissary.
4 — Chest Wars
The underground war between Templars and Assassins is expensive. It has emptied the treasury of both organizations in Veneto. It is time to tax the traitors. Assassins and Crows clash to retrieve chests full of treasures from wealthy local lords who have refused any alliance. These chests will be used to finance further operations.
I - Setup: Build the Map as shown on the printed diagram. If one of the players has the Secret Objective "Chests!", discard that card and take another one.
II - Objectives
- Collect as many Chests as possible and bring them back to the foot of your Tower.
- Spend 1 action cube to pick up 1 Chest. Place the Chest on your miniature's base. You can carry a maximum of 1 Chest. A Character cannot carry a Chest and an Automaton at the same time.
- Putting down a Chest costs 0 action cubes.
- Each collected Chest is worth 3 XP at the end of the game.
WARNING! If you open a Chest, it is removed from the Map and will bring only 1 XP to the faction that opened it at the end of the game, as usual.
- An Eliminated Assassin / Crow leaves the Chest they were carrying on their square.
- Two members of the same faction can trade a Chest when performing the Trade action.
Note: You can pick up a Chest anywhere, including at the foot of the opposing Tower!
5 — The Borgias in Danger
As a good portion of the Borgia family prepares to enter the city, two rooftops provide a privileged position for an Assassin who would want to take them out. The Assassins must take up position on the rooftops for an attack on the Borgia. The Crows must secure these positions to protect the Borgia.
I - Setup: Build the Map as shown on the printed diagram.
II - Objective
- Objective 2: Go to the rooftops and spend 2 action cubes to secure these positions.
6 — Hate in the Time of War
Sometimes war by proxy has its limits. When it comes to the decisive blow, leaders must step into action. After several clashes by proxy, the leaders have to intervene to show their worth and improve the morale of the troops. Ezio Auditore reunites with his best enemy Cesare Borgia in a Venetian city in a race to obtain a chest full of gold and, above all, the keys to the city, so as to make it a base of operations. Assassins and Crows will have to support their respective leaders and make the most of their abilities.
I - Setup
- Place one Ezio miniature and the Cesare Borgia miniature on the Map.
- Remove the 4 following cards before forming the Event deck: "Like the wind.", "Leave them to me!", "Maestro!", "Peek-a-boo."
II - Objectives
- Objective 1: Obtain the contents of the sealed chest.
- Objective 3: Collect the keys to the city.
Leaders (special rules for this Mission)
- Enemy Movement Step: Cesare and Ezio move according to the same rules as the Enemies. If they move to a square containing 1+ Assassins / Crows or if an Assassin / Crow enters their square, perform 1 Detection Test. Note: Ezio and Cesare do not count towards the 4 Enemies per square limit.
- Enemy Combat Step: Any exposed Assassin / Crow on the opposing Leader's square endures 1 attack from this Leader.
- Leaders never Hunt. But any exposed Assassin / Crow leaving the Leader's square endures 1 attack from the opposing Leader.
- Leaders are always exposed and cannot be attacked.
7 — Bring Out Your Doctors!
The incessant clashes between Assassins and Templars tend to fill the hospitals with all kinds of wounded. But they don't heal themselves! Assassins and Crows are looking for the few medical experts. The Dottore are valuable resources for both the Brotherhood and the Order. They must return to the fold.
I - Setup
- Remove the 2 "Dottore" cards from the Equipment deck and place them near the Map.
- Take the 2 Dottore miniatures from the Assassin's Creed: Brotherhood of Venice game box.
- Build the Map as shown on the printed diagram.
II - Objectives
- Join each Dottore. As soon as you have, take 1 of the "Dottore" Equipment cards placed near the Map (once per Dottore).
- Escort each of them to a square at the foot of your Tower. As soon as you succeed, remove them from the game and gain 4 XP.
- You cannot escort a Dottore while they are on a square with 1+ Opponents escorting them.
- You cannot escort both Dottore with only 1 character.
- The Dottore cannot become exposed, nor be attacked.
8 — Between a Rock and a Traitor
A very strange character has come to be a spoilsport in the confrontation between Assassins and Crows. His mysterious identity does not hide his role as a potential threat. Escorted by a strong guard, he will fight as much with one side as with the other. He must be eliminated at all cost, but you cannot let your opponent win either...
I - Setup
- Take the Traitor miniatures from the Assassin's Creed: Brotherhood of Venice game box.
- Build the Map as shown on the printed diagram.
- Take the Traitor card from this expansion's box.
II - Objective
- Eliminate the Traitor.
Note: You will gain different XP values each time you withdraw 1 health cube from the Traitor (see this Boss' card). The Objectives page prints the values 1 and 4 with chevron icons; their meaning is given on the Traitor card, which is not reproduced in this booklet.
Reminder: Boss rules are in rule point 33 of the rulebook from Assassin's Creed: Brotherhood of Venice.
Icons
The printed icon reference at the back of the booklet. Icons are listed with their printed names.
- 1 hit: a black starburst
- Melee weapon: a sword
- Ranged weapon: a crossbow
- Exposed Assassin / Crow: an eye
- Red base: a red base
- Boss: a skull
- Weapon's Special Ability: the Assassin's Creed emblem
- Card to be removed from the game permanently: a crossed-out X
- Card to be placed in its discard pile: an arrow into a card
- Action cube: a grey cube
- Health cube: a red cube
- Assassin / Crow attack die: a white die with a red starburst
- Enemy attack die: a black die with a white starburst
- Detection die: a red die with an eye
- Attack Failed (Enemies): a shield-shaped marker