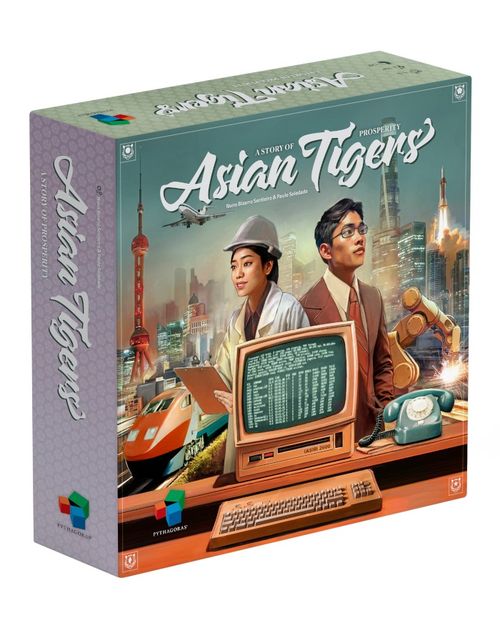
Asian Tigers: A Story of Prosperity
Asian Tigers: A Story of Prosperity Rulebook
Table of Contents
Table of Contents
- Components
- General Setup
- Player Setup
- Overview
- Anatomy of a Tiger
- Investment Funds Track
- Investment Centers
- Local Markets
- Influence Track
- Infrastructures
- Activate an Infrastructure Bonus
- Investment Points
- Sell Goods on the Global Market
- Bonuses
- End of an Era
- Setup: Era II
- End of the Game
- Solo Mode
- Appendix
- Iconography
Components
- 1 double-sided game board (assembled from 6 connecting parts; use the side matching the player count — front for 3–4 players, back for 2)
- 4 player boards
- 140 infrastructures: 96 generic infrastructures (24 of each player color), 24 factories (6 of each color), 16 satellites (4 of each color), and 4 headquarters (1 of each color)
- 60 goods, split evenly among 6 types: Electronics, Automobiles, Machinery, Finance, Ships, Chemicals (10 of each)
- 51 workers of 3 types (17 of each type), plus 4 bags (one per player)
- 36 flags (nation flags used at the global market)
- 35 energy tokens
- 25 science tokens (4 of each of the 4 buildable-infrastructure types, roughly)
- 24 parts factories
- 20 discs (5 of each player color, used for turn order and the investment funds track)
- 20 squared markers (5 of each color, used on the global market, influence, and investment funds tracks)
- 12 performance tokens, split into a $ set and a ¥ set
- 10 action tiles (used only by the Automa in solo mode)
- 9 campaign tiles (solo mode)
- 6 region bonus tokens
- 5 prosperity tokens
- 1 round marker
- 1 Automa board (solo mode only)
- 1 double-sided multiplayer/solo scorepad — if you run out of score sheets, a digital version can be downloaded from the Pythagoras website
General Setup
- Assemble the 6-part game board at the center of the table, using the side that matches the player count (front for 3 or 4 players, back for 2).
- Shuffle the 5 prosperity tokens and place 1 face up on each of the 4 Tigers, showing the value for the current player count; return the leftover token to the box.
- Shuffle the region bonus tokens and place 1 at random on each Tiger; keep the remaining 2 next to the board, as they may be needed later (see the "Region bonuses" appendix entry).
- Mix 1 worker of each of the 3 types together. Place one at random in investment center A of the Tiger with the highest prosperity value, another at random in investment center B of the Tiger with the second-highest value, and the last in investment center C of the Tiger with the third-highest value.
- Sort the nation flags by type and, depending on player count, remove the unneeded ones: in a 3-player game remove all flags marked with 4 dots; in a 2-player game remove flags marked with either 3 or 4 dots. Stack each remaining flag type with the highest value on top, and place each stack in its designated spot on the board.
- Sort the 12 performance tokens by type ($ and ¥) into 2 rows next to the board, face up.
- Form a general supply within reach of everyone: the goods (sorted by type), the energy tokens, the science tokens, and the parts factories.
- Each player picks a color and takes a matching disc. Mix one disc of each chosen color and draw them one at a time to set turn order, placing them in sequence on the turn order track (first draw = first position, and so on clockwise).
- Each player places a squared marker of their color on the global market track, at the starting space matching their turn-order position (1st player at space 1, 2nd at space 2, etc.).
- Each player places a disc of their color on space 6 of the investment funds track for every one of the 4 Tigers.
- Each player places a squared marker of their color at position 0 on the influence track of every Tiger.
- Place the round marker on the first space of the Era I section of the management track.
Player Setup
- Give each player a player board and their color's infrastructures: the 24 generic infrastructures go on the round spaces and the 6 factories go on the square spaces of the player board. Each player also keeps their 4 satellites and 1 headquarters beside their player board.
- Give each player a bag and, for each of the 3 worker types, 4 workers. Each player mixes all 12 workers in their bag, then draws until exactly 2 workers of different types have been drawn; if two of the same type come up, return them to the bag and keep drawing, so that the bag ends up holding 10 workers.
- Each player now repeats the following 10 times: draw a random worker from the bag and place it in the next open slot of the team area on their player board, filling left to right. (The 2 workers left over from step 14 are not used during Era I.)
- Give each player 4 energy tokens and 2 science tokens from the general supply.
- Mix together one token each of Electronics, Machinery, Finance, and Chemicals goods, and deal 1 at random to each player in turn order; return any goods that are left over to the general supply.
For a 3-player game, place the unused colored infrastructures on each Tiger as blockers, representing a neutral player: put them on the 5 infrastructure spaces marked with 4 dots (a university, a department, a factory, a power plant, and a laboratory), and put a squared marker for the neutral player at position 5 on each Tiger's influence track. In the advanced version of the 3-player game, also give the neutral player's factories a parts factory each, and place its influence marker at position 6 instead of 5.
Return any components not needed for the current player count to the box.
Overview
On a turn, a player takes the leftmost worker from the team area of their player board and places it on the game board. Where the worker is placed determines the action:
- A worker placed in an investment center must be used to build an infrastructure.
- A worker placed in a trade center must be used to sell goods on the global market.
Whichever action is taken, the player may also resolve any immediate effects or bonuses that the action unlocks. Activating a bonus can itself unlock a further bonus, and so on — this chain is referred to as a cascading effect (see the Appendix for a full example). A player is always free to use anything gained earlier in their turn — goods, funds, tokens — toward a later bonus in the same chain, and may choose to resolve a newly unlocked bonus immediately or defer it until the rest of the current action/bonus chain is finished.
Anatomy of a Tiger
Each of the 4 Tigers on the board has the same layout:
- A, B, C — three investment centers, used to build infrastructures.
- D — the investment funds track for that Tiger, with the starting funds marker (D1).
- E — the influence track for that Tiger, with the starting influence marker (E1).
- F — a local market attached to investment center C (F1 marks the local market itself).
- G — a space for a university, with an attached department slot (G1).
- H — a space for a satellite.
- I — a space for a factory.
- J — a space for a power plant.
- K — a space for a laboratory.
- L — construction spaces marked with an infinity symbol (∞), which never run out.
- One space on the Tiger also holds that region's prosperity token and its region bonus token, and one space holds a headquarters slot.
Investment Funds Track
Each player begins Era I with 6 investment funds on every Tiger; these are spent to build infrastructures in that region. A Tiger's investment funds track tops out at 10. Funds do not carry over between Eras — any funds left unspent at the end of an Era are lost, and every player again starts the next Era at 6 funds per Tiger (regardless of what was left over). If a player runs out of funds on a Tiger, they simply cannot build there until they earn more funds through other actions.
Investment Centers
Each Tiger has 3 investment centers — A, B, and C — and building an infrastructure always means placing a worker into one of them and paying its cost from that Tiger's investment funds track.
The type of worker first placed into a given investment center becomes that center's fixed type for the rest of the current Era — every later worker placed there, by any player, must be of the same type. This restriction is set either by the initial 3 workers placed during general setup or by the first player to use that center. Within a single Tiger, no two investment centers may share the same worker type.
- Investment center C costs 1 investment fund and lets you build 1 infrastructure, but only in column C.
- Investment center B costs 2 investment funds and lets you build 1 infrastructure, in either column B or column C.
- Investment center A costs 3 investment funds and lets you build 1 infrastructure, in any of the 3 columns (A, B, or C).
Local Markets
Every investment center sits next to a local market that wants one specific type of good, different from the goods wanted by the other local markets in that region. Only 1 good may be sold to a given local market per Era. When placing a worker in an investment center, a player may also sell a good to that center's local market: this happens after paying the investment fund cost but before building the infrastructure. Selling means placing the good on the matching local-market space and advancing on that region's influence track by the amount shown there.
- At an investment center of type C, a player may sell 1 good, but only to the local market in column C.
- At an investment center of type B, a player may sell 1 good to the local market in column B or column C.
- At an investment center of type A, a player may sell 1 good to the local market in any of the 3 columns.
Influence Track
Every player starts each Tiger's influence track at 0. Influence is earned in several ways over the course of the game — selling to local markets, resolving certain bonuses, and, above all, at the end of each Era through the management phase, based on relative standing in investment points. An influence track is not capped at any particular value (the printed track simply loops past 40). At the end of the game, a player's final standing on each Tiger's influence track (compared with the other players) decides how many prosperity points that Tiger is worth to them.
Infrastructures
Each player begins with a full set of infrastructures on their player board — 24 generic infrastructures and 6 factories — ready to be built anywhere on the board. When a worker is placed in an investment center, the player may choose any infrastructure from their board to build in that region, which both scores investment points and can unlock the bonus printed on the player board space that infrastructure was removed from. See "Activate an Infrastructure Bonus" below. A generic infrastructure, once built, can become a university, a department, a power plant, or a laboratory; multiple infrastructures can never share one construction space, except for spaces marked with the infinity symbol (∞), which can hold any number.
Laboratories
To build a laboratory in a region, place a worker in one of that Tiger's investment centers, pay the cost for that investment center type, then take any generic infrastructure from the player board and place it in an open laboratory construction space in that region (respecting the placement rules above). Constructing a laboratory has no extra cost of its own. In return, the player receives 2 science tokens from the general supply — or only 1 if the laboratory was built on a space marked with the infinity symbol (∞).
At the start of Era II, in addition to the normal 6 investment funds per Tiger, a player also receives 1 extra investment fund on a Tiger for every laboratory they built there (laboratories on infinity-symbol spaces count too).
Power Plants
To build a power plant, place a worker in an investment center, pay the cost, then take a generic infrastructure and place it in an open power-plant construction space in that region. Building a power plant has no extra cost. In return, the player receives 3 energy tokens from the general supply — or only 2 if it was built on an infinity-symbol space.
Every power plant, once built, gives a 1-energy-token discount on the construction cost of the 2 factories connected to it. This discount is available to any player, not only the one who built the power plant. A power plant built on an infinity-symbol space is not connected to any factory and provides no discount.
Factories
Every player starts with a set of 6 factories on their player board, one for each good type. To build a factory in a region, place a worker in an investment center and pay both the investment-center cost and the factory's construction cost. The base construction cost for any factory is 4 energy tokens, reduced by 1 for every adjacent power plant already built; Automobile and Ship factories additionally require 2 science tokens. Take the matching factory from the player board and place it in an open, matching construction space, respecting placement rules. Building the factory immediately triggers its production: the player receives 2 goods of the matching type from the general supply.
Universities
To build a university, place a worker in an investment center, pay the cost, then take a generic infrastructure and place it in an open university construction space in that region, following the normal placement rules.
Building a university optionally grants an additional action, shown in the construction space: either building a department in the same region, or building a parts factory in any region (paying 1 energy token for the parts factory in that case). Only one of the two may be chosen, and if it is skipped it cannot be carried out later. After resolving the additional action (or skipping it), the player receives the bonus printed in that university's construction space — typically advancing on the global market track or on the region's influence track. Note that university construction spaces cannot be built into directly via a type-C investment center; those spaces are reserved for the department-building additional action.
Departments
Building a department is only available as the additional action from building a university (see above), not as a stand-alone build. To build a department, pay its listed construction cost — 1 or 2 science tokens, shown in the construction space — then take any generic infrastructure from the player board and place it in an open department construction space in the same region as the university that unlocked it.
Parts Factories
The additional action of building a parts factory can come from building a university or from another immediate bonus. Pay the construction cost if one is specified, then take a parts factory from the general supply and attach it beneath one of the player's already-built factories — a factory that does not already have a parts factory attached. Attaching the parts factory immediately triggers an extra production: the player receives 1 good matching that factory's type from the general supply.
Headquarters
A player's headquarters can only be built by activating an infrastructure bonus that unlocks it (see "Activate an Infrastructure Bonus"). When unlocked, take the headquarters from beside the player board and place it in an available headquarters construction space. Each Tiger can only ever hold one player's headquarters; whoever builds there gets a tie-breaking advantage on that Tiger (see "Tie Breakers").
Satellites
A satellite, like a headquarters, can only be built by activating an infrastructure bonus that unlocks it. Pay its construction cost of 2 investment funds from the relevant Tiger's investment funds track, then take one satellite from beside the player board and place it in an open construction space of the type shown on the bonus (power plant row, factory row, or laboratory row — matching the type of satellite being built; the generic satellite may go in any of these rows).
Activate an Infrastructure Bonus
Every infrastructure a player's board offers to build sits in one of several sectors. Whenever a player builds an infrastructure and that build empties the last remaining infrastructure in one of those sectors, they immediately receive a one-time infrastructure bonus tied to that sector. This bonus may be ignored, but if ignored it cannot be activated later. Some infrastructure bonuses carry a cost, which must be paid in investment funds taken from the Tiger where the bonus is being used.
Every player begins with a private stock of special infrastructures beside their player board — 1 headquarters and 4 satellites — that start out unavailable and can only enter play by unlocking the matching infrastructure bonus. A player is never required to use a just-unlocked bonus in the same region where the triggering infrastructure was built.
Investment Points
Every infrastructure a player has built in a region contributes to that player's investment points for that Tiger. By default, each built infrastructure — including universities, departments, factories, power plants, laboratories, satellites, headquarters, and anything built on an infinity-symbol space — is worth 1 investment point in its region.
Additionally, each parts factory attached to one of a player's factories adds 1 investment point to that factory. Each of a player's satellites also acts as a modifier, adding 1 extra investment point to every infrastructure that player has in that satellite's row — though this bonus does not apply to infrastructures on infinity-symbol spaces or to parts factories.
At the end of each Era, a player's investment points on a Tiger (compared to the other players') determine how many influence points that player gains on that Tiger's influence track during the management phase (see "Management Phase" below). Investment points are never tracked directly on a permanent track during play; the investment funds track may be borrowed as a scratch-pad for counting them only during the management phase itself, since any leftover funds are wiped at that point anyway.
Sell Goods on the Global Market
Anatomy of the Global Market
The global market area holds:
- A — the 2 international trade centers.
- B — the regional trade center.
- C — the special trade center.
- D — the global market track, with milestones (D1) marked by a globe icon every 5 spaces.
- E — the stacks of nation flags.
- F — the space reserved for special flags.
Global Market Track
Every player starts the game with a position on the global market track equal to their turn-order position. As the game progresses, players advance along this track by selling goods; the final positions set the new turn order at the end of each Era. The globe-marked milestones every 5 spaces act as multipliers that award prosperity points at the end of the game.
Trade Centers
The global market has 4 distinct trade centers. To sell goods to the global market, a player places a worker in one of them.
Just as with investment centers, the type of worker first placed in a given trade center becomes that center's fixed type for the rest of the current Era, and (with the exception of the special trade center, which always accepts any worker type) no two trade centers may share the same fixed worker type.
Selling Goods
Placing a worker in a trade center lets a player sell goods to one or more nations available at that trade center. To sell to a nation, the player pays the general supply the specific goods that nation demands (shown on the board), then takes the top flag from that nation's flag stack and advances on the global market track by the number of spaces printed on that flag. When selling to several nations in the same turn, a player may sell once to each nation the trade center represents, but only once per nation; after all sales and flags are collected, only 1 of the flags gained that turn is used to advance on the global market track (the others still go to the player's board as normal — see "Nation Bonuses" below).
- The 2 international trade centers each allow 1 to 3 sales, one per nation, at a cost of 2 different goods per nation as shown at the global market.
- The regional trade center allows 1 to 2 sales, one per nation, at a cost of any 2 or 3 different goods of the player's choosing.
- The special trade center accepts any worker type and offers a choice: either make a sale to any nation represented at another trade center (paying the required goods and receiving that nation's flag, but without advancing on the global market track), or simply advance 2 spaces on the global market track without selling anything. Because it accepts every worker type, a player can always use this trade center on their turn regardless of which worker type they must play.
Bonuses
Final Scoring Bonuses
The right-hand margin of each player board is divided into 6 sectors, each tied to a final-scoring objective that can award prosperity points for some or all of the 4 Tigers, based on the number of star icons on the flags allocated to that sector (see the "Final Scoring Bonuses" appendix entry for each sector's exact requirement). Each sector is made up of one or more rows of specific nation flags, and each row also carries a one-time immediate nation bonus, unlocked the moment a matching flag is placed into that row.
Nation Bonuses
Whenever a player sells goods to a nation at the global market, they keep that nation's flag and must allocate it to one of the designated final-scoring spaces on their player board, unlocking that row's one-time nation bonus (which may be ignored, but not saved for later — see the "Nation Bonuses" appendix entry for the full list). When a turn produces flags from multiple nations, each flag is allocated — and its bonus resolved — one at a time, in any order the player likes. The number of flags that fit in a given sector equals the number of rows in that sector, one flag per row.
End of an Era
Asian Tigers is played over 2 Eras. In each Era, every player places all 10 of their workers across their turns, and once everyone has placed all 10, the Era closes with a management phase — a fixed sequence of steps tracked on the management track using the round marker.
Tie Breakers
A tie on a Tiger is broken first in favor of whichever tied player has their headquarters built there. If none of the tied players has a headquarters there, it is broken in favor of the tied player with more investment points in columns A, B, and C, checked in that order. Any tie not covered by those rules is broken in favor of whichever tied player comes first in the current turn order.
Management Phase: Era I
At the start of the game the round marker sits on the first space of the Era I section of the management track; during the first management phase it advances one space at a time, resolving these steps in order:
- Global Market — Determine the turn order for Era II from positions on the global market track: the player furthest along goes first, and so on down the track. A tie is broken in favor of whichever tied player's marker sits lower on the track space, since that player reached the space first.
- Influence — Every player advances on each Tiger's influence track according to their investment points there relative to the other players; the exact influence-point award for each rank is printed on the management track space itself.
- Special Flags — Special flags live in a reserved part of the global market, cost nothing, cannot be earned through trade-center sales, and can only be handed out during this step of the first management phase. After the influence step, each Tiger offers a special flag to whichever player leads that Tiger's influence track (ties favor whoever is first in turn order). That player may accept or decline: accepting means moving their influence marker back to the previous Tiger-icon space on the track (even if already on one), then placing the special flag in a section of the player board reserved for special flags — without activating any nation bonus — and finally advancing 2 spaces on the global market track. Declining passes the offer to the next player along that influence track, and so on, until someone accepts or, if nobody does, the flag returns to the box.
- Investment Funds — Reset every player's investment funds to 6 on every Tiger. In addition, each player gains 1 extra investment fund on a Tiger for every laboratory (including infinity-symbol-space laboratories) they built there.
In a 3-player game, the neutral player participates like a normal player throughout this phase: it gains influence and advances normally, and it always accepts special flags (moving back on the influence track as any player would). Ties involving the neutral player are broken in its favor.
Setup: Era II
After finishing the Era I management phase, prepare for Era II:
- Move the round marker to the first space of the Era II section of the management track.
- For every Tiger, clear all goods from its local markets back to the general supply.
- Retrieve 1 worker of each of the 3 types from the board and set them aside. Then every player simultaneously retrieves the rest of their workers from the board until they hold 4 of each type again (which includes the 2 workers left over from the start of Era I), and each player repeats the same random-draw team-area setup used at the start of Era I.
- Mix the 3 remaining workers (sequestered in step 1), one of each type, and place them exactly as in general setup step 4: one in investment center A of the highest-prosperity Tiger, one in investment center B of the second-highest, and one in investment center C of the third-highest.
Management Phase: Era II
By the end of Era I the round marker sits on the first space of the Era II section of the management track; during the second management phase it again advances one space at a time, resolving:
- Global Market — Every player advances 1 space on the global market track for every 3 leftover resources they hold (goods, energy tokens, and science tokens combined). The resulting positions on the global market track set the new turn order for the remainder of the game.
- Influence — As in Era I, every player advances on each Tiger's influence track according to their relative investment points there.
- Prosperity from Influence — Record prosperity points on the scorepad based on each player's position on every Tiger's influence track; the exact prosperity-point award per rank is printed on that Tiger's prosperity token.
- Prosperity from Final Scoring Bonuses — See "Final Scoring Bonuses" below.
- Prosperity from Nations — See "Nations" below.
In a 3-player game, the neutral player again participates in the influence step as a normal player, and it earns prosperity points at this stage without ever recording them on the scorepad. Ties throughout this phase are broken in favor of whichever tied player is first in turn order, except ties directly involving the neutral player, which are broken in its favor.
Final Scoring Bonuses
For each of the 6 sectors on a player board's right margin, calculate prosperity points as follows: first count how many of the 4 Tigers meet that sector's specific requirement (see the appendix entry "Final Scoring Bonuses" for the exact requirement of each sector), then count the number of star icons among the flags allocated to that sector, and multiply the two totals together. If a player fails the requirement in every Tiger, or never allocated a flag to that sector at all, the sector scores 0.
Nations
Count how many distinct nation flags (including special flags) sit on a player's board, and separately count how many milestones (the highlighted globe spaces) that player has passed on the global market track. Multiply the two totals together and record the result as prosperity points on the scorepad.
End of the Game
At the end of Era II, add up every player's prosperity points earned across the two Tiger-influence scoring rounds, the final scoring bonuses, and the nations bonus. Whoever has the highest total wins. Ties are broken in favor of whichever tied player is first in the final turn order.
Solo Mode
In solo mode, a single player competes against an automated opponent, the Automa, to see who becomes the more successful investor.
General Setup
Set the game up for 2 players as normal, with these changes:
- The human player's disc goes in the 1st turn-order position, the Automa's disc in the 2nd.
- The Automa does not receive discs on any Tiger's investment funds track.
Automa Setup
- Shuffle the 10 action tiles into a face-down pile in the Automa's designated play area, leaving room beside it for the currently revealed tile.
- Place the Automa board in the center of that play area.
- Pick one of the unused player colors for the Automa and give it that color's infrastructures:
- Place 18 generic infrastructures on the Automa board's numbered spaces.
- Place the 6 factories on the Automa board's goods-marked spaces.
- Place the 4 satellites, 1 headquarters, and remaining 6 generic infrastructures beside the Automa board as a reserve supply, to be used only as needed.
- Set up the Automa's workers exactly as for a human player (bag draws, team area, etc.).
- Do not give the Automa any starting energy tokens, science tokens, or goods.
Return any components not needed to the box.
Player's Turn
The human player goes first and alternates turns with the Automa as normal. Before the first turn, choose the difficulty mode for the session — this sets the multiplier applied to the star count on the Automa's flags at the end of the game: ×1, ×2, ×3, or ×4, from easiest to hardest.
Automa's Turn
On its turn, the Automa takes the leftmost worker from its team area and places it on the board, just like a player. To determine where, reveal the next tile from its pile and follow the instructions printed on it (see the "Automa: Action Tiles" appendix entry for the full list of instructions).
Build an Infrastructure. The Automa has its own set of infrastructures ready to build, just like a human player. It always builds universities, departments, power plants, and laboratories using the next generic infrastructure on its board, taken in numerical order (1 through 18). For factories, it uses the matching factory for whichever type of construction space is available.
Activate an Infrastructure Bonus. When the Automa's build empties the last infrastructure in a sector, it receives the matching one-time infrastructure bonus, exactly like a player (see "Automa: Infrastructure Bonuses" in the appendix).
Activate a Nation Bonus. When placing a flag completes an entire sector on the Automa's board, it receives that sector's one-time nation bonus (see "Automa: Nation Bonuses" in the appendix).
The Automa never handles investment funds — it neither pays nor receives them — and it never collects goods, energy tokens, or science tokens.
Placement Rules. The Automa must respect the same worker-type restrictions as a player at both investment and trade centers. If a worker of the matching type is already required at the location its tile points to, it places there and performs that action. Otherwise, among the still-unoccupied investment or trade centers, it always chooses the leftmost investment center; at trade centers it chooses the topmost one during Era I and the bottommost one during Era II.
Management Phase
The management phase proceeds as normal, with one exception: both the human player and the Automa always accept any special flag offered to them, and always move back on the corresponding influence track as described under "Special Flags."
Automa's Setup: Era II
At the start of Era II, set the game up as usual, and additionally reset the Automa: shuffle the 10 action tiles back into a face-down pile in its play area, and set up its workers exactly as for a player.
End of the Game
After totaling the human player's prosperity points, calculate the Automa's score using the same method, except that the star values on its flags are multiplied by the difficulty setting chosen at the start of the game (not by the number of Tigers where objectives were met). The human player wins if their final score is equal to or higher than the Automa's.
As an alternative to playing against the Automa's score, a player may instead try to beat their own previous high score; in that case the Automa's score is not calculated at all, and the goal becomes exceeding the previously recorded high score.
A rank table converts final score into a title:
| Score | Rank |
|---|---|
| Below 115 PP | Bankruptcy |
| 115–129 PP | Small Investor |
| 130–144 PP | Successful |
| 145–160 PP | Wealthy |
| Above 160 PP | Magnate |
Scenario Variant
For a single scenario, randomly draw one campaign tile during setup and choose a difficulty level before the first turn. Play proceeds as normal, with an additional goal defined by the tile (see "Automa: Campaign Tiles" in the appendix for what each tile requires). The scenario is won by completing the tile's goal and out-scoring the Automa; otherwise it is lost.
Campaign Variant
For a full campaign, choose to play through 2 to 9 scenarios. Randomly select that many campaign tiles and lay them face up (optionally all 9 tiles may be displayed, with unselected ones left face-down). Each time the 1st goal of a session is achieved, flip that tile face-down to mark it used; any other goals reached in the same session stay face-up — never flip more than one tile face-down per session. Failing to reach a session's goal costs the player 1 starting science token in the next session; a second failure drops the next session's starting science tokens to 0; a third failure ends the campaign immediately. The campaign is won by completing every chosen scenario, achieving a different goal in each one, and finishing with a higher score than the Automa in each; otherwise it is lost.
Appendix
Cascading Effect
Bonuses can chain into one another over the course of a single turn. For example: a player places a worker in a trade center and sells goods to the global market, receiving a flag that they allocate to a final-scoring bonus. That allocation activates a nation bonus letting them remove a generic infrastructure from their player board. If that removal happens to empty the last infrastructure in a sector, it triggers an infrastructure bonus that lets the player build their headquarters and activate that region's bonus. If that region bonus in turn grants a good, the player may use the good to make another sale at the trade center where their turn began — resuming the original action that the cascade briefly interrupted.
Infrastructure Bonuses
When a build empties the last infrastructure in a sector, the resulting one-time bonus (which may always be ignored, but never saved for later) can be one of the following, depending on which sector was emptied:
- Receive a parts factory from the general supply, to build and activate under the normal rules, at no cost.
- Select and activate a performance bonus from the $ set (see "Performance Bonuses").
- Select and activate a performance bonus from the ¥ set.
- Build your headquarters on any Tiger that doesn't already have another player's headquarters there, and activate that region's bonus.
- Pay 1 investment fund from a Tiger in the board's upper area to advance 3 spaces on its influence track, and activate that region's bonus.
- Pay 1 investment fund from a Tiger in the board's lower area to advance 3 spaces on its influence track, and activate that region's bonus.
- Pay 1 investment fund from any Tiger to advance 5 spaces on its influence track, and activate that region's bonus.
- Pay 1 investment fund from any Tiger to advance 7 spaces on its influence track.
- Pay 2 investment funds from any Tiger to build a satellite in an available laboratory-row construction space of that region, if one exists.
- Pay 2 investment funds from any Tiger to build a satellite in an available power-plant-row construction space of that region, if one exists.
- Pay 2 investment funds from any Tiger to build a satellite in an available factory-row construction space of that region, if one exists.
- Pay 2 investment funds from any Tiger to build a satellite in any available construction space of that region.
Performance Bonuses
Activating certain infrastructure or nation bonuses may let a player choose a one-time performance bonus. Once a performance bonus is chosen and its benefit received, flip that token face down — it becomes unavailable to everyone for the rest of the game. Performance bonuses are split into 2 separate sets, $ and ¥, kept beside the board.
Bonuses in the $ set include effects such as: advancing on the investment funds track for one or both Tigers in the upper area of the board, advancing on the investment funds track for one or both Tigers in the lower area, and advancing the investment funds track for a specific named Tiger (South Korea, Taiwan, Hong Kong, or Singapore).
Bonuses in the ¥ set include effects such as: advancing on the global market track by 1 space for every distinct flag on the player's board (a special flag counts as distinct for this purpose), activating the 2 leftover region bonus tokens set aside during general setup, relocating a built satellite to a different Tiger (following normal construction rules, and activating that Tiger's region bonus), relocating a special flag to a different row on the player board (following normal placement rules, and activating that row's nation bonus), making a sale at any trade center under the normal rules but without assigning a worker there or advancing on the global market track, and paying 1 energy token to activate production from one of the player's factories on any Tiger (optionally paying a second energy token to also activate a second factory, in the same or a different Tiger).
Region Bonuses
Activating an infrastructure or performance bonus may also unlock a region bonus. Depending on which region bonus token is revealed, the effect can be:
- Advance 3 spaces on the influence track of one of the 4 Tigers. If the bonus token had been assigned to a specific Tiger during setup, the influence gain must be taken there; if it was one of the 2 leftover tokens, the player may choose any Tiger.
- Receive 1 good from the general supply — a good already produced in the relevant region if the bonus token is tied to a Tiger, or any good if it is one of the leftover tokens.
- Receive 2 science tokens from the general supply.
- Receive 2 energy tokens from the general supply.
Final Scoring Bonuses
Each of the 6 final-scoring sectors on the player board can potentially be scored in all 4 Tigers, but only counts for a given Tiger if that Tiger meets the sector's specific requirement:
| Sector | Requirement |
|---|---|
| A | At least 8 investment points from infrastructures built in that region. |
| B | At least 5 different infrastructure types built in that region — university, factory, power plant, laboratory, satellite, and/or headquarters. (A parts factory does not count as an infrastructure for this purpose, and a department counts as a university.) |
| C | At least 1 satellite built in that region. |
| D | At least 1 parts factory built in that region. |
| E | At least 1 power plant built in that region. |
| F | At least 1 laboratory built in that region. |
Nation Bonuses
Allocating a nation flag to a final-scoring objective on the player board may trigger a one-time nation bonus, which can be one of the following, depending on the row the flag was placed in:
- Pay 1 energy token to receive a parts factory from the general supply, to build and activate under the normal rules.
- Build a factory in a construction space of column B or C, under the normal rules.
- Remove any generic infrastructure from the player board without building it (this can itself trigger an infrastructure bonus if it empties a sector — see "Cascading Effect").
- Select and activate a performance bonus from either the $ or ¥ set, among the tokens still available.
- Advance 3 spaces on the influence track of a Tiger in the board's upper area, at no cost.
- Advance 3 spaces on the influence track of a Tiger in the board's lower area, at no cost.
- Advance 3 spaces on the global market track.
- Receive 2 energy tokens from the general supply.
- Receive 2 science tokens from the general supply.
Automa: Action Tiles
Each turn, the Automa reveals the next tile from its pile and follows its instructions. The instructions found across the 10 tiles include: placing its worker in a trade center of the global market; placing its worker in an investment center of a named Tiger (South Korea, Hong Kong, Taiwan, or Singapore); choosing between 2 named Tigers according to whichever region it has more (or fewer) investment points in, with ties broken toward a tile-specific default Tiger; advancing 2 or 4 spaces on the influence track of whichever region it is acting in; and selling a good to the corresponding local market from the general supply, without advancing on the influence track (if that local market is occupied, it sells to the next local market to the right in the same region instead).
Each tile also has a trade-center-selection rule: if there's a flag in the trade center that differs from the flags the Automa already holds, it takes that different flag; otherwise it takes a repeated one. When multiple different flags are required but not enough exist, it takes as many as it can. Regardless of which flag, it always chooses the higher-value one and advances the corresponding number of spaces on the global market track. If a tile points to a trade center with no worker-type restriction that matches, or no flags at all, the Automa instead places its worker in the special trade center and advances 2 spaces on the global market track. During Era I, if there is no worker-type restriction in place yet at the global market, it uses the topmost unoccupied trade center; during Era II, the bottommost.
For building infrastructures, the Automa always proceeds through a fixed priority order — university, factory, laboratory, power plant — building whichever comes first among the 4 that it can still build, in the investment center where its worker was placed. If none of the 4 fit there, it tries the investment center to the right, moving rightward around the Tiger. When no ordinary construction space is available, it may always fall back to building power plants and laboratories in infinity-symbol spaces.
Automa: Infrastructure Bonuses
Just as with a human player, when an Automa build empties the last infrastructure in a sector, the Automa receives that sector's one-time infrastructure bonus. Bonus effects for the Automa include: advancing on the influence track of all 4 Tigers by 1 or by 2 spaces; building a parts factory in the region where it has the least influence (as long as it has a factory there); building a parts factory in the region where it has the most influence (as long as it has a factory there); building a satellite in the power-plant row of the region where it has the most power plants; and building a satellite in the factory row of the region where it has the most factories.
If a tie arises over which region an Automa board bonus should apply to, it is resolved in favor of the region where the human player has the most investment points; if still tied, the region where the human player has the most investment funds; if still tied, the human player chooses.
Automa: Nation Bonuses
When a flag placement completes a full sector on the Automa's board, it receives that sector's one-time nation bonus. Bonus effects include: building a satellite in the laboratory row of the region where it has the most laboratories; advancing 3 spaces on the global market track; and building its headquarters in the region where it has the fewest investment points. As with infrastructure bonus ties, region ties for nation bonuses are resolved first toward the human player's highest investment points, then their highest investment funds, then the human player's choice.
Automa: Campaign Tiles
Each campaign tile pairs a requirement with an Automa behavior split across the two Eras (the left side of the tile applies during Era I, the right side during Era II). Sample requirements found on the tiles include: building at least 5 universities (departments do not count); building all 6 different factory types; building at least 5 laboratories; allocating at least 7 different flags to final objectives; building the headquarters and all 3 satellite types; building at least 5 power plants; having more investment points than the Automa in South Korea or Taiwan; having more investment points than the Automa in Hong Kong or Singapore; and reaching at least space 45 on the global market track.
Automa: Player Aid
- When placing a worker, if another worker of the matching type is already at the location its tile points to, the Automa places there and performs that action.
- Otherwise, among unoccupied investment or trade centers: during Era I it selects the topmost unoccupied trade center, and during Era II the bottommost; at investment centers, in both Eras, it always selects the leftmost.
- If there are no flags in the trade center indicated by its tile, it uses the special trade center instead and advances 2 spaces on the global market track.
- When the Automa builds a university that offers a department, it always builds that department in the first open construction space from left to right, and activates its bonus.
- If no ordinary construction space is open where its tile points, the Automa may always build power plants and laboratories on infinity-symbol spaces.
- When the Automa sells a good to a local market, it never advances on that region's influence track.
- Region ties for Automa board bonuses are resolved toward the human player's highest investment points, then investment funds, then the human player's choice.
Iconography
The player board and game board icons cover: the 4 buildable infrastructure types (university, factory, satellite, laboratory, power plant, headquarters); the 4 Tigers (South Korea, Hong Kong, Taiwan, Singapore); the 6 goods (Electronics, Automobiles, Machinery, Finance, Ships, Chemicals); the various tracks and their point types (player influence, Automa influence, prosperity, investment points, investment funds, global market); flag icons (any Tiger, flag stars, a different flag, a milestone); a color code distinguishing prosperity points, influence, investment funds, investment points, the global market track, the turn order track, and the management track (referring players back to this appendix); and miscellaneous icons for energy, science, any good, a parts factory, removing a generic infrastructure, and the performance/region-bonus/prosperity tokens.