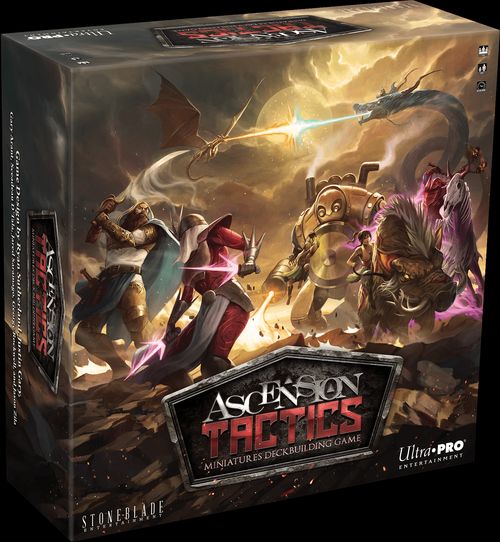
Ascension Tactics: Miniatures Deckbuilding Game
Ascension Tactics: Miniatures Deckbuilding Game Rulebook
Table of Contents
Table of Contents
Components
- 45 Champion Standees
- 45 Champion Miniatures (Kickstarter edition only)
- 32 Standee Plastic Holders (8 of Each Color)
- 16 Cultist Tracking Plastic Rings (4 of Each Color) (Kickstarter edition only)
- 65 Battlefield Tiles
- 40 Honor Tokens (20 Red and 20 White)
- 24 Treasure Tokens
- 17 Misc. Tokens
- Game Board
- Treasure Bag
- Scenario Book & Rule Book
- 334 Cards:
- 132 Center Deck
- 40 Starting Deck (Apprentice & Militia)
- 15 Mystic
- 15 Heavy Infantry
- 1 Cultist (Blue Back)
- 24 Champion Cards (Blue Back)
- 4 Gateways (Double Sided)
- 32 Schemes (Red Back)
- 31 Villain Champions (Double Sided)
- 40 Sigils (Faction Backs)
Setup
Ascension Tactics™ contains many different scenarios that are playable with anywhere from 1 to 4 players. The setup and basic game rules covered here apply to standard 2-player competitive scenarios. For rules on the other modes of play or for different player counts, see "Additional Ways to Play."
Starting Decks
Each player begins with an identical 10-card starting deck, which consists of 8 Apprentices and 2 Militias. These white-bordered cards are the foundation of your personal deck that you will build upon and modify during each game.
At the start of the scenario, each player shuffles their personal deck, draws 5 cards into their hand, and leaves the other 5 cards face down in their deck.
Always Available Cards
Arrange the silver-bordered cards (Heavy Infantry, Mystics, and the Cultist) into separate face-up piles and place them near the play area. You may acquire or command these "always available" cards on your turn by spending the required resources.
Game Board
Decide which scenario you want to play and use the corresponding layout diagram in the Scenario Book to set up the game board. (For your first game, we recommend playing the "Battle of the Three Shrines" scenario on page 4 of the Scenario Book. The layout for this scenario has been pre-printed on one side of the game board.) The layout will determine the starting locations for terrain tiles, Treasure tokens, and other important features of the battlefield. Read the scenario details carefully for any special game rules, changes to the scenario set up, and to see the recommended Champions for each player.
Shuffle the Treasure tokens face down and place one on each hex with a Treasure symbol as displayed in the Scenario Book. Put all remaining game tokens nearby within reach of all players, including the Honor tokens.
Gateways and Team Colors
Randomly determine which player is going first. Give the first player the Player 1 Gateway card and the second player the Player 2 Gateway card.
Your Gateway determines your player or team color for the game. It also grants 2 Power on each of your turns. Gateways cannot be destroyed or affected by other players. Keep the card in front of you as a helpful reminder to spend your Power each turn.
Gateways provide additional bonuses to the players or teams that do not take the first turn. For example, the Gateway for Player 2 provides an additional 2 Power on that player's first turn.
Champion Selection
Each player begins the game with a roster of Champions that they can command. These are the figures you will deploy to the game board to attack enemies and accomplish scenario goals. Consult the Scenario Book to find each player's suggested Champion roster for the chosen scenario. Place those figures and their associated Champion Cards in front of you.
If you would rather recruit your own custom roster of starting Champions, instead of using the ones suggested for each player, see "Champion Drafting." We recommend using Champion Drafting as the standard mode of play, once you've played through a few scenarios and gained familiarity with the game rules.
Center Row
Shuffle together all of the Center Deck cards and place the deck face down in its designated location on one side of the board. (Center Deck cards have a black color on their back side.) Take the top 6 cards of the Center Deck and arrange them into a row of face up cards next to the deck. This forms the Center Row, where cards can be acquired by players on their turn.
Once you have set up the starting deck and Champions for each player, and formed the Center Row, you are ready to begin!
Champions
Champions are the valiant warriors you send into combat on the battlefield. They are represented by figures on the game board. Their abilities and combat attributes are determined by their Champion Card.
A Champion Card shows the Champion's Name, Faction, Card Type, Abilities, Strength, Command Cost, and Defense.
There are four different factions: Enlightened, Lifebound, Mechana, and Void.
- Abilities — Special abilities of the Champion.
- Command Cost — Power you must spend to command the Champion.
- Strength — Damage dealt when the Champion attacks.
- Defense — Champion is defeated when it is dealt this much damage.
On your turn, you can use Power to command your Champions. When commanded, a Champion can move and attack in any order. You may command as many Champions as you can afford to, but you cannot command Champions that are exhausted. (See "Commanding Champions" for more details.)
In addition to your roster of starting Champions, there are additional Champions available to be acquired from the Center Deck. Pay their cost to acquire them from the Center Row and add them to your roster.
Heroes
Heroes represent the allies you recruit to aid your Champions in battle. They can be acquired from the Center Row by spending Runes. Heroes you acquire will become part of your evolving personal deck.
A Hero card shows its Faction, Cost (the number of Runes you must spend to acquire this card), Card Type, Effect (what the card does when played), and Rarity (each pip represents a copy of the card in the Center Deck). There are four different factions: Enlightened, Lifebound, Mechana, and Void.
On your turn, you may play any number of Heroes from your hand. When you play a Hero, gain the effect listed on the card. Heroes you play will stay in front of you until the end of your turn, and are then put into your discard pile.
Constructs
Constructs are the weapons, magical items, and fantastic devices you can equip to your Champions to enhance their capabilities. You can use Runes to acquire new Constructs from the Center Row for your deck.
A Construct card shows its Name, Faction, Cost (the number of Runes you must spend to acquire this card), Card Type, Effect (what the card does when played or while attached), Other Bonus (a reminder of any other stats/abilities added to the equipped Champion, such as bonus Speed), Strength Bonus (Strength added to the equipped Champion), and Defense Bonus (Defense added to the equipped Champion). There are four different factions: Enlightened, Lifebound, Mechana, and Void.
When you play a Construct, choose one of your Champions to equip it to. Equipped Constructs can give Champions bonuses to their Strength, Speed, and Defense, and they can grant other abilities as well.
You can equip any number of Constructs to a Champion. Constructs remain equipped until that Champion is defeated, and are then put into your discard pile.
Monsters
Monsters are a special type of Champion. They are unpredictable creatures that strive to sow death and destruction. Use Power to recruit a Monster from the Center Row to your roster and command it to lay waste to your enemies.
A Monster card shows its Name, Cost (the amount of Power you must spend to acquire this card), Card Type (Monsters are a special type of Champion), Command Cost (Power you must spend to command the Monster), Abilities (special abilities of the Monster), Strength (damage dealt when the Monster attacks), and Defense (Monster is defeated when it is dealt this much damage).
Monsters are a type of Champion. They are represented by a Monster Card and a figure on the battlefield. You use Power to recruit them from the Center Row and to command them on your turns. They can equip Constructs, perform scenario objectives, become exhausted, and follow the rules that apply to other Champions.
There are other non-Monster Champions that can be acquired from the Center Row using Runes.
Gameplay
Some cards and scenarios may have text that contradicts the game rules listed within this rule book. The card or scenario text supersedes the rules defined in this book.
Turn Breakdown
On your turn, you may take the following actions in any order, as many times as you'd like:
- Play a card to gain Runes, Power, and other card effects.
- Acquire a Hero or Construct from the Center Row by paying its cost and putting it into your discard pile.
- Acquire a Champion from the Center Row by paying its cost and adding its card and figure to your roster.
- Command one of your ready Champions by paying its command cost, then exhausting it.
When you have finished taking these actions, perform the following steps to end your turn:
- Place any played Hero cards into your discard pile along with any cards still in your hand.
- Draw five cards from your personal deck to create your hand for the following turn.
- Ready all of your exhausted Champions.
- Score Honor. Check if anyone meets the victory conditions for the scenario. (In "Battle of the Three Shrines," the first player to have 30 Honor wins.)
Replenishing Your Personal Deck
When your personal deck is empty, and you need to draw a card (or reveal a card from your deck), shuffle the cards in your discard pile to replenish your personal deck. Each time you shuffle, the cards you've acquired become part of your ever evolving deck. Hero cards played during your turn are only put into your discard pile at the end of your turn, so if you need to replenish your deck in the middle of your turn, don't shuffle in the cards you've played this turn.
Your Deck → Your Hand → Play and Acquire cards → Your Discard Pile
Playing Cards from Hand
There is no up-front cost to play cards from your hand. To play a Hero card, take the card from your hand and place it face up in front of you, announce its effect, and follow the instructions on the card. Any choices required by the card must be made at that time, and any conditions for additional effects are then checked.
Any Runes or Power generated can be saved and spent until the end of your turn.
Heroes remain in front of you until the end of your turn, when they are put into your discard pile, along with any cards you chose not to play from your hand.
Effects that enhance your Champions, such as those from playing certain Hero cards, will only do so until the end of the turn, by default.
Card Effect example: When you play Steelweaver from your hand, you gain 3 Runes to spend this turn. It also has an additional effect: if you acquire a Construct it can be put on top of your deck.
You may play Constructs from your hand to equip them directly to any of your Champions. They remain equipped until they are destroyed or the equipped Champion is defeated. (See below.)
Equipping Constructs
Constructs played from your hand are immediately equipped to a Champion of your choice. While equipped, the Construct will grant bonus attributes and effects to that Champion.
Slide the Construct under the Champion Card of the Champion you are equipping, keeping the bottom section exposed so that the attribute symbols on the Construct remain visible. Arranging the cards this way will allow you to add up the Champion's attribute totals more easily, especially when there are multiple Constructs equipped to a Champion. The protruding Constructs may also have an icon at the bottom-center of the card, as a helpful reminder of other abilities granted to the Champion.
There is no limit to the number of Constructs you can equip to a Champion. You may equip your Champions even if they are exhausted or are currently off the battlefield.
When an effect destroys one of your equipped Constructs, place it into your discard pile and it is no longer equipped to your Champion. When one of your Champions is defeated, destroy all of their equipped Constructs and put them into your discard pile.
Acquiring Cards from the Center Row
You can acquire a card from the Center Row by spending Runes equal to the cost listed in the upper-right corner of the card, within the Rune symbol. You may acquire any number of cards on your turn, including the 'always available' Mystics and Heavy Infantry, as long as you pay the cost for each card acquired.
When you acquire a Hero or Construct, place it in your discard pile. When you acquire a Champion Card, place it, and its corresponding figure, in front of you near your other Champions. (There is no limit to the number of Champions you can acquire for your roster.) You may now command that Champion during your turns, including on the current turn, by paying its Command Cost.
When a card leaves the Center Row, replace it with the top card of the Center Deck (and turn it face up), so that the Center Row always has 6 cards available to be acquired.
Acquiring an Ambush Card: Some cards have Ambush effects that occur when you acquire the card. If a card has an Ambush effect, it will be listed at the top of the effect box.
After taking the card from the Center Row and refilling its vacant spot, follow the instructions on the Ambush portion of the card. Ambush abilities are ignored when you play the card later in the game.
Cards with Ambush effects have a slightly different graphical frame than other cards, to help them stand out when they are in the Center Row.
Replenishing the Center Deck
If the Center Deck ever runs out of cards, shuffle together any cards that have been banished during the game to replenish the deck. There should be no Apprentice, Militia, Mystic, or Heavy Infantry cards in the Center Deck. Keep those cards separate from the other Center Deck cards when you banish them.
Commanding Champions
Your roster of Champion figures will begin the game in front of you, next to their Champion Cards. You will need to command them in order to deploy them to the battlefield and engage in combat. You can command a Champion by spending Power equal to their command cost. The command cost is the number within the symbol at the bottom-center of the Champion Card.
When you command a Champion that is not currently on the battlefield, deploy them by placing their figure onto your unoccupied Portal hex. (See "Terrain Tiles.")
The commanded Champion gains a "move action" and an "attack action" that can be used in any order. You may also choose to skip either action.
Champions who are already on the battlefield do not need to be deployed again when commanded. They can move and/or attack starting from their current location.
Once you've begun commanding a Champion, you must finish the entire command sequence before you can take other actions, like playing cards, acquiring cards, or commanding a different Champion. You may, however, use your Treasure tokens at any time during the command. (See "Treasure" below.)
When you've finished commanding a Champion, turn its Champion Card sideways to indicate that it is now exhausted. You cannot command a Champion that is already exhausted. At the end of your turn, ready your exhausted Champions by turning their cards back upright.
Using a Move Action
Commanded Champions gain a number of movement points equal to their Speed. All Champions have a default Speed of 3, unless otherwise noted. You can spend a movement point to move the commanded Champion to an adjacent hex in any direction. Some special terrain tiles can impact Champion movement by requiring multiple movement points, or even by blocking movement altogether. See "Terrain Tiles" for more details.
Moving is a single continuous action and cannot be broken up during a command. For example, you cannot use one movement point, then attack, then use the remaining movement points.
You cannot move a Champion onto, or through, a hex occupied by an enemy. You can move a Champion through a hex occupied by an allied Champion without penalty, but you cannot end their move in an already occupied hex.
Using an Attack Action
Champions can attack enemies adjacent to them on the battlefield. When they do, they deal damage equal to their Strength to the target of the attack. The defending Champion does not deal any damage back to the attacker.
A Champion is defeated when it is dealt damage equal to, or greater than, its Defense. Remove the defeated Champion figure from the battlefield and place it on its Champion Card, then turn the card sideways to indicate that it is exhausted. (The Champion will still be able to return to the battlefield later.) You must also destroy any Constructs equipped to the defeated Champion, and place them into their owner's discard pile.
You cannot command an exhausted Champion, so if they are defeated on an opponent's turn, you will not be able to command them on your next turn.
All damage is automatically healed from Champions at the end of each turn. It does not carry over from turn to turn. This means that it is typically only beneficial for you to attack an enemy if your Champion's Strength is equal to, or higher than, that enemy's Defense. However, damage dealt to Champions is cumulative until the end of a turn, so if the total damage dealt by all sources in a turn exceeds a Champion's Defense, they are defeated.
Tip: If even your strongest Champion doesn't deal enough damage to defeat an enemy alone, you can try attacking with multiple Champions to bring them down! Plan and coordinate your attack carefully, so that you will have enough power to command as many Champions as you need for the combined assault.
Acquiring Monsters
Monsters are a unique type of Champion that can be recruited to your Champion roster from the Center Row. You must spend Power equal to the cost listed in the upper-right corner of the card to acquire it. Then, place the Monster Card and its associated figure in front of you, near your other Champions. You can now command the Monster on your turns, just as you would any other Champion on your roster.
There is no limit to the number of Champions you can have on your roster, so recruiting Monsters and other powerful Champions from the Center Row will give you more options for commanding on your turn.
Monsters follow all of the other standard Champion rules: they move and attack when commanded, they become exhausted, they can be equipped with Constructs, they can be defeated and later redeployed, etc.
Monsters and other acquired Champions typically have powerful Ambush abilities. These are bonus effects that occur only when you acquire them. You will ignore the Ambush effect when commanding them later in the game.
Commanding Cultists
In addition to being able to command the Champions on your roster, you may also command Cultists. Commanding a Cultist is something any player can choose to do on their turn. Each player can have up to four Cultists on the battlefield at a time.
Cultists cost 2 Power to command. They have 2 Strength and 1 Defense. They are deployed onto your Portal, have 3 Speed when moving, can attack enemies, and may interact with map objectives, just like any other Champion. You do not need to move the Cultist card, it should remain in its designated location on the board as a reminder.
When you command a Cultist, you can choose to either command any of your ready Cultists already on the battlefield, or command and deploy a new one from the reserve of available Cultist figures. You cannot command a Cultist that belongs to an opposing player, or that has already been commanded this turn.
Cultists cannot equip Constructs, due to their iconoclastic nature. They can, however, gain temporary bonuses to their attributes and gain temporary abilities like Ranged for the turn. Cultists are Champions and are therefore effected by cards that effect Champions. Each Cultist figure can be commanded only once per turn. When defeated, they are removed from the board and returned to the reserve.
Attaching Cultist Rings (Kickstarter Edition Only): Before you deploy a new Cultist onto the battlefield, you should attach one of the colored detachable rings onto the base of that figure. Whenever a Cultist is removed from the battlefield, detach the ring from its base.
Each of your deployed Cultists should be fitted with a ring that matches the color of your Gateway (which is your player color). Each player has their own unique ring color, making it easier to identify which Cultist belongs to which player. This is especially useful when there are lots of Cultists on the battlefield at the same time!
There are four unique colors of detachable rings, allowing you to track Cultists for up to four different players. You may only deploy a new Cultist to the battlefield if there is a ring of your color available. You cannot deploy a Cultist if all of your rings are currently in use on the battlefield.
Cultist miniatures and color rings are exclusive to the Kickstarter Edition of the game.
Banishing Cards
Some card effects will allow you to "banish" cards in your hand, discard pile, or cards you've played during your turn. When an effect tells you to banish a card, choose one and remove that card from the game.
If you banish an Apprentice or Militia, return it to the box so that it is never mixed into the Center Deck. If the banished card is a Heavy Infantry or Mystic, return it to the appropriate 'always available' pile. If the Center Deck ever runs out of cards, you can shuffle all of the banished Center Deck cards together to form a new deck.
If a card allows you to banish a card in your hand, you cannot choose to banish a card that you've already played during your turn, as that card is no longer in your hand. However, there are some effects that specifically allow you to banish a played card. (Some effects may banish multiple cards at a time or banish cards from the Center Row. Follow these same rules when removing those cards from the game.)
Tip: Banishing your weaker cards allows you to draw your powerful cards more frequently over the course of the game. Banish your Apprentice and Militia cards whenever you get the opportunity!
Ending Your Turn
When you are done playing cards from your hand, acquiring cards from the Center Row, and commanding Champions, place all the cards you've played this turn, and any that remain in your hand, into your discard pile. You lose all of your unspent Runes and Power.
Draw 5 cards from your personal deck to create a new hand for your next turn. If you run out of cards in your personal deck and need to draw more, shuffle the cards in your discard pile and set them face down as your new deck, then draw until you have 5 cards in hand.
Ready all of your exhausted Champions by turning their cards back upright. Collect any Honor that your Champions would score from objectives by taking the appropriate amount of Honor tokens and placing them in front of you. You typically earn Honor from controlling Honor Shrines at the end of your turn (see "Honor Shrine" under Terrain Tiles), but each scenario's description will explain any additional ways to score Honor, the total amount needed to win the game, and any other victory conditions. (The victory condition for the first scenario "Battle of the Three Shrines" is to gain 30 Honor.)
If you meet the victory conditions, the game ends immediately and you are the winner! Otherwise, the game continues, and it is the next player's turn.
Small white Honor Tokens are worth 1 Honor. Large red Honor Tokens are worth 5 Honor.
Ability Keywords
Allegiance (Enlightened, Lifebound, Mechana, and Void)
Allegiance is an ability that appears on Champions, Constructs, and Heroes. Allegiance comes in four varieties, one for each of the different faction types. You gain a bonus effect if you play, or have already played, another card that matches the faction listed during the same turn.
Ambush
Ambush is a bonus effect that appears on some Center Deck cards. When you acquire a card with Ambush, you may gain the bonus effect listed in the Ambush portion of the card. The Ambush effect is ignored when you play the card. Cards with Ambush have a slightly modified card frame, making them easier to identify.
Area Attack
Area Attack is a Champion ability that causes the Champion's attack to hit all enemies within their attack range.
A Champion with Area Attack and the Ranged ability attacks all enemies within their line of sight, up to three hexes away. A Champion with Area Attack that does not have Ranged attacks all adjacent enemies.
Area attacks count as a single simultaneous attack against each possible enemy target. All enemies with Strikeback who are attacked this way will strike back at the same time. (See "Strikeback" below.) Area attacks are always made against all enemies in range; you cannot choose to attack only some of the available targets.
Double Attack
Double Attack is a Champion ability that allows the Champion to take up to two attack actions each time they are commanded.
The commanded Champion can move before, after, or between their attacks. Each attack can be used against a different enemy, or the same enemy can be attacked twice. You may choose to skip any of the attack actions.
Ranged
Ranged is a Champion ability that allows the Champion to attack enemies up to 3 hexes away, within their line of sight. Champions without Ranged can only attack enemies in adjacent hexes.
To determine line of sight, if any of the shortest paths between your Champion and their target does not pass through another enemy Champion or blocking terrain (such as a Forest), then you have Line of Sight. See "Ranged Attacks" for more details.
Slay
Slay is a Champion ability that grants a bonus effect when the Champion defeats an enemy using an attack action. Slay abilities only occur when the defeat is the direct result of an attack; you don't gain the bonus effect when defeating an enemy using Strikeback or non-attack damage. Slay works the same way for Villain Champions when playing in Solo or Co-op modes.
Slay can trigger multiple times in a turn if the Champion is able to attack and defeat more than one enemy.
Constructs that grant a Slay effect to the equipped Champion will display a Slay symbol at the bottom of the card, as a reminder to gain the added Slay effect.
Strikeback
Strikeback is an ability that allows a Champion to retaliate against an attack. If a Champion with Strikeback is attacked, they will deal damage equal to their Strength back to the attacker. This occurs even if the defending Champion is defeated by the attack, as the damage is dealt simultaneously.
The defender must be adjacent to their attacker in order to Strikeback, or they must have Strikeback and Ranged to retaliate against a ranged attack.
Dealing damage is not an attack action, so you do not gain Slay effects for defeating an enemy this way.
Your Champion can trigger Strikeback multiple times in the same turn, if they survive an attack and are attacked again. For example, if a Champion with Strikeback is attacked by multiple enemies in a turn, or is attacked twice by the same enemy with Double Attack, they will deal the retaliation damage against each of those attacks.
Constructs that grant a Strikeback effect to the equipped Champion will display a symbol at the bottom of the card as a reminder.
Terrain Tiles
Terrain represents the different types of locations you will encounter in a scenario. It can impact the way you move your Champions from one place to another and affect how you assess the overall battlefield when planning your attacks. In addition to the standard hexes, there are several types of special terrain tiles each with unique game mechanics. These tiles are placed onto the battlefield during the scenario setup or can be placed during gameplay by certain effects.
When an effect allows you to place (or move) a piece of special terrain onto the battlefield, you may only place the terrain tile onto a standard hex. You cannot place a terrain tile onto another terrain tile. If an effect tells you to do this, you may ignore that part of the effect.
Standard Hex
These are the normal battlefield hexes that do not have any special terrain effects. They look like typical ground covering, such as grass, rock, or dirt. These hexes may have other terrain tiles or tokens placed over them, but standard hexes do not have unique gameplay modifiers by default.
Portal
Each player begins the scenario with a Portal on the battlefield that matches their player color. When you command a Champion that is not currently on the battlefield, you must deploy them onto your Portal.
Your Champions can move in and out of your Portal's hex without penalty, however, they can not move or be placed onto an enemy's Portal. Some scenarios allow you to have more than one Portal on the battlefield, giving you the ability to choose which to use when you deploy a Champion.
Inactive Portal
Champions cannot deploy onto Inactive Portals. When one of your Champions moves onto an Inactive Portal, they activate it. Replace the Inactive Portal tile with a normal Portal tile that matches your player color. You may now deploy your Champions onto that Portal.
Honor Shrine
Controlling these locations allows you to gain Honor. The player with the most Champions on an Honor Shrine and its adjacent hexes controls that shrine. At the end of your turn, you gain 2 Honor for each Honor Shrine you control. (Some scenarios have differing values for certain shrine locations.) If two opposing players have an equal number of Champions around an Honor Shrine, it is contested and neither player controls it. Each Honor Shrine is scored individually, so it's possible to gain Honor from multiple shrines at the end of your turn.
Aside from awarding Honor, these tiles have no impact on Champion movement or combat. Honor Shrines come in two different visual styles. Use the alternative image for Honor Shrines that behave differently from the default rules, for example, those that award more than 2 Honor, or have unique scenario rules.
Forest
Champions are slowed by moving through Forests; they must spend an additional movement point to move onto a Forest tile. This includes moving from one Forest onto another adjacent Forest. There is no penalty for moving out of a Forest.
Forests block line of sight. (See "Ranged Attacks.") Champions can attack enemies on Forest tiles as normal. However, a Champion with Ranged cannot shoot through a Forest into the hex behind it.
Tainted Tile
Tainted tiles generally cause a negative effect for the Champion on the tile. The exact effects are determined by the scenario details listed in the Scenario Book. If not specified by the scenario, the default effect of a Tainted tile is: "Deal 5 damage to any Champion who enters onto this hex, or begins a turn on this hex."
Note: When playing in the Solo or Co-op modes, Villain Champions will ignore the negative effects of the Tainted tiles, unless the scenario details say otherwise.
Enchanted Tile
The effects of Enchanted tiles are determined by the scenario details in the Scenario Book. Enchanted tiles typically behave as either a magical barrier that blocks Champion movement, or they provide a positive effect for the Champion on the tile. Their exact effects will vary, depending on the scenario.
Beacons — Inactive Beacons and Beacon Tokens
Beacons typically begin a scenario as an Inactive Beacon tile on the battlefield. They have no impact to Champion movement or line of sight, and they provide no effects while inactive.
Moving one of your Champions onto a Beacon tile will activate it and turn control of that Beacon over to you. As soon as your Champion moves onto a Beacon, place a Beacon token that matches your player color on top of the tile, to denote that you now control that beacon. Remove any Beacon tokens belonging to other players that may have been placed on this tile. This change happens as soon as your Champion enters the Beacon hex, it doesn't need to end its movement on the tile for you to gain control of it.
You will gain a benefit for controlling Beacons, as determined by the scenario details in the Scenario Book. Some scenarios may require you to control a certain number of Beacons before you gain a benefit, while others may provide a bonus effect each time you gain control of a single Beacon.
Control of a Beacon is normally only exchanged when another player's Champion moves onto the tile. However, some scenarios may list other rules for how control of a Beacon is exchanged.
Token Types
Tokens are small circular game pieces that are placed onto the battlefield. When located on a hex with a special terrain tile, you must follow the rules of both the terrain tile and the token. In addition to the Beacon tokens, there are a few other unique types:
Treasure Tokens
Treasures are the most common type of token. They are placed onto the battlefield at the start of the game, based on the scenario setup. You can move your Champions onto Treasure tokens to pick them up from the board, or gain them from the Treasure Bag through certain card effects. (See "Treasure" below.)
Turret
Acquiring the card Salvagemaster Mila allows you to place the Turret token on the battlefield. Playing that card later allows you to move the Turret token to a different hex. While the Turret doesn't directly affect the hex that its placed on, some cards allow you to use the Turret to make an attack against enemies.
Faerie Ring
Acquiring the card Kiri, Meadow Witch allows you to place the Faerie Ring token on the battlefield. Playing that card later allows you to move the token to a different hex. If you were the last person to place or move the Faerie Ring token, your Champions will gain +3 Strength and +3 Defense while they are on the Faerie Ring's hex.
Objective Tokens
Used for commanding Villain Champions in the Solo and Co-op modes. Each pair of tokens is assigned to both a Villain and a battlefield hex. There are 4 Objective token types.
Treasure
Treasure tokens should be placed on the battlefield before the start of the game, on locations with Treasure icons as displayed in the scenario layout diagram. Store all extra Treasure tokens in the Treasure Bag.
If a card effect tells you to "gain a Treasure," take a random Treasure from the Treasure Bag. When a Champion you've commanded ends its movement on a hex with Treasure, (or was deployed onto a hex with Treasure,) gain the token by picking it up from the board. You may look at the other side of the token to view the Treasure's secret effect, but don't reveal it until you are ready to use it!
Playing a Treasure allows you to improve one of your Champions on the battlefield by increasing their attributes. Treasures are typically either offensive or defensive in nature. Some will increase your Champion's Strength or Defense attributes, allowing you take down bigger foes. Others will enhance your Champion's Speed or give them Strikeback (allowing them to deal their Strength as damage back to the attacker).
To use a gained Treasure, reveal the token to your opponents and declare which of your Champions you are granting the effect to. The Treasure's effect lasts until the end of the current turn. Treasures are all one-time use; remove the token from the play area after using it. Treasure tokens may be played at any time, including on enemy turns, or even in reaction to your opponent playing a Treasure token of their own. All Treasure tokens follow these rules, regardless of their color.
Ranged Attacks
Champions with the Ranged ability can attack enemies that are adjacent to them or those slightly further away. When they attack, they can target an enemy that is up to 3 hexes away, within their line of sight.
Your Champion has line of sight of their target if any of the shortest paths between those hexes does not pass through a Forest (or other line of sight blocking terrain) or through another enemy Champion. You can ignore allied Champions when checking for line of sight, as they will duck out of the way of the shot.
Terrain that blocks line of sight will only prevent attacking through the hex into a hex behind it. For example, you can attack into (or out of) a Forest, but can't attack an enemy directly behind a Forest. Most types of terrain tiles and tokens do not impede attacks, including Shrines, Beacons, and Treasure.
Line of Sight Diagram
The Champion in the center of the diagram, Icarus Steelfoot (A), has Ranged. He and the Tyranyx to his left are allies. The other Champions, in the blue circles, are enemy Champions.
Icarus can attack the Water Djinn (B) just above him, because Champions with Ranged can still attack adjacent enemies. Icarus does not have line of sight to the Psyche Askara (C), since the shortest path to the Askara is blocked by the enemy Djinn.
Icarus can attack the Unbound Emissary (D) to the left. Neither the Honor Shrine nor his ally, Tyranyx, will block his line of sight.
Icarus cannot attack the Arha Templar (E) to the right. The shortest path between them intersects with a Forest, which will block his line of sight.
Icarus can attack the Twilight Scout (F) near the bottom of the diagram. Attacking into a Forest does not break line of sight, and neither does attacking through a Treasure token.
Additional Ways to Play
There are many ways to experience scenarios in Ascension Tactics™ beyond the standard competitive 1 vs. 1 mode. The following pages will describe how to set up and play these alternative modes, and what makes each a unique experience.
Not all game modes are available to be used in every scenario. Consult the Scenario Book to determine which scenarios are available for the mode you wish to play. (Champion Drafting is always available and therefore will not be listed in the scenario's potential modes of play.)
Here is a quick breakdown of the different modes available:
- Champion Drafting — Strategically choose your starting Champions from the Champion Row using a drafting process, instead of using the default suggested Champions for the scenario. Champion Drafting can be done on any non-Campaign scenario, and it can be combined with any of the other game modes.
- 2 vs. 2 Teams — Pits two teams of allied players against each other. Each team selects their starting Champions through a modified form of Champion Drafting. Teams alternate taking shared turns to complete the scenario's objectives.
- 3 or 4 Player Brawl — Get ready for a multiplayer free-for-all battle. Who will prevail when it's everyone for themselves?
- Solo Play — Battle against a Villain Team and their deadly Boss Champion. Enemy turns are automated by a Scheme Deck, which determines how the enemy moves, attacks, and performs other abilities.
- Co-op — You and a friend face-off against a team of powerful Villains and their Scheme Deck. Share Treasures with your ally, and plan your sequence of actions together carefully, to defeat the enemy team.
- Become the Boss — Take control of the Villains! Use the Scheme Deck to brawl against up to two other players.
Champion Drafting
Each scenario in the Scenario Book includes a suggested Champion roster for each player to use during setup. These recommended rosters serve as a quick way for you to jump right into the game, and will often feature specific characters or factions to help convey the theme or background story of the scenario.
To make these scenarios endlessly replay-able, and to add a bit more strategy to your games, you can skip the suggested rosters and draft your own Champions instead!
How to Draft: Take the (non-Center Row) Champion Cards and shuffle them together to create the Champion Deck. (These cards have a blue back side.) Lay out six Champion Cards at random, face up, next to each other, to create a Champion Draft Row.
Take turns selecting Champions to add to your individual rosters, starting with the player who is going last, based on your Gateway cards. When it is your turn, you may take ANY Champion available in the row; you are not constrained by things like faction or Command Cost. (Though it's generally a good idea to have Champions with a variety of Command Costs.)
The player with the Gateway indicating that they will go last will draft the first Champion. To draft a Champion, take the chosen Champion Card from the Draft Row and place it in front of you. Then a new Champion Card is added to the Draft Row from those remaining in the Champion Deck. Then, the next player (in reverse order) drafts a Champion, and so on, with "Player 1" drafting last. Continue picking in this same order, until each player has drafted their entire starting roster.
In a two-player game, each player drafts a total of four Champions. In a three or four-player game, each player drafts a roster of three Champions.
Return the remaining un-selected Champion Cards to the game box. Then give each player the figures matching their drafted Champion Cards. Continue to set up the game as usual, but make sure to resolve any start of game effects that your Champions may have!
2 vs. 2 Mode
This mode allows four people, split into two teams, to battle against each other in competitive scenarios.
Team Setup and Draft: First, decide the members of each team or randomly assign players to each team. Next, randomly determine which team is going first and assign those players the Gateway cards for Team 1. The other team should receive the Gateways for Team 2. The Gateways determine the player colors and Portal locations for the scenario.
To establish Champion rosters for each team, you will need to perform a modified version of the Champion Draft. The Team 2 players will select from the Champion Draft Row first. After they have selected a Champion, refill the empty space in the Champion Draft Row and then Team 1 drafts a Champion. Repeat this process back and forth until each team has drafted 6 Champions in total.
Once your team has drafted their 6th and final Champion, you must assign 3 of those drafted Champions to the roster of each player on your team. This will determine the starting Champions for each player, so think carefully about how to assign the Champions to create effective roster compositions. Collect the figures for each Champion or your roster.
Tip: Players on the same team may want to position themselves near each other around the table, so that they can share hidden card and Treasure information or discuss strategy away from the other team.
Shared Turn Structure: Players on the same team will take simultaneous shared turns. Teammates can discuss and choose how they want to sequence actions on their turn, including when to play cards, acquire cards, command Champions, etc. You don't need to keep your cards or Treasure tokens hidden from your teammate. Sharing information can help your team plan the most effective combined strategy.
Each player still has their own personal deck, hand, and discard pile. You do not share resources, such as Runes or Power, with your teammate. You cannot acquire cards for other players and you can only command your own Champions. However, you can share your Treasure tokens. For example, you could share a Strength-increasing Treasure to help them get into a better position, or a Defense-boosting Treasure to help an ally's Champion survive an attack!
When your team has concluded taking game actions, follow the normal end of turn procedure. The other team takes the next turn.
Your team has a combined Honor total. When scoring Honor Shrines at the end of your turn, if your team has the most collective Champions around the shrine, your team controls it and gains Honor.
The first team to meet the victory conditions for the scenario is the winner.
3 or 4 Player Brawl
Gather three or four players to battle in a free-for-all competition where only one player can be declared the ultimate winner.
Brawl Setup: Choose a 3 or 4-Player scenario in the Scenario Book and setup the battlefield according to its diagram and description. Deal a random Gateway to each player to determine turn order and player color.
You may choose to use either the suggested Champion rosters for the Scenario or perform a modified Champion Draft. Follow the standard Champion Draft rules, with the player taking the last turn drafting first. Then proceed in reverse turn order, with Player 1 drafting last. Repeat this process until each player has drafted 3 Champions for their starting roster.
Free-for-All Brawl Details: Each player takes their turn in order, following the player order listed on the Gateways. Turns and player actions use the same rules as the 2-player competitive mode, with all other players considered to be your opponents. When you have finished your turn, play passes to the next player in turn order.
Cards or effects that allow you to impact any Champion on the battlefield can be used against the Champions of any player. Your Treasure tokens can only be used on your own Champions.
When scoring Honor Shrines, if you have the most Champions on/adjacent to an Honor Shrine, you control it. The first player to meet the victory conditions for the scenario is the winner.
Tip: Don't forget to claim your Gateway's bonus effects! The Gateways for Player 2, 3, and 4 have additional effects on that player's first turn.
Solo Play Mode
In this mode, you will command your Player Champions against an enemy team comprised of a menacing Boss and several Villain Champions. You and the Villains will alternate turns, with each of you trying to accumulate enough Honor to win the scenario.
On your turn, you will play using the standard rules, using Runes to acquire cards and Power to command your Champions and gain Honor. The actions on enemy turns are determined by a deck of Scheme cards that indicate which Villains are commanded and other malicious effects to be executed.
Solo Mode Setup: First, choose the Scenario you wish to play in the Scenario Book. Campaign scenarios use the Campaign rules in the Scenario Book to determine your Champion roster. For a non-Campaign scenario, decide if you want to use the suggested Champion rosters or if you want to try your luck against a randomized Villain roster.
If you wish to battle against random Villains, you must first determine your own starting roster by setting up a solo Champion Draft and choosing your Champions one at a time. Any Champions you draft cannot show up on the Villain roster. Search through the Villain Champion cards and set aside any that have the same name as your drafted Champions.
After the Champion Draft, randomly select a Boss Champion to lead the enemy team. Boss Champions are Villain Champions that have a Defense value of 4 or more and have a Surge ability listed on their card. Next, randomly draw 3 more non-Boss Villain Champions to comprise the rest of the Villain roster.
Villain cards are double-sided. One side is used for Solo mode and the other side is used for Co-op play. The side with the lower Villain stats is the Solo side. The Co-op side has more challenging stats and abilities, more suited for battling against multiple players.
Place your Champions in front of you and the Villain Champions on another side of the board. Place the Boss Objective token on the Boss's Champion Card. Randomly distribute the other Objective token types onto the other Villain Champion Cards.
Next, setup the battlefield according to the Scenario Book. Place each of the Objective tokens on their designated locations. (Usually on an Honor Shrine.) Objective tokens are referenced by the Schemes to control Villain movement and other effects. They have no impact on your Champion's movement or line of sight.
Shuffle up the Center Deck cards. There are several Champions you can acquire from Center Deck cards during gameplay, but you cannot acquire a Champion that is already part of the Villain's roster. When playing against a Villain that has a Champion Card of the same name in the Center Deck, you may either remove that card from the deck during setup or you can replace it with the next card from the Center Deck when it appears in the Center Row during the game.
Shuffle together the Schemes to create the Scheme Deck. Leave room next to it for a Scheme discard pile.
When you are ready to begin, draw your starting hand and you take the first turn of the game.
Schemes
After each of your turns, you will execute the enemy's turn by using the Scheme Deck. The Villain team won't buy cards from the Center Row or command their Champions using Power. Instead, they will play two Schemes from the Scheme Deck and resolve their effects one at a time.
A Scheme card shows its Name, Effect (follow the directions listed here each time the card is played; some effects may have a duration), Threat Level (if there are at least this many cards in the Scheme discard pile, also execute the bonus effect below), and Bonus Effect (executed after the normal effect, if the Threat Level has been reached).
When executing a Scheme, if the number of cards in the Scheme discard pile matches or exceeds the Threat Level shown on that Scheme, also perform the bonus effect listed on the bottom of the card. Execute each effect one at a time, in the order that they appear on the card. Completely resolve the normal Scheme effect before you execute the bonus effect.
By default, you will play two Schemes on each Villain turn. Play each Scheme one at a time, fully resolving the first card before playing the next. Some Scheme effects will give Villain Champions a bonus that lasts for the entire turn. Remember to take these bonuses into account when executing the second Scheme.
When you have finished executing both Schemes, place both cards into the Scheme discard pile.
If you ever need to play a Scheme card and the Scheme Deck is empty, the Villain team wins the game.
Playing the Villain's Turn
After each of your turns, you will execute the Villain's turn by performing the following steps:
- Play and execute the top card of the Scheme Deck.
- Play and execute the next card of the Scheme Deck.
- Put both cards into the Scheme discard pile.
- Score Honor for the enemy team, based on the Honor Shrines they control.
Play and execute each Scheme one at a time, including the bonus effect when their Threat Level condition is met.
Commanding Villain Champions
Schemes determine which Champions become commanded, based on their assigned Objective token. For example, "Command" a given Objective token means you must command the Villain Champion with the matching Objective token. Some effects may ask you to perform multiple actions at a time, such as commanding multiple Champions. You should always execute these actions in the order that they appear on the Scheme card.
A Villain Champion's primary goal is to defeat any Player Champions. Their secondary goal is to move to their matching Objective token, which is typically on an Honor Shrine.
Understanding these goals will help you determine how a Villain Champion should behave when commanded.
When determining what a Villain Champion should do when commanded, ask the following question: Can this Villain Champion defeat a Player Champion this turn, by moving and/or attacking?
If the answer is YES: The Villain Champion should attack the Player Champion with the highest Defense that it can defeat this turn. (In the case of a tie, you get to choose which of those Champions they attack.) If the Villain Champion needs to move to another hex to make this attack, move them as needed using a standard move action. If there are multiple paths they could take to reach their target, they should take the path that puts them closest to their Objective token. (If the options are the same distance from the token, you get to choose which they move to.) If the target of the Villain Champion's attack is already within range before they have moved, the Villain should attack first and then move towards their matching Objective token.
If the answer is NO: That Champion should move towards the hex with their matching Objective token using a standard move action. Villains prefer to move onto the same hex as their Objective token, but if that hex is already occupied, they will stop in an adjacent hex. If they cannot reach the Objective token with a single move action, they should move as close as possible while taking the most direct route. In the case of a tie for potential shortest routes, you get to choose which path they take.
If the commanded Villain Champion is already on or adjacent to an Honor Shrine with their matching Objective Token, and they cannot defeat a Player Champion, they will remain at their current location and immediately score Honor for that Shrine. They can still score for controlling the Honor Shrine as they normally would at the end of the turn.
If a Villain moves towards their Objective token and stops with a Player Champion in their attack range, they will attack that Champion. They will do this even if their attack will not deal enough damage to defeat the Player Champion, as other Scheme actions during the turn could result in the Champion taking more damage and becoming defeated. If there are multiple Player Champions in range, they will choose one with the highest Defense.
Villain Champion Special Rules
Villain Champions operate similarly to the standard Player Champions, but there are a few important ways in which they differ:
- Villain Champions do not become exhausted. They are always able to be commanded.
- They are not exhausted when they are defeated.
- They can be commanded more than once per turn. For example, if the first Scheme played tells you to command the Villain and then the second Scheme also says to command the Villain, you must command it again that turn.
- Players earn Honor for defeating Villain Champions, equal to the number listed in the Honor symbol at the bottom of the Villain's Champion Card.
- Villain Champions cannot pick up Treasure tokens. They can move onto (or through) hexes with Treasure, but the token will remain on the battlefield.
- If a Villain acquires a Construct from the Center Row, ignore any Ambush effects on that card.
- If a Villain equipped with a Construct is defeated, or the Construct is destroyed, banish that Construct.
- Villains can score Honor Shrines early during their turn. If they are at the location matching their Objective Token and are commanded, but cannot defeat another Champion, they will immediately score the Honor Shrine instead of moving. They will also still score the Shrine normally at the end of the turn.
Boss Surge Powers
Each Boss Villain has a unique ability they can unleash, called a Surge power. These are impressive actions that will make the Boss more challenging and dangerous than other Villain Champions.
Surge powers are triggered when certain Schemes are played. When a Scheme says to "Surge," perform the Surge effect listed in the abilities area of the Boss's Villain card.
There are multiple Schemes that can cause the Boss to use their Surge power. When facing off against an unfamiliar Boss, it's a good idea to examine the abilities on their Champion Card carefully, to know what sorts of effects you are up against.
Some Campaign scenarios will also have unique effects that occur when a Surge is triggered. Read the details in the Scenario Book carefully for any additional Surge rules or effects that may exist in your current scenario.
Villain Cultists
Some Scheme cards will instruct you to deploy a Cultist onto one of the Objective tokens. When this happens, take a Cultist from the reserve and place it on the hex with the matching Objective token. If that hex is occupied, place it in one of the adjacent hexes of your choosing. If all adjacent spaces are also occupied, you may ignore the effect.
Villain Cultists do not receive a detachable colored ring. The Villains are not limited to having only four cultists, the Villain Cultists can always be deployed onto the board unless there are no Cultist figures left in the reserves.
You gain 1 Honor when you defeat a Villain Cultist.
Victory Conditions
The first team to meet the victory conditions listed in the Scenario Book wins the scenario. (This typically means reaching an Honor total before the Villain team does, but some scenarios may list different victory conditions for each side.) Players and Villains each gain 2 Honor for each Honor Shrine they control at the end of their own turn. (Shrine values can vary by scenario.) When a player defeats a Villain Champion, they gain Honor equal to the value on the defeated Villain's card.
If there are no cards left in the Scheme Deck, and you need to play a Scheme, the Villain team automatically wins the scenario.
Co-op Play Mode
In this mode, two players work together against a team of Villain Champions and their Boss Champion leader. The allied players take a shared turn, acquiring cards and commanding Champions in any order. Then the Villains take a turn, with turns alternating back and forth between the players and Villains. Players gain Honor as a team. To win, you must achieve the victory conditions of the scenario before the Villain team.
The rules for Co-op mode build upon the base Solo mode rules. The instructions for playing Schemes and operating the enemy turn are identical, so it is recommended that you read the "Solo Play Mode" section first.
Co-op Scenario Setup (Non-Campaign): First, select the Co-op scenario that you want to play from the Scenario Book. Each player should place one of the Team 1 Gateway cards in front of them. Perform a Champion Draft to determine each player's starting Champion roster, with the player of your choice selecting first. Alternate drafting Champion Cards until each player has a roster of 3 Champions.
Search through the Villain Champion cards and set aside any that have the same name as any of the drafted Champions. Randomly select a Boss Champion to lead the enemy team. (Boss Champions have a Defense value of 4 or more and have a Surge ability.) Draw 3 more non-Boss Villain Champions to comprise the rest of the Villain roster. Place the Villain Champions away from the players, with the Co-op side of their Villain Cards face up. The Co-op sides will have more challenging stats and abilities, better suited for battling against multiple players. Place the Boss Objective token on the Boss Champion's card. Randomly distribute the other Objective tokens to each of the other Villains.
Finish setting up the battlefield, including the Objective tokens, and shuffle the Scheme Deck. Finally, if the scenario has multiple starting Portals for players, each player must choose one. Players can only deploy their Champions onto the Portal they select. If either player activates an Inactive Portal, any player on the team can now deploy onto that Portal.
When you are ready to begin, the players should draw their starting hands and take the first turn of the game.
Co-op Shared Turns: The allied players will take their turn simultaneously, during a shared player turn. After the players' turn is over, it is the enemy team's turn. The two teams will then alternate turns, back and forth.
This is a cooperative mode and players are encouraged to strategize when building their decks and to work together to take down Villain Champions. You may share Treasure tokens, however, you cannot share resources or cards, and you can only command your own Champions. For more details on the shared turn rules, see "Shared Turn Structure" under 2 vs. 2 Mode.
Tip: Remember that you either win or lose as a team. You'll need to work together to collectively earn enough Honor to complete the scenario's victory conditions and overcome the Villain team.
Become the Boss Mode
In this mode, the allied players (or a brave solo player) will compete against a Villain team being controlled by another player. Any Scenario that can be played in Solo or Co-op mode can also be played in Become the Boss mode. Choose a scenario from the Scenario Book and determine who will take on the role of the Boss. Assign Objective tokens to the battlefield as determined by the scenario setup and to each of the Villain Champions as normal.
The solo or allied players will follow the standard solo/co-op rules for their turns. On the first turn of the game, the enemy player will shuffle the Scheme Deck and draw three Schemes. They will choose two of these cards to play, revealing and resolving them one at a time. When they have finished, they will place the played Schemes into the discard and draw two new Schemes, so that they have three cards in hand for their next turn. Then their turn is over.
When the enemy player plays a Scheme that commands a Villain Champion, they do not need to follow the normal behavioral rules for operating the Villain's actions. They get to perform the move and attack actions of that Villain Champion however they wish, making all choices. If a Surge power or other effect would cause a decision to be made, or a tie to be broken, the enemy player makes those decisions. In this mode, the rule that says a Villain Champion can remain at their Objective token to earn Honor in the middle of their turn does not apply.
All other rules are identical to the standard solo and co-op rules. Villain Champions do not become exhausted, but are worth Honor when defeated. Play until either side has achieved the victory condition for the scenario. (Note that the enemy team's conditions may be different than the player's conditions.)
Adjusting Solo/Co-op Difficulty
You may adjust the difficulty of any Solo or Co-op scenario to better suit your desired level of challenge. To increase the difficulty level, put cards from the Scheme Deck into the Scheme discard pile at the start of the game. This will allow the Villain team to reach the Threat Level on their Scheme cards more quickly, and ramp up the overall danger of the enemy turns. There are 3 preset difficulty settings to choose from:
- Standard — No change. Do not begin with any Schemes in the Scheme discard.
- Hard — Put 4 Schemes into the Scheme discard.
- Nightmare — Put 8 Schemes into the Scheme discard. (Are you sure about this?)
F.A.Q.
Question 1: When there is an empty space in the Center Row, when do I replace it with a new card? Answer: You should replace an empty space in the Center Row with a new card from the Center Deck right away, before performing any other effects or making any decisions. This includes before resolving the Ambush effect on an acquired card.
Question 2: If my Champion is defeated during my turn, will they still become ready at the end of my turn? Answer: Yes. Your Champions always ready at the end of your turn. If one of your Champions is defeated by an effect like Strikeback during your turn, you will ready that Champion at the end of that same turn.
Question 3: If a card or ability allows me to command a Champion for free, can I command a Champion that is exhausted? Answer: No. Unless a card specifically states otherwise, a Champion cannot be commanded when it is already exhausted.
Question 4: Can I use a Treasure immediately after picking it up? Answer: Yes. You pick up a Treasure at the end of a move action when your Champion ends their move (or is deployed) on that Treasure's hex. So for example, you could move a Champion onto a Treasure, pick it up, and play it before or during their attack action to enhance their Strength. However, applying a Speed enhancing Treasure that you just acquired will not allow them to move further this turn since they have already ended their move action.
Question 5: What happens if my Champion has an equipped Construct removed that was providing them with additional Defense, and they now have less Defense than the amount of damage they've taken this turn? Answer: Your Champion is defeated. Since damage remains until the end of your turn, losing a Construct that was providing a bonus to Defense can sometimes cause your Champion to become defeated.
Question 6: What happens if a Champion's command cost would be reduced to a number below zero? For example, by equipping an All-Seeing Eye to a Champion with a command cost of 1, such as Faerie Commander. Answer: Command costs cannot go below zero. The Champion in this example would cost no Power to command, but would still exhaust and follow other command rules as normal.
Question 7: What happens if I want to acquire a Heavy Infantry or Mystic but there are none left? What happens if I want to deploy a Cultist but there are no more Cultist figures or tracking rings available? Answer: You cannot acquire a Heavy Infantry or Mystic when there are none available. Each player can have a maximum of four Cultists deployed at a time. You cannot deploy a new Cultist when all of your tracking rings, or all Cultist figures, are in use.
Question 8: If I play a Hero card that gives my Champion +1 Strength, is this a permanent bonus? Answer: No. Effects that alter a Champion's attributes or abilities only last until the end of the current turn, unless they say otherwise. Constructs are the exception; they will continue to effect the equipped Champion until they are destroyed and removed.
Question 9: If my Champion with a Slay ability attacks and defeats an enemy Champion, but that enemy uses Strikeback to defeat my attacking Champion, do I still get the Slay bonus? Answer: Yes, you still gain the Slay effect when both are simultaneously defeated.
Question 10: Am I allowed to look through another player's discard pile? Answer: Yes. The contents of all discard piles are public knowledge, and you may look through them at any time. This is also true for cards that have been banished from the game. You may NOT look at an opponent's hand, deck, or their unplayed Treasure tokens.
Question 11: What happens if an effect tells me to do something I can't currently do? For example, "discard a card" with no cards in hand, or "place a Forest under a Champion" when there are no Champions on the battlefield. Answer: You may ignore that part of the effect. You should still attempt to resolve any other parts of the effect that you are able to.
Question 12: If I acquire a Champion from the Center Row, does it count as having played a card of that Champion's faction? Answer: No. Champions never go to your hand, so they can't be played, and acquiring a card does not count for Allegiance or other 'play' effects.
Question 13: What happens if multiple effects would trigger at the same time? For example, if my Champion with two different Slay powers defeats an enemy Champion, in what order do they happen? Answer: The player who is currently taking their turn can choose the order in which these effects happen.
Question 14: Can I move a Portal onto a Forest tile using Kor's slay power? Answer: No, a hex can only have one terrain tile on it at a time. Therefore, a Portal cannot move onto a hex that already has a terrain tile.
Question 15: If I play a Treasure on my Psyche Askara, does it apply to both figures? Answer: Psyche Askara has a single Champion Card that determines the base stats for its two Champion figures. When you play an effect that targets a single Champion, such as a Treasure token, you must choose which Champion figure to apply the effect to. Constructs equipped to Psyche Askara are attached to the Champion Card, therefore, the Construct's effects apply to both figures.
Question 16: When I command Psyche Askara, can I move both figures before attacking with them? Answer: No. You must finish commanding one figure before you can begin commanding the other.
Question 17: Can I give a Champion the same keyword ability multiple times? Answer: Most Champion abilities do not stack, including Strikeback, Ranged, Area Attack, and Double Attack. Gaining those abilities a second time on a Champion will have no effect. However, Slay and Allegiance abilities do stack, and each will take effect when their condition is met.
Question 18: Can I move or deploy my Champion onto an already occupied hex? Answer: Your Champions cannot be deployed onto occupied hexes and they cannot end a move action on an occupied hex. Each hex on the battlefield can only be occupied by one Champion at a time. However, your Champions can move through hexes that are occupied by allied Champions during a move action, as long as they end on an unoccupied hex. Your Champions cannot move through hexes occupied by enemy Champions.
Question 19: In Solo or Co-op mode, what happens when a Champion Card is in the Center Row that matches one of the Villain Champions on the enemy roster? Answer: You should remove that Champion from the Center Row and replace it with the next card from the Center Deck. You could also choose to remove the Champions matching Villains from the Center Row before you start playing.
Question 20: If an enemy Champion is on the hex with my placed Turret Token, does that Champion block the turret's line of sight? Answer: No. The turret is unaffected by that Champion and can still attack into nearby hexes within its range. The turret may also still attack the enemy standing on its hex.
Question 21: If I play Isla, the Serene, and copy the effect of a Kiri, Meadow Witch, or a Salvagemaster Mila in the Center Row, do I get to place a token on the battlefield? Answer: No. You do not gain the Ambush effect of the card you copy. Therefore, you cannot place either the Faerie Ring or Turret token on the battlefield.
Question 22: If I play Isla, the Serene, and copy the effect of a card in the Center Row, does Isla count as the copied card's faction? Answer: No, the Faction property is not copied with the card effect. Isla will count toward Enlightened Allegiance, but not Allegiance of other factions.
Have other questions that were not answered here? Want to discuss Tactics strategies or share your epic victory? Come join us on Discord: https://discord.gg/57tE3x9S
Glossary of Terms
Acquire: Gain a card from the Center Row. This is typically done by paying the card's cost and then placing it into your discard pile if it is a Hero or Construct. Acquiring a Champion will add it to your roster.
Allegiance: Grants the listed bonus effect if you play another card of the matching faction on the same turn.
Ambush: When you acquire a card with Ambush, you gain the bonus effect listed in the Ambush portion of the card.
Area Attack: A Champion ability that causes the Champion's attack to hit all enemies within their range.
Attack: When a Champion is commanded, it may attack an enemy in range and deal damage equal to its Strength.
Banish: When a card is banished, it is removed from the game. Apprentices and Militia are returned to the game box. Mystics and Heavy Infantry are returned to their respective piles.
Battlefield: The hexes on the game board where Champions move and fight.
Champion: A figure that can be deployed to the battlefield. They have attributes, such as Strength and Defense, and a Command Cost, listed on their Champion Card.
Command: When you command a Champion, they can take a move action and an attack action, in any order. They can move a number of hexes based on their Speed, deal attack damage equal to their Strength, and then become exhausted. Exhausted Champions can't be commanded.
Command Cost: The amount of Power you need to spend in order to command a Champion. This is listed at the bottom center of the Champion Card.
Construct: When you play a Construct from your hand, attach it to one of your Champions. Constructs give bonuses to Champions by increasing Strength, Defense, Speed, or granting additional abilities.
Control: Players can control certain types of terrain tiles on the battlefield. Honor Shrines are the most common example. The player with the most Champions on a Shrine and its adjacent hexes controls it.
Defeat: A Champion is defeated when they take damage equal to, or exceeding, their Defense. Some effects can outright defeat a Champion without dealing damage. When a Champion is defeated, remove its figure from the battlefield, destroy all of their equipped Constructs, and exhaust their Champion Card.
Defense: A Champion attribute that determines how much damage is required to defeat the Champion. A Champion's Defense attribute is listed in the bottom-right corner of their Champion Card.
Deploy: You deploy a Champion by placing them on the battlefield. When you command a Champion that is not on the battlefield, you must deploy them onto one of your unoccupied Portals. Some card effects may allow you to deploy Champions onto other locations on the battlefield, without commanding them.
Destroy: When a Construct is destroyed, place it into its owner's discard pile. It is no longer equipped to a Champion.
Double Attack: Allows a Champion to take two attack actions when commanded, against the same or different enemies.
Enlightened: One of the four major factions. Enlightened cards are blue.
Exhausted: Exhausted Champions cannot be commanded. Champions become exhausted after they are commanded or defeated. Turn their Champion Card sideways to indicate they are exhausted. At the end of your turn, ready your exhausted Champions by turning their cards back upright.
Gateway: A Gateway card is dealt to each player at the start of the game to determine their player color and turn order. Gateways provide players with 2 Power on their turn, and provide additional effects to players not going first.
Hero: When you play a Hero card from your hand, you gain the effect listed on the card.
Hex: An individual space on the battlefield.
Honor: Used to determine the winner of the game. The game ends when a player has Honor equal to the victory requirement of the scenario. You can track your accumulated Honor using Honor tokens.
Lifebound: One of the four major factions. Lifebound cards are green.
Line of Sight: Your Champion must have line of sight to an enemy to make a Ranged attack against them. They have line of sight when one of the shortest paths to the target is not blocked by another enemy Champion or a Forest.
Mechana: One of the four major factions. Mechana cards are brown.
Move: A Champion may move when commanded. The maximum number of hexes it can move is based on its Speed attribute (default of 3). Certain terrain tiles can also affect movement.
Occupied: A hex on the battlefield with a Champion on it. Only one Champion can occupy a hex at a time.
Power: A resource that can be spent to command your Champions and to acquire Monsters. At the end of your turn, any unused Power is lost.
Ranged: An ability that allows a Champion to attack an enemy within their line of sight, up to 3 hexes away. Champions without Ranged can only attack adjacent enemies.
Ready: Champions who are ready can be commanded. It is the default state of Champions and the opposite of exhausted. At the end of your turn, ready all of your exhausted Champions by turning their Champion Cards upright.
Roster: The group of Champions belonging to an individual player. These are the Champions you can command on your turn, when they are ready. Acquiring a Champion will add it to your roster.
Rune: A resource that can be spent to acquire Heroes, Constructs, and Champions from the Center Row. At the end of your turn, any unused Runes are lost.
Slay: Grants the listed bonus effect when the Champion defeats an enemy Champion with an attack.
Speed: Determines the maximum number of standard hexes a Champion can move when commanded. Champions have a default Speed of 3.
Steal: When you steal a card from another player, it is owned by you for the remainder of the game.
Strength: A Champion attribute that determines the amount of damage they deal when attacking. A Champion's Strength attribute is listed in the bottom-left corner of their Champion Card.
Strikeback: A Champion with Strikeback retaliates against incoming attacks. They deal damage equal to their Strength back to their attacker, if they are in range.
Surge: When you play a Scheme that says "Surge," perform the effect listed in the Boss's abilities, and follow any additional Surge rules listed in the scenario details.
Treasure: When your Champion ends their move action on a Treasure token, you pick it up. If a card tells you to gain a Treasure, take a random one from the Treasure Bag. Treasures can be played on any turn, including during combat, to enhance the attributes of one of your Champions.
Unoccupied: A hex on the battlefield with no Champion on it.
Void: One of the four major factions. Void cards are purple.