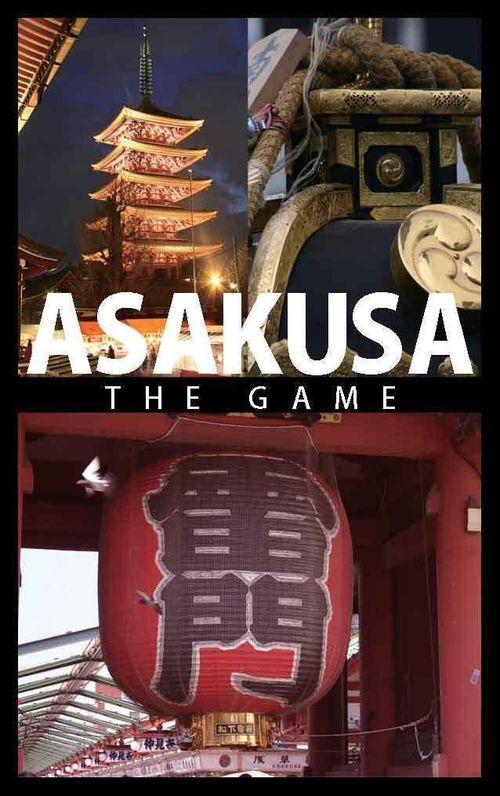
ASAKUSA: The Game
ASAKUSA: The Game Rulebook
Table of Contents
Table of Contents
Overview
Players are city fathers of Asakusa. You walk around sites of Asakusa, and place your men to the sites. When there are already other player's men, you can kick them out by placing more number of your men! You can get income from the sites with your men when you arrive there again.
But please keep in mind that your men are of limited number -- to be the king of Asakusa, better business sense is also important as well as the power.
At the end of the game, the player of the most money (= winning points) wins.
Contents
25 cards (16 spot cards / 7 score track cards / 1 bonus table card / 1 GO card), 4 pawns (1 x 4 colors), 80 chips (20 x 4 colors), 7 shop markers, and this rule sheet.
There are 3 types of spot cards:
- 7 blue STREET cards
- 5 red SENSO-JI (*) spot cards
- 4 yellow TRANSPORTER cards
(* Senso-ji is one of the most significant temple in Tokyo found in 628 AD)
Preparation
Each spot card has a letter from A to P in top-left corner. Place these spot cards and GO card (total 17 cards) on the table in a circle with their faces up. This circle is regarded as the game board. Each player puts a pawn in the circle and proceeds clockwise.
- For the first game, we recommend placing the spot cards in alphabetical order (clockwise) and putting the GO card between the P and A cards.
- From the 2nd time, it is also good to shuffle all spot cards and the GO card together, and place them randomly.
- In games of 3 players, it is recommended to remove [A: Yougoudo] from the game so that only 16 (15+1) cards are in the circle.
Each STREET card in the circle has an area to show the stage of development. For example, in [J: Dembo-in st.], there are 4 spaces [+0][+2][1.5x][2x] that make up the development stage area. Put 7 shop markers to the [+0] spaces of all 7 STREETs.
Each player determines his/her color and takes 1 pawn and 20 chips of the color. The eldest player puts his/her pawn 1 space behind the GO card (please keep in mind that the direction of movement is clockwise). Then the 2nd eldest player puts his/her pawn 2 spaces behind the GO card, and the 3rd eldest player 3 spaces behind the GO card, and (in 4-player games) finally the youngest player 4 spaces behind the GO card. Because of the turn order rule as described below, the youngest player becomes the first player.
Next, make the score track. Each of the 7 score track cards has numbers to show players' winning points. Place them in serial order (with their faces up). Each player puts one of his/her chips on the [0] space at the top of the score track, and another one on the [+0] space at the bottom of the score track.
Finally, each player puts 9 of his/her remaining 18 chips inside the circle, and keeps the rest 9 chips in front of him/her. We call the chips inside of the circle the "STOCK", and the chips in front of each player the "HAND". Display the STOCK and HAND so that all players can easily see how many chips are there.
Place the bonus table cards next to the score track (facing up).
Player's Turn
The player whose pawn is in the rearmost spot becomes the turn player (here again, direction of movement is clockwise). The same player may play several turns in one stretch.
NB: The number of chips in STOCK has nothing to do with determining the rearmost player. It is determined only by "real" laps. But it is not necessary to count the lap number, because players never fall behind one lap.
As the turn player, you must move your pawn clockwise (forward) and stop at a spot with the following restrictions:
- The pawn cannot move one lap or more.
- The pawn cannot stop at a spot with another player's pawn (passing is ok).
- If you want to stop your pawn at a spot with another player's chips, you must have more chips in your HAND than the opponent's chips on the spot (passing is ok).
- GO card is not a spot, so it cannot be stopped at. Passing only.
When passing the GO card, you must take one chip of your own from STOCK and put it into your HAND. It takes place at the moment of passing, before stopping the pawn.
NB: All players must pass the GO card in their first turn. Thus, the virtual initial HAND is 10 chips rather than 9.
When there are no chips on the spot you stopped at: if you wish, you can take any number of chips from your HAND and put them on the spot. Chips on a spot show the current owner of the spot.
When there are chips of another player on the spot you stopped at: you must take more chips from your HAND and put them on the spot than the opponent's existing chips. The opponent's chips on the spot are returned to his/her HAND. It changes the owner of the spot. If the spot is a STREET, down the stage of development by one rank (if it is at [+0], it does not go down anymore).
When there are the turn player's chips on the spot you stopped at: choose one of the following alternatives. And then, if the spot is a STREET, move the shop marker up the stage of development by one rank (if it is at the highest rank, it does not go up anymore).
- Do nothing
- Take any number of chips from your HAND, and put them onto the spot.
- Take any number of chips from the spot, and return them to your HAND.
- Do the ACTION of the spot (as described in the next chapter)
With that, your turn ends.
ACTIONs
Yellow TRANSPORTERs:
By choosing "ACTION" in a TRANSPORTER spot, the player on the spot can use the function of the spot. Each TRANSPORTER has a different function. The name of the function is written at the bottom of the card.
- [Hand +1/-1 (C: Asakusa station)] Take 1 chip from your HAND and put it onto STOCK, or take one of your chips from STOCK and put it into your HAND.
- [Shop +1 (G: Yakatabune)] Choose a STREET that you own. Move the shop marker up the stage of development of the spot by 1 rank.
- [Closure (K: Water Bus)] Choose a spot that you own. Take any number of chips from the spot, and return them into your HAND. (Please see also the optional rule described below.)
- [Buy 1 (O: Rickshaw)] Choose an empty spot or a spot which an opponent owns (a spot with a pawn cannot be chosen). Put chips from your HAND by ordinal rule (thus, if it is an opponent's spot, you must put more chips than his/her chips on the spot, and the movement stage will go down if it is a STREET).
Blue STREET:
By choosing "ACTION" in a STREET spot, the player on the spot gets income (winning points) from the spot. The amount of income is determined by the "basic income" and the "scale factor".
Fundamentally, the basic income is calculated by "2 x the number of your chips in STOCK". However, each STREET has its own "max basic income" parameter written at the bottom of the card. For example, the max basic income parameter of [J: Dembo-in st.] is 12 (the information "[max: 12]" is written at the bottom of the card). Thus, even if there are 7 or more of your chips in STOCK, the basic income from Dembo-in st. is 12 (of course, for example, if there are only 4 chips in your STOCK, the basic income from Dembo-in st. is 8 [2 x 4]).
The scale factor is solely determined by the stage of development of the spot displayed by a shop marker. If the stage is [1.5x], the final income is calculated by "1.5 x basic income". When the stage is [+2], the final income will be "basic income + 2".
Red SENSO-JI:
By choosing "ACTION" in a SENSO-JI spot, the player on the spot gets income (winning points) from the spot.
The number of SENSO-JI spots that you own determines the amount of income. Each SENSO-JI spot has a table at the bottom of the card to show the relationship between the number of SENSO-JI spots of your own and the income from the spot.
For example, the table of [M: Asakusa-jinja] is "6|9|12|15|18". Thus, if you own 3 of 5 SENSO-JI spots (including [M: Asakusa-jinja] itself), then your income from [M: Asakusa-jinja] is 12 points.
The Score Track
When you get winning points (income), proceed your chip (not the one on the [+0][+100] space) on the score track by the number of the income.
If your total score becomes 100 or more points, move your chip on the [+0] space of the track to the [+100] space to keep the lap, move back your chip on the last space (99) of the track to the [0] space, and proceed it again.
When the last player moves his/her chip from [+0] to [+100] and all players' chips are on [+100], all of the chips are moved back from [+100] to [+0].
The End of the Game
At the end of a player's turn, if there are no his/her chips on STOCK, the game ends.
At the end of the game, each player gets bonus income depending on the number of spots of his/her own. See the Bonus Table card. For example, if it is a game of 4 players and you own 6 spots, you get 40 points as the bonus.
The player with the highest winning points wins. In the case of a tie, the player whose pawn is on the front most spot wins.
Negotiations
You can do negotiation freely, though it is not allowed to change (or pass over) your resources (chips, winning points, spots and so on). You don't have to stand to any promise.
Optional Rules
- If you feel [Closure (K: Water Bus)] is weaker than other TRANSPORTERs, change the function to "Choose a spot which you own. Take any number of chips from the spot and return them into your HAND, or take 1 chip from your HAND and put them on the spot."
- If you want a harder and more challenging game, abolish the Bonus Table.
Tips
- Negotiation between fewer winning points to attack the top player together is very important.
- TRANSPORTERs are strong, but costly. We advise you not to own unnecessary TRANSPORTERs.
- When you are at the bottom, utilize the position. It is possible to catch up if all other players allow it.
- Keep in mind that you can get decent income only from SENSO-JI spots (and [B: Rokku]) at endgame.
- Usually it is not good to beat someone up too early. A player who cannot win often acts beyond your expectation.
Here are some of the basic strategies:
- Get high-income spots like [M: Nakamise] in the beginning (also [Hand +1/-1] if possible), and shift gradually to SENSO-JI spots (and [B: Rokku]). It is the most natural strategy.
- Get 2 SENSO-JI spots and middle-income spots like [H: Park main st.] (and one TRANSPORTER -- the meaning of the strategy varies by the TRANSPORTER), and keep the situation as long as possible.
- Get as many SENSO-JI spots as possible. If it is possible, get also [Hand +1/-1] to add some more chips into your HAND. Keep in mind that it is a risky strategy.
- Get [Hand +1/-1] and cheap spots, add chips into your HAND, and get 7 spots just before the end of the game. It is a difficult strategy, so at the beginning of the game it had better to take another one.