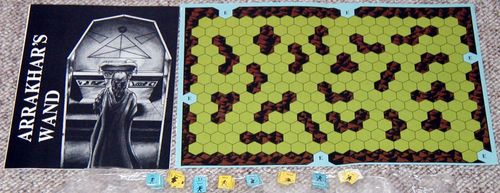
Arrakhar's Wand
Arrakhar's Wand Rulebook
Table of Contents
Table of Contents
Introduction
ARRAKHAR'S WAND is a fantasy boardgame of tactics and strategy for two players. One player (the sorcerer player) hides the wand in his realm and defends it with a group of evil sorcerers who can summon the aid of demons, orcs, and ghouls. The other player (the wizard player) invades with a force of good wizards, barbarians, dwarves, and elves, seeking to locate the wand and escape with it.
Before the play of the game begins, both players secretly design their forces. The board portrays the valley of the evil sorcerers, and on it the sorcerer player places the counters representing haunts (temples, ruins and crypts), secretly recording one of them as the haunt in which the wand is hidden. The counters representing the sorcerers and their minions are then placed on the board, and on the sorcerer player's first turn they can begin summoning other evil units. The wizard player brings in the wizard units and their allies through one or more of the hexes along the valley border, and the struggle begins.
Each side can attack with spells and by physical combat. The wizard player should usually try to strike quickly, before the sorcerer player can organize an effective resistance. Only the sorcerer player gets a steady stream of reinforcements, in the form of wandering-orc counters, but the wizard player has the advantage of special attacking bonuses. To win, the wizard player must locate the wand and remove it from the sorcerers' valley through an entry/exit hex.
Game Components
1.0 — The game includes this set of rules, the board, and a sheet of counters. Also required is one six-sided die, which must be supplied by the players.
1.1 — The board has three types of hexes: clear terrain, which may be moved into by all units; mountains, into which no movement is allowed; and entry/exit hexes (marked "E") used only by wizard-player units. Sorcerer-player units may never enter "E" hexes. Once a wizard-player unit enters clear terrain, it must remain on the board until it is eliminated by the enemy or until it leaves the playing area by exiting through an "E" hex. A unit that leaves the board in this manner may not return. "E" hexes are considered off the board; stacking restrictions (see 3.3) do not apply to units located on them, and no attacks may be made on or by units in these hexes.
1.2 — The four main types of counters (identifiable by color and initial letter) are these:
- Wizard-player units: 20 counters each of wizards, dwarves, barbarians, and elves.
- Sorcerer-player units: 20 counters each of sorcerers, demons, orcs, and ghouls.
- Wand: 2 counters (one is a spare).
- Haunts: 3 numbered counters of each type — temples (T), ruins (R), and crypts (C).
The countermix also includes pieces marked +2, +4, or +6, which are used to keep track of the effects of haste spells (see 3.6) on units and stacks of units, plus a few blank counters for each side, to aid in the replacement of lost or damaged pieces.
Note: The rules on the following pages pertain specifically to the Basic Scenario. Once they are understood, players will have no difficulty adapting them to other scenarios.
Set-up for Play
2.0 — The three steps in preparing for play are: designing forces (see 2.1); sorcerer-player force placement (2.2); and wizard-player force placement (2.3).
2.1 — Designing forces: Both players secretly design their forces out of unit counters (neither the wand nor the haunts are units). The point cost for a certain type of unit counter is given on the Counter Chart (see charts and tables page at the end of the rule text). Each unit available to a player costs either 1, 2, or 3 points. The point limit for a force depends on the scenario being played (see below). No units should be revealed to the opposing player until they are placed on the board. Once a unit is positioned on the board, its identity cannot be concealed.
The following restrictions apply to force design:
(1) For the Basic Scenario, the wizard player may not spend more than 60 points in designing his force, and the sorcerer player may not spend more than 66 points.
(2) Neither player can exceed the countermix, which provides 20 units of each type.
(3) The sorcerer player must include at least 6 counters of each of his four types of units in his force design. The wizard player must have at least four counters of each of his four types of units in his force design.
(4) All units not allocated to force design are set aside and out of play. (Exception: As explained later, the sorcerer player has a chance to receive wandering-orc reinforcements on each turn of the game; these units can be taken from orc units not part of the sorcerer-player's force design.)
2.2 — Sorcerer-player force placement: The sorcerer player first takes all haunts numbered "1" or "2" (two each of the temples, ruins, and crypts) and places them on the board. (Haunts numbered "3" are not used in the Basic Scenario.) Haunts must be placed in clear terrain hexes; they may not be placed within a two-hex radius from an "E" hex, and one haunt cannot be located within a three-hex radius from another haunt. This three-hex distance is counted through clear terrain only, not over or through mountain hexes; haunts can be placed so that they are separated by only one hex, so long as that is a mountain hex, and a path more than three hexes long through clear terrain is required to move from one haunt to another. (For movement, hexes containing haunts are treated as clear terrain.) Next, the sorcerer player secretly records (by type and number) the haunt in which the wand is hidden.
Then the sorcerer player places all the sorcerer units in his designed force — but not any demons, orcs, or ghouls in the designed force — on clear-terrain hexes. Sorcerer units may not be placed within a two-hex radius from an "E" hex. Up to four sorcerer units may be placed in the same hex (see 3.3).
Other units in the sorcerer player's designed force are set aside until they may be brought into play by a Summon spell (see 3.2).
2.3 — Wizard-player force placement: The wizard player places all of his units on the board in "E" hexes; the sorcerer player may examine the counters after they are placed on their respective "E" hexes to determine the makeup of the wizard player's force. The wizard player may keep all of his units in one group (entering through only one "E" hex) or he may divide them into as many as six groups (one group entering through each "E" hex). All of the wizard-player units committed to enter through a given "E" hex are considered to be located in that hex before movement begins, but since "E" hexes are considered off the board (see 1.1), stacking limitations (see 3.3) do not need to be met until wizard units actually enter the valley and complete one turn of movement. No wizard unit spends movement points until it enters its first hex of clear terrain; placement in an "E" hex does not constitute movement.
The Game-Turn
3.0 — A game-turn consists of a sorcerer-player phase followed by a wizard-player phase. Neither player engages in any activity during the opposing player's phase. Each phase consists of five segments which must be carried out in strict sequence:
Sorcerer-player phase:
- Wandering-orc check (3.1)
- Summon spells (3.2)
- Movement (3.3)
- Fireball spells (3.4)
- Combat (3.5)
Wizard-player phase:
- Haste spells (3.6)
- Movement (3.3)
- Fireball spells (3.4)
- Combat (3.5)
- Haunt check (3.7)
3.1 — Wandering-orc check: At the beginning of each game-turn, the sorcerer player rolls one die. On a result of 1 or 2, the sorcerer player receives 1 orc counter as reinforcements for that turn. On a result of 3 or higher, 2 new orc units enter the game. Wandering-orc units are immediately placed on the board in either (1) any empty clear-terrain hex adjacent to any sorcerer-player unit, or (2) any hex already containing orc units (up to a limit of four units per hex). Wandering-orc units are not taken from the sorcerer player's designed force; they are taken either from the supply of unused counters or from orc units previously eliminated.
The supply of reinforcements is limited by the counter-mix; if all 20 orc units are already on the board, the sorcerer player can receive no reinforcements until the turn after one or more orc units are eliminated.
3.2 — Summon spells: This type of magic is only usable by sorcerer units, and is one of the two spells sorcerers may cast; however, each sorcerer unit can only cast one spell per turn.
A summon spell is the only means by which the demons, orcs, and ghouls in the sorcerer player's designed force may be brought into play. (The sorcerer player should conceal from his opponent the identity of these units until they enter the game.) Each type of unit may be summoned only at, and into, hexes occupied by one type of haunt: Demons may be summoned only at temples, orcs only at ruins, and ghouls only at crypts.
For the spell to be effective, three conditions must be met:
(1) A sorcerer unit must be adjacent to a haunt for which a summon spell is to be cast.
(2) There must be at least 1 unit of the type that can be summoned at that haunt still available in the sorcerer player's designed force.
(3) The hex containing the haunt must be either empty of units or occupied by three or fewer units of the type that can be summoned at the haunt.
For one casting of the spell by a single sorcerer unit, the sorcerer player must first designate the haunt in which the summoning is to take place and the sorcerer unit that is to cast the spell (if more than one is eligible). Then the sorcerer player rolls a die and consults the Summon Table to see whether he may place 2, 3, or 4 of the appropriate units on the board (in the hex of the haunt).
The sorcerer player may bring in fewer units than the number indicated by the table if he so desires. The sorcerer player must summon fewer units than the number indicated by the table if either (1) he has an insufficient number of available units of the appropriate type left in his designed force, or (2) to bring in the indicated number would cause five or more units to be stacked in the hex of the haunt. (If the sorcerer player summons fewer units than the number on the table indicates, and it is clearly not due to stacking limits, he need not reveal to the wizard player whether this action was the player's choice or was taken because he has run out of that type of unit.)
Only one summon spell may be cast at each haunt per turn. Because this spell can work only if a sorcerer is adjacent to a haunt in this segment (before sorcerer-player movement), it is a good idea for the sorcerer player to place at least some of his sorcerers next to haunts during his original placement of haunts and sorcerers (2.2). Sorcerer units that cast a spell should be inverted immediately, for the rest of the current phase, to remind players that they cannot cast another spell this turn.
3.3 — Movement: The rules governing movement are the same for both players. The Counter Chart shows that barbarians and demons have a movement capability of 6 hexes per turn, and all other units can move up to 4 hexes per turn. Units may be moved into any clear-terrain hex (including a hex containing a haunt) that is not occupied by an enemy unit (there are no "zones of control"). Wizard-player units spend their first movement point when they enter the board from an "E" hex; sorcerer-player units spend their first movement point when they move from their initial placement (for sorcerer units) or when they move away from the haunt in which they were summoned (for demons, orcs, and ghouls). Haunts, of course, can never move, and the wand can only be moved if it is being carried by a wizard-player unit.
Movement is always optional; units cannot "store up" movement points from turn to turn or transfer them from one unit to another.
At the end of a player's movement segment, only units of the same type may occupy the same hex, and there may be no more than 4 units per hex. On the first turn only, sorcerer-player units may not end their movement within 2 hexes of an "E" hex. Units may move freely through hexes containing friendly units, but may not violate end-of-movement stacking restrictions.
3.4 — Fireball spells: The rules governing fireball spells are the same for both players. Both wizards and sorcerers may cast fireball spells in the appropriate segments of their respective phases. However, neither type of spell-caster can employ more than one spell per turn.
Fireball spells are the only means by which wizard and sorcerer units can attack enemy units; they cannot engage in combat (3.5) like other units. The fireball spell has a range of 2 hexes; it can be cast on opposing units in a hex adjacent to the wizard or sorcerer, or on opposing units one hex removed, as long as a two-hex-long path of clear terrain can be traced from the caster to the target. The spell can be cast "over" an adjacent hex, not affecting the units in that hex, if the adjacent hex happens to be in line with the target hex.
To cast the spell for a single sorcerer unit or wizard unit, the phasing player designates the spell-caster and the target hex (which must be done for all fireball attacks before any of them can be resolved; see below), and then rolls one die for each unit in the target hex and refers to the Fireball Table to obtain a result for that unit only against that specific attack. For example: If a wizard is casting a fireball spell against a stack of three ghouls, each ghoul unit is rolled for to see whether it is eliminated or not. (Obviously, the spell is most useful against stacks of units, even though it is far from "automatic" that every unit in a stack would be eliminated.) Note that barbarians and demons are the least susceptible to fireball attacks, and sorcerers are more vulnerable to an opponent's fireball than wizards are.
In either player's appropriate segment, all fireball attacks must be designated before the results of any single spell are rolled for. If more than one fireball attack is directed against a single target hex, only units that survive the first attack(s) are rolled for when resolving subsequent attacks. For example, if 3 wizards are all casting fireball spells against a stack of 4 orcs, the first attack is resolved with three die rolls. If two orcs are eliminated in the first attack, only one die roll is needed to resolve the second attack. If the first two attacks result in the elimination of all three units, the third fireball is wasted and cannot be re-directed at a different hex.
Wizards or sorcerers stacked together may cast fireball spells at different target hexes. The spell may be cast into or out of hexes containing haunts, but not into or out of "E" hexes. A fireball spell has no effect on haunts or on the wand.
3.5 — Combat: The rules governing combat are the same for both players. Combat is always optional on the part of the would-be attacker, and never causes the elimination of an attacking unit. The basic rules concerning combat are these:
An attacking unit (or stack) must be adjacent to a defending unit (or stack) to engage in combat.
All attacks must be designated before any are resolved by rolling on the Combat Table.
Units stacked in the same hex can "split" their attacks against adjacent enemy units in the same or different hexes, but each unit may only attack once per turn.
Units in two separate hexes can combine in a mass attack against one or more units in a single hex.
The same unit may be announced as the object of more than one attack in a given turn; however, if the target unit is eliminated by an earlier attack, subsequent attacks are wasted and cannot be re-directed against a unit which has not been eliminated.
Not all units adjacent to an attacking force need be attacked; one or more of the units in a single hex may be "ignored" during an attack on other units in the same hex.
As shown in the Counter Chart, barbarians and demons each have a combat factor of 2; dwarves, elves, orcs, and ghouls each have a combat factor of 1.
Wizards and sorcerers have a combat factor of ½, but these units may not attack in combat — their factors are used only in figuring odds for combat attacks made against them.
To resolve each attack, the attacking player compares the total of the combat factors of the attacking unit(s) to the total of the combat factors of the defending unit(s), expressing it as a ratio (always rounded down in favor of the defending units). The attacking player then rolls a die, consults the table, and applies the result to the defending units. Attacks at odds greater than 6:1 are treated as 6:1; attacks at odds less than 1:2 are not allowed.
If all the units in a hex are eliminated, any units that attacked that hex (up to four of one type) may advance into the hex vacated by the eliminated units. Special: If all units in a hex were eliminated by fireball spells in the segment immediately preceding combat, any of the phasing player's units adjacent to the now-vacant hex (up to four of one type) may be moved into the vacant hex; however, units that do this may not attack during the current combat segment.
Each type of wizard-player unit receives a combat bonus against one type of sorcerer-player unit. As noted earlier (3.4), fireball spells cast by wizards are especially dangerous to sorcerers. In regular combat, barbarians receive a bonus vs. demons, dwarves have a bonus vs. orcs, and elves have a bonus vs. ghouls. Whenever all the attacking and defending units in a single attack (made by the wizard player) are of the specified types (barbarians vs. demons, dwarves vs. orcs, or elves vs. ghouls), the attack result is read as if the odds were one step better (for the attacker) than they actually are (an attack at 1:2 becomes 1:1; 1:1 becomes 2:1, etc.).
The combat bonus does not work both ways; sorcerer-player units always attack at the regular odds. The combat bonus does not apply if two different types of wizard-player units are participating in the same attack.
Some examples of the calculation of combat odds are given in the next column. It should be noted that there is never more than one type of unit defending against an attack, because each attack is made against one or more units in the same hex, and stacking restrictions do not allow different types of units to be stacked in the same hex. By referring to the combat factors and combat bonuses listed in the Counter Chart, players should see why the odds listed for each attack are appropriate.
| Attacker(s) | Defender(s) | Odds |
|---|---|---|
| 2 elves | 2 ghouls | 2:1 |
| 2 ghouls | 2 elves | 1:1 |
| 1 elf, 1 dwarf | 2 ghouls | 1:1 |
| 3 barbarians | 3 sorcerers | 4:1 |
| 2 barbarians | 3 sorcerers | 2:1 (note 1) |
| 4 wizards | 1 orc | — (note 2) |
| 1 dwarf | 3 ghouls | — (note 3) |
| 4 barbarians | 1 orc | 6:1 (note 4) |
| 3 orcs |
Notes to the combat odds table:
- Rounded in favor of the defender.
- Not allowed; wizards can't attack in combat.
- Not allowed; odds are less than 1:2.
- Best ratio possible, even though actual odds are 8:1.
3.6 — Haste spells: This type of magic is only usable by wizard units, and is one of the two spells wizards may cast; however, each wizard unit can only cast one spell per turn.
A Haste spell enables a wizard to give a single stack of wizard-player units (up to four of the same type in the same hex) a bonus of 2, 4, or 6 hexes to the movement capability of each of the target units for the movement segment that immediately follows the haste spell segment. The target hex must be the same hex the spell-caster is occupying (if the spell-caster and/or other wizards are being hasted), or an adjacent hex containing friendly units. Wizards stacked in the same hex may cast haste spells on units in separate hexes.
No units can be under the effect of more than one haste spell per turn, but the same target unit(s) can be the object of more than one casting of the haste spell. For example: If the result of the first casting is a movement bonus of 2 or 4 for the affected units, a subsequent haste spell cast on the same units in the same segment might yield a higher result, and in that case the higher result would apply. If the result of the first casting is a movement bonus of 6, subsequent spells cast on the same units are effectively wasted and cannot be applied to a different target. The counters printed +2, +4, and +6 are used to keep track of the movement bonus a certain unit or stack will receive in the ensuing movement phase.
To cast the spell, the wizard player first designates the casting wizard and the hex whose units are to be hasted. This designation must be announced for each intended casting of the spell before any of the spells are resolved. Then the wizard player rolls a die and consults the Haste Table for each casting, in any order the wizard player desires.
Units in a hasted stack need not move to the same destination hex. At the conclusion of movement, stacking restrictions must be observed. Since this spell segment comes immediately before the wizard-player movement segment, the haste spell is useful to give wizard-player units "long-range strike capabilities."
Wizard units that cast haste spells should be inverted immediately, for the rest of the current phase, as a reminder to players that they cannot cast another spell this turn.
Special: A wizard in an "E" hex at the start of the wizard player's first turn may cast a haste spell on up to four units of the same type to be entered through the same "E" hex.
3.7 — Haunt check: This final segment of the wizard player's phase comes into play only when at least one haunt is currently occupied by wizard-player units. A haunt check is not conducted if the wizard-player unit(s) is simply moved through a hex containing a haunt.
Each occupied haunt is "destroyed" (the counter is removed from play) and the sorcerer player must reveal the location of the wand if the haunt that contained it was destroyed. (Players, of course, will never cheat; in any event, the sorcerer player could be required to produce the notation he made during set-up (see 2.2), after the game is over.)
If a destroyed haunt did contain the wand, the wand counter is brought into play and stacked with the unit(s) that occupied the hiding place.
Note: If the wizard player eliminates all haunts of a certain type, the sorcerer player cannot summon any more units of the type corresponding to that type of haunt (see 3.2). Haunt checks can be conducted, and haunts can be destroyed for this purpose, even after the wand has been discovered.
The Wand
4.0 — The counter of Arrakhar's Wand can only be moved if it is stacked with at least one wizard-player unit (not necessarily a wizard). It can be moved by one carrier (one wizard-player unit or stack) each turn, when that unit or stack moves. The wand may be "handed off" from a stationary carrier to a unit or stack which is moving through the carrier's hex, but only if the stationary carrier has not already moved in that turn. (The unit or stack receiving the wand becomes the new carrier, and must have movement capability left so that it can leave the hex where the transfer took place.)
The wand's power will function only for wizard units — not any wizard-player unit, although they can all be carriers. A wizard unit or stack possessing the wand can cast a single "extra" spell — in effect, a more potent version of the fireball spell — once per turn during the wizard-player's fireball-spell phase. The effects of the wand fireball spell are rolled for on the Wand Table instead of the Fireball Table. Even if the wand is carried by a stack of wizards, only one wand fireball spell may be cast per turn.
Sorcerer-player units can retake the wand after it is discovered by eliminating all the wizard-player units in the hex containing the wand, and then occupying that hex (possibly by an advance after combat) with at least one sorcerer-player unit. The sorcerer player cannot move or use the wand, but can cluster units in and around the hex it occupies to keep it away from wizard-player units. If the wand is in an otherwise empty hex, it is simply left there until other units enter the hex.
The wizard player wins by carrying the wand into an "E" hex and thereby escaping to safety. The sorcerer player wins by eliminating all wizard-player units, keeping the wand in his clutches even if he can't do a thing with it.
Notes on Strategy and Tactics
Although there is no turn limit to the game, it is obvious that the wizard player must achieve victory before the sorcerer player's constant reinforcements make such a result impossible. Usually the sorcerer player will place the haunts in the shape of a rough circle around the board. After the wizard player places his forces at "E" hexes, the sorcerer player will summon demons, orcs and ghouls to block off access to the haunts and the vulnerable sorcerer units. (Even a single sorcerer-player unit can block an advance, as a sacrifice to buy time for summoning and effectively deploying other sorcerer-player units.) If the wizard player cannot establish an edge in eliminated units early on, he will find victory difficult to achieve.
Alternatively, the sorcerer player might place haunts in a tight pattern, intending to hole up in a corner of the valley and fight a war of attrition. Or, he might spread haunts and sorcerers far and wide, turning the contest into more of a bluffing match.
If the sorcerer player, by an exaggerated deployment of units, clearly indicates the haunt in which the wand is hidden — and such is actually the case — it is possible that the wand will not come into play until (or unless) the larger issue is already decided; such a "last stand" defense will usually result in a clear victory for one side or the other through decimation of the loser's units. (But what if the wand turns out to be in one of the haunts that isn't even defended, and which the wizard player hasn't bothered to check?)
Much of the tactical approach to a game is dictated by the initial force design. Both the heavy-duty shock troops (barbarians and demons) and the fireball artillery (wizards and sorcerers) are attractive, but also expensive. The other units can be useful for blocking avenues of attack; this becomes especially important as more units are eliminated.
Variations
-
Short Scenario. Initial force points: Wizard 40, Sorcerer 44. The sorcerer player is only required to have four of each type of unit in his force design; the wizard player is only required to have three of each type of unit in his force design. All other rules of the Basic Scenario apply.
-
Long Scenario. Initial force points: Wizard 90, Sorcerer 100. The sorcerer player is required to have nine of each type of unit in his force design; the wizard player is required to have six of each type of unit in his force design. The sorcerer player places all haunts (three of each type) on the board. All other rules of the Basic Scenario apply.
-
Advanced Play. This rule change can be applied to all scenarios. In designing forces, players are not required to have a minimum number of units of a given type. They are restricted only by the countermix and the point limit of the scenario being played, whether it is one given here or one of the players' devising.
-
Handicapping. Reduce the number of force-design points available to the more experienced player (for a shorter game), or increase the number of force-design points available to the less experienced player (for a longer game). If either the wizard-player side or the sorcerer-player side wins too often for a given set of players, adjust the design points available to the sorcerer player up or down in increments of two points.
Transcriber's Note on Missing Tables
The rules refer to a Counter Chart, a Summon Table, a Fireball Table, a Haste Table, and a Wand Table, which the magazine printed on a separate charts-and-tables page. That page is not in the scanned copy and is not transcribed here. The movement allowances, combat factors, and combat bonuses that the Counter Chart would list are stated in the rules text above (3.3, 3.5). The combat odds table printed on page 50 is reproduced in 3.5. The Summon, Fireball, Haste, and Wand Table results are not available in this source.