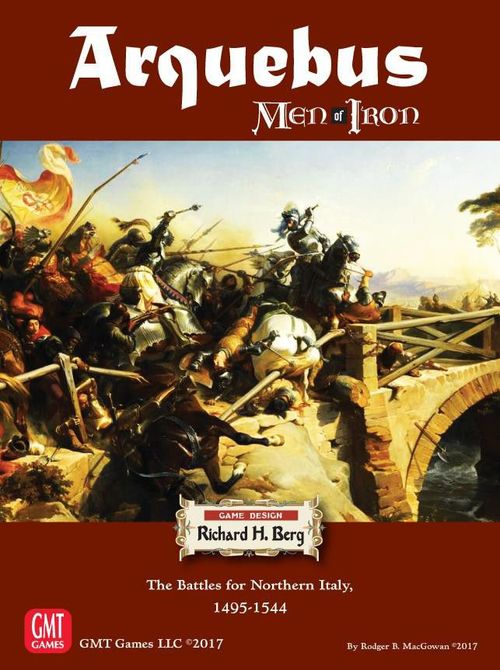
Arquebus: Men of Iron Volume IV – The Battles for Northern Italy 1495-1544
Arquebus: Men of Iron Volume IV – The Battles for Northern Italy 1495-1544 Rulebook
Table of Contents
Table of Contents
- Rules Manual
- 1.0 Introduction
- 2.0 The Components
- 3.0 Victory
- 4.0 Sequence of Play
- 5.0 Leaders & Command
- 6.0 Activation & Continuity
- 7.0 Movement
- 8.0 Facing
- 9.0 Zones of Control (ZOC)
- 10.0 Stacking
- 11.0 Missile Fire
- 12.0 Shock
- 13.0 Charging & Counter-Charging
- 14.0 Combat Results
- 15.0 Rallying Units
- 16.0 Special Rules
- Battle Book
Rules Manual
1.0 Introduction
Men of Iron is a play-oriented series of games covering the wide spectrum of land battles from, roughly, the era just prior to the first Crusades to the arrival of gunpowder. This is a historical simulation game, not so much intended to show What happened, but Why things occurred as they did. The purpose of the Men of Iron series is to provide gamers with accessible, fast-playing, fun games of low complexity. To that end, much detail has been either omitted or factored into overall mechanics. We have tried to provide as much period flavor and historical accuracy as we can, within that stated focus.
The fourth volume in the series, Arquebus, focuses on the battles fought in Northern Italy between France and Spain, among many others, who were fighting for control of Milan and other cities, between 1495 and 1525. This was a turning point in warfare, where hand-held firearms—the arquebus (mostly)—appeared on the battlefield in noticeable and effective numbers and the pike-armed square formations of infantry replaced the armored, mounted men-at-arms as the key element of battle effectiveness.
Getting into the game: Veteran gamers will find most of the rules quite familiar, as they use concepts basic to almost all simulation games. The sections on Continuation and some of the combat mechanics are not quite as familiar. Gamers new to the hobby should read once through the rules so they know the basic premises, pick out a scenario, and play a few turns to see how everything works.
Components: A complete game of Arquebus includes:
- Two 34" x 16" game-maps, back-printed
- 840 counters on three sheets
- Two identical 11" x 25.5" Player Aid Cards
- One 8.5" x 11" Player Aid Card
- One Rules Manual
- One Battle Book
- Two ten-sided dice
Leaders have a variety of ratings. These are discussed in section 5.2. Units have multiple ratings as shown on the sample counters. There are several different types of units, divided into two groups: mounted units and foot units. The reverse side of each unit is its Disordered side. Exception: Artillery have no Disordered side.
Sample Leader ratings: Name & Command Stripe, Nationality (color), Overall Commander, Effectiveness, Activation Rating, Command Range, Movement Allowance, Charisma.
Sample Combat Unit (PK): front side shows Missile Fire DRM & Missile Type, Unit ID Number, Nationality (color), Command Stripe, Shock Defense DRM, Unit Type, Movement Allowance. The back of a PK Combat Unit (Disordered side) shows Missile Fire DRM & Missile Type, Disordered Symbol, Disordered Shock Defense DRM, Disordered Movement Allowance.
Unit Types in Arquebus: Arquebus (AQ), Crossbow (CB), Genitors (GE), Longbow (LB), Spanish LC with Javelins, Light Cavalry (LC), Light Cavalry Archers (LC/A), Mounted Arquebus (MAQ) — when they dismount, they are replaced by the corresponding AQ counter (same Command Stripe and counter number) with a horse in the background, Mounted Crossbow (MCB) — when they dismount, they are replaced by the corresponding CB counter (same Command Stripe and counter number) with a horse in the background, Men-at-Arms (MM), Pike (PK) (come in three types: No Missile, CB, and AQ), Sappers (SP), Sword & Buckler (SB) (come in three types: No Missile, CB, and AQ), Skirmishers (SK), Stradiotti Cavalry (STR), Falconet artillery, Saker artillery, Culverin artillery, Heavy Cannon artillery, Organ Gun artillery, Gun Wagons, Baggage Wagons.
2.0 The Components
See 2.5 for detailed descriptions of each type of unit included in the game.
Missile Types in Arquebus: A: Composite bow · AQ: Arquebus, early type of hand-held musket firearm · CB: Crossbows · LB: Longbows · J: Javelins · F: Falconet · S: Saker · C: Culverin · OG: Organ Gun · H: Heavy Cannon
Markers: Charge, Counter-Charge Used, Retired, Continued Attack, Shock Attack –1, Out of Command, Number of Successful Continuations, Flight Points, Current Flight Level, Standard (Venice) (Spain) (France), Charge No Move, No Arquebus, Arquebus Fired, Engaged, Road Filled.
2.1 The Maps
The game maps cover the area over which the battles were fought. Each map is overlaid with a grid of hexagons—hexes—that are used to regulate movement and fire. Terrain specifics and peculiarities are discussed in the rules (in the Battle Book) for the individual battles.
2.2 The Counters
The game has four types of counters: leaders, units, Standards, and markers (both informational and status).
2.3 The Die
The game uses a ten-sided die to resolve combat and other factors for which performance will vary. A '0' is a "zero", not a "ten".
2.4 Definitions & Abbreviations
It might help to be familiar with the following game terms, some of which are found in individual battles only:
Activation: All the Moving, Firing, and Attacks of one Battle (or Army), during which some of the opponent's units may react. This also includes Rallying with a Standard. N.B. See the definition of a Battle on this page.
Activation Rating: The number on a leader used for Continuation and some other game functions. It ranges from 1 to 5; most leaders have a value of 2 or 3.
Active: The leader and all units of the Battle (or Army) which are Activated (see Activation above).
Active player: The player who is currently Activating his Battles. The other player is the Non-Active player.
Army Activation: A method for Activating and moving more than one Battle at a time.
Battle: The individual "divisions" of any army. Each Battle is an individual "command", usually with its own leader. Battles can be identified by the color stripe on the counters.
Design Note: In an attempt to avoid the confusion that will inevitably occur, the word battle beginning with a lower case 'b' will be used exclusively to refer to a scenario (a historical battle). Any reference to battle that begins with an upper case 'B' is covered by the definition of Battle above, except when referencing the Battle Book.
Blocking Terrain: Terrain in a hex which blocks LOS, see 11.4 for a complete list.
Battle leader: A leader of a specific group of units. See section 5.1.
Charge Path: A series of hexes between a Charging, or Counter-Charging, unit and its target. See section 13.3.
Charisma: A number on a leader counter which represents the ability of a leader to inspire troops in combat. See section 5.2.
Command Range: A number on a leader representing the number of hexes over which that leader can command his units. See section 5.2.
Continuity/Continuation: The mechanic used by the Active player to attempt further Activation after completing an Activation.
Disengage: An Engaged unit moving away from the unit(s) it is Engaged with. See section 14.5.
Disordered: The state of a unit that has lost cohesion due to combat or movement through difficult terrain. See section 14.2.
Displaced: When leaders end up alone in a hex due to a combat effect or when enemy units enter their hex. See section 5.4.
DR, DRM: Abbreviations for "die roll" and die roll modifier. DRM is a plus or minus number used to adjust the die roll.
Effectiveness: A number on an Overall Commander (OC) indicating his ability to help subordinates Activate. See section 5.2.
Engaged: Units locked in combat after an initial Shock or Charge attack. See section 14.5.
Foot Unit: All Arquebus (excluding Mounted), Artillery, Baggage Wagons, Crossbow (excluding Mounted), Gun Wagons, Longbow, Pike, Sapper, Skirmisher, and Sword & Buckler units are foot units.
FP (Flight Points): See section 3.0 Victory.
Free Activation: A non-Continuation/non-Seized Activation. It is a Free Activation if it is the first Activation of the game, or the Activation that follows the opposing Player Passing or failing a Continuation or Seizure roll.
In Command: A unit in its leader's Command Range or adjacent to a unit of its Battle that is in its leader's Command Range. See section 5.2.
Leader Casualty Check: The DR to determine if a leader dies in combat. See section 5.4.
Loss Check: The DR to see if a player loses the game. See section 3.0.
Missile Unit: Any units with a missile type on the counter are missile units.
Mounted Unit: All Genitor, Light Cavalry (including LC/A), Mounted Arquebus, Mounted Crossbow, Men-at-Arms, and Stradioti Cavalry units are mounted units.
OC (Overall Commander): The army Commander. See section 5.1.
Out of Command: A unit outside its leader's Command Range and not considered in its leader's Command Range via the Command rules in 5.2. Out of Command units have some restrictions, see 5.3.
Rally: The act of re-organizing a Disordered unit into its normal state. In addition, Rally is the term used for reviving the fighting spirit of a Retired unit by removing a Retired marker. See section 15.0.
Seizure: The game mechanic wherein one player tries to take away the other player's Activation . . .or what happens to a player who rolls seven straight 0's on Shock attack rolls.
Shock: A term for hand-to-hand combat… or what happens to a player whose opponent rolls seven straight nines.
Shock Defense DRM: A DRM for a unit indicating that unit's level of training, discipline, and joie de guerre. For some Swiss units, it indicates whether they've been paid or not. Really.
Standard: The rallying point for units of an army. In most battles, each army will have one Standard that is used by all of its units. At Pavia, each army has two Standards, see the battle-specific rules in the battle book for which units use each Standard. See section 15.2.
Surrounded: When all hexes adjacent to a unit or leader are occupied by enemy units, impassable terrain (to it), or map edges.
2.5 Unit Types & Military Terms
Knowledge of the following types of units/terms will be useful for play.
Arquebusiers: Arquebus-armed infantry slowly—and ultimately—totally replaced archers and crossbowmen. At the battle of Pavia, Arquebus-armed infantry revealed the eventual future of warfare, which only came about when the Dutch and Asian armies—primarily the Japanese—developed volley fire. However, volley fire was not in use during the time period of this game. Once volley fire developed, the arquebus went from being a support weapon to the primary component of most early modern armies… as the games in Ben Hull's and GMT's Musket and Pike series show. Here, we're giving you a "sneak-peek" of a coming attraction.
Archers and Crossbowmen: These units were still present in 16th century armies—most crossbowmen in this period were mounted, and may even have fought that way. Although it was extremely difficult to cock a crossbow while mounted and significantly reduced their capabilities. Plate armor had substantially reduced the effect of the vaunted longbow. Crossbows took far more time to wind and fire than an arquebus, which had similar penetrative abilities but a far lower rate of fire. In the earlier battles of this time period, some armies did field small troops of these missile-throwers of yore.
Artillery: Artillery came in many different sizes, as there was no standardization of gun calibers. Guns were named for size ranges from smallest to largest—Falconets, Sakers, Culverins, and Heavy Cannon. While some accounts from the time discuss the effectiveness of artillery in battle, the data does not seem to support this effectiveness. Organ Guns consist of multiple smaller barrels connected side by side, much like a double-barreled shotgun, but with up to nine barrels.
Genitor: Light cavalry, much in the style of the Moorish horse the Spanish fought for centuries. Genitors were javelin-armed, used for throwing. They excelled in skirmish hit-and-run tactics but were most reluctant to engage in shock against heavy troops. You will observe that they were relatively useless, for the most part, against the armies of the Italian Wars.
Gun Wagon: The war wagon was a medieval development during the Hussite Wars around 1420 by Hussite forces rebelling in Bohemia. It was a heavy wagon given protective sides with firing slits and heavy firepower from either a cannon or a force of hand-gunners. Groups of them could form defensive works, as at Ravenna.
Light Cavalry: Units in this game designated simply as LC are cavalry troops with little armor and few weapons. They were un-suited for Shock combat and were used primarily for reconnaissance and screening duties. Some were armed with bows and therefore useful for skirmishing during a battle. We call these units LC/A.
Pike: Close formation infantry armed with a long pike or spear, usually protected by some armor, mostly heavy-leather quilted jerkins. They primarily fought in closely-packed multiple-ranked formation, while brandishing pikes or spears. Only the first 4-5 ranks had any significant battle impact. The numerous ranks in the middle and rear of the formation were there to exert pressure and momentum. At the same time, these troops replaced the fallen dead and wounded from the front lines. These formations were usually preceded or accompanied by crossbowmen and arquebusiers. These additional troops were often included within the ranks or deployed as "sleeves" on the perimeter of the formation. As time passed, arquebusiers completely replaced crossbowmen in this position.
Men-at-Arms: The strike force and main shock weapon of every army at the end of the 15th century was its heavy cavalry. These men were completely covered by plate armor and mounted on equally armored (barded) horses, armed with with a lance of up to 18 feet that invariably broke on the initial charge. Other common weaponry was a mace and perhaps a long sword. These men were the elite of the army. It was not unusual for them to fight dismounted, especially if terrain was not conducive to charging cavalry. By the beginning of the 16th century, men-at-arms fighting dismounted was a rarity due to their limited mobility in full armor. The men moved too slowly while so heavily dressed. By the end of the Italian Wars, infantry—pikes and shot—had replaced cavalry as the foremost battlefield weapons system.
Mounted Crossbowmen/Arquebusiers: Many armies did field small—and occasionally larger—contingents of these men. The lighter, more modern crossbow could be fired while mounted, as opposed to the much larger longbow. Mounted arquebusiers were used as skirmishers by some armies. It appears that mounted arqubusiers fought dismounted, due to the difficulty of reloading while mounted. They would ride to battle and fight as "mounted infantry". The invention of the pistol changed all of this.
Stradiotti: Mercenary light cavalry recruited from the Balkans, where they had likely adapted similar tactics from the Ottoman Sipahis and Akinci light cavalry. The stradiot appears to have been more heavily armed than the genitor, favoring hand weapons such as mace and sword. The Italians used them as skirmishers and raiders, and as a vanguard strike force (as at the battle of Fornovo).
Sword & Buckler: Open formation infantry generally armed with a long slashing/thrusting sword and buckler. A buckler is a small circular shield, held opposite the sword, used to smash into the face of the enemy. Sword & Buckler troops wore some armor. The formations included groups of crossbowmen, and as time went on, crossbowmen were gradually replaced by arquebusiers. The Spanish infantry had much higher percentages of arquebusiers by 1525. These formations proved to be effective against the Swiss pikes in much the same way as Roman legions were against the Greek phalanx. The Roman "Spanish" sword, the gladius, was dominant against the Greek spear; especially when the swordsmen got past (through and under) the spears. To effectively fight with a sword took practice, and along with the English longbow, the sword became a less desirable weapon than pikes and arquebuses. These weapons required less practice, which allowed troops to be mustered and trained more quickly.
2.6 The Scale
The map scale is approximately 100-125 yards per hex.
The numerical strength of units is relative, not absolute. The number of men depends much on the depths and rank, which often went as far back as 24 rows. An infantry formation of pike would contain about 500 men, although it could contain more than 1000 pikemen: these men were tightly packed, with each man taking up maybe 2 yards at most (probably less), for a frontage of, say, 75 yards; just do the math. The pike formations were often protected by either horns (at the corners) or sleeves (all around) of, at first, archers/crossbowmen, but eventually arquebusiers. The percentage of the latter varied from lower than 10% for the Swiss—who disdained such frivolities—to about 25% for the eventually-vaunted Spanish.
Missile-armed troops, especially arquebusiers, did not fight in a tightly packed formation and represent around 300-400 men. Men-at-arms units represent about 150-200 men. We have grouped cannon into pseudo-batteries of 4-6 guns, depending on the situation.
There is no time scale, as there are no turns, in the historical game sense. Most battles rarely lasted more than a couple of hours.
3.0 Victory
Victory is primarily achieved by eliminating enemy units and named leaders. At the end of every Free Activation, the players check if the conditions of victory have been fulfilled.
Each Eliminated unit or leader costs the owning side a number of Flight Points, as listed below. The accumulation of Flight Points should be tracked as they occur on the Flight Point Track.
At the end of every Free Activation each player makes a Loss Check by rolling one die and adding their Flight Point total. If the DR plus Flight Point total is greater than the Flight Level of that player in this battle, he loses. If both players' totals exceed their Flight Level simultaneously the battle is a draw. For much of the early parts of the game, Loss Checks will be unnecessary as players will be unable to exceed their Flight Level with their current Flight Point total plus the roll of one die.
Flight Points (FP):
- 5 FP for the player's Overall Commander being Eliminated (5.4).
- 10 FP if it is a King.
- 5 FP for each Eliminated Pike infantry or Sword & Buckler infantry, even if the infantry has AQ or CB missile weapons.
- 3 FP for each Eliminated Men-at-Arms, Mounted Arquebus, or Arquebus infantry.
- 2 FP for each Eliminated Crossbow infantry, Genitor Cavalry, Light Cavalry Archers, Mounted Crossbow, Stradiotti Cavalry, or named Battle leader (other than an OC or King).
- 1 FP for each Eliminated Artillery unit, Gun Wagon, Light Cavalry, or Longbow infantry.
- 0 FP for each Eliminated Skirmisher or Sapper.
- 1 FP for each Retired unit regardless of type. If a unit is rallied out of Retired status, adjust the Flight Point Track accordingly.
When a Retired unit is Eliminated, add the difference between the Eliminated value and the Retired value. In some cases this will be zero.
EXAMPLE: A Retired Light Cavalry unit is Eliminated, 1 more FP is added to the track (2 – 1). A Retired Longbow unit is Eliminated, 0 FP are added to the track (1 – 1).
Design Note: The DR adds uncertainty to an army's breaking point, something which—while it probably will annoy some player, somewhere—adds some tension and flavor to the contretemps. This represents waxing and waning morale, fog of war, and other battlefield uncertainties.
4.0 Sequence of Play
There are no game-turns in the Men of Iron series. The game simply starts and keeps going until one player wins. To do this, the system uses a Continuation Activation mechanic; see 6.0.
A. Activation Phase: Choose a Battle (6.1), Army Activation (6.1), Standard (15.2), or Pass (6.1). Place any replacement leaders (5.5) at the end of the Activation Phase. If a Standard was Activated go to Phase D.
B. Move/Fire Phase: Play Battle Cry or Unsteady Troops Seizure Counters. Check Command Status (5.3). During Army Activation, Activated units may only Move (7.0). During Battle Activation any or all units of the Activated Battle may Move (7.0) and/or Fire (11.0).
C. Shock Phase: During a Battle Activation units in that Battle may initiate Shock combat (12.0) and Charges (13.0).
D. Rally Phase: During Battle Activation, Rally (15.0) Disordered units in that Battle that qualify. If a Standard was Activated, Rally (15.0) Retired units from that army within one hex of the Standard that qualify.
E. Continuation Phase: If the completed Activation was a Free Activation, both players make a Loss Check (3.0). If the game does not end due to Loss Check, Pass or choose Continue with a Battle or Army Activation (6.2).
- This cannot be the Battle that just Activated, unless the Active player has only one Battle.
- Army Activation can only follow an Army Activation. A Battle Activation can follow Activation of a Battle, Army, or Standard.
- The Non-Active player may attempt to Seize Continuity (6.3). If so, he plays a Seizure Opportunity counter and chooses one of his Battles to Activate. The Active player may play a Seizure Negation (6.3) counter and the Continuation attempt is then resolved, otherwise the Non-Active player rolls the die for Seizure. If successful, the Non-Active player Activates that Battle and proceeds from Phase A with that Battle. If not successful, the Active player gets a Free Activation, proceed to Phase A; this Free Activation may even be used to Activate the Battle that just completed Activation.
- If no Seizure attempt occurs, roll the die for Continuation (6.2). If successful, Activate that Battle or Army and proceed from Phase B. If not successful, or the Active player Passes, the Non-Active player gets a Free Activation and proceeds to Phase A.
Play continues in this manner until one or both players fail a Loss Check (3.0).
Who Starts the Game
Each battle in the Battle Book indicates which player goes first.
5.0 Leaders & Command
Every unit in the game belongs to a Battle—the era term for division-level Command—listed specifically in the Deployment instructions, and as identified by its color stripes which correspond to that of the leader. When a Battle is Activated, all units and leaders in that Battle may move and fight. Leaders are not units and the rules for units do not apply to them (hence a lone leader does not cause enemy units that move adjacent to stop moving). A Battle leader that has had his entire Battle eliminated is removed from play without penalty unless:
- He is an Overall Commander.
- He has another Battle in play or off-map reinforcements to command (see Ravenna and Pavia, respectively).
- He qualifies for the capture rule (5.4) in his current hex.
If he does not meet the above criteria, he rides off into the sunset to fight again.
5.1 Types of Leaders
There are two types of leaders; see 2.2 sample leader counter: Overall Commander and Battle leader.
Overall Commanders. These command the entire army. Some OC's are also Battle leaders (if they have an Activation Rating).
Battle leaders. These are the leaders for the units in their Battle.
5.2 Leader Ratings
Activation Rating. This number/rating reflects that leader's ability to Activate his Battle as Continuity (6.2).
Effectiveness. All friendly leaders, except the OC himself, within the Overall Commander's Command Range have this number added to their Continuation DRs (6.2).
Charisma. Leaders have a charisma rating. This is a DRM used when any unit stacked with the OC or its Battle leader is attacking in Shock or Charge combat.
EXAMPLE: Gonzaga will give any unit he is stacked with a +4 DRM when attacking in Shock/Charge combat.
Command Range. A leader's Command Range is traced in hexes, not Movement Points, from the leader to all units in his Battle; this does not need to be a straight line. Command status is determined at the start of Activation and stays with the unit throughout that Activation. You cannot trace Command range through an enemy unit or a hex(side) impassable to leaders.
A unit not actually within Command Range but adjacent to a unit of its Battle that is in Command, or one that is considered in Command by virtue of this specific rule, is considered to be in Command (in a chain effect).
5.3 Out of Command effects
A unit that is within its leader's Command Range, or considered to be in Command, may do anything and everything allowed by the rules.
Units that begin Activation outside their leader's Command Range (Out of Command) cannot:
- Move adjacent to or Charge (13.0) an enemy unit.
- Counter-Charge an enemy unit that is not adjacent.
- Move into a hex with an enemy Standard or leader.
- Move, if they begin the Activation adjacent to an enemy unit.
5.4 Leader Casualties
Leaders can get killed. (In game terms, that encompasses being captured and other not-so-hot events.) Leaders do not make casualty checks for movement related Disorder effects.
By Fire: Any time an adjusted Fire DR of 9 or more occurs and there is a leader in the target hex, roll the die. If the DR is an 8 or 9, the leader is killed and removed from the game. Otherwise, there is no effect on the leader. If all units the leader is stacked with are Retired or Eliminated by missile fire, the leader is displaced (see below).
By Shock or Charge: Any time a leader is stacked with one or more units that receive a Disordered, Retired or Eliminated result, roll the die for the leader, with no adjustments. If the DR is 7 or higher that leader has been killed and removed from the game. If he survives, but all units are Retired or Eliminated, the leader is displaced (see below).
By Capture: If an enemy unit enters a hex solely occupied by one or more leaders, all leaders are displaced (see below).
Displaced: If the leader(s) is surrounded at this time, he is captured and removed from the game, probably to be ransomed later… no DR is necessary. Otherwise, the owning player places the leader with the nearest unit from a Battle he commands. If there are no units left in any of his Battles, he is removed without penalty (see 5.0). If he is an OC that is not a Battle leader or is an OC that is also a Battle leader (with no units remaining), place him with the closest friendly unit.
Play Note: In cases where all of a leader's on-map units are eliminated, the nearest unit from that leader's Battle can be a reinforcement group that has not yet entered the map. If this is the case, place him with those units and he will enter the map with them.
Killed/captured named leaders (not replacements) count towards the Flight Point total.
5.5 Replacement Leaders
When a named leader is killed/captured, at the beginning of that player's next Move/Fire Phase (Phase B) flip the dead leader counter to its Replacement leader side and place with any unit from a Battle he commands. Replacement leaders are returned as often as necessary, as above, but remain on their replacement side. Replacements for Overall Commanders never count as Overall Commanders, only Battle leaders. In some battles, there is no Replacement for a lost OC.
6.0 Activation & Continuity
6.1 Activation
Battle: When a Battle is Activated, all units and leaders in the Activated Battle may move and/or fire (7.0, 11.0). After all movement/fire has been completed, units eligible to do so may Shock attack or Charge (12.0, 13.0).
When the player designates a Battle for Activation, the player may use some or all of that Battle's units, regardless of where they are on the map. Units that start the Activation Out of Command have certain restrictions (5.3).
Army Activation: A player may choose to use Army Activation to Activate all units and leaders in his army that meet the requirements below:
- Battle leaders must be within the Command Range of the Overall Commander (or be the OC).
- Units must be within Command Range of their leader.
- All units and leaders so activated must be more than three hexes away from an enemy unit.
Units Activated for Army Activation may only move, and no unit or leader may move within four hexes of an enemy unit (three intervening hexes). Units may not fire, engage in Shock combat, or Rally.
Standard: A Standard may be Activated instead of a Battle or Army. Standards may be Activated only in a Free Activation; they may not be Activated by Continuity or Seizure. When a Standard is Activated, the player may either Rally Retired units (15.1) or move the Standard (and just the Standard, not any units near it) (15.2).
Pass: Instead of Activating a Battle, Army, or Standard a player may always Pass. If the Passed Activation was a Free Activation, he may move the Time marker if this battle is a Timed Engagement (16.1) and his opponent is the timed player. A Passed Free Activation also counts as an Activation for some battle specific rules (reinforcement arrival, etc.) and both players make Loss Checks (3.0). The player's opponent then receives a Free Activation.
6.2 Continuity
After the Active player has completed his Activation, he may attempt to continue his "turn" by selecting one of the following Continuity options:
- If he just completed Activation with a Battle, the player may select another Battle for the Continuation attempt or Pass. He cannot select the Battle that was just Activated unless it is his only Battle on the map.
- If the completed Activation was an Army Activation, the player may select an Army Activation Continuation attempt, a Battle for the Continuation attempt, or Pass. Any Battle (including the Overall Commander's Battle) may be selected.
- If the completed Activation was a Free Activation of a Standard, the player may select any Battle for the Continuation attempt or Pass.
After the Active player has made his selection, if it was not to Pass, his opponent has the opportunity to Seize Continuity (6.3).
For a Continuation attempt with a Battle, the Active player notes the Activation Rating of the Battle's leader (only leaders currently on the map can attempt Continuation) and makes a Continuation DR:
- If the (adjusted) DR is the same as or less than the selected leader's Activation Rating, the Battle is Activated.
- If the (adjusted) DR is more than that rating, Continuation fails and his opponent now gets a Free Activation (2.4).
If the Battle leader chosen for Continuation is within the Overall Commander's Command Range, add the OC's Effectiveness Rating to the Continuation DR (not if the chosen Battle leader is the OC).
For an Army Activation Continuation attempt, the Active player makes a Continuation DR, adding the Effectiveness Rating of the Overall Commander:
- If the (adjusted) DR is 2 or less, the Army Activation succeeds.
- If the (adjusted) DR is 3 or more, Continuation fails and his opponent now gets a Free Activation (2.4).
After his first successful Continuation DR (of any type), a player adds a plus one (+1) cumulative DRM to his Continuation DR for each new, consecutive attempt.
If a player has only one Battle, he adds an additional one (+1) cumulative DRM to his Continuation DR for each new attempt, in addition to the penalty for successful Continuations above. Any DRM for Continuing with one Battle incurred applies until reset (see below), even if the player enters another Battle, from off map, before the reset occurs.
These penalties reset when he fails a Continuation DR, his opponent attempts to Seize Continuity (successfully or not), or he Passes.
Play Canard: The more you roll, the higher the toll.
EXAMPLE: At Fornovo, Ricardo used his Free Activation for Army Activation. He then successfully rolled for Army Activation Continuation, adding Gonzaga's negative two (–2) Effectiveness to the DR. He now seeks to roll for Continuation with Gonzaga's Battle; he must add one (+1) to that DR due to successive Continuations. If Ricardo chose Caiozzo for Continuation and Caiozzo was within Gonzaga's Command Range, the net DRM would be negative one (–1), due to Gonzaga's negative two (–2) Effectiveness and the positive one (+1) due to successive Continuations. If he also succeeds with this Continuation roll, he will add two (+2) to his next Continuation DR due to successive Continuation.
6.3 Seizing Continuity
Each player starts the game with a specific number of Seizure Counters, as stated in the scenario for that battle (e.g., at Cerignola, Gonsalvo de Cordoba starts the game with 2 Seizure counters, Le Duc de Nemours with 1).
At the start of the game, each player places his 8 possible Seizure Counters in a cup and blindly/randomly draws the number of Seizure Counters the scenario specifies. The drawing player may freely examine his counters; he does not reveal these to his opponent until they are played. Put the unselected ones aside, also unrevealed.
There are three types of Seizure Counters:
- Seizure Opportunity (4 possible): each of which can be used to try to Seize Continuity from the opposing player by successful DR, as below.
- Seizure Negation (1 possible): a counter played to negate the use of an opponent's Seizure Opportunity counter.
- Other Effect (1 possible of each, below): a counter played for another effect in the game, think of them as a consolation prize for not getting an opportunity to Seize Continuity. When played they are discarded and may not be used again this battle. The Non-Active player plays any counters he wishes to, then the Active player can play any counters he wishes to.
- Battle Cry: Rally one friendly Retired unit. Play before units move or fire at the beginning of the Move/Fire Phase of any Activation (yours or your opponent's).
- Unsteady Troops: Disorder one enemy unit (Eliminate Artillery). Play before units move or fire at the beginning of the Move/Fire Phase of any Activation (yours or your opponent's).
- Into the Breach: +1 DRM for one Shock/Charge attack against one defending unit. Play during Step 3 of Shock Resolution, before the DR is made.
Seizure Opportunity
A player may play one, and only one, of his Seizure Opportunity counters before his opponent attempts Continuation, before the Continuation DR is made.
After playing the Seizure Opportunity counter, he announces which Battle (which must have a leader on the map) of his will attempt the Seizure, rolls the die, and consults the DR range on the counter played. There are no DRMs for this roll.
- If the DR falls within that range, that player is now the Active player and that Battle is Activated with a Battle Activation (6.1).
- If the DR is higher than that range, there is no Seizure; in addition, the Active player gets a Free Activation and may even use this Free Activation to Activate a Battle that just completed Activation!
Regardless of the outcome, the Seizure Opportunity counter is then discarded and may not be used again this battle.
EXAMPLE: Pavia. The French player has a Free Activation. He selects Flourence's and Montmorency's Battles to Activate. After that Activation, he selects Francis's Battle for an attempt at Continuation. The Imperialist player, however, decides it would be better if that didn't happen and announces, before the DR, that he is going to attempt to Seize Continuity with Terranova's Battle. He plays a Seizure Opportunity counter with a range of 0-5. He then rolls the die, getting a '6' which is higher than the range on the counter. The French, with a Free Activation, now decides to Activate Flourence's Battle once again. If the Imperialist player had rolled a '5', he would have Seized Continuity.
Seizure Negation
When an opponent plays a Seizure Opportunity counter and before that player rolls his die, the Active player may play a Seizure Negation counter if he has one. Doing this negates the use of the Seizure Opportunity counter and no Seizure attempt may be made. Both counters are then discarded and may not be used again this battle. The Active player proceeds with his Continuation attempt.
Play Note: You cannot Seize a Seizure or Free Activation. You may have a seizure, but that is probably your style of play.
6.4 Leaderless Battles
In some scenarios there are no leaders for a Battle (mostly because the sources did not name one). Battles that begin the game without a leader may never be activated by Continuity or Seizure; they are activated solely as a Free Activation. Units of Battles without a leader are always Out of Command.
7.0 Movement
7.1 What is Movement, What is Not
Movement is any action that requires the expenditure of Movement Points. Actions that change a unit's position (e.g., Retreat, changing facing, etc.)—but do not require an expenditure of Movement Points—are not considered Movement for other game effects, such as Reaction Fire or Charging.
7.2 Movement Procedures
Units and leaders Move and/or Fire in the Move/Fire Phase. Individual units from the same Battle may move in whatever order the player wishes; each unit, and any stacked leader moving with it, must complete its Move and/or Fire before another may begin its movement. See 11.0 for when missile units may Fire.
Each unit and leader has a Movement Allowance, representing the number of Movement Points (MP) it may expend in one Activation. The costs to enter hexes and cross the various types of hexsides are listed on the Terrain Chart for the individual battle. Units and leaders move from one hex to another contiguous hex.
Units cannot move into a hex occupied by an enemy unit and they must stop when they move adjacent to an enemy unit (Exception: Light Cavalry Archers and Genitors who fire; 11.2). Units can move into a hex occupied by another friendly unit (10.0) in some cases. An Activated, in Command, unit which begins in a hex adjacent to an enemy unit may move, at the cost of one extra MP to leave the hex, but not directly into another hex adjacent to that unit (note that Advance After Combat is not movement). If the hex it enters is adjacent to an enemy unit, it must stop.
OCs who are not Battle Leaders may move during any Free Activation by their side. Battle leaders, including an OC who is a Battle leader, move when their Battle moves. A unit's Battle leader, or the OC (whether a Battle leader or not), that begins an Activation stacked with it may move with that unit during that Activation. If a leader begins to move with a unit, he must continue to do so throughout the unit's movement and stop moving when the unit stops. If a leader is not stacked with a unit or chooses to move on his own, his Movement Allowance is five (5) and he uses the leader column of the Terrain Chart for each hex entered or hexside crossed. A leader moving alone cannot enter a hex occupied by an enemy leader, unit, or Standard; in addition he may not enter a hex adjacent to an enemy unit (unless that hex contains a friendly unit). A leader stacked with a unit may Charge, Counter-Charge, or Advance with that unit. A leader stacked with one or more units must Retreat if all units it is stacked with Retreat.
Terrain
Most battlefields feature terrain of varying kinds, all of which are listed, with their movement effects (in terms of Movement Points expended; "NA" means entry Not Allowed, "NE" means No Effect, and "D" means there is a chance of Disorder) on the Terrain Chart for each scenario/battle. Some hexsides are noted as uncrossable; units cannot move across these hexsides.
7.3 Movement Restrictions
Units and leaders may not move off the map. If forced to retreat off the map, they are Eliminated.
A unit may not move, Advance After Combat, or Retreat into a hex where enemy reinforcements enter the map.
Changing facing is not considered movement for purposes of "Fire or Movement", as it does not expend Movement Points.
7.4 Dismounting and Remounting
Dismounting and Remounting are voluntary actions.
Only Mounted Arquebus and Crossbow units may dismount. Mounted Arquebus and Crossbow units must dismount to reload. These weapons were too big and it took two hands to reload them, leaving none for the horse! These units were not horse archers.
To dismount, a Mounted Arquebus or Mounted Crossbow unit must be:
- Within Command Range of their leader.
- Not adjacent to an enemy unit.
- Not Disordered.
The mounted unit expends three MPs at any time during its move and is replaced with the foot version of that unit (remove the mounted version from the map). That foot unit may not move any further this Activation, but it does reload if marked with a Fired marker (11.5).
To remount, a foot Arquebus or Crossbow unit that has a mounted version must be:
- Within Command Range of their leader.
- Not adjacent to an enemy unit.
- Not Disordered.
The foot unit expends three MPs at any time during its move and is replaced with the mounted version of that unit (remove the foot version from the map). The mounted unit may continue to move, up to its original foot unit MA, if it has any MP remaining after remounting.
7.5 Reinforcements
All reinforcing units and leaders are considered to begin in an off-map area adjacent to every reinforcement entry hex for their Battle (as defined for the battle in the Battle Book). Their first MP spent moves them into any reinforcement entry hex for their Battle; there are no additional costs for other units that may have entered into the same hex from off map. Every reinforcing unit and leader can spend its full MA the turn it enters the map. A reinforcing unit is considered to be in Command and can fire missiles, Shock attack, or Charge the Activation it enters the map.
If all of a reinforcing group of units from a Battle cannot enter the map on their initial Activation, then the rest must continue to enter on that Battle's subsequent Activations until all have entered. A reinforcing leader must enter the map with his initial units. If a part of a Battle is already on the map for any reason, those units Activate as well as the off-map reinforcements when the off-map reinforcements are Activated.
7.6 Artillery Movement
Artillery can either be in a limbered or unlimbered state. A limbered Artillery unit can move; if it fires it is turned to its unlimbered side and thereafter may only fire or change facing. An unlimbered Artillery unit may change facing and fire in the same Activation. See the individual battle for information about the state a player's Artillery begins the game in.
Design Note: Artillery in this time period varied in size from small guns that could be wheeled around easily to larger guns that were much more difficult to move. Due to considerations of ammunition and powder supply, as well as for simplicity, we are choosing to anchor Artillery to a single location once it sets up and begins firing. There is scant evidence of highly mobile Artillery in the sources for these battles.
8.0 Facing
Facing refers to how a unit sits within a hex. A unit must be faced so that the top of the unit faces one of the hex's vertexes, not the side of the hex. A unit may ignore this facing when moving, but once it stops movement or conducts missile fire it must be faced in a specific direction. The two hexes to each side of the vertex the unit is facing are Frontal, the two at the other end, the Rear; the side, Flank.
Facing determines at whom missile units may fire and in what direction Men-at-Arms may Charge.
Facing does not matter when determining movement direction (except for Charging units), and units are free to change facing as much as they want during movement, at no cost, unless they are adjacent to an enemy unit. A unit, regardless of Command status, that begins its Activation adjacent to an enemy unit may change facing one vertex if it does not move out of its starting hex. An Engaged unit can turn two vertexes to satisfy its requirement to attack.
Changing facing is not considered movement for purposes of "Fire or Movement", as it does not expend Movement Points.
9.0 Zones of Control (ZOC)
There are no Zones of Control in this version of the game. We say this up front and out loud so as to avoid the dozens of letters that ask where they are if we don't do so.
10.0 Stacking
With some exceptions, one unit, one Standard, and any number of leaders and markers may exist in one hex. Units may not stack with enemy units at any time (Exception: units may Advance into a hex with an enemy Baggage Wagon). Units may not stack at any time, even during movement, with the following exceptions:
- A non-Pike, non-Artillery foot unit may stack with an unlimbered Artillery unit.
- Non-Artillery units may move through friendly unlimbered Artillery units not stacked with another unit, at no extra cost to movement points spent due to terrain. However, Artillery units may not move through other units.
- A non-Pike foot unit may stack with a Baggage Wagon (Exception: Two Baggage Wagons may not stack).
- Sapper units may stack with any one other unit, except limbered Artillery units.
- Foot Arquebus, foot Crossbow, Longbow, and Skirmisher units may move through a friendly unit that is not stacked with another unit and is not a limbered Artillery, Pike, or Sword & Buckler unit (bullet 2 above covers moving through unlimbered Artillery) at a cost of 1 MP for each such hex entered, this cost is in addition to any movement points spent due to terrain.
- Retreats (which have a separate rule; 14.3).
10.1 Movement, Facing, Retreat, Retreat Before Combat, and Advance After Combat Effects
The following rules apply to the movement, facing, Retreat, Retreat Before Combat, and Advance After Combat of stacked units.
- A player may not move, Retreat Before Combat, or Retreat units to cause units to stack that are not listed as able to stack.
- When units that are allowed to stack are stacked together they must always face the same direction at the end of each Move/Fire Phase or Shock Phase.
- Stacked units do not move together, they move one at a time.
- Units may not enter a hex that contains an Engaged unit.
- All units not listed as Attacker on the Weapons System Matrix may not Advance After Combat, even if the unit they are stacked with attacked and must Advance, since they cannot participate in a declared attack.
10.2 Missile Fire Effects
Stacked units may both Fire using Active Fire. Stacked units are both affected by missile fire targeting the hex (make one DR, with DRMs applied individually, and apply to both units).
10.3 Shock/Charge Effects
These rules govern how stacking affects Shock/Charge combat.
- Stacked units count as a single unit when determining strength advantage (12.3 case #1).
- When consulting the Weapon System Matrix (12.3 case #5):
- If the stack consists of one unit that is Artillery, Baggage Wagon, or Sapper and one unit which is neither Artillery, a Sapper, nor a Baggage Wagon, use the defender row of the other unit.
- If the stack is of two Sapper units, or one Sapper unit and one Artillery unit, use the Sapper row.
- If one of the units is Disordered, use the Disordered status column when consulting the Shock or Charge Combat Results table.
- When stacked units are attacked by Shock/Charge combat, both units suffer any results (Exception: Baggage Wagons never suffer results from Shock/Charge combat).
- Sappers and Artillery suffer the same results as the unit they are stacked with, even if they do not share the same status (normal or Disordered), see 12.5 for Artillery. If two Sappers are stacked together, they both suffer the same combat result.
11.0 Missile Fire
11.1 Missile Units
Design Note: The capability of these units—other than javelins and Artillery—in terms of effectiveness (piercing ability) is remarkably similar. Arquebuses may have been somewhat more effective against the heavy armor of Men-at-Arms, but not greatly so. Their superiority was—at this time—almost entirely one of cost and training time. Longbows did have a much better Rate of Fire than either crossbows or arquebuses, reflected in their Reaction Fire ability.
Missile units (see 2.4) are capable of firing at enemy units, but not lone leaders. The Maximum Range, the maximum number of hexes over which a unit may fire, is given on the Fire/Range DRM Chart for its weapon type (e.g., Artillery may fire at units up to their maximum listed range, although they are not very effective at ranges over 4 hexes). You count the target hex, but not the firing hex.
Non-Artillery missile units may fire through their frontal and flank hexsides (8.0). Artillery may fire only through their frontal hexes. A LOS (11.4) that passes down a hex spine between flank and rear counts as rear, whereas a LOS that passes down a hex spine between flank and front counts as front. Longbow and Light Cavalry Archer units may fire over other units (11.4). If a Mounted Arquebus or Mounted Crossbow unit fires, place a Fired marker on the unit; it cannot fire again until it has reloaded (11.5).
All missile units have a Missile Fire DRM which is applied when resolving their Fire, as below; e.g., a Swiss Pike unit with a Missile Fire DRM of –2 and a Missile Type of CB has squadrons of Crossbows, usually attached at their "horns", giving them the ability to fire Crossbows but with a DRM of –2. A unit with a Missile Type, but no Missile Fire DRM on the current side of the counter may not fire (e.g., limbered artillery).
11.2 When Units May Fire
There are three opportunities for Missile Fire, each one available depending on the unit type: Active Fire, Return Fire, and Reaction Fire.
Non-Artillery Missile Units may fire:
Active Fire: When Activated, each unit may fire individually. A unit may fire once when its Battle is Activated at any time during its movement.
- Once a missile capable unit fires, its Move/Fire Phase is finished (Exception: Light Cavalry Archer and Genitors; see next bullet). Thus, if it fires before moving it cannot then move.
- Light Cavalry Archer and Genitor units may fire during their Movement and continue to move. They may move before/after firing. If they are in a hex adjacent to an enemy when they fire, it costs 1 MP to fire, otherwise firing costs 0 MP. After firing, they may leave a hex adjacent to an enemy unit they have entered in the same Activation, paying the additional 1MP cost to do so (per the Terrain Chart). They may not enter another hex adjacent to the same enemy unit during that Activation.
Return Fire (Non-Active player's units only): When fired at by an enemy missile unit within the unit's range. The Return Fire and the Active Fire are resolved simultaneously, before any results are applied. Non-Artillery missile units may not use Return Fire if fired at through a rear hex. Pike and Sword & Buckler infantry armed with Crossbows or Arquebus may not conduct Return Fire (reflecting the smaller number of missile armed men, the slower rate of fire of these weapons, and the men being spread out across the formation).
Reaction Fire (Non-Active player's units only): When any enemy unit moves or Charges into an adjacent frontal hex that does not already contain an enemy unit; Reaction Fire is resolved the instant such movement takes place. Genitors, Longbow, and Light Cavalry Archer units may fire each time an enemy unit enters their frontal hexes. All other non-Artillery missile units may only Reaction Fire once per Activation (mark them with a Fired marker for the rest of this Activation (unless the unit is Mounted Crossbow or Mounted Arquebus; see 11.5). Only one missile unit (Artillery or not—owner's choice) can Reaction fire at an enemy unit when it enters a hex, no matter how many units are adjacent to the hex. There is no Reaction Fire to Retreats or Advances of any kind (including Continued Attack).
Artillery Units may fire:
Active Fire: When Activated, each unit may fire individually. A unit may fire once when its Battle is Activated at any time during the Move/Fire phase. Once a unit fires, if it is not already on its unlimbered side, it is flipped to its unlimbered side and its movement for that Activation is finished. Thus, if it fires before moving it cannot then move.
Reaction Fire (Non-Active player's units only): When already unlimbered and any enemy unit moves or Charges into an adjacent frontal hex that does not already contain an enemy unit, it is resolved the instant such movement takes place. They may use Reaction Fire only once during a given enemy Activation (mark them with a Fired marker for the rest of this Activation). Only one missile unit (Artillery or not—owner's choice) can Reaction fire at an enemy unit when it enters a hex, no matter how many units are adjacent to the hex. There is no Reaction Fire to Retreats or Advances of any kind (including Continued Attack).
Artillery units may not use Return Fire (reflecting their rather poor rate of fire).
11.3 Resolving Fire
To Fire, check the range and consult the Fire/Range DRM Chart. The chart gives any DRM for the firing unit at that Range. The DRM For Missile Fire Table lists all of the circumstances (as DRMs) that provide modifiers to the DR. Roll one die, adding all appropriate DRMs. Compare the adjusted DR to the Fire Results Table column appropriate to the defending unit's status (On Foot, Mounted, Normal, or Disordered) to get the result, as defined in 14.0. See 10.2 for stacked units.
EXAMPLE: A Crossbow firing at a range of 1 hex gets a DRM of +2. This particular Crossbow unit has a Missile Fire DRM of 0 on the counter. But if they are firing at Men-at-Arms, that incurs an additional DRM of –1, for an accumulated DRM of +1.
11.4 Line Of Sight (LOS)
A unit must be able to see an enemy unit to fire at it and for Charge/Counter-Charge. To do so, the player must be able to trace an unblocked LOS from the center of the firing hex to the center of the target hex. LOS is blocked:
- by Woods, Light Woods, Vineyards, Towns, City, and Buildings hexes, which are blocking terrain. Units may fire into and out of these hexes, but not through one.
- by Wall hexsides and the two impassable hexsides of the Torre del Gallo, which are blocking terrain. Units may not fire through a Wall hexside.
- if the LOS passes through any intervening slope which is higher—of greater elevation—than both the firing and target hex. It may be necessary to use a string to measure between hexes to determine this LOS case.
- by other units for Arquebus, Artillery, Crossbow, and other purposes (such as Charge). Units do not block LOS for Longbows and Light Cavalry Archers (see Raining Fire below).
If a hex contains blocking terrain and/or a unit that blocks LOS, then the entire hex is treated as blocking, not just the graphic feature inside the hex. A LOS may be traced along a hexside if only one of the hexes adjoining the hexside contains blocking terrain and/or a unit that blocks LOS. A LOS may be traced unblocked past a hex vertex if blocking terrain/unit(s) is not on both sides of the LOS as it crosses the vertex.
Raining Fire: Longbows and Light Cavalry Archers may fire "through" (they're actually firing over them) adjacent, intervening units at a target two hexes distant, unless the intervening hex contains a friendly unit which is Engaged with the target, but with a Raining Fire DRM of minus one (–1).
11.5 Mounted Arquebusiers and Mounted Crossbowmen
Design Note: The "problem" with these two types of mounted units is that while they could fire mounted, they could only do so once because it was mostly impossible to reload/rewind the weapon while mounted.
Whenever a Mounted Arquebus or Mounted Crossbow unit fires while mounted, place a Fired marker on that unit to indicate that it may not fire again until it reloads.
To reload its weapons, a Mounted Arquebus or Mounted Crossbow unit must dismount (7.4). When it dismounts, the unit reloads its weapons. Remove the Fired marker.
Remember, Mounted Arquebus and Mounted Crossbow units can Retreat Before Combat (12.2), whether able to fire or not.
12.0 Shock
Design Note: Units' weapon systems, armor, and morale are represented by a combination of the Weapons System Matrix on the player aid card and the unit Shock Defense DRM.
12.1 The Shock Phase
All Shock/Charge attacks must be declared before any Shock/Charge attacks are resolved. In the Shock Phase, all (eligible) Active units listed as Attacker on the Weapons System Matrix may Shock attack (Exception: Engaged 14.5, Continued Attack 14.7). If they do so they must Shock any/all enemy units that are in their frontal hexes, unless those units are being Shocked/Charged by other friendly units or are across/in terrain into which the Active unit cannot attack (Exception: Engaged 14.5). Any declared attacks must be completed, there is no ability to "call off" a declared attack. Units not listed in the "Attacker" row may never Shock attack (or Charge). They do defend, though. A unit can only participate in one attack per Activation (Exception: Continued Attack result; 14.7). This attack can be with or without other units against a single hex or by itself against both hexes in the attacking unit's frontal hexes. A unit can only be attacked once per Activation (Exception: Continued Attack result; 14.7).
EXAMPLE: Three units in a line attack two defending units in a line. The attacker must choose to attack one defender with two units and the other with one unit, the middle unit cannot split its attack against both defenders.
Play Note: Place an appropriate Shock/Charge marker on any unit that declares an attack with the arrow facing the unit attacked as a reminder. If a single unit is attacking two enemy-occupied hexes, point the arrow at the hexside between them as a reminder.
12.2 Retreat Before Combat
Any Mounted unit, foot Arquebus, foot Crossbow, Longbow, or Skirmisher unit, that is not Disordered or Engaged, and attacked solely by foot units, may Retreat Before Combat. If the unit is foot (Skirmishers excluded), it may retreat one hex. If the unit is a Skirmisher or Mounted, it may retreat one to three hexes. Pike and Sword & Buckler units armed with arquebus or crossbow, cannot Retreat Before Combat. Each hex retreated must increase the distance from each of the attacking units. The Retreating unit must be able to end its Retreat at least one hex away from all attacking units or it may not Retreat. It may not enter the path of a Charge, or an occupied hex, but it may change facing at will. Units that Retreat Before Combat become Disordered at the completion of the Retreat. If the hex is vacant, one attacker that can enter the hex may advance, even if Disordered. The unit that just advanced cannot Shock. If one attacker is attacking two hexes and all units in both hexes Retreat Before Combat, the attacker may pick which hex to advance into as above. If only one hex is vacant, the attacker cannot advance and must resolve the attack on the other.
Retreat Before Combat applies to any Shock/Charge, including a Continued Attack.
12.3 Shock Resolution
Design Note: Shock resolution uses a mechanic somewhat different from most games of this type. Shock/Charge is resolved against each defending hex individually, regardless of how many units are attacking and/or how many units are being attacked.
Order of Shock Resolution
Shock is resolved after all Movement and Fire is finished, in the following order:
- The Active player designates which of his units are attacking which defending units, including Charges (13.0).
- Pre-Shock activities: a) One at a time, the Active player places each Charging unit adjacent to its target. Any Reaction Fire caused by this is resolved. b) Roll for terrain-induced Disorder checks for attackers; apply automatic terrain-induced Disorders. c) Roll for Swiss Shock Reluctance (16.2). d) Any Retreat Before Combat (12.2) by the defender is resolved. e) The defender attempts any Counter-Charges (13.6) of which he is capable.
- The Active player resolves all his Shock and Charge attacks, in any order he wishes. The Charge Table is used as long as at least half of the units in an individual attack succeeded in Charging (not Disordered by Reaction Fire or Counter-Charged); otherwise the Shock Table is used. Continued Attack (14.7) markers are placed and Advances (12.4) are taken. Exception: Attacks by a single attacker against multiple defending hexes are resolved at the same time, and they are considered to be going on simultaneously, with results (which can be cumulative for the attacker) applied after both attacks are resolved.
- All Continued Attacks (14.7) are now resolved. Begin again at Step 1, except that only units marked with Continued Attack markers Shock and they must Shock; Charging and Counter-Charging are not allowed.
All of the below are cumulative; "+" DRMs favor the Attacker; "–" DRMs favor the Defender.
Die Roll Modifiers for Resolving Shock
To resolve the Shock, roll the die for each defending hex, then apply any DRM(s) that apply from the following situations and consult the appropriate Combat Results Table (see 10.3 for stacked units). If at least half of the attacking units succeeded in Charging, use the Charge Table, otherwise use the Shock Table. Look under the column appropriate to the defending unit's status (Normal or Disordered) to find the result.
- Strength Advantage
- Position Advantage
- The Defender's Shock Defense DRM
- Leader Presence
- Weapon/Armor Comparison (Weapons System Matrix)
- Attacker Status (Disorder or moved)
- Defender Status (Retired)
- Continued Attack
1. Strength Advantage: The player with the higher number of units receives the differential between the number of units as a DRM. See 10.3 for stacked defending units.
EXAMPLE: One Stradiotti Cavalry attacks two Pike Infantry. There is a –1 Strength (Dis-)Advantage DRM to the Shock resolution against each infantry.
The Strength Advantage, or Disadvantage, that the defense may have is applied (as a DRM) to each separate DR.
Play Note: If one unit is attacking two hexes, the attacker will roll twice, each with a –1 DRM …and undergo possible adverse results twice.
EXAMPLE: A Men-at-Arms Shock attacks two Pike infantry. In resolving each defender separately, the Men-at-Arms gets a Continued Attack against the first, but is Disordered in the second combat. The Men-at-Arms must then Continue Attacking, but is Disordered.
2. Position Advantage: There are two types of position advantages:
A. Angle of Attack: This reflects the advantage of attacking from an angle other than frontally:
- If all attacking units are attacking through a defender's Flank, there is a +2 DRM.
- If all attacking units are attacking through a defender's Rear, there is a +3 DRM.
- If the attackers are attacking through two or more sides (Front, Rear, Left Flank, or Right Flank) of a unit there is a +4 DRM.
Only one bullet applies.
B. Terrain: See the Terrain Charts for the individual battles for the effects of terrain on combat. All terrain modifiers are cumulative; use all that apply. The row for the defender's terrain is used (unless otherwise noted on the Terrain Chart) to find the modifier for each attack. A unit may attack into/across any terrain not listed as NA in the Shock/Charge DRM column on the Terrain Chart, whether it is prohibited from entering the terrain or not. If more than one unit is being attacked by a single unit, the terrain of each individual defending unit is used in the combat against that defender. If there is more than one attacker with different hex or hexside terrain considerations (e.g., one is attacking across a ditch, the other isn't), apply all terrain DRMs (but a single DRM is only applied once).
3. Shock Defense DRM: The defender's—not the attacker's—individual Shock Defense DRM is added.
4. Leader Presence: If a leader is stacked with an attacker, the leader's Charisma rating is added as a DRM to the attack. This only applies once to each attack, no matter how many leaders the attackers are stacked with the attacker (use the highest DRM). Sounds great, huh… well see 5.4.
5. Weapons/Armor Comparison: The attacker uses the Weapons System Matrix to compare his attacking unit Type to that of the defender. The matrix provides the appropriate DRM. If an attacker is attacking with units of different types, the attacker uses the column with the best DRM from among the attacking unit types. See 10.3 for stacked defending units.
6. Attacker Status: Two attacker statuses can affect an attack:
A. Disorder: If any attacker is Disordered, there is a –2 DRM. (Defender's Disorder status is covered by the chart itself.)
B. Move before Charge: If any attacker is Charging (marked with a Charge marker) and moved this Activation, there is a –1 DRM.
Design Note: This disadvantageous DRM reflects the need to prepare and form up for a Charge.
7. Defender Retired: If the defender is Retired (14.4) add two (+2) to the attacker's DR, and use the Disordered portion of the Combat Resolution Table.
8. Continued Attack: Units undertaking Continued Attacks (14.7) receive a cumulative –1 DRM for each previous Shock Phase they undertook in this Activation.
12.4 Advance After Combat
Advance After Combat is part of combat resolution and is undertaken after a unit has finished all of its attacks. If a defender vacates a hex as a result of a Shock or Charge attack, the attacker must (if possible) advance one of his eligible attacking units—any leader(s) stacked with it may advance—into that hex. The advancing unit may change facing as it wishes after such advance (unless a Continued Attack resulted, in which case no facing change is allowed). A unit is eligible to Advance unless:
- It is Disordered and did not receive a Continued Attack result (14.7).
- It would have to cross or enter terrain that it is prohibited from moving across or into.
- It is a unit of any type with a Shock Defense DRM +2 or higher.
If more than one unit attacked, follow the priorities below to determine which eligible unit must Advance; in the event that two or more eligible units are in the same category the attacker chooses which to Advance:
- A Charging unit
- A Mounted unit
- A non-Disordered unit
- A Disordered unit which obtained a Continued Attack result
If there was a Continued Attack (14.7) result, place a Continued Attack marker on the advancing unit.
If a single unit attacked two defenders and both hexes are vacated, the attacker chooses which hex to advance into. If a single unit attacked two defenders and only one hex is vacated, the attacker must advance into the vacated hex, unless the other combat result causes the attacking unit to Retreat (a Continued Attack result overrides any Retreat result).
Play Note: Remember that Disordered units only advance due to Continued Attack results.
12.5 Artillery in Shock/Charge Combat
No die is rolled when Artillery units are Shocked or Charged, unless they are stacked with another non-Artillery unit. The result is automatically Defender Eliminated for Shock attacks and Defender Eliminated, Continued Attack for Charges. The attack otherwise follows all normal rules.
If Artillery is stacked with another non-Artillery unit which is Shocked or Charged, the Artillery unit is Eliminated if the other unit is Disordered or Eliminated. If stacked with another unit that is Engaged (14.5), the Artillery is also Engaged.
13.0 Charging & Counter-Charging
Charging is a method of Shock attack in which the attacking units use their weight and momentum to obtain a more favorable result. It is a special form of Shock that targets only one unit, an exception to 12.1. Counter-Charging represents the ability of Men-at-Arms to initiate a Charge in response to being attacked, either blunting opposing Shock/Charge attacks against them or initiating an attack against units targeting them with missile fire. It helps to remember that Charge is just another form of Shock that uses a different Combat Results Table.
13.1 Which Units May Charge or Counter-Charge
Both Charge and Counter-Charge are usable only by Men-at-Arms. Only Active units may Charge and only units of the Non-Active player may Counter-Charge.
13.2 Charge Procedure
All Charges are designated and Charge markers placed in Step 1 of the Shock Phase prior to resolving any Charge or Shock attacks. To Charge, a Mounted Men-at-Arms unit must not meet any of the restrictions in 13.3 below. Place a Charge marker on the Charging unit with the arrow pointed at the target of the Charge. The Charging unit can change facing by one vertex prior to placing the Charge marker provided the Charging unit then has a Charge Path (13.3) to its target.
If a Charging unit is Disordered during its Charge, replace the Charge marker with a Shock marker and that unit must still Shock attack the original target of the Charge (and only that enemy unit), see 12.3 to determine the final Combat table.
Charges are resolved by placing the Charging unit adjacent to the target, in Step 2 of the Shock Phase. A unit may not change facing during a Charge.
Play Note: This is not actual game Movement, so there is no use of Movement Points, but Reaction Fire (11.2) is allowed.
13.3 Charge/Counter-Charge Restrictions
A Men-at-Arms unit may not Charge, or Counter-Charge, if it meets any of these restrictions:
- It is Disordered.
- It began the Activation or the Shock Phase adjacent to an enemy unit (for Charges).
- It began the Activation adjacent to an enemy unit and is still adjacent to that enemy unit (for Counter-Charges). If an Active unit leaves the hex in which it started the Activation, voluntarily or involuntarily, then it no longer prevents the unit from Counter-Charging that Activation.
- It does not have a LOS (11.4) to the target unit.
- It does not have a clear Charge Path to the target. A Charge Path: a. Must be through the Charging/Counter-Charging unit's frontal hexes. b. Must end with the target(s) in the Charging/Counter-Charging unit's frontal hexes. c. Must include the hex, adjacent to the target, in which the Charging/Counter-Charging unit will end its Charge. d. May not cross a hex adjacent to an enemy unit, but may end in such a hex. e. Must be of the appropriate length for the type of Charge. i. Charges: one or two hexes between the Charging unit and the target unit. ii. Counter-Charges against Charge or Shock: the target is adjacent. iii. Counter-Charges against Missile Fire: the target can be adjacent or separated by a number of hexes that are equal to or less than the Counter-Charging unit's MA. f. Must be free of friendly or enemy units. A unit stacked with a unit that wants to Charge does not prevent the unit from Charging. g. May not cross rivers (or any water hexside that costs more than +1 MP to cross or incurs a Disorder roll), Trench, Ditch, or Rampart hexsides (nor may the target be on the other side of such a hexside). h. May not cross a Woods, Light Woods, Marsh, Rough, Buildings, Cropfields, Vineyards, Taro River, or Town hex (nor may the target be in such a hex). i. May not cross terrain which the unit is prohibited from moving into/across (nor may the target be in/across such a hex/hexside). j. Cannot be shared with other Charging/Counter-Charging units.
Play Note: If a Men-at-Arms begins an enemy Activation adjacent to one or more enemy units, place a Counter-Charged Used marker on it for reference. If all of the enemy units move away remove the marker.
Design Note: Units that start the Activation adjacent to an enemy unit could withdraw and then charge again, but doing so would require putting the unit into some sort of order, and that would mean, in game terms, "not in the same Activation".
13.4 Benefits and Results of a Charge
Charging Men-at-Arms remain marked with a Charge marker as long as they were not Disordered during their Charge or successfully Counter-Charged. As long as at least half of the units attacking a defending unit are marked with a Charge marker during Shock resolution the Charge Table is used, not the Shock Table.
Subtract one (–1 DRM) from the Shock or Charge DR if any Charging unit has moved (used Movement Points) in that Activation. As noted in rule 7.3, changing facing is not considered moving.
A unit that has Charged and attained a "Continue Attack" result is no longer Charging when it resolves the Continued Attack. The Continued Attack is resolved as regular Shock.
13.5 Charge Reluctance
Design Note: There is no Charge Reluctance in this version of the game. But see 16.2 for a variant on this.
13.6 Counter-Charge
Counter-Charges can only be performed by the non-Active player's Men-at-Arms as a response to certain enemy actions. Men-at-Arms that are not stacked with another unit may attempt to Counter-Charge when attacked through their front or flank hexsides by Charge, Shock, or missile fire.
If a unit is attacked by enemy units using both Shock and Charge combat, the owner must choose to Counter-Charge either the Shock or the Charge (but not both), since there are different Counter-Charge success DRs and effects for each type of Counter-Charge.
A Counter-Charge must end with all Counter-Charged units in the Counter-Charging unit's frontal hexes or it may not be performed. A Counter-Charge must also adhere to the restrictions on Charge (13.3) for all Counter-Charged units or it may not be performed. A Men-at-Arms unit may change facing by one vertex if it succeeds in Counter-Charging.
Only one Counter-Charge per unit per Activation is allowed, once a unit has attempted to Counter-Charge place a Counter-Charge Used marker on it as a reminder.
EXAMPLE: During a French Activation, a Spanish Men-at-Arms unit is fired upon by a French Crossbow unit. It attempts to Counter-Charge in response (13.9), but rolls an 8 and fails. The Spanish Men-at-Arms unit is marked with a Counter-Charge Used marker. It may not now Counter-Charge if fired on by other missile units or attacked by Shock in the Shock Phase, until the Counter-Charge Used marker is removed at the end of the current Activation.
13.7 Counter-Charge Against Charge
Counter-Charge against an enemy Charge attack reflects the ability of Men-at-Arms to negate the momentum of any such enemy attack by launching its own Charge.
To Counter-Charge, the defender rolls the die before the enemy Charge against the Men-at-Arms unit is resolved.
- add the Counter-Charging unit's Defense DRM
- if a Counter-Charging Men-at-Arms unit must change facing to end with attacking unit(s) in its frontal hex(s) add one (+1) to the DR
If the adjusted DR is 4 or less, the unit has successfully Counter-Charged. Change the unit's facing by one vertex if required to place the Counter-Charged unit(s) in its frontal hexes. The Charge of the Attacker(s) has been negated and all Charge marker(s) are replaced with Shock marker(s).
If the adjusted Counter-Charge Attempt DR is 5 or more the Counter-Charge fails and the unit does not change facing if it was attempting to do so as part of the Counter-Charge.
13.8 Counter-Charge Against Shock
Counter-Charge against an enemy Shock attack reflects the ability of Men-at-Arms to disrupt any such enemy attack by launching a Charge.
To Counter-Charge, the defender rolls the die before the attack is resolved.
- add the Counter-Charging unit's Defense DRM
- if a Counter-Charging Men-at-Arms unit must change facing to end with Counter-Charged unit(s) in its frontal hex(s) add one (+1) to the DR
If the adjusted DR is 5 or less, the unit has successfully Counter-Charged. Change the unit's facing by one vertex if required to place the Counter-Charged unit(s) in its frontal hexes. The Attackers must subtract two (–2) from the DR when resolving the attack. This applies even if the attack includes Charging units and will be resolved on the Charge Table. In cases where one Attacker is attacking two hexes, a successful Counter-Charge by one defender applies the Counter-Charge modifier only to the resolution of the attack against the Counter-Charging unit.
If the adjusted Counter-Charge Attempt DR is 6 or more the Counter-Charge fails and the unit does not change facing if it was attempting to do so as part of the Counter-Charge.
13.9 Counter-Charge Against Fire
Men-at-Arms may choose to Charge missile units in response to being targeted by missile fire. A unit may not change facing during a Counter-Charge against Fire, but it may change facing to begin one. No Reaction Fire is allowed against a unit Counter-Charging against Fire. A Counter-Charge against Fire can be undertaken against an enemy a number of hexes distant equal to or less than the Counter-Charging unit's Movement Allowance (including adjacent).
To Counter-Charge, the defender rolls the die before the fire is resolved.
- add the Counter-Charging unit's Defense DRM
- if a Counter-Charging Men-at-Arms unit must change facing to end with attacking unit(s) in its frontal hex(s) add one (+1) to the DR
If the adjusted DR is 5 or less, the unit has successfully Counter-Charged. Resolve the missile fire, change the unit's facing by one vertex if required to begin the Counter-Charge, place (if needed) the Counter-Charging unit adjacent to the firing/missile unit, and then perform an immediate Charge attack (treat this as a mini-Shock Phase for just this unit). If the successfully Counter-Charging unit is Disordered by the fire which initiated the Counter-Charge, the Counter-Charge is still undertaken, but is resolved as a Shock attack targeting the firing unit only. The successful Counter-Charge ends the movement of the missile unit, even if it would still otherwise be eligible to move after firing (Light Cavalry/Archers or Genitors).
If the adjusted DR is 6 or more the Counter-Charge fails and the unit does not change facing if it was attempting to do so as part of the Counter-Charge. Resolve the missile fire.
If the Counter-Charging unit earns a Continued Attack, that Continued Attack is resolved immediately. The Continuing unit must Shock attack all units in its frontal hexes, those units can Retreat Before Combat, and there can be more Continued Attacks and/or Advances.
14.0 Combat Results
SUGGESTION: Please refer to the Fire Results Table, Shock Combat Results, and Charge Combat Results tables located on the Arquebus Player Aid Card while reading this section.
14.1 The Combat Results Tables
Missile weapons use the Fire/Range DRM Chart, DRM for Missile Fire List, and the Fire Results Table. Charging units use the Charge Combat Results table. All other Shock attacks use the Shock Combat Results table. Both Charge and Shock attacks use the Weapons System Matrix and the Possible DRMs for Shock or Charge table.
Shock and Charge combat results depend on whether the defending unit is Normal (not Disordered) or Disordered. Missile fire results depend on whether the target is mounted or foot and Normal or Disordered. There are separate results columns for each status.
If a result applies to the attacker, it applies to all units attacking that defending hex.
If a single unit attacks two units, the attacks are considered simultaneous and the player implements all combat results after both attack rolls. If both sides must Retreat, the defender Retreats first. Combining results on the attacking unit:
- Engaged and Retreat: The unit must Retreat; ignore the Engaged result.
- Engaged/Retreat and Continued Attack: The unit must implement the Continued Attack; ignore the Engaged/Retreat result.
Play Note: Shock/Charge is resolved separately for each hex containing defending units.
14.2 Disorder
When a unit is Disordered, flip the counter to its "Disordered" side. The effects of being Disordered are:
- Movement Allowance on the Disordered side of the counter is lower. This penalty does not apply until the unit's next Activation, even if the Disorder result occurred during movement.
- Missile Fire DRM on the Disordered side of the counter is lower.
- Shock attacks made by Disordered units incur a –2 DRM (as noted on the Possible DRMs for Shock or Charge table).
- A Disordered unit may not Charge or Counter-Charge.
- A Disordered unit may not Retreat Before Combat.
- A Disordered Mounted Arquebus or Mounted Crossbow unit may not dismount.
- A Disordered Dismounted Arquebus or Dismounted Crossbow unit may not re-mount.
Additional Disorder results have no further effect on a unit that is already Disordered.
Artillery units are never Disordered, instead when an Artillery unit suffers a Disorder result from missile fire, roll one die:
- if the DR is 4 or less the Artillery unit is Eliminated.
- if the DR is 5 or more, there is no effect.
14.3 Retreat
A unit that must Retreat, and, if the hex is vacated, any leader(s) stacked with it, must be retreated exactly one hex away from the unit(s) inflicting the result by the unit's player. It must end its retreat one hex farther away from every enemy unit which participated in the attack (each die roll is a separate attack) that caused the retreat. It may enter any hex, or cross any hexside, that it is not prohibited from entering during the retreat. It may not stack with friendly units it could not normally stack with and it may not retreat into a hex occupied by an enemy unit, but may retreat into a hex occupied solely by an enemy leader (5.4) or Standard. It may retreat adjacent to an enemy that did not cause the retreat and it may change facing.
If its retreat is blocked by a friendly Arquebus, Artillery, Crossbow, Longbow, Sapper, or Skirmisher unit (not Pike or Sword & Buckler infantry armed with AQ or CB, or Mounted Arquebus or Mounted Crossbow) not stacked with another unit, even if that unit is Engaged, it may retreat through that unit an extra hex. If it does so, the unit retreated through is Disordered; if already Disordered, it is Retired. If the unit retreated through is already Retired, it is Eliminated. If the unit retreated through was an Artillery unit, the unit retreated through is Eliminated. Any leader stacked with the newly Retired/Eliminated unit must make a Leader Casualty check (5.4) as if the unit suffered the Retire/Eliminated result from Shock combat.
If any unit cannot retreat, satisfying the above conditions, it is Eliminated. Any leader stacked with the unit must make a Leader Casualty Check (5.4) as if the unit suffered the Eliminated result from Shock combat.
Note: If the unit and leader are totally Surrounded, both will be Eliminated. See 5.4 for the leader.
14.4 Retire
If the unit is stacked with its Standard when it incurs a Retired result, it is instead Eliminated. If not stacked with its Standard pick up the unit and place it in a hex with or adjacent to its Standard and place a Retired marker on top of it. If the unit is unable to trace a route to a hex with or adjacent to its Standard not blocked by enemy units and impassable terrain, it is Eliminated. The hex chosen must not be adjacent to the enemy units that caused the Retire result, if this is not possible, it is Eliminated. If all hexes in or adjacent to its Standard are occupied by units (even units it would normally be able to stack with) or impassable terrain, the Retired unit is Eliminated. Retired units are counted towards that army's Flight Level (3.0).
Retired units have a Movement Allowance of one hex per Activation, and may move only towards their Standard. They may not fire, initiate attacks, Charges, or Counter-Charges. If a Retired unit is attacked or fired upon, treat it as Disordered (including using its Disordered Shock Defense DRM), but add two (+2) to the Combat Resolution DR (as noted on the Possible DRMs for Shock or Charge table). Any Retreat, Retire, or Eliminated result in that unit being Eliminated.
Play Note: Retired units are Activated along with other units in their Battle when that Battle is Activated.
14.5 Engaged
Engaged represents the units involved in that combat mixing together and continuing to fight. Place an Engaged marker atop the units to so indicate; any existing Engaged markers remain. Retired units cannot be Engaged, disregard this result against a Retired unit.
When Activated, an Engaged unit must either Disengage or remain in its hex. An Engaged unit may not fire, nor may it be targeted by missile fire.
A unit may Disengage by moving if it is not Disordered or Out of Command, but at a cost of one extra (+1) MP (cumulative with the cost for leaving a hex adjacent to an enemy unit). Some units will therefore be unable to Disengage, due to the cost of moving that one hex. Moreover, in so Disengaging the unit is automatically Disordered. During the Activation it Disengages, it may not move adjacent to an enemy unit. Units that are not eligible to Shock attack must Disengage, if possible.
If it does not Disengage and has none of the units it is Engaged with in its frontal hexes, it must turn one or two vertexes to place the maximum number of enemy units it is Engaged with in its frontal hexes. If it does not Disengage and has one or two of the units it is Engaged with in its frontal hexes, it cannot turn. During the Shock Phase a Shock capable unit must declare a Shock attack, satisfying 12.1, but ignoring any enemy units that it is not Engaged with.
Play Note: A unit listed as able to shock on the Weapons System Matrix that is Engaged must attack at least one enemy unit it is Engaged with. It can never attack an enemy unit it is not Engaged with. If there are two units it is Engaged with in its Frontal hexes it must attack them both, unless one is being Shocked/Charged by another friendly unit.
In the diagram in the original rules, a Spanish PK unit is shown being forced to attack only the French Swiss PK, since the French Landsknecht PK is attacked by the Spanish SB unit. If the Spanish SB unit was not there or was from a different Battle, the Spanish PK would be forced to attack both French units.
If all enemy units that a unit is Engaged with are no longer adjacent at any time, including during a Retreat, immediately remove its Engaged marker.
Remove all Engaged markers from a unit that receives a Continued Attack result.
Leaders stacked with units are unaffected by Engaged results.
14.6 Eliminated
The unit is no longer effective as a fighting force and is finished for the day. Remove it from the board. Eliminated units are counted towards that army's Flight Level (3.0).
Design Note: Eliminated does not mean that all men in the unit have been killed. It represents the loss of men and/or morale past the point the unit can remain effective.
14.7 Continued Attack
A Continued Attack result always results in the unit that Advanced After Combat (12.4) being marked with a Continued Attack marker indicating the negative DRM it incurs for this additional attack, as per 12.3 case #8. Continued Attack. Place the marker even if no enemy units currently occupy the attacking unit's frontal hexes. If a Continued Attack result occurred and no unit Advanced After Combat due to impassable terrain, then place the Continued Attack marker on the unit that would have Advanced had the terrain allowed. Remove all Engaged markers from the unit receiving the Continued Attack result.
After all combats are resolved, another Shock Phase is conducted for all units marked with a Continued Attack marker. During this Shock Phase only those units marked with a Continued Attack marker may Shock and these units must declare a Shock attack; no Charges or Counter-Charges are allowed. Otherwise Continued Attack is resolved identically to 12.0.
If a unit marked with a Continued Attack marker has no enemy units in its two frontal hexes, remove the marker during Step 1 of the Continued Attack Shock Phase when attacks are declared.
After all Continued Attacks that resulted from the initial Shock Phase are resolved, remove the Continued Attack markers from any units that did not earn another Continued Attack result. If any unit that has a Continued Attack marker on it obtains another Continued Attack result, increment the Continued Attack marker (i.e., flip a Continued Attack –1 to Continued Attack –2 or add another Continued Attack –1 marker to the unit) and conduct another Continued Attack Shock Phase for all of those units still marked with Continued Attack markers. Continue this procedure until no unit is marked with a Continued Attack marker.
When resolving a Continued Attack, subtract one (–1) from the Resolution DR for each previous Shock, or Continued Attack Shock, Phase undertaken by that unit in this Activation; this will be denoted by the sum of the Continued Attack markers on the unit.
Design Note: The DRM reflects the ongoing loss of formation and impetus such attacks are subject to.
Play Note: There is no limit to the number of times a unit can obtain a Continued Attack result. If you run out of Continued Attack markers, add some other marker to designate the additional modifiers.
15.0 Rallying Units
15.1 Rally
Disordered units may cure their Disorder status by spending their entire Activation doing nothing. If a Disordered unit is not adjacent to an enemy unit after all combat has concluded—even if it is within range of enemy missile fire—and it has neither moved, changed facing, fired missiles, declared an attack, or been attacked that Activation, flip the Disordered unit to its normal side. Disordered units that are Out of Command (5.3) may Rally.
Play Note: The unit may have started the Activation adjacent to an enemy unit, but can still rally if there are no enemy units adjacent after combat.
Retired units that are in or within one hex of their Standard, but not adjacent to an enemy unit, may be Rallied if that Standard is Activated (6.0). Units within range of enemy missile fire or Out of Command may still be Rallied. When a Standard is Activated, remove the Retired marker from every eligible unit. After removal, the unit is in Disordered status.
15.2 Standards
Standards are the rallying points for units. Any unit that is Retired and is in or within one hex of its Standard, and not adjacent to an enemy unit, when the Standard is Activated, has its status changed from Retired to Disordered.
An Activated Standard may be moved to any hex on the game-map (not a Reinforcement hex) instead of Rallying Retired units. When doing so, any Retired units that are in or within one hex of the Standard prior to its being moved must check to see what effect this has on them. Roll one die. If the DR is a 5 or more, that Retired unit is now Eliminated. If the DR is 4 or less, there is no effect.
Standards may be moved by enemy action if an enemy unit enters the hex with the Standard. When a Standard is moved, the player follows the same procedure for moving an Activated Standard.
Standards may not Retreat Before Combat.
16.0 Special Rules
16.1 Timed Engagement
This rule is intended to encourage one side to attack in a timely manner, even when it may not be in its best interest to do so. It will generally be used to ensure the historical attacker in a battle does attack, rather than spend too much time maneuvering around the flanks of a defender's position. We have tried to be generous with the time allotment so that players may explore alternatives to frontal assault, while at the same time constraining how much exploration is possible.
The Time marker starts at a space on the General Track as defined in the battle. The timed player loses the battle if the Time marker reaches the "0" space on the General Track. The non-timed player may Pass when he has a Free Activation and move the Time marker one (1) space towards zero (0). Some battles may have special rules for the Time marker, otherwise this is the only way the Time marker is moved.
16.2 Swiss Shock Reluctance
(The Harry Lime/Jerry Maguire Rule)
For much of the late 15th century, the Swiss Pike—almost always in mercenary status—had rightfully gained a fearsome reputation for their fighting ability and on-field dominance. By the end of the century they had also gained an equally fearsome—for their commanding generals—reputation for refusal to fight if they hadn't been paid. The apropos phrase of the era was "Point d'argent? Point de Suisse!" (No silver? No Swiss.) The German Landsknechts—equally as feared—were not quite so fiscally oriented.
To reflect this possibility, each and every time a Swiss Pike infantry unit that is not already Engaged (which negates this rule) declares a Shock attack that is not a Continued Attack, the player must check to see if the Swiss carry out the Shock attack, unless directed otherwise by a rule in the battle. Before resolving the attack the player rolls one die, to which he adds that unit's Shock Defense DRM.
If the DR is 6 or less, the Sons of Billy Tell lower their pikes and go to work. Cue up the Rossini.
If the DR is 7 to 9, that unit refuses to Shock attack.
If the DR is 10 or more, the unit not only decides not to fight but decides to go home and invent the cuckoo clock (a piece of information we got from Harry Lime). Remove it from the game instantly. It is not considered an Eliminated unit for purposes of Victory (3.0).
If a Swiss Pike infantry unit refuses to Shock attack or is removed, it does not affect any other declared attacks, since the refusal happens after attacks are declared. It has declared an attack and so is not eligible to Rally during this Activation.
16.3 Gun Wagons
Gun Wagons seem to be inspired by the War Wagons used by the Hussites in the early 15th Century. These rules reflect the fact that the draft animals were unhitched before battle, meaning the wagons could not be moved once the battle started.
Gun Wagons have the following special rules:
- They may not move.
- Gun Wagons that incur Retreat or Retire results, from either missile fire or Shock/Charge combat, are Eliminated instead.
Battle Book
Preface
The Italian Wars of 1494 to 1559 saw the transition from muscle-powered weapons to gunpowder weapons on the European continent; this occurred amid changes in battlefield tactics. Gunpowder weapons became more numerous and reliable, while being easier to train soldiers to use than bows and crossbows. Innovative commanders began including crossbowmen, and later arquebusiers, in their pike formations to increase their effectiveness. A new type of formation, armed with swords and small shields (bucklers) also appeared at this time. These successful innovations were soon copied by all armies. Some would last and slowly evolve into modern warfare, while others would be relegated to historical curiosities.
Gunpowder weapons, such as artillery and handgonnes (or hand cannon), had been growing in reliability through the 15th century. While they had initially been quite rare and used mostly in sieges, their growing numbers eventually lead them to be widely adopted on the European battlefield in the 16th century. As seen in the previous game in the Men of Iron series, Blood & Roses, artillery and handguns gradually appeared in greater numbers as battlefield weapons. The arquebus was a large step forward in reliability and ease of use for hand-held gunpowder weapons. Handgonnes were cumbersome and fired from the hip, providing a limited ability to aim them. Arquebus were mounted with a shoulder stock that allowed the firer to aim down the barrel at the target, greatly increasing accuracy. Soldiers were also often outfitted with a wooden rest to hold the barrel, thus providing a more stable firing platform. Later in the 16th century the arquebus gave way to the new, and larger, musket. Developments of these weapons continued, from matchlock firing mechanisms to more reliable flintlock firing mechanisms, and eventually to the rifled muskets of the American Civil War. Muskets would eventually be replaced in the 19th century by breech-loading rifles, which then gave way in the 20th century to bolt-action rifles, and eventually to the semi-automatic and automatic rifles of today's battlefield. Training soldiers to fire and maintain the arquebus took months, rather than years, for bows and crossbows (though crossbows had a shorter training time than bows).
One of the innovations of this time period was adding missile-armed troops into a pike formation, to make the pike formation more effective. The missile troops would help defend the pike formation's flanks, and harry enemies. The missile troops would then move behind the pikemen when the close combat began. These missile-armed troops were crossbowmen at first, as seen at the Battle of Fornovo, but were quickly replaced with arquebusiers. Gonzalo de Córdoba is credited with the innovation of placing arquebusiers in his pike formations and this, along with a strong defensive position, helped him win a great victory at the Battle of Cerignola in 1503. Once the plug bayonet, a spike that fit into the barrel of the musket to turn it into a spear, was designed, the pike component of these formations was slowly phased out. By the mid to late 17th century, there were no pikemen in infantry formations in most European countries. In the late 17th to early 18th century the ring bayonet, which fit around the muzzle of the musket and did not block it from firing, was designed and adopted by most European armies. This was the bayonet on the muskets of the Napoleonic Wars. Today bayonets are still issued to soldiers and sometimes still used in combat.
Another of the innovations was the addition of sword and buckler armed troops. These soldiers were to use their weapons to lift the pikes of enemy units and approach the men holding the pikes. These pikemen were relatively defenseless since they could not break ranks and could not wield their pike in a face-to-face fight. The Spaniards were the first to adopt this mixed formation and it was successful at the Battle of Ravenna in 1513, even though the Spaniards lost. However, lacking the close ranks of pikemen, they were vulnerable to attack by enemy cavalry. Being skilled enough with a sword for this tactic to work took a lot of practice. In fact it took years of practice, just as it took years to be proficient with a bow, which was another drawback of this formation. By the mid-16th century the Spaniards had dropped the formation and re-ordered their pike formations into the Tercio, a formation which would dominate the battlefields of Europe for the next 100 years. The remainder of the European powers quickly followed suit and ended their experiments with sword and buckler armed formations, thus relegating this innovation to a historical curiosity.
Notes on Setup and Selecting Units
After selecting a battle to play, lay out the map and set up the units called for in the Deployment section of the chosen battle. Some units appear in more than one battle. They are made identifiable for scenario purposes by their Command Stripe color. In Arquebus, units of the same type may have different Shock Defense DRMs. This means that players need to choose the specific numbered units called for the battle.
At the start of the game, each player places his 8 possible seizure counters in a cup and blindly/randomly draws the number of seizure counters the battle specifies. He does not show these to his opponent until they are played (6.3). Put the unselected ones aside, also unrevealed.
Fornovo
Duchy of Parma, Italy ~ 6 July, 1495
Historical Background
A League army under Francesco Gonzaga, Duke of Mantua, accompanied by his brother Ridolfo, sought to destroy a French army marching home after it attacked the Kingdom of Naples, under King Charles VIII. The two armies ran into each other on the same side of the Taro River, but, while the League decided what to do, the French crossed over to continue towards Parma. The Taro River then separated them.
On 27 June the Venetians and their allies established camp near Fornovo di Taro, some 30 km southwest of Parma, to wait for the French. They would not have to wait long, but the Venetian Senate was not unanimous on fighting the French. Some members wanted to attack the rear guard of the French to try and seize their money, while others cautioned that Italy was risking too much in this battle, while for the French it was just one army. They had plenty more to draw upon.
When an effort to sway the undecided forces of Parma was thwarted by the Venetians, Charles instead sent a messenger to request free passage to return to France, but the Venetians replied that he would have to restore all his conquests before his request could be considered.
Two days later, 6 July, Charles decided to offer battle because the French were short on provisions. The League armies, mostly Venetians, were at the right side of the Taro River, and the French decided to cross to the left side of the river right in front of the League. The French position was deemed to be good for defense because the Venetians had not cleared the field, and the rain had made the river banks slippery and difficult for the cavalry.
Charles organized his army in Battle groups. The first group, the vanguard, was the largest, a troop of about 5,000 plus the artillery train, and was led by Marshal de Gie and Gian Giacomo Trivulzio. The second was led by Jean de Foix, along with Charles himself. The final group, of about 1,400, was led by Louis Trémoille. There was, in addition, a large phalanx of pike infantry. Artillery, around 30 field-level guns, ranged before the first line and protected the second line on the French side of the Taro.
The League commander, the quite competent Francesco Gonzaga, Duke of Mantua, accompanied by his brother Ridolfo, divided his forces into nine lines. His battle plan was to distract the first and middle groups of the French by two lines while flanking the rear. Once the French groups were disorganized, the rest of the Italian troops would attack. To aid this plan, a large number of stradiotti and other light cavalry were sent across the river, behind the rear of the French line of march.
Gonzaga's plan of attack – different Battles crossing to attack the outnumbered French - appeared faultless but obviously had significant problems. The battle is notable for the bad choice of ground by the League, and for their overelaborate tactical scheme. Lack of determination prevented them from driving their attacks home or from making use of their reserves, while indiscipline (looting) ruined the most promising feature of the plan – the diversion of the stradiotti and light cavalry, behind the French rear and baggage train.
The League's plan correctly identified the French center and Charles as the most promising target and allotted 10,000 men in the Battle groups of Gonzaga, Garlino, Fortebraccio and Montefeltro to defeat the 3,900 men of the French center and rearguard.
However, the above factors eroded the mass and energy of the main thrust: "Thus, at the moment of confrontation, Gonzaga and Fortebraccio were left without support, and the French probably outnumbered them". The river itself was a problem. For one, the banks were often steep and mostly covered with heavy brush, often disordering troops getting to land. And, because of the previous rain, the river kept rising, making it more difficult to use reserves.
This battle is classified as a draw and had little eventual consequence, but did create a situation in which decisive results and consequences were possible. In a strategic sense, the French were able to achieve their objective of continuing on to France as a result of their tactical victory over League forces on every front. However, League cavalry was able to loot the French baggage train, claiming 180,000 gold ducats as well as forcing most French soldiers to go without tents, dry clothes and food for the night (Nicolle, 1996: 73). Aside from sowing tensions among the League commanders, the League army may have been in a better state compared to the French after the battle, suffering proportionately fewer casualties and possessing more fresh soldiers. Of course, neither army followed up the battle with bold action, thus the battle is remembered as an indecisive draw.
Numbers for this battle are drawn from Santosuosso who describes the composition of each army's many moving parts in detail (1994: 228-232). Nicolle's Osprey edition was extremely helpful with the battle's events, with only a few difficult reconciliations between the two sources. I did however add the 1,000 low-quality infantry to the French baggage train that Nicolle mentions (1996: 53) but Santosuosso omits.
After over an hour of fighting, both sides returned to camp. The French had lost about a thousand men, while the Venetians lost twice that many. Many nobles had died. The French had lost the booty of the Italian expedition. A day's truce was declared for burial of the dead. The dead and even the wounded were looted by the victorious League infantry and then the local peasantry.
Playing Time
Playing Time averaged about 3 hours for the playtesters.
Initial Deployment
The French Army sets up first. All Artillery sets up limbered or unlimbered as the player wishes.
French Army
Leaders: King Charles VIII (OC), Pierre de Rohan, Marshal de Gie, Jean de Foix, Vicomte of Narbonne, Louis II, Seigneur de la Trémoille, Guyot de Louviers.
Seizure Counters: 2
Standards: France; the French Standard may be placed anywhere the French player wishes.
Facing: All units, save the Baggage Train, are faced east. The Baggage Train units are faced west.
Deployment:
- King Charles VIII (Purple command stripe) — Hex 2140: Charles VIII and his Bodyguard Mounted Men-at-Arms (#1 +3).
- Pierre de Rohan, Marshal de Gie (Black command stripe) — Hexes 1739-1741: 1 French Mounted Men-at-Arms (#2 –1), 1 Italian Mounted Men-at-Arms (#1 +1), 1 French Mounted Crossbow (#1 +2), Gie. Hexes 1840-1843, 1940-1942: 5 Swiss Pike w/No missile (#1-2 -2, #3-5 –1), 1 French Longbow (#1 +2), 1 Royal Guard Crossbow (#1 +1). Hexes 2040-2042: 3 Gascon Crossbow (#1-3 +1).
- Jean de Foix, Vicomte of Narbonne (Aqua command stripe) — Hexes 2240-2242, 2339-2340, 2440-2441: 2 Landsknecht Pike w/No missile (#1-2 –1), 1 Scots Longbow (#1 +2), 2 French Mounted Men-at-Arms (#1 –1, #2 0), 2 French Mounted Crossbow (#1-2 +2), Narbonne.
- Louis II, Seigneur de la Trémoille (Red command stripe) — Hexes 2539-2540, 2640-2641: 2 Scots Guard Pike w/No missile (#1-2 +1), 1 Scots Guard Longbow (#1 +3), 1 Scots Guard Mounted Men-at-Arms (#1 –1), Trémoille.
- Guyot de Louviers [a] (Green command stripe) — Hexes 1539, 1639, 1738, 1839, 1938, 2039, 2138, 2239: 1 French Falconet artillery (#1), 2 French Saker artillery (#1-2), 2 French Culverin artillery (#1-2), 3 French Heavy Cannon artillery (#1-3), Louviers.
- Baggage Train (Grey command stripe) — Hexes 2940, 3040, 3140: 3 Baggage Wagons (#1-3) (use the four movement side of the counters), 3 Baggage Train Crossbow (#1-3 +3).
a: Killed during the battle.
Army of the League of Venice
Leaders: Francesco Gonzaga, Duke of Mantua (OC), Pietro Duodo, Gianfrancesco, Count of Caiozzo, Bernardino Fortebraccio de Montone, Carlo di Pian di Melita.
Seizure Counters: 3
Standards: Venice; the League of Venice Standard may be placed anywhere the League player wishes.
Facing: Duodo's units are faced east. All other units are faced northwest.
Deployment:
- Francesco Gonzaga, Duke of Mantua [a] (Grey command stripe) — Hexes 2232, 2432: 2 Venetian Mounted Men-at-Arms (#1-2 –2), Gonzaga. Hexes 2130, 2230: 2 Venetian Mounted Men-at-Arms (#3 –2, #4 –1). Hexes 2231, 2330, 2431: 3 Venetian Light Cavalry (#1-3 –1). Hexes 2630-2632, 2729-2732, 2830-2832: 8 Venetian Sword & Buckler w/Crossbow (#1 –2, #2-5 –1, #6-8 0), 2 Mantuan Sword & Buckler w/Crossbow (#1 –1, #2 0).
- Pietro Duodo (Purple command stripe) — Hexes 3442, 3342-3343, 3242-3243: 2 Venetian Stradiotti Cavalry (#1 –2, #2 –1), 1 Venetian Light Cavalry (#1 +1), 2 Venetian Mounted Crossbow (#1-2 +1), Duodo.
- Gianfrancesco, Count of Caiozzo (Orange command stripe) — Hexes 1531, 1631, 1730, 1831: 4 Milanese Sword & Buckler w/No missile (#1-2 +1, #3 +2, #4 +3). Hexes 1632, 1731: 2 Venetian Mounted Men-at-Arms (#2-3 –1), Caiozzo. Hex 1532: 1 Venetian Mounted Men-at-Arms (#4 0).
- Bernardino Fortebraccio of Montone (Gold command stripe) — Hexes 2932, 3032: 2 Venetian Mounted Men-at-Arms (#1-2 -2), Fortebraccio. Hex 3031: 1 Venetian Mounted Men-at-Arms (#3 -1). Hex 3132: 1 Venetian Genitors (#1 -1).
- Carlo di Pian di Melita [b] (Blue command stripe) — Hexes 1727, 1827, 1828, 1927: 1 Venetian Mounted Men-at-Arms (#1 0), 3 Friulian Sword & Buckler w/No missile (#1-3 0), Melita.
- Artillery [c] (Green command stripe) — Hexes 2024, 2224, 2725, 2825: 4 Venetian Heavy Cannon artillery (#1-4). Hexes 1826, 2131, 2229, 2928, 3330: 1 Venetian Falconet artillery (#1), 2 Venetian Saker artillery (#1-2), 2 Venetian Culverin artillery (#1-2).
a: No, not the Duke of Mantua in Verdi's Rigoletto. b: "Encamped"; see the Encamped rule below. c: The Venetian Artillery moved up to the edge of the Taro to keep the French from re-crossing to the Venetian side. Otherwise, it doesn't appear to have done much. There is no artillery commander (6.4).
Who Goes First
The League of Venice has the first Activation to start the game.
Terrain
The game-map is based on the most detailed battlefield map we had, as well as pictures of the actual area (obviously taken recently) plus descriptions of the battle and the effects of the area thereon. Some notes:
The river basin and lands beneath the hills were farmland, rather crisscrossed by irrigation ditches, canals, etc., which made much of it somewhat, well, not truly firm under foot. Then again, it was tough to tell the local roads and trails from streams on our sources… There were, it seems, a large number of cultivated fields and such which did not figure in the scheme of things, so they do not appear. The towns were small but closely packed with narrow streets and lots of walls. They still are.
The banks of the Taro River, sometimes steep, were often clogged with tangled growth, bushes, etc., which made getting on land from the river not that easy. Therefore, any unit that moves or Advances from a Taro River or marsh hex to a shoreline hex (e.g., 1834 into 1835) must check to see if it is Disordered in doing so. Roll one die, adding the Shock Defense DRM of the unit.
- If the adjusted DR is 5 or more, that unit is immediately Disordered.
- If the adjusted DR is 4 or less, no effect.
Those marshy areas within the river did not make movement in the river easy, given that they were so "marshy". They appear to have been totally avoided by any troop movements.
The river bed was, for the most part (but see below) shallow (thigh-high). However, it was very rocky making it difficult for the horses (not to mention men)… And it kept rising during the battle.
All Level 3 Terrain is Rough; much of it was probably covered by trees (as the photos of today indicate), and, at that level, the ground was not conducive to easy military movement.
Where a stream or irrigation ditch enters the Taro River in a Shoreline hex, the stream hexside effect applies when units cross that hexside.
The Rising River
It had rained the entire day before the battle, and the rain continued intermittently during the battle. The level of the river kept rising, making crossing it an ongoing, changing problem… especially for infantry. Therefore, after each Activation, roll one die:
- If that DR is 7 or more, the river rises. The effect is that +1 is added to movement into any Taro River or marsh hex. There is a maximum of +2 to this, but a unit may always move one hex from one Taro River or marsh hex or into an adjacent Taro River or marsh hex. Use the River Rise marker on the General Track to track this status.
- If that DR is 6 or less, no effect.
Encamped
Melita's Battle was encamped in a fortified camp (whatever that means here, in terms of a moving army). Therefore, place an Encamped marker on top of each unit therein. The effects of this are:
- To voluntarily move out of camp, the Battle must be Activated and that Activation may only be used to remove the Encamped marker. When Activated without an Encamped marker move out of camp, they may move, fire, and Shock normally for the rest of the game.
- Remove the Encamped marker if the unit is forced to Retreat or is Retired.
- If they are Shock attacked while encamped, a –2 DRM is added to the attackers DR. Encamped units may not initiate Shock or Charge attacks.
- Any missile fire against an Encamped unit has a –1 DRM, in addition to any others.
Over-Elaborate Plan
Due to the over-elaborate plan that Gonzaga attempted, the League of Venice may not use Army Activation.
Arquebusiers
Very few sources show either army with any arquebusiers, like none we could find.
Charles VIII and His Bodyguard
The French Bodyguard unit represents less than a dozen hand-picked knights and our representation of it in the game is quite generous. The Bodyguard unit moves with Charles VIII during every French Free Activation (when Charles moves as OC) and the two must remain stacked until one or the other is Eliminated. The Bodyguard unit is not part of any French Battle. If the Bodyguard is Eliminated, Charles VIII need not remain stacked with a French unit. If Charles VIII is killed, the Bodyguard unit is removed as they carry his body back to France, the French still gain ten Flight Points for Charles' death. The French player does not incur Flight Points for the removal of the Bodyguard unit in this case.
Who Goes First / Swiss Aggression
The Swiss pikemen—infamous for their monetary positions—were highly aggressive at Fornovo (mostly because of looting possibilities). Therefore, in any turn in which a Battle containing Swiss pike units is Activated, any/all non-Retired Swiss pike units that are within two hexes (regardless of facing) of one or more enemy units and not Engaged, must attempt to move adjacent to one of those units (French player's choice) and attack.
In Fornovo, the Swiss do not use the Swiss Shock Reluctance rule (16.2) (obviously).
Baggage Wagons
The French Baggage Train does not have a leader, it may only be Activated by Free Activation and are always Out of Command. French Baggage Wagons may stack with any one friendly foot unit that is not Pike or Baggage Wagon (10.0). A Baggage Wagon alone in a hex may not be attacked in Shock/Charge combat or fired at by missile-armed units. A Baggage Wagon is not affected by combat results inflicted upon an infantry unit it is stacked with. If a stacked foot unit vacates the Baggage Wagon's hex during Shock/Charge combat and the enemy unit is eligible to Advance After Combat, it may Advance and stack with the Baggage Wagon (in contravention of the normal stacking rules).
Baggage Wagon Capture and Looting
If any League unit begins the Continuation Phase (Phase E) in the same hex as a Baggage Wagon and/or in an adjacent hex to one or more Baggage Wagons not stacked with a French foot unit, that Baggage Wagon is captured. Remove the Baggage Wagon from the game and increase the French Flight Points by two. Then, roll one die and add the League unit's Shock Defense DRM to see if the League unit loots the Baggage Wagon:
- If the adjusted DR is 3 or more, the League unit loots that Baggage Wagon and runs off with the spoils. Remove the League unit from the game, but do not count the unit as Eliminated for Flight Points.
- If the adjusted DR is 2 or less, the League unit has captured the Baggage Wagon and only minor looting has occurred.
A League unit can capture/loot more than one Baggage Wagon at a time, all looting DRs by one unit are simultaneous. If more than one unit could capture/loot a Baggage Wagon, any unit stacked with the Baggage Wagon rolls first, thereafter the League player designates the order of the DRs.
Game Balance
The League of Venice outnumbers the French in total men by about 33%; however, the League is going to have a difficult time bringing half their army across the Taro River. The League has more high quality Pike and numerous, excellent quality, Mounted Men-at-Arms. French command is mediocre (especially King Charles). Given all that, the balance is not great in either direction, as is reflected by the historical view that the battle was considered an inconclusive draw (with the French losing somewhat more men).
Flight Levels
Automatic Victory: If the French can get 60 FP (3.0) off the north edge of the map (see map exit above) they instantly win. Otherwise, its Flight Point time, even if King Charles gets killed (which he almost did).
A looted Baggage Wagon incurs 2FP per Baggage Wagon for the French, a Baggage Wagon that exits the map counts as 5 FP for the map exit rule.
French Flight Level is 45 FP.
League of Venice Flight Level is 35 FP.
Map Exit
In contravention of the normal movement rules, non-Retired French units can exit the map from hexes 1038-1044. They pay one (1) MP to do so. They may also retreat off the map through those hexes. Leaders may not exit the map. If all of a leader's units are Eliminated or have exited the map, he is removed per 5.0. Count his Flight Points as exited as long as he would not qualify for the capture rule (5.4) in his current hex, in which case he is captured (5.4). King Charles and his Bodyguard may never leave the map while Charles is alive. Exited units and leaders do not count against the French FP total. Venetian units may not enter these hexes.
Cerignola
Kingdom of Naples, Italy ~ 28 April, 1503
Historical Background
The French were marching to Cerignola, strung out along the road, advancing without reconnaissance, and harassed by Spanish light cavalry. It was very late in the day when they finally arrived before Cerignola. On seeing the Spanish army below the town, the French held a council of war to determine their next move.
The Duke of Nemours favored waiting until morning to attack. This would allow his artillery (struggling up the road some distance to the rear) to come up, and his tired infantry (some of whom had suffered heat stroke) to rest after their long, hot march. Many of Nemours' captains disagreed. Even though the army had not yet fully arrived, Yves d'Alégre, amongst others, urged an immediate attack. Surely, they said, one violent attack with a combination of the Swiss and Gendarmes that were present would decide the battle – as they always had – and afterwards they could all sleep, victorious, in comfortable beds in the town.
The council became argumentative and Nemours was forced to bow to his officer's wishes. No one in the French army had seen the deepened ditch and rampart that separated them from the Spanish troops.
The French deployed in three columns, echeloned from right to left. The right wing under Louis d'Ars comprised heavy and light cavalry. The center comprised the Swiss under Tambien Chandieu and the Gascon infantry. The left, which had not fully arrived on the field, comprised heavy and light cavalry under Yves d'Alégre. The artillery was still on the road and miles away.
The Spanish deployed behind their rampart. In the center of the line Gonsalvo placed his German Landsknechts under the command of Fabricio Zamudio. To either flank of the Landsknechts were Spanish infantry, deployed for the first time in permanently organized battalions called coronela. These were commanded by Pizarro and Diego Garcia de Paredes. The front was effectively manned by arquebusiers from end to end. The mixed Italian and Spanish cavalry was drawn up, in reserve, behind the wings and center. The heavy cavalry was commanded by Fabrizio Colonna on the left, and by Gonzalo de Córdoba in the center. The light cavalry was, after coming in from its harassing duties, placed on the right. The artillery was drawn up on the crest of the slope and was trained on d'Ars' heavy cavalry.
Nemours ordered the trumpets to sound the attack. The French line moved forward under fire from Spanish arquebusiers and artillery. A light wind blew the powder smoke towards the French and that, with the clouds of dust kicked up by the horse's hooves, blinded them to the danger of the ditch until they were upon it. The French were brought to an abrupt halt at the edge of the unexpected obstacle and subjected to a murderous fire. It was several minutes before the French crossed the ditch and came to close quarters with its defenders on the other side.
Suddenly, there was a moment of panic in the Spanish ranks as a powder magazine blew up inside the entrenchment. Gonzalo, seeing his troops flinch, rode up in person to restore their courage. All along the ditch the French tried to break through the Spaniard's defensive line. Attempt after attempt was made in vain. Crashing volleys of Spanish arquebus fire poured into them and soon the French were knee deep in mud, and the blood of their piling dead. As the sun began to set the Duke of Nemours, riding along the line shouting words of encouragement to his men, was shot by an anonymous arquebusier. Then Chandieu crossed the ditch in an attempt to find a gap. He was immediately identified by his white plumes and fell, armor sieved, in a hail of shot. Darkness fell and the leaderless French began to falter.
Gonzalo ordered a general advance. His infantry leaped across their breastwork crying out "Castile, Aragon, Santiago!" His cavalry crossed the ditch and wheeled in on the French flanks. The French broke. The slaughter was terrible. Only the darkness saved them from being completely massacred. The battle had lasted little more than an hour but, in that time, more than 4000 French soldiers had been slain. The Spaniards had lost less than 100 men.
For the first time in history, an army comprising the best troops in Europe had been defeated by a thin line of ragged soldiers wielding short lengths of iron tube loaded with gun powder and lead pellets. Warfare was changing…
Playing Time
This is a small, fast, and great solitaire battle. A good battle to get used to the system. Playing time averaged about 1½ hours for the playtesters.
Initial Deployment
The French Army sets up first. All Artillery sets up limbered.
French Army
Leaders: Louis d'Armagnac, Duke of Nemours (OC).
Seizure Counters: 2
Standards: France; the French Standard may be placed anywhere the French player wishes.
Facing: All units are faced north.
Deployment:
- d'Ars (Red command stripe) — Hex 1311: 1 French Stradiotti (#1 0). Hexes 1309-1310: 2 French Mounted Men-at-Arms (Gendarmes) (#6-7 0).
- Chandieu (Black command stripe) — Hex 1310: Nemours. Hexes 1206-1209, 1106-1108: 7 Swiss Pike w/No missile (#4-5 –1, #6-9 0, #10 +1). Hexes 1103-1105, 1004-1005: 5 French Sword & Buckler w/Crossbow (#1-5 0).
French Reinforcements
d'Alegre's left wing command (French cavalry) was late in getting to the field, while the artillery never arrived. Historically, they were late enough so that the only effect they had was to act as rearguard defense for the French retreat. Here we make it a "Who Knows When" special.
Every time the French player activates his cavalry, including successful Continuation, he rolls to see if d'Alegre's Battle enters the game. For each Activation he has previously rolled (and failed) he adds one (+1) to that DR. Use the French Reinforcement DRM marker to track this. Thus, if this is his third try, he adds +2.
- If the DR is 9 or more, d'Alegre's Battle enters between 1002-1005 (inclusive) Activated along with the French cavalry. No more d'Alegre DR are made.
- If the DR is 8 or less, d'Alegre's Battle is still on its way, no effect.
d'Alegre's Battle (Red command stripe) — 1 French Mounted Men-at-Arms (#8 0), 2 French Mounted Crossbow (#1-2 +2). These units enter through hexes 1002-1005.
Spanish Army
Leaders: Gonzalo de Córdoba (OC).
Seizure Counters: 3
Standards: Spain; the Spanish Standard may be placed anywhere the Spanish player wishes.
Facing: All units are faced towards the French.
Deployment:
- Zamudio and Paredes (Brown command stripe) — Hexes 1605-1609: 5 Landsknecht Pike w/Arquebus (#8 –2, #9-10 –1, #21-22 0). Hexes 1603-1604, 1610-1611: 4 Spanish Sword & Buckler w/Arquebus (#1-2 –2, #3-4 –1). Hex 1706: Córdoba.
- Gonzalo of Córdoba (Red command stripe) — Hexes 1704, 1709: 2 Spanish Mounted Men-at-Arms (#1-2 –1). Hexes 1800, 1812: 2 Spanish Genitors (#4-5 +3). Hex 1801: 1 Spanish Mounted Crossbow (#1 +2).
- Navarro (Green command stripe) — Hexes 2010-2011: 2 Spanish Saker artillery (#1-2).
Who Goes First
The French have the first Activation to start the game.
Leaders and Battles
This is a very small battle, so the only leaders for each side are the Overall Commanders. Each OC is the Battle leader for all Battles for his side and his Activation Rating is used for all Continuation rolls. Even though the same leader is used for all Battles, a Battle that was just Activated cannot roll for Continuation.
The French have two Battles: Infantry (Black command stripe) and Cavalry (Red command stripe).
The Spanish have three Battles: Infantry (Brown command stripe), Cavalry (Red command stripe), and Artillery (Green command stripe).
The Spanish Defenses
The Spaniards are deployed behind a deep ditch and a dirt walled rampart, giving them exceptional positioning. What is worse for the French is that the day was so dusty that they could not see these defenses until they actually reached them.
Therefore, any French unit that moves adjacent to a Spanish unit separated by a Ditch hexside (with or without Rampart) must stop immediately. That unit may fire but cannot Shock Attack during that Activation. This restriction applies until a French unit crosses a Ditch hexside with a Rampart. French units may then move adjacent to a Spanish unit, separated by a Ditch, and Shock attack during the same Activation. A French unit that receives a Continued Attack result must Shock attack, even if it just Advanced adjacent to a Spanish unit separated by a Ditch hexside. No unit may Charge across a Ditch hexside.
A unit Shock attacking across a ditch from a hex without a Rampart in it, must check to see if it is Disordered before actually making the attack DR (Step 2 of the Shock Phase). In addition, roll for Disorder if a unit moves across a Ditch hexside or Advances across a Ditch hexside from a hex that contains a Rampart on its hexside. Regardless of the effect of the Disorder roll, a unit cannot Charge during that Activation after crossing the Ditch. Attacking units that are required to roll for Disorder can never gain Angle of Attack position advantage (Die Roll Modifiers for Resolving Shock #2). The player rolls one die, and adds the Shock Defense DRM of the unit:
- If the adjusted DR is 5 or more, that unit is Disordered and, if during an attack, the Shock attack is undertaken as Disordered.
- If the adjusted DR is 4 or less, no effect.
Explosion
Any time the Spanish player Activates his Infantry he must check to see if some of his powder has exploded (as it did in the actual battle). At the end of the Rally Phase (Phase D), roll one die:
- If the DR is 6 or more, an explosion has occurred. Roll the die again and consult the Cerignola Spanish Explosion Table on the map to determine where the explosion occurs (rerolling if necessary per the table). All Spanish units, including the one indicated by the table if a Sword & Buckler or Pike unit, within 2 hexes of the explosion are immediately Disordered. This is due to the detrimental effect on morale from the explosion within their lines. There is no effect on Córdoba. No more explosion DRs occur in the game.
- If the DR is 5 or less, no explosion occurs. The Spanish player must roll again the next time the Infantry is Activated.
Timed Engagement
This battle uses the timed engagement rule (16.1). Initially, set the Time marker in the 12 space on the General Track. The French are the timed side in this battle. Until a French unit crosses a Ditch hexside with a Rampart, the Time marker is moved one space towards zero at the beginning of every Spanish Free Activation, without the Spanish player needing to Pass. Once a French unit crosses a Ditch hexside with Rampart, the Spanish player has to Pass to move the Time marker per 16.1.
Game Balance
Without an explosion, this is a Spanish runaway. They have a great defensive position, and they have all the artillery and arquebuses. They also have a great commander, but that is not taken so much into effect in play terms. If the French can use an explosion to pinpoint a massive charge and get a breakthrough, they just might make it close.
Hypothetical Battle (favors French)
What if Nemours' subordinates had listened to him and waited until the next day—when his entire army would be present (and not exhausted for an all-day march)? This should make a more interesting battle. Let's see!
Add d'Alegre's Cavalry and the army's Artillery to the historical deployment:
d'Alegre (Red command stripe) — Hexes 1210-1212: 1 French Mounted Men-at-Arms (#8 0), 2 French Mounted Crossbow (#1-2 +2).
Artillery (Green command stripe) — Hexes 1305-1308: 4 French Culverin artillery (#1-4).
Add another Battle, Artillery (Green command stripe), to the French for Activation.
Decrease all French units Shock Defense DRM by one (so a 0 becomes a –1). This is the effect of rest, as the Shock Defense DRM on the counters represent a historically exhausted army.
Change the French Flight Level to 30.
Flight Levels
Balance: The Spanish are favored in the historical battle.
French Flight Level is 25 FP.
Spanish Flight Level is 15 FP.
Agnadello
Ghiaradadda Region, Italy ~ 14 May, 1509
Historical Background
On 15 April 1509, a French army under Louis XII left Milan and invaded Venetian territory. Venice massed a mercenary army near Bergamo, jointly commanded by the Orsini cousins, Bartolomeo d'Alviano and Niccolò di Pitigliano. The Orsini had orders to avoid a battle with the French, and spent the next several weeks engaged in light skirmishing.
Louis crossed the Adda River at Cassano d'Adda by 9 May. Encamped around the town of Treviglio, the Orsini brothers disagreed on how to deal with Louis. Alviano wanted to attack the French in defiance of orders, while Pitigliano wanted to continue skirmishing and disrupting the French advance. They finally decided to move south, towards the Po River, in search of better positions.
On 14 May, as the Venetian army moved south and Alviano's rearguard, commanded by Piero del Monte and Saccoccio da Spoleto, was attacked by a French detachment under Charles II d'Amboise. D'Amboise had massed his troops around the village of Agnadello. Alviano was at Pandino and hurried back to position his forces. He and his eight thousand troops set up on a ridge overlooking some vineyards. Charles II attacked, first with cavalry and then with Swiss pikemen. The French were unable to breach the Venetian lines, having to attack up a hillside crossed with irrigation ditches, which were filling with mud from the pouring rain.
Pitigliano was moving ahead of Alviano, and was several miles away when the French attacked. Alviano requested help from Pitigliano and in response Pitigliano sent a note suggesting that a pitched battle should be avoided. He then continued his march south.
During the battle, King Louis XII reached Agnadello with the remainder of the French army. The French were able to surround Alviano on three sides. They then proceeded to destroy Alviano's forces over the next three hours. The Venetian cavalry collapsed and fled, then Alviano was wounded and captured. More than four thousand of Alviano's men were killed, including his commanders Spoleto and del Monte, and 30 pieces of artillery were captured.
Pitigliano had avoided engaging the French directly, but his brother had not. News of the disastrous battle reached him by the evening. By morning the majority of his forces had deserted. The French army continued to advance and Pitigliano hurriedly retreated towards Treviso and Venice. The French king proceeded to occupy the remainder of Lombardy.
In Machiavelli's "The Prince" the battle of Agnadello is mentioned. Machiavelli wrote that in one day, the Venetians "lost what it had taken them eight hundred years' exertion to conquer".
Playing Times
Playing time averaged about 3 hours or the playtesters.
Initial Deployment
The French Army sets up first. All Artillery sets up unlimbered.
French Army
Leaders: King Louis XII (OC), Charles d'Amboise, Seigneur de Chaumont, Louis II, Seigneur de la Trémoille.
Seizure Counters: 3
Standards: France; the French Standard may be placed anywhere the French player wishes.
Facing: Chaumont's units are faced towards the northeast, while King Louis's units are faced southeast.
Deployment:
- Charles d'Amboise, Seigneur de Chaumont [a] (Aqua command stripe) — Hexes 3415, 3514, 3614, 3713: 4 Swiss Pike w/No missile (#2-3 –1, #4-5 0) [b]. Hexes 3218, 3317, 3417, 3516, 3616, 3715, 3815: 7 Gascon Crossbowmen (#1-2 0, 3-7 +1), Chaumont. Hexes 3517, 3617, 3716: 2 French Mounted Men-at-Arms (#1 –1, #2 0), 1 Italian Mounted Men-at-Arms (#1 0).
- King Louis XII (Black command stripe) — Hexes 3016, 3116, 3216, 3315: 4 Swiss Pike w/No missile (#1 –2, #3 –1, #6-7 0) [b]. Hexes 2413, 2513, 2614, 2714, 3016, 3116, 2716: 2 French Falconet artillery (#1-2), 3 French Saker artillery (#1-3), 1 French Culverin artillery (#1), 7 French Sword & Buckler w/Arquebus (#1-3 0, #4-7 +1). Hexes 2415, 2515, 2616, 2618, 2718, 2817, 2917: 2 French Mounted Men-at-Arms (#1 –2, #2 –1), 2 French Light Cavalry Archers (#1 –1, #2 0), 3 French Light Cavalry (#1 –1, #2-3 0), Louis XII.
a: There is no indication of use of the arquebus in this specific French Battle. The French still heavily relied on the crossbow. b: The quality of Swiss Pike had diminished somewhat from the previous century.
French Reinforcements
The French player has the choice, during each Free Activation, to Activate a Battle on the map or roll to enter his reinforcing Battle. If he chooses to roll to enter a reinforcing Battle, he rolls one die:
- If the DR is a 3 or less Trémoille's Battle is Activated and enters as that Free Activation.
- If the DR is 4 or more, no reinforcements enter and the French player loses the Activation. He may then roll for Continuation normally.
Trémoille's Battle (Red command stripe) — 4 French Mounted Men-at-Arms (#2-5 –1), 4 French Light Cavalry (#1 –1, #2-3 0, #4 +1), 10 French Sword & Buckler w/Arquebus (#3-7 0, #8-12 +1), 2 French Falconet artillery (#1-2), 3 French Saker artillery (#1-3), 1 French Culverin artillery (#1), Trémoille. These units enter through hexes 3021-3521. When the first unit of Trémoille's Battle enters, add 20 to the French Flight Level using the French Current Flight Level marker.
Venetian Army
Leaders: Bartolomeo d'Alviano (OC), Alberto III Pio di Carpi.
Seizure Counters: 2
Standards: Venice; the Venetian Standard may be placed anywhere the Venetian player wishes.
Facing: All units are faced towards the northwest.
Deployment:
- Alberto III Pio di Carpi (Grey command stripe) — Hexes 2811, 3809: 2 Venetian Mounted Men-at-Arms (#4-5 –1). Hexes 2812, 2912, 3013, 3113, 3213, 3311, 3411, 3510, 3610, 3710, 3810: 1 Venetian Light Cavalry (#4 0), 3 Venetian Falconet artillery (#1-3), 4 Venetian Sword & Buckler w/No missile (#1 –1, #2-3 0, #4 +1), 6 Venetian Sword & Buckler w/Arquebus (#1-2 –1, #3-6 0), 2 Venetian Saker artillery (#1-2). Hex 3110: Carpi.
- Alviano's Battle (Orange command stripe) — Hexes 3209, 3309, 3409, 3508, 3608: 5 Venetian "Provisional" Sword & Buckler w/Arquebus [a] (#1 –2, 3-6 0). Hexes 2104, 2205, 2305, 2406: 3 Venetian Mounted Men-at Arms (#1 –2, #2-3 –1), 1 Venetian Stradiotti (#1 –1). Hexes 2104, 2205, 2305, 2406, 2809, 2909: 6 Venetian Sword & Buckler w/Arquebus (#2 –1, #7-10 0, #11 +1), 1 Venetian Falconet artillery (#1), 1 Venetian Saker artillery (#1). Hex 3007: Alviano.
a: The term "provisional" referred to regular infantry.
Who Goes First
The French have the first Activation to start the game.
Terrain
Most of the battlefield consisted of farm fields, with some vineyards mixed in. It was well irrigated, for the battlefield was crisscrossed by ditches and muddy at best, due to rain that occurred before or during the battle. That's why movement costs are a tad higher for some units in clear terrain.
The Ditch
This defensive work was apparently a dry irrigation ditch that the Venetians pressed into service. They may have dug it a little deeper, but sources conflict.
Timed Engagement
This battle uses the timed engagement rule (16.1). Initially, set the Time marker in the nine space on the General Track. The French are the timed side in this battle.
Game Balance
The French really outnumber the Venetians and, despite some clever defensive tactics by the canalsuckers, the French eventually just wore them down. So this is a tough battle for the Venetian player… not recommended for a novice to the game or the hobby. However, if you decide to use the variant below, that could change.
Pitigliano to the Rescue (favors Venetians)
The Venetian column under Nicolò Orsini Conte di Pitigliano numbering around 11,000 men did not join their compatriots in the battle. However, if you want to see what could have happened had Orsini decided that helping out his compatriots was advisable, here is a major "What-If" possibility (albeit, not a probability).
On (or after) the 3rd Venetian Free Activation after all French units are on the game map, the Venetian player may enter Pitigliano's Battle using a Free Activation (the French player may not hold units off the map to avoid this).
Pitigliano's Battle (Green command stripe) — 4 Venetian Mounted Men-at Arms (#1 –2, #2-3 –1, #4 0), 1 Venetian Light Cavalry Archer (#1 +1), 1 Venetian Light Cavalry (#1 0), 2 Venetian Stradiotti (#1-2 –1), 14 Venetian Sword & Buckler w/Arquebus (#1 –1, #2-10 0, #11-14 +1), 2 Venetian Saker artillery (#1-2), 2 Venetian Culverin artillery (#1-2), Pitigliano. These units enter through hexes 4200-4205. When the last unit of Pitigliano's Battle enters, add 10 to the Venetian Flight Level using the Venetian Current Flight Level marker.
Flight Levels
The French Flight Level is 25 FP.
The Venetian Flight Level is 50 FP.
Ravenna
Papal States, Italy ~ 11 April, 1512
Historical Background
In April 1512, a French army, with troops from its ally the Duke of Ferrara, was besieging the Italian city of Ravenna, while a Spanish-Papal army marched to its relief. As was usual in the Italian Wars, the French had far more striking power, concentrated in its 2,000 noble, heavily armored Gendarmes and 5,000 Landsknechts. They were supported by another 10,000 French and Italian infantry of more dubious quality, and 2,000 light cavalry, of which a body of stradiots was the most formidable. Critically, the French army also included 54 cannon.
The Spanish-Papal army fielded twelve of the new 'colunelas', mixed pike, arquebus and sword-and-buckler men with a theoretical strength of 1,000 each. (It is possible a few of these formations were still the old closed-order type.) In addition there were around 2,000 Papal infantry, mainly crossbowmen with some pike support, a little over 1,000 Spanish and 670 Papal men-at-arms, and 1,700 lighter cavalry, half of which were the famous Spanish genitors. They were supported by 30 cannon.
This wasn't enough to face the French army in the open, but the master engineer, Pedro Navarro, had constructed entrenchments to establish a position that would be impregnable to attack. Since the French could neither undertake a formal siege of Ravenna with such an enemy force nearby, nor beat it out of its entrenchments, Ravenna would be relieved.
This was to be the first real artillery battle of the Renaissance. The French commander, Gaston de Foix, formed up opposite the entrenchment but, instead of attacking, opened fire with his artillery. A small battery attached to the French bridge guard moved down the west side of the Ronco River and enfiladed the Spanish position. Although the Spanish infantry were reasonably sheltered, their cavalry, forced to remain mounted, suffered terribly. After about two hours their light cavalry made a charge for the guns of Ferrara and were met by the French cavalry. The Spanish commander, Ramón of Cardona, Viceroy of Naples, was obliged to send in his own heavy cavalry, which was duly beaten by the more numerous and better quality French. While this was going on, Gaston sent in an infantry assault against the entrenchment, which was beaten off with significant losses.
However, once the Spanish cavalry had been disposed of, the French launched a combined arms attack, both frontally and round the sides of the entrenchment. Both the Landsknechts and, more surprisingly, some of the Gendarmes were able to cross the rampart (perhaps it had been battered down by the artillery?). From that point on, the battle became a massacre. To their tragic 'credit,' all twelve of the Spanish pike formation commanders were killed outright or mortally wounded at the head of their corunelas, while the Viceroy fled and Pedro Navarro was captured.
Playing Time
A nasty, nasty heavy artillery battle, and probably, the first major artillery battle of the Renaissance. Lots of decisions to make. Playing time averaged about 3 hours for the playtesters.
Initial Deployment
Historical Note: While all sources pretty much agree on the general dispositions of the units, there is little agreement on specifics units. We have opted to go with the Thomas Arnold deployments, which match several others.
The French Army sets up first. All Artillery sets up unlimbered.
French Army
Leaders: Gaston de Foix, Duke of Nemours (OC), Alfonso d'Este, Duke of Ferrara [a], Le Seigneur de Molard, Jakob Empser, Thomas Bohier, Seneschal of Normandy, Frederico de Bozzolo, Gian Bernardo Caracciolo.
Seizure Counters: 2
Standards: France; the French Standard may be placed anywhere the French player wishes.
Facing: All units are faced towards the Spanish trench and ramparts.
Deployment:
- Ferrara's French Mounted Men-at-Arms [b] (Black command stripe) — Hexes 4704, 4804-4805: 3 French Mounted Men-at-Arms (#3 -1, #4-5 0), Ferrara.
- Artillery [c] (Green command stripe) — Hexes 4904, 5005, 5105-5106: 2 French Saker artillery (#1-2), 2 French Culverin artillery (#1-2).
- Gascon Crossbowmen (Grey command stripe) — Hexes 5206-7, 5306: 3 Gascon Crossbow (#1-3 +2).
- Landsknecht Pike (Bronze command stripe) — Hexes 5208-5211, 5307-5310: 8 Landsknecht Pike w/Arquebus (#1 -2, #2-6 –1, #11-12 0), Empser.
- Picard Pike [d] (Gold command stripe) — Hexes 5114, 5212-5216, 5312-14, 5414: 10 Picard Pike w/No missile (#1 –1, #2-4 0, #5-8 +1, #9-10 +2), Molard.
- Bohier's French Mounted Men-at-Arms [e] (Red command stripe) — Hexes 5015-5016, 5115: 3 French Mounted Men-at-Arms (#1-3 –1), Bohier.
- Italian Sword & Buckler [f] (Aqua command stripe) — Hexes 4618-4619, 4717-4718, 4817-4818, 4915-4916: 8 Italian Sword & Buckler w/Arquebus (#1 –1, #2-4 0, #5-8 +1), Bozzolo.
- Ferrara's Artillery (Orange command stripe) — Hexes 4517, 4617, 4716, 4816: 4 Ferrara's Culverin artillery (#1-4).
- French Light Cavalry & Archers [f] (Pink command stripe) — Hexes 4318, 4418, 4518: 1 French Stradiotti (#1 –1), 1 French Mounted Arquebus (#1 0), 1 French Mounted Crossbow (#1 0), Caracciolo. Hexes 4319, 4419, 4519: 3 French Longbow (#1-3 +1).
- Any hex you wish: Nemours.
a: Ferrara was a most active fellow. He had brought his own guns (see Ferrara's artillery) and was quite involved in deploying and moving them. b: Some sources include Jacques de la Palice as commanding. c: No listed commander, but d'Este seems to be active here. d: A source or two say Bohier was involved here. e: Some sources include Louis d'Ars Vicomte de Lautrec and the Chevalier de Bayard. f: Some sources list Yves d'Alegre as in charge of the Italian Pike and French Light Cavalry. We gave him the day off.
Spanish Army
Leaders: Ramón de Cardona, Viceroy of Naples (OC), Pedro Navarro, Count of Oliveto, Fabrizio Colonna [a], Fernando d'Avalos, Marquis of Pescara.
Seizure Counters: 3
Standards: Spain; the Spanish Standard may be placed anywhere the Spanish player wishes.
Facing: All units are faced towards the French. Those manning the trench and ramparts face the trench and rampart hexside.
Deployment:
- Artillery [b] (Green command stripe) — Hexes 4907-4912: 4 Spanish Culverin artillery (#1-4), 1 Spanish Saker artillery (#1), 1 Spanish Organ Gun artillery (#1), 6 Spanish Gun Wagons (#1-6 +3) [c].
- Pedro Navarro, Count of Oliveto (Brown command stripe) — Hexes 4807-4813, 4706-4707, 4709, 4711, 4713, 4606, 4614, 4514, 4415: 12 Spanish Sword & Bucker w/Arquebus (#2 –2, #3-9 –1, #10-13 0), 4 Papal Pike w/Arquebus (#1-3 0, #4 +1), Oliveto.
- Fabrizio Colonna (Blue command stripe) — Hex 4406: 1 Italian Mounted Men-at-Arms (#1 -1), Colonna. Hexes 4009, 4109: 2 Italian Mounted Men-at-Arms (#2-3, 0).
- Fernando d'Avalos, Marquis of Pescara (Red command stripe) — Within 2 hexes of 3914: 3 Spanish Genitors (#1 –1, #2-3 0), 2 Papal Mounted Arquebus (#1-2 +1), Pescara.
- Any hex you wish: Cardona.
a: Colonna is the main speaker in Machiavelli's The Art of War and is referenced throughout the book as an authority on both Classical and current military structure, strategy, and tactics. Actually, he commanded only the Mounted Men-at-Arms in 4406; the other two units were commanded by The Marquis of La Palude and Alfonso Caraval. b: There is no artillery commander (6.4). c: To start, one artillery unit is stacked with one gun wagon unit in each hex, see 10.0 and 12.5 for stacking and combat rules.
Who Goes First
The French have the first Activation to start the game.
Terrain
The Ravenna battlefield is entirely flat terrain, with three prominent features. South of the area were marshes which, while not literally uncrossable, presented difficulty to the type of units involved. The Ronco River was un-crossable with enemy forces in the area, as it was too deep to ford in the face of the enemy. And then there was the Spanish defensive trench with rampart, behind which they deployed.
The Spanish trench has a dirt rampart on its side of the Trench. A unit Shock attacking across a Trench from a hex without a Rampart in it, must check to see if it is Disordered before actually making the attack DR (Step 2 of the Shock Phase). In addition, roll for Disorder if a unit moves or Advances across a Trench hexside. Regardless of the effect of the Disorder roll, a unit cannot Charge during that Activation after crossing the Trench. Attacking units that are required to roll for Disorder can never gain Angle of Attack position advantage (Die Roll Modifiers for Resolving Shock #2). The player rolls one die, and adds the Shock Defense DRM of the unit:
- If the adjusted DR is 5 or more, that unit is Disordered and, if during an attack, the Shock attack is undertaken as Disordered.
- If the adjusted DR is 4 or less, no effect.
French Battles and Activation
The French army was a hodge-podge of units from all over the place: Italy, Switzerland, Germany, Hoboken… with commanders who did little to alleviate that situation. Therefore, we will use an activation mechanic different from the base game, albeit a rather simple one.
The French may not use Army Activation.
There are nine French Battles (see list on the Ravenna map). The leaders are not used to Activate, instead use the following rules:
During a French Free Activation, the French player chooses his Standard or chooses from one to three Battles anywhere on the map. He then rolls on the French Activation Table, located on the Ravenna map, using the Free Activation column to determine if he succeeds. Success allows all chosen Battles to Activate simultaneously; failure means the French player does not get to Activate any Battles and treats the result as a failed Continuation DR (the Spanish will then get a Free Activation). All units and leaders from the Activated Battles move and fire together, but units from different Battles may not Shock/Charge attack the same targets.
For Continuation attempts, the French player chooses from one to three Battles, anywhere on the map, that did not just complete an Activation. He then rolls on the French Activation Table, located on the Ravenna map, using the Continuation column to determine if he succeeds. Success allows all chosen Battles to Activate simultaneously; failure is treated as a failed Continuation DR. All normal Continuation DRMs apply, with the exception of the OC's Effectiveness Rating. All units and leaders from the Activated Battles move and fire together, but units from different Battles may not Shock/Charge attack the same targets.
When playing a Seizure Opportunity counter, the French player chooses one Battle and rolls for Seizure per 6.3. If successful, that Battle Activates and the French player follows the Continuation rules above when attempting Continuation.
All of the French Battles have leaders, even if that leader is shared with other Battles. These leaders do not Activate units; they are used for their Charisma additions to Shock attack DRs. They may move whenever any of their Battles are Activated. The French OC can add his Charisma to Shock attack DRs of units, but does not modify Continuation rolls. Most of them were killed, including Overall Commander Gaston de Foix, or captured during the battle!
Spanish Infantry "Entrenchment"
The Spanish (and Papal) Infantry (all 16 of Navarro's infantry units) are going to be subjected to some heavy artillery bombardment (probably... one never knows what players will actually do). When this happened, Navarro ordered his infantry to protect themselves, either by lying down, digging shallow trenches, or a whole bunch of possibilities that are not clearly described. The counters provided for this "entrenchment" show them standing waist deep in a ditch, as a bit of fun since there is such disagreement among historians. Whatever, whenever he activates Navarro's infantry, the Spanish player may, as his sole undertaking for that Activation, "entrench" his units by placing an Entrenched marker atop as many units as he wishes.
Entrenched infantry get a defensive DRM of –2 when fired at by artillery, crossbow, and arquebus armed units. However, they may not move, fire, or Shock/Charge attack, but they may rally. If attacked by Shock/Charge while entrenched the Entrenched marker is immediately removed and the attacker applies +1 DRM for that attack. The marker is also removed if the infantry unit is Retreated or Retired by missile fire.
For the Spanish player to voluntarily remove an Entrenched marker from a unit, the unit must be Activated by Battle or Army Activation and not perform any action (move, fire, Shock/Charge, Rally, etc.). During the Rally Phase (Phase D) of that Activation, remove the Entrenched marker.
Ferrara's Guns
There was lots of movement with the French artillery, much of it rather mystifying as to what where and when, so we have deployed them as they were for most of the battle.
However, one of the more interesting things that happened, was that some guns were moved back across the river and thence behind the Spanish camp, causing much damage to the camp and forcing the Spaniards to change their plans. Once per game, when the French player Activates the French artillery Battle (green command stripe), he may activate one artillery unit and do the following:
- He may flip the unit to its limbered side and remove it from the map. The unit must be able to trace a path of hexes to hex 4800 that does not enter a hex in or adjacent to an enemy unit.
- The next Spanish Free Activation, flip the unit to its unlimbered side.
- The next Activation of the French artillery Battle, place the unit (on its unlimbered side) in a hex, tracing a path of hexes from hex 4700 (on the other side of the river).
- Once placed in a hex of the French player's astute calculation, it may fire whenever that Battle is Activated, including the Activation it is placed back on the map.
Game Balance
The game is fairly balanced between the two players. Since no one agrees whether anyone actually won this battle, and given that each side has different—and difficult—decisions to make, this could be fairly even. The French have the numbers (and the potential for artillery fire). The Spaniards have a great defensive position and the ability to "entrench", and their front wall of guns—both cannon and arquebus—is ferocious.
Flight Levels
The French Flight Level is 45 FP.
The Spanish Flight Level is 40 FP.
Marignano
Duchy of Milan, Italy ~ 13-14 September, 1515
Historical Background
The Battle of Marignano was fought during the phase of the Italian Wars (1494–1559) called the War of the League of Cambrai, between France and the Old Swiss Confederacy. It took place in September, 1515, 10 miles southeast of Milan. The battle effectively ended the war and the Swiss Confederacy never went to war again as a body.
The French army was composed of the best armored lancers and artillery in Europe and led by Francis I, newly crowned king of France and a day past his 21st birthday, faced the Old Swiss Confederacy. Francis had a force of German Landsknechts, bitter rivals of the Swiss for fame and renown in war, and his Venetian allies.
The Swiss had taken control of Milan and rolled back French power in northern Italy during the war. All of that was reversed in the Marignano campaign. After hauling many cannons over the Alps, the French surprised and captured the Papal commander, Prospero Colonna. At that point, the Pope and Swiss both came to a peace agreement with the French, however fresh Swiss troops arrived and refused to abide by the agreement after being urged to battle by Cardinal Matthäus Schinner.
The Swiss attacked as the sun set, by lowering their pikes and charging the center where Francis commanded and his artillery was concentrated. They were able to drive back the Landsknechts and capture some of the guns. Charles III, Duke of Bourbon, and the French right counter-attacked driving the Swiss back. At this point the battle swayed back and forth like a drunken sailor, with the Swiss pike making gains and then being pushed back by French counter-attacks. Many of the counter-attacks were cavalry charges led by King Francis himself. The two sides would regroup and rejoin the fight. Frustrated by their lack of success, the Swiss eventually wore down and withdrew. The battle ended in a decisive victory for the French and ended the Swiss "habit of victory" that they had enjoyed for the preceding decades.
Playing Time
Playing time averaged about 3 hours for the playtesters.
Initial Deployment
The French Army sets up first. All Artillery sets up unlimbered.
French Army
Leaders: Francis I, King of France (OC), Charles III, Duke of Bourbon, Charles IV, Duke of Alençon, Bartolomeo d'Alviano.
Seizure Counters: 3
Standards: France; the French Standard may be placed anywhere the French player wishes.
Facing: All units are faced towards the west.
Deployment:
- Artillery [a] (Green command stripe) — Hexes 1903-1904, 2109, 2210, 2309, 2410, 2812, 2912, 3013, 3113, 3214: 2 French Falconet artillery (#1-2), 4 French Saker artillery (#1-4), 2 French Culverin artillery (#1-2), 3 French Heavy Cannon artillery (#1-3).
- Charles III, Duke of Bourbon (Black command stripe) — Hex 1804: 1 French Mounted Men-at-Arms (#3 -1). Hexes 1806-1808, 1905-1908, 2006-2009, 2311-2313, 2412-2414, 2510, 2512-2513, 2611, 2613, 2711: 4 Black Band Landsknecht Pike w/Arquebus (#1-2 –1, #3-4 0), 10 Landsknecht Pike w/Arquebus (#1-6 –1, #7-10 0), 4 French Sword & Buckler w/Arquebus (#3 0, #4-6 +1), 5 Gascon Crossbow (#1-3 +1, #4-5 +2). Hex 2914: 1 French Mounted Men-at-Arms (#2 –1). Any of the above hexes: Bourbon.
- Francis I, King of France (Bronze command stripe) — Hex 1307: 1 French Mounted Men-at-Arms (#5 –1). Hexes 1715, 1815: 2 French Mounted Men-at-Arms (#3 –2, #4 –1). Hexes 1108-1113, 1208-1214, 1308-1313, 1409-1414, 1508-1513: 6 Black Band Landsknecht Pike w/Arquebus (#1 –2, #2-5 –1, #6 0), 16 Landsknecht Pike w/Arquebus (#1 –2, #2-10 –1, #11-16 0), 4 French Sword & Buckler w/Arquebus (#1 0, #2-3 +1, #4 +2), 5 Gascon Crossbow (#1-3 +1, #4-5 +2). Hexes 1514-1515, 1615-1616: 1 Royal Guard Mounted Men-at Arms (#1 0), 1 Scots Light Cavalry Archers (#1 +2), 1 French Light Cavalry Archers (#4 0), 1 Gascon Mounted Crossbow (#1 +2), Francis I.
a: There is no artillery commander (6.4).
Play Note: The Shock Defense Ratings for some of Francis' units are low because they have few men.
French Reinforcements
The French player may Activate Alençon's Battle to enter using a French Free Activation at any time.
Alençon's Battle (Red command stripe) — 8 Landsknecht Pike w/Arquebus (#1-2 –1, 3-8 0), 6 French Sword & Buckler w/Arquebus (#2 –1, #3-4 0, #11-12 +1, #13 +2), 10 Gascon Crossbow (#1-3 +1, #4-8 +2, #9-10 +3), Alençon. These units enter through hexes 1007-1014. When the first unit of Alençon's Battle enters, add 30 to the French Flight Level using the French Current Flight Level marker.
The French player may Activate d'Alviano's Battle to enter as a French Free Activation on the 2nd day (see below) and after Alençon's Battle has entered.
d'Alviano's Battle (Aqua command stripe) — 1 Italian (Venetian) Mounted Men-at-Arms (#1 0), 5 Italian (Venetian) Sword & Buckler w/Arquebus (#1 –1, #2-3 0, #5-6 +1), Alviano. These units enter through hex 1001.
Swiss Army
Leaders: Cardinal Mattheus Schinner (OC) [a], Werner Steiner, Marx Roist, Ulrich Katzi.
Seizure Counters: 2
Standards: Swiss; the Swiss Standard may be placed anywhere the Swiss player wishes.
Facing: All units are faced towards the east.
Deployment:
- Werner Steiner (Green command stripe) — Hexes 3006, 3105-3106, 3206-3207, 3306-3307, 3407-3408, 3507-3508, 3608-3609: 13 Swiss Pike w/Arquebus (#1 –3, #2-7 –2, #8-13 –1), Steiner, Schinner (Purple command stripe).
- Marx Roist (Gold command stripe) — Hexes 3101-3102, 3202-3203, 3302-3303, 3403-3404, 3502-3504, 3603-3605, 3704-3705: 16 Swiss Pike w/Arquebus (#1-7 –2, #8-16 –1), Roist.
a: We are considering Schinner the Overall Commander for this battle, since he had rallied the Swiss to go out to fight. The higher Flight Point cost for losing an OC reflects this importance.
Swiss Reinforcements
The Swiss player may Activate Katzi's Battle to enter using a Swiss Free Activation. When the first unit of Katzi's Battle enters, add 40 to the Swiss Flight Level using the Swiss Current Flight Level marker.
Katzi's Battle (Blue command stripe) — 1 Swiss Mounted Men-at-Arms (#1 +1), 13 Swiss Pike w/Arquebus (#1-4 –2, #5-11 –1, #12-13 0), Katzi. These units enter through hexes 4200-4202.
Hurry Up Offense
Until Darkness falls (see below), all Swiss Continuation rolls receive a –2 DRM.
No Reluctance
Do not apply the Swiss Reluctance rule (16.2) on the first day of the battle (13 September). Since the Swiss were fired up by Cardinal Schinner's rousing speech.
Who Goes First
The Swiss have the first Activation to start the game.
Terrain
The area of the battlefield was 'littered' with small towns and numbers of wall-enclosed farms. It was also crisscrossed by irrigation canals and ditches which made some maneuvers problematic but not impossible. This is why what appears to be "clear" terrain, is not. It is really farm fields with small ditches. Due to this, units may not Charge into or through Clear terrain. This means that no Charges are allowed in this battle and units may only Counter-Charge into adjacent hexes. In addition, the roads that cross these fields were all elevated above ground.
End of Days
Marignano was a battle that took place over a two day period, starting late in the afternoon of 13 September, continuing until close to midnight! Fighting halted and began again at dawn the next day.
This makes for some sketchy (and rather arbitrary and somewhat artificial) rules, because we do not use timed game turns, life is fast in the die-rolling design lane.
Darkness
Darkness descends at the end of the sixth Activation (a Darkness Activations marker has been provided to count this down) after Katzi's Battle begins entering the map. If the Swiss player decides not enter Katzi's Battle onto the board, slap him with a maggoty biscuit and run the Time marker out.
Once Darkness arrives, the following rules are in effect:
- No missile fire is allowed at ranges of three hexes or greater.
- Command Ranges are halved, rounding up.
- All units have their Movement Allowance reduced by one.
- At the start of every Activation when Darkness is in effect, right after placing any replacement leaders, roll two dice and add them (thus a 1 and an 8 = 9). If the total is 17 or more, that Activation is interrupted and the fighting ends for the day.
Once the day has ended there is a break in the action for the night. During the night between the 13th and 14th, the Swiss player checks for desertions (see the Swiss Desertion rule below), then both players (Swiss first) may move whatever units they have on the game-board up to three Movement Points. No unit or leader may move within four hexes of an enemy unit (three intervening hexes). Units and leaders that begin within four hexes of an enemy unit may move away, each hex moved must move the unit or leader no closer to enemy units within four hexes. Units that Disengage are not Disordered. No missile fire or Shock/Charge attacks are allowed. If a Disordered unit, not adjacent to an enemy unit, does not move, it is Rallied. After Disordered units are Rallied, each player's Standard is Activated to Rally Retired units. The Swiss player will begin the next day with a Free Activation.
Swiss Desertion
The Swiss, whose army had already been decimated by desertions in Milan and on the way south (pas d'argent? pas de Suisse!), suffered even more reductions through desertion during the night.
During the night between the 13th and 14th, the Swiss player rolls one die for each Pike unit he has… including any that have not yet entered the game!
- If the DR is 8 or more, that unit is removed from the game. Deserting Swiss units are not counted against their Flight Level.
- If the DR is 7 or less, that unit stays to fight on the 14th.
For Swiss Pike units in the same, or adjacent, hex as their Battle leader or the Overall commander subtract one (-1) from the DR.
Timed Engagement
This battle uses the timed engagement rule (16.1). Initially, set the Time marker in the 12 space on the General Track. The Swiss are the timed side in this battle.
Game Balance
This battle seems almost irreparably unbalanced against the Swiss. However, they did fairly well, even if they did manage to destroy their army in the process. Rampant desertion didn't help much. To that end, we have given the Swiss a rather high Flight Level. It is rather obscure what the Swiss were attempting to do to "win" this battle.
No Desertion (favors Swiss)
Do not use the Swiss Desertion rule in the night between the 13th and 14th.
No Reluctance (favors Swiss)
Do not apply the Swiss Reluctance rule (16.2) on the 14th.
Flight Levels
The French Flight Level is 75 FP.
The Swiss Flight Level is 45 FP.
Bicocca
Duchy of Milan, Italy ~ 27 April, 1522
Historical Background
The Battle of Bicocca was fought on 27 April 1522, during the Italian War of 1521–26. A combined French and Venetian force under Odet de Foix, Vicomte de Lautrec, was decisively defeated by a Spanish-Imperial and Papal army under the overall command of Prospero Colonna. Lautrec then withdrew from Lombardy, leaving the Duchy of Milan in Imperial hands.
Having been driven from Milan by an Imperial advance in late 1521, Lautrec had regrouped, attempting to strike at Colonna's lines of communication. When the Swiss mercenaries in French service did not receive their pay, however, they demanded an immediate battle, and Lautrec was forced to attack Colonna's fortified position in the park of the Arcimboldi Villa Bicocca, north of Milan. The Swiss pikemen advanced over open fields under heavy artillery fire to assault the Imperial positions, but were halted at a sunken road backed by earthworks. Having suffered massive casualties from the fire of Spanish arquebusiers, the Swiss retreated. Meanwhile, an attempt by French cavalry to flank Colonna's position proved equally ineffective. The Swiss, unwilling to fight further, marched off to their cantons a few days later, and Lautrec retreated into Venetian territory with the remnants of his army.
The battle is noted chiefly for marking the end of the Swiss dominance among the infantry of the Italian Wars, and of the Swiss method of assaults by massed columns of pikemen without support from other troops. It was also one of the first engagements which established the decisive role of firearms on the battlefield.
Playing Time
Playing time averaged about 3 hours for the playtesters.
Initial Deployment
The French Army sets up first. All French Artillery sets up limbered. All Spanish Artillery sets up unlimbered.
French Army
Leaders: Odet de Foix, Vicomte of Lautrec (OC), Anne, Duke of Montmorency, Thomas de Foix, Seigneur de Lescun, Giovanni de Medici, Francesco Maria I della Rovere, Duke of Urbino.
Seizure Counters: 2
Standards: France; the French Standard may be placed anywhere the French player wishes.
Facing: All units are faced south.
Deployment:
- Anne, Duke of Montmorency [a] (Black command stripe) — Hexes 5501-12, 5602-13: 22 Swiss Pike w/Arquebus (#1-2 –2, #3-12 –1, #13-22 0), 2 French Sappers (#1-2 +3) [b], 2 French Saker (#1-2), Montmorency, Lautrec (Purple command stripe).
- Thomas de Foix, Seigneur de Lescun [c] (Red command stripe) — Hexes 5802-6, 5902-6: 8 French Sword & Buckler w/Arquebus (#1-2 –1, #3-7 0, #8 +1), 2 French Mounted Men-at-Arms (#5 –1, #6 0) [d], Lescun.
- Giovanni de Medici [e] (Green command stripe) — Hexes 5407-5410: 4 Black Band Mounted Arquebusiers (#1 –2, #2 –1, #3-4 +1) [f], Medici.
a: This huge command, mostly of feuding Swiss Pike, is commanded by a French duke, who led from the front (and was badly wounded doing so). Anne was a major military figure for France in later years. b: See special rules below for Sappers. c: Brother of Lautrec. d: Gendarmerie. e: Changed sides more times than Alcibiades. f: The Black Band was a famous unit of condottieri.
French Reinforcements
After the first Swiss Pike unit has been Eliminated, the Venetians under Francesco Maria I della Rovere, Duke of Urbino may be Activated and enter by the use of a Free Activation.
The Venetians never got into the battle. Urbino was lucky enough to have his portrait painted by such famous/great artists as Titian and Raphael.
Urbino's Battle (Aqua command stripe) — 1 Italian Mounted Men-at-Arms (#1 0), 1 Venetian Stradiotti (#1 0), 6 Italian Sword & Buckler w/Arquebus (#1 –1, 2-4 0, #5-6 +1), Urbino. These units enter through hexes 6000-6002.
Spanish Army
Leaders: Prospero Colonna (OC) [a], Fernando d'Avalos, Marquis of Pescara, Georg von Frundsberg, Antonio de Leyva, Duke of Terranova, Francesco II Sforza [b].
Seizure Counters: 2
Standards: Spain; the Spanish Standard may be placed anywhere the Spanish player wishes.
Facing: All units are faced north.
Deployment:
- Fernando d'Avalos, Marquis of Pescara (Red command stripe) — Hexes 5004-5011: 8 Spanish Arquebusier (#1-8 –1), Pescara. Hexes 5005, 5008, 5010: 2 Spanish Saker (#1-2), 1 Spanish Culverin (#1). Hexes 5209, 5210, 5111: 3 Spanish Genitors (#1 –1, #2-3 0) [c].
- Georg von Frundsberg (Brown command stripe) — Hexes 4904-4911: 8 Landsknecht Pike w/No missile (#1 –2, #2-4 –1, #5-8 0) [d], Frundsberg. Hexes 4804-4810: 7 Spanish Sword & Buckler w/No missile (#1-2 –1, #3-6 0, #7 +1) [d].
- Imperial Cavalry (Blue command stripe) — Hexes 4505, 4508: 2 Holy Roman Empire Mounted Men-at-Arms (#1 –1, #2 0), Terranova.
a: A free-lance condottiere who worked mostly for The Papal States and the Holy Roman Empire. b: Recently deposed as Duke of Milan, a position he retook shortly after this battle. c: In essence, acting as pre-battle skirmishers blocking the effect of Medici's Black Band pickets. d: These units have no arquebus capability because all the Arkies are up front, having been drawn away from their parent unit.
Spanish Reinforcements
The Spanish reinforcements, the Milanese militia and Mounted Men-at-Arms under Francesco II Sforza, may be Activated and enter using any Free Activation after a French unit has entered hex 5012 or 5013.
The infantry units of Sforza were urban militia, at best okay, but mostly poor. Their numbers could have been as much as 6000. The Mounted Men-at-Arms unit is Sforza's personal retinue.
Sforza's Battle (Green command stripe) — Milan Mounted Men-at-Arms (#1 0), Milan Sword & Buckler w/No missile (#1-2 +1, #3-4 +2), Sforza. These units enter through hexes 3612-3613.
Who Goes First
The French have the first Activation to start the game.
Terrain
The Spanish position at Bicocca was a marvelous defensive one. In the center was a large manor house with gardens, all sides surrounded by water ditches and, on the north side, a sunken road, deep with perpendicular walls which meant anyone attacking from inside the road was way below the defender on top… almost half a body length at least. Even though this was a road, we are not treating it as a road for game purposes, but as a deep ditch. In addition to the marshes to the left of the manor house, most of the grounds all around were riddled with irrigation ditches, making movement difficult, especially for guns, unless they used the road.
Swiss Intransigence
As usual, the Swiss, not yet paid, threatened to go home… unless Lautrec attacked immediately with the Swiss doing the work. That forced Lautrec's hand, although it does appear that waiting another day or two, while it might have allowed the French and Venetians contingents to arrive, wouldn't have made much difference, given the terrain.
Due to their insistence on leading the attack, the Swiss Reluctance rule (16.2) does not apply to this battle.
It should be noted that all the major leaders of the Swiss led, on foot, up front… and they all died, except for Montmorency, who was dragged away while lying wounded.
Sappers
The Swiss have some French sappers (engineers) who—they hope—will fill the deep sunken road/ditch and allow the Swiss pike to attack with some efficiency.
Sappers may not attack. If a non-Engaged Sapper unit is attacked by Shock/Charge, in the Retreat Before Combat sub-Phase the French player may have the Sapper unit and any leader stacked with it choose to do the time-honored, medieval "Great Cooga Mooga Gemme Outta Here" strut. He declares all Retreat Before Combat from the Sappers hex and then he rolls one die:
- If the DR is a 0-6, he then rolls again; if that DR is a 0-2, the Sapper unit is eliminated … it has not stopped running. Any leader that attempted to Retreat Before Combat with the Sapper instead stays in the hex. Otherwise he follows the Retreat Before Combat (12.2) procedure, except the Sapper, and any leader, move up to four hexes. The attacking unit may then Advance After Combat.
- If the initial DR is a 7-9, the Sapper unit stays to get whacked.
Sappers may stack with any other unit, except limbered Artillery units.
To do its job, a non-Engaged Sapper (Disordered or not; In or Out of Command) unit must start its Activation adjacent to a sunken road hexside. Then, at the end of the Activation in the Rally Phase and as its sole action for that Activation, it may place a Half-Filled marker with its arrows pointing to the road hexsides adjacent to the hex it occupies, or turn over a Half-Filled marker that was already there at the beginning of the Activation to the reverse, Road Filled side.
- A Half-Filled marker reduces the Shock Defense value of a sunken road hexside by one.
- A Road Filled marker reduces the Movement cost of a sunken road hexside by one, reduces the Shock Defense value of that hexside by three (the rampart is still there), eliminates the bonus for firing from the Ramparts above, and removes the automatic Disorder effect for movement, Shock/Charge attacks, and Advance After Combat.
Half-Filled and Road Filled markers cannot be removed.
Sappers are Eliminated by Retired results. Engaged status only stops a Sapper unit from filling in the sunken road. Engaged status does not impede the Sapper unit from moving away (without becoming Disordered by Disengaging) nor are they forced to attack, even if stacked with another unit that becomes Engaged. Eliminated Sappers do not count against the French Flight Level.
Timed Engagement
This battle uses the timed engagement rule (16.1). Initially, set the Time marker in the 20 space on the General Track. The French are the timed side in this battle. Until a French unit crosses a sunken road hexside from hex row 51xx to 50xx, the Time marker is moved one space towards zero at the beginning of every Spanish Free Activation, without the Spanish player needing to Pass. Once a French unit crosses a sunken road hexside (as above), the Spanish player has to Pass to move the Time marker per 16.1.
Game Balance
The Spaniards have a great defensive position, and lots of firepower up front. They are heavily favored.
Flight Levels
The French Flight Level is 55 FP.
The Spanish Flight Level is 40 FP.
Pavia
Duchy of Milan, Italy ~ 24 February, 1525
Historical Background
The Battle of Pavia was the decisive engagement of the Italian War of 1521-1526. A Spanish and Imperial army under the nominal command of Charles de Lannoy (and working in conjunction with the garrison of Pavia, commanded by Antonio de Leyva) was attacked by the French army under the personal command of Francis I in the great hunting preserve/park of Mirabello outside the city. In the four-hour battle, the French army was split and defeated in detail. The French suffered massive casualties, including many of the chief nobles of France; Francis himself, captured by the Spanish troops, was imprisoned by Charles V and forced to sign the humiliating Treaty of Madrid, surrendering significant territory to his captor. The outcome of the battle cemented Spanish Habsburg ascendancy in Italy.
Playing Time
Playing time averaged about 4 hours for the playtesters.
Initial Deployment
The French Army sets up first. All Artillery sets up limbered, unless noted.
French Army
Leaders: Francis I, King of France (OC), Richard de la Pole [a], Robert de la Marck, Seigneur de Flourance, Anne, Duke of Montmorency, Jacques Ricard, Galiot de Genouillac, Charles IV, Duke of Alençon.
Seizure Counters: 2
Standards: France and French King. The French Standard can be placed anywhere the French player wishes in or south of hexes numbered xx24. The Standard of the French King can be placed anywhere the French player wishes in or north of hexes numbered xx20.
Facing: Montmorency's units are faced north-west, Flourance's units are faced north-east, Francis I and de la Pole's units are faced south-east, and all other units are faced south.
Deployment:
- Francis I, King of France (Bronze command stripe) — Hexes 1703-1708, 1804-1808, 1904-1907: 5 French Mounted Men-at-Arms (#1-3 –2, #4-5 –1), 6 French "Heavy" Light Cavalry Archers [b] (#1-3 –1, #4-6 0), 4 French Light Cavalry (#1 –1, #2-4 0), Francis I.
- Richard de la Pole [a] (Pink command stripe) — Hexes 2104-2107, 2204-2208, 2303-2308: 2 Gascon Sword & Buckler w/No missile (#1-2 0), 3 Gascon Arquebus (#1 0, #2-3 +1), 7 Landsknecht Pike w/Arquebus [c] (#1-4 –2, #5-7 –1), 2 Saker artillery (#1-2), 1 Culverin artillery (#1), de la Pole.
- French Baggage Train (Grey command stripe) — Hex 2508: 1 French Baggage Wagon (#1) (use the zero movement side of the counter).
- Robert de la Marck, Seigneur de Flourance (Aqua command stripe) — Within 2 hexes of 3316: 7 Swiss Pike w/No missile (#1-3 –1, #4-7 0), 3 French Light Cavalry (#1 –1, #2-3 0), 1 Falconet artillery (#1), Flourance.
- Galiot de Genouillac (Green command stripe) — Within 1 hex of 3525: 2 Swiss Pike w/Arquebus (#1-2 +1), 3 Falconet artillery (#1-3), Genouillac.
- Anne, Duke of Montmorency (Black command stripe) — Within 1 hex of 3137: 5 Swiss Pike w/Arquebus (#11-12 –1, #13-15 0), Montmorency.
- Charles IV, Duke of Alençon [d] (Red command stripe) — Hexes 1231-1233, 1331-1333, 1432-1434, 1532-1534, 1633: 3 Italian Light Cavalry (#1 –1, #2 0, #4 +1), 5 Italian Arquebus (#1-2 –1, #3-5 0), 2 Gascon Sword & Buckler w/No Missile (#1-2 –1), 1 Saker artillery (#1), 2 Culverin artillery (#1-2), Alençon.
a: Richard de la Pole, was a pretender to the English crown. He was the last member of the House of York to actively and openly seek the crown of England. He was killed in this battle. b: These were horse archers that wore some armor, enough to qualify them nominally as "heavy". They were not trained to Shock attack, so we have chosen not to make them much different from other Light Cavalry Archers. c: These were one of a dozen groups of Landsknechts called "The Black Band". During the battle they fought face-to-face with the Imperialist Landsknechts in truly destructive, carnage-level force. Apparently, de la Pole led the Landksnechts here, while Lorraine commanded the French infantry. We have given all of the infantry to de la Pole. d: Not Alerted; see the Alençon's Rearguard rule below.
French Reinforcements
There are two groups of units in Alençon's Battle that are off the map, the San Lanfranco contingent and the Borgo Ticino contingent. After Alençon has been Alerted (see the Alençon rule below), during any Activation of Alençon, the French player may move Alençon's on-map units and enter one of these groups. All the units in a group must enter the game before another group begins to enter.
San Lanfranco — 2 Gascon Sword & Buckler w/No missile (#3-4 0). These units enter through any hex on the west edge of the map between 1037 and 1039 inclusive.
Borgo Ticino — 2 Gascon Sword & Buckler w/No missile (#5 0, #6 +1), 2 French Mounted Men-at Arms (#1 -2, #2 -1). These units are never Out of Command, no matter their distance from Alençon or intervening units/terrain. Enter through any hex on the south edge of the map between 1844 and 2044 inclusive.
Spanish and Imperial Army
Leaders: Charles de Lannoy, Viceroy of Naples (OC), Antonio de Leyva, Duke of Terranova, Alfonso de Avolos d'Aquino, Marquis of Vasto, Fernando d'Avalos, Marquis of Pescara, Georg von Frundsberg, Lord of Mindelheim.
Seizure Counters: 3
Standards: Spain and Pavia. The Spanish Standard may be placed anywhere the Spanish player wishes. The Pavia Standard is printed on the map in hex 2138.
Facing: All units are faced in any direction the Spanish player wishes.
Deployment:
- Antonio de Leyva, Duke of Terranova (Blue command stripe) — Any city or garden hex of Pavia: 3 Spanish Men-at Arms (#1 –2, #2-3 –1), 3 Spanish Arquebus (#1-3 +1), 4 Spanish Sword & Buckler w/No missile (#1 –2, #2-3 –1, #4 0), 17 Landsknecht Pike w/Arquebus (#1-3 –2, #4-13 –1, #14-17 0), 2 Militia Pike w/No missile (#1 +2, #2 +3), 1 Falconet artillery (#1), 1 Saker artillery (#1), Terranova.
- Charles de Lannoy, Viceroy of Naples (Green command stripe) — Within 2 hexes of 4031: 2 Spanish Arquebus (#1 0, #2 +1), 1 Saker artillery (#1) [a]. Hex 3305: 1 Falconet artillery (#1). Hexes 3103, 3204, 3304, 3405, 3505: 3 Spanish Light Cavalry (#1-2 -1, #3 0), 2 Italian Light Cavalry (#1-2 0), Lannoy.
- Alfonso de Avolos d'Aquino, Marquis of Vasto (Black command stripe) — Hexes 2905, 3006, 3105-3106, 3206-3207, 3307: 7 Italian Arquebus (#1-3 -1, #4-7 0), Vasto.
a: There is no artillery commander (6.4).
French Reinforcements (Spanish/Imperial arrival groups)
No Spanish unit is allowed to enter the Bridge hex until Alençon's Borgo Ticino reinforcements have entered a Bridge hex.
The groups below enter in the order listed. Each group below can only initiate its entry using a Free Activation. All the units in a group must enter the map before another group begins to enter.
Frundsberg's Battle (Brown command stripe) — 20 Landsknecht Pike w/Arquebus (#1-8 –2, #9-20 –1), Frundsberg, Sittlich [a]. This group enters through hex 3300.
Lannoy's Battle (Green command stripe) [b] — 4 Holy Roman Empire Mounted Men-at-Arms (c) (#1 –2, #2 –1, #3-4 0), 2 Spanish Genitors (#1-2 –1), 3 Falconet artillery (#2-4), 3 Saker artillery (#2-4). This group enters through hex 3901. When the last unit of Lannoy's Battle enters, add 25 to the Spanish Flight Level using the Spanish Current Flight Level marker.
a: See special rule for using this leader. b: These units were led by Civitas Sant'Angelo during the battle, but we have enough commands already. c: Several sources say these are German (Holy Roman) … others say these were Spanish. We went with the Teuts. This could be an issue, as Spanish men-at-arms wore rather less armor than those of other countries. Life is tough in the Designer Decision Lane.
Who Goes First
The Spanish have the first Activation to start the game.
Terrain
This battle is one of the best mapped battles in all medieval/Renaissance history. And, surprisingly, they all pretty much agree (with some minor exceptions).
Virtually all of the extensive battlefield of Pavia, aside from the city itself, was an immense park, surrounded/enclosed by a 15-foot high wall, through which passed several roads (at noted gates). Walls cannot be crossed by units of any kind, except where there are gates (e.g., hex 1511, Porta Riazzo). The city itself is enclosed by a Wall, which, similarly, restricts movement into/out of Pavia to gates in the walls.
There is one break in the wall, just created by the Imperialists, at hex 3300. However, the break was not usable by all units, as some three feet of wall still remained.
The park was mostly low-lying cultivated lands, with intermittent marshes and clumps of woods, most of them dense, but with a large patch of light woods just north of Castella Mirabello. Most of the ground was sodden and crisscrossed with irrigation ditches, making movement of artillery difficult, except by road. Streams and major irrigation ditches (which we have treated as streams) run north-to-south. The wide Ticino River, south of the city, was militarily un-crossable except via the bridge (some sources say this was a pontoon bridge) running into Borgo Ticino.
There was very little combat in the center of the park, with virtually all fighting congregating around three areas: the area north of Castella Mirabello (2509-2609), the area around Torro del Gallo (3626)—which includes a large house on two hexsides (which cannot be crossed, making this a tough defensive position) plus the tower complex, and the fairly built-up area between San Giacomo and the city itself (known locally as the Five Abbeys area, because there were five abbeys there).
We have included the earthworks (dirt ramparts) constructed by both sides, prior to the battle, in various positions.
Standards
Unlike all other battles, each side has two Standards at Pavia due to the size of the battle and the separation of the forces. When a player Activates a Standard, he must choose one Standard to Activate.
For the French, the French Standard is the Standard for the Battles of Genouillac, Montmorency, and Alençon. The Standard of the French King is the Standard for the Battles of Francis I, de la Pole, and Flourance.
For the Spaniards, the Pavia Standard is the Standard for Terranova's Battle. The Spanish Standard is the Standard for every other unit.
Activations
Due to the separation of the forces, each side gets more Activations than normal.
Every French Free Activation, if the French player chooses Battle Activation, but not Multiple Battle Activation (see below), the French player can Activate one Battle that Retires to each Standard. The French player chooses which Battles to Activate, then Activates each Battle in turn, finishing the first before beginning the second. After the Free Activation, the French player can Continue with one Battle as normal.
Every Spanish Free Activation, if the Spanish player chooses Battle Activation, but not Multiple Battle Activation, the Spanish player can Activate one Battle that Retires to one of the Standards and also roll to Activate one Battle that Retires to the other Standard. The Spanish player chooses which Battles to Activate, then must roll 3 or less to Activate the second Battle. The Spanish player Activates each Battle in turn, finishing the first before beginning the second. After the Free Activation, the Spanish player can Continue with one Battle as normal.
Mist
The battle, which began just before dawn, started in a heavy mist that obscured vision for anything beyond 100 yards for most of the morning. Artillery fired primarily at what they heard, rather than saw; arquebusiers (and archers) could not fire at their maximum capability. How long this lasted is not specifically noted, other than that most sources insist it was most of the morning (whatever that means).
So, given what we don't know, use the Mist Activations marker and the General Track to record the passage of "time" for this rule. Advance the Mist Activations marker along the General Track each Activation, by either player. Mist remains at least until players have finished their 10th Activation (combined, not for each player). Free Activations where a player Activates more than one Battle, and Multiple Activations, count as one Free Activation, whether the player was able to Activate any Battles or not. Starting with the next Activation after that in Phase A when replacement leaders are placed, and each succeeding activation, the active player rolls one die.
- If he rolls 5 or less, the Mist remains.
- If he rolls 6 or more, the Mist has lifted and is no longer in effect.
Effects of Mist:
- Non-artillery units may only fire at adjacent targets.
- Artillery firing at ranges over than two hexes (three or more) subtract two (–2) from that DR to simulate the fact that they really could not see what they were shooting at.
Design Note: The combat units could not see where and who the other units in the distance were, with units of opposing sides sometimes passing each other without knowing because of that. However, you gamers can see everything on the map, so there is nothing reasonable we can do to simulate that.
Effectiveness Objectives
Players may increase their Effectiveness (their OC's rating for such) by holding certain objectives at the start of their Activation. For each of the following objectives that player holds by physically occupying it with a combat unit (of any kind, any status) he subtracts one (–1) from his OC's Effectiveness Rating. Note that because the Effectiveness Rating is a DRM for Continuation rolls, this increases the OC's ability to help his subordinates. This does not increase the OC's ability to conduct Multiple Activations (see the Multiple Battle Activations rule above), but affects all other uses of the Effectiveness Rating (e.g., Army Activation).
- Castella Mirabello (2509 and 2609, must occupy both hexes)
- San Giacomo (2836 and 2935, must occupy both hexes)
- Toro del Gallo (3626)
Some of these also affect Flight Levels; see Flight Levels below.
Multiple Battle Activations
During a Free Activation, players may try to activate more than one Battle at a time, a limited capability based on the abilities of their Overall Commander (and, for the Imperialists, much credit for this goes to Charles III, Duke of Bourbon). The Spanish player can use this twice per game; the French player can use this once per game. If the OC dies then all unused multiple Activations are lost.
To attempt a Multiple Activation the player announces he is doing so, uses the appropriate Multiple Activation marker to note that attempt, and then rolls one die. He then halves that DR, rounding down, so a three becomes a one and a one becomes a zero. Treat a zero DR as just that, zero. The adjusted (halved) DR is the number of Battles that player may then Activate in that single Activation. Thus, a DR of six, halved, would allow that player to activate three Battles that Activation.
All units and leaders from the Activated Battles move and fire together, but units from different Battles may not Shock/Charge attack the same targets. After a Multiple Battle Activation, a Battle that was Activated cannot be chosen for Continuation, nor can Army Activation be attempted.
Mark Sittlich
The large Imperialist contingent of Landsknechts—some 12,000—was under the command of Georg von Frundsberg. However, during the battle, these units were split into two columns for aggressive purposes, one remaining under Frundsberg, the other assigned to Mark Sittlich.
The Imperial player may use either Frundsberg's or Sittlich's Command Range to determine if a unit in Frundsberg's Battle is Out of Command. This allows him to split off a group with Sittlich to lead them. All of Frundsberg's Battle, including Sittlich, is Activated when the Imperial player Activates Frundsberg (except during Army Activation, when each leader must be within Command Range of the OC in order for units to trace Command Range to that leader). Sittlich has no ratings other than Range and Charisma.
If at least a third (round up) of the Landsknechts of this Battle that are not Eliminated or Retired are not within Frundsberg's Command Range, Frundsberg cannot benefit from Lannoy's Effectiveness Rating when rolling for Continuation.
French Baggage Train
The French baggage train was situated right outside Castella Mirabello. (The Imperialist train appears to have been in the area of the Casa de Levrian.) This Baggage Wagon unit cannot move (use the zero movement side of the counter). Any one friendly foot unit that is not Pike may stack with the French Baggage Wagon unit (10.0). A Baggage Wagon alone in a hex cannot be attacked in Shock/Charge combat or fired at by missile-armed units. A Baggage Wagon is not affected by combat results inflicted upon a foot unit it is stacked with. If a stacked foot unit vacates the Baggage Wagon's hex during Shock/Charge combat and the enemy unit is eligible to Advance After Combat, it may Advance and stack with the Baggage Wagon (in contravention of the normal stacking rules).
Baggage Wagon Capture and Looting
If any Spanish/Imperial unit begins the Continuation Phase (Phase E) in the same hex as the Baggage Wagon or in an adjacent hex to the Baggage Wagon and it is not stacked with a French Infantry unit, the Baggage Wagon is captured. Remove the Baggage Wagon from the game. Roll one die for every Spanish/Imperial unit in or adjacent to the Baggage Wagon hex (2508) to determine if it is looting. Add the unit's Shock Defense DRM to the DR:
- If the DR is 3 or more, that unit is looting and immediately becomes Disordered. If it is already Disordered, it is Eliminated (the troops, already in bad shape, have taken the money and run). Do count any Eliminated units for Flight Points.
- If the DR is 2 or less, there is no effect.
Alençon's Rearguard
This is a semi-tricky game design area. The commander of the French "Rearguard", Charles of Valois, Duke of Alençon (not a very capable officer in any case) did not realize that a battle was taking place until a couple of hours into the morning. (Routing French units trying to cross the Ticino River did give him some idea…) By the time he did react, the issue had been decided. But gamers love "What-Ifs", so here's this battles' iffer.
Alençon's Battle cannot be Activated until it is Alerted. Alençon may be Alerted if there is combat of any kind (missile fire or Shock/Charge combat), in the Five Abbeys area (any hex within five hexes of 2734). For missile fire, this includes missile fire where the firing unit or target is in this area. Any Free Activation after that, the French player may attempt to Activate Alençon, but he must make sure he has been Alerted first (several messengers appear to have been sent for that purpose). To do that, as the French player's Activation he designates Alençon and rolls one die:
- If the DR is 4 or less, Alençon has been Alerted and may proceed with his Free Activation. He is Alerted for the remainder of the game and his Battle can be Activated like any other.
- If the DR is 5 or greater, Alençon remains in a fog and the Free Activation is spent to no effect.
Alençon's Battle is automatically Alerted if any of these conditions occur:
- Any unit of Alençon's Battle is attacked by missile fire or Shock/Charge combat.
- Any Spanish unit exits Pavia via a gate hexside adjoining hexes 1736 or 2044.
- Any Spanish unit that is outside Pavia's city walls (walls on a hexside of a Pavia city hex) ends its move within seven hexes and in LOS of any unit of Alençon's Battle.
Play Note: Obviously, this possibility is something the Imperialist player should keep in mind, vis-a-vis Terranova's Pavia garrison units.
Timed Engagement
This battle uses the timed engagement rule (16.1). Initially, set the Time marker in the 15 space on the General Track. The Spanish are the timed side in this battle.
Game Balance
The Spaniards are heavily favored. In total numbers—not including Alençon's off-map contingents—the Imperialists outnumber the French by several thousand men. However, all the French units are on the map at start, ready to roll; most Imperialist units are not (or are in the city). We think the Imperialists have a 2-1 advantage in winning the game.
Design Note: Many sources state that the French lost over half their fighting men—either as casualties or fled - in this brutal battle. More disastrous was their loss of almost every high-level officer, including King Francis, who was captured. Imperialist losses were also high, but nowhere near this level. Brutal carnage, especially when the two opposing Landsknecht commands fought each other.
Flight Levels
Objective hexes: A player who occupies the following hexes receives a Flight Level increase. Track this Flight Level increase using the Current Flight Level markers for each player. The player increases his Flight Level by two for each hex occupied (see Effectiveness Objectives for how to occupy the hex):
- 2230 (San Giuseppe)
- 2509 (Castella Mirabello)
- 2609 (Castella Mirabello)
- 2632 (Torrette)
- 2836 (San Giacomo)
- 2935 (San Giacomo)
- 3626 (Toro del Gallo)
The French win instantly if they occupy the Pavia Standard hex (2138).
If the French Baggage Wagon is looted the French incur 2 FPs.
The French starting Flight Level is 75 FP.
The Spanish starting Flight Level is 65 FP.
Ceresole
Duchy of Milan, Italy ~ 11 April, 1544
Historical Background
The Battle of Ceresole was an encounter between a French army and the combined forces of Spain and the Holy Roman Empire during the Italian War of 1542–46. The lengthy engagement took place on 11 April 1544, outside the village of Ceresole d'Alba in the Piedmont region of Italy; the French, under François de Bourbon, Count of Enghien, defeated the Spanish-Imperial army of Alfonso d'Avalos d'Aquino, Marquis del Vasto. Despite having inflicted substantial casualties on the Imperial troops, the French subsequently failed to exploit their victory by taking Milan.
Enghien and d'Avalos had arranged their armies along two parallel ridges; because of the topography of the battlefield, many of the individual actions of the battle were uncoordinated with one another. The battle opened with several hours of skirmishing between opposing bands of arquebusiers and an ineffectual artillery exchange, after which d'Avalos ordered a general advance.
In the center, Imperial Landsknechts clashed with French and Swiss infantry, with both sides suffering terrific casualties. In the southern part of the battlefield, Italian infantry in Imperial service were harried by French cavalry attacks and withdrew after learning that the troops of the Imperial center had been defeated. In the north, meanwhile, the French infantry line crumbled, and Enghien led a series of ineffectual and costly cavalry charges against Spanish and German infantry before the latter were forced to surrender by the arrival of the victorious Swiss and French infantry from the center.
Ceresole was one of the few pitched battles during the latter half of the Italian Wars. Known among military historians chiefly for the "great slaughter" that occurred when columns of intermingled arquebusiers and pikemen met in the center, it also demonstrates the continuing role of traditional heavy cavalry on a battlefield largely dominated by the emerging pike and shot infantry.
Playing Time
Playing time averaged about 2½ hours for the playtesters.
Initial Deployment
The French Army sets up first. All Artillery sets up limbered.
French Army
Leaders: François de Bourbon, Count of Enghien (OC), Jacques Dampierre, Guigues Guiffrey, Seigneur de Boutières, Blaise de de Lasseran-Massencôme, Seigneur de Montluc [a].
Seizure Counters: 3
Standards: France; the French Standard may be placed anywhere the French player wishes.
Facing: All units are faced east.
Deployment:
- Jacques Dampierre (Aqua command stripe) — Hexes 4002-4003: 2 French Light Cavalry Archers (#1-2 –1) [b]. Hexes 4004-4006, 3905: 4 Italian Sword & Buckler w/Arquebus (#1 –1, #2-4 0). Hexes 4007-4009, 3907-3909: 6 Gruyeres Pike w/Arquebus (#1-3 0, #4-6 +1), Dampierre [c].
- François de Bourbon, Count of Enghien (Black command stripe) — Hex 4010: 1 French "Gendarmerie" Mounted Men-at-Arms (#2 –1) [d]. Hex 4011: 1 French "Volunteer" Mounted Men-at-Arms (#6 +1) [e]. Hex 4012: 1 French Light Cavalry (#1 –1). Hexes 4013-4017, 3913, 3915-3916: 8 Swiss Pike w/Arquebus (#1-2 –2, #3-6 –1, #13-14 0) [f], Enghien. Hexes 4108, 4110, 4115, 4119: 1 French Falconet (#1), 1 French Saker (#1), 2 French Culverin (#1-2).
- Guigues Guiffrey, Seigneur de Boutières (Red command stripe) — Hexes 4018-4022, 3918-3921: 9 French Sword & Buckler Infantry w/Arquebus (#2 –1, #3-7 0, #8-10 +1), Boutières [g]. Hexes 4023-4024: 2 French Light Cavalry (#2-3 0).
a: Montluc does not begin the game on the map. He is only placed if the French create Skirmishers (see that rule below). b: These units were usually part of the compagnies d'Ordonnance, but here detached to serve as flanking units. c: These troops had only partially arrived at the time of the battle and their commander, the Count of Gruyere, was also missing. They were led on the field by Seigneur Devruz, who also apparently commanded the Italians, although Dampierre was in charge of the entire Battle. d: Originally part of King Charles VII's companies d'Ordonnance. e: 100 or so courtiers who had rushed to Italy to join in the 'fun', arriving hours before the battle. Their Shock DRM reflects not their abilities but the size of the unit. f: In two commands, one under William Frulich of Soleure, the other, slightly smaller, under Captain St.Julien. g: Remainder of one of the 4 "bands" (battalion-like organizations) originally formed as a sort of standing army.
Spanish Army
Leaders: Alfonso d'Avalos d'Aquino, Marquis del Vasto (OC), Ramón de Cardona, Eriprando Madruzzo, Ferdinando Sanseverino, Prince of Salerno.
Seizure Counters: 3
Standards: Spain; the Spanish Standard may be placed anywhere the Spanish player wishes.
Facing: All units are faced west.
Deployment:
- Ramón de Cardona (Brown command stripe) — Hexes 5702-5703: 2 Italian Light Cavalry (#1-2 +1). Hexes 5704-5709, 5805-5808: 4 Spanish Sword & Buckler Infantry w/Arquebus (#9 –1, #10-12 0), 6 German Pike Infantry w/Arquebus (#1-4 –1, #5-6 0), Cardona.
- Eriprando Madruzzo (a) (Blue command stripe) — Hex 5710: 1 Italian Mounted Men-at-Arms (#2 0). Hexes 5711-5717, 5811-5817: 14 Landsknecht Pike Infantry w/Arquebus (#1 –2, #7-13 –1, #14-19 0), Madruzzo.
- Ferdinando Sanseverino, Prince of Salerno (Green command stripe) — Hexes 5718-5723, 5818-5823: 12 Italian Sword & Buckler Infantry w/Arquebus (#1-5 -1, #6-12 0), Salerno. Hex 5724: 1 Italian Light Cavalry (#1 0).
- Alfonso d'Avalos d'Aquino, Marquis del Vasto (Red command Stripe) — Hexes 5608-5611: 1 Spanish Falconet (#1), 2 Spanish Saker (#1-2), 1 Spanish Culverin (#1). Any hex: Vasto.
a: An Italian mercenary, and brother of the Bishop of Trent.
Who Goes First
The Spanish have the first Activation to start the game.
Terrain
A rather simple battlefield: two low ridges on each side, with plain field in between with very little else. Ceresole, the town, is off to the upper right of the map.
Skirmishers
To start the battle, both sides sent out hundreds of arquebusiers as skirmishers, who picked and fumbled at each other for several hours to no end. Vasto was hoping his larger number of arkies would turn the flank of the French, but that never happened.
If the players wish, they may create Skirmishers (counters are provided) of pure arquebusiers. To create a Skirmisher unit, the player chooses a non-Disordered Activated unit with an AQ rating that is not adjacent to an enemy unit and places a No AQ marker on it to indicate that unit's missile fire capability has been removed. Place a Skirmisher unit adjacent to that unit, but not adjacent to an enemy unit. Creating a Skirmisher unit is the unit's sole action for the Activation; Skirmishers cannot be created during an Army Activation. Each side is limited by counter mix in the number of Skirmisher units it can create.
A non-Disordered Skirmisher unit may rejoin a non-Disordered unit with a No AQ marker that is not adjacent to an enemy unit. The Skirmisher moves adjacent to the unit and spends the number of MP required to enter the unit's hex. Both the No AQ marker and the Skirmisher unit are removed.
Spanish Skirmishers all become part of Vasto's Battle when created. The instant that a French Skirmisher is created and Montluc, or his replacement, (Green command stripe) is not on the map, place him with that unit. French Skirmishers all become part of Montluc's Battle when created. If there are no French Skirmishers on the map, remove Montluc, or his replacement, until another is created.
Skirmishers have the following special rules:
- When Shock attacked solely by foot units, they may Retreat Before Combat (12.2) one to three hexes, if not Disordered or Engaged.
- They are Eliminated if they suffer a Disordered or Retreat result in Shock/Charge combat. They are Eliminated if they suffer a Retired or Eliminated result from any source.
Timed Engagement
This battle uses the timed engagement rule (16.1). Initially, set the Time marker in the 12 space on the General Track. The French are the timed side in this battle.
Bonus for Attacking
There are two objective hexes, one for each player, the Spanish objective hex is 4515 and the French objective hex is 5215. A player who occupies their objective hex with any unit receives a 10 FP Flight Level increase. Track this Flight Level increase using the Current Flight Level markers for each player.
Game Balance
It was a French victory, but a real slaughter, with close to 30% of those engaged as casualties. The French horse proved far more effective than the much better Spanish/Holy Roman Empire pike. For gameplay, it's a toughie for both sides, with a slight nod to the French.
Flight Levels
Balance: The French are slightly favored.
The French Flight Level is 45 FP.
The Spanish Flight Level is 50 FP.
Extended Example of Play
Cerignola
French Infantry Activation – Move/Fire Phase
French Swiss PK 4 moves from hex 1405 to hex 1504. This allows Reaction Fire from one of the two Spanish units in hexes 1604 and 1605. Per 11.2, only one unit can Reaction Fire when an enemy enters a hex. The Spanish player Reaction Fires with Landsknecht PK 22. Consulting the FIRE/RANGE DRM CHART, Arquebus fire at a range of 1 hex results in a +2 DRM. The Missile Fire DRM from the counter is –2. No other DRMs apply. Total DRM +2 –2 = 0. The Spanish player rolls a 4 with no DRM. The FIRE RESULTS TABLE shows that a Foot Target in Normal status is not affected by a die roll of 4. Spanish Landsknecht PK 22 is marked with a Fired marker, since all units except Genitors, Longbow, and Light Cavalry Archers are marked with a Fired marker when they Reaction Fire (see 11.2).
French SB 2 moves from hex 1404 to hex 1503. This allows Reaction Fire from one of the two Spanish units in hexes 1603 and 1604. The Spanish player Reaction Fires with Spanish SB 3. Arquebus fire at range 1 has a +2 DRM, as before. The Missile Fire DRM from the counter is –2. No other DRMs apply. Total DRM +2 –2 = 0. The Spanish player rolls a 2 with no DRM. The FIRE RESULTS TABLE shows that a Foot Target in Normal status is not affected by a die roll of 2. Spanish SB 3 is marked with a Fired marker. French SB 2 then conducts Active Fire at Spanish SB 3. Per 11.2, there is no Return Fire, since Sword & Buckler units cannot conduct Return Fire. Consulting the FIRE/RANGE DRM CHART, Crossbow fire at a range of 1 hex results in a +2 DRM. The Missile Fire DRM from the counter is –2. The Rampart on the defenders hexside causes a –1 DRM. Total DRM +2 –2 –1 = –1. The French player rolls an 8 –1 DRM for a total of 7. The FIRE RESULTS TABLE shows that a Foot Target in Normal status is Disordered by a die roll of 7. Spanish SB 3 is flipped to its Disordered side.
French SB 3 moves from hex 1403 to hex 1502. This would allow Reaction Fire from Spanish SB 3, however that unit has already conducted Reaction Fire this Activation, as noted by the Fired marker. Therefore, there is no Reaction Fire. French SB 3 then conducts Active Fire at Spanish SB 3. Crossbow fire at range 1 has a +2 DRM, as before. The Missile Fire DRM from the counter is –2. The Rampart on the defenders hexside causes a –1 DRM. Total DRM +2 –2 –1 = –1. The French player rolls a 1 –1 DRM for a total of 0. The FIRE RESULTS TABLE shows that a Foot Target in Disordered status is not affected by a die roll of 0.
French Swiss PK 6 moves from hex 1402, through hex 1501, to hex 1601 and is faced towards hexes 1600 and 1700. This allows Reaction Fire from Spanish MCB 1 in hex 1701. Arquebus fire at range 1 has a +2 DRM, as before. The Missile Fire DRM from the counter is –1. No other DRMs apply. Total DRM +2 –1 = +1. The Spanish player rolls a 4 +1 DRM for a total of 5. The FIRE RESULTS TABLE shows that a Foot Target in Normal status is Disordered by a die roll of 5. French PK 6 is flipped to its Disordered side. Spanish MCB 1 is marked with a Fired marker.
French SB 1 moves from hex 1302 to hex 1602 through hexes 1402 and 1501. This allows Reaction Fire from Spanish GE 5 hex 1702, rather than Spanish MCB 1 in hex 1701 as it is marked with a Fired marker. Consulting the FIRE/RANGE DRM CHART, Javelin fire at a range of 1 hex results in a 0 DRM. The Missile Fire DRM from the GE counter is –1. No other DRMs apply. Total DRM 0 –1 = –1. The Spanish player rolls a 5 –1 DRM for a total of 4. The FIRE RESULTS TABLE shows that a Foot Target in Normal status is not affected by a die roll of 4. Spanish GE 5 is not marked with a Fired marker (see 11.2). French SB 1 then conducts Active Fire at Spanish GE 5. Per 11.2, there is simultaneous Return Fire from Spanish GE 5. Crossbow fire at range 1 has a +2 DRM, as before. The Missile Fire DRM from the counter is –2. Total DRM +2 –2 = 0. The French player rolls a 6 with no DRM. The FIRE RESULTS TABLE shows that a Mounted Target in Normal status is Disordered by a die roll of 6. Spanish GE 5 conducts Return Fire at French SB 1. Javelin fire at range 1 has a 0 DRM. The Missile Fire DRM from the counter is –1. No other DRMs apply. Total DRM 0 –1 = –1. The Spanish player rolls a 0 –1 DRM for a total of –1. The FIRE RESULTS TABLE shows that a Foot Target in Normal status is not affected by a die roll of –1. Spanish GE 5 is flipped to its Disordered side.
Shock Phase Step 2: Pre-Shock Activities
French MM 7 is placed in hex 1500, without changing facing. All other sub-steps are skipped, since the Spanish MM 1 in hex 1600 cannot Counter-Charge since it is marked with a Counter-Charge Used marker. If French Swiss PK 6 was not adjacent, Spanish MM 1 could attempt to Counter-Charge. The Spanish player would consult the COUNTER-CHARGE vs CHARGE TABLE, roll, apply any applicable modifiers, and check the result. In this case, the only modifier would be the Shock Defense DRM of Spanish MM 1 (–1). If Spanish MM 1 succeeded in Counter-Charging, the Charge would be negated and the Charge marker on French MM 7 would be replaced with a Shock marker.
French Infantry Activation – Shock Phase
Shock Phase Step 1: Declaration of Attacks
The French player cannot declare Shock attacks from the units in hexes 1502-1504 and 1602, since they moved adjacent to the Ditch this Activation (see Cerignola special rule The Spanish Defenses). He decides that attacking Spanish MM 1 in hex 1600 with his Disordered Swiss PK unit in 1601 is not a great idea and declines to attack, since attacking is voluntary unless a unit is Engaged (see 12.1 and 14.5).
French Infantry Activation – Rally Phase
The Disordered French Swiss PK unit does not qualify for Rally, since it moved this Activation and is adjacent to an enemy unit.
French Infantry Activation – Continuation Phase
The French player decides to Continue with his Cavalry. The Spanish player declines to play a Seizure counter. The Number of Successful Continuations marker is in the 0 box, so 0 is the DRM for the Continuation attempt. The French player rolls a 3 with no DRM and compares that to Nemours' Activation Rating of 3. Since the DR is the same as or less than the Activation Rating, the French player Continues with his Cavalry. The Number Of Successful Continuations marker is advanced on the General Track from the 0 box to the 1 box. Fired markers are removed from Spanish Landsknecht PK 22 and Spanish SB 3. The Fired marker on Spanish MCB 1 will remain in place until the unit Dismounts to reload (see 11.5).
French Cavalry Activation – Move/Fire Phase
A Counter-Charge Used marker is placed on Spanish MM 1 in hex 1600, since it begins the Activation adjacent to an enemy unit. The French player does not move any mounted units.
French Cavalry Activation – Shock Phase
Shock Phase Step 1: Declaration of Attacks
French MM 7 will Charge Spanish MM 1.
Shock Phase Step 3: Attack Resolution
There is only one attack to resolve.
Attack by French MM 7 on Spanish MM 1
The defender's Shock Defense DRM is –1 (from the counter). From the Weapons System Matrix, a MM attacking a MM has a 0 DRM. No other DRMs apply. Total DRM –1 +0 = –1. The combat will be resolved on the CHARGE COMBAT RESULTS TABLE, since at least half of the attacking units (one Charging unit of one attacking unit in this case) are Charging after Step 2, using the Defending Unit's Status Normal column. The French player rolls a 9 –1 DRM for a total of 8, a result of Defender Disordered, Retreat 1 hex, Continue Attack. Spanish MM 1 is flipped to its Disordered side and retreats to hex 1700, its only allowed hex (since units cannot retreat off-map), and changes facing to face hexes 1600 and 1601. French MM 7 must advance since it is not Disordered, so it advances to hex 1600. French MM 7 is marked with a Continued Attack –1 marker. Had the French player been able to attack with both French MM7 and French Swiss PK 6 and obtained a retreat result, Spanish MM 1 would be Eliminated since it could not end its retreat adjacent to any unit that participated in the attack, nor retreat off the map (7.3 and 14.3).
Shock Phase Step 4: Continued Attack Resolution
All units marked with a Continued Attack marker must now begin again at Shock Phase Step 1, declaring attacks against all enemy units in their Frontal hexes (14.7). In this example, French MM 7 has an enemy in its Frontal hexes. French MM 7 must declare a Shock attack targeting Spanish MM1 (again). If French Swiss PK 6 was also marked with a Continued Attack marker, then both French MM 7 and French Swiss PK6 would declare a Shock attack against Spanish MM1.
Attack by French MM 7 on Spanish MM 1
The defender's Shock Defense DRM is 0 (from the counter). From the Weapons System Matrix, a MM attacking a MM has a 0 DRM. The Ditch on the hexside between the two units causes a –1 DRM. No other DRMs apply. Total DRM 0 +0 –1 = –1. The combat will be resolved on the SHOCK COMBAT RESULTS TABLE, using the Defending Unit's Status Disordered column. The French player rolls a 1 –1 DRM for a total of 0, an Attacker Disordered, Retreat 1 Hex result. French MM 7 is flipped to its Disordered side and retreats to hex 1500, its only allowed hex (since it must end its retreat one hex from the unit that caused the retreat).
French Cavalry Activation – Rally Phase
The Disordered French MM unit does not qualify for Rally, since it attacked this Activation.
French Cavalry Activation – Continuation Phase
The French player decides to Continue with his Infantry. The Spanish player declines to play a Seizure counter. The Number of Successful Continuations marker is in the 1 box, so +1 is the DRM for the Continuation attempt. The French player rolls a 1 +1 DRM for a total of 2 and compares that to Nemours' Activation Rating of 3. Since the DR is the same as or less than the Activation Rating, the French player Continues with his Infantry. The Number of Successful Continuations marker is advanced on the General Track from the 1 box to the 2 box.
French Infantry Activation 2 – Move/Fire Phase
No movement for the purposes of this example.
French Infantry Activation 2 – Shock Phase
Shock Phase Step 1: Declaration of Attacks
French Swiss PK 4 will Shock attack Spanish Landsknecht PK 22 and Spanish SB 4. French SB 2 and French SB 3 will Shock attack Spanish SB 3. French SB 1 will Shock attack Spanish GE 5 and Spanish MCB 1. French Swiss PK 6 will Shock attack Spanish MM 1. The French player could have had each of the units adjacent to the Ditch and Rampart attack a single enemy unit, but is concentrating his attacks instead in an attempt to force his way across.
Shock Phase Step 2: Pre-Shock Activities
a) Does not apply since no units are Charging.
b) Roll for terrain-induced Disorder checks for attackers. French Swiss PK 4, French SB 2, and French SB 3 must all make Disordered checks while attacking across the Ditch and Rampart (see Cerignola Terrain Chart printed on the map). French Swiss PK 4 adds its –1 Shock Defense DRM (from the counter) to its DR. The French player rolls a 5 –1 DRM for a total of 4, which does not result in the Disorder of the unit. French SB 2 adds its 0 Shock Defense DRM to its DR. The French player rolls a 9 with no modifier, which results in the Disorder of the unit. French SB 2 is flipped to its Disordered side. French SB 3 add its 0 Shock Defense DRM to its DR. The French player rolls a 2 with no modifier, which does not result in the Disorder of the unit.
c) Roll for Swiss Shock Reluctance. French Swiss PK4 and French Swiss PK 6 must both roll for Shock Reluctance. French Swiss PK 4 adds its –1 Shock Defense DRM (from the counter) to its DR. The French player rolls a 3 –1 DRM for a total of 2, and consults the SWISS SHOCK RELUCTANCE TABLE. A result of 2 means the unit will conduct its declared Shock attacks. French Swiss PK 6 adds its +1 Shock Defense DRM to its DR. The French player rolls a 7 +1 DRM for a total of 8, and consults the SWISS SHOCK RELUCTANCE TABLE. A result of 8 mean the unit refuses to conduct the designated Shock attack. The French should have paid them before the battle!
d) Retreat Before Combat. The Spanish player has a choice to Retreat Before Combat with Spanish MCB 1, because it is a mounted unit and is attacked solely by foot units.
Shock Phase Step 3: Attack Resolution
[The below two attacks are resolved by the same DR against Spanish SB 4 and the attacks (and hence any results) are simultaneous.]
Attack by French Swiss PK 4 on Spanish SB 4
The defender's Shock Defense DRM is –1 (from the counter). The attacking PK is at a strength disadvantage of 1:2, so a –1 DRM applies. From the Weapons System Matrix, a PK attacking an SB has a –1 DRM. The Ditch and Rampart on the hexside between the two units causes a combined –2 DRM, since the attack is across the Ditch from a hex without the Rampart in it. No other DRMs apply. Total DRM 0 –1 –1 –2 = –4. The combat will be resolved on the SHOCK COMBAT RESULTS TABLE, using the Defending Unit's Status Normal column. The French player rolls a 1 –4 DRM for a total of –3, an Attacker Disordered, Retreat 1 Hex result.
The results of the attacks by French Swiss PK 4 are now applied.
Spanish GE 5 cannot Retreat Before Combat because it is Disordered. Spanish MCB 1 could retreat 3 hexes to hex 2002 (not shown in image). At the completion of its retreat it would be flipped to its Disordered side. If it did, French SB 1 could not Advance, since it still has a declared combat against Spanish GE 5. The Spanish player instead has Spanish MCB 1 hold its ground since this flank isn't doing too well and he wants to delay the French long enough to reinforce it.
e) Does not apply since no unit being attacked is capable of Counter-Charging. If Spanish MM 1 were not Disordered, it could still not Counter-Charge in this example, because the Shock attack against it was negated by the Swiss Shock Reluctance roll and Counter-Charges cannot be conducted across Ditch hexsides.
Shock Phase Step 3: Attack Resolution
The French player decides to resolve his attack in order from left to right. Since all combat is simultaneous the order of resolution only matters for advance and retreat decisions.
Attack by French Swiss PK 4 on Spanish Landsknecht PK 22
The defender's Shock Defense DRM is 0 (from the counter). The attacking PK is at a strength disadvantage of 1:2, so a –1 DRM applies. From the Weapons System Matrix, a PK attacking a PK has a 0 DRM. The Ditch and Rampart on the hexside between the two units causes a combined –2 DRM, since the attack is across the Ditch from a hex without the Rampart in it. No other DRMs apply. Total DRM –1 –1 +0 –2 = –3. The combat will be resolved on the SHOCK COMBAT RESULTS TABLE, using the Defending Unit's Status Normal column. The French player rolls a 6 –3 DRM for a total of 3, an Attacker Disordered, Engaged result. The result is not yet implemented, since French Swiss PK 4 is also attacking Spanish SB 4 and the attacks (and hence any results) are simultaneous.
French Swiss PK 4 is flipped to its Disordered side. Per 14.1 when a single unit attacks two units and it incurs both an Engaged result and a Retreat result, the unit must Retreat and does not incur the Engaged result. French Swiss PK 4 retreats to hex 1405.
Had the Retreat not occurred, an Engaged marker would have been placed such that it connected the two units with the arrows on the marker. If the marker remained in place during the next Infantry Activation by either side, the Activated unit would be forced to attack. This applies to the Spanish as well, which could well draw them from their defensive works as the melee rages back and forth.
Attack by French SB 2 and French SB 3 on Spanish SB 3
The defender's Shock Defense DRM is 0 (from the counter). The attacking SB are at a strength advantage of 2:1, so a +1 DRM applies. From the Weapons System Matrix, an SB attacking an SB has a 0 DRM. The Ditch and Rampart on the hexside between the two units causes a combined –2 DRM, since the attack is across the Ditch from a hex without the Rampart on its hexside. At least one attacker is Disordered for a –2 DRM. No other DRMs apply. Total DRM 0 +1 +0 –2 –2 = –3. The combat will be resolved on the SHOCK COMBAT RESULTS TABLE, using the Defending Unit's Status Disordered column. The French player rolls an 8 –3 DRM for a total of 5, a Defender Retired result. Spanish SB 3 is picked up and placed near its Standard (14.4), and the Spanish Flight points are increased by 1 (3.0). French SB 2 cannot advance after combat because of its Disordered status, but French SB 3 must advance since it is not Disordered. French SB 3 turns to face hexes 1604-1703 after advancing. The French are across the Ditch and Rampart!
Note that even if French SB 1 in hex 1602 had been able to participate in the attack, the Positional Advantage modifier for having units attack through the Front and Flank of the defender would not apply due to terrain rules for the Ditch and Rampart.
Attack by French SB 1 on Spanish GE 5
The defender's Shock Defense DRM is +4 (from the counter). The attacking SB is at a strength disadvantage of 1:2, so a –1 DRM applies. From the Weapons System Matrix, an SB attacking a GE has a +2 DRM. The Ditch hexside between the two units causes a –1 DRM. No other DRMs apply. Total DRM +4 –1 +2 –1 = +4. The combat will be resolved on the SHOCK COMBAT RESULTS TABLE, using the Defending Unit's Status Disordered column. The French player rolls a 6 +4 DRM for a total of 10, a Defender Eliminated, Continue Attack result. The result is not yet implemented, since French SB 1 is also attacking Spanish MCB 1 and the attacks (and hence any results) are simultaneous.
Attack by French SB 1 on Spanish MCB 1
The defender's Shock Defense DRM is +2 (from the counter). The attacking SB is at a strength disadvantage of 1:2, so a –1 DRM applies. From the Weapons System Matrix, an SB attacking a MCB has a +3 DRM. The Ditch hexside between the two units causes a –1 DRM. No other DRMs apply. Total DRM +2 –1 +3 –1 = +3. The combat will be resolved on the SHOCK COMBAT RESULTS TABLE, using the Defending Unit's Status Normal column. The French player rolls a 2 +3 DRM for a total of 5, an Engaged result.
The results of the attacks by French SB 1 are now applied. Spanish GE 5 is removed from the map, the Spanish Flight Points are increased by 2 (3.0). Per 14.1 when a single unit attacks two units and it incurs both a Retreat or Engaged result and a Continued Attack result, the Retreat or the Engaged result is ignored and the unit must implement the Continued Attack result. French SB 1 advances into hex 1702 and is marked with a Continued Attack –1 marker. Had the Engaged marker been placed, the Spanish MCB would have been forced to Disengage during its next Activation, since they are not listed in the Attacker column of the Weapon System Matrix and hence cannot attack.
Shock Phase Step 4: Continued Attack Resolution
All units marked with a Continued Attack marker must now begin again at Shock Phase Step 1, declaring attacks against all enemy units in their Frontal hexes (14.7). In this example, French SB 1 has no enemy units in its Frontal hexes. The Continued Attack marker is removed.
French Infantry Activation 2 – Rally Phase
The Disordered French Swiss PK 4, French Swiss PK6, and French SB 2 units do not qualify for Rally, since they declared attacks this Activation.
French Infantry Activation 2 – Continuation Phase
The French player decides to Continue with his Cavalry. The Spanish player declines to play a Seizure counter. The Number of Successful Continuations marker is in the 2 box, so +2 is the DRM for the Continuation attempt. The French player rolls a 2 +2 DRM for a total of 4 and compares that to Nemours Activation Rating of 3. Since the DR is more than the Activation Rating, the French player fails to Continue with his Cavalry. The Number of Successful Continuations marker is moved on the General Track from the 2 box to the 0 box. The Spanish player has a Free Activation.
Example of Combat
Spanish Infantry Activation – Shock Phase
Shock Phase Step 1: Declaration of Attacks
The Spanish player must declare attacks with both Spanish Landsknecht PK 22 and Spanish SB 4, since they are both Engaged. Spanish SB 4 must attack French SB 2, since it is Engaged with French SB 2 and no other unit can attack French SB 2. Spanish Landsknecht PK 22 must attack French Swiss PK 4, since it is Engaged with French Swiss PK 4. Spanish Landsknecht PK 22 ignores French SB 3 in hex 1405 since it is not Engaged with it (per 14.5). Spanish SB 4 can only participate in one attack per Activation (per 12.1), it cannot split its attack to attack French Swiss PK 4 with Spanish Landsknecht PK 22, even though it is Engaged with that French unit.
Shock Phase Step 2: Pre-Shock Activities
a) Does not apply since no units are Charging.
b) Does not apply. The Spanish units do not need to roll for terrain-induced Disorder since the hex they are attacking across the Ditch from contains a Rampart (see Cerignola Terrain Chart printed on the map).
c)-e) Do not apply.
Shock Phase Step 3: Attack Resolution
The Spanish player decides to resolve his attacks in order from left to right. Since all combat is simultaneous the order of resolution only matters for advance and retreat decisions.
Attack by Spanish Landsknecht PK 22 on French Swiss PK 4
The defender's Shock Defense DRM is +1 (from the counter). From the Weapons System Matrix, a PK attacking a PK has a 0 DRM. The Ditch and Rampart on the hexside between the two units causes a -1 DRM, since the attack is across the Ditch from a hex with a Rampart on its hexside. No other DRMs apply. Total DRM +1 +0 –1 = 0. The combat will be resolved on the SHOCK COMBAT RESULTS TABLE, using the Defending Unit's Status Normal column. The French player rolls a 5 with +0 DRM for a total of 5, an Engaged result. The Engaged marker on Spanish Landsknecht PK 22 and French Swiss PK 4 remains in place. The next time one of these units is Activated it must attack.
Attack by Spanish SB4 on French SB 2
The defender's Shock Defense DRM is 0 (from the counter). From the Weapons System Matrix, an SB attacking an SB has a 0 DRM. The Ditch and Rampart on the hexside between the two units causes a –1 DRM, since the attack is across the Ditch from a hex with a Rampart on its hexside. No other DRMs apply. Total DRM 0 +0 –1 = –1. The combat will be resolved on the SHOCK COMBAT RESULTS TABLE, using the Defending Unit's Status Normal column. The French player rolls a 9 with a –1 DRM for a total of 8, a Defender Disordered, Retreat 1 Hex. French SB2 is flipped to its Disordered side and retreats to hex 1403. At this point, the Spanish SB 4 and French SB 2 are no longer Engaged, since the two units are no longer adjacent to each other. Spanish SB 4 must advance into hex 1502. Since this is not a Continued Attack, it can change facing to any direction. Upon Advancing across the Ditch from a hex with a Rampart on its hexside (see Cerignola Terrain Chart printed on the map), it must roll for Disorder. Spanish SB 4 adds its –1 Shock Defense DRM (from the counter) to its DR. The Spanish player rolls a 6 –1 DRM for a total of 5, which results in the Disorder of the unit. The Engaged marker between Spanish SB 4 and French Swiss PK 4 remains in place, since the two units were always adjacent to each other, it is replaced by a two arrow Engaged marker pointing between the two units.
Extended Sequence of Play
A. Activation Phase:
- If this is a Free Activation, choose a Battle, Army Activation (6.1), Standard (15.2), or Pass (6.1). If Pass is chosen, the non-Active player gets a Free Activation; the Time marker may be moved (16.1).
- If a Standard is Activated skip to Phase D or move the Standard and skip to Phase E (15.2).
B. Move/Fire Phase: During Army Activation, Activated units may only Move (7.0). During a Battle Activation any or all units of the Activated Battle may Move (7.0) and/or Fire (11.0).
- Place any replacement leaders (5.5).
- Before any unit is moved or fires, first the Non-Active player plays any Battle Cry or Unsteady Troops Seizure counters, then the Active player plays any Battle Cry or Unsteady Troops Seizure counters.
- Before any unit is moved or fires check Command status for all Activated units.
- A foot unit armed with missile weapons or a Mounted Arquebus unit may fire only at the end of its move. Light Cavalry Archers, Genitors, and Mounted Crossbow units may fire before, during, or at the end of their move. A unit may fire without moving.
- Each unit must finish its movement/firing before another unit may begin to move/fire.
- The Non-Active player's units may qualify for Reaction/Return fire (11.2) or Counter-Charge (13.9) depending on the Active player's actions.
- After movement in an Army Activation skip to Phase E.
C. Shock Phase: During a Battle Activation, after all movement/firing for the activated Battle is complete, Shock combat (12.0) and Charges (13.0) may be initiated.
- The Active player designates which of his units are attacking which defending units, including Charges (13.0).
- Pre-Shock activities: a) One at a time, the Active player places each Charging unit adjacent to its target. Any Reaction Fire caused by this is resolved. b) Roll for terrain-induced Disorder checks for attackers; apply automatic terrain-induced Disorders. c) Roll for Swiss Shock Reluctance (16.2). d) Any Retreat Before Combat (12.2) by the defender is resolved. e) The defender attempts any Counter-Charges (13.6) of which he is capable.
- The Active player resolves all his Shock and Charge attacks, in any order he wishes. The Charge Table is used as long as at least half of the units in an individual attack succeeded in Charging (not Disordered by Reaction Fire or Counter-Charged); otherwise the Shock Table is used. Continued Attack (14.7) markers are placed and Advances (12.4) are taken. Exception: Attacks by a single attacker against multiple defending hexes are resolved at the same time, and they are considered to be going on simultaneously, with results (which can be cumulative for the attacker) applied after both attacks are resolved.
- All Continued Attacks (14.7) are now resolved. Begin again at Step 1, except that only units marked with Continued Attack markers Shock and they must declare a Shock attack; Charging and Counter-Charging are not allowed.
D. Rally Phase: During Battle Activation, Rally (15.0) any Disordered units that did nothing for the entire Activation and that are currently not adjacent to an enemy unit. If a Standard was Activated, Rally (15.0) any Retired unit belonging to that army in or within one hex of the Standard, and not adjacent to an enemy unit.
E. Continuation Phase: If the completed Activation was a Free Activation, both players make a Loss Check (3.0). If the game does not end due to Loss Check, Pass or choose to Continue with a Battle or Army Activation (6.2).
- This cannot be the Battle that just Activated, unless the Active player has only one Battle.
- Army Activation can only follow an Army Activation. A Battle Activation can follow Activation of a Battle, Army, or Standard.
- The Non-Active player may attempt to Seize Continuity (6.3). If so, he plays a Seizure Opportunity counter and chooses one of his Battles to Activate. The Active player may play a Seizure Negation (6.3) counter and the Continuation attempt is then resolved, otherwise the Non-Active player rolls the die for Seizure. If successful, he Activates that Battle and proceeds from Phase B with that Battle. If not, the Active player gets a Free Activation, proceed to Phase A; this Free Activation may even be used to Activate the Battle that just completed Activation.
- If no Seizure attempt occurs, roll the die for Continuation (6.2). If successful, Activate that Battle or Army and proceed from Phase B. If not, or the Active player Passes, the Non-Active player gets a Free Activation and proceeds to Phase A.