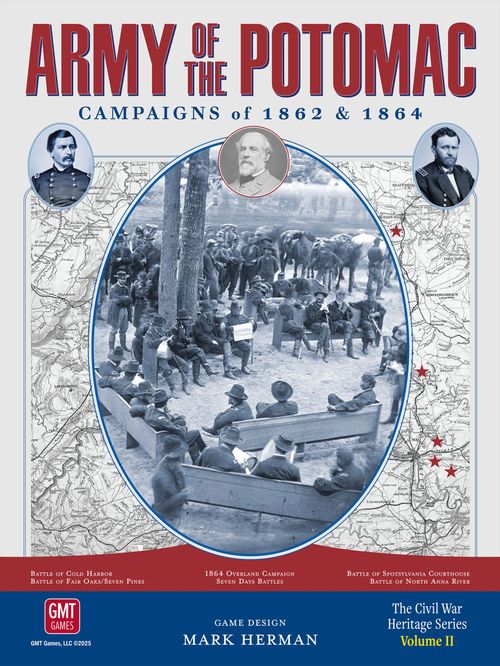
Army of the Potomac: Campaigns of 1862 and 1864
Army of the Potomac: Campaigns of 1862 and 1864 Rulebook
Table of Contents
Table of Contents
- PART ONE: CIVIL WAR HERITAGE SERIES CORE LIVING RULES (WINTER 2025)
- 1.0 Introduction
- 2.0 Key Concepts & Definitions
- 3.0 Sequence of Play
- 4.0 Command Phase
- 5.0 Organization Phase
- 6.0 Movement Phase
- 7.0 Attack Phase
- 8.0 End Phase
- 9.0 Additional Rules
- 10.0 Victory Conditions (all scenarios)
- PART TWO: ARMY OF THE POTOMAC PLAYBOOK
- Introduction
- Changes to the Series Rules
- 1862 Scenarios
- The Battle of Fair Oaks/Seven Pines
- The Seven Days Battles
- 1864 Scenarios
- The Battle of Spotsylvania Courthouse
- The Battle of North Anna
- The Battle of Cold Harbor
- Campaign Scenarios
- Campaign Rules
- 1864 Overland Campaign
- Extended Overland Campaign
- Expanded Civil War Heritage Sequence of Play
PART ONE: CIVIL WAR HERITAGE SERIES CORE LIVING RULES (WINTER 2025)
The following part is the Civil War Heritage Series Core Living Rules ("Living Series Rules", Winter 2025), which includes updates and clarifications to the original rules published with Rebel Fury; updates of significance were printed in blue text.
Changes to Series Rules
For Rebel Fury players, here is a brief summary of rules changes in this version of the Civil War Heritage Series rules:
- Cavalry Divisions must now make Mandatory Attacks against Infantry Divisions, but may not voluntarily create such Mandatory Attack situations.
- The exploding caissons result no longer depends upon the expenditure of an Ammunition Point.
- Geographic Victory may not be blocked by enemy units within four hexes of an entry hex (instead of five).
Examples of play shown in these rules are based on scenarios from the first volume of the series, Rebel Fury.
1.0 Introduction
The Civil War Heritage Series of wargames are low-to-moderate complexity games focusing on the Grand Tactical level battles of the American Civil War. Each volume covers different battles, with some playable in a linked campaign.
1.1 Set Up
After deciding which scenario to play and who will play each side, the players refer to the historical setup found in the Playbook that indicates the turn a unit is set up and in which numbered hexagonal map spaces (hexes) units are set up. The counters have the setup information on them and a code to denote which scenario they are for, but players should check the setups in the Playbook for additional information on scenario specific rules and whether the units are in Field Works or Forts as such information could not be included on the counters.
The counter illustrations in the rules are labeled as follows. Divisions: Battle Code, Setup Hex, Corps Designation, Name, Battle Star, Movement Allowance (examples shown: Union Cavalry Division (Maneuver Formation) and Confederate Infantry Division (Battle Formation)). HQs: Turn of Entry, Army (no game effect), Battle Stars, Battle Mode Indicator, Command Range (examples shown: Union HQ (Maneuver Mode) and Union HQ (Battle Mode)). Detachments (examples shown: Union Infantry Detachment and Confederate Cavalry Detachment). Heavy Artillery: Heavy Artillery Concentration and Heavy Artillery Target marker. A Sleeping Sentry marker is also shown.
Infantry/Cavalry Detachments behave identically: the difference is shown for historical flavor.
1.2 Scale
Map hexes are half a mile per hex. Units are primarily Divisions (large counters) with large Divisions represented by multiple counters. Detachments are typically brigade or regimental formations (small counters). Each game turn is half a day, making every two turns one day of historical time.
2.0 Key Concepts & Definitions
2.1 Key Concept 1
There are two different sized units in the Civil War Heritage Series: Divisions (large counter) and Detachments (small counter).
Detachments have a traditional Zone of Control (hereafter ZOC) that consists of all adjacent hexes unless interrupted by terrain (e.g., Major Rivers).
2.2 Key Concept 2
The Civil War Heritage Series does not use traditional movement points but uses hexes of movement. Divisions can be in one of two Formations: Maneuver or Battle.
- Any Division in Battle Formation: move 1 hex.
- Infantry Division in Maneuver Formation: move 4 hexes, Extended March along roads 8 hexes.
- Cavalry Division in Maneuver Formation: move 6 hexes, Extended March along roads 12 hexes.
When a Division in Maneuver Formation leaves a road to enter/cross most terrain types or enters an enemy ZOI, it must immediately cease its move and enter Battle Formation (by flipping the counter over). Players should consult the Terrain Effects Chart (hereafter TEC) on the back side of the player aid for the effects of various types of terrain on movement and battle.
Divisions cannot change from Battle Formation to Maneuver Formation during a Movement Phase but can do so during the following game turn's Organization Phase, if not in an enemy ZOC/ZOI.
2.3 Key Concept 3
A Division has both a ZOC and a Zone of Influence (hereafter ZOI). A Division's ZOI consists of all hexes that are adjacent to that unit's ZOC hexes unless interrupted by terrain.
The only units that move across the hex grid in the Civil War Heritage Series are Division (Infantry or Cavalry) units represented by the larger-sized counters. Detachments (smaller counters) cannot move but are placed during the Command Phase.
The Movement Phase is conducted as a series of alternating moves whereby each player moves one Division. A Division in an enemy ZOC cannot move. Divisions not in an enemy ZOC can move once, or multiple times in any order; there are no restrictions beyond moving within or toward your HQ's Command Range. Once one side decides that they do not wish to move any further, they pass with their opponent receiving a variable number of additional moves based on a modified die roll.
2.4 Key Concept 4
Only Divisions that are in an enemy ZOC can attack (sometimes referred to as combat for readability). Attack is usually voluntary although there are a few Mandatory Attack situations discussed later (e.g., Entrenchments, Forts, and Pontoon Bridges). A Division can attack multiple times, even sequentially, only restricted by surviving the combat results.
Detachments can never attack but can be attacked. A unit (Divisions and Detachments) can be attacked multiple times in any sequence—again only affected by combat outcomes.
While Command Range affects movement, it does not inhibit the ability of a Division to attack, retreat, or pursue.
2.5 Definitions
Artillery: All Infantry Divisions have organic artillery factored into their capabilities. During combat, each player will have an opportunity to enhance the Battle Rating of their attacking or defending Division with Corps/Army artillery by expending one of their finite Ammunition Points.
Attack: The acting player designates one Division to attack an adjacent enemy unit. Dice are rolled and modified, resulting in a combat outcome (see Attack Resolution Procedure). Some attacks are mandatory; all other attacks are voluntary.
Battle Formation: Battle Formation represents the Division formed for attack or defense, depending on the circumstances. When a Division (Infantry or Cavalry) enters certain types of terrain, an enemy ZOI, or has an enemy Division enter its ZOC, it must change to Battle Formation (flipping the counter to its Battle Formation side). A Division in Battle Formation cannot change back into Maneuver Formation until the next game turn's Organization Phase.
Blown: This can occur to a Division during an attack or the Disengagement Step. The Division is placed on the Game Turn track two turns later. If there are less than two turns remaining, the Division is Eliminated. Each game turn, each player can return up to two Blown units to the map.
Cavalry Divisions: Both sides field Cavalry Divisions that are distinct from Infantry Divisions. Cavalry units can only voluntarily declare an attack against another Cavalry Division or an Infantry or Cavalry Detachment, but they always defend from a Division attack (Infantry or Cavalry). Cavalry may not move to create a situation where they must make a Mandatory Attack against an Infantry Division, but can be forced to do so by enemy movements. Whether attacking or defending, Cavalry Divisions cannot choose to add Artillery Support (they must always select No Support) nor may they benefit from Heavy Artillery.
Command Range: Each side will have at least one (but often more) HQ in play every turn. An HQ has a range value (the HQ's Command Range) on the counter that varies whether it is in Maneuver or Battle Mode. Divisions move and resolve some steps of the Organization Phase differently depending on whether they are within this range from the HQ (counted in hexes).
Confederate: Confederate units, also referred to as CSA or Rebel forces, are controlled by the Confederate player.
Detachments: Regardless of whether a Detachment shows an Infantry or a Cavalry symbol, they behave identically in play. Detachments are special units on smaller counters which never move except by being withdrawn from the map and subsequently being placed in a new location during the Detachment Placement Step and Detachment Recall Step of the Command Phase. Detachments have a ZOC (but no ZOI) and are useful for screening, holding flanks, or as the rearguard when on the strategic retreat. Detachments, like a Cavalry Division, can never benefit from Artillery Support.
Dice: The Civil War Heritage Series uses a 10-sided die (d10) where zero is zero, not ten. Each player is supplied with their own die (blue or gray). Die rolls may be modified by adding or subtracting values in some situations. The Die Roll Modifier (hereafter DRM) is applied before checking the final result against listed outcomes. There is also a special six-sided die that is used exclusively for retreat situations in certain terrain types (e.g., Woods).
Division: Divisions are the only type of unit that can move during the Movement Phase. For ease of identification and discussion, all large counter units are referred to as Divisions.
Empty Hex: An empty hex has no units or HQ markers in it. Heavy Artillery Concentrations and terrain markers (Entrenchments, Forts, and Pontoon Bridges) do not affect a hex's empty status.
Entrenchments: Entrenchments are significant defensive earthworks (distinct from Field Works which are constructed during play). The rear hexsides of Entrenchments are marked on the map with X's, and all other hexsides of an Entrenchment hex are frontal hexsides. In the Civil War Heritage Series, Entrenchments are either printed on the map, placed on the map at the beginning of a scenario or built during a scenario (according to scenario rules).
Extended March: Extended March allows Divisions moving entirely on a road or finished railroad to double the number of hexes they may move, as long as they do not enter an enemy ZOC or ZOI. Some terrain types will force a unit that uses Extended March to cease movement and enter Battle Formation (e.g., Switchback hexsides).
Field Works: Field Works have two sides, one side for a Construct Field Works, and one for a completed Field Works. Only Infantry Divisions can construct Field Works. A Field Works is placed during setup or constructed over the course of a Movement Phase and the following Organization Phase. If the last friendly unit in a hex with a Field Works or Construct Field Works is ever moved or removed from that hex, the Field Works or Construct Field Works is immediately removed. If a unit with a Field Works or Construct Field Works marker on it attacks or supports an attack, the marker is removed. If an enemy unit enters the ZOC of a Division with a Construct Field Works, the Construct Field Works is immediately removed.
Formation: Divisions can be in one of two Formations, shown on each side of a Division counter: Maneuver or Battle. A Division in Battle Formation can move one hex. An Infantry Division in Maneuver Formation can move up to 4 hexes (or 8 in Extended March) whereas a Cavalry Division can move up to 6 hexes (or 12 in Extended March). During each Organization Phase, units determine their starting Formation for the turn depending on their proximity to enemy units.
Play Note: Entry into most non-clear terrain hexes will force a unit in Maneuver Formation to change into Battle Formation (see the TEC).
Headquarters (HQs): Each side will have one or more HQ markers. HQs have a Maneuver and Battle Mode. Each side of an HQ has that mode's Command Range as measured in hexes and, when in Battle Mode, its attack benefit as measured by the number of Stars on the counter. When the rules say Mode, they are always referring to an HQ and not the similar Division Maneuver and Battle Formation terms. HQs never move but are placed during the HQ Redeployment Placement Step of the Command Phase. HQs cannot be Eliminated. Some scenarios skip the initial HQ Redeployment Placement Step with the HQ set up in a predetermined location for Turn 1. Some scenarios depict a Turning Movement and an HQ in this circumstance must remain in the same location for the first two turns of a scenario, see scenario instructions.
Design Note: HQs do not represent the location of the named generals and their command staff but are an abstract representation of each army's center of operations for the game turn. You cannot interfere with an HQ marker or displace it during play in any manner. HQs have a single value representing their range of command and, when in Battle Mode, one or more stars.
HQ markers denote a side's center of gravity. Take note these are markers not units and rules that refer to units do not refer to these markers. There are several administrative markers, such as the Game Turn marker used on the Game Turn track. Each side has an Artillery Decision marker (Artillery Support/No Support), in some scenarios a Heavy Artillery Concentration and Target marker, and an Artillery Ammunition Remaining marker that is used on the Artillery Support track. There is also a Moves/Attacks Remaining mnemonic marker for use after one side passes.
Heavy Artillery: Some scenarios give one side (almost always the Union) immobile Heavy Artillery Concentrations that have a set up location. The associated Heavy Artillery Target marker is used to show where it is firing and shows an explosion with the range of 5 hexes from the Heavy Artillery Concentration.
Infantry Divisions: Both sides field Infantry Divisions that are distinct from Cavalry Divisions. Infantry Divisions can declare an attack against any type of Division or Detachment. Infantry Divisions are the only types of units that can receive Artillery Support in combat.
Mandatory Attack: A Division must make a Mandatory Attack in several situations, usually by being in the ZOC of an enemy unit in a Fort or Entrenchment. Detachments that would have to make Mandatory Attacks are instead Eliminated. All Mandatory Attacks must be conducted before voluntary (non-mandatory) attacks, in the order of the attacking player's choosing.
Maneuver Formation: Most Divisions move around the map in Maneuver Formation until they enter certain dense terrain, an enemy ZOI, or a unit enters its ZOC, when Divisions must change to Battle Formation (flipping the counter over).
Map-Entry Spaces/Hexes: As indicated in scenarios and on maps. Several scenarios have an associated Off-Map Display with several Off-Map Spaces. An Off-Map Space is either connected to other Off-Map Spaces, or a Map-Entry Space (which is not an Off-Map Space) which shows its associated Map Entry hex. Divisions which move from the Off-Map Display to the Game Map can no longer return to the Off-Map Display.
Markers: The Civil War Heritage Series includes several markers that are placed on the map. Entrenchments, Forts, Field Works, and Pontoon Bridges are terrain markers used on the map.
Stacking: Each hex can contain up to one Division, one Detachment, one HQ, one Pontoon Bridge (per hexside), and one terrain marker (Entrenchment, Fort, or Field Works). Divisions can never stack, move, retreat, or pursue through each other at any time during a turn. Friendly Divisions can enter, move through, and/or remain in the same hex as a friendly Detachment or any HQ (friendly or enemy). Divisions on an Off-Map Display have no stacking limit while on the display. Some scenario setups have entry hexes with stacks of Divisions. Once those Divisions have left the entry hex, the entry hex returns to a one Division stacking limit.
Terrain: Terrain is printed on the Game Map. Each time a Division in Maneuver Formation enters a hex, it expends one hex of movement. All hexes on the map cost one hex of movement. When a Division enters non-clear terrain (e.g., Woods), it will cease movement and change to Battle Formation. See the TEC for the effects of terrain on Formation changes and attack resolution.
Union: Union units, also referred to as USA or Union forces, are controlled by the Union player.
Zone of Control (ZOC): The six hexes adjacent to a unit are its Zone of Control. Divisions and Detachments have a ZOC which restricts enemy movement and enemy Detachment placement. A unit in an enemy ZOC must be in Battle Formation and cannot move for the remainder of the Movement Phase. A Division that is in an enemy ZOC, whether moving or stationary, must flip to Battle Formation if not already in that Formation. Some types of terrain block ZOC; see TEC. There is no additional effect for a hex having more than one ZOC projected into it.
Zone of Influence (ZOI): All hexes adjacent to the ZOC of a Division, not Detachments, constitute the unit's Zone of Influence. ZOI restrict enemy movement and enemy Detachment placement. ZOI extend through and beyond enemy units but are blocked by some terrain types; see TEC. There is no additional effect for a hex having more than one ZOI projected into it.
Design Note: Zones of Influence include the sound of battle and information from skirmishers that impact a commander's decision to deploy out of Maneuver Formation into Battle Formation.
3.0 Sequence of Play
The Sequence of Play is divided into five phases. A phase may be composed of several steps. Each step must be fully completed before the next phase/step in the sequence can begin.
- Command Phase
- Initiative Step
- HQ Redeployment Check Step
- HQ Redeployment Placement Step
- Detachment Placement Step
- Detachment Recall Step
- Off-Map Movement Step
- Organization Phase
- Formation Determination Step
- Blown Division Return Step
- Disengagement Step
- Field Works Construction Step
- Movement Phase
- Attack Phase
- End Phase
Play Note: Questions of timing are usually caused by taking shortcuts and not following the Sequence of Play. If you have a timing question, make sure that you are conducting the game's procedures in the correct order.
4.0 Command Phase
Units: Units are divided into Divisions (Infantry and Cavalry) using larger counters and Detachments using smaller counters. All references to units include Divisions and Detachments. HQs and Heavy Artillery Concentrations are not units but markers, so references to units never include HQs or other markers.
For each step below, both sides complete the step fully before moving on to the next.
4.1 Initiative Step
Each scenario designates which side is the first player on Turn 1. Some scenarios begin with a Turning Movement (e.g., Chancellorsville), and the side executing the Turning Movement is automatically the first player for the first two turns of the scenario.
Starting on Turn 2, or Turn 3 in a Turning Movement scenario, each side totals the number of Battle Stars on their HQs which are on the map. The side with the greater number of Battle Stars is the first player for this game turn. In case of ties, such as zero, each player rolls one die until one player has rolled higher than the other. They are the first player.
Play Note: As this step precedes the HQ Redeployment Placement Step, initiative is based on the situation at the end of the last turn or the scenario setup.
4.2 HQ Redeployment Check Step
Starting with the first player, each player must check all their HQs to see if they must be removed or they remain on the map. Check the HQs in order based on their mode as given below.
-
HQs in Maneuver Mode are removed from the map.
Notable Exception: If a side is executing a Turning Movement, its HQ(s) are not removed on Turns 1 and 2 and remain in the same hex in Maneuver Mode.
Play Note: In some scenarios, the Turning Movement HQ is set up in an enemy-occupied hex. This is not a mistake and constitutes a general exception to the HQ placement rules.
-
HQs in Battle Mode with a Battle Mode Auto marker on it. The HQ is removed from the map.
-
HQs in Battle Mode with a Battle Mode +2 marker on it. The HQ must make a removal die roll. Roll 1d10. Add the number of Battle Stars on the HQ and add 2. Look up the modified result on the following HQ Removal Check Table.
-
HQs in Battle Mode without a Battle Mode marker on it. The HQ must make a removal die roll. Roll 1d10. Add the number of Battle Stars on the HQ. Look up the modified result on the following HQ Removal Check Table.
HQ Removal Check Table
| Modified Roll | Result |
|---|---|
| 4 or less | HQ must remain in Battle Mode in the same hex for this game turn. If the HQ has a Battle Mode +2 marker, flip it to its Auto side. Otherwise, place a Battle Mode +2 marker on the HQ. |
| 5 or greater | HQ is removed from the map. Remove the Battle Mode marker if present. |
Example: An HQ with one Battle Star and no Battle Mode marker rolls the die and gets a 5. Since 5 + 1 = 6, it is removed from the map. If it had rolled 3 or less, it would have remained in the hex and have received a Battle Mode +2 marker.
4.3 HQ Redeployment Placement Step
Starting with the first player, each player must place all HQs that were removed in the step above, or are arriving as reinforcements, on the map. Each HQ may be placed in either Maneuver or Battle Mode. The placement hex must follow these limitations:
- cannot be placed in a hex containing an enemy ZOC, ZOI, or unit.
- cannot be placed in a hex with a HQ.
- must be placed within 3 hexes of a friendly unit (Division or Detachment). It may be placed in a hex with a friendly unit.
- must be placed closer (not the same distance) to a friendly unit than it is to any enemy units.
In the unlikely event a HQ has no friendly units on the map, place the HQ in any empty hex on the map within 3 hexes of a friendly Entry Hex, even in an enemy ZOC or ZOI.
Play Note: This marker represents your command intent. It is not meant to represent a physical presence. Once placed, you cannot interfere with an enemy's HQs in any tangible manner.
4.4 Detachment Placement Step
Starting with the first player, each HQ may place one Detachment on the map within its Command Range. The placement hex must follow these limitations:
- cannot be placed in a hex containing an enemy ZOC, ZOI, or unit.
- cannot be placed in a hex with a Detachment.
- cannot be placed in an enemy entry hex, or in a way that projects ZOC into an enemy entry hex.
- may be placed in a hex with a friendly HQ and/or Division
- may be placed in an unoccupied Entrenchment or Fort if not in an enemy ZOC or ZOI.
The HQ must trace a path from its hex to the Detachment's placement hex. The path cannot be traced through an enemy ZOC, ZOI, or unit. The path can be no longer than the HQ's Command Range.
Exception: If the HQ is in Maneuver mode and the path is traced entirely by road or finished railroad, the path can be up to double the HQ's Command Range. Note that regardless of how the path is traced the final Detachment placement hex must still be in range of the placing HQ.
Play Note: Remember there is no difference between an Infantry or a Cavalry Detachment. It's just there for historical flavor.
4.5 Detachment Recall Step
Starting with the first player, each player may remove all, some, or none of their Detachments from the map. A Detachment can be removed even if placed in the previous step. Detachments can be removed from any location. This includes in an enemy ZOC or surrounded. Removed Detachments are available for placement on any following turn.
4.6 Off-Map Movement Step (some scenarios)
Starting with the first player, each player resolves Off-Map movement. Each Division or stack of Divisions that are in an Off-Map space can move from one space to an adjacent connected space. Each Off-Map space may hold an unlimited number of Divisions. Divisions transfer from the Off-Map Display to the map during the Movement Phase.
5.0 Organization Phase
For each step below, both sides complete the step fully before moving on to the next.
5.1 Formation Determination Step
Starting with the first player, each Division that is in Battle Formation and not in an enemy ZOC or ZOI can be flipped to Maneuver Formation. This is the only time during a turn that a Division can change from Battle Formation to Maneuver Formation.
As the players are checking each Division, they should ensure each Division in an enemy ZOC is set to Battle Formation. This should have occurred previously, but it never hurts to check!
Play Note: If a Division in Battle Formation does not change into Maneuver Formation during this step, then it is going to remain in Battle Formation for the remainder of the game turn.
5.2 Blown Division Return Step
Starting with the first player, each player can return to the map up to two Blown Divisions. Divisions removed due to receiving a Blown combat result or the inability to retreat count toward this two Division maximum. Divisions designated to return to play at this time cannot be delayed for any reason. If more than two Divisions are available to return, the player's opponent chooses which two Divisions return and the remainder are Eliminated from play. They will count as Eliminated units for victory point purposes. Place the returning Divisions in empty hexes adjacent to, not stacked with, a friendly HQ. The hex may not be in an enemy ZOC or ZOI. The returning Divisions are placed in Battle Formation. If for any reason a Division cannot be returned to play, it is Eliminated.
Play Note: It is assumed that the enemy player will pick inferior units to return to play, but it is their choice. Remember, you cannot delay a unit's re-entry for any reason!
5.3 Disengagement Step
Starting with the first player, players conduct voluntary retreats. Alternate choosing a friendly Division in an enemy ZOC and have it conduct a retreat. Once a player passes, they cannot retreat any further Divisions, and their opponent may then retreat up to three more Divisions before ending this step. Retreats in this step follow all the rules for a Retreat combat result. Divisions that are surrounded by enemy Divisions and/or enemy ZOC can be removed by applying a Blown result.
Play Note: This is how a surrounded Division can extricate itself, but it is not a 'free lunch.'
5.4 Field Works Construction Step
Flip any Field Works or Entrenchments markers on their Construct side to their completed side if it is in the same space as an Infantry Division that is not in an enemy ZOC (but it may be in an enemy ZOI).
6.0 Movement Phase
Starting with the first player, players alternate choosing a Division to activate. Each time it is a player's chance to choose, they must either activate a Division or pass. A Division in an enemy ZOC may not be chosen to activate. Detachments and HQ are never activated; they are only placed and removed during the Command Phase. The same Division may be activated multiple times (and even sequentially) during a given Movement Phase. When a Division is activated, it will generally move and may change to Battle Formation. Units in an Off-Map Entry Space may be activated, placed into their associated Map Entry hex, and then conduct a full movement. Instead of moving, an activated Division may construct Field Works or place a Pontoon Bridge.
Play Note: Unlike most games, the same Division can move multiple times in a row and a player's Divisions can collectively move in any sequence until both players pass.
When a player no longer wishes to activate any Divisions, or cannot, they pass. The passing player may no longer activate any Divisions for the remainder of the Movement Phase. The non-passing player must pick one HQ to be the Active HQ. The non-passing player rolls 1d10 and adds one to the die roll for each Battle Star showing on the Active HQ and one for each friendly Division not in an enemy ZOI or ZOC that is within Command Range of the Active HQ. In addition, if there are no non-passing player Divisions in any opponent's ZOCs anywhere on the map, then add 10 to the die roll. The modified die roll is the number of additional activations the non-passing player may make. Mark this number with the Moves Remaining marker. Regardless of the result, the non-passing player can never have more than 19 additional activations.
Play Note: If your opponent tries to use 'cute' tactics and immediately pass to slow down the game, the +10 DRM is intended to thwart this tactic. You can forgo rolling the die once the modifiers are +19 as that is the maximum.
Off-Map units may enter the map as one of the non-passing player's activations. Reduce the Moves Remaining marker by 1 as each Division is activated. The non-passing player must pass when the Moves remaining reaches 0 or all their units are in an enemy ZOC. The non-passing player may pass at any time.
Once both players have passed, the Movement Phase is concluded.
6.1 Command Check
When a Division is activated, it must designate an Active HQ. In most scenarios, a side only has one HQ so there is no decision. Otherwise, the player may select any friendly HQ to be the Active HQ. Generally, a Division may select a different HQ each time it is activated.
However, if one player has passed, the non-passing player must select the Active HQ used when determining their Moves Remaining.
Before the Division moves, check to see if the Division is within the Active HQ's Command Range. Command Range is measured in hexes. Do not count the hex where the Active HQ is located but count the hex where the Division is or the hex the Division is trying to enter. The Command Range can be traced through enemy ZOI and ZOC, enemy and friendly units, and all terrain. The activated Division may move, or it may instead construct Field Works or place a Pontoon Bridge (see Field Works and Pontoon Bridges later in these rules for details on their placement).
Design Note: Command represents the army's center of gravity. Each Division is under corps leadership that is factored into the ability for Divisions to conduct local operations.
6.2 Movement
If the Division starts its move within Command Range, the Division cannot enter a hex during its movement outside the Active HQ's Command Range. If the Division starts its move outside of Command Range, the Division must move closer to its Active HQ until it is within the Active HQ's Command Range, and thereafter it may not voluntarily move beyond the HQ's range (see Notable Exception under Road Movement below). Closer means less distance, not the same distance.
The chosen Division moves from hex to adjacent hex, in any combination of directions, up to the movement allowance of its current Formation. Each hex on the map costs 1 point of movement allowance. A Division is never required to use its full movement allowance. A Division may never enter a hex containing another Division, friendly or enemy, an enemy Detachment, nor an enemy entry hex. In addition, a Division may never move in such a way as to bring an enemy entry hex into their ZOC or ZOI. A Division may move through or remain in a hex with a friendly Detachment, friendly HQ, or enemy HQ. A Division entering a hex containing an enemy HQ has no impact on its movement or the enemy HQ. Note that some scenarios begin with an HQ and an enemy unit stacked with each other.
Important: The Civil War Heritage Series has two absolute rules of movement. First, a Division may never enter a hex containing a friendly or enemy Division or enemy Detachment. Second, a Division may never move such that an enemy entry hex is in its ZOI or ZOC. There are no exceptions.
A Division in Maneuver Formation cannot cross a River, Creek, or Run hexside. Only Divisions in Battle Formation can cross these hexsides. Some terrain types (e.g., Woods) will force a Division to change from Maneuver to Battle Formation (see the TEC for specifics). A Division moving in Maneuver Formation may voluntarily change to Battle Formation, regardless of whether it has already moved any hexes. Any time a Division changes from Maneuver to Battle Formation, for any reason, it ends the Division's current movement.
Play Note: One reason to do this would be to cross a River, Run, or Creek hexside. Remember any time a Division changes from Maneuver to Battle Formation it ceases its current move.
When a Division enters a hex in an enemy ZOI or ZOC, it must end its movement and change to Battle Formation. When a moving Division enters the ZOC of an enemy Division in Maneuver Formation, the enemy Division immediately changes into Battle Formation. ZOCs and ZOIs do not extend across some types of terrain hexsides (e.g., Major rivers; see the TEC for specifics).
Play Note: An enemy Division entering a friendly Division's ZOI does not force the latter to change Formation. This is how it is possible for that Division to move away at its higher movement rate.
A Division in Maneuver Formation that begins its movement in an enemy ZOI whose first hex of movement is a hex without an enemy ZOC, ZOI, or Battle Formation terrain effect, remains in Maneuver Formation.
Entrenchment Entry Restriction: A Division that is not in an Entrenchment may not enter an Entrenchment hex that is in the ZOC of an enemy Division in an Entrenchment hex. Any such Entrenchment hex is considered occupied during movement but can be entered due to a successful attack during the Attack Phase (see Entrenchments for details).
Cavalry Division Mandatory Attack Restriction: A Cavalry Division may never move in such a way as to force them to make a Mandatory Attack against an Infantry Division. This does not preclude an enemy movement that would cause a Cavalry Division to make such a Mandatory Attack.
Play Note: Entrenchments have some directional nuances that are covered in detail in section 9.3.
6.3 Road Movement and Extended March
When a Division in Maneuver Formation moves from hex to hex along a road or finished railroad, it may use Road Movement and ignore the effect of other terrain in the hex unless the terrain explicitly affects Road Movement (e.g., Switchbacks). A Division may combine Road Movement and non-Road Movement in the same activation, up to its movement allowance. Divisions using Road Movement can enter enemy ZOIs, but must stop movement and change into Battle Formation. Divisions in Battle Formation cannot use Road Movement (this is moot as they may only move 1 hex).
Extended March: Divisions in Maneuver Formation that use Road Movement for their entire move and never enter an enemy ZOC or ZOI may move twice their printed movement allowance.
Notable Exception: If a Division in Maneuver Formation that starts its move outside of the Active HQ's Command Range uses Road Movement exclusively, the moving Division can temporarily be further from its HQ, if and only if a. the Division does not enter an enemy ZOC/ZOI; b. at the conclusion of its movement, it is closer (not the same distance) to the HQ than it was when it began its movement. This does not allow a Division that starts within the Active HQ's Command Range to move outside of that range during its move.
Design Note on Notable Exception: The intent here is that sometimes the historic road network is arrayed in a manner that makes moving closer to a friendly HQ impossible without doing silly things to conform with the Command Range restrictions. A Division ordered to close on the army would follow the road network for its entire march. Please do not torture the wording of this exception to achieve some perceived match advantage.
6.4 Entering Off-Map Units
Some scenarios have units that begin on the Off-Map Display or arrive as reinforcements on a specific turn.
Divisions on an Off-Map Display may remain there for all or part of the scenario. During a Movement Phase, if the associated entry hex is empty, an Off-Map Division may make a full movement by being transferred to the associated Map Entry hex and conduct a full movement from that location. If the associated Map Entry hex is occupied by a friendly Division, then the Off-Map Division may not be transferred from the Off-Map Display. Divisions that have entered the Game Map may not move back to the Off-Map Display.
Divisions that arrive on a specific turn are stacked in their entry hex at the beginning of the Movement Phase of their arrival turn (marked on the counter and in the scenario rules). These Divisions are activated one at a time, in any order. Once the entry hex is empty of these initial units, it may never again contain more than one Division. Divisions in an entry hex do have a ZOC and ZOI. All other movement rules apply.
A player with any Divisions in an Entry Hex may not pass during the Movement Phase if it is possible to move Divisions out of an Entry Hex. After one player passes, the non-passing player must activate a unit in an Entry Hex and move it out of the Entry Hex if possible before moving units already on the map.
Play Note: Remember, never place a Detachment nor move a Division such that it projects a ZOC/ZOI into an enemy entry hex. Therefore, there is no situation that would cause a Division in a friendly entry hex to have to attack to enter the map or be attacked in an entry hex.
Design Note: Gamers love to try to interdict enemy reinforcements at the map edges. Simply stated, you cannot, and I have written these rules to reflect this intent. In addition, if possible, you must move all reinforcements that are on an entry hex out onto the map and, again, attempts to do something else are illegal behavior.
Extended Movement Example
It is the beginning of the Battle of the Wilderness Scenario. Per the scenario rules, the CSA player takes the first six activations, which we will use to illustrate various movement principles. This example does not attempt to show what "good" play looks like! You will have to experiment for yourself to discover what a good opening looks like for the Confederates. Remember that the only units that cannot be chosen for activation are units in an enemy Zone of Control (ZOC). Units in an enemy Zone of Influence (ZOI) can still be activated!
For their first activation, the CSA player activates the Early a Division in hex 2103, and checks if it is in the Command Range of an HQ. The only CSA HQ on the map is R.E. Lee in hex 2006 which is only three hexes away, easily within its Command Range of 15. Whatever Early a does, it must stay within that 15 hex Command Range. Because Early a is in Maneuver Formation it can move up to four hexes, or if it moves entirely along a road and does not enter an enemy ZOC or ZOI, it may move up to eight hexes. The CSA player moves Early a seven hexes along Orange Turnpike to hex 2608 (red arrow). Because it is using Extended March, Early a cannot move to hex 2708 because it would enter the ZOI of Griffin a.
For their second activation, the CSA player activates Early b in hex 2003. Like Early a, Early b will have no trouble staying inside the R.E. Lee HQ's Command Range for this activation. Early b moves along Orange Turnpike and the small road in hex 2506 to end its movement in hex 2607 (orange arrow). Note that the smaller roads work the same as larger finished roads like the Orange Turnpike, and units may use Extended March to move across both types of road.
Next, the CSA player activates Early b again. You can activate your units in any order, and activate the same unit multiple times in a row (or activate other units and then come back and activate a unit again!). They move Early b two hexes, to hex 2808 (yellow arrow), and flip Early b to its Battle Formation side. There are actually two reasons Early b has to enter Battle Formation. First, because Early b entered an enemy ZOI, and secondly because Early b entered terrain that flips an entering Division to its Battle Formation side.
Instead, the CSA player activates the W.H.F. Lee Cavalry Division in hex 1012. This Division is 11 hexes from the R.E. Lee HQ, so the Confederate player will have to ensure they do not move the Cavalry Division out of the Active HQ's Command Range (as a reminder, it is 15 hexes). They move the Cavalry along Catharpin Road to hex 1317, but cannot move into hex 1318, because it would be outside of the Active HQ's Command Range. So, they stop moving there, using only seven hexes of the Extended March.
Finally, the CSA player activates the F. Lee Cavalry Division in hex 3025. This Division is already more than 15 hexes from the R.E. Lee HQ, so normally it must move closer to the HQ with each hex of its movement. However, if the Division moves only on roads and doesn't enter any enemy ZOI or ZOC, and ends its movement closer to the Active HQ than it started (not the same number of hexes away!), it can enter hexes during its movement that are equidistant or farther from the Active HQ as the hex they are moving from. F. Lee starts 24 hexes away and does not want to enter hex 3024, because it would have to stop moving when entering an enemy ZOI. Instead, it moves to hex 2825, then along the small roads until it reaches Furnace Road in hex 2520. Even though the move from hex 2924 to 2825 did not bring the Division closer to the Active HQ, it is allowed to make this move because of the conditions mentioned in the previous paragraph.
Having used half their starting activations, the CSA player decides to pin Griffin in place and activates Early b one more time. Early b is still only nine hexes away from the R.E. Lee HQ, well within its Command Range (remember, a Division cannot leave the Command Range of the active HQ). The CSA player moves Early b to hex 2908, and all three of the adjacent Union Divisions are flipped to their Battle Formation sides, because an enemy unit entered their ZOC (not ZOI!). Because Early b is in the ZOC of a Union unit, it may not be activated any more—but neither may the Union Divisions. At some point during this Movement Phase, the CSA should probably bring more units up to support Early b! But not now.
6.5 Optional Analysis-Paralysis Stalemate Rule
If each player makes 20 consecutive moves (40 moves in total) without a Division from either side entering a ZOC, then end the Movement Phase immediately. Use the Moves Remaining counter to keep track if desired.
Design Note: This rule should never come into effect and hence it's optional. It is basically a variant of a Chess rule. On two rare occasions I have seen players adamant that they were not going to pass. Both players just pushed the same unit back and forth in a classic "I am not going to blink" standoff. While I found it amusing, this rule is added to maintain the pace of play.
7.0 Attack Phase
Starting with the first player, players alternate choosing a Division to attack an enemy unit in their ZOC. The same Division may attack multiple times in the same Attack Phase including attacks against the same target. Each time it is a player's turn to choose, they must either attack with a Division or pass.
Most attacks are voluntary and a player can pass at any time unless they have remaining Mandatory Attacks. Some attacks involving Entrenchments, Forts, and Pontoon Bridge placement are mandatory and must all be resolved before a player may conduct voluntary attacks or pass. As a reminder, mark Mandatory Attacks with Must Attack markers.
Play Note: The same Division can be the attacker in a series of attacks until it either suffers an adverse result or is victorious. Any unit (Division or Detachment) can be the target of a series of consecutive attacks until it either suffers an adverse result or prevails.
When a player passes, they may no longer initiate attacks for the remainder of the Attack Phase. The non-passing player rolls a 1d10 and receives additional attacks equal to the die roll plus 3. Mark this on the record track with the Attacks Remaining marker. Reduce the marker by one for each attack conducted.
The non-passing player must use the additional attacks first to make all Mandatory Attacks. If the Attacks Remaining marker is on zero and there are still Mandatory Attacks to be made, the player must continue to conduct the Mandatory Attacks until all have been conducted and then the Attack Phase ends. If after conducting all Mandatory Attacks, the player has Attacks remaining, they may conduct voluntary attacks. The non-passing player may pass at any time after they have conducted all Mandatory Attacks. They do not need to conduct all additional attacks they receive.
7.1 Mandatory Attacks
There are three situations where units must make Mandatory Attacks (see the Entrenchments, Forts, and Pontoon Bridge sections for additional details).
- All units that are not in an Entrenchment and are in the ZOC of an enemy unit across a frontal hexside of an Entrenchment must make an attack against the unit in that Entrenchment hex.
- All units in the ZOC of a unit in a Fort must make a Mandatory Attack against the Fort.
- A unit that placed a Pontoon Bridge during the previous Movement Phase must attack any enemy unit(s) in its ZOC across the Pontoon Bridge.
If a Division must make more than one Mandatory attack, the owning player decides the order of execution. Cavalry Divisions must make Mandatory Attacks, even if against an Infantry Division. If any set of combat results create a circumstance in which an unstacked Detachment would have to make a Mandatory attack, the Detachment is immediately Eliminated. Field Works do not require a Mandatory Attack.
Play Note: Remember during the Attack Phase you cannot pass if you have any remaining Mandatory Attacks. All Mandatory Attacks must be resolved, even if you do not have remaining attacks after an opponent's pass.
7.2 Heavy Artillery Concentration
If the scenario has a Heavy Artillery Concentration, before any attacks are declared by either player, the owning player (usually Union) may place their Heavy Artillery Target marker. Place the Heavy Artillery Target marker on any hex (occupied or unoccupied) that is within five hexes of the Heavy Artillery Concentration. This marker is removed at the conclusion of the Attack Phase.
7.3 Stacked Detachments in Combat
A Detachment stacked with a Division has no effect on combat and cannot be the target of an attack. In all situations where a non-pursuing Division involuntarily vacates the hex the Detachment is Eliminated.
7.4 Attack Resolution
The side declaring the attack is the Attacker and the opposing side is the Defender. Each attack consists of one attacking Division versus one defending Division or Detachment. The Attacker can potentially have another Division provide support to the attack. A Division does not have to be in Command Range of an HQ to attack. A Cavalry Division can only declare a non-Mandatory Attack against an enemy Cavalry Division or a Detachment. Detachments can never declare an attack. A Detachment stacked with an attacking or defending Division has no effect on the attack but suffers any result.
Play Note: As distinct from Movement, Attack, Retreat and Pursuit occur both within and outside of an HQ's Command Range.
To resolve each attack, conduct the following steps:
- Step 1: Each side secretly determines Artillery Support then both simultaneously reveal.
- Step 2: Each side determines their Battle Rating.
- Step 3: Each side determines their Tactical Position using their Battle Rating (and potential Leader Casualty).
- Step 4: Resolve the Attack Result.
- Step 5: Conduct possible Pursuit.
Step 1: Determine Artillery Support
Each side secretly determines Artillery Support using their Artillery Decision marker, then both simultaneously reveal. Only attacking or defending Infantry Divisions may use Artillery Support, never Cavalry Divisions nor Detachments. Players with 0 Ammunition Points may no longer receive Artillery Support. If a side reveals Artillery Support, they must spend an Ammunition Point. A maximum of one Ammunition Point can be spent in each attack, and if the same attack is repeated, another Ammunition Point must be expended if Artillery Support is desired.
Step 2A: Attacker Battle Rating
The Attacker begins with a Battle Rating of 1. All modifiers to the Battle Rating given below are cumulative.
-
Troop Quality: Add the attacking Division's Battle Stars to their Attacker Battle Rating.
-
Artillery Support: Add 3 to the Attacker Battle Rating if the player has Artillery Support. Cavalry cannot receive Artillery Support.
-
Heavy Artillery: Add 3 to the Attacker Battle Rating if a Heavy Artillery Target marker is on or adjacent to the attacking Infantry Division. Cavalry cannot benefit from Heavy Artillery. The use of Heavy Artillery is independent of Artillery Support and does not require the expenditure of an Ammunition Point.
-
Leadership: If the attacking Division (not the defender's hex), is in Command Range of a friendly HQ in Battle Mode, the HQ's Battle Stars may be added to the Attacker Battle Rating. This use is optional since the HQ will be subject to Leader Casualty if the attack die roll is a 0 or 9. Only one HQ from each side can affect a given attack.
-
Corps/Division Integrity: Add 1 to the Attacker Battle Rating if one or more friendly unit(s) is adjacent to the Attacker (does not have to be adjacent to the Defender) and has the same Corps designation or has the same Division name with a different lower case letter.
Example: Anderson a and Anderson b would provide Division Integrity to the other.
-
Attack Support: Add 2 to the Attacker Battle Rating if a friendly Division (not Detachment), is simultaneously in both the Attacker's and Defender's ZOC. This can be the same unit used for Corps/Division Integrity.
-
Unstacked Defending Detachment: Add 4 to the Attacker Battle Rating if the Defender is a lone Detachment.
Play Note: Remember Detachments stacked with a Division have no effect on the attack, but are Eliminated if a combat result causes the Division to vacate the hex.
Design Note: Historically, attacks came from a single vector. Commanders could not coordinate multi-vector attacks due to command control and doctrine (friendly fire). In a nutshell, you cannot gain support from a unit that is not adjacent to both the primary Attacker and Defender.
Design Note: My dear friend Richard Berg in his epic Terrible Swift Sword acquainted the gaming community with the idea of coherent command structure where units that did not operate with their Formation suffered command penalties. Unfortunately, while this type of command system is pleasing and well understood, the historical participants rarely felt so constrained. In most of the battles in the Civil War, there are so many exceptions that I am imposing no penalties for mixing Formations. Instead, you get a benefit if you are adjacent to one of your associated units when attacking, even if it is not adjacent to the enemy.
Step 2B: Defender Battle Rating
The Defender begins with a Battle Rating of 1. All modifiers to the Battle Rating given below are cumulative.
-
Troop Quality: Add the defending unit's Battle Stars to the Defender Battle Rating.
-
Artillery Support: Add 4 to the Defender Battle Rating if the player has Artillery Support. Defending Cavalry and Detachments cannot receive Artillery Support.
-
Defender Terrain Modifier: Use the highest addition that applies:
- Add 5 to the Defender Battle Rating if the attack is made across the frontal hexside of an Entrenchment.
- Add 5 to the Defender Battle Rating if in a hex with a Fort marker.
- Add 3 to the Defender Battle Rating if in a Defensible Terrain hex (see TEC).
- Add 3 to the Defender Battle Rating if in a hex with a Field Works marker.
Play Note: Detachments do benefit from Terrain modifiers. Field Works in Defensible Terrain are factored into the Defensible Terrain modifier, so building a Field Works in Defensible Terrain adds no additional benefit.
-
Leadership: If the defending Division (not Detachment) is in Command Range of a friendly HQ in Battle Mode, the HQ's Battle Stars may be added to the Defender Battle Rating. This use is optional since the HQ will be subject to Leader Casualty if the attack die roll is a 0 or 9. Only one HQ from each side can affect a given attack.
-
Corps/Division Integrity: Add 1 to the Defender Battle Rating if one or more friendly Division(s) is adjacent to the defender (does not have to be adjacent to the attacker) and has the same Corps designation or has the same Division name with a different lower-case letter.
Example: Anderson a and Anderson b would provide Division Integrity to the other.
Play Note: There is no defender support beyond Corps/Division Integrity.
Step 3: Tactical Position Determination and Possible Leader Casualty
Each side rolls 1d10 and cross references the die roll with their Battle Rating on the Tactical Position Determination Table. The result is used in Step 4.
If a side used the Leadership modifier for their Battle Rating and their Tactical Position die roll is a 0 or 9, they suffer a possible Leader Casualty. The player immediately rolls 1d10 and adds 1 to the die roll for each Battle Star on the HQ. If the modified die roll result is equal to or greater than 9, the HQ is immediately flipped over to its Maneuver Mode and cannot enter Battle Mode for the remainder of the scenario. Place a Leader Casualty marker on the HQ as a reminder. A Leader Casualty has no effect on the current attack. The Tactical Position does not change due to this casualty.
Play Note: HQs that are in Maneuver Mode can never receive a casualty result as they do not add Battle Stars to an attack. An HQ with 3 stars (Jackson) has a 30% greater chance of becoming a casualty, so make sure that you do not frivolously use an aggressive HQ.
Design Note: While the HQ marker does not represent the exact location of the General and his staff, they are somewhere in the vicinity of their troops. A leader casualty does not necessarily mean that the named personage such as Lee himself becomes wounded, but that the hostile fire has damaged the HQ's ability to conduct aggressive operations due to the loss of some key subordinates. A critical example occurred at Chancellorsville where Jackson and Hill were both wounded with Rodes taking command. In the same battle, Hooker was wounded but continued to maintain command at a reduced capacity.
Step 4: Resolve Attack Result
Cross reference the Defender's Tactical Position in the left column with the Attacker's Tactical Position across the top of the Attack Results Table to determine the result and implement it immediately (see Combat Result Explanations below). If a Defender in Defensible Terrain or a Field Works receives a Defender Retreats result, or an Attacker attacking Defensible Terrain, an Entrenchment, a Field Works, or a Fort receives an Attacker Retreats result, roll the special six-sided die to see if the unit retreats or is Blown (see the Attack Results Table on the Player Aid Card). Defenders in an Entrenchment or a Fort which receive a Defender Retreats result are instead Eliminated. A Detachment stacked with an attacking or defending Division that receives a result that has the Division vacate the hex is Eliminated.
Play Note: If the Defender is in a Field Works or Defensible Terrain, I suggest that you roll the special six-sided die with the attack dice to save time.
Combat Result Explanations
The Combat Results below apply to Divisions; Detachments that receive any combat result that causes them to vacate their hex are Eliminated. A Counterattack result removes the Detachment for potential future placement. If a Detachment is stacked with a Division that receives a combat result that causes the Division to vacate the hex, the Detachment is Eliminated.
Blown:
- Division Defender in Entrenchment or Fort is Blown: Blown result is treated as Eliminated.
- Attacker versus a Detachment Defender: Defender Blown result is treated as Eliminated.
- All other Blown Result to either Attacker or Defender: Blown Division is removed from the map and placed on the Game Turn track two turns ahead of the current turn (i.e., one day later). If there are less than two turns remaining, the Division is Eliminated.
Breakthrough: The defending Division is Eliminated. One defending player's Division that was in the defending unit's ZOC (if more than one, Attacker's choice) must retreat (see Retreat). If the only adjacent unit is a Detachment, it is Eliminated. The Defender loses one Ammunition Point for exploding caissons. If there are no Ammunition Points left, there is no additional effect.
Disaster: The attacking Division is Eliminated (see Eliminated). If Attack Support was used, the supporting Division is Blown (see Blown). The Attacker loses one Ammunition Point for exploding caissons. If there are no Ammunition Points left, there is no additional effect.
Eliminated: Eliminated unit is removed from play for the remainder of the game.
Retreat: If Division Defender in Entrenchment or Fort: treat as Eliminated.
All Other Division Retreat Situations: A Division must retreat by moving two to three hexes away from the victorious enemy unit considering the following restrictions:
- a. Each hex of retreat must be further from the victorious enemy unit regardless of friendly HQ range.
- b. A Division cannot enter a hex containing a Division, whether friendly or enemy. Retreating into and through an HQ or friendly Detachment is allowed.
- c. A Division must retreat three hexes unless the second hex entered is Defensible Terrain, where the retreat may stop or be continued to the third hex at the retreating player's choice.
- d. A Division may not retreat through an enemy ZOC.
If a retreating Division cannot meet each of these restrictions, it is treated as a Blown result; it is immediately removed from the map and placed on the Game Turn track two turns ahead of the current turn (i.e., one day later). Units removed due to an inability to meet all retreat conditions return in the same manner as Blown units. They must return on the designated turn; their return cannot be delayed and they count toward the two 'Blown' unit return limit.
Counterattack: The defending Division must perform an immediate counterattack. The original Defender is now the Counter Attacker and the original Attacker is Counter Attacked. The Counter Attacking Division is eligible for Pursuit (see Step 5 below).
- a. The original Attacker retains its originally calculated Battle Rating, no changes.
- b. The Counter Attacker uses their original Battle Rating and adds 3.
- c. Per Step 3 of the Attack Procedure, each side rolls 1d10 to determine a new Tactical Position on the Tactical Position Determination Table.
- d. Per Step 4 of the Attack Procedure, the Counter Attacker now uses the Attacker column with the Counter Attacked unit using the Defender row to determine the counterattack result.
- e. Resolve the result of the Counterattack. If the result is a second Counterattack, the Counter Attacker (original Defender) Retreats. Apply all Blown or Retreat results using the original Defender's Terrain, regardless of which side was Blown or Retreating.
Step 5: Pursuit
If the defending unit (not Attacker) is Blown, Eliminated, or Retreats and the attacking Division is not in the ZOC of any other enemy unit, the attacking Division must move into the vacated hex. A pursuing Division can enter a hex beyond the Command Range of its HQ.
If a Detachment is stacked with a Division that pursues, the Detachment remains in the hex.
If the pursuing Division after this one-hex move is in Command Range of a friendly HQ in Battle Mode with two or more Battle Stars and is not in the ZOC of any enemy unit, the Division may move one additional hex.
Play Note 1: The attacking Division may continue attacking in subsequent attack opportunities, so long as there is at least one enemy unit in its own ZOC and is otherwise eligible.
Play Note 2: A Detachment stacked with a Division that must pursue into the now vacated enemy hex is not eliminated.
Extended Attack Example
It is the Attack Phase of the first turn of the Fredericksburg scenario. The Union player is the first player and declares the first attack. They have a number of Mandatory Attacks to resolve, along with some voluntary attacks they would like to make. These attacks will be used to show how the combat procedure works, but should not be taken as sound strategic advice. Note that in the Fredericksburg scenario, Corps Integrity is applied for the Union via a special rule: Divisions with the same Grand Division designation (L, C, or R) receive the bonus.
First, the Union player must place the Heavy Artillery Target marker within five hexes of the Heavy Artillery Concentration in 3635. They place it in hex 3238, which is exactly 5 hexes away. Note that it's placed in a hex that contains a Union unit; it could also have been placed in a hex with a CSA unit, or an empty hex. It does not matter what else is in the hex. This Heavy Artillery Target marker will convey an advantage to some upcoming attacks.
Next, the Union chooses to resolve a Mandatory Attack. There are several on the map, including an attack by the Union Getty Division against the CSA D.H. Hill b Division in the Entrenchment adjacent to the Heavy Artillery Target marker. We will resolve that attack first. Note that attacks may be made by Divisions outside the Command Range of a friendly HQ. To attack, we will carefully follow each of the five steps of the Attack Procedure:
Step 1: Determine Artillery Support. The Union and CSA player each take their Artillery Support marker and secretly choose whether they will add Artillery Support to this combat. In this case, both the Union and CSA player choose Artillery Support and expend an Ammunition Point. The benefit of Artillery Support is resolved in Step 2.
Step 2A: Determine Attacker Battle Rating. The Union Division begins with a Battle Rating of 1 and each modifier will add to it (never subtract):
- Troop Quality: The Getty Division has no Battle Stars, so no modifier.
- Artillery Support: The Union has Artillery Support, so +3 Battle Rating (now totaling 4).
- Heavy Artillery: The attacking Getty Division is in or adjacent to a hex with a Heavy Artillery Target marker, so +3 Battle Rating (now totaling 7).
- Leadership: The Getty Division is not within the Command Range of a friendly HQ in Battle Mode, so no modifier.
- Corps/Division Integrity: There is an adjacent Division with the same Corps designation (Sturgis), so +1 Battle Rating (now totaling 8). Technically only the Grand Division designation of "R" matters for this scenario.
- Attack Support: There is not a Union Division in both the Attacker and Defender's ZOC, so no modifier.
- Unstacked Defending Detachment: The Defender is not an unstacked Detachment, so no modifier.
The final attacker Battle Rating is 8.
Step 2B: Determine Defender Battle Rating. The CSA Division also starts with a Battle Rating of 1 and each modifier will add to it (never subtract):
- Troop Quality: The D.H. Hill b Division has one Battle Star, so we add it to the Battle Rating (now totaling 2).
- Artillery Support: The CSA has Artillery Support, so +4 Battle Rating (now totaling 6).
- Defender Terrain Modifier: The D.H. Hill b Division is in an Entrenchment being attacked across a frontal hexside, so +5 Battle Rating (now totaling 11). Any further additions to the Battle Rating will still roll on the 10+ column of the Tactical Position Determination Table, so we could stop adding to the Battle Rating, but we will check the other two modifiers for completeness.
- Leadership: D.H. Hill b is not in the Command Range of a friendly HQ in Battle Mode, so no modifier.
- Corps/Division Integrity: D.H. Hill b can get this modifier two different ways. The adjacent Early a Division has the same Corps designation (II Corps), and the adjacent D.H. Hill a division can provide Division Integrity since they share the same Division name (D.H. Hill). Either way, this modifier can only be applied one time, so it doesn't matter which one they choose, +1 Battle Rating (now totaling 12).
Step 3: Determine Tactical Position. Each side rolls 1d10 and checks the Tactical Position Determination Table to see their Tactical Position. The Union rolls a 4, and the CSA rolls a 1. With the Union Battle Rating of 8, they have "Advantage" as their Tactical Position. With the CSA Battle Rating of 12 (using the 10+ column of the table) their roll of 1 also gives a Tactical Position of "Advantage."
Step 4: Determine Attack Result. Now we can resolve the combat. We check the Attack Results Table and cross reference the Tactical Position of Attacker and Defender (both "Advantage" in this case) to see the result: Attacker Retreat. Because the Defender is in an Entrenchment, the Union must roll the special six-sided die to see if they apply this Retreat result, or are instead Blown. They roll and get a Retreat result. The Union Getty Division must retreat three hexes, and each hex it enters must be farther away from D.H. Hill b than the previous hex. They retreat to hex 3536. That brings the CSA Battle Rating to 13 (Artillery Support, Entrenchment, Corps/Division Integrity, Leadership) — so it would be a foolish decision, but let's assume they decide to anyway so we can see what happens.
Step 5: Pursuit. There is no pursuit because the defending unit was not Blown, Eliminated, or forced to Retreat. Defenders may never pursue.
Now the CSA player may conduct an attack. They choose to attack the Union Sturgis Division in hex 3338 with their A.P. Hill b Division in 3339. This time, we will summarize the steps: Each side again uses Artillery Support and expends an Ammunition Point. Note that because the Union is defending, the Heavy Artillery Target marker will have no effect on the combat. Now we determine the Attacker Battle Rating. Adding Troop Quality, Artillery Support, Division Integrity, and Attack Support, we come to a total of 8 (note that the same Division can provide both Corps/Division Integrity and Attack Support). The Defender only benefits from the modifier for Artillery Support for a Battle Rating of 5.
The CSA rolls an 8 and the Union rolls 1. The CSA Tactical Position is "Significant Advantage," while the Union Tactical Position is "Disadvantage." The result of combat is Defender Blown. The Union Sturgis Division is removed from the map and placed on the Turn Track two spaces ahead of the current turn (Dec 13 PM). Because the defender was Blown, the attacker must move into the vacated hex (3338). If A.P. Hill b was in Command Range of a friendly HQ with two Battle Stars in Battle Mode, it would be able to move into an additional hex, but it is not.
Now the Union may declare another attack (our final example), and they still have Mandatory Attacks remaining: they declare an attack against the CSA Ransom a Division in Marye's Heights with their Hancock Division. Again, both sides add Artillery Support. The Union Battle Rating is 8 (Troop Quality, Artillery Support, Corps/Division Integrity, Attack Support). The CSA Battle Rating depends on whether they choose to add support from the R.E. Lee HQ that is in Battle Mode. Because Ransom a is within the HQ's Command Range, they could add the Leadership (Battle Stars) from the HQ to their Battle Rating. Even without the Leadership modifier, they will roll on the 10+ column.
Now we roll dice to determine the Tactical Position for each side. The Union rolls a 1, and the CSA rolls a 0. Any time a side uses the Leadership modifier and they roll a 0 or 9 when determining their Tactical Position, they must check if they have a Leader Casualty. To do this, they roll 1d10 and add the number of Battle Stars on the HQ used for Leadership (in this case, there are two Battle Stars on R.E. Lee). If the total is 9 or greater, they suffer a Leader Casualty. The CSA rolls a 7 and adds 2 for Lee's Battle Stars. Oh no! Lee is flipped to its Maneuver Mode side and a Leader Casualty marker is placed on the HQ to remind the CSA player that it cannot be flipped back to Battle Mode for the remainder of the Scenario. Leader Casualties can be disastrous.
But the combat isn't over; both sides have a Tactical Position of "Disadvantage" which gives a result of Counterattack. We resolve a Counterattack with the CSA Ransom a Division as the Attacker, and Union Hancock as the Defender. The Counterattack Steps are similar to (but not the same) as the combat steps, so we will follow them carefully:
- Step a. The Defender keeps their original Battle Rating.
- Step b. The Counter-Attacker adds 3 to their original Battle Rating (it is not recalculated, just add 3). That means Ransom a has a Battle Rating of 16.
- Step c. The Counter-Attacker and Defender roll for a new Tactical Position. Ransom a rolls an 8, which is Significant Advantage. Hancock rolls a 1 again, so they once again have Disadvantage.
- Step d. The result is Defender Blown, but because this is a Counterattack, the Blown result is applied using the Defender's Entrenchment Terrain. Hancock is Eliminated and removed from the game.
- Step e. This step is skipped because the result was not another Counterattack, but if it had been, the CSA Ransom a Division would have had to Retreat.
Because Hancock vacated the hex (due to being Eliminated), Ransom a must check for Pursuit, however, because Ransom a is in the ZOC of the Union Howard Division, Ransom a may not pursue. The attack is complete and the CSA may again choose to conduct an attack.
8.0 End Phase
After both players have passed in the Attack Phase, the turn is over. Remove the Heavy Artillery Target marker if present. If this was the last turn, determine the winner; otherwise, advance the Game Turn marker and begin a new turn.
9.0 Additional Rules
9.1 Artillery
Each side has a set number of Ammunition Points they receive for the entire scenario. Each time a player uses Artillery Support in an attack, reduce their Ammunition Points by one. Heavy Artillery Concentrations do not expend an Ammunition Point when used. A player can never have a negative Ammunition Point value (no deficit spending). A player with no Ammunition Points places their Artillery Support marker on its No Support side for the remainder of the game.
Play Note: Ration your artillery ammunition. It is poor tactical management to run out of Artillery Support before the final attack. Remember the Breakthrough and Disaster combat results cause an Ammunition Point loss due to exploding caissons.
Design Note: An army fought with the amount of ammunition in its caissons and supply train. Based on available research, this amount would supply at most a three-day engagement.
9.2 Heavy Artillery Concentration (Union only)
Some scenarios give a player a stationary Heavy Artillery Concentration. At the beginning of the Attack Phase, the Union player may place the associated Heavy Artillery Target marker on any hex (occupied or unoccupied) that is within 5 hexes of the Heavy Artillery Concentration. Each attacking Union Infantry Division that is with or adjacent to the Heavy Artillery marker adds 3 to the Attacker Battle Rating. This increase can be in addition to Artillery Support. A Heavy Artillery Concentration can only be used during an attack, never a defense. If a Rebel Division enters the hex with the Heavy Artillery Concentration (not the Target marker), the Heavy Artillery Concentration is removed from play and does not return.
The Heavy Artillery Concentration is not a unit and may not move, attack, or defend from attack.
Design Note: During several major battles, the Union had very heavy artillery in position to support an opening attack (e.g., Stafford Heights at Fredericksburg). These guns were not field artillery and were essentially immobile during the battles in which they participated. Thus, they could not be redeployed to support an advance after the initial bombardment. The removal of the Heavy Artillery Concentration represents aggressive counterbattery fire forcing the guns off the heights.
9.3 Entrenchments
Entrenchments are a graphic on the map or are placed as a marker at the beginning of the scenario and are never removed during play. Entrenchments have frontal hexsides, rear hexsides, and hexsides that separate adjacent Entrenchments. A rear hexside is either marked with X's on the map (see TEC) or it is designated in the scenario instructions when the Entrenchment markers are placed (see following Design Note, below). Any Entrenchment hexsides that are not rear hexsides and not separating two adjacent Entrenchment hexes are frontal hexsides. Entrenchments only give a benefit to the Defender when being attacked across a frontal hexside.
If a Defender in an Entrenchment receives a Retreat or Blown result, the unit is Eliminated.
Example: In the diagram, a unit in hex 3034 has only one frontal hexside adjacent to hex 3133. Hexes 3033 and 3134 are adjacent Entrenchments and the three rear hexsides are marked with 'XXXX'. A unit in hex 3132 has two frontal hexsides adjacent to hex 3133 and 3233 with all other hexsides being adjacent Entrenchments or rear hexsides.
Any Division not in an Entrenchment hex during the Attack Phase must conduct Mandatory Attack(s) against all enemy units that are projecting their ZOC across an Entrenchment frontal hexside into their hex. Such Mandatory Attacks must continue until all such situations are resolved. A unit that is in an Entrenchment hex or in an enemy ZOC across the rear hexside of an Entrenchment hex may voluntarily attack; such an attack is not mandatory.
Example (continued): Assuming a CSA unit was in hex 3034 it would project its ZOC into hex 3133 across a frontal hexside, and any USA unit in hex 3133 must make Mandatory Attacks until it either advances into hex 3034, no unit is in 3034, or the USA unit is no longer in hex 3133. A USA unit in 3035 (rear hexside) or 3134 (USA is itself in an Entrenchment hex) can attack hex 3034 but it is voluntary, not mandatory.
Play Note: Remember that if your Division is in an Entrenchment hex or attacking an enemy unit across the rear hexside of an Entrenchment hex, attacking is voluntary. The only time an Entrenchment attack is mandatory is when you are assaulting an enemy unit across the front of the Entrenchment.
Ghost Detachment: A unit not in an Entrenchment hex that attempts to enter an Entrenchment hex that is in the ZOC of an enemy Division in an Entrenchment hex may not enter the hex during movement. The empty hex can be voluntarily attacked during the Attack Phase, as if it contained an enemy Detachment that only exists on the map for the duration of the attack (use the optional ghost Detachment for a reminder or aesthetics). Regardless of the result, the 'ghost' Detachment is removed from the map and can be resurrected whenever another attack can benefit from its visual presence.
In an attack the ghost Detachment is treated as any defending Detachment and conforms to all Detachment combat rules. If a ghost Detachment receives any combat result it is removed and the attacker follows the normal pursuit rules that include the inability to pursue if it is in an enemy ZOC. The elimination of a ghost Detachment does not confer any VP bonus.
Play Note: A Division in an Entrenchment is spread out, so adjacent hexes are considered to be defended even if they are technically devoid of a physical counter.
Example: In the Chancellorsville scenario, Rodes c Division sets up in hex 3136. The adjacent but empty Entrenchment hex 3137 is in the ZOC of Rodes c. If Wadsworth Division moves to the non-Entrenchment hex 3237 it is in the ZOC that Rodes c projects through an Entrenchment frontal hexside, triggering a Mandatory Attack. If Wadsworth instead moves to hex 3238 it is still not in an Entrenchment hex, but also not in the ZOC of Rodes c, so it need not conduct a Mandatory Attack. However, Wadsworth, who is not in an Entrenchment hex, cannot advance into hex 3137 due to the ZOC of Rodes c from an adjacent Entrenchment hex. During the ensuing Attack Phase Wadsworth wants to advance into hex 3137 by attacking. At this time a 'ghost' Detachment is placed in the hex for its visual impact, but it is not required. Wadsworth conducts an attack against a Detachment in an Entrenchment hex. Regardless of the outcome the 'ghost' Detachment is removed, whether the attack is successful or not. Wadsworth can continue to attack 3137 hex multiple times.
Design Note: Entrenchments may only be constructed in certain scenarios and campaigns, especially sieges.
9.4 Forts
Forts may be placed per a scenario's setup instructions. Forts cannot be built during a scenario. Forts add 5 to the Defender Battle Rating of a defending unit in a hex with a Fort marker against an attack across any hexside no matter which terrain is in the hex. A unit in a Fort must be attacked by an enemy unit in its ZOC during the Attack Phase as a Mandatory Attack. Forts are not removed if they are left vacant and therefore may be used by Defenders from either side. If a Defender in a Fort receives a Retreat or Blown result, the unit is Eliminated.
Some Forts are Garrisoned, as specified in the scenario rules. Garrisoned Forts always project a ZOC and ZOI even when not occupied by a Division or Detachment. Enemy units may not enter Garrisoned Forts during movement; they must be attacked during the Attack Phase and receives a Ghost Detachment (see Ghost Detachment rules).
9.5 Field Works
Field Works may be placed per a scenario's setup instructions. Field Works can be built during a scenario by activating a Division and placing a Construct Field Works marker with the activated Division. A completed Field Works gives a defending Infantry Division (not Cavalry or Detachment) a +3 to its Battle Rating, which is used instead of the terrain in the hex. A Cavalry Division or Detachment in a Field Works still benefits from other terrain in the hex.
If a completed Field Works or Construct Field Works is ever alone in a hex it is immediately removed from play. If a Division in a hex with a Construct Field Works marker leaves the hex for any reason, even if stacked with a Detachment, the Construct Field Works marker is removed. If a Division with a Field Works or Construct Field Works marker on it attacks or supports an attack, the marker is removed.
Play Note: During Detachment placement you can, if other conditions are satisfied, stack a Detachment with a Division in a completed Field Works. If the Division subsequently vacates the Field Works the Detachment prevents the Field Works from being removed.
9.6 Pontoon Bridges
Pontoon Bridges may be placed per a scenario's setup instructions or built during the Movement Phase. Each side may be given a number of Pontoon Bridges they may deploy in a scenario's setup instructions. A Pontoon Bridge connects two hexes across a river hexside.
A side may only place one Pontoon Bridge per Movement Phase. A Pontoon Bridge may not be moved across during the Movement Phase in which it is placed. When activated, an Infantry Division in Battle Formation that is adjacent to a river may place a Pontoon Bridge on the river hexside between its hex and the adjacent hex instead of moving. Cavalry Divisions may not build Pontoon Bridges. Once a Pontoon Bridge is placed, ZOC and ZOI can be traced across the Pontoon Bridge. Movement across a hexside with a Pontoon Bridge ignores the River hexside terrain. If the opposite hex contains an enemy Division or Detachment, the enemy unit must change to Battle Formation. If the Division placing the Pontoon Bridge moves after placing it during the same Movement Phase, the bridge is immediately removed (the Division abandoned building the bridge).
Place a Must Attack marker on the Division placing the Pontoon Bridge. If at the beginning of the Attack Phase there is an enemy unit in the Division's ZOC across the Pontoon Bridge, it must conduct a Mandatory Attack against that unit. If the Mandatory Attack causes the enemy unit to vacate the hex, the attacker must pursue across the Pontoon Bridge into the now-vacated enemy hex, regardless of other enemy ZOC. If a single Mandatory Attack does not cause the enemy unit to vacate the hex, the pontoon bridge is removed and the ZOCs now do not extend across the river. If the Division with a Must Attack marker is not in an enemy ZOC, the Division during the Attack Phase must still declare an attack (which it automatically wins) and must advance across the bridge. In either situation the pursuing Division may now be in an enemy ZOC creating the conditions for further attacks.
Play Note: The Division placing the Pontoon Bridge must attack a unit on the opposite shore if present, even if the enemy unit was not present when the Pontoon Bridge was initially placed. Alternatively, if there is no enemy unit present, during the Attack Phase the Division must pursue across the bridge.
Once placed, a Pontoon Bridge can be voluntarily removed by any Division in Battle Formation that is adjacent to the Pontoon Bridge and not in an enemy ZOC (not ZOI) as its entire activation during a Movement Phase.
10.0 Victory Conditions (all scenarios)
After the last turn, players calculate their Victory Points (VP) as follows:
- Each Eliminated Division scores 3VP for the opponent.
- Each Eliminated Detachment scores 1VP for the opponent.
- Each scenario has unique Strategic Victory conditions.
Compare the two sides' VP to determine the level of victory:
- Generalship Victory: The side with the most VP wins. In case of a tie, the Confederate player wins the game.
- Tactical: If VP difference is 7 or less.
- Operational: If VP difference is 8 or more.
- Strategic Victory: Each scenario has a geographic condition that, if met by a player, means that player wins a Strategic victory regardless of the Generalship victory condition.
Play Note: The incentive for the attacker is that if you successfully press the attack, losing more units than the defender will still give you victory. Basically, are you a McClellan or a Grant? Your choice. In many of these battles one side is trying to turn an army's flank. If you successfully turn an army's flank they have lost—even if the casualties favor them. My intent is to avoid 'turtling' tactics once one side gets a small VP advantage. In this context 'turtling' usually opens the way for a Strategic victory.
Important Geographic Victory Rule!
A geographic condition that traces from one entry hex to another cannot be blocked by an enemy unit, ZOC, or ZOI that is within 4 hexes counted from, but not including, an entry hex friendly to that unit. Remember there is already a prohibition against projecting a ZOC/ZOI into an opposing entry hex.
Play Note: As a continuation that I do not want you or your opponent to use the 'edge of the map' as some twilight zone special case to block reinforcements, you also cannot use it to 'steal' a victory that you did not earn. Therefore, you cannot form your army on or very close to an entry hex to block your opponent from tracing across the map to that location. If you want to stop your opponent you will have to accomplish your goal further from the map edge.
Design Note: You may find it curious that there are no attack modifiers for attacking across a Pontoon Bridge. The reason is that, historically, river defenses were held by small picket forces, sometimes with some rifle pits and Entrenchments for a regiment. The crossing force, always Union, would have Artillery Support and engineers that would or would not succeed, hence the single mandatory combat.
PART TWO: ARMY OF THE POTOMAC PLAYBOOK
Civil War Heritage Series, Volume II: 1862: Fair Oaks/Seven Pines, The Seven Days; 1864: Spotsylvania, North Anna, Cold Harbor, The Overland Campaign.
Components List
- One Civil War Heritage Series Core Rulebook
- One Playbook (this manual)
- Four 22"x 34" map sheets (lettered A, B, C, D)
- Two 11"x 34" map sheets (lettered E and F)
- One 11"x17" map sheet (lettered G)
- One Small cardstock map (Map C Extension)
- One 8"x10" cardstock Union 1864 Off-Map Display
- Two 8"x10" cardstock Game Turn Tracks (1862 and 1864; the 1862 Game Turn Track is two-sided)
- Two Counter sheets
- Two Player Aid Cards
- Two 10-sided dice (one blue and one gray)
- One special die (orange with soldier/explosions)
Introduction
Army of the Potomac scenarios use the core Civil War Heritage Series rules for each of the five battle scenarios. Army of the Potomac also has two campaign scenarios covering Grant's 1864 Overland Campaign.
Play Note: If you already know how to play Rebel Fury, you do not need to read the Series Rules in order to play any of the battle scenarios (e.g., Battle of Spotsylvania Courthouse (May 18)). I have included in this package the entire 1864 Overland Campaign, from the end of the Battle of Spotsylvania Courthouse (May 18) until the Battle of Cold Harbor (June 3rd). In order to play either campaign, you will need to read and apply the Campaign Rules, which will bring in a number of operational level rules and conditions that take a low complexity Grand Tactical battle game up several notches in difficulty. I say this knowing that you have likely stopped reading this note by now and are setting up a campaign game. That said, you are never required to learn or play it; but who am I kidding?
Army of the Potomac, Volume II of Civil War Heritage Series, comes with four scenarios that are set up on a single map (along with one or more partial maps or map extensions), one or more for each of the three maps (and half map extensions) supplied in the game. The Seven Days Battles scenario uses multiple maps, and the 1864 Campaign uses all of the maps. The maps are labeled and used for the following scenarios:
- The Battle of Spotsylvania Courthouse (May 18): Map A
- The Battle of North Anna: Maps B and E
- The Battle of Cold Harbor: Maps C, F, and G
- The Battle of Fair Oaks/Seven Pines: Maps C, F, and G
- The Seven Days Battles: Maps C, D, F, and G
- 1864 Overland Campaign: Maps A, B, C, D, E, F, and G plus Map C extension
- 1864 Overland Campaign (May 5 Start): Maps A, B, C, D, E, F, and G plus Map C extension and the Wilderness/Spotsylvania Map from Rebel Fury
Army of the Potomac Map Schematic
Map C Extension, Map A, Map B, Map C, Map E, Map G, Map D and Map F are laid out as shown in the schematic (diagram not reproduced).
Note: When placing maps, a higher-lettered map always overlaps a lower-lettered map; e.g., when placing Map B, its edges are placed to overlap Map A, but would in turn be overlapped by Maps C and E. When in use, the Map C Extension always overlaps Map C.
Map and Hex Setup Note: All setup hexes are preceded by a letter from A-G and denote on which map the hexagon is located. No units set up on the Map C extension.
Play Note: The scenarios are of various lengths, but I suggest Fair Oaks/Seven Pines if you are playing your first game versus an opponent, since it is only two Game Turns long. This is just a suggestion, so if you have another battle that interests you more, have at it.
Counter Codes
The counters for each scenario have a one- or two-letter/number code in the upper left hand corner of the counter. Use the counters with the corresponding Scenario Code that align with the setup for a particular scenario. The extended 1864 Campaign scenario (May 5 Start) uses some counters from Rebel Fury.
Play Note: Each scenario has its own unique set of counters with their own letter code, so it should be possible to set up and play multiple scenarios simultaneously on different maps if you make some accommodation for extra copies of Game Turn Tracks, special die, and such.
Counter Codes for Army of the Potomac, Civil War Heritage Series, Volume II:
- 18 = Spotsylvania (May 18)
- N = North Anna
- CH = Cold Harbor
- FO = Fair Oaks/Seven Pines
- 7 = Seven Days
- 64 = 1864 Overland Campaign
Play Note: Spotsylvania (May 18) counters (labeled "18") are used to begin the 1864 Overland Campaign and are augmented by the counters labeled "64" that are added to the Campaign scenario.
The extended 1864 Campaign scenario (May 5 start) uses the Wilderness counters and setup from Rebel Fury (with some modifications).
General Scenario Setup Conditions
- HQs that have a "B" after their setup are in Battle Mode, those with an "M" are in Maneuver Mode. Due to space constraints the HQ Mode is not listed on the counters, so refer to the setup instructions in this booklet.
- Units begin all scenarios in the hex indicated in the setup instructions, on their Maneuver Formation side (the side with a 4 Infantry or 6 Cavalry movement allowance), unless told otherwise in the scenario setup. Setup hexes are prefaced by the map letter on which the unit sets up.
- If a scenario has units stacked in an Entry Hex, these units are treated as reinforcements and must exit the Entry Hex before the owning player may pass during a Movement Phase.
- Union units that have a setup instruction of OFF are placed on the Union Off-Map Display. The space is not indicated on the counter but in the setup information in this booklet.
- Detachments that have a setup instruction of AVAIL(able) can be placed per the normal rules for Detachment placement during the first or later Detachment Placement Step of the scenario.
- The Time Record Track for the 1864 Campaign shows the entire period of Grant's offensive, with labeled Turn numbers for each scenario. Reinforcements enter for each scenario according to these Turn numbers. All reinforcement Turns of entry are tied to the individual non-Campaign scenarios and the corresponding Turn's date and time (AM/PM) should be used to ensure that units enter at the proper time when playing the Campaign.
Reinforcements
- Units with a turn-hex setup instruction enter that turn in that location (e.g., "3-C2200"), whereas units that have a Turn number (e.g., "T6") enter as if they are Blown units placed adjacent to their HQ in Battle Formation, but do not count against the Blown unit limit. If more than one unit is arriving, they can be stacked but must be unstacked prior to the owning player passing unless there are no legal hexes to enter, in which case the player may pass.
- If an HQ is received as a reinforcement, it is placed during the HQ Redeployment Placement Step of the Turn indicated for its arrival, following all rules for HQ placement.
Defensive Works
- Some scenarios have Entrenchment hexes that are printed on the map.
- Note that some scenarios have units already in Field Works or Entrenchments; these are not indicated on the counter but in the setup information in this booklet.
New Terrain Types
- Swamp: Change Formation; no Attacker Artillery Support or Heavy Artillery can be used.
- Richmond On-Map Forts: These hexes are Garrisoned Forts (9.4).
Optional Flank Attacks
Play Note: This is a rule that I left out of Rebel Fury, as I felt that it added a bit more complexity to the system than I wanted at the time. Here I reintroduce this optional rule that I left on the Rebel Fury cutting room floor.
One of the reasons that I did not go with this rule in Rebel Fury is there are many situations that look like they should apply, but do not. During this war they rarely coordinated line attacks from different units, let alone those separated by any distance; their desire to avoid friendly fire, and sound/couriers were inconsistent timing methods. The situations when forces successfully coordinate are already built into the combat system when you force the defender to Retreat or become Blown.
During Step 2A of Attack Resolution, if all the following conditions are true, the Defender is considered Flanked:
- The Infantry Division Attacker benefits from its Infantry Division Attack Support and Corps/Division Integrity bonuses from the same unit.
- The Defender is surrounded by a continuous line of at least four enemy Infantry Divisions that includes the attacking Infantry Division and its Attack Support from the same Corps/Division plus none of the attacking units or their ZOCs cross uncrossable Terrain (such as a River or Escarpment hexside).
There are two important reminders when considering if a unit is Flanked:
- Units friendly to the Defender do not negate ZOCs.
- ZOCs do not extend across some terrain (see TEC).
When a Defender is Flanked:
- It cannot receive Artillery Support.
- Its Defender Terrain Modifier from Defensible Terrain is reduced to +1 instead of +3. A Defender in an Entrenchment or a Fort still benefits from the +5 modifier.
- A Defender still receives any applicable Leadership, Troop Quality, and Corps/Division Integrity bonuses.
Diagram 1 demonstrates how two situations look similar, but only one of them gains the Flank attack benefit. Diagram 2 shows two similar situations where the Defender is not Flanked, due to a discontinuous line of attackers. Note that in both Diagram 2 cases, if the Defender were forced to Retreat, it would instead become Blown due to Retreating into an enemy ZOC, which is unchanged from the Series rules.
Design Note: This rule subtlety enforces proper ACW tactics of continuous lines of defense where a position's vulnerability is its flanks where multiple supported assaults should statistically achieve their objective. The flank optional rule that I removed from Rebel Fury is bringing in the tactical situation where a defender perceiving it was simultaneously receiving fire from its front, flanks, and rear, would usually break and retreat.
Diagram 1: In the left image, the Defender is not Flanked as it is not surrounded by enemy ZOC and is surrounded by less than the four Infantry Division minimum. In the right image, you see the typical situation where a Defender is Flanked as it is an attacking Infantry Division receiving its Attack Support from its Corps/Division and is a component of four Infantry Divisions in a continuous line with their ZOCs surrounding the Defender (and not shown there is no uncrossable terrain).
Diagram 2: In both of the images, the Defender is not Flanked for the same reason: while there are a minimum of four Infantry Divisions projecting their ZOCs to surround the Defender, they do not form a continuous line. Note that even though the Defender is not Flanked (thus denying the Flank bonus to the Attacker), in all situations where the Defender has to retreat, the retreating unit would be Blown as it is still surrounded by enemy ZOCs.
Game Tracks
- There are two Game Turn Track Displays, one for the 1862 scenarios, and one for 1864 scenarios and the 1864 Overland Campaign. The 1864 display shows the entire period of Grant's offensive, with spaces marked for the various scenarios. Place the Game Turn marker on the appropriate track or start space on its Clear or Rain side for the scenario being played.
- The Remaining Moves/Attacks tracks are also used to keep track of artillery Ammunition Points; place the Artillery Ammo marker on the track in the appropriate location. Note that the back of the marker has a +10 and allows tracking up to 19 Ammunition Points, which is the maximum in any scenario.
- Place the Moves/Attacks Remaining marker near the same track to allow you to track moves after one side has passed. (You can also use a die for the same purpose if you prefer that method.)
Victory Conditions and Entry Hexes
Scenarios may have a Generalship Victory condition (determined by VP, as outlined in the series rules), a unique Strategic Victory condition, or both. Many Strategic Victory conditions require a player to trace from one map Entry Hex to another of a specific length or less.
Important: Strategic Victory Condition Rule – As a reminder, you cannot use any friendly unit on or within four hexes of a friendly Entry Hex to include the hex it occupies or its ZOC/ZOI extending beyond this four-hex limit, to prevent your opponent from achieving a Strategic Victory condition. This situation would usually arise in the form of a path being traced from two locations of a length specified in the Strategic Victory condition for that scenario. Since your opponent cannot place units near the Entry Hex, you in turn cannot use units near the Entry Hex (or their ZOC/ZOI) to block a path being traced to an Entry Hex for a Strategic Victory condition. This restriction only applies to Strategic Victory conditions, otherwise all core rules apply to other restrictions.
Design Note: This is a public safety measure to prevent a "rules lawyer" from being injured by their opponent. Entry Hexes are an "edge of the world" phenomenon and neither player can use their units to impede reinforcements or avoid an obvious defeat by trying to exploit the map edge in an obviously poor sportsmanship manner. In order to prevent your opponent from tracing a path from one location to another, you will have to block that path somewhere other than the four-hex zone near a friendly Entry Hex. Try not to spend too many mental cycles trying to circumvent this rule, just try and win the battle. If you think you have found a loophole to this rule, you have not.
Game Balance and Choosing Sides
For situations where competitive play is an important dimension of enjoyment, I have supplied the following bidding for sides procedure:
- Write down on a piece of paper which side a player prefers to play and the number of Victory Points they are willing to give to their opponent in order to play that side.
- Compare the bids, and one of two conditions will apply:
- A. Different Sides Chosen: Each player gets to play the side chosen. Compare the Victory Point bids and subtract the lower from the higher and award to the lower bid that number of Victory Points, then begin play.
- B. Same Sides Chosen: The player with the higher Victory Point bid plays the chosen side and awards that number of Victory Points to the lower bidder. In case of a tie, continue throwing 1d10, until one player rolls higher and gets to play the side of their choice and applies their bid.
Design Note: As I have written in my C3i Clio's corner, game balance is far more sensitive to player skill than the historical conditions of the battle. That said, some scenarios such as Seven Days are best played solitaire, for which I have supplied solo rules of play.
For me a game is more about the journey than the destination. However, for competitive purposes I supply the above procedure to even-up a situation that—due to player experience and knowledge—gives one side a disproportionate perceived or real advantage.
Changes to the Series Rules
Since this is Volume II of the Civil War Heritage Series, there is a Series Rulebook included with this game. There are four changes to the series rules for players familiar with Rebel Fury, and you can save time re-reading the whole Series Rulebook by reading this section instead. The first two of these changes may be applied to Rebel Fury scenarios, the other two must be applied when playing Rebel Fury.
First, the Strategic Victory Condition Rule (see the "Important" box in the prior section) has been changed so that friendly units within four hexes of a friendly Entry Hex cannot be used to prevent their opponent from achieving a Strategic Victory Condition. This is the same rule that is in Rebel Fury, but going forward, the number of hexes is reduced from five to four; this change can be used in Rebel Fury scenarios but is not mandatory.
Play Note: An Entry Hex is a hex that is specifically labeled with a letter. Some paths trace from or to an Entry Hex from or to an on-map hex, such as Richmond. The four-hex range exclusion for ZOC/ZOI only pertains to Entry Hexes not on map hexes.
Second, when bidding for sides using the Game Balance rules, players now bid with Victory Points instead of Ammunition Points. Again, these rules may be used with Rebel Fury scenarios or they may be played according to the rules in the box, as players prefer.
Third, the rules now specify that Cavalry Divisions may never move in such a way as to create a Mandatory Attack against an Infantry Division, and they can never build Pontoon Bridges. These changes do not mean Cavalry Divisions will never have to make a Mandatory Attack, as a competent enemy may seek to pin your cavalry in place and force them to fight without Artillery Support against their Infantry Divisions. Any Mandatory Attacks that a Cavalry Division would be required to make against Infantry Divisions must be resolved.
Finally, when a Breakthrough or Disaster result is achieved on the Attack Results Table, the Defender loses one Ammunition Point for exploding caissons whether the defending Division used Artillery Support or not.
In addition to these changes, there are now rules for Garrisoned Forts (9.4) in the Series Rulebook. These are used in the Campaign, and will be used in future scenarios.
Design Note: In the following scenarios, where place names are relevant to gameplay, a hex number will always be provided to make sure you can pinpoint it. If no hex number is provided, the place name is provided for historical interest only.
1862 Scenarios
The Battle of Fair Oaks/Seven Pines
May 31, 1862
- Maps: C, F, and G
- Battle Length: 2 Game Turns (May 31, 1862, AM and PM)
- Ammunition Points: Union starts with 4 Ammunition Points and CSA starts with 0 Ammunition Points
- Scenario Code: FO
Special Rules
- The game begins with the Movement Phase (skip the Command and Organization Phases).
- The CSA is the first player on Turn 1.
- Do not use the optional Flank Attack rules (page 3).
- Divisions that receive eliminated results in an attack count for 3 VPs. As this is a one-day scenario, Blown units are eliminated, but count for 1 VP, not the usual 3 VP.
- Both the Union and CSA HQ must remain in Battle Mode for the entire scenario and never leave their starting hex.
- Uncoordinated Forces: The Attack Support modifier cannot be received by either side (see Step 2A of the Attack Resolution process). The Corps/Division Integrity modifier is only available to Divisions, not Corps. In case of a Breakthrough or Disaster result, any unit used for Division Integrity must be the unit chosen to be affected beyond the attacker.
- "Bull Sumner" Fearlessness: Only Union II Corps units may cross a River Bridge or Ford, and only during the PM Game Turn's Movement Phase. No other units may cross at any time.
Victory Conditions
- Generalship Victory: Per the rules except the Union wins ties.
- Strategic Victory: There is no Strategic Victory in this scenario.
Optional Solitaire Rules
This scenario is very amenable to solitaire play. Solitaire play uses all the scenario Special Rules in addition to the following Solitaire-only rules.
Player Forces: You play as the CSA and will move and attack with Union forces per the rules below (there is no "bot", just follow the instructions below as best as you can).
Guidelines: The Union is run according to the guidelines below. These are only guidelines and you, the player, will have to make a number of decisions for the Union. When there are multiple equally good options, assign probabilities and roll a die to decide. Do not stick to these guidelines where it would result in obviously bad play—the intent of the guidelines is to give you an overall strategy for the Union and help you make decisions.
Movement Phase
- During the AM Turn, the Union will pass on their first move, at which time the CSA player determines the number of Remaining Moves they will receive on 1d10, no modifiers.
- During the PM Turn, the Union will move Sumner's II Corps north of Fair Oaks (C4823) and enter the ZOC of any CSA units that are on or project a ZOC onto Fair Oaks.
- During the PM Turn, the Union will move the Union III Corps units toward Seven Pines (C5023) and either occupy it or attempt to recapture it if held by CSA units.
Attack Phase
- During the AM Turn, the Union will not attack. The Union will pass after the first CSA attack, at which time the CSA player determines the number of Remaining Attacks they will receive.
- The Union will use Artillery Support defending against all CSA attacks until their Ammunition Points are expended.
- During the PM Turn, the Union will not attack except to recapture Fair Oaks (C4823) or Seven Pines (C5023). If both are CSA-occupied, roll a die to determine the order to attack.
- The Union will use Artillery Support for attacks during the PM Turn only to attempt recapture of Fair Oaks (C4823) or Seven Pines (C5023), in which case one artillery ammunition point will be used for an attack to recapture either of those locations or both.
Solitaire Play Balance: Reduce the Union from 4 to 2 Ammunition Points and give the CSA 1 Ammunition Point.
Fair Oaks/Seven Pines Setup
In the setup tables, the Quality column shows troop-quality star icons; "None" means no stars, and a star symbol below stands for the printed star icon(s).
USA
| Organization | Unit | Name | Quality | Special Setup | Setup |
|---|---|---|---|---|---|
| AoP | HQ | McClellan | ★ | Battle Mode | C5120B |
| II Corps | Infantry | Richardson | None | C5414 | |
| II Corps | Infantry | Sedgwick | ★ | C4916 | |
| III Corps | Infantry | Hooker | None | C5721 |
CSA
| Organization | Unit | Name | Quality | Special Setup | Setup |
|---|---|---|---|---|---|
| AoNV | HQ | JE Johnston | ★ | Battle Mode | C4525B |
| GW Smith | Infantry | Whiting a | ★ | C4323 | |
| GW Smith | Infantry | Whiting b | None | C4225 | |
| GW Smith | Infantry | AP Hill a | ★ | C3323 |
Setup diagram for the Fair Oaks/Seven Pines scenario (Maps C, F and G) is a map illustration and is not reproduced.
The Seven Days Battles
June 25 - July 1, 1862
- Maps: C, D, F, and G
- Battle Length:
- Solitaire: June 26 PM to July 1 PM 1862 (11 Game Turns)
- Two-Player: June 26 AM to July 1 PM 1862 (12 Game Turns)
- Ammunition Points: Union starts with 19 Ammunition Points and CSA starts with 9 Ammunition Points
- Scenario Code: 7
Design Note: I chose to make the Seven Days battle a solitaire scenario, which I have found more accurately captures the historical narrative, plus there is a two-player option for those who would like to see a "what if" version of the battle.
Design Note: Army of the Potomac, like its Rebel Fury predecessor, is a Grand Tactical ACW simulation (see design notes and article for more details). As such, the HQs represent the commanding general's maneuver intent, not their location. McClellan intended to attack Lee on the same day Lee initiated his turning movement attack on Porter's Corps. Lee's turning movement was intended to threaten the Union Pamunkey River supply line at White House and destroy the V Corps, isolated from immediate support by the rain-swollen river. Lee's attack unsettled McClellan's plans, and the Union commander chose to forgo offensive operations and shift his supply base from White House to Harrison's Landing (on the James River). While there are many issues around the exact timing of when McClellan made this decision, what is clear is that on or about the time when Lee attacked on the afternoon of June 26th, the Union supplies began to move by land and sea toward Harrison's Landing.
Special Rules
- The game begins with the Movement Phase (skip the Command and Organization Phases).
- The CSA is executing a Turning Movement (see design note on the previous page). Use the Turning Movement rules (4.1, 4.2), except Lee begins in Battle Mode. There are specific rules for removal of the Lee HQ in the Two-Player and Solitaire scenarios (see below).
- Prior to the June 27 AM Movement Phase, Jackson's units make three Extended Marches. Once this is concluded, conduct the Turn's Movement Phase. All Command Range and movement rules apply.
- Union Gunboats: McClellan's HQ is a two star in Battle Mode if he is within five hexes of a James River hex or hexside.
- Jefferson Davis HQ: If the Jefferson Davis HQ is chosen as the Active HQ, a unit is only in Command if it is stacked with Davis. Hence, when Davis is the Active HQ, units may only move toward Davis. Davis may only deploy a Detachment stacked with his HQ.
- Union Supply Base Transfer: Set up the Wagon Supply Path (Wagon) markers in their setup hexes. During the End Phase of each Turn, remove the Wagon marker labeled with that Turn (e.g., remove the June 29 AM Wagon marker during the End Phase of the June 29 AM Turn). Both the Solitaire and Two-Player rules have Victory Conditions related to the CSA blocking the Union Supply Base Transfer (see Victory Conditions).
- Wagon Train Escort: Peck's Division from the IV Corps is tasked with protecting the Wagon route. As such, Peck's Division may move without any Command Range restrictions. Peck's Division can be the source for Detachment deployment and any deployments count against McClellan's limit of two per Phase.
- Mechanicsville Bridge Damage (Hexes C3322/C3323): Treat this bridge as a ford until the Movement Phase on the June 28 AM Turn.
- Chickahominy Bridge Repair: With the exception of the Mechanicsville Bridge (see Special Rule 8), all CSA units that cross a Chickahominy River Bridge from scenario start until the June 29 AM turn End Phase treat the Bridge as a Ford hexside. From the June 29 PM turn until the end of the scenario, this restriction is permanently lifted. Union units treat all Chickahominy Bridge hexsides normally for the entire scenario.
- Union Gaines' Mill Siege Guns: CSA units in hexes C4121, C4221, C4320 cannot receive attacker or defender Artillery Support.
Historical Note: The Union had some large caliber siege guns located at Gaines' Mill (hex C4117) and they suppressed CSA artillery units on the south side of the river during the early stages of this scenario.
Solitaire Rules
Solitaire play uses all the scenario Special Rules in addition to the following Solitaire-only rules.
Guidelines: The Union is run according to the guidelines below. These are only guidelines and you, the player, will have to make significant decisions for the retreating Union army. When there are multiple equally good options, assign probabilities and roll a die to decide. Do not stick to these guidelines where it would result in obviously bad play—the intent of the guidelines is to give you an overall strategy for the Union and help you make decisions.
Player Forces: You play as the CSA and will move and attack with Union forces per the rules below (there is no "bot", just follow the guidelines below as best as you can). Because the Solitaire scenario begins one Turn later than the Two-Player scenario, Lee is completing his Turning Movement. So, to simplify, the CSA is the first player. The game begins with the Movement Phase (skip the Command and Organization Phases). Determine Initiative normally in the following Turns.
Command Phase
- Even though Lee is conducting a Turning Movement, Lee's HQ begins in Battle Mode. During the HQ Redeployment Placement Step of Turn 2, Lee's HQ may flip to Maneuver Mode. Lee's HQ is available for normal Redeployment on Turn 3 and after; however, Lee's HQ cannot deploy south of the Chickahominy River or SE of the New Bridge (C4220/4221) if any Union units are north of the river. This restriction is automatically lifted from the June 28 PM Command Phase for the remainder of the scenario.
- McClellan's HQ begins the scenario in Maneuver Mode and remains in its starting hex for the duration of the scenario. During the HQ Redeployment Placement Step, if one or more Union Infantry Divisions are within 5 hexes of the HQ, McClellan will flip to Battle Mode and will remain in Battle Mode for the remainder of the scenario.
- McClellan can deploy up to two detachments per Detachment Placement Step and will deploy Detachments to block unguarded routes that threaten the Supply Wagons (see Overlapping ZOI Guidelines below).
- The CSA Holmes Division arrives as a reinforcement on Turn 6 (Solitaire) or Turn 7 (2-player), returning like a Blown Division as explained on page 31.
Organization Phase
- During the Disengagement Step, Union V Corps units that are in an enemy ZOC and are not south of the Chickahominy River will voluntarily Retreat if they would end their Retreat closer to the McClellan Bridge (C4817/C4818) or Grapevine Bridge (C4916/C4917), or south of the Chickahominy River.
Movement Phase
- June 26th PM Turn:
- a. The CSA can make a maximum number of moves equal to an unmodified 1d10 die roll.
- b. The Union does not move.
- June 27th AM Turn and following:
- a. At the beginning of each Command Phase, roll 1d10+10. This result is the maximum number of moves the Union will take during the Turn, then it will pass. If the Union cannot move according to the following guidelines, it will pass.
- b. If the CSA passes first, continue to move Union units until the Union is out of moves or passes.
- c. If the CSA has not passed when the Union passes, the CSA conducts a normal pass die roll to determine how many moves it has remaining.
- d. Union units must end their movement closer to their HQ when they move, except if they move by road, in which case they can end the movement the same number of hexes away from their HQ as when they began moving.
- e. The Union units move according to the rules and guidelines in the following sections.
- Porter's V Corps: This Corps starts the scenario north of the Chickahominy River, and while any units are north of the McClellan (C4817/4818) or Grapevine Bridges (C4916/4917) they will move toward the bridges to get south of the river.
- a. Until all units from the V Corps are south of the Chickahominy River (or Blown), or the end of the June 28 AM Turn, no other Union units will move unless necessary to maintain a coherent line of ZOI hexes south of the Chickahominy River to protect the Wagons (see Overlapping ZOI Guidelines below).
- b. Once south of the river, the units conform to normal Command Range restrictions.
- c. Porter's V Corps units will not move more than two hexes from McClellan or Grapevine Bridges until all units are south of the river and the other Union Corps have moved SE of these bridges (roughly the line of hexes from C4818 to F3702, but do not belabor this decision and use your judgement). V Corps units may be forced to Retreat away from the Bridges due to combat, but they will not move otherwise until these conditions are met.
Attack Phase
- The Union will only attack to stop CSA units from penetrating the Union Overlapping ZOI (see Overlapping ZOI Guidelines above).
- Use defensive Artillery Support in all situations when the Union defender is in Command Range and is not in Defensible Terrain.
End Phase
During the End Phase of the June 26 PM Turn, Porter's Corps is ordered to pull back to a new defensive line.
- Any Union unit in a CSA ZOC automatically disengages three hexes.
- Once all Union units disengage, all Porter units are placed in Maneuver Formation, whether or not they are in a CSA ZOI.
- Once this is completed, the June 26 PM Game Turn is concluded. Note that at the beginning of the June 27 AM Turn, Jackson's units will move onto the map prior to the Movement Phase.
Solitaire Play Balance
Each time you beat the Union, prior to your next play remove three Wagon markers until you do not win, or you feel it is competitive. For example, after you win the first time, remove the June 26 PM, 27 AM, and 27 PM Wagons. If you win again, remove the June 28 AM, 28 PM, and 29 AM Wagons, etc. At some point you will have removed enough Wagons where the Union will become competitive to your skill level.
Solitaire Victory Conditions
- There is no Generalship Victory in this scenario.
- Strategic Victory: During the End Phase of any Turn, if any of a, b, or c below apply, then the Union Supply Base Transfer is blocked, and the CSA wins:
- a. A CSA Infantry Division (not Cavalry Division) occupies a hex with a Wagon marker, or
- b. A Union Wagon marker is in the ZOC of a CSA Infantry Division, or
- c. A CSA Infantry Division occupies a Road hex between two Wagon markers.
- d. If the CSA has not won the scenario by the End Phase when the last Union Wagon marker (July 1 PM) is removed, the Union has won (historical result).
Solitaire Play Note: The Seven Days battle was initiated by a CSA turning movement against the Union's right flank (Porter's V Corps). McClellan, perceiving the threat to his isolated Corps and supply line, began a retrograde movement toward Harrison's Landing. I could write a ton of special rules to force a human Union player to follow this plan or use the extant HQ rules to accurately capture the historical narrative. McClellan's HQ is located on Malvern Hill close to Harrison's Landing where the last battle of this mini campaign occurred. Union units, when they move, must move toward this HQ location; but remember, command rules only impact movement. Units in and out of command can still attack, pursue, and retreat regardless of their range to the HQ, they are just restricted during movement.
Optional Two-Player Rules
What if McClellan was an aggressive commander? He wasn't, but this is alternate history at its best. When playing with two players, use all the scenario Special Rules in addition to the following Two-Player-only rules:
- Even though Lee is conducting a Turning Movement, Lee's HQ begins in Battle Mode and remains in Battle Mode for the first two Turns. Beginning on Turn 3, the CSA player rolls for removal normally during the HQ Redeployment Check Step without a Battle Mode DRM marker.
- McDowell's I Corps: Starting with the June 29th AM Game Turn, the Union player rolls 1d10 at the start of each Turn's End Phase. If the Union rolls a zero, the Union I Corps enters during the next Turn's Movement Phase as a standard reinforcement in hex C0906.
Play Note: McClellan still sets up way back on Malvern Hill, so all Union units still begin the scenario out of command. He may be redeployed on subsequent Turns per the normal rules.
Two-Player Victory Conditions
- Generalship Victory: Per the rules. The Union wins ties.
- Strategic Victory:
- a. During the End Phase of any Turn, if any of the following apply, then the Union Supply Base Transfer is blocked, and the CSA wins:
- i. A CSA Infantry Division (not Cavalry Division) occupies a hex with a Wagon marker, or
- ii. A Union Wagon marker is in the ZOC of a CSA Infantry Division, or
- iii. A CSA Infantry Division occupies a Road hex between two Wagon markers.
- b. During the End Phase of any Turn, if three or more Union Infantry units occupy a Richmond hex not in a CSA ZOC and can trace a path of hexes free of CSA ZOC/ZOIs to the Union HQ, the Union wins.
- c. If both sides achieve a Strategic Victory in the same End Phase, the Union wins.
- a. During the End Phase of any Turn, if any of the following apply, then the Union Supply Base Transfer is blocked, and the CSA wins:
Two-Player Play Note: On June 25th, the Union III Corps (Hooker and Kearny) attacked down Williamsburg Road pushing back Huger's picket line. This attack brought Lee to the battlefield to assess the situation. Lee concluded that this was not the prelude to a larger offensive toward Richmond, but he was wrong. McClellan had planned a more general attack for the 26th to capture Old Tavern (hex C4423; now a ruin) and gain access to the New Bridge crossing, currently contested by Magruder (south of river) and Sickles (north of river). However, on June 24th, McClellan received intelligence reports that Jackson was moving to flank his army to the north and threaten his White House supply line. His reaction to this information was to send cavalry under Cooke to delay Jackson's route march and postpone his June 26th attack. The interesting detail is that both armies were planning to attack on the 26th; Lee proceeded, and McClellan postponed. This version of the scenario is the 'what if' McClellan launched an attack to capture Richmond while Lee attempted a turning movement on the other flank, a classic path not taken situation.
Historical Note: The opening of the Seven Days battles was not amongst Stonewall Jackson's finest hours as a military commander. I had two choices to factor this in: writing a rule with die rolls and such to determine Jackson's possible options, or just follow history. My research for this game series indicates that a coordinated attack was the rare exception, not the norm during the American Civil War. Lee communicated his turning movement objectives by bringing Jackson, AP Hill, DH Hill, and Longstreet into a meeting where he let his subordinate commanders establish how they would communicate and initiate his converging attack on Porter. The plan was for Jackson to communicate to AP Hill via Branch when he was ready to attack, which would in turn send AP Hill to retake Mechanicsville and assault the main V Corps line. Jackson's forces arrive on the map during the June 26th Game Turns, but Jackson does not attack. Around 2pm, AP Hill on his own initiative initiates the offensive without Jackson and without consulting Lee (post-war evidence says he did, it's unclear) or Davis who were nearby. Jackson eventually gets in motion on the 27th. Instead of writing rules to have Jackson not attack, I just have him show up on the morning of the 27th when his units enter the narrative. I am stating all of this just so you understand that I know where Jackson was located from the 17th when he left the Valley through the 26th but I have chosen this simple method for avoiding another special procedural rule. As an aside, for Jackson to be present at Lee's planning meeting he had to ride over 100 miles round trip on horseback and then oversee a rapid rail/foot march from the Valley. I think the answer to his lethargy on the 26th is he was exhausted, not something we sometimes accept from a legend… In fact, I got up at 4am today and I think I need a nap.
The Seven Days Battles Setup
USA
| Organization | Unit | Name | Quality | Special Setup | Setup |
|---|---|---|---|---|---|
| AoP | HQ | McClellan | ★ * | Maneuver Mode (not shown on page 14 setup diagram) | F3901M |
| II Corps | Infantry | Richardson | None | Field Works | C4823 |
| II Corps | Infantry | Sedgwick a | None | Field Works | C4623 |
| II Corps | Infantry | Sedgwick b | None | Field Works | C4723 |
* McClellan is one star, but can have two, see Special Rules.
Union Wagon Supply Path Markers Locations:
- a. June 26 AM: D2400 (Two-Player start)*
- b. June 26 PM: D2203 (Solitaire start)
- c. June 27 AM: D1904
- d. June 27 PM: D1607
- e. June 28 AM: D1410
- f. June 28 PM: D1313
- g. June 29 AM: D1416
- h. June 29 PM: D1718
- i. June 30 AM: D2021
- j. June 30 PM: D2024
- k. July 1 AM: F3500
- l. July 1 PM: F3802
* There is no June 26 AM Turn in the Solitaire version of this scenario, so remove the June 26 AM Wagon marker from the Solitaire setup.
CSA
| Organization | Unit | Name | Quality | Special Setup | Setup |
|---|---|---|---|---|---|
| AoNV | HQ | Lee | ★★ | Battle Mode | C2923B |
| CSA | HQ | J Davis | None | Maneuver Mode | C2923M |
| Jackson | Infantry | Whiting | None | 3-C0906 | |
| Jackson | Infantry | Jackson a | ★ | 3-C0906 |
Setup diagram for The Seven Days Battles scenario (Maps C, D, F and G) is a map illustration and is not reproduced.
1864 Scenarios
The Battle of Spotsylvania Courthouse
May 13, 1864 - May 18, 1864
- Map: A
- Battle Length: 11 Game Turns (May 13 PM to May 18 PM)
- Ammunition Points: USA and CSA each start with 10 Ammunition Points
- Scenario Code: 18
Special Rules
- May 13 PM Turn:
- a. The May 13 PM Game Turn only consists of Grant's Night March, then proceed to the May 14 AM Turn (see below).
- b. Grant's Night March: Use the Campaign Night March rules with the following modifications (pg 28):
- i. The Union V and VI Corps are conducting a Redeploy Night March per the Overland Campaign Rules, with Grant as the Active HQ. The Rain (see below) does not affect this Redeploy Night March.
- ii. Prior to moving any units, the Union may deploy the MD Bde detachment in any hex with a V Corps unit in contravention of the normal Detachment placement rules.
- iii. At the conclusion of all Night March movement, the May 14 AM Turn begins with the Movement Phase.
- The Union is the first player on the May 14 AM Turn.
- Mule Shoe Entrenchment: The CSA may not enter the Entrenchment until a Union unit has entered it (as a reminder, the Union will have to attack the Ghost Detachment to enter the Entrenchment). Once a Union unit has entered this Entrenchment, follow standard Entrenchment rules.
- Wagon Escort: Ferrero's Division is escorting the Union Wagon train.
- a. The Wagon marker is not used in this scenario; its presence is implied.
- b. Ferrero's Division can only move in Battle Formation.
- c. Ferrero's Division may not voluntarily enter an enemy ZOI/ZOC, nor may it attack or receive Artillery Support. It may Counterattack if it receives that result but will not conduct Pursuit.
- d. If Ferrero is attacked and receives a Defender Retreat or Breakthrough combat result, it is treated as a Blown result, and the unit returns to play per the normal rules and under the same restrictions. If there is a choice on which units to return, it must be one of the two units returned to play.
- e. If Ferrero is attacked and removed as a Blown unit, the Union player loses 5 Ammunition Points (cannot go below zero).
Lee's Uncertainty: During the May 13 AM Command Phase, Lee was in Battle Mode and failed his redeploy die roll, receiving a Battle Mode +2 DRM marker. During the Command Phase of the May 13 PM turn (scenario start), Lee once again failed to redeploy and received a Battle Mode Auto marker, while Grant was in Maneuver Mode establishing the conditions for a Night March. During the May 14 AM Command Phase, Lee automatically redeploys.
Victory Conditions
- Generalship Victory: Per the rules, plus:
- a. If the Union occupies Spotsylvania Courthouse (hex A3305) at the end of any Game Turn, it is worth a variable number of VPs to the Union according to the following schedule:
- i. May 13th AM to May 15th PM: 20 VPs
- ii. May 16th AM to May 18th PM: 15 VPs
- b. This is a one-time payout. The Union retains any VPs from capturing Spotsylvania Courthouse (A3305) if it is reoccupied by CSA units during a later Game Turn.
- c. If the Union never occupies Spotsylvania Courthouse (A3305) by the end of any Game Turn listed above, the CSA receives 15 VPs.
- d. If General Grant's HQ is placed on the map greater than 6 hexes from Spotsylvania Courthouse (A3305), the Union can no longer score VPs for capturing Spotsylvania Courthouse and the CSA receives 15 VPs.
- a. If the Union occupies Spotsylvania Courthouse (hex A3305) at the end of any Game Turn, it is worth a variable number of VPs to the Union according to the following schedule:
- Strategic Victory: There is no Strategic Victory in this scenario.
Entrenchments
| Hex | Facing | Rear Hexsides |
|---|---|---|
| A2905 (Mule Shoe) | North | A2906, A3006 |
| A2907 | North | A2908, A3008 |
| A3305 | East | A3206, A3306 |
Entrenchment facing indicates the direction of the vertex which the Entrenchment faces; per Series rules all non-rear hexsides are frontal hexsides.
Setup diagram for The Battle of Spotsylvania Courthouse scenario (Map A) is a map illustration and is not reproduced.
The Spotsylvania Courthouse Setup
USA
| Organization | Unit | Name | Quality | Special Setup | Setup |
|---|---|---|---|---|---|
| AoP | HQ | Grant | ★★ | Maneuver Mode | A3101M |
| II Corps | Infantry | Barlow a | ★ | Field Works | A2804 |
| II Corps | Infantry | Barlow b | ★ | Field Works | A2903 |
| II Corps | Infantry | Gibbon | ★ | Battle Formation | A2904 |
CSA
| Organization | Unit | Name | Quality | Special Setup | Setup |
|---|---|---|---|---|---|
| AoNV | HQ | Lee | ★★ | Battle Mode +Auto DR | A3207B |
| I Corps | Infantry | Kershaw | ★ | Field Works; Battle Formation | A3007 |
| I Corps | Infantry | Field a | ★ | Battle Formation | A2908 |
| I Corps | Infantry | Field b | ★ | Battle Formation | A2907 |
The Battle of North Anna
May 25, 1864
- Maps: B and E
- Battle Length: 2 Game Turns (May 25 AM to May 25 PM)
- Ammunition Points: USA and CSA each start with 10 Ammunition Points
- Scenario Code: N
Historical Note: This is a hypothetical scenario that examines a Union assault on Lee's North Anna positions instead of the historical situation where Grant executed a new turning movement to capture Richmond. This turning movement is covered in the Cold Harbor scenario.
Use this setup for both the Solitaire and Two-Player versions of this scenario.
Special Rules
- The game begins with the Movement Phase (skip the Command and Organization Phases).
- The Union is the first player on Turn 1.
- Union units that start the scenario in Field Works that are in the ZOC of a CSA Entrenchment are not obligated to make a Mandatory Attack while they occupy these Field Works.
- Use the Entrenchment Construction rules from the Campaign (pg. 29).
- Optional: If desired, the Union may add the Sheridan Cavalry units; they can arrive on the PM Turn at hex B5812.
Play Note: This 'what if' scenario is best played as a solitaire exercise in assaulting a prepared defense. You will likely see why Grant did not.
Solitaire Rules
Player Forces: You play as the Union. The CSA will not move or attack but remain in place and defend only. The CSA will always use defensive Artillery Support.
Victory Conditions
- Generalship Victory:
- a. VPs per the rules for eliminated units. Note that, since this scenario is only two Turns in length, all Blown unit results are eliminations.
- b. Generalship: Hanover Junction (B4121) is worth 15 VPs if the Union occupies it at any time during the scenario and, in the Two-Player scenario, the CSA does not reoccupy it.
- Strategic Victory: There is no Strategic Victory in this scenario.
The Battle of North Anna Setup
USA
| Organization | Unit | Name | Quality | Special Setup | Setup |
|---|---|---|---|---|---|
| AoP | HQ | Grant | ★★ | Maneuver Mode | B3216M |
| II Corps | Infantry | Barlow a | ★ | Field Works; Battle Formation | B4119 |
| II Corps | Infantry | Barlow b | ★ | Field Works; Battle Formation | B4220 |
| II Corps | Infantry | Gibbon | ★ | Field Works; Battle Formation | B4020 |
CSA
| Organization | Unit | Name | Quality | Special Setup | Setup |
|---|---|---|---|---|---|
| AoNV | HQ | Lee | ★★ | Battle Mode | B3824B |
| I Corps | Infantry | Kershaw | ★ | Battle Formation | B3623 |
| I Corps | Infantry | Field a | ★ | Battle Formation | B3822 |
| I Corps | Infantry | Field b | ★ | Battle Formation | B3921 |
Entrenchments
| Hex | Facing | Rear Hexsides |
|---|---|---|
| B3623 | North | B3624, B3723 |
| B3822 | North | B3823, B3922 |
| B3921 | North | B3922, B4022 |
| B4121 | Northeast | B4022, B4122 |
| B4021 | North | B4022, B4121 |
| B4222 | Northeast | B4122, B4223 |
| B3524 | Northwest | B3624, B3625 |
| E3500 | Northwest | E3600, E3601 |
| B3525 |
Entrenchment facing indicates the direction of the vertex which the Entrenchment faces; per Series rules all non-rear hexsides are frontal hexsides.
Setup diagram for the Battle of North Anna scenario (Maps B and E) is a map illustration and is not reproduced.
The Battle of Cold Harbor
May 27 - June 3, 1864
- Map: C, F and G
- Battle Length: 15 Turns (May 27 PM to June 3 PM)
- Ammunition Points:
- USA and CSA each start with 10 Ammunition Points.
- Each side receives an additional 10 Ammunition Points at the start of the Command Phase of June 1 AM but cannot exceed 19 Ammunition Points.
- Scenario Code: CH
Special Rules
- The Union is the first player on Turn 1 (May 27 PM).
- On Turn 1, skip the Command and Organization Phases, begin with Movement Phase.
- On Turn 1, after one side passes, the number of Moves Remaining for the other side is determined by a straight 1d10 die roll, no modifiers.
- CSA automatically has the Initiative for Turn 2 (May 28 AM).
- Normal HQ Initiative and Deployment rules are in effect for the remainder of the scenario.
- CSA units may not move north of the Pamunkey River.
- Union units may not cross the Chickahominy River at a Ford or Bridge hexside without first constructing a Pontoon Bridge, of which only two are available for this purpose.
- The CSA have no Bridge or Ford restrictions to cross the Chickahominy River.
- The Union has 5 Pontoon Bridges available, of which 3 are deployed at the beginning of the scenario at Nelson's Ferry (hexsides C2504/C2605), Bosher's Ferry (hexsides C3102/C3202), and Newcastle Ferry (hexsides C4001/C4100). These cannot be reused if destroyed or voluntarily removed.
- Use the Entrenchment Construction rules from the Campaign rules (pg. 29).
Victory Conditions
- Generalship Victory: There is no Generalship Victory in this scenario.
- Strategic Victory:
- a. The Union wins an immediate Strategic Victory if they establish Division ZOCs from three different Divisions on Richmond City Hexes (all are on Map G North of the James River). The Division units must be in Grant's Command Range, not in a CSA ZOC, plus be able to trace a path of any length free of CSA ZOCs and ZOIs from their location to any of the at-start Pontoon Bridges.
- Play Note: Please try and not make this a chore to figure out whether you did or you did not; success should be obvious and if not, you did not succeed.
- b. The CSA wins a Strategic Victory at the end of any Game Turn if the Union cannot trace a path of not more than 30 hexes, free of CSA ZOC/ZOIs, from the Grant HQ to at least two of the three at-start Pontoon Bridges.
- c. If the Union does not achieve a Strategic Victory by the end of the scenario, the CSA wins.
- a. The Union wins an immediate Strategic Victory if they establish Division ZOCs from three different Divisions on Richmond City Hexes (all are on Map G North of the James River). The Division units must be in Grant's Command Range, not in a CSA ZOC, plus be able to trace a path of any length free of CSA ZOCs and ZOIs from their location to any of the at-start Pontoon Bridges.
The Battle of Cold Harbor Setup
USA
| Organization | Unit | Name | Quality | Special Setup | Setup |
|---|---|---|---|---|---|
| AoP | HQ | Grant | ★★ | Battle Mode | C3206B |
| II Corps | Infantry | Barlow a | ★ | 3-C2200 | |
| II Corps | Infantry | Barlow b | ★ | 3-C2200 | |
| II Corps | Infantry | Gibbon | ★ | 3-C2200 |
CSA
| Organization | Unit | Name | Quality | Special Setup | Setup |
|---|---|---|---|---|---|
| AoNV | HQ | Lee | ★★ | Battle Mode | C2710B |
| I Corps | Infantry | Kershaw | ★ | 2-C0910 | |
| I Corps | Infantry | Field a | ★ | 2-C0910 | |
| I Corps | Infantry | Field b | ★ | 2-C0910 | |
Design Note: This is an epic Grand Tactical scenario, with your maneuver decisions determining how things will evolve. For the record, the infamous Cold Harbor assault was an attempt to turn Lee's right flank and was repulsed on and near hex C4315 (New Cold Harbor). The scenario emphasizes that Grant has to break through to Richmond or Lee has thwarted him.
This part of the Overland Campaign ended Grant's attempt to destroy the Army of Northern Virginia in front of Richmond. Grant's next maneuver over the James River led to the siege of Petersburg and ultimately Appomattox Courthouse, which will be featured in a future volume in the series.
Historical Note: Early became the II Corps Commander and Ramseur took his division.
Setup diagram for the Battle of Cold Harbor scenario (Maps C, F and G) is a map illustration and is not reproduced.
Campaign Scenarios
You do not need Rebel Fury to play Grant's 1864 Overland Campaign. The Overland Campaign uses a setup almost identical to the Battle of Spotsylvania Courthouse (May 18) scenario but instead of one map, it uses all Maps (A-G), and adds a few reinforcement units.
I have added, as a bonus for the very hardcore, a method to play this campaign from The Wilderness (May 5) to Cold Harbor (June 5), but this longer campaign requires a copy of Rebel Fury.
Campaign Rules
Setting Up the Campaign
The Campaign Game comes in two versions. One scenario, using the counters marked 18 and 64, starts on May 13. Army of the Potomac includes all the components you need to play this Campaign Scenario. The other scenario starts on May 5 and requires the Wilderness counters from Rebel Fury. The following Campaign Rules supersede or add onto the Series rules.
The May 13 Campaign scenario requires the counters from the Battle of Spotsylvania Courthouse (May 18) as well as the Campaign-specific reinforcement counters labeled "64." The May 5 Campaign scenario requires the counters from Rebel Fury's Battle of the Wilderness, as well as the "64" reinforcement counters. Each Campaign scenario sets up a little differently; refer to the Campaign specific setup instructions.
Play Note: Some of these Campaign rules are used by scenarios in Army of the Potomac and may be used in future scenarios as well. Thus, they are presented in a modular format for ease of reference.
Off-Map Displays
Units can leave the map and enter the Off-Map Display:
- A unit on an Off-Map Display is automatically in Command Range.
- A unit can move from the map to the Off-Map Display by moving into an Entry Hex that is in Command Range, which immediately places the unit on the appropriate Off-Map Display space, ending the unit's movement for the Movement Phase.
- Per the Series rules, a unit enters via an Entry Hex connected to the Off-Map space it occupies.
- Once a unit leaves the Entry Hex, it is immediately subject to all Command Range movement restrictions.
Night March
- At the end of each PM turn, check if one side has all of its HQs in Maneuver Mode and the opposing side has any of its HQs in Battle Mode. If this is the case, the side with its HQs in Maneuver Mode may conduct one Night March, which is executed at the end of the End Phase as the last action of the Game Turn.
- The player executing the Night March option declares one of two choices (Redeploy or Turning Movement) then follows the appropriate procedure.
- a. Redeploy Night March: A Redeploy Night March consists of the Divisions of up to two Corps moving toward their active HQ. The moving Divisions may make up to two moves. If the weather is clear (i.e., not raining), the Division may use Extended March for one or both of those moves. A moving unit must conclude its road moves (both if making two moves) before another unit can be moved. At the conclusion of its total road movement, each moving unit must be closer to its HQ than its point of origin.
- b. Turning Movement Night March: A Turning Movement Night March consists of the Divisions of one Corps making one or two moves (which are not required to use roads), but may not use Extended March. The movement may be any distance from the HQ as long as the unit remains in Command Range at all times.
- To conduct a Night March, whether a Redeploy or Turning Movement Night March, follow these steps:
- a. Units in an enemy ZOC may not participate in a Night March.
- b. All units conducting a Night March flip to their Maneuver Formation side, even if they start in an enemy ZOI. For each moving unit, complete steps c and d before continuing to the next moving unit.
- c. Each unit conducting a Night March moves one hex, which may not be into an enemy ZOC. The unit does not change Formation as a result of this movement, regardless of terrain, rain, or enemy ZOI.
- d. Then, if the unit is on a road and is not in an enemy ZOI, the unit may conduct a road movement or Extended March. This movement may not enter an enemy ZOC/ZOI for any reason.
Design Note: The player with the night march is attempting one of two types of historical maneuvers, a shifting of forces from one flank to the other (Redeploy) such as Grant conducted during the May 18th battle when he shifted the V and VI Corps from his right to his left flank behind his front lines. The second maneuver is a turning movement, which Grant conducted several times during this campaign such as when he set Hancock's II Corps on a turning movement that initiated his maneuver to the North Anna River. The main distinction is during a Redeploy Night March, two Corps must move towards an HQ, whereas during a Turning Movement Night March, a single Corps may move away from its HQ (but must remain within Command Range). Try and not torture your opponent trying to do something that is not intended.
Entrenchments
These Entrenchment rules are used in all 1864 scenarios in Army of the Potomac:
- An Entrenchment is an improvement of a Field Works.
- Play Note: While Field Works do not improve the value of Defensible Terrain, they are necessary if you want to build an Entrenchment in a Defensible Terrain location.
- An Entrenchment is built following the same procedure as a Field Works, in a hex that already contains a completed Field Works.
- Entrenchment facing for those built during a scenario is up to the owner upon completion but once chosen cannot be changed for any reason. Entrenchments must face one vertex (not hexside) in their hex. The two hexsides adjoining the vertex opposite the vertex that the Entrenchment faces are the Entrenchment's rear hexsides.
- An Entrenchment is not removed if unoccupied. Entrenchments, once placed, cannot be removed for any reason.
Logistics
The Golden Rule of Logistics: All hexes of a legal Supply Path or Railroad Line of Communication must be free of enemy ZOC/ZOI for their entire length.
RR Depot
- Each side has a Railroad (RR) Depot marker. The RR Depot marker must be located on a hex containing a Railroad or an Off-Map space that contains a Railroad line (e.g., Fredericksburg).
- There are three main Railroad lines: the Richmond-Fredericksburg-Potomac RR (hereafter the RFP RR), the Richmond-York RR (hereafter RY RR), and the Virginia Central RR (hereafter the VC RR). Only the CSA may use the VC RR, only the Union can use the RY RR, while either side can use the RFP RR.
- Each side's RR Depot must be located on a RR that can connect by RR to an origin point. The path between the RR Depot and its origin point is called the RR Line of Communication (RR LOC).
- i. The Union RR Depot origin point is the Fredericksburg Off-Map Display space or hex D1300 (Entry Hex O).
- ii. The CSA RR Depot origin point is Richmond (hex G2808).
- During the Command phase, before placing HQs during the HQ Redeployment Placement Step, players may choose to (or be required to) remove their RR Depot and place it two Turns ahead on the Turn Track Display:
- i. If the RR Depot does not have a RR LOC, it must be removed.
- ii. Once per game, the Union may change their RR Depot origin point from Fredericksburg (RFP RR) to hex D1300 (RY RR) with the requisite two-turn delay.
- iii. A player may voluntarily remove their RR Depot with the requisite two-turn delay.
- If a player's RR Depot is on the Turn Track Display and due to return this Turn, it is placed on the map during the HQ Redeployment Placement Step before HQ placement. When being placed back on the map, a RR Depot must be placed on a RR hex that has a RR LOC.
Historical Note: The Union, partway through the campaign, shifted their main logistic depot from Fredericksburg to Port Royal and then to White House. I am forgoing making the Union player shift the base and putting the logistic disruption impact in how a Wagon Train draws supply from the RR Depot. This is in case you were wondering…
Wagon Trains
Each side has a Wagon marker with Normal and Extended sides. While a Wagon marker is not a unit, it is placed and removed like a Detachment; unlike a Detachment, however, it can be stacked with a friendly Detachment.
Normal and Extended Supply
- A Wagon marker has two supply states: Normal and Extended. These states are determined at the end of the Command Phase, and the Wagon marker is flipped to the appropriate side. If a Wagon marker is not in Normal Supply, it is in Extended Supply. After determining if a side is in Normal or Extended Supply, that side remains in that state for the entire Turn, even if conditions change during the Turn.
- For a side's Wagon marker to be in Normal supply, three things must be true:
- i. That side's RR Depot is on the map or Off-Map Display.
- ii. That side's Wagon marker is on the map and is within range of Grant (Union HQ) or Lee (CSA HQ) connected by a legal path (see the "Golden Rule" above).
- iii. The Wagon marker can trace a legal path of any length to its side's RR Depot.
- Effects of Supply Status
- i. A side's Wagon marker determines that side's supply state.
- ii. A side under Normal supply operates under all Series rules without restrictions.
- iii. A side in Extended supply can only use one Ammunition Point per Game Turn, and subtracts 2 from its Battle Rating in combat (to a minimum of 1).
- iv. Supply status applies to all units for a side for the entire Game Turn, regardless of whether the unit is within Command Range of any HQ.
- v. While a side is under Extended supply, it cannot receive more than 10 additional moves after their opponent passes.
- vi. A side under Extended supply cannot conduct Night Marches.
Play Note: Once you are in Extended Supply, you will need to prioritize fixing your supply lines. To fix your supply situation requires some combination of getting your RR Depot back onto the map and recalling and placing your Wagon marker onto the map so that, at the end of a future Command Phase, your Wagon marker on Extended Supply meets all of the conditions for Normal Supply and can flip back to its Normal Supply side.
Placing and Removing Wagon Markers
Wagon markers do not move, but are deployed and recalled like a Detachment. To change the location of a Wagon, it is recalled during a Detachment Recall Step, and redeployed during the next Turn's Detachment Placement Step. A Wagon marker placed on the map during the Detachment Placement Step enters on its Extended side and its Supply status will be checked at the end of that Command Phase. Placing a Wagon does not count against an HQ's one detachment per turn limit.
Play Note: Remember to follow the Sequence of Play; you cannot remove and then place the Wagon, it must first be recalled in the Detachment Recall Step and then placed in the next Game Turn's Detachment Placement Step.
To remove a Wagon marker, simply remove it during the Detachment Recall Step. As a reminder, a side with their Wagon marker off the map will be in Extended Supply for that Turn.
When placing a Wagon marker during the Detachment Placement Step:
- A Wagon marker must be placed on a road hex that is within Command Range of Grant (Union HQ) or Lee (CSA HQ), following the same rules as Detachment placement (4.4).
- The Wagon marker must also be able to trace a legal path of any length from the Wagon marker to a RR Depot on the map or via an Entry Hex to an Off-Map RR Depot.
- A Wagon marker may be placed in a hex with a friendly Division and/or Detachment. If this occurs, the friendly Division changes to Battle Formation. (Consider the Division or Detachment to be the Wagon's marker escort.)
Raiding an Opponent's Wagon Train
If at any time a Wagon marker is alone in a hex without a friendly Division or Detachment, and is in an enemy ZOI/ZOC or in a hex occupied by an enemy unit, the Wagon marker is immediately removed from the map. If a Wagon marker is stacked with a friendly Detachment or Division, it is not removed.
Play Note: Yes, a Wagon marker can be removed by an enemy Detachment being placed next to it.
- This removal does not change the current supply status.
- Removal of a Wagon marker reduces that side's available Ammunition Points by 3 (to a minimum of 0) unless the Wagon was stacked with a friendly Division or Detachment and was removed as a result of Combat.
- A Wagon marker removed due to a raid is placed on the Game Turn Track two Turns ahead of the current Turn, and becomes available for redeployment in that Turn's Detachment Placement Step. If there are less than two Turns remaining, the Wagon marker is removed from the game.
Casualties
- When playing the Campaign scenario, the limit on returning two Blown Divisions (5.2) does not apply. During each Blown Division Return Step, each player returns all Blown Divisions and may not delay any returning Divisions for any reason.
- Each time a Division is Blown, it receives a Casualty marker:
- a. A Division with no Casualty marker is given a Casualty 1 marker.
- b. A Division with a Casualty 1 marker flips it to its 2 side.
- c. A Division with a Casualty 2 marker is instead Eliminated.
- Whenever a Blown Division returns, you must first consolidate Casualty markers:
- a. All returning Blown Divisions sharing a name (e.g. Field a and Field b) consolidate their Casualty markers with every 3 Eliminating one of the Blown Divisions. For example, if you had two Divisions with the same name, both with Casualty 2 markers, one would be eliminated with the other one returning to play with a Casualty 1 marker.
- b. After consolidating a Division, any Divisions from the same Corps consolidate using the same method as for Divisions, potentially Eliminating a Division that just consolidated with another.
- c. The enemy player chooses which Divisions are Eliminated during consolidation.
- d. Once this has been accomplished, any Blown Divisions that are returning do so per the normal rules.
Effects of Casualties on Combat
- Divisions with Casualty 2 markers subtract 2 from their Battle Rating (to a minimum of 1).
- Divisions with Casualty 1 markers do not suffer any reduction.
Artillery Ammunition Resupply
- When a side has 4 or fewer Ammunition Points remaining, an automatic request for Ammunition Resupply is made at the end of the End Phase. Roll the special die: if the result is a burst symbol, the player receives 5 Ammunition Points in three Game Turns. Otherwise, the resupply arrives in two Game Turns (infantry soldier result). Supply status has no effect on this resupply.
- Only one Ammunition Resupply can be pending at a time; you may not request more Ammunition until your current request has been resolved.
- Ammunition Points are received at the end of the Command Phase of the Turn during which they arrive. Use the "5 Ammo" marker to track resupply Turn.
Replacements
Each side has a pool of replacements as specified in the Campaign scenario.
Whenever a Division receives a Casualty marker (Casualty 1 or Casualty 2) or is Eliminated, that Division's side receives a replacement (reduce that side's replacement counter by 1) of the same type as the Division (Infantry or Cavalry) from their replacement pool. This is tracked by placing the corresponding REPL marker 8 Game Turns ahead on the Game Turn track. A side cannot receive more than four replacements on a single Game Turn (ignore any additional replacements from Casualty markers or Eliminated Divisions for that Turn). Once a side's replacement counter reaches zero, they cannot receive any further replacements.
Play Note: Ammunition Points and replacements that would be placed beyond the last turn of the campaign are lost.
At the end of the Command Phase of the Turn during which replacements arrive, each side resolves replacements:
- Each replacement removes a Casualty 1 marker (flip a Casualty 2 to a Casualty 1 or remove a Casualty 1) or can return an Eliminated Division during the Blown Division Return step with a Casualty 2 marker. Eliminated Divisions must be reconstituted before removing or flipping any Casualty markers. If there are not enough replacement steps to reconstitute all Eliminated Divisions, your opponent chooses which Divisions return. For a unit on the map to receive a single replacement, it must be in Command Range of a friendly HQ.
- Infantry replacements can only be used for Infantry Divisions, but Cavalry replacements can be used for Infantry or Cavalry Divisions.
- Replacements cannot be saved, use them or lose them.
- Each unit can receive a maximum of one replacement/Turn.
Reinforcements and Replacements
- Units marked with a turn entry of Tx (as opposed to T-Hex number) or units that have been returned with replacements are placed adjacent to a Friendly HQ in Battle Formation, as if they were a Blown unit returning to play (5.2), except if more Divisions are eligible to return than can be placed, treat the remaining Divisions (selected by your opponent) as Blown and give them a Casualty marker.
- Eliminated Detachments may never be brought back into play. A side's available detachments are a finite resource.
Rain Weather Effects
- Any movement not along contiguous roads forces a formation change.
- There is no Extended March during rain except along the Orange Plank Road (hexes A1007-A1400); the entire Extended March must be on this road to qualify.
Cavalry HQs
Stuart, Hampton, and Sheridan are Cavalry HQs. They behave as other HQs except as noted below:
- Cavalry units that have the same hex setup as their Cavalry HQ can set up stacked with the HQ or in any hex that is in Command Range of the Cavalry HQ and not in any enemy ZOC or ZOI.
- Cavalry HQs only have a Maneuver Mode side.
- Cavalry units are in command if they are within range of an HQ or a Cavalry HQ. Infantry units can never trace command to a Cavalry HQ.
- Cavalry HQs are redeployed and placed per all the normal rules for HQ placement (4.3), but must be placed within 3 hexes of a friendly Cavalry unit and must be closer to that Cavalry unit than any type of enemy unit.
- Cavalry HQs can be deployed to an Entry Hex that is connected to an Off-Map Display space that contains a friendly Cavalry Division.
1864 Overland Campaign
May 13th to June 5th, 1864
- Maps: Use all Maps A, B, C, D, E, F, G, and Map C extension and Union Off-Map Display. See the map schematic on page 2 for how the maps align.
- Campaign Length: 48 Turns (May 13 AM to June 5 PM)
- Ammunition Points: Each side begins the scenario with 10 Ammunition Points.
- Pontoon Bridges: Union has 5 bridges, the CSA has none.
- Scenario Code: 64
Special Rules
- Use all of the Campaign rules (pages 28-31); use the Optional Flank Attack rule (page 3) if players agree.
- The Campaign scenario uses the Union Off-Map Display and uses all Series and Campaign rules.
- The Union is the first player for the May 13 AM Turn. Begin with the Command Phase.
- The Union and the CSA begin in Normal Supply.
- Lee HQ begins the scenario in Battle mode with a +2 DRM marker and does not redeploy for the May 13 AM Turn.
- Rain: The weather for the first turn is Rain, thereafter use the following procedure:
- a. At the start of the Command Phase each Game Turn from the Campaign start until May 21st PM, roll the special combat die to determine the weather. If the result is the burst icon, it's raining; if the soldier icon, it is clear.
- b. From May 22nd till the end of the Campaign, roll a 1d10. If the result is a 0-1, it's raining; if 2-9 is rolled, it is clear.
- Supply
- a. The Union begins in Normal Supply, tracing a Supply path to Map A, Entry Hex B (A2000).
- b. The CSA begins in Normal Supply, tracing a Supply Path to the Rail Depot at Hanover Junction (B4121).
- Detachments: All May 18 and Campaign Detachments (marked with "18" or "64") are available from the start of the scenario for both Union and CSA sides.
- Reinforcements and Replacements
- a. Reinforcements: Both sides receive reinforcements per setup instructions.
- b. Replacement Pools:
- i. USA 12 Infantry Replacements, CSA 8 Infantry Replacements
- ii. USA 6 Cavalry Replacements, CSA 3 Cavalry Replacements
Campaign Victory Conditions
- Generalship Victory: Per the rules, plus:
- a. Track Campaign Victory Points (VP) on a sheet of paper or with any other convenient method.
- b. If the Union occupies Spotsylvania Courthouse (A3305) at the end of any Game Turn, it is worth a variable number of VPs to the Union according to the following schedule:
- i. May 13th PM to May 15th PM: 20 VPs
- ii. May 16th AM to May 18th PM: 15 VPs
- iii. May 19th AM to May 19th PM: 10 VPs
- iv. May 20th AM onward: 0 VPs
- b. This is a one time payout. The Union retains any VPs from occupying Spotsylvania Courthouse (A3305) even if later reoccupied by CSA units.
- c. If the Union never occupies Spotsylvania Courthouse (A3305) at the end of any Game Turn up to and including the May 19th Game Turn, the CSA receives 15 VPs.
- d. If General Grant's HQ is placed on the map greater than six hexes from Spotsylvania Courthouse (A3305), the value thereafter of capturing Spotsylvania Courthouse permanently changes to 0 VPs and the CSA receives 15 VPs.
- e. Any Division that is Eliminated awards 3 VPs to the opponent. If that Division is subsequently reconstituted with replacements, the VPs are retained. If any Division is Eliminated a second, third, etc. number of times, it awards 3 VPs for each time the Division is Eliminated.
- f. Eliminated Detachments are worth 1 VP and cannot return once Eliminated.
- Strategic Victory
- a. If the Union is able to establish ZOCs on Richmond City Hexes (all are on Map G, North of the James River) from three different Infantry Divisions in Command Range of the Grant HQ and not in an enemy ZOC, the Union wins an immediate Strategic Victory. Do not finish the Game Turn, as the CSA government has fled the city.
- b. If the Union fails to achieve a Strategic Victory, determine the winner by Generalship Victory.
1864 Overland Campaign Setup
This 1864 Overland Campaign uses a slightly modified Spotsylvania Courthouse (May 18) setup and counters, augmented by the Campaign counters with a "64" (upper left) scenario designation. Note that Sheridan begins the scenario at Haxall on the James River (hex F4004) and is screened from Richmond by Hampton near Richmond (G3406). Cavalry units that have the same hex setup as their Cavalry HQ can set up stacked with the HQ, or in any hex that is in Command Range of the Cavalry HQ and not in any enemy ZOC or ZOI.
Entrenchments
| Hex | Facing | Rear Hexsides |
|---|---|---|
| A2905 (Mule Shoe) | North | A2906, A3006 |
| A2907 | North | A2908, A3008 |
| A3305 | East | A3206, A3306 |
Entrenchment facing indicates the direction of the vertex which the Entrenchment faces; per Series rules all non-rear hexsides are frontal hexsides.
Grant's 1864 Overland Campaign Setup
USA (Spotsylvania Courthouse counters, Scenario Code 18)
| Organization | Unit | Name | Quality | Special Setup | Setup |
|---|---|---|---|---|---|
| AoP | HQ | Grant | ★★ | Maneuver Mode | A3101M |
| II Corps | Infantry | Barlow a | ★ | Field Works | A2804 |
| II Corps | Infantry | Barlow b | ★ | Field Works | A2903 |
| II Corps | Infantry | Gibbon | ★ | Battle Formation | A2904 |
USA (Campaign counters, Scenario Code 64)
| Organization | Unit | Name | Quality | Special Setup | Setup |
|---|---|---|---|---|---|
| AoP | RR Depot | RR Depot | Marker | Fredericksburg | OFF |
| AoP | Wagon | Wagon | Marker | Normal Supply | A1801 |
| Cavalry | HQ | Sheridan | None | Maneuver Mode | F4004M |
| Cavalry | Sheridan | Merritt | ★ | F4004 |
CSA (Spotsylvania Courthouse counters, Scenario Code 18)
| Organization | Unit | Name | Quality | Special Setup | Setup |
|---|---|---|---|---|---|
| AoNV | HQ | Lee | ★★ | Battle Mode +2 DRM | A3207B |
| I Corps | Infantry | Kershaw | ★ | Field Works; Battle Formation | A3007 |
| I Corps | Infantry | Field a | ★ | Battle Formation | A2908 |
| I Corps | Infantry | Field b | ★ | Battle Formation | A2907 |
CSA (Campaign counters, Scenario Code 64)
| Organization | Unit/Depot | Name | Quality | Special Setup | Setup |
|---|---|---|---|---|---|
| AoNV | Wagon | Wagon | Marker | Normal Supply | A3210 |
| AoNV | RR Depot | RR Depot | Marker | B4121 | |
| Cavalry | HQ | Hampton | None | Maneuver Mode | G3406M |
| Cavalry | Cavalry | F Lee | ★ | G3406 |
Setup diagram for the 1864 Overland Campaign scenario (Map A; most counters with "64" scenario code not shown) is a map illustration and is not reproduced.
Extended Overland Campaign
May 5th to June 5th, 1864 - Requires Rebel Fury
This Extended Overland Campaign, which backs up the campaign's start date to May 5th, requires a map and several counters from Rebel Fury.
- Map: This scenario starts on Rebel Fury's (hereafter RF) Wilderness/Spotsylvania Map, and eventually transfers to Army of the Potomac (hereafter AoP) Maps A, B, C, D, E, F, G, plus Map C extension. See the map schematic on page 2 for how the AoP maps align.
The easiest way to align the RF Wilderness/Spotsylvania Map with AoP Map A is by using the North compass (RF upper left, AoP lower left). Once the units are all on AoP Map A, you can remove the RF Wilderness/Spotsylvania Map.
- AoP Spotsylvania CH (A3305) = RF hex 1834
- AoP Chancellorsville (A1301) = RF hex 3221
- AoP Shady Grove Church (A2017) = RF hex 1318
(A diagram shows how the RF Wilderness Map aligns with AoP Map A.)
- Extended Campaign Length: 64 Turns (May 5 AM to June 5 PM)
- Ammunition Points: Each side begins the scenario with 10 Ammunition Points.
- Pontoon Bridges: Union has 5 bridges, the CSA has none.
Special Rules
-
Use all of the Campaign rules (pages 28-31); use the Optional Flank Attack rule if players agree (page 3).
-
The Campaign scenario uses the Union Off-Map Display and uses all Series and Campaign rules.
-
Use the Special Rules from the Battle of the Wilderness scenario in Rebel Fury, along with the counters and reinforcement schedule from the battle.
-
The CSA is the first player for the May 5th AM Turn. Begin with the Movement Phase (note Rebel Fury Battle of the Wilderness Special Rule 3, page 16 of Playbook).
-
The Union and CSA begin in Normal Supply.
-
Rain: Do not roll for Weather on the first turn; it's automatically Clear. Thereafter use the following procedure:
- a. At the start of the Command Phase each Game Turn from the Campaign start until May 21st PM, roll the special combat die to determine the weather. If the result is the burst icon, it's raining; if the result is the soldier icon, it's clear.
- b. From May 22nd till the end of the Campaign, roll a 1d10. If the result is a 0-1, it's raining; if 2-9 is rolled it is clear weather.
-
Supply:
- a. The Union begins in Normal Supply. The Union Wagon Train uses Rebel Fury Map Entry Hex C as its supply path to the Union RR Depot (Fredericksburg).
- b. The CSA begins in Normal Supply, tracing a Supply Path to the Rail Depot at Hanover Junction (B4121). If you cannot lay out all of the maps at one time, just know the RR Depot has a legal Supply Path.
- c. The CSA Wagon marker is placed on RF Map hex 1000 (Entry Hex B), and has no effect on CSA units on the Entry Hex or reinforcements that enter at that location. After the Lee HQ Redeploys, if he is out of Command Range of Entry Hex B, then during the ensuing Detachment Recall Step the Wagon marker is removed and re-enters play per the Campaign rules.
Play Note: This special rule allows for Sheridan to initiate his famous ride toward Richmond to force Stuart's CSA cavalry into a running fight to eliminate them. While historical analysis considers this to be an inferior decision that significantly reduced Grant's intelligence on Lee's movements and positions, the fact is it happened.
Victory Conditions
- Generalship Victory: Per the rules, plus:
- a. Track Campaign Victory Points (VP) on a sheet of paper or with any other convenient method.
- b. Once the Grant HQ comes within Command Range of Spotsylvania Courthouse (A3305), if the Union occupies Spotsylvania Courthouse at the end of any Game Turn, it is worth a variable number of VPs to the Union according to the following schedule:
- i. First six turns (the turn Grant HQ comes within Command Range of Spotsylvania Courthouse counts as the first turn): 20 VPs
- ii. Turns seven through 12: 15 VPs
- iii. Turns 13 and 14: 10 VPs
- c. The Union retains any VPs from occupying Spotsylvania Courthouse (A3305) even if later reoccupied by CSA units on a later turn.
- d. If the Union never occupies Spotsylvania Courthouse (A3305) at the end of any Game Turn in the schedule in (b), the CSA receives 15 VPs.
- e. If General Grant's HQ is deployed onto any Army of the Potomac map other than Map A, the value for capturing Spotsylvania Courthouse permanently changes to 0 VPs and the CSA receives 15 VPs.
- f. Any Division that is Eliminated awards 3 VPs to the opponent. If that Division is subsequently reconstituted with replacements, the VPs are retained. If any Division is Eliminated a second, third, etc. number of times, it awards 3 VPs for each time the Division is Eliminated.
- g. Eliminated Detachments are worth 1 VP and cannot return once Eliminated.
- Strategic Victory
- a. If the Union is able to establish ZOCs on Richmond City Hexes (all are on Map G North of the James River) from three different Infantry Divisions in Command Range of the Grant HQ and not in an enemy ZOC, the Union wins an immediate Strategic Victory. Do not finish the Game Turn, as the CSA government has fled the city.
- b. If the Union fails to achieve a Strategic Victory, determine the winner by Generalship Victory.
Grant's Overland Campaign May 5th Start Setup
USA (Campaign/additional counters)
Set up the Battle of the Wilderness from Rebel Fury, with the following additional counters/markers (counter code 18 unless specified):
| Organization | Unit | Name | Quality | Special Setup | Setup |
|---|---|---|---|---|---|
| AoP | RR Depot | RR Depot | Marker | Fredericksburg | OFF |
| AoP | Wagon | Wagon | Marker | Normal Supply | 4012 |
| IX Corps | Infantry | Ferraro * | None | Battle Formation | 4012 |
| II Corps | Infantry | Mott † | None | 3221 |
CSA (Campaign/additional counters)
| Organization | Unit | Name | Quality | Special Setup | Setup |
|---|---|---|---|---|---|
| AoNV | Wagon | Wagon | Marker | Normal Supply | 1000 |
| AoNV | RR Depot | Marker | B4121 | ||
| Cavalry | HQ | Stuart ‡ | None | Maneuver Mode | Special Rule |
| Cavalry | Cavalry | Hampton § | ★ | May 7 AM | 1000 |
* Ferraro Division from Army of the Potomac (marked "18" on the counter).
† Rebel Fury Substitute Counter: Mott's Division ("W" designation) consisted of two brigades that are often cross-attached to Birney's two brigade Division. Don't look for Birney b in Army of the Potomac; I chose to designate them as Mott for simplicity. I have supplied a replacement counter for Rebel Fury if you want to substitute in the counter.
‡ Stuart Cavalry HQ from Army of the Potomac, (marked "W" on the counter).
§ Hampton is a Rebel Fury counter from the Wilderness scenario; it enters on hex 1000 during the May 7 AM Movement Phase.
Note: The red line on the setup diagrams marks the approximate edge of AoP Map A when overlapping RF's Wilderness Map.
Setup Diagram A (map illustration) is not reproduced.
Design Note, or "Let the Insanity Begin": Consider this a life experience. Basically, you are starting the Campaign scenario with all of its special rules, starting with Grant's initial turning movement covered in Rebel Fury's Wilderness scenario. There is no way that I can anticipate every situation that will occur when you transfer from the RF Wilderness Map to the AoP Map A.
My basic guidance is to look at the maps as a conveyor belt. Start with the AoP Map A on top of the RF Wilderness Map. When all units have left the RF map remove it and add AoP Map B to your table and likely at some point Map E. Rinse and repeat.
AoP/RF Map Overlay Note: It should be obvious that whether you place the AoP Map A on top or underneath the RF Wilderness Map, there is a map border that will obscure some hexes and terrain. As the RF maps were never intended to be used in this manner, it's one of those temporary situations that is a bit annoying until the forces move fully onto AoP Map A.
Setup diagrams B and C for the Extended Overland Campaign are map illustrations and are not reproduced. Not shown in these three Ext. Campaign setup diagrams are: 1) the Union RR Depot (on Fredericksburg Off-Map Display); 2) the CSA RR Depot in Hanover Junction (hex B4121); 3) Union Supply Wagon and Ferrero's IX Corps Division in RF hex 4012 (Entry Hex C).
Expanded Civil War Heritage Sequence of Play
Underscored Notations are only used in the two Campaign Scenarios. (Underscoring is not preserved in this transcription; the Campaign-only notations are: + Rain Determination, RR Depot Redeployment, Wagon Placement, Wagon Recall, Receive Artillery Ammunition Resupply, Receive Replacements, Supply Status Determination, Blown unit return casualty consolidation, Entrenchment Construction, Receive Reinforcements, Potential Replacement Generation, Potential Artillery Ammunition Generation and Potential Night March, as listed on the printed page.)
- Command Phase (4.0)
- A. Initiative Step (4.1) + Rain Determination
- B. HQ Redeployment Check Step (4.2)
- C. HQ Redeployment Placement Step (4.3)
- i. RR Depot Redeployment
- D. Detachment Placement Step (4.4)
- i. Wagon Placement
- E. Detachment Recall Step (4.5)
- i. Wagon Recall
- F. Off-Map Movement Step (4.6)
- i. Receive Artillery Ammunition Resupply
- ii. Receive Replacements
- iii. Supply Status Determination: Normal or Extended
- Organization Phase (5.0)
- A. Formation Determination Step (5.1)
- B. Blown Division Return Step (5.2)
- i. Blown unit return casualty consolidation
- C. Disengagement Step (5.3)
- D. Field Works/Entrenchment Construction Step (5.4)
- Movement Phase (6.0)
- A. Receive Reinforcements