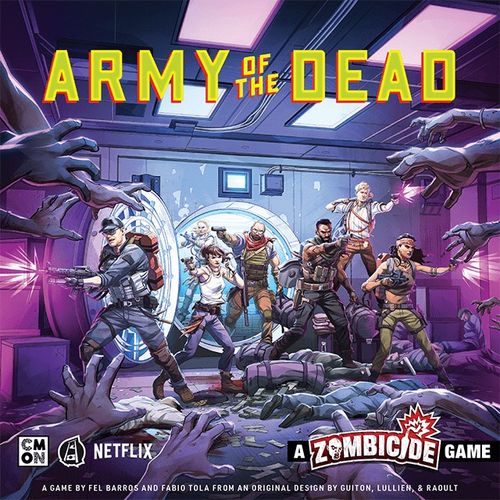
Army of the Dead: A Zombicide Game
Army of the Dead: A Zombicide Game Rulebook
Table of Contents
Table of Contents
Game Components
- 8 double-sided tiles
- 12 ID cards
- 62 miniatures
- 12 Survivors: Kate Ward, Scott Ward, Ludwig Dieter, Chambers, Vanderohe, Lilly, Maria Cruz, Mikey Guzman, Burt Cummings, Bly Tanaka, Marianne Peters, Martin
- 50 Zombies: 30 Shamblers, 16 Alphas, Mounted Zeus, Zeus, The Queen, Valentine
- 106 mini cards
- 1 Reference Card: Taco Truck (1)
- 55 Equipment cards: Aaahh!! (4), Adrenaline Shot (2), Ammo Clip (8), Army Knife (3), Army Sniper Rifle (1), Bola Gun (1), Booby Trap (2), Combat Shotgun (2), Crowbar (1), Desert Eagle (1), First Aid Kit (2), Golden AK-47 (1), Grenade (2), Grenade Launcher (1), Heavy Machine Gun (1), Jerry Can (3), Katana (1), Machete (2), Revolver (2), Ring Saw (1), Rocket Launcher (1), Scott's Military Rifle (1), Semi-Automatic Pistol (2), Semi-Automatic Rifle (4), Silencer (1), Spiked Baseball Bat (2), Submachine Gun (1), TNT (2)
- 12 Personal Objective cards
- 18 Zombie cards
- 5 Abomination cards
- 10 Zeus Orders cards
- 5 Vault cards
- 56 tokens
- Taco Truck (1)
- Exit Zone (1)
- First Player (1)
- Noise token (1)
- Elevator token (2)
- Time Track token (1)
- Door (Closed/Open) (4)
- Objective (Red/Red) (4)
Introduction
Thousands of protesters marched on the Capitol this morning in response to yesterday's historic Congressional vote that narrowly ratified the controversial proposal to wipe out the last remains of the so-called "Zombie Wars" which drew to a dramatic end with the U.S. Military suffering massive casualties and being forced to retreat as Vegas was walled off with the zombies left inside to haunt the abandoned city. This will mark the culmination of the president's efforts to fulfill his campaign promise to exterminate Las Vegas' undead population by taking the extreme action of dropping a low-yield tactical nuclear bomb on the city of Las Vegas in four days' time, coinciding with sunset on the Fourth of July holiday.
Army of the Dead: A Zombicide Game is a cooperative game in which 1 to 6 players take part as the movie's Survivors against different types of Zombies controlled by the game itself.
Players choose a Mission and complete its main objective, alongside any personal goals Survivors might have, killing as many Zombies as possible along the way. These, however, are not the Zombies you are used to seeing on television. They are faster, smarter, better organized, and they even divided themselves in a complex hierarchy that now rules over Las Vegas, with the mighty Zeus watching everything from above.
The Survivors are experienced and well-equipped. Far from hopeless victims of the Zombie apocalypse, they chose to be here and they're planning on getting out with more than just their lives. The abandoned Vegas holds millions of dollars waiting for a team brave enough to get them, with the vault under Bly Casino being the crown jewel of any heist mission.
Your best weapon, however, is cooperation. All players win or lose together, and only through teamwork will the Survivors become the best they can be, unlocking powerful Skills. They must prepare themselves for each Mission in advance, coming up with the best combination of their talents and the best possible equipment for each occasion. Cooperation is the key to survival and victory!
Setup
Army of the Dead features 6 Survivors, distributed in any way seen fit among the players. We recommend new players start with a single Survivor in order to get a quick grasp on the game mechanics. Veteran players can easily control a whole team of mercenaries, coordinating the action among the 6 Survivors.
-
Open the Mission folder and choose 1 Mission file.
-
Place the tiles as indicated in the Mission file. Leave the Mission file close to the board.
-
Place the Spawn Zones, tokens, and miniatures as indicated by the Mission file and tiles. Shuffle the Sleeper tokens and add 1 each in all Zones indicated by the Mission, always with the number facedown. Place all 8 dice within reach of all players.
-
Read the Mission aloud to the group of players. Then, select the 6 Survivors that have the best chance of success and distribute them among the players as seen fit. As they are cooperating against the game, all players form a single mercenary team. Players sit around the table in any order they choose.
-
Players take 1 Dashboard for each of their Survivors, placing the Survivor's ID card on it. They take a colored plastic base and attach it to the Survivor's miniature to help identify it. They also take 5 plastic trackers of the same color as their base.
-
Players check the back of their Survivor's ID card and choose a starting Equipment pack. They'll take these cards from the Equipment deck.
For his initial Equipment, MARTIN can choose either the Army Sniper Rifle and Ammo Clip, or a Desert Eagle and TNT. He must take the selected set from the Equipment deck.
-
Set the following cards in separate decks. They are identified by their category, as written on their back, and their respective color. Shuffle each deck and place them facedown close to the board.
- Equipment cards (blue): Equipment left by other teams and other useful items found around Vegas.
- Zombies (pink): Different kinds of Zombies roam throughout Vegas. Most of them are slow and dumb, but some could be faster and way more dangerous than humans.
- Zeus Orders (red): The king of all Zombies inside the abandoned Vegas. Zeus watches the Survivors from afar.
-
Place the Abomination cards for all versions of Zeus, Queen, Valentine, and the Taco Truck within view of all players. These cards act as a reminder of their rules and stats. They do not belong to any single player.
Abomination cards give information about the unique Zombies in Vegas: Zeus, Queen, and Valentine.
-
Place the miniatures representing the chosen Survivors in the Survivor Starting Zone, as indicated by the Mission. Set the Noise token in the Starting Zone (in the case of several Starting Zones, pick any 1 of those Zones).
-
Each player places their Survivors' Dashboard(s) in front of them. Make sure the sliding arrow is on the 0 space in the blue area of the Danger Bar. Then, they place a tracker in the appropriate slot of their Wound Bar and another tracker in the slot for the first (Blue) Skill. Place 3 more trackers in the reserve slots at the top of the Dashboard. Their starting Equipment may be set in Hand or in their Backpack slots of the Dashboard (P. 16).
SCOTT is a Bruiser Specialist. He starts with 1 extra Health and has unique roles in some Missions (P. 14).
- Take the Personal Objective cards for all Survivors in play. Shuffle them and draw 2 Personal Objective cards (unless otherwise stated by the mission). Read them aloud to all players and return the unused Personal Objective cards to the box. Place the selected cards over the Yellow and Purple Objectives on the Mission Folder. These Objectives must be accomplished in addition to the Objectives listed in the Mission file (P. 28).
Personal Objective cards are drawn for 2 Survivors. They represent personal goals for these characters and must be completed during the mission.
-
Shuffle the Objective tokens indicated by the Mission with the Yellow and Purple Objectives. Add 1 Objective to each Zone indicated by the Mission, always with the Red side faceup.
-
Choose a player to receive the First Player token. They will play first when the game starts.
Game Overview
You'd best gather your team. You'll need a helicopter pilot and a safe cracker. I'm going to text you an address. Be there at 4pm tomorrow.
Army of the Dead is played over a series of Game Rounds, which proceed as follows.
Player Phase
The player with the First Player token takes their Turn, activating their Survivors 1 at a time, in any order of their choice. Each Survivor can initially perform 3 Actions per Turn, though they may gain Skills allowing them to perform extra Actions as the game progresses.
The Survivor may use their Actions to kill Zombies, move around the board, or perform other tasks to accomplish the various Mission Objectives. Once a player has activated all their Survivors, the player to their left takes their Turn, activating their Survivors in the same manner.
When all players have completed their Turns, the Player Phase ends. The Player Phase is explained in depth on P. 19.
Zombie Phase
Army of the Dead has 3 different types of Zombies. During the Zombie Phase, all Shamblers on the board activate and spend 1 Action to either attack a Survivor standing in their Zone or, if they have nobody to attack, move towards the Survivors.
Some Zombies, called Alphas, get 2 Actions, so they can attack twice, attack and move, move and attack, or move twice.
Some Zombies are faster, smarter, and stronger than Alphas. They are called Abominations. Abominations have their own reference cards with special rules.
Once all Zombies have performed their Actions, new Zombies appear in all active Spawn Zones on the board and Zeus gives new orders to all Zombies. The Zombie Phase is explained in depth on P. 20.
End Phase
Move the Noise token to the Zone with the most Survivors (the First Player chooses in case of a tie). Then, move the First Player token to the player to their left and another Game Round begins.
Mission Complete!
The game is won immediately when all Mission Objectives and Personal Objectives have been accomplished. Army of the Dead is a cooperative game, so all players win and lose together, even the ones that sacrificed themselves for the team.
The game is lost whenever:
- A Survivor with a Personal Objective is eliminated, even if the Objective was already accomplished.
- When the Mission Objectives can no longer be fulfilled.
- By Mission specific rules.
The Basics
Here's the thing. There's two hundred million the insurance company already reimbursed me for. Untaxable, un-traceable. Un-spendable. That's where you come in. With 96 hours left, the government has already moved more than half of its military presence out of the quarantine zone, which makes it vulnerable. I want you to put together a team and get it out. In exchange, fifty million is yours to divvy up amongst whomever you take in with you. Intrigued?
Useful Definitions
Actor: A Survivor or Zombie.
Zone: On a street, a Zone is the area between 2 linear markings (or a linear marking and the board's edge) and the walls of buildings. Any Zone not on a street is considered inside a building. Inside buildings, a Zone is a room or part of a room limited by a linear marking and the walls of that room.
Line of Sight
Lines of Sight define whether Actors can see each other, such as whether a Survivor can see a Zombie through a door, from one room to the next, across the street, etc.
In street Zones, Actors see in straight lines that run parallel to the edges of the board. Actors cannot see diagonally. Their Line of Sight covers as many Zones as the line can pass through before reaching a wall or the edge of the board.
In building Zones, an Actor sees into all the Zones that share an opening or dividing line with the Zone the Actor currently occupies. If there is an opening, the walls do not block Line of Sight between 2 Zones.
An Actor's Line of Sight is always limited to a distance of 1 Zone in building Zones, even if they are Zones within the same Room.
If the Survivor is looking from a building Zone out into street Zones, the Line of Sight can go through any number of street Zones in a straight line.
If the Actor is looking from a street Zone into a building, the Line of Sight can only go a single Zone into the building, adjacent to the door.
NOTE: Closed Doors always block Lines of Sight.
There is no diagonal Line of Sight in Army of the Dead.
Some tiles in Army of the Dead feature different rules for Line of Sight and Search Actions (P. 19):
- Line of Sight can be traced in Casino main room Zones (tiles R4 and R5) and Hotel's corridor Zones (tiles V4 and V5) as if they were street Zones.
- Slot Machines in the Casino main room Zones block Line of Sight.
- Survivors cannot perform Search Actions on the Hotel's corridor Zones.
The Zones inside the Casino main room have unlimited Line of Sight, so DIETER has Line of Sight to all 3 Alphas in the room. Slot Machines block Line of Sight, so GUZMAN has no Line of Sight to this Alpha.
Movement
Actors can move from one Zone to the next adjacent Zone as long as they share at least 1 door or linear marking. Corners do not count, so Actors cannot move diagonally.
In street Zones, movement from one empty Zone to another has no restrictions. However, Actors must go through a door to move from a building Zone to a street Zone and vice-versa.
In building Zones, Actors may move from one Zone to another adjacent Zone as long as their Zones are linked by a door or a linear marking dividing the room into multiple Zones. The position of a miniature in the Zone and the layout of the walls does not matter as long as the Zones are adjacent.
Adjacent Zones - all Zones in Line of Sight and at a distance of 1 Zone are considered adjacent.
CHAMBERS cannot move diagonally, so she must first move to the adjacent Zone, then to the destination Zone.
Elevator Zones
Elevator Zones on different floors are always considered adjacent, except that Line of Sight cannot be traced between them. So, any Actor can spend 1 Movement Action to move between 2 Elevator Zones.
DIETER can move from his Elevator Zone to another Elevator Zone, but has no Line of Sight to it.
Vegas' Statue of Liberty
This is a special Zone. The Statue of Liberty and the area immediately around it are inaccessible to all Actors. Zombies that spawn directly on the highlighted area can only move from it to adjacent Zones but cannot enter it again. The Statue of Liberty also blocks Line of Sight.
The Vault Tile
Okay, the man who designed this wonderful work of art, Hans Wagner, he named it Der Götterdämmerung for the final chapter in his namesake, Richard Wagner's epic opera, Der Ring des Nibelungen. Can it be opened and by me? I don't know. I honestly don't. But of the world's living locksmiths, do I represent your greatest chance of opening it? I can, with humility, say yes… It's a doorway to another realm, my friends, and providence has brought you to me. We go through it together.
The Vault tile has a special door that can be opened only by passing through traps placed in that location. During the Missions setup, if needed, the Vault cards are shuffled, and 1 Vault card is placed facedown over the Trap Zone.
Opening the Vault
The Vault Expert (P. 27) is the only Survivor who can open the Vault Door. But first, the Survivors must remove all traps set in that Zone.
Resolving the Challenge
When at least 1 Survivor enters the Trap Zone, immediately flip the facedown Vault card. In order to remove the traps, that Survivor must spend 2 Actions to Resolve the Challenge.
This action allows the player to roll 5 dice up to 3 times to obtain a Straight sequence: Either 1, 2, 3, 4, and 5, or 2, 3, 4, 5, and 6.
If the Straight wasn't reached after the first roll, the Player can set aside any number of dice, reserving them on the Vault tile. All dice not reserved can be rolled and set aside again.
If, after 3 rolls, the Player didn't obtain a Straight on the reserve, they keep the Vault card faceup and any Survivor may spend 2 Actions to try the Resolve the Challenge Action again.
Challenge Bonus
Any Survivor at Range 0-1 (see P. 25) from the Trap Zone may grant a Bonus to the roll. The Bonus is specified on the Vault card.
The Bonuses are:
- +1 OR -1 to any die: May change the face of 1 die and either increase or decrease its value by 1 (a 3 can either be a 2 or a 4). A 6 can't change to a 1, or vice-versa.
- +1 to 1 die AND -1 to another die: May change the face of 2 dice. 1 is increased and the other is decreased. EXAMPLE: Change a 3 and a 5, reduce the 3 to a 2 and increase the 5 to a 6. 1 die must be increased while the other must be decreased.
- Change 1 die to any facing: May change 1 die to face any side of the player's choice.
- Perform 1 extra roll: May roll the dice a 4th time.
- Roll 1 extra die: Roll 6 dice instead of 5 during this attempt.
Opening the Vault
After the Straight sequence is obtained and placed on the reserve, the Vault Door can be opened. The Vault Expert can use 1 Action to open the Door.
EXAMPLE: Dieter (Vault Expert), Cruz (Mechanic), and Guzman (Bruiser) reach the Trap Zone. Guzman Moves into the Trap Zone and performs 2 Actions to Resolve the Challenge. He reveals the Vault card Gears and Bolts. Guzman rolls 2, 2, 4, 4, and 5. He reserves a 2, 4, and 5 on the Vault tile. He then rerolls the dice that are not reserved, obtaining a 2 and a 3. Then, he can reserve the 3 and, since the Mechanic is in the same Zone, he can use the Mechanic bonus to change the remaining 2 to a 1. Placing the 1 in the reserve, he obtains a sequence from 1 to 5 and the Vault Door can be opened later by Dieter.
Reading an Equipment Card
Army of the Dead features many different Equipment cards. The ones the Survivors use to eliminate Zombies have Combat characteristics displayed at the bottom.
Weapons fall into 2 categories: Melee weapons and Ranged weapons. The Melee and Ranged symbols are used to distinguish each type.
Melee weapons bear the Melee symbol. They have a Range 0 value and thus can only be used in the same Zone as the Survivor. They are used with Melee Actions (P. 19).
Ranged weapons have the Ranged symbol. They have a minimum and maximum Range value. They are used with Ranged Actions (P. 19). Attacking at Range 0 with a Ranged weapon is still a Ranged Action. Most Ranged weapons can run out of ammo during the game (P. 25).
Combat Characteristics
Well, we all know the basics. Zombies, Shamblers, the undead. Whatever you wanna call them, when it comes to killing, it's all about the brain. One comes at you, shoot it in the brain. It's that simple. Any questions?
Weapons display Combat characteristics used to eliminate Zombies in many ways:
- Weapon type: Whether this Equipment is a Melee or a Ranged weapon.
- Silent: This Equipment doesn't move the Noise token when used in Melee Combat.
- Range: Minimum and maximum number of Zones the weapon can reach. 0 indicates it can only be used in the Survivor's Zone. For Ranged weapons, 0-1 indicates it can be used to shoot at its own Zone or 1 Zone away, no more, and within Line of Sight. A Ranged Attack at Range 0 is still a Ranged Attack!
- Dice: Roll this many dice when a Melee (or Ranged) Action is spent to use this weapon.
- Skill: Some weapons give a Skill to the Survivor holding it. See P. 30.
- Accuracy: Each roll that equals or exceeds this value is a success. Lower results are failures.
- Damage: Damage inflicted with each success. Damage does not stack with multiple successes.
- Ammo Dice: Extra dice added for this Ranged Action. Rolling a skull result means that the weapon is out of ammo. See P. 25.
Noisy Equipment and Zombie Killing
Some Weapons display a symbol related to Noise, defining if the Action is noisy or not. Weapons that produce Noise sometimes can attract Zombies and always wakes Sleepers up!
This Action is noisy and moves the Noise token. Noisy: This Equipment moves the Noise token when used.
This Action is not noisy and does not moves the Noise token. Only Melee weapons that are not noisy can remove Sleepers (see P. 18).
Noise
Shooting with a Machine Gun or running the Ring Saw makes Noise and attracts Zombies. Noise is represented by a Noise token. Every time an Action is used to attack with noisy Equipment, it makes Noise. Place the Noise token in the Zone where the Survivor resolved the Action. It stays in the Zone where it was produced, even if the Survivor later moves during their Turn.
The Noise token starts the game in the Survivor Starting Zone and is moved around the board every time a new noise is emitted.
During the End Phase, set the Noise token in the Zone containing the most Survivors. If several Zones are eligible, the player with the First Player token chooses.
Producing Noise immediately awakens Sleepers in the same and adjacent Zones (see P. 18).
GUZMAN shoots with his Golden AK-47. The shot moves the Noise token. Set it in the same Zone as GUZMAN. When GUZMAN moves 1 Zone, the Noise token stays in the same Zone. It will only be moved if GUZMAN uses a Noisy weapon again.
Specialties
If you coordinate and communicate, this should be a simple in-and-out.
Each Survivor has 1 or more Specialties listed on their ID card. The Specialties are: Bruiser, Pilot, Vault Expert, Stealthy, and Mechanic. 1 or more Specialists are necessary to complete the heist for some Missions. See P. 27 for specific rules when using specialists.
- Bruiser: Tougher than most, they only have one job: kill anything in their way.
- Vault Expert: If your team wants to get inside the Vault, they're the key.
- Stealthy: Sometimes being quiet and fast is the solution.
- Pilot: Someone to take everyone out of this hell.
- Mechanic: If it's broken, they will find a way to unbreak it, fast.
Adrenaline, Danger Level, and Skills
For each Zombie eliminated during a Combat Action, a Survivor gains 1 Adrenaline Point (AP) and moves up a notch on their Danger Bar. Some Missions provide additional AP by taking Objectives. There are 4 Danger Levels on the Danger Bar: Blue, Yellow, Orange, and Red.
Reaching a new Danger Level provides the Survivor with a new Skill (see P. 30) to help them during their Mission. Skills stack across Danger Levels. As new Skills are unlocked, place new trackers on the Survivor Dashboard to indicate them.
Reaching new Danger Levels has a side effect. When players draw a Zombie card to spawn Zombies, they must always read the line that corresponds to the highest Danger Level achieved by any Survivor (see Zombie Spawn, P. 22). The stronger the Survivor is, the more Zombies will appear.
- 0 to 6 Adrenaline Points: Blue Level, possess a starting Skill: Born Leader.
- 7 to 18 Adrenaline Points: Yellow Level, gain +1 Action Skill.
- 19 to 42 Adrenaline Points: Orange Level, choose 1 Skill from the 2 available.
- 43 Adrenaline Points: Red Level, choose 1 Skill from the 3 available.
Example Zombie card: Red Level: 4 Shamblers. Orange Level: 4 Shamblers. Yellow Level: 2 Shamblers. Blue Level: 2 Shamblers.
Inventory
Each Survivor can carry up to 5 Equipment cards, divided into 2 Hand slots and 3 Backpack slots. Players may discard cards from their Survivor's inventory to make room for new cards at any time for free (even during another player's Turn).
Hand slots are used primarily for combat. Each Hand slot may hold 1 Equipment card. Weapons and other items in Hand slots may be used as usual.
The Backpack can hold up to 3 Equipment cards. Characteristics and game effects described on Equipment cards cannot be used until they are moved to a Hand inventory slot.
Equipment cards bearing "May be used in the Backpack" may be used when in either Hand or Backpack slots.
The Grenade can be used from the Backpack. The Army Knife cannot.
The Zombies
You don't understand. They're not what you think they are. We're not talking about Shamblers here. You're right. They don't think. They just move and eat. But we're talking about the other ones.
Army of the Dead features 3 types of Zombies: Shamblers, Alphas, and Abominations. A Zombie is eliminated as soon as it is successfully hit with an attack that has the minimum required Damage value. Its assailant then immediately earns the listed Adrenaline Points.
Shambler
Slow and in a decaying state, they are only threatening in large numbers.
- Actions: 1
- Wounds dealt: 1
- To eliminate: Damage 1
- Adrenaline provided: 1 point
Alpha
Fast, smart, and in a permanent state of rage. Get rid of them as quick as possible.
- Actions: 2
- Wounds dealt: 1
- To eliminate: Damage 2
- Adrenaline provided: 2 points
Abomination
Among the ranks of Zombies, these stand out as more evolved, becoming stronger and smarter while decaying. Abominations can't be killed by a regular Attack with Damage 2 weapons. So, a Concentrated Attack (see P. 25) or Explosives (see P. 26) are the only ways to eliminate these monsters.
When an Abomination is killed, its Zombie card and miniature are removed from the game. No Abomination can Spawn more than once during each Mission.
- Actions: 3
- Wounds dealt: 1
- To eliminate: Damage 4
- Adrenaline provided: 5 points to all Survivors
Valentine
It's a goddam zombie tiger. That's crossing a line.
The Queen
They're smarter. They're faster. They're organized. Straight out of your nightmares. You all keep talking about this city like it's their prison. It's not. It's their kingdom. They won't mind us poking around the outside so long as we play by their rules, but we're moving into the heart of it now.
Her death cry. They'll have heard it. Once they find her body, our trade is off.
- Actions: 1
- Wounds dealt: 2
- To eliminate: Damage 5
- Adrenaline provided: 5 points to all Survivors. When the Queen is killed, if the Zeus Spawn token is still on the board, replace it with Zeus.
Zeus
Scott, was that a zombie in a goddamn cape?
Zeus has 3 versions: Regular, Helmeted, and Mounted. Only 1 version of Zeus is used for each Mission. All mentions to Zeus on cards or rules will work for any version present in the Mission.
Zeus
- Actions: 1
- Wounds dealt: 2
- To eliminate: Damage 6
- Adrenaline provided: 5 points to all Survivors
Helmeted Zeus
- Actions: 1
- Wounds dealt: 2
- To eliminate: Helmeted Zeus cannot be Damaged. When hit by any Explosive weapon, replace Helmeted Zeus with the Zeus card. Keep the miniature on the board.
- Adrenaline provided: 5 points to all Survivors.
Mounted Zeus
- Actions: 2
- Wounds dealt: 2
- To eliminate: Damage 6
- Adrenaline provided: 5 points to all Survivors.
Sleepers
Don't touch them. Don't shine the light in their eyes. I've seen this before. They're hibernating.
Sleeper tokens are used to indicate that some Shamblers are hibernating in that Zone.
When Sleepers wake up, flip the Sleeper token and replace it with the number of Shamblers displayed on it. Shamblers added to the board this way do not perform any Actions during the current Phase. If there's not enough Shambler miniatures available to replace the token, instead just remove the token and all Shamblers on the board immediately resolve 1 extra Activation.
Sleepers wake up when:
- Any Noise is produced in the same or an adjacent Zone. Search Actions and Activating Objectives also immediately wakes up Sleepers.
- Zombies spawn or Move INTO a Zone with Sleeper tokens.
- Survivors Move OUT OF a Zone with Sleeper tokens. Unless the Survivor has the Stealthy Specialty (P. 27), roll a die when leaving a Zone with a Sleeper token. If a 1 is rolled, those Sleepers have awoken.
During the Zombie Phase, 2 Alphas move towards DIETER. When entering the first Zone, they will awake the Sleepers in that Zone. Replace the token with 2 Shamblers. Then, the Alphas move again, reaching DIETER's Zone. If DIETER attacks the Alphas with a Noisy weapon, the Sleepers adjacent to him will also awaken immediately.
Player Phase
Starting with whoever holds the First Player token, each player activates their Survivors one after the other, in the order of their choice. Each Survivor can perform up to 3 Actions at the Blue Danger Level (not counting any free Actions their Blue Level Skill may give them). The possible Actions are:
Move
The Survivor moves from their Zone to another adjacent Zone. A Survivor must spend 1 additional Action per Zombie standing in the Zone they're attempting to leave. Entering a Zone containing Zombies always ends the Survivor's Move Action. Remember that Sleeper tokens don't count as Zombies.
If a Survivor leaves a Zone with 1 or more Sleeper tokens in it, they must roll a die. On a roll of 1, flip the Sleeper tokens and replace them with the number of Shamblers revealed. Survivors with a Stealthy Specialty ignore this rule.
Search
A Survivor can only Search inside a building in a Zone with no Zombies in it. Searching in a Zone with a Sleeper token wakes them up immediately. Flip the Sleeper token and replace them with the number of Shamblers revealed.
When Searching, the player draws the top card from the Equipment deck. They may then either place it in their Survivor's inventory, reorganizing it for free, or immediately discard it.
A Survivor can only perform a single Search Action per Turn (even if it's a free Action).
When the Equipment deck runs out, reshuffle all the discarded cards to make a new deck.
AAAHH!! Cards
Sometimes, a lone Shambler catches a Survivor by surprise when looking for equipment. When the Survivor draws an AAAHHH!! card, add 1 Shambler to their Zone.
Reorganize/Trade
The Survivor can reorganize the cards in their inventory in any way the player wishes. The Survivor can simultaneously exchange any number of cards and Personal Objective tokens with 1 (and only 1) other Survivor currently in the same Zone. This other Survivor may reorganize their own inventory for free.
A Trade Action doesn't have to be equal. Players can trade everything for nothing if both parties agree!
Combat Actions
Combat Actions use Melee and Ranged Equipment cards to eliminate Zombies.
Melee Action
The Survivor uses a Melee weapon they are holding in their Hand to attack Zombies in their Zone (see P. 24).
Ranged Action
The Survivor uses a Ranged weapon they are holding in their Hand to fire at a single Zone within the Range shown on the weapon's card and within Line of Sight (see P. 25). Survivors shoot at Zones, not Actors. This is especially important for Targeting Priority Order (P. 26). Using a Ranged weapon at Range 0 is still a Ranged Action.
Eliminate Sleepers
The Survivor can use 2 Actions with any Melee weapon to remove 1 Sleeper token in the same Zone. This Action doesn't count as a Melee Action and no Combat roll is needed, but if the weapon makes Noise, move the Noise token to the Zone. In this case, the Noise token will wake Sleepers in adjacent Zones.
Each Sleeper token removed this way gives the Survivor AP equal to the number of Shamblers shown on the token.
Sleeper tokens can never be targeted by Combat Actions. They are only removed by the Eliminate Sleeper Action or when they are awoken.
While performing a Move Action out of a Zone with a Sleeper token, CHAMBERS rolls a 1. So, the Sleepers in that Zone become awake. The player must flip the Sleeper token and replace it with that many Shamblers (1 Shambler in this case). In the next Zone, CHAMBERS uses 2 Actions to remove the Sleepers in that Zone. She flips the Sleeper token and receives that number of Adrenaline Points (3 AP in this case).
Take or Activate an Objective Token
The Survivor takes an Objective or activates an Objective in the same Zone. The game effects and AP gained are explained in the Mission's description. Taking Objectives also wakes Sleepers up just like a Search Action.
All Objectives have the same Red color on their back. Some Objectives and Personal Objectives have a different color on their front.
Make Noise
The Survivor makes Noise in an attempt to attract Zombies. Place the Noise token in the Survivor's Zone.
Do Nothing
The Survivor does nothing and prematurely ends their Turn. Any remaining Actions they had are lost.
Zombie Phase
Once the players have activated all their Survivors, the Zombies activate. The Zombies act all on their own, performing the following steps in order.
Step 1: Activation
Each Zombie activates and spends its Action on either an Attack or a Move, depending on the situation. Resolve all the Attacks first, then all the Moves. Each Zombie performs either an Attack OR a Move with a single Action.
Attack
Each Zombie in the same Zone as Survivors performs an Attack. A Zombie's Attack is always successful and does not require any die rolls. Survivors in the same Zone split the Zombies' Attacks in any way the players prefer.
Most Zombie Attacks deal 1 Wound. The tracker on the Survivor's Wound Bar is moved 1 point lower per Wound received.
A Survivor is eliminated as soon as their Wound Bar reaches the bottom (usually after taking 4 Wounds for a Bruiser, 3 Wounds for other Specialties).
Zombies fight in groups. All Zombies activated in the same Zone as a Survivor join the Attack, even if there are so many Wounds being dealt that it would be overkill.
SCOTT and CHAMBERS are in the same Zone as a Shambler when it Attacks. The Shambler deals 1 Wound and the players choose who takes it: SCOTT or CHAMBERS.
Move
The Zombies that did not Attack use their Action to Move 1 Zone towards Survivors:
-
Zombies select their destination Zone. The first Zone they select is the one with Survivors in Line of Sight that has the Noise token. If no Survivors in sight have the Noise token, they select the Zone in Line of Sight with the most Survivors. In case of ties, the player with the First Player token chooses the destination Zone. If no Survivors are visible, they Move towards the Noise token.
-
Zombies move 1 Zone towards their destination Zone. Zombies move by taking the shortest available path. If there are no open paths to their destination Zone, the Zombies don't move.
If there is more than 1 route of the same length to their target Zone, Zombies split into groups of equal numbers separated by type to follow all possible routes. Uneven Zombie groups are split the same way. The player with the First Player token decides which splitting group gets the extra Zombie and which direction the uneven split groups go. In case of a single Zombie being offered multiple routes, the player with the First Player token decides which direction it goes.
Zombies can move between different floors using Elevator Zones.
This Alpha selected the destination Zone with the most Survivors in Line of Sight. These Alphas have 2 possible destination Zones, both with 1 Survivor. The Player with the First Player token chooses their destination Zone. These Alphas have no Line of Sight to DIETER, so their destination Zone is the Noise token. This Alpha has 2 open routes of the same distance to the destination Zone with the Noise token. The Player with the First Player token chooses their path.
Playing Alphas
Alphas (and some Abominations) have 2 Actions per Activation.
After all Zombies have gone through the Activation Step and resolved their first Action, Alphas go through the Activation step again, using their second Action to attack a Survivor in their Zone or Move if there is nobody to Attack.
EXAMPLE 1: At the beginning of the Zombie Phase, an Alpha stands in the same Zone as a Survivor. The Alpha spends its first Action to Attack, inflicting 1 Wound to that Survivor. Then, the Alpha performs its second Action, attacking again for another 1 Wound. If another Survivor was in the same Zone, players could choose to split the Attacks, so each Survivor only takes 1 Wound.
EXAMPLE 2: A group of 2 Alphas and 1 Shambler is 1 Zone away from a Survivor. For their first Action, since they have nobody to Attack in their Zone, the Zombies Move into the Survivor's Zone. The Alphas then perform their second Action. Since they now occupy the same Zone as a Survivor, they Attack and inflict 1 Wound each.
Step 2: Spawn
Using Zombie Spawn tokens, the Mission map shows where Zombies appear at the end of each Zombie Phase. These are the Spawn Zones.
Zombie Spawn tokens mark the Spawn Zones' locations. During the Spawn Step, always start from the Starting Spawn Zone.
Find the Starting Spawn token. Then, draw a Zombie card. Read the Zombie type and the line that corresponds to the Danger Level of the Survivor with the highest Adrenaline (Blue, Yellow, Orange, or Red). Place the indicated number of the corresponding Zombie type in the Starting Spawn Zone.
The Starting Spawn Zone is always the first one to spawn.
Repeat this for each Spawn Zone, one after the other, going clockwise from the Starting Spawn Zone. When the Zombie deck runs out, reshuffle all the discarded Zombie cards to make a new deck.
This Zombie card spawns Alphas. Red Danger Level: 6 Alphas. Orange Danger Level: 6 Alphas. Yellow Danger Level: 5 Alphas. Blue Danger Level: 3 Alphas.
Zeus Spawn Zone
While Zeus is not on the game board, the Zeus Spawn Zone also spawns Zombies in the same order as other Spawn Zones.
Instead of drawing a Zombie card for the Zeus Spawn Zone, draw a Zeus Orders card and follow its instructions. Zeus Orders cards will spawn Zombies and give orders to some Zombies.
When Zeus is placed on the game board, remove the Zeus Spawn token from the game.
The Activation Step has left KATE and GUZMAN in the Blue Danger Level and SCOTT in the Yellow Danger Level, so all the Spawns will be made using the Yellow line on the Spawn Cards. For the Starting Spawn Zone, Spawn card #2 is drawn and adds 2 Shamblers to that Zone. Then, in clockwise order, Spawn card #5 is drawn for the next Spawn Zone and 4 Shamblers are added to that Zone. Following in clockwise order, the Zeus Spawn Zone is next. The Zeus card drawn adds 2 Alphas and activates all Alphas in that Zone. The Alphas move 2 Zones towards the Zone with SCOTT and KATE.
Colored Spawn Zones
Some Missions feature a Blue and/or Green-colored Zombie Spawn token. Unless otherwise stated, these Zones don't spawn Zombies until a specific event happens (like taking an Objective of the matching color or moving to the same floor). Unless otherwise stated, these Spawn Zones will only start spawning during the next Zombie Phase.
Running Out of Zombies
Players may run out of miniatures of the indicated type when required to place a Zombie on the board through spawning. In this case, the remaining Zombie miniatures are placed (if there are any). Then, all Zombies of the indicated type immediately resolve an extra Activation (P. 20). Multiple extra Activations may occur in a row. Keep an eye on the Zombie population!
Combat
- Two between the eyes. - Two? - The second one is just for fun.
Dice symbol: When a Survivor performs a Melee or Ranged Action to attack Zombies, roll as many dice as the dice number of the weapon used.
Accuracy symbol: Each die that equals or exceeds the Accuracy value of the weapon scores a successful hit. Missed ranged attacks can cause Friendly Fire (P. 26).
IMPORTANT: The minimum Accuracy is always 2+.
Damage symbol: Each hit inflicts the amount of Damage specified by the Damage value of the weapon to a single target. If all targets are eliminated, extra hits are lost.
REMEMBER:
- Shamblers are killed with a Damage 1 (or more) hit.
- Alphas are killed with a Damage 2 hit. Unless using Concentrated Attacks (P. 25), Damage 1 has no effect on them, no matter how many times a Survivor hits them.
- Abominations are killed with a Damage 4 (or more) hit. This is only possible with Explosives (P. 26), Concentrated Attacks, or Skills.
EXAMPLE: Dieter is standing in a Zone along with 3 Shamblers. He performs a Melee Attack with his Spiked Baseball Bat and rolls a 5 and 5. He obtained 2 hits! Both of them are allocated to different Shamblers and inflict Damage 1, eliminating them. He Attacks again with a second Melee Action, and scores 2 hits again. 1 of them is enough to eliminate the last Shambler. The remaining hit is lost.
Melee Action
Melee weapons are marked with the Melee symbol.
A Survivor holding a Melee weapon in their Hand can attack Zombies in their Zone. Each die that rolls equal to or higher than the Accuracy value on the weapon's card is a hit. The player divides their hits as they wish among the possible targets in their Zone.
Missed Melee strikes cannot cause Friendly Fire (P. 26).
EXAMPLE: Kate and Dieter are in the same Zone as 1 Alpha and 1 Shambler. Dieter attacks with his Crowbar. He rolls a 5, which means 1 hit. The Crowbar has Damage 1 and it cannot hurt the Alpha, so Dieter allocates his hit to the Shambler, eliminating it. As it is a Melee Action, Kate would be safe from Friendly Fire even if a miss was rolled.
Ranged Action
Ranged weapons are marked with the Ranged symbol.
A Survivor holding a Ranged weapon in their Hand can shoot at a Zone within the weapon's Range and in Line of Sight (P. 10).
REMEMBER:
- For building Zones, Line of Sight is limited to the Zones that share an opening and are just 1 Zone away.
- For street Zones, the Line of Sight goes in a straight line parallel to the board's edge until it meets a wall or the board's edge.
- Missed shots can cause Friendly Fire (P. 26), so carefully consider the risks!
Range symbol: The Range of a weapon, indicated by the Range value on its card, is the number of Zones it can shoot across.
The first of the 2 values shows the minimum Range. The weapon may not shoot at Zones closer than the minimum. In some cases, it may be 0, meaning the Survivor can shoot at targets in the Zone they currently occupy (it is still a Ranged Action).
The second value shows the maximum Range of the weapon. A weapon cannot fire at Zones beyond its maximum Range.
EXAMPLE: The Submachine Gun has a Range of 0-1. It can shoot in the Survivor's Zone and up to 1 Zone away, but no further.
EXAMPLE: The Army Sniper Rifle has a Range of 1-4, which means it can shoot up to 4 Zones away but cannot be used to fire at the same Zone as the Survivor. Ignore any Actors in the Zones between the shooter and the target Zone. Survivors may shoot through occupied Zones without danger to either fellow Survivors or Zombies. A Survivor can even shoot at another Zone while there are Zombies in their own Zone!
Ammo symbol: Most ranged weapons use ammunition. They can run out of ammo after repeated use. When a Survivor performs a Ranged Action to attack Zombies, they must roll that many Ammo Dice in addition to the regular dice. If an Out of Ammo result is shown on at least 1 of the dice, that weapon is out of ammo. Flip the out of ammo weapon upside down. It cannot be used again until an Ammo Clip card is used.
EXAMPLE: Guzman makes a Ranged Action with the Heavy Machine Gun against 3 Shamblers. He rolls 2 dice and 2 Ammo dice and gets a 1 and 5 with the regular dice and a 5 and an Out of Ammo result on the Ammo dice. He can deal 2 Damage to 2 Shamblers, killing them and leaving 1 single Shambler standing.
Because he rolled an Out of Ammo result, his Heavy Machine Gun runs out of Ammo after this attack. The player must flip the Equipment card upside down. Only discarding an Ammo Clip Equipment card can make that weapon available for another Combat Action.
Concentrated Attack
A Survivor performing a Melee or Ranged Action may choose to concentrate their Attack towards a single target to increase their chance of overcoming its defenses and eliminating it.
To perform a Concentrated Attack, before rolling the dice, the Survivor must first designate a single specific target among those the Attack may hit, following the Targeting Priority Order in case of Ranged Attacks. Friendly Fire (see next page) applies to Ranged Concentrated Attacks.
Multiply the Damage value by the number of hits obtained (1 success = Damage x1, 2 successes = Damage x2, 3 successes = Damage x3, etc.) Only the designated target may be hit. While this is a powerful attack, it only hits a single Zombie, so all leftover damage is lost.
EXAMPLE: Tanaka is in the same Zone as 1 Alpha and 1 Shambler. His Katana has Damage 1, but the Alpha needs a Damage 2 weapon to be killed. So, with a Combat Action, he chooses to perform a Concentrated Attack with his Katana against the Alpha.
He rolls 3, 3, and 3. With 3 successes, he is able to deal Damage 3, killing the Alpha. The leftover damage is lost and cannot be used to kill the Shambler.
Targeting Priority Order
When using a Ranged weapon (even at Range 0), or during a Concentrated Attack, targeting a Zone with different kinds of Zombies, the shooting Survivor does not choose the targets hit by successful rolls. Hits are always assigned to Actors in the targeted Zone according to the Targeting Priority Order:
- Shamblers
- Alphas
- Abominations
The hits are assigned to targets on the lowest Priority Level until they have all been eliminated, then to targets of the next Priority Level until they have all been eliminated, and so on.
If several targets share the same Targeting Priority Order, players choose the targets hit among them.
REMEMBER: Targeting Priority Order doesn't apply to Melee Actions.
EXAMPLE: Guzman performs a Combat Action with his Heavy Machine Gun against a Zone with 3 Shamblers, 1 Alpha, and Zeus and rolls a 2 and a 6 with the regular dice, and a 2 and a 6 with the Ammo dice. The 2 Damage hits must be done to Shamblers first, so he cannot hit the Alpha or try a Concentrated Attack against Zeus.
| Targeting Priority | Name | Actions | Min. Damage to Kill | Adrenaline Earned |
|---|---|---|---|---|
| 1 | Shambler | 1 | 1 | 1 |
| 2 | Alpha | 2 | 2 | 2 |
| 3 | Abominations | 1/2/3 | 4/5/6 | 5 to all Survivors |
Friendly Fire
A Survivor can't hit themselves with their own attacks. However, emergency situations can call for Ranged Actions aimed at a Zone where a teammate is stuck.
In that case, misses during the Attack roll automatically hit Survivors standing in the target Zone. Assign these Friendly Fire hits in any way the player wants and apply Damage as usual (Damage 2 weapons inflict 2 Wounds).
REMEMBER: Friendly Fire doesn't apply to Melee Actions.
EXAMPLE: Peters shoots with a Revolver at a Zone where Kate and a Shambler are standing. She rolls a 5 and a 6. That's 2 successes! 1 hit is enough to kill the Shambler. The other success is lost. Only missed shots are assigned to Survivors, so Kate is safe.
Equipment Traits
Explosives symbol: Some Equipment cards have a special icon indicating that they are Explosives. They are: Grenade Launcher, Jerry Can, TNT, Booby Trap, Grenade, and Rocket Launcher.
When any Explosive weapon deals Damage in a Zone containing another Explosive weapon, add the Damage from both weapons to all Actors in that same Zone.
Some Explosives just need a Combat Action to be used: Jerry Can, TNT, Grenade, and Booby Trap will always hit the target. No die roll is needed.
Bola Gun
The Bola Gun is a weapon that deals no Damage. Instead, any Zombie hit by the Bola Gun is trapped for 1 round. Place the miniature lying down. During the next Zombie Phase, it has no Actions. Then, place the miniature standing up again. While the Zombie is trapped, all Concentrated Attacks receive +2 to their dice rolls. The Bola Gun must be discarded after a successful hit.
EXAMPLE: Martin performs a Combat Action against the Queen with the Bola Gun. He rolls a 5, obtaining 1 hit. The Queen miniature is placed lying down, indicating that she is trapped. Martin's next Action is a Concentrated Attack with a Submachine Gun. He adds +2 to all dice. He gets a 3, 5, 5, 4, and 5 (the last one with the Ammo die). All dice are hits. The Queen takes 5 Damage and is killed.
Equipment Skill
Some Equipment cards have their own Skill (like Charge for the Katana, for example). The Survivor benefits from the indicated Skill when performing an Action with an equipped weapon featuring a Skill.
Extras
Specialties
Army of the Dead features 5 Survivor Specialties, each with its own role for the heist: Bruiser, Vault Expert, Mechanic, Stealthy, and Pilot. Each Survivor ID card displays 1 or more icons indicating their specialty.
- Stealthy: Survivors with a Stealthy specialty don't need to roll a die when leaving a Zone with Sleepers.
- Bruisers: Survivors with a Bruiser specialty have 1 extra health.
- Pilot, Vault Expert, and Mechanic are specialties needed to complete certain Missions (like when opening the Vault or leaving with a helicopter). These will be shown in the Mission file.
Companions
Some Missions feature Survivor miniatures as objectives or support characters. They are called Companions and either play as described in the Mission or follow Survivors. Players choose which Companion is set in each of the spots indicated by the Mission. Set aside their ID cards during Setup for all players to see.
Note that some Mission descriptions may differ from the following rules. In that case, the Mission's special rules have priority.
Escorting a Companion
According to the Mission, a Companion may be linked to a given Survivor during the game. The Survivor gets the corresponding ID card and benefits from the Companion's Blue Danger Level Skill. The Companion's miniature is placed next to the Survivor's.
The Companion's ID card may be traded, along with the corresponding miniature and Skill, in the same way as an Equipment card.
The Survivor possessing the Companion's ID card is called their Leader. Unless stated by the Mission, a Survivor may be the Leader of several Companions.
Companion General Traits
A Companion:
- Is a Survivor.
- Is hit by Friendly Fire (P. 26).
- Is eliminated upon receiving any Wounds. Unless otherwise stated by the Mission, the game is lost if they are eliminated.
- Always stays together with their Leader. All special rules, Move-related Skills, and Truck-related Actions also apply to the Companion. A Companion always takes a Passenger seat in the Truck.
- Does not have an Inventory.
- Does not have any Actions.
Truck Actions
Army of the Dead features a token for the Taco Truck. The old vehicle, used by Scott and his crew to rescue people at the beginning of the Zombie infestation in Vegas, can be found by the Survivors. The Taco Truck comes with a Machine Gun mounted on its top.
At the cost of 1 Action, a Survivor may perform 1 of the Actions listed below when in the same Zone as the Taco Truck.
Survivor's Skills don't apply to the Taco Truck itself or the attacks performed with it. The Taco Truck cannot be attacked or destroyed. A Survivor sitting inside the Taco Truck can still be attacked as usual as if the Survivor was just standing in the Zone.
Possible Actions for a Survivor when in the same Zone as the Taco Truck are:
Get In or Out of the Truck
The Survivor gets inside the Truck only if there are no Zombies in that Zone. Set the Survivor's miniature either in the Driver's seat, the Gunner's seat, or in another seat as a Passenger. The Taco Truck can hold 1 Driver, 1 Gunner, and up to 2 Passengers. There are no restrictions to getting out of the Taco Truck.
Change Seats Inside the Truck
The Survivor becomes either the Driver, Gunner, or a Passenger. Move the Survivor miniatures accordingly. Changing seats is not a Move Action, does not utilize Move-related rules, and can be done with Zombies in the same Zone.
Drive the Truck
The Truck can only be driven by the Driver and cannot be driven into building Zones.
This Action is not a Move and is not subject to movement modifiers. The Taco Truck can leave or go through Zones with Zombies without spending extra Actions or stopping.
When moving with the Truck, it drives to 1 adjacent Zone and performs a Truck Attack if the Zone has any Zombies.
Killing Zombies with Truck Attacks earns the Driver the associated Adrenaline Points.
Hits from a Truck Attack are assigned to Actors in the targeted Zone according to the Targeting Priority Order (P. 26).
Truck Attacks may cause Friendly Fire (P. 26) to Survivors if the Truck moves into Zones containing both Zombies and Survivors out of the vehicle! No Truck Attack occurs if the Truck enters a Zone with only Survivors.
The Machine Gun mounted on the Truck can be used by any Survivor seated in the Gunner's seat. Any kills with the Machine Gun earn the Adrenaline Points from the killings to the Gunner.
PETERS and CRUZ are inside the Taco Truck. PETERS is in the Driver's seat and CRUZ is in the Gunner's seat. PETERS uses her last Action to Drive the Truck, performing a Truck Attack against the 3 Shamblers and 1 Alpha. She rolls a 5 and a 6; 2 hits that eliminate 2 Shamblers, leaving 1 Shambler and 1 Alpha left. She cannot hit the Alpha due to the Targeting Priority Order.
CRUZ activates next. She can perform a Ranged Attack with the Machine Gun against the 2 Alphas on the left side. But if she wants to Attack the Alpha and Shambler in the same Zone, the Attack cannot be done with the Truck's Machine Gun. She must perform it with a Range 0 weapon.
Mission File
Army of the Dead has 10 Missions inside the Mission Folder. These Missions can be played in any order, suiting player's play time and desired challenge level.
Special rules detailed in Missions supersede general rules and card rules.
Personal Objectives
Each Personal Objective has 2 different pieces of information: the Objective itself (what the Survivor or the team needs to accomplish in order to complete it) and the Objective token (the effect received when the respective token is taken). Each Mission can only be won after all Personal Objectives are completed in addition to the Mission's Objectives.
Specialty Required: Each mission needs some kind of Specialist to be completed. Players should start the game with at least 1 of each type.
Zeus Type: Indicates which Zeus miniature and reference card to be used in the Mission.
Game Duration and Difficulty: Each mission has its own difficulty and duration. Short Missions should take less than 1 hour, depending on the group of players. Regular Missions should take around 1 hour and a half. Long Missions usually take at least 2 hours to win.
Time Track: Some Missions have a time limit. Use this track with the Time token to keep track of game rounds.
Personal Objective Tokens: Place 2 (or more!) Personal Objectives over these slots to link the Objective token color to each Personal Objective.
Kill Count
Some Personal Objective cards ask the Survivor to keep a kill count against a specific type of Zombie. While the Survivor holds that Objective, every time they kill that type of Zombie, they must place the Zombie miniature on the Personal Objective card, using it to keep track of how many kills they have made. Note this may cause you to run out of Zombies (P. 23). When the Personal Objective is complete, return all the miniatures to the supply.
List of Skills
- +1 Damage: [Action] – The Survivor gets a +1 Damage bonus with the specified type of Action (Combat, Melee, or Ranged).
- +1 Free [Action type] Action – The Survivor has 1 extra free Action of the specified type (Combat, Melee, Move, Ranged, or Search). This Action may only be used to perform an Action of the specified type.
- +1 Zone Per Move – When the Survivor spends 1 Action to Move, they can Move 1 or 2 Zones instead of 1. Entering a Zone containing Zombies still ends the Survivor's Move Action.
- +1 Die: [Action] – Each of the Survivor's weapons rolls an extra die with Actions of the specified type (Combat, Melee, or Ranged).
- Bloodlust: [Action] – The Survivor can use this Skill once during each of their Turns. The Survivor spends 1 Action. They Move up to 2 Zones to a Zone containing at least 1 Zombie. They then gain 1 free Action of the specified type (Combat, Melee, or Ranged). Normal Movement rules apply.
- Born Leader – During the Survivor's Turn, the Survivor may give 1 free Action to another Survivor to use as they please. This Action is used immediately. Then, the Born leader Survivor resumes their Turn.
- Can Search More Than Once – The Survivor can Search multiple times per Turn, spending 1 Action for each Search Action.
- Charge – The Survivor can use this Skill, for free, once during each of their Turns. They move up to 2 Zones to a Zone containing at least 1 Zombie. Normal Movement rules still apply. Entering a Zone containing Zombies still ends the Survivor's Move Action.
- Combat Reflexes – Whenever any Zombies spawn within Range 0-1, the Survivor may immediately perform a free Combat Action against them. This Action may eliminate more Zombies than have just been spawned. Ranged Actions must be aimed at the Zone where the Zombies spawned. The Survivor may use this Skill once per Zombie card drawn.
Game Round Summary
Each Round begins with:
01 - Player Phase
The player with the First Player token activates all of their Survivors, one after the other, in any order. When they're done, the next player's Turn begins. Play clockwise.
Each Survivor has 3 Actions to spend, chosen from the following list. Unless otherwise stated, each Action may be performed several times per Activation.
- Move: Move 1 Zone (spend extra Actions if there are Zombies in the starting Zone).
- Search (1x per Turn): In a building Zone free of Zombies only. Draw a card from the Equipment deck.
- Reorganize/Trade: The Survivor can reorganize the cards in their inventory in any way the player wishes. The Survivor can simultaneously exchange any number of cards with 1 other Survivor currently in the same Zone. This other Survivor may reorganize their own inventory for free.
- Combat Action: Melee Action: Equipped Melee weapon required. Ranged Action: Equipped Ranged weapon required.
- Eliminate Sleepers: This takes 2 Actions.
- Take or Activate an Objective in the Survivor's Zone.
- Make Noise: Put the Noise token in the Survivor's Zone.
- Do Nothing: All remaining Actions are lost.
02 - Zombie Phase
This step happens when every player has finished their Turn.
Step 1: Activation
Each Zombie activates and spends its Action on either an Attack or a Move, depending on the situation. Resolve all the Attacks first, then all the Moves. Each Zombie performs either an Attack OR a Move with a single Action.
- Attack: Each Zombie in the same Zone as Survivors performs an Attack. A Zombie's Attack is always successful and does not require any die rolls.
- Move: The Zombies that have not Attacked use their Action to Move 1 Zone toward Survivors.
NOTE: Alphas and some Abominations get 2 Actions, so they can Attack twice, Attack and Move, Move and Attack, or Move twice.
Step 2: Spawn
Using Zombie Spawn tokens, the Mission maps show where Zombies appear at the end of each Zombie Phase.
- The Starting Spawn Zone is always the first one to spawn.
- Always draw Zombie cards for all Spawn Zones in a clockwise order starting with the Starting Spawn Zone.
- Zombies spawn following the highest Danger Level among Survivors (Blue, Yellow, Orange, or Red). The Zeus Spawn Zone spawns in the same order as the other Spawn Zones, but using Zeus Orders cards.
Sleepers wake up when:
- Any Noise is produced in the same or adjacent Zone. Search Actions and Activating Objectives also immediately wakes up the Sleepers.
- Zombies Move INTO a Zone with Sleeper tokens.
- Survivors Move OUT OF a Zone with Sleeper tokens. Unless the Survivor has the Stealthy Specialty (P. 27), roll a die when leaving a Zone with a Sleeper token. If a 1 is rolled, those Sleepers have awoken.
03 - End Phase
The first player hands the First Player token to the player to their left. Another Game Round then begins.
Targeting Priority Order
When several targets share the same Targeting Priority Order, the players choose which ones are eliminated first.
| Targeting Priority | Name | Actions | Min. Damage to Kill | Adrenaline Earned |
|---|---|---|---|---|
| 1 | Shambler | 1 | 1 | 1 |
| 2 | Alpha | 2 | 2 | 2 |
| 3 | Abominations | 1/2/3 | 4/5/6 | 5 to all Survivors |