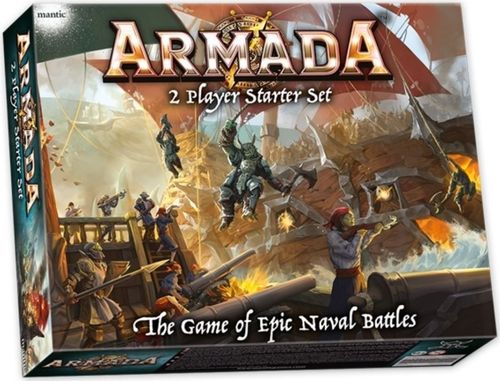
Armada: Two Player Starter Set
Armada: Two Player Starter Set Rulebook
Table of Contents
Table of Contents
Turn Sequence
Each Turn of the game uses the following sequence:
- Roll for Wind
- Initiative
- Activations (movement – shooting – boarding actions, for each ship)
- End Phase
Roll for Wind
The Wind Rose indicates from which direction the wind is blowing. When the wind changes direction, the Wind Rose is moved to that location on the edge of the gaming area.
One player must roll 2D6 (two 6-sided dice) to see if the wind changes direction. There are eight directions the wind can come from: the four outer table edges and the four corners.
Initiative
Tactical positioning in Armada is very important. The ships closest to the point where the wind starts, activate and move first, while those ships furthest away move last. We call this "activating in Initiative order".
To find the order in which ships activate, you draw a line running perpendicular to the point of origin of the wind, then move that line in the direction the wind is blowing.
Players then get the Initiative and Activate in the order that this line contacts their ships, first to last, with each ship Moving, Shooting and finally resolving any Boarding Actions, before progressing to the next ship. Where the line contacts two or more ships at the same time, the ship with the more experienced crew goes first. If the crews have the same experience, you decide randomly which goes first.
Activations
Movement
Ships can move at four different Speeds:
- Anchored: The ship will make no Move Steps but may still make a single turn (and still then Shoot).
- Steady Speed: The ship will make one Move Step.
- Battle Speed: The ship will make two separate Move Steps. This is the maximum Speed for Crippled ships.
- Full Speed: The ship will make three separate Move Steps.
A ship can maintain the Speed it has, or it can increase or decrease its Speed by one level (e.g. from Battle Speed to Full Speed, but not from Full Speed to Anchored).
Turning
At the end of a Move Step, once a ship has moved its full Movement value in inches, it may make a single turn, in order to change its heading, depending on its Speed and Turn Angle. A ship's Turn Angle (Red or Yellow) is indicated on its Ship Card.
A ship that is already Anchored when it is Activated, may turn up to its Turn Angle. To turn a ship, pivot it on the corner of the base at the rear of the ship, up to the maximum angle allowed, using the appropriately coloured part of the Ship Turning Template. A ship doesn't have to turn the full amount.
Disengage
A ship that starts its Activation Grappled will not be able to move unless it can first Disengage.
Shooting
Armada uses four categories of weapons: Heavy Weapons (H), Light Weapons (L), Close Quarter Weapons (C) and Indirect Weapons (IDW).
Ships can shoot from up to four Weapon Positions. The type and number of each weapon a ship has in each position is shown on its Ship Card (e.g. 4 H, 2 L, 1 IDW, etc.). Ships that are Grappled, cannot shoot.
At the end of each Move Step, after any turning (including any turn while Anchored), a ship may choose to shoot with some or all of its weapons. A ship may shoot from as many of the four weapon positions as desired, but may only ever shoot from each once per Turn. This means the Activating ship may potentially target more than one enemy ship, and a different one for each of the four weapon positions. A single target must be nominated for each weapon position.
Any part of the base of the target must be within one of the Fire Arcs from the shooting ship, even if only partially.
Depending on the distance to the target, one, some or all of a ship's weapon types may be within range. You then select the appropriate number of dice (D10s) of the relevant colour. For example if a weapon position is listed as having 2 H and 1 L, that means 2 Heavy Weapons (rolling 2 Blue dice) and 1 Light Weapon (rolling 1 Red die).
Roll to hit
The dice are all rolled together, applying any relevant modifiers (e.g. point blank range, inexperienced crew, partial visibility, etc.)
- Any dice which roll a natural 1 automatically miss.
- Each die that scores 6 or more gets a solid hit on the target! For each natural roll of 10 (regardless of modifiers), a Critical Hit is scored.
- All dice that score below 6 are misses and are discarded.
- Any dice that score hits will cause Damage.
Damage
Each die that scored a hit when firing will do an amount of Damage to the target depending on the weapon type. All Damage is added together and then inflicted on the target (Damage counters are placed on its Ship Card). For example, a Heavy Weapon will do 2 damage as standard, while a Light Weapon will do 1. Being at point blank range, or shooting down the length of a ship will multiply the damage caused. Critical Hits are rolled for (2D6 on a table) to see what effect they have.
Crippled ships and Nerve Tests
As soon as a ship has taken Damage that exceeds its Nerve value it is then considered Crippled for as long as that remains the case.
Crippled ships may surrender when they Activate. A Crippled ship must also take a Nerve Test if it loses a Boarding Action.
Crippled ships cannot move faster than Battle Speed and it halves the number of each type of Weapon it has in each Weapon Position (rounding up), and halves its Crew Strength (rounding up) in Boarding Actions.
The ship may lose its Crippled status (for example via a Repair Action).
Destruction
If a ship has taken as much Damage (or more!) than its Structure Points (SP) value after a Shooting attack (or from other means like Collisions), the ship is destroyed and sunk! The ship model is removed from play.
Surrender
If a ship Surrenders, it remains in place but can no longer be Activated. It will still attempt to Evade to avoid collisions however, and can still fight in further Boarding Actions made against it, but with an additional -1 modifier. If it is on fire, it can continue to roll to put it out or take more Damage.
If a ship is Crippled and/or has Surrendered, its Crew Strength is halved (rounding up).
Boarding Actions
After a ship has completed all its Move Steps and Shooting, it can engage in a Boarding Action. To initiate a Boarding Action, the target ship must first be Grappled. To attempt to Grapple a ship, the attacking and the target ships must be within 3" of each other after the Activating ship has completed all its Move Steps, and neither ship can be travelling at Full Speed.
If the test is successful, both ships come to an immediate stop (Anchored) and become Grappled and must now Align together.
Both ships now fight each other by rolling a D10 for each point of Crew Strength they have.
For each dice score of 6 or more, the target ship takes 2 damage. For each dice score of a natural 10, this is a Crushing Blow and the ship takes 4 damage instead of 2.
If the Boarding Action is a draw, nothing further happens.
Otherwise, the ship that took the most amount of damage is the loser. If the losing ship is Crippled, it must now make a Nerve Test with a -1 modifier. If it fails, it Surrenders.
A Boarding Action is the last part of a ship's activation.
Repairs
When a ship Activates, it can declare the crew will attempt a Repair Action, unless it has a Blaze marker on it or is Disengaging from a ship. The ship cannot Shoot, make a Grapple or Boarding Action this Activation. Instead, you roll a die to see how much damage is removed from the ship.