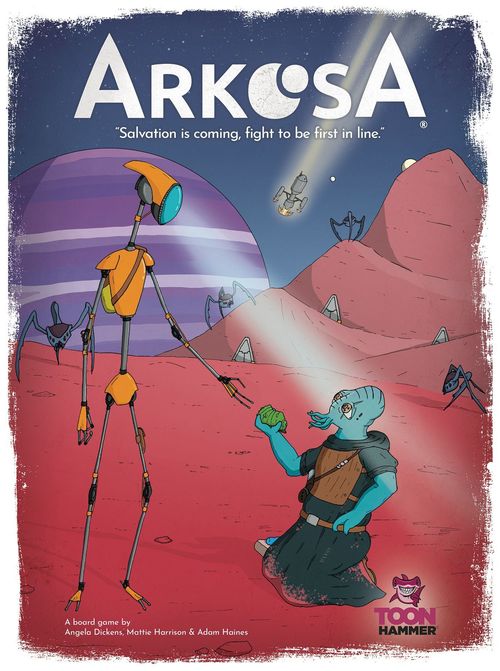
Arkosa
Arkosa Rulebook
Table of Contents
Table of Contents
Overview
In Arkosa, you'll be developing your bunker, recruiting unique colonists and trying to keep your population happy, fed, rested and breathing.
However, the planet won't make it easy for you. There will be regular attacks from the resident hostiles to contend with, plus a whole bunch of events that can occur while your intrepid explorers are out in the great desert. In order to claim victory you'll need a well organised, productive and happy bunker. But only one colony will win the grand prize... a ticket off the planet.
Object of the Game
Each player will build and take charge of their own bunker. They will then compete to have the best reputation over the course of 3 rounds. Players will earn reputation points by recruiting new colonists, building new rooms, keeping their colony happy and acquiring resources. Resources can be offered as bribes to the incoming rescue ship to earn bonus reputation, but unfulfilled bribes will see points taken away. The player with the best reputation at the end of the game will be rescued from planet Arkosa and declared the winner. In the event of a tie, the colony with the highest morale will take the victory.
Game Components
- 6 Bunker Boards
- 1 Game Board
- 1 Solo Bunker Board
- 2 Quick Guide Sheets
- 1 Nitro Generator
- 49 Room Tiles: 29 x A Rooms, 10 x B Rooms, 10 x Unique Rooms
- 17 Solo Cards
- 1 First Player Token
- 27 Food Tokens: 15 x 1 Food, 12 x 3 Food
- 27 Nitrogen Tokens: 15 x 1 Nitrogen, 12 x 3 Nitrogen
- 60 Power Shard Tokens
- 20 Magtape Tokens
- 20 Scrap Tokens
- 1 Solo Colony Leader Board
- 7 Colony Leader Boards
- 28 A Colonist Cards
- 20 B Colonist Cards
- 1 Resource Dice
- 1 Numbered Dice
- 1 Round Track Marker
- 1 Explore Track Marker
- 16 Player Markers: 2 x Discs and 2 x Cubes for each of the 4 colours
- 1 Room Tile Bag
- 11 Dr. Sawbones Event Cards
- 38 Low Risk Event Cards
- 28 Medium Risk Event Cards
- 24 High Risk Event Cards
- 6 Raid Event Cards
Component Setup
- Place the game board in the middle of the table.
- Put the resource tokens (food, nitrogen, scrap, magtape and power shards) in a general supply in reach of all players.
- Shuffle the Low Risk Events and place them near the game board.
- Shuffle the Medium Risk Events and place them near the game board.
- Shuffle the High Risk Events and place them near the game board.
- Shuffle the Raid Events and place them near the game board.
- Shuffle the Dr. Sawbones Events and place them near the game board.
- Shuffle the Bribes and place them near the game board.
- Shuffle the A Colonists and place them near the game board.
- Shuffle the B Colonists and place them near the game board.
- Put the resource dice on 'The Factory' location on the game board.
- Roll the numbered dice and then place the exploration track marker on the corresponding number of the exploration track. Then put the numbered dice to one side.
- Put the quick guide sheets near the play area, so all players can reference them.
- Separate the A, B and special room tiles. Add the A room tiles to the room tile bag and give the bag a good mix.
- Put the round tracker on the round 0 space.
Bunker Setup
For your first game of Arkosa, follow the Starter Bunker Setup instructions. This will give you a predetermined set of starting rooms, bonuses, resources and morale, plus a random selection of founding colonists. In subsequent games, follow the Regular Bunker Setup to give you more control of your starting bunker and its inhabitants.
Starter Bunker Setup
Each player must choose a colour and take their corresponding playing pieces. For the starter setup, each player will need 2 wooden discs and 1 wooden cube.
- Randomly assign each player a bunker board. Each player should place their bunker board in front of them on the A side.
- Give each player a colony leader board. Each player should place their colony leader board in front of them on the A side.
- Place the disc with numbered sides on the assigned space in the top left corner of your bunker board, with the number 1 facing up.
- Place your other disc on space 20 of the reputation track.
- Place your wooden cube on the corresponding space of the morale track according to your colony's starting morale value (see bottom middle of your bunker board).
- Each player takes the resources pictured on their bunker board and places them in their supply (somewhere in front of them).
- Each player takes 3 power shards from the general supply and puts them in the slots next to their built rooms. These should be placed with the shard symbol face up.
- Establish each bunker's founding colonists by dealing each player 4 cards face-down from the A colonist deck. These cards make up each player's hand and should be kept private for now.
The first player is the person who was most recently lost on an abandoned alien planet. Failing that, each player rolls the numbered dice. The player who rolled the highest number gets the first player token. Re-roll for any ties.
Regular Bunker Setup
Each player rolls the numbered dice to determine who gets first pick in the first stage of setup. Give the player who rolled the highest number the first player token. Re-roll for any ties.
1. Choose Bunker Foundations & Player Colour
Take the following actions, starting with the player with the first player token, and then proceeding clockwise:
- Choose a bunker board and place it B side up in front of you.
- Choose a colour to play as and take the corresponding playing pieces (2 wooden discs and 2 wooden cubes).
- Place the disc with numbered sides on the assigned space in the top left corner of your bunker board, with the number 1 facing up.
- Place the other disc on space 20 of the reputation track.
When each player has chosen their bunker foundations and colour, pass the first player token clockwise.
2. Choose Colony Leader
Take the following actions, starting with the player with the first player token, and then proceeding clockwise:
- Choose one of the colony leader boards and place it B side up in front of you.
- Take the resources pictured on the board and place them in your supply (somewhere in front of you).
- Place one of your coloured cubes on the morale track according to the value on the colony leader board.
- Place one of your wooden cubes on the special trade space on your colony leader board.
When each player has chosen their colony leader, pass the first player token clockwise.
3. Choose Special Room
Take the following actions, starting with the player with the first player token, and then proceeding clockwise:
- Look at the quick guide sheet and select a special room from the options available. Find the room tile for your chosen room and place it on the star space on your bunker board.
- Take 3 power shards from the general supply and place them in the slots next to the three built rooms on your bunker board. These should be placed with the shard symbol face up.
When each player has chosen their special room, pass the first player token clockwise. The remaining special rooms can be returned to the game box.
4. Draft Founding Colonists
- Deal each player 4 cards face-down from the A colonist deck.
- Each player should pick up their cards, look at them, and select one they wish to keep, placing it face-down next to them.
- Each player should pass their remaining cards to the player on their left.
Repeat the process above 3 more times so that each player has drafted 4 colonists. These cards make up each player's hand. Players should keep these cards private for now.
You are now set up and ready to play! It's time to lead your colony to salvation... good luck!
So it begins... the race for salvation, the struggle to survive. Your bunker has the basic essentials to start this story and tackle the challenges that the great desert planet of Arkosa will throw at you. Let me tell you friend, it's a relentless world out there; the barren desert is a playground for the savage and skittering hostiles that call Arkosa home. They care not for your grand plans of progress and the promise of preservation from the stars.
Keep your wits about you, your schemes secret and reputation spotless. Your colonists will need care and protection... traverse the outlands prudently, disturb as little as possible. Salesmen and Nerffles can be dealt with accordingly, but the hostiles are less amenable. They will rip you and your colony apart with as little interest as a Sandwurm shows the starlight. Be bold, be daring, be vigilant. Arkosa cares not for valour... but that is what it will take to survive its merciless grasp. Salvation is coming... make sure you are first in line.
Playing the Game
Arkosa is played in rounds. After 3 rounds the game is over. Here is a summary of the phases of each round:
- Preparation: Prepare the game board for the upcoming round. This includes things such as: drawing bribes, colonists and rooms, refreshing the trade pool, moving the round tracker and passing the first player token.
- Player Actions: Players take it in turns to carry out 2 actions each. Available actions are: make a bribe (round 2 onwards), put a colonist to work, build a room and make a trade. Players keep taking turns until everyone has passed.
- Rations: Players may pay food and nitrogen to keep their colony happy and maintain their position on the morale track.
- Morale Points: Each player gains or loses reputation points according to their position on the morale track.
- Room Production: Powered rooms in each player's bunker activate.
- Rest Colonists: Players put non-injured colonist cards they played in the round back into their hand.
1. Preparation
Round 1: Move the round tracker to the next space on the round track.
- Colonists: Draw 5 A colonist cards and place them face-up on the colonist spaces of the game board in a random order.
- Rooms: Draw 4 rooms from the room tile bag and place them face-up on the production line in a random order.
- Trade Pool: Place 1 food and 1 nitrogen in the trade pool.
Round 2: Move the round tracker to the next space on the round track & reset special trade markers (if applicable).
-
Colonists: Discard all colonists on the game board. Draw 5 B colonist cards and place them face-up on the colonist spaces of the game board in a random order.
-
Rooms: Add all the B rooms to the room tile bag and give the bag a good mix. The room at the end of the production line is removed from the game and the rest of the rooms are moved along (following the arrows). A new room is drawn to fill the space.
-
Trade Pool: Remove all food and nitrogen from the trade pool and replace it with 2 food and 2 nitrogen.
-
Bribes: Draw bribe cards and place them face-up in view of all players. Depending on your player count, draw the following amount:
- 1 Player: 3 Cards
- 2 Players: 6 Cards
- 3 Players: 9 Cards
- 4 Players: 12 Cards
Return the rest of the bribe cards to the game box.
Round 3: Move the round tracker to the last space on the round track & reset special trade markers (if applicable).
- Colonists: The colonist in the 'New Colony Network' location is removed from the game and the rest of the colonists are moved down the path (following the arrows). A new colonist is drawn from the B colonist deck to fill the space.
- Rooms: The room at the end of the production line is removed from the game and the rest of the rooms are moved along (following the arrows). A new room is drawn to fill the space.
- Trade Pool: Remove all food and nitrogen from the trade pool and replace it with 3 food and 3 nitrogen.
2. Player Actions
Player actions make up the bulk of each round. Going in clockwise order, players take it in turns to carry out 2 actions each (you can use your numbered disc to track these). A player may take as many turns as they are able to. When a player runs out of actions they can take, or does not wish to take any more actions, they must declare that they pass. When all players have passed, the remaining stages of the round are carried out. Once a player has passed they cannot take any more actions in the current round.
The first player to pass is granted the 'luck of the Nerffles'. They take the first player token and two resources (power shards included) of their choice.
When taking an action, players can choose from any of the options below. They can choose to do two different types of action or do the same type of action twice (except for make a bribe). The actions available are:
- Put a colonist to work
- Build a room
- Make a trade
- Make a bribe
Put a Colonist to Work
Play a colonist from your hand to the table to put them to work. Each colonist can carry out different types of work. Pictures of resources indicate what the colonist can produce and pictures of backpacks indicate that the colonist can explore. You will only select one option when putting a colonist to work (see example pg. 10). If a colonist has a name with star symbols around it, this means they have special rules / actions. Use the quick guide sheet to find out more about a special colonist.
Arkosa was once a bustling intergalactic hub, a bountiful world of opportunity and progress, teeming with life from every race in the known cosmos. But after 'The Event', it was left desolated. The only vestige of the old world is the eclectic mix of survivors, bunkered down and awaiting rescue. To thrive and be first in line for deliverance, it is up to you to make the most of your host planet. Tentacles and antennae, robotic limbs and redundant fins, even the weird and whimsical Nerffle may tip the balance of fortune for your colony. The welfare and fate of this alien smorgasbord is in your hands / paws / suckers / claws... don't let them down!
Once you have used a colonist, place them face-up on the 'resting' (left) side of your bunker board. If your colonist is injured whilst completing their action, place them face-up on the injured (right) side of your bunker board. Colonists which are injured will need to be healed if you want to use them in subsequent rounds (see pg. 15).
Example special colonist: B'Orlol can take 1 of 3 different actions. They can either produce 1 magtape and 1 scrap, produce 2 food, or explore. If exploring, they can only go to locations that have the brown backpack symbol on them. See the glossary (page 17) for a guide to what the symbols on each colonist card mean.
Example colonist: the symbols on the card show what type of colonist Combustible Joe is. The types are (from top to bottom) scientist, labourer and entertainer. The number shows how many reputation points Combustible Joe will be worth if they are in your colony at the end of the game. The name of the colonist is shown on the card; the star symbols indicate they are a special colonist. You should consult the quick guide sheet to find out more.
Exploring
If a colonist has one of the 3 types of backpack symbols, you can choose to use them to explore. Exploring allows you to either gain resources or recruit new colonists into your bunker. When you recruit new colonists, do NOT score the points straight away - these are scored at the end of the game. Look at the backpack symbols next to each location name to determine where your explorer is allowed to go.
Follow these steps in this order when sending your colonist out exploring:
-
Choose your target location: Declare the name your colonist's target location.
-
Move the exploration track marker and resolve any effects: Move the exploration track marker the number of spaces stated (see example at the bottom of the page). Some spaces on the exploration track have immediate effects and some are blank (i.e. no effect). If you land on a space with an event card you must immediately draw and resolve that type of event card. The player to the right of the active player will read the text on the card aloud. If the exploration track marker ever moves over a raid event space, it immediately stops there and a raid event is resolved. Do not continue moving the marker any remaining spaces. After resolving any event, put the card in a discard pile. For explanation of all symbols on the exploration track, see the glossary (page 17).
-
Pay any costs then gain colonist / resource(s): Pay any food and/or nitrogen costs, making sure to apply any discounts that your explorer might have. Then gain the resource(s) or colonist on the target location. If gaining a colonist, put them straight into your hand, unless an event says otherwise.
IMPORTANT: If an event was resolved during your explore action, you have the option to change your mind on the explore action's target location. You can choose any other location that requires the exploration track marker to move the same amount of spaces or fewer, but do NOT move the exploration track marker again. Pay the food and/or nitrogen costs (if any) for the new location and receive the colonist / resource(s) for that location instead.
Example explore discount: backpacks with resources give a discount to the explore cost.
-
Draw and place a new colonist card (if necessary): If the player's explore action recruited a new colonist, then do the following: Move any colonists above the vacated location down the path (following the arrows) and draw a new colonist face-up to the 'Wanderers' Path' location. If it is round 1, draw the new card from the A colonist deck. If it is round 2 or 3, draw the new card from the B colonist deck. If a colonist deck is ever depleted, then carry on without drawing a new colonist card.
Example explore location (labels): move the exploration track marker this many spaces (2); pay this cost when going to this location; gain the contents in the dashed box, which could be resources or a new colonist (in this example, 1 magtape and 2 scrap); this is the location name and the types of backpack that allow a colonist to explore there (Research Outpost).
Example raid event space: the marker stops on a space showing a raid event and the raid event is resolved, as described in step 2 above.
Make a Trade
Players can carry out any of the common trades pictured at the bottom of the game board. They may do the same type of common trade multiple times in one action, but different types of trades count as separate actions.
- Trade 1 nitrogen OR 1 food for 1 scrap.
- Trade 1 nitrogen AND 1 food for 1 magtape.
- Trade 1 nitrogen OR 1 food to resolve 1 Dr. Sawbones event.
- Reset the production line. Lose 1 reputation, discard all rooms from the production line, then draw and place 4 new ones.
- Trade 1 nitrogen for 1 food or vice versa. You may only do this trade within the trade pool space, NOT from the general supply.
Players can carry out the special trade pictured on their colony leader board (if playing with the Regular Bunker Setup). Special trades cannot be done multiple times in one action and can only be used once per round. Once you have carried out your special trade, move the special trade marker from the left space to the right space to show this trade has been used. At the start of the next round, you will move the marker back to the left space to show this trade is once again available.
Players may NOT trade with other players.
Build a Room
Choose and build one of the rooms available on the production line. Pay the appropriate resources and add the room to your bunker. Do NOT score points as rooms are built - these will be scored at the end of the game.
The Bionic Workshop is a labour (green) type of room. The other room types in the game are:
- Science (blue)
- Entertainment (orange)
- Labour, Science & Entertainment
Example room: the number shows how many reputation points the Bionic Workshop is worth at the end of the game. Pay these resources to build the Bionic Workshop. This shows what the Bionic Workshop produces in the Room Production phase.
Bunkers must be built from the top down. There must be a room above the location of your new room in order for you to build there. You may overbuild on previously existing rooms, but keep in mind, any point scoring rooms that are covered up will not score at the end of the game.
When a room is taken from the production line, it is immediately replaced: move the remaining rooms according to the arrows and place a new room from the bag into the first space. If you run out of room tiles, place any that have been discarded back into the bag, give the bag a good mix and then draw from those.
Room Bonuses
Each empty space on your bunker board has a bonus for the room you build there. This will either be a placement bonus, production bonus or double production bonus.
- Room Placement Bonus: Resources or points that appear in the middle of a space are immediately gained when a room is first built there. Example: you would gain 1 scrap.
- Room Production Bonus: Resources that appear under a space can be gained during each room production phase IF the type of room built matches the type displayed before the bonus. The room must be powered to receive the bonus production. Example: you would gain 1 bonus nitrogen in the room production phase because a science room was correctly built. If a different (i.e. labour or entertainment) type of room was built there, the bonus would not be gained.
- Room Production Bonus - Double: Each bunker board has a space that will double the production of the room built there. This bonus will not apply to some types of room. Rooms marked with a crossed-out double symbol are exempt from the double production bonus. Example: you would gain 6 food instead of the usual 3.
Make a Bribe (2nd & 3rd Round Only)
To make a bribe, simply take one of the available face-up bribe cards. You can only do this once per turn.
Do NOT score points as bribes are completed, these must be completed and scored at the end of the game.
When a bribe card is taken, do NOT draw a new one to replace it.
Example bribe (Set of Nitro Rockets): the resources required at the end of the game to complete the bribe; the name of the bribe that you are offering; the reputation points you will receive for successfully completing the bribe OR the reputation points you will lose if you don't complete the bribe.
After Every 2 Actions
Once a player has taken 2 actions, they must check to see if they have exceeded their maximum population of 6 colonists. If they have, they must exile colonists until they are down to their limit.
Exiling Colonists: When you exile a colonist, remove the card from the game and pay the appropriate penalty:
- If you exile a colonist from your hand or from the resting (left) side of your bunker board, lose 1 morale.
- If you exile a colonist from the injured (right) side of your bunker board, lose 1 morale AND 1 reputation.
3. Rations
Each round, your colony will demand food to eat and nitrogen to breathe. To avoid your colony becoming unhappy, you will need to pay 1 food and 1 nitrogen for every 2 colonists (rounded up). Your bunker will lose 1 morale for every pair of colonists that do not get their full rations. Rations are resolved in player order and are always optional.
4. Morale Points
Each player gains or loses reputation points according to their position on the morale track.
The Morale Track: The morale of each player's bunker is tracked on the left hand side of the game board. Players cannot share the same morale track space. Whenever you gain morale, add each morale point one step at a time. If you move up into a space occupied by an opponent, move the opponent's marker down one space. Your opponent's colony doesn't like to see your colony happy, it makes them worry!
Similarly, whenever you lose morale, subtract each morale point one step at a time. If you move down into a space occupied by an opponent, move the opponent's marker up one space. When your colony is feeling down the other colonies feel much better about themselves!
Example 1: Grey player gains 1 morale and moves up into the blue player's space. Blue player therefore loses 1 morale.
Example 2: Purple player loses 3 morale. The morale is subtracted one space at a time. As purple moves into the green player's space, the green player gains 1 morale.
If you ever exceed the maximum amount of morale on the track, add the excess to your reputation points instead. Similarly, if you ever move below the minimum amount, subtract the excess from your reputation points instead.
5. Room Production
In this phase of the round, the powered rooms in your bunker will activate and produce. A room will only activate if it has an active power shard connected to it. If it has a power shard connected but the shard is deactivated (i.e. flipped over to the X side), the room must instead be fixed: rather than the room producing, flip the power shard back over to the active side instead.
See the glossary (page 17) for a guide to what the symbols on each room tile mean.
Room production is carried out in player order. Each player may choose the order in which their rooms activate.
Some rooms allow you to convert resources into something else. This conversion can be done multiple times when the room activates. Conversion rooms are exempt from the double production bonus.
You may add a power shard to your bunker at any time. There should always be a built room where the power shard is placed. Once a power shard is in position it cannot be moved.
At any time, you may choose to fix a deactivated power shard by replacing it with one from your supply. If you do this, the deactivated power shard must be returned to the general supply.
6. Rest Colonists
Pick up any colonists on the resting (left) side of your bunker board and put them back in your hand. Colonists on the injured (right) side must stay where they are. If you want to use an injured colonist in the next round, you must heal them before the round gets to this phase.
Healing Colonists: There are some rooms and colonists that have the ability to heal an injured colonist. If you don't have any of these, your best option is to make a trade to resolve a Dr. Sawbones card (see page 12). Whenever you are told to heal an injured colonist, this always means move the colonist from the injured (right) side of your bunker board to the resting (left) side of your bunker board (unless otherwise stated).
Game End & Scoring
The game ends after the Room Production phase in the third round. At this point, scoring occurs. Add on the following points to each player's current position on the reputation track:
- Points on rooms: Points on rooms covered up by other rooms do NOT count. Rooms do NOT have to be powered to score.
- Points on colonist cards: Injured colonists should also be scored but subtract 1 point for the injury.
- Points for specialisation bonuses: For each category (labour, science and entertainment) give the player with the best* rooms and colonists 5 points and the runner-up 2 points (except in a 2 player or solo game). Players tied at the same level get the same points for 1st or 2nd place. *Worth most reputation points (combined total).
- Points on any successfully completed bribe cards: For failed bribes, subtract these points instead. Resources cannot be shared across multiple bribe cards, each individual bribe requires its own set of resources. Make sure to return the resources used for each successful bribe back to the general supply.
- Points for leftover resources: 1 point for every 2 nitrogen, food or scrap (any combination). 1 point per magtape. 2 points per power shard in your supply (not on your bunker board).
The player with the most reputation points is the winner! If any players are tied on points, the player whose bunker has the highest morale breaks the tie.
Rolling the Resource Dice
At certain points in the game you may be told to roll the resource dice. With this roll, you will either be suffering damage (e.g. from an attack) or perhaps trying to gain resources (e.g. exploring 'The Factory' location). See below for how to resolve each side of the dice for both suffering damage and gaining resources.
Suffering Damage: When the resource dice is rolled to suffer damage, the result is resolved as follows:
- Lose 1 food
- Lose 1 nitrogen
- Lose 1 magtape
- Lose 1 scrap
- Lose 1 power shard from your supply OR deactivate 1 power shard in your bunker
- Injure 1 colonist
Gain Resources: When the resource dice is rolled to gain resources, the result is resolved as follows:
- Gain 1 food
- Gain 1 nitrogen
- Gain 1 magtape
- Gain 1 scrap
- Gain 1 power shard
- Injure your explorer
Example: when exploring 'The Factory' location, the resource dice is rolled to gain resources.
Glossary
A guide to the symbols in the game, and what they mean.
Action Symbols on Basic Colonist Cards
- Resource symbols on their own mean gain the resource(s) pictured.
- Gain 1 morale.
- Lose 1 morale.
- Backpacks mean a colonist can explore. The type of backpack determines which locations they can go to.
- Backpacks with resources give a discount to the explore cost.
- Heal a colonist. Move them from the injured (right) side to the resting (left) side of your bunker board.
For special colonists, refer to the quick guide sheet.
Production Symbols on Basic Rooms
- Resource symbols on their own mean gain the resource(s) pictured.
- Gain 1 power shard.
- Gain 1 morale.
- Gain 1 reputation.
- Heal a colonist. Move them from the injured (right) side to the resting (left) side of your bunker board.
- Convert 1 nitrogen into 1 morale. This conversion can be done multiple times when the room activates.
- Convert 1 food into 1 morale. This conversion can be done multiple times when the room activates.
- Convert 1 magtape and 1 scrap into 3 reputation. This conversion can be done multiple times when the room activates.
For special rooms, refer to the quick guide sheet.
Symbols on the Exploration Track
- Resource symbols on their own mean gain the resource(s) pictured.
- Gain 1 morale.
- Lose 1 morale.
- Resolve a low risk event. The player to the right of the active player will read this aloud.
- Resolve a medium risk event. The player to the right of the active player will read this out.
- Resolve a high risk event. The player to the right of the active player will read this out.
- Resolve a raid event. The player to the right of the active player will read this out.
- Attempt to gain a resource by rolling the resource dice. Further explanation on page 16.
- Heal a colonist. Move them from the injured (right) side to the resting (left) side of your bunker board.
- Injure your explorer.
- Gain 1 reputation.
- Lose 1 reputation.
- Reset the production line. Discard all rooms from the production line, then draw and place 4 new ones.
Other Symbols
- 2 reputation points per labour type room you have in your bunker.
- 2 reputation points per entertainment type room you have in your bunker.
- 2 reputation points per science type room you have in your bunker.
Events
There are four different types of events that you can encounter whilst out exploring Arkosa:
- Story Events: A great many events can befall an intrepid explorer in the Arkosa dunes. Story events contain some narrative to let you know what has happened. Follow the instructions on the card - you may have a decision to make. Some events require all players to make individual decisions.
- Item Events: If you find an item whilst out exploring, you can keep the card and use it at any point. The card will always explain the conditions of when the item can be used. Using an item does NOT count as an action, unless otherwise stated.
- Crate Events: The resident hermit hoarder of Arkosa has buried crates in various places on the planet. If you find one, you'll be required to roll the numbered dice to see what's inside. Resolve the outcome based on the result.
- Raid Events: Raid events can be quite painful, so watch out! Simply follow the instructions on the card to resolve the raid.
N.B. If an event ever instructs you to do something you cannot do (e.g. lose a resource you don't have), simply skip the instruction. However, if you are presented with two options, one you can't do and one you can, you must choose the option you can carry out.
Event Probability
Events will either have positive, negative or mixed consequences. For those who like to crunch the numbers, here's the odds of each outcome for each type of event:
- Low Risk Events: Positive: 50%. Mixed: 11%. Negative: 39%.
- Medium Risk Events: Positive: 37%. Mixed: 17%. Negative: 46%.
- High Risk Events: Positive: 9%. Mixed: 35%. Negative: 56%.
The great desert lands of Arkosa are a turbulent place for intrepid explorers. One indigenous creature of this hostile planet deserves its own special note of caution for would-be travellers; the mythical Nerffle. These chaotic blue furry balls strike uncertainty into anyone they come across. If a Nerffle doesn't like the cut of your jib, or the contents of your lunchbox, then you can be sure your luck will change for the worse! Sandstorms, power outages, even hostile raids are all consequences of a discontented Nerffle. If you happen upon these fate-twisting deities, you must appease them as best you can with an offering - for the wrath of a brood of Nerffle is legendary!
Solo Game Variant
Overview
The solo variant of Arkosa provides two 'Bot' opponents for you to challenge yourself against: 4e 69 67 65 6c (Bot A) and D.A.V.E. (Bot B). (The name of Bot A is printed in the rulebook as the hex bytes 4e 69 67 65 6c; these decode to "Nigel".) If you are new to the game or just the solo variant, then play against Bot A first. Bot A is easy to predict but also easy to automate, therefore they make for a good introductory opponent. Bot B has more to keep track of but is a more realistic adversary! Each bot has 4 levels of difficulty for you to try out.
Setup
Before you start, remove the following special colonists and rooms from the game: Hoo-di-di (A), Z0-E (B) and The Vault (Room). Then follow the Component Setup (pg. 5) instructions as normal.
Player Bunker Setup
You may use the Starter or Regular Bunker Setup (pg. 5-7) when playing against Bot A. However if you are playing against Bot B you should always use the Regular Bunker Setup.
Follow the bunker setup steps as normal (with the exception of establishing founding colonists). Ignore instructions to pass the first player token. Take and keep the first player token and consider yourself the first player when carrying out each step. Once bunker setup is complete, give the first player token to the bot. They will keep the token for the rest of the game (i.e. go first every round).
When establishing your bunker's founding colonists, do as follows: Draw 5 cards from the A Colonist deck. Choose 3 to keep and give the other 2 to the bot. If playing against Bot A, put the bot's cards face-up on the resting (left) side of their bunker board. If playing against Bot B, shuffle the two cards and place them face down in a draw pile near their bunker board.
When choosing colonists, it is worth noting that Bot A will not put colonists to work but Bot B will.
Bot Bunker Setup
Choose which bot to play against (A or B) and place the solo colony leader board on the appropriate side, somewhere you can reference it.
Give the bot player the solo bunker board. If playing against Bot A, this should be placed with the A side face-up. If playing against Bot B, this should be placed with the B side face-up.
Choose a colour for the bot to play as and give them 1 wooden disc and 1 wooden cube. Place the disc on space 20 of the reputation track and the cube on the morale track according to the value on the solo colony leader board. (N.B. If you are playing as Libra against Bot B, Bot B's morale starts on 1 instead of 0.)
If playing against Bot B, take 3 power shards from the general supply and place them in the slots next to the three built rooms on their bunker board. These should be placed with the shard symbol face-up.
Take the resources pictured on the solo colony leader board and place them in the bot's supply (somewhere near their bunker board).
Solo Preparation
Take the solo cards and remove all of the idle cards from the deck. Add the following amount back in to set the difficulty level of the bot:
- Easy: 3 cards
- Normal: 2 cards
- Hard: 1 card
- Very Difficult: 0 cards
Then shuffle and place the solo deck face-down to create a draw pile.
Playing the Game (Solo)
Rules for BOTH Bots
- Bots must take at least 6 turns per round. If you pass before this happens, draw and resolve solo cards until the bot has taken 6 turns. Create a separate discard pile for each round so you can keep track of the number of turns the bot has taken.
- Bots ignore any events that target 'ALL PLAYERS'.
- Bots are immune to raid events. All raids target the solo player but only at the round 1 level (regardless of what round you are in).
- Bots will never replace a deactivated power shard with one from their supply.
Rules for Bot A
- Bot A does NOT trigger any effects on the exploration track (with the exception of raid events).
- Bot A obeys the maximum population limit (6) but they ignore exile penalties and the rations phase of each round.
- Bot A's colonist cards are kept face-up in a pile on the resting (left) side of their bunker board. The solo player can look through these at any time.
- Bot A does NOT pay resources when recruiting colonists or building rooms.
Rules for Bot B
- Bot B does NOT trigger any events on the exploration track (with the exception of raid events), but other effects DO apply.
- Bot B obeys the maximum population limit (6), they suffer exile penalties and participate in the rations phase of each round.
- Whenever you need to look through Bot B's colonist draw pile (e.g. when choosing which colonist they should exile), shuffle the cards before putting them back.
- Bot B will power rooms as they gain power shards. They will prioritise powering the rooms worth the most reputation points first. If the decision is tied then randomise the choice.
- Bot B does NOT pay resources when recruiting colonists but DOES pay when building rooms.
Solo Player Actions
Follow instructions as per normal (pg. 8 & 9). Carry out your actions as per normal (pg. 9-14). On the bot's turn, draw a solo card and resolve the actions for the bot you are playing against. The solo colony leader board will tell you what each symbol means. Bots will keep taking turns until you decide to pass (as long as they have taken at least 6 turns). If you ever run out of solo cards, collect and shuffle the cards in the previous rounds' discard piles to create a new draw pile.
How bots build rooms:
- Bots will always build the room worth the most reputation points that they can afford.
- Bot B will automatically trade nitrogen and/or food for scrap and/or magtape using the common trades at the bottom of the game board. When trading for scrap, Bot B will use the resources it has the most of. If there is a tie, the player chooses which resource they use. If they can use the trade pool to afford a better room, then they will.
- Bots build their bunker from left to right then top to bottom. When their bunker is full they will overbuild on the room worth the least reputation points, but only if it will give them more points overall. If the decision is tied on which room to overbuild, randomise the choice.
Resolving Bot B's colonist actions: When choosing what to do with a colonist, the bot will follow the priority order stated on the solo card. From left to right, starting with 1 and continuing sequentially, give each colonist action a number. If the first number stated does not exist or does not have any effect then carry on to the next action. Do this until one number applies. This is the action of the colonist that the bot will carry out.
Example: the bot puts a colonist to work with the priority order '2 3 4 1' (the printed priority icon in this example reads 2 4 1 3; the text gives 2 3 4 1). They draw the colonist card Deby Wardson. Their first priority is to carry out Deby's second action: heal 2 colonists. However, if no colonists are injured, the bot would instead try to do Deby's fourth action. Deby does not have a fourth action so they carry on to the next action in priority order: action 1. Deby is able to produce 2 nitrogen so this is the action the bot chooses.
Resolving Bot B's explore actions: When exploring with a colonist, Bot B will always target resources. They always target the most resources they can afford and reach with their backpack type (their location priority order is: Sanctuary Prime, Research Outpost, Crash Site, The Factory). If they can use the trade pool to afford a higher priority target then they will.
- They MUST move the exploration track the required amount of spaces.
- They MUST pay any nitrogen and/or food costs.
- They do NOT trigger any events (with the exception of raid events) but do resolve other effects on the exploration track.
Important: At the end of the player actions phase, bots will use food and nitrogen to resolve Dr. Sawbones cards in an attempt to heal any injured colonists. They will do this until all colonists are healed or until they run out of resources to do the trade anymore.
Special Colonists (Solo)
On the quick guide sheet, some special colonists have the solo symbol next to them. This means they have rules that apply to them specifically for solo play. See below for what those rules are:
- Beren Whaller (A): If the bot selects action 1: If they can remove a power shard and instead use it to power a room worth more reputation points, then they do so.
- Kronch (A): If the bot is the target of an attack, the bot will injure their lowest reputation colonist. If the decision is tied then randomise the choice.
- Lee-Roi (B): If the bot is the target of an attack, roll for the bot. If the bot must deactivate a room or injure a colonist, they choose the one with the lowest reputation. If the decision is tied then randomise the choice.
- Oran (A): The bot will prioritise the resource they steal in this order: magtape, food, nitrogen then scrap.
- Patrea Partay (B): If the bot selects the party action but has insufficient nitrogen, go to the next action in priority order.
- Peregrine Peremo (B): If the bot is the target of an assassination, they will exile the colonist with the lowest reputation. If the decision is tied then randomise the choice.
- Ruein (B): If the bot is the target of a sabotage, the bot will deactivate their lowest reputation rooms. If the decision is tied then randomise the choice.
- Ton-B (A): If the bot successfully time travels then they will use the next action in priority order.
- Trayze Taraia (A): If used by the bot, they gain 1 power shard instead of trading.
The solo bunker boards have room production bonuses with a solo symbol. It means no matter what type of room is built in these positions, if the room is powered they will get the bonus production.
Special Rooms (Solo)
On the quick guide sheet, some special rooms have the solo symbol next to them. This means they have rules that apply to them specifically for solo play. See below for what those rules are:
- Workers' Union: The bot will choose a random resting colonist to use again with the priority order: 1 2 3 4.
- Parallel Dynamics: The bot will choose to activate the adjacent room worth the most reputation points again. If the decision is tied then randomise the choice.
- Transmogrifier: The bot will always activate this room last and try to make an equal amount of food and nitrogen.
- Pandora's Portal: The bot will always choose to produce 1 reputation.
- Gamblers' Den: If able to, bots will always use the gamblers' den.
3. Rations (Solo)
The player carries out the rations phase as per normal (pg. 14). Bot A ignores this phase but Bot B will always pay as many rations as they can. If they can use the trade pool to feed more pairs of colonists, then they will.
4. Morale Points (Solo)
Follow instructions as per normal (pg. 14).
5. Room Production (Solo)
The printed text of this step reads "The player carries out the rations phase as per normal (pg. 15)." in the Room Production step; this is reproduced as printed (the rule referred to is the Room Production phase on pg. 15).
Bots activate their rooms from left to right then top to bottom. They will always convert as many resources as they can when using conversion rooms and always activate conversion rooms last.
6. Rest Colonists (Solo)
The player rests colonists as per normal (pg. 15). Bot A's colonist cards remain where they are. Bot B's non-injured colonist cards are shuffled into a face-down draw pile.
End Game Scoring (Solo)
Follow instructions as per normal (pg. 16) but with this one exception: When scoring bribes, the bot will take and score any unclaimed bribes that they can complete. If they can use any of the common trades to get the necessary resources needed to complete an unclaimed bribe, they will do so.
Other Game Variants
The Network Harmony Variant
There are some colonists and rooms in the game that can be used to sabotage your opponents' plans. Some players may prefer to play without these for a more peaceful game (at least as far as your opponents go). Remove the following colonist cards and room tiles from the game before you begin...
- Room tiles: Secret Meat Dispensary and Space Pirate Radio.
- Colonist cards: Kronch, Lee-Roi, Movoo, Oran, Peregrine Peremo and Ruein.
The Secret Promises Variant
In this variant, bribes are made at the start of the game and kept secret until the end. Before any bunker setup occurs, deal each player 4 bribe cards. Each player must then choose 3 to keep. More bribe cards do NOT become available in the second round and the make a bribe action is NOT used during the game.
Usual point scoring occurs at the end: successfully completed bribes score points and unsuccessful ones lose points.
Advanced Game Variant
Once you are an Arkosa veteran, you can give this advanced game variant a try... Follow the Regular Bunker Setup instructions, but after each player has chosen a special room, add the remaining special rooms to the room tile bag.
You can mix up any of the above variants in any way you choose. Tailor your game of Arkosa to the way you like to play!
FAQ
Q: During raid events, when calculating who has the 'best' of something, should colonists that get points per type of room in your bunker be included (e.g. Tann)? A: Yes. Calculate how many reputation points they are worth based on the amount of that type of room you have at the current point in the game.
Q: Can I use Hoo-di-di to skip over raids? A: No. The exploration track marker will stop when it moves over a raid event regardless of the number steps you choose to move it with Hoo-di-di's special ability.
Q: What happens when the exploration track marker lands on one of these spaces? (see image in the rulebook) A: These spaces are purely for determining where the exploration track marker starts during setup. Consider them blank spaces.
Q: What happens if I roll the injury symbol (the "Injure 1 colonist" icon) when using the Gambler's Den? A: You must injure 1 of your colonists (if able to).
Q: If I do not convert any resources with my conversion room, do I still get the room production bonus? A: Yes, but only if the room has an active power shard next to it.
Q: Can I use Beren Whaller to remove a deactivated power shard and then plug it back in activated again? A: Yes!
Q: Can I overbuild the rooms printed on the bunker boards? A: Yes!
Q: If Parallel Dynamics re-activates a powered room with a production bonus, does the bonus also trigger again? A: Yes!
Q: When playing the solo variant, when I pass, do I take the first player token and two resources? A: No, this rule only applies to the multiplayer version of the game. In the solo variant, the bot keeps the first player token and goes first in every round.
Resources
- Nitrogen: Fresh air for residents of Arkosa. Used for feeding colonists and exploring. Can be converted into morale with the Shisha Spa room. Required for some bribes.
- Food: Delicious bugs. Used for feeding colonists and exploring. Can be converted into morale with the Cyber Diner room. Required for some bribes.
- Scrap: The bricks of Arkosan bunkers. Used for building rooms. Can be converted into morale with the Innovation Unit room and Mech Arena special room. Required for some bribes.
- Magtape: The mortar of Arkosan bunkers. Used for building rooms. Can be converted into morale with the Innovation Unit room. Required for some bribes.
- Power Shard: Arkosa's most precious resource. Used to power rooms and required for some high value bribes.