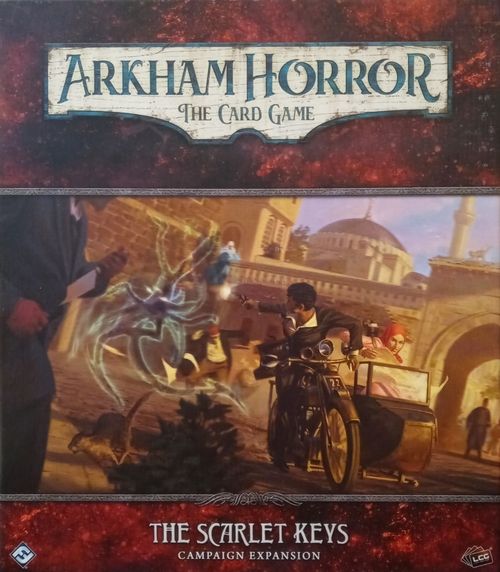
Arkham Horror: The Card Game – The Scarlet Keys: Campaign Expansion
Arkham Horror: The Card Game – The Scarlet Keys: Campaign Expansion Rulebook
Table of Contents
Table of Contents
- Additional Rules and Clarifications
- New Keywords
- Alert
- Patrol
- Campaign Setup
- File #5–A (Prologue): Riddles and Rain
- Interlude: The Foundation
- Embarking and Travel
- The Foundation Dossiers
- File #11–B: Dead Heat
- File #14–C: Ruses and Reclamation
- File #16–D: Sanguine Shadows
- Scenario Interlude: Cast a Light
- File #20–E: The Great Work
- File #21–F: Dealings in the Dark
- File #26–G: Quid Pro Quo
- File #27–H: Dead and Gone
- File #28–I: Dancing Mad
- File #32–J: The Coiled Serpent
- File #33–K: On Thin Ice
- Scenario Interlude: Raw Deal
- File #36–L: Strange Architecture
- File #37–M: Special Delivery
- File #38–N: Dogs of War
- File #44–O: Theory of Annihilation
- File #45–P: Metamorphosis
- File #46–Q: Shades of Suffering
- Scenario Interlude: The Bomoh
- File #49–R: Ringing Hollow
- File #50–S: Blood, Sweat, and Tea
- File #51–T: Romulus and Remus
- File #52–U: The Safehouse
- File #53–V: Whistle on the Wind
- File #54–W: Infernal Machinery
- File #55–X: Paranatural Selection
- File #56–Y: Without a Trace
- File #59–Z (Finale): Congress of the Keys
- Epilogue
- Status Reports
Additional Rules and Clarifications
The cards in The Scarlet Keys campaign expansion can be identified by the expansion icon before each card's collector number.
New Cardtype: Keys
The Scarlet Keys campaign features a new cardtype: keys. Keys are powerful artifacts that may be "shifted" to either aid or hinder investigators, depending on whom they are attached to and whether their Stable or Unstable side is faceup.
- During the resolution of a scenario, a key may become bound to a single bearer, whose name is marked in the Campaign Log. A key may be bound to an investigator, a story asset, or an enemy.
- A key always enters play attached to its bearer (as marked in the Campaign Log). At the start of each scenario, each investigator who is the bearer of 1 or more keys attaches those keys to their investigator card. Whenever a story asset or enemy enters play, if it is the bearer of 1 or more keys, those keys also enter play attached to their bearer.
- If a key's bearer is an investigator or a story asset, it enters play Stable side faceup.
- If a key's bearer is an enemy, it enters play Unstable side faceup.
- A key cannot leave play unless its bearer leaves play. If the bearer of 1 or more keys leaves play, each key they control is set aside, out of play. (Those keys do, however, remain bound to their bearer for future scenarios unless explicitly noted otherwise.)
- While a key is attached to an investigator, that investigator may trigger its shift ability during any player window as an action ability. This is called "shifting" the key. As part of this ability's resolution, it will instruct the investigator to flip the key to its other side, so its other shift ability is active. The investigator will then have to perform the shift ability on its Unstable side in order to flip it back over again.
- While a key is attached to a story asset, it may be shifted by any investigator who controls that asset in the same way.
- Each key (by title) attached to an investigator or story asset can only be shifted once per round.
- While a key is under an enemy's control, its shift ability only resolves when a card or game effect instructs an investigator to shift that key, after which it remains Unstable side faceup.
- A key attached to an enemy cannot be flipped to its Stable side.
- There is no limit to the number of times a key attached to an enemy can be shifted.
The Red-Gloved Man
During The Scarlet Keys campaign, investigators will confront a number of dangerous and mysterious members of the secret society known as the Red Coterie. One such member is the iconic Red-Gloved Man. As a result, while playing The Scarlet Keys campaign, investigators cannot purchase or include The Red-Gloved Man asset (The Dunwich Legacy card #310) in their decks.
New Keywords
Concealed X
Concealed X is a keyword that appears on some enemy cards in The Scarlet Keys campaign. Concealed enemies represent hidden enemies whose true location is a mystery until the investigators work to expose where—and in some cases, who—they truly are.
When a scenario includes one or more concealed enemies, investigators are instructed to set aside several concealed mini-cards. These mini-cards are double-sided. The facedown side represents the possible location of a concealed enemy. The revealed side reveals the mini-card's true nature—an enemy's true location, or simply a decoy.
- An enemy's mini-card marks the location of an enemy in the shadows.
- A decoy marks the location of nothing of consequence—a harmless bystander, or perhaps just a trick of the light.
When an investigator draws an enemy with the concealed X keyword (or is instructed to resolve an enemy's concealed keyword), they spawn that enemy into a game area above the agenda deck, not at any location. This area is called "the shadows," and represents enemies the investigators know exist somewhere on the map, but are unsure where. Then, that investigator takes the set-aside concealed mini-card that matches that enemy, along with X decoys (where X is defined by that enemy's concealed X value), shuffles them facedown, and puts them into play distributed as evenly as possible among each location in play, starting with the locations nearest to them. Then, at each of those locations that already had 1 or more concealed mini-cards, they shuffle each of them facedown as well.
Example: Amina draws Coterie Agent (A), which has "concealed 2." She first spawns the Coterie Agent into the shadows. Then, she takes the set-aside Coterie Agent (A) mini-card, along with 2 decoys, shuffles them facedown, and places one at each of the three locations nearest to her. Then, if any of those locations already had 1 or more concealed mini-cards, she would shuffle each concealed mini-card at those locations, as well.
Enemies in the shadows observe the following additional rules:
- Enemies in the shadows are considered to be in play, but not at any particular location. They cannot move until they leave the shadows.
- Enemies in the shadows can qualify as the "nearest" enemy, but only if there are no other enemies in play at any location.
- Enemies in the shadows cannot be damaged or leave play via player card effects.
Concealed Mini-Cards
While in play, concealed mini-cards represent the possible location of an enemy in the shadows. In order to deal with such an enemy, its true location must first be discovered by exposing its mini-card. This can be done via one of three methods: fighting, evading, or investigating.
- Concealed mini-cards are not enemies and cannot be engaged like enemies. However, any investigator at the same location as a concealed mini-card may attempt to expose it by successfully attacking it or evading it (as if it were an engaged enemy), or by successfully investigating its location. The difficulty to successfully attack or evade a concealed mini-card is equal to the shroud value of its location.
- An investigator may also use a card effect that automatically evades an enemy, deals damage to an enemy, or discovers a clue at a location in order to instead expose a concealed mini-card.
- If an investigator chooses to expose a concealed mini-card, that effect replaces the standard effects of the action or ability that exposed it. (i.e., if an enemy's mini-card is exposed by evasion or damage, the matching enemy is not evaded, nor does it take damage. If a mini-card is exposed by discovering clues or investigating, no clues are discovered.)
- If a concealed mini-card is exposed (via any of the above methods), flip it to its revealed side.
- If it is a decoy, set it aside, out of play, with no effect.
- If it is an enemy's mini-card, that enemy is now exposed. Place the matching enemy in the shadows at that mini-card's location, then set that mini-card aside, out of play. (That enemy is no longer in the shadows, and is now at the location where its mini-card was located.) Then, if there are no other enemies in the shadows, set all remaining concealed mini-cards in play aside, out of play.
- Only one concealed mini-card may be exposed per effect unless explicitly stated. (i.e., an effect that deals 3 damage to each enemy at a location does not expose all concealed mini-cards at that location; only one.)
Example: There is a Coterie Agent and a Coterie Assassin in the shadows. There is a concealed mini-card at Kymani's location and another concealed mini-card at a connecting location. (1) First, Kymani plays an event that discovers a clue at their location, but instead of discovering a clue, they choose to expose the concealed mini-card at their location, flipping it over. That mini-card is a decoy, and is set aside without effect. (2) Next, they move to the connecting location with the other concealed mini-card and attempt to expose it using an evade action. They succeed and flip the mini-card over…revealing the Coterie Assassin's mini-card! (3) The Coterie Assassin's mini-card is set aside, and the Coterie Assassin in the shadows is moved to Kymani's location, engaging them. Because there is another enemy in the shadows, they do not remove any of the other concealed mini-cards from play.
Alert
Some enemies have the alert keyword. Each time an investigator fails a skill test while attempting to evade an enemy with the alert keyword, after applying all results for that skill test, that enemy performs an attack against the evading investigator. An enemy does not exhaust after performing an alert attack. This attack occurs whether the enemy is engaged with the evading investigator or not.
Patrol
Some enemies have the patrol keyword. During the enemy phase (in framework step 3.2), each ready, unengaged enemy with the patrol keyword moves to a connecting location along the shortest path toward the designated location (as described in parentheses next to the word patrol).
- If there are multiple locations that qualify as the designated location, the lead investigator may choose which location the enemy moves toward.
- If an enemy with patrol would be compelled to move to a location via a path that is blocked by a card ability, the enemy does not move.
Campaign Setup
To set up The Scarlet Keys campaign, perform the following steps in order.
- Choose investigator(s).
- Each player assembles their investigator deck.
- Choose difficulty level.
- Assemble the campaign chaos bag.
- Easy (I want to wield the Keys): +1, +1, 0, 0, 0, –1, –1, –1, –2, –2, [skull icon], [skull icon], [hooded-figure icon], [insect icon], [S-shaped icon], [star icon].
- Standard (I want to be bound in Red): +1, 0, 0, –1, –1, –1, –2, –2, –3, –4, [skull icon], [skull icon], [hooded-figure icon], [insect icon], [S-shaped icon], [star icon].
- Hard (I want to face the Outside): 0, 0, 0, –1, –1, –2, –2, –3, –3, –4, –5, [skull icon], [skull icon], [hooded-figure icon], [insect icon], [S-shaped icon], [star icon].
- Expert (I want to be Hollowed): 0, –1, –1, –2, –2, –3, –3, –4, –4, –5, –6, –8, [skull icon], [skull icon], [hooded-figure icon], [insect icon], [S-shaped icon], [star icon].
You are now ready to begin at the Prologue (page 5).
File #5–A (Prologue): Riddles and Rain
Intro journal and dialogue text (Intro 1 through Intro 5) is read-aloud and is omitted; only the rules instructions are kept.
Intro 1
- If there is only one investigator in the game, proceed to Intro 2.
- If there is more than one investigator in the game, the lead investigator must decide (choose one):
- "Go alone, as requested." Skip to Intro 3.
- "Go with backup." Skip to Intro 4.
Intro 2
Read-aloud text is omitted.
- Skip to Intro 5.
Intro 3
Read-aloud text is omitted.
- Skip to Intro 5.
Intro 4
Read-aloud text is omitted.
- Proceed to Intro 5.
Intro 5
Read-aloud text is omitted.
- The investigators must decide (choose one):
- "Take his offer." Proceed to Intro 6.
- "Go to London on your own terms." Skip to Intro 7.
Intro 6
Read-aloud text is omitted.
- Trust is born of naïveté. Remove 1 [insect icon] token from the chaos bag and add 1 [hooded-figure icon] token. (This token can be later removed through an act of secrecy. However, you may become stronger if you stick to your convictions.)
- Read the rules for "Tracking Time" below. Mark 1 time in your Campaign Log now. Then, proceed to Setup.
Intro 7
Read-aloud text is omitted.
- Deception breeds uncertainty. Remove 1 [hooded-figure icon] token from the chaos bag and add 1 [insect icon] token. (This token can be later removed through an act of trust. However, you may become stronger if you stick to your convictions.)
- Read the rules for "Tracking Time" below. Mark 2 time in your Campaign Log now. Then, proceed to Setup.
Tracking Time
Throughout this campaign, tracking the passage of time is of crucial importance. As time marches on, these paranormal events will grow more and more dangerous, and machinations beyond your understanding will progress. Additionally, some opportunities may only be open to you during certain windows of time. When you are instructed to mark one or more time in your Campaign Log, fill in that many boxes under the "Time Passed" header.
If you fill in a box that has a symbol (in the form of a Greek letter), proceed to the Status Reports section of the Campaign Guide (on page 69), find the status report matching that letter, and read the text that follows.
Setup
- Gather all cards from the following encounter sets: Riddles and Rain, Crimson Conspiracy, Dark Veiling, Outsiders, Shadow of a Doubt, Strange Happenings, Chilling Cold, Locked Doors, and The Midnight Masks. These sets are indicated by their encounter set icons in the printed guide.
- When gathering The Midnight Masks encounter set, only gather the five treachery cards (2x False Lead and 3x Hunting Shadow). Do not gather the locations, acts, agendas, and scenario reference cards from that set.
- Set the Crimson Conspiracy and Outsiders encounter sets aside, out of play.
- Put the Rainy London Streets location into play.
- Each investigator begins play at Rainy London Streets.
- Set each other location aside, out of play.
- Set The Red-Gloved Man enemy and The Eye of Ravens key aside, out of play.
- Gather each decoy mini-card and each of the following mini-cards: The Red-Gloved Man and Coterie Agents (A, B and C). Set them aside, out of play.
- Shuffle the remaining encounter cards to build the encounter deck.
- You are now ready to begin.
Do Not Read Until the End of the Scenario
Read-aloud text is omitted.
If no resolution was reached (each investigator resigned or was defeated)
Read-aloud text is omitted.
- Skip to Resolution 4.
Resolution 1
Read-aloud text is omitted.
- Each investigator earns experience equal to the Victory X value of each card in the victory display.
- Choose an investigator to be the bearer of The Eye of Ravens and update the Campaign Log accordingly. From now on, whenever a character becomes the bearer of a Key, keep that Key handy for the rest of the campaign, as it will begin play attached to that character. (In future scenarios, The Eye of Ravens begins play attached to the investigator it is bound to.)
- In your Campaign Log, record you haven't seen the last of the Red-Gloved Man.
- Mark 1 time in your Campaign Log.
- Proceed to Interlude: The Foundation (page 9).
Resolution 2
Read-aloud text is omitted.
- Each investigator earns experience equal to the Victory X value of each card in the victory display.
- Choose an investigator to be the bearer of The Eye of Ravens and update the Campaign Log accordingly. From now on, whenever a character becomes the bearer of a Key, keep that Key handy for the rest of the campaign, as it will begin play attached to that character. (In future scenarios, The Eye of Ravens begins play attached to the investigator it is bound to.)
- In your Campaign Log, record you haven't seen the last of the Red-Gloved Man.
- Mark 1 time in your Campaign Log.
- Proceed to Interlude: The Foundation (page 9).
Resolution 3
Read-aloud text is omitted.
- Each investigator earns experience equal to the Victory X value of each card in the victory display.
- The Red-Gloved Man is the bearer of The Eye of Ravens. Update the Campaign Log accordingly. From now on, whenever a character becomes the bearer of a Key, keep that Key handy for the rest of the campaign, as it will begin play attached to that character. (In future scenarios, if The Red-Gloved Man enters play, The Eye of Ravens begins play attached to him.)
- In your Campaign Log, record you haven't seen the last of the Red-Gloved Man.
- Mark 1 time in your Campaign Log.
- Proceed to Interlude: The Foundation (page 9).
Resolution 4
Read-aloud text is omitted.
- Each investigator earns experience equal to the Victory X value of each card in the victory display.
- The Red-Gloved Man is the bearer of The Eye of Ravens. Update the Campaign Log accordingly. From now on, whenever a character becomes the bearer of a Key, keep that Key handy for the rest of the campaign, as it will begin play attached to that character. (In future scenarios, if The Red-Gloved Man enters play, The Eye of Ravens begins play attached to him.)
- In your Campaign Log, record you haven't seen the last of the Red-Gloved Man.
- Mark 2 time in your Campaign Log.
- Proceed to Interlude: The Foundation (page 9).
Interlude: The Foundation
The Foundation 1
Read-aloud text is omitted.
- The investigators must decide (choose one):
- "Tell Taylor about the disappearances." Proceed to The Foundation 2.
- "Do not tell Taylor about the disappearances." Skip to The Foundation 3.
The Foundation 2
Read-aloud text is omitted.
- Remove 1 [insect icon] token from the chaos bag. Add 1 [hooded-figure icon] token (if there are already 4, each investigator earns 1 experience instead).
- In your Campaign Log, record the cell told the truth to Taylor. Skip to The Foundation 4.
The Foundation 3
Read-aloud text is omitted.
- Remove 1 [hooded-figure icon] token from the chaos bag. Add 1 [insect icon] token (if there are already 4, each investigator earns 1 experience instead).
- In your Campaign Log, record the cell hid the truth from Taylor. Proceed to The Foundation 4.
The Foundation 4
Read-aloud text is omitted. The leads below are the Foundation's own briefing text, kept in the order printed.
The Foundation has several leads concerning the whereabouts of the Red Coterie.
- One is likely in Inspector Flint's home city of Shanghai, where there have been many rumors about the existence of a secret cabal led by a mysterious woman with a red parasol.
- In Alexandria, there have been a rash of beastly killings throughout the city. The Foundation has reason to believe a member of the Coterie is involved.
- A string of high-profile burglaries in Buenos Aires has led the Foundation to believe that one of the Coterie members is responsible. It is likely a Key is the primary target.
- A member of the Coterie has a sanctum in Nairobi. Perhaps there you might learn what they have planned.
- The Foundation have procured the journal of a prospector recently working in Anchorage. Perhaps the site of a Key?
- A Coterie agent operating out of Istanbul has already reached out to Foundation operatives. A defector, perhaps? Or it could be a trap.
- Locals in Kathmandu have reported seeing a "spirit" matching the description of another Coterie agent.
- A deadly Coterie agent has been sighted in Marrakesh. Reports of tomb robberies and strange overgrowth have the local Foundation operatives on edge.
- A Coterie agent has made a name for himself in Havana, where rum and other illicit goods are being smuggled into the United States.
Read the rules for "Embarking and Travel" and "The Foundation Dossiers" below. Then, when you are ready to proceed, embark from London to a new location.
Embarking and Travel
Whenever you embark, you may travel wherever you wish using the map included in The Scarlet Keys campaign expansion. Each space on the map is connected to one or more other spaces by paths. When you are ready to embark, travel along the paths to reach whichever destination you wish (as a group). For each path you use to reach your destination, you must mark 1 time in your Campaign Log (to a minimum of 1).
[The travel map is an illustration and is not transcribed. Its spaces are marked with a number and letter, for example Rome 51–T, Marrakesh 11–B, Alexandria 38–N, and Constantinople 21–F, and the page of this guide for each space is that number and letter.]
At each space on the map, there is a number and letter combination that will guide you to a particular page in this Campaign Guide. You do not have to stop at every space you travel through; however, if you wish to stop traveling and see what is at that space, turn to the page of the Campaign Guide that matches the indicated number and follow the story text there. (Or use the table of contents on page 2 to help you find the appropriate page.) This might lead you to an interlude or to a scenario. There is no perfect path to follow, so follow your gut…just be wary of how much time you spend (see "Tracking Time" on page 6).
For example: Shelley wishes to travel from Alexandria to Marrakesh. She first marks 1 time to use the path to Rome, but chooses not to stop there, and marks 1 more time to travel to Marrakesh, where she stops. Marrakesh is marked as "11–B," so she opens the Campaign Guide to page 11 and reads File #11–B: Dead Heat.
- Some locations are marked by a red border and the lack of a letter. You can only travel to such a location once you are permitted to do so by a Campaign Log entry.
- Some locations, marked by a green border, represent the sites of possible side stories (found in other Arkham Horror: The Card Game standalone products). If you wish to incorporate a side story into this campaign, simply travel to the appropriate location on the map and spend additional time equal to the normal experience cost for playing that side story (instead of spending the experience cost).
- If you are not stopping at one of these locations to embark on a side-story, you may skip it and continue traveling along the path. If so, count it as one contiguous path, not as two separate paths.
- Once you have stopped at a location, you cannot stop there again for the remainder of the campaign unless instructed otherwise.
The Foundation Dossiers
Throughout this Campaign Guide, there are a number of Foundation Dossier sidebars, an example of which is presented below. Investigators are allowed to peek at the Foundation Dossier sidebar for any space on the map, at any time. Use these sidebars to help guide your actions and plan your route. While reading a dossier, investigators are not allowed to peek at any other text on that page until they travel to that location.
[The printed Foundation Dossier sidebar example is not transcribed. Dossiers are marked "You may read this dossier at any time" (standard), "cannot stop here until unlocked" (secret/locked location), or "may stop at to play side-story" (side-story location). The dossier text for each file appears under its File number in this guide.]
File #11–B: Dead Heat
The File #11–B Foundation Dossier (the subject file on Amaranth) is printed text that the investigators may read at any time; it is omitted here as lore, and the dossier's approach procedure is non-mechanical. The intro and resolution narrative is read-aloud and is omitted; only the rules instructions are kept.
Intro 1
Read-aloud text is omitted.
- Check how much time has passed in the Campaign Log.
- If fewer than 15 time has passed, proceed to Intro 2.
- If 15 to 24 time has passed, skip to Intro 3.
- If 25 or more time has passed, skip to Intro 4.
Intro 2
Read-aloud text is omitted.
- Proceed to Setup.
Intro 3
Read-aloud text is omitted.
- Proceed to Setup.
Intro 4
Read-aloud text is omitted.
- Skip to Resolution 5 (page 13).
Setup
- Gather all cards from the following encounter sets: Dead Heat, Scarlet Sorcery, Spreading Corruption, Ghouls, and Striking Fear. These sets are indicated by their encounter set icons in the printed guide.
- Put all 5 Marrakesh locations into play, using only their non-Abandoned versions. Set aside the Abandoned version of each location.
- Each investigator begins play at Marrakesh Railway Station.
- For each location in play, place resources on it equal to one more than the number of investigators, as civilians (see "Civilians" below). Then, check the Campaign Log:
- If 10 or fewer time has passed, no change is made.
- If 11–17 time has passed, choose 1 civilian as evenly as possible among all locations in play. Those civilians are slain.
- If 18–24 time has passed, choose 2 civilians as evenly as possible among all locations in play. Those civilians are slain.
- Set the following cards aside, out of play: the double-sided Amaranth enemy, the Razin Farhi enemy, the Khalid enemy, both copies of the Ancient Raider enemy, The Last Blossom key, and the double-sided "Save the Civilians / Aftermath" story card.
- Check the Campaign Log and build the act and/or agenda decks accordingly.
- If fewer than 15 time has passed, no change is made.
- If 15 to 24 time has passed, remove act 1 from the game. The game begins at act 2a. Place doom equal to the number of players on agenda 1. Spawn Amaranth (Lurking Corruption) at Bahia Palace Garden, and attach The Last Blossom to her. Put the set-aside Save the Civilians story card into play. Shuffle the Khalid enemy into the encounter deck.
- Shuffle the remaining encounter cards to build the encounter deck.
- You are now ready to begin.
Civilians
In this scenario, resources on locations represent the innocent civilians of Marrakesh, who are in grave danger.
- For the purposes of enemy movement and enemy attacks, enemies treat civilians as if they were investigators. (Enemies do not engage civilians, but may attack civilians at their location as if they were engaged.) If a civilian is attacked, they are automatically slain.
- Civilians remain present on a location when it is revealed.
- When a civilian is slain, place it on the scenario reference card, to track how many civilians have been slain.
Choosing a Random Location
During this scenario, you will often be instructed to choose a random location. This should be done by shuffling together the 5 locations not currently in play (the versions of each location in play not currently being used) and drawing 1 at random.
Replacing Locations
Throughout this scenario, you may be instructed to swap set-aside locations with existing ones. When a location is swapped with one that is already in play, it takes its place. All tokens, attachments, investigators, enemies, and other cards at the former location are considered to now be at the new location (attached cards remain attached, for example). No game element is considered to have moved during such a swap.
Do Not Read Until the End of the Scenario
Read-aloud text is omitted.
If no resolution was reached (each investigator resigned or was defeated)
Read-aloud text is omitted.
- Each civilian remaining in play is slain. If it is still Act 1, draw the set-aside Save the Civilians story card and resolve the Aftermath side.
- Check which enemies are in play.
- If Razin Farhi is in play, skip to Resolution 1.
- If the above is not true, skip to Resolution 2.
Resolution 1
Read-aloud text is omitted.
- Each investigator earns experience equal to the Victory X value of each card in the victory display.
- Amaranth is the bearer of The Last Blossom. Update the Campaign Log accordingly.
- In your Campaign Log, record the lovers are reunited.
- Mark 1 time in your Campaign Log. You may embark.
Resolution 2
Read-aloud text is omitted.
- Each investigator earns experience equal to the Victory X value of each card in the victory display.
- Amaranth is the bearer of The Last Blossom. Update the Campaign Log accordingly.
- In your Campaign Log, record you haven't seen the last of Amaranth.
- Mark 1 time in your Campaign Log. You may embark.
Resolution 3
Read-aloud text is omitted.
- Each investigator earns experience equal to the Victory X value of each card in the victory display.
- Choose an investigator to be the bearer of The Last Blossom and update the Campaign Log accordingly.
- In your Campaign Log, record Amaranth has left the Coterie.
- Mark 2 time in your Campaign Log. You may embark.
Resolution 4
Read-aloud text is omitted.
- Each investigator earns experience equal to the Victory X value of each card in the victory display.
- Choose an investigator to be the bearer of The Last Blossom and update the Campaign Log accordingly.
- In your Campaign Log, record you haven't seen the last of Amaranth.
- Mark 1 time in your Campaign Log. You may embark.
Resolution 5
Read-aloud text is omitted.
- In your Campaign Log, record you haven't seen the last of Amaranth.
- Each investigator suffers 1 mental trauma as they survey the ruins of Marrakesh.
- Each investigator earns 3 bonus experience as they help the survivors of the city rebuild.
- Amaranth is the bearer of The Last Blossom. Update the Campaign Log accordingly.
- Mark 1 time in your Campaign Log. You may embark.
File #14–C: Ruses and Reclamation
The opening step of this file is printed without a heading; it is transcribed in place below.
- Determine if this is the site of your missing Keys by performing the following steps:
- Gather an enemy's concealed mini-card (it doesn't matter which one) and three decoys.
- If wrong leads is recorded in your Campaign Log, gather one fewer decoy for each tally mark recorded next to it.
- If there are 3 tally marks next to wrong leads, skip this process and go immediately to Ruses and Reclamation 2.
- Flip the gathered concealed cards facedown and shuffle them. Choose one at random.
- If it is a decoy, proceed to Ruses and Reclamation 1.
- If it is an enemy's concealed mini-card, skip to Ruses and Reclamation 2.
- Gather an enemy's concealed mini-card (it doesn't matter which one) and three decoys.
Ruses and Reclamation 1
Read-aloud text is omitted.
- In your Campaign Log, record wrong leads, and next to this, record 1 tally mark. (If wrong leads is already recorded in your Campaign Log, add 1 tally mark to it.)
- You may embark.
Ruses and Reclamation 2
Read-aloud text is omitted.
- Mark 1 time in your Campaign Log. Read only the following section that pertains to your situation. Then, you may embark.
- If The Red-Gloved Man stole the Key(s): Update the Keys section of your Campaign Log such that the Key(s) that were stolen return to their original bearers. Each investigator earns 1 experience, plus 1 additional experience for each tally mark recorded next to wrong leads. Cross off "14–C" on each of the remaining locations in the Campaign Log.
- If The Claret Knight stole the Key(s): Update the Keys section of your Campaign Log such that the Key(s) that were stolen return to their original bearers. Each investigator earns 1 experience, plus 1 additional experience for each tally mark recorded next to wrong leads. Cross off "14–C" on each of the remaining locations in the Campaign Log.
- If The Beast in a Cowl of Crimson stole the Key(s): Update the Keys section of your Campaign Log such that the Key(s) that were stolen return to their original bearers. Each investigator earns 1 experience, plus 1 additional experience for each tally mark recorded next to wrong leads. Cross off "14–C" on each of the remaining locations in the Campaign Log.
- If La Chica Roja stole the Key(s): Update the Keys section of your Campaign Log such that the Key(s) that were stolen return to their original bearers. Each investigator earns 1 experience, plus 1 additional experience for each tally mark recorded next to wrong leads. Cross off "14–C" on each of the remaining locations in the Campaign Log.
- If The Sanguine Watcher stole the Key(s): Update the Keys section of your Campaign Log such that the Key(s) that were stolen return to their original bearers. Each investigator earns 1 experience, plus 1 additional experience for each tally mark recorded next to wrong leads. Cross off "14–C" on each of the remaining locations in the Campaign Log.
- If Amaranth stole the Key(s): Update the Keys section of your Campaign Log such that the Key(s) that were stolen return to their original bearers. Each investigator earns 1 experience, plus 1 additional experience for each tally mark recorded next to wrong leads. Cross off "14–C" on each of the remaining locations in the Campaign Log.
- If Aliki Zoni Uperetria stole the Key(s): Update the Keys section of your Campaign Log such that the Key(s) that were stolen return to their original bearers. Each investigator earns 1 experience, plus 1 additional experience for each tally mark recorded next to wrong leads. Cross off "14–C" on each of the remaining locations in the Campaign Log.
File #16–D: Sanguine Shadows
The File #16–D Foundation Dossier (the subject file on the Girl in Carmine Coat) is printed text omitted here as lore. The intro narrative is read-aloud and is omitted; only the rules instructions are kept.
Intro 1
Read-aloud text is omitted.
- The investigators must decide (choose one):
- "Tell Bolívar everything regarding the target." Proceed to Intro 2.
- "Give Bolívar some breadcrumbs." Skip to Intro 3.
- "Insist that Bolívar tells you what he knows." Skip to Intro 4.
Intro 2
Read-aloud text is omitted. A passage is read only if an investigator has the Criminal trait; it is noted here and not transcribed.
- Remove 1 [insect icon] token from the chaos bag. Add 1 [hooded-figure icon] token (if there are already 4, each investigator earns 1 experience instead).
- Remember that "Matias Bolívar trusts you."
- Proceed to Setup.
Intro 3
Read-aloud text is omitted.
- Proceed to Setup.
Intro 4
Read-aloud text is omitted.
- Remove 1 [hooded-figure icon] token from the chaos bag. Add 1 [insect icon] token (if there are already 4, each investigator earns 1 experience instead).
- Remember that "Matias Bolívar doesn't trust you."
- Proceed to Setup.
Setup
- Gather all cards from the following encounter sets: Sanguine Shadows, Dark Veiling, Mysteries Abound, Shadow of a Doubt, Strange Happenings, Locked Doors, and Nightgaunts. These sets are indicated by their encounter set icons in the printed guide.
- Build the agenda deck using only agenda 1 and the act deck using only acts 1 and 2.
- Put the Avenida de Mayo location into play.
- Each investigator begins play at Avenida de Mayo.
- Choose one of the seven remaining locations at random, and remove it from the game. Put the other six locations into play, surrounding Avenida de Mayo (see suggested location placement below).
- Place one resource on each location in play other than Avenida de Mayo, as targets. (There should be six targets, in total).
- These targets represent the locations you suspect La Chica Roja is looking to steal from.
- Gather each decoy mini-card and each of the following mini-cards: La Chica Roja and Apportioned Ka. Set them aside, out of play.
- Find the double-sided La Chica Roja card, flip her to her enemy side, and resolve her concealed keyword.
- Set the following cards aside, out of play: The Sanguine Watcher enemy, the Apportioned Ka enemy, the Seeing Red act/agenda, and The Weeping Lady key.
- Shuffle the remaining encounter cards to build the encounter deck.
- You are now ready to begin.
Location Placement for "Sanguine Shadows"
The suggested placement diagram is printed on the guide. The seven candidate locations, all in Buenos Aires, are: Catedral Metropolitana, Casa Rosada, Cementerio de la Recoleta, Banco de la Provincia, Palacio Errázuriz, The Cabildo, and Teatro Colón. Their location descriptions are flavour and are omitted. Note printed on the guide: one of the above locations is randomly removed from the game during setup and will not be in play.
Scenario Interlude: Cast a Light
Within this interlude, "(→R1)" is printed as a reference to a resolution outside the interlude; it is kept as printed. The printed "Proceeed to Cast a Light 7" is transcribed as "Proceed to Cast a Light 7".
Cast a Light 1
Read-aloud text is omitted.
- Check the targets in play and the Campaign Log.
- If there are no targets on La Chica Roja, proceed to Cast a Light 2.
- Otherwise, skip to (→R1).
Cast a Light 2
Read-aloud text is omitted.
- The lead investigator must decide (choose one):
- "I believe you." Proceed to Cast a Light 3.
- "I'm sorry, but I cannot believe you." Skip to Cast a Light 4.
Cast a Light 3
Read-aloud text is omitted.
- If "Matias Bolívar trusts you," skip to Cast a Light 5.
- If "Matias Bolívar doesn't trust you," skip to Cast a Light 6.
- If neither of the above are true, skip to Cast a Light 7.
Cast a Light 4
Read-aloud text is omitted.
- Skip to (→R1).
Cast a Light 5
Read-aloud text is omitted.
- Skip to Cast a Light 7.
Cast a Light 6
Read-aloud text is omitted.
- Proceed to Cast a Light 7.
Cast a Light 7
Read-aloud text is omitted.
- Flip La Chica Roja to her story asset side, removing all tokens and attachments from her, and choose an investigator to take control of her.
- Remove the agenda and act decks from the game. Put the set-aside Seeing Red act/agenda into play. It is both the current act and the current agenda.
- Place 1 doom on Seeing Red.
- Randomly choose a location with a target on it. Spawn The Sanguine Watcher at that location. Remove all other targets from locations in play.
- Find the set-aside Apportioned Ka enemy and resolve its concealed keyword, distributing its 5 concealed mini-cards as evenly as possible among each non-Central location that does not have a target.
- Shuffle the encounter discard pile into the encounter deck.
- You are now ready to continue playing.
Do Not Read Until the End of the Scenario
Read-aloud text is omitted.
If no resolution was reached (each investigator resigned or was defeated) and it is act 1 or 2
Read-aloud text is omitted.
- Skip to Resolution 3.
If no resolution was reached (each investigator resigned or was defeated) and the current act/agenda is "Seeing Red"
Read-aloud text is omitted.
- Each investigator earns experience equal to the Victory X value of each card in the victory display. Each investigator earns 3 bonus experience, as they gain insight into the inner workings of the Red Coterie.
- In your Campaign Log, record The Sanguine Watcher's torment continues.
- In your Campaign Log, record La Chica Roja is on your side.
- The Sanguine Watcher is the bearer of The Weeping Lady. Update the Campaign Log accordingly.
- Mark 2 time in your Campaign Log. You may embark.
Resolution 1
Read-aloud text is omitted.
- Each investigator earns experience equal to the Victory X value of each card in the victory display. Each investigator earns 1 bonus experience for each target that was on the scenario reference card when the scenario ended.
- In your Campaign Log, record you haven't seen the last of La Chica Roja.
- Choose an investigator to be the bearer of The Weeping Lady and update the Campaign Log accordingly.
- Mark 1 time in your Campaign Log. You may embark.
Resolution 2
Read-aloud text is omitted.
- Each investigator earns experience equal to the Victory X value of each card in the victory display. Each investigator earns 3 bonus experience, as they gain insight into the inner workings of the Red Coterie.
- In your Campaign Log, record you haven't seen the last of The Sanguine Watcher.
- In your Campaign Log, record La Chica Roja is on your side.
- Choose an investigator to be the bearer of The Weeping Lady and update the Campaign Log accordingly.
- Mark 3 time in your Campaign Log. You may embark.
Resolution 3
Read-aloud text is omitted.
- Each investigator earns experience equal to the Victory X value of each card in the victory display. Each investigator earns 1 bonus experience for each target that was on the scenario reference card when the scenario ended.
- In your Campaign Log, record you haven't seen the last of La Chica Roja.
- La Chica Roja is the bearer of The Weeping Lady. Update the Campaign Log accordingly.
- Mark 1 time in your Campaign Log. You may embark.
File #20–E: The Great Work
Read-aloud text is omitted throughout this file; only the rules instructions are kept.
The Great Work 1
Read-aloud text is omitted.
- Check the Campaign Log.
- If Tuwile Masai fled to Bermuda, proceed to The Great Work 2.
- Otherwise, skip to The Great Work 5.
The Great Work 2
Read-aloud text is omitted.
- Check the Campaign Log.
- If at least two of the following are recorded (Ece does not trust the cell, you haven't seen the last of La Chica Roja, you haven't seen the last of Desi, you haven't seen the last of the Claret Knight, you haven't seen the last of Thorne, or you haven't seen the last of Aliki Zoni Uperetria), proceed to The Great Work 3.
- Otherwise, skip to The Great Work 4.
The Great Work 3
Read-aloud text is omitted.
- Each investigator earns 3 experience, as they gain insight into the inner workings of the Red Coterie.
- You may embark.
The Great Work 4
Read-aloud text is omitted.
- In your Campaign Log, record Tuwile Masai is on your side.
- Each investigator earns 1 experience, as they gain insight into the inner workings of the Red Coterie.
- Choose an investigator to be the bearer of The Bale Engine and update the Campaign Log accordingly. This card can be found in the Globetrotting encounter set (indicated by its encounter set icon in the printed guide).
- Mark 1 time in your Campaign Log. You may embark.
The Great Work 5
Read-aloud text is omitted.
- Each investigator may begin the next scenario with 1 additional card in their opening hand.
- You may return to Bermuda again during this campaign, but only after playing another scenario.
- You may embark.
File #21–F: Dealings in the Dark
The File #21–F Foundation Dossier (the subject file on Ece Şahin) is printed text omitted here as lore. Read-aloud text is omitted throughout this file; only the rules instructions are kept.
Intro 1
Read-aloud text is omitted.
- The investigators must decide (choose one):
- "All right. We will find it and place it in your care." Proceed to Intro 2.
- "All right. We will find it and place it in your care." (You are lying.) Skip to Intro 3.
- "We will track down this talisman, but we will be taking it into our custody." Skip to Intro 4.
Within Intro 1 there is a passage marked "Read only if at least 1 key is bound to an investigator." It is read-aloud text and is omitted.
Intro 2
Read-aloud text is omitted.
- In your Campaign Log, record the cell is working with Ece.
- Remove 1 [insect icon] token from the chaos bag. Add 1 [hooded-figure icon] token (if there are already 4, each investigator earns 1 experience instead).
- Proceed to Setup.
Intro 3
Read-aloud text is omitted.
- In your Campaign Log, record the cell is deceiving Ece.
- Remove 1 [hooded-figure icon] token from the chaos bag. Add 1 [insect icon] token (if there are already 4, each investigator earns 1 experience instead).
- Proceed to Setup.
Intro 4
Read-aloud text is omitted.
- In your Campaign Log, record the cell refused Ece's offer.
- Proceed to Setup.
Setup
- Gather all cards from the following encounter sets: Dealings in the Dark, Agents of Yuggoth, Dark Veiling, Ancient Evils, Dark Cult, Locked Doors, and The Midnight Masks. These sets are indicated by their encounter set icons in the printed guide.
- When gathering The Midnight Masks encounter set, only gather the five treachery cards (2x False Lead and 3x Hunting Shadow). Do not gather the locations, acts, agendas, and scenario reference cards from that set.
- Put the double-sided "The Unveiling / The Unsealing" story card into play next to the scenario reference card, The Unveiling side faceup.
- Check how much time has passed in the Campaign Log.
- If 10 or fewer time has passed, no changes are made.
- If 11–17 time has passed, place clues on The Unveiling equal to half the number of investigators (rounded up).
- If 18–24 time has passed, place clues on The Unveiling equal to the number of investigators.
- If 25 or more time has passed, place clues on The Unveiling equal to twice the number of investigators.
- Put the following locations into play: Hagia Sophia, Istanbul University, Obelisk of Theodosius, and Galata. Hagia Sophia must be on the right hand side of the play area. (See location placement below.)
- Each investigator begins play at the Hagia Sophia.
- Check the Campaign Log.
- If the cell is working with Ece, or if the cell is deceiving Ece, put the Ece Şahin story asset into play under any investigator's control.
- If the cell refused Ece's offer, remove the Ece Şahin story asset from the game.
- Set each of the following cards aside, out of play: Each of the seven Grand Bazaar locations, the Umbral Harbinger enemy, the Emissary from Yuggoth enemy, the Galata Docks location, the Twisted Antiprism key, and The Chase act/agenda card.
Location Placement for "Dealings in the Dark"
The suggested placement diagram is printed on the guide. The four starting locations are Istanbul University, Galata, Hagia Sophia, and Obelisk of Theodosius. Their location descriptions are flavour and are omitted.
Location Adjacency in the Grand Bazaar
This scenario's 4 starting locations are arranged as shown above, and are connected through their connection symbols. Later during the scenario, the investigators will be instructed to put Grand Bazaar locations into play. Each Grand Bazaar location is connected to each Grand Bazaar location adjacent to it.
- Adjacent locations share a side in common (left, right, above, or below). Locations that share only a corner are not adjacent.
Acolyte Concealed Mini-cards
The first agenda of this scenario causes each Cultist enemy, including those from the Core Set, to gain the concealed keyword. Since the three Acolytes from the Core Set are not labeled as A, B and C, when resolving their concealed keyword, use any of the Acolyte (any) mini-cards along with their decoy. Likewise, when an "Acolyte (any)" mini-card is exposed, the exposing investigator may choose any Acolyte in the shadows to engage.
Act 2 Setup
When you are instructed to do so during act 1b, follow these instructions to set up the play area for act 2.
- Set each of the current locations aside, without discarding any cards or tokens at those locations. Those locations (along with cards and tokens at those locations) are not considered to be in play during act 2, but will re-enter play later in the same state. (Investigators are not defeated during this process.)
- Shuffle the seven Grand Bazaar locations and remove one of them from the game at random, without looking at it.
- Reveal a random token from the chaos bag, and find the diagram below that matches the revealed chaos token (if none match, retry).
- Put the remaining six Grand Bazaar locations into play, arranged in a pattern of rows and columns according to the randomly chosen diagram. Note that one of these locations is designated as the "entrance" and one is designated as the "east gate."
- Move each investigator to the Grand Bazaar location marked in the randomly chosen diagram as the "entrance."
- Shuffle together each of the concealed mini-cards on the four locations from act 1, and divide them as evenly as possible among the Grand Bazaar locations in play.
- You are now ready to proceed to act 2.
Diagram key: the five layouts on the printed page are each keyed to a set of chaos token images (shown as numbered tokens or as symbol tokens). Each layout is transcribed below as a grid, read row by row from the top. "E" marks the entrance, "G" marks the east gate, "X" is a Grand Bazaar location, and "_" is an empty space. The token images for each layout are pictured on the printed page and are matched to the revealed token there.
- Layout 1 (keyed to the numbered tokens 2, 4, 5 and 6):
- _ X _ _
- E X X X
- _ _ _ G
- Layout 2 (keyed to three symbol tokens):
- _ _ G
- E X X
- _ X X
- Layout 3 (keyed to the numbered tokens 1, 3, 5 and 7):
- _ _ X _
- E X X G
- _ X _ _
- Layout 4 (keyed to a symbol token and the numbered tokens 1 and 0):
- _ _ X G
- E X X X
- Layout 5 (keyed to two symbol tokens):
- _ _ _ G
- _ _ _ X
- E X X X
Location Placement for Act 2 (Grand Bazaar)
Each Grand Bazaar location is printed as "Istanbul. Bazaar." with a flavour description, which is omitted.
Do Not Read Until the End of the Scenario
Read-aloud text is omitted.
If no resolution was reached because each investigator was defeated, and it is act 1 or 2
Read-aloud text is omitted.
- Each investigator earns experience equal to the Victory X value of each card in the victory display.
- The Red-Gloved Man is the bearer of The Twisted Antiprism. Update the Campaign Log accordingly.
- Mark 1 time in your Campaign Log. You may embark.
If no resolution was reached (each investigator resigned or was defeated) and it is act 3
Read-aloud text is omitted.
- Skip to Resolution 6.
Resolution 1
Read-aloud text is omitted.
- Check the Campaign Log.
- If the cell refused Ece's offer, proceed to Resolution 2.
- If the cell is working with Ece or if the cell is deceiving Ece, skip to Resolution 3.
Resolution 2
Read-aloud text is omitted.
- Each investigator earns experience equal to the Victory X value of each card in the victory display.
- Choose an investigator to be the bearer of The Twisted Antiprism and update the Campaign Log accordingly.
- Mark 2 time in your Campaign Log. You may embark.
Resolution 3
Read-aloud text is omitted.
- Check the Campaign Log.
- If the cell is working with Ece, proceed to Resolution 4.
- If the cell is deceiving Ece, skip to Resolution 5.
Resolution 4
Read-aloud text is omitted.
- Each investigator earns experience equal to the Victory X value of each card in the victory display.
- In your Campaign Log, record Ece trusts the cell.
- Ece Şahin is the bearer of The Twisted Antiprism. Update the Campaign Log accordingly.
- Mark 3 time in your Campaign Log. You may embark.
Resolution 5
Read-aloud text is omitted.
- Each investigator earns experience equal to the Victory X value of each card in the victory display.
- In your Campaign Log, record Ece does not trust the cell.
- Choose an investigator to be the bearer of The Twisted Antiprism and update the Campaign Log accordingly.
- Mark 3 time in your Campaign Log. You may embark.
Resolution 6
Read-aloud text is omitted.
- Each investigator earns experience equal to the Victory X value of each card in the victory display.
- The Red-Gloved Man is the bearer of The Twisted Antiprism. Update the Campaign Log accordingly.
- Mark 2 time in your Campaign Log. You may embark.
File #26–G: Quid Pro Quo
The File #26–G1–6 Sanctum Dossier is printed text omitted here as lore. Read-aloud text is omitted throughout this file; only the rules instructions are kept.
- Check where you are on the map.
- If you are in San Francisco, proceed to Quid Pro Quo 1.
- If you are in Moscow, skip to Quid Pro Quo 2.
Quid Pro Quo 1
Read-aloud text is omitted.
- The investigators must decide (choose one):
- "We'd like to get around faster." The lead investigator adds one copy of Expedited Ticket to their deck. You may embark.
- "We'd like some supplies." Each investigator earns 1 experience. You may embark.
- "We'd like some intel on 'Subject #11–B.'" Skip to Quid Pro Quo 3. Choose this option only if you have not yet visited Marrakesh.
Quid Pro Quo 2
Read-aloud text is omitted.
- The investigators must decide (choose one):
- "We'd like to get around faster." The lead investigator adds one copy of Expedited Ticket to their deck. You may embark.
- "We'd like some supplies." Each investigator earns 1 experience. You may embark.
- "We'd like some intel on 'Subject #28–I.'" Skip to Quid Pro Quo 4. Choose this option only if you have not yet visited Havana.
Quid Pro Quo 3
Read-aloud text is omitted.
- In your Campaign Log, record the cell knows Amaranth's real name.
- You may embark.
Quid Pro Quo 4
Read-aloud text is omitted.
- In your Campaign Log, record the cell knows Desi's past.
- You may embark.
File #27–H: Dead and Gone
Read-aloud text is omitted throughout this file; only the rules instructions are kept.
Dead and Gone 1
Read-aloud text is omitted.
- Check the Campaign Log.
- If Agent Quinn does not trust the cell, proceed to Dead and Gone 2.
- Otherwise, skip to Dead and Gone 5.
Dead and Gone 2
Read-aloud text is omitted.
- The investigators must decide (choose one):
- "Tell Agent Quinn the truth." Proceed to Dead and Gone 3.
- "Keep your secrets." Skip to Dead and Gone 4.
Dead and Gone 3
Read-aloud text is omitted.
- In your Campaign Log, cross off Agent Quinn does not trust the cell.
- Remove 1 [insect icon] token from the chaos bag. Add 1 [hooded-figure icon] token (if there are already 4, each investigator earns 1 experience instead).
- Check the Campaign Log.
- If the cell possesses a mysterious whistle and 30 or fewer time has passed, skip to Dead and Gone 6.
- Otherwise, skip to Dead and Gone 7.
Dead and Gone 4
Read-aloud text is omitted.
- In your Campaign Log, record the Foundation remains in the dark.
- Remove 1 [hooded-figure icon] token from the chaos bag. Add 1 [insect icon] token (if there are already 4, each investigator earns 1 experience instead).
- You may embark.
Dead and Gone 5
Read-aloud text is omitted.
- Check the Campaign Log.
- If the cell possesses a mysterious whistle and 30 or fewer time has passed, proceed to Dead and Gone 6.
- Otherwise, skip to Dead and Gone 7.
Dead and Gone 6
Read-aloud text is omitted.
- In your Campaign Log, record the cell is off-mission.
- Each investigator earns 1 experience, as they gain insight into the strange happenings around the world.
- Mark 1 time in your Campaign Log. You may embark.
Dead and Gone 7
Read-aloud text is omitted.
- Each investigator earns 2 experience, as they gain insight into the strange happenings around the world.
- Mark 1 time in your Campaign Log. You may embark.
File #28–I: Dancing Mad
The File #28–I Foundation Dossier (the subject file on Desiderio Delgado Álvarez) is printed text omitted here as lore. Read-aloud text is omitted throughout this file; only the rules instructions are kept.
Intro 1
Read-aloud text is omitted. A passage is read only if an investigator has the Police or Detective trait; it is noted here and not transcribed.
- Check how much time has passed in the Campaign Log.
- If fewer than 20 time has passed, proceed to Intro 2.
- If 20 or more time has passed, skip to Intro 3.
Intro 2
Read-aloud text is omitted.
- In your Campaign Log, record the cell made a deal with Desi.
- Proceed to Setup (v. I).
Intro 3
Read-aloud text is omitted.
- Proceed to Intro 4.
Intro 4
Read-aloud text is omitted.
- In your Campaign Log, record the cell has been ambushed!
- Proceed to Setup (v. II).
Setup (v. I)
- Gather all cards from the following encounter sets: Dancing Mad, Agents of the Outside, Cleanup Crew, Crimson Conspiracy, Secret War, and Shadow of a Doubt. These sets are indicated by their encounter set icons in the printed guide.
- Build the act deck using only (v. I) of acts 1 and 2, along with act 3. Remove (v. II) of acts 1 and 2 from the game.
- Put the Café Luna location into play, (Bastion of Remembrance) side faceup.
- Each investigator begins play at Café Luna (Bastion of Remembrance).
- Put all six remaining locations into play (see location placement on next page).
- Find both copies of the Desiderio Delgado Álvarez enemy. One has a story asset version on its other side, and one has a standard encounter card back.
- Set the version with the encounter card back aside, out of play.
- Flip the other version to its story asset side.
- Choose an investigator to take control of the Desiderio Delgado Álvarez story asset.
- Set the Cleanup Crew and Crimson Conspiracy encounter sets aside, out of play. These sets are indicated by their encounter set icons in the printed guide.
- Gather each decoy mini-card and each of the following mini-cards: Desiderio Delgado Álvarez, Coterie Agents (A, B and C), Coterie Assassins (A and B), and Coterie Enforcers (A and B). Set them aside, out of play.
- Shuffle the remaining encounter cards to build the encounter deck.
- You are now ready to begin.
Setup (v. II)
- Gather all cards from the following encounter sets: Dancing Mad, Agents of the Outside, Cleanup Crew, Crimson Conspiracy, Secret War, and Shadow of a Doubt. These sets are indicated by their encounter set icons in the printed guide.
- Build the act deck using only (v. II) of acts 1 and 2, along with act 3. Remove (v. I) of acts 1 and 2 from the game.
- Put the Café Luna location into play, (Coterie Haunt) side faceup.
- Each investigator begins play at Café Luna (Coterie Haunt).
- Set each other location aside, out of play.
- Find both copies of the Desiderio Delgado Álvarez enemy. One has a story asset version on its other side, and one has a standard encounter card back. Set both of them aside, out of play.
- Set each of the four Outsider enemies aside, out of play (2x Otherworldly Mimic and 2x Paradigm Effacer).
- Gather each decoy mini-card and each of the following mini-cards: Desiderio Delgado Álvarez, Coterie Agents (A, B and C), Coterie Assassins (A and B), and Coterie Enforcers (A and B). Set them aside, out of play.
- Shuffle the remaining encounter cards to build the encounter deck.
- Spawn enemies in the shadows, as follows:
- Find the set-aside Desiderio Delgado Álvarez enemy with the encounter card back. The lead investigator draws that enemy, resolving his concealed keyword.
- One at a time, in player order, each other investigator discards cards from the top of the encounter deck until they discard a different Coterie enemy. Each investigator draws the enemy they discarded, resolving its concealed keyword. Shuffle each other discarded card back into the encounter deck.
- You are now ready to begin.
Location Placement for "Dancing Mad"
The suggested placement diagram is printed on the guide. The locations named on the printed placement are: El Malecón, Miramar Yacht Club, Plaza Hotel, Jardines de la Tropical, and Gran Teatro de La Habana, alongside Café Luna. Their location descriptions are flavour and are omitted.
- Café Luna: Café Luna gets –1 shroud for each Outsider enemy in play. Forced – If there are no clues on Café Luna: Add clues to it until it has 1 [clue icon] clues on it.
Note printed on the guide: if you are playing v. II of this scenario, only Café Luna is in play during Act 1, and a different version of Café Luna than the one shown is used.
Do Not Read Until the End of the Scenario
Read-aloud text is omitted.
If no resolution was reached (each investigator resigned or was defeated)
Read-aloud text is omitted.
- Each investigator earns experience equal to the Victory X value of each card in the victory display.
- In your Campaign Log, record the cell didn't discover the truth in Havana.
- In your Campaign Log, record you haven't seen the last of Desiderio Delgado Álvarez.
- Desiderio Delgado Álvarez is the bearer of The Mirroring Blade. Update the Campaign Log accordingly.
- Mark 1 time in your Campaign Log. You may embark.
Resolution 1
Read-aloud text is omitted.
- Each investigator earns experience equal to the Victory X value of each card in the victory display.
- In your Campaign Log, record Desi is in your debt.
- In your Campaign Log, record you know the passphrase.
- In your Campaign Log, under "Time Passed," find the 6th spot from the current time. Under that spot, write "Θ." (When you reach that spot on the time track, proceed to status report theta Θ in the Status Reports section of the Campaign Guide.) If there is fewer than 6 time remaining under "Time Passed," write "Θ" under the final spot, instead.
- Remember not to look at the other side of Desiderio Delgado Álvarez when you clean up.
- Mark 2 time in your Campaign Log. You may embark.
Resolution 2
Read-aloud text is omitted.
- Each investigator earns experience equal to the Victory X value of each card in the victory display.
- In your Campaign Log, record the cell didn't discover the truth in Havana.
- In your Campaign Log, record you haven't seen the last of Desi.
- Desiderio Delgado Álvarez is the bearer of The Mirroring Blade. Update the Campaign Log accordingly.
- Mark 1 time in your Campaign Log. You may embark.
File #32–J: The Coiled Serpent
The File #32–J Foundation Dossier (the asset file on Li Flint) is printed text omitted here as lore. Read-aloud text is omitted throughout this file; only the rules instructions are kept.
The Coiled Serpent 1
Read-aloud text is omitted.
- Check the Campaign Log.
- If the cell told the truth to Taylor, proceed to The Coiled Serpent 2.
- If the cell hid the truth from Taylor, skip to The Coiled Serpent 3.
The Coiled Serpent 2
Read-aloud text is omitted.
- In your Campaign Log, record Flint is working solo.
- In your Campaign Log, find the 6th spot from the current time. Under that spot, write "ψ." (When you reach it, proceed to status report psi ψ in the Status Reports section of the Campaign Guide.)
- You may embark.
The Coiled Serpent 3
Read-aloud text is omitted.
- The investigators must decide (choose one):
- "Keep inquiring, and let us know when you have something." Proceed to The Coiled Serpent 4.
- "We'll stick around and help." Skip to The Coiled Serpent 5.
- "Forget her. We need your help." Skip to The Coiled Serpent 6.
The Coiled Serpent 4
Read-aloud text is omitted.
- In your Campaign Log, record Flint is working solo.
- In your Campaign Log, find the 6th spot from the current time. Under that spot, write "ψ." (When you reach it, proceed to status report psi ψ in the Status Reports section of the Campaign Guide.) If there is fewer than 6 time remaining under "Time Passed," write "ψ" under the final spot, instead.
- You may embark.
The Coiled Serpent 5
Read-aloud text is omitted.
- In your Campaign Log, record the cell aided in Flint's investigation.
- Each investigator earns 1 experience, as they gain insight into the inner workings of the Red Coterie.
- In the Southeast Asia section of the Campaign Log, find Hong Kong. In its spot, write "50–S." You are now allowed to travel to Hong Kong whenever you embark.
- Mark 3 time in your Campaign Log. You may embark.
The Coiled Serpent 6
Read-aloud text is omitted.
- In your Campaign Log, record Flint abandoned his search. Any one investigator may choose to add the Inspector Flint story asset to their deck. It does not count toward their deck size. This card can be found in the Globetrotting encounter set (indicated by its encounter set icon in the printed guide).
- You may embark.
File #33–K: On Thin Ice
The File #33–K Foundation Dossier (the subject file on Thorne) and the prospector's journal are printed text omitted here as lore. Read-aloud text is omitted throughout this file; only the rules instructions are kept.
Intro
Read-aloud text is omitted.
A passage is read only if an investigator has the Wayfarer trait; it is noted here and not transcribed.
- Proceed to Setup.
Setup
- Gather all cards from the following encounter sets: On Thin Ice, Agents of the Outside, Agents of Yuggoth, Crimson Conspiracy, Dark Veiling, Outsiders, Spatial Anomaly, and Chilling Cold. These sets are indicated by their encounter set icons in the printed guide.
- Put the Anchorage and Fairbanks locations into play. Each investigator begins play at Anchorage.
- Shuffle the three Alaskan Wilderness locations (Mountain Stream, Isolated Road, and Frozen Lake) together facedown so you do not know which is which. Put each of them into play adjacent to Fairbanks. Set the remaining three Outer Wilderness locations aside, out of play.
- Set each of the following cards aside, out of play: The Sable Glass key, the double-sided Thorne enemy/story asset, and each copy of the Void Chimera enemy.
- Gather each decoy mini-card and each of the following mini-cards: Emissary from Yuggoth, and Coterie Agents (A, B and C). Also gather the Void Chimera's mini-card and the four special Void Chimera decoys. Set them aside, out of play.
- Shuffle the remaining encounter cards to build the encounter deck.
- Check how much time has passed in the Campaign Log. For every 5 time that has passed, add 1 doom to agenda 1.
- You are now ready to begin.
Scenario Interlude: Raw Deal
- Check the current agenda.
- If it is agenda 1, proceed to Raw Deal 1.
- If it is agenda 2 or 3, skip to Raw Deal 2.
Raw Deal 1
Read-aloud text is omitted.
- The investigators must decide (choose one).
- "We'll work with you for now." Skip to Raw Deal 3.
- "No. We won, fair and square." Skip to Raw Deal 4.
Raw Deal 2
Read-aloud text is omitted.
- The investigators must decide (choose one).
- "We'll work with you for now." Proceed to Raw Deal 3.
- "We can't let the Key fall into Coterie hands!" Skip to Raw Deal 5.
Raw Deal 3
Read-aloud text is omitted.
- In your Campaign Log, record the cell made a deal with Thorne.
- Remove 1 [insect icon] token from the chaos bag. Add 1 [hooded-figure icon] token (if there are already 4, each investigator earns 1 experience instead).
- Put the Thorne story asset into play under the lead investigator's control and attach The Sable Glass key to Thorne, Stable side faceup.
- Search the encounter deck, discard pile and all play areas for all cards from the Crimson Conspiracy encounter set and remove them from the game.
Raw Deal 4
Read-aloud text is omitted.
- Remove 1 [hooded-figure icon] token from the chaos bag. Add 1 [insect icon] token (if there are already 4, each investigator earns 1 experience instead).
- Put The Sable Glass key into play under the lead investigator's control.
- Spawn the Thorne enemy at the Mountain Stream location.
Raw Deal 5
Read-aloud text is omitted.
- Remove 1 [hooded-figure icon] token from the chaos bag. Add 1 [insect icon] token (if there are already 4, each investigator earns 1 experience instead).
- Spawn the Thorne enemy at the Mountain Stream location. Attach The Sable Glass key to Thorne, Unstable side faceup.
Do Not Read Until the End of the Scenario
Read-aloud text is omitted.
If no resolution was reached (each investigator resigned or was defeated)
Read-aloud text is omitted.
- Each investigator earns experience equal to the Victory X value of each card in the victory display.
- In your Campaign Log, record The Void Chimera escaped.
- Update the Keys section of your Campaign Log as follows:
- Check the Campaign Log. If the cell made a deal with Thorne or no investigator controls The Sable Glass, Thorne is the bearer of The Sable Glass.
- If an investigator controls The Sable Glass, they are the bearer of The Sable Glass. In your Campaign Log, record you haven't seen the last of Thorne.
- Mark 1 time in your Campaign Log. You may embark.
Resolution 1
Read-aloud text is omitted.
- Each investigator earns experience equal to the Victory X value of each card in the victory display.
- Thorne is the bearer of The Sable Glass. Update the Campaign Log accordingly.
- Mark 3 time in your Campaign Log. You may embark.
Resolution 2
Read-aloud text is omitted.
- Each investigator earns experience equal to the Victory X value of each card in the victory display.
- In your Campaign Log, record you haven't seen the last of Thorne.
- The investigator who controls The Sable Glass is its bearer.
- Mark 3 time in your Campaign Log. You may embark.
Resolution 3
Read-aloud text is omitted.
- Each investigator earns experience equal to the Victory X value of each card in the victory display.
- In your Campaign Log, record Thorne disappeared.
- Update the Keys section of your Campaign Log as follows:
- If an investigator controls The Sable Glass, that investigator is the bearer of The Sable Glass.
- If no investigator controls The Sable Glass, Thorne is the bearer of The Sable Glass.
- Mark 3 time in your Campaign Log. You may embark.
Resolution 4
Read-aloud text is omitted.
- This scenario never happened.
- Do not mark any time in your Campaign Log.
- Do not record any experience gained or trauma suffered from On Thin Ice.
- Do not update the Keys section of the Campaign Log.
- In your Campaign Log, record there is nothing of note in Anchorage. You cannot stop there again for the remainder of the campaign.
- You may embark, departing from Anchorage.
File #36–L: Strange Architecture
Read-aloud text is omitted throughout this file; only the rules instructions are kept.
- Check where you are on the map.
- If you are at Bombay, proceed to Strange Architecture 1.
- If you are at Stockholm, skip to Strange Architecture 4.
Strange Architecture 1
Read-aloud text is omitted.
- Check the Campaign Log.
- If the cell appreciated the architecture, proceed to Strange Architecture 2.
- Otherwise, skip to Strange Architecture 3.
Strange Architecture 2
Read-aloud text is omitted.
- In your Campaign Log, cross off the cell appreciated the architecture. Each investigator earns 2 experience, as they gain insight into the strange happenings around the world.
- Mark 1 time in your Campaign Log. You may embark.
Strange Architecture 3
Read-aloud text is omitted.
- In your Campaign Log, record the cell appreciated the architecture.
- You may embark.
Strange Architecture 4
Read-aloud text is omitted.
- Check the Campaign Log.
- If the cell appreciated the architecture, proceed to Strange Architecture 5.
- Otherwise, skip to Strange Architecture 6.
Strange Architecture 5
Read-aloud text is omitted.
- In your Campaign Log, cross off the cell appreciated the architecture. Each investigator earns 2 experience, as they gain insight into the strange happenings around the world.
- Mark 1 time in your Campaign Log. You may embark.
Strange Architecture 6
Read-aloud text is omitted.
- In your Campaign Log, record the cell appreciated the architecture.
- You may embark.
File #37–M: Special Delivery
The File #37–M Foundation Dossier (the asset file on Commissioner Taylor) is printed text omitted here. Read-aloud text is omitted throughout this file; only the rules instructions are kept.
- Check the Campaign Log and where you are on the map.
- If the cell is delivering Foundation intel…
- …and you are in Tokyo, skip to Special Delivery 2.
- …and you are in Lagos, skip to Special Delivery 4.
- If the above entry is not recorded…
- …and you are in Tokyo, proceed to Special Delivery 1.
- …and you are in Lagos, skip to Special Delivery 3.
- If the cell is delivering Foundation intel…
Special Delivery 1
Read-aloud text is omitted.
- In your Campaign Log, record the cell is delivering intel. Each investigator must add one copy of Foundation Intel to their deck. It does not count toward their deck size. This card can be found in the Globetrotting encounter set (indicated by its encounter set icon in the printed guide).
- Mark 1 time in your Campaign Log. You may embark.
Special Delivery 2
Read-aloud text is omitted.
- In your Campaign Log, cross off the cell is delivering intel. Each investigator removes one copy of Foundation Intel from their deck. Choose any number token in the chaos bag. Replace it with a number token of a value 1 higher (i.e. You may replace a 0 token with a +1 token, or a –3 token with a –2 token).
- You may embark.
Special Delivery 3
Read-aloud text is omitted.
- In your Campaign Log, record the cell is delivering intel. Each investigator must add one copy of Foundation Intel to their deck. It does not count toward their deck size. This card can be found in the Globetrotting encounter set (indicated by its encounter set icon in the printed guide).
- Mark 1 time in your Campaign Log. You may embark.
Special Delivery 4
Read-aloud text is omitted.
- In your Campaign Log, cross off the cell is delivering intel. Each investigator removes one copy of Foundation Intel from their deck. Choose any number token in the chaos bag. Replace it with a number token of a value 1 higher (i.e. You may replace a 0 token with a +1 token, or a –3 token with a –2 token).
- You may embark.
File #38–N: Dogs of War
The File #38–N Foundation Dossier (the subject file on the Beast in Cowl of Crimson) is printed text omitted here. Read-aloud text is omitted throughout this file; only the rules instructions are kept.
Intro 1
Read-aloud text is omitted. A passage is read only if an investigator has the Miskatonic or Scholar trait, and is noted in Intro 2.
- Check how much time has passed in the Campaign Log.
- If fewer than 20 time has passed, proceed to Intro 2.
- If 20 or more time has passed, skip to Intro 3.
Intro 2
Read-aloud text is omitted. A passage is read only if an investigator has the Miskatonic or Scholar trait; it is noted here and not transcribed.
- The investigators must decide (choose one):
- "Very well, we accept." Skip to Intro 4.
- Refuse. Skip to Intro 5.
Intro 3
Read-aloud text is omitted.
- The investigators must decide (choose one):
- "Very well, we accept." Skip to Intro 6.
- Refuse. Skip to Intro 7.
Intro 4
Read-aloud text is omitted.
- In your Campaign Log, record the cell made a deal with the Claret Knight.
- Remove 1 [insect icon] token from the chaos bag. Add 1 [hooded-figure icon] token (if there are already 4, each investigator earns 1 experience instead).
- Proceed to Setup (v. I).
Intro 5
Read-aloud text is omitted.
- Remove 1 [hooded-figure icon] token from the chaos bag. Add 1 [insect icon] token (if there are already 4, each investigator earns 1 experience instead).
- In your Campaign Log, record the cell is assisting Agent Sirry.
- Proceed to Setup (v. II).
Intro 6
Read-aloud text is omitted.
- In your Campaign Log, record the cell made a deal with the Claret Knight.
- Remove 1 [insect icon] token from the chaos bag. Add 1 [hooded-figure icon] token (if there are already 4, each investigator earns 1 experience instead).
- Proceed to Setup (v. III).
Intro 7
Read-aloud text is omitted.
- Remove 1 [hooded-figure icon] token from the chaos bag. Add 1 [insect icon] token (if there are already 4, each investigator earns 1 experience instead).
- In your Campaign Log, record the cell is assisting Agent Sirry.
- Proceed to Setup (v. III).
Setup (v. I)
- Gather all cards from the following encounter sets: Dogs of War, Scarlet Sorcery, Spatial Anomaly, Spreading Corruption, and Dark Cult. These sets are indicated by their encounter set icons in the printed guide.
- Put the following locations into play: Windsor Palace Hotel, Victoria College, Qaitbay Citadel, The Corniche, and Zan'et el Settat.
- Each investigator begins play at Qaitbay Citadel.
- Build the agenda deck using only Agenda 1a—"Brewing Catastrophe (v. I)." Remove each other agenda from the game.
- Build the act deck using only Act 1a—"Rabbits Who Run (v. I)." Remove each other act from the game.
- Put one Key Locus story asset into play at each of the four Locus Site locations, (Last Bastion) side faceup.
- Place 1 doom on each of those locations.
- Put The Bourse (Locus Safeguard) and Catacombs of Kom el Shoqafa (Bloody Nexus) into play. Remove the other versions of The Bourse and Catacombs of Kom el Shoqafa from the game.
- Put The Claret Knight into play at The Bourse, story asset side faceup. Attach The Light of Pharos key to The Claret Knight. Both The Claret Knight and The Light of Pharos are controlled by all of the investigators.
- The lead investigator spawns the The Beast in a Cowl of Crimson enemy at Catacombs of Kom el Shoqafa, (Ravager in Red) side faceup.
- Shuffle the remaining encounter cards to build the encounter deck.
- You are now ready to begin.
Setup (v. II)
- Gather all cards from the following encounter sets: Dogs of War, Cleanup Crew, Scarlet Sorcery, Spatial Anomaly, and Spreading Corruption. These sets are indicated by their encounter set icons in the printed guide.
- Put the following locations into play: Windsor Palace Hotel, Victoria College, Qaitbay Citadel, The Corniche, and Zan'et el Settat.
- Each investigator begins play at Qaitbay Citadel.
- Build the agenda deck using only Agenda 1a—"Brewing Catastrophe (v. II)." Remove each other agenda from the game.
- Build the act deck using only Act 1a—"Rabbits Who Run (v. II)." Remove each other act from the game.
- Put one Key Locus story asset into play at each of the four Locus Site locations, (Defensive Barrier) side faceup.
- Put The Bourse (Coterie Post) and Catacombs of Kom el Shoqafa (Ancient Tomb) into play. Remove the other versions of The Bourse and Catacombs of Kom el Shoqafa from the game.
- Spawn The Claret Knight at The Bourse, enemy side faceup. Attach The Light of Pharos key to The Claret Knight, under his control.
- Remove the double-sided The Beast in a Cowl of Crimson enemy from the game.
- Gather each decoy mini-card and each of the following mini-cards: Coterie Assassins (A and B) and Coterie Enforcers (A and B). Set them aside, out of play.
- The lead investigator searches the gathered encounter cards for Coterie Assassin (A) and draws it, resolving its concealed keyword, with 1 additional decoy for each other investigator in the game.
- Shuffle the remaining encounter cards to build the encounter deck.
- You are now ready to begin.
Setup (v. III)
- Gather all cards from the following encounter sets: Dogs of War, Cleanup Crew, Scarlet Sorcery, Spatial Anomaly, Spreading Corruption, and Dark Cult. These sets are indicated by their encounter set icons in the printed guide.
- Put the following locations into play: Windsor Palace Hotel, Victoria College, Qaitbay Citadel, The Corniche, and Zan'et el Settat.
- Each investigator begins play at Qaitbay Citadel.
- Build the agenda deck using only Agenda 1a—"Brewing Catastrophe (v. III)." Remove each other agenda from the game.
- Build the act deck using only Act 1a—"Rabbits Who Run (v. III)." Remove each other act from the game.
- Put one Key Locus story asset into play at each of the four Locus Site locations, (Defensive Barrier) side faceup.
- Put The Bourse (Commercial Center) and Catacombs of Kom el Shoqafa (Den of the Beast) into play. Remove the other versions of The Bourse and Catacombs of Kom el Shoqafa from the game.
- Spawn The Beast in a Cowl of Crimson enemy at Catacombs of Kom el Shoqafa, (Wolf in Sheep's Clothing) side faceup. Attach The Light of Pharos key to The Beast in a Cowl of Crimson, under its control.
- Remove the double-sided The Claret Knight enemy/asset from the game.
- Gather each decoy mini-card and each of the following mini-cards: Coterie Assassins (A and B) and Coterie Enforcers (A and B). Set them aside, out of play.
- Shuffle the remaining encounter cards to build the encounter deck.
- You are now ready to begin.
Location Notes for "Dogs of War"
- Catacombs of Kom el Shoqafa (Bloody Nexus): The way into the catacombs is blocked. You cannot enter the Catacombs of Kom el Shoqafa. The Beast in a Cowl of Crimson cannot leave Catacombs of Kom el Shoqafa. Forced – If there is 6 or more doom on the current agenda: Reveal Catacombs of Kom el Shoqafa.
- The Bourse (Locus Safeguard): The entrance to the offices is secure. Enemies cannot enter The Bourse unless The Claret Knight is the only Key Locus in play (if an enemy would spawn here, spawn it at a connecting location instead).
Note printed on the guide: depending on which version of Dogs of War is played, the versions of The Bourse and Catacombs of Kom el Shoqafa may differ from those depicted. The location placement diagram names Victoria College, The Bourse, Qaitbay Citadel, Windsor Palace Hotel, The Corniche, Catacombs of Kom el Shoqafa, and Zan'et el Settat; their flavour text is omitted.
Do Not Read Until the End of the Scenario
Read-aloud text is omitted.
- If no resolution was reached (each investigator was defeated) and the version you played was (v. I): Skip to Resolution 3.
- If no resolution was reached (each investigator resigned or was defeated) and the version you played was (v. II): Skip to Resolution 4.
- If no resolution was reached (each investigator resigned or was defeated) and the version you played was (v. III): Skip to Resolution 7.
Resolution 1
Read-aloud text is omitted.
- Skip to Resolution 8.
Resolution 2
Read-aloud text is omitted.
- Each investigator earns experience equal to the Victory X value of each card in the victory display.
- In your Campaign Log, record you haven't seen the last of the Claret Knight.
- Choose an investigator to be the bearer of The Light of Pharos and update the Campaign Log accordingly.
- Mark 2 time in your Campaign Log. You may embark.
Resolution 3
Read-aloud text is omitted.
- Each investigator earns experience equal to the Victory X value of each card in the victory display.
- Each investigator who was not defeated suffers 1 mental trauma.
- In your Campaign Log, record the following:
- The cell failed to fend off the Beast.
- You haven't seen the last of the Beast in a Cowl of Crimson.
- The Beast in a Cowl of Crimson is the bearer of The Light of Pharos. Update the Campaign Log accordingly.
- Mark 1 time in your Campaign Log. You may embark.
Resolution 4
Read-aloud text is omitted.
- Each investigator earns experience equal to the Victory X value of each card in the victory display.
- In your Campaign Log, record you haven't seen the last of the Claret Knight.
- The Claret Knight is the bearer of The Light of Pharos. Update the Campaign Log accordingly.
- Mark 1 time in your Campaign Log. You may embark.
Resolution 5
Read-aloud text is omitted.
- Skip to Resolution 8.
Resolution 6
Read-aloud text is omitted.
- Each investigator earns experience equal to the Victory X value of each card in the victory display.
- In your Campaign Log, record you haven't seen the last of the Beast in a Cowl of Crimson.
- Choose an investigator to be the bearer of The Light of Pharos and update the Campaign Log accordingly.
- Mark 2 time in your Campaign Log. You may embark.
Resolution 7
Read-aloud text is omitted.
- Each investigator earns experience equal to the Victory X value of each card in the victory display.
- In your Campaign Log, record the dogs are at war.
- Mark 1 time in your Campaign Log. You may embark.
Resolution 8
Read-aloud text is omitted.
- Each investigator earns experience equal to the Victory X value of each card in the victory display.
- In your Campaign Log, record the following:
- The cell aided the knight.
- You haven't seen the last of the Beast in a Cowl of Crimson.
- The Claret Knight is the bearer of The Light of Pharos. Update the Campaign Log accordingly.
- Mark 3 time in your Campaign Log. You may embark.
File #44–O: Theory of Annihilation
The File #44–O/55–X Foundation Dossier (the asset file on Dr. Dewi Irawan) is printed text omitted here. Read-aloud text is omitted throughout this file; only the rules instructions are kept.
Theory of Annihilation 1
Read-aloud text is omitted.
- Check the Campaign Log.
- If the cell met Dr. Irawan and less than 25 time has passed, proceed to Theory of Annihilation 2.
- If the cell met Dr. Irawan and 25 or more time has passed, skip to Theory of Annihilation 3.
- Otherwise, skip to Theory of Annihilation 4.
Theory of Annihilation 2
Read-aloud text is omitted.
- In your Campaign Log, record Dr. Irawan traveled to New Guinea.
- Each investigator earns 1 experience, as they gain insight into the strange happenings around the world.
- Under "Time Passed," write δ (delta) underneath the current time. (This symbol has no status report and is only used as a time marker.)
- In the Southeast Asia section of the Campaign Log, find Manokwari. In its spot, write "45–P." You are now able to travel to Manokwari whenever you embark.
- You may embark.
Theory of Annihilation 3
Read-aloud text is omitted.
- In your Campaign Log, record Dr. Irawan vanished from existence.
- You may embark.
Theory of Annihilation 4
Read-aloud text is omitted.
- In your Campaign Log, record the cell met Dr. Irawan.
- Each investigator earns 1 experience, as they gain insight into the strange happenings around the world.
- You may embark.
File #45–P: Metamorphosis
Read-aloud text is omitted throughout this file; only the rules instructions are kept.
Metamorphosis 1
Read-aloud text is omitted.
- Check how much time has passed since δ (delta).
- If 10 or fewer time has passed since δ (delta), proceed to Metamorphosis 2.
- If 11 or more time has passed since δ (delta), skip to Metamorphosis 3.
Metamorphosis 2
Read-aloud text is omitted.
- In your Campaign Log, record Dr. Irawan joined the cell. Any one investigator may choose to add the Dr. Dewi Irawan story asset to their deck. It does not count toward their deck size.
- Choose an investigator to be the bearer of The Ruinous Chime and update the Campaign Log accordingly. Both of these cards can be found in the Globetrotting encounter set (indicated by its encounter set icon in the printed guide).
- Mark 1 time in your Campaign Log. You may embark.
Metamorphosis 3
Read-aloud text is omitted.
- In your Campaign Log, record Dr. Irawan vanished from existence.
- Each investigator earns 2 experience, as they gain insight into the strange happenings around the world.
- Mark 1 time in your Campaign Log. You may embark.
File #46–Q: Shades of Suffering
Read-aloud text is omitted throughout this file; only the rules instructions are kept.
- Check your Campaign Log.
- If Flint traveled to Kuala Lumpur, proceed to Intro 1.
- If Agent Flint is missing, skip to Intro 2.
Intro 1
Read-aloud text is omitted.
- In your Campaign Log, record Flint rejoined the cell. Any one investigator may choose to add the Inspector Flint story asset to their deck. It does not count toward their deck size. This card can be found in the Globetrotting encounter set (indicated by its encounter set icon in the printed guide).
- Proceed to Setup.
Intro 2
Read-aloud text is omitted.
- Proceed to Setup.
Setup
- Gather all cards from the following encounter sets: Shades of Suffering, Dark Veiling, Mysteries Abound, Scarlet Sorcery, Spreading Corruption, and Striking Fear. These sets are indicated by their encounter set icons in the printed guide.
- Put the Kuala Lumpur Station (East Wing), Kuala Lumpur Station (West Wing), Selangor Club, and Selangor Club Padang locations into play.
- Set each other location (Melati's Shop, Tin Mine, and Wayang Kulit Theater) aside, out of play.
- Check the Campaign Log.
- If Flint rejoined the cell, each investigator begins play at Selangor Club. If an investigator added the Inspector Flint story asset to their deck, they may search their deck for Inspector Flint, put him into play under their control, then shuffle their deck. For the remainder of this scenario, he does not take up an ally slot.
- If Agent Flint is missing, each investigator begins play at Kuala Lumpur Station (West Wing).
- Choose one of each Geist enemy (Uncanny Shadow, Buried Miner, and Slain Foreman) at random and set them aside, out of play. Remove the other copies of those Geist enemies from the game. These cards are double-sided and have story cards on their reverse side. For the best experience, do not look at the story cards on their other side until you are instructed to do so.
- Spawn the Tzu San Niang enemy (The Lady with the Red Parasol) side faceup in the shadows and attach The Shade Reaper to her, Unstable side faceup. Resolve her concealed keyword, placing her concealed mini-cards at each location other than the starting location.
- Check how much time has passed in the Campaign Log.
- If 11 or fewer time has passed, no change is made.
- If 12–18 time has passed, place three resources on The Shade Reaper, as charges.
- If 19–26 time has passed, place six resources on The Shade Reaper, as charges.
- If 27 or more time has passed, place nine resources on The Shade Reaper, as charges. Place 1 doom on the agenda.
Scenario Interlude: The Bomoh
Read-aloud text is omitted throughout this interlude; only the rules instructions are kept. A passage is read only if an investigator has the Sorcerer or Clairvoyant trait; it is noted here and not transcribed. Location names are kept as printed ("Wayang Kulit Theater" in the setup, "Wayang Kulit Theatre" in The Bomoh 4).
The Bomoh 1
Read-aloud text is omitted.
- Check your Campaign Log.
- If Flint rejoined the cell, proceed to The Bomoh 2.
- If Agent Flint is missing, skip to The Bomoh 3.
The Bomoh 2
Read-aloud text is omitted.
- Skip to The Bomoh 4.
The Bomoh 3
Read-aloud text is omitted.
- In your Campaign Log, cross off Agent Flint is missing. In its place, record Agent Flint is dead.
- Place two charges on The Shade Reaper.
- Proceed to The Bomoh 4.
The Bomoh 4
Read-aloud text is omitted.
- Put the Tin Mine and Wayang Kulit Theater locations into play.
- Find the three set-aside Geist enemies and spawn them as follows:
- Spawn Slain Foreman at Kuala Lumpur Station (West Wing).
- Spawn Uncanny Shadow at Wayang Kulit Theatre.
- Spawn Buried Miner at Tin Mine.
- Return Tzu San Niang (The Lady with the Red Parasol) to the shadows and resolve her concealed keyword, distributing each of those concealed mini-cards among each location with a Geist enemy.
- Remove all doom from each card in play other than Tzu San Niang. If it is agenda 1a, advance directly to agenda 2a (Do not resolve agenda 1b).
Do Not Read Until the End of the Scenario
Read-aloud text is omitted.
If no resolution was reached (each investigator resigned or was defeated)
Read-aloud text is omitted.
- Each investigator earns experience equal to the Victory X value of each card in the victory display.
- In your Campaign Log, record you haven't seen the last of Tzu San Niang.
- Tzu San Niang is the bearer of The Shade Reaper. Update the Campaign Log accordingly.
- Mark 1 time in your Campaign Log.
- You may embark.
Resolution 1
Read-aloud text is omitted.
- Each investigator earns experience equal to the Victory X value of each card in the victory display.
- Each investigator earns 1 bonus experience, as they mastered the Shade Reaper. Each investigator also suffers 1 physical trauma as the Shade Reaper draws essence from your soul.
- In your Campaign Log, record Tzu San Niang is under your sway.
- Choose an investigator to be the bearer of The Shade Reaper and update the Campaign Log accordingly.
- Mark 1 time in your Campaign Log.
- You may embark.
Resolution 2
Read-aloud text is omitted.
- Each investigator earns experience equal to the Victory X value of each card in the victory display.
- In your Campaign Log, record you haven't seen the last of Tzu San Niang.
- Choose an investigator to be the bearer of The Shade Reaper and update the Campaign Log accordingly.
- Mark 1 time in your Campaign Log.
- You may embark.
Resolution 3
Read-aloud text is omitted.
- Each investigator earns experience equal to the Victory X value of each card in the victory display.
- In your Campaign Log, record Tzu San Niang has you under her sway.
- Tzu San Niang is the bearer of The Shade Reaper. Update the Campaign Log accordingly.
- Mark 1 time in your Campaign Log.
- You may embark.
File #49–R: Ringing Hollow
The File #49–R Foundation Dossier (the asset file on Agent Ari Quinn) is printed text omitted here. Read-aloud text is omitted throughout this file; only the rules instructions are kept.
- Check how much time has passed in the Campaign Log.
- If less than 20 time has passed, proceed to Ringing Hollow 1.
- If 20 or more time has passed, skip to Ringing Hollow 4.
Ringing Hollow 1
Read-aloud text is omitted.
- Check the Campaign Log.
- If the cell told the truth to Taylor, proceed to Ringing Hollow 2.
- If the cell hid the truth from Taylor, skip to Ringing Hollow 3.
Ringing Hollow 2
Read-aloud text is omitted.
- In the North Atlantic section of the Campaign Log, find London. In its spot, write "27–H." You are now allowed to travel back to this location whenever you embark.
- You may embark.
Ringing Hollow 3
Read-aloud text is omitted.
- In your Campaign Log, record Agent Quinn does not trust the cell.
- In the North Atlantic section of the Campaign Log, find London. In its spot, write "27–H." You are now allowed to travel back to London whenever you embark.
- You may embark.
Ringing Hollow 4
Read-aloud text is omitted.
- In your Campaign Log, record Agent Quinn vanished from existence.
- You may embark.
File #50–S: Blood, Sweat, and Tea
Read-aloud text is omitted throughout this file; only the rules instructions are kept.
- Check the Campaign Log.
- If the cell aided in Flint's investigation, proceed to Blood, Sweat, and Tea 1.
- If Flint is working solo and 10 or fewer time has passed since ψ, skip to Blood, Sweat, and Tea 2.
- If Flint is working solo and 11 or more time has passed since ψ, skip to Blood, Sweat, and Tea 3.
Blood, Sweat, and Tea 1
Read-aloud text is omitted.
- In your Campaign Log, record Flint traveled to Kuala Lumpur.
- In the Southeast Asia section of the Campaign Log, find Kuala Lumpur. In its spot, write "46–Q." You are now allowed to travel to Kuala Lumpur whenever you embark.
- You may embark.
Blood, Sweat, and Tea 2
Read-aloud text is omitted.
- In your Campaign Log, record Flint traveled to Kuala Lumpur.
- In the Southeast Asia section of the Campaign Log, find Kuala Lumpur. In its spot, write "46–Q." You are now allowed to travel to Kuala Lumpur whenever you embark.
- You may embark.
Blood, Sweat, and Tea 3
Read-aloud text is omitted.
- In your Campaign Log, record Agent Flint is missing.
- In the Southeast Asia section of the Campaign Log, find Kuala Lumpur. In its spot, write "46–Q." You are now allowed to travel to Kuala Lumpur whenever you embark.
- You may embark.
File #51–T: Romulus and Remus
Read-aloud text is omitted throughout this file; only the rules instructions are kept.
- Check the Campaign Log.
- If the cell is off-mission, proceed to Romulus and Remus 1.
- Otherwise, skip to Romulus and Remus 2.
Romulus and Remus 1
Read-aloud text is omitted.
- In the Americas section of the Campaign Log, inside the Bermuda Triangle (the triangle formed by lines connecting Ybor City, San Juan, and Bermuda), write "56–Y." You are now able to travel inside the Bermuda Triangle whenever you embark. You may do so from Ybor City, San Juan, or Bermuda, at the cost of 1 time. (When you do, proceed to File 56–Y in the Campaign Guide.)
- You may embark.
Romulus and Remus 2
Read-aloud text is omitted.
- Each investigator may begin the next scenario they play with 1 additional resource in their resource pool.
- You may return to Rome again during this campaign, but only after playing another scenario.
- You may embark.
File #52–U: The Safehouse
The File #52–U Sanctum Dossier is printed text omitted here. Read-aloud text is omitted throughout this file; only the rules instructions are kept.
The Safehouse 1
Read-aloud text is omitted.
- Check the Campaign Log.
- If you know the passphrase and the current time is at or after Θ (theta), proceed to The Safehouse 2.
- Otherwise, skip to The Safehouse 3.
The Safehouse 2
Read-aloud text is omitted.
- Choose an investigator to be the bearer of The Mirroring Blade and update the Campaign Log accordingly. This card can be found in the Globetrotting encounter set (indicated by its encounter set icon in the printed guide).
- Each investigator earns 2 experience, as they gain insight into the inner workings of the Red Coterie.
- Mark 1 time in your Campaign Log. You may embark.
The Safehouse 3
Read-aloud text is omitted.
- You may return to this location again later. For now, you may embark.
File #53–V: Whistle on the Wind
The File #53–V Foundation Dossier (the subject file on Aliki Zoni Uperetria) is printed text omitted here. Read-aloud text is omitted throughout this file; only the rules instructions are kept. A passage is read only if an investigator has the Drifter trait (excluding Wendy Adams); it is noted here and not transcribed.
Whistle on the Wind 1
Read-aloud text is omitted.
- The lead investigator must decide (choose one):
- "Accept what she is offering you." Proceed to Whistle on the Wind 2.
- "Do not accept her offer." Skip to Whistle on the Wind 3.
Whistle on the Wind 2
Read-aloud text is omitted.
- In your Campaign Log, record the cell possesses a mysterious whistle.
- Each investigator suffers 1 mental or 1 physical trauma as the shrill sound follows them everywhere they go.
- Remove 1 [insect icon] token from the chaos bag. Add 1 [hooded-figure icon] token (if there are already 4, each investigator earns 1 experience instead).
- You may embark.
Whistle on the Wind 3
Read-aloud text is omitted.
- In your Campaign Log, record the cell refused Aliki's offer.
- Each investigator earns 1 experience, as they gain insight into the inner workings of the Red Coterie.
- Remove 1 [hooded-figure icon] token from the chaos bag. Add 1 [insect icon] token (if there are already 4, each investigator earns 1 experience instead).
- You may embark.
File #54–W: Infernal Machinery
The File #54–W Sanctum Dossier (the subject file on Tuwile Masai) is printed text omitted here. Read-aloud text is omitted throughout this file; only the rules instructions are kept.
Infernal Machinery 1
Read-aloud text is omitted.
- Check the Campaign Log.
- If at least three of the following are recorded (La Chica Roja is on your side, the cell aided the knight, Aliki is on your side, Desi is on your side, the cell made a deal with Thorne, or Ece trusts the cell), proceed to Infernal Machinery 2.
- Otherwise, skip to Infernal Machinery 3.
Infernal Machinery 2
Read-aloud text is omitted.
- In your Campaign Log, record Tuwile Masai is on your side.
- Each investigator earns 1 experience, as they gain insight into the inner workings of the Red Coterie.
- Choose an investigator to be the bearer of The Bale Engine and update the Campaign Log accordingly. This card can be found in the Globetrotting encounter set (indicated by its encounter set icon in the printed guide).
- Mark 1 time in your Campaign Log. You may embark.
Infernal Machinery 3
Read-aloud text is omitted.
- In your Campaign Log, record Tuwile Masai fled to Bermuda.
- You may embark.
File #55–X: Paranatural Selection
The File #44–O/55–X Foundation Dossier (the asset file on Dr. Dewi Irawan) is printed text omitted here. Read-aloud text is omitted throughout this file; only the rules instructions are kept.
Paranatural Selection 1
Read-aloud text is omitted.
- Check the Campaign Log.
- If the cell met Dr. Irawan and less than 25 time has passed, proceed to Paranatural Selection 2.
- If the cell met Dr. Irawan and 25 or more time has passed, skip to Paranatural Selection 3.
- Otherwise, skip to Paranatural Selection 4.
Paranatural Selection 2
Read-aloud text is omitted.
- In your Campaign Log, record Dr. Irawan traveled to New Guinea.
- Each investigator earns 1 experience, as they gain insight into the strange happenings around the world.
- Under "Time Passed," write δ (delta) underneath the current time. (This symbol has no status report and is only used as a time marker.)
- In the Southeast Asia section of the Campaign Log, find Manokwari. In its spot, write "45–P." You are now able to travel to Manokwari whenever you embark.
- You may embark.
Paranatural Selection 3
Read-aloud text is omitted.
- In your Campaign Log, record Dr. Irawan vanished from existence.
- You may embark.
Paranatural Selection 4
Read-aloud text is omitted.
- In your Campaign Log, record the cell met Dr. Irawan.
- Each investigator earns 1 experience, as they gain insight into the strange happenings around the world.
- You may embark.
File #56–Y: Without a Trace
Read-aloud text is omitted throughout this file; only the rules instructions are kept.
Intro 1
Read-aloud text is omitted.
- The lead investigator must decide (choose one):
- "Blow the whistle and summon Aliki to your side." Proceed to Intro 2.
- "Dispose of the whistle and do this alone." Skip to Intro 3.
Intro 2
Read-aloud text is omitted.
- In your Campaign Log, record the cell blew the whistle.
- Skip to Intro 4.
Intro 3
Read-aloud text is omitted.
- In your Campaign Log, record Agent Quinn has your back. Any one investigator may choose to add the Agent Ari Quinn story asset to their deck. It does not count toward their deck size. This card can be found in the Globetrotting encounter set (indicated by its encounter set icon in the printed guide).
- In your Campaign Log, record the cell threw away the whistle.
- Proceed to Intro 4.
Intro 4
Read-aloud text is omitted.
- Proceed to Setup.
Setup
- Gather all cards from the following encounter sets: Without a Trace, Agents of the Outside, Beyond the Beyond, Outsiders, Secret War, and Spreading Corruption. These sets are indicated by their encounter set icons in the printed guide.
- Put the Court of the Outsiders location into play.
- Each investigator begins play at Court of the Outsiders.
- Check the Campaign Log. If the cell blew the whistle, choose an investigator to take control of the Aliki Zoni Uperetria story asset. Otherwise, remove her from the game.
- Set the following cards aside, out of play: The Red-Gloved Man story asset, the Mimetic Nemesis enemy, the Protoplasmic Reassembler enemy, and the Apocalyptic Presage enemy.
- Prepare the Otherworld deck. This is done by performing the following steps:
- Find the Outsiders' Lair and both copies of the Cliffs of Insanity locations. Shuffle these locations together, with their unrevealed sides faceup, to form a deck. This deck is called the Otherworld deck.
- Find the remaining seven City of Remnants locations. Shuffle these locations together, with their unrevealed sides faceup. If there are exactly two investigators in the game, remove one of those locations from the game at random, without looking at it. If there is only one investigator, remove two of those locations from the game at random, without looking at them. Place the rest on top of the Otherworld deck.
- Place the Otherworld deck near the scenario reference card.
- Take the top three locations in the Otherworld deck and place them in the shadows, arranged in a straight line from left to right (without looking at their other sides).
- Gather each decoy mini-card and the three City of Remnants (L, M and R) mini-cards. Set them aside, out of play.
- Take one decoy mini-card and the three City of Remnants (L, M and R) mini-cards, shuffle them facedown, and arrange them around the Court of the Outsiders as follows: One to its left, one to its right, one above, and one below. (See location placement on the next page.)
Location Adjacency in the Realm of the Outsiders
Throughout this scenario, locations are arranged in a pattern of rows and columns, along with concealed mini-cards (see Locations in the Shadows, below). Each location is connected to each location adjacent to it.
- Adjacent locations share a side (left, right, above, or below). Locations that share only a corner are not adjacent.
- During this scenario, concealed mini-cards are also placed adjacent to one or more locations as above, instead of placed at locations as normal (see Locations in the Shadows, below).
Locations in the Shadows
During this scenario, investigators must traverse the deceptively labyrinthine and illusory home world of the Outsiders. To represent the difficulty of exploring this alien dimension, three City of Remnants locations are placed in the shadows at all times (taken from the top of the Otherworld deck) and concealed mini-cards are arranged adjacent to locations, rather than placed at them. Exposing these concealed mini-cards is the key to finding a route through this otherworldly place.
- Concealed mini-cards adjacent to a location are considered to be at that location for the purposes of card abilities and game rules. Use the shroud value of your current location when attempting to expose an adjacent concealed mini-card.
- When a City of Remnants mini-card is exposed, set it aside and find the City of Remnants in the shadows whose position in the shadows matches that mini-card (L for left, M for middle, and R for right). Put that location into play in the position where its mini-card was (unrevealed side faceup).
- If there were any other concealed mini-cards in that position, move them so they are arranged as evenly as possible in empty spots adjacent to the newly placed City of Remnants.
- After a City of Remnants location leaves the shadows, place the top card of the Otherworld deck in the shadows in the position where the just-exposed City of Remnants was (without looking at its other side). Then, resolve its concealed keyword, placing each of its concealed mini-cards arranged as evenly as possible in empty spots adjacent to the just-exposed City of Remnants.
- There must always be three City of Remnants locations in the shadows, if possible.
- More than one concealed mini-card may occupy the same spot, but no concealed mini-cards may occupy a spot where a location already is present.
Location Placement for "Without a Trace"
The suggested placement diagram is printed on the guide. The starting location is the Court of the Outsiders, surrounded by concealed mini-cards. Its location description is flavour and is omitted.
Do Not Read Until the End of the Scenario
Read-aloud text is omitted.
If no resolution was reached because each investigator was defeated
Read-aloud text is omitted.
- In your Campaign Log, record the cell was hollowed.
- The investigators lose the campaign.
Resolution 1
Read-aloud text is omitted.
- Each investigator earns experience equal to the Victory X value of each card in the victory display.
- Each investigator earns 1 bonus experience, as they gain insight into the strange happenings around the world.
- In your Campaign Log, record the following:
- The cell knows the true nature of the Coterie.
- Aliki is on your side.
- Mark 3 time in your Campaign Log.
- You may embark (from Bermuda, Ybor City or San Juan).
Resolution 2
Read-aloud text is omitted.
- Each investigator earns experience equal to the Victory X value of each card in the victory display.
- Each investigator earns 1 bonus experience, as they gain insight into the strange happenings around the world.
- In your Campaign Log, record the following:
- The cell knows the true nature of the Coterie.
- You haven't seen the last of Aliki Zoni Uperetria.
- Mark 2 time in your Campaign Log.
- You may embark (from Bermuda, Ybor City, or San Juan).
Resolution 3
Read-aloud text is omitted.
- Each investigator earns experience equal to the Victory X value of each card in the victory display.
- In your Campaign Log, record Aliki is on your side.
- Mark 2 time in your Campaign Log.
- You may embark (from Bermuda, Ybor City, or San Juan).
Resolution 4
Read-aloud text is omitted.
- Each investigator earns experience equal to the Victory X value of each card in the victory display.
- In your Campaign Log, record you haven't seen the last of Aliki Zoni Uperetria.
- Mark 1 time in your Campaign Log.
- You may embark (from Bermuda, Ybor City, or San Juan).
File #59–Z (Finale): Congress of the Keys
Read-aloud text is omitted throughout this file; only the rules instructions are kept.
- Depending on how you got here…
- If you have arrived at this finale due to a status report (because time ran out), proceed to Intro 1.
- If you traveled to Tunguska of your own accord, skip to Intro 2.
Intro 1
Read-aloud text is omitted.
- Proceed to The Trial 1.
Intro 2
Read-aloud text is omitted.
- Proceed to The Trial 1.
The Trial 1
The Coterie casts votes to determine your fate. Read the relevant passage from each of the following sections, in order, and tally all of the votes received. Each "yea" vote represents a Coterie member who wishes to see you disposed of. Each "nay" vote represents a Coterie member who wishes to keep you safe. An abstaining vote, or a vote of silence, is neither a yea or a nay.
- If the cell aided the knight: Read-aloud text is omitted. The Claret Knight votes "nay." The Beast in a Cowl of Crimson abstains by default.
- If the cell failed to fend off the Beast: Read-aloud text is omitted. The Claret Knight abstains by default. The Beast in a Cowl of Crimson votes "yea."
- If you haven't seen the last of the Claret Knight: Read-aloud text is omitted. The Claret Knight votes "yea." The Beast in a Cowl of Crimson votes "yea."
- If the dogs are at war: Read-aloud text is omitted. The Claret Knight abstains by default. The Beast in a Cowl of Crimson abstains by default.
- If none of the above are true: Read-aloud text is omitted. The Claret Knight votes "nay." The Beast in a Cowl of Crimson votes "yea."
- Flip a coin and update the Keys section of your Campaign Log as follows: If it is heads, the bearer of The Light of Pharos is "The Claret Knight;" if it is tails, it is "The Beast in a Cowl of Crimson."
- If Ece trusts the cell: Read-aloud text is omitted. Ece Şahin votes "nay."
- If Ece does not trust the cell: Read-aloud text is omitted. Ece Şahin abstains.
- If neither of the above are true: Read-aloud text is omitted. Ece Şahin votes "nay."
- If you haven't seen the last of Amaranth: Read-aloud text is omitted. Amaranth votes "yea."
- If the lovers are reunited: Read-aloud text is omitted. Amaranth votes "yea." Razin Farhi votes "yea."
- If Amaranth has left the Coterie: Read-aloud text is omitted. Amaranth abstains by default.
- If none of the above are true: Read-aloud text is omitted. Amaranth votes "yea."
- Amaranth is the bearer of The Last Blossom. Update the Campaign Log accordingly.
- If you haven't seen the last of Thorne: Thorne votes "yea."
Tally the Votes
Depending on how votes were cast, proceed as follows:
- If it is a tie, or if the "yeas" have it, you have been deemed a liability. Proceed to The Trial 2.
- If the "nays" have it…
- …and La Chica Roja, Ece Şahin, and Desiderio Delgado Álvarez all voted "nay," you may try to convince them to overthrow the Coterie. If you do, skip to The Trial 3.
- …and Thorne, Tuwile Masai, and The Claret Knight all voted "nay," you may attempt to join the Coterie. If you do, skip to The Trial 4.
- Otherwise, you have been deemed an asset. Skip to The Trial 5.
The Trial 2
Read-aloud text is omitted.
- In your Campaign Log, record the cell escaped the Red Coterie.
- Proceed to Setup (v. I).
The Trial 3
Read-aloud text is omitted.
- In your Campaign Log, record the cell overthrew the Red Coterie.
- Skip to The Trial 8.
The Trial 4
Read-aloud text is omitted.
- Each investigator chooses an article of clothing depicted in their investigator art. Your keys are now bound through this mundane implement through occult esoterica. Its color becomes scarlet-red from now until the end of time.
- In your Campaign Log, record the cell joined the Red Coterie.
- Skip to The Trial 8.
The Trial 5
Read-aloud text is omitted.
- In your Campaign Log, record the Red Coterie spared the cell.
- Skip to The Trial 8.
The Trial 6
Read-aloud text is omitted.
- In your Campaign Log, record the Red Coterie spared the cell.
- Proceed to Setup (v. III).
The Trial 7
Read-aloud text is omitted.
- In your Campaign Log, record the Red Coterie was destroyed from within.
- Proceed to Setup (v. III).
The Trial 8
Read-aloud text is omitted.
- Proceed to Setup (v. II).
Setup (v. I)
- Gather all cards from the following encounter sets: Congress of the Keys, Red Coterie, Scarlet Sorcery, Spatial Anomaly, Spreading Corruption, and Locked Doors. These sets are indicated by their encounter set icons in the printed guide.
- Put the Lair versions of Scarlet Halls and the three Coterie Sanctuary locations into play.
- Remove the Sanctum versions of these locations from the game.
- Each investigator begins play at Scarlet Halls.
- Build the act deck using only Act 1a—"Secrets and Lies (v. I)." Remove each other version of Act 1a from the game.
- Find each Coterie enemy from the Red Coterie encounter set who voted "yea," along with The Red-Gloved Man. This set is indicated by its encounter set icon in the printed guide.
- Do not gather any of the Coterie enemies from this set who voted "nay," abstained, or were eerily silent (not counting The Red-Gloved Man).
- The lead investigator spawns The Red-Gloved Man in the shadows and resolves its concealed keyword (as granted by act 1a).
- Shuffle the rest of the gathered Coterie enemies. One at a time, in player order, each investigator other than the lead investigator draws 1 of them, spawning them as normal.
- Shuffle the rest of the gathered Coterie enemies (those not drawn in the previous step) into the encounter deck.
- Note that the following characters may vote "yea," but do not have enemy cards in this encounter set: Tuwile Masai, Abarran Arrigorriagakoa, and Razin Farhi.
- For each member of the Coterie who voted "nay," find their Conspirator story asset version and put them into play under any investigator's control. (Note: These story assets are scattered across various encounter sets. Some of them are on the reverse sides of enemy cards.)
- Note that Tuwile Masai may vote "nay," but does not have a Conspirator story asset.
Setup (v. II)
- Gather all cards from the following encounter sets: Congress of the Keys, Agents of the Outside, Beyond the Beyond, Outsiders, Red Coterie, Secret War, Spreading Corruption, Ancient Evils, and Striking Fear. These sets are indicated by their encounter set icons in the printed guide.
- When gathering the Striking Fear encounter set, only gather the following cards (2x Frozen in Fear and 2x Dissonant Voices). Do not gather 3x Rotting Remains from that set.
- Find each of the nine City of Remnants locations from the Beyond the Beyond encounter set. Shuffle these locations together, with their unrevealed sides faceup, to form a deck. This deck is called the Otherworld deck. Place this deck near the scenario reference card.
- Put the Sanctum versions of Scarlet Halls and the three Coterie Sanctuary locations into play.
- Remove the Lair versions of these locations from the game.
- Each investigator begins play at Scarlet Halls.
- Build the act deck using only Act 1a—"Secrets and Lies (v. II)." Remove each other version of Act 1a from the game.
- Find each Coterie enemy from the Red Coterie encounter set who voted "yea," along with The Red-Gloved Man, and set each of those enemies aside, out of play. This set is indicated by its encounter set icon in the printed guide.
- Note that the following characters may vote "yea," but do not have enemy cards in this encounter set: Tuwile Masai, Abarran Arrigorriagakoa, and Razin Farhi.
- For each member of the Coterie who voted "nay," find their Conspirator story asset version and put them into play under any investigator's control. (Note: These story assets are scattered across various encounter sets. Some of them are on the reverse sides of enemy cards.)
- Note that Tuwile Masai may vote "nay," but does not have a Conspirator story asset.
- Set the three Otherworld locations from the Congress of the Keys encounter set and the Mimetic Nemesis enemy aside, out of play.
Setup (v. III)
- Gather all cards from the following encounter sets: Congress of the Keys, Agents of the Outside, Beyond the Beyond, Outsiders, Red Coterie, Secret War, Spreading Corruption, Ancient Evils, and Striking Fear. These sets are indicated by their encounter set icons in the printed guide.
- When gathering the Striking Fear encounter set, only gather the following cards (2x Frozen in Fear and 2x Dissonant Voices). Do not gather 3x Rotting Remains from that set.
- Find each of the nine City of Remnants locations from the Beyond the Beyond encounter set. Shuffle these locations together, with their unrevealed sides faceup, to form a deck. This deck is called the Otherworld deck. Place this deck near the scenario reference card.
- Put the Sanctum versions of Scarlet Halls and the three Coterie Sanctuary locations into play.
- Remove the Lair versions of these locations from the game.
- Each investigator begins play at Scarlet Halls.
- Build the act deck using only Act 1a—"Secrets and Lies (v. III)." Remove each other version of Act 1a from the game.
- Find each Coterie enemy from the Red Coterie encounter set who was eerily silent. This set is indicated by its encounter set icon in the printed guide.
- Do not gather any of the Coterie enemies from this set who voted "yea," "nay," or abstained.
- The lead investigator spawns The Red-Gloved Man in the shadows and resolves its concealed keyword (as granted by act 1a).
- Shuffle the rest of the gathered Coterie enemies. One at a time, in player order, each investigator other than the lead investigator draws 1 of them, spawning them as normal.
- Shuffle the rest of the gathered Coterie enemies (those not drawn in the previous step) into the encounter deck.
- Check the Campaign Log. If the Red Coterie spared the cell, find the Conspirator story asset version of The Red-Gloved Man, along with each other member of the Coterie who was not gathered during the above step. Put each of them into play under any investigator's control. (Note: These story assets are scattered across various encounter sets. Some of them are on the reverse sides of enemy cards.)
Do Not Read Until the End of the Scenario (Finale)
Read-aloud text is omitted.
- Before resolving any other resolution, if at least 1 investigator was defeated: The defeated investigators read Investigator Defeat first.
Investigator Defeat
Read-aloud text is omitted.
- Each investigator who was defeated is driven insane and is never seen or heard from again. All memory of their existence is purged from reality.
- If another resolution was reached, the remaining investigators proceed to that resolution.
- If no resolution was reached (each investigator was defeated): Go to Resolution 2.
Resolution 1 (each defeated investigator must resolve Investigator Defeat first)
Read-aloud text is omitted.
- Lay out the world map on a flat surface. Each investigator tosses a coin or chaos token onto the map. Wherever it lands, that is where that investigator ended up. (If it lands in an ocean, they ended up by chance on a random boat.)
- In your Campaign Log, record that the Outsiders were stopped.
- Each investigator suffers 2 physical trauma and 2 mental trauma, as they may never truly recover from their paradimensional ordeal.
- Each investigator earns experience equal to the Victory X value of each card in the victory display. Each investigator earns 5 bonus experience, having saved their dimension from a terrible fate.
- The investigators win the campaign!
- Proceed to Epilogue.
Resolution 2 (each defeated investigator should resolve Investigator Defeat first)
Read-aloud text is omitted.
- In your Campaign Log, record the cell was hollowed.
- The investigators lose the campaign.
Epilogue
Read the following only if the investigators won the campaign. Read-aloud text is omitted throughout.
Epilogue 1
Read-aloud text is omitted.
- Check the Campaign Log.
- If the cell joined the Coterie, proceed to Epilogue 2.
- Otherwise, skip to Epilogue 3.
Epilogue 2
Read-aloud text is omitted.
- In your Campaign Log, record the Red Coterie and The Foundation agreed to work together. File closed.
Epilogue 3
Read-aloud text is omitted.
- In your Campaign Log, record Foundation Trust and Cell Deception.
- For each of the following that is recorded in your Campaign Log (the cell is assisting Agent Sirry, the cell told the truth to Taylor, Agent Quinn has your back, the cell is delivering intel is crossed off), mark 1 tally next to Foundation Trust.
- For each of the following that is recorded in your Campaign Log (the cell hid the truth from Taylor, the cell is off-mission, the cell aided the knight, Ece trusts the cell, the cell made a deal with Thorne, Aliki is on your side, Desi is in your debt, Tuwile Masai is on your side), mark 1 tally next to Cell Deception.
- If the number of tallies next to Foundation Trust is equal to or greater than the number of tallies next to Cell Deception, proceed to Epilogue 4. Otherwise, skip to Epilogue 5.
Epilogue 4
Read-aloud text is omitted.
- In your Campaign Log, record the cell was given a permanent position. File closed.
Epilogue 5
Read-aloud text is omitted.
- In your Campaign Log, record the cell was dismantled. File closed.
Status Reports
When you fill in a box under "Time Passed" with one of the following symbols (in the form of Greek letters), proceed to the status report matching that letter, and read the text that follows. Read-aloud text is omitted.
Status Report Alpha (α)
Read-aloud text is omitted.
- Add 1 [hooded-figure icon] token to the chaos bag.
Status Report Beta (β)
Read-aloud text is omitted.
- Add 1 [hooded-figure icon] token to the chaos bag.
- In the Central Asia section of the Campaign Log, find Tunguska. In its spot, write "59–Z." You are now allowed to travel to this location whenever you embark. (Note: This will end the campaign. You may wish to investigate further before proceeding to Tunguska… but be wary of how much time you spend.)
Status Report Epsilon (ε)
Read-aloud text is omitted.
- For the remainder of the campaign, whenever you are setting up a scenario, perform the following: gather each of the enemies in the Red Coterie encounter set whose name matches those who you "haven't seen the last of" in your Campaign Log, choose one at random, and shuffle it into the encounter deck for this scenario. The Red Coterie encounter set is indicated by its encounter set icon in the printed guide.
Status Report Gamma (γ)
Read-aloud text is omitted.
- Add 1 [hooded-figure icon] token to the chaos bag.
- Each investigator must add 1 copy of the Paradimensional Understanding weakness to their deck. It does not count toward their deck size. These cards can be found in the Globetrotting encounter set (indicated by its encounter set icon in the printed guide).
Status Report Zeta (ζ)
Read-aloud text is omitted.
- Check the Keys section of the Campaign Log and find each of the Keys whose bearer is an investigator. Choose 1 at random (2 instead if the investigators control 5 or more Keys in total). That Key(s) has been stolen.
- Gather each of the enemies in the Red Coterie encounter set whose name matches those who you "haven't seen the last of" in your Campaign Log and choose one at random. This is the identity of the character who stole your Key(s).
- Update the Keys section of your Campaign Log such that the bearer of the Key(s) that were stolen is the randomly chosen enemy.
- In the Central Asia, Americas, and North Atlantic sections of the Campaign Log, find Kabul, Quito, San Juan, and Reykjavik. In each of these spots, write "14–C." You are now allowed to travel to these locations whenever you embark.
Status Report Theta (Θ)
Read-aloud text is omitted.
Status Report Psi (ψ)
Read-aloud text is omitted.
- In the Southeast Asia section of the Campaign Log, find Hong Kong. In its spot, write "50–S." You are now allowed to travel to this location whenever you embark.
Status Report Omega (ω)
Read-aloud text is omitted.
- Add 1 [hooded-figure icon] token to the chaos bag.
- You are out of time. Immediately travel directly to Tunguska and proceed to Finale Scenario: Congress of the Keys.
Note: the Achievement List, the Design Notes, the Campaign Log form, the Quick Reference index and the Credits printed on pages 68–72 of the guide are not transcribed, as they are not rules. The map, the Foundation Dossier sidebars, and the Campaign Log form are images and are not transcribed.